
If you’re craving a project that’s equal parts pattern-play and color therapy, a sugar skull painting is such a satisfying place to start. I pulled together my favorite sugar skull painting ideas—from classic, traditional vibes to creative twists you can totally make your own.
Classic Symmetrical Sugar Skull on a Dark Background
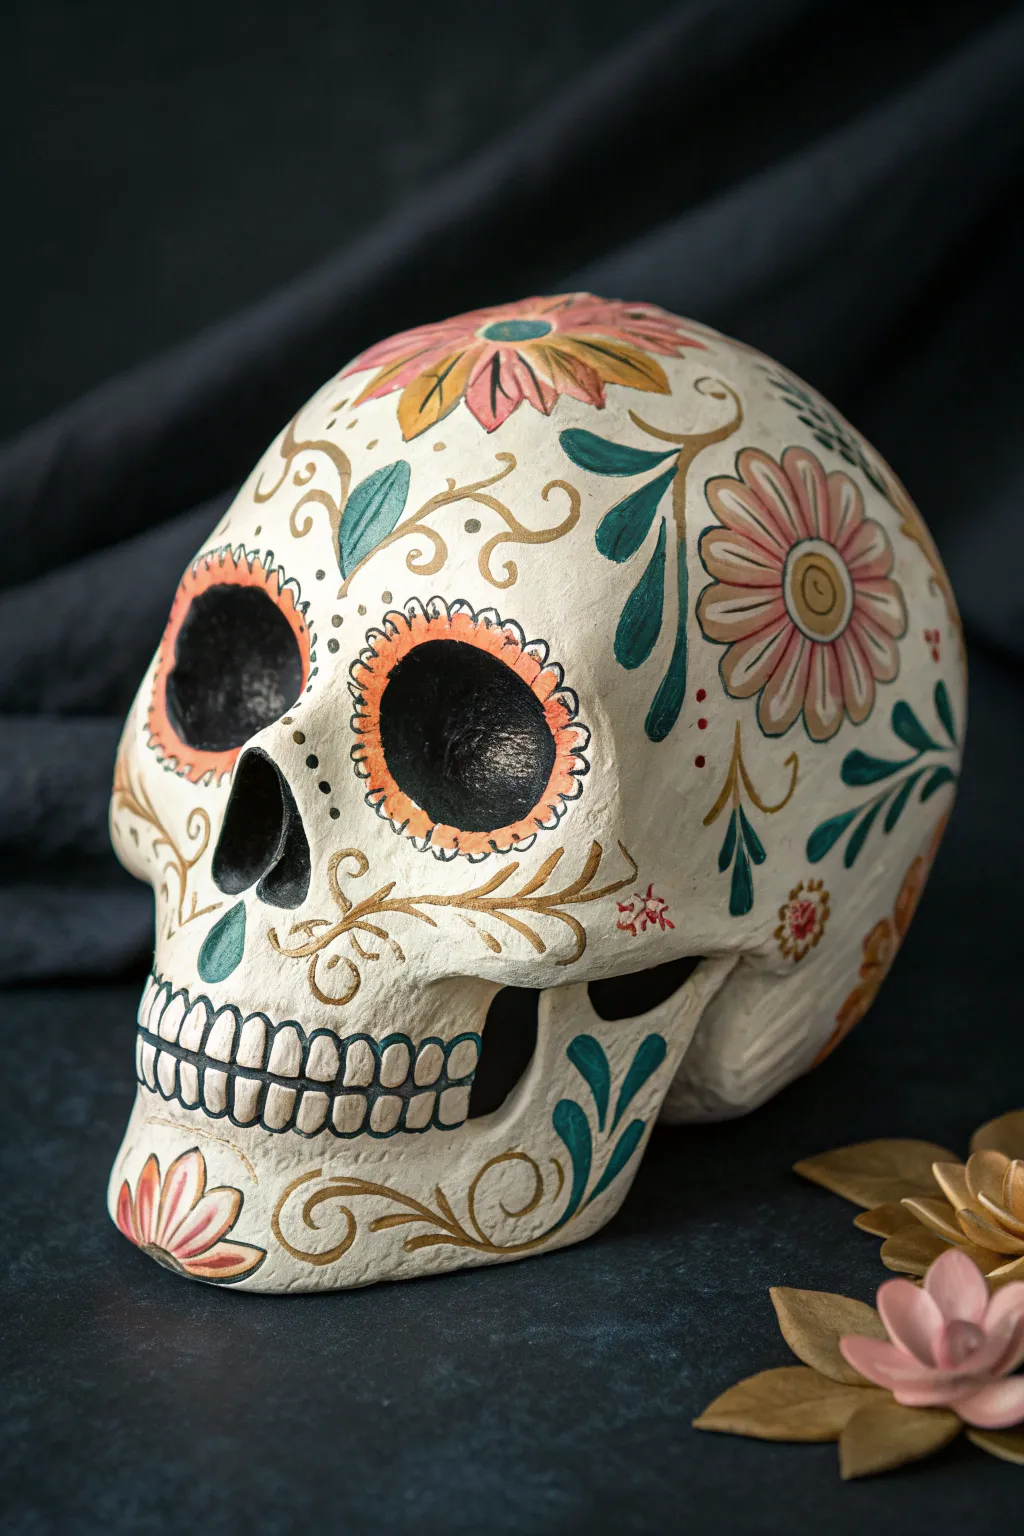
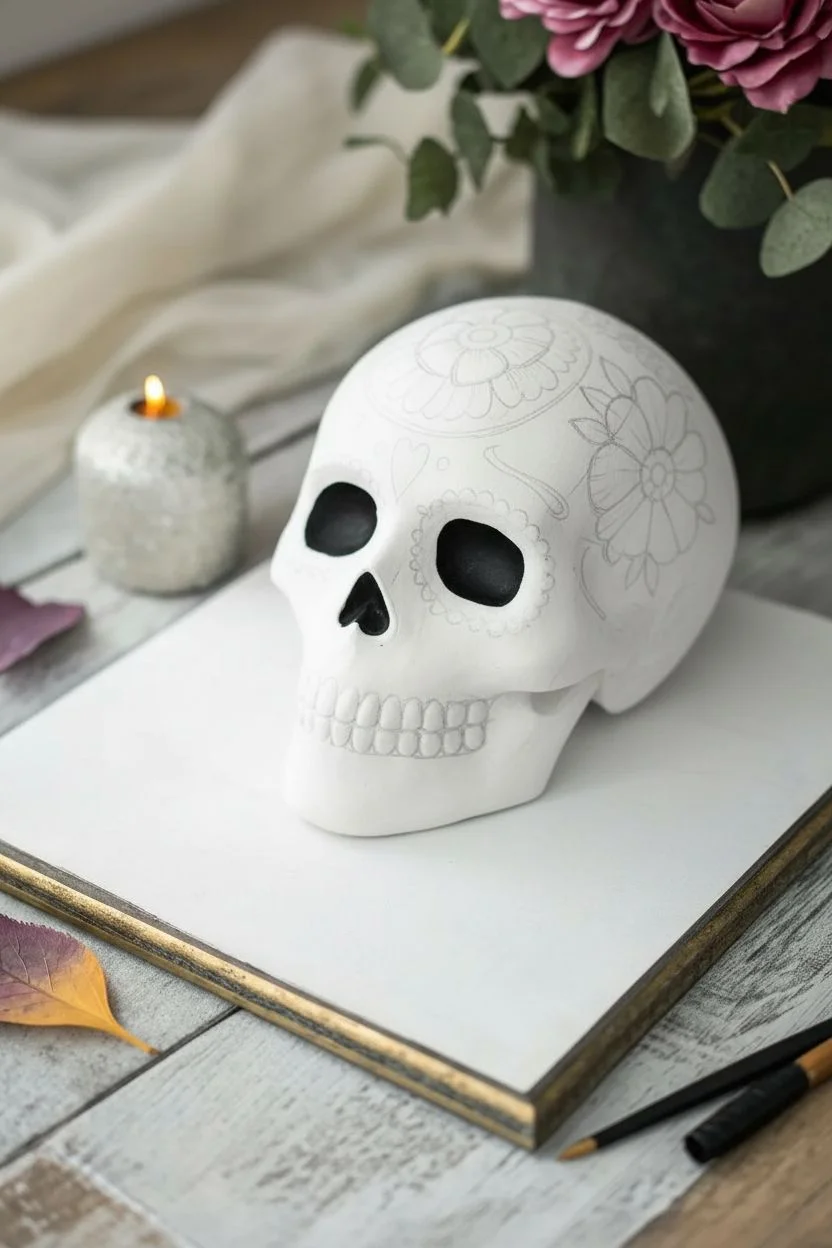
Embrace the elegance of Dia de los Muertos with this sophisticated take on a classic sugar skull, featuring muted earthy tones and flowing botanical lines. This project transforms a simple papier-mâché or ceramic skull base into a timeless piece of art using a soft palette of teal, mustard, and dusty rose against a creamy background.
Step-by-Step Guide
Materials
- Papier-mâché or ceramic skull base (life-size)
- Acrylic paints: Cream/Off-white, Black, burnt orange, mustard yellow, teal green, dusty pink/rose, gold metallic (optional)
- Gesso primer (if using papier-mâché)
- Pencil with eraser
- Round synthetic brushes (sizes 2, 4, and 0 for fine details)
- Palette
- Water cup and paper towels
- Matte spray varnish
Step 1: Preparing the Canvas
-
Prime the surface:
Before adding any color, coat your skull base with gesso if it’s papier-mâché, or a base primer if it’s ceramic. This ensures the paint adheres smoothly and the colors pop. -
Apply the base coat:
Mix a warm cream or off-white acrylic paint. Apply two even coats over the entire skull, letting the first coat dry completely before adding the second to avoid streaks. -
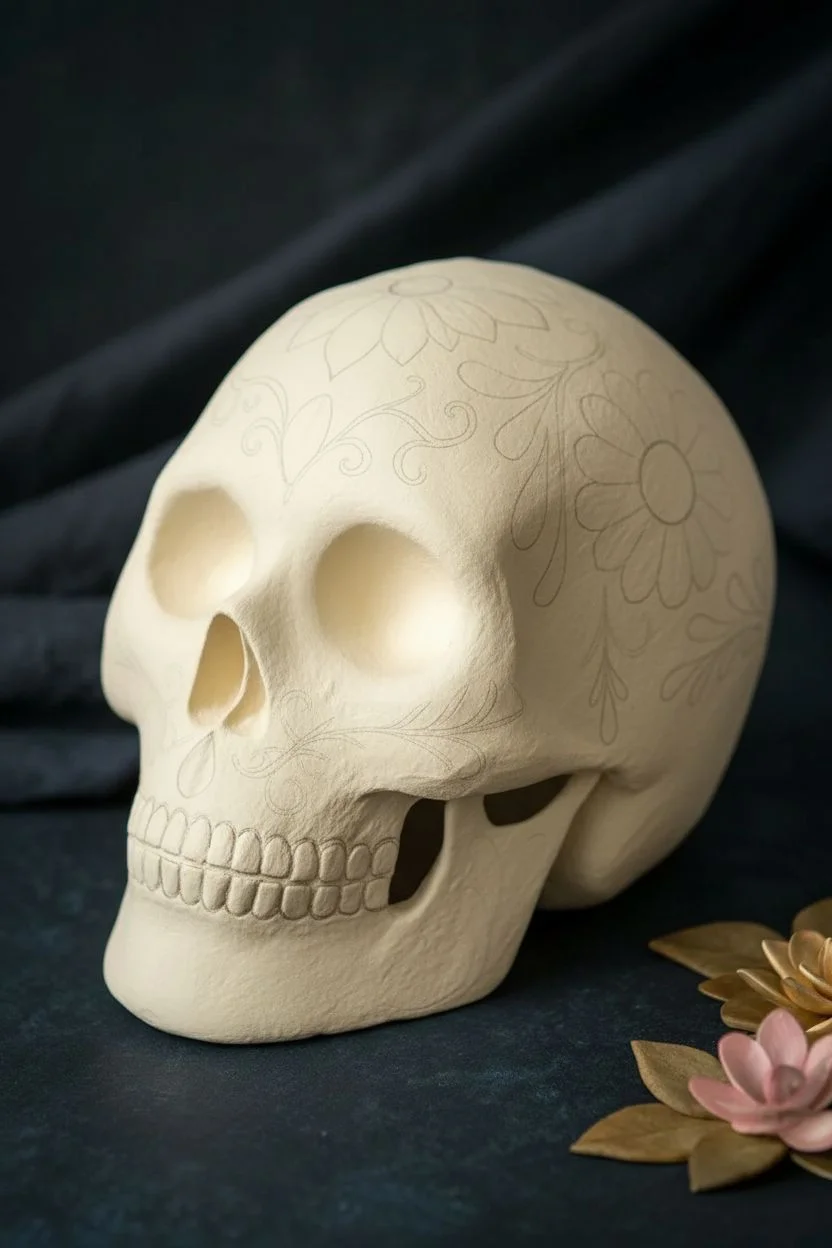
Map out the design:
Using a pencil, lightly sketch your symmetrical design. Start with circles around the eye sockets, a heart or teardrop shape for the nose, and the outline of the teeth. Add large flowers on the forehead and temples, connecting them with swirling vines.
Symmetry Hack
Draw your design on one side of the skull first. Use a flexible measuring tape to mark key points (like the center of a flower) on the opposite side to keep things perfectly symmetrical.
Step 2: Eyes and Nose
-
Darken the cavities:
Fill the deep recesses of the eye sockets and the nose cavity with solid black paint. Use a size 4 brush for the larger areas, switching to a smaller brush near the edges for a crisp line. -
Paint the eye rims:
Create the scalloped flower shape around the eyes using burnt orange paint. I like to carefully paint small ‘U’ shapes around the black socket, ensuring they connect seamlessly. -
Detail the scalloping:
Once the orange is dry, take your smallest brush (size 0) and black paint to outline the scalloped orange shapes. Add small dots or dashes inside the scallops for extra texture.
Shaky Lines?
If your fine lines are jittery, try thinning your black paint slightly with a drop of water. Ink-like consistency flows better from a liner brush than heavy body acrylics.
Step 3: Painting the Florals
-
Block in main flowers:
Paint the petals of the large flower on the forehead using dusty pink and mustard yellow. Alternating petal colors adds a nice rhythm to the design. -
Add secondary blooms:
Moving to the sides of the skull (the temples), paint large daisy-like flowers in dusty pink with a mustard center. Keep the paint relatively thin so it lays flat against the curved surface. -
Create the vines:
Load a size 2 brush with teal green paint. follow your pencil sketches to create flowing vines that curve around the eyes and jawline. Vary the pressure on your brush to make the lines thick and thin. -
Add leaves:
Attached to your teal vines, paint simple leaf shapes. Use a ‘press and lift’ motion with your round brush to get a natural tapered leaf shape. -
Paint the chin detail:
On the chin, add a smaller half-flower or fan shape using the dusty pink and teal to anchor the bottom of the design.
Step 4: Defining the Mouth
-
Outline the teeth:
Using your fine liner brush and black paint, carefully trace the vertical lines of the teeth. Don’t make them too uniform; a little variation makes it look more organic. -
Shape the gum line:
Paint a subtle horizontal line intersecting the teeth to separate the top and bottom jaw, curving it slightly at the ends to follow the skull’s shape.
Step 5: Fine Details and Finishing
-
Gold accents:
If you’re using metallic gold, add delicate curving tendrils or small dots near the vine, specifically focusing on the cheekbone area. -
Outline the florals:
With the thinnest brush and slightly watered-down brown or dark gold paint, outline the petals of your main flowers to define them against the cream background. -
Add center details:
Paint small concentric circles inside the flower centers using contrasting colors (like a teal dot inside a mustard center). -
Create tiny fillers:
Look for empty creamy spaces and fill them with tiny triads of dots or small teardrop shapes in red or orange to balance the composition. -
Seal the work:
Allow the skull to dry overnight. Once fully cured, spray with a matte varnish to protect the paint and give it a professional, unified finish.
Display your painted skull on a dark mantel or shelf to really let those muted colors shine.


Marigold Crown Sugar Skull Painting
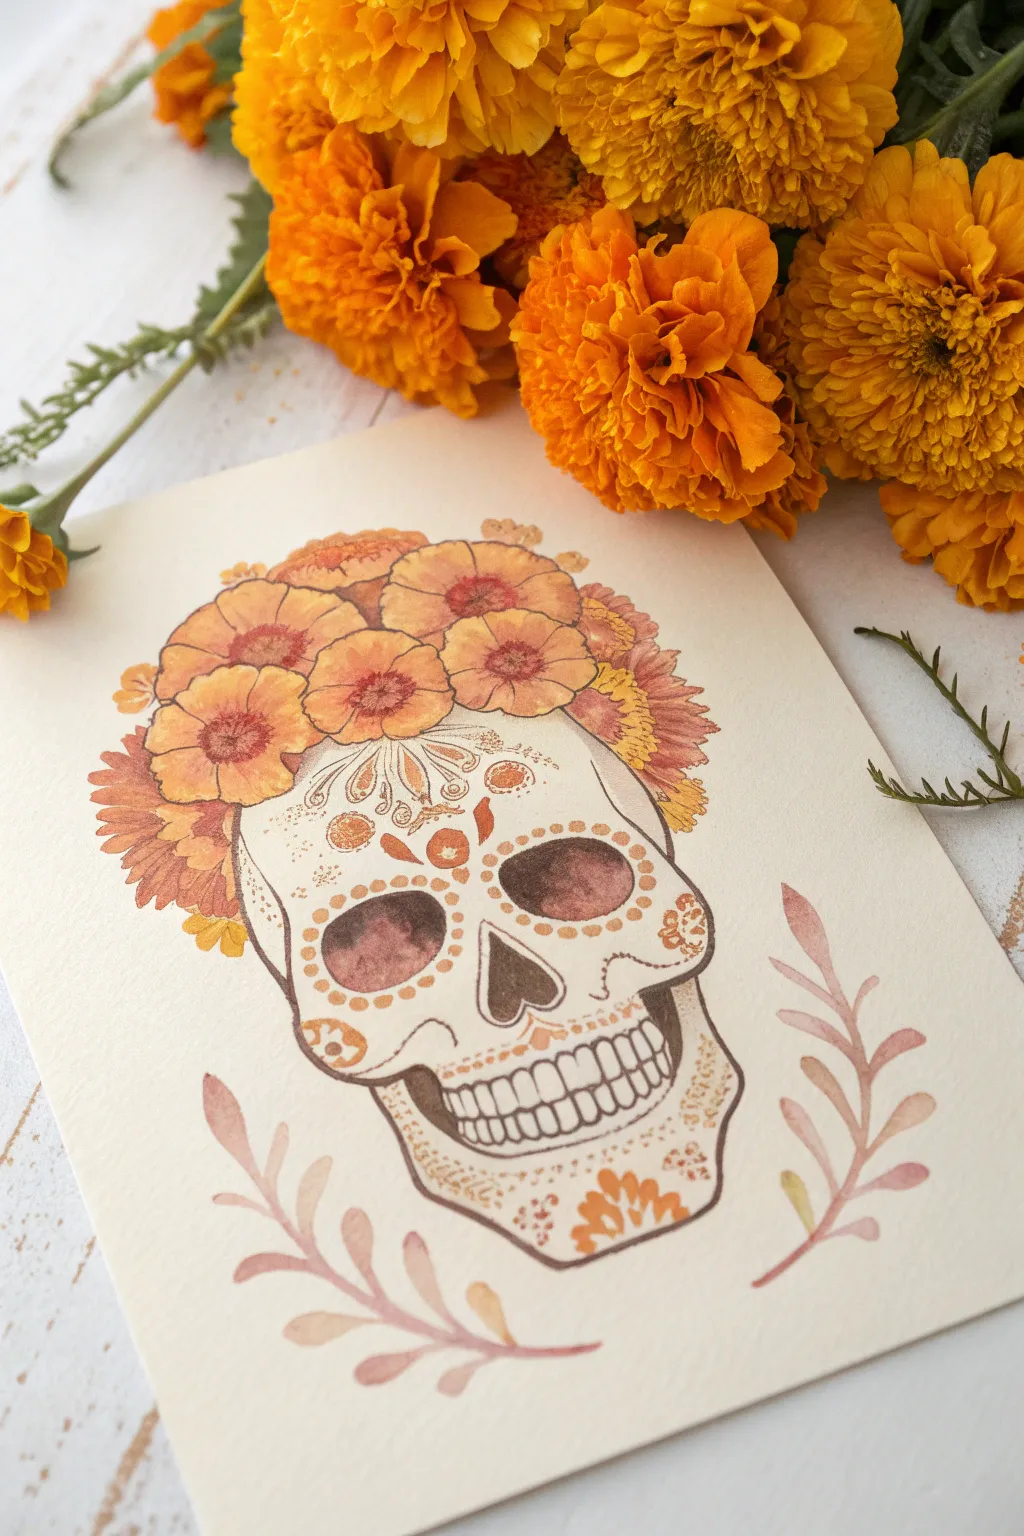
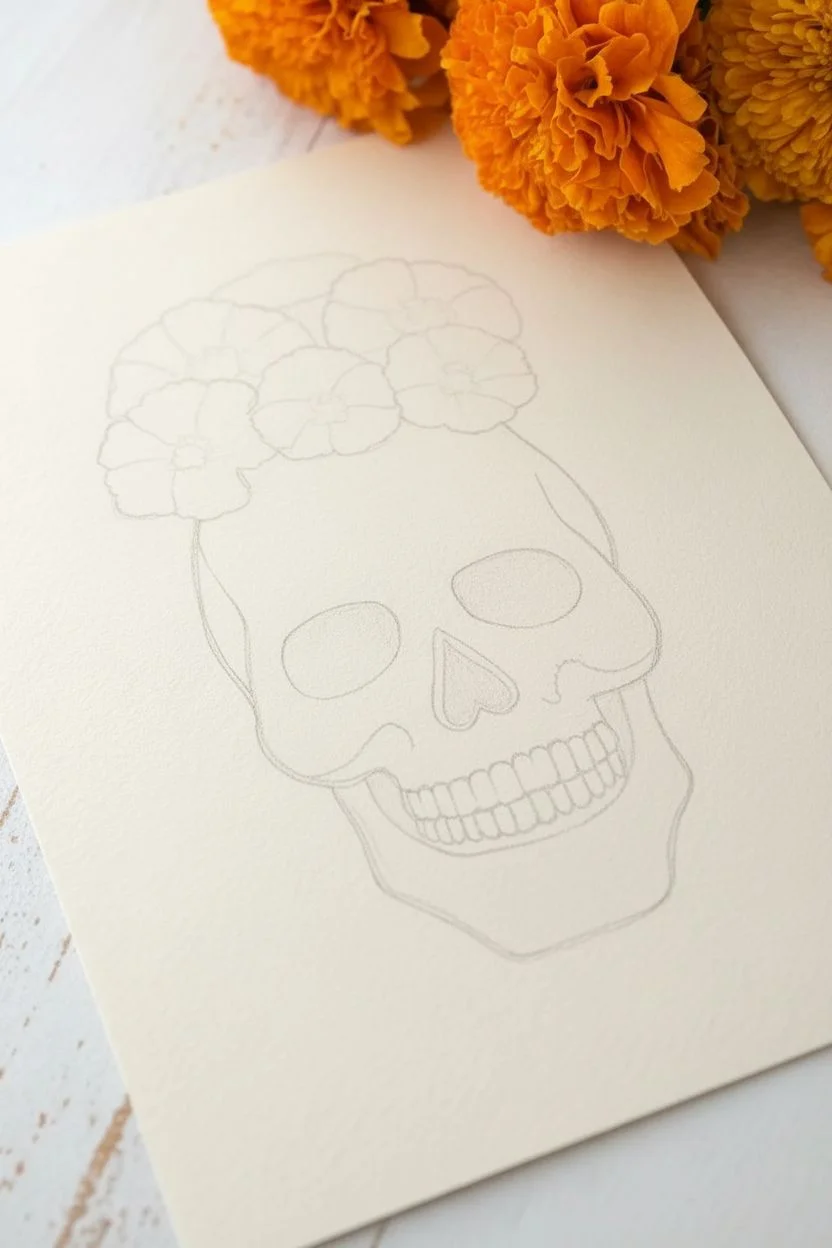
Capture the spirit of Dia de los Muertos with this gentle watercolor illustration featuring a classic sugar skull adorned with a vibrant crown of marigolds. The warm orange and yellow tones of the flowers create a beautiful contrast against the soft, cream-colored paper and delicate facial details.
Detailed Instructions
Materials
- Cold press watercolor paper (cream or natural white preferred)
- Pencil (HB or H)
- Kneaded eraser
- Watercolor paints (Yellow Ochre, Burnt Sienna, Cadmium Orange, Sepia, Alizarin Crimson)
- Round watercolor brushes (Size 2 and 6)
- Fine liner brush (Size 0 or 00) or brown fineliner pen
- Water container and paper towel
Step 1: Sketching the Structure
-
Outline the Skull Shape:
Begin by lightly sketching the outline of the skull in the center of your paper. Focus on the wide cranium and the narrower jawline, leaving ample space at the top for the floral crown. -
Add Facial Features:
Sketch two large, slightly irregular circles for the eye sockets and an upside-down heart shape for the nose. Draw a wide, curved line for the mouth area. -
Detail the Teeth:
Within the mouth area, lightly draw the individual teeth. Keep the lines soft and slightly rounded rather than perfectly rectangular to maintain an organic look. -
Map the Floral Crown:
Sketch a cluster of circular shapes overlapping the top of the cranium. These don’t need to be detailed yet; just establish the placement of the large blooms across the forehead. -
Erase Heavy Marks:
Gently roll your kneaded eraser over the entire sketch. You want the pencil lines to be barely visible guides so they don’t show through the transparent watercolor later.
Step 2: Painting the Marigolds
-
Base Layer for Flowers:
Load your size 6 brush with a watery wash of Yellow Ochre. Fill in the flower shapes loosely, leaving small slivers of white paper for highlights. -
Adding Orange Depth:
While the yellow is still slightly damp, touch in some Cadmium Orange near the centers of the flowers and along the bottom edges to create volume and shadow. -
Defining Petals:
Once the base layer is dry, mix a slightly thicker orange-red using Cadmium Orange and a touch of Burnt Sienna. Use the tip of your brush to paint small, C-shaped strokes inside the flower circles to suggest layers of petals. -
Painting the Centers:
Drop a concentrated mix of Burnt Sienna or reddish-brown into the very center of each main flower to give them a focal point. -
Side Foliage:
For the feathery leaves or filler flowers on the sides, use diluted Burnt Sienna or an earthy red tone, dabbing the brush to create texture rather than distinct petals.
Petal Tip
Don’t paint every single petal perfectly. The marigold look comes from the chaos of ruffled edges. Use wiggly, irregular brushstrokes for a more natural texture.
Step 3: Bringing the Skull to Life
-
Painting Eye Sockets:
Mix a diluted wash of Sepia and Alizarin Crimson. Paint the eye sockets, keeping the color transparent so the paper texture shows through. I like to let the color pool slightly at the bottom of the socket for a natural gradient. -
Shading the Nose:
Fill the nose cavity with a stronger mix of Sepia. It should be darker than the eyes to anchor the face. -
Tracing the Details:
Switch to your fine liner brush (or use a brown fineliner pen). Carefully outline the skull’s jaw, cheekbones, and teeth with very thin, delicate lines. Avoid a heavy black outline; stick to warm browns. -
Decorative Forehead Elements:
Using a fine brush and a warm orange-brown mix, paint the decorative swirls and tear-drop shapes on the forehead and around the eyes. Keep your hand steady and your paint consistency inky. -
Cheek and Chin Details:
Add small dotted patterns and simple floral motifs on the cheeks and chin using the same warm orange tones found in the marigolds. -
Adding Delicate Sprigs:
Paint two simple, curving leafy branches at the bottom left and right of the skull. Use a single stroke for the stem and simple press-and-lift strokes for the leaves using a soft, diluted reddish-brown.
Muddy Colors?
If your orange shadings on the flowers are turning muddy, let the yellow base layer dry completely before adding the darker details on top.
Step 4: Final Touches
-
Deepening Shadows:
Mix a very watery grey or dilute Sepia. Add subtle glazing under the cheekbones and along the temples to give the skull dimension without making it look dirty. -
Highlight Check:
Ensure the teeth remain largely white. If you accidentally painted over them, you can use a touch of white gouache or white gel pen to reclaim the brightness. -
Final Assessment:
Step back and look at the balance. If the crown feels too light, add another layer of petal details with your darkest orange mix to make it pop.
Enjoy the seasonal warmth of your finished marigold sugar skull painting


Floral Eye Sockets With Petal Rings
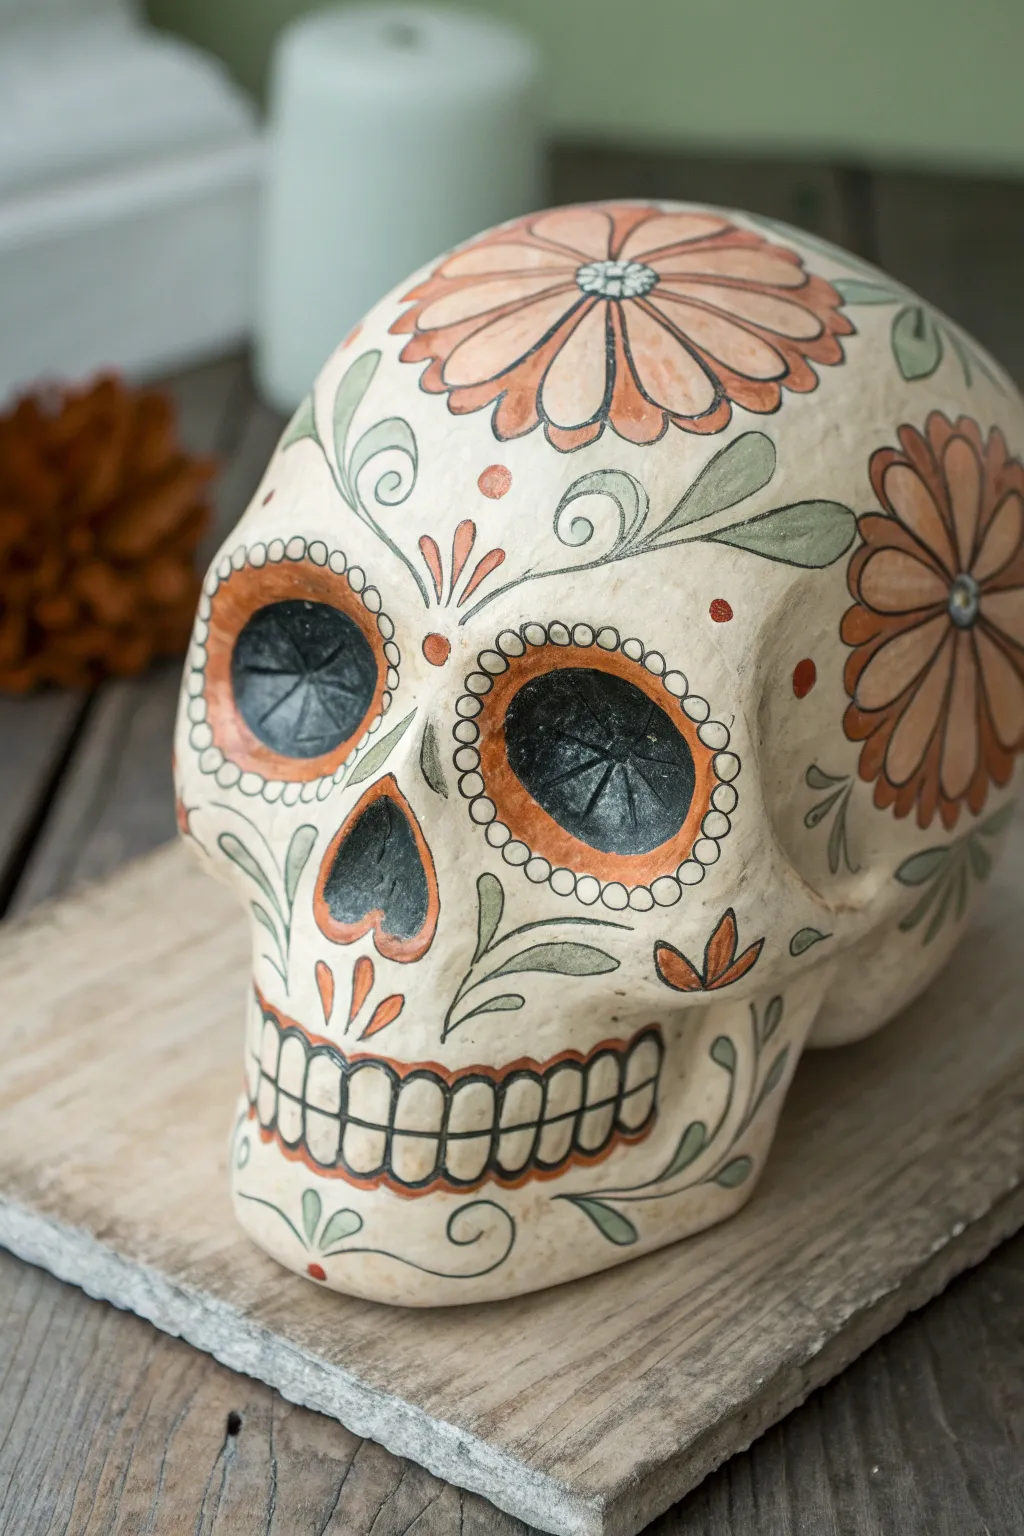
Embrace a softer, earthy aesthetic with this sugar skull design that pairs rustic terracotta tones with gentle sage green flourishes. The result is a beautifully weathered look that mimics traditional pottery, perfect for a sophisticated seasonal display.
How-To Guide
Materials
- Bisque ceramic or papier-mâché skull blank
- Acrylic paints: Cream/Off-White, Burnt Orange (Terracotta), Sage Green, Black
- Gesso (if porous surface)
- Fine detail paintbrush (size 0 or 00)
- Small round paintbrush (size 2 or 4)
- Pencil for sketching
- Matte varnish or sealant
- Paper plate or palette
- Water cup for rinsing
Step 1: Base Preparation
-
Prime the Surface:
Before adding color, wipe down your skull to remove dust. If you are using a papier-mâché base, apply a coat of gesso to create a smooth, non-porous starting point. -
Apply the Base Coat:
Paint the entire skull with the cream or off-white acrylic paint. You may need two thin coats to get solid, opaque coverage without brushstrokes showing through. Let this dry completely. -
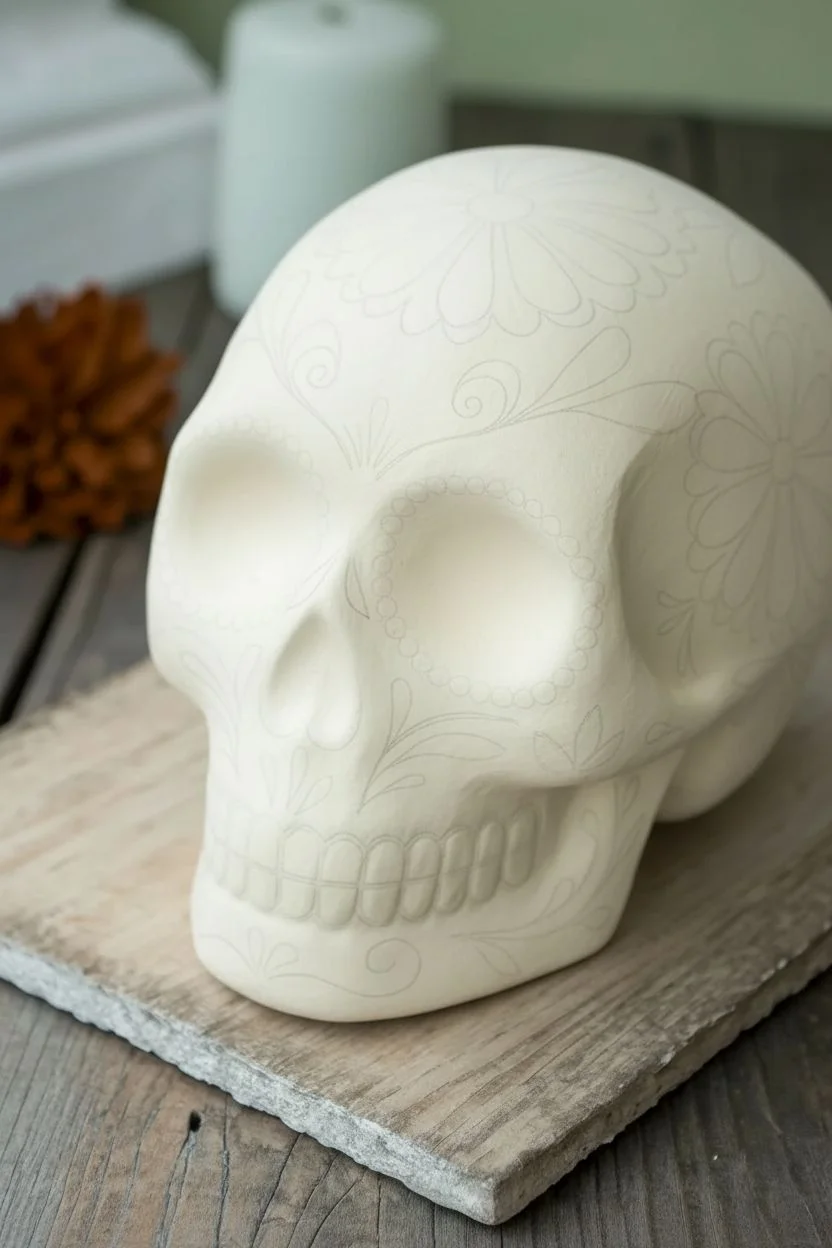
Sketch the Design:
Using a pencil, very lightly sketch your main elements onto the cream skull. Mark the circles around the eyes, the petal shapes on the forehead, the side flowers, and the vine flourishes. Keep lines faint so they are easy to cover.
Steady Tip
Rest your painting hand’s pinky finger on a dry part of the skull while doing detail work. This anchors your hand and prevents shaking for crisp lines.
Step 2: The Features
-
Paint the Eye Sockets:
Using your black paint, fill in the deep hollows of the eye sockets. If your skull has carved details inside the eye (like the starburst shown), use a drier brush to ensure paint doesn’t pool in the crevices, preserving the texture. -
Create the Eye Rings:
Take your burnt orange paint and a round brush to create a thick band around each black eye socket. Paint smoothly up to the edge of the black, creating a bold, warm border. -
Add the Nose Detail:
Paint the nose cavity black to match the eyes. Once dry, outline the upside-down heart shape of the nose with a thin line of the burnt orange paint. -
Detail the Mouth:
With a fine detail brush and black paint, outline the teeth area. Draw a horizontal line for the mouth opening and vertical lines to separate individual teeth. Once dry, outline the entire teeth section with burnt orange to tie it into the color scheme.
Step 3: Floral Flourishes
-
Paint the Forehead Flower:
Using the burnt orange, fill in the large, elongated petals of the flower centered on the forehead. Leave a small circular center unpainted for now. -
Paint the Side Flowers:
Repeat the petal process for the large flowers on the sides of the skull near the temples. Ensure the petals radiate outward naturally. -
Outline the Petals:
Switch to your fine liner brush and black paint. Carefully outline each orange petal. This step gives the design its illustrative, ‘talavera’ pottery style and crisps up any messy edges. -
Add Greenery:
Load your brush with sage green paint. Paint the swirling vines and leaves that extend from the flowers and around the jawline. Use a ‘press and lift’ motion for the leaves to get a tapered point.
Fixing Smudges
If you smudge black paint onto the cream base, don’t wipe it! Let it dry completely, then paint over the mistake with your base cream color.
Step 4: Fine Details & Finishing
-
Outline Vines & Leaves:
Go back with your black liner brush and add a thin outline to one side of the green vines and leaves. You don’t need to outline everything fully; partial outlines add artistic depth. -
Dot Patterns:
Dip the handle end of a paintbrush into white or cream paint (or use a dedicated dotting tool). Create the ring of small dots framing the orange eye sockets. Also, add the small center dots to the flowers. -
Decorative Accents:
Using burnt orange, add small dots or teardrop shapes in negative spaces, such as above the nose or between vines, to balance the composition. -
Seal the Work:
Once all paint is thoroughly dry—I like to give it at least an hour—apply a coat of matte varnish. This protects the paint and unifies the sheen, giving it that finished ceramic appearance.
Display your finished skull on a rustic wooden board or amidst autumn candles to highlight its earthy charm


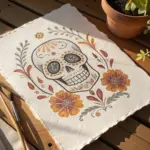
Heart Nose and Scrollwork Filigree Details
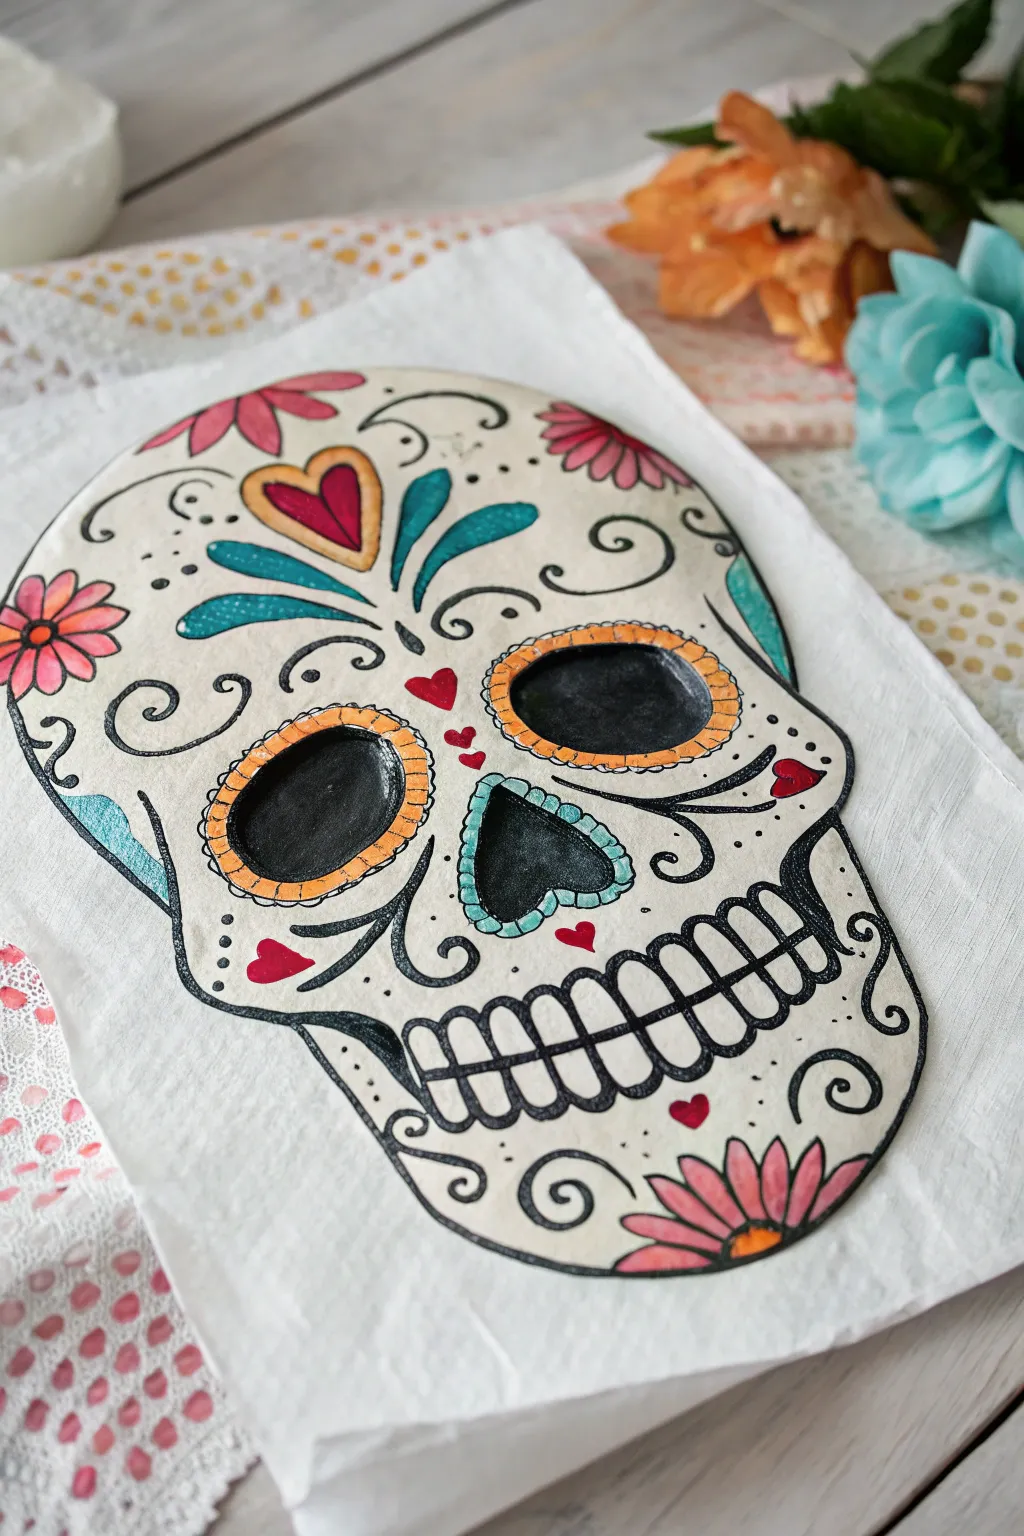
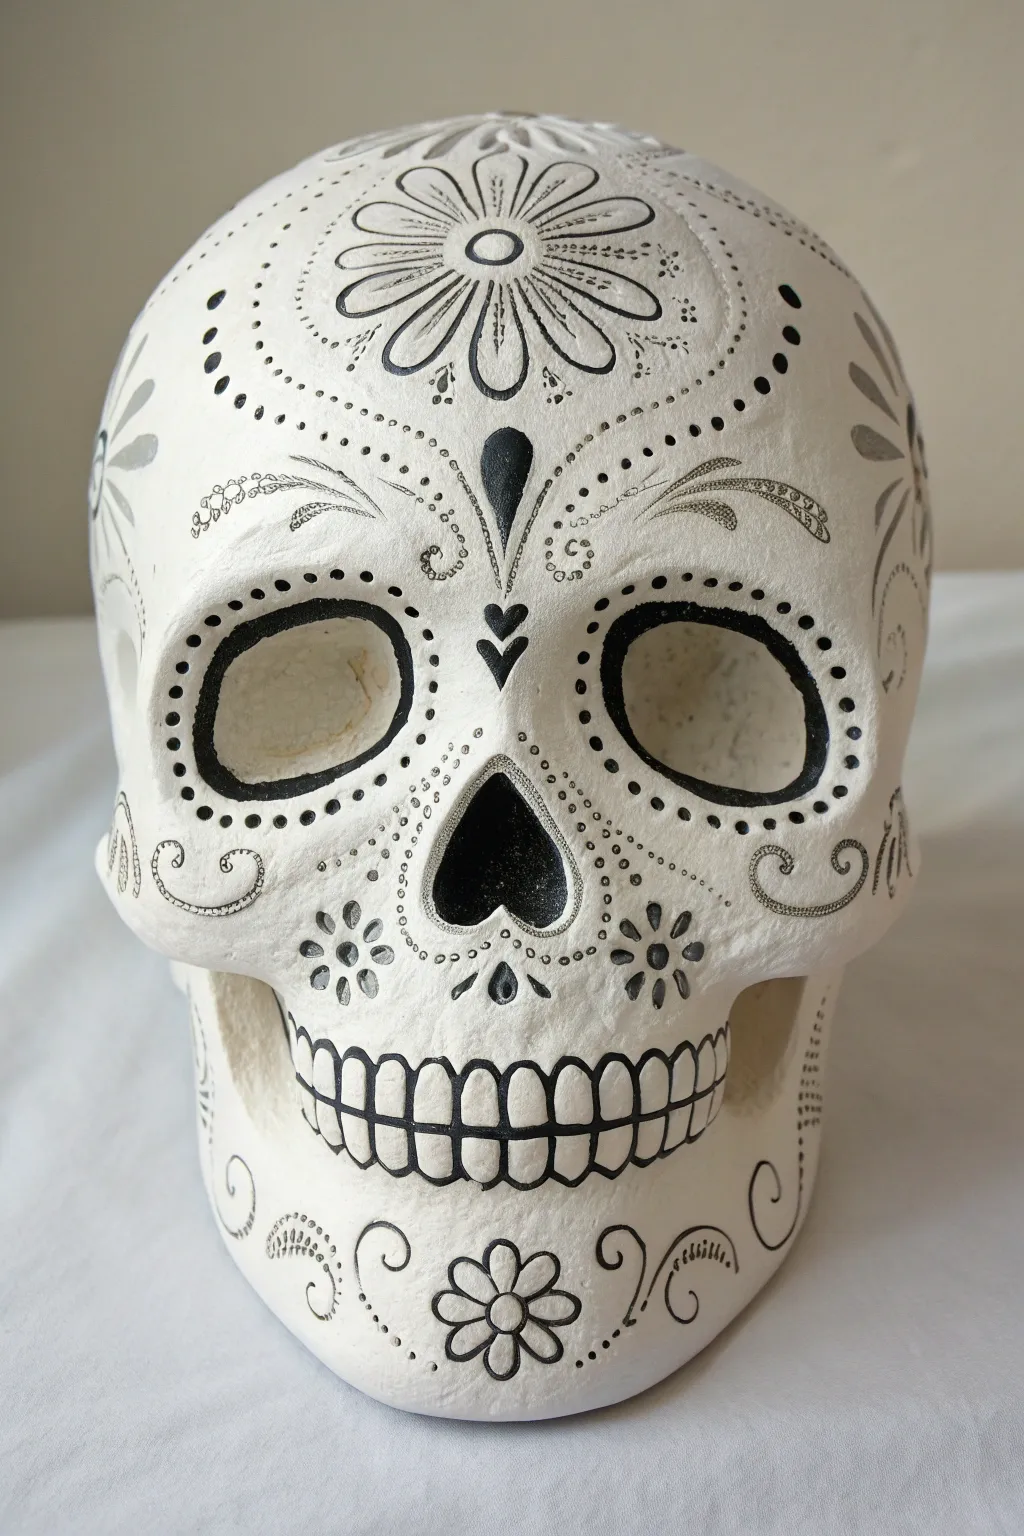
This project transforms simple paper into a vibrant Dia de los Muertos decoration, featuring a stylized sugar skull with cheerful floral accents and intricate scrollwork. The design focuses on bold black outlines filled with soft washes of color, creating a charming, hand-drawn aesthetic perfect for seasonal crafting.
Step-by-Step Tutorial
Materials
- Heavyweight white paper or white paper napkin (decoupage style)
- Black fine-tip permanent marker or drawing pen
- Colored markers or watercolor brush pens (pink, teal, orange, red, yellow)
- Pencil and eraser
- Scissors
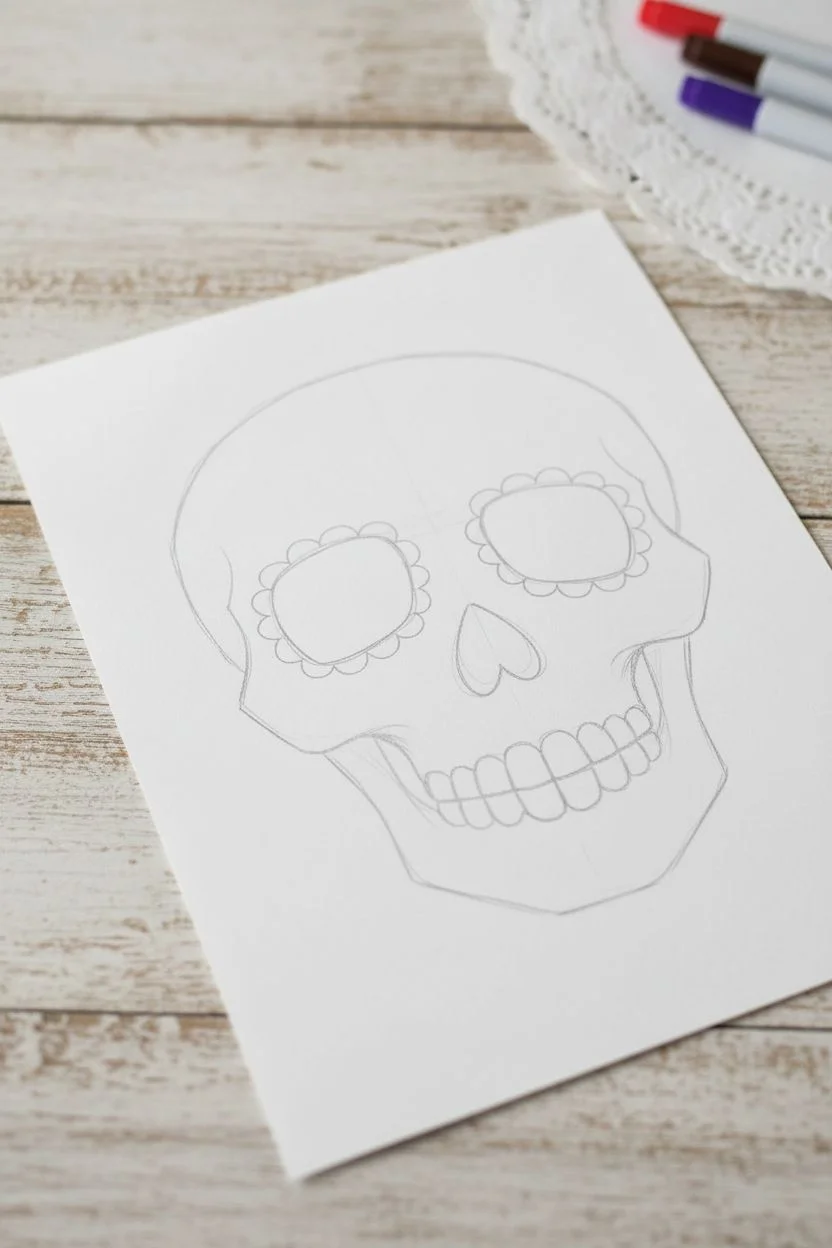
Step 1: Drafting the Outline
-
Sketch the cranium shape:
Begin by lightly sketching the large, rounded top part of the skull with your pencil. Make it slightly wider at the top and taper it inward where the jaw will begin. -
Form the jawline:
Draw the lower mandible section, keeping it squared but rounded at the corners. It should be significantly narrower than the cranium. -
Placement of features:
Lightly mark the locations for the two large eye sockets, the upside-down heart nose, and the wide grinning mouth.
Ink Bleed Prevention
If using a paper napkin or tissue, make sure to place a scrap sheet of cardstock underneath while drawing to catch any ink bleed-through.
Step 2: Drawing the Features
-
Define the eye sockets:
Draw two large, slightly oval shapes for the eyes. Inside each oval, sketch a slightly smaller oval to create a thick rim. -
Add the nose:
Sketch the nose as an upside-down heart shape right in the center of the face, aligned with the bottom of the eye sockets. -
Create the mouth:
Draw a long horizontal line for the mouth opening. Add vertical lines across it to represent teeth, curving them slightly at the ends to follow the form of the jaw. -
Inking the outline:
Go over your main pencil lines with the black fine-tip marker. Create a bold, continuous line for the outer skull shape and the main features.
Step 3: Adding Decorative Details
-
Forehead centerpiece:
Draw a heart in the center of the forehead. Surround it with a scalloped border and add three leaf-like shapes extending outward on each side. -
Floral elements:
Sketch half-flowers at the temples and on the chin. Simple daisy-like petals work best here. -
Scrollwork filigree:
Fill the empty white spaces on the cheeks and forehead with swirling scroll lines and dots. Symmetrical placement helps balance the design. -
Tiny hearts:
Scatter small hearts—some upright, some inverted—around the nose and jaw area for extra filler detail.
Glitter Glam
Apply tiny dots of liquid glitter glue to the center of the flowers and the tips of the scrollwork for a finish that sparkles in the light.
Step 4: Coloring and Finishing
-
Color the eyes:
Fill the very center of the eye sockets with solid black ink. This gives the skull depth. -
Paint the eye rims:
Use an orange marker to fill the thick rim around the eyes. Once dry, draw small vertical tick marks around the rim for texture. -
Fill the nose:
Color the heart-shaped nose solid black. Once the black is set, outline the nose with a teal scalloped border. -
Add color to foliage:
Use teal to color the leaves on the forehead centerpiece and the scalloped border of the nose. I like to leave small white streaks for highlights. -
Brighten the flowers:
Color the forehead heart and the flower petals with pink. Use orange for the flower centers. -
Accent hearts:
Fill the small scattered hearts with red ink to make them pop against the white background. -
Final black details:
Go back with your black pen and thicken any outlines that look too thin, specifically around the jawline and the filigree swirls. -
Cut it out:
If you wish to display just the skull, carefully cut along the outer black edge with scissors.
Display your colorful skull on a bright background or string several together for a festive garland
BRUSH GUIDE
The Right Brush for Every Stroke
From clean lines to bold texture — master brush choice, stroke control, and essential techniques.
Explore the Full Guide
Bold Color Blocking With Clean Outlines
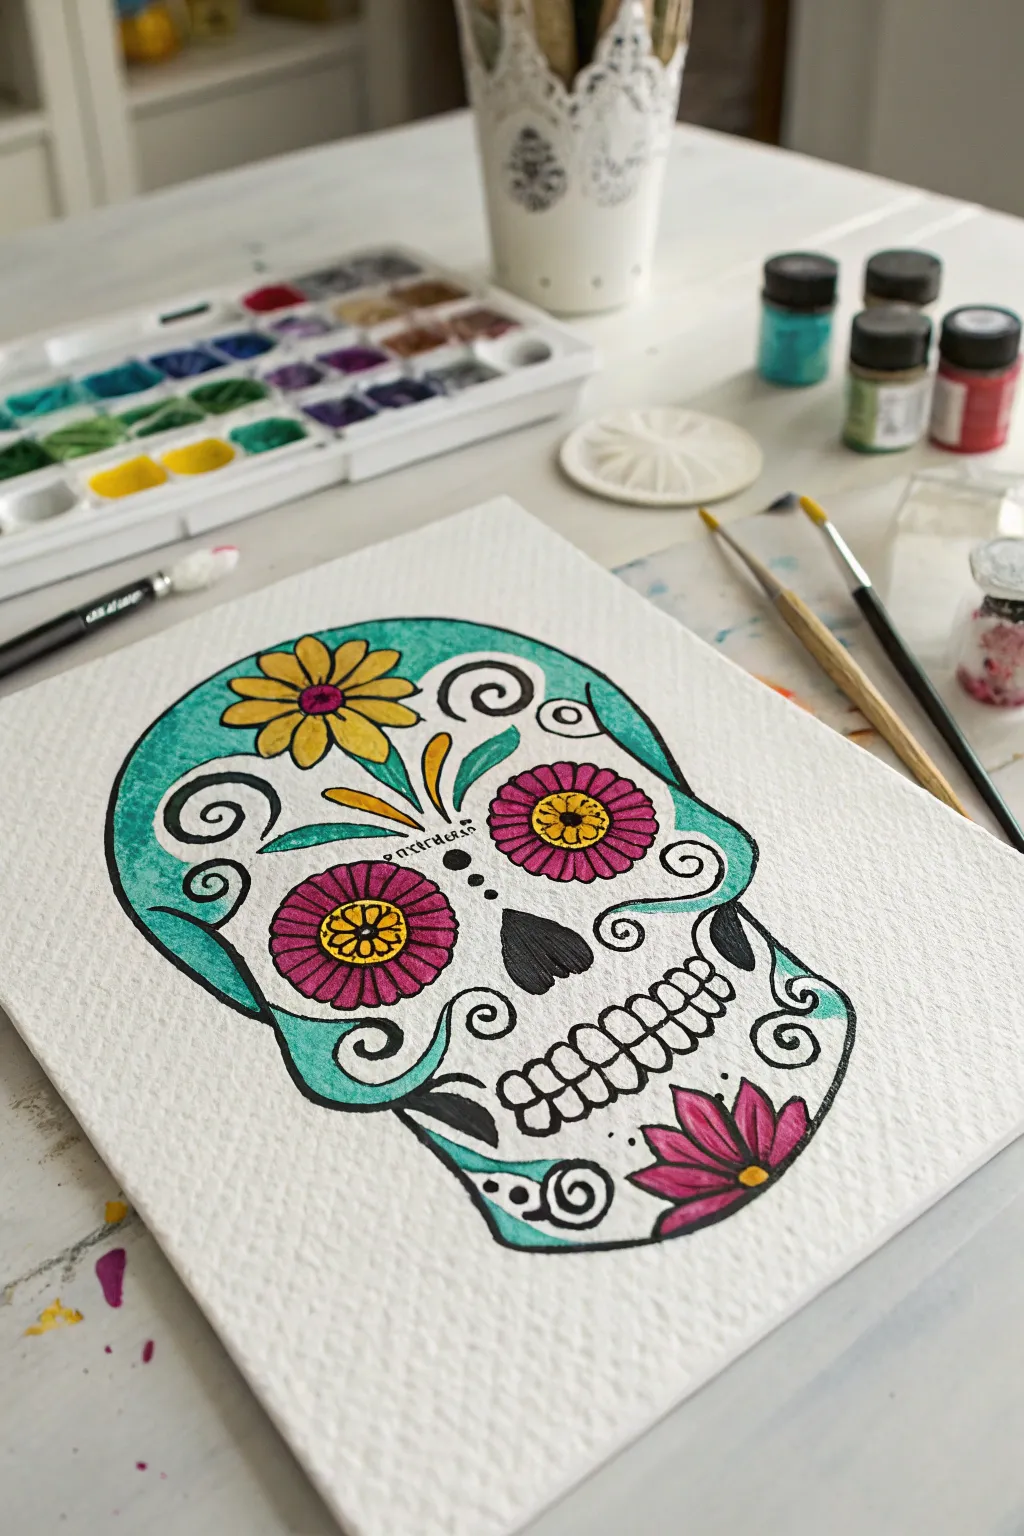
Capture the festive spirit of Dia de los Muertos with this bright, illustrative sugar skull design. Featuring bold watercolor blocking in teal and magenta against stark black linework, this approachable project balances clean graphic shapes with traditional floral motifs.
Step-by-Step Guide
Materials
- Cold press watercolor paper (approx. 140lb/300gsm)
- Pencil (HB or H) and eraser
- Waterproof fine liner pen (black, 0.5mm)
- Waterproof brush pen or permanent marker (black)
- Watercolor paints (Teal/Turquoise, Magenta/Deep Pink, Golden Yellow)
- Round watercolor brushes (size 4 and size 0)
- Clean water jar and paper towels
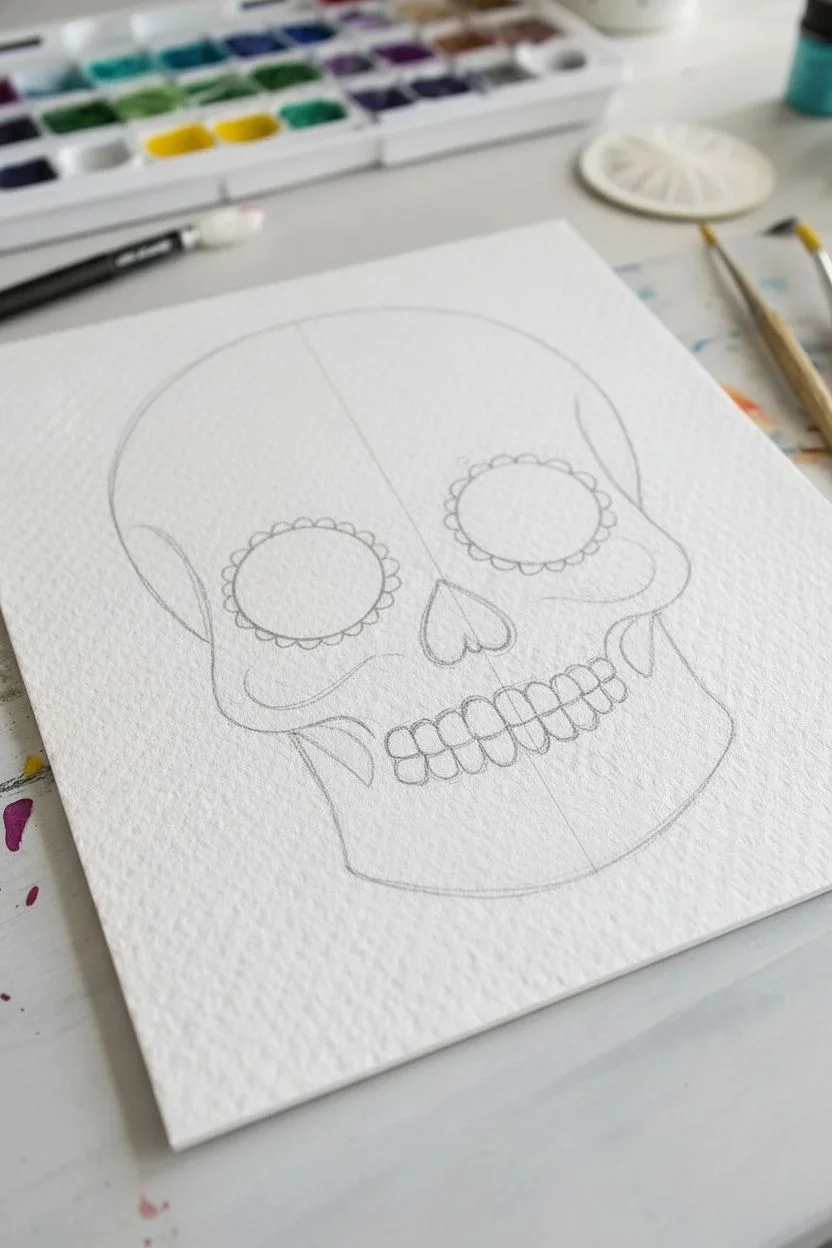
Step 1: Sketching the Structure
-
Outline the skull shape:
Start by lightly sketching the main cranium shape. Draw a large, rounded dome for the top of the head, tapering down slightly at the temples. -
Define the jawline:
Extend the lines downward to form the cheekbones and jaw. Keep the jaw somewhat squared but rounded at the corners for a stylized look. -
Map out the features:
Lightly mark a vertical center line to help with symmetry. Sketch two large circles for the eye sockets and an upside-down heart shape for the nose cavity. -
Add the mouth and teeth:
Draw a horizontal line for the mouth opening. Sketch individual teeth above and below this line, making the center teeth largest and getting smaller as they move outward.
Pro Tip: Line Weight
Make the outer skull outline twice as thick as the interior details. This ‘holding line’ technique contains the colors and makes the image pop significantly more.
Step 2: Drafting the Design
-
Draw the flower eyes:
Inside the large eye sockets, draw flower petals radiating from a central circle. The petals should fill most of the socket space. -
Add the forehead floral:
Sketch a large daisy-like flower on the upper left forehead. Add a few leaves tucked underneath the petals. -
Sketch scrollwork details:
Add swirling scroll lines on the temples, cheeks, and chin. These should curl inward like fern fronds or decorative ironwork. -
Place the chin flower:
Draw a half-flower shape at the very bottom chin area, with petals pointing upwards towards the mouth. -
Refine decorative dots:
Add small circles or dots around the eyes and along the forehead scrollwork to fill empty spaces.
Troubleshooting: Bleeding Ink
If your black ink bleeds when you paint over it, stop immediately. Your pen isn’t waterproof. Let it dry 24 hours or switch to permanent markers for the outlines.
Step 3: Inking the Lines
-
Trace with fine liner:
Go over your pencil lines with a waterproof 0.5mm fine liner. Focus on smooth, continuous strokes for the flowers and teeth. -
Thicken main contours:
Use a thicker brush pen or marker to go over the outermost outline of the skull. This heavy line weight separates the skull from the background. -
Fill clear black areas:
Completely fill in the nose cavity and the deep recesses of the scrollwork with black ink. This high contrast is crucial for the graphic look. -
Erase pencil marks:
Wait until the ink is completely dry—I usually give it a full five minutes—then gently erase all visible graphite sketch lines.
Step 4: Applying Color
-
Paint the teal base:
Load your size 4 brush with teal watercolor. Carefully paint the main ‘bone’ areas of the skull, leaving the flowers, teeth, and decorative scrolls white. -
Create texture:
While the teal is wet, you can dab a little extra pigment into the edges for a slight gradient effect, but keep the overall wash fairly flat and graphic. -
Color the flower eyes:
Paint the petals inside the eye sockets with a vibrant magenta or deep pink. Use the tip of your brush to stay inside the lines. -
Add yellow centers:
Paint the centers of the eye-flowers and the main forehead flower with golden yellow. Use a dense mixture so the yellow pops. -
Paint remaining florals:
Use the golden yellow for the petals of the forehead flower, and return to magenta for the chin flower details. -
Refine small details:
Using a size 0 brush, carefully add small touches of color to any tiny leaves or dots you missed, using green or teal. -
Final drying:
Let the piece dry flat completely. If the black lines look faded after painting over them, you can do a quick touch-up with your pen.
Once the paint is dry, your vibrant sugar skull is ready to bring a touch of celebration to your space
Soft Watercolor Sugar Skull With Gentle Glazes
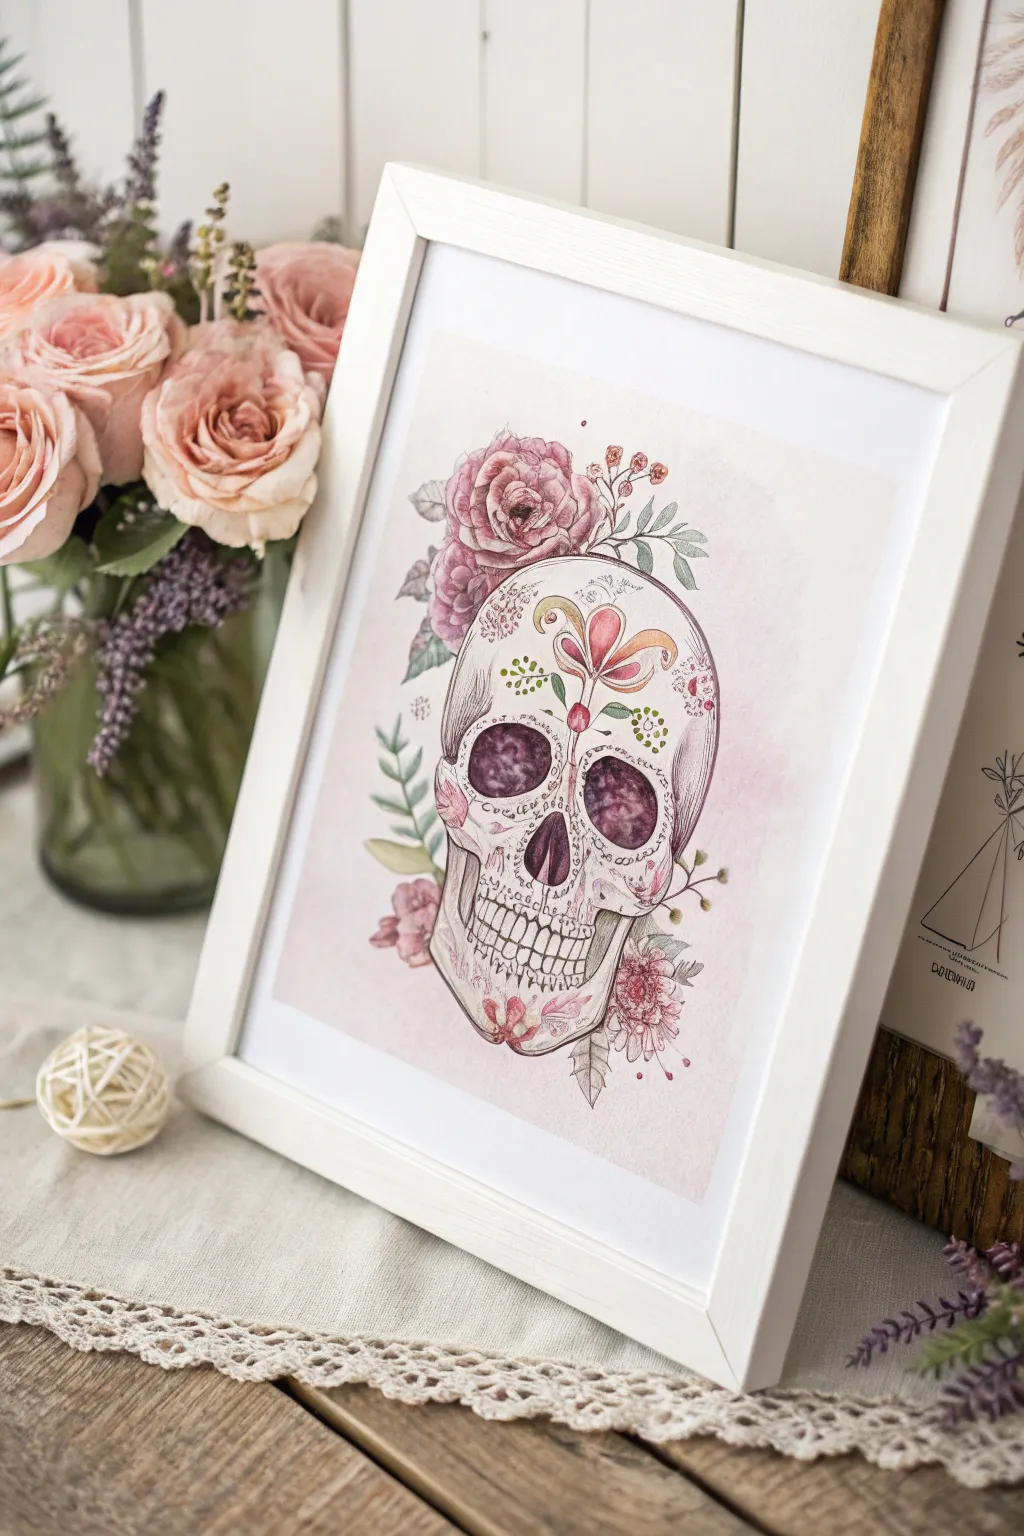

Embrace the softer side of sugar skull imagery with this watercolor project that blends delicate anatomical lines with romantic florals. By layering gentle washes of pink and rose over intricate ink work, you’ll create a piece that feels vintage and beautifully haunting.
Detailed Instructions
Materials
- Hot press watercolor paper (smooth texture is key for detail)
- Waterproof fine liner pens (0.1mm and 0.3mm, black or sepia)
- Watercolor paints (Alizarin Crimson, Sap Green, Burnt Umber, Payne’s Grey, Yellow Ochre)
- Soft round brushes (sizes 2, 4, and 6)
- HB pencil and kneaded eraser
- Paper towels
- Two jars of water (one for rinsing, one for clean blending)
Step 1: Sketching the Bones
-
Outline the Shape:
Start with a light HB pencil sketch of the skull. Focus on the large cranberry-shaped cranium and the narrower jawline. Don’t worry about perfect realism; a slightly stylized shape works best for this motif. -
Add Facial Features:
Draw large, slightly uneven orbital sockets for the eyes. Add the upside-down heart shape for the nose cavity and sketch the teeth, making sure the roots extend slightly upward into the jaw. -
Draft the Florals:
Pencil in a large rose cluster sitting atop the skull’s left side. Add smaller buds and leaves tucking behind the jaw and cheekbones to create balance. -
Ink the Linework:
Using your 0.1mm waterproof pen, carefully trace your pencil lines. For the skull cracks and floral centers, use a shaky, broken line to suggest age and texture. -
Erase and Clean:
Wait until the ink is completely dry—I usually give it at least ten minutes—before gently erasing all pencil marks with a kneaded eraser to prevent smudging.
Step 2: The First Washes
-
Base Rose Tones:
Mix a very watery wash of Alizarin Crimson. Paint the roses using the wet-on-dry technique, leaving plenty of white space on the petal edges for highlights. -
Skull Undertones:
Create a dilute mix of Yellow Ochre and a tiny dot of Burnt Umber. Apply this pale ‘bone’ color to the skull, avoiding the eye sockets and nose cavity completely. -
Greenery Glaze:
Using a size 4 brush, paint the leaves with a pale Sap Green. While the paint is still wet, drop in a tiny amount of Payne’s Grey at the base of the leaves for instant depth. -
Eye Socket Depth:
Mix Alizarin Crimson with Payne’s Grey to create a deep, dusty purple. Fill the eye sockets and nose cavity, dropping in pure water in the center of the wet puddle to create a ‘bloom’ texture as it dries.
Muddy colors?
Wait for each layer to be bone-dry before glazing the next. If the paper is cool to the touch, it’s still wet. Patience prevents the ink from bleeding and colors from turning brown.
Step 3: Decorative Details
-
Forehead Florals:
Use a size 2 brush to paint the decorative motif on the forehead. Start with a central teardrop shape in pink, flanked by curving orange-yellow petals. -
Cheek Embellishments:
Paint small green dots and swirled lines on the cheekbones. Keep the paint mix fairly translucent so the black ink lines underneath remain visible. -
Adding Shadows:
Once the bone layer is dry, mix a diluted grey-purple shadow color. Glaze this under the cheekbones, beneath the rose cluster, and around the teeth to define the form. -
Intensifying the Roses:
Go back into the centers of the dried roses with a more concentrated crimson mix to create the illusion of tightly packed petals. -
Splatter Texture:
Load a brush with watery pink paint and tap it against another brush handle to create a fine mist of speckles across the top of the skull and background.
Add a vintage twist
Brew a strong cup of black tea and let it cool. Use this tea to stain the background wash for an instant antique parchment look that complements the skull theme perfectly.
Step 4: Final Definition
-
Restating Lines:
Use a 0.3mm pen to reinforce the darkest areas, specifically the gaps between the teeth and the deepest crevices of the rose petals. -
Tiny Stippling:
Add tiny ink dots (stippling) around the eye sockets and on the decorative forehead patterns to mimic traditional sugar skull icing texture. -
White Highlights:
If you lost any highlights, use a white gel pen to add tiny sparkles to the eyes or the tips of the leaves. -
The Background Wash:
Finally, wet the paper around the skull (avoiding the artwork itself) and drop in a very faint, cloudy wash of dirty pink to settle the image into the page.
Once framed, this delicate piece serves as a beautiful reminder of celebration and memory all year round

PENCIL GUIDE
Understanding Pencil Grades from H to B
From first sketch to finished drawing — learn pencil grades, line control, and shading techniques.
Explore the Full Guide
Acrylic Layering for Super Bright, Opaque Patterns
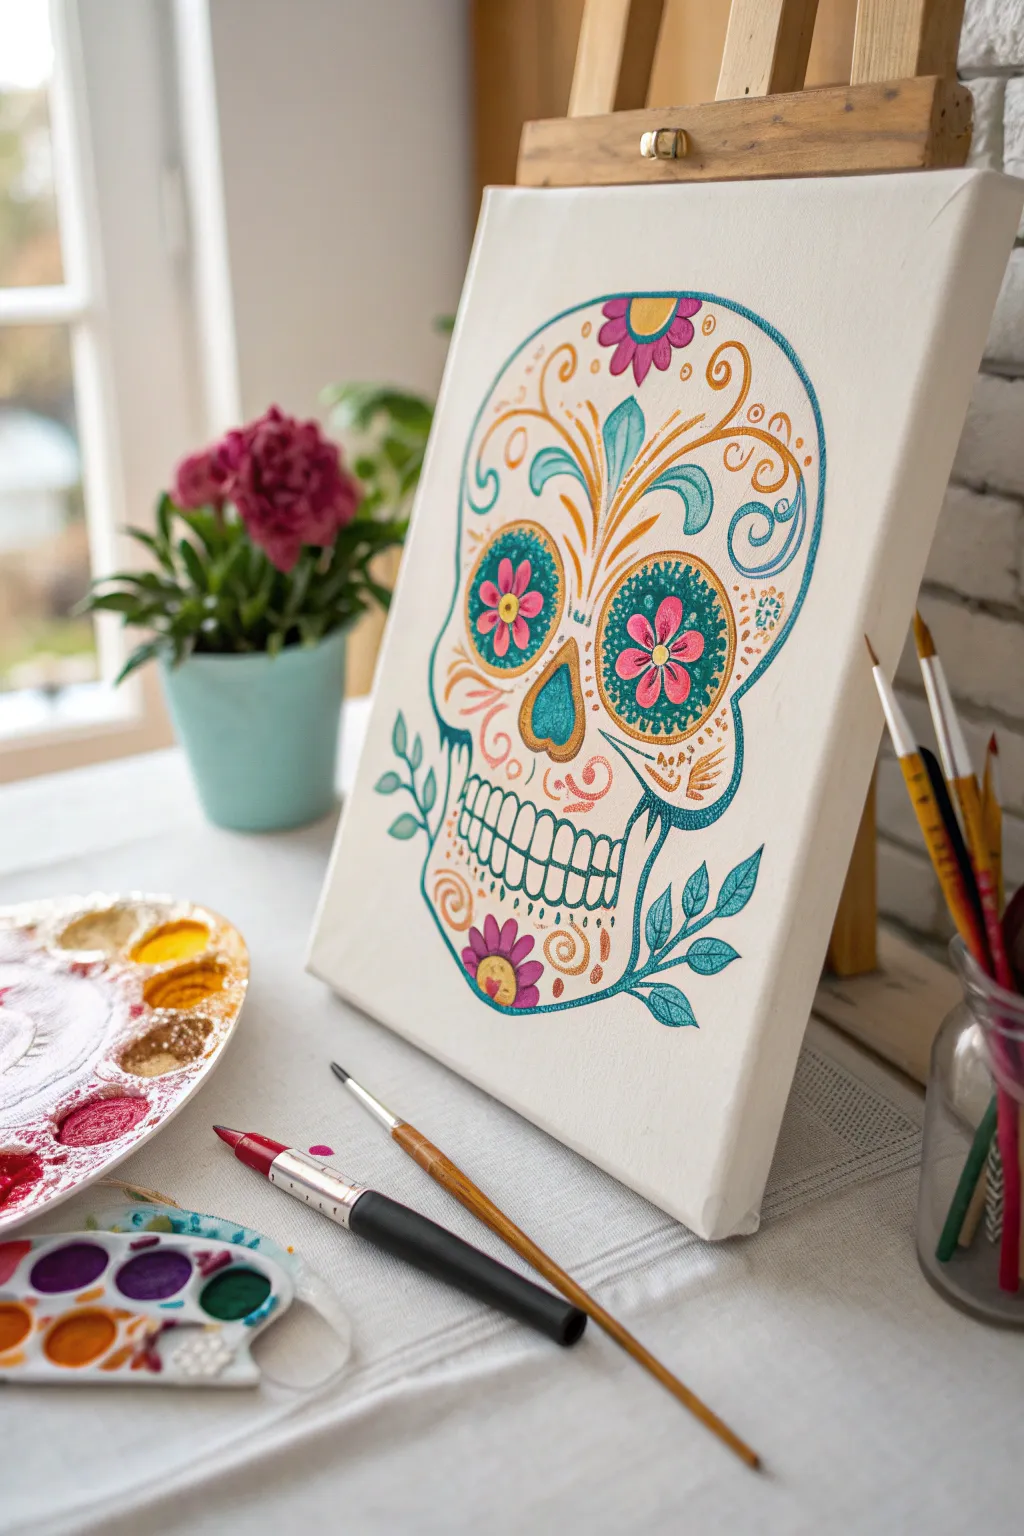
This project captures the vibrant spirit of a traditional sugar skull with a modern, elegant twist, featuring crisp lines and glowing metallic accents against a clean white background. By using high-quality acrylics and a deliberate layering technique, you will achieve rich, opaque patterns that truly pop off the canvas.
Step-by-Step Guide
Materials
- Small stretched canvas (e.g., 8×10 or 9×12 inches)
- Acrylic paints: titanium white, bright teal/turquoise, magenta or deep pink, metallic gold, burnt orange/ochre
- Round synthetic brushes: size 2 (fine tip) and size 0 (detail)
- Flat brush: size 6 (for mixing or larger fill areas)
- Pencil (HB or H for light lines)
- Eraser
- Palette or paper plate
- Water cup and paper towels
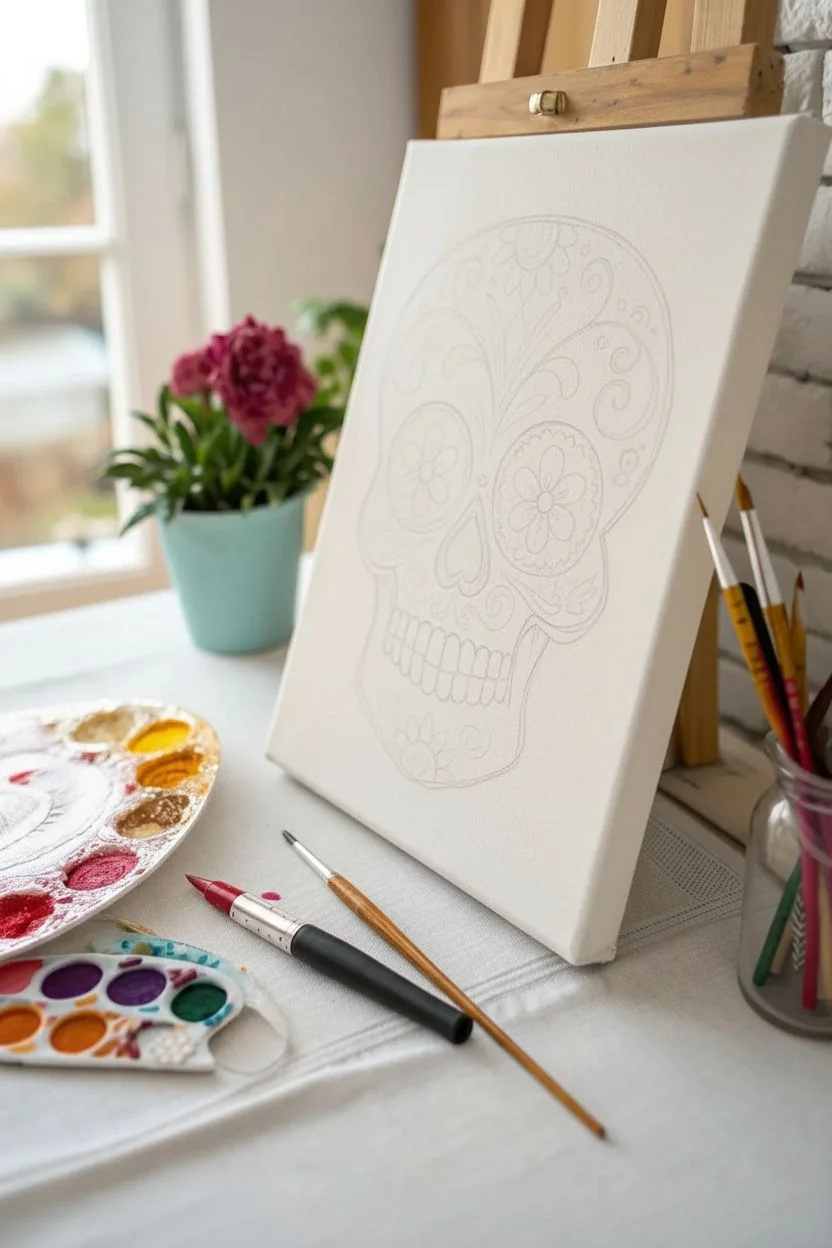
Step 1: Sketching the Structure
-
Outline the skull shape:
Start by lightly sketching the main outline of the skull on your raw canvas. Aim for a rounded cranium that narrows slightly at the cheekbones and flows down into a squared jawline. Keep your pencil pressure very light so the graphite doesn’t smudge into the white paint later. -
Draft facial features:
Draw two large, upside-down teardrop shapes for the eye sockets. In the center, below the eyes, sketch an upside-down heart shape for the nose cavity. -
Add the mouth and teeth:
Draw a horizontal line for the mouth opening, curving up slightly at the ends. Sketch simple vertical rectangles for the teeth, ensuring the top and bottom rows align nicely. -
Plan placement of details:
Lightly trace the decorative elements: a large floral shape on the forehead, swirls on the cheeks, and the flower petals inside the eye sockets. Don’t worry about perfect symmetry; hand-drawn imperfections add charm.
Step 2: Blocking in Color
-
Paint the eye sockets:
Mix a vibrant teal with a tiny touch of white to increase opacity. Fill in the large eye socket shapes carefully, avoiding the flower petals inside if you sketched them, or paint the whole socket teal and layer the pink on top once fully dry. -
Fill the nose cavity:
Using the same teal mix or a slightly darker variation, fill in the upside-down heart nose shape. Use your size 2 round brush to keep the edges sharp. -
Create the forehead flower:
Load your brush with magenta. Paint the simple five-petal flower centered at the very top of the forehead. For better coverage, I find applying two thin layers works better than one thick gloppy one. -
Add chin details:
Paint the small flower at the center of the chin using the same magenta shade. Add the teal leaves extending outwards from the chin flower.
Opacity Secret
Teal and yellow often dry sheer. Mix a tiny drop of Titanium White into these colors before painting. It makes the paint opaque instantly without changing the hue too much.
Step 3: Layering Gold and Details
-
Outline decorative swirls:
Dip your fine liner brush (size 0) into the metallic gold paint. Carefully trace the spiral designs on the temples, cheeks, and around the jawline. The gold paint might be translucent, so let it dry and apply a second pass for that bright, foil-like effect. -
Detail the eye flowers:
Paint the pink flower petals inside the teal eye sockets. If the teal is dark, start with a layer of white primer in the petal shape, let it dry, then add the pink on top for maximum brightness. -
Add floral centers:
Use a dot of gold or bright yellow ochre for the centers of all your flowers—the forehead, eyes, and chin. -
Create the forehead foliage:
Using the teal paint, add the large, leafy flourishes stemming from the center of the forehead, framing the central gold designs.
Clean Lines Hack
If your hand is shaky for the fine outlines, dilute your acrylic paint with a few drops of water until it has an ink-like consistency. It will flow much smoother.
Step 4: Refining and Outlining
-
Define the teeth:
Using a very thinned-down teal or a dark grey-blue, carefully outline each tooth. You can also round off the corners of the teeth slightly to make them look more organic. -
Add dotted accents:
Take the back end of your paintbrush handle, dip it into white or orange paint, and stamp small dots around the eye sockets and along the curve of the skull for extra texture. -
Sharpen the outer edges:
Use your teal paint to create a thin, consistent outline around the entire skull shape. This acts like a container for the design and makes it stand out against the white canvas. -
Highlight the gold:
Mix a tiny bit of white into your gold paint and add highlight lines on the thickest parts of your gold swirls to make them look three-dimensional. -
Final clean up:
Look for any smudged pencil lines or rough paint edges. Use a small brush with titanium white to crisp up the background around the skull, essential for that ‘floating’ look.
Allow your painting to dry completely before displaying it to let those metallic accents catch the light
Gouache Sugar Skull With Matte, Velvety Color
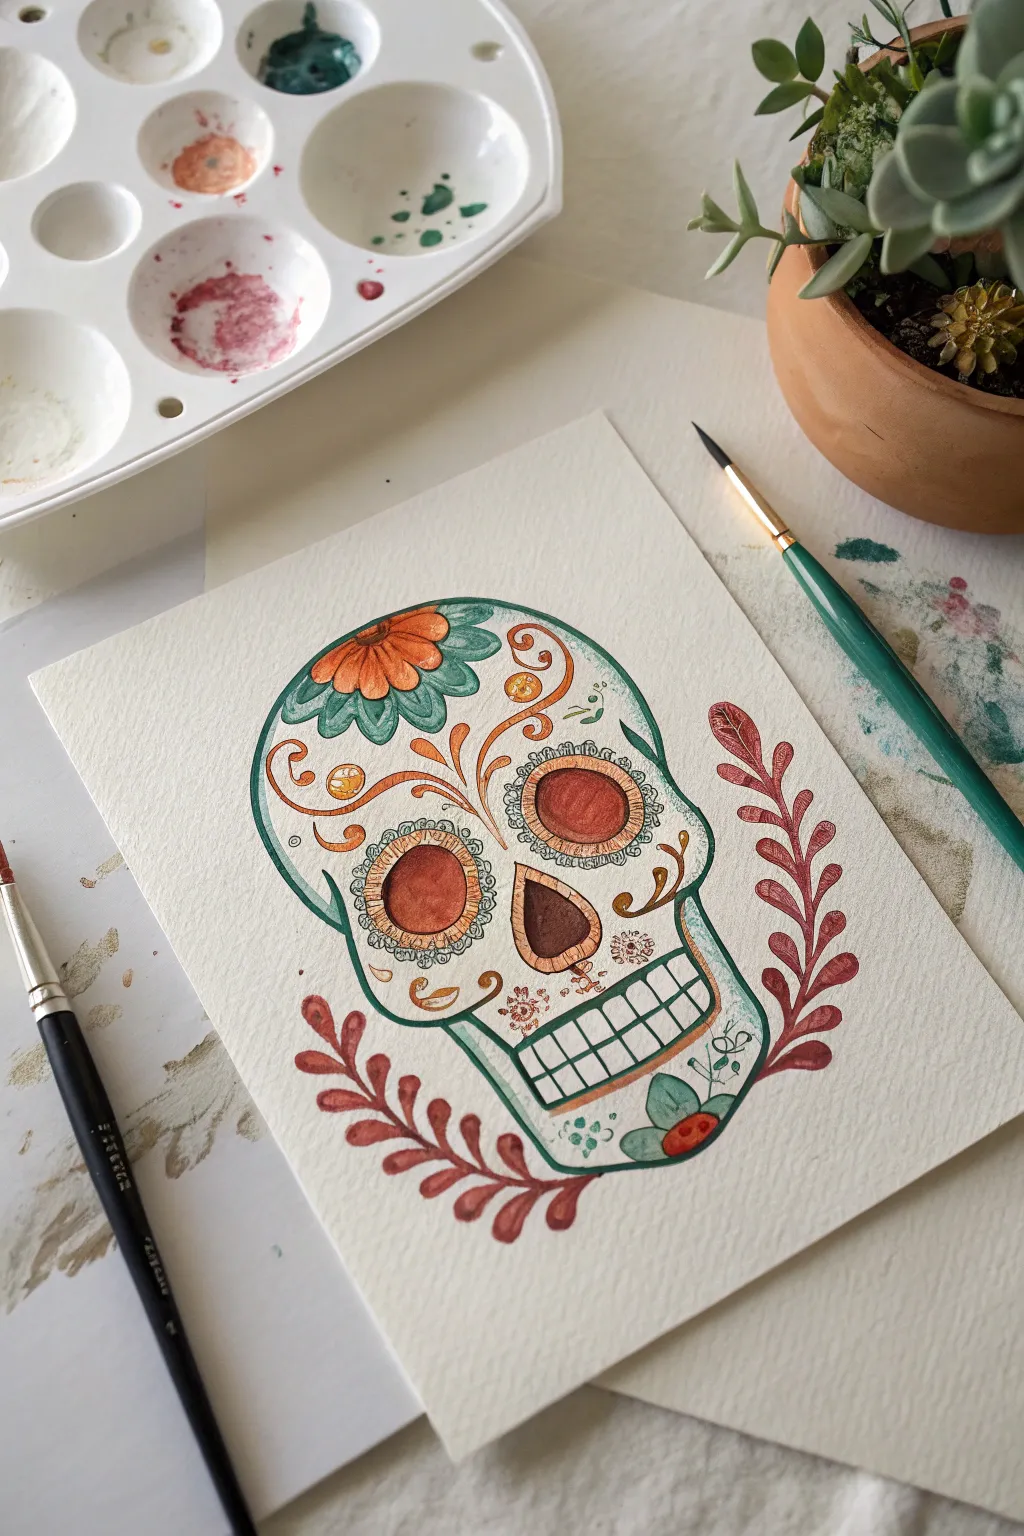
Embrace the beautifully matte and opaque finish of gouache with this folk art-inspired sugar skull. The velvety texture of the paint perfectly complements the intricate floral details and warm, earthy color palette.
How-To Guide
Materials
- Cold press watercolor paper (300 gsm)
- Gouache paint set (Teal, Burnt Orange, Deep Red, White, Olive Green, Black)
- Round brushes (Size 2 and 4 for details, Size 6 for fills)
- Pencil (HB) and eraser
- Ceramic or plastic palette
- Jar of water
- Paper towels
Step 1: Sketching the Framework
-
Outline the skull shape:
Start by lightly sketching the main cranial shape in the center of your paper. Draw a large, rounded upper section that tapers down into a narrower jawline. Keep your pencil lines faint so they won’t show through the lighter gouache colors later. -
Position facial features:
Sketch two large, slightly uneven circles for the eye sockets. In the center, below the eyes, draw an upside-down heart shape for the nose cavity. Mark out a rectangular mouth area with a simple grid for teeth. -
Draft the ornamentation:
Now for the fun part: decorate the skull. Sketch a large flower on the forehead, swooping vines along the temples, and circular patterns around the eyes. Don’t forget the leafy branches that frame the bottom of the skull on the outside.
Creamy Consistency
Gouache dries matte and can crack if applied too thickly. Aim for a consistency like melted ice cream—opaque enough to cover, but fluid enough to flow.
Step 2: Blocking in the Skull
-
Mix a pale bone color:
On your palette, mix a large amount of white gouache with a tiny dot of yellow ochre or burnt orange to create a warm, off-white bone tone. You want a consistency similar to heavy cream. -
Paint the skull base:
Using a size 6 brush, carefully fill in the entire skull shape, painting around the eye sockets, nose, and the major forehead flower. The opacity of gouache means you don’t need to preserve every tiny detail, but keeping the large areas clear helps. -
Outline in teal:
While the base is drying, mix a muted teal or sea-green color. Using a thinner brush (Size 2 or 4), carefully trace the outer edge of the skull. This defines the shape and acts as a container for your design.
Step 3: Adding Colorful Details
-
Fill the eye sockets:
Mix a warm, rusty orange color. Paint the centers of the eye sockets, leaving a rim of white around them for the decorative border. I like to let this dry briefly before adding any overlapping details. -
Paint the forehead bloom:
Use the same rusty orange for the petals of the forehead flower. Use the teal mix to paint the leaves behind the flower. If your paint feels too thick and drags, dip the very tip of your brush in water. -
Detail the eye borders:
With a fine brush and diluted black or dark grey paint, create the scalloped lace pattern around the orange eye centers. Add tiny loops and dots to simulate embroidery. -
Add vines and swirls:
Using a burnt orange or gold shade, paint the curling vines on the cheeks and forehead. Use a light touch to keep the lines elegant and tapering. -
Define the nose and mouth:
Fill the nose cavity with a dark brown or black for depth. For the mouth, outline the teeth grid with your teal color, then fill the gaps between the teeth with the dark background color to make them pop.
Metallic Accents
Once the matte paint is dry, use a gold gel pen or metallic watercolor to trace the swirls and vines. This adds a stunning shimmer against the flat gouache.
Step 4: Final Flourishes
-
Paint the exterior foliage:
Mix a deep red or maroon shade. Paint the leafy branches that curve upwards from the bottom of the skull, framing the jawline. Use single, confident brushstrokes for each leaf. -
Add texture and dots:
Dip a small brush into your white or a pale yellow paint. Add tiny decorative dots to the orange vines, the center of the forehead flower, and along the cheekbones. This stippling effect mimics traditional sugar skull icing. -
Refine the outlines:
Go back over your teal skull outline if any white paint obscured it. Sharpen up the edges of the teeth and the eye sockets to ensure everything looks crisp. -
Erase stray marks:
Once the painting is completely bone-dry (gouache remains water-soluble, so be careful), gently erase any visible pencil lines around the exterior foliage or skull edge.
Now you have a stunning piece of matte folk art ready to be framed or gifted.


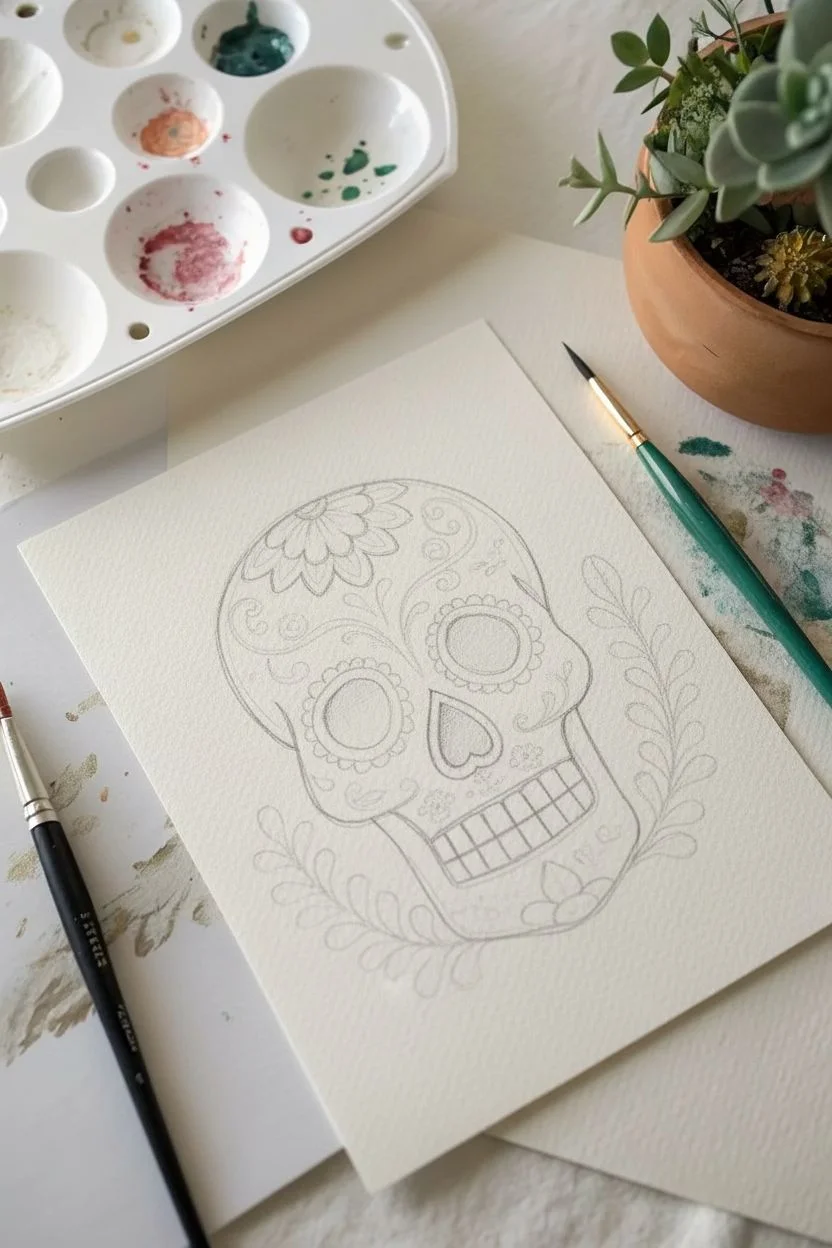
Ink Linework Sugar Skull Over a Painted Wash
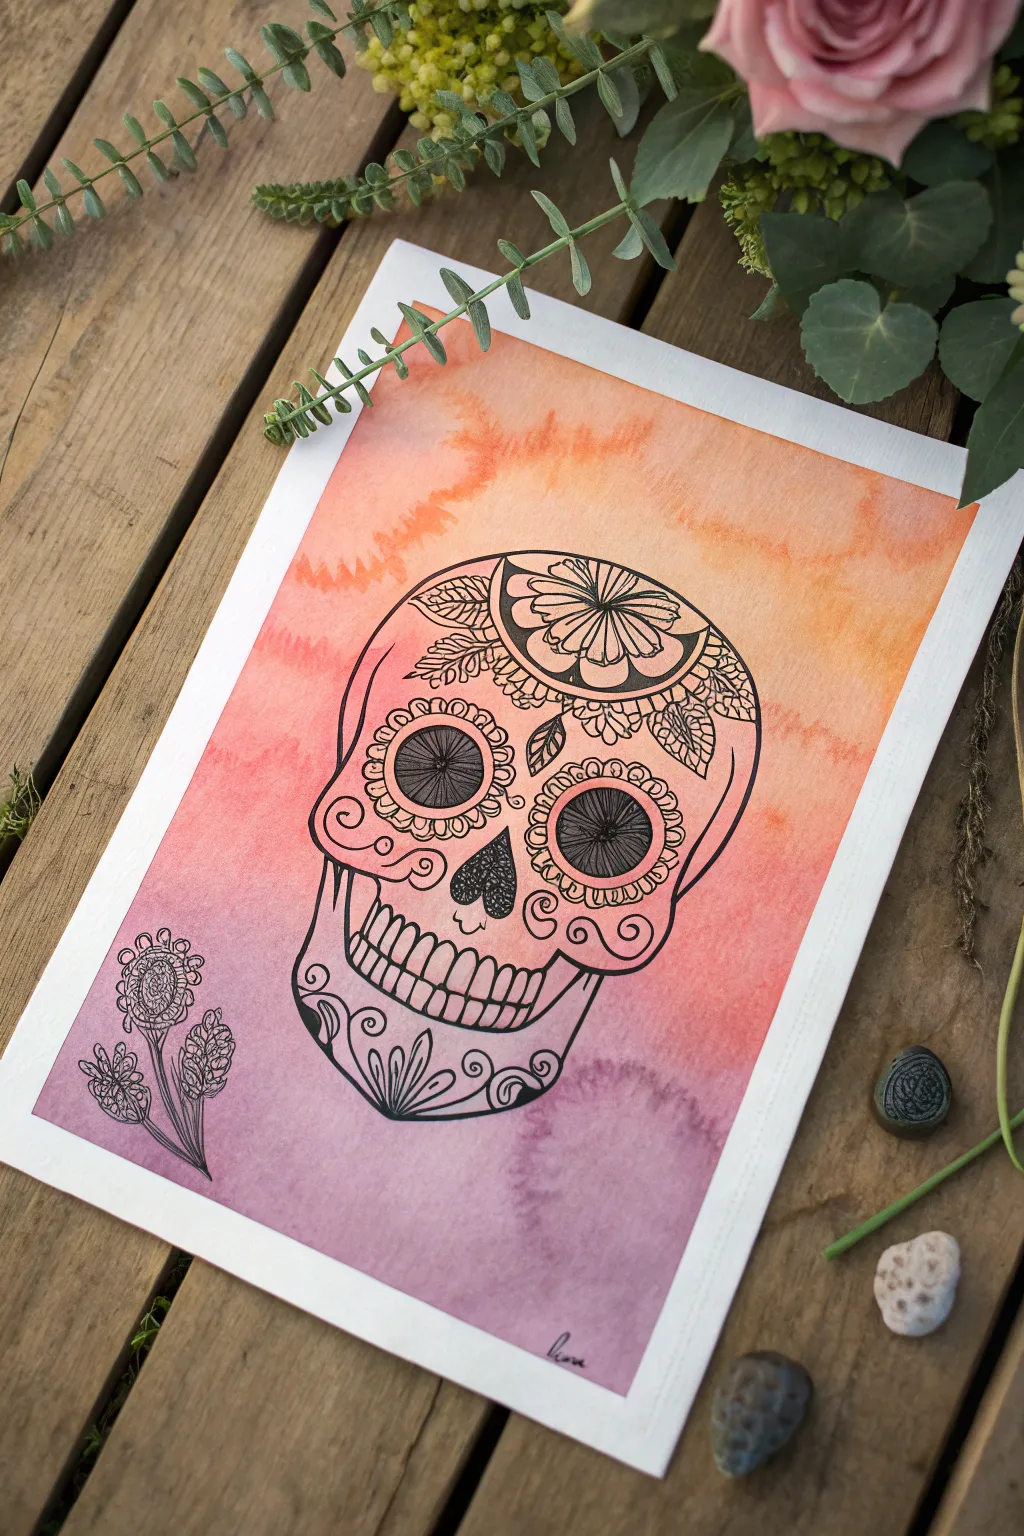
This project combines the looseness of a watercolor wash with the precision of ink illustration for a stunning contrast. You will create a vibrant gradient background that transitions from warm orange to cool purple, perfectly framing an intricate black-and-white sugar skull.
Step-by-Step
Materials
- Cold press watercolor paper (140lb/300gsm)
- Watercolor paints (Orange, Red, Magenta, Purple)
- Large flat wash brush or mop brush
- Painter’s tape or masking tape
- Drawing board or hard surface
- HB Pencil and eraser
- Fine liner pens (sizes 005, 01, 03, and 05, waterproof)
- Jar of clean water
- Paper towels
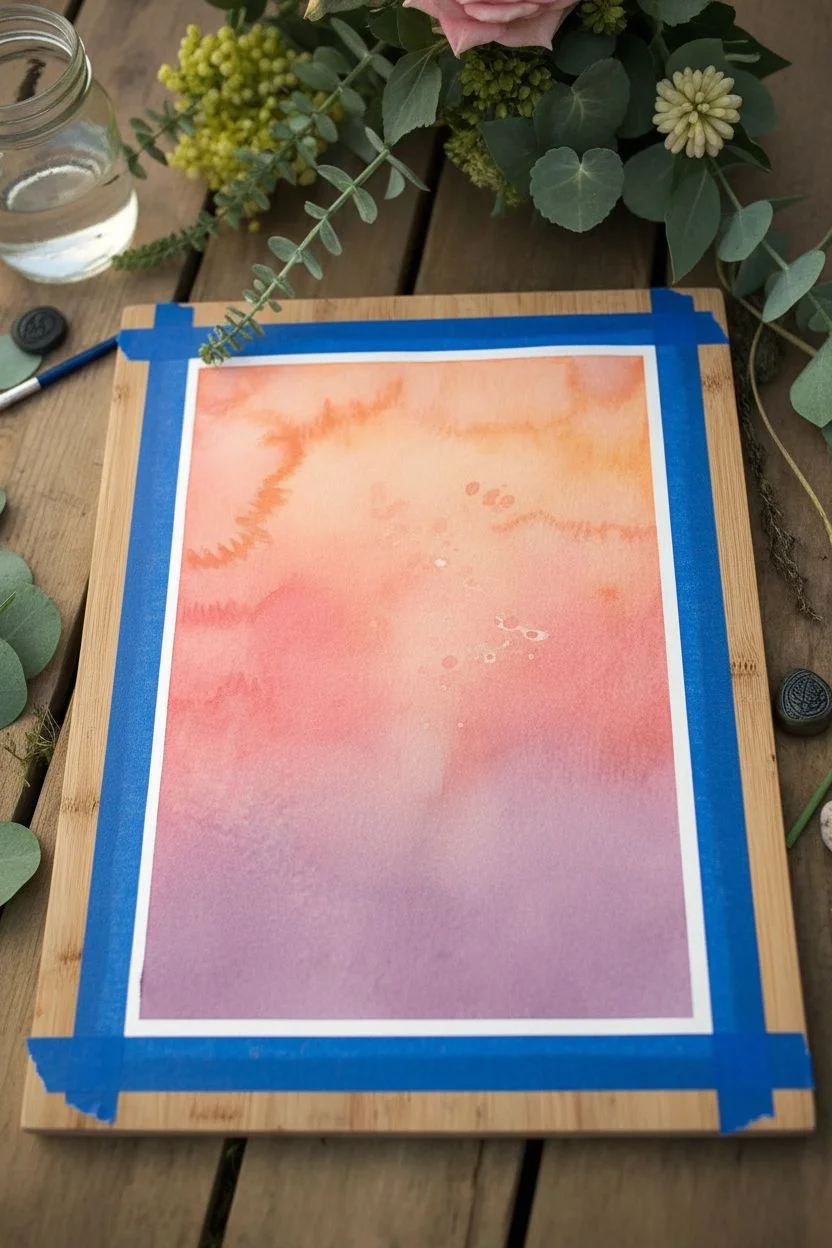
Step 1: Preparing the Wash
-
Secure your paper:
Begin by taping down all four edges of your watercolor paper to a board using painter’s tape. This prevents the paper from buckling when it gets wet and creates that crisp white border you see in the final piece. -
Pre-wet the surface:
Using your large brush and clean water, apply a light, even coat of water across the entire paper surface. The paper should glisten but not have puddles collecting in the corners. -
Start with orange:
Load your brush with a watered-down orange pigment. Start painting at the very top of the paper, using horizontal strokes that sweep from left to right. -
Transition to pink:
While the orange is still wet, rinse your brush slightly and pick up a reddish-pink or magenta tone. Begin blending this into the bottom of the orange section, allowing the colors to bleed together naturally. -
Finish with purple:
For the bottom third, introduce a cool purple hue. Blend this into the pink section above it. The wet-on-wet technique will handle most of the blending for you, creating a seamless sunset gradient. -
Create blooms (optional):
If you want the textured ‘bloom’ or cauliflower effect seen in the reference, drop tiny droplets of clear water or slightly more concentrated pigment into the drying wash. Let the physics of the water create those organic edges. -
Let it dry completely:
This is crucial: do not touch the paper until it is bone dry. If the paper is cool to the touch, it’s still damp. I like to use a hairdryer on a low setting to speed this up, but air drying is safest to prevent warping.
Clean Lines Hack
Work from the center of the skull outwards when inking. This prevents your hand from smudging wet ink on lines you just drew, keeping the illustration crisp.
Step 2: Sketching the Skull
-
Outline the head shape:
Using an HB pencil with a very light hand, draw the basic outline of the skull. Aim for a rounded top that tapers down into the jawline. Don’t press hard, as you don’t want to groove the paper. -
Place the features:
Draw two large circles for the eye sockets, an upside-down heart shape for the nose cavity, and a horizontal curve for the mouth line. -
Draft the decorations:
Lightly sketch the floral elements. Add a half-flower shape on the forehead, scalloped edges around the eyes, and swirly patterns on the cheeks and chin. Also, sketch the small flower branch in the bottom left corner.
Warped Paper?
If the wash made your paper buckle excessively, place the finished, dry artwork face-down on a clean sheet and weigh it down with heavy books overnight to flatten it.
Step 3: Inking the Details
-
Outline the main shapes:
Switch to a thicker pen (size 05) to trace the main perimeter of the skull. A bold outer line helps the subject pop against the colorful background. -
Detail the eyes:
Use an 03 pen for the eye sockets. Draw the inner ‘iris’ lines radiating from the center. Fill the center pupil area with solid black ink, leaving small white gaps for texture if desired. -
Ink the nose:
Fill in the nose cavity with stippling or a loose cross-hatch pattern rather than solid black. This adds depth without looking like a flat hole. -
Refine the forehead flower:
Using a finer 01 pen, draw the petals of the forehead fan-flower. Add the surrounding leaves with serrated edges for a realistic botanical look. -
Add intricate patterns:
Use your finest pen (005) to add the delicate scallops around the eyes, the swirls on the cheeks, and the small decorative dots. Precision here makes the skull look ornate. -
Draw the teeth:
carefully outline the teeth. Unlike a realistic skull, sugar skull teeth are often stylized as simple rectangles with rounded corners. Ensure the gum line is distinct. -
Ink the corner floral:
Go over your pencil sketch for the flower in the bottom left. Use loose, sketchy lines to differentiate it from the rigid structure of the skull. -
Erase pencil marks:
Wait at least 10-15 minutes to ensure the ink is totally set. Then, gently use a kneaded eraser to lift away any visible graphite lines. -
Peel the tape:
Slowly peel the painter’s tape away from the paper at a 45-degree angle. This reveals the clean white border that makes the artwork look framed and professional.
Now you have a vibrant, tradition-inspired piece of art ready to display or gift.
Metallic Accents for Shimmering Sugar Skull Highlights
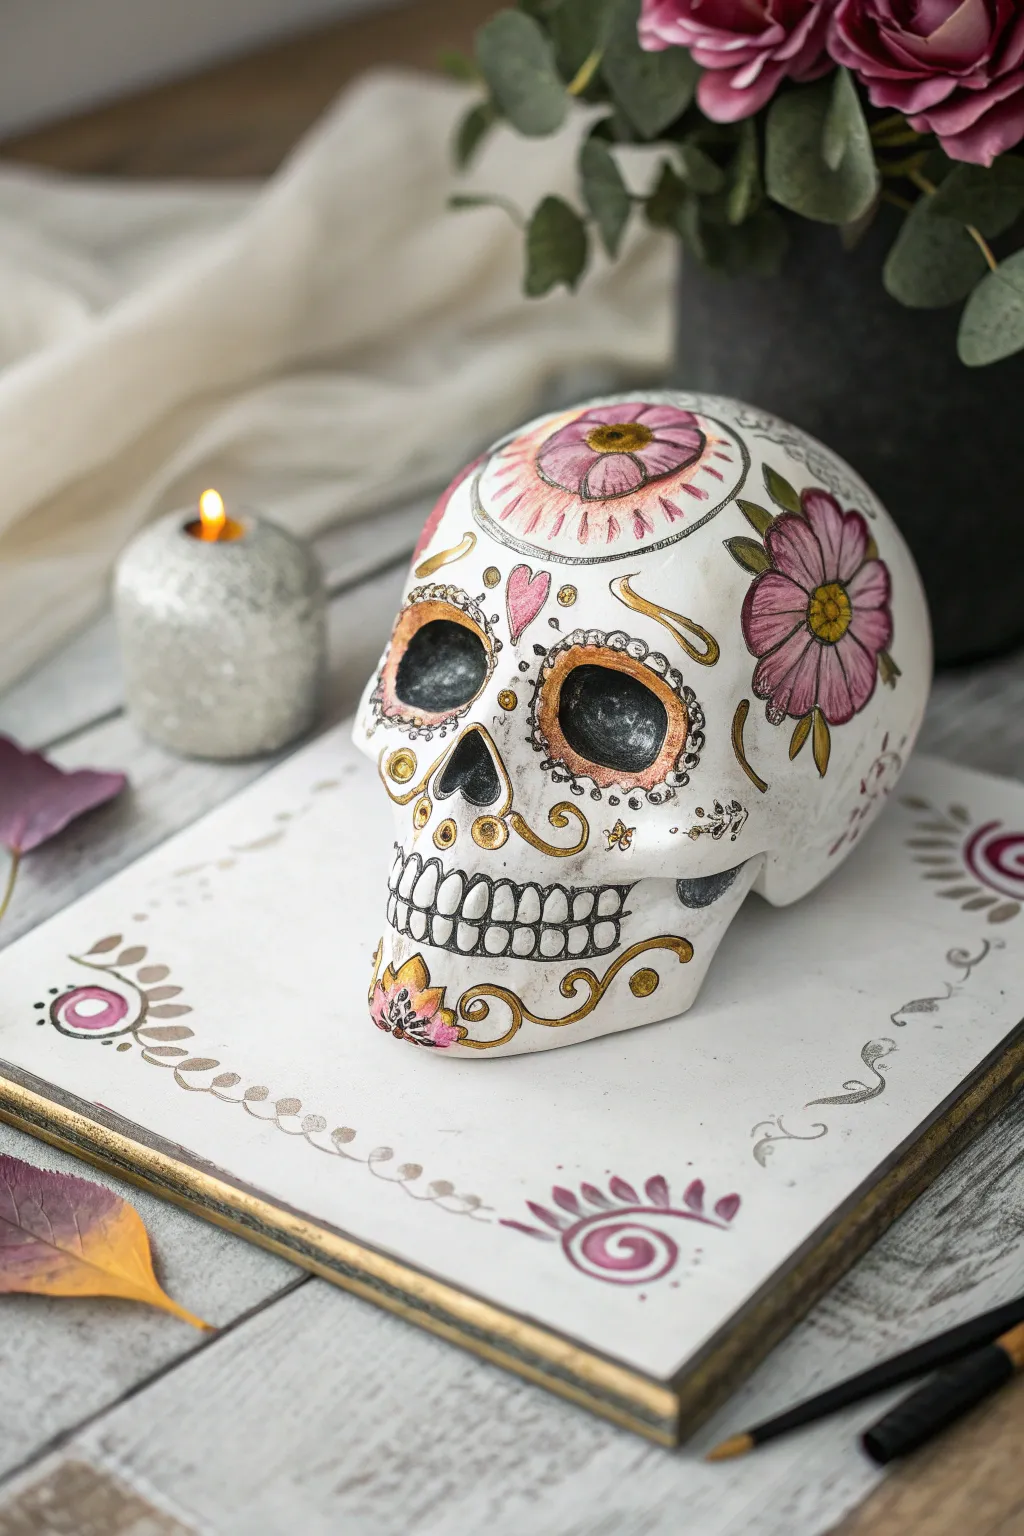
This project transforms a plain ceramic or resin skull into a shimmery, elegant piece of décor using metallic gold accents and soft floral motifs. The result is a sophisticated take on traditional sugar skull art, perfect for a subtle yet festive display.
How-To Guide
Materials
- Resin or ceramic skull blank (white)
- White acrylic paint or gesso (if skull is unpainted)
- Square wood or ceramic plaque (for the base)
- Metallic gold paint (high brilliance)
- Dusty rose or mauve acrylic paint
- Fine point black permanent marker or liner pen
- Detail paintbrush (0 or 00 round)
- Medium flat brush
- Pencil for sketching
- Matte spray varnish
Step 1: Preparing the Canvas
-
Base Coating:
Start by ensuring your skull blank is clean and dry. Apply two thin coats of white acrylic paint or gesso to create a smooth, unified surface. Let it dry completely between coats. -
Painting the Eye Sockets:
Using a small brush, carefully paint the inside of the eye sockets and the nasal cavity with black acrylic paint. This creates deep contrast and makes the skull look hollow. -
Sketching the Design:
Lightly sketch your main design elements onto the skull with a pencil. I like to start with the circles around the eyes, the large flower on the forehead, and the blooms on the temples to establish symmetry.
Smudge Patrol
If your black pen smudges on the paint, wait for it to fully dry, then dab a tiny bit of white paint over the mistake to act as ‘white-out’ before redrawing.
Step 2: Floral & Gold Detailing
-
Painting the Forehead Flower:
Mix a small amount of dusty rose paint with a drop of water to create a watercolor-like effect. Paint the petals of the large flower centered on the forehead, letting the white base show through slightly for highlighted areas. -
Side Florals:
Repeat the watercolor-style painting for the large daisy-like flowers on the temples. Keep the color application somewhat loose and organic rather than fully opaque blocks of color. -
Gold Eye Accents:
Switch to your metallic gold paint. Carefully paint the scalloped edges around the black eye sockets. Using a fine brush ensures the scallops are distinct and defined. -
Gold Linework:
Add swirling gold decorative lines above the eyes (simulating eyebrows) and curling designs on the cheeks and jawline. The shimmer really comes alive here against the matte white. -
Center Accents:
Paint the center of the forehead flower and the side flowers with gold. You can stipple the paint slightly to give the center some texture. -
Defining the Teeth:
Use your fine black marker or liner pen to draw the teeth. Start with vertical lines to separate individual teeth, then frame them. Keep the lines sketchy and thin for an illustrated look. -
Outlining the Details:
Go over your painted flowers and gold shapes with the fine black pen. Add details like veins in the petals and small dots around the eye scallops to mimic traditional icing drops. -
Final Skull Flourishes:
Add a small pink heart in the center of the forehead and paint a small flower on the chin using the dusty rose and gold combination.
Jeweled Effects
Enhance the glam factor by gluing tiny adhesive flat-back rhinestones or pearls into the centers of the flowers or along the scalloped eye ridges.
Step 3: Creating the Decorated Base
-
Base Preparation:
Paint your square plaque white to match the skull. Coat the outer edges with metallic gold paint to create a framed effect. -
Corner Motifs:
In the corners of the plaque, paint stylized floral or swirling motifs using mauve and gold. These should echo the design on the skull but remain simpler. -
Connecting Scrolls:
Connect the corner designs with faint, scrolling lines drawn in pencil first, then trace over them with diluted gold paint or a gold paint pen for a delicate touch. -
Sealing the Work:
Once everything is fully dry (give the marker ink plenty of time to set), mist the entire skull and base with a matte varnish spray to protect the paint without dulling the gold shine too much.
Place your finished skull on its matching base for a sophisticated centerpiece that honors the season
Stencil-and-Sponging Patterns for Quick, Clean Repeats

For a striking yet minimalist take on traditional Día de los Muertos decor, this black-and-white sugar skull design focuses on precision and clean lines. Using a fine-point approach rather than bold colors creates a modern, sophisticated aesthetic reminiscent of vintage illustrations.
Step-by-Step
Materials
- Ready-to-decorate paper mâché or ceramic skull (smooth finish)
- White matte acrylic paint or gesso
- Synthetic sponge painter
- Black ultra-fine tip permanent marker or lining pen (0.3mm)
- Black fine tip permanent marker (0.5mm – 0.7mm)
- Black brush pen or medium round paintbrush with black fluid acrylics
- Pencil (HB or lighter)
- Eraser
- Compass or circle stencil (optional)
Step 1: Preparation & Base Coat
-
Prime the surface:
Begin by applying a smooth, even base coat of white matte acrylic paint or gesso to your skull. Use a synthetic sponge to dab the paint on rather than brushing; this eliminates visible brushstrokes and gives the surface a texture similar to real sugar or bone. -
Dry and inspect:
Let the first coat dry completely for at least 30 minutes. If the underlying color of the skull form shows through, apply a second sponged layer and allow it to cure fully before drawing.
Steady Hands Pro-Tip
Rest your painting hand on a small beanbag or a rolled-up towel while working. This elevates your wrist to the right height and stabilizes your strokes on the curved surface.
Step 2: Major Features
-
Outline the eyes:
Using your medium tip marker or black paint, carefully outline the inner rim of the eye sockets. Thicken this line slightly to create a bold, dark frame that anchors the face. -
Fill the nose cavity:
Locate the upside-down heart shape of the nose cavity. Using a brush pen or black acrylic paint, fill this area completely solid black. It adds crucial depth and contrast to the white skull. -
Draft the teeth:
With a light pencil, sketch a vertical dividing line down the center of the mouth area. Then, sketch the individual teeth, curving the outer edges slightly to follow the jawline. -
Define the mouth:
Go over your pencil sketches with the fine-tip marker. Draw the horizontal line separating the upper and lower teeth first, then the vertical dividers. Round off the tops and bottoms of each tooth, leaving small gaps at the gum line to make them look distinct.
Step 3: Floral Centerpiece
-
Mark the forehead center:
Identify the very top center of the forehead. Use a pencil to lightly mark a small circle which will serve as the hub of your main flower. -
Draw the petals:
Sketch eight large, elongated tear-drop petals radiating from the center circle. Try to keep them symmetrical, extending down towards the brow and back towards the crown. -
Ink the flower:
Trace your flower sketch with the fine-tip marker. Inside each petal, draw three lines: a central vein and two shorter lines on either side, stopping halfway up the petal. -
Add stippling details:
Using the ultra-fine tip pen, create a dotwork gradient around the flower. Place dots densely near the center circle and the gaps between petals, spacing them out further as you move away.
Level Up: Gold Leaf
For a luxe touch, apply gold leaf sizing to the center of the forehead flower and the eye sockets, then lay down small sheets of gold leaf. The metallic shine pops against the matte white.
Step 4: Intricate Flourishes
-
Create the eye frames:
Around the blackened eye sockets, draw a ring of small, solid black dots. Leave a few millimeters of white space between the socket edge and your dots for a ‘halo’ effect. -
Draft cheek swirls:
Pencil in large, symmetrical swirls on the cheeks. Add smaller swirls and fern-like leaves extending from the temples towards the center of the forehead. -
Ink the filigree:
Trace these swirls with your fine liner. For the fern leaves, use quick, flicking motions to create tapered lines that look delicate and organic. -
Add contrast accents:
To balance the lightness, find small areas within your swirls or between pattern sections to fill in solid black, like the teardrop shapes above the nose bridge or small hearts on the forehead.
Step 5: Chin & Jaw Details
-
Draw the chin flower:
Revisit the floral motif by drawing a smaller, five-petal flower on the center of the chin. Keep the lines simple compared to the forehead piece. -
Frame the jaw:
Add curling vines or waves along the jawline on either side of the chin flower. Use the ultra-fine pen to add tiny interior lines or cross-hatching to these curves for texture. -
Connect the design:
Visually connect the nose and mouth area by adding a dotted pattern or small floral stamps (asterisks inside circles) on the upper lip area. -
Final stippling pass:
Step back and look at the skull. Use your finest pen to add tiny clusters of dots in empty white spaces—particularly around the temples and jaw—to unify the composition. -
Erase guidelines:
Wait at least an hour to ensure all ink is bonedry. Gently erase any visible pencil marks with a kneaded eraser to reveal the crisp black-and-white finish.
Display your monochrome masterpiece in a well-lit spot to let the fine details shine
Tape-Resist Geometric Sugar Skull Design
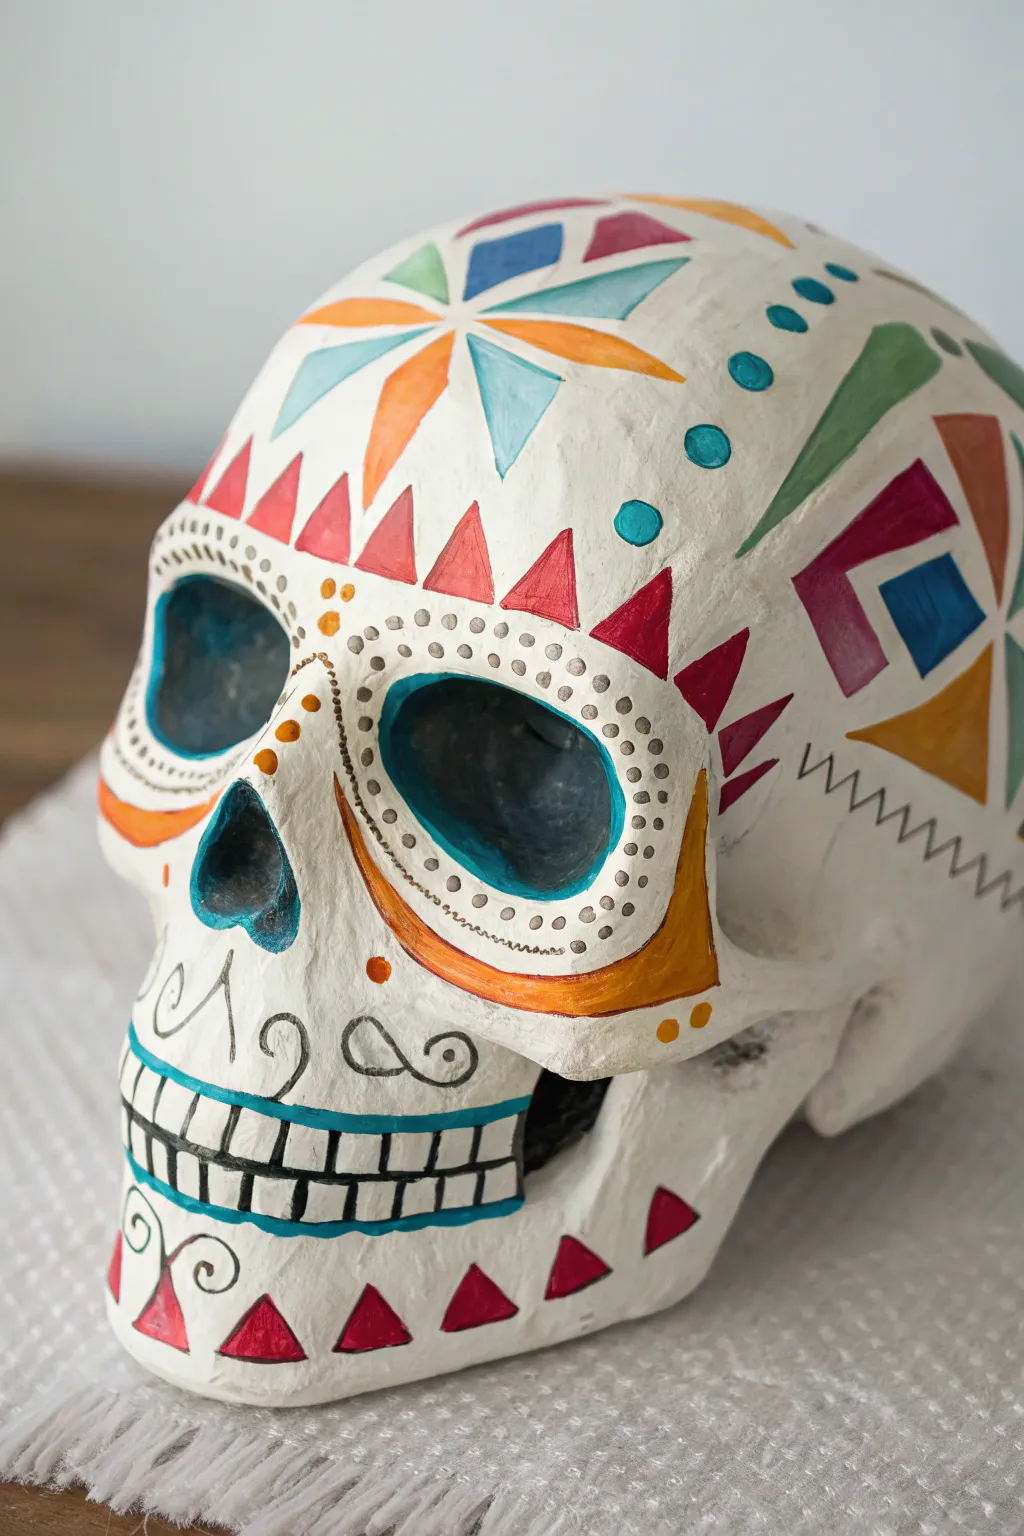
Give the traditional sugar skull a contemporary twist with clean lines and sharp geometric shapes. This design uses painter’s tape to create crisp negative space against a bright white background, resulting in a striking, architectural look.
How-To Guide
Materials
- Papier-mâché or ceramic skull base
- White acrylic paint or gesso
- Assorted acrylic craft paints (red, orange, teal, dark blue, gold)
- Painter’s tape or dedicated masking tape (various widths)
- Craft knife or scissors
- Small flat shader brush
- Fine detail liner brush
- Pencil
- Eraser
- Metallic silver paint pen or fine brush
Step 1: Base Prep
-
Prime the surface:
Begin by coating your skull entirely in opaque white acrylic paint or gesso. Depending on the material of your skull, you might need two coats to get a solid, matte finish. Let this dry completely before moving on. -
Inspect for smoothness:
Check the surface for any rough bumps that might interfere with your tape adhering correctly and sand lightly if necessary.
Clean Lines Hack
Before applying color, paint a thin layer of white over your tape edges. This seals the tape, so any bleed is just white on white.
Step 2: Geometric Masking
-
Cut your shapes:
Cut small triangles and strips from your painter’s tape. Use a craft knife on a cutting mat to get really sharp, straight edges. -
Create the forehead starburst:
For the starburst pattern on the top, place thin strips of tape intersecting at a central point. You are masking off the white lines between the colorful diamonds. -
Mask the zig-zags:
Along the cheekbones and jawline, place triangular pieces of tape pointing upwards or downwards to reserve white space for your zig-zag patterns later. -
Press down firmly:
Run your fingernail or a burnishing tool over the edges of every piece of tape. This seal is crucial to prevent paint from bleeding underneath.
Sticky Tape Trouble?
If your tape is too sticky and peeling up base paint, stick it to your jeans or a t-shirt first to remove some tackiness.
Step 3: Blocking in Color
-
Painting the triangles:
Using a small flat brush, fill in the exposed geometric spaces. Alternate colors like red, bright orange, and teal for high contrast. -
Top detail work:
Carefully paint the diamond shapes created by your starburst masking on the forehead. I find it helpful to rotate the skull in my hand to get the best angle for each section. -
Check opacity:
Some colors, especially yellows and oranges, might need a second coat to look truly vibrant against the white base. -
Eye sockets:
Paint the inside of the eye sockets a deep teal or dark blue to give the skull depth. -
Remove the tape:
Once the paint is dry to the touch but not fully cured, gently peel away your tape to reveal the crisp white lines between your colors.
Step 4: Final Details
-
Eye rim details:
Use a fine liner brush and silver paint (or a metallic marker) to create a dotted border around the eye sockets. -
Cheek accents:
Add curlicue flourishes on the cheeks and chin using a very fine black or dark grey line. Keep your hand steady and use light pressure. -
Teeth definition:
Paint a teal band across the mouth area, then outline individual teeth in black using a thin brush or a paint pen for precision. -
Refining edges:
If any paint bled under the tape, use a tiny brush with white paint to touch up the lines and restore that sharp geometric look. -
Jawline triangles:
Finish by hand-painting a row of small red triangles along the bottom of the jaw to anchor the design.
Display your geometric skull prominently to show off those crisp, colorful angles
Acrylic Pour Base With Hand-Painted Sugar Skull Details
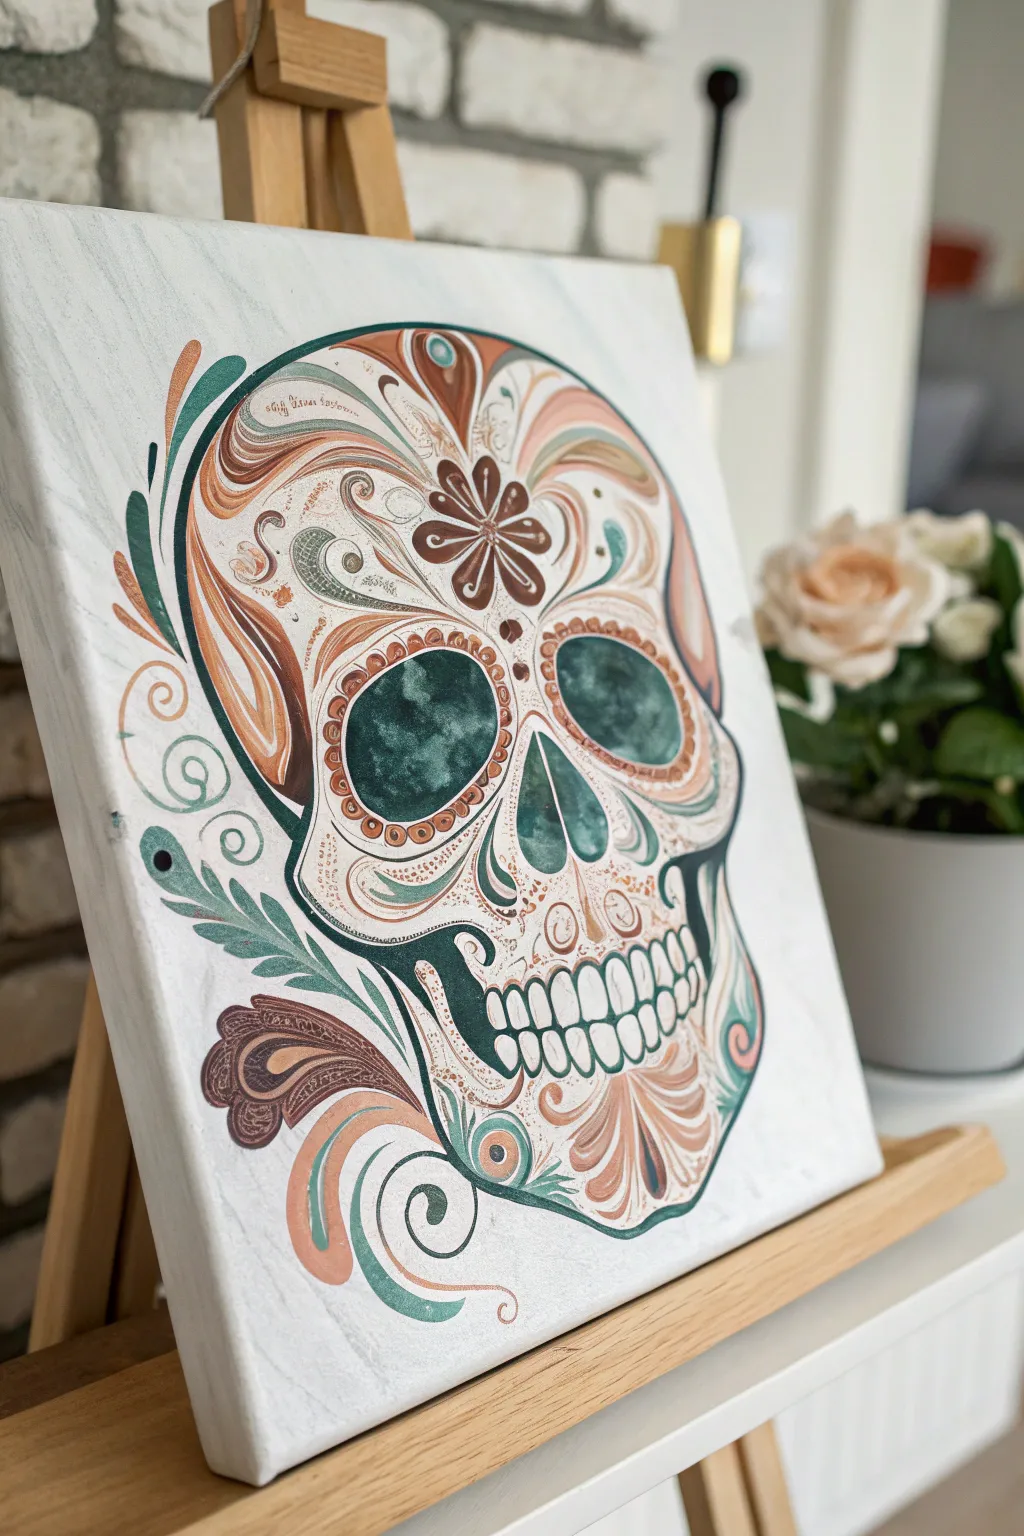
This project combines the unpredictable beauty of a subtle acrylic pour background with the intricate, deliberate lines of traditional sugar skull art. The result is a stunning juxtaposition of fluid marble textures and sharp, decorative foliage in muted earth tones and teals.
Detailed Instructions
Materials
- Stretched canvas (rectangular)
- White acrylic paint (heavy body)
- Fluid acrylics or acrylic ink (light grey, pale teal)
- Pouring medium
- Carbon paper or transfer paper
- Pencil
- Sugar skull template/design
- Fine detail brushes (size 0, 00, 1)
- Flat shader brush (size 4 or 6)
- Acrylic paints: Burnt sienna, terracotta, teal/emerald green, cream, metallic gold/copper
- Palette or mixing plate
- Easel (optional)
- Varnish (matte or satin)
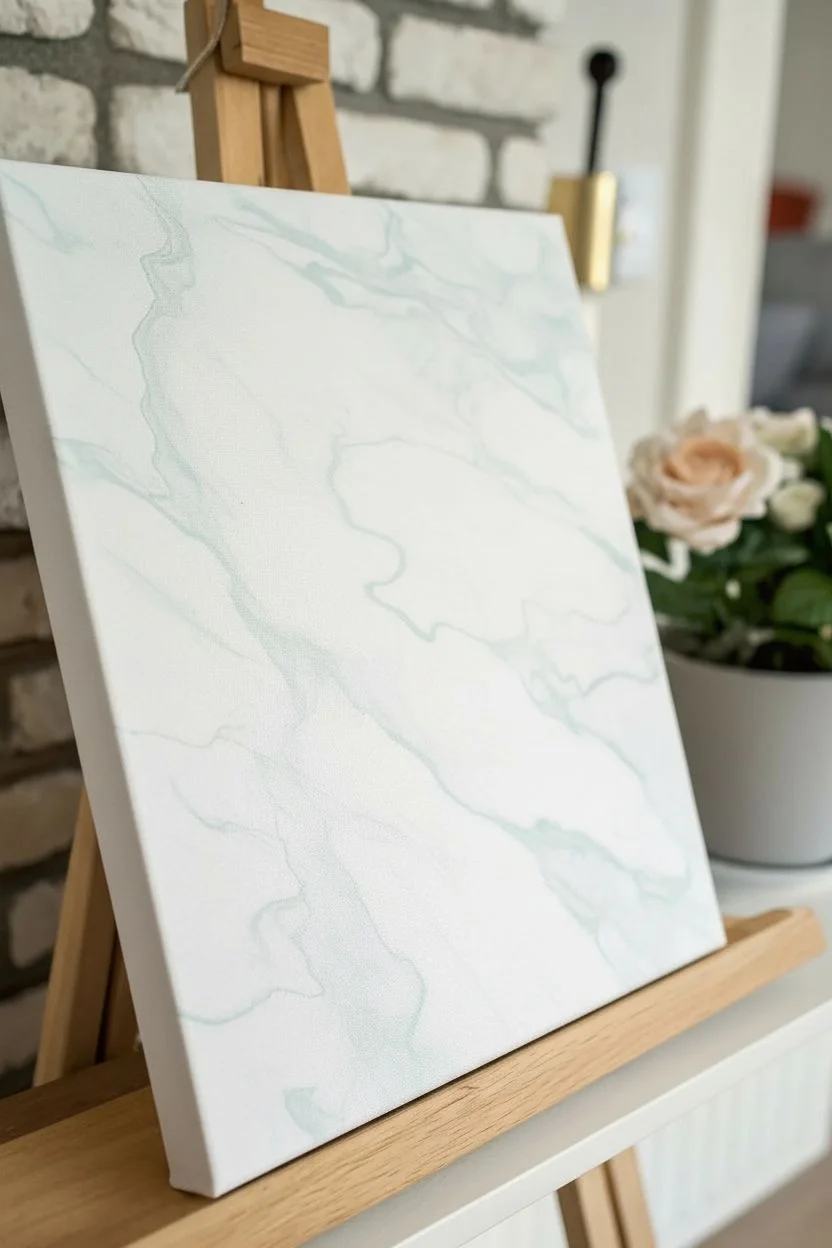
Step 1: Creating the Marble Base
-
Mix the pouring base:
Begin by creating a very fluid white base. Mix heavy body white acrylic with a generous amount of pouring medium until it has the consistency of warm honey. You want a solid, opaque coverage. -
Add subtle veining colors:
In separate small cups, mix tiny amounts of light grey and pale teal with pouring medium. These should be slightly thinner than the white base to allow for soft spreading. -
Technique: The dirty pour or swipe:
Flood the canvas with your white base first, tilting it to ensure full coverage over the edges. Then, drag a small amount of the grey and teal mixtures through the white. You can use a damp paper towel to ‘swipe’ lightly or simply tilt the canvas to stretch the colors into faint marble veins. -
Dry thoroughly:
This step is critical. Allow the canvas to dry completely on a flat surface, which usually takes 24 to 48 hours depending on humidity. The surface must be hard before you try to paint details on top.
Smudge Control
Rest your hand on a mahl stick or clean dry sponge while painting details. This prevents oils from your hand touching the canvas and stops you from dragging wet paint across the white base.
Step 2: Transferring the Design
-
Prepare the stencil:
Once the base is cured, print out a sugar skull design that fits your canvas size. You can draw your own or find a printable template online. -
Position and secure:
Tape your printed design onto the canvas with painter’s tape to keep it centered. Slide a sheet of graphite or carbon transfer paper underneath the printout, dark side down. -
Trace the outline:
Using a sharp pencil or a stylus, firmly trace over every line of the design—the skull outline, the eye sockets, the floral elements, and the decorative swirls. Lift a corner occasionally to ensure the lines are transferring clearly.
Marble Magic
Don’t over-mix your pour base! The beauty lies in the separation. Mix the grey/teal only 2-3 times into the white before pouring to keep distinct, crisp veins rather than making grey sludge.
Step 3: Painting the Details
-
Fill the eye sockets:
Start with the darkest areas. Mix a deep teal—perhaps adding a touch of black or dark green—and fill in the large eye sockets and the nose cavity using a flat shader brush. -
Dapple the dark zones:
While the eye paint is still wet, I like to drop in a tiny bit of lighter teal or water to create that mottled, watercolor-like texture seen in the reference image. Let these pools dry naturally. -
Outline main features:
Switch to your size 1 liner brush and the dark teal paint. Carefully outline the jaw, the cheekbones, and the major floral swirls extending from the skull. -
Add earthy tones:
Using burnt sienna or terracotta, paint the secondary decorative elements like the flower petals on the forehead, the swirls on the cheeks, and the accent leaves. -
Layering the colors:
For the floral elements inside the skull shape, layer cream or pale peach paint first, then go over them with your terracotta accents to make the colors pop against the white marble background. -
Detailing the teeth:
Paint the teeth with a mix of white and a tiny drop of cream. Outline each tooth carefully with a very thin line of dark teal or grey to define them. -
Fine decorative work:
Use your smallest brush (00) to add the intricate dots, small dashes, and stippling patterns around the eyes and on the chin. This is where patience pays off. -
Enhance with metallics:
If desired, take a metallic copper or gold paint and highlight specific curves—like the center of the forehead flower or the edges of the largest swirls—to catch the light. -
Final outline check:
Step back and look at the composition. If any lines look shaky or faint, go over them one last time with your dark teal mixture to crisp up the edges. -
Seal and protect:
Once the painting is fully dry (give it another day), apply a coat of matte or satin varnish to protect your work and unify the sheen of the different paints.
Now you have a sophisticated piece of art that blends modern abstract techniques with traditional symbolism
3D Plaster Skull Painting With Curves and Recessed Shadows
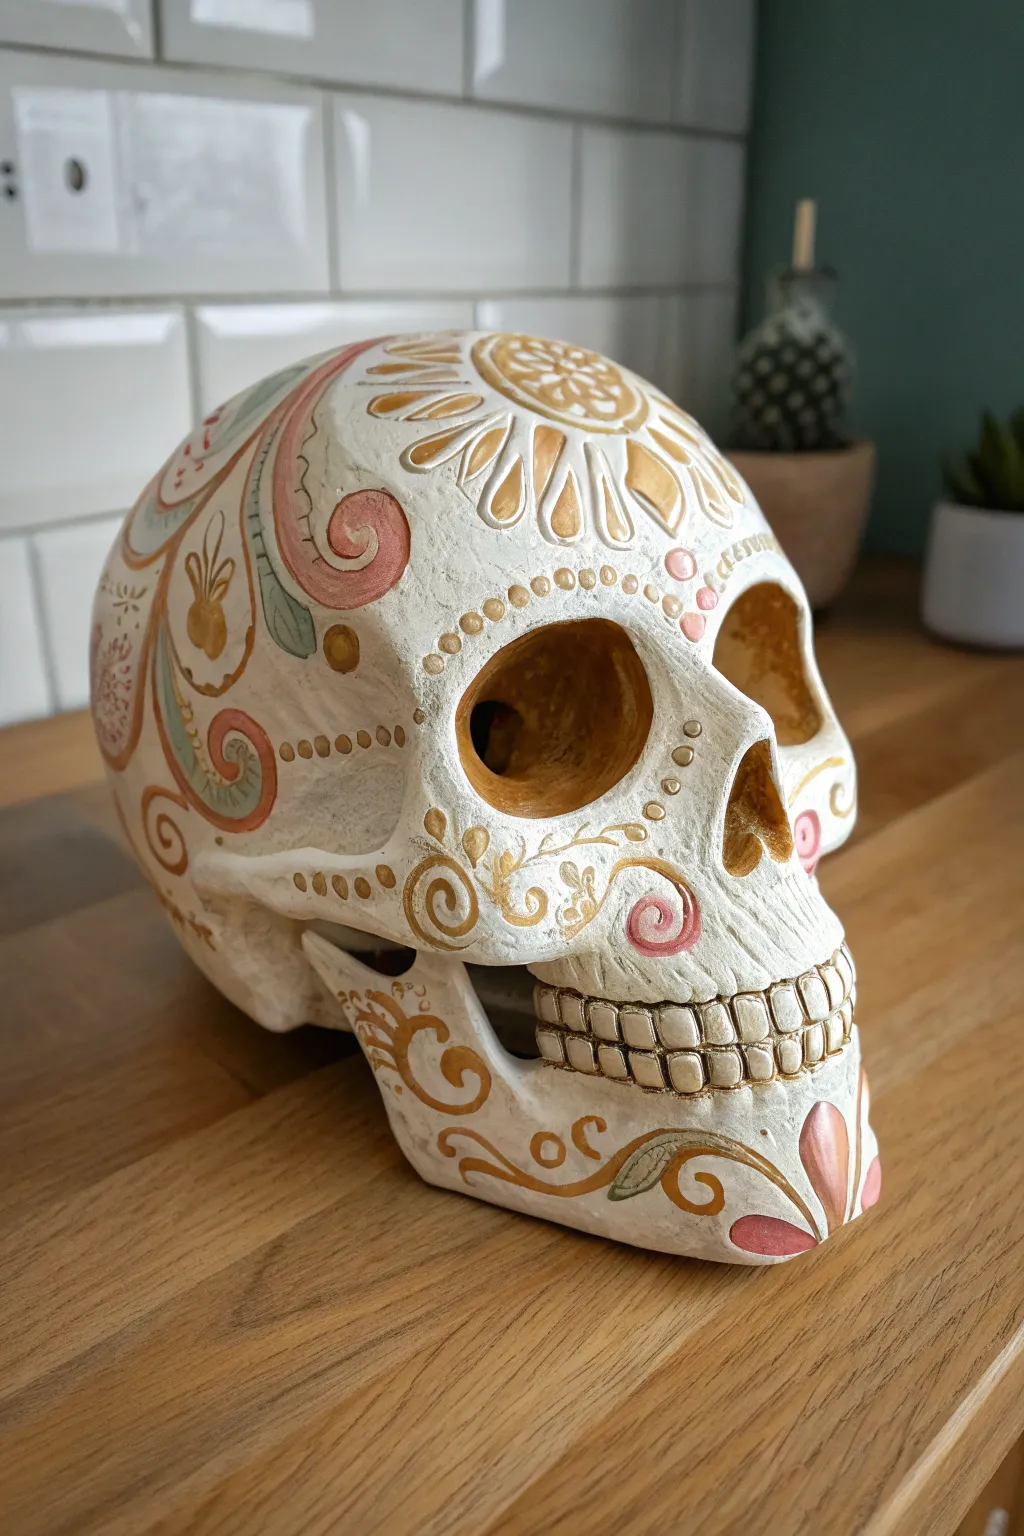
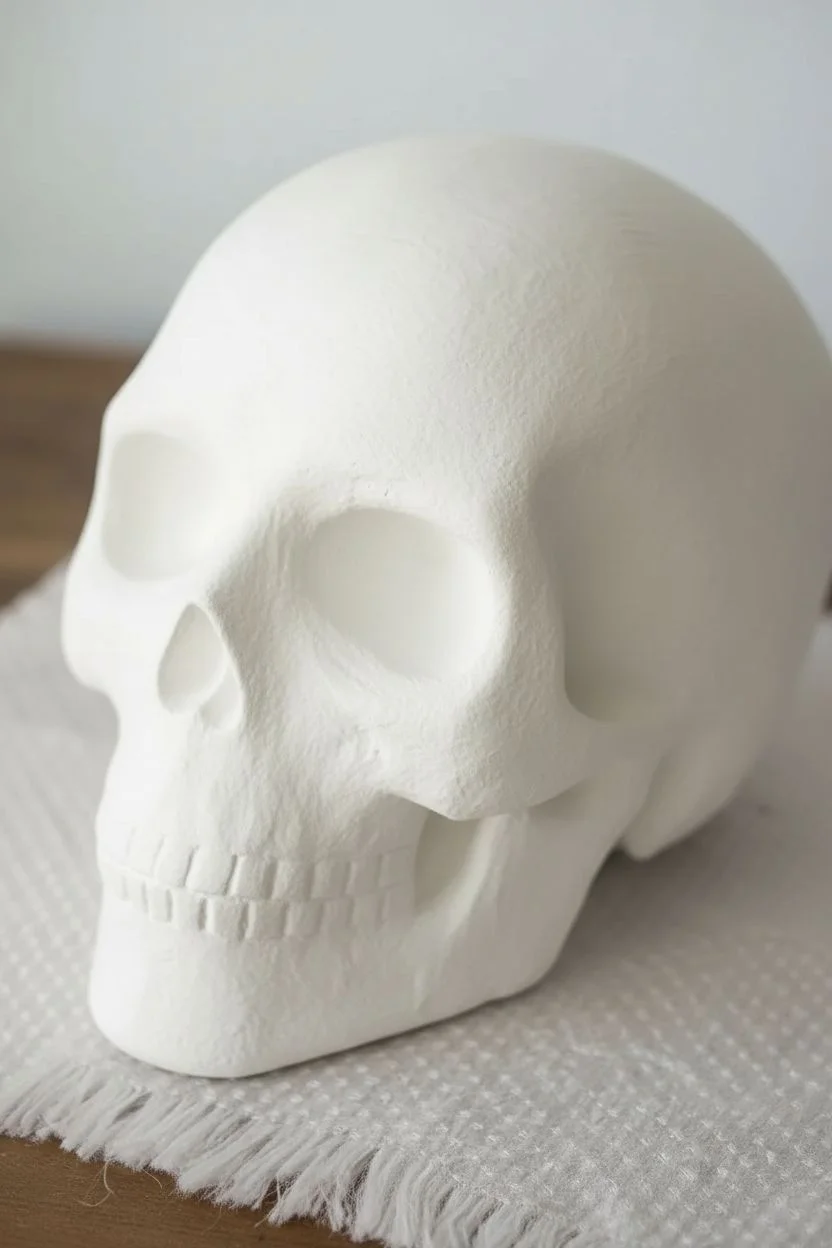
Transform a plain white plaster skull into an elegant decor piece featuring soft, muted tones and flowing scrollwork. This project balances precise detailing with an antiqued wash to create depth and a sophisticated, timeworn aesthetic.
Step-by-Step Guide
Materials
- Plaster or ceramic skull (approximately life-size)
- Acrylic paints (Cream, Metallic Gold, Pastel Pink, Sage Green, Burnt Umber)
- Small round paintbrushes (sizes 0, 2, and 4)
- Mixing palette
- Water cup
- Paper towels or soft rag
- Matte or satin clear sealant spray
- Pencil (optional for sketching)
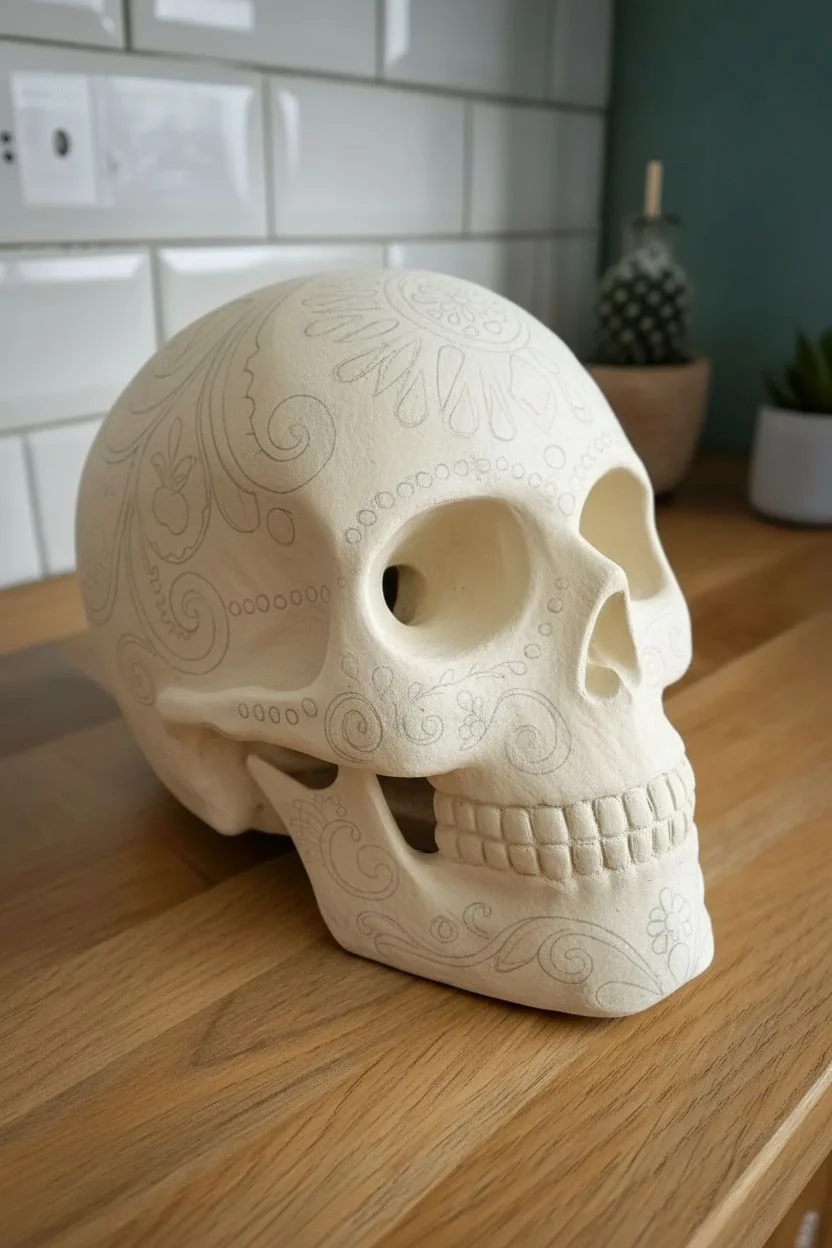
Step 1: Base Coat and Preparation
-
Clean the Surface:
Begin by wiping down your plaster skull with a dry, soft cloth to remove any dust or debris from the molding process. If the surface feels oily, give it a quick wipe with a damp cloth and let it dry completely. -
Apply the Base Layer:
Mix a small amount of Burnt Umber into your Cream paint to create a warm, off-white bone color. Apply two thin coats over the entire skull, allowing the first coat to dry fully before adding the second to ensure smooth coverage. -
Map Out the Features:
Once the base is dry, lightly sketch your main focal points with a pencil. Mark the large floral rosette on the forehead and the swirling distinct paisley shapes on the cheeks and jaw.
Step 2: Painting the Details
-
Start with the Gold:
Using a size 2 brush and Metallic Gold paint, fill in the center of the forehead rosette and the larger petal shapes. I like to apply this layer slightly thick so the metallic sheen really catches the light. -
Add Decorative Dots:
Switch to a smaller size 0 brush or a dotting tool. Dip into the Gold paint and carefully create the row of dots that frame the upper eye sockets and bridge of the nose. -
Paint the Scrolls:
Mix a soft Pastel Pink. Carefully paint the swirling scroll inside the cheek and the spiral details on the upper jaw. Keep your hand steady and rotate the skull as you paint to maintain a comfortable angle. -
Introduce Green Accents:
Load your brush with Sage Green paint. Fill in the leaf-like shapes that curve around the pink scrolls on the side of the head and the decorative leaves on the chin. -
Detail the Jaw:
Return to your Metallic Gold. Paint the ornate flourishes on the lower jawbone, ensuring the curves are smooth and taper off gently at the ends. -
Highlight the Forehead:
Use Cream paint (lighter than your base coat) to add highlights to the tips of the forehead flower petals, giving them a three-dimensional appearance. -
Paint the Teeth:
Mix Cream with a tiny drop of Burnt Umber. Carefully paint individual teeth, keeping the gaps between them dark to define the separation. -
Add Floral Centers:
Using the pink or a slightly darker coral shade, add small accent dots or centers to the flowers on the side of the skull.
Uneven Lines?
If your swirl lines feel shaky, try thinning your acrylic paint slightly with water. Ink-consistency paint flows off the brush smoother, making curves easier to control than thick paint.
Step 3: Antiquing and Finishing
-
Create an Antiquing Wash:
Dilute a small amount of Burnt Umber paint with water until it has the consistency of ink or watercolor. You want this to be very sheer. -
Apply the Wash to Recesses:
Brush this dark wash into the deep eye sockets and nasal cavity. Let it pool slightly in the deepest crevices to simulate shadow depth. -
Antique the Details:
Lightly brush the wash over the painted designs and teeth. Before it dries, immediately wipe the high points with a paper towel. The dark paint will remain in the textures and grooves, ageing the piece beautifully. -
Check for Balance:
Step back and look at the skull. If any areas look too clean and new compared to the rest, spot-apply a little more wash and wipe it back. -
Final Cleanup:
If painting the wash muddied your Gold highlights too much, gently re-apply a touch of fresh Metallic Gold to the tops of the raised details for contrast. -
Seal the Project:
Once the paint is completely cured (wait at least 4 hours), take the skull to a well-ventilated area and apply a light coat of matte or satin clear spray to protect the finish.
Jeweled Eyes
Glue faux amber gemstones or flat-back rhinestones inside the center of the painted flowers or deep within the eye sockets for a mysterious, sparkling hidden detail.
Now you have a stunning, artistically aged sugar skull that brings a touch of elegant mystery to your space.
Sugar Skull Pumpkin Painting for a Seasonal Twist
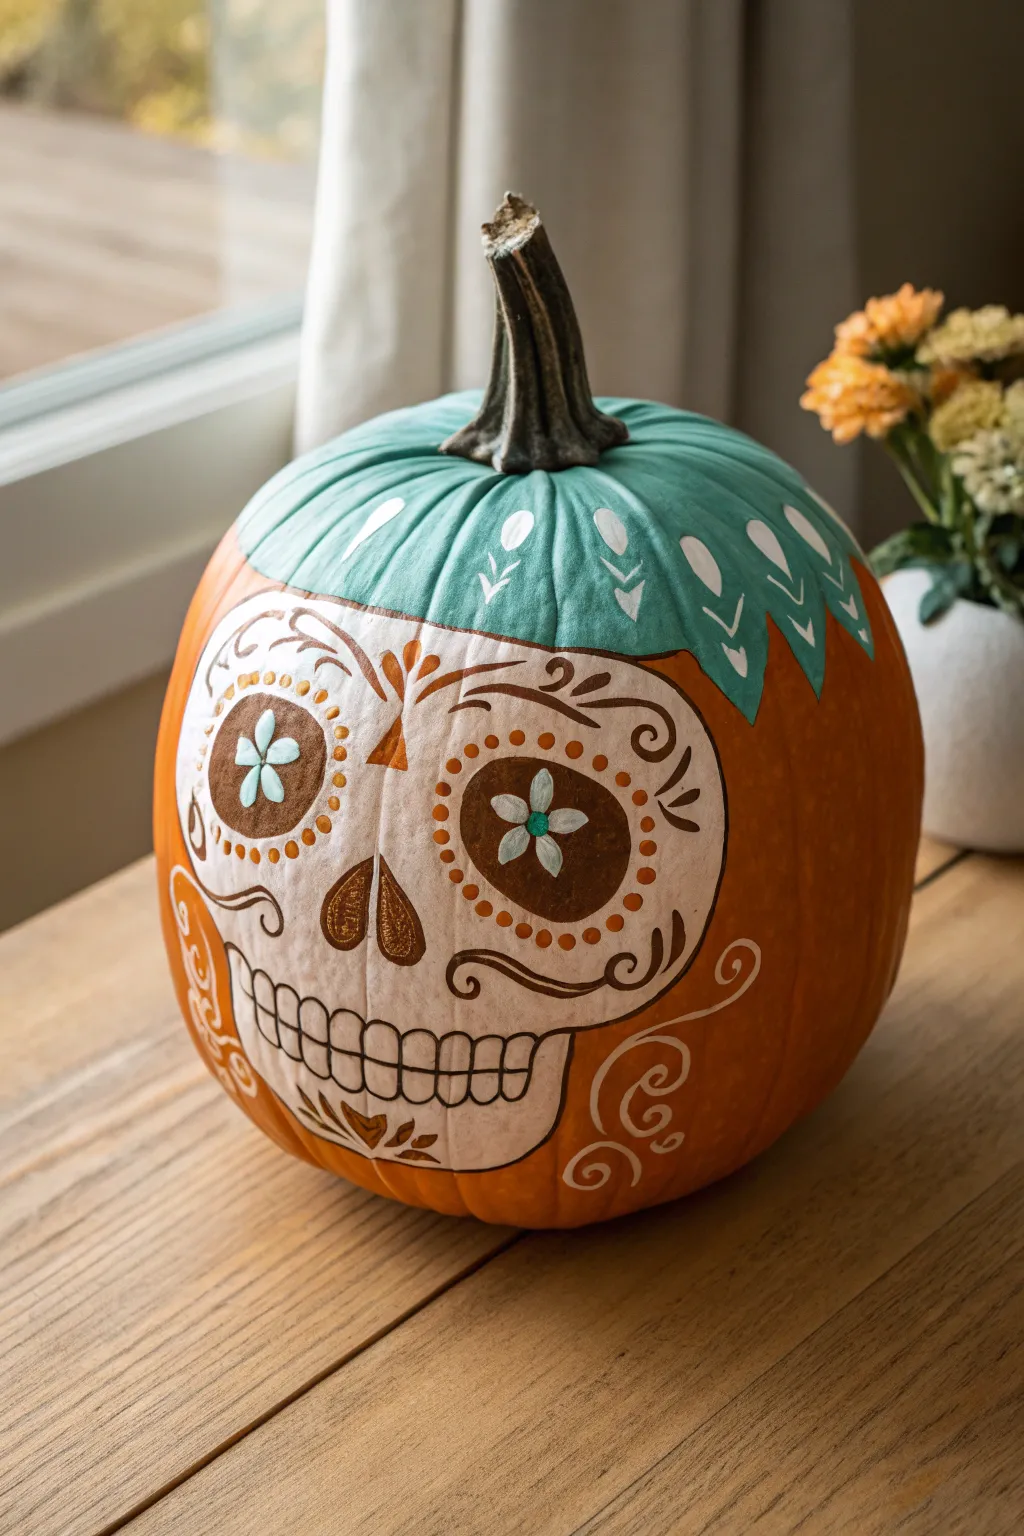
Merge the spookiness of Halloween with the vibrant traditions of Dia de los Muertos using this elegant pumpkin design. The project features a stark white skull face set against the natural orange rind, topped with a distinctive teal ‘hair’ or hat element for a pop of cool color.
Detailed Instructions
Materials
- Medium-sized orange pumpkin (real or faux)
- White acrylic craft paint
- Teal or turquoise acrylic craft paint
- Brown acrylic craft paint
- Gold paint pen or small brush with metallic acrylics
- Black fine-tip paint pen or permanent marker
- Pencil / Eraser
- Medium flat paintbrush
- Small round paintbrush
- Sealer spray (optional)
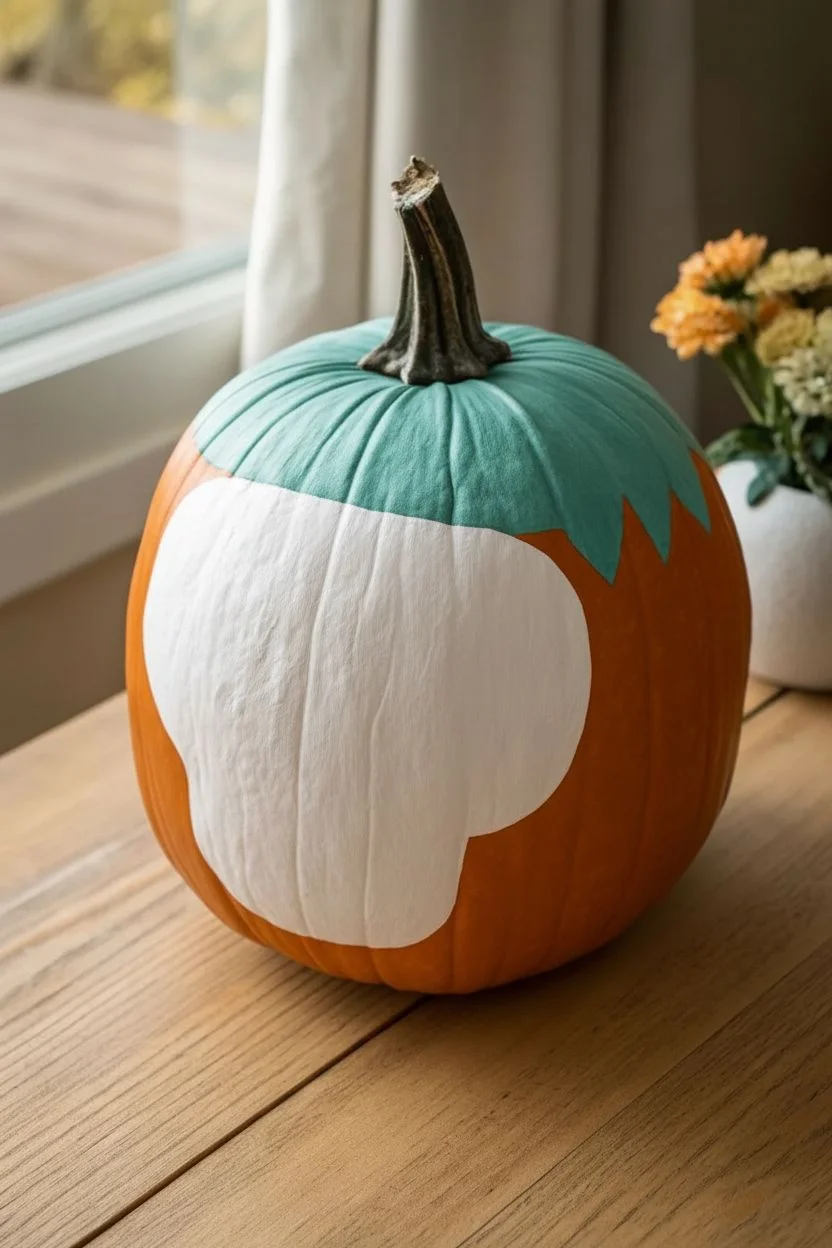
Step 1: Base Prep & Blocking Colors
-
Clean the surface:
Wipe down your pumpkin with a damp cloth to remove any dirt or oils. If using a real pumpkin, ensure it is completely dry before starting to paint so the acrylic adheres properly. -
Sketch the ‘hair’ line:
Using a pencil, draw a wavy line around the top third of the pumpkin. This line should scallop downwards slightly, creating a sort of cap or hair shape that covers the stem area. -
Draft the skull shape:
Below the wavy line, sketch a large, rounded skull shape. It doesn’t need to be anatomical; think of a smooth, stylized mask that dominates the front face of the pumpkin. -
Paint the top teal:
Fill in the entire top section above your wavy line with teal acrylic paint. Use a medium flat brush for coverage and switch to a smaller brush to get a crisp edge along the scallops. You may need two coats for opacity. -
Fill the skull face:
Paint the large skull shape with white acrylic paint. This is your canvas for the details, so apply enough layers to ensure the bright orange skin doesn’t show through. Let this dry completely.
Step 2: Mapping the Features
-
Sketch facial features:
Once the white paint is bone-dry, lightly pencil in two large circles for eye sockets, an upside-down heart shape for the nose, and a wide grin with teeth near the bottom. -
Paint the eye sockets:
Fill the large eye circles with brown acrylic paint. This creates a softer, more earthy look than harsh black voids. I find a round brush works best for these curves. -
Add the nose:
Paint the upside-down heart nose shape with the same brown paint used for the eyes. Allow the brown areas to dry before adding details on top of them. -
Detail the eyes:
Inside each brown eye socket, paint a simple five-petal flower using the white paint or a thicker paint pen. Add a tiny dot of teal in the very center of the flower to tie in the top color.
Use Your Pinky Finger
When doing fine line work on a curved surface, rest your pinky finger on a dry part of the pumpkin to stabilize your hand and prevent shaky lines.
Step 3: Intricate Line Work
-
Outline the skull:
Take a fine-tip black paint pen or marker and carefully trace the outer edge of the white skull shape to separate it cleanly from the orange pumpkin skin. -
Draw the mouth and teeth:
Draw a long horizontal line for the mouth, curving up slightly at the ends. Add vertical lines for teeth, and round the tops and bottoms of each tooth to make them look distinct. -
Add flourish lines:
Using the black pen, draw decorative swirls on the cheeks and forehead. Look closely at the reference: there are elegant S-curves on the cheeks and scrolling vines above the eyes. -
Create the nose definition:
Outline the brown nose shape with your gold paint pen. Add a vertical line down the center of the nose heart to give it dimension. -
Embellish the eyes:
Use the gold paint pen to add small dots around the perimeter of the brown eye sockets. This ring of dots gives it that classic sugar skull texture.
Add 3D Texture
Glue small flat-back rhinestones or sequins into the center of the eye flowers or along the forehead patterns for a design that sparkles in candlelight.
Step 4: Final Flourishes
-
Decorate the teal cap:
On the dry teal paint at the top, paint simple white teardrop shapes or ‘seeds’ pointing upwards. Add a small ‘V’ shape under each one to create a pattern resembling feathers or leaves. -
Add forehead details:
Paint a small gold detail, like a stylized flower or diamond, right in the center of the forehead between the eyes. -
Side embellishments:
On the bare orange skin next to the white skull, use white paint or a pen to draw large, swirling flourishes. This integrates the skull into the rest of the pumpkin. -
Seal the artwork:
If you plan to display this outdoors, give the entire pumpkin a light mist of clear acrylic sealer to protect your detailed line work from moisture.
Place your masterpiece on a porch or mantle to enjoy the festive spirit you have created
Butterfly and Vine Sugar Skull With Botanical Borders
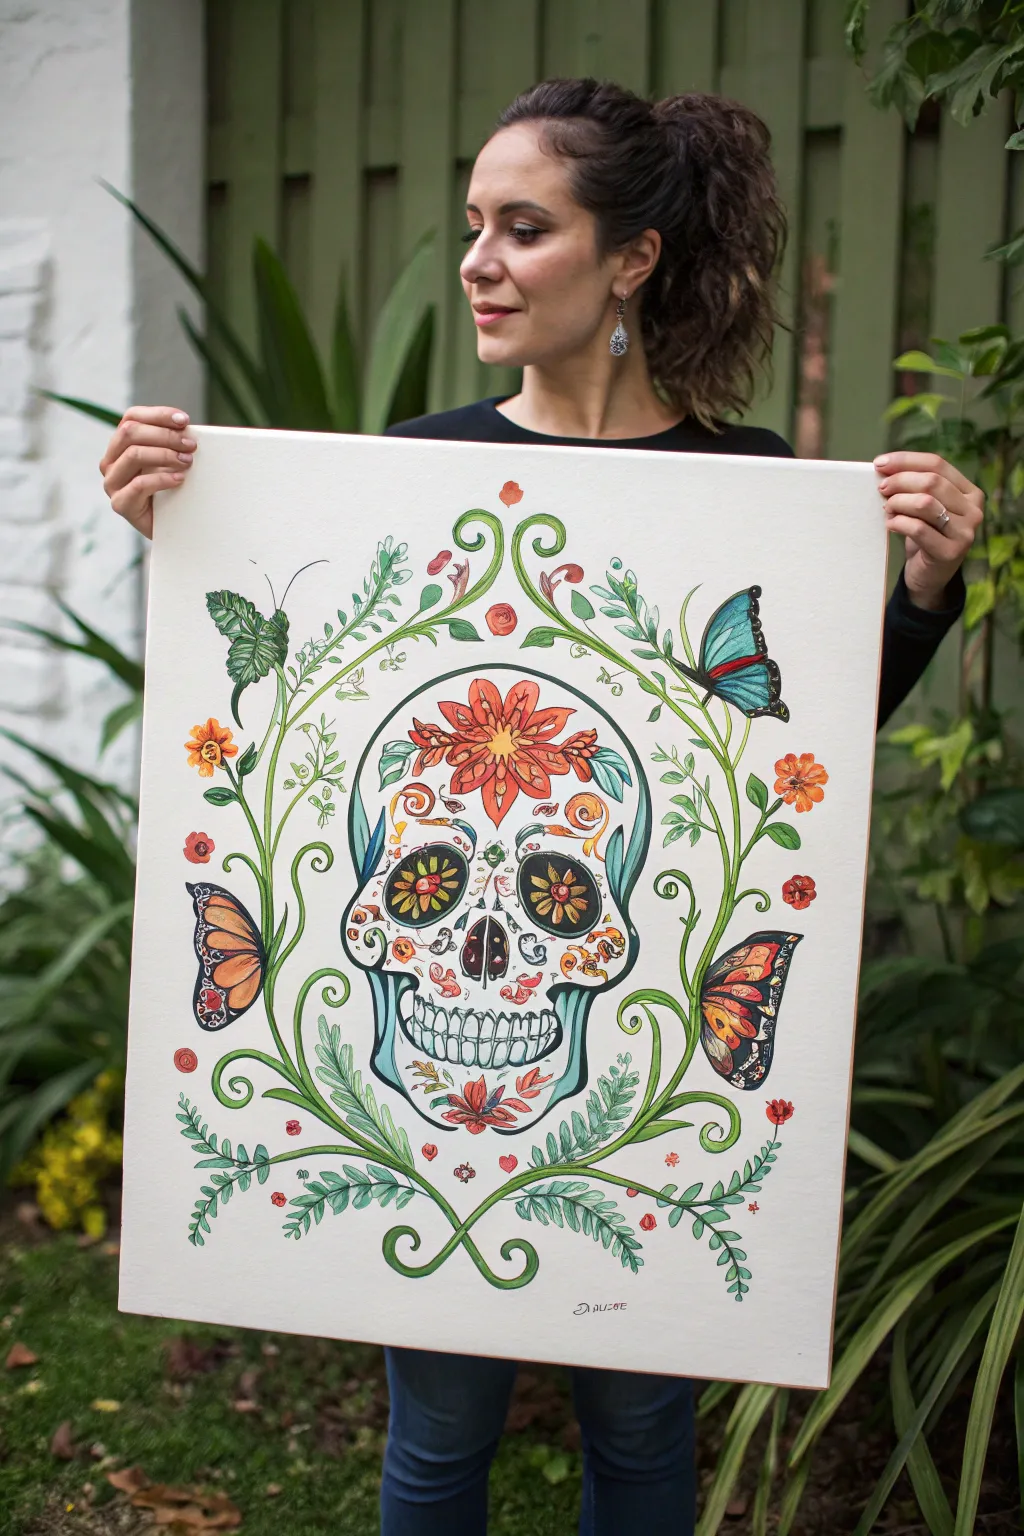
This elegant take on Day of the Dead art combines the traditional sugar skull iconography with flowing organic lines and vibrant butterflies. The result is a balanced, nature-inspired composition perfect for a large canvas or high-quality art paper.
Step-by-Step Tutorial
Materials
- Large rectangular mixed-media paper or primed canvas (approx. 18×24 inches)
- Pencil (HB or H) and eraser
- Fine liner pens (black, 0.3mm and 0.5mm)
- Watercolor paints or fluid acrylics
- Round brushes (sizes 2, 4, and 8)
- Small detail brush (size 0)
- Palette for mixing
- Jar of water
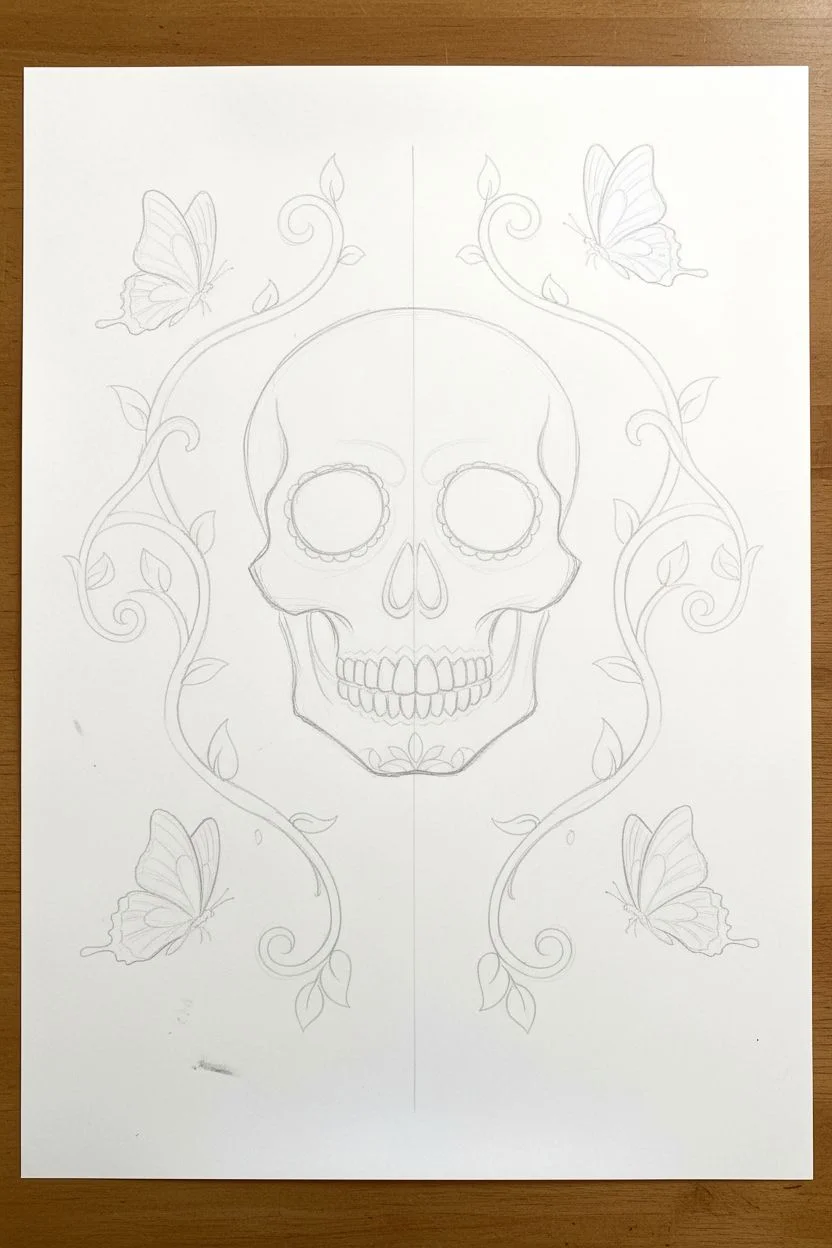
Step 1: Drafting the Composition
-
Establish the centerline:
Begin by lightly drawing a vertical line down the exact center of your surface to ensure symmetry for the skull. -
Sketch the skull outline:
In the center of the page, sketch a soft, rounded skull shape. Keep the jawline slightly squared but gentle, and make the cheekbones prominent. -
Map out the facial features:
Draw two large, circular eye sockets. Add an inverted heart shape for the nose cavity and sketch a grinning mouth with defined teeth. -
Draft the vines:
Starting from the bottom center, draw two main vine stems that curve upwards and outwards, framing the skull. Repeat this at the top, having vines curl down to meet the sides. -
Place the butterflies:
Sketch four butterflies perched on or near the vines: one at the top right, one top left, and two lower down on either side. Vary their angles to make them look alive.
Step 2: Inking the Lines
-
Outline the main skull features:
Using your 0.5mm pen, carefully go over the outline of the skull, the eye sockets, and the nose. Use confident, smooth strokes. -
Detail the teeth and jaw:
Switch to a slightly finer touch for the teeth, adding small cracks or roots to give them character without looking too messy. -
Inking the botanical border:
Trace your vine sketches. As you ink, add small leaves branching off the main stems. Some leaves can be fern-like, while others can be simple ovals. -
Define the butterflies:
Ink the butterfly wings. For the monarchs, draw the distinct vein patterns inside the wings; for the others, keep the patterns simpler. -
Erase pencil guides:
Once the ink is completely dry—I usually give it at least 15 minutes to be safe—gently erase all your pencil marks to leave a clean black-and-white base.
Pro Tip: Symmetry Hack
Draw one half of the skull on tracing paper, fold it along the centerline, and transfer it to the other side. This ensures your skull is perfectly symmetrical.
Step 3: Adding Color
-
Paint the eye sockets:
Mix a warm yellow-ochre and fill the center of the eye flower shapes. Then, use a burnt orange for the petals surrounding the pupils. -
Add floral skull details:
Paint the large flower on the skull’s forehead using bright orange and red. Add small blue flourishes to the temples for contrast. -
Color the vines:
Use a light, watery green for the main stems to keep them translucent. For the leaves, mix a slightly darker sap green to add depth. -
Paint the Monarch butterflies:
Fill the lower butterfly wings with a gradient of yellow to deep orange. Be careful to stay inside your inked lines. -
Color the upper butterflies:
For the top right butterfly, use a vibrant turquoise blue with a streak of red. For the top left, use earthy greens and browns to balance the palette. -
Accentuate the skull shadows:
Mix a very diluted teal or light blue wash. Apply this subtly to the edges of the skull (jawline, temples) to give it three-dimensional form without making it look gray.
Level Up: Gold Leaf
Apply small bits of gold leaf to the center of the forehead flower and the butterfly wings. It catches the light beautifully and adds a sacred feel.
Step 4: Final Touches
-
Deepen the darks:
Go back with black ink or concentrated dark paint to fill in the nose cavity and the centers of the eyes for dramatic impact. -
Add white highlights:
If you have a white gel pen or white acrylic, add tiny dots to the butterfly wings and the centers of the flowers for sparkle. -
Scattered petals:
Paint small, floating red and orange petals or dots around the composition to fill empty negative space and tie the colors together.
Step back and admire the lovely balance between the stark skull and the lively garden you’ve created
Sugar Skull Portrait Mashup With a Half-Face Transformation
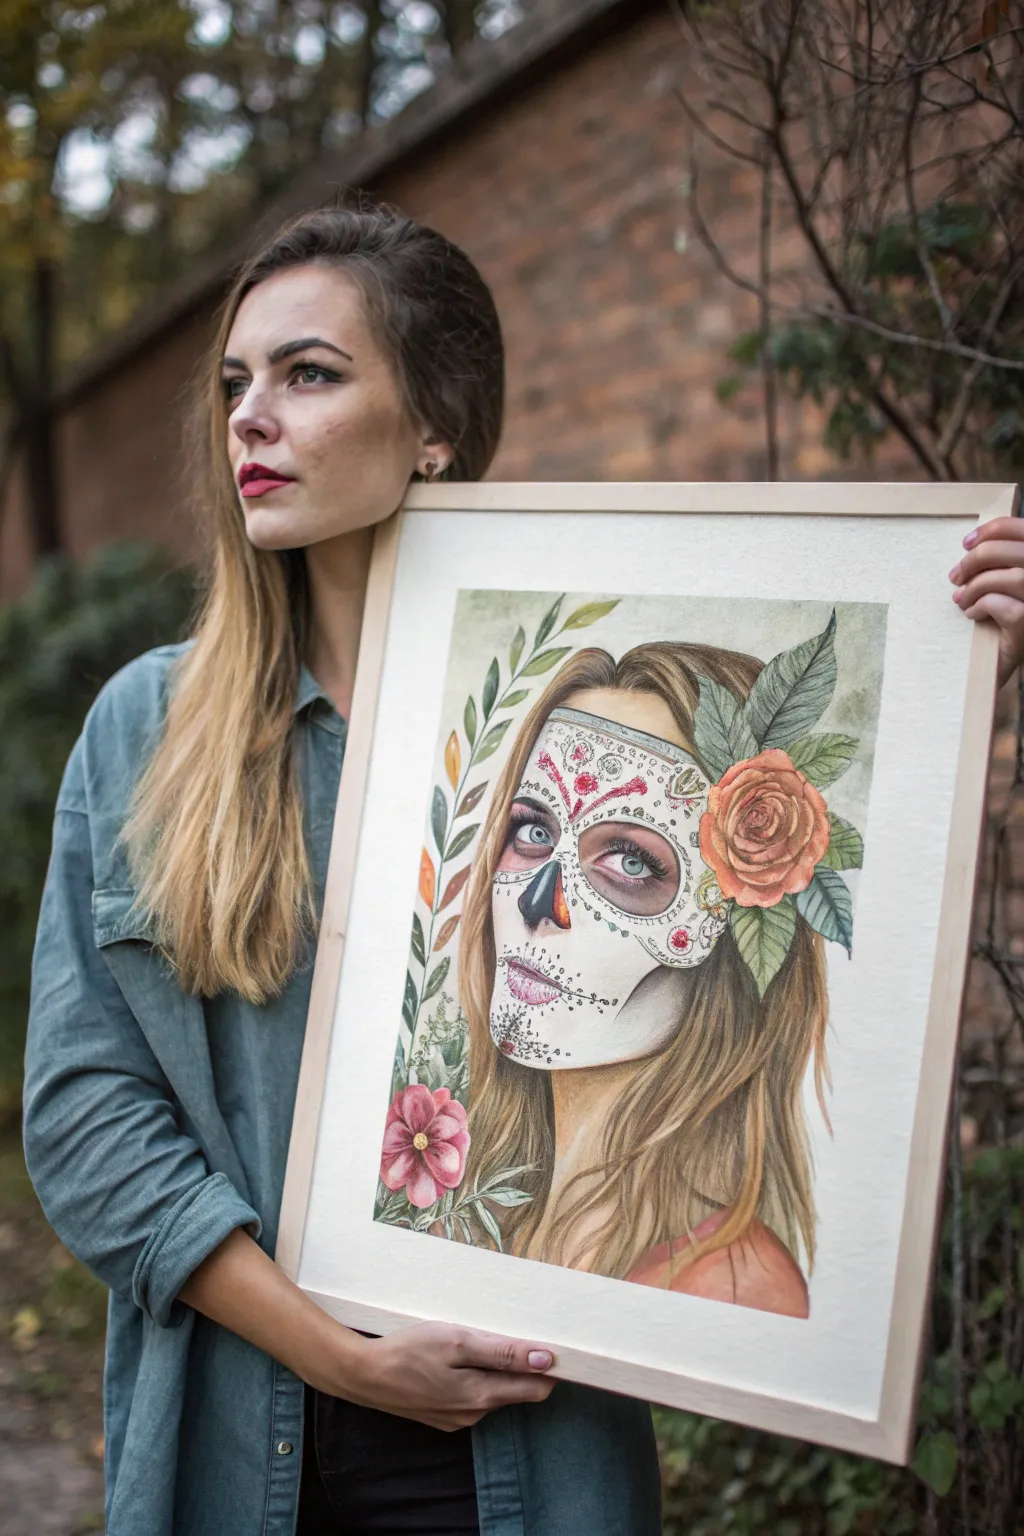
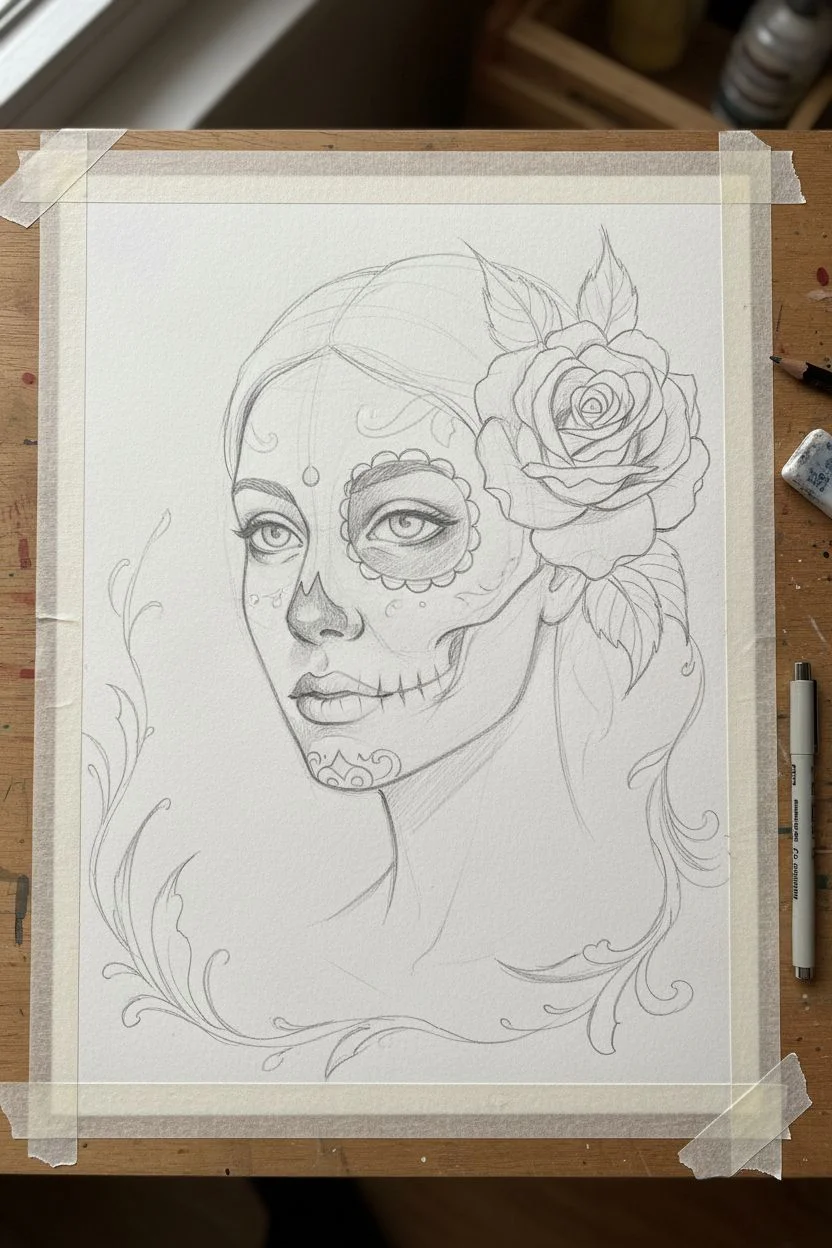
Blend realism with vibrant folklore in this striking mixed-media portrait that transforms an ordinary face into a captivating sugar skull mashup. Using soft watercolor washes and precise ink detailing, you’ll capture the delicate balance between life and the celebrated aesthetics of Dia de los Muertos.
How-To Guide
Materials
- High-quality watercolor paper (cold press, 300 gsm)
- Graphite pencils (HB and 2B)
- Kneaded eraser
- Watercolor paints (skin tones, earthy greens, vibrant pink/red, deep charcoal)
- Round watercolor brushes (sizes 2, 6, and 10)
- Fine liner pens (black, waterproof, 0.1mm and 0.3mm)
- White gel pen or white gouache
- Wooden painting board or frame backing
- Masking tape
Step 1: Sketching the Dual Identity
-
Establish the proportions:
Begin with a light HB pencil sketch of a female face in a 3/4 view. Map out the eyes, nose, and mouth carefully to ensure symmetry before adding the skull elements. -
Define the mask line:
Draw a distinct line across the forehead and down the cheekbone to separate the ‘living’ skin from the skull mask area. This line should look like a physical edge, perhaps slightly raised. -
Draft the skull details:
Inside the mask area, sketch the traditional sugar skull features: a darkened nose cavity, a decorative circle around the eye, and stitched mouth lines extending from the lips. -
Add floral elements:
Sketch a large rose tucked behind the ear on the right side and flowing leaves framing the face on the left to create a natural border.
Fixing Smudged Ink
If you accidentally smudge wet ink, wait for it to dry completely. Then, use white gouache to carefully paint over the mistake before redrawing the line.
Step 2: Layering Watercolor Washes
-
Paint the base skin tones:
Mix a soft beige or warm brown for the skin. Apply a light wash to the neck, shoulders, and the ‘human’ side of the face, leaving the mask area pure white for now. -
Shade the hair:
Using a mix of ochre and burnt umber, paint the hair in loose, flowing strokes. I like to keep the edges slightly soft to suggest movement. -
Develop the skull whiteness:
Use a very diluted wash of grey or pale violet to add shadow to the white mask, particularly under the eye and along the jawline, to give it 3D form without darkening it too much. -
Color the floral accents:
Paint the rose using layers of coral and terracotta, letting each layer dry to build depth. Use sap green and olive for the leaves, varying the saturation to differentiate between new and old growth.
Step 3: Defining Features and Contrast
-
paint the eyes:
For the eyes, use a piercing blue-grey. Pay special attention to the iris on the skull side—it needs to look intensely alive despite the skeletal surrounding. -
Darken the nose cavity:
Fill in the spade-shaped nose on the mask with black or deep charcoal paint. Add a tiny highlight of pure white to make it look like a painted surface rather than a hole. -
Enhance the hair depth:
Go back into the hair with a smaller brush and darker brown paint to define individual strands and deep shadow areas near the neck. -
Deepen the background:
Apply a mottled, olive-grey wash to the background. Keep it loose and uneven to give the piece a vintage, textured feel.
Add Metallic Flair
Use gold leaf or metallic watercolor paint for the decorative dots on the skull mask or the veins in the leaves to make the artwork shimmer in the light.
Step 4: Inking and Fine Details
-
Outline the mask edge:
Using a 0.1mm pen, carefully ink the boundary line of the mask. Add tiny ticking marks to simulate a shadow, making the mask appear to sit on top of the skin. -
Detail the sugar skull designs:
Ink the decorative elements on the mask—scalloped edges around the eye orbital, floral motifs on the forehead, and the ‘stitched’ mouth lines. -
Add texture to the rose:
Use the pen to add delicate hatching inside the rose petals and veins on the leaves. This integrates the botanical elements with the illustrative style of the skull. -
Apply highlights:
Using a white gel pen or gouache, add sharp highlights to the eyes, the tip of the nose, and the highest points of the rose petals. -
Final decorative touches:
Add small red dots or jewels to the forehead design using concentrated red watercolor or ink for a pop of color.
Once framed, the contrast between the soft portrait and the graphic skull design creates a truly mesmerizing piece of art
Galaxy Sugar Skull With Starry Negative Space
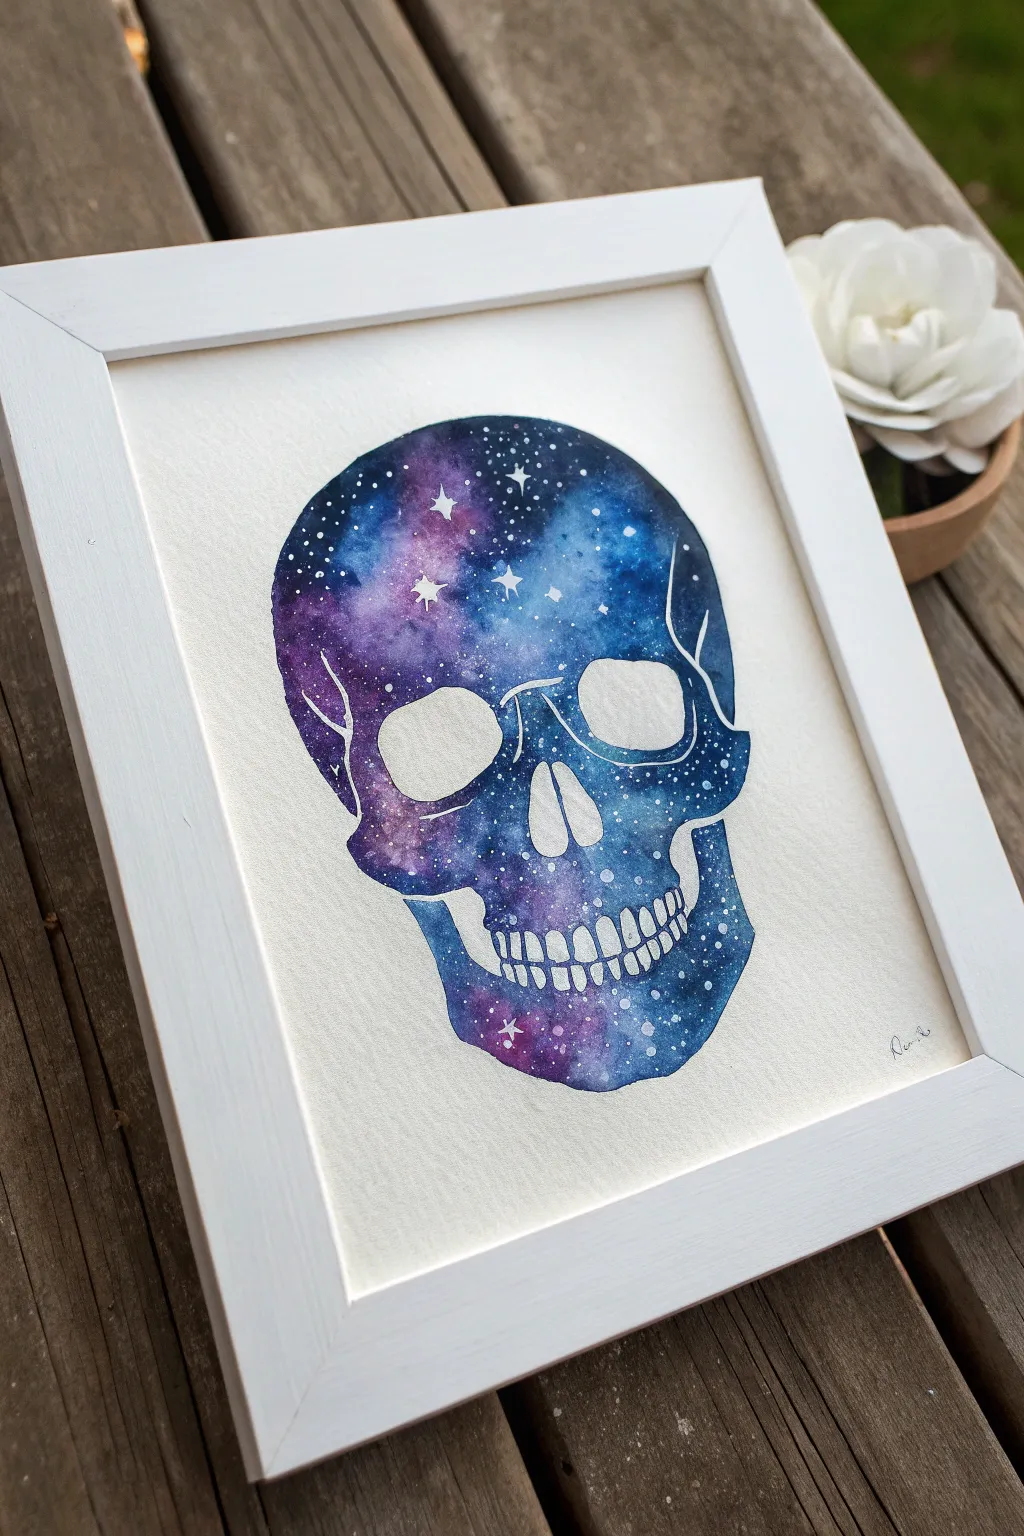
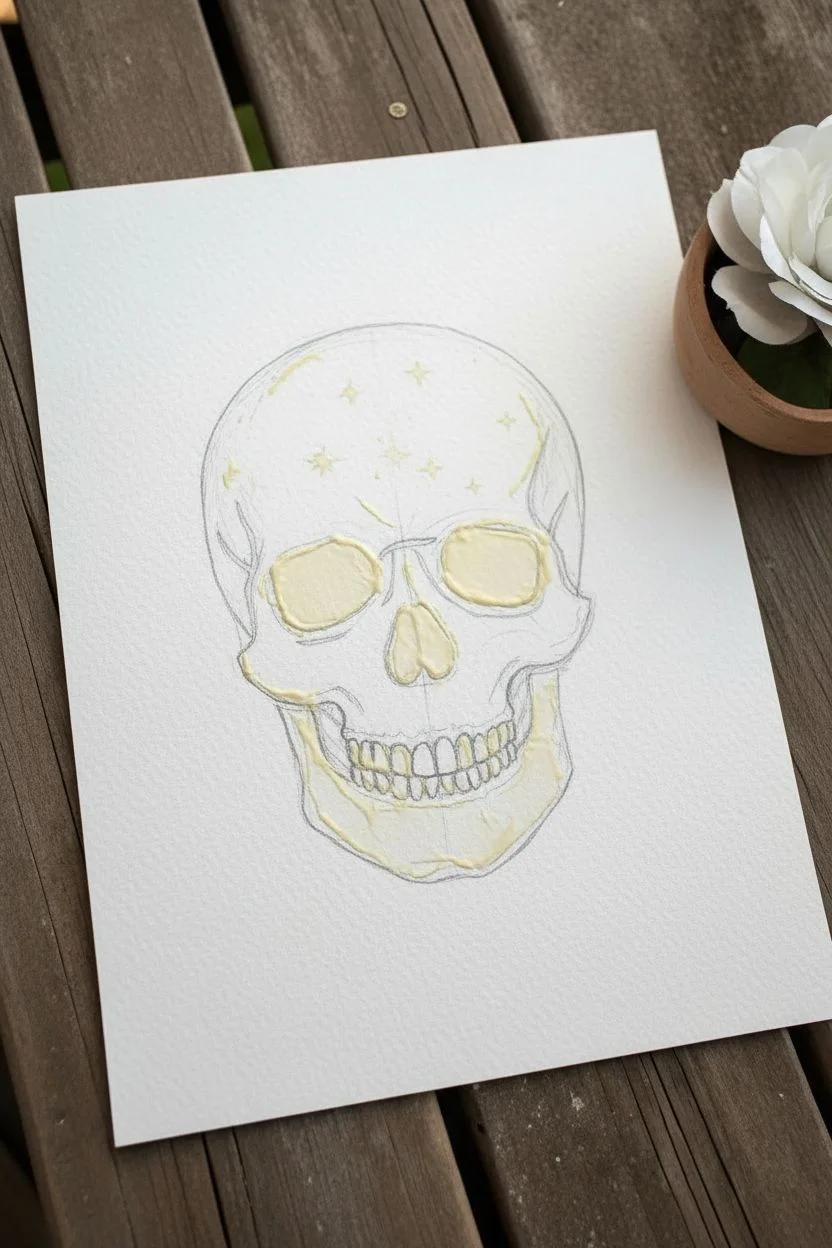
Blend the eerie elegance of a skull silhouette with the vibrant wonders of a nebula in this stunning watercolor project. By using masking fluid to preserve crisp white stars and lines, you’ll create a deep, starry galaxy contained entirely within the shape of a skull.
Detailed Instructions
Materials
- Cold press watercolor paper (140lb/300gsm)
- Pencil and eraser
- Liquid masking fluid (drawing gum)
- Small round brush or silicone masking tool
- Watercolor paints (Indigo, Purple, Magenta, Turquoise, Black)
- Medium round watercolor brush (size 6 or 8)
- Small detail brush (size 0 or 2)
- White gouache or white gel pen (optional for extra stars)
- Two jars of water
- Paper towels
- Rubber pick-up tool or clean fingers
Step 1: Preparation and Sketching
-
Outline the Skull:
Begin by lightly sketching a skull shape in the center of your watercolor paper. It helps to start with a circle for the cranium and a squared-off jaw shape below. -
Define the Features:
Draw the large eye sockets, the inverted heart shape for the nose cavity, and the individual teeth. Keep your pencil pressure very light so graphite doesn’t smudge into the final painting. -
Add Decorative Lines:
Sketch a few thin, jagged lines along the temples and jawline to represent cranial sutures or cracks, which adds character to the silhouette. -
Mask the Negative Space:
Dip your masking tool or an old brush (coated in soap first to protect it) into the masking fluid. Carefully paint over the areas you want to remain pure white: the eye sockets, the nose cavity, and the teeth. -
Create the Stars:
Use the tip of a fine brush or a toothpick dipped in masking fluid to dot small stars throughout the skull area. Draw a few four-pointed star shapes for brighter celestial bodies. -
Mask the Detail Lines:
Trace over those thin suture lines on the skull’s surface with a very fine line of masking fluid. Let the masking fluid dry completely until it is hard and tacky to the touch.
Protect Your Brush
Masking fluid ruins bristles instantly. Before dipping into the fluid, coat your brush bristles in dish soap. This creates a barrier that makes cleaning the rubbery fluid off much easier.
Step 2: Painting the Galaxy
-
Wet-on-Wet Base:
Using your medium round brush, apply clean water to the entire interior of the skull shape. The paper should be glisten but not have standing puddles. -
Drop in Bright Colors:
While the paper is wet, drop in vibrant blobs of magenta, turquoise, and purple. Let them bleed into each other naturally, creating soft, cloud-like transitions. -
Deepen the Cosmos:
While the first layer is still damp, introduce darker colors like indigo and hints of black. Concentrate these darker hues around the edges of the skull and in the gaps between the bright nebulas to create depth. -
Refine the Edges:
Use the tip of your brush to carefully paint up to the pencil outline of the skull, ensuring a crisp exterior edge while the inside remains blended. -
Let it Dry:
A crucial step: allow the paint to dry completely. If the paper feels cool to the touch, it’s still wet. Patience prevents smudging. -
Second Layer (Optional):
If your galaxy looks too pale after drying, I often add a second glaze of dark blue or purple to intensify the contrast, specifically focusing on the areas farthest from the bright star clusters.
Step 3: Finishing Touches
-
Remove Masking Fluid:
Once the painting is bone-dry, gently rub off the dried masking fluid using a rubber pick-up tool or your clean finger. Rub in a circular motion to lift the gum without tearing the paper. -
Clean Up:
Use a kneaded eraser to gently lift any visible pencil marks remaining around the outer edge of the skull. -
Splatter Stars:
For extra dimension, load a small brush with opaque white gouache or slightly diluted white acrylic. Tap the handle against another brush to flick tiny speckles of white over the darkest painted areas. -
Final Details:
If the teeth or eye sockets have rough edges from the masking fluid, you can refine them slightly with a white gel pen for a polished look.
Add Metallic Magic
Mix a small amount of gold or silver watercolor paint into your galaxy wash, or use a metallic pen to trace the teeth and eye sockets for a shimmering, upscale finish.
Frame your cosmic creation in a simple white frame to let the deep colors truly pop


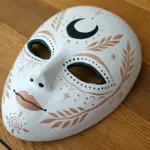
Have a question or want to share your own experience? I'd love to hear from you in the comments below!