When I’m not sure what to draw, I circle back to sunflowers—they’re cheerful, forgiving, and packed with texture. Here are some sunflower drawing ideas that start simple and slowly get more playful, so you can pick the vibe that fits your sketchbook today.
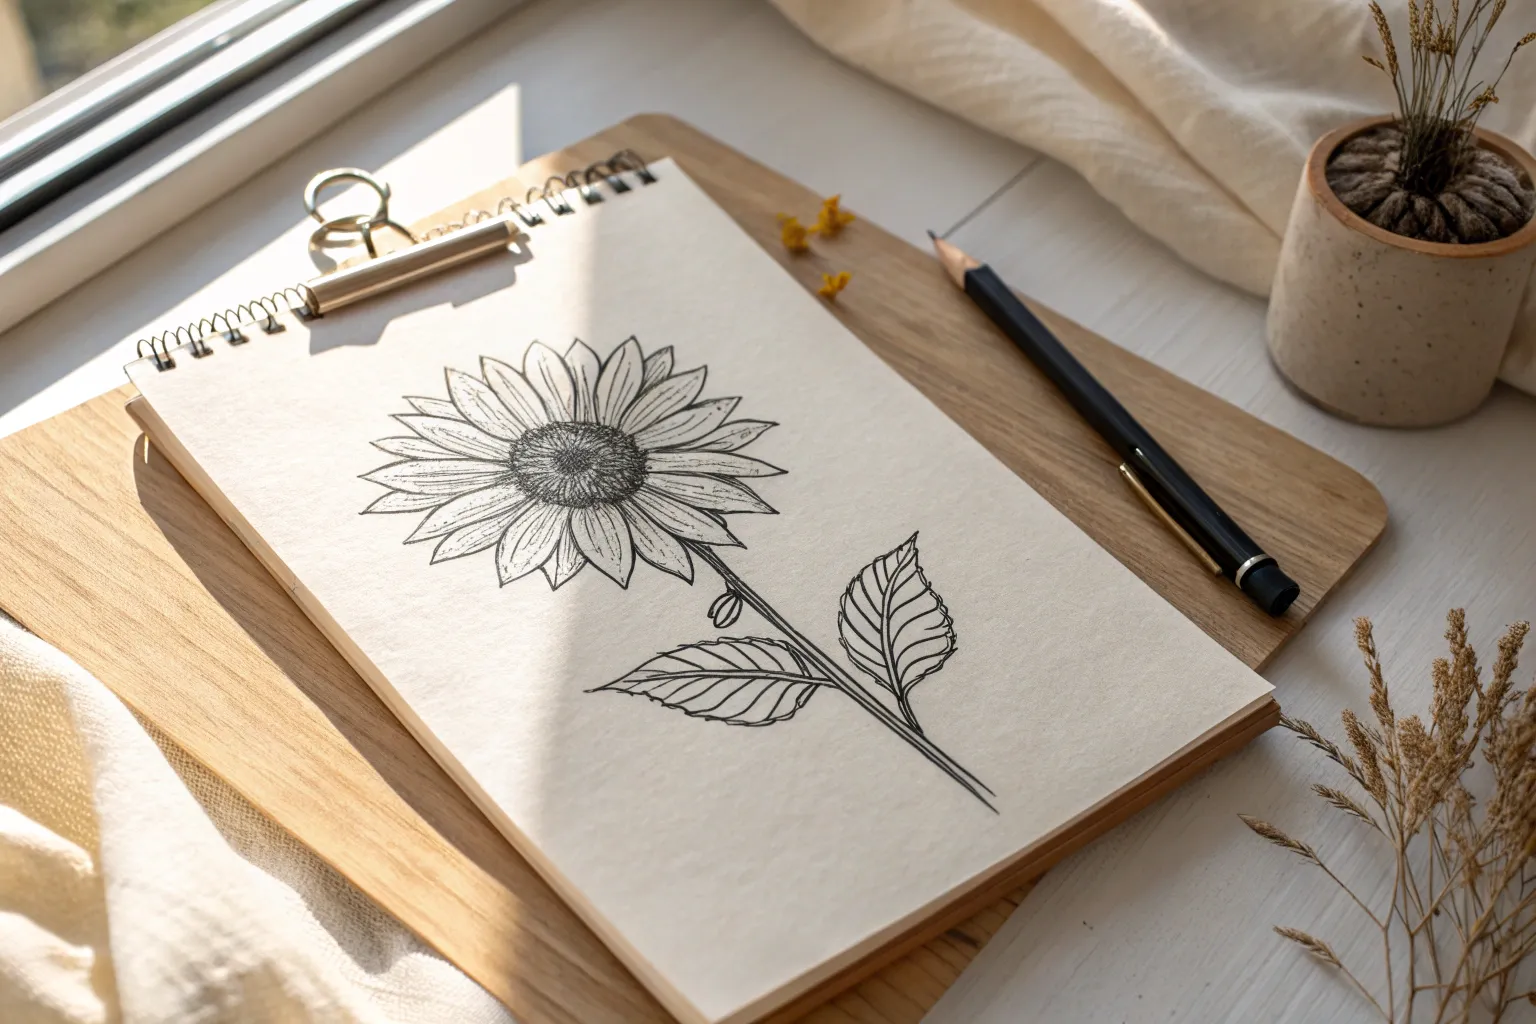
Simple Sunflower Line Art
This project focuses on the elegance of clean lines and symmetry, capturing the essence of a sunflower without needing color. The result is a crisp, illustration-style drawing perfect for framed wall art or a bullet journal cover.
Step-by-Step Guide
Materials
- Smooth white bristol board or heavy drawing paper (A5 size)
- Pencil (HB or H for sketching)
- Fine liner pen (0.3mm or 0.5mm, black ink)
- Eraser (kneaded or plastic)
- Ruler
- Compass (optional, for perfect circles)
Step 1: Planning the Structure
-
Find the center:
Begin by marking the center of your paper lightly with a pencil. This will help keep your flower perfectly centered on the page. -
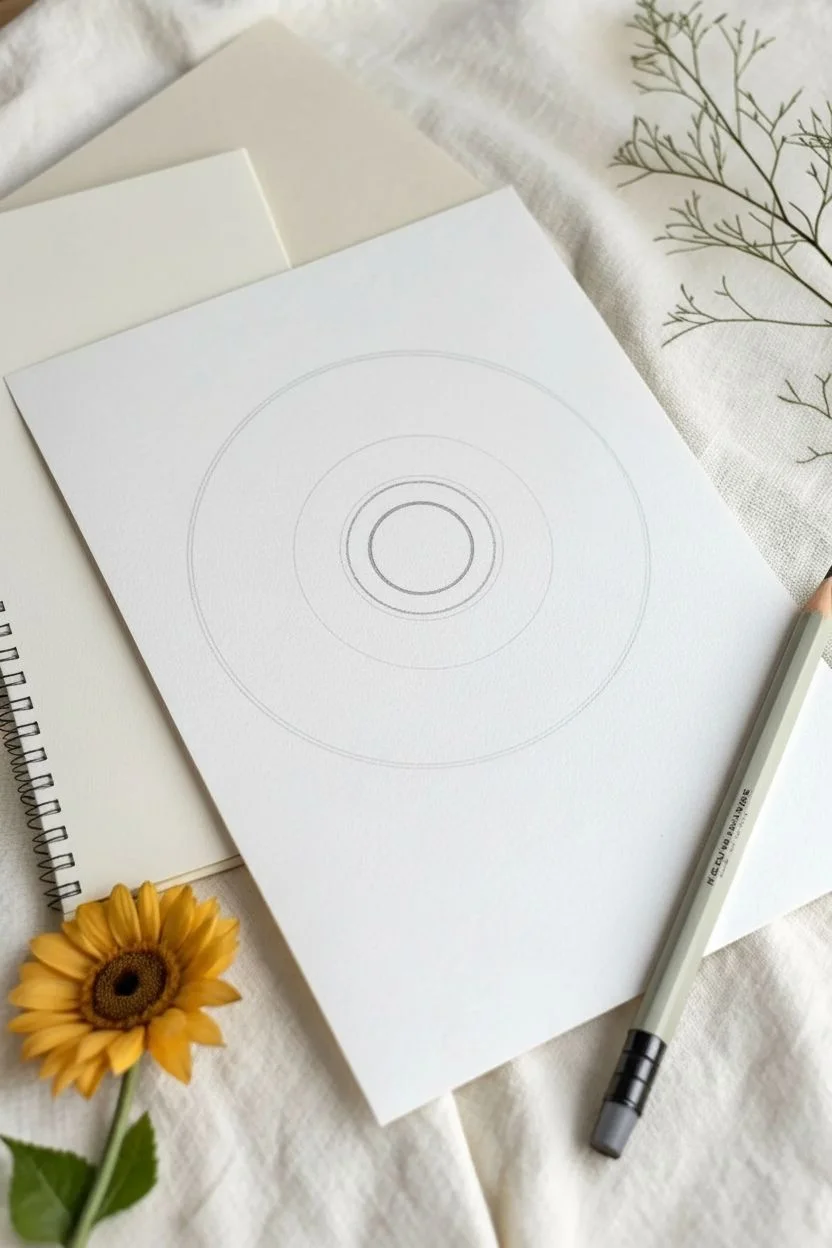
Draw the center circle:
Sketch a small circle in the middle, roughly 1.5 inches in diameter. You can freehand this for a natural look or use a compass for precision. -
Define the petal boundary:
Draw a much larger faint circle around the first one. This outer ring marks the maximum length of your petals, ensuring they stay uniform in length. -
Add the inner seed ring:
Inside your center circle, draw a slightly smaller circle, leaving a narrow band between them. This will contain the small petal details later.
Wobbly Circles?
Don’t stress about perfect geometry. If your center looks lopsided, thicken the outline on the flatter side to balance it visually.
Step 2: Drafting the Petals
-
Sketch the primary petals:
Start drawing the main layer of large petals. Point the tips toward the outer boundary circle you drew earlier. Keep the base of each petal slightly wider and the tips sharp. -
Space them evenly:
Aim for about 12-15 main petals. Don’t worry if they overlap slightly or have jagged edges; you’ll refine this with ink. -
Add the second layer:
In the gaps between the main petals, sketch the tips of a second layer of petals peeking out from behind. These should look like simple triangles filling the negative space. -
Draw the central crease:
For each main petal, lightly sketch a central line running from the base to the tip. This adds dimension and creates that classic sunflower look.
Step 3: Inking the Outline
-
Outline the center:
Switch to your fine liner pen. Carefully trace the inner circle that defines the sunflower’s face. Keep your hand steady for a smooth curve. -
Ink the main petals:
Trace over your pencil lines for the primary petals. Instead of a single continuous line, try to make the strokes crisp and definitive. -
Trace the background petals:
Ink the triangular tips of the petals in the back layer. Ensure these lines stop cleanly where they touch the front petals. -
Add petal details:
Draw the central vein on each main petal with your pen. I like to make this line slightly thinner or broken near the center to keep it delicate. -
Detail the center ring:
In the small band between the two center circles, draw tiny semi-circles or U-shapes all the way around. This mimics the small florets.
Add Dimension
Lightly stipple (add tiny dots) at the base of each petal where it meets the center. This creates a shadow effect without needing gray ink.
Step 4: Texturing the Seeds
-
Fill the seed head:
Inside the very center circle, start drawing tiny circles. Begin at the outer edge and spiral inward. -
Vary the sizes:
Make the circles slightly larger near the outer rim and smaller as you get closer to the absolute center to create depth. -
Fill the gaps:
If there are large white spaces between the seed circles, add tiny dots to make the center look dense and textured.
Step 5: Finishing Touches
-
Let the ink dry:
Wait at least 15 minutes to ensure the ink is completely set. Smudging black ink at this stage is heartbreaking. -
Erase guidelines:
Using a clean specific eraser, gently rub away all the pencil marks, including the outer boundary circle and center guides. -
Assess line weight:
Look over your drawing. If you want the outer silhouette to pop more, re-trace the outermost petal lines just once more to thicken them slightly.
Now you have a striking botanical illustration that proves simple lines can be incredibly expressive


Full Stem Botanical Study
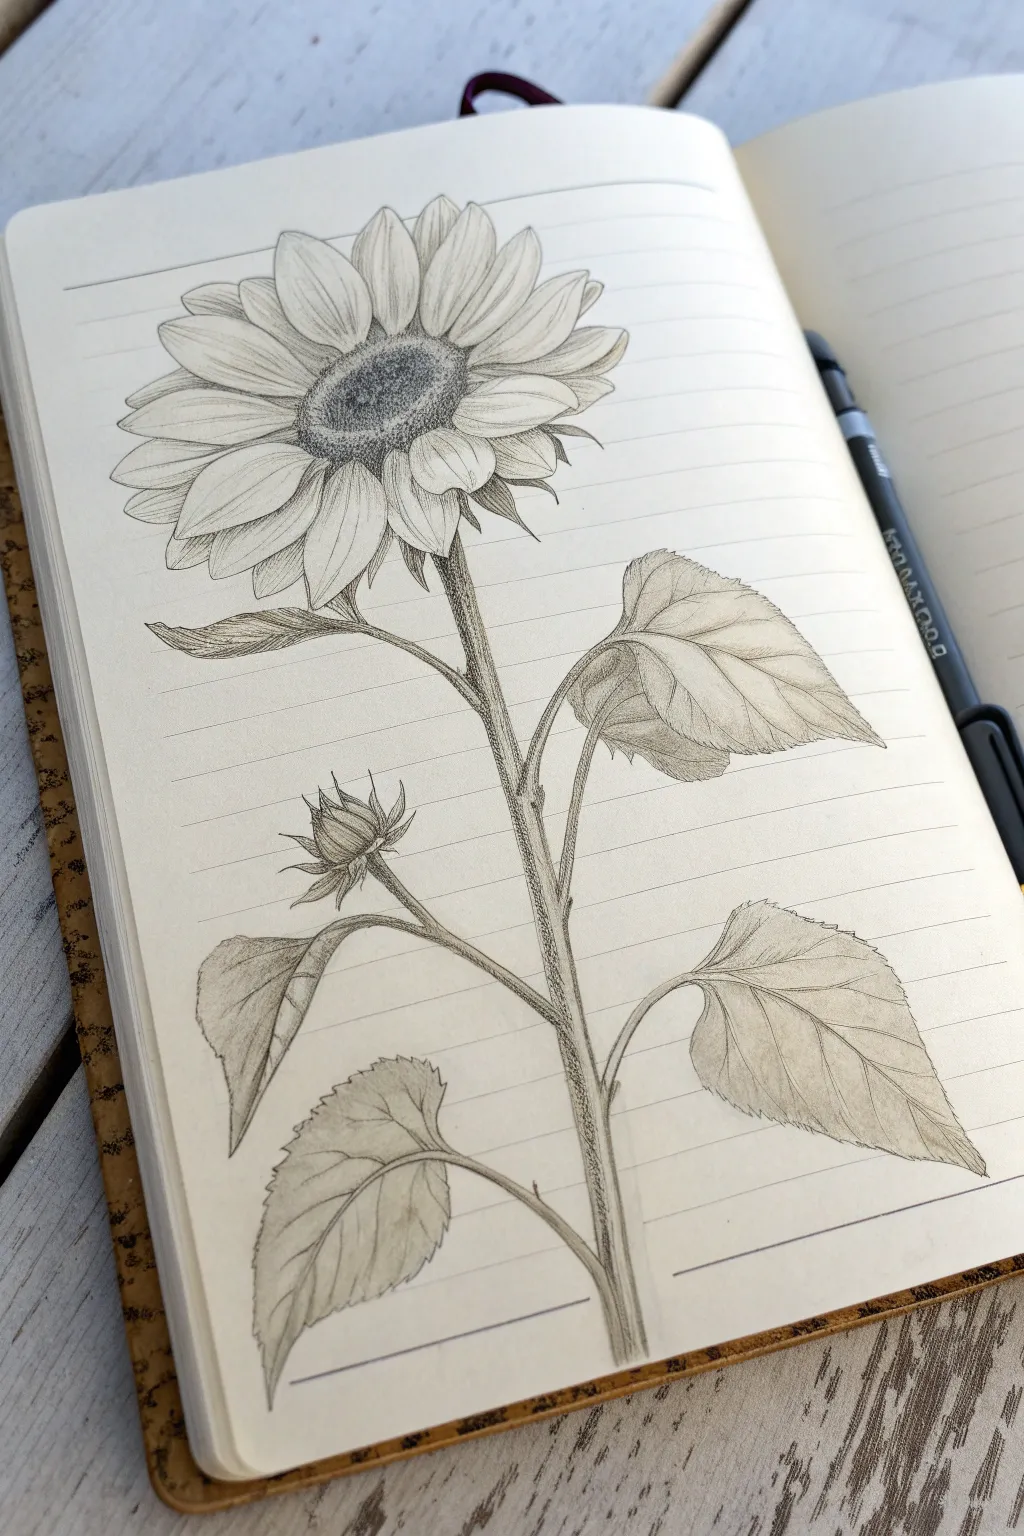

Capture the elegance of a botanical study with this full-stem sunflower sketch on classic lined paper. This project balances fine detail work in the flower head with broad, sweeping leaves for a timeless, field-notebook aesthetic.
Step-by-Step Guide
Materials
- A5 or B5 lined notebook (cream or ivory paper)
- Mechanical pencil (0.5mm or 0.7mm lead)
- HB graphite pencil (for initial outlines)
- 2B or 4B graphite pencil (for deeper shading)
- Fine-point eraser or kneaded eraser
- Blurring stump (tortillon) – optional
Step 1: Structural Framework
-
Establish the curve:
Begin by drawing a long, gentle S-curve starting near the bottom right of the page and sweeping up towards the top left. This line will act as the spine for your sunflower’s stem. -
Position the flower head:
At the very top of your stem line, sketch a large oval tilted slightly towards the viewer. This will become the center disk of the sunflower. -
Map the leaves:
Mark the positions for four major leaves along the stem. Place two lower down on opposite sides, one large leaf midway up on the right, and a smaller leaflet near the flower head. -
Add the bud:
Sketch a small, branching line coming off the left side of the main stem, about halfway between the flower head and the middle leaf. Top it with a small, teardrop shape to represent an unopened bud.
Keep it clean
Graphite smudges easily on smooth notebook paper. Place a clean scrap piece of paper under your drawing hand to protect your finished work while you shade.
Step 2: Drafting the Flower
-
Sketch the center disk:
Refine the oval at the top. Instead of a smooth line, use small, jagged marks to suggest the texture of the seeds. Draw an inner circle slightly off-center to create a three-dimensional effect. -
Layer the first petals:
Draw the first row of petals radiating outward from the center disk. Keep them irregular—some slightly twisted, some overlapping—rather than perfectly uniform. -
Fill the gaps:
Add a second layer of petals behind the first, filling in the V-shaped gaps. These back petals should appear slightly smaller or partially hidden. -
Texture the seeds:
Using your mechanical pencil, fill the center disk with tiny stippling dots. Pack them densely near the bottom edge of the center to create shadow and depth, and sparser near the top for highlights.
Vintage flare
To enhance the botanical study look, write the scientific name ‘Helianthus annuus’ in cursive near the bottom stem using a fine liner pen.
Step 3: Refining Stem and Leaves
-
Thicken the stem:
Go back to your initial S-curve and draw parallel lines to give the stem thickness. It should be thickest at the bottom and taper slightly as it reaches the flower head. -
Detail the leaf outlines:
Outline the leaves using jagged, serrated lines to mimic the rough edge of sunflower foliage. Ensure the tips point generally away from the stem. -
Draw leaf veins:
Sketch a central vein through each leaf, following the curve of the leaf body. Add smaller veins branching out towards the edges, keeping your touch light. -
shape the bud:
Detail the unopened bud by drawing tightly packed, leafy bracts wrapping around the teardrop shape you sketched earlier. Give the small stem supporting it a slight curve.
Step 4: Shading and Definition
-
Shadow the petals:
Switch to your 2B pencil. Add shading at the base of each petal where it meets the center disk using short, flicking strokes outward. This separates the petals from the center. -
Define petal overlaps:
I like to darken the edges where one petal casts a shadow on the one beneath it. This simple step instantly adds volume to the flower. -
Shade the leaves:
Lightly shade one side of the central vein on each leaf. darken the areas where the leaves fold or curl over themselves to show dimension. -
Texture the stem:
Use short, vertical hatching lines along one side of the stem (the side away from your light source) to make it look cylindrical and fuzzy. -
Final contrast check:
Review the drawing for contrast. Darken the very center of the sunflower disk and the deepest crevices between leaves to make the drawing pop against the cream paper.
Now you have a beautiful botanical study preserved in your notebook pages


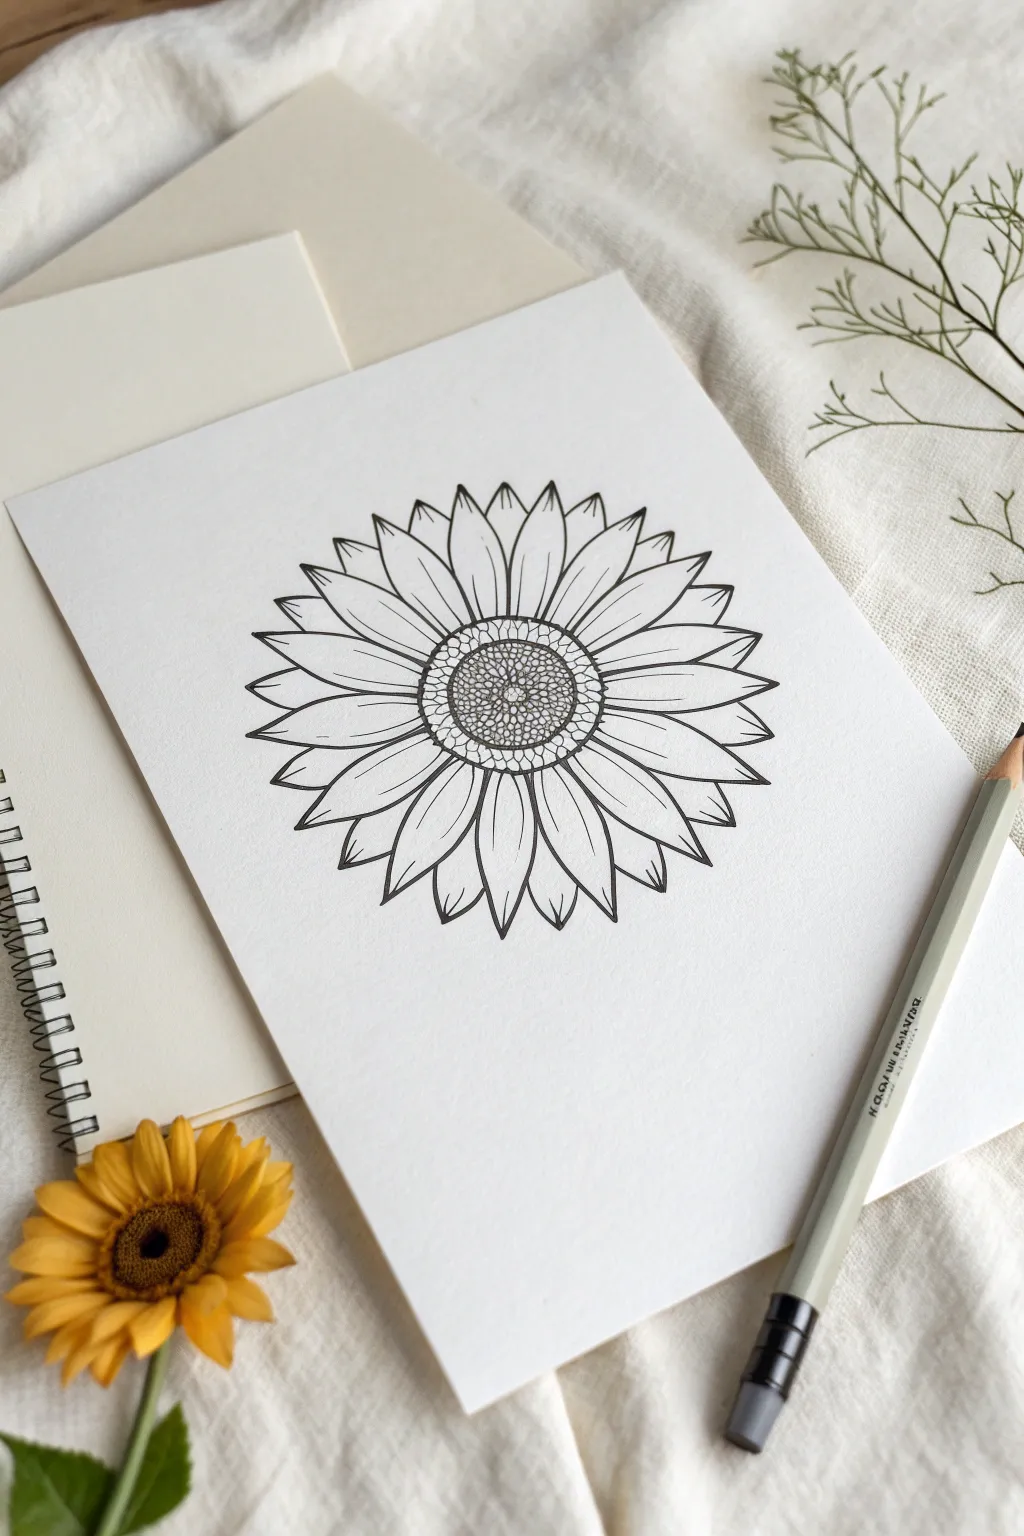
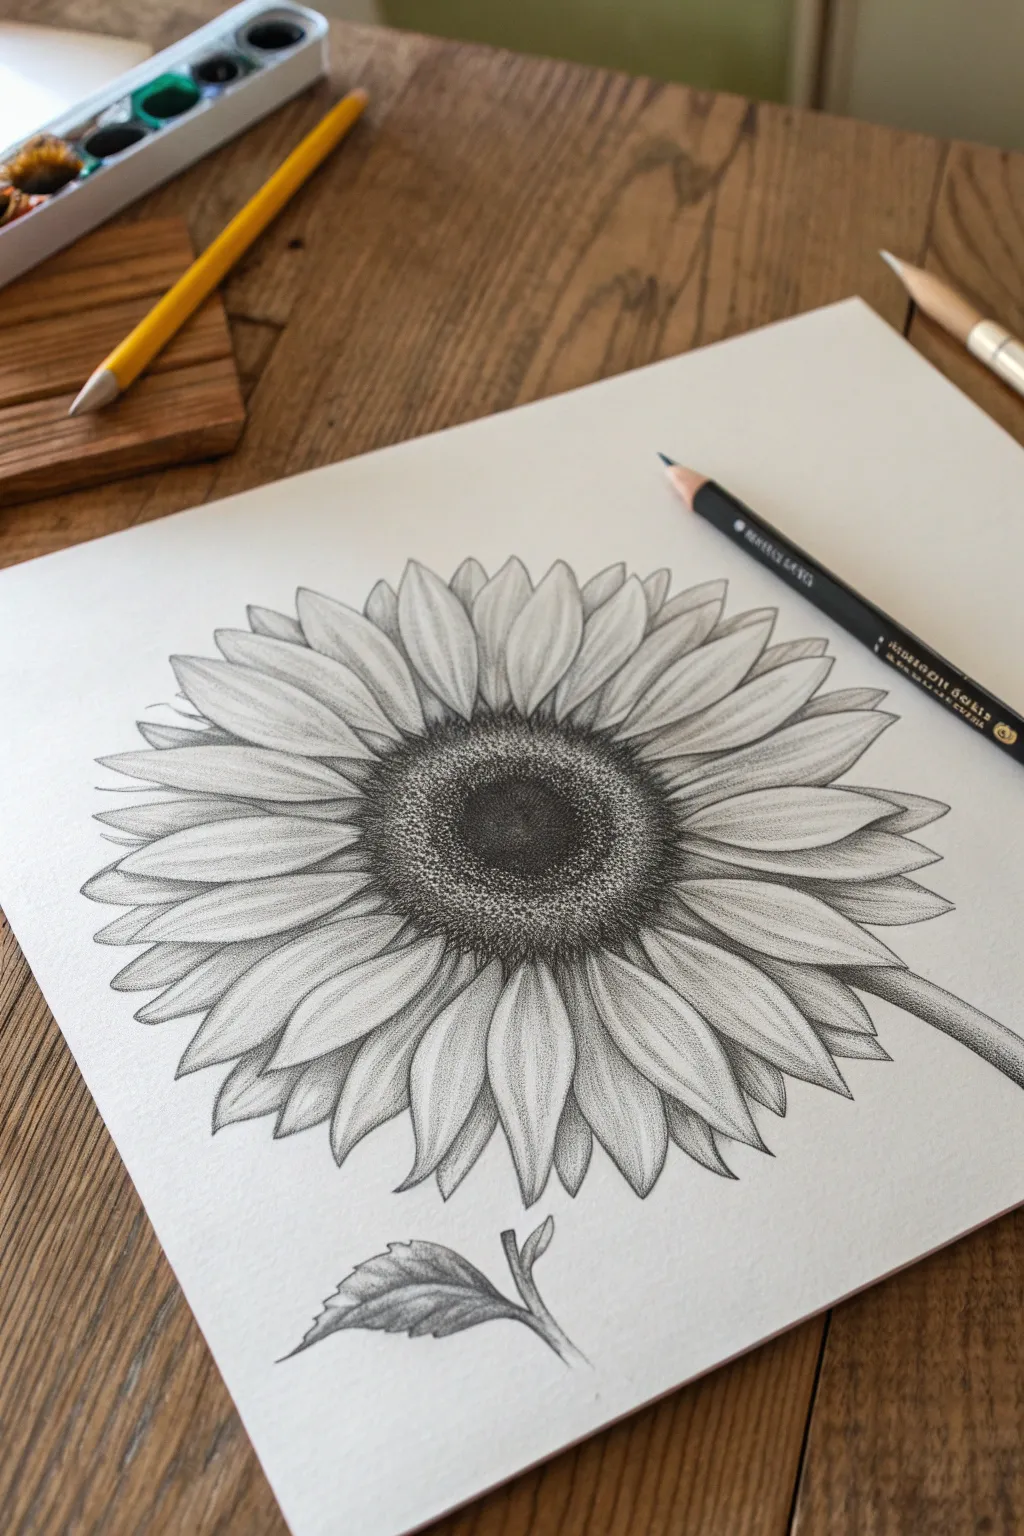
Sunflower Center Seed Texture
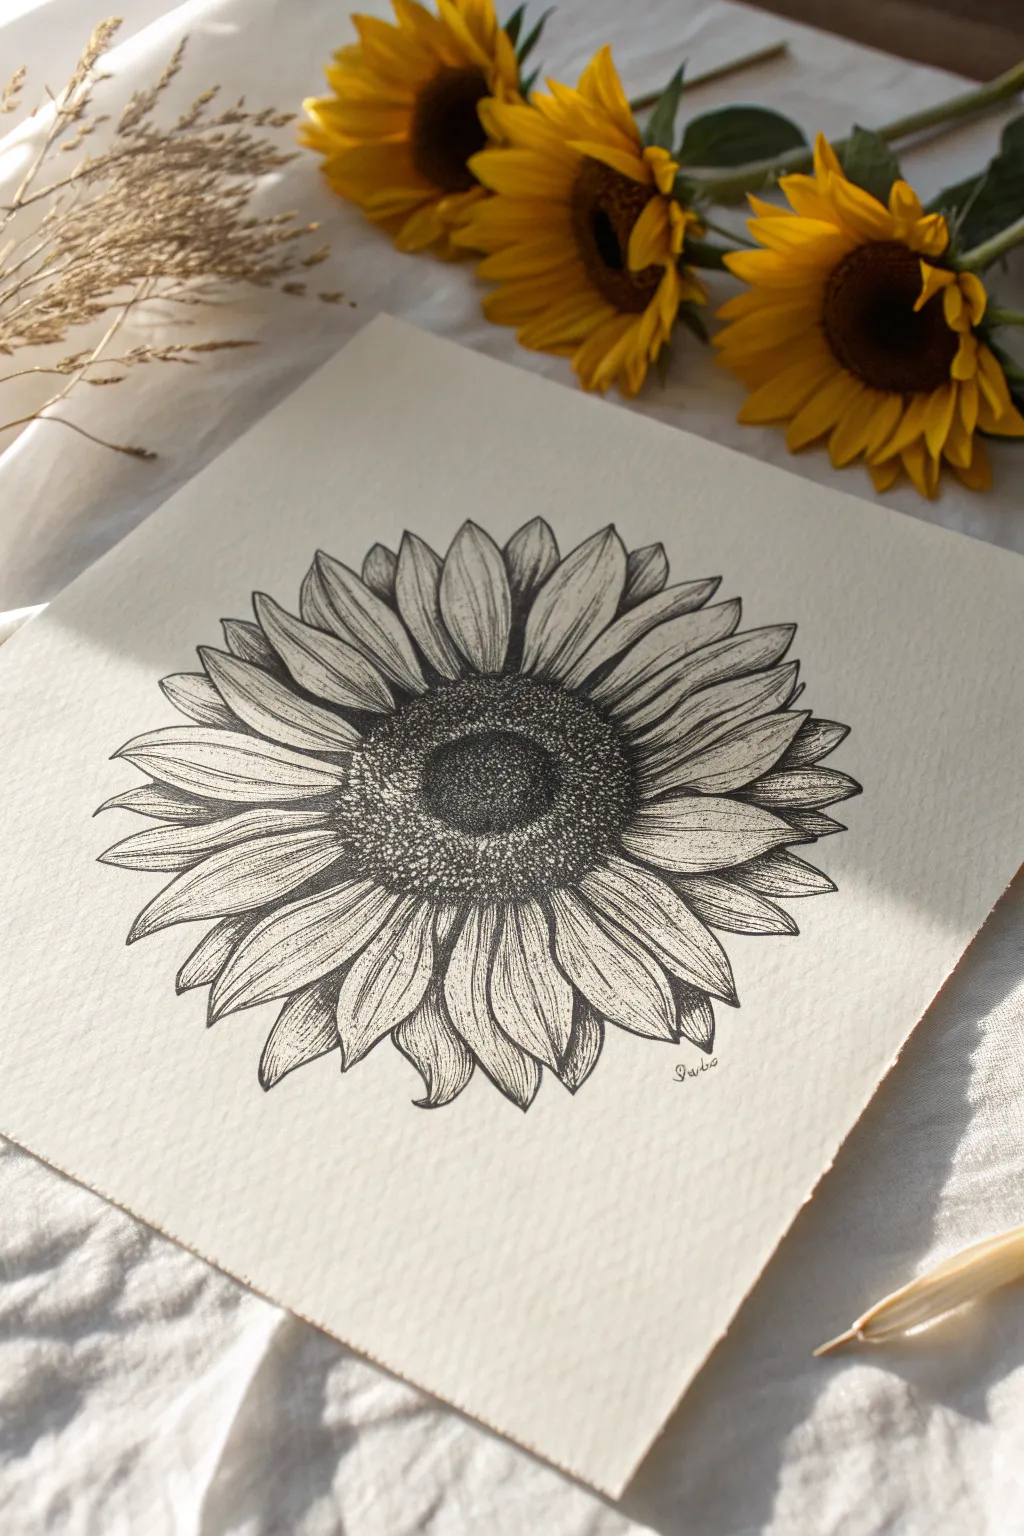
This tutorial guides you through creating a detailed black ink sunflower illustration, focusing heavily on texture and depth. By combining precise stippling for the center with flowing hatching lines for the petals, you’ll achieve a striking, high-contrast botanical drawing.
How-To Guide
Materials
- High-quality textured paper (e.g., cold press watercolor paper or mixed media vellum surface)
- Fine liner pens (sizes 005, 01, 03, and 05)
- Graphite pencil (HB or 2B)
- Kneaded eraser
- Ruler (optional, for centering)
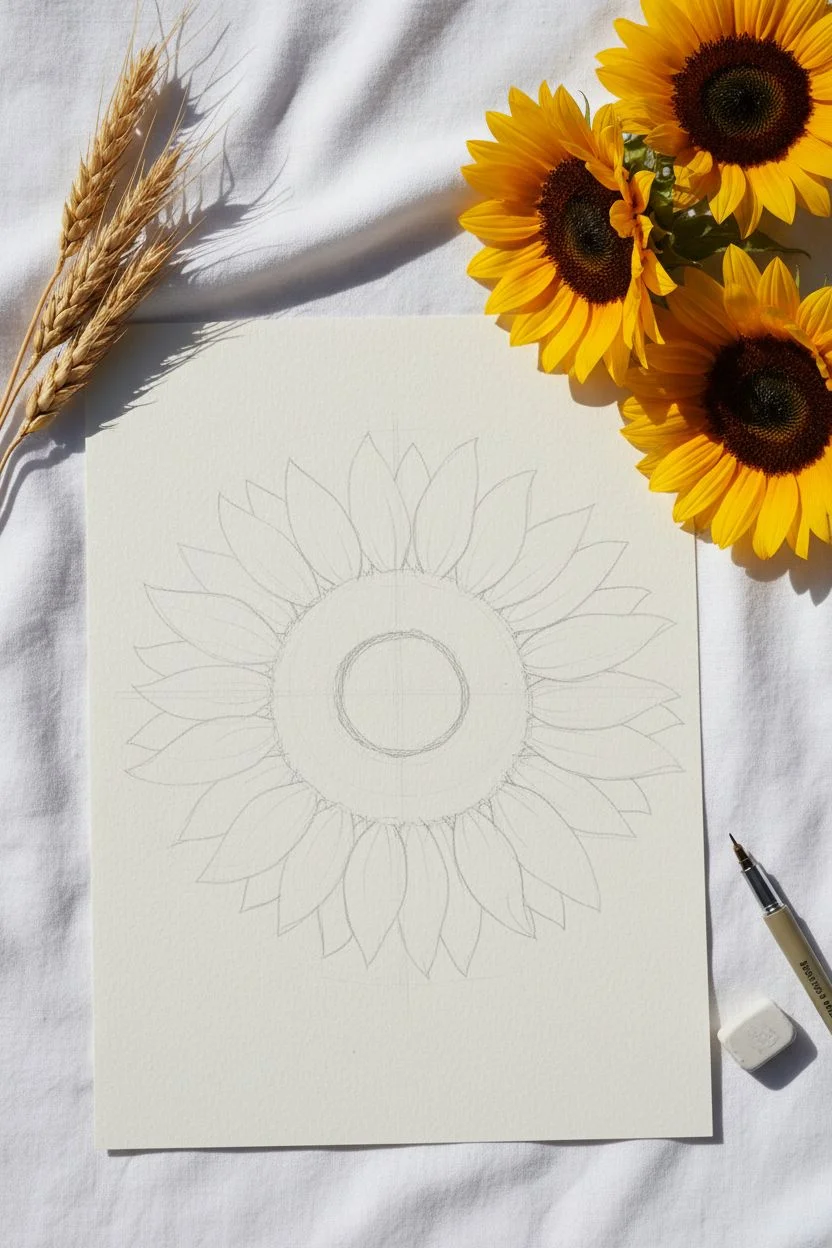
Step 1: Planning and Sketching
-
Establish the Core Shape:
Begin lightly with your pencil. Draw a medium-sized oval or circle in the center of your page to represent the sunflower’s seed disk. It doesn’t need to be perfectly round; a slight organic irregularity looks more natural. -
Map Out Inner and Outer Rings:
Within that central oval, sketch a smaller, rough circle slightly off-center. This creates the ‘eye’ where the darkest seeds reside. Then, sketch a faint guideline for the outer limit of the petals to ensure they fit on the page. -
Draft the Petals:
Sketch the primary layer of petals radiating from the center. Make them varied—some wide, some narrow, and some slightly twisted. Ensure the tips are pointed but soft. -
Add Secondary Petals:
Fill in the gaps between the main petals with a second layer of smaller petals peeking through from behind. This adds immediate volume to the flower. -
Refine the Outlines:
Gently refine your pencil lines. Look for any stiff shapes and soften them into more organic curves before you commit to ink. Once happy, lighten the sketch with your kneaded eraser until it’s barely visible.
Step 2: Inking the Seed Center
-
Outline the Seed Boundary:
Switch to an 01 fine liner. Very delicately trace the outer edge of the seed disk. Use a broken, dotted line rather than a solid one to suggest a fuzzy transition where the petals meet the seeds. -
Darkest Center Stippling:
Using an 03 or 05 pen, begin stippling (drawing dots) in the very center ‘eye’ you mapped out earlier. Pack the dots densely here to create a deep black core, representing the depression in the middle of the flower. -
Create the Gradient:
Move outward from the dark center using an 01 pen. Space your dots further apart as you move toward the petals. This gradient creates the illusion of a convex 3D shape. -
Texture the Edges:
Around the outer rim of the seed head, increase the density of dots slightly again using an 005 pen. This shadow helps separate the seed head from the petals visually. -
Review Contrast:
Step back and look at the center. If the transition from dark to light looks too abrupt, merge the zones with more fine dots using your smallest pen.
Uneven Stippling?
If your center texture looks patchy, don’t rush to fill it with big dots. Use your smallest pen (005) to fill gaps. It creates a smoother, more velvet-like gradient than large ink blobs.
Step 3: Inking the Petals
-
Outline Main Petals:
With an 01 or 03 pen, trace the outlines of the foreground petals. Keep your hand relaxed; a slightly shaky line can actually mimic the delicate texture of a flower petal better than a rigid smooth line. -
Outline Retracted Petals:
Trace the background petals with a finer 005 or 01 pen. Making these lines slightly thinner pushes them visually into the background. -
Add Central Veins:
Draw the central vein on each petal. Start from the seed base and flick the pen outward toward the tip, lifting the pen off the paper at the end of the stroke to taper the line. -
Hatching for Texture:
Using your 005 pen, add hatching lines alongside the central veins. These strokes should follow the curve of the petal, reinforcing its shape. -
Deepen Petal Shadows:
Add denser hatching or cross-hatching where petals overlap each other. The darkest shadows should be right at the base where the petals tuck under the seed head. -
Final Cleanup:
Allow the ink to dry completely (wait at least 15 minutes to prevent smearing). Gently erase any remaining pencil marks to leave a crisp, high-contrast image. -
Optional Signature:
Sign your work discreetly near a petal edge to balance the composition, just like in the reference image.
Pro Tip: Directional Strokes
Always stroke your petal lines outward from the center. This mimics the direction of growth and ensures the heaviest ink deposit is at the base, naturally creating depth.
Enjoy the meditative process of building up those textures dot by dot until your sunflower blooms on the page


Graphite Shading for Realistic Depth
Capture the delicate textures and dramatic contrast of nature with this graphite sunflower study. By focusing on smooth gradients and seed-like stippling, you will create a drawing that pops off the page with realistic depth.
Step-by-Step
Materials
- Smooth bristol or drawing paper (heavyweight)
- Graphite pencils (HB, 2B, 4B, 6B)
- Mechanical pencil (for fine details)
- Kneaded eraser
- Blending stump or tortillon
- Pencil sharpener
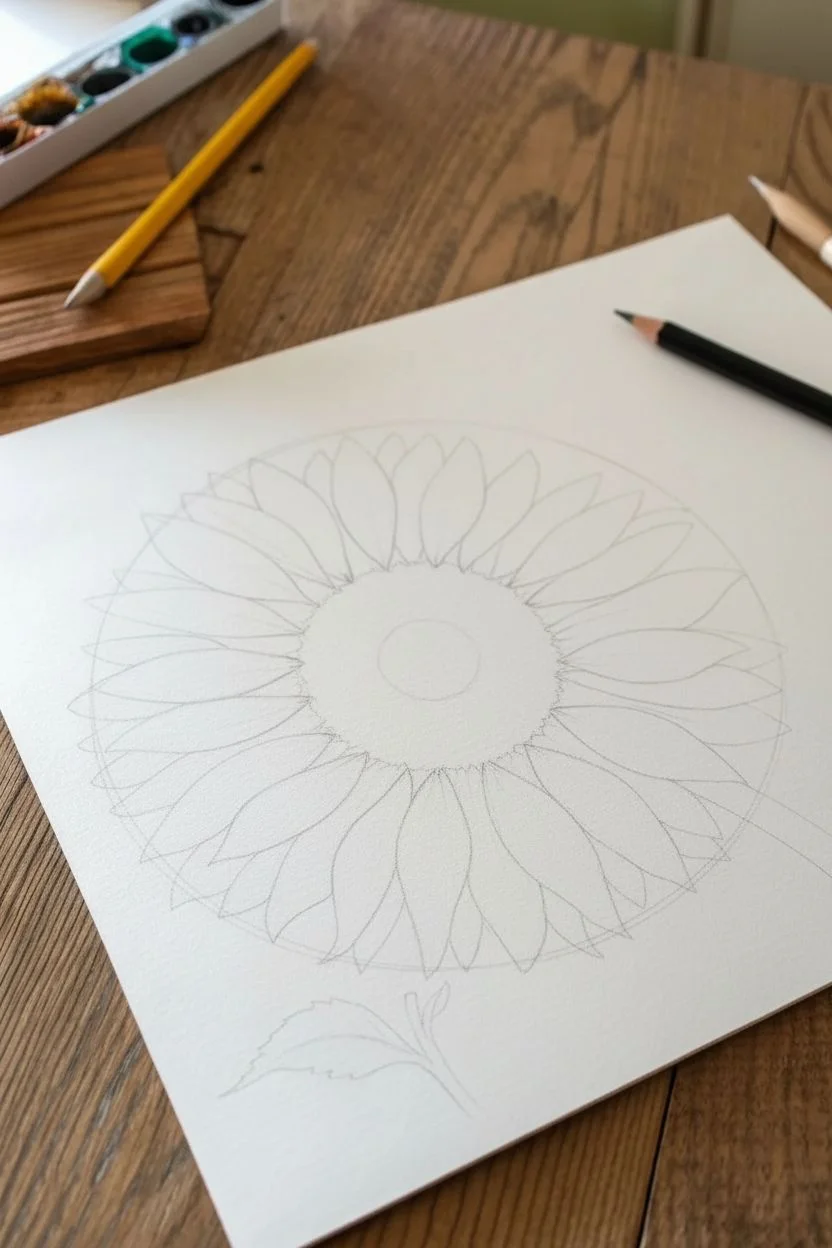
Step 1: Structural Outline
-
Center Placement:
Begin by lightly sketching a large circle in the middle of your paper. Inside this, draw a smaller concentric circle about one-third the size of the larger one; this will define the seed head. -
Petal Guidelines:
Sketch radiating lines from the center circle out to the edge of the larger circle. These don’t need to be perfect, just guides to verify the angle and flow of your petals. -
Petal Shapes:
Using an HB pencil, draw the individual petal shapes. Make them pointed at the tips and slightly tapered at the base. Ensure they overlap naturally—some in the front, some peeking from behind. -
Stem and Leaf:
Add a thin stem extending from the bottom right of the flower head. Below the flower, sketched separately towards the bottom, add a single leaf shape with jagged, serrated edges.
Step 2: Defining the Center
-
Core Darkness:
Switch to a 4B or 6B pencil for the very center of the flower. Use a stippling motion—tapping the pencil to create tiny dots—to build up a dense, dark value in the middle “bullseye” area. -
Seed Transition:
Moving outward from that dark center, transition your texture. Instead of just dots, start making tiny, tight circles or ‘u’ shapes to suggest individual seeds. Use a 2B pencil here to slightly lighten the value. -
Outer Ring Texture:
For the outermost ring of the center texture (closest to the petals), keep the marks distinct and lighter. I like to let the paper white show through more here to create a fuzzy, pollen-heavy look.
Smudge Control
Graphite travels easily. To keep your background pristine white, place a spare sheet of scrap paper under your drawing hand. This acts as a shield, preventing oils and friction from smearing your hard work.
Step 3: Shading the Petals
-
Base Layer:
With an HB pencil, lightly shade the entirety of the petals, leaving only the very tips white for highlights. Keep your pencil strokes following the direction of the petal growth (center to tip). -
Deepening Shadows:
Identify where petals overlap. Use a 2B pencil to darken the areas *underneath* the top petals. This cast shadow creates immediate separation and depth. -
Center Veins:
Draw faint lines running down the center of each petal to suggest the central vein. Shade slightly darker on either side of this vein to make the petal look concave or cupped. -
Texture Striations:
Using a sharp mechanical pencil or a freshly sharpened HB, draw fine, flicking lines from the base of the petal upwards. These striations mimic the velvety texture of the flower. -
Contrast Check:
Go back in with your 4B pencil right where the petals meet the center seed head. Deepen those crevices significantly to make the center look recessed.
Pro Tip: Pencil Direction
Never shade ‘against the grain.’ Always pull your pencil strokes from the base of the petal outward toward the tip. This directional shading mimics the plant’s actual fiber structure for better realism.
Step 4: Refining Elements
-
Leaf Detailing:
Shade the bottom leaf. Make one side of the central vein significantly darker than the other to show lighting direction. Add branching veins that extend to the jagged tips. -
Stem Volume:
Shade the stem using a cylinder technique—darker on the edges and lighter in the middle to create a rounded 3D form. -
Highlight Lifting:
Take your kneaded eraser and mold it into a fine point. Gently dab or stroke the centers of the petals and the tips of the leaf to lift graphite, sharpening your highlights. -
Final Polish:
Use a blending stump sparingly to smooth out any shading on the petals that looks too scratchy, but keep the seed texture crisp and unblended.
Step back and admire the rich contrast you’ve created between the intricate seeds and the smooth, flowing petals.
BRUSH GUIDE
The Right Brush for Every Stroke
From clean lines to bold texture — master brush choice, stroke control, and essential techniques.
Explore the Full Guide
Bold Ink Outline Sunflower Sketch
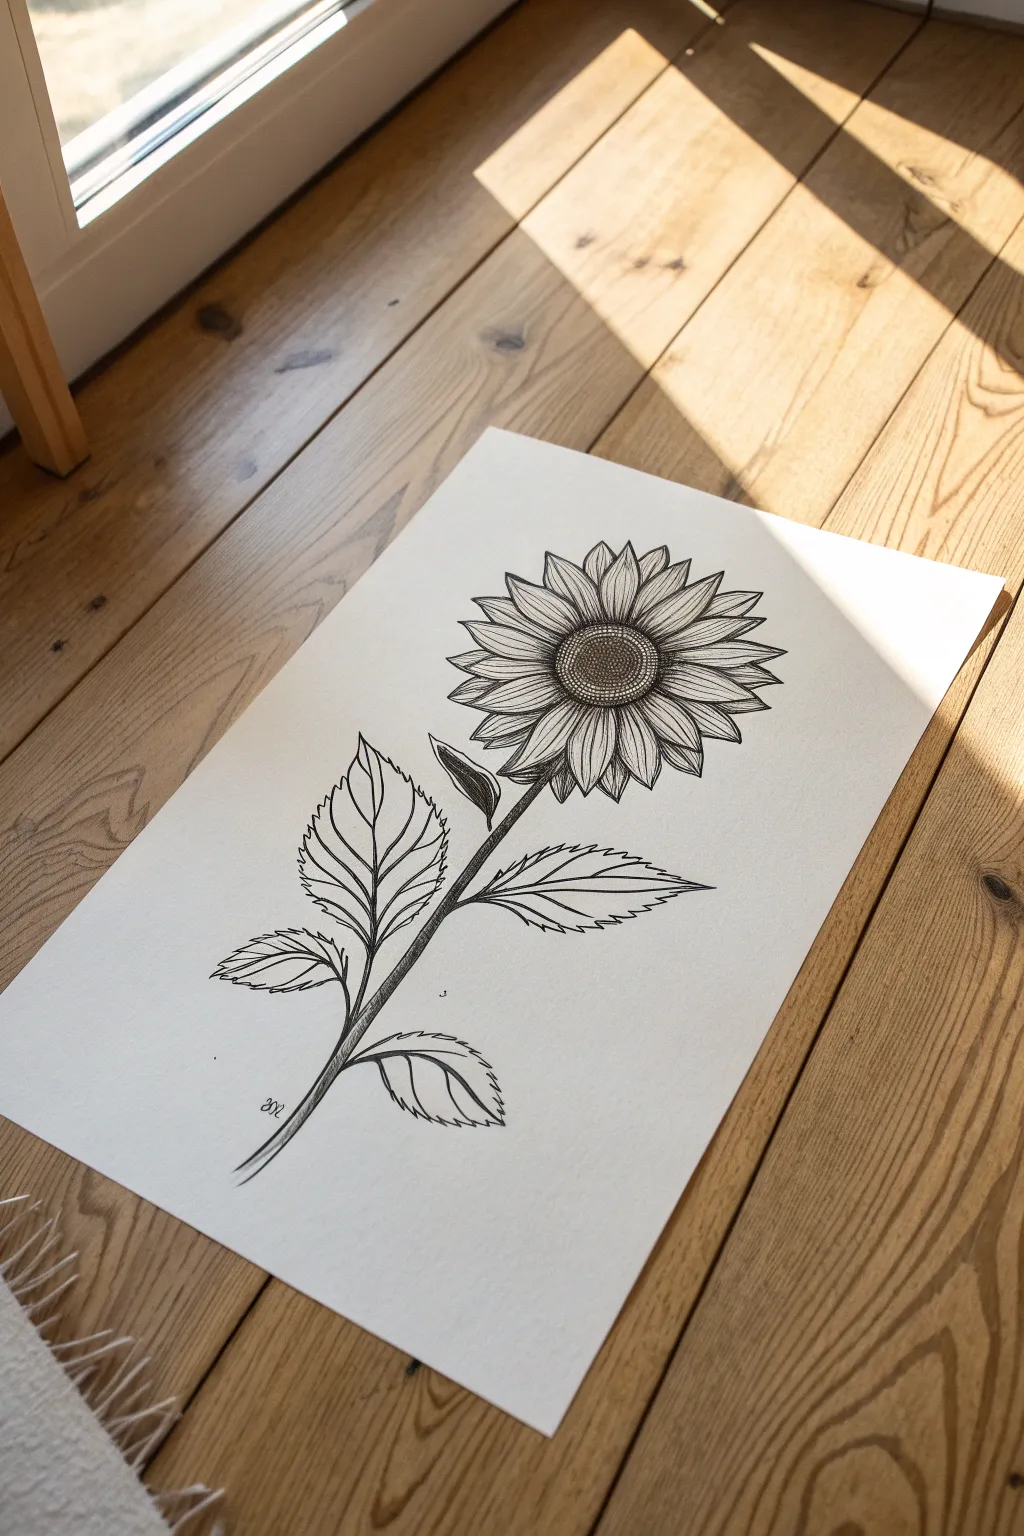
Capture the rustic beauty of a sunflower with this bold ink illustration that focuses on clean lines and textural shading. The high-contrast black and white style gives the piece a timeless, botanical print feel that looks stunning on a minimalist wall.
Step-by-Step Tutorial
Materials
- Smooth white heavyweight drawing paper (A3 or A4)
- HB or 2B graphite pencil (for sketching)
- Kneadable eraser
- Fine liner pen (0.1mm) for details
- Medium liner pen (0.3mm or 0.5mm) for outlines
- Thick marker or brush pen (0.8mm or 1.0mm) for stem shading
- Ruler (optional)
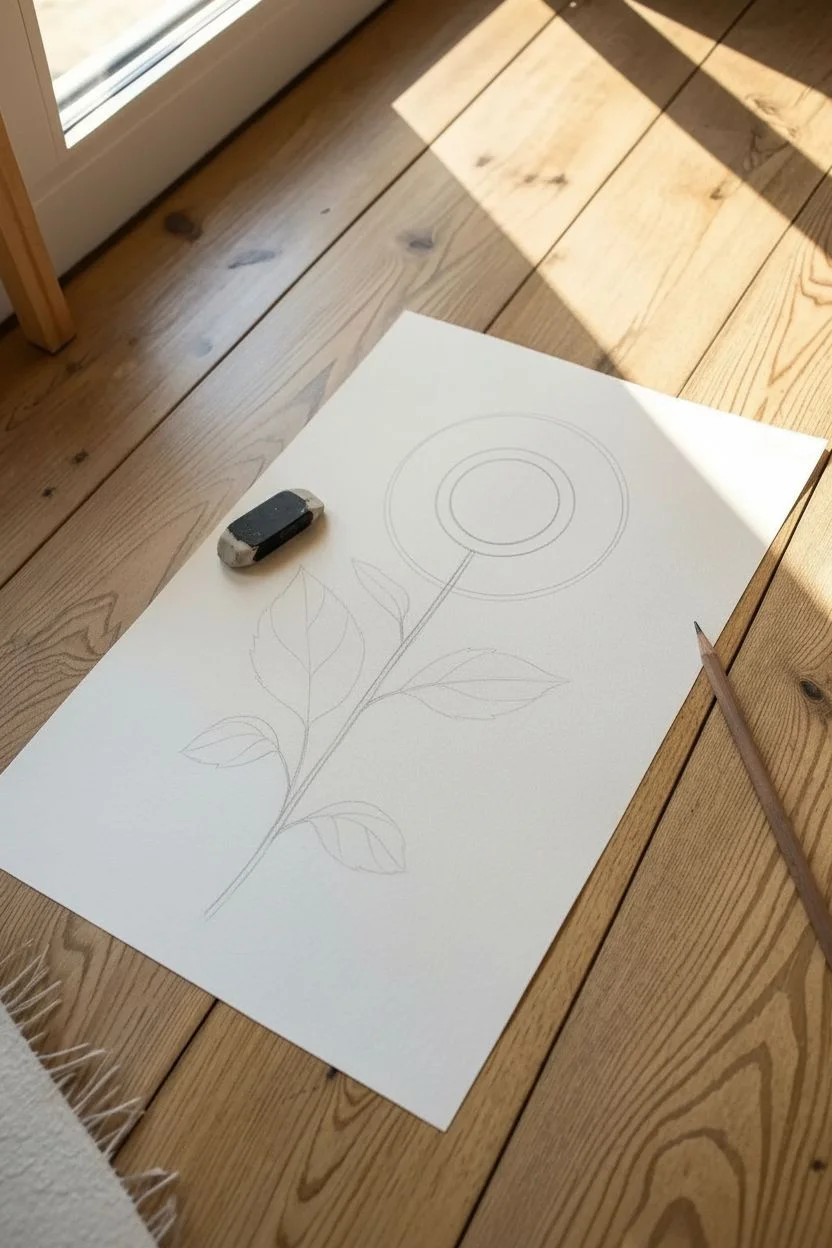
Step 1: Pencil Structure
-
Establish the stem line:
Start by lightly drawing a slightly curved vertical line down the center of your page. This will act as the spine of the flower. Don’t make it perfectly straight; a subtle curve adds organic realism. -
Mark the flower head:
At the top of your stem line, draw a medium-sized circle for the seed center. Around this, sketch a larger, concentric circle lightly to define the outer limit of the petals. -
Rough in leaf placements:
Along the stem, sketch the central veins for four or five leaves. Alternate their placement—some pointing left, some right. Use simple oval shapes to block out the general size of each leaf before detailing.
Ink Smearing?
If you are left-handed or working quickly, place a scrap piece of paper under your drawing hand. This acts as a shield, preventing oils from your skin and friction from smudging fresh ink.
Step 2: Inking the Flower Head
-
Draw the center seeds:
Switch to your 0.1mm fine liner. Fill the center circle with tiny, tight stippling (dots) or very small circles. Make them denser at the outer edge of the center circle to create a sense of depth and shadow. -
Outline the front petals:
Using a 0.3mm pen, draw the first layer of petals that radiates directly from the center. These should be roughly tear-drop shaped but with slightly pointed, irregular tips. Make sure they don’t all look identical. -
Add the back petals:
Fill in the gaps between your front petals with a second row of petals peaking out from behind. These can be slightly smaller or just the visible tips. -
Texture the petals:
With the 0.1mm pen, draw fine lines starting from the base of each petal flicking outward towards the tip. Keep these lines light to suggest the vein texture without coloring the petal in completely.
Add Vintage Flair
Once the ink is totally waterproof/dry, apply a light wash of watered-down coffee or tea over the paper. This gives the drawing an aged, antique botanical manuscript appearance.
Step 3: Leaves and Stem
-
Outline the leaves:
Using the 0.3mm pen, go over your leaf sketches. Give the edges a serrated, ‘saw-tooth’ look rather than a smooth line, as sunflower leaves are naturally jagged. -
Draw the leaf veins:
Draw a strong central vein down each leaf, then branch off smaller veins towards the jagged edges. I find that offsetting these side veins slightly, rather than having them meet perfectly at the center, looks more natural. -
Define the stem:
Thicken the stem line using a 0.5mm or 0.8mm pen. The stem should be thick enough to support the heavy flower head. It connects to the flower base with a slightly wider, cup-like shape. -
Add stem shading:
Use your thickest pen or a brush pen to add heavy shadow on one side of the stem (usually the left or right, consistent with your light source). Use vertical hatching lines to blend this dark edge into the lighter part of the stem.
Step 4: Final Touches
-
Strengthen contrast:
Look at the areas where petals overlap or where leaves meet the stem. Use the 0.3mm pen to darken these ‘nooks and crannies’ to add localized contrast. -
Add a small bud leaf:
Just under the flower head, you can add a small, dark leaf hugging the stem, almost fully filled in with ink to balance the composition. -
Erase pencil guides:
Wait at least 10-15 minutes to ensure the ink is bone dry. Gently erase all visible pencil lines with your kneadable eraser. -
Sign and date:
Add your initials and the year in a small, stylized font near the bottom of the stem to complete the artwork.
Frame your botanical sketch in a simple wood frame to complement the organic lines you have created
Sunflower Bouquet Cluster
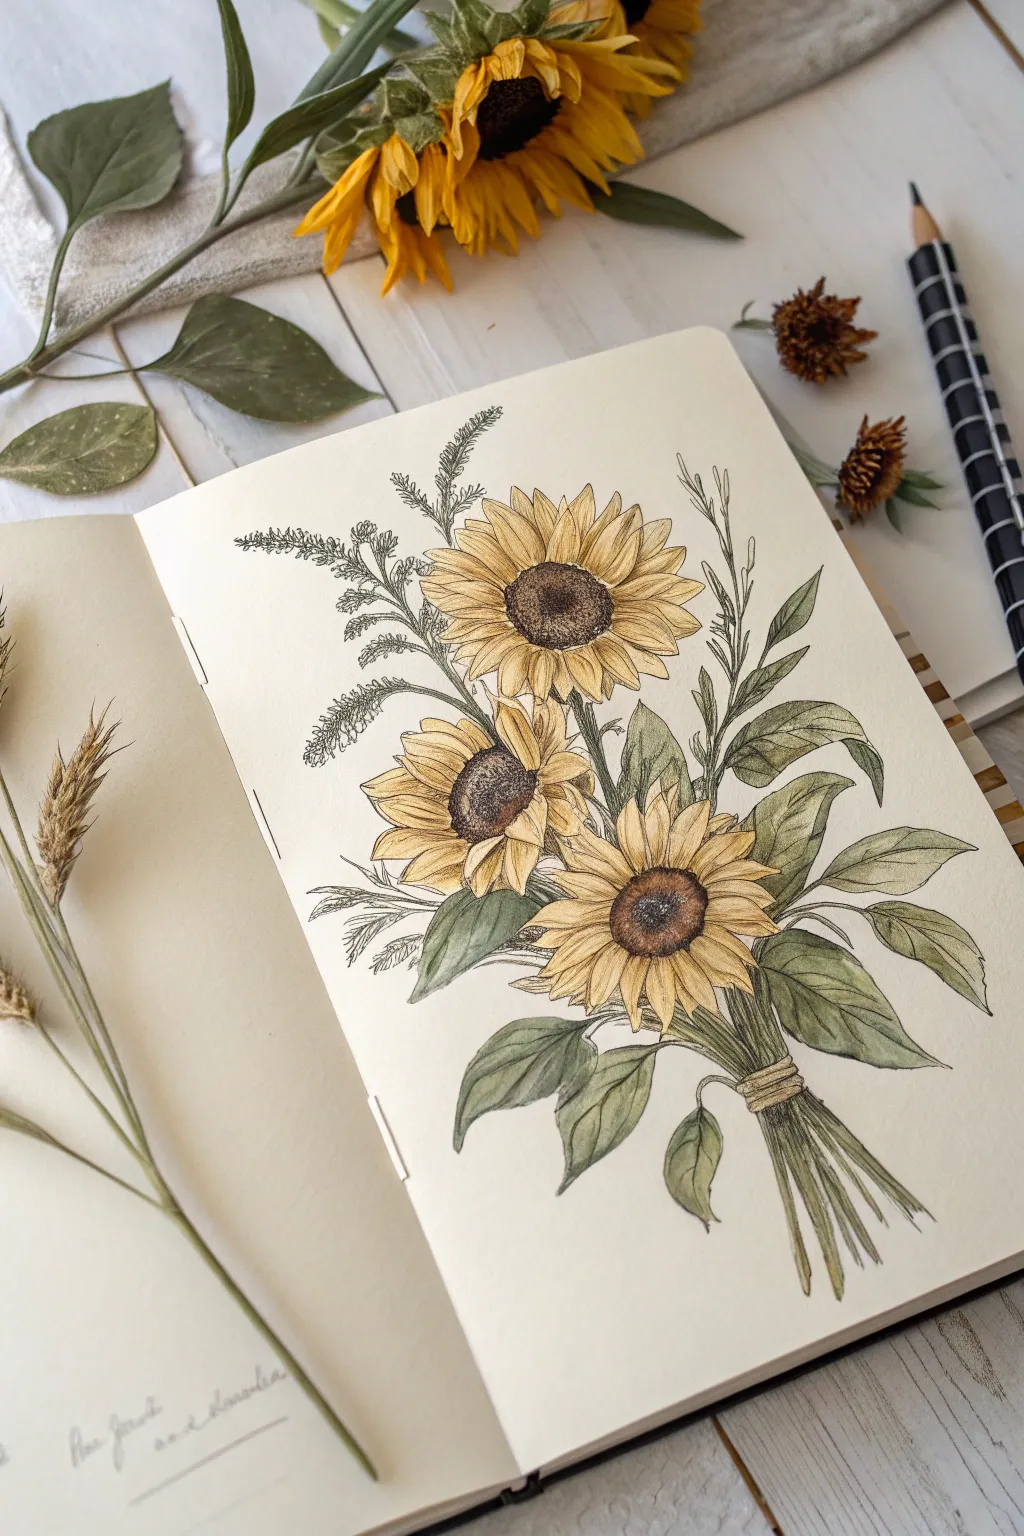
This elegant floral study focuses on a balanced composition of three sunflowers bundled with lush greenery and delicate filler textures. The result is a soft, illustrative piece that looks beautiful in a cream-colored sketchbook.
Detailed Instructions
Materials
- Good quality sketchbook (heavyweight paper preferred, cream or off-white)
- H or HB pencil for initial sketching
- Fine liner pens (0.1mm, 0.3mm, and 0.5mm, black or sepia)
- Colored pencils (yellow ochre, burnt sienna, olive green, dark green, cream/white)
- Kneaded eraser
- Optional: Watercolor or alcohol markers for base layers
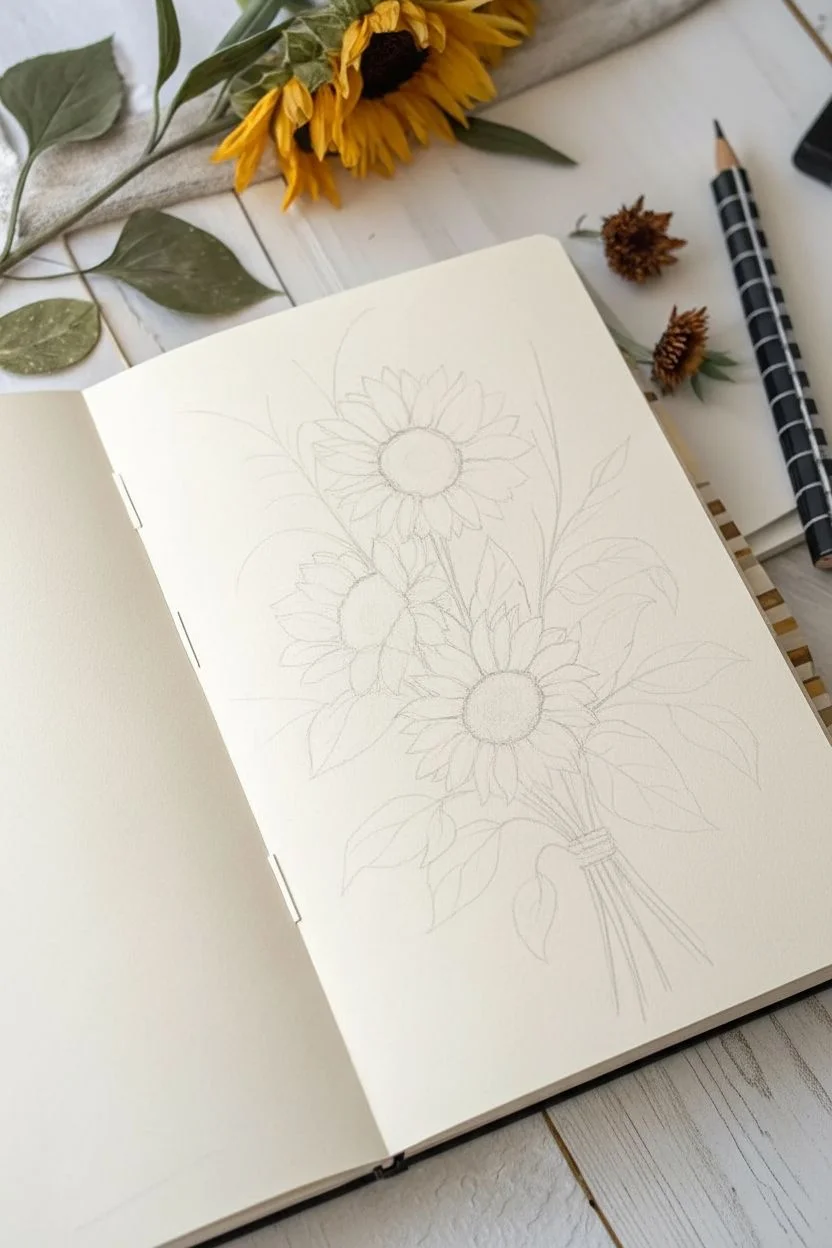
Step 1: Conceptual Layout
-
Establish the centers:
Begin by lightly sketching three circles to represent the centers of your sunflowers. Place the largest one near the top center and angle the other two slightly below it to forming a loose triangle. -
Map the petals:
Around each center circle, sketch a larger, rough circle to define the outer limit of the petals. This ensures your flowers stay proportional and don’t grow too unruly. -
Indicate stem flow:
Draw faint, curved lines extending downwards from the flower heads. Gather them at a single point near the bottom of the page where the bouquet will be tied. -
Block in foliage:
Roughly sketch the shapes of the leaves. Place larger, broad leaves near the base and mid-section of the stems, and reserve space for tall, wispy filler stalks reaching up behind the top sunflower.
Step 2: Detailed Ink Work
-
Define the centers:
Using a 0.1mm fine liner, stipple the center of each sunflower. Use denser dots near the edges of the center circle and fewer in the middle to create a 3D domed effect. -
Draft the petals:
With a 0.3mm pen, outline the petals. Make them slightly irregular—some overlapping, some curling slightly at the tips. The petals shouldn’t be perfect elongated ovals; give them character. -
Add petal texture:
Drawing from the base of each petal outward, add two or three very fine lines to suggest veins and curvature. I find that lifting the pen quickly at the end of the stroke keeps these lines looking natural. -
Ink the filler plants:
For the wispy plants behind the top flower, use short, feathery strokes or tiny loops to simulate texture without drawing every individual seed head. -
Detail the leaves:
Outline your leaves with a slightly bolder line (0.3mm or 0.5mm). Add center veins, then branch out with smaller veins. Keep the leaf edges slightly serrated or wavy rather than perfectly smooth. -
Draw the binding:
Where the stems converge, draw a small band or coiled rope to gather the bouquet. Draw the stem ends sticking out below this band, cut at slightly different lengths.
Ink Confidence
Don’t stress about perfect lines. Slight wobbles in your ink work actually make organic subjects like flower petals and leaves look more realistic and natural.
Step 3: Adding Color & Depth
-
Erase guidelines:
Wait for the ink to dry completely, then gently remove all pencil marks with your kneaded eraser to prepare for color. -
Base layer for petals:
Lightly shade the petals with a cream or pale yellow pencil. Apply this evenly as a foundation. -
Deepen the yellows:
Using a yellow ochre pencil, shade the base of the petals near the brown center. Fade this color out as you move toward the tips. -
Darken the centers:
Enhance the stippled centers with a burnt sienna or dark brown pencil. Press harder around the rim of the center disk to create a shadow where the petals emerge. -
Color the greenery:
Start with a light olive green for the leaves and stems. Shade the entire leaf surface lightly. -
Add leafy shadows:
Take a darker green pencil and shade one side of the central leaf vein and the areas where leaves overlap or tuck behind the flowers. This contrast makes the bouquet pop. -
Shade the filler stems:
Use a very sharp dull green or grey-brown pencil to trace over the wispy filler plants, giving them just a hint of color without overpowering the ink. -
Highlighting:
Finally, use a white pencil or a white gel pen to add tiny highlights on the upper curves of the leaves and the very tips of the petals to catch the light.
Vintage Vibe
For an antique look, wash the entire page with strong tea or watered-down coffee and let it dry completely before you start your initial sketch.
Close your sketchbook knowing you’ve captured a timeless botanical cluster.

PENCIL GUIDE
Understanding Pencil Grades from H to B
From first sketch to finished drawing — learn pencil grades, line control, and shading techniques.
Explore the Full Guide
Sunflower Field Perspective Sketch
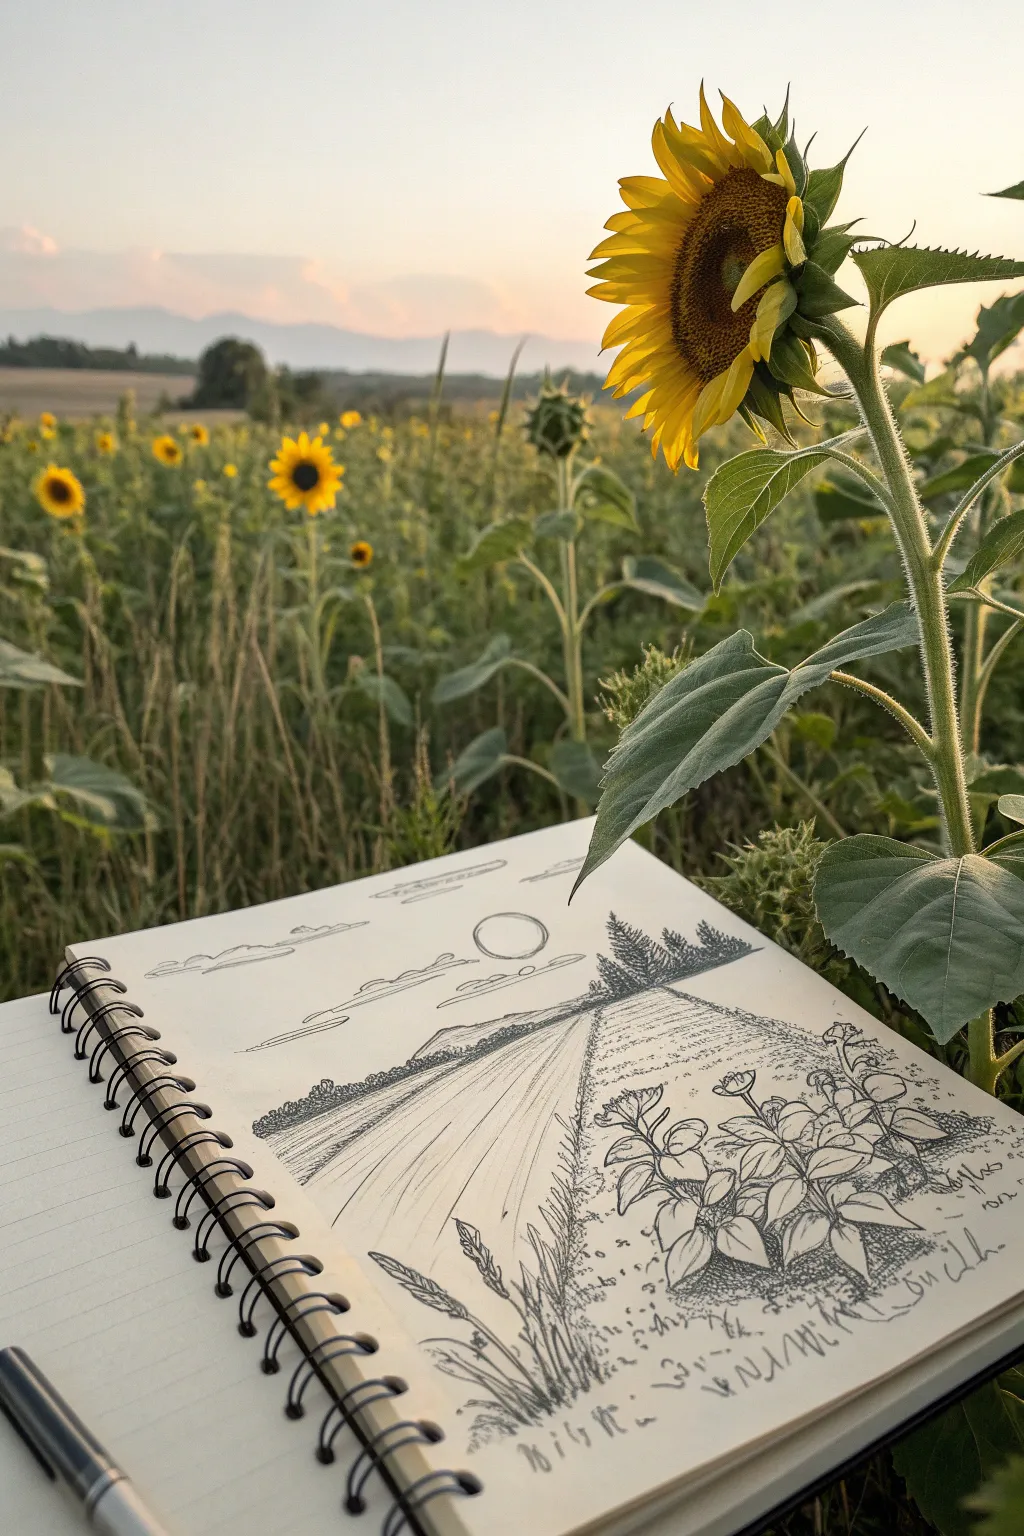
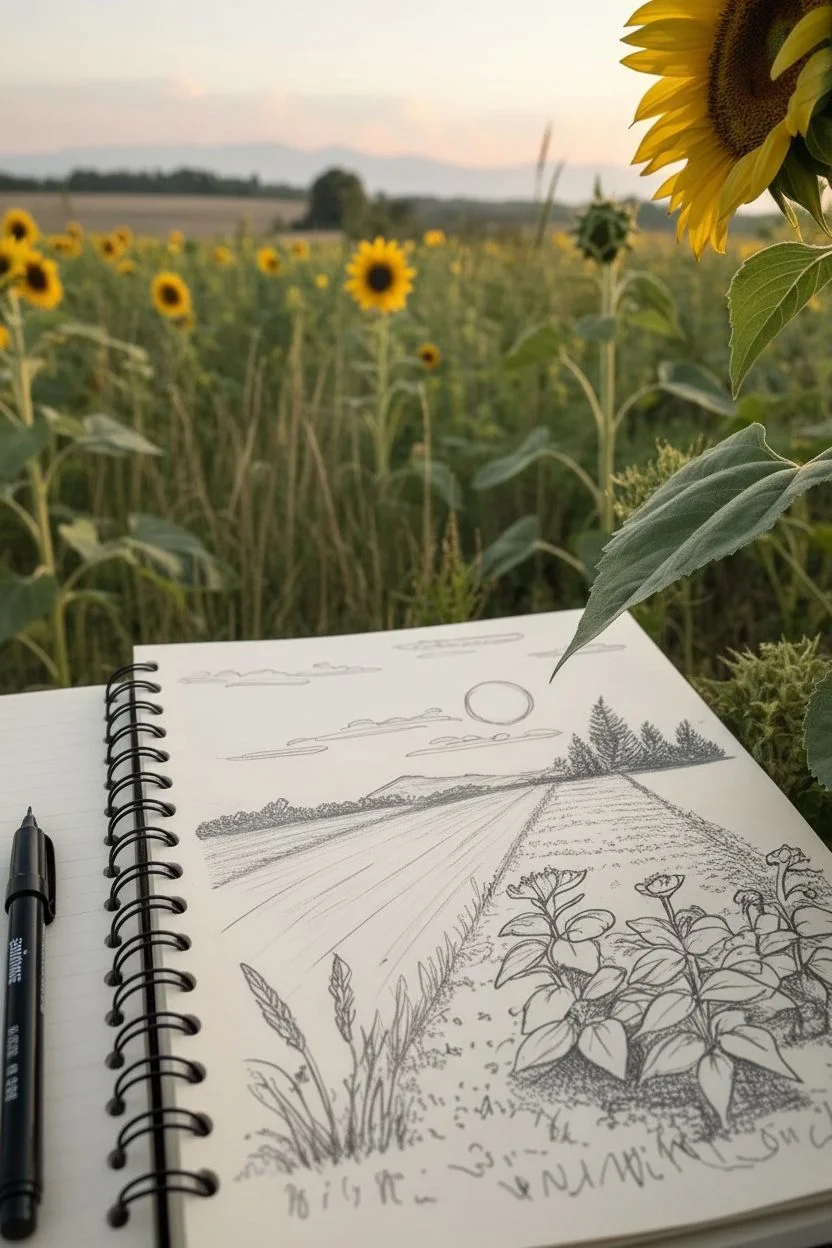
Capture the serene beauty of a sunflower field stretching toward the horizon with this detailed pen sketch. This project uses simple hatching techniques and perspective lines to create depth, making it perfect for capturing rural landscapes on the go.
How-To Guide
Materials
- Sketchbook (smooth or mixed media paper recommended)
- Black fineliner pens (sizes 0.1, 0.3, and 0.5)
- HB Pencil
- Kneaded eraser
- Ruler (optional)
Step 1: Setting the Scene
-
Establish the horizon line:
Begin by lightly sketching a horizontal line with your pencil across the upper third of your page. This will separate the sky from the land and serve as your anchor for the perspective. -
Draft the perspective road:
From a vanishing point near the center of your horizon line, draw two diagonal lines spreading outward toward the bottom corners of the page. This creates the main road leading into the distance. -
Sketch the distant elements:
Lightly pencil in the shape of a low mountain range just above the horizon on the left. On the right side of the road, sketch a small cluster of triangular pine trees that sit near the vanishing point. -
Mark the sun and clouds:
Draw a clean circle floating above the mountain for the sun. Add a few long, thin horizontal slivers to represent floating clouds, keeping them simple and linear. -
Place foreground sunflowers:
In the bottom right corner, pencil in the rough shapes of three or four large sunflower heads and their broad leaves. These should be much larger than anything in the background to emphasize depth.
Step 2: Inking the Landscape
-
Outline the distant trees:
Switch to your 0.3 pen. Ink the cluster of pine trees near the horizon using short, jagged vertical strokes to suggest needles and texture. Make the trees darkest at the bottom. -
Detail the mountain range:
Use the 0.1 pen to outline the mountains. Add very sweeping, horizontal hatching lines along the base of the mountains to give them shadow and form without making them too heavy. -
Define the sky:
Ink the sun circle carefully. For the clouds, use broken, horizontal lines. Shade the underside of the clouds with faint hatching to give them a bit of volume. -
Create the road texture:
Using the 0.1 pen, draw long, continuous flowing lines that follow the direction of the road. Don’t fill the whole space; leave gaps of white paper to suggest bright sunlight hitting the dirt path. -
Add field texture:
On the left side of the road, use dense, short scumbling or stippling motions to suggest a crop field or grassy verge. I like to make this darker near the horizon and lighter as it comes forward.
Depth Trick
Use thinner pens (0.05 or 0.1) for background objects and thicker pens (0.5 or 0.8) for the foreground. This line weight variation instantly creates distance.
Step 3: Foreground and Finishing Touches
-
Ink the foreground flowers:
Use the 0.5 pen for the foreground sunflowers to make them pop. Outline the petals and centers clearly. Draw the broad leaves with confident curves. -
Texture the leaves:
Add veins to the sunflower leaves using the 0.1 pen. Use cross-hatching to darken the areas underneath the leaves and petals, creating strong contrast. -
Add foreground grasses:
Sketch tall, wild blades of grass and wheat stalks rising up in the bottom left corner using quick, upward flicks of the pen. -
Ground the sketch:
Add some stippling (dots) and scribbles around the base of the sunflowers and grass to ground them, so they don’t look like they are floating. -
Erase guidelines:
Once the ink is completely dry—give it a full minute—gently erase all your underlying pencil sketches with the kneaded eraser to leave a crisp black-and-white drawing. -
Add handwriting (optional):
If you wish to match the reference style, scrawl some loose notes or a date at the bottom right corner to give it that authentic ‘field study’ vibe.
Golden Hour
Use a yellow watercolor wash or marker over just the sunflower petals and the sun after inking for a specific pop of color that mimics the sunset.
Take a moment to admire how simple lines created a vast sense of space on your page
Sunflower With a Tiny Pollinator
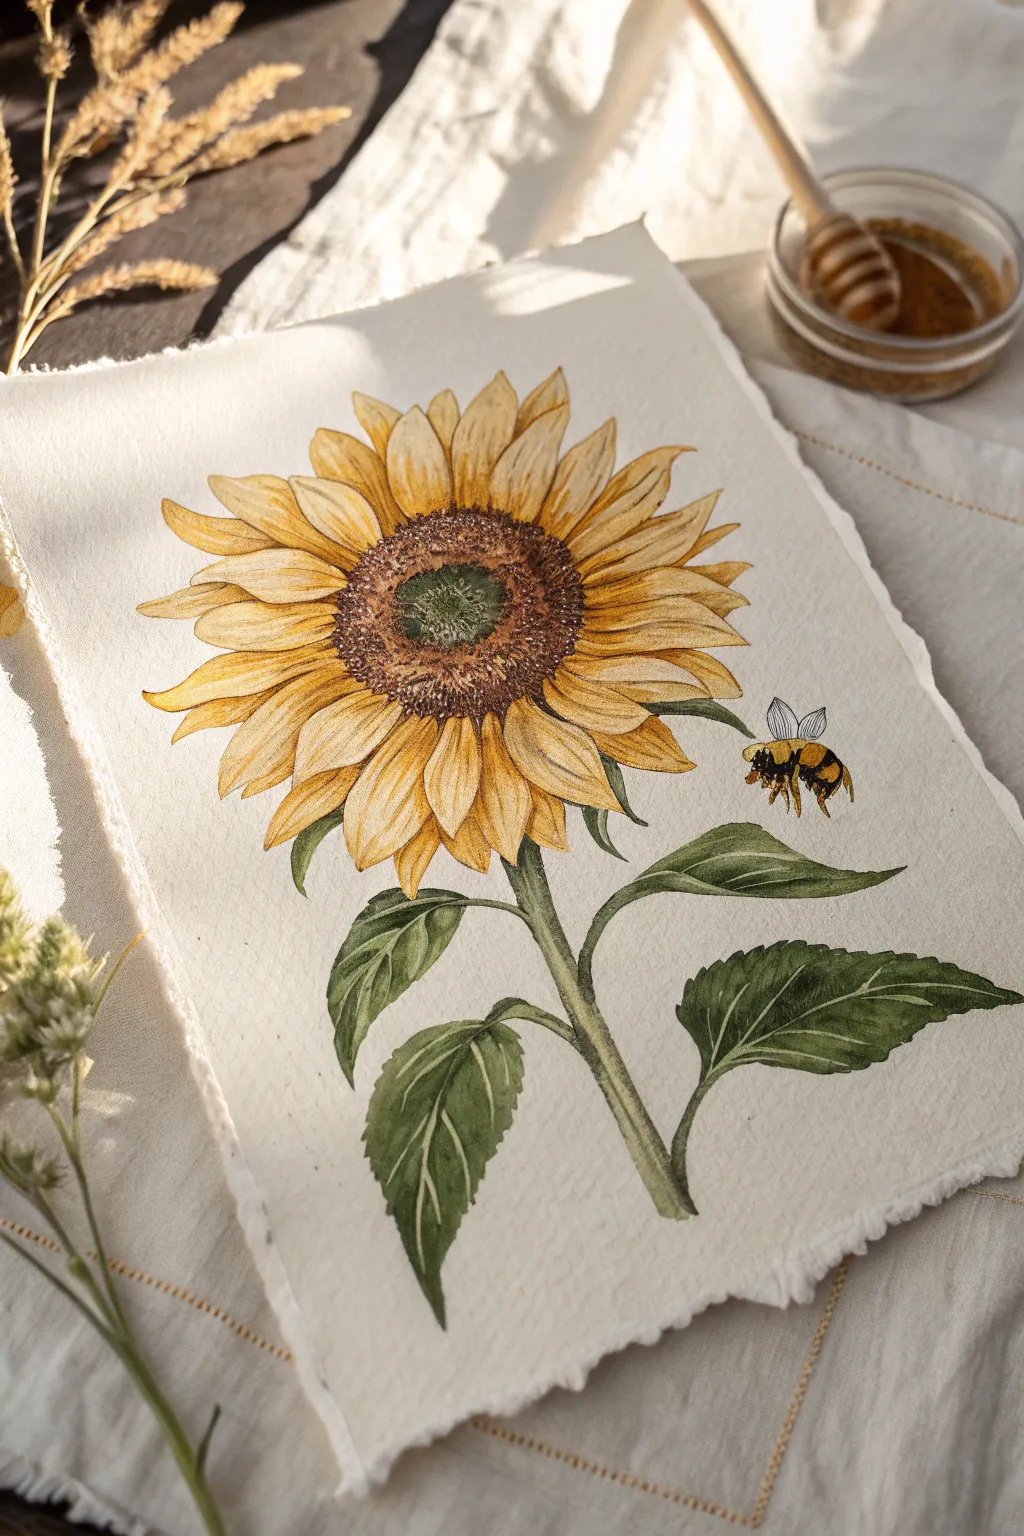
This project captures the delicate beauty of a sunflower in full bloom accompanied by a fuzzy little bumblebee friend. Using watercolor and ink on textured rag paper, you’ll create a vintage-inspired botanical illustration that feels warm and timeless.
Detailed Instructions
Materials
- Cold press watercolor paper (preferably rough/rag edge)
- Watercolor paints (Yellow Ochre, Cadmium Yellow, Burnt Sienna, Sap Green, Ivory Black)
- Fine liner waterproof pen (0.1 and 0.3 sizes)
- Round watercolor brushes (sizes 2, 4, and 6)
- Graphite pencil (HB) and kneaded eraser
- masking fluid (optional, for bee wings)
- Jar of clean water
- Paper towels
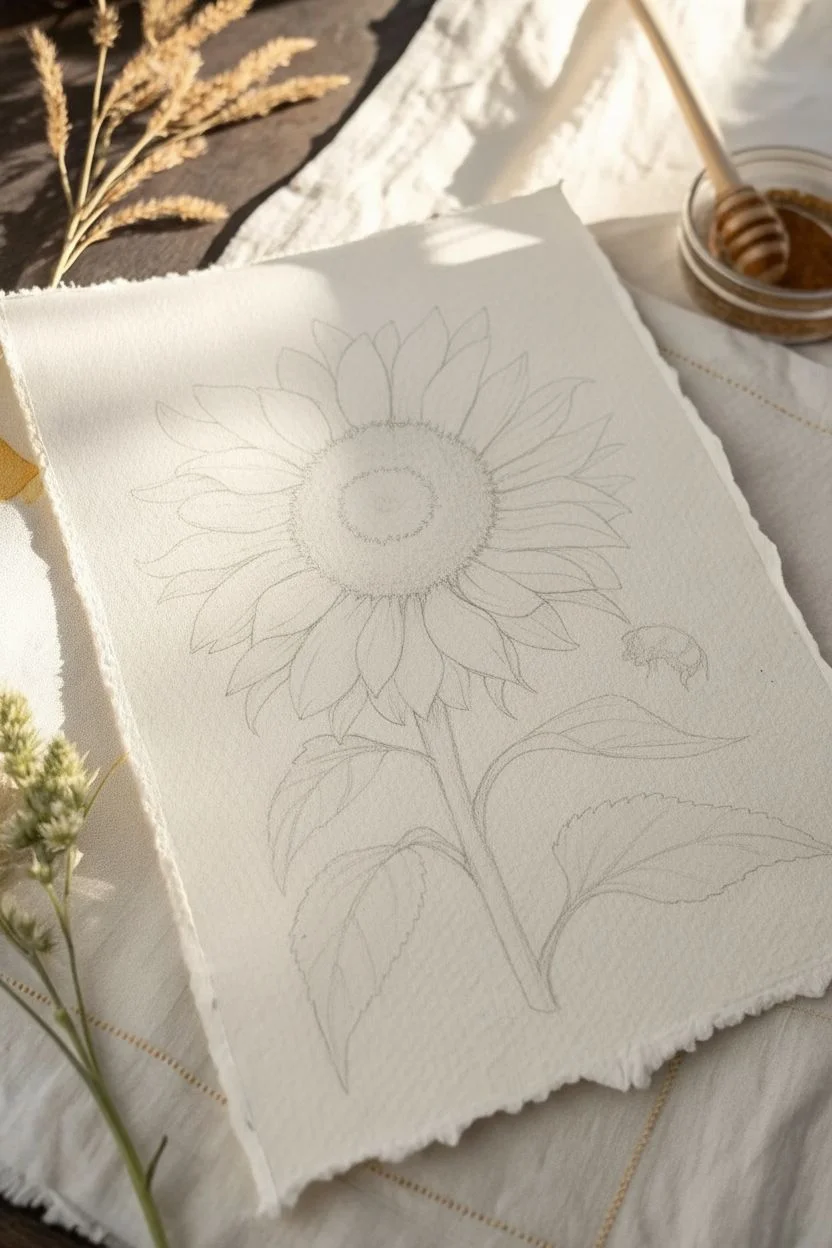
Step 1: Sketching the Composition
-
Map the center:
Begin by lightly sketching a large oval slightly off-center on your paper. Inside this, draw a smaller, rougher circle for the seed head. Keep your pencil pressure extremely light so the graphite doesn’t show through the yellow paint later. -
Sketch the petals:
Draw two layers of petals radiating from the center. Start with the front layer of large, broad petals, giving them slightly pointed tips. Then, fill the gaps with a second layer of petals peeking from behind. Let them twist and turn slightly for a natural look. -
Add stem and leaves:
Draw a sturdy stem extending downward, curving slightly to the right. Add three main leaves attached to the stem—two lower ones and one tucked just under the bloom on the right. Sketch the jagged, serrated edges characteristic of sunflower foliage. -
Place the pollinator:
To the right of the flower, sketch a small, oval-shaped bumblebee. Give it two distinct body segments and sketch delicate, transparent wings angled upward as if it’s hovering.
Step 2: Layering the Watercolor
-
First wash on petals:
Mix a watery wash of Cadmium Yellow with a touch of Yellow Ochre. Paint the petals, starting from the center and pulling the color outward. Leave tiny slivers of white paper between some petals to define them. -
Deepening petal shadows:
While the first layer is still slightly damp, drop a concentrated mix of Yellow Ochre and Burnt Sienna at the base of the petals (nearest the center). This creates a natural gradient as the color bleeds outward. -
Painting the seed head:
Wet the center disk area. Drop in Burnt Sienna around the outer ring of the center. Immediately drop Sap Green creates a soft, mossy look in the very center. Let these colors merge naturally. -
Texture for the center:
Once the center is semi-dry, use a small, damp brush to stipple (tap repeatedly) darker brown spots around the transition zone between the green center and brown outer ring to simulate seeds. -
Base layer for greenery:
Mix Sap Green with a tiny bit of Burnt Sienna to dull the green naturally. Paint the stem and leaves with a flat wash. I like to lift a little color out of the leaf centers with a thirst brush while wet to suggest veins. -
Shadows on leaves:
Once the green base is dry, mix a darker green using Sap Green and a touch of Black or Indigo. Paint the shadows on the underside of the leaves and along the veins to give them dimension. -
Painting the bee:
Paint the yellow stripe on the bee with pure Cadmium Yellow. Carefully paint the black segments with a concentrated black mix, being very careful not to let the black bleed into the yellow.
Master the Fuzzy Texture
To fix a flat-looking bee, use a ‘dry brush’ technique for the black stripes. Wipe most paint off your brush and drag it lightly to create a rough, fuzzy edge.
Step 3: Inking & Fine Details
-
Outline the petals:
Once the paint is completely bone dry, use your 0.1 fine liner to outline the petals. Use broken, shaky lines rather than solid continuous ones to mimic the delicate texture shown in the reference. -
Detail the petal veins:
Draw fine lines radiating from the base of each petal outward. Keep these lines very thin and stop them halfway up the petal to keep the tips looking soft and sunlit. -
Texture the seed head:
Use stippling (lots of little dots) with the pen over the brown section of the center disk. Densely pack the dots near the edge and spread them out as you move toward the green center. -
Define the leaves:
Outline the leaves and stem with the fine liner. Add clear, branching veins inside the leaves. Use slightly thicker lines on the shadowed sides of the stem for visual weight. -
Detail the bumblebee:
Outline the bee’s fuzzy body. Use tiny, quick hatch marks to suggest fur texture. Outline the wings with a very faint, thin line and add simple vein structures inside them. -
Final contrast check:
Step back and look at your piece. If the center feels too flat, add a few more dark ink dots. If the petals need separation, darken the V-shapes between them with a tiny bit of Burnt Sienna watercolor.
Vintage Paper Effect
If you can’t find rag paper, tear the edges of standard watercolor paper and lightly stain the borders with diluted tea or coffee before painting for that aged look.
Now you have a charming botanical study that captures the warmth of late summer


Sunflower Mandala Pattern
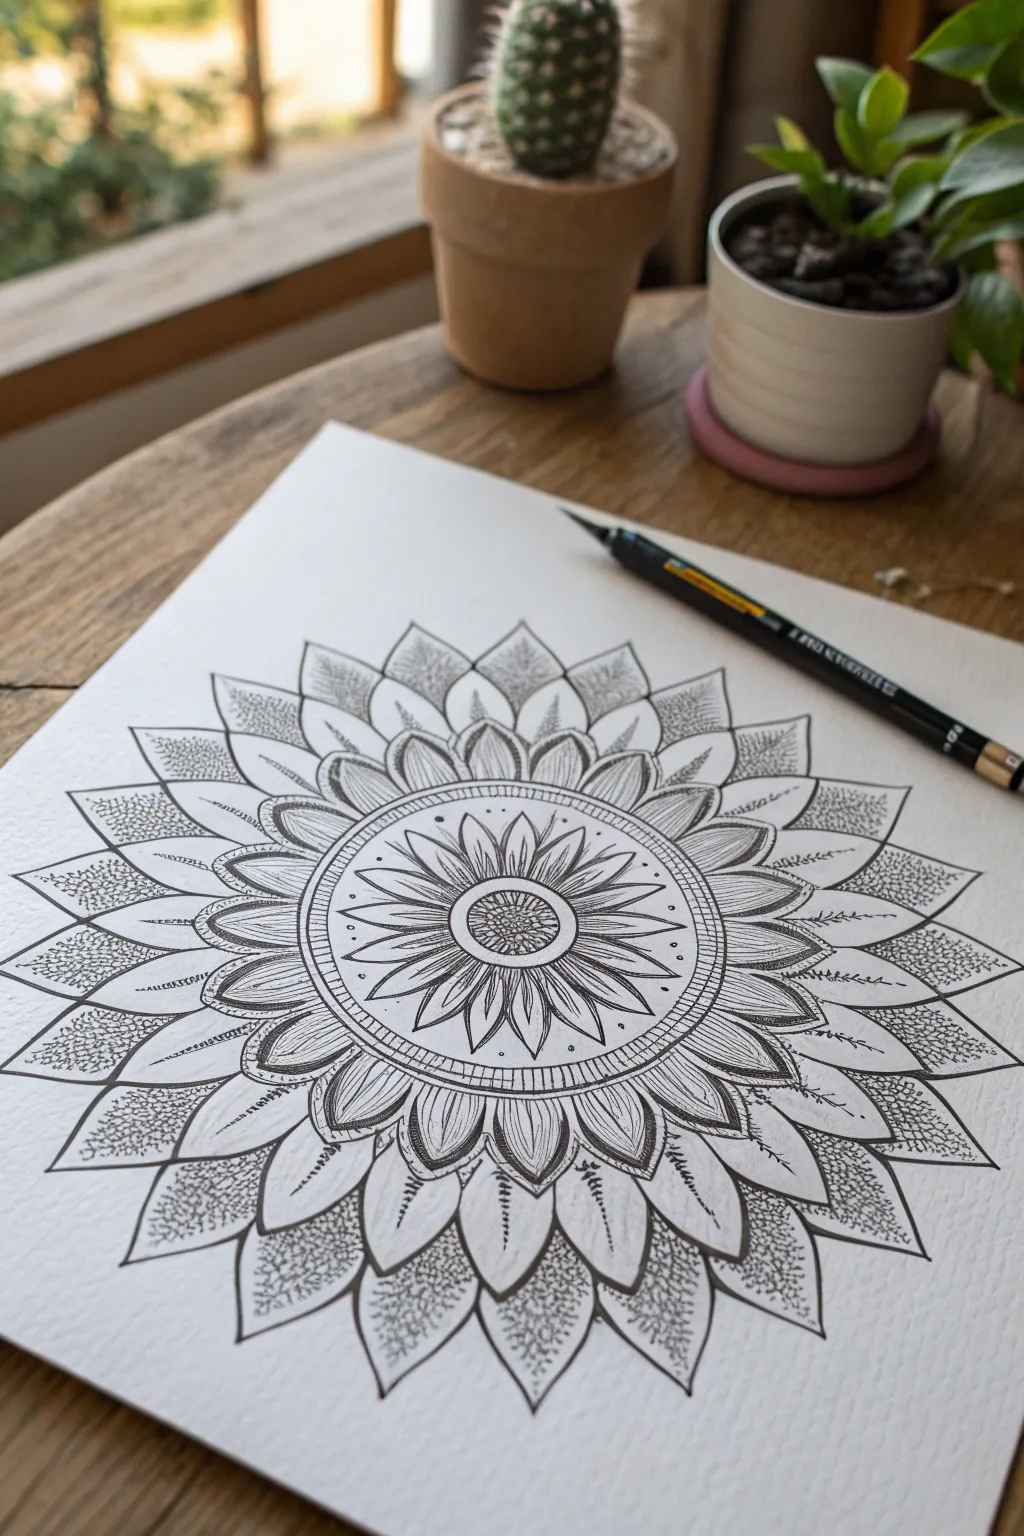
This intricate project blends the organic beauty of a sunflower with the meditative geometry of a mandala. Sharp fineliner lines contrast with soft stippled shading to create a mesmerizing piece that looks much more complex than it actually is.
How-To Guide
Materials
- High-quality white drawing paper (heavyweight/textured sketch paper)
- Black fineliner pens (sizes 005, 01, and 05 or 08)
- Compass
- Protractor (optional)
- HB pencil
- Eraser (kneaded eraser preferred)
- Ruler
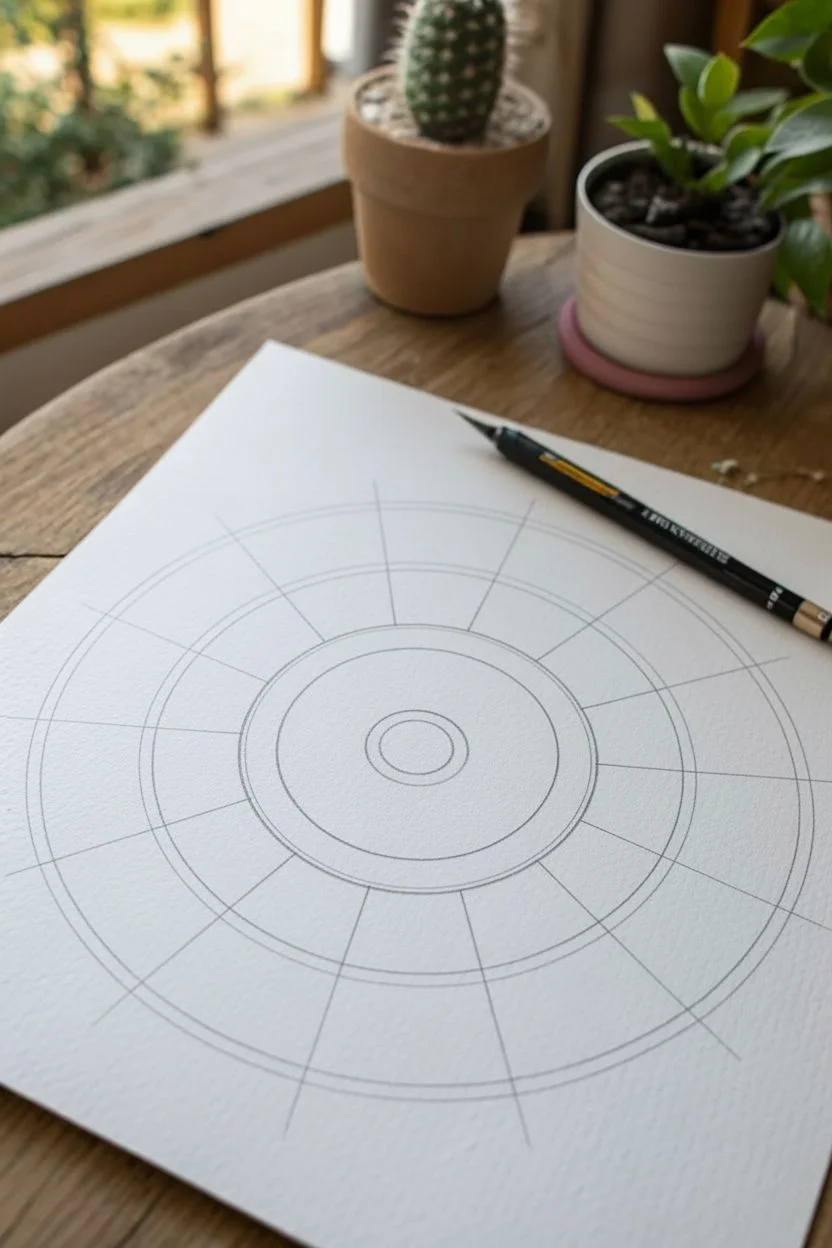
Step 1: Setting the Framework
-
Establish the center:
Begin by finding the exact center of your paper. Using your compass with an HB pencil, draw a small circle about 1 inch in diameter for the flower’s core. -
Map the petal rings:
Continuing from the center point, draw three concentric circles expanding outward. These will act as guidelines for the layers of petals: one tight circle for the inner petals, a wider one for the middle layer, and the largest for the outer tips. -
Divide the space:
Lightly draw straight lines intersecting through the center like a pizza. Start with vertical and horizontal lines, then divide those quadrants in half to create 8 or 16 equal sections. This ensures your symmetry stays sharp as you draw.
Fixing Wobbly Lines
If a petal outline isn’t perfectly symmetrical, thicken the line slightly on one side to correct the curve. A bolder line often hides minor shakes.
Step 2: Drawing the Core
-
Detail the center seeds:
Switch to a medium-sized fineliner (01). Inside the very center circle, draw a slightly smaller inner ring. Fill this innermost space with small, tightly packed circles to represent sunflower seeds. -
Draw the first petal ring:
Using the smallest pencil guideline circle, sketch the first layer of petals. These should be pointed ovals radiating directly from the textured seed center. There are roughly 16 petals in this primary layer. -
Add petal details:
Inside each primary petal, draw a central vein line. Add tiny dots (stippling) near the base of each petal where it meets the center to add depth. -
Create the decorative border:
Draw two clean ink circles enclosing this first flower layer. Between these two rings, add evenly spaced dots or small hash marks to create a decorative band that separates the core from the outer layers.
Step 3: Expanding the Mandala
-
Sketch the middle tier:
Moving to the next pencil guideline, draw a second layer of larger, wider petals. Position the peaks of these petals so they settle in the gaps between the petals of the inner layer. -
Outline the outer tier:
Create the final, largest ring of petals using your outermost guideline. These should be broad and pointy, extending almost to the edge of your planned design area. Keep your hand steady for smooth, curving lines. -
Finalize the outlines:
Once satisfied with the pencil symmetry, go over your main petal shapes with a thicker pen (05 or 08) to make the structural lines bold and distinct.
Golden Glow
After inking, use watercolor pencils to add a subtle wash of yellow and ochre to the petals, blending out from the center for a glowing effect.
Step 4: Shading and Texture
-
Hatching the middle petals:
Switch back to the 005 or 01 fineliner. On the middle tier of petals, use curved hatching lines starting from the base and flicking upward. This creates a shadowed effect where the petals overlap. -
Detailing the outer petals:
For the largest outer petals, focus on the tips. Draw a central vein line, then add stippling (lots of tiny dots) near the points and edges. The dots should be dense at the tip and fade out as you move inward. -
Fill the negative space:
Look for triangular gaps between the outer petals. Fill these areas with dense stippling or fine lines to make the white petals pop against the darker background. -
Add organic flourishes:
Draw tiny, fern-like squiggles or leafy shapes floating between the petals in the white space. This breaks up the rigid geometry and enhances the organic sunflower feel. -
Clean up:
Wait at least 15 minutes for the ink to fully cure. Gently erase all remaining pencil guidelines to reveal the crisp black-and-white contrast.
Take a moment to admire the rhythm and balance created by your steady hand and patience
Geometric Sunflower Design

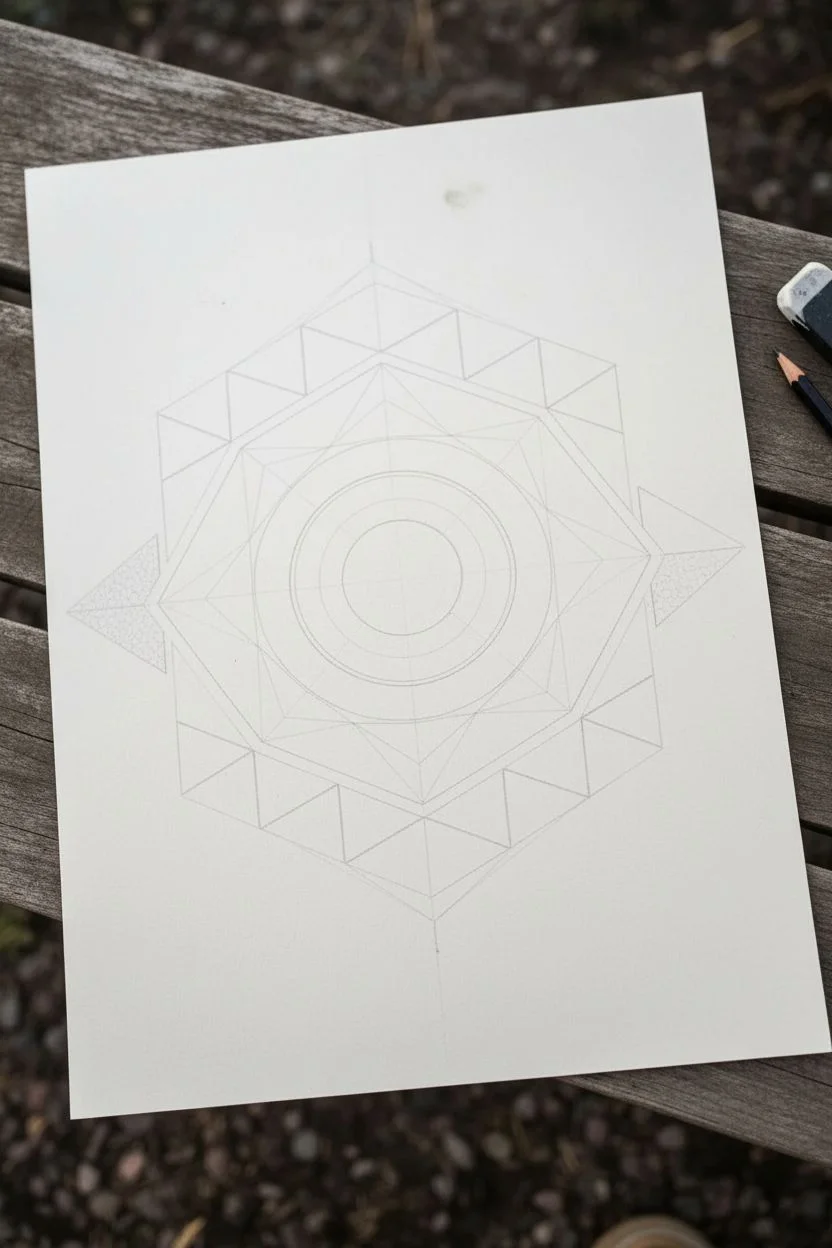
This stunning piece combines the organic beauty of a classic sunflower with the sharp precision of modern geometry. The result is a vibrant, framed floral design featuring intricate linework and blocks of textured color.
Detailed Instructions
Materials
- High-quality mixed media or Bristol paper (heavyweight)
- Fine liner pens (sizes 005, 01, 03, and 05)
- Ruler
- Compass
- Pencil (HB or H)
- Eraser (kneaded preferred)
- Alcohol-based markers or colored pencils (yellows, ochres, muted teal/green, terracotta/rust)
- White gel pen (optional for highlights)
Step 1: Drafting the Geometric Frame
-
Establish the center:
Begin by finding the exact center of your paper and marking it lightly with your pencil. Draw a vertical line through this point to guide your symmetry. -
Draw the main hexagon:
Using your compass and ruler, lightly sketch a large hexagon centered on your paper. This will serve as the inner boundary for the sunflower. -
Create the outer geometric layers:
Extend lines outwards from the hexagon’s sides to create triangular facets. You want to build an abstract, star-like shape composed of various triangles surrounding the central space. -
Add detail lines:
Within the outer triangles, draw smaller internal lines to subdivide some shapes. This creates the ‘mosaic’ look seen in the red and teal sections. -
Sketch the flower circle:
Inside the central hexagon, use your compass to draw a perfect circle that almost touches the edges. This defines the outer limit of your sunflower petals. -
Define the seed head:
Draw a smaller concentric circle in the very middle for the seed head. Add a second, slightly wider circle around it to mark the rim of the disk florets.
Clean Lines Pro Tip
When inking long geometric lines, look at the destination point rather than the pen tip. This helps your hand travel in a straighter, more confident path.
Step 2: Drawing the Organic Elements
-
Sketch the primary petals:
Lightly sketch the first layer of petals radiating from the center. Keep them relatively uniform in length but vary the tips—some pointed, some slightly rounded—for a natural look. -
Fill in secondary petals:
Draw a second layer of petal tips peeking out from behind the first layer to add volume and density to the flower. -
Add leaves:
Sketch a few jagged leaves emerging from behind the petals. Position them so they overlap slightly with the geometric frame, creating depth. -
Texture the seed head:
Fill the very center circle with a dense grid of tiny, intersecting curved lines to mimic the Fibonacci spiral pattern of sunflower seeds.
Smudge Trouble?
If your ruler smears the ink while drawing the frame, tape a penny to the underside of the ruler. This lifts the edge off the paper, preventing ink drag.
Step 3: Inking and Coloring
-
Ink the outlines:
Switch to your 03 or 05 fine liner. Carefully trace over your pencil lines. Use the thicker pen for the main geometric frame and outer petal contours. -
Add floral details:
Use a finer 005 or 01 pen to add texture lines inside the petals and leaves. These striations should follow the curve of the petals. -
Erase pencil guides:
Once the ink is completely dry—I usually wait at least ten minutes to be safe—gently erase all underlying pencil sketches. -
Color the geometry:
Select a muted color palette (terracotta, teal, mustard). Fill in the outer geometric triangles, alternating colors to create a balanced composition. -
Add geometric texture:
For some of the colored blocks (specifically the teal ones), use a white gel pen or a darker marker to add a stippled or ‘cracked earth’ pattern on top of the solid color. -
Color the sunflower:
Use rich yellows and golden ochres for the petals. Start with a light yellow base and shade the base of each petal with the darker ochre to create dimension. -
Finalize the center:
Color the seed head with dark browns and blacks. Leave tiny specks of white or add white gel pen later to ensure the texture doesn’t get lost in the darkness.
Step back and admire the satisfying contrast between your crisp geometric lines and the organic flow of the petals
Sunflower Under a Moonlit Sky
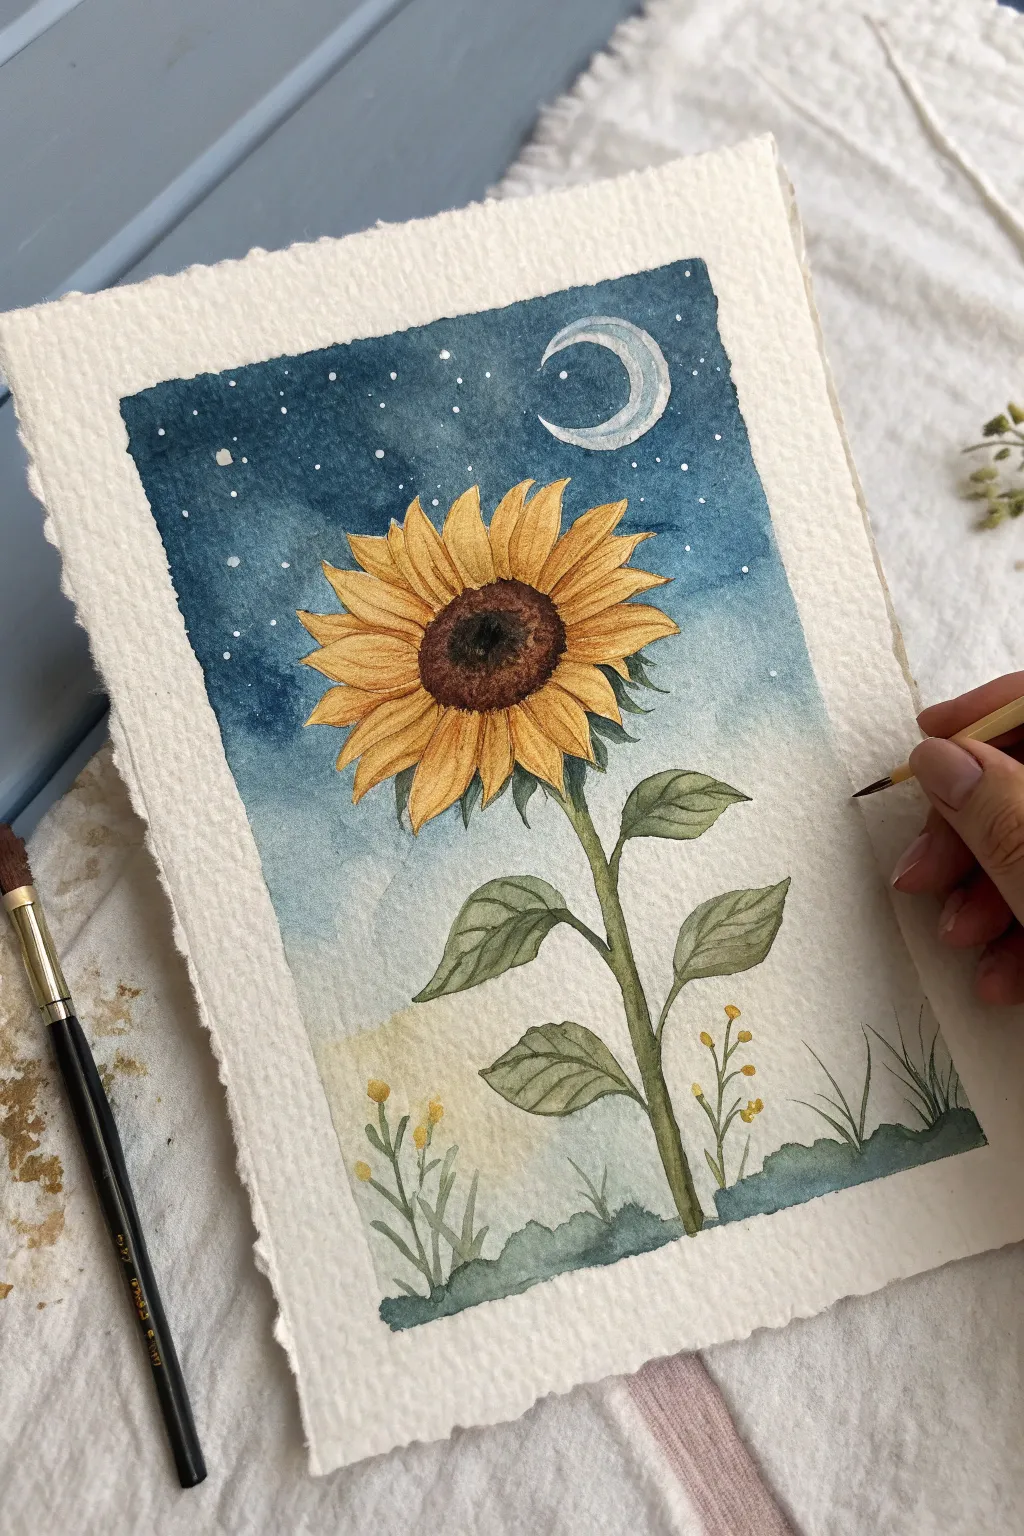
Capture the quiet magic of a sunflower blooming under the stars with this enchanting watercolor painting. The contrast between the deep indigo sky and the warm, golden petals creates a striking composition that feels peaceful yet vibrant.
How-To Guide
Materials
- Cold press watercolor paper (deckled edge preferred for that rustic look)
- Watercolor paints (Indigo, Phthalo Blue, Yellow Ochre, Cadmium Yellow, Burnt Sienna, Burnt Umber, Sap Green, White Gouache)
- Round brushes (sizes 2, 6, and 10)
- Pencil (HB or H)
- Kneaded eraser
- Masking fluid (optional)
- Two jars of water
- Paper towels
- Artist tape
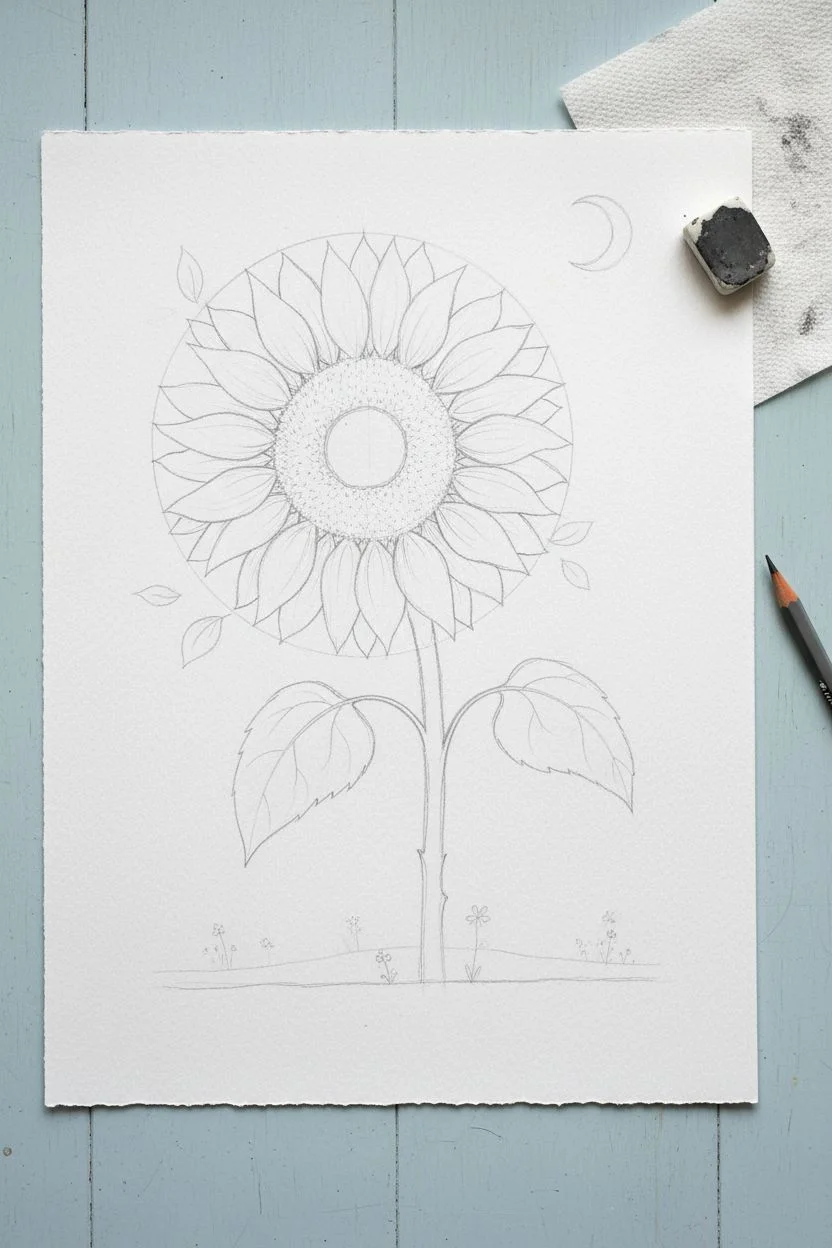
Step 1: Drafting the Composition
-
Sketch the flower head:
Start by lightly sketching a large circle in the center-left area of your paper for the flower head. Inside this, draw a smaller, slightly off-center circle for the sunflower’s disk (the seed center). -
Draw the petals:
Sketch the petals radiating outward from the center disk. Make them slightly irregular—some overlapping, some curved, some pointed—to give the flower a natural, organic feel. They should extend well beyond your initial outer circle guide. -
Add stem and leaves:
Draw a sturdy stem extending from the flower head down to the bottom right. Add two large, teardrop-shaped leaves on the stem, and sketch a few smaller leaves near the flower’s base. -
Outline the background elements:
Lightly sketch a crescent moon in the upper right corner. Below, near the stem base, draw a gentle, wavy horizon line for the ground and a few sprigs of grass or tiny wildflowers. -
Clean up the sketch:
Use your kneaded eraser to gently lift graphite until the lines are faint but still visible. This ensures the pencil marks won’t show through the transparent watercolor later.
Step 2: Painting the Sky and Background
-
Protect the moon:
If you have masking fluid, apply a thin layer over the crescent moon and the stars (if you want defined white stars). Alternatively, you can carefully paint around the moon later. -
Wet-on-wet sky base:
Using your largest brush, wet the sky area with clean water, avoiding the flower and moon. While wet, drop in a light wash of Phthalo Blue near the horizon line, fading it upwards. -
Deepen the night sky:
While the paper is still damp, load your brush with concentrated Indigo. Apply this to the top portion of the sky, letting it bleed down into the lighter blue. The goal is a gradient from deep night at the top to a lighter glow near the horizon. -
Create the stars:
Once the sky is bone dry (ensure it’s completely dry to avoid blooms), use white gouache or white gel pen to dot tiny stars across the indigo section. Vary their sizes slightly for realism. -
Paint the moon:
Remove masking fluid or paint the moon shape carefully with very dilute blue-grey. Leave slight white spaces within the crescent to suggest texture.
Muddy Colors?
If your sunflower yellow looks dirty next to the blue sky, make sure the sky is 100% dry before starting the petals. Yellow and blue make green, so any wet overlap will ruin the vibrant contrast.
Step 3: Bringing the Sunflower to Life
-
Base layer for petals:
Mix a bright Cadmium Yellow and apply a wash over all the petals. Keep this first layer light and transparent. -
Adding petal depth:
Once the base is dry, use Yellow Ochre to paint the shadows where the petals overlap or meet the center disk. Use a smaller brush (size 6) for this precision work. -
Refining petal details:
Mix a small amount of Burnt Sienna into your yellow. Add fine lines and streaks radiating from the center of the petals outward to mimic the vein texture found in sunflowers. -
Painting the center disk:
Fill the center circle with a mix of Burnt Sienna and Burnt Umber. While it’s still wet, drop in concentrated Burnt Umber or even a touch of Indigo in the very center to create a convex, 3D effect. -
Texturing the seeds:
After the center dries, use a dry-brush technique with dark brown to stipple tiny dots around the outer edge of the disk, simulating the texture of the seeds.
Add Some sparkle
For a magical touch, use metallic gold watercolor for the stars or fine lines on the petals. It will catch the light beautifully when the painting is viewed from different angles.
Step 4: Foliage and Finishing Touches
-
Base green layer:
Mix Sap Green with a touch of yellow for a fresh, leafy color. Paint the stem and the main leaves with a flat wash. -
Shading the greenery:
Deepen your green mix with a tiny bit of Indigo or blue. Paint the underside of the leaves and one side of the stem to indicate a light source coming from the moon. -
Veins and details:
With your smallest brush (size 2), paint the central veins on the leaves using the darker green mixture. Keep these lines crisp. -
Create the ground:
Paint the bottom section with a watery mix of green and blue-grey to suggest a grassy field at night. Add a few upward strokes for grass blades. -
Tiny wildflowers:
Use the tip of your small brush to dab tiny yellow dots onto the stems of the small wildflowers at the bottom, connecting them with faint green lines.
Peel off your tape gently to reveal that crisp border and admire your twilight bloom.


Have a question or want to share your own experience? I'd love to hear from you in the comments below!