There is nothing quite as magical as watching a child’s eyes light up when they make their very first mark on a blank canvas. I believe that art focused on sensory exploration allows our little ones to build confidence while creating messy, beautiful keepsakes that you will cherish forever.
Family Handprint Keepsakes
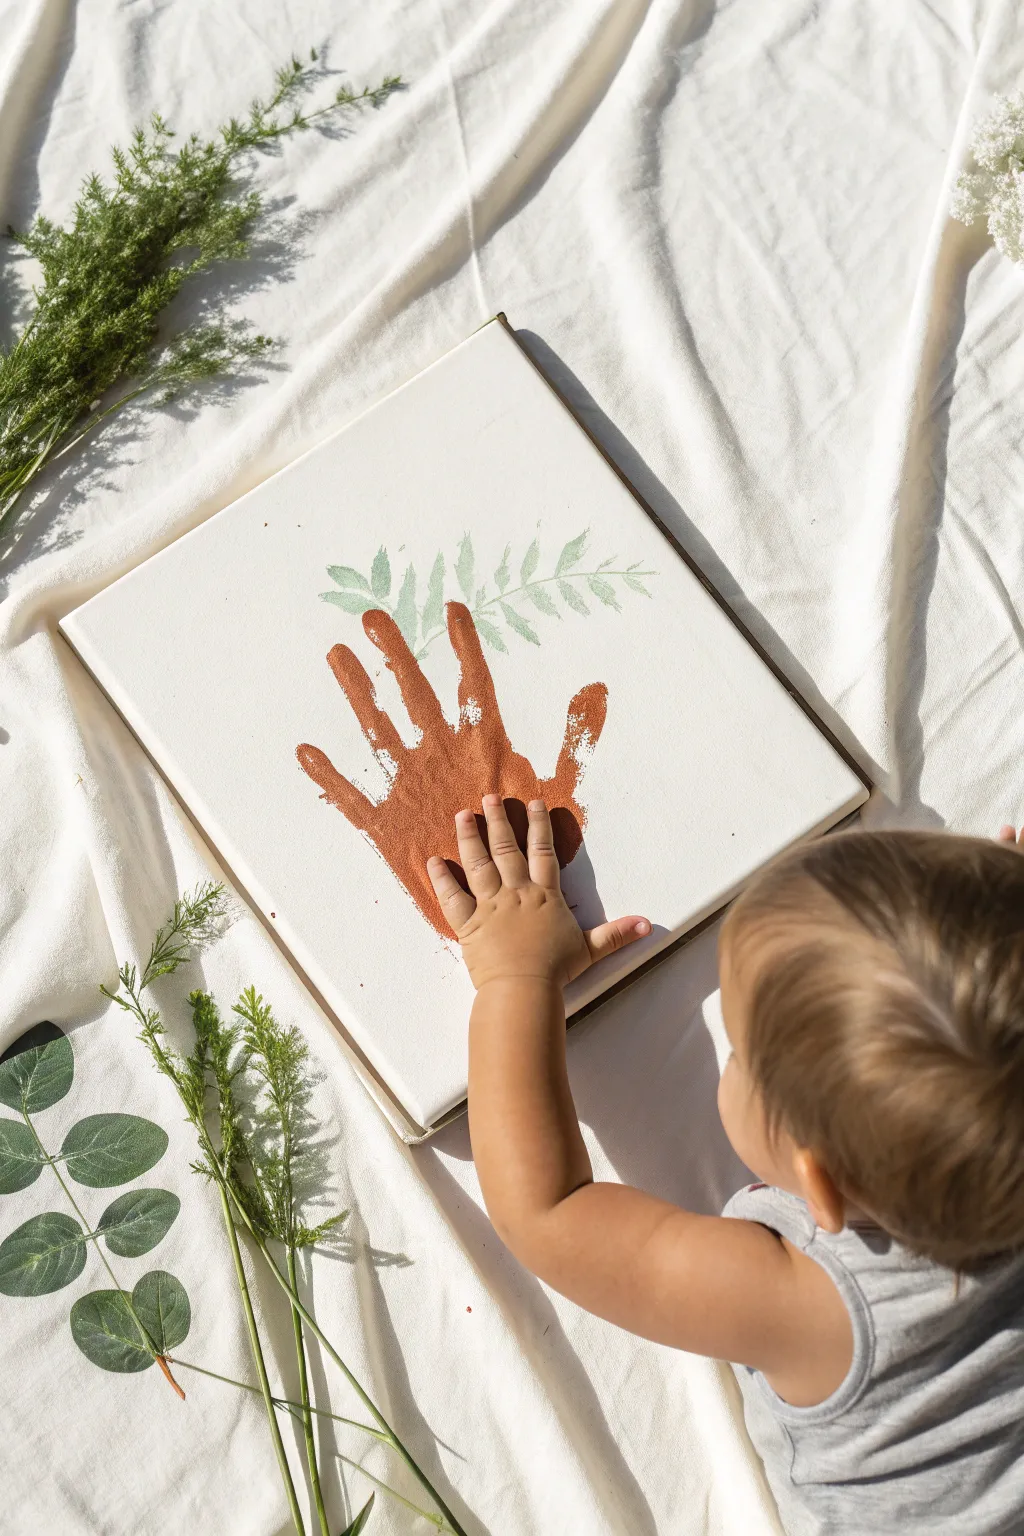

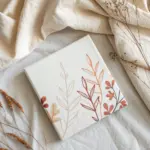
Merge the beauty of nature with a sentimental family keepsake in this layered canvas project. By combining a natural fern stamp with a warm-toned handprint, you create a rustic, minimalist piece of art perfect for a nursery or living room.
How-To Guide
Materials
- Square stretched canvas (12×12 inches recommended)
- Fresh fern frond (flat and not too dry)
- Sage ceramic or soft green acrylic paint
- Terracotta or burnt sienna acrylic paint
- Two foam brushes
- Scrap paper or newspaper
- Paper towels
- Baby wipes
- Matte spray varnish (optional)
Step 1: Creating the Botanical Background
-
Prepare your workspace:
Lay down newspaper to protect your table and set your canvas in the center. Ensure the canvas surface is free of dust or lint. -
Prepare the greenery:
Select a fresh fern frond that fits nicely within the top two-thirds of your canvas. Gently wipe it to remove any dirt or bugs. -
Load the paint:
Pour a small amount of sage green acrylic paint onto a paper plate or palette. -
Apply paint to the fern:
Using a foam brush, dab a thin, even layer of green paint onto the underside of the fern frond. The underside usually has raised veins which create a better stamp. -
Test your print:
I like to do a quick test stamp on a piece of scrap paper first to ensure the paint amount is just right—not too blobbular, not too dry. -
Position the botanical:
Re-apply paint if needed, then carefully place the paint-side down onto the canvas. Aim for the fern to flow from the center upwards. -
Transfer the image:
Place a clean paper towel carefully over the fern. Gently smooth your hand over the paper towel, pressing down on the stem and all the leaves to transfer the paint. -
Reveal the print:
Remove the paper towel, then slowly peel the fern frond off the canvas from the stem upwards. Discard the fern. -
Let it set:
Allow this green layer to dry completely. It must be dry to the touch so the handprint doesn’t smudge it later.
Vein Definition
When painting the fern, always apply paint to the ‘bumpy’ side (the underside). This is where the vein structure is most prominent and will give you that beautiful, realistic botanical texture.
Step 2: Adding the Handprint
-
Prepare the hand paint:
Pour the terracotta or burnt sienna paint onto a fresh plate. If the paint is very thick, add a drop of water to make it creamy. -
Coat the hand:
Use a clean foam brush to paint the palm and fingers of the participant. Ensure the paint covers every crease but isn’t dripping. -
Align the hand:
Hover the painted hand over the canvas. The goal is to have the palm centered at the bottom, with the fingers overlapping the fern stem, looking like the fern is held or growing behind. -
Press down:
Firmly press the palm onto the canvas. Instruct the person to keep their fingers still and slightly spread. -
Secure the print:
Gently press down on each finger and the center of the palm with your free hand to ensure good contact with the canvas texture. -
The lift off:
Hold the canvas down with one hand and have the person lift their hand straight up in one smooth motion to avoid smearing. -
Immediate cleanup:
Use baby wipes immediately to remove the bulk of the paint from the hand before washing with soap and warm water. -
Check for gaps:
If there are any major missing spots in the handprint where the canvas shows through too much, use a tiny detailed brush to dab a little paint in, keeping it natural. -
Final drying:
Let the canvas sit undisturbed for several hours until the thickest parts of the paint are fully hardened. -
Seal the memory:
Once fully cured (after 24 hours), spray a light coat of matte varnish over the canvas to protect the prints from dust and fading.
Layering Generations
Make this a multi-generational piece! Once the terracotta handprint is dry, layer a smaller toddler handprint in cream or gold right in the center of the adult palm.
Hang your new botanical masterpiece in a spot where it can remind you daily of how small those hands once were.


The Tummy-Time Floor Station
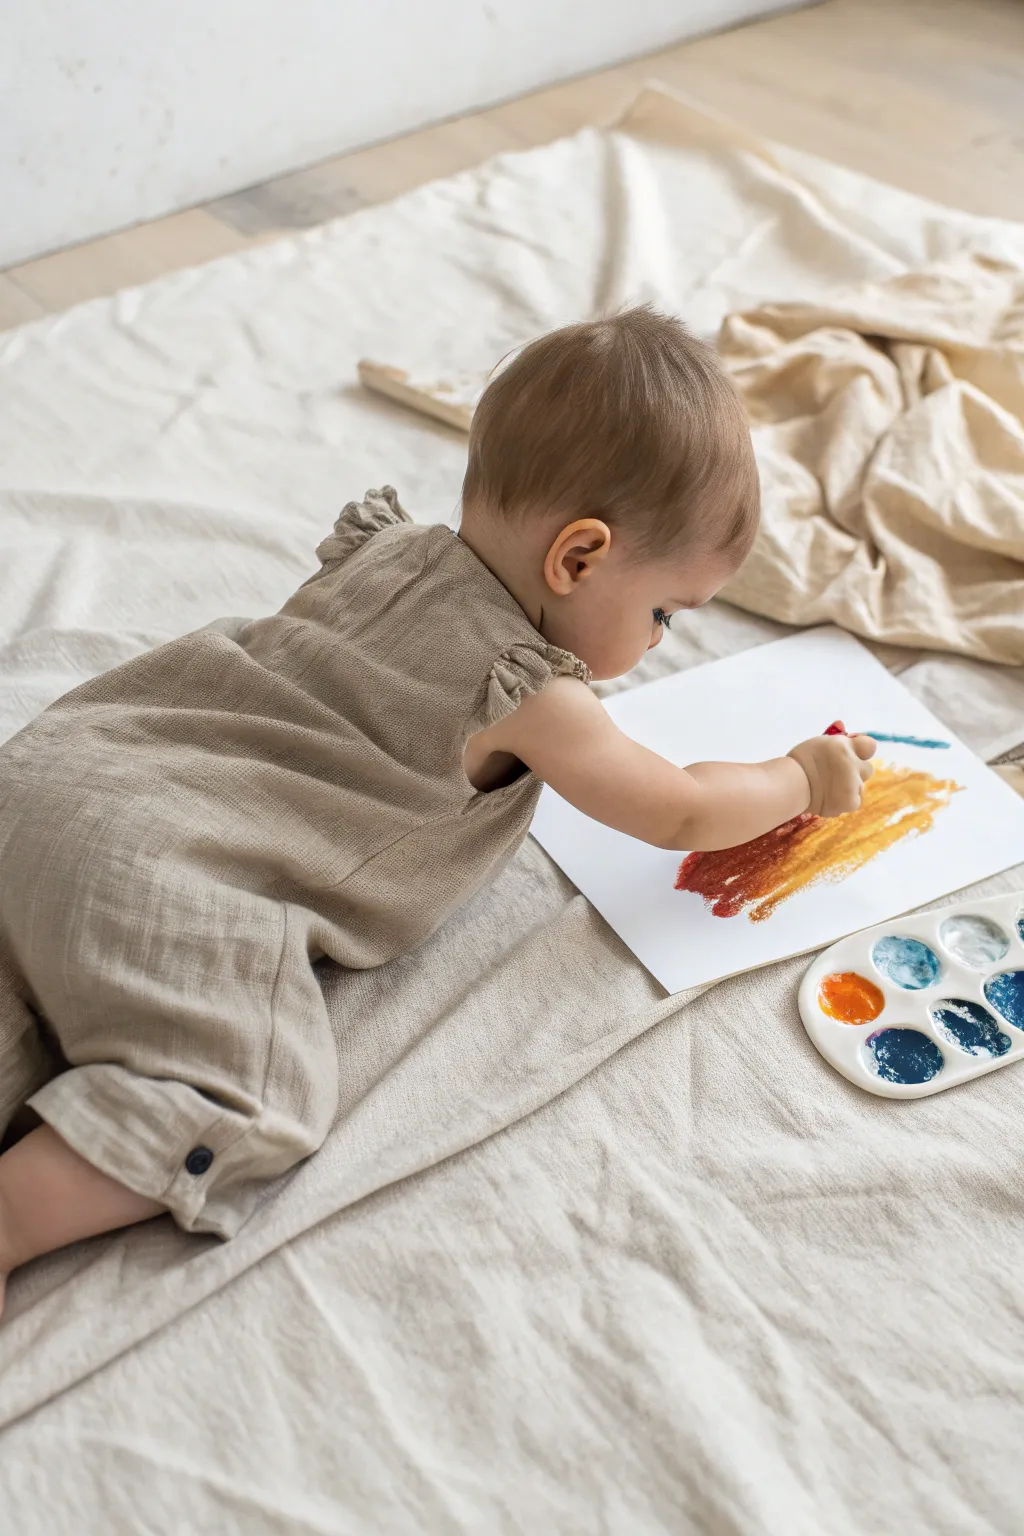
Bring the studio down to floor level with this engaging sensory art project that results in beautiful, abstract washes of color. By securing the materials to a soft surface, you create a safe and comfortable station for exploring broad brushstrokes and color blending.
Step-by-Step Tutorial
Materials
- Heavyweight multimedia paper or watercolor paper
- Tempera paint cakes or watercolor palette
- Thick, short-handled paintbrush
- Cup of water
- Painter’s tape or masking tape
- Large linen drop cloth or old sheet
- Paper towels or rag
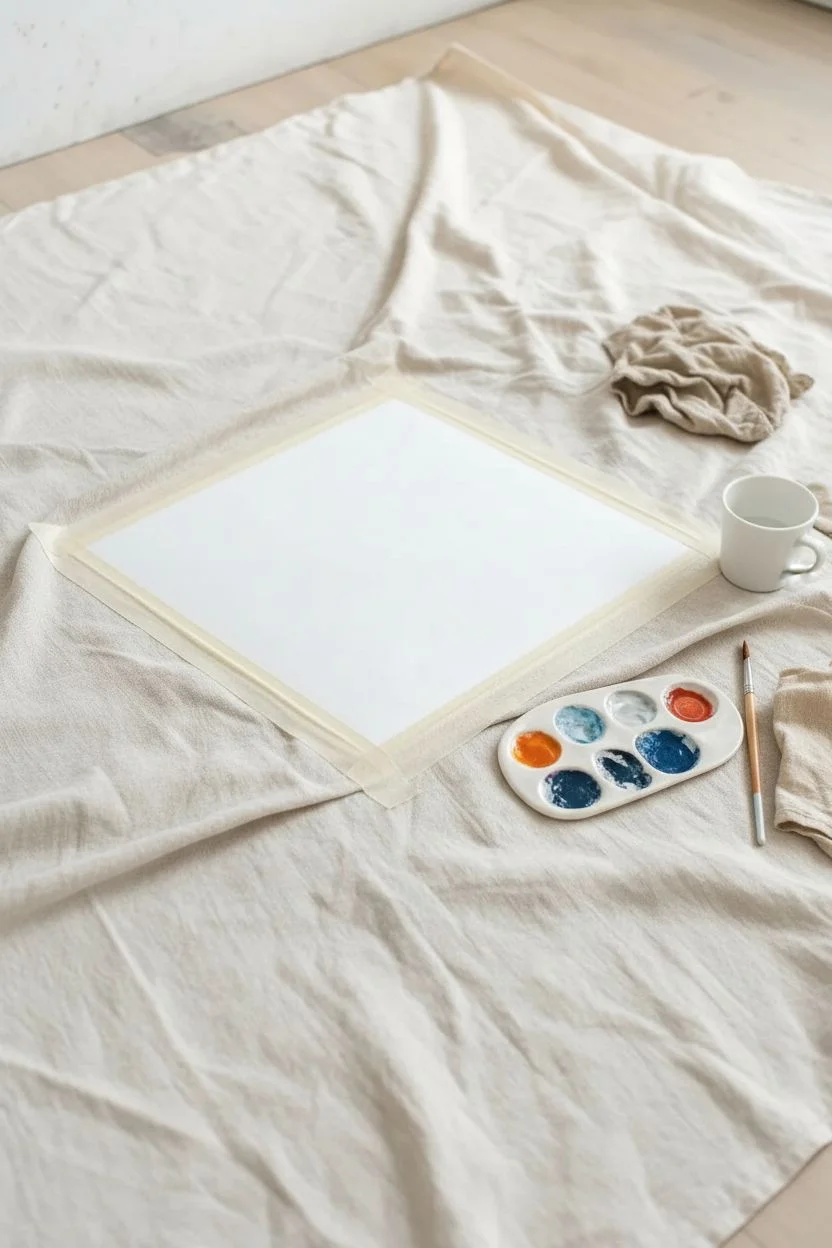
Step 1: Setting the Stage
-
Prepare the floor:
Clear a spacious area on the floor, ideally near natural light, and spread out a large linen drop cloth or neutral sheet to protect the surface. -
Smooth the surface:
Pull the drop cloth taut to ensure there are no major bunches or wrinkles that might make the workspace uneven. -
Position the paper:
Place a sheet of heavyweight paper in the center of the cloth; using thicker paper prevents tearing when it gets wet. -
Secure the canvas:
Use strips of masking tape to tape down all four corners or edges of the paper directly to the cloth so it doesn’t slide around during the activity. -
Prime the paints:
Take your palette of tempera cakes and add a few drops of water to the orange, red, and blue cakes to soften the pigment.
Step 2: Creating the Swirls
-
Load the brush:
Swirl the wet brush into a warm color, like rust red or deep orange, ensuring the bristles are fully saturated with pigment. -
First contact:
Guide the brush to the paper to make the first broad, horizontal stroke, focusing on the movement of the arm. -
Layering warmth:
Without rinsing the brush completely, dip into a yellow or lighter orange tone to pick up a secondary color. -
Blend on paper:
Apply the second color right next to or over the first stroke, allowing the wet paints to bleed together to create a natural gradient. -
Add contrast:
Rinse the brush in your water cup, then load it with a cool tone like teal or navy blue. -
Accent strokes:
Add a singular, distinct stroke of blue near the edge or top of the warm colors to create visual interest and pop. -
Encourage reach:
I like to prompt stretching motions here, encouraging strokes that go from one side of the paper all the way to the other. -
Monitor moisture:
Keep an eye on the paper’s saturation; if puddles form, dab them gently with a rag to prevent the paper from buckling too much. -
Continuing the flow:
Repeat the process of mixing warm tones with occasional cool accents until the page feels balanced.
Sticky Situation
If the masking tape tears the paper upon removal, warm the tape slightly with a hair dryer on a low setting first, or stick the tape to your clothes before applying it to reduce its grip.
Step 3: Preserving the Art
-
Let it set:
Allow the painting to sit undisturbed for a few minutes while the shine of the water evaporates. -
Remove tape:
Carefully peel the masking tape away from the paper, pulling slowly at a 45-degree angle to avoid ripping the edges. -
Final drying:
Move the artwork to a flat, elevated surface or drying rack to finish drying completely before framing.
Level Up
Sprinkle a pinch of coarse salt over the wet paint patches before they dry. The salt absorbs the water and pigment, creating a stunning, starry texture that you can brush off once dry.
Now you have a captured moment of artistic exploration ready to display.


Sponge Stamping for Little Grips
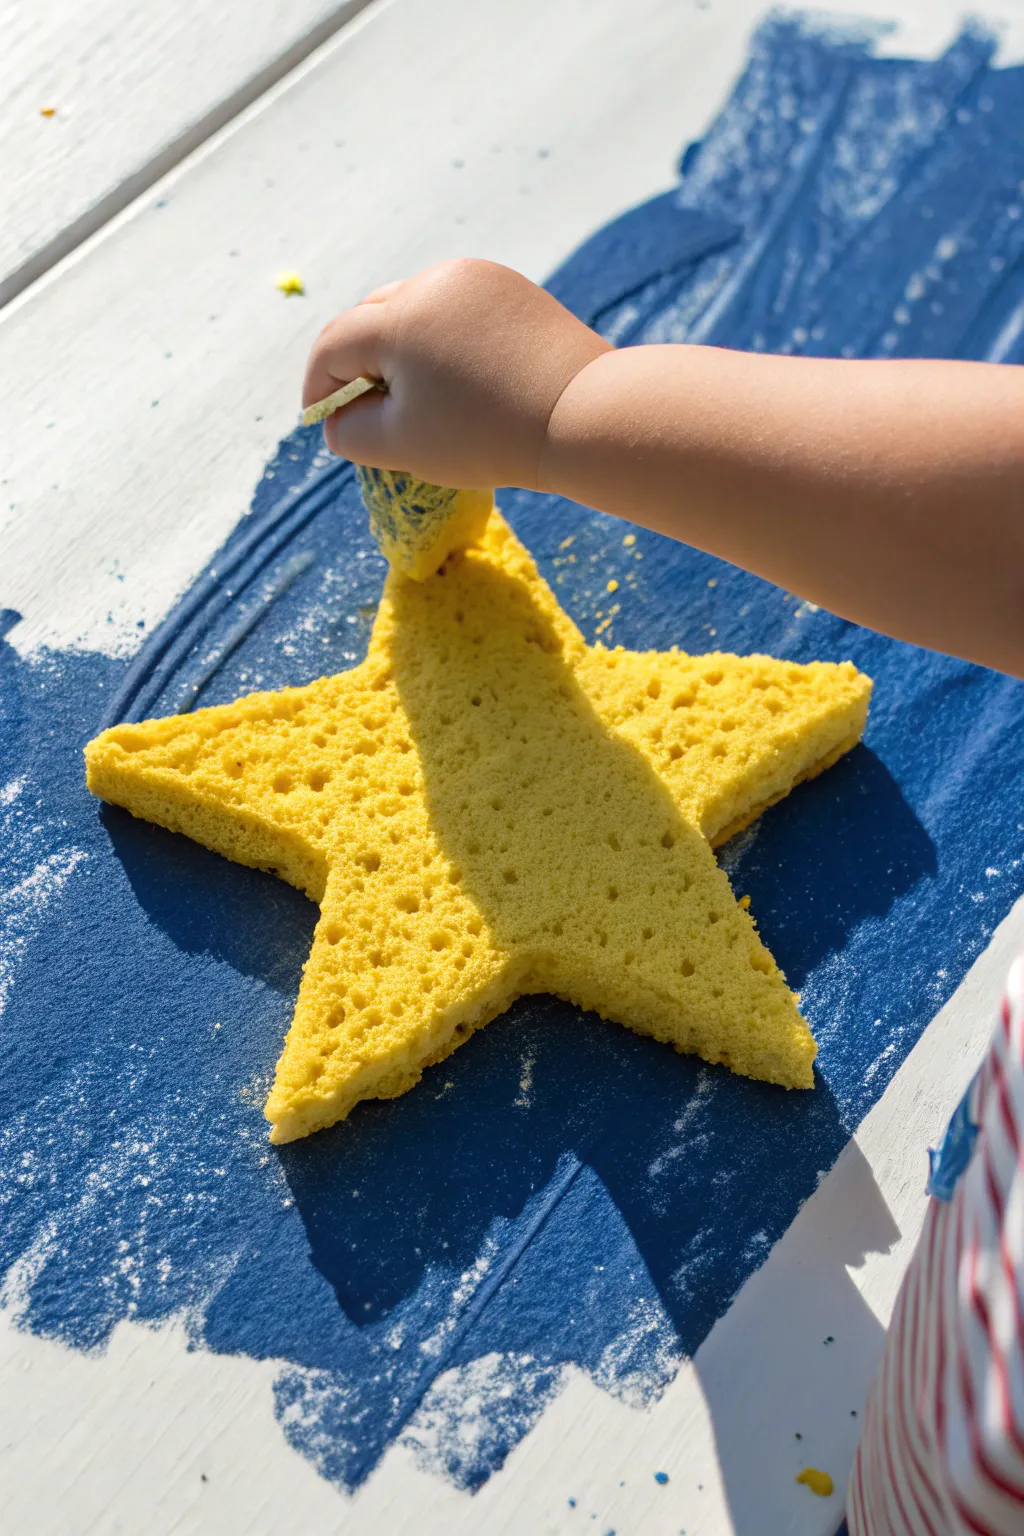
This tactile art project is perfect for developing fine motor skills while exploring negative space concepts. By using a large sponge shape as a shield, your toddler can freely stamp blue hues around it to reveal a crisp, bright star in the center.
Step-by-Step Tutorial
Materials
- Large yellow car wash sponge (cellulose)
- White canvas panel or heavy watercolor paper
- Blue washable tempera paint
- White washable tempera paint (optional)
- Painter’s tape or masking tape
- Scissors
- Permanent marker
- Paper plate or paint tray
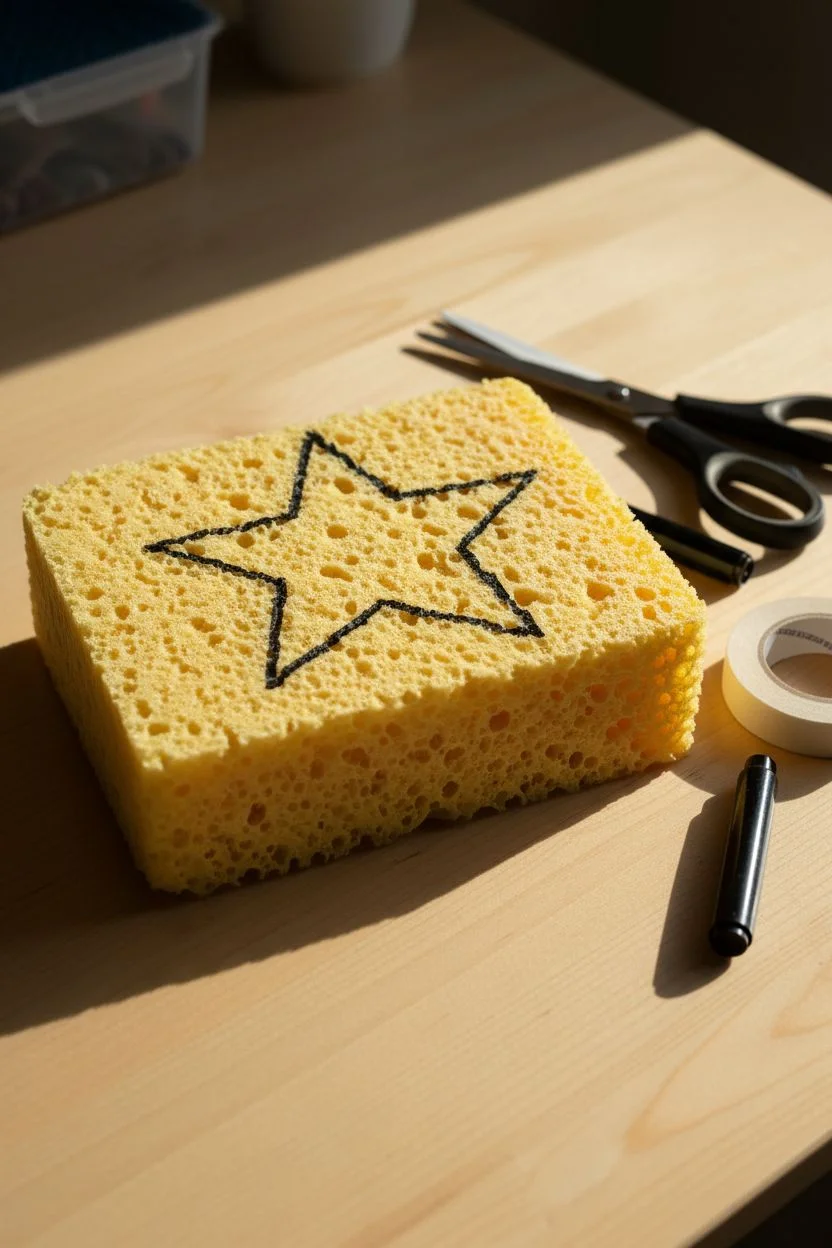
Step 1: Preparing the Star Mask
-
Outline the Shape:
Take a large, dry car wash sponge and draw a simple five-point star outline on it using a permanent marker. -
Cut the Sponge:
Using sharp scissors, carefully cut out the star shape; this step is strictly for adults as thick sponges can be tough to slice through. -
Save the Scraps:
Don’t throw away the leftover sponge corners, as these small wedges make excellent stamping tools for your toddler’s little hands. -
Secure the Mask:
Roll a small loop of painter’s tape and attach it firmly to the center of the star’s back side. -
Position on Canvas:
Press the sponge star firmly onto the center of your white canvas panel so it stays in place during the painting session.
Step 2: Stamping the Sky
-
Prepare the Paint:
Pour a generous amount of blue tempera paint onto a paper plate. -
Add Dimension:
I like to add a dollop of white paint next to the blue, allowing the colors to swirl slightly for a dimensional sky effect. -
Tool Selection:
Hand your toddler one of the small triangular sponge scraps you saved from the cutting phase. -
Dip and Load:
Show your child how to dip the small sponge wedge into the wet paint, picking up a good amount of color. -
Stamp the Edges:
Encourage them to stamp repeatedly around the outline of the big yellow star. -
Fill the Background:
Let them work their way outward, filling the rest of the white canvas with blue stamps. -
Cover the Canvas:
Ensure the white space immediately surrounding the yellow sponge is heavily covered with blue paint to define the shape clearly. -
Texture Time:
Allow the paint to be thick and textured; the sponge dabbing motion creates a lovely rough surface similar to the photo.
Clean Lines Troubleshooting
If paint is bleeding under the star, try using thicker paint (mixed with a little flour) and ensure the child presses straight down rather than brushing side-to-side.
Step 3: The Big Reveal
-
Check Coverage:
Verify that the background is covered to your satisfaction before moving to the final step. -
Lift the Mask:
While the paint is still wet, gently lift the large yellow star sponge straight up off the canvas. -
Clean Up Edges:
If any paint seeped under, you can quickly wipe it with a damp cotton swab or leave it for a rugged look. -
Wash the Tool:
Rinse the large star sponge immediately with water so it can be reused for future play. -
Dry Flat:
Lay the canvas on a flat surface to dry completely to prevent the thick blue paint from running into the white star silhouette.
Sensory Pro Tip
For the tactile grainy look shown in the image, mix a tablespoon of salt or sand into the blue paint before stamping. It adds a magical, starry texture!
Once dry, you’ll have a striking piece of art that highlights your toddler’s effort through the magic of negative space


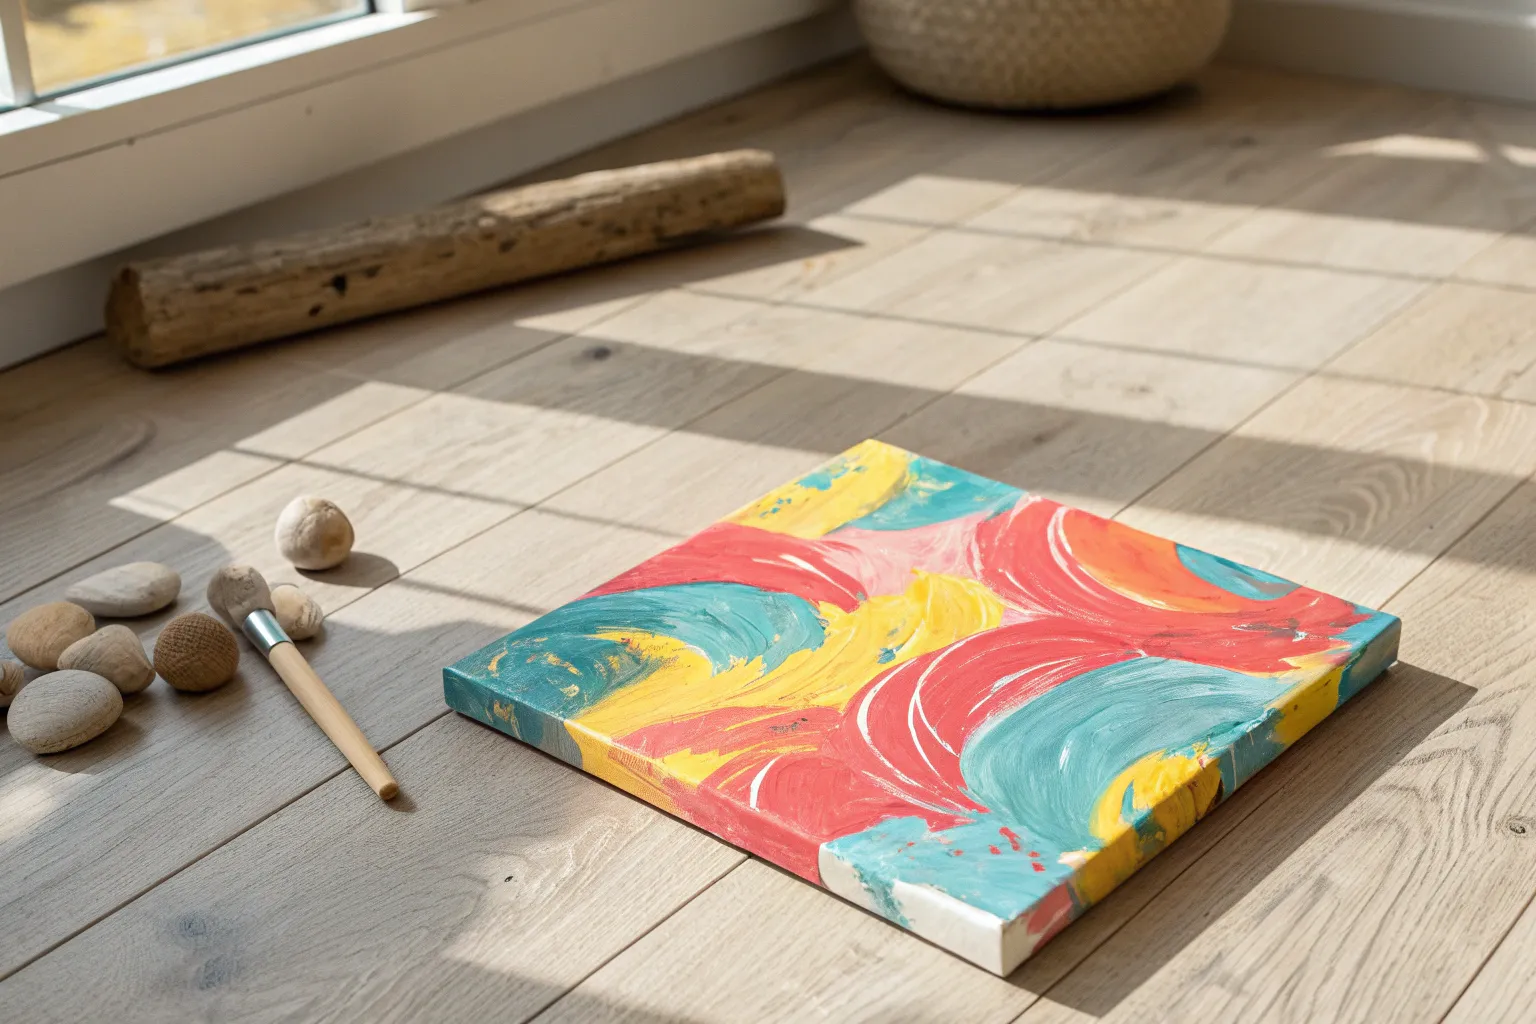
Scrape Painting with Cardstock
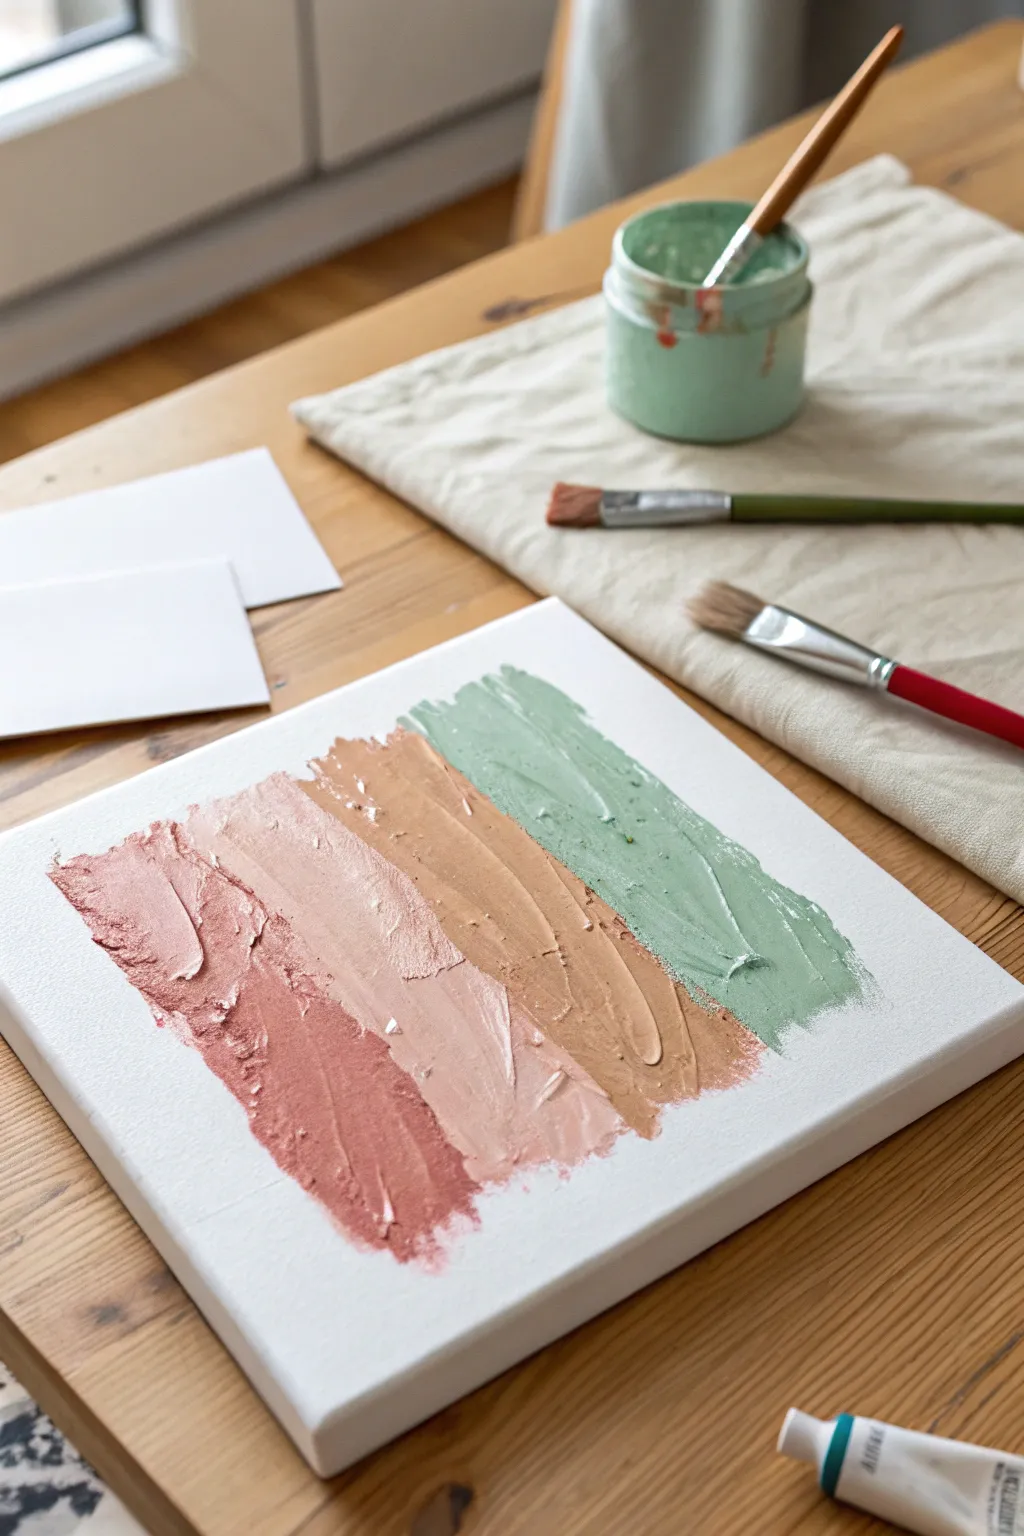
This satisfying sensory project moves away from traditional brushes to create thick, textured bands of color using simple scraps of paper. The final result is a modern, earth-toned piece of art that looks surprisingly sophisticated despite being toddler-friendly.
Step-by-Step Guide
Materials
- Small square canvas (stretched or canvas board)
- Heavy body acrylic paints (Terracotta, pale pink, beige, mint green)
- Stiff white cardstock or recycled cereal box cardboard
- Scissors
- Paper plate or palette
- Paper towels
- Table covering
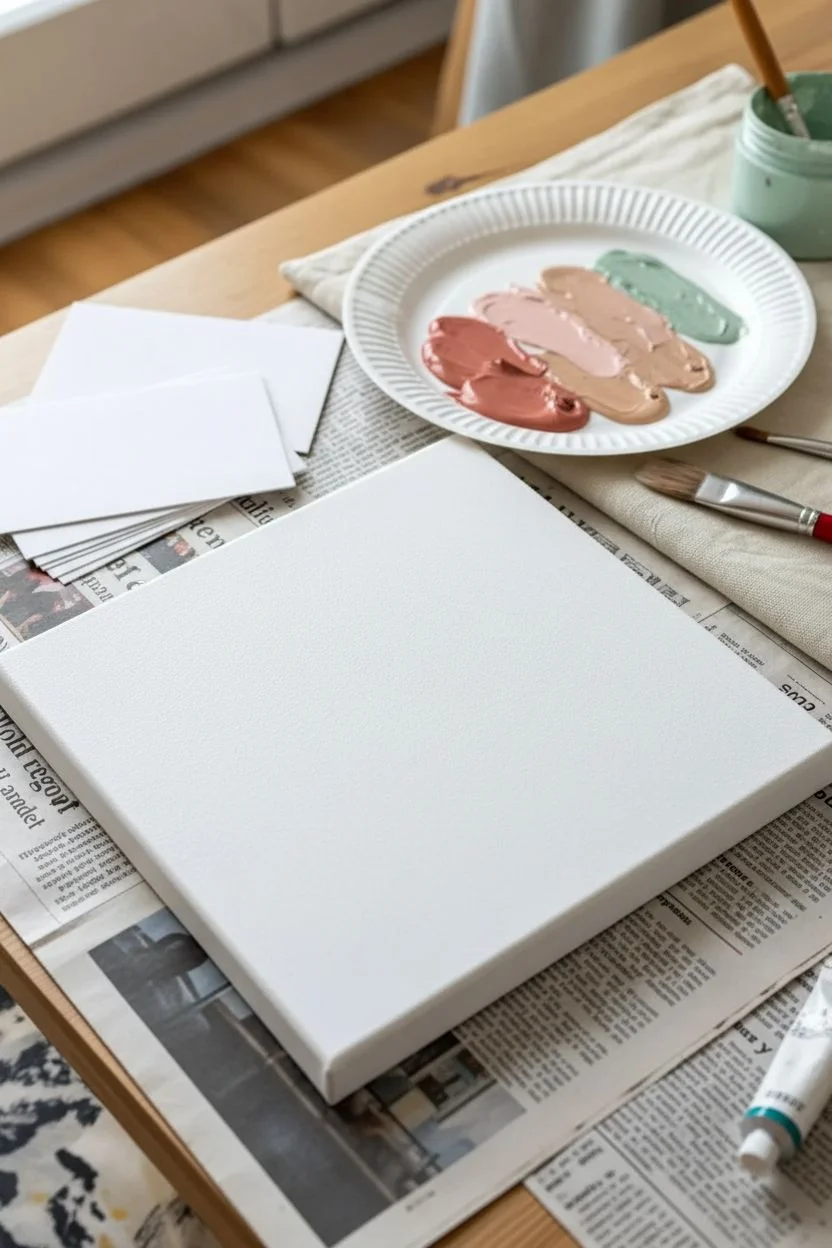
Step 1: Preparation and Mixing
-
Protect the workspace:
Cover your crafting table with a drop cloth or newspaper, as scraped paint can sometimes travel off the edge of the canvas. -
Prepare the scrapers:
Cut your cardstock or thin cardboard into rectangles. The width of the rectangle will determine the width of the paint stripes. -
Mix the terracotta shade:
If you don’t have premixed colors, create the first shade by mixing red with a little brown and white to get a muted rusty pink. -
Create the pale pink:
Mix a tiny dot of red into a large amount of white paint to create a soft, pastel blush color. -
Mix the beige tone:
Combine white with a small drop of yellow ochre or light brown to achieve a warm sand color. -
Mix the mint green:
Blend green with plenty of white and a tiny touch of grey or black to desaturate it into a soft sage. -
Load the palette:
Squeeze generous dollops of each mixed color onto a paper plate so they are ready for quick application.
Step 2: Scraping the Design
-
Apply the first color:
Squeeze or spoon a thick line or several large blobs of the terracotta paint along the top edge of the canvas on the far left side. -
Position the scraper:
Hand your toddler a piece of the cut cardstock and help them align the flat edge just above the paint blobs. -
Drag the paint:
Encourage them to pull the cardstock downward firmly, dragging the paint across the canvas surface to create a flattened, textured stripe. -
Lift and clean:
Lift the cardstock at the bottom. I usually switch to a fresh piece of cardstock here to keep the colors crisp, but you can also wipe the edge clean with a paper towel. -
Apply the second stripe:
Place drops of the pale pink paint next to the first stripe. It is okay if they touch slightly. -
Scrape the pink:
Drag the cardstock down through the pink paint, keeping the pressure even to maintain that thick, impasto texture. -
Add the beige layer:
Repeat the process with the beige paint blobs, placing them in the center-right area of the canvas. -
Fill the final section:
Apply the sage green paint to the remaining right edge of the canvas and scrape it down to complete the design. -
Touch ups:
If there are large gaps of white canvas showing between stripes, you can carefully dab a little paint in and gently scrape over that specific spot. -
Drying time:
Lay the canvas flat to dry. Because the scrape method leaves the paint quite thick, this creates a lovely texture but will take longer than usual to dry completely.
Muddy Colors?
If the stripes are turning brown or muddy, ensure you are using a clean edge of cardstock for each new color. Encourage pulling the paint in one direction only rather than scrubbing back and forth.
Texture Twist
To mimic the gritty look of a plastered wall, try mixing a pinch of baking soda or fine sand into your acrylic paints before you start scraping. This adds amazing tactile variety!
Once fully dry, you’ll have a stunning textured art piece that highlights beautiful color combinations.
BRUSH GUIDE
The Right Brush for Every Stroke
From clean lines to bold texture — master brush choice, stroke control, and essential techniques.
Explore the Full Guide
Plastic Wrap Smoosh Textures
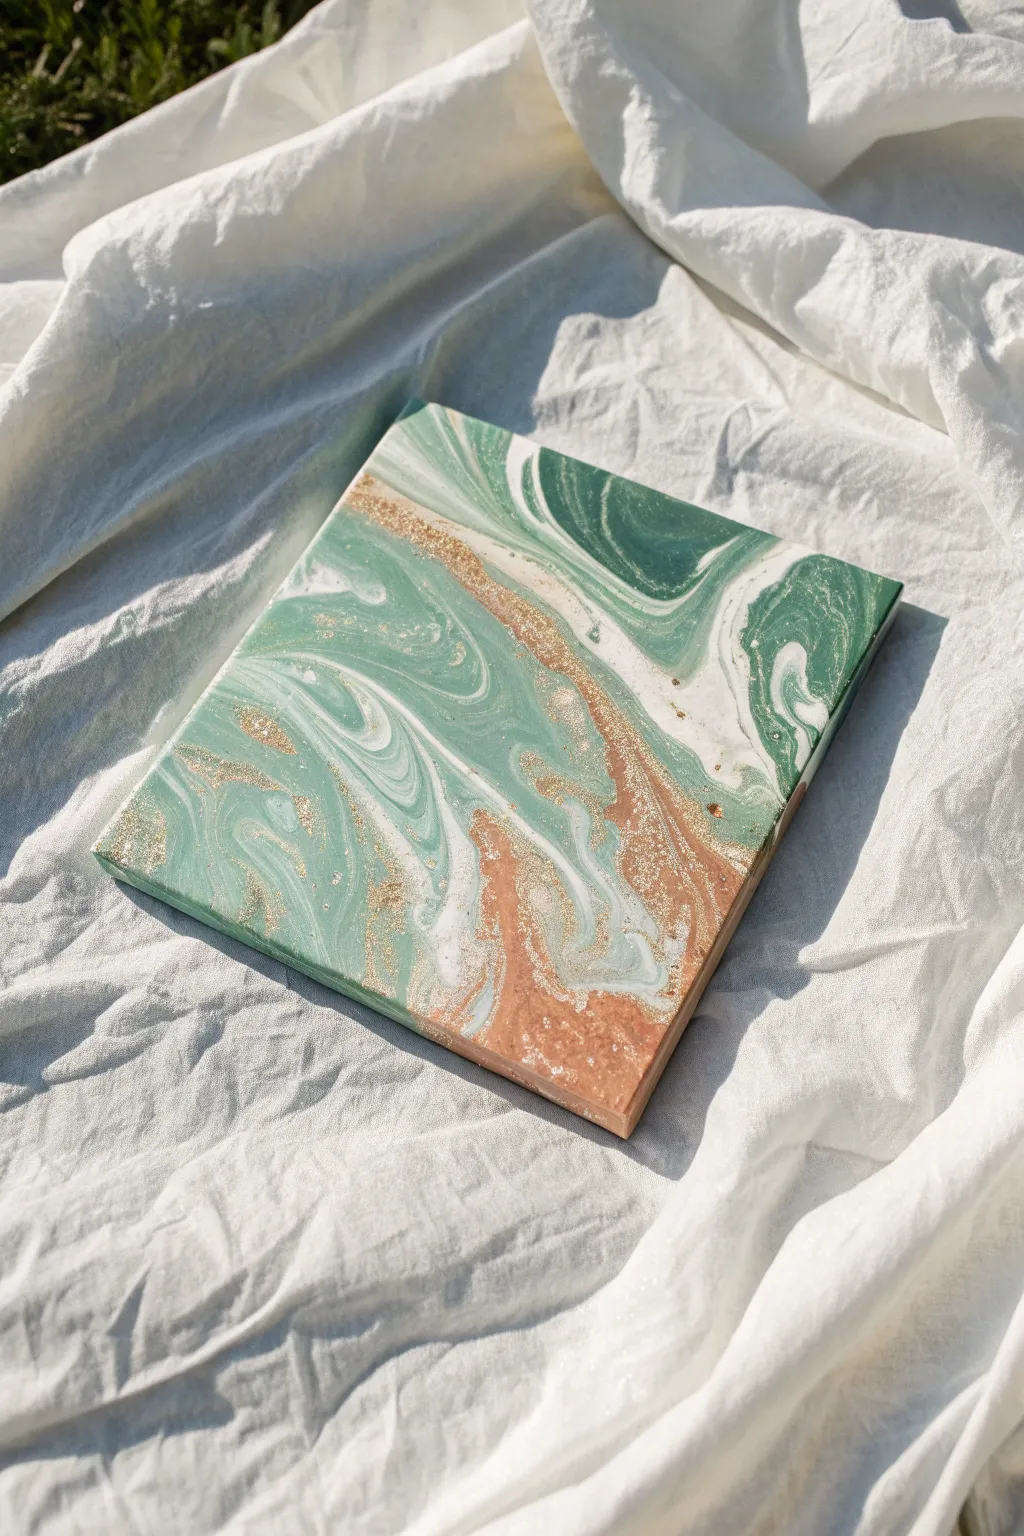
This mess-free technique uses cling wrap to blend bold metallic copper, soothing sage green, and white into a sophisticated abstract piece. It is perfect for little hands to explore textures while creating stunning, marble-like decor.
Step-by-Step Tutorial
Materials
- Small square canvas (e.g., 8×8 or 10×10 inches)
- Acrylic paint: Sage Green
- Acrylic paint: White or Cream
- Acrylic paint: Metallic Copper or Rose Gold
- Loose copper or gold glitter
- Plastic cling wrap
- Scissors
Step 1: Preparation & Puddles
-
Prepare the workspace:
Lay down a drop cloth or old newspaper to protect your table, though this method keeps most of the mess contained. -
Position the canvas:
Place your canvas flat on the table, ensuring it is stable and won’t slide around easily. -
Apply the base color:
Squeeze generous, coin-sized puddles of sage green paint randomly across the canvas surface. -
Add contrast:
Note the open spaces between the green puddles and fill them with equal-sized dollops of white paint. -
Introduce the metallic:
Drizzle the metallic copper paint in thin lines or small blobs across both the green and white areas. -
Add sparkle:
Sprinkle a pinch of loose copper glitter directly onto the wet paint piles for that embedded shimmer seen in the photo.
Step 2: The Smoosh Technique
-
Cut the plastic:
Cut a piece of plastic cling wrap that is slightly larger than your canvas, leaving enough excess to hang over the edges. -
Cover the paint:
Gently lay the plastic wrap over the wet paint puddles, trying not to press down hard just yet. -
Secure the wrapping:
I find it helpful to fold the excess plastic over the edges of the canvas to keep it in place during the fun part. -
Begin smooshing:
Have your toddler use their palms to gently press down on the paint, squishing the colors toward each other. -
Spread to edges:
Encourage pushing the paint all the way to the corners so the entire white canvas surface is covered. -
Swirl gently:
Use fingertips to trace light swirls through the plastic, mingling the copper into the green without fully blending them. -
Monitor the mixing:
Keep an eye on the colors; stop the squishing process as soon as you see a beautiful marble pattern to avoid creating a muddy color.
Stop the Mud
The hardest part is knowing when to stop! Halt the smooshing while distinct streaks of white and copper are still visible to keep the crisp marble look.
Step 3: Reveal & Dry
-
Lift the plastic:
Starting from one corner, very slowly peel the plastic wrap off the canvas. -
Observe the texture:
As you lift, the suction creates organic veins and ridges that give the painting its stone-like appearance. -
Remove completely:
Pull the plastic entirely away and discard it immediately to avoid errant drips. -
Touch up edges:
If there are bare spots on the sides, use a gloved finger to dab a little excess paint onto the canvas edge. -
Allow to dry:
Let the artwork dry flat in a safe area for at least 24 hours, as the thick paint layers take time to set.
Glossy Finish
Once the painting is bone dry (wait 48 hours), brush on a coat of high-gloss varnish. This mimics the look of polished agate stone.
Once dry, you’ll have a shimmering, professional-looking piece of abstract art that captures a fun creative moment.
Nature’s Paintbrushes
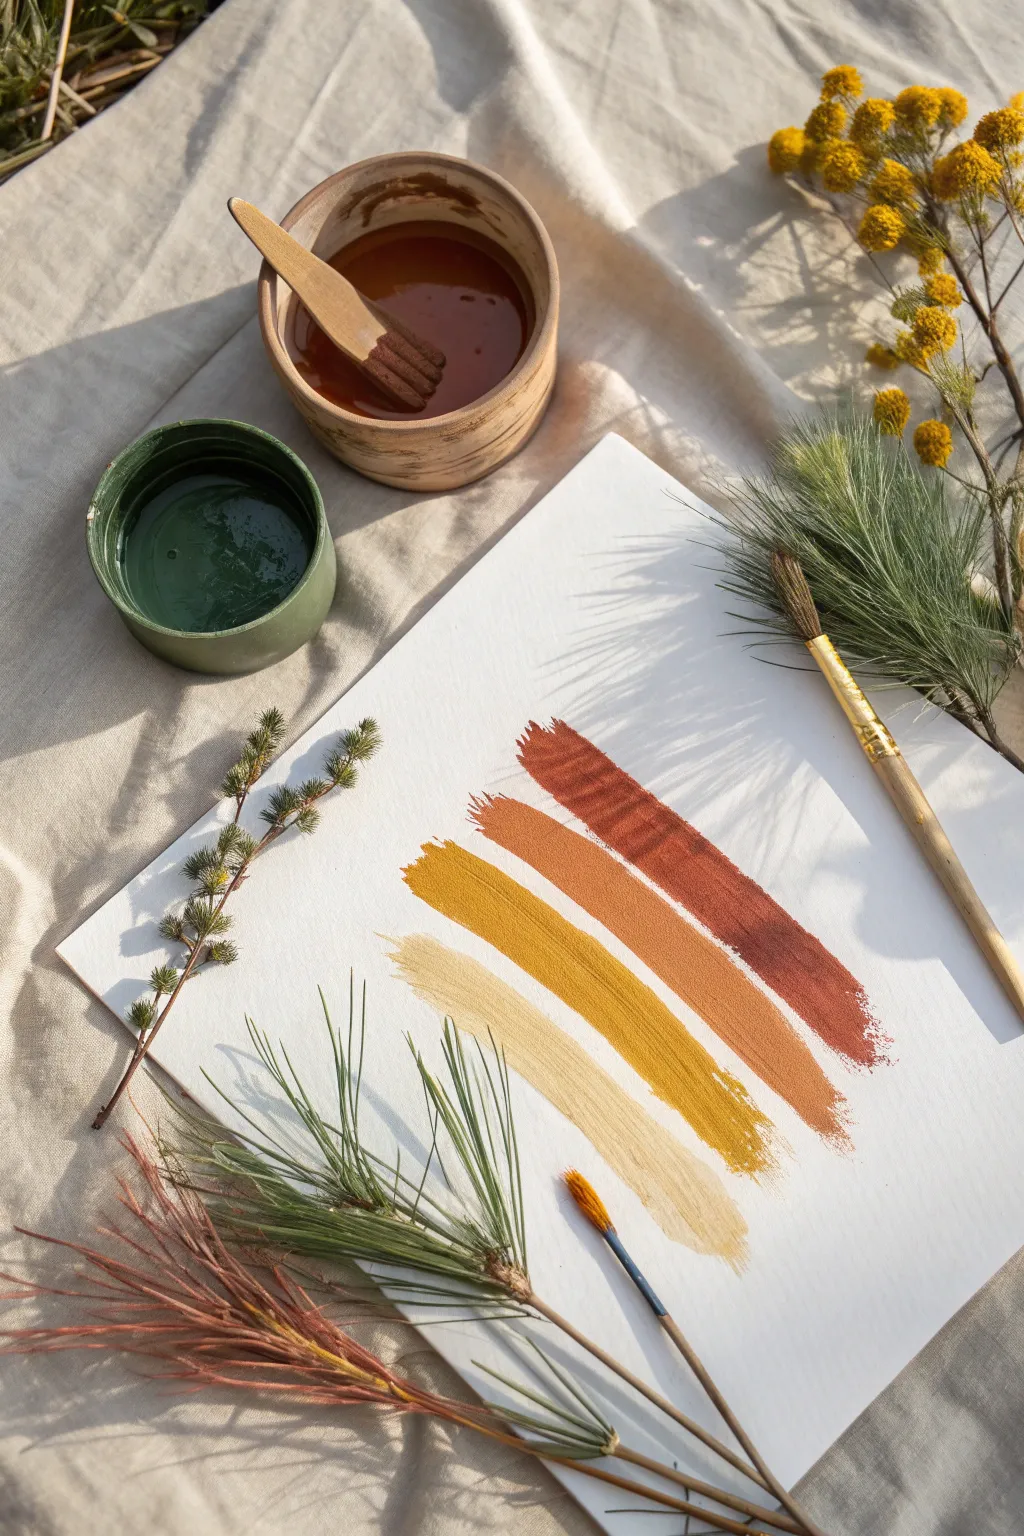
Transform a simple nature walk into a creative session by using foraged finds as painting tools. This project creates a stunning, textured abstract piece using earth tones and the unique bristles of pine branches and dried stems.
Step-by-Step
Materials
- Heavyweight watercolor paper or canvas sheet
- Acrylic paints (Dark Rust, Terracotta, Mustard Yellow, Cream)
- Wide-mouthed bowls or shallow jars
- Fresh pine branches/needle clusters
- Stiff dried flower stems or twigs
- Palette knife or craft stick (for mixing)
- Drop cloth or messy mat
- Water for thinning paint
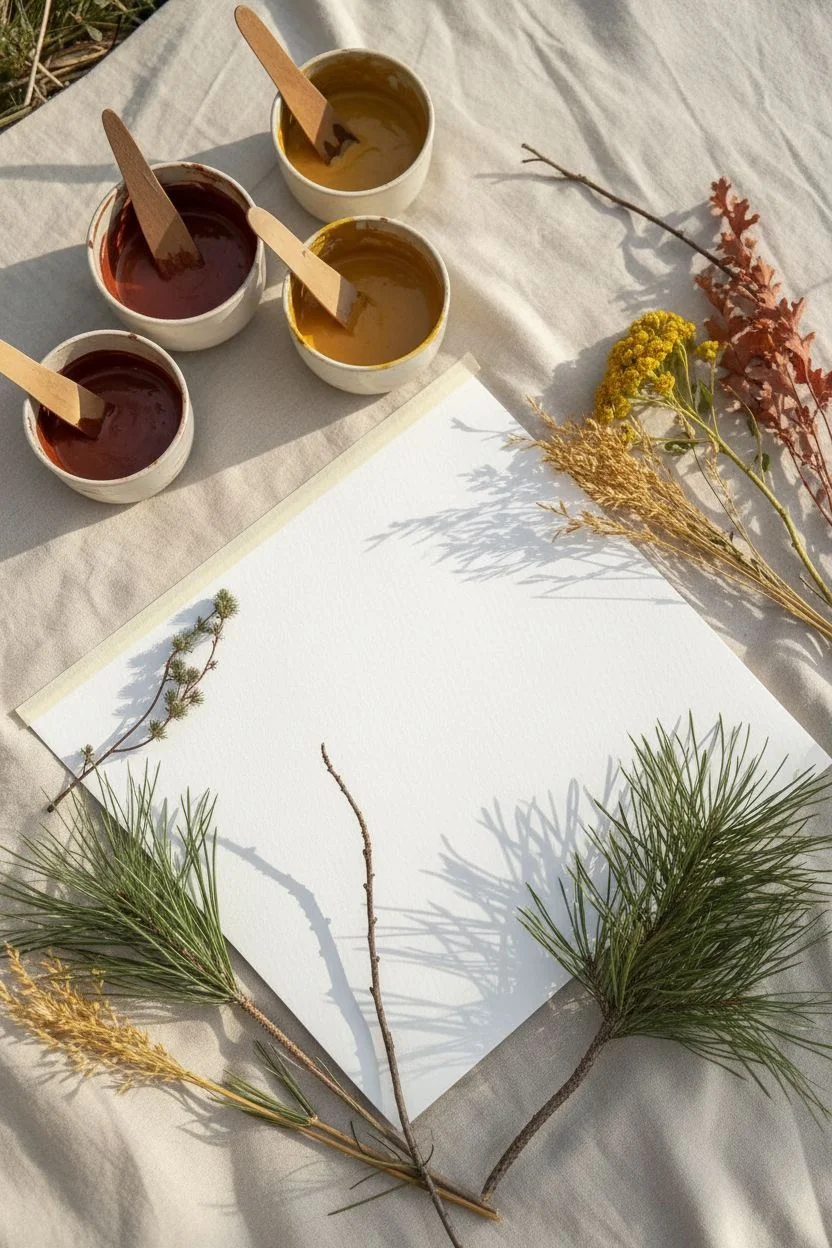
Step 1: Foraging & Prep
-
Gather your tools:
Take a stroll outside with your toddler to collect natural ‘brushes.’ Look for pine branches with long needles, stiff dried grasses, or sturdy flower stems. -
Prepare the workspace:
Lay down a drop cloth or messy mat, ideally outdoors or on a washable table, as painting with branches can occasionally splatter. -
Set up the palette:
Squeeze your acrylic paints into separate shallow bowls. You want containers wide enough to dip a bundle of pine needles into easily. -
Mix your shades:
Aim for a cohesive earth-tone palette. If you don’t have the exact shades, mix orange with a little brown for terracotta, or yellow with a touch of brown for mustard. -
Adjust consistency:
Add a few drops of water to each bowl and mix. The paint should be fluid enough to drip slightly, similar to heavy cream, which helps it flow off the needles. -
Secure the paper:
If using paper instead of a canvas board, take loose sheets and tape the corners down to prevent them from sliding around while you paint.
Natural Grip
Wrap masking tape around the handle end of the pine branch bundles. This creates a comfortable grip for little hands and keeps the needles together.
Step 2: Painting with Nature
-
Test the texture:
Before starting the final piece, let your toddler dip a pine branch into paint and drag it across a scrap paper to see the cool lines it makes. -
Start dark:
Begin with your darkest color, the deep rust. Dip a fresh cluster of pine needles into the paint, ensuring the tips are well-coated. -
Create the first stroke:
Press the painted needles onto the paper near the top. Drag them diagonally downward in one confident swooping motion to create a textured band. -
Observe the lines:
Point out how the individual needles act like the bristles of a brush, leaving scratchy, parallel lines that reveal the white paper underneath. -
Switch tools:
Pick up a new nature tool, perhaps a different type of leaf or a fresh pine bundle, for the next color to keep the shades clean. -
Apply the second color:
Dip into the terracotta or burnt orange paint. Place this stroke just below and parallel to the first one, leaving a small gap of white space between them. -
Add the mustard tone:
Using a stiff dried flower stem or another pine bunch, dip into the mustard yellow. Drag this stroke swiftly across the paper, maintaining the diagonal rhythm. -
Refine the edges:
If the paint clumps too much, I like to lightly feather the end of the stroke with a dry twig to pull the texture out further. -
Finish with light:
Complete the series with the lightest cream color at the bottom. This adds a lovely brightness and balances the darker tones above. -
Let it dry:
Allow the artwork to dry flat completely. The thicker ridges of paint created by the coarse texture may take a little longer to set.
Level Up
Try rotating the paper 90 degrees and painting a second set of strokes across the first ones once dry to create a plaid, woven texture effect.
Once dried, these textured masterpieces look beautiful framed in natural wood to match their earthy origins.

PENCIL GUIDE
Understanding Pencil Grades from H to B
From first sketch to finished drawing — learn pencil grades, line control, and shading techniques.
Explore the Full Guide
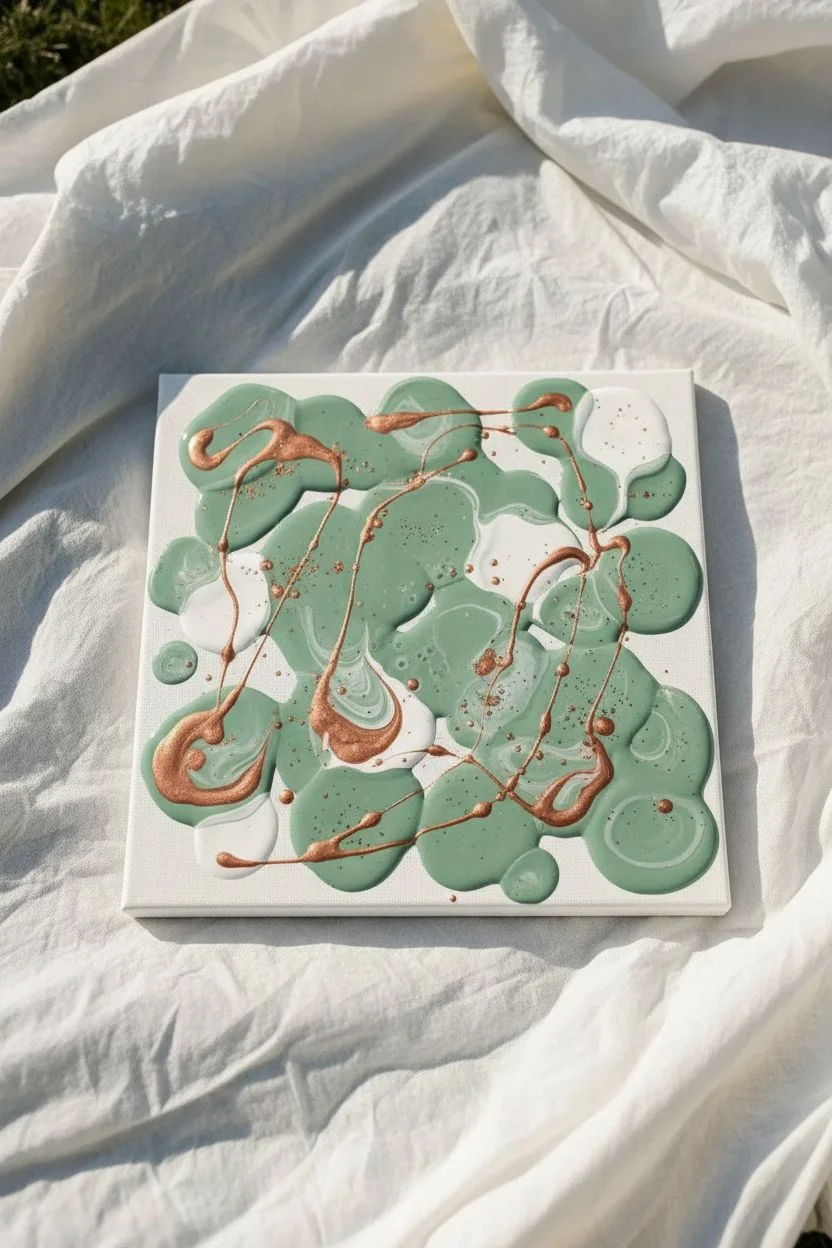
Squeeze Bottle Drip Art
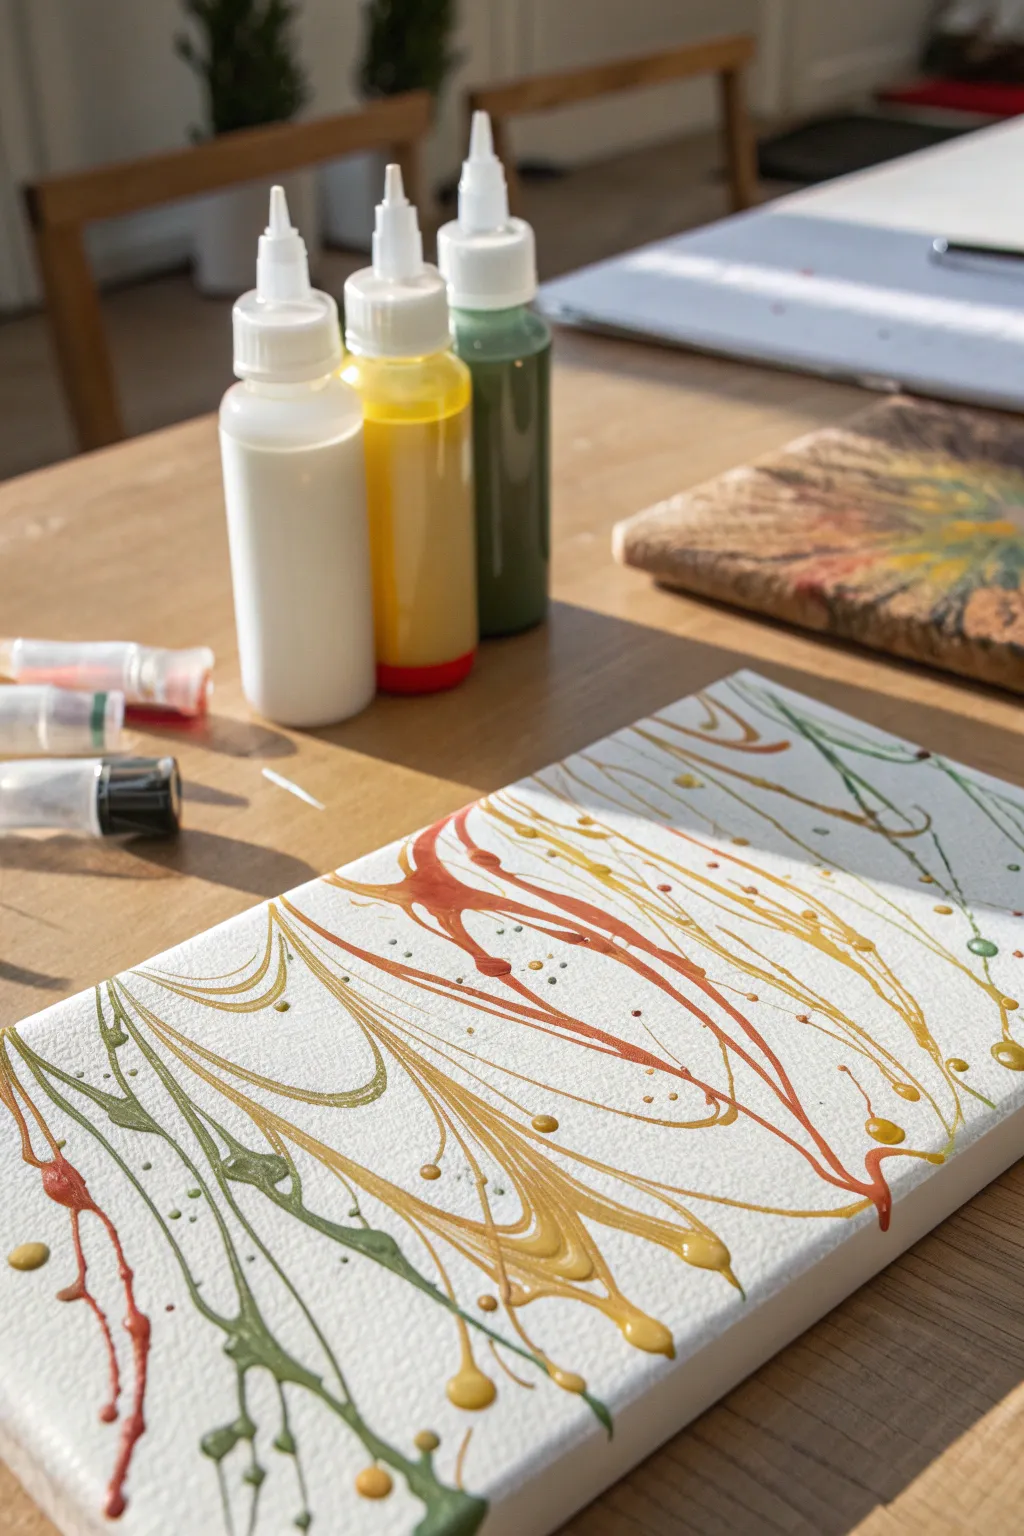
Ditch the brushes for this tactile art activity that creates beautiful, marble-like ribbons of color. By using squeeze bottles, your toddler can easily create mesmerizing, raised textures that look like professional abstract art.
Step-by-Step Guide
Materials
- Small rectangular canvas
- Plastic squeeze bottles (condiment style)
- Acrylic paints (Olive Green, Mustard Yellow, Burnt Orange, White)
- Pouring medium or water
- Protective table covering
- Paper towels for spills
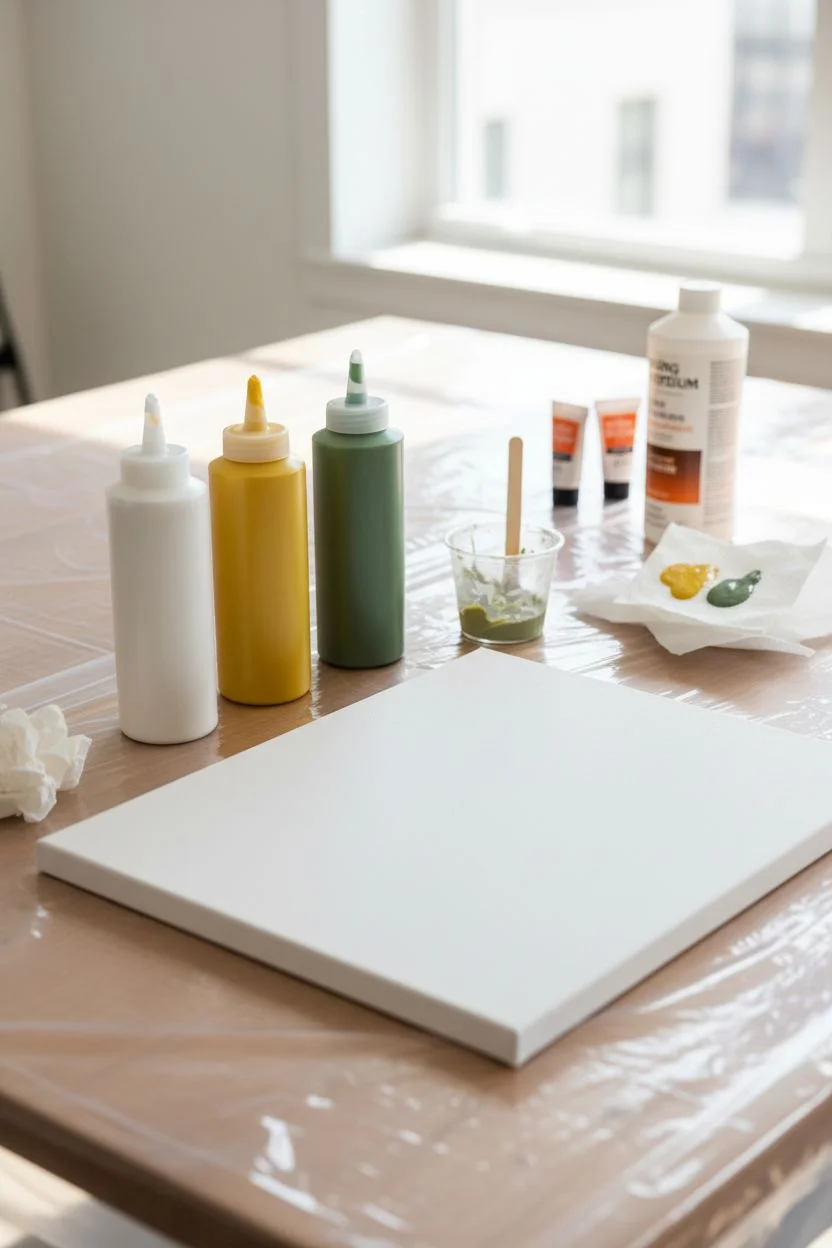
Step 1: Preparation and Mixing
-
Prepare the workspace:
Cover your table completely with the protective covering, as squeeze painting can sometimes surprise you with splashes. -
Select your palette:
Choose earth-toned acrylics like olive green, mustard yellow, and burnt orange to match the reference image. -
Mix the paint base:
In small cups, mix your acrylic paint with a pouring medium or a small amount of water. -
Check consistency:
Stir well until the paint has the consistency of fluid honey or melted ice cream; it needs to flow but hold its shape. -
Fill the bottles:
Carefully pour each color into its own squeeze bottle and screw the lids on tightly. -
Prime the tips:
I like to squeeze a small dot onto a paper towel first to ensure the air bubbles are out and the paint flows smoothly.
Flow Control Secret
Improve your line quality by keeping the bottle tip moving constantly. If you stop moving while squeezing, you’ll get a large puddle instead of a line.
Step 2: Creating the Drips
-
Position the canvas:
Lay the canvas flat on your table, ensuring it is stable and won’t slide around. -
Start with the lightest color:
Using the mustard yellow or white bottle, squeeze a continuous line starting from the top left corner. -
Create movement:
Encourage a wavy hand motion, creating loops and arches that stretch diagonally across the canvas surface. -
Layer the second color:
Take the olive green bottle and follow the general path of your first lines, crossing over them in some spots. -
Vary the pressure:
Squeeze harder in some areas to create thick pools of paint, and release pressure while moving fast to create thin, trailing lines. -
Add accent color:
Use the burnt orange paint sparingly to add pops of contrast between the green and yellow ribbons. -
Fill empty spaces:
Look for large white gaps and add small dots or short squiggles of white or yellow to balance the composition.
Step 3: Manipulating and Drying
-
The tilt technique:
Gently lift one end of the canvas just an inch or two to help the thicker pools of paint start to slide and drip naturally. -
Create drip tails:
Let gravity pull the paint lightly to create the thin ‘vein’ look seen in the finished artwork, then lay it back down. -
Check the edges:
Wipe away any drips that have run off the side of the canvas with a damp paper towel for a clean edge. -
Clean the bottles:
Immediately cap your bottles or wash the tips so the acrylic doesn’t dry inside the nozzle. -
Allow to cure:
Place the artwork in a safe, dust-free area to dry flat for at least 24 hours, as the thick ridges take time to harden.
Troubleshooting Clogs
If a bottle sputters or stops, don’t squeeze harder or it might explode. Use a paperclip to clear the dried paint from the nozzle tip.
Once fully dry, the raised texture of the paint leaves a wonderful tactile finish that looks great displayed on a shelf
The “Splash Zone” Collaborative Mural
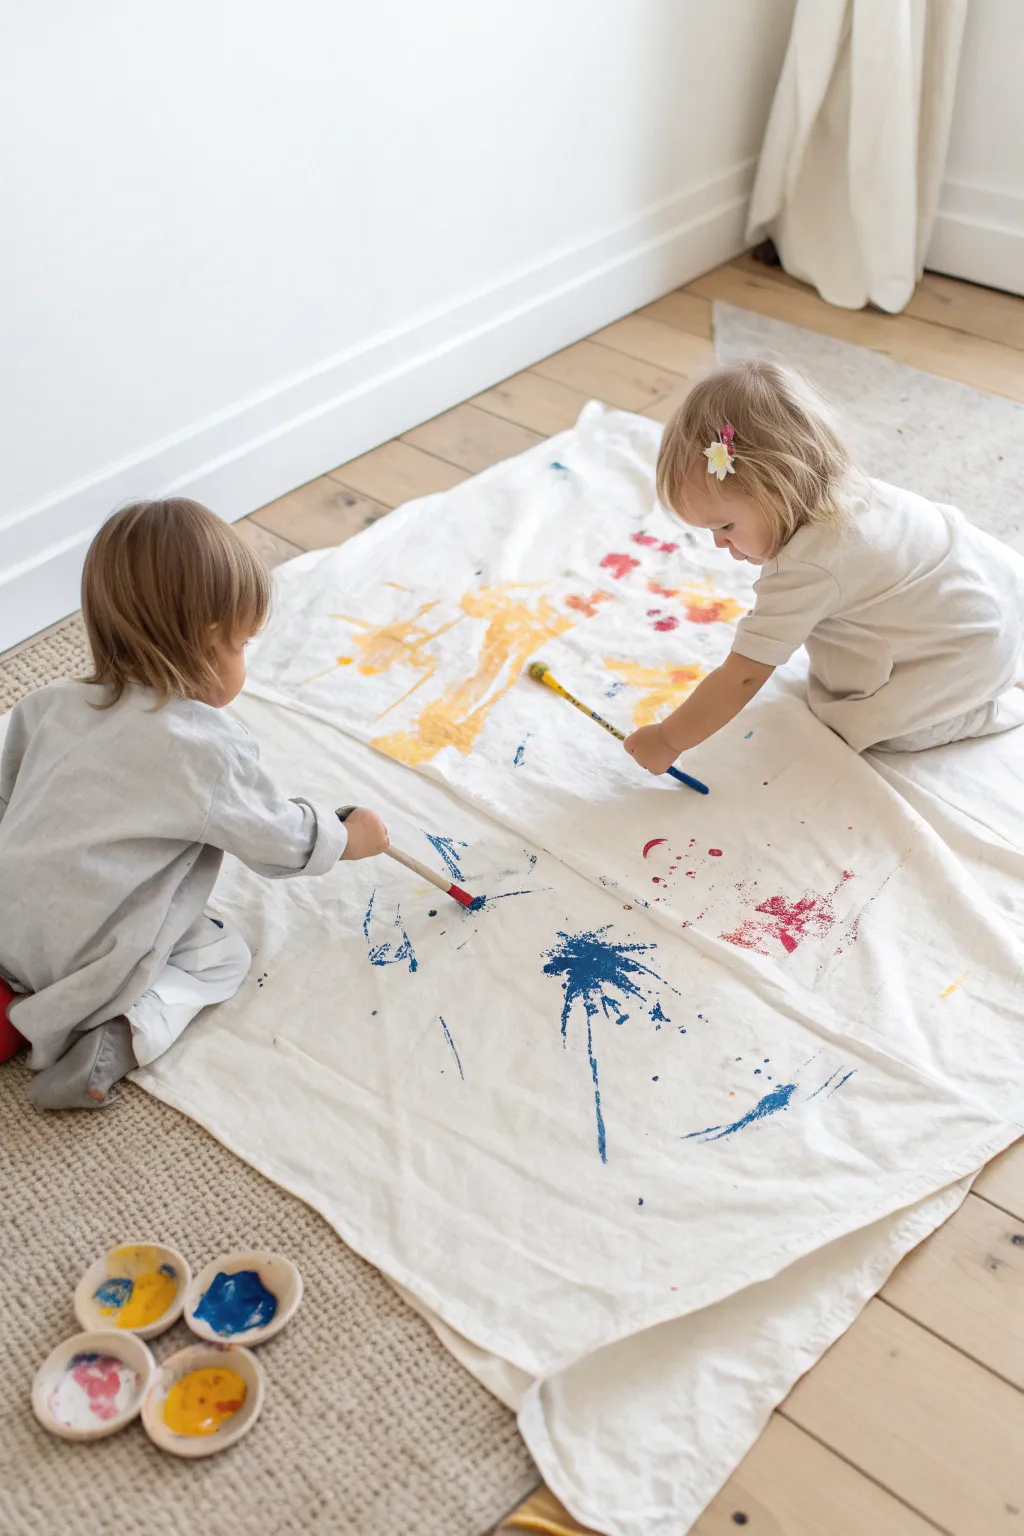
Transform your floor into a sprawling art studio with this large-scale painting project designed for energetic toddlers. Using a durable fabric canvas and broad strokes, this activity encourages collaborative play and results in a vibrant, abstract masterpiece worthy of display.
Step-by-Step
Materials
- Large heavyweight cotton canvas or drop cloth (approx. 4×5 feet)
- Washable tempera paints (Primary Yellow, Royal Blue, Bright Red)
- Small wooden pinch bowls or heavy-bottomed dishes
- Long-handled hog bristle paintbrushes
- Protective floor mat or rug
- Painter’s tape (optional)
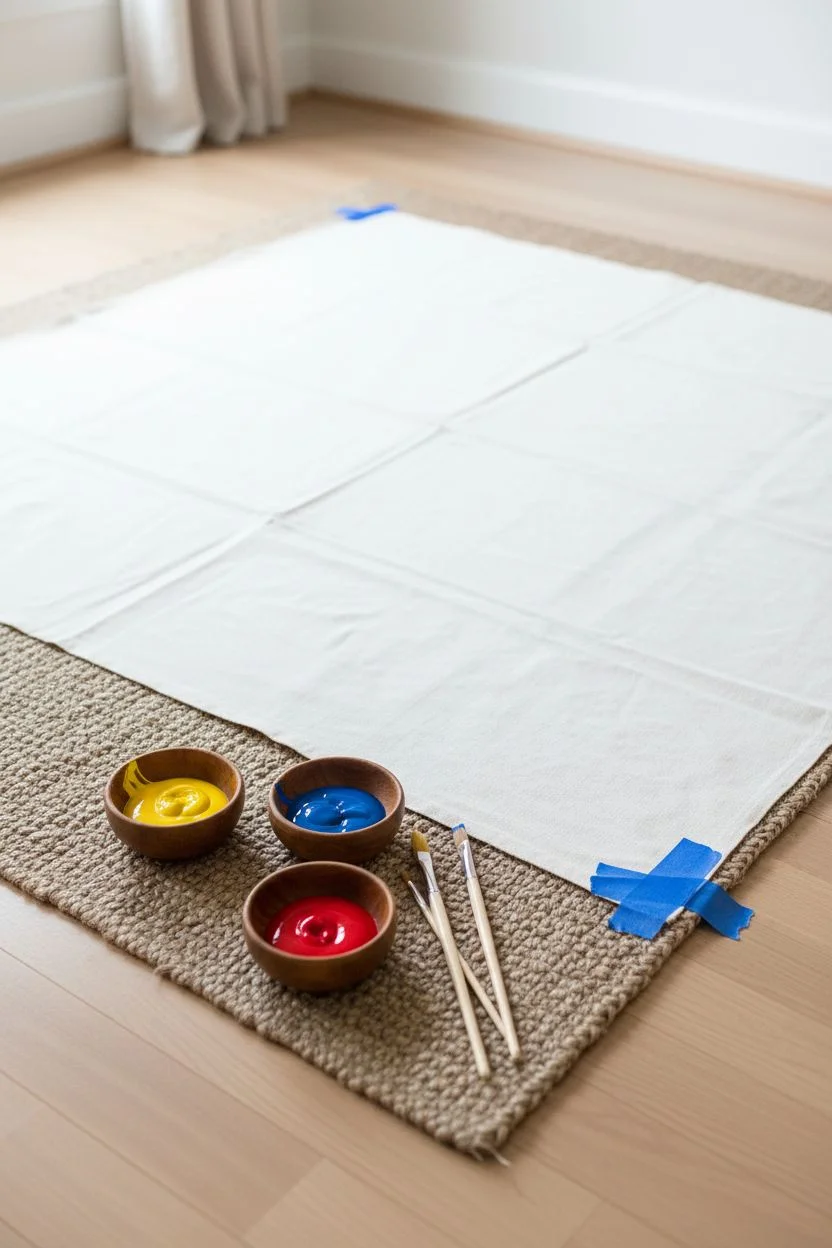
Step 1: Setting the Stage
-
Prepare the workspace:
Clear a large section of the floor to ensure plenty of elbow room for movement. Lay down a protective rug or plastic mat to catch any accidental spills that might migrate off the canvas. -
Position the canvas:
Unfold your large cotton canvas or drop cloth directly over the protected area. Smooth out any major creases with your hands to create a relatively flat surface for the little artists. -
Secure the edges (optional):
If your toddlers are particularly active, you might want to use painter’s tape to secure the corners of the canvas to the floor mat. This prevents the fabric from bunching up as they crawl around. -
Portion the paint:
Pour generous dollops of washable tempera paint into small, heavy wooden bowls. Using heavy bowls is key here, as they are harder for little hands to accidentally tip over. -
Arrange the palette:
Place the paint bowls and brushes in a cluster near the edge of the canvas, making them easily accessible but not directly in the path of movement.
Bleed-Through Defense
Paint soaking through? Slide a plastic tarp or a layer of flattened cardboard boxes under the fabric canvas. This protects your floors and rugs from heavy saturation while providing a firm surface.
Step 2: Painting in the Splash Zone
-
Demonstrate the dip:
Show the toddlers how to dip the long-handled brush into the wooden bowl, ensuring the bristles are fully coated with vibrant color. -
Encourage the first stroke:
Invite the children to make their first mark. Encourage long, sweeping arm movements to utilize the large scale of the fabric. -
Introduce the splatter technique:
Demonstrate a gentle flick of the wrist to create dynamic splashes and droplets like the blue bursts seen in the example. This adds energy and texture to the composition. -
Rotate colors:
Once a color has been explored, switch out the brushes or bowls. I find it helpful to offer one color at a time initially before introducing the full palette to prevent muddy brown mixing too early. -
Collaborative crossing:
Encourage the children to paint on each other’s ‘side’ of the canvas. Let the yellow strokes cross over the blue splashes to create natural green blends directly on the fabric. -
Manage paint density:
If large puddles of paint form, guide the toddler to use a dry brush to spread the pigment outward, turning the puddle into a wider shape. -
Add detail work:
Suggest using the tip of the brush handle or the very edge of the bristles to make thinner lines or dots amidst the broader chaotic strokes. -
Step back and observe:
Pause briefly to look at the artwork together. Point out the ‘busy’ areas and the empty white space, asking if they want to fill the gaps or leave them open.
Level Up: Art into Decor
Once the masterpiece is dry, crop the most interesting sections of the painted canvas to sew into unique throw pillow covers or stretch them over square wooden frames for a gallery-style look.
Step 3: Drying and Preserving
-
Remove materials safely:
Before moving the canvas, carefully collect all paint bowls and brushes and move them directly to the sink to avoid dripping on the finished work. -
Lift the canvas:
With the help of another adult if possible, gently lift the canvas by the corners, keeping it taut to prevent wet paint from running or smearing. -
Relocate for drying:
Lay the canvas flat in a safe, low-traffic area to dry. Because the paint application is thick, this may take 12 to 24 hours. -
Set the paint (optional):
If you used fabric medium mixed with your acrylics or tempera, you might need to heat-set the artwork with an iron (on the reverse side) once fully dry to make it permanent. -
Display or repurpose:
You can hang the entire canvas as a tapestry using wooden dowels, or wait for the ‘Level Up’ step to transform it into something new.
Enjoy the process of free expression and the beautiful chaos your little ones create on the canvas


Have a question or want to share your own experience? I'd love to hear from you in the comments below!