If you’ve been craving a wall that feels alive, a tree mural is one of my favorite ways to bring nature indoors. Here are a bunch of tree mural ideas—from classic, calming looks to playful and unexpected designs that really interact with your space.
Classic Single Tree Feature Wall
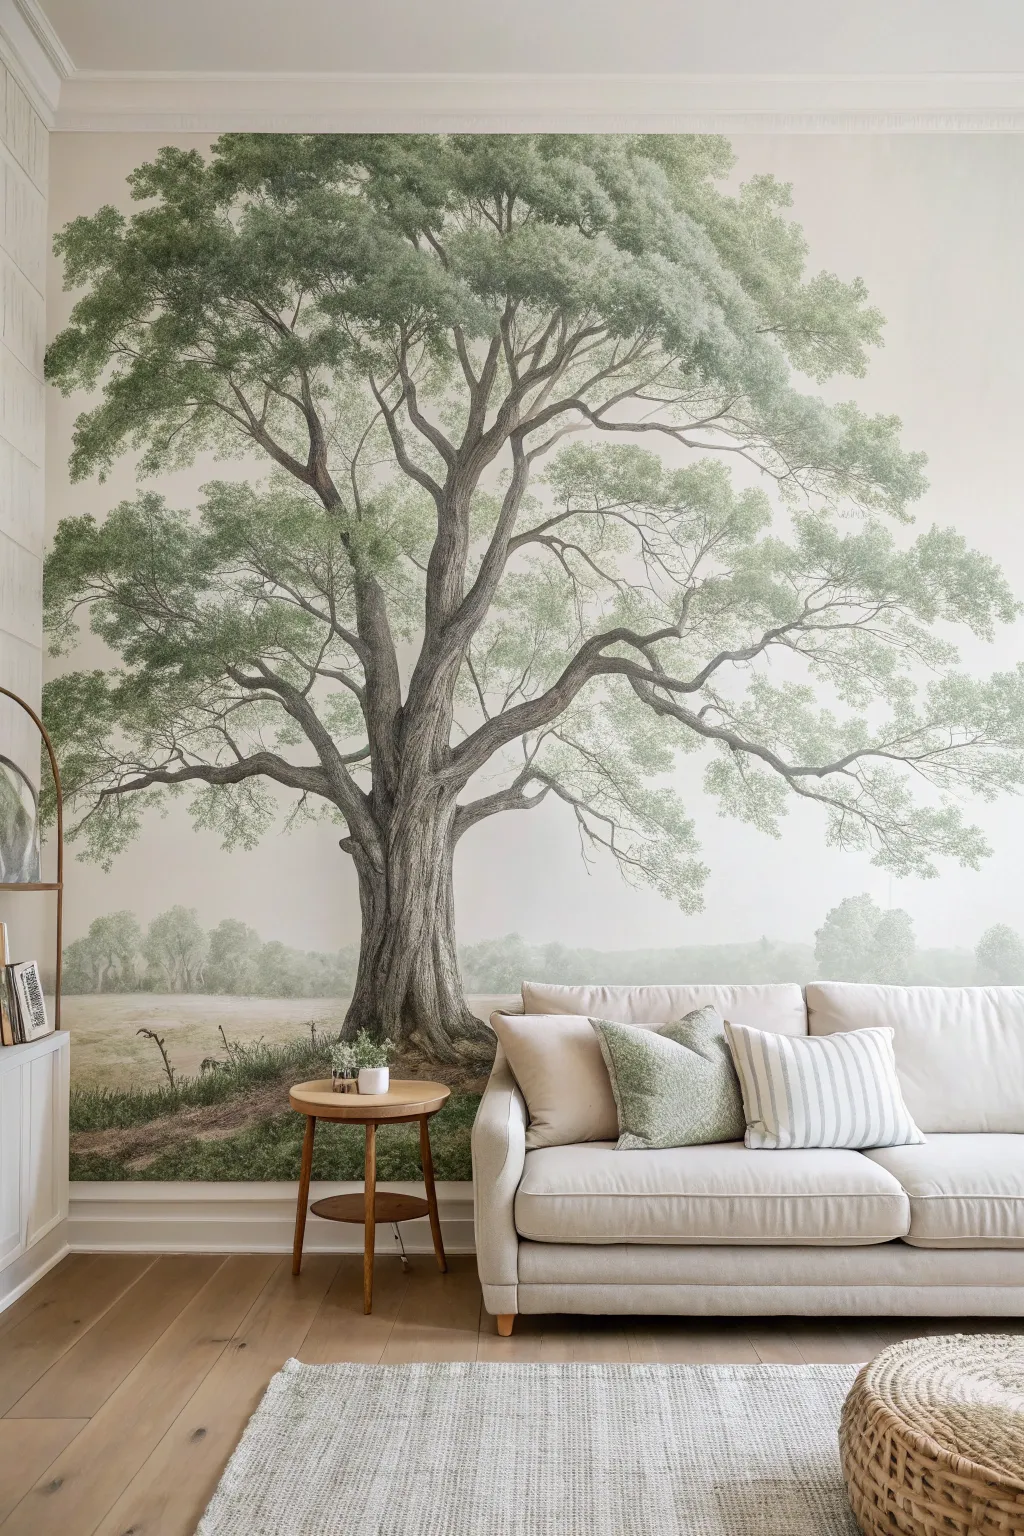
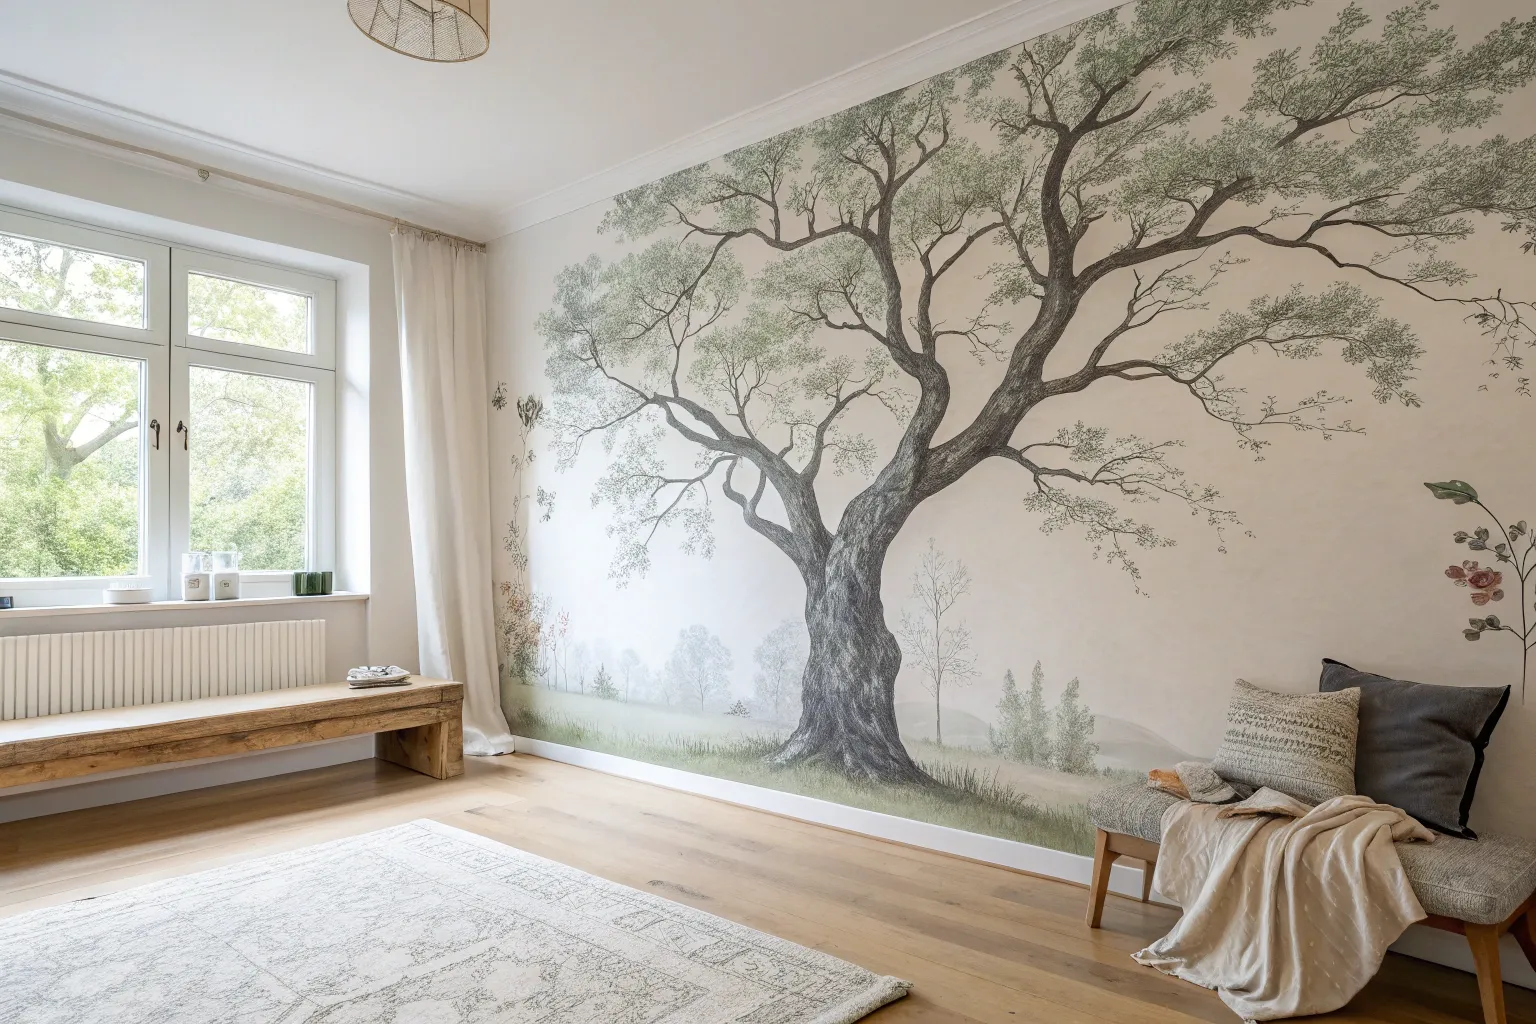
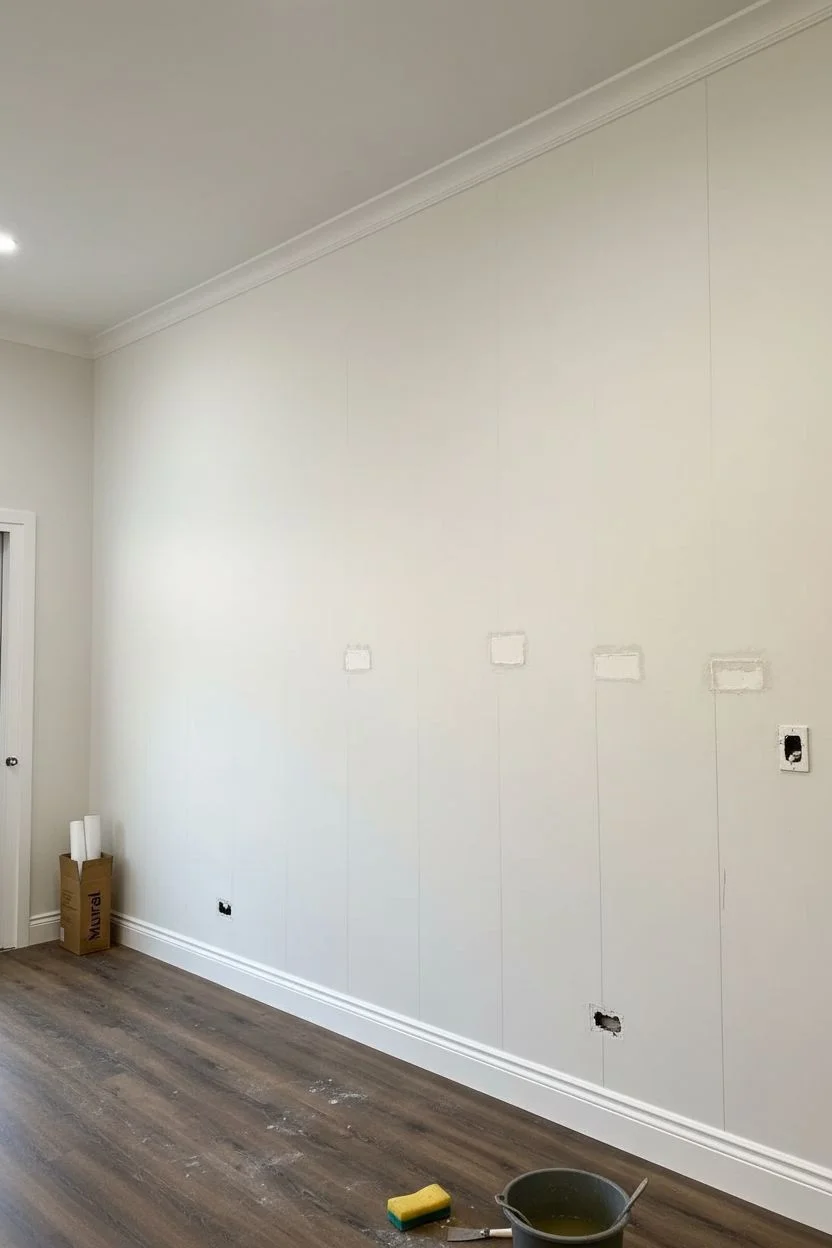
Transform your living space with the timeless elegance of a full-scale tree mural that evokes the charm of 19th-century botanical illustrations. This project creates a dramatic focal point using high-quality wallpaper panels to achieve a detailed, hand-drawn aesthetic without requiring advanced painting skills.
Step-by-Step Guide
Materials
- Custom-sized mural wallpaper (pre-pasted or paste-the-wall)
- Wallpaper paste (if not pre-pasted)
- Paste brush or roller
- Smoother tool (plastic or felt-edged)
- Sharp utility knife with snap-off blades
- Metal straight edge or ruler
- Stepladder
- Drop cloth
- Sponge and bucket of clean water
- Plumb bob or laser level
- Tape measure
- Pencil
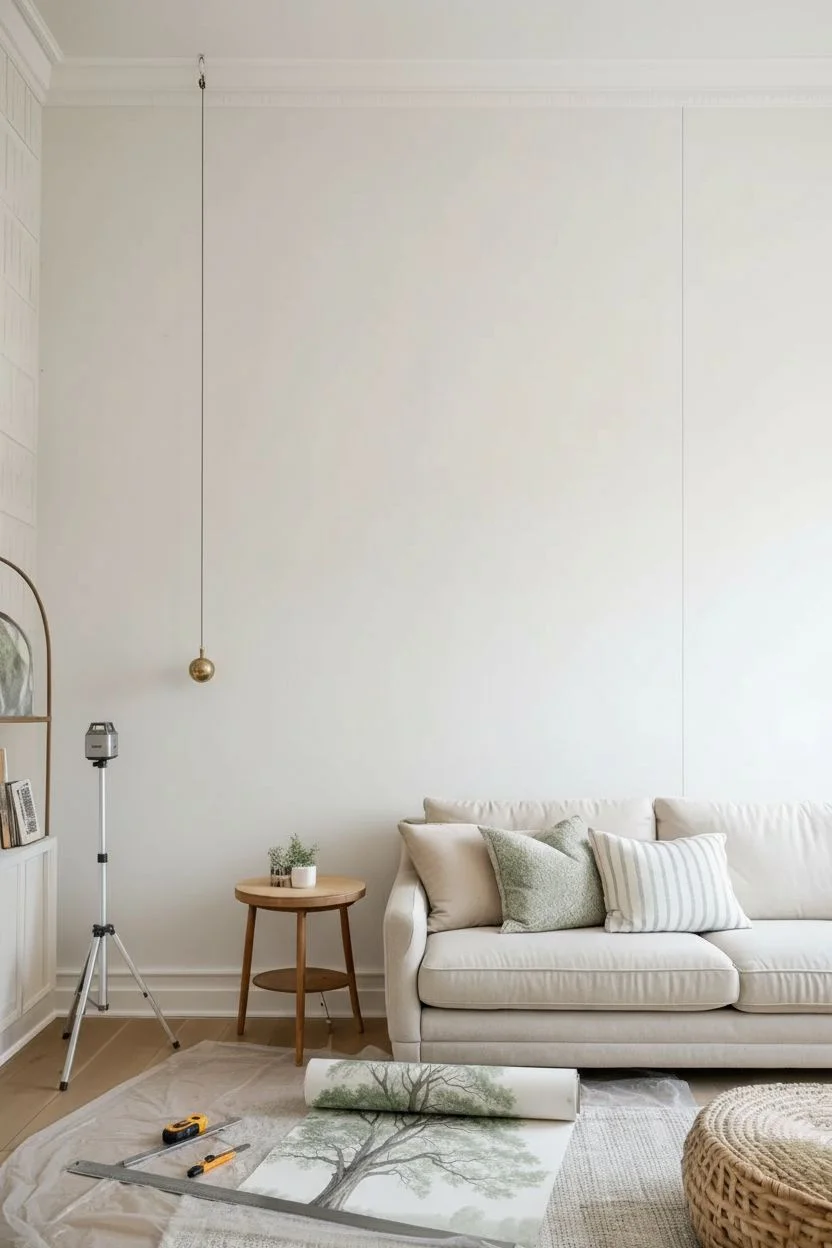
Step 1: Preparation & Planning
-
Measure the wall:
Begin by measuring your wall’s height and width accurately at three different points: the left, center, and right for height; top, middle, and bottom for width. Walls are rarely perfectly square, so use the largest measurements to order your mural, adding a few inches of bleed. -
Prepare the surface:
Remove any existing nails, screws, or outlet covers. Patch holes with spackle and sand them smooth once dry. Wash the wall with a mild detergent solution to remove dust and grease, which ensures the adhesive bonds properly. -
Unroll and acclimate:
Lay out your mural panels on the floor in the correct order to visualize the full image. Let the paper acclimate to the room’s temperature and humidity for at least 24 hours to prevent shrinking or expanding after installation. -
Establish a plumb line:
This is the most critical step for straight alignment. I like to start not in the corner, but about a panel’s width in. Use a laser level or plumb bob to draw a perfectly vertical pencil line where the edge of your first panel will sit.
Bubble Trouble?
If a large bubble appears after drying, use a syringe to inject a tiny amount of wallpaper paste into it, then smooth it flat with a roller.
Step 2: Installation
-
Apply adhesive:
If using ‘paste-the-wall’ paper, apply a generous, even layer of paste directly to the wall section for the first panel. If using pre-pasted paper, soak the panel according to the manufacturer’s instructions. -
Hang the first panel:
carefully lift the first panel and align its edge strictly with your pencil plumb line. Allow a couple of inches of excess paper to overlap the ceiling and the floor. -
Smooth it out:
Using your smoothing tool, gently press the paper against the wall, working from the center outward and downward. This pushes out air bubbles and ensures firm contact. -
Trimming the excess:
Once the panel is smooth, use your metal straight edge to firmly press the paper into the corner of the ceiling and wall. Run your sharp utility knife along the edge to trim the excess paper. Repeat for the bottom edge at the baseboard. -
Align the second panel:
Apply paste for the next section. Bring the second panel to the wall and match the pattern exactly with the first panel. The tree branches must flow seamlessly across the seam. -
Butt the seams:
Unlike traditional wallpaper that might overlap, mural panels usually butt up against each other. Push the edges together gently so they touch perfectly without overlapping or showing the wall underneath. -
Wipe away paste:
Immediately wipe off any excess paste that squeezes out of the seam using a damp, clean sponge. Do not rub aggressively; just dab and wipe gently to avoid damaging the print.
Step 3: Problem Solving & Finishing
-
Handling outlets:
When you encounter an electrical outlet, paper right over it. Feel for the corners of the box and carefully cut a small ‘X’ over the opening. Fold the flaps back and trim around the box, ensuring the faceplate will cover your cuts. -
Dealing with corners:
If your mural wraps around a corner, never try to bend a full sheet around it as it will pull away as it dries. Instead, cut the sheet vertically so it overlaps the adjacent wall by about a half-inch, then hang the remainder of the sheet over that overlap. -
Inspect for bubbles:
Step back and look for trapped air. If you find a stubborn bubble that won’t smooth out, prick it with a fine needle and gently press the air out. -
Final wipe down:
Give the entire wall one last gentle wipe with a fresh, damp sponge to remove any unseen adhesive residue that could leave a shiny finish once dry. -
Reattach hardware:
Once the wallpaper is visibly dry (usually after 24 hours), screw your outlet covers back on. -
Style the space:
Position your furniture to complement the tree. A low-profile sofa, as seen in the inspiration image, allows the trunk and lower branches to remain visible, grounding the artwork.
Dimensional Depth
Frame the mural with simple wood molding painted the same color as the baseboards to make it look like a giant framed art piece.
Enjoy the serene atmosphere your new vintage oak feature wall brings to the room


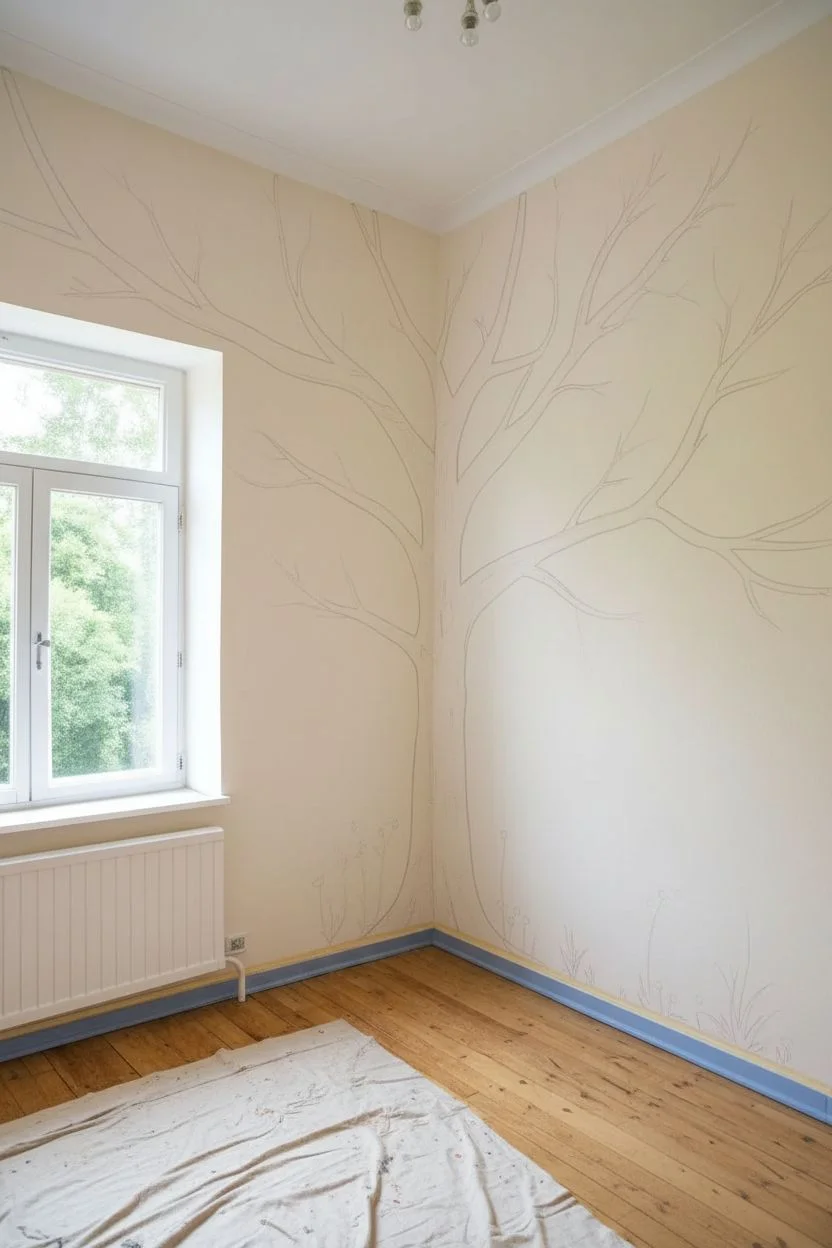
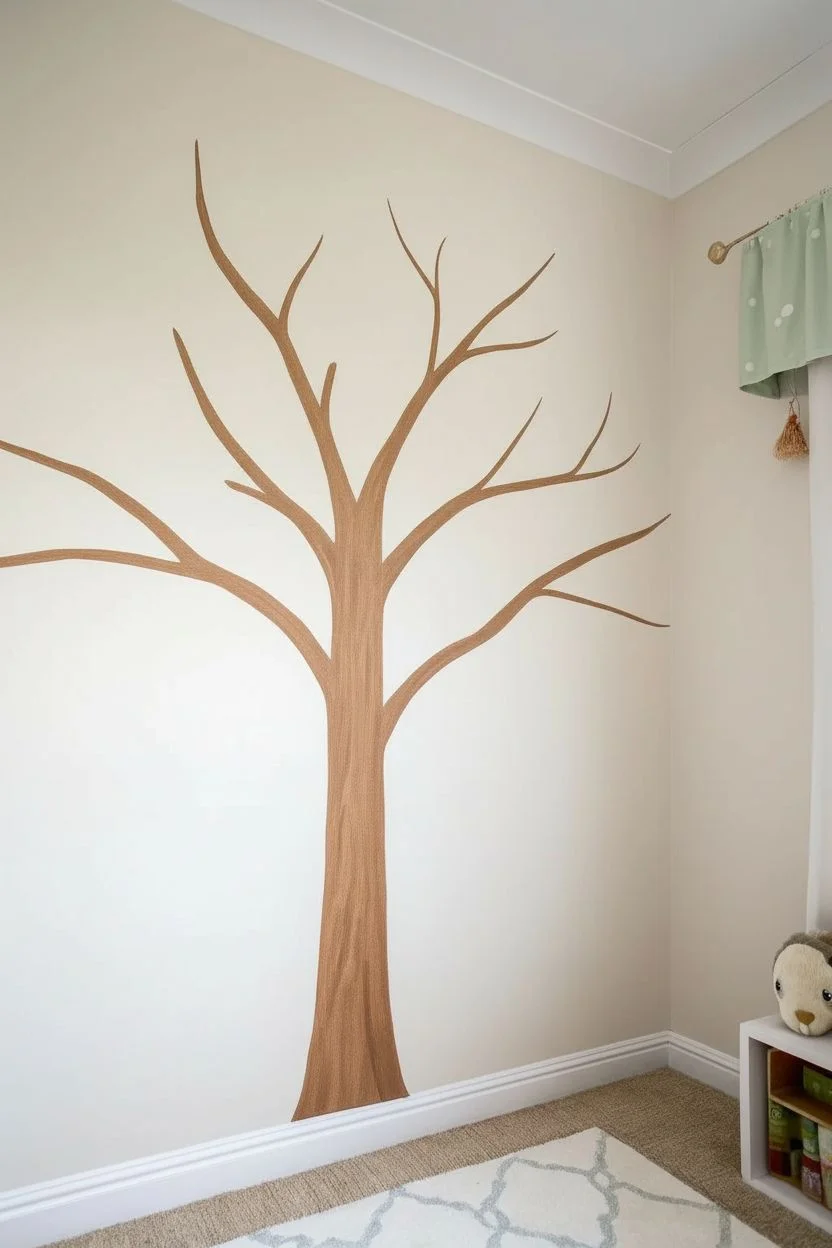
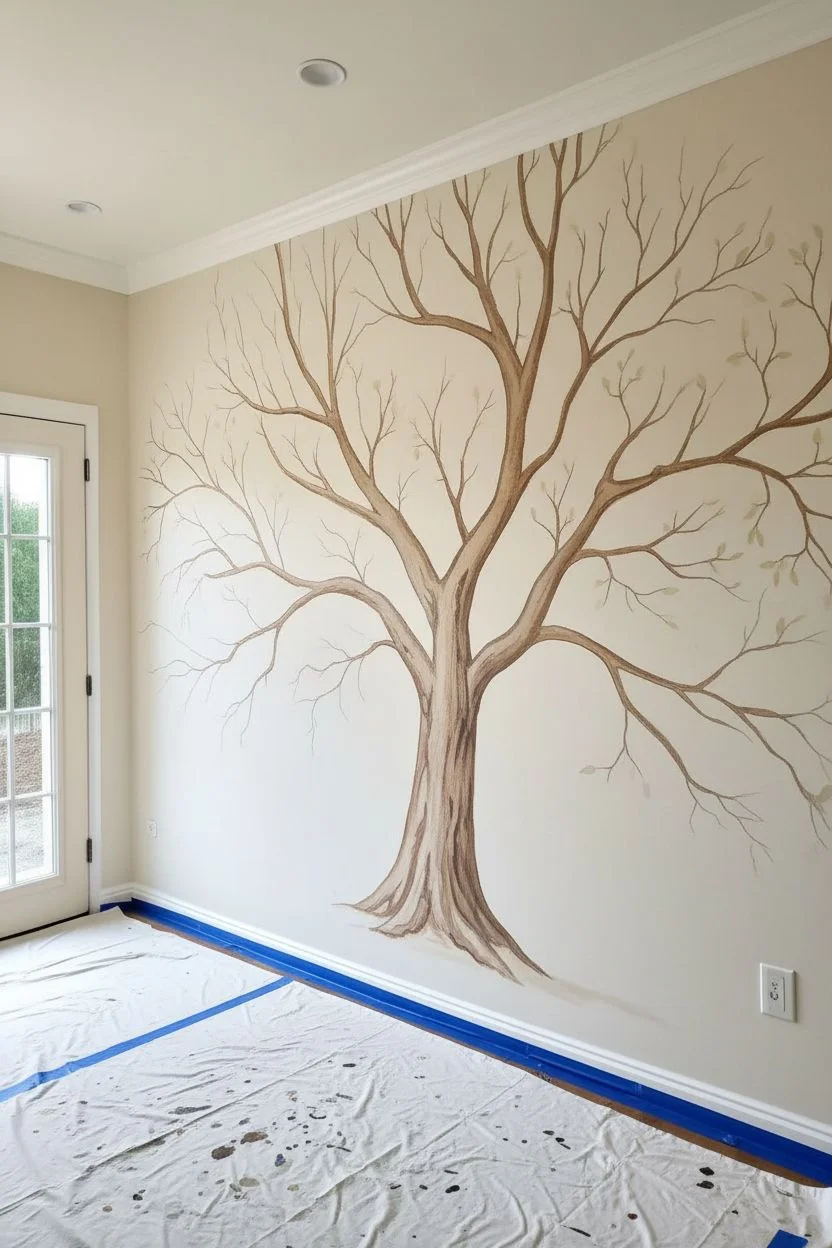
Simple Silhouette Tree for a Modern Look
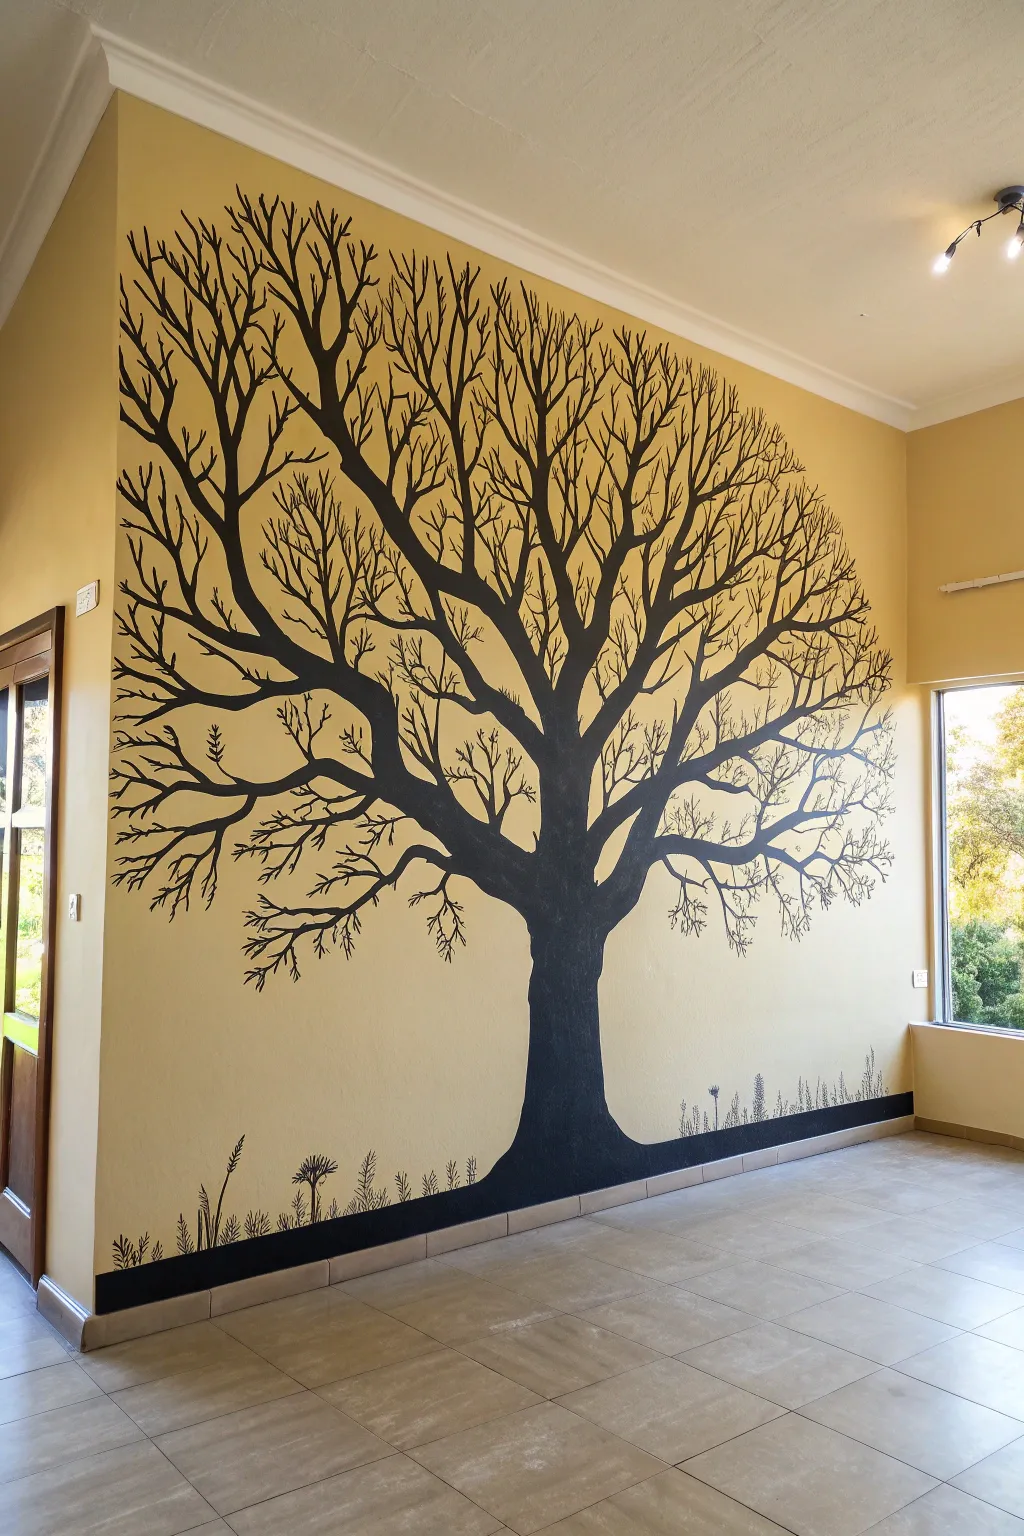
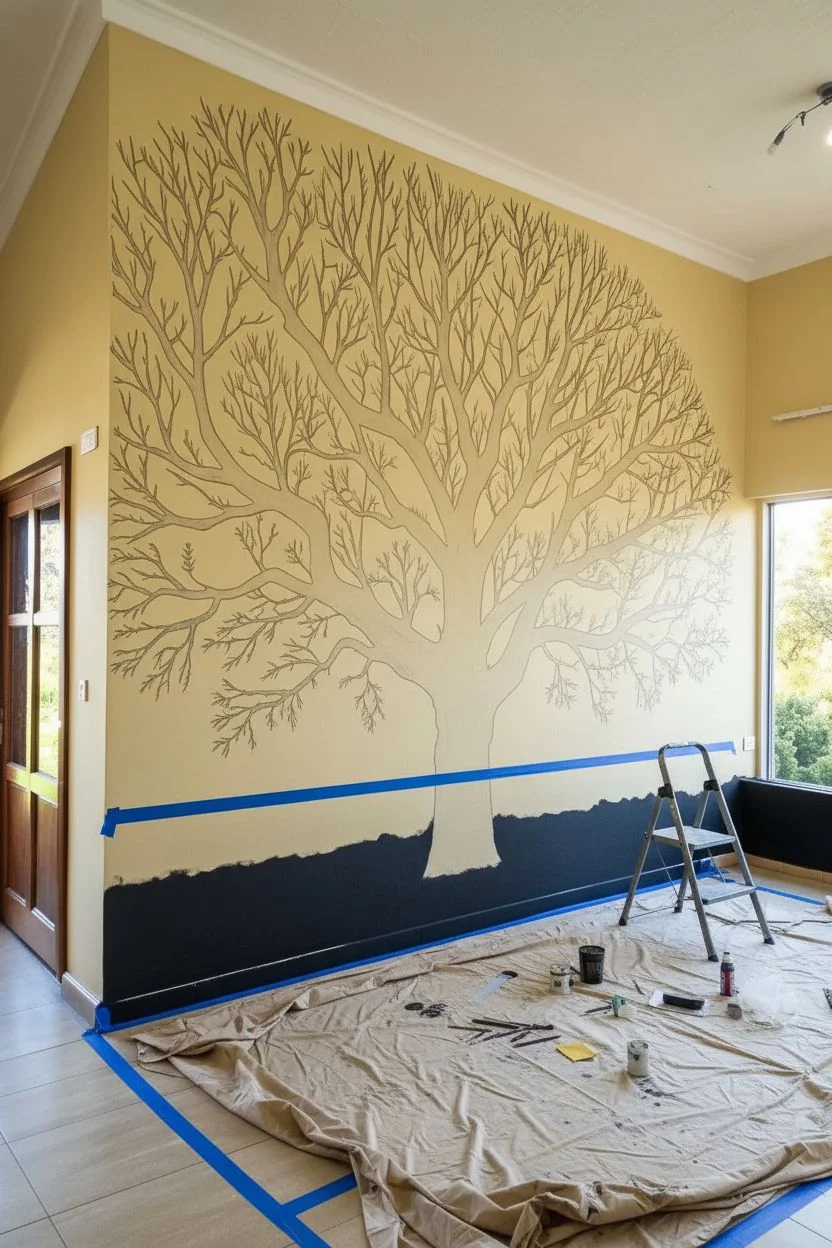
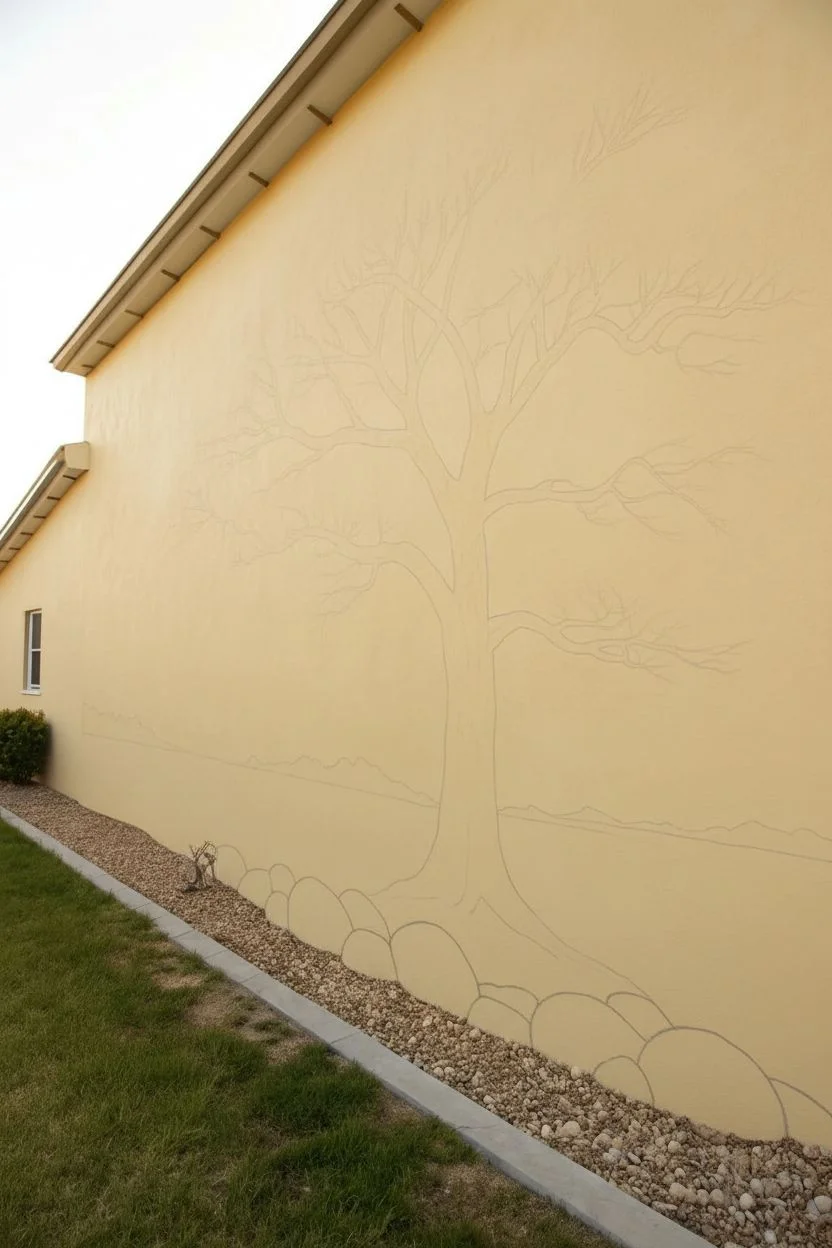
Transform a blank yellow or beige wall into a striking focal point with this bold, leafless tree silhouette. This mural plays with high contrast and organic lines to create a modern, minimalist statement piece that feels both grounded and expansive.
Step-by-Step Tutorial
Materials
- Interior acrylic latex paint (Matte Black)
- Beige or yellow wall paint (for base/touch-ups)
- Pencil (HB or lighter)
- Large eraser
- Assorted brushes: 2-inch angled sash brush (for trunk)
- Round synthetic brushes: sizes 4, 2, and 0 (for branches)
- Painter’s tape
- Drop cloth
- Step ladder
- Reference photo of a tree structure
Step 1: Preparation and Sketching
-
Prepare the workspace:
Clear the area against the wall and lay down a drop cloth to protect your flooring. Tape off the baseboards and any adjacent trim or door frames to ensure crisp edges later. -
Establish the ground line:
Decide on the horizon line for your mural. Measure up from the baseboard (about 4-6 inches) and run a long strip of painter’s tape horizontally across the wall where the black ‘ground’ will end. -
Draft the trunk silhouette:
Using a light pencil, sketch the main trunk. Start wide at the bottom, mimicking a root flare, and taper it gently as you move upward toward the center of the wall. -
Map out primary branches:
Draw three to four main thick branches splitting off from the trunk. Keep your lines organic and slightly wavy; trees rarely have perfectly straight limbs. -
Fill in the canopy structure:
Sketch the secondary branches extending from the primary ones. I like to step back frequently here to ensure the overall shape balances well on the wall. -
Detail the twig ends:
Lightly indicate where the finest twigs will go at the very tips. You don’t need to draw every single line, just get the general direction and density planned out.
Step 2: Painting the Tree
-
Paint the base strip:
Fill in the area below your horizontal tape line with black paint using a larger brush. Paint slightly over the tape edge to seal it. -
Fill the trunk:
Use the 2-inch angled brush to paint the main trunk. Use long, smooth vertical strokes to minimize texture and get solid coverage. -
Paint primary branches:
Switch to a smaller round brush (size 4) as the branches narrow. Focus on keeping the connections between the trunk and branches smooth and curved, like a ‘V’ or ‘U’ shape. -
Extend to secondary branches:
Continue moving outward with a size 2 brush. Remember to twist the brush slightly as you pull the stroke to create natural tapering and irregularities. -
Add fine twigs:
For the delicate tips, use your size 0 or liner brush. Use thinned paint (add a drop of water) for better flow, allowing you to flick the brush for sharp points. -
Clean up edges:
step back and look for any wobbly lines on the thick branches. Carefully smooth them out with the round brush to maintain that crisp silhouette look.
Uneven Coverage?
If the black looks streaky after one coat, don’t overwork it while wet. Let it dry completely, then apply a second coat for that solid, opaque vinyl-sticker look.
Step 3: Ground Details and Finishing
-
Remove the tape:
While the paint is still slightly tacky, carefully peel off the horizontal tape strip to reveal a sharp line for the ground. -
Paint grass blades:
Using the smallest brush, paint varying heights of grass blades rising directly from the black ground line. Group them in small tufts rather than a uniform picket fence row. -
Add floral silhouettes:
Intersperse the grass with simple wildflower shapes. Paint thin vertical stems topped with small ovals, circles, or spikes to represent seed heads and blooms. -
Erase guidelines:
Once the paint is fully dry (wait at least 4 hours), use a large eraser to gently remove any visible pencil marks that weren’t covered by paint.
Add Depth
Mix a tiny amount of charcoal grey paint and highlight just the right edge of the trunk and main branches to give the silhouette a hint of 3D volume.
Enjoy the dramatic atmosphere this simple yet elegant nature scene brings to your room


Corner-Wrap Tree Trunk That Softens the Angle
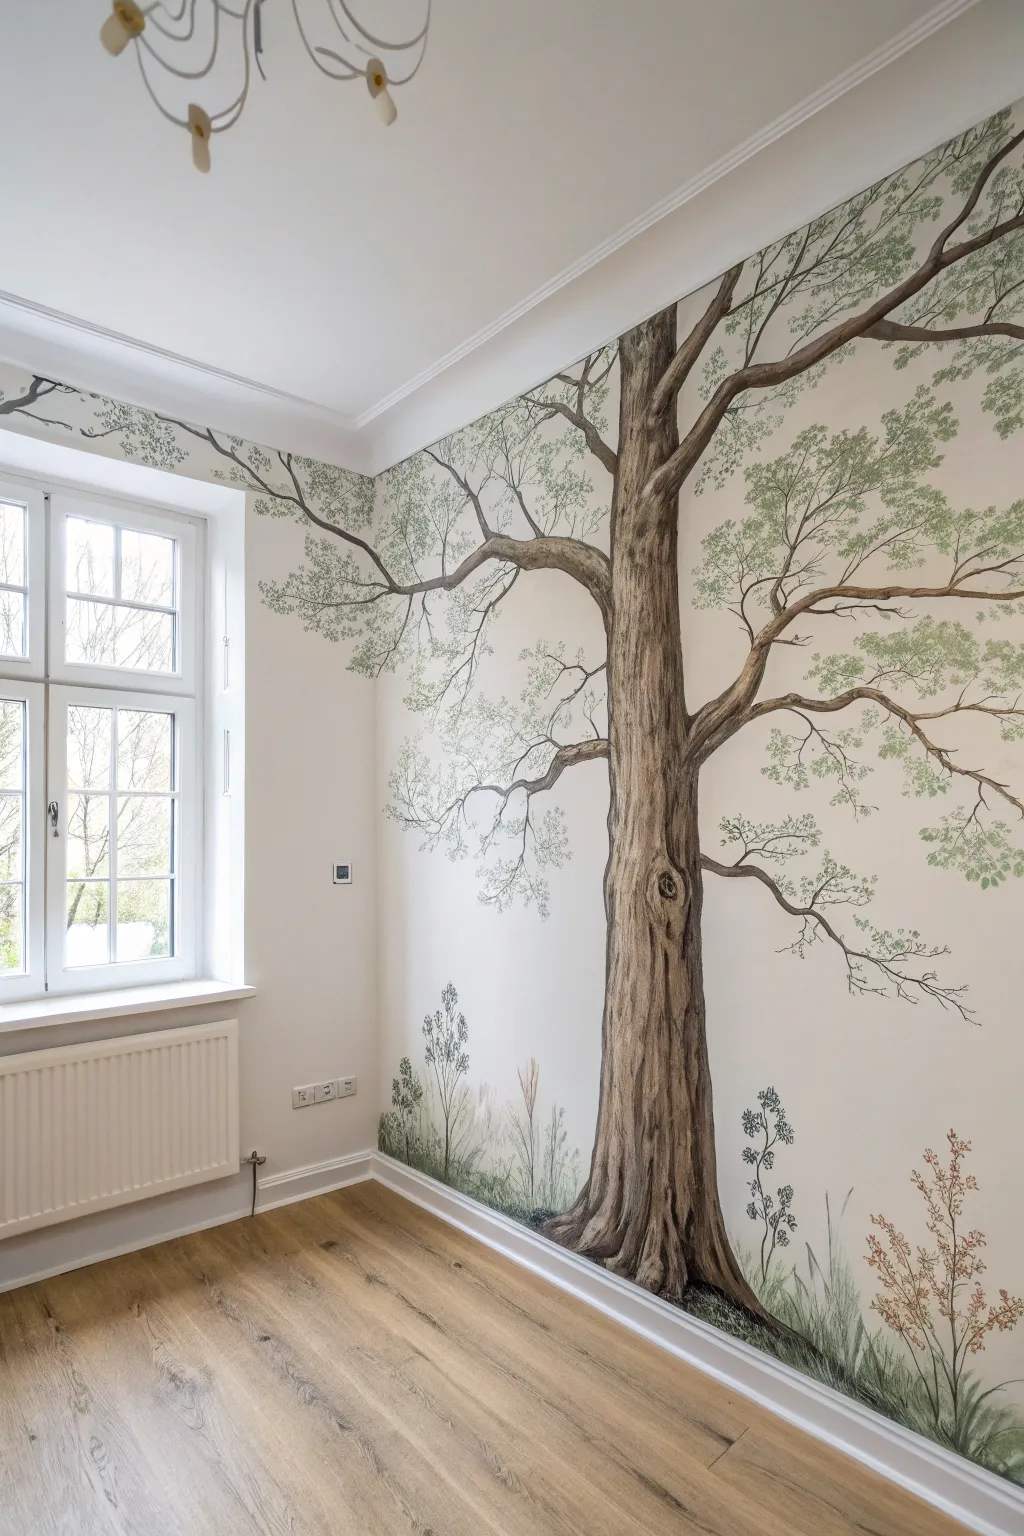
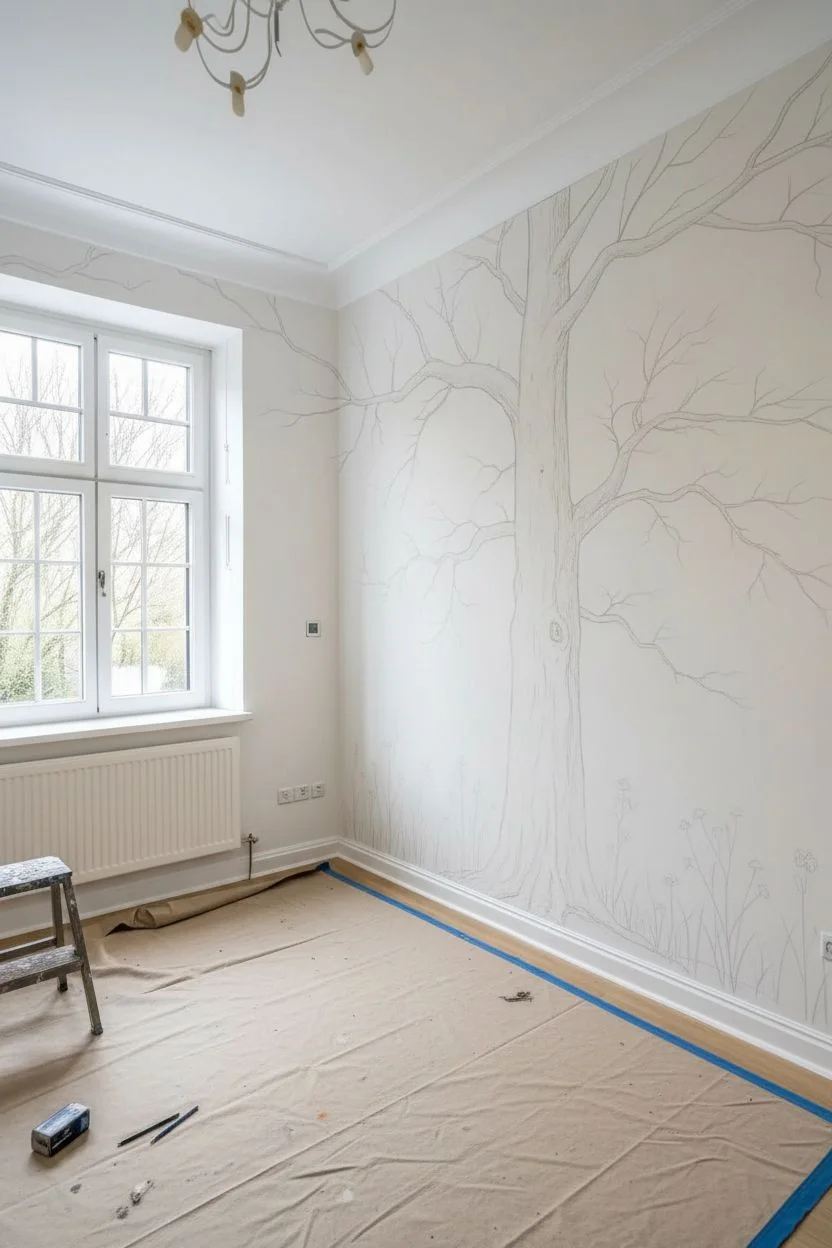
Transform a plain corner into a serene woodland escape with this illustrative tree mural. Featuring a textured trunk that anchors the space and delicate branches that reach across adjacent walls, this design softens harsh architectural angles with organic flow.
Step-by-Step Guide
Materials
- Interior latex paint (Eggshell or Satin base wall color, likely off-white/cream)
- Acrylic paints (Dark brown, medium warm brown, taupe, sage green, muted olive, dark green)
- Assorted brushes: 2-inch angled sash brush, 1-inch flat brush, round brushes (#4, #8), liner brush
- Pencil and large eraser
- Painter’s tape
- A ladder or sturdy step stool
- Mixing palette or plastic plates
- Water cup and rags
- Drop cloth
Step 1: Preparation and Sketching
-
Prep the space:
Clear the corner of furniture and lay down a drop cloth to protect your flooring. If the walls need a fresh base coat, apply a warm off-white latex paint and let it cure completely for at least 24 hours. -
Map the trunk:
Using a pencil, lightly sketch the main trunk on the larger wall section. Position it about 1-2 feet away from the corner. Draw the base wider, tapering slightly as it goes up, with a slight lean or curve to make it feel organic rather than rigid. -
Extend the branches:
Sketch major branches radiating from the trunk. Crucially, draw 2-3 large branches that cross over the corner seam onto the adjacent wall (the window wall). This ‘wrapping’ effect is what integrates the two surfaces. -
Add secondary twigs:
From the main branches, sketch thinner secondary branches and twigs. Keep the lines somewhat jagged and unpredictable to mimic an old oak tree. -
Sketch ground details:
Lightly pencil in varied heights of grass, wildflowers, and weeds along the baseboard to ground the tree in a landscape.
Step 2: Painting the Tree Structure
-
Base coat the trunk:
Mix a medium taupe-brown acrylic paint. Using a 1-inch flat brush, fill in the entire trunk and the thickest branches. Don’t worry about perfect coverage; a little streakiness adds texture. -
Define the shadows:
While the base is dry to the touch, mix a dark chocolate brown. Use a round brush to paint long, vertical striations up the trunk to mimic deep bark fissures. Focus these darker tones on the side of the tree furthest from the light source (window). -
Add highlights:
Mix a lighter tan or cream into your base brown. Paint thinner vertical strokes on the ‘lit’ side of the ridges you just created, giving the bark a 3D cylindrical effect. -
Create the knot:
If you sketched a knot hole (like the one in the reference), paint a dark oval center. Circle it with concentric rings of your highlight and shadow colors to show the wood grain warping around it. -
Extend the reach:
Switch to a #4 round brush or a liner brush. Extend the branch tips using a dark brown, making sure to carry the paint right into the corner groove and out the other side onto the adjacent wall.
Seamless Corners
When painting the corner seam, dab the brush directly into the crease first, then pull the line outward in both directions. This prevents a white gap from showing when viewed from side angles.
Step 3: Foliage and Ground Cover
-
Stipple the canopy:
Mix a muted sage green with a touch of water to make it translucent. Using an old, splayed bristle brush or a round brush, dab clusters of leaves at the ends of the twigs. Keeps the clusters airy and separated. -
Layer depth in leaves:
Go back over your foliage clusters with a slightly darker olive green, concentrating on the bottom of each leaf clump to suggest volume and shadow. -
Detail the branches:
Use your liner brush and dark brown paint to add tiny connecting twigs that might be visible through the leaf clusters, connecting floating leaves back to the main structure. -
Paint the background grass:
At the floor level, use a watered-down green to wash in a soft, misty background layer of grass. Use upward, flicking strokes. -
Define foreground plants:
Using a liner brush and opaque dark green and brown, paint crisp, individual blades of grass and weed stalks in the foreground. Vary the heights significantly. -
Add floral accents:
Mix a soft reddish-brown or dusty pink. Dot tiny flowers onto the tall weed stalks at the base, keeping the stippling loose and delicate. -
Final review:
Step back to the center of the room. Look for any branches that stop abruptly at the corner seam and connect them visually so the transition looks seamless.
Seasonal Switch
Keep the foliage sparse and focused on the branch tips. This allows you to easily add painted autumn leaves or even glue on 3D paper blossoms later without repainting the whole tree.
Enjoy the peaceful atmosphere your new hand-painted forest brings to the room


Ceiling-Extended Canopy That Feels Like Shade
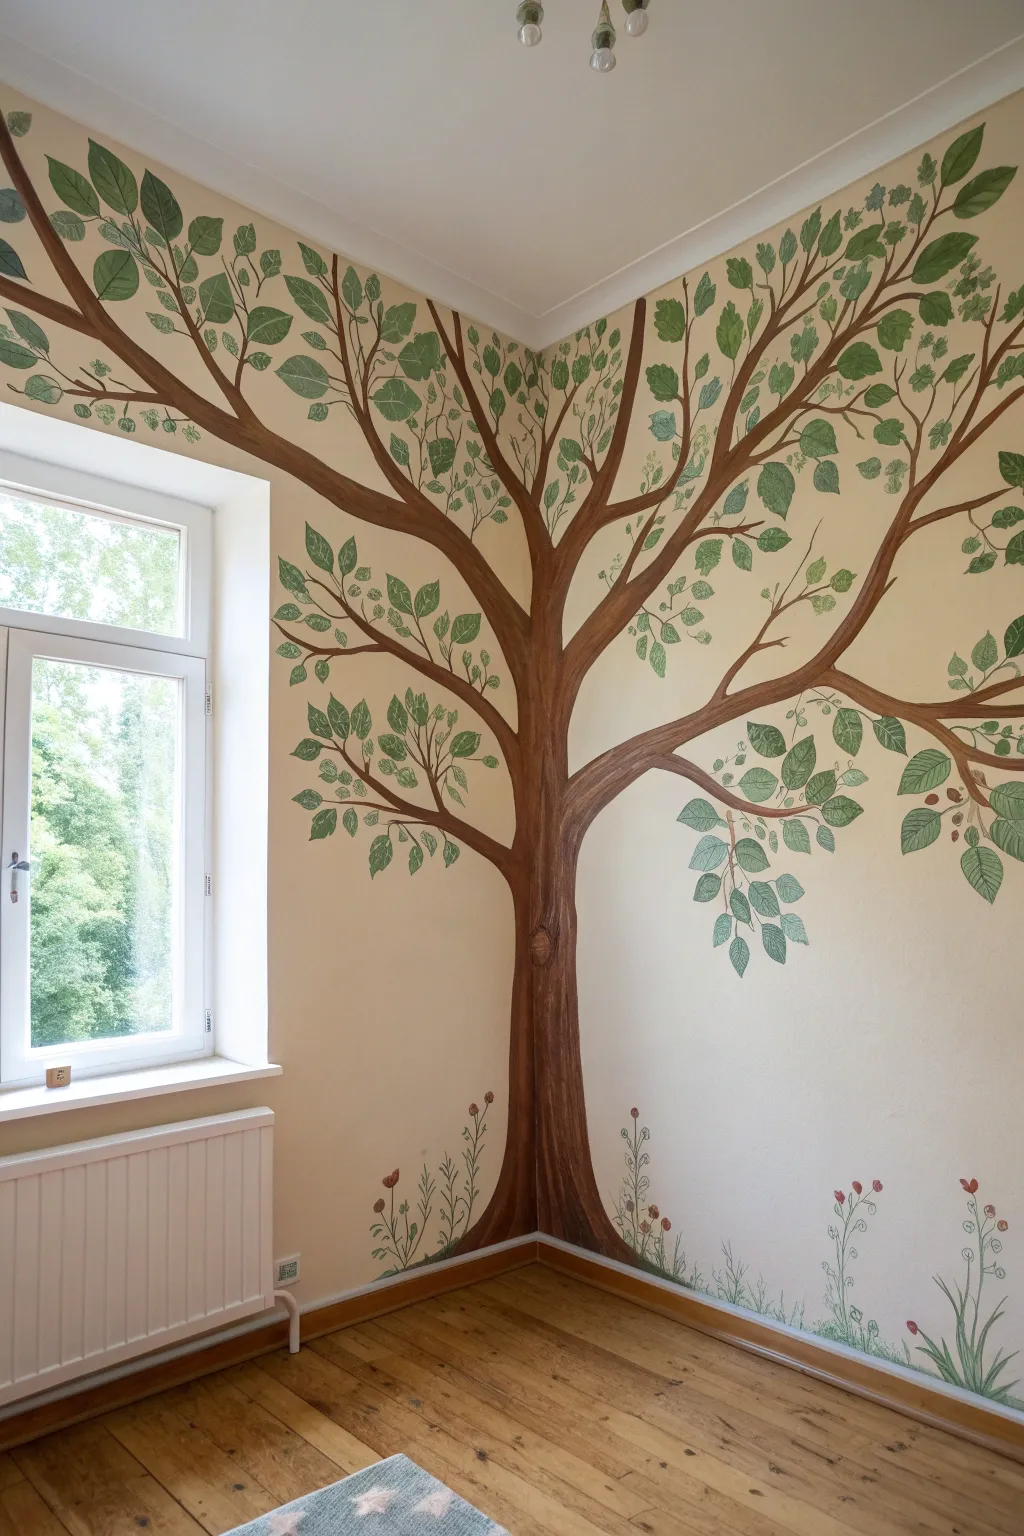
Transform a standard room corner into a whimsical canopy by anchoring a hand-painted tree right in the angle of the walls. This project uses the room’s architecture to create depth, making the branches feel like they are wrapping around you in a comforting embrace.
Step-by-Step
Materials
- Interior latex wall paint (dark brown for the trunk)
- Interior latex wall paint (medium brown for highlighting)
- Acrylic craft paints (various shades of green for leaves)
- Pencil and eraser
- Painter’s tape and drop cloths
- Chalk (optional, for drafting)
- Wide angle brush (2-inch)
- Medium round brush (size 8 or 10)
- Small filbert brush (size 4 or 6)
- Fine liner brush
- Paper plate or palette
- Step ladder
Step 1: Preparation and Sketching
-
Prep the space:
Clear the corner of furniture and lay down drop cloths to protect your flooring. Tape off the baseboards, window trim, and ceiling edges with painter’s tape to ensure crisp lines where the mural ends. -
Visualize the anchor point:
Stand back and decide how high the main trunk should go before splitting. The trunk will sit directly in the corner crease, essentially bisecting the two walls. -
Draft the trunk:
Using a pencil or light chalk, sketch the vertical lines of the trunk right into the corner. Mark the base wider near the floor to mimic root flare, and taper it slightly as it goes up. -
Map the branches:
Sketch major branches extending outward onto both the left and right walls. Aim for asymmetry to keep it organic; perhaps let one long branch reach over the window frame and another stretch high toward the ceiling on the opposing wall.
Uneven Coverage?
Walls have texture that can leave white speckles in your paint. If this happens, don’t press harder; instead, do a second coat or dab the brush tip into the texture divots.
Step 2: Painting the Structure
-
Block in the trunk base:
Load your wide angle brush with the dark brown latex paint. fill in the main trunk area, pushing the bristles right into the corner seam to ensure full coverage. -
Extend the main branches:
Switch to a medium round brush to paint the thicker branches you sketched earlier. Use long, confident strokes, easing pressure as you reach the tips to create a natural taper. -
Add secondary branches:
While the paint is still wet or tacky, add smaller offshoot branches. Vary the angles, making sure they don’t look like perfect forks; nature is a bit chaotic. -
Create bark texture:
Once the dark brown base is dry, mix a little of your medium brown paint with water to create a glaze. Lightly brush this vertically along the trunk and main branches to simulate bark ridges and add dimension. -
Highlight the form:
I like to take a nearly dry brush with the un-thinned medium brown paint and hit the ‘tops’ of the horizontal branches, imagining a light source coming from the ceiling.
Pro Tip: Perspective
Paint the branches on the wall furthest from the window slightly darker. This mimics natural shadows and makes the tree look remarkably 3D in the corner.
Step 3: Creating the Canopy
-
Mix your greens:
Squeeze out three different shades of green acrylic paint: a deep forest green, a medium grassy green, and a lighter sage or lime tone. Do not mix them completely; leaving them distinct on the palette helps create variety. -
Paint the leaf clusters:
Using the filbert brush, start painting individual leaves. A simple press-and-lift motion works wonders here: press the belly of the brush down near the branch connection and lift as you pull away to create a pointed tip. -
Vary the leaf direction:
Ensure leaves point in different directions. Some should droop downward, while others reach up toward the light. -
Layer the colors:
Start with your darkest green leaves to establish the background foliage. Once those are semi-dry, layer the medium and light green leaves over and around them to build lushness. -
Outline for definition:
For a slightly stylized look like the example image, take a fine liner brush with a very diluted dark green or brown and loosely outline some—not all—of the larger leaves. This adds a subtle illustrative quality. -
Add internal leaf veins:
Using that same liner brush, sketch quick central veins on the prominent leaves. Keep the lines incredibly thin and delicate.
Step 4: Grounding details
-
Sketch ground flora:
At the very bottom near the baseboards, lightly pencil in some tall grasses and simple wildflowers rising up to meet the trunk. -
Paint the grass:
Use the liner brush and quick, upward flicking motions with your green paints to create wispy blades of grass varying in height. -
Add floral accents:
Dab small spots of red or pink paint onto the tips of some grass stems to create simple wildflowers. -
Final inspection:
Step back to the center of the room. Check for any bald spots in the canopy that look unnatural and fill them with a few extra small leaves. -
Cleanup:
Wait for the paint to cure fully (usually 24 hours) before removing the painter’s tape carefully at a 45-degree angle.
Now you have a peaceful, nature-inspired corner that adds permanent greenery to your room without taking up any floor space
BRUSH GUIDE
The Right Brush for Every Stroke
From clean lines to bold texture — master brush choice, stroke control, and essential techniques.
Explore the Full Guide
Soft Nursery Tree With a Gentle Storybook Style
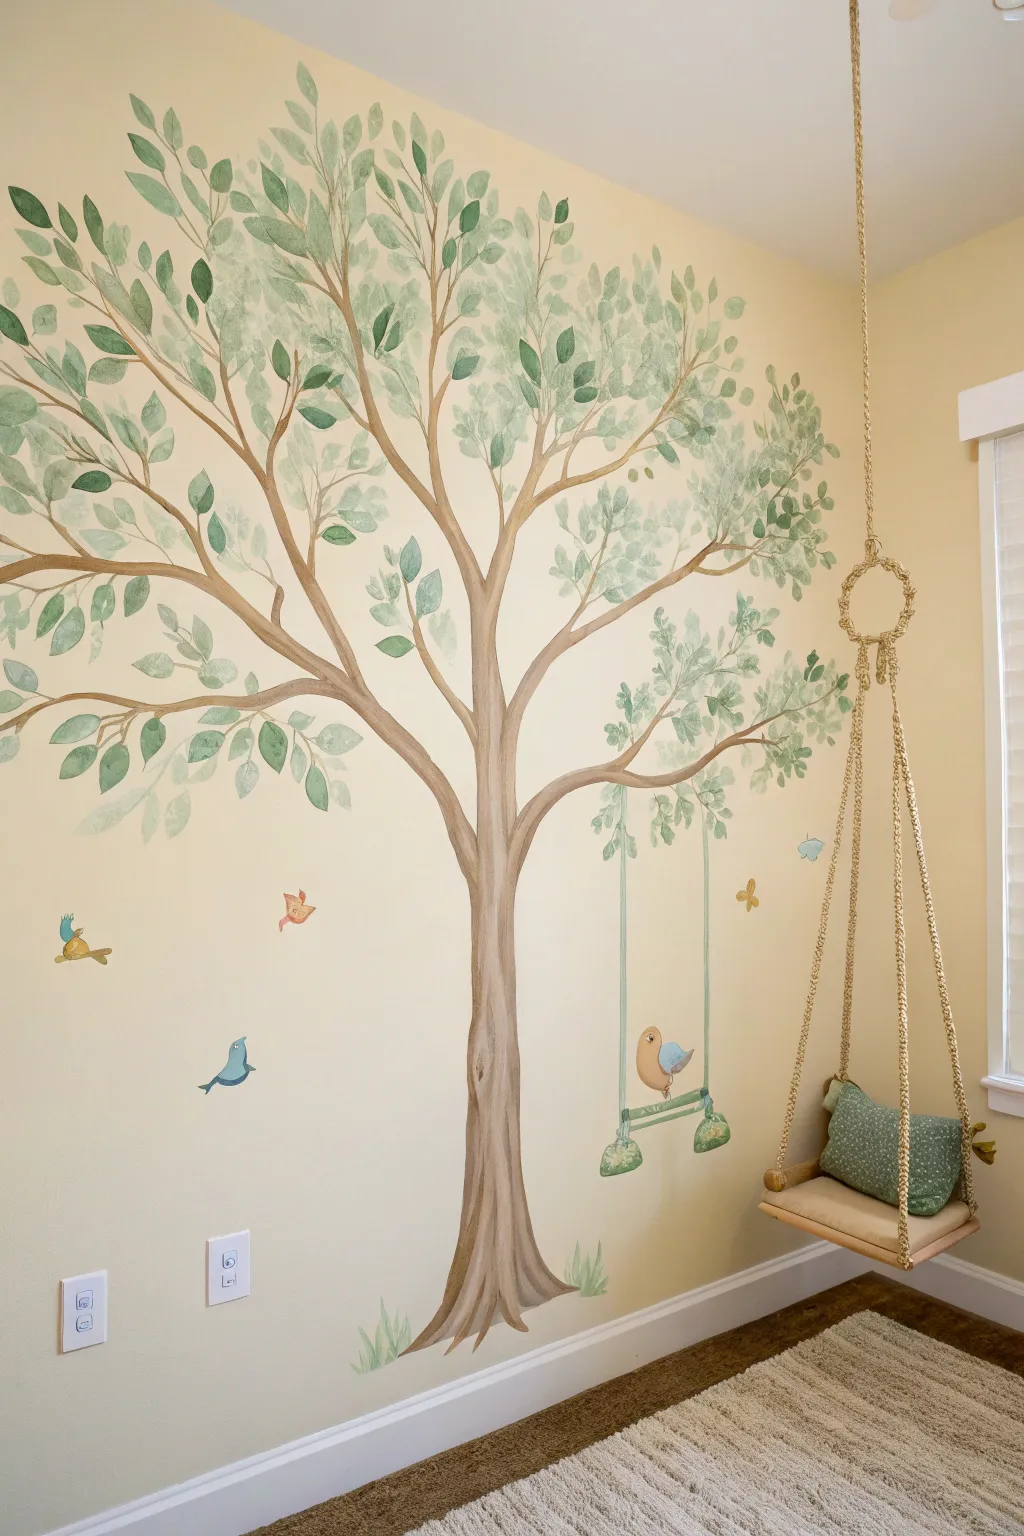
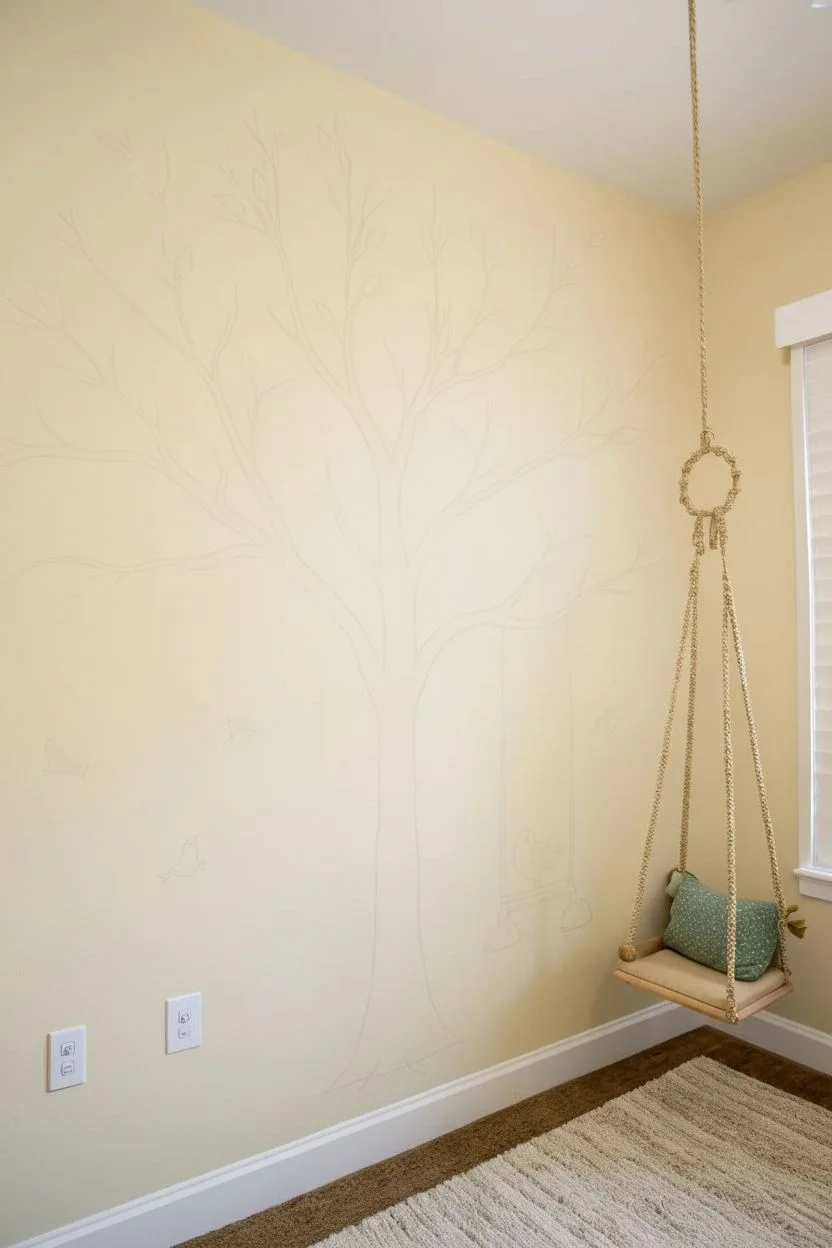
Transform a plain nursery wall into an enchanting storybook scene with this gentle, watercolor-inspired tree mural. Using transparent glazes and soft brushwork, you’ll create a dreamy, ethereal effect that feels like it stepped right out of a classic fairy tale illustration.
Detailed Instructions
Materials
- Latex wall paint (light beige/yellow for base)
- Acrylic craft paints (burnt umber, raw sienna, sage green, forest green, white)
- Glazing medium (clear)
- Pencil and eraser
- Painter’s tape
- Drop cloth
- Large flat brush (2-3 inch)
- Round artist brushes (sizes 6, 10, and 12)
- Sea sponge (natural)
- Palette or paper plates for mixing
- Cup of water and paper towels
Step 1: Preparation & Sketching
-
Prepare the Wall:
Ensure the wall is clean and painted with your desired base color. In this project, a soft, creamy yellow provides a warm, sunlit background. -
Map Out the Trunk:
Lightly sketch the main trunk shape using a pencil. Start from the floor, creating a flared base for roots, and extend upward to roughly two-thirds of the wall height before branching out. -
Extend the Branches:
Draw the main branches extending outward like reaching arms. Keep the lines fluid and organic rather than stiff and straight, tapering them as they reach the edges. -
Placement of Details:
Mark the positions for the hanging swing, the little birds, and the bird on the swing. Keep these sketches faint as watercolor-style paint is translucent and won’t hide heavy pencil marks.
Oops! Blobs happen
If a drip runs down your wall, don’t panic. Quickly dab it with a damp paper towel to lift it. If a stain remains, paint a falling leaf over it once it’s dry.
Step 2: Painting the Tree Structure
-
Mix the Trunk Color:
Mix burnt umber acrylic paint with a generous amount of glazing medium (about 1:1 or 1:2 ratio). This transparency is key to achieving that soft, illustrated look. -
Base Coat the Trunk:
Using a large flat brush, paint the trunk with long, vertical strokes. Let the paint be uneven in places to simulate bark texture. -
Add Shadow and Depth:
While the glaze is still slightly tacky, mix a darker brown (burnt umber with a touch of black or dark blue). Apply this to the sides of the trunk and the underside of branches to create roundness. -
Highlighting the Bark:
Mix a lighter tan using raw sienna and white. Dry brush this lightly down the center of the trunk and top surfaces of the larger branches to catch the imaginary light. -
Extend Fine Branches:
Switch to a size 6 or 8 round brush. using your thinned brown mixture, paint the thinner twigs growing off the main branches. A shaky hand actually helps here to make them look natural.
Step 3: Creating the Foliage
-
Mix Leaf Colors:
Prepare three shades of green on your palette: a pale sage, a medium olive, and a deeper forest green. Mix glazing medium into all of them to maintain transparency. -
Paint Individual Leaves:
Using a round brush (size 10 or 12), press the belly of the brush against the wall and lift quickly to create a simple leaf shape. Start with the medium green tone. -
Layering Shades:
Once the first layer dries, add lighter sage leaves overlapping the darker ones. This layering creates volume without needing heavy paint. -
Softening Edges:
For a softer, dreamier canopy, dampen a clean sea sponge and lightly dab the edges of some leaf clusters while the paint is wet to blur them slightly. -
Adding Floating Leaves:
Paint a few stray leaves drifting away from the branches to give the scene a sense of gentle movement and airiness.
Make it Sparkle
Mix a tiny amount of iridescent medium into your final layer of leaves or bird wings. It catches daylight subtly, adding a magical shimmer to the room.
Step 4: Whimsical Details
-
Paint the Birds:
Use a small detail brush to fill in your bird sketches. Soft blues, yellows, and mute reds work beautifully. Keep the shapes simple and rounded. -
Add the Swing:
Using a steady hand or a mahl stick for support, paint the vertical ropes for the painted swing. Ensure they hang straight down from a sturdy-looking branch. -
Ground the Tree:
At the base of the trunk, flick your brush upward with green paint to create small tufts of grass growing around the roots. -
Final Touches:
Step back and assess the composition. If any area feels too empty, add a small floating butterfly or an extra twig. Erase any visible pencil marks gently.
Enjoy the peaceful atmosphere your beautiful new tree brings to the space.
Playroom Tree With Hidden Little Animal Moments
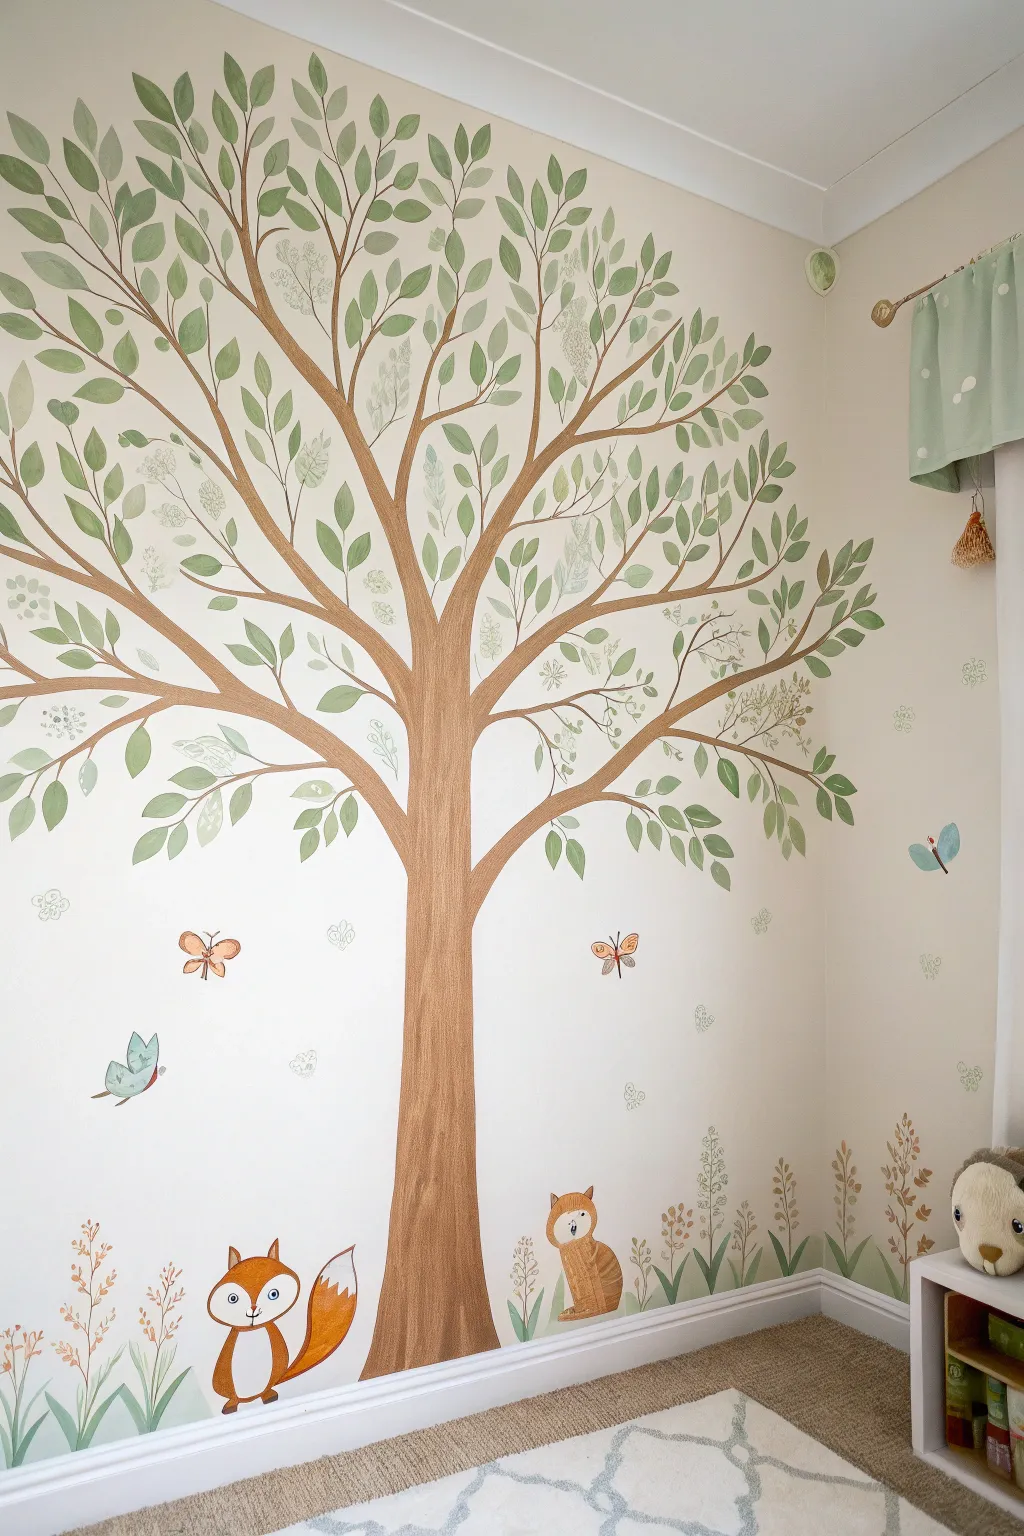
Transform a blank corner into an enchanted forest with this charming hand-painted mural, featuring a sturdy oak, fluttering butterflies, and friendly woodland creatures. The soft, illustrative style creates a calm yet playful atmosphere perfect for sparking little imaginations.
Step-by-Step
Materials
- Interior wall paint (Beige/Cream base)
- Acrylic paints or interior latex samples: Medium Brown, Dark Brown, Sage Green, Forest Green, Pastel Green, White, Orange, Yellow
- Pencils and eraser
- Large flat brush (1-2 inch)
- Medium round brush
- Small detail brush (0 or 00 size)
- Leaf stencil (optional but helpful)
- Painter’s tape
- Drop cloth
- Step ladder
- Small sponge (for texture)
Step 1: Setting the Scene and Tree Structure
-
Prepare the canvas:
Begin by clearing the corner of the room and laying down a drop cloth. Ensure your base wall color is a soft, warm beige or cream to let the mural colors pop gently. Wipe down the walls with a damp cloth to remove dust. -
Sketch the trunk skeleton:
Using a pencil, lightly sketch the main trunk of the tree. Position the base slightly off-center on the main wall so the branches can reach naturally into the corner and onto the adjacent wall. Draw a wide base that tapers as it goes up. -
Branch out:
Extend lines from the trunk to create the primary branches. Let them curve organically, reaching high toward the ceiling. Don’t worry about perfect symmetry; nature is perfectly imperfect. -
Base coat the tree:
Load your large flat brush with medium brown paint. Fill in the trunk and main branches, using long, vertical strokes to mimic the direction of wood grain. It’s okay if the coverage isn’t perfectly opaque yet. -
Add bark texture:
While the base coat is dry to the touch, mix a little dark brown with your medium brown. using a dry-brushing technique, lightly streak this darker color up the trunk and along the undersides of branches to add dimension and shadow.
Step 2: Foliage and Atmosphere
-
Start the leaf canopy:
Using a medium round brush and sage green paint, start painting individual simple leaf shapes. Cluster them near the ends of the branches. Vary the direction they point to create a wind-blown, natural look. -
Layering lighter tones:
Once the first layer of leaves is dry, mix a pastel green shade or use a lighter green paint. Paint new leaves overlapping some of the darker ones. This layering creates depth and makes the tree look full. -
Stencil detail work:
To achieve the delicate, patterned leaf look seen in the inspiration image, use a stencil or a very fine brush with diluted white or pale green paint. Add subtle vein patterns or lacy textures inside some of the larger leaves. -
Paint the butterflies:
Sketch small butterfly silhouettes fluttering around the tree. Use soft oranges and pastel blues for their wings. Once the base color dries, add a tiny black line for the body and delicate antennae using your smallest detail brush.
Natural Spacing
Don’t rush the leaves! Step back frequently to check density. It looks more natural to have “clumps” of leaves rather than spacing them all out evenly.
Step 3: Foxes and Floor Details
-
Draft the forest floor:
Along the baseboard, sketch varying heights of grass blades using your pencil. Intersperse them with simple flower stems. -
Sketch the foxes:
Fill in the grass area with varied greens. Use quick, upward strokes with a medium brush to taper the blades at the top. Add small dabs of yellow or pink for wildflower hints among the grass. -
Block in the animals:
Paint the foxes’ bodies with a warm orange. Leave the chest, tip of the tail, and muzzle area blank for now, as these will be white. -
Fox details:
Fill in the white patches on the foxes. Once dry, use a fine liner brush with black or dark brown to paint the eyes, nose, and smiling mouth. Add a few distinct brushstrokes on the orange fur to suggest texture. -
Final texture touches:
I like to take a look from a distance at this stage. If the tree trunk looks too flat, lightly sponge a tiny bit of the wall color over parts of the brown to make the tree look like it belongs in the space. -
Sealing (Optional):
If this is in a high-traffic play area, consider applying a clear matte water-based sealer over just the painted areas to protect your artwork from sticky fingers.
Oops! Paint Drips?
Keep a wet rag and a dry rag nearby. If you drip, catch it immediately with the wet rag. If a line goes wonky, just wait for it to dry and paint over it with the wall color.
Now step back and enjoy the peaceful woodland corner you’ve brought to life for playtime adventures

PENCIL GUIDE
Understanding Pencil Grades from H to B
From first sketch to finished drawing — learn pencil grades, line control, and shading techniques.
Explore the Full Guide
Cherry-Blossom-Inspired Tree for a Romantic Pop of Color
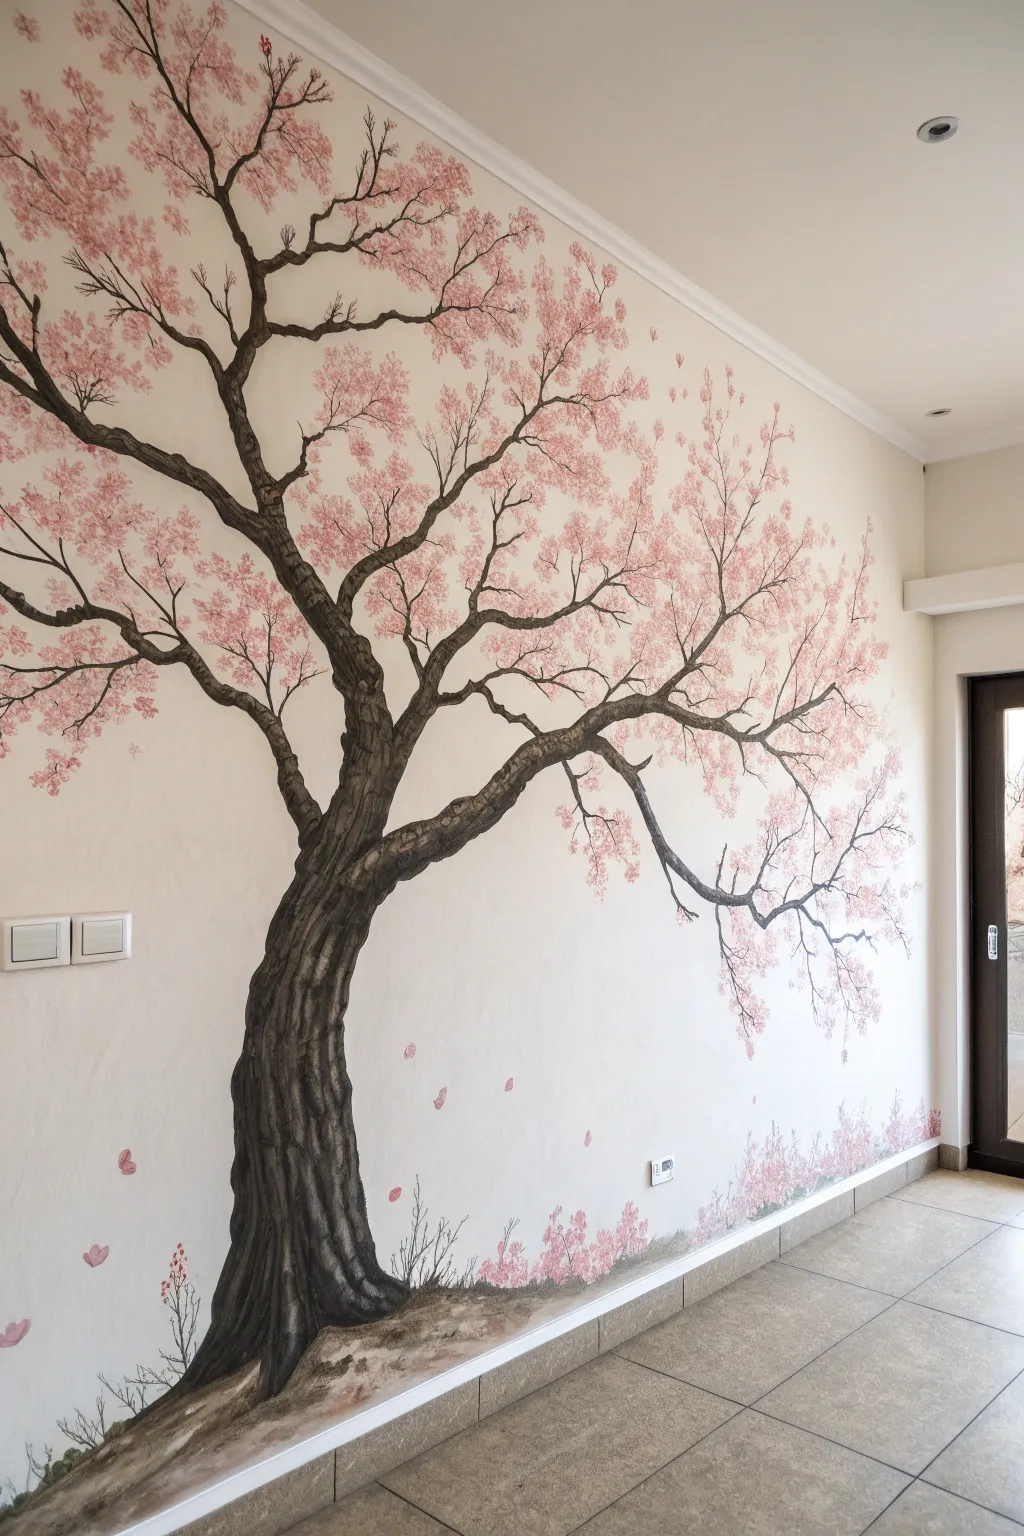
Transform a plain wall into a romantic landscape with this sweeping cherry blossom mural, featuring a deeply textured trunk and delicate clouds of pink flowers. This large-scale painting brings the outdoors in, creating a serene focal point that feels both grounded and ethereal.
Step-by-Step Tutorial
Materials
- Interior acrylic latex paint (white/canvas base)
- Dark brown/black acrylic paint (trunk base)
- Medium brown and grey acrylic paint (trunk highlights)
- Various shades of pink acrylic paint (blossoms)
- Pencil and large eraser
- Wide flat brushes (2-3 inch)
- Small round brushes (size 4 and 8)
- Stipple sponge or sea sponge
- Painter’s tape and drop cloth
- Step ladder
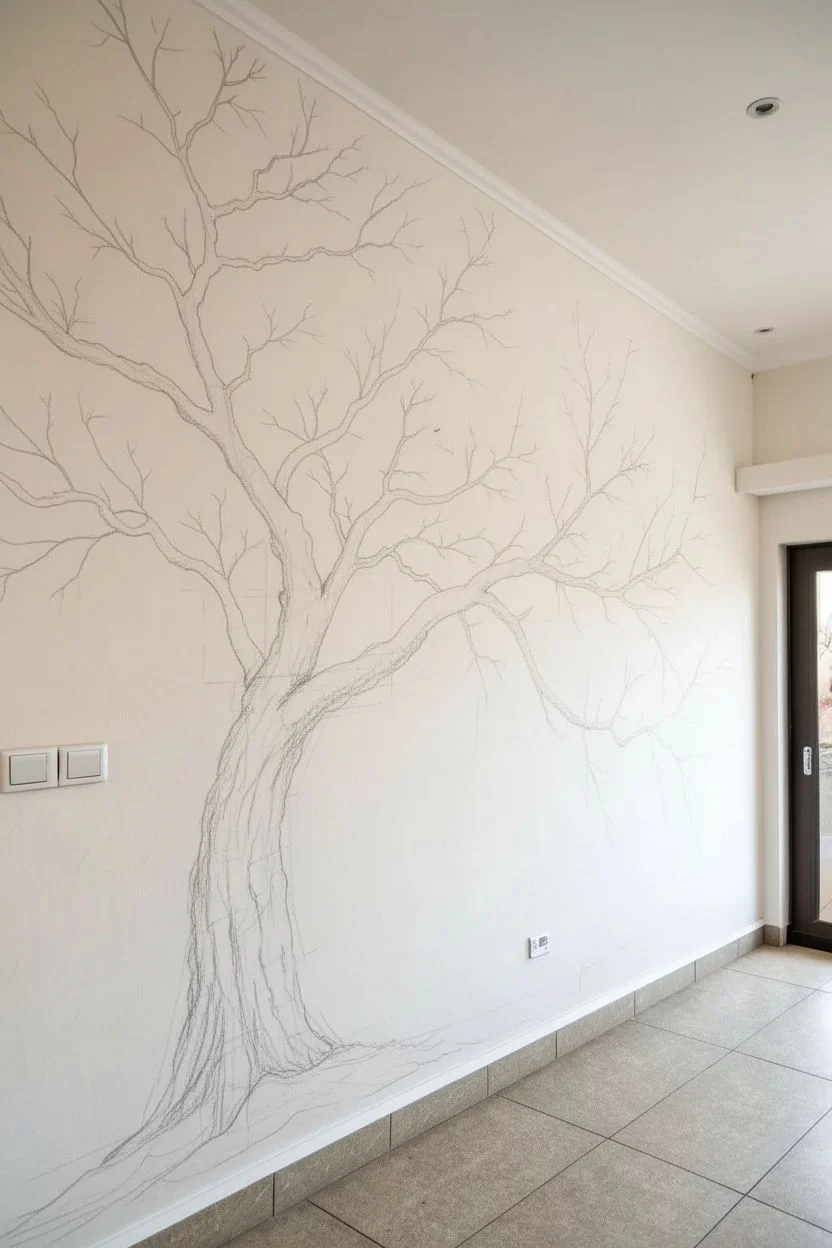
Step 1: Planning and Sketching
-
Prepare the workspace:
Begin by clearing furniture away from the wall and laying down a drop cloth to protect your flooring. Tape off the baseboards and any adjacent walls or ceiling lines you want to keep crisp. -
Establish the trunk’s anchor:
Using a pencil, lightly sketch the base of the tree trunk on the left side of the wall. Start wide at the bottom to give the tree a sense of weight and age, tapering slightly as you move upward essentially creating a leaning ‘Y’ shape. -
Map the main branches:
Extend lines from your trunk to map out the major branches. Notice how the reference tree splits into two main sections mid-wall, with one large branch arching dramatically over the top right. Keep your lines loose and organic; nature rarely makes straight lines. -
Refine the branch structure:
Add smaller sub-branches stemming from the main limbs. Ensure they start thicker near the connection point and thin out towards the tips. Step back frequently to check the balance of negative space.
Pro Tip: Custom Scale
Take a photo of your blank wall and use a drawing app to sketch the tree over it first. This helps you visualize the correct scale for the room before you ever touch a paintbrush to the wall.
Step 2: Painting the Structure
-
Block in the trunk base:
Mix a dark brown-black shade. Using a medium flat brush, fill in the entire silhouette of the trunk and major branches. Don’t worry about texture yet; just get solid, opaque coverage. -
Create bark texture:
While the base coat is still slightly tacky or just dry, take a smaller flat brush with a lighter grey-brown mix. Paint vertical, slightly wavy streaks following the curve of the trunk. This mimics the deep fissures of old bark. -
Enhance trunk depth:
Add a third layer of highlights using a pale grey on the raised areas of the bark—specifically on the right side of the trunk where the light would naturally hit. I find blending the edges of these highlights while wet creates a more natural 3D rounding effect. -
Extend the fine branches:
Switch to a size 4 round brush using your darkest brown-black. Paint the delicate, spindly twigs at the very ends of the branches. A shaky hand is actually helpful here to create jagged, realistic growth patterns.
Step 3: Creating the Blossoms
-
Mix your palette:
Prepare three shades of pink: a darker mauve-pink for shadows, a medium bubblegum pink, and a very pale blush pink for highlights. -
Apply the first blossom layer:
Dip a sea sponge or a stipple brush into the darkest pink. Lightly dab clusters of color along the branches, focusing heavily on the branch tips and joints. Keep the pressure light to create an airy, irregular texture. -
Add volume with mid-tones:
Once the dark layer is dry, repeat the sponging process with the medium pink. Overlap the previous layer but leave some dark spots showing through to create depth within the flower clusters. -
Highlight the canopy:
Use the palest blush pink sparingly on the top edges of the flower clusters. This simulates sunlight catching the tops of the blossoms. -
Refine individual flowers:
Take a small round brush and paint a few defined five-petal flower shapes here and there on the edges of your sponged clusters. This tricks the eye into seeing individual blooms within the larger mass. -
Falling petals:
Paint single brushstrokes of pink ‘floating’ in the empty white space below the branches and near the floor to suggest petals falling in the breeze.
Troubleshooting: Too Blotchy?
If your sponge texture looks too uniform or like polka dots, rotate the sponge in your hand between every few dabs. This ensures the pattern stays random and organic like real foliage.
Step 4: Grounding details
-
Paint the forest floor:
At the base of the trunk, paint a small mound of earth using horizontal strokes of brown and beige. Soften the edges so it fades gently into the wall color. -
Add low-lying foliage:
Using a small brush, paint vertical grassy strokes and small scrubby bushes along the bottom edge of the wall. Dab pink on top of these bushes to tie them visually to the tree above. -
Final inspection:
Step back to the other side of the room. Look for any bald spots in the canopy or branches that look too unconnected. Fill in gaps with a quick dab of the sponge or a fine line of dark paint.
Now you have a stunning, permanent art piece that brings a breath of spring into your home all year round
Weeping Willow for a Calm, Drapey Mood
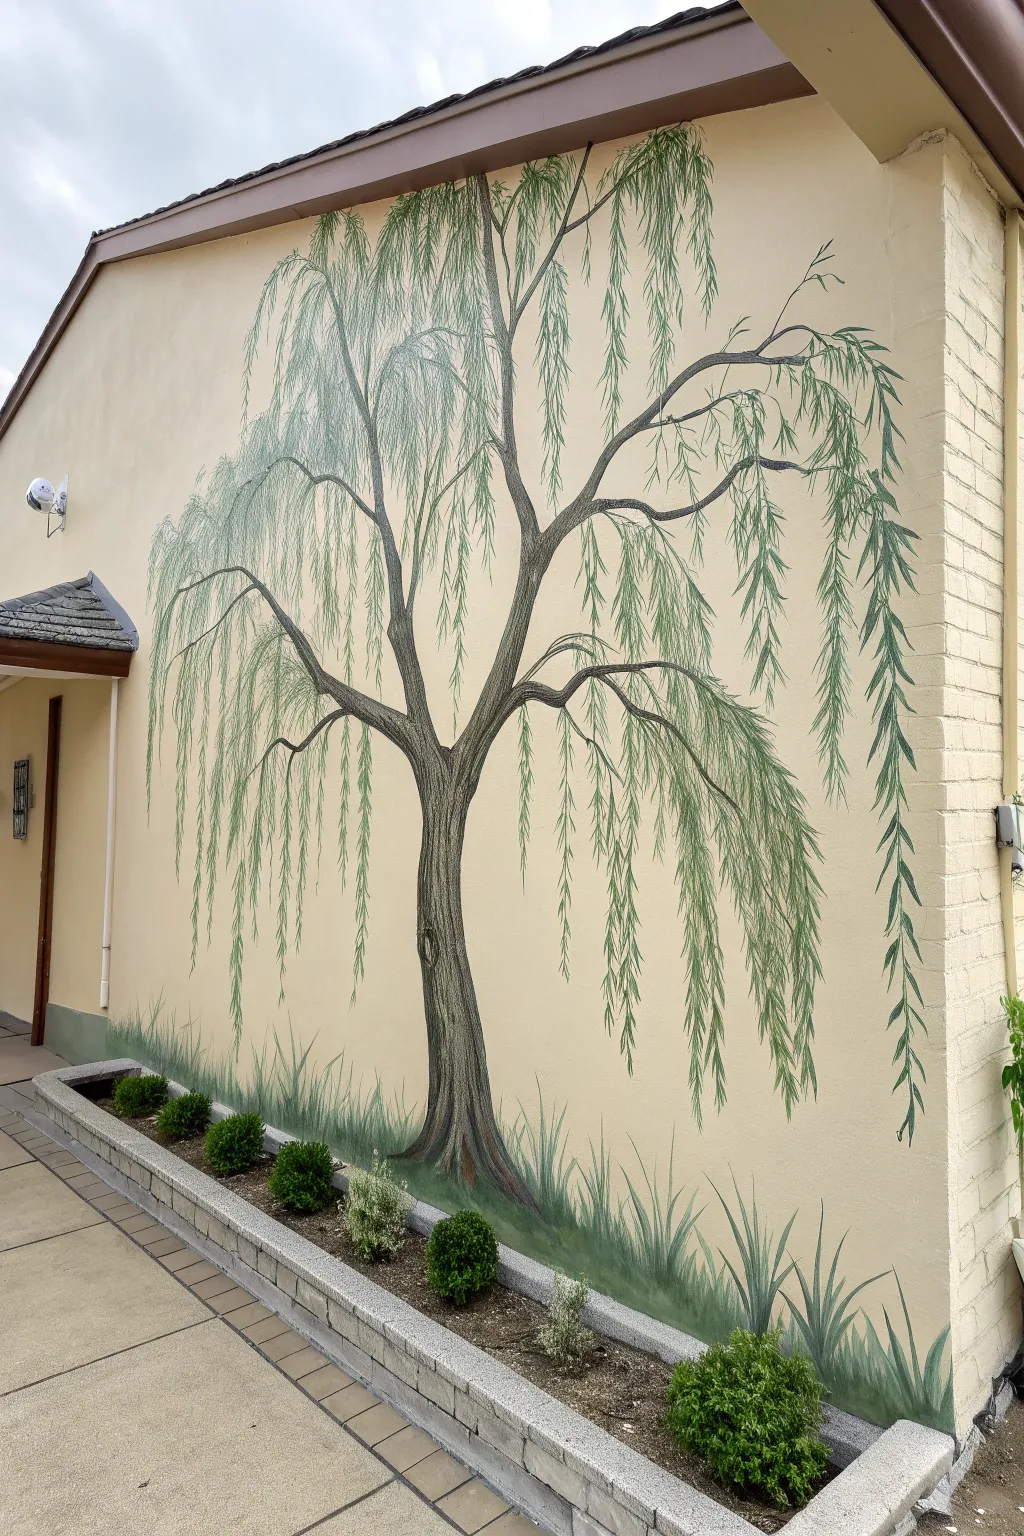
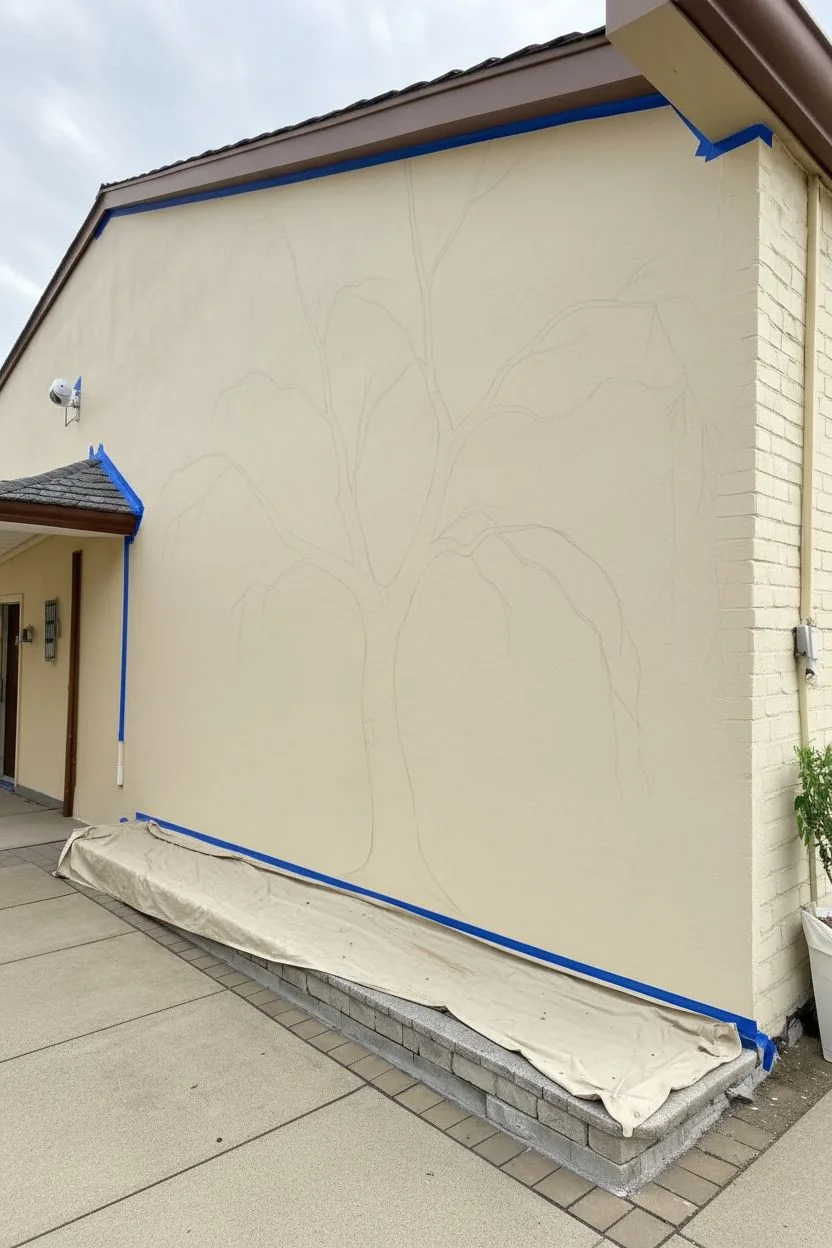
Transform a plain exterior wall into a serene garden scene with this elegant weeping willow mural. The design features graceful, draping branches and soft greenery that adds a calming, natural touch to any outdoor space.
How-To Guide
Materials
- Exterior acrylic latex paint (dark brown, medium brown, light greyish-brown)
- Exterior acrylic latex paint (deep forest green, sage green, pale lime green)
- Assorted angular paintbrushes (1-inch to 2-inch)
- Small round detail brushes (sizes 4 and 6)
- Chalk or pastel pencil for sketching
- Painter’s tape
- Drop cloths
- Ladder or step stool
- Outdoor clear coat sealant (optional)
Step 1: Preparation and Sketching
-
Clean surface:
Begin by thoroughly cleaning the wall surface to remove dust, dirt, or spiderwebs. If the wall is textured like the stucco in the example, use a stiff brush to get into the crevices. -
Protect the area:
Lay down drop cloths over the planter box and walkway to catch any drips. Use painter’s tape to mask off any adjacent trim, electrical boxes, or the roofline if you are painting high up. -
Envision the shape:
Stand back and visualize where the trunk will anchor the composition. The trunk in this project is slightly off-center to the left, allowing the branches to cascade across the wider right side. -
Sketch the trunk:
Using a piece of chalk or a pastel pencil that contrasts lightly with the wall color, sketch the main trunk. Draw it thick at the base near the planter and taper it as it reaches upward. -
Outline main branches:
Extend 4 to 5 major structural branches outward from the trunk. Keep your lines loose and curved; weeping willows don’t have stiff, straight limbs.
Step 2: Painting the Structure
-
Base coat the trunk:
Fill in your trunk sketch with the medium brown exterior paint. Since the surface is textured, use a stiff 1-inch brush to stipple and push the paint into the nooks and crannies for solid coverage. -
Establish shadows:
While the base coat is still slightly tacky, take your dark brown paint and add vertical streaks along the sides of the trunk and under the main branches to create cylindrical volume. -
Add texture highlights:
Mix a little light greyish-brown. Use a smaller brush to paint thin, wavy vertical lines up the trunk. This mimics the rough, furrowed bark texture characteristic of willow trees. -
Extend the limbs:
Paint the main branches extending outward, tapering them until they become quite thin. Remember that willow branches tend to arch upward before drooping down.
Uneven Texture?
If the stucco is too rough for fine lines, thin your paint slightly with water. This helps the paint flow into the deep texture rather than skipping over the surface.
Step 3: Creating the Foliage
-
Draft the drape lines:
Switch back to your chalk and lightly draw long, vertical guide lines hanging down from your main branches. These will help you keep the ‘weeping’ effect vertical and consistent. -
Paint the stems:
Using a thin finish brush or a liner brush with dark green paint, trace over your chalk guide lines. These stems should be very long and slender, reaching almost to the bottom of the wall. -
Add main leaves:
Dip a round brush into sage green paint. Starting at the top of a hanging stem, paint teardrop-shaped leaves in downward strokes. I find it helpful to press the brush down and flick it up to get a sharp tip. -
Layer depth colors:
Go back in with the deep forest green. Add leaves sporadically behind the sage ones to create shadow and density, making the tree look fuller. -
Highlight for movement:
Using the pale lime green, add leaves on the outer edges and tops of the clumps. This highlights where the sunlight would naturally hit the foliage.
Level Up
Add small, subtle wildlife like butterflies or a perched bird on a sturdy branch to bring a little life and narrative to your peaceful tree scene.
Step 4: Adding the Grass Border
-
Base the grass:
Along the bottom edge where the wall meets the planter, use the medium green to paint a horizontal band of vertical brushstrokes. -
Define grass blades:
Use the dark green to paint distinct, sharp blades rising from the base. Vary the heights and angles so it looks wild and organic rather than like a manicured lawn. -
Blend the transition:
Feather some of the grass blades upward so they gently fade into the background wall color, creating a soft, misty effect at the base of the mural. -
Final touches:
Step back about 10 feet to view the whole mural. Fill in any sparse areas in the canopy with a few extra drooping branches to balance the composition. -
Seal (Optional):
If your wall gets heavy direct sun or rain, consider applying a clear, water-based outdoor sealer over the dry mural to protect the colors from fading.
Enjoy the peaceful atmosphere your new weeping willow brings to your garden area


Four-Season Tree That Changes Across the Wall
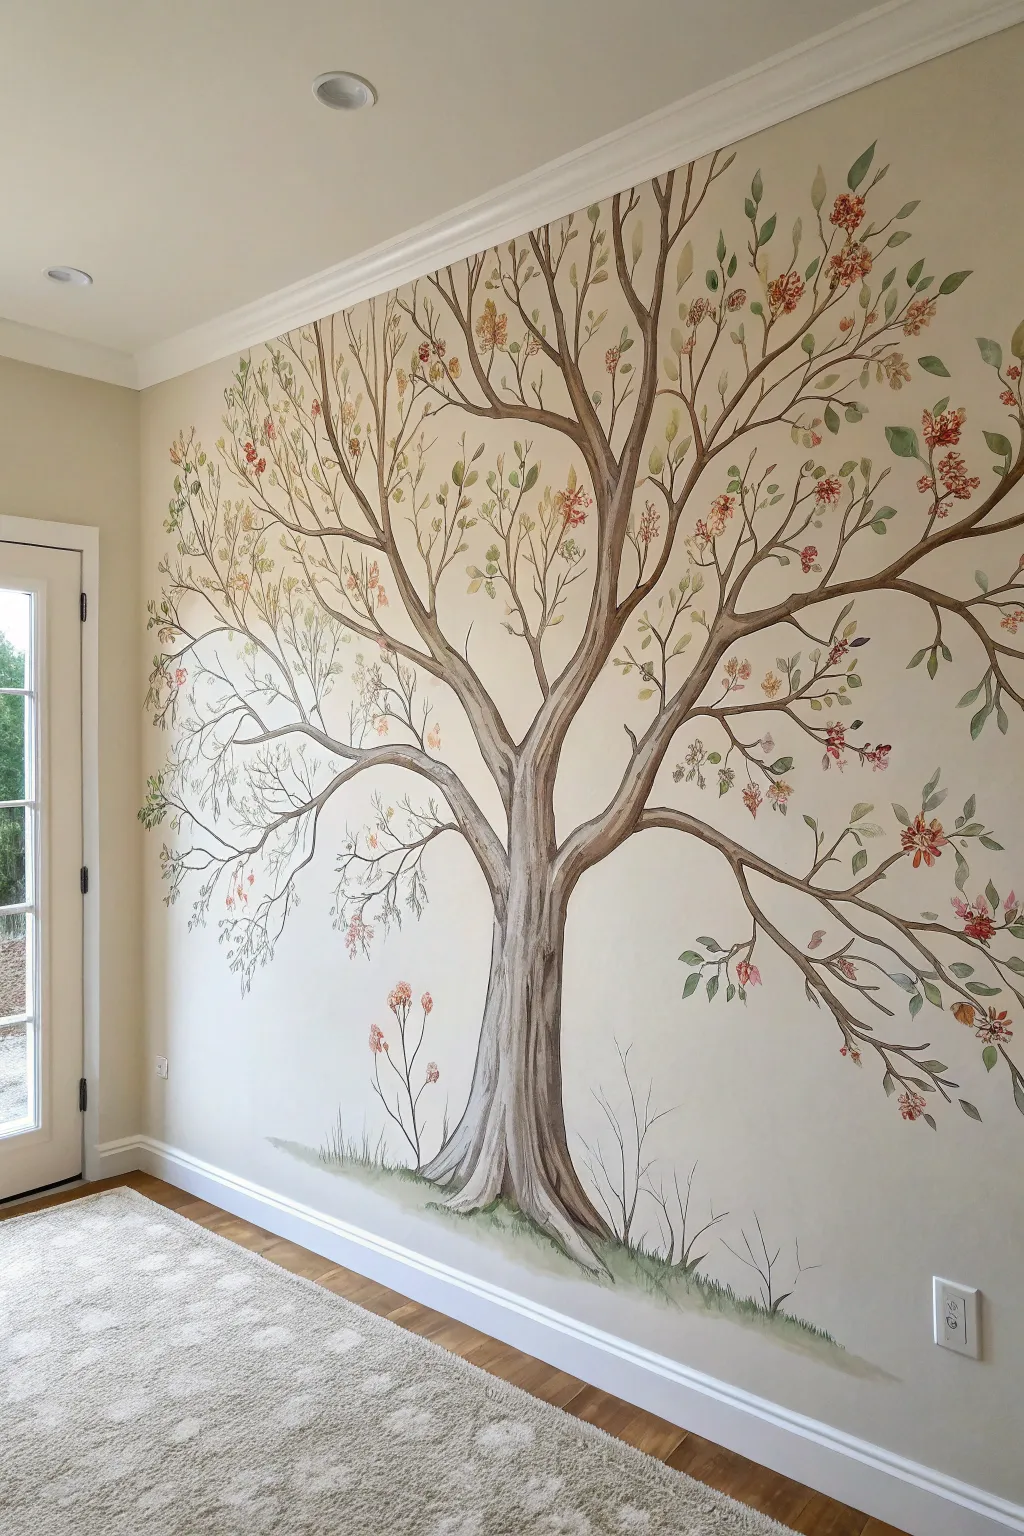
Bring the outdoors in with this breathtaking mural that captures the gentle transition of seasons across a single tree, moving from spare, budding branches to lush, flowering foliage. The soft, watercolor-style application creates a dreamlike atmosphere perfect for a nursery or quiet reading nook, transforming a blank wall into a piece of fine art.
Step-by-Step
Materials
- Interior acrylic latex paint (matte or eggshell base)
- Acrylic craft paints (various browns, greens, pinks, deep reds)
- Glazing medium (essential for watercolor effect)
- Pencil and large eraser
- Various paintbrushes: 2-inch angular sash brush, round brushes (sizes 4, 8, 12), and a liner brush
- Painter’s tape and drop cloths
- Water cups and mixing palette (or paper plates)
- Stepladder
- Sponge (natural sea sponge works best)
Step 1: Planning and Sketching
-
Prepare the workspace:
Begin by clearing the wall area completely and laying down drop cloths to protect your flooring. Tape off the baseboards and ceiling molding with painter’s tape to ensure crisp edges later on. -
Establish the trunk’s anchor:
Using a pencil, lightly sketch the base of the trunk. Position it slightly off-center if you want an asymmetrical look, but ensure the roots flare out naturally at the bottom to ‘ground’ the tree visually. -
Map out the main branches:
Draw the primary trunk rising up, then split it into three or four major limbs. These should act as the skeleton of your tree, reaching out toward the corners of the wall. -
Sketch the seasonal transition:
This is crucial for the conceptual effect: on the left side, sketch fewer, thinner twigs to represent early spring or winter. As you move to the right, draw denser, overlapping branches to support the lush summer and autumn foliage.
Step 2: Painting the Structure
-
Mix the trunk base color:
Create a mixture of warm taupe and a bit of glazing medium. The glaze makes the acrylic semi-transparent, mimicking watercolor. I like to keep this first layer very watery. -
Lay down the first wash:
Using your 2-inch brush, paint the interior of your trunk sketch. Don’t worry about perfect coverage; unevenness adds texture resembling bark. -
Add bark definition:
While the base is tacky, mix a darker cool brown. Use a size 12 round brush to paint vertical, wavy striations up the trunk and main limbs, following the direction of growth. -
Extend the smaller branches:
Switch to a size 4 or 8 round brush. using a mid-tone brown, paint the smaller branches extending from the main limbs. Use a ‘lift-off’ stroke, releasing pressure at the end of the stroke to create tapered, natural-looking tips. -
Detail the twigs:
For the finest twigs, especially on the ‘spring’ (left) side, use a liner brush with slightly thinned ink-like paint to get sharp, delicate lines.
Fixing Heavy Splatter
If you accidentally drip or paint a line too thick, don’t wipe it! Let it dry, sand it lightly, paint over it with your wall color, and try again.
Step 3: Adding Foliage and Seasons
-
Start the spring buds:
On the left side of the tree, mix a very pale sage green and a soft pink. Use the tip of a small round brush to dab tiny, single buds directly onto the twig tips. -
Develop the summer canopy:
Moving toward the center and right, begin adding larger leaves. Mix two or three shades of green (olive, mint, and forest). Instead of painting individual leaves perfect, press the belly of the brush against the wall to create organic leaf shapes. -
Transition to autumn:
On the far right branches, introduce warm ochres, rusty reds, and burnt orange tones. Intersperse these with the greens to show the turning of the seasons. -
Create depth with glazing:
go back over the denser areas of foliage on the right side with a very sheer wash of watered-down dark green or brown. This pushes some leaves into the background and creates a 3D effect. -
Add floral clusters:
Scatter clusters of small flowers throughout the tree where seasons prompt it. Use a dotting motion with a small brush in shades of coral and cream to create the look of blossoms. -
Ground the tree:
At the base of the trunk, paint wispy blades of grass using upward flicks of your liner brush. Vary the greens and add a touch of brown earth to integrate the tree into the ‘ground’.
Keep it Loose
Hold your paintbrush by the very end of the handle, not near the ferrule (metal part). This forces a looser wrist and creates more natural, organic branch lines.
Step back and admire how your wall now tells a story of growth and change throughout the year
Forest Edge Mural to Add Depth and Distance
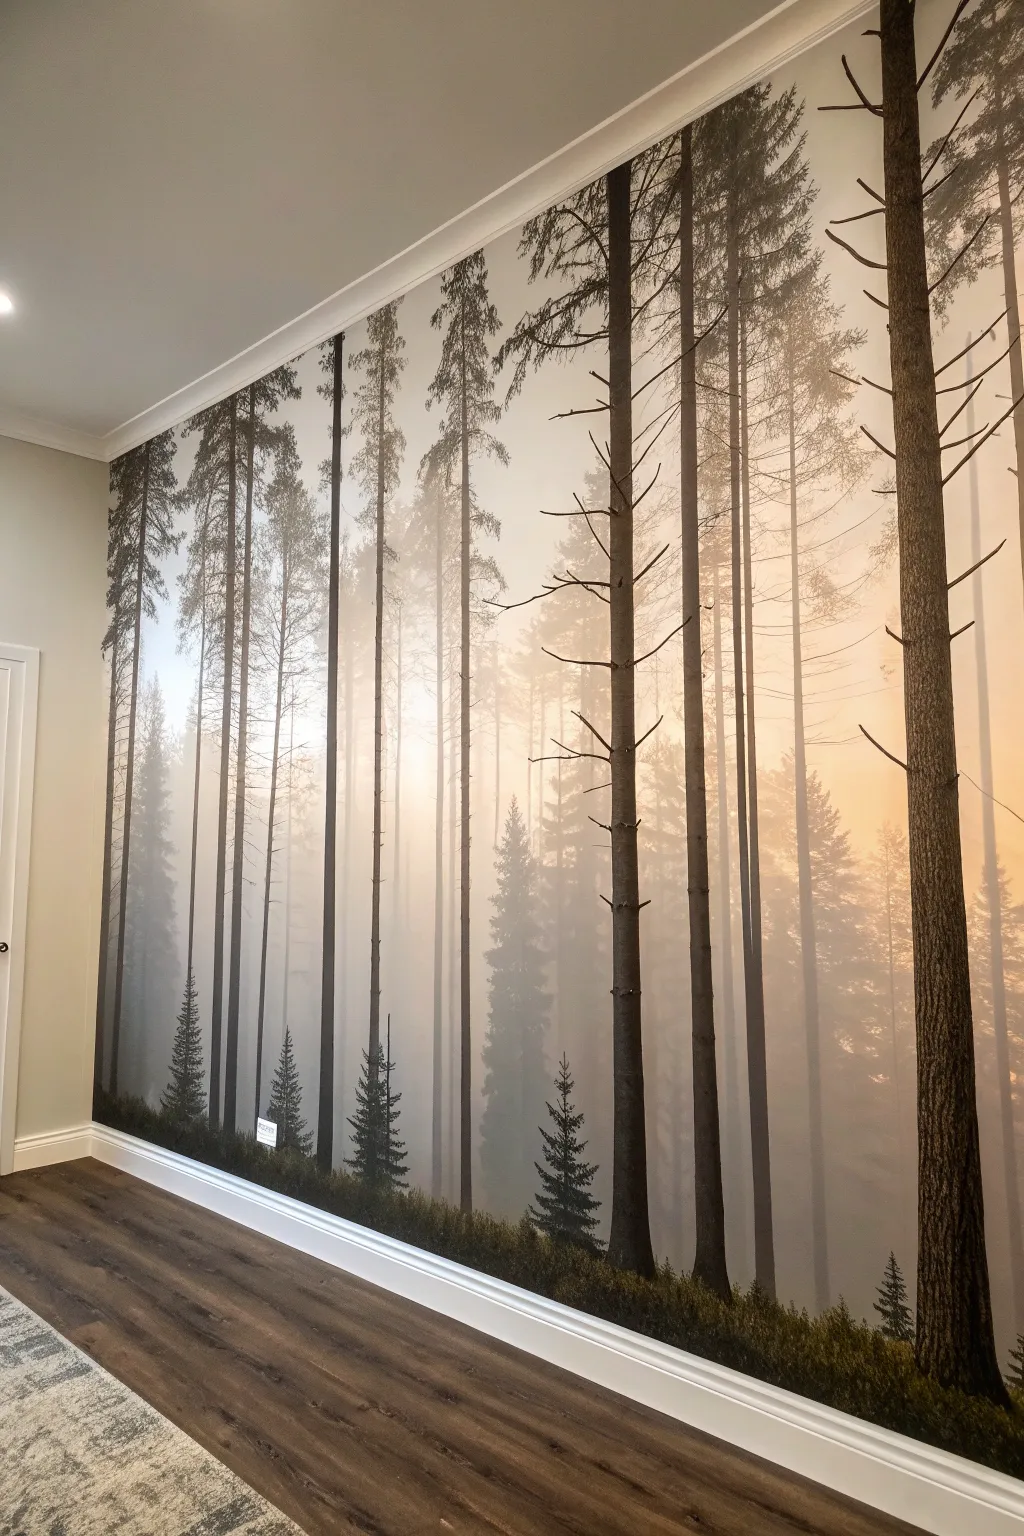
Transform a blank wall into a serene woodland escape with this breathtaking forest mural. By using a pre-printed wall mural, you can instantly add immense depth and a calm, atmospheric vibe to any room without needing to be a master painter.
Step-by-Step Guide
Materials
- Custom-sized forest wall mural (adhesive or paste-required)
- Wallpaper paste (if not peel-and-stick)
- Paste brush or roller
- Smoothing tool or plastic squeegee
- Sharp utility knife (snap-off blade style is best)
- Plumb line or spirit level
- Pencil
- Ladder or step stool
- Sponge and bucket of clean water
- Seam roller
- Tape measure
Step 1: Wall Preparation
-
Clear and Clean:
Begin by removing all furniture, switch plates, and outlet covers from the wall. Wash the surface thoroughly with a sponge and mild soapy water to remove dust or grease, which ensures strong adhesion. -
Patch Imperfections:
Inspect the wall for holes or bumps. Fill any nail holes with spackle and sand them smooth once dry. A mural shows texture easily, so a flat surface is crucial. -
Prime the Surface:
If your wall has bright colors or high-gloss paint, apply a coat of primer. This prevents old colors from showing through lighter misty sections of the mural and helps the paste grip better.
Clean Cuts Only
Change your utility knife blade after every few cuts. Wet mural paper tears easily if the blade is even slightly dull, ruining the edge.
Step 2: Planning the Layout
-
Measure Twice:
Measure the total width and height of your wall. Compare this to your mural panels to confirm everything fits, usually allowing a couple of inches of overlap on all sides for trimming. -
Lay Out Panels:
Roll out your mural panels on a clean floor. Assemble the image fully to verify the order and ensure the pattern matches perfectly from one strip to the next before you start pasting. -
Draw a Plumb Line:
Walls are rarely perfectly straight. Measure the width of your first panel out from the corner (minus an inch for overlap). Use a spirit level and pencil to draw a perfectly vertical guideline down the wall.
Step 3: Application
-
Apply Paste:
For paste-the-wall types, roll a generous layer of adhesive directly onto the wall surface where the first panel will go, extending slightly past your pencil line. -
Hang First Panel:
Lift the first panel and align its edge strictly with your pencil line, not the corner of the room. Let the excess paper hang over the ceiling and the corner edge. -
Smooth it Out:
Using your smoothing tool, gently press the panel against the wall, working from the center outwards to push out any air bubbles. I find distinct, sweeping motions work best here to prevent creases. -
Hang Subsequent Panels:
Apply paste for the next section. Align the second panel’s visual pattern (usually the tree trunks or branches) with the first panel. Butt the edges tightly together without overlapping unless the manufacturer specifies otherwise. -
Check Seams:
Run a seam roller lightly over the joins to ensure they lie flat. Wipe away any excess paste that squeezes out immediately with a damp sponge so it doesn’t dry on the print. -
Continue Across:
Repeat the process across the wall. Keep checking your vertical alignment periodically; corrections are easier to make while the paste is still wet.
Bubbles Won’t Budge?
If a bubble persists after smoothing, prick the center with a fine sewing needle, then gently press the air out through the tiny hole.
Step 4: Finishing Touches
-
Trim Edges:
Once all panels are up, use a sharp utility knife and a straight edge (like your smoothing tool) to trim the excess paper at the ceiling and baseboard. Change blades frequently for a crisp cut. -
Cut Outlets:
Locate your outlets by feeling through the paper. Carefully cut an ‘X’ over the box, fold the flaps back, and trim the excess around the opening before reinstalling the covers. -
Final Wipe Down:
Give the entire wall one last gentle wipe with a clean, damp sponge to remove any residual paste haze from the surface.
Step back and enjoy the peaceful view of your new indoor forest retreat
Grounded Tree Base With Grass, Stones, and a Soft Horizon

This expansive wall mural creates a convincing illusion by anchoring a realistic tree into a painted landscape that extends to the ground. The design features detailed bark textures, soft foliage, and a clever trompe l’oeil effect where painted stones meet the real garden bed.
Step-by-Step Tutorial
Materials
- Exterior acrylic latex paint (matte or eggshell base)
- Exterior acrylic paints (various shades of brown, tan, gray, cream, sage green, olive green)
- Chalk or pastel pencil for sketching
- Large rollers and extension pole
- Assorted paintbrushes (large scenery brushes, angled sash brushes, fine liner brushes)
- Sea sponge or stippling brush
- Drop cloths and painter’s tape
- Ladder or scaffolding
- UV-resistant clear topcoat (optional)
Step 1: Preparation and Base Coat
-
Clean the surface:
Begin by thoroughly cleaning the exterior wall to remove dust, dirt, or mildew. A pressure washer is effective here, but ensure the stucco or siding is completely dry before painting. -
Apply the background color:
If your wall isn’t already the desired warm cream or pale yellow hue shown in the base, roll on two coats of high-quality exterior latex paint to establish a smooth, warm canvas for your scene. -
Sketch the outline:
Using a piece of chalk or a pastel pencil, lightly sketch the skeleton of the tree. Focus on the gentle S-curve of the trunk and the major dividing branches. Mark a low horizon line about knee-height and sketch in the large stones at the very bottom.
Paint Dries too Fast?
Exterior walls get hot. Add a retarder medium to your acrylics to slow drying time, or paint during the cooler early morning hours.
Step 2: Painting the Landscape and Background
-
Establish the horizon:
Mix a diluted wash of light tan and cream. Paint the distant hills along your horizon line, keeping edges soft and slightly blurry to create atmospheric perspective. I like to keep these colors very muted so they don’t compete with the tree. -
Add soft clouds:
Using a dry brush technique with white and pale orange paint, scrub in faint, horizontal cloud wisps above the horizon line to suggest a sunset or dawn sky. -
Paint the background terrain:
Fill in the ground area between the horizon and the base of the wall with warm beige tones, mimicking dry earth or sand. Use horizontal brushstrokes to emphasize flatness.
Enhance the 3D Effect
Place real rocks or boulders in the garden bed directly in front of the painted stones to seamlessly blend the mural into reality.
Step 3: Creating the Tree
-
Block in the trunk:
Fill the trunk and main branches with a medium-dark brown base color. Don’t worry about texture yet; just get the solid shape established. -
Add bark texture:
Once the base is dry, use a smaller brush to apply streaks of dark espresso brown and lighter tan. Follow the vertical growth of the tree, waving the lines slightly to mimic the rough ridges of bark. -
Highlight the form:
Determine your light source (suggested from the upper left in the example) and paint lighter cream or grey highlights on that side of the trunk and branches to give them cylindrical volume. -
Extend the branches:
Switch to a liner brush or a rigger brush to paint the fine, spindly twigs extending from the main boughs. Ensure these taper to fine points at the ends.
Step 4: Foliage and Foreground
-
Stipple the leaves:
Use a sea sponge or an old, splayed bristle brush to tap in clusters of leaves. Start with a dark olive green for shadows, then layer lighter sage and yellow-green on top for sunlight. -
Keep foliage airy:
Avoid painting solid blocks of green. Leave negative space between leaf clusters so the sky and branches show through, maintaining a realistic, airy canopy. -
Paint the bottom stones:
At the base of the wall, paint the large oval stone shapes using a mid-tone grey. Create a 3D effect by shading the bottom of each stone with dark charcoal and highlighting the tops with almost-white grey. -
Add stone shadows:
Paint dark cast shadows underneath and between the painted stones to ground them visually. -
Paint foreground grass:
Using a fan brush or liner brush, flick upward strokes of green and tan paint along the bottom edge. Make these overlap the painted stones and the trunk base to integrate the tree into the scene. -
Seal the work:
Once the paint has cured completely (usually 48 hours), apply a clear, matte, UV-resistant exterior sealer to protect your artwork from sun fading and weather damage.
Step back and admire how your new landscape blends perfectly with the natural surroundings of your yard
Root System Along the Baseboard for a Subtle Surprise
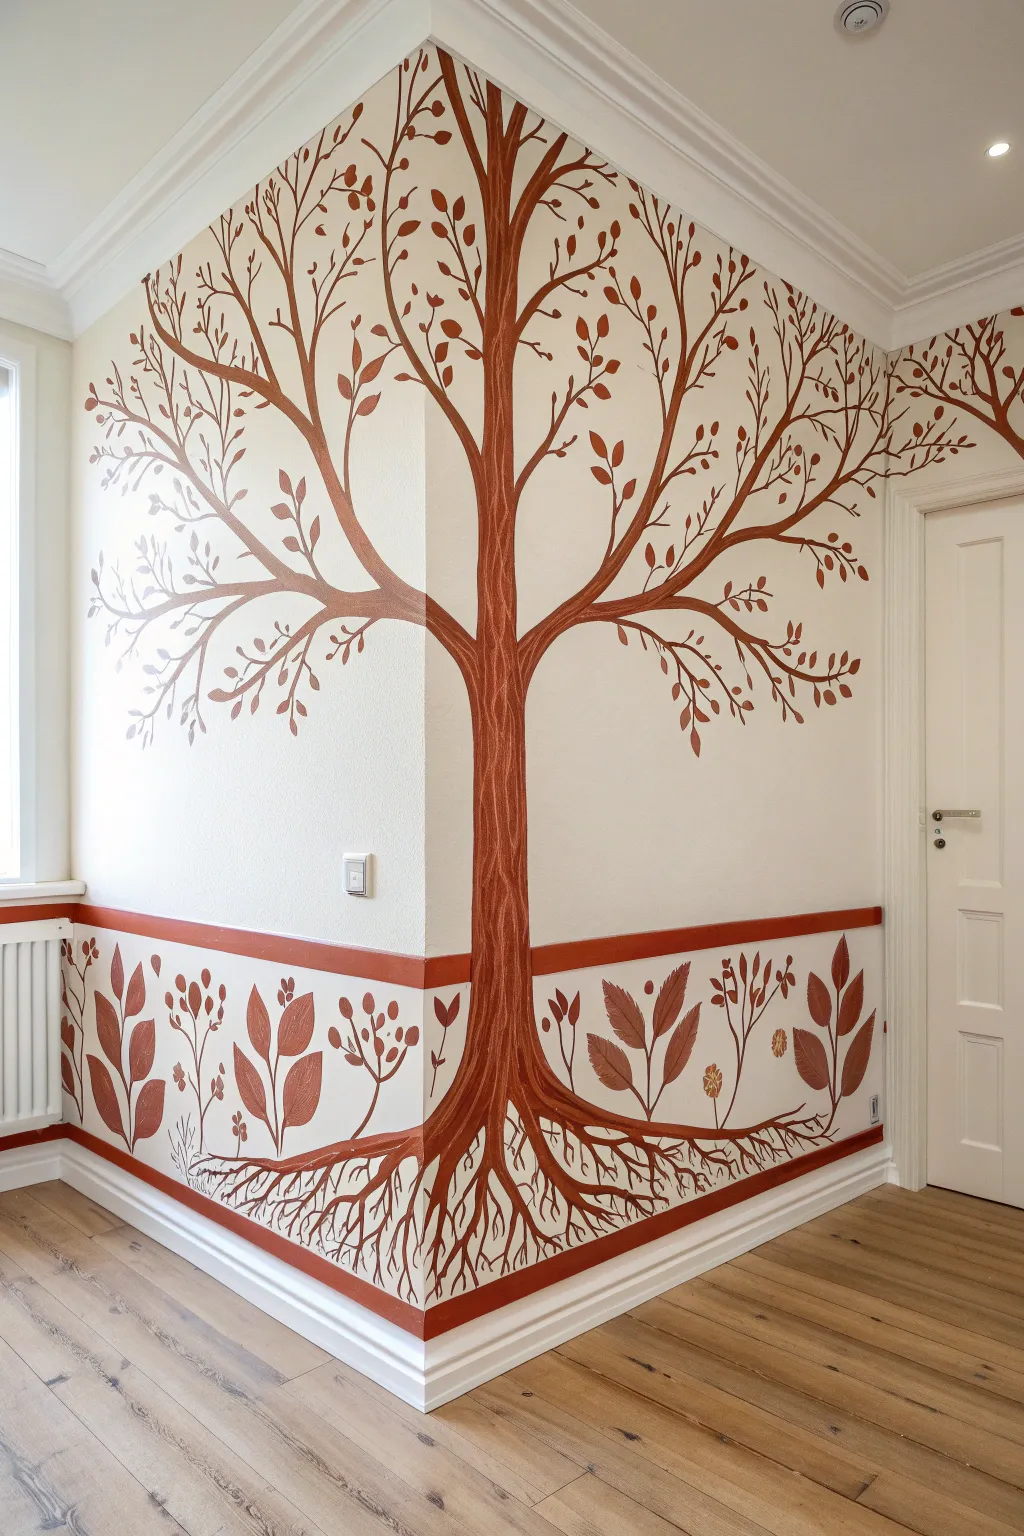
Transform an ordinary corner into an enchanting focal point with this clever mural design that utilizes the architecture of the room. By painting the trunk directly into the corner and extending a detailed root system along the baseboards, you create an immersive, storybook feel that grounds the space beautifully.
Step-by-Step
Materials
- High-quality interior latex paint (creamy white for base)
- Reddish-brown acrylic or latex paint (for tree and borders)
- Painter’s tape (1-inch and 2-inch widths)
- Pencil and large eraser
- Laser level or long spirit level
- Measuring tape
- Angled sash brush (2-inch)
- Round artist brushes (various sizes: #4, #8, #12)
- Fine liner brush (for root details)
- Drop cloths
- Step ladder
Step 1: Setting the Stage
-
Prepare the workspace:
Begin by clearing the corner of any furniture and laying down drop cloths to protect your flooring. Ensure the walls are clean, dry, and free of dust before starting. Take a moment to remove any electrical wall plate covers that might be in your painting zone, storing the screws safely. -
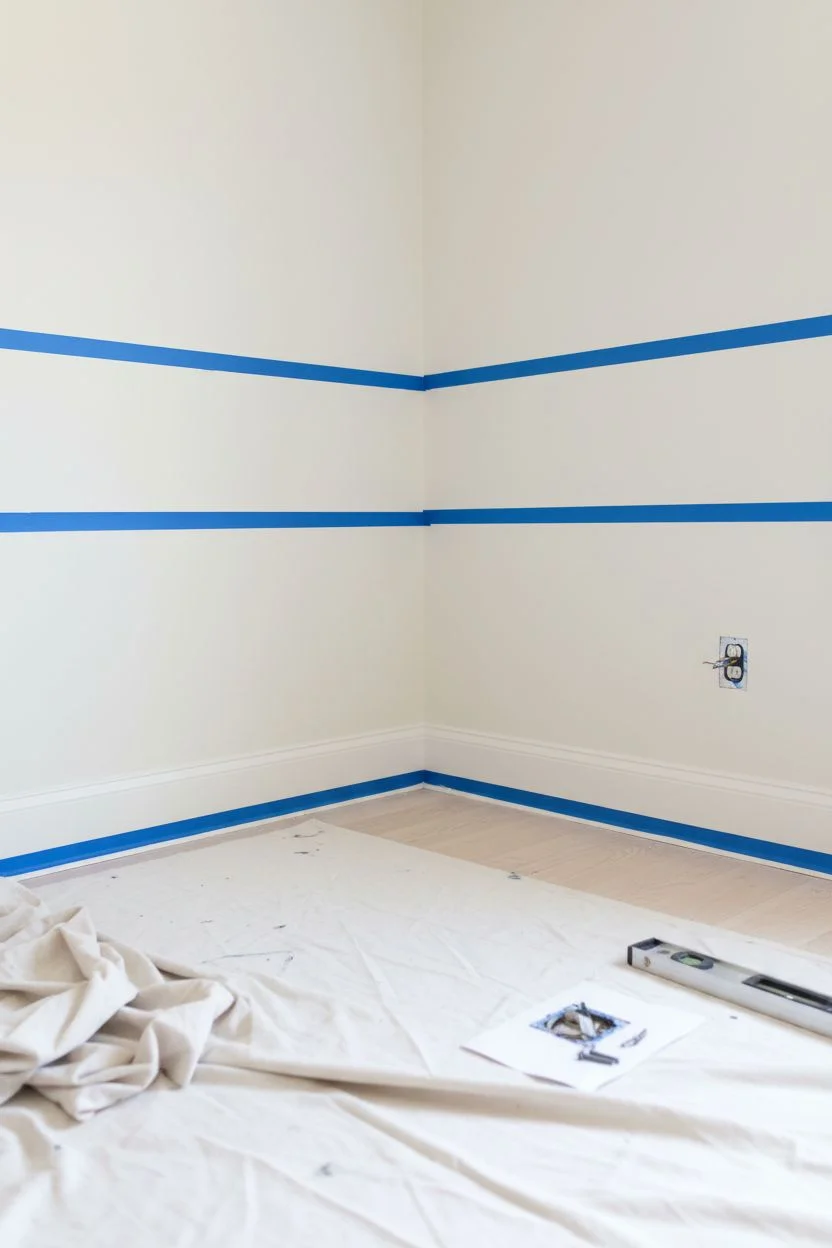
Establish the lower border:
Using a measuring tape, mark a height for your lower ‘wainscoting’ section—approximately 24 to 30 inches from the floor works well visually. Use a laser level or a spirit level and pencil to draw a straight horizontal line across both walls meeting at the corner. -
Tape the horizontal bands:
Apply painter’s tape to create the borders. You want to create two parallel horizontal stripes. Place one strip of tape just above your pencil line and another roughly 1.5 inches below it to define the thick red border shown in the image. Press the edges of the tape down firmly to prevent paint bleed. -
Tape the baseboard protection:
Run a line of painter’s tape along the top edge of your existing white baseboard molding to protect it from stray brushstrokes while you paint the lower root section.
Corner Trick
Painting a straight vertical line right in a corner crease is tricky. Use a long ruler or straight edge to guide your pencil sketch first, rather than freehanding the center of the trunk.
Step 2: Drafting the Tree Structure
-
Sketch the trunk:
Lightly sketch the main trunk using a pencil. Position the trunk so it straddles the corner itself, using the crease of the wall as the center line. Draw the trunk going straight up, gradually narrowing as it reaches the ceiling. -
Outline the branches:
Extend branches out from the main trunk onto both wall surfaces. Aim for a balanced but organic look—don’t make them perfectly symmetrical. Let some branches reach high toward the ceiling and others curve gently downwards. -
Draft the root system:
In the lower section (between the baseboard and your tape line), sketch a complex network of roots. Start with thick roots originating from the corner ‘trunk’ and tapering out horizontally along the floor. Add smaller lattice-like roots drooping down from the main roots. -
Add decorative elements:
Sketch simple leaf shapes along the upper branches and larger, stylized botanical elements like broad leaves or seed pods in the empty spaces of the lower wainscoting area to fill the gaps between roots.
Level Up: Ombré Effect
For added depth, mix a slightly darker shade of brown for the roots and base, and gradually lighten the paint color as you work your way up toward the highest canopy branches.
Step 3: Painting the Design
-
Paint the borders:
Dip your sash brush into the reddish-brown paint. Fill in the horizontal stripe area between your tape lines. I always like to paint slightly over the tape edge to ensure a crisp line when peeling. Also, paint a thick band just above the baseboard tape to anchor the bottom. -
Fill the trunk:
Using a smaller angled brush or a large round artist brush, paint the main trunk. Use long, vertical strokes to mimic the texture of bark. Since the trunk is in the corner, double-check that you get paint deep into the wall crease. -
Paint the main branches:
Switch to a #8 or #12 round brush for the thickest branches. Ensure the paint flows smoothly; if the paint is too thick and drags, thin it with a tiny drop of water. Connect these seamlessly to the trunk. -
Detail the roots:
Carefully paint the root system in the lower section. Use the reddish-brown color to fill in your sketched outlines. Pay attention to where the roots ‘cross’ the horizontal border; painting the trunk continuously through that stripe integrates the design. -
Add fine twigs:
Using a #4 round brush or liner brush, paint the smaller twigs extending from the main branches. Keep your hand loose and vary the pressure on the brush—press down for thickness and lift up for a fine point at the end. -
Execute the botanical motifs:
Paint the leaves and stylized plants in the lower section. These shapes are solid silhouettes, so just fill in your pencil outlines carefully with the reddish-brown tone. -
Refine the bark texture:
Once the base coat of the trunk is dry, you can subtly add texture. Mix a slightly lighter version of your brown (add a drop of white) and paint thin, wavy vertical lines on the trunk and roots to simulate bark grooves.
Step 4: Finishing Touches
-
Peel the tape:
While the paint is tacky (not fully dry), slowly peel off the painter’s tape at a 45-degree angle. This prevents the dried paint from cracking or pulling away from the wall. -
Touch up edges:
Inspect your lines where the tape was removed. If any brown paint bled onto the white wall, use a small flat brush and your original wall color to touch it up for a perfect finish. -
Clean up sketch lines:
Once the paint is completely cured (wait at least 24 hours), gently erase any visible pencil marks. Be gentle so you don’t burnish the paint.
Step back and enjoy the way this organic design softens the hard angles of your room.
Tree Mural That Frames a Window Like Branches
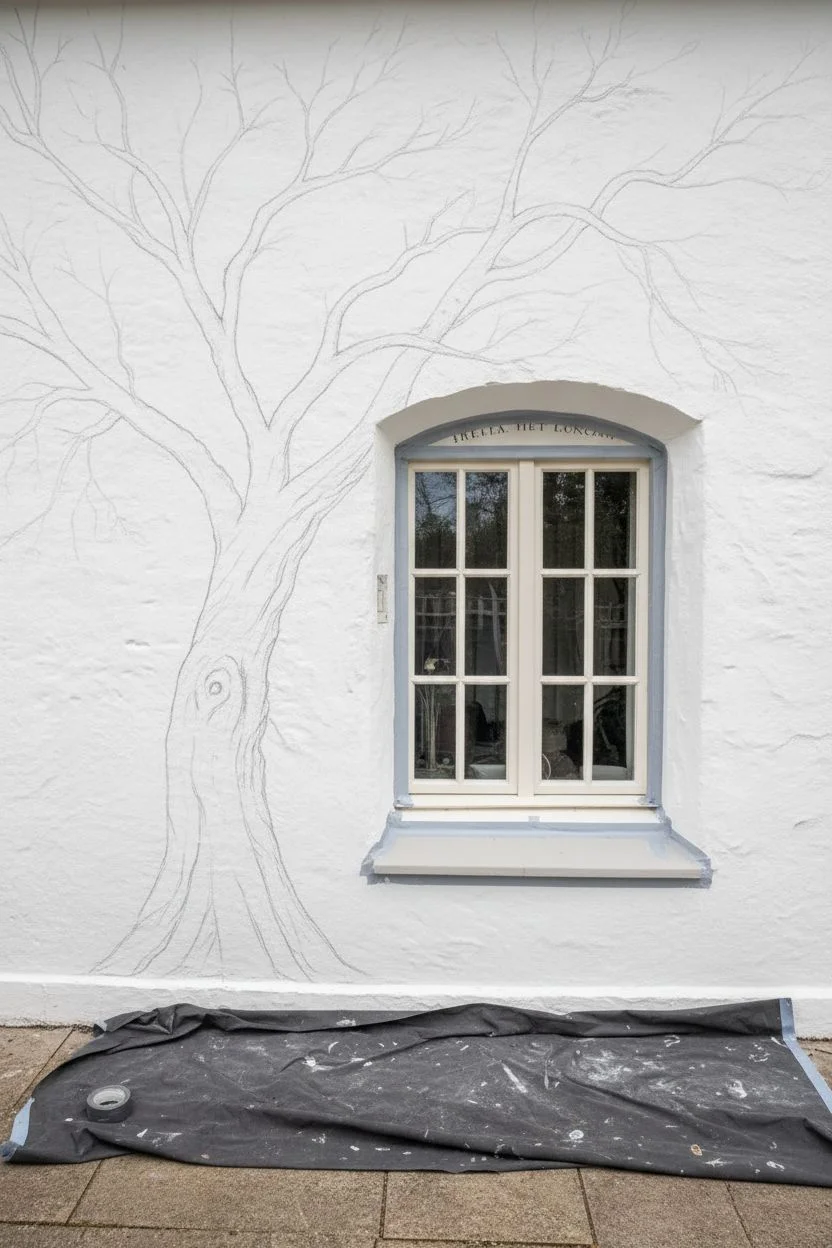
Transform a plain exterior wall into a storybook scene with a mural that wraps organically around architectural features. This project depicts a gentle, twisting tree climbing up the side of a window, integrating nature-inspired art directly with the structure of your home.
Step-by-Step Guide
Materials
- Exterior masonry primer
- Exterior acrylic latex paint (shades of brown, tan, cream, green, grey)
- Painter’s tape
- Drop cloths
- Chalk or charcoal stick for sketching
- Assorted paintbrushes (large flat brushes for filling, angled brushes for bark texture, fine liner brushes for leaves)
- Sea sponge (optional for texture)
- Clear exterior matte sealant
- Ladder or step stool
- Mild detergent and scrub brush
Step 1: Preparation & Sketching
-
Clean the canvas:
Begin by thoroughly cleaning the exterior wall surface. Use a mild detergent and a scrub brush to remove dirt, dust, and any loose paint bits. Allow the wall to dry completely before proceeding. -
Protect the area:
Lay down drop cloths to protect the ground and patio area. Apply painter’s tape carefully around the window frame and sill to ensure crisp edges where the mural meets the trim. -
Prime the surface:
Apply a coat of exterior masonry primer to the area where you plan to paint the tree. This ensures the mural adheres properly to the rough stucco or brick texture and increases longevity. -
Sketch the primary form:
Using a piece of chalk or a charcoal stick, loosely sketch the outline of the tree trunk starting from the ground up to the left of the window. Let the lines flow naturally, avoiding rigid straightness. -
Map the branches:
Extend your sketch lines to create branches that reach up and over the window frame. Pay attention to how real trees grow—limbs should generally get thinner as they extend further from the trunk.
Step 2: Painting the Trunk & Bark
-
Block in the base color:
Mix a mid-tone brown shade and use a large flat brush to fill in the entire outline of the trunk and main branches. Don’t worry about texture yet; just get solid coverage. -
Add deep shadows:
While looking at your reference or imagining a light source (usually from above), paint darker brown or charcoal grey along the undersides of branches and the edges of the trunk to create cylindrical volume. -
Create bark texture:
Using a smaller angled brush, drag lighter shades of tan and cream vertically along the trunk. Use broken, wavy strokes to mimic the ridges and furrows of natural bark. -
Highlight knots and twists:
Identify areas where branches split or where a knot might naturally occur. Add brighter cream highlights to the raised areas of these features to make them pop against the darker bark recesses. -
Blend for softness:
If the contrast between bark colors feels too harsh, use a dry brush techniques or a slightly damp sponge to gently soften the transitions between the darks and lights.
Weather Watch
Check the forecast before starting! You need at least 3 dry, mild days. Painting on damp stucco causes peeling, and high humidity can ruin drying times.
Step 3: Leaves & Ground Detail
-
Paint structural stems:
Switch to a liner brush and use a dark brown to paint the very thin, delicate visual ‘twigs’ extending from the ends of your main branches. These will hold your leaves. -
Layer the leaves:
Mix three shades of green: a dark olive, a mid-tone herbal green, and a pale sage. Start by dabbing the dark green leaves closest to the branches. -
Add lighter foliage:
Layer the mid-tone and finally the pale sage leaves on top and towards the outer tips. Vary the direction of your brushstrokes so the leaves look like they are fluttering in different directions. -
Sketch ground cover:
At the base of the trunk, paint small vertical strokes in earthy greens to represent tufts of grass or fern-like plants. This grounds the mural so the tree doesn’t look like it’s floating. -
Add botanical details:
Paint a few smaller shrub-like plants to the right of the window using the same bark and leaf techniques, creating visual balance across the wall. -
Detail the grass:
Use your finest brush to add crisp, light-colored highlights to individual blades of grass or fern fronds at the base to separate them from the wall background. -
Final inspection:
Step back about ten feet to view the whole composition. Touch up any areas where the wall texture prevented full paint coverage or where branch connections look unnatural. -
Seal the work:
Once the paint has cured (check your paint can for duration, usually 24-48 hours), apply a clear exterior matte sealant to protect your artwork from UV rays and weather.
Level Up: Hidden details
Hide small, whimsical details among the leaves for guests to find, like a painted ladybug, a small bird on a branch, or a squirrel peeking around the trunk.
Enjoy the view of your permanent garden feature every time you glance out the window
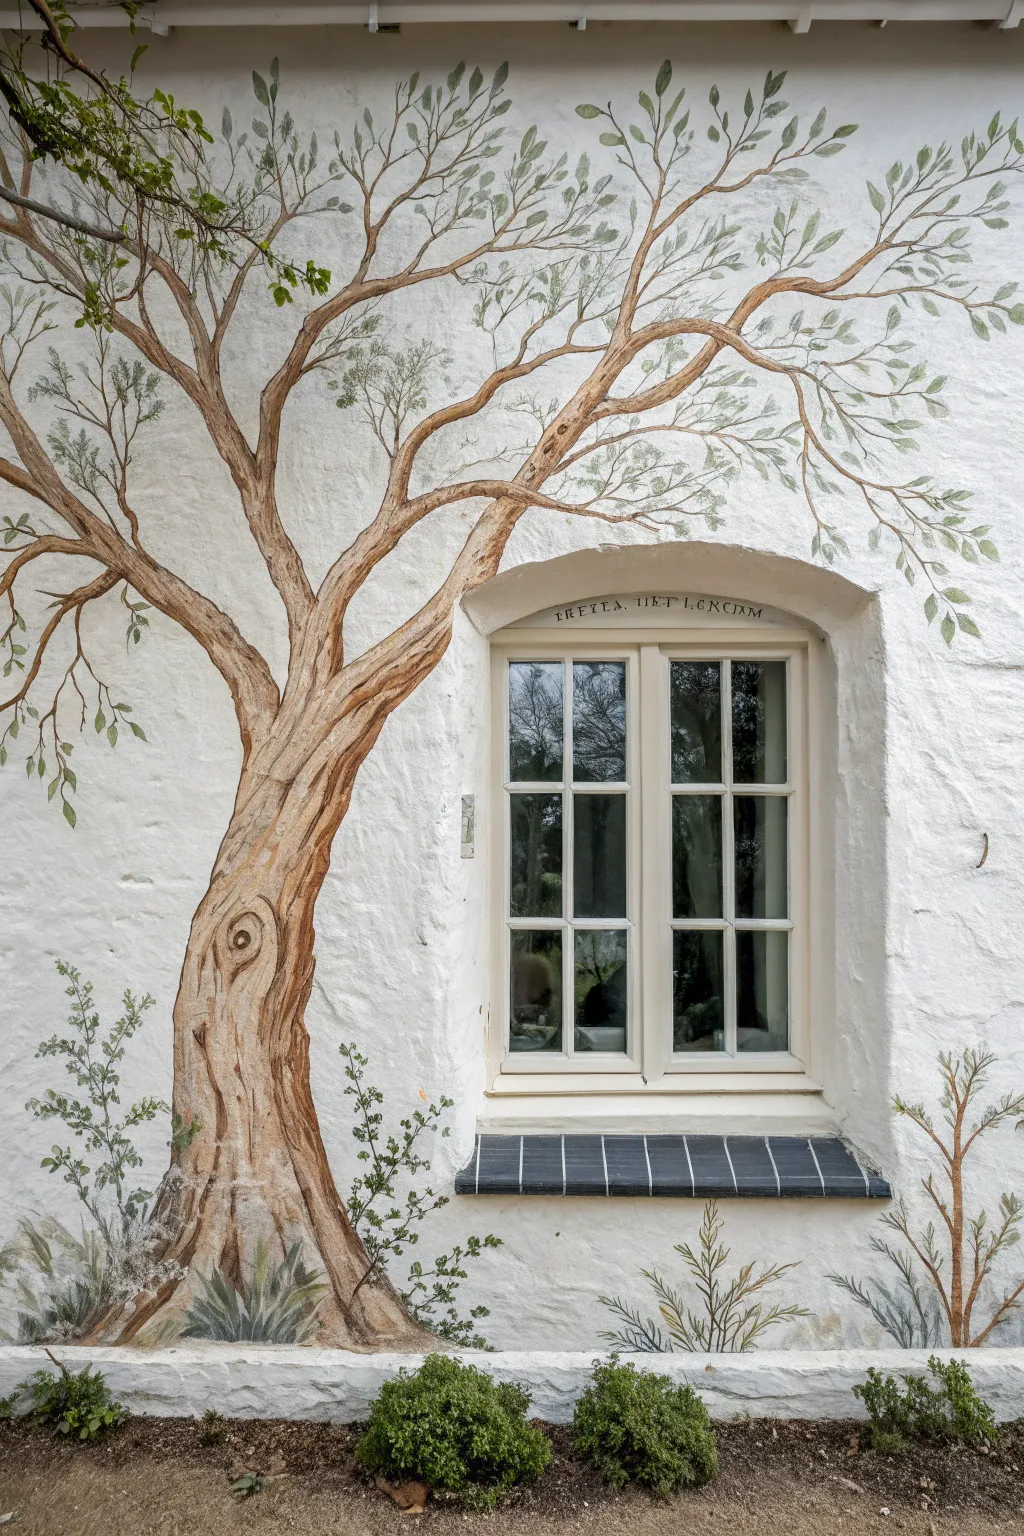
Doorway Tree Illusion That Turns Trim Into Part of the Trunk
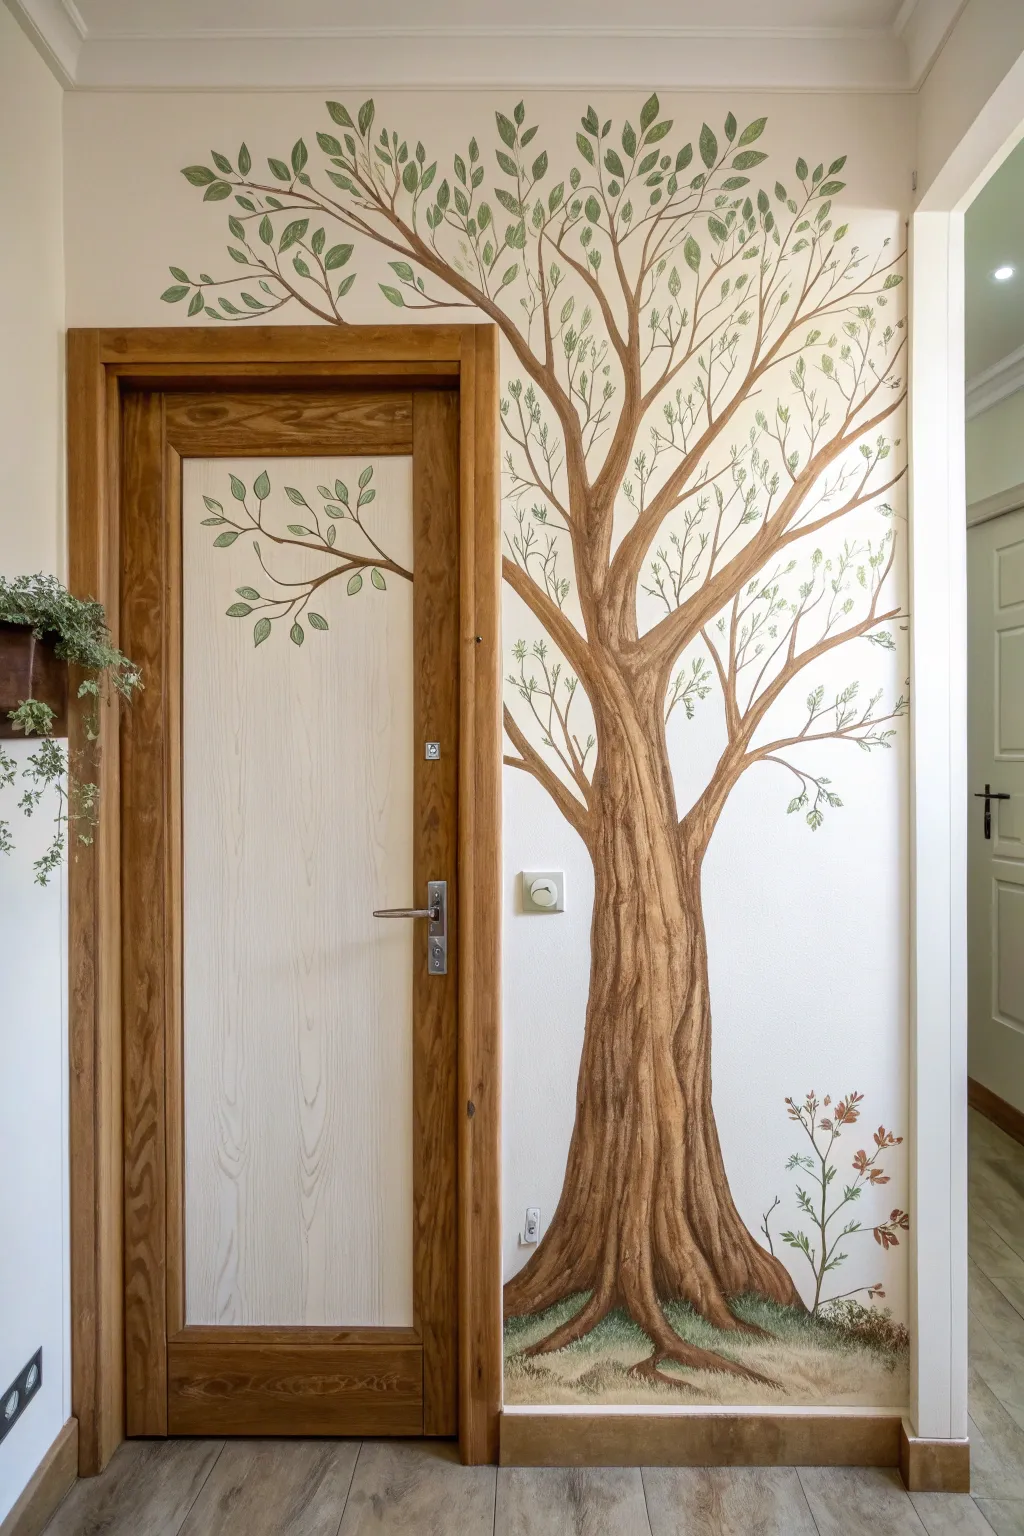
Transform a standard hallway door into a whimsical portal by painting a grand tree that doesn’t just sit beside the frame, but reaches right across it. This clever mural technique integrates your architectural trim into the artwork, creating a seamless flow between the wall and the entryway.
How-To Guide
Materials
- Acrylic wall paints (dark brown, medium brown, tan, cream, olive green, sage green)
- Pencil and eraser
- Painter’s tape
- Sandpaper (medium grit)
- Primer (appropriate for wood/laminate)
- Assorted brushes (2-inch flat, 1-inch angled sash, small round detail brushes)
- Clean rags
- Drop cloth
- Clear matte varnish or sealer
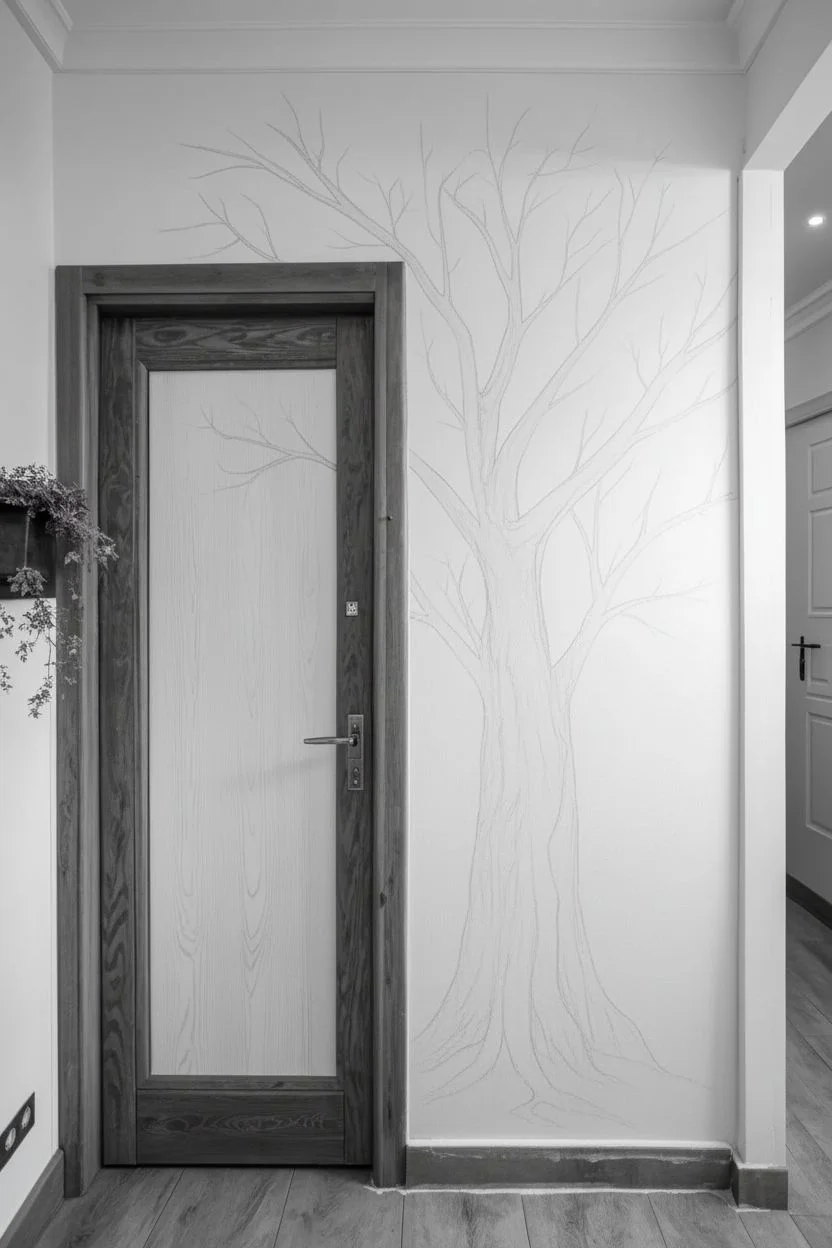
Step 1: Preparation & Sketching
-
Prepare the workspace:
Lay down your drop cloth to protect the flooring. If your door has a glossy finish, lightly sand the specific panel where the branch will be painted to ensure the paint adheres properly. -
Clean and prime:
Wipe down the wall and the door panel with a damp rag to remove dust. Apply a thin coat of primer specifically to the area of the door panel you plan to paint; this is crucial for durability on high-touch surfaces. -
Sketch the trunk:
Using a pencil, lightly outline the main trunk on the wall next to the door. Allow the base to flare out near the floor for stability and draw the trunk narrowing as it reaches upward. -
Bridge the gap:
Draw the main branches extending from the trunk. For the illusion effect, sketch one prominent branch that originates on the wall, crosses over the door trim, and continues onto the door panel itself. -
Outline the canopy:
Sketch thinner twigs and leaf placements radiating from the main branches, filling the upper wall space and the upper corner of the door panel.
Uneven Coverage?
If the paint on the door feels slippery or streaks, the surface is too smooth. Very lightly sand the dried layer, wipe clean, and re-apply paint using a stippling motion for better grip.
Step 2: Painting the Structure
-
Block in the base color:
Load a 2-inch brush with your medium brown paint. Fill in the entire trunk and the thickest branches on the wall. Don’t worry about texture yet; just get solid coverage. -
Paint the door branch:
Continue that same medium brown carefully across the door trim and onto the primed door panel. You may need a smaller angled brush here to keep the edges sharp against the white door background. -
Add shadows:
Mix a dark brown hue. Using a 1-inch brush, paint long, vertical streaks along the sides of the trunk and the underside of the branches to create distinct shadows and cylindrical volume. -
Create bark texture:
Switch to a smaller flat brush with tan or light brown paint. Paint uneven, wandering lines vertically up the center of the trunk to mimic the ridges of bark. -
Highlights and depth:
I like to use a very dry brush with a cream color to lightly graze the “high points” of the bark texture. This highlights the ridges and makes the tree look three-dimensional. -
Root details:
Paint the roots extending slightly along the floor trim. Add dark shading right at the base where the tree meets the grass to ground the painting.
Pro Tip: Perspective
Make the branches thinner as they move away from the trunk. On the door panel, ensure the branch doesn’t look ‘broken’ where the door gap is; line it up perfectly with the wall branch.
Step 3: Foliage & Finishing
-
Paint the stems:
Use a liner or small round brush with dark brown paint to create fine, delicate twigs branching off the main limbs. Keep your hand loose for organic, non-straight lines. -
Start the leaves:
Mix a muted olive green. Using a small round brush, paint simple almond shapes for the leaves. Vary the direction they point to make the foliage look natural. -
Layer leaf colors:
Once the olive leaves are dry, add a second set of leaves using the sage green. Overlapping some leaves creates density, while leaving others sparse keeps the mural airy. -
Add leaf veins:
With a tiny detail brush and diluted light green or cream paint, carefully add a central vein line to the larger leaves, especially those on the door panel which will be seen up close. -
Paint the ground cover:
Stipple some greens and browns at the very bottom of the wall to suggest grass and soil around the roots. You can add small wildflower details here if desired. -
Seal the artwork:
Allow the paint to cure for at least 24 hours. Apply a clear matte varnish over the painted areas, paying extra attention to the branch on the door panel to protect it from cleaning and handling.
Step back and admire how your hallway has blossomed into a serene woodland passage
Staircase-Climbing Tree That Grows With the Steps
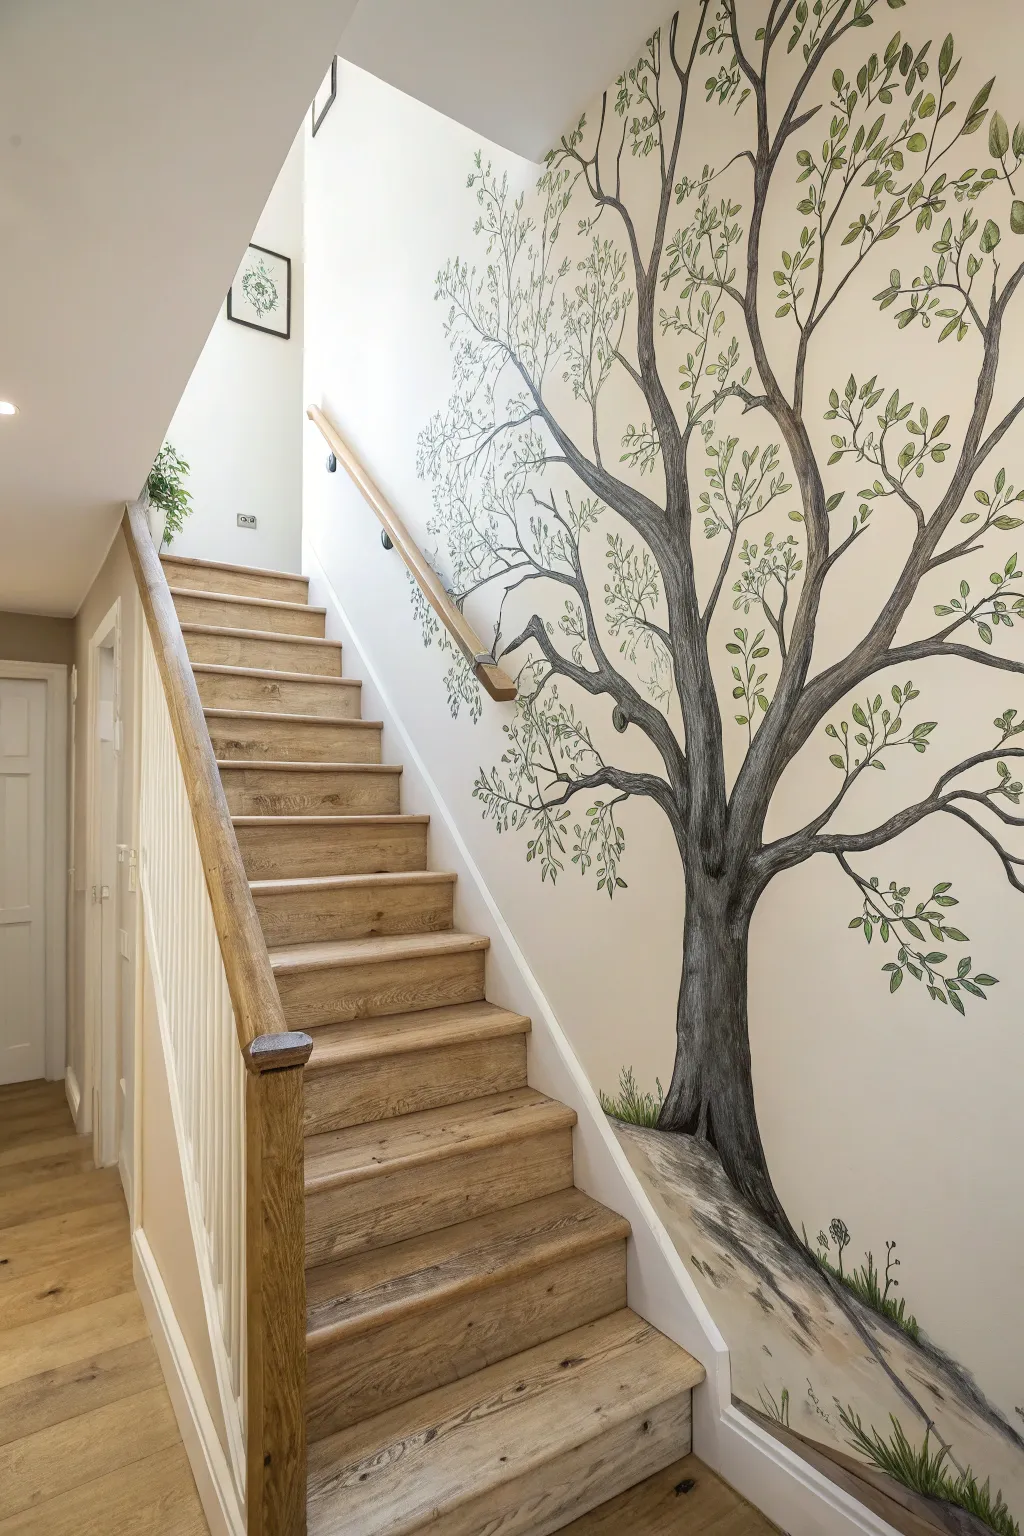
Transform a plain stairwell into an enchanted forest path with this beautifully illustrated tree mural. Using a combination of charcoal-style linework and soft, watercolor-like shading, the tree naturally follows the ascent of your steps for a truly immersive architectural feature.
Step-by-Step Guide
Materials
- Interior wall paint (flat/matte finish, cream or off-white)
- Pencil (HB or 2B) and eraser
- High-quality acrylic paints (Dark Grey/Charcoal, Black, Olive Green, Sage Green, Beige/Tan)
- Glazing medium or water (to thin acrylics)
- Assorted brushes (Fine liner/rigger brushes, medium round brushes, large flat brush for base)
- Painter’s tape
- Drop cloth
- Ladder or sturdy step stool
- Reference image of a tree (optional but helpful)
Step 1: Planning and Sketching
-
Prepare the workspace:
Begin by masking off the skirting boards, stair treads, and the handrail with painter’s tape to protect them from drips. Lay down a drop cloth on the stairs to catch any potential spills. -
Base wall preparation:
Ensure your wall has a clean, matte base coat. The mural works best on a warm cream or off-white background, which mimics the look of paper in an illustration. -
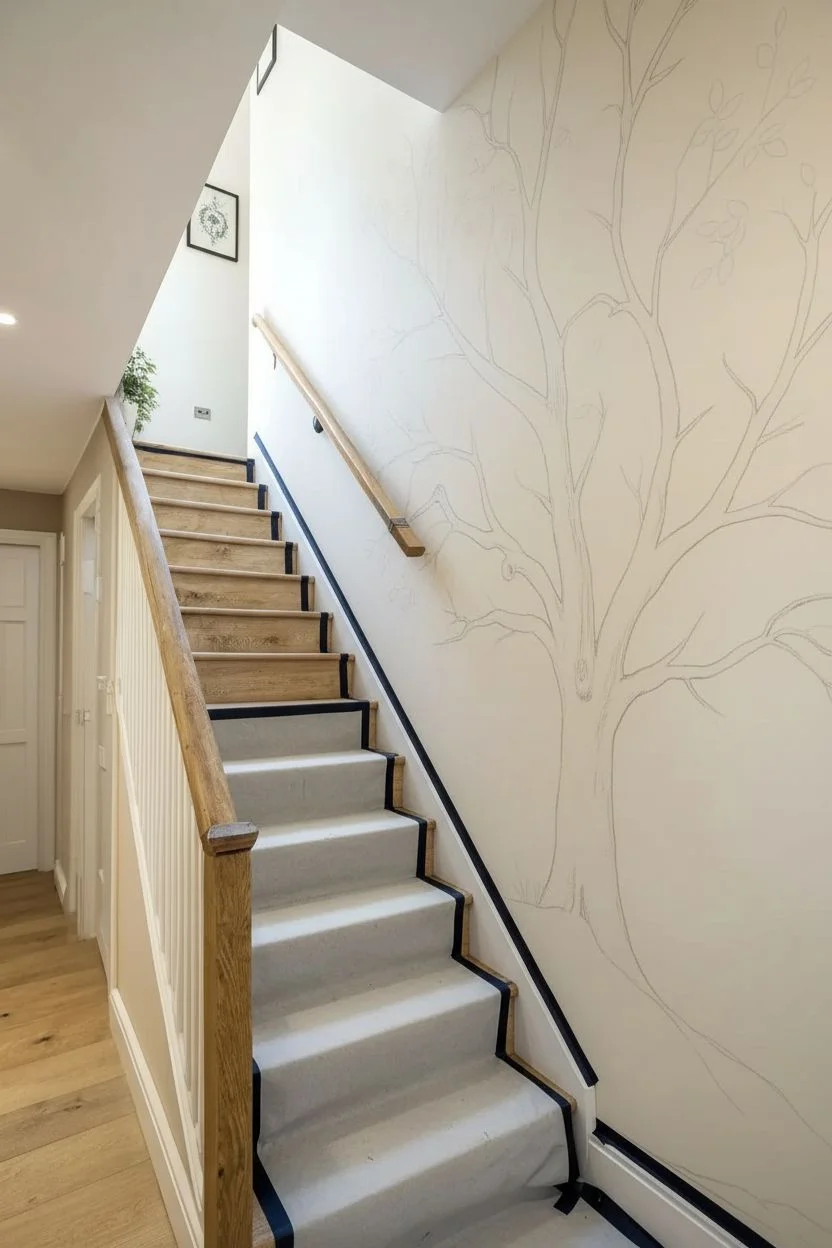
Sketch the trunk skeleton:
Using a light pencil, draw a sweeping diagonal line for the main trunk that roughly parallels the angle of the staircase. This ensures the tree feels like it’s ‘climbing’ with you. -
Flesh out the trunk:
Add width to your initial line, making the base of the trunk thicker near the bottom steps and tapering it slightly as it reaches upward. Sketch in irregular bumps and knots to give it an organic feel. -
Map the main branches:
Extend primary branches from the top of your trunk, reaching them up toward the ceiling. Keep the lines elongated and graceful, rather than jagged. -
Refine the details:
Add secondary, smaller twigs branching off the main limbs. Sketch loose clusters where you plan to place leaves later, but keep these pencil lines very faint.
Ink-Style Consistency
To get that specific illustrated look, your paint should be the consistency of heavy cream. Test it on paper first; if the lines break too much, add a drop more water.
Step 2: Painting the Structure
-
Mix your trunk color:
Create a dark charcoal grey by mixing black with a touch of beige and thinning it slightly with water or glazing medium. The goal is a fluid consistency that flows like ink. -
Outline the bark:
Using a fine liner brush, trace over your pencil lines for the trunk. Don’t make the line perfectly smooth; jiggle your hand slightly to create a texture that resembles rough bark. -
Fill the trunk shading:
Switch to a medium round brush and a thinned down, lighter grey wash. Fill in the trunk area, leaving some areas lighter to suggest sunlight hitting the curved wood. -
Add bark texture:
Once the wash is dry, go back with your fine brush and the dark charcoal mix. Paint contour lines—curved vertical strokes that travel up the trunk—to emphasize the roundness and grain of the wood. -
Extend the branches:
Paint the smaller branches and twigs using the dark grey liner. Let these lines fade out or break slightly at the tips to maintain that sketchy, illustrative quality.
Step 3: Adding Foliage and Ground
-
Mix leaf greens:
Prepare two shades of green: a darker olive and a lighter, fresher sage. Thin them significantly so they have a transparent, watercolor appearance. -
Paint the leaves:
Using a small round brush, paint simple almond or teardrop shapes along the twigs. I prefer to vary the pressure, pressing down to widen the leaf and lifting up for a sharp point. -
Layer the foliage:
Alternate between your olive and sage greens. Don’t worry about filling every gap; leaving negative space keeps the mural feeling airy and delicate. -
Outline selected leaves:
For a stylized look, take your finest brush and very watered-down black paint to loosely outline just a few of the leaves, or add a central vein line to them. -
Ground the tree:
At the very base of the mural, along the skirting board, paint a soft wash of beige and grey to look like earth or stone. This anchors the tree so it doesn’t look like it’s floating. -
Add grass details:
Flick small, upward strokes of green and charcoal at the base of the trunk to create tufts of grass growing out of the ‘ground’ area. -
Final touches:
Step back and assess the balance. Erase any visible pencil marks and add a stray leaf or two floating in the air for movement.
Hidden Wildlife
Hide small details for guests to find! Paint a tiny owl peeking from a knot hole, a squirrel on a branch, or a bird perched high up near the ceiling.
Now you have a timeless piece of art that turns a simple walk upstairs into a stroll through nature
Branch Border That Wraps the Room Near the Ceiling
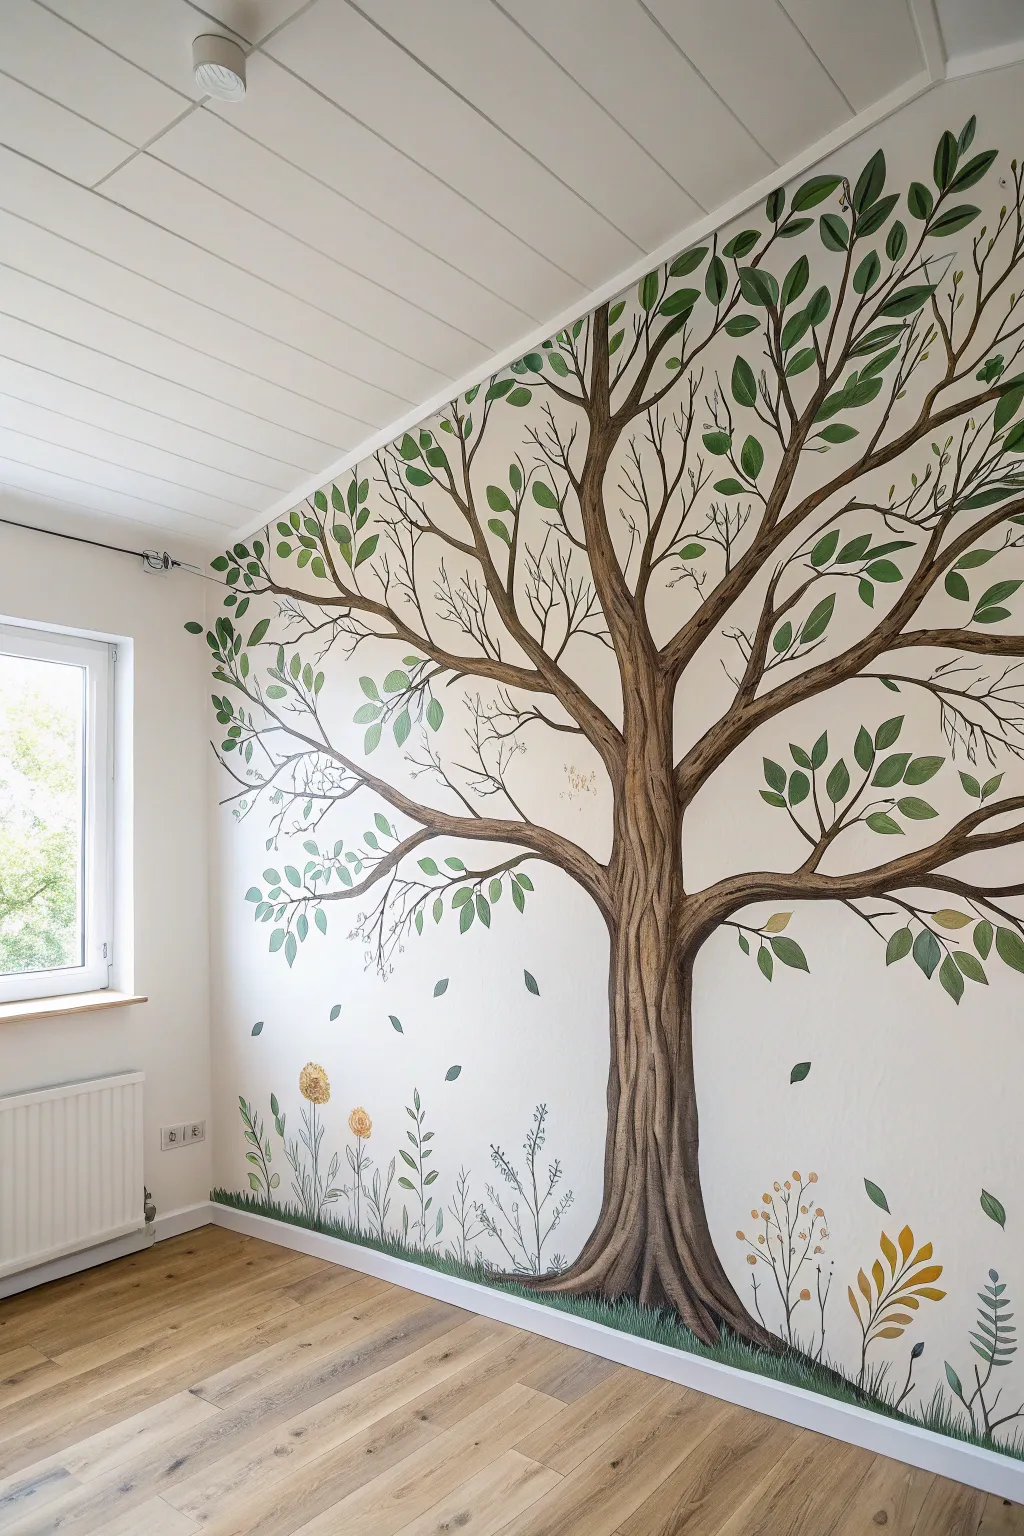
Transform an empty corner into an enchanting forest escape with this grand tree mural that stretches from floor to ceiling. Its textured bark, swaying branches, and delicate meadow base create a serene, storybook atmosphere perfect for a bedroom or nursery.
Detailed Instructions
Materials
- Interior wall paint (white or off-white background)
- Acrylic paints (Dark brown, medium brown, tan, various greens, yellow)
- Pencil and eraser
- Large flat brush (1-2 inch)
- Medium round brush
- Small liner or detail brush
- Painter’s tape
- Drop cloth
- Stepladder
- Paper plate or palette
- Bucket of water and rags
Step 1: Preparation and Sketching
-
Prepare the canvas:
Start by ensuring your wall is clean and painted with your desired base color—white or a very soft cream works best to make the tree pop. Lay down a drop cloth and tape off the skirting boards to protect the floor. -
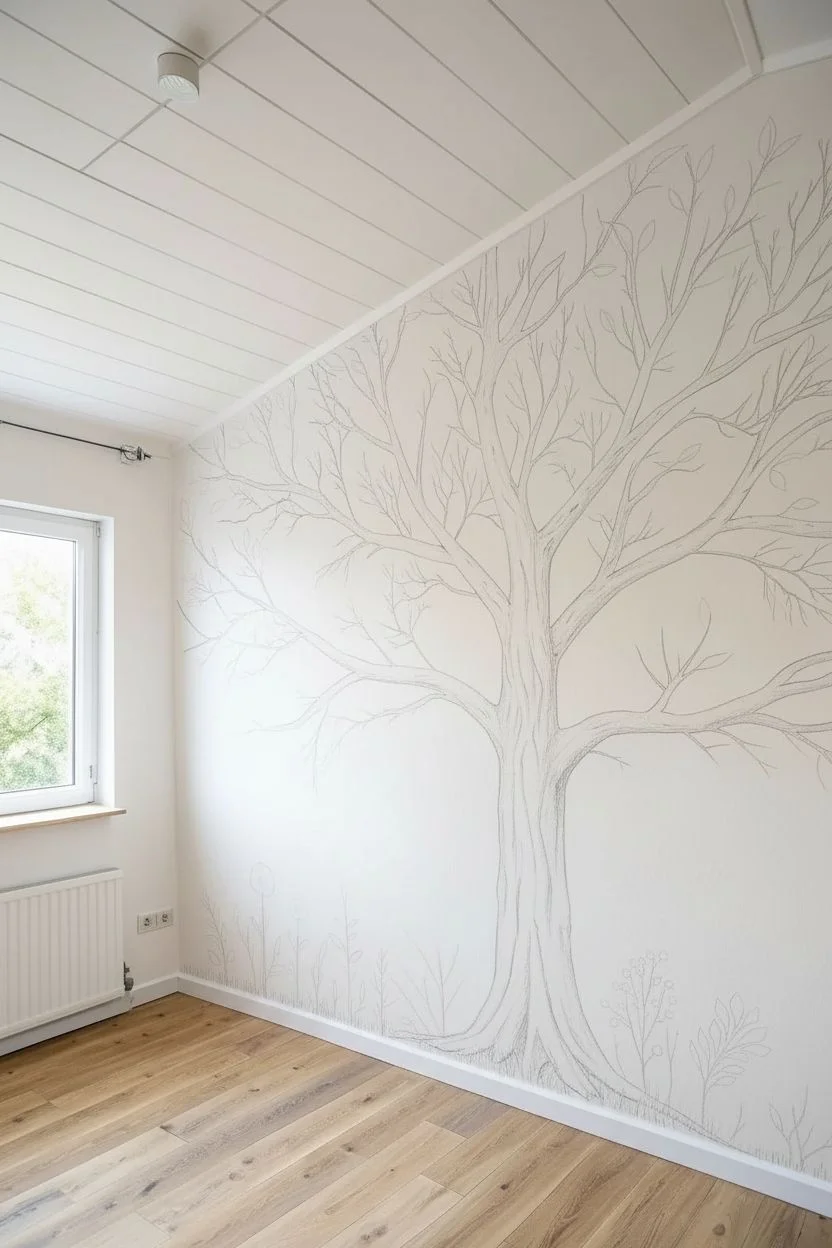
Outline the trunk:
Using a pencil, lightly sketch the main trunk of the tree. Let it start wide at the base, flaring out slightly like roots, and taper gradually as it moves upward toward the ceiling. -
Branch out:
Draw the primary branches extending from the trunk, focusing on reaching them high up and toward the corners. Keep the lines fluid and slightly organic rather than perfectly straight. -
Add secondary twigs:
Sketch smaller, finer twigs splitting off from the main branches. Don’t worry about being too precise; nature is delightfully imperfect.
Natural Flow
When painting branches, hold the brush loosely at the end of the handle. This reduces shaky hands and creates more natural, sweeping curves instead of rigid lines.
Step 2: Painting the Tree Structure
-
Base coat the trunk:
Load your large flat brush with a medium brown acrylic paint. Fill in the entire trunk and the thickest branches, ensuring solid coverage. Don’t worry about texture just yet; focus on shape. -
Apply shadows:
Mix a darker brown shade. While the base coat is still slightly tacky or dry, use a medium brush to paint vertical streaks along the edges of the trunk and the underside of branches to create depth. -
Create bark texture:
Using a tan or light brown color, paint thin, wavy vertical lines down the trunk. I like to use a slightly dry brush here to let the underlying colors peek through, giving it that rugged bark appearance. -
Extend the branches:
Switch to a medium round brush and continue painting the smaller branches in dark brown. Ensure they taper to a fine point at the ends. -
Add fine twigs:
With your smallest liner brush, paint delicate twigs extending from the branch ends. These should look like wispy lines, ready to hold leaves. -
Detail the knots:
Add small, oval-shaped swirls on the trunk in dark brown to simulate knots in the wood, highlighting them with a touch of tan on the top edge.
Step 3: Adding Foliage and Flora
-
Mix your greens:
Prepare three shades of green on your palette: a dark forest green, a medium grassy green, and a lighter sage or lime green. -
Paint the first leaf layer:
Using the medium round brush, paint simple almond-shaped leaves along the branches. Start with the medium green tone for the bulk of the foliage. -
Add depth with shadows:
Paint darker green leaves behind or slightly overlapping the first set. This creates the illusion of density and deep canopy shadows. -
Highlight the canopy:
Add the lightest green leaves at the tips of branches and ‘floating’ slightly detached to suggest movement in the breeze. -
Create the grassy base:
At the bottom of the wall, use the liner brush and varied green shades to flick upward strokes, simulating tall blades of grass growing over the tree roots. -
Paint falling leaves:
Scatter a few single leaves floating in the open white space under the branches to create a sense of autumn wind or seasonal change. -
Add meadow flowers:
Paint simple stems rising from the grass. Top them with small circles or brush dabs in yellow and ochre to create wildflowers or seed pods. -
Final touches:
Step back and look for any sparse areas. Add tiny dots or specks near the flowers to represent pollen or distant seeds, and erase any remaining visible pencil lines.
Seasonal Switch
Change the leaf colors to match the season! Use oranges and reds for autumn, or add tiny pink dabs among the green for spring cherry blossoms.
Now stepping into the room will feel like taking a breath of fresh forest air
Tree With a Painted Nest That Cleverly Hides a Wall Fixture
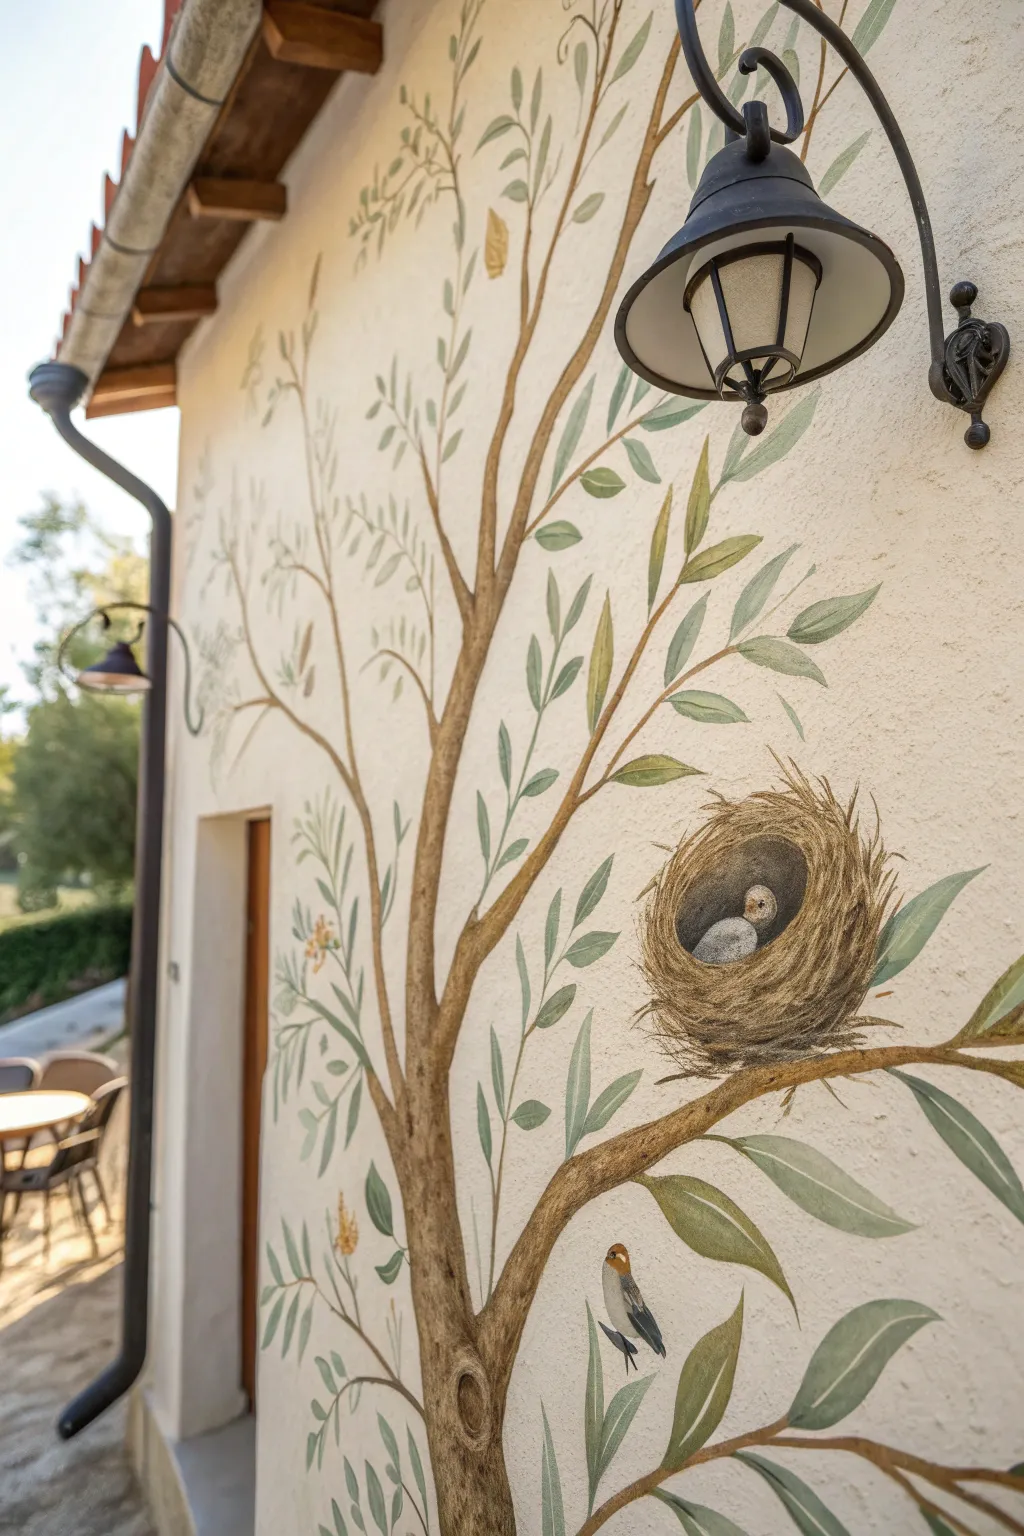
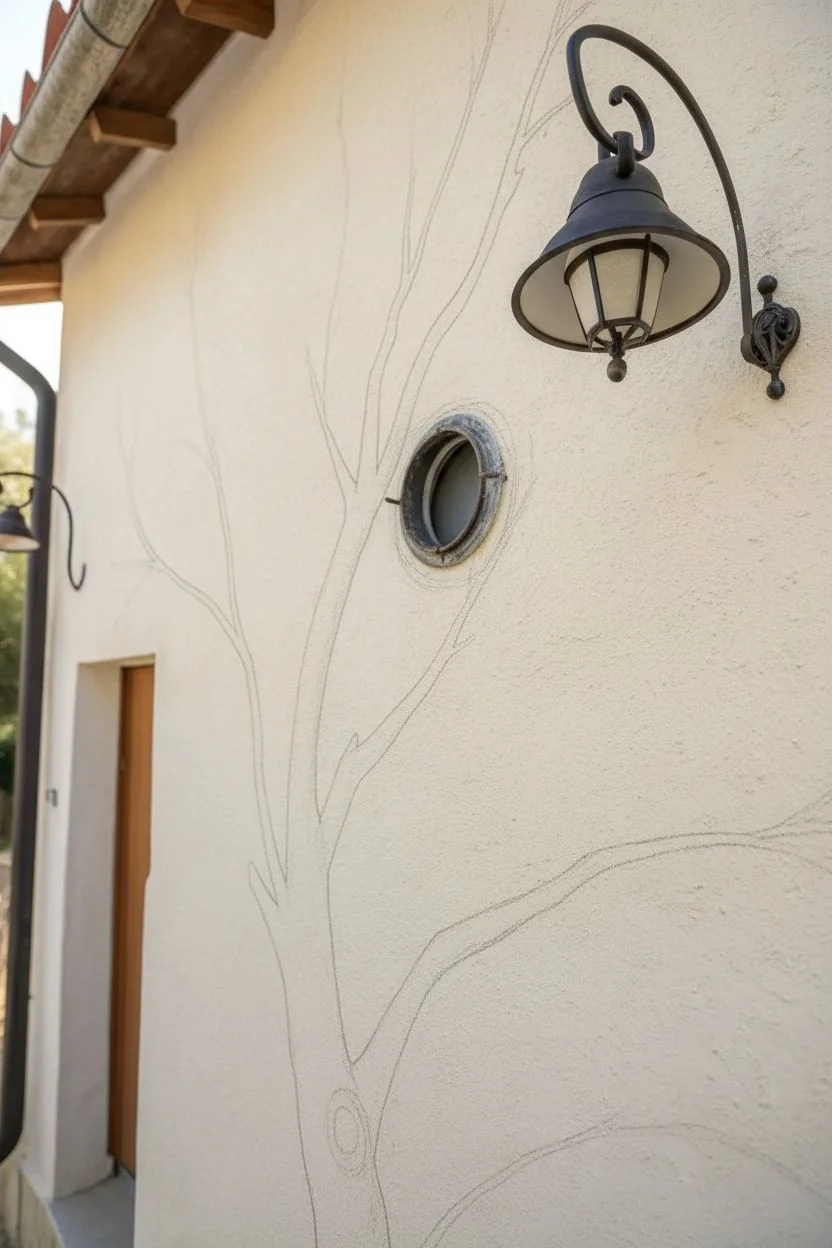
Transform an unsightly wall fixture or vent into a charming focal point by incorporating it into a hand-painted tree mural. This trompe l’oeil design uses the natural shape of a circular opening to act as the dark, hollow interior of a cozy bird’s nest.
Step-by-Step Tutorial
Materials
- Exterior acrylic latex paint (white/cream base)
- Small sample pots of exterior paint (burnt umber, raw sienna, olive green, sage green, grey, white, black, goldenrod)
- Assorted paintbrushes (1-inch flat, #4 round, #0 detail liner)
- Chalk or pastel pencil for sketching
- Painter’s tape
- Small sponge (optional for texture)
- Reference photo of olive or willow branches
- Ladder (if painting high up)
Step 1: Planning and Sketching
-
Assess the fixture:
Identify the wall element you want to camouflage. In our example, it’s a circular vent or fixture hole. Clean the surrounding wall area thoroughly to ensure the paint adheres well to the stucco texture. -
Map the tree structure:
Using a light colored chalk or pastel pencil, lightly sketch the main trunk rising from the ground. Position a major branch so it extends directly underneath and around your chosen wall fixture, making the fixture the ‘center’ of where the nest will sit. -
Sketch the branches:
Extend secondary branches upwards and outwards from the main trunk. Keep the lines organic and slightly wavy to mimic natural growth, rather than stick-straight lines.
Stucco Struggles?
bumpy walls can eat up paint brushes. Use older, stiffer brushes for the base layers to urge paint into the crevices, saving your nicer soft brushes for the final surface details.
Step 2: Painting the Tree Structure
-
Base coat the wood:
Mix burnt umber with a touch of white to create a medium brown. Using a flat brush, fill in the trunk and main branches. Don’t worry about perfect coverage yet; the stucco texture adds natural character. -
Add shadows:
While the base is tacky, use straight burnt umber to paint the underside of the branches and the right side of the trunk (assuming light comes from the left). This creates immediate volume. -
Highlight the bark:
Mix raw sienna with white to create a light tan. Dry-brush this highlight color onto the top edges of the branches and the left side of the trunk to suggest sunlight hitting the bark. -
Detail the bark texture:
Use a smaller round brush and your darkest brown to create squiggly, vertical lines along the trunk, emphasizing the knots and rough texture of the wood.
Step 3: Creating the Hidden Nest
-
Form the nest shape:
Using a dark brown mix, paint a cup shape cradling the bottom half of your wall fixture. The fixture itself becomes the dark hollow of the nest. -
Layer the twigs:
Switch to a liner brush. Paint hundreds of thin, curved strokes overlapping each other in various shades of brown, tan, and grey. Start with dark colors at the bottom and layer lighter straw colors on top. -
Add stray fibers:
Extend some fine, wispy lines outward from the neat cup shape to make the nest look constructed from natural materials. I find that quick, flicking motions work best here to keep the twigs looking sharp. -
Paint the egg:
Paint a small oval shape resting just inside the bottom lip of the nest (or fixture hole). Use a soft grey-blue or speckled cream color, adding a distinct white highlight on the upper curve to make it look round and three-dimensional.
Seasonal Switch
Instead of a bird’s nest, transform the circular hole into an owl’s hollow or a squirrel’s den. You can also paint seasonal details like flowers in spring or red leaves in autumn.
Step 4: Adding Foliage and Life
-
Paint the leaves:
Use a dagger striper or round brush to paint almond-shaped leaves along the branch tips. Alternate between sage green and olive green to create depth. Vary the size of the leaves for realism. -
Add leaf details:
Mix a very light green (almost white). Paint a thin vein down the center of a few selected leaves to give them definition. -
Sketch the bird:
Locate a spot on a lower branch for your bird. Lightly sketch a small, plump oval for the body and a circle for the head. -
Color the bird:
Fill in the bird with grey and white for the underbelly, and perhaps a rust orange for the head or chest to add a pop of color. Use tiny brushstrokes to simulate feathers. -
Final touches:
Add a tiny black dot with a white reflection for the bird’s eye. Step back and check your work, adding any final highlights to the branches or nest where the sun would naturally hit.
Step back and enjoy how your art has turned a functional necessity into a delightful discovery for anyone passing by
Geometric Tree With Faceted Leaves and Clean Lines
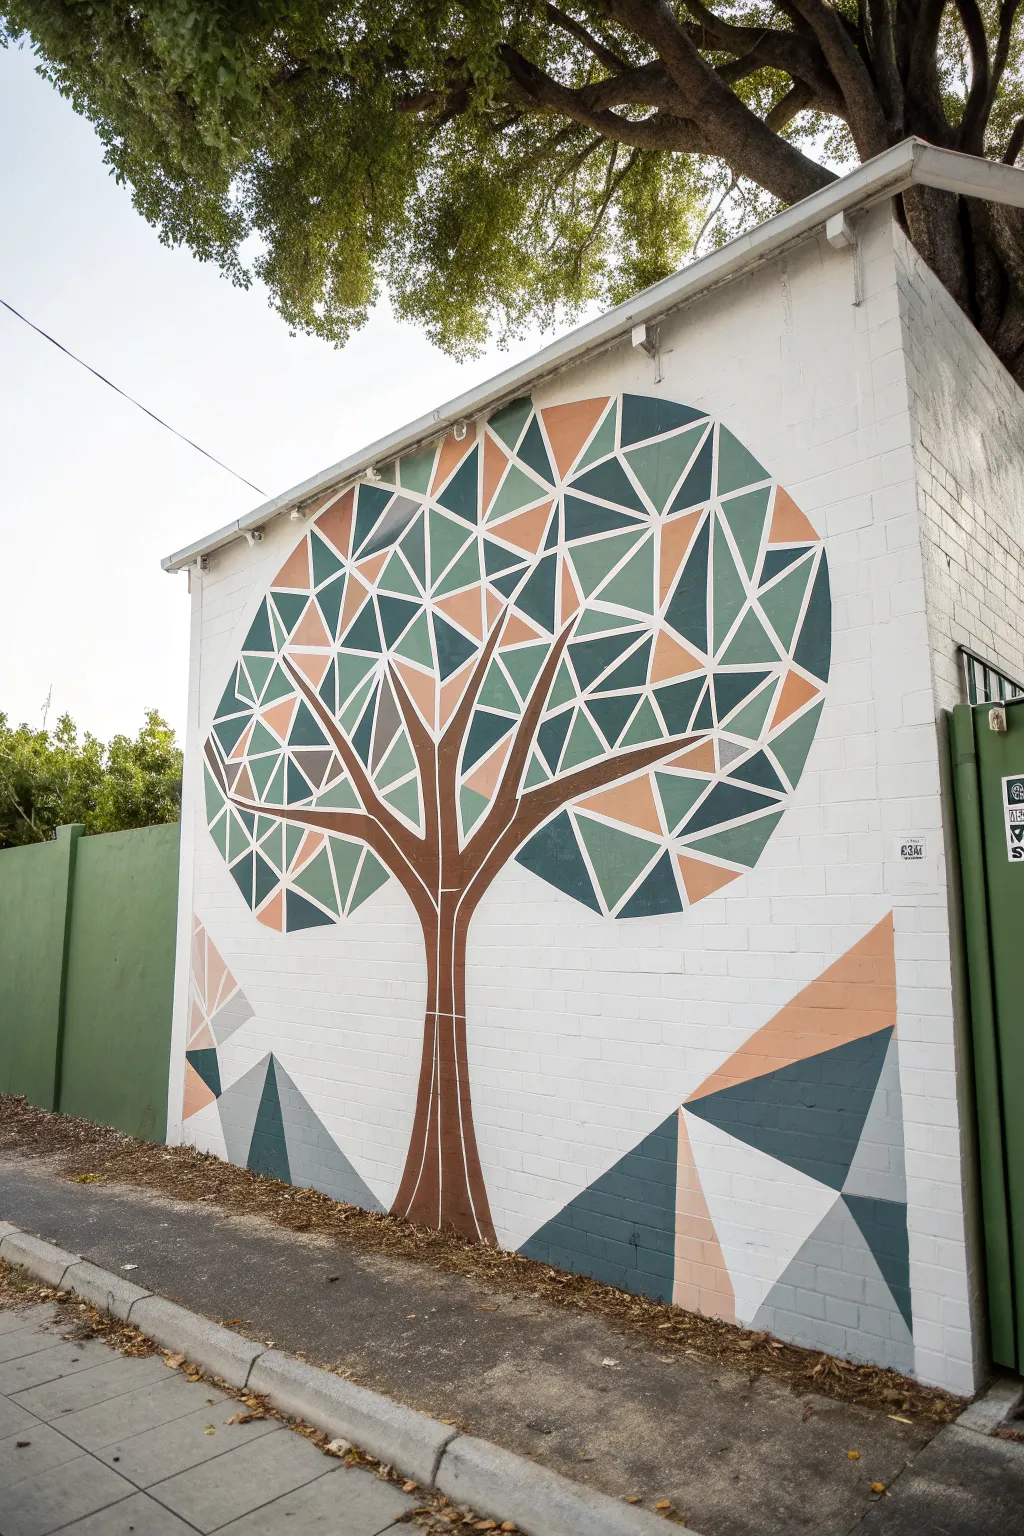
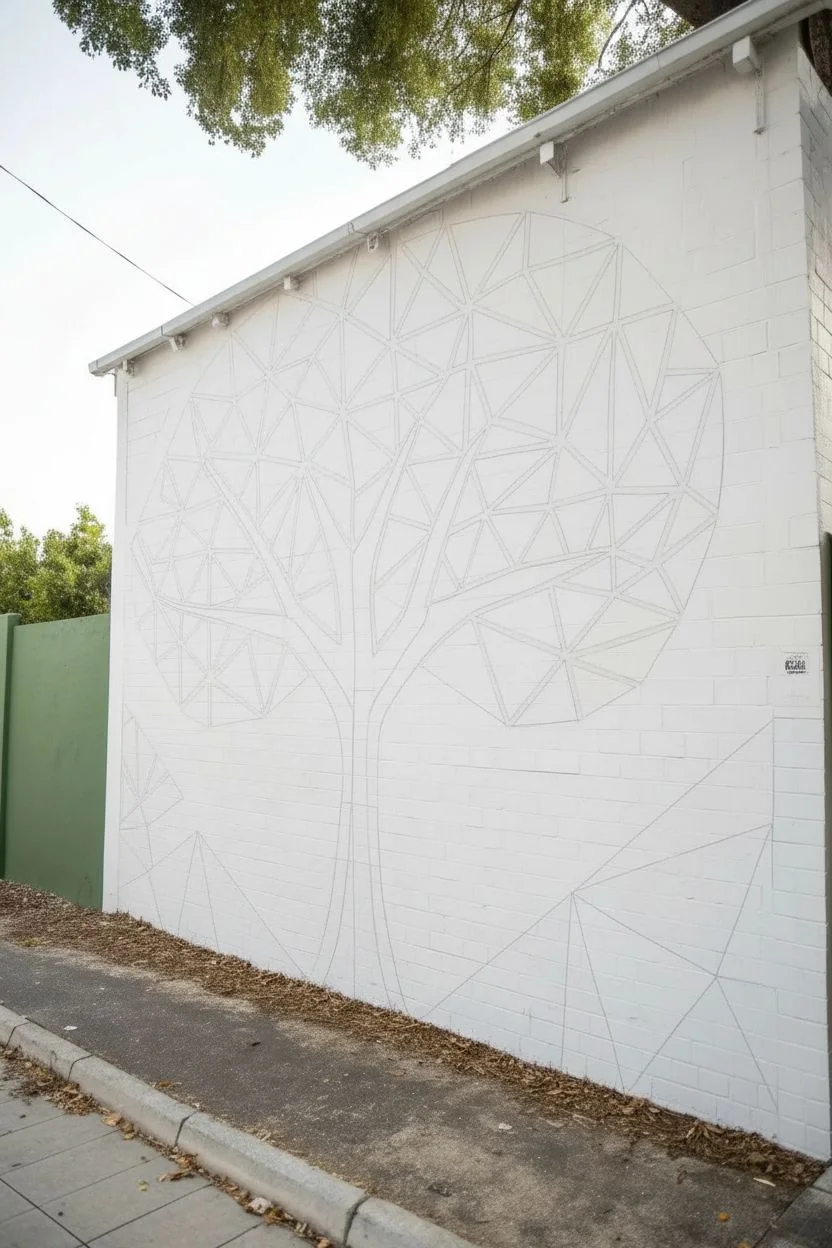
Transform a plain exterior wall into a piece of modern art with this striking geometric tree mural. The design features a low-poly aesthetic with clean lines and faceted “leaves” in earthy tones of sage, teal, and peach, creating a sophisticated and structured look.
How-To Guide
Materials
- White masonry paint (base coat)
- Exterior acrylic latex paint (dark teal, sage green, peach/terracotta, medium brown)
- Painters tape (various widths, 0.5 inch and 1 inch)
- Chalk snap line
- Pencil or chalk
- Straight edge or long ruler
- Paint rollers and tray
- Angled sash brushes (2 inch)
- Small detail brushes
- Ladder (if needed)
Step 1: Preparation and Base Layer
-
Clean surface:
Begin by thoroughly cleaning the brick or concrete wall. Use a pressure washer or a stiff scrub brush with soapy water to remove dirt, moss, and loose debris. Let the wall dry completely for at least 24 hours. -
Prime and base:
Apply a fresh coat of white masonry paint to the entire wall area. This ensures your geometric colors will pop and provides a clean slate. I like to do two coats here to cover any old stains. -
Draft the trunk:
Locate the center point of where you want your tree. Using pencil or chalk, sketch the main trunk shape lightly. Keep the lines straight and angular rather than curved, branching out into a ‘Y’ shape. -
Outline the canopy:
Lightly sketch a large, rough circle or oval around the top of the trunk to define the canopy’s boundary. This won’t be a solid line but rather a guide for where your geometric shapes will stop.
Step 2: Designing the Geometry
-
Tape the trunk:
Using painter’s tape, mask off the outline of the trunk and the main branches. Remember to keep the edges sharp and angular. -
Subdivide the canopy:
Within your canopy guide, use a straight edge to draw random intersecting straight lines. Connect these lines to create a network of triangles and varying polygons. -
Tape the grid:
Apply painter’s tape over your pencil lines. Crucially, masking tape has width, which will create the white “grout” lines between your shapes. Press the edges down firmly to prevent bleed. -
Draft the ground accents:
Don’t forget the bottom corners. Sketch and tape off a few large, angular triangles rising from the ground level to balance the composition, mimicking mountains or fallen design elements.
Bleed-Through Blues?
If paint bleeds under the tape on textured brick, don’t panic. Wait for it to dry completely, then use your base white paint and a flat, stiff artist brush to cut a sharp line back over the mistake.
Step 3: Painting the Facets
-
Plan your palette:
Before painting, mark each taped-off triangle with a small dot of the color you intend to use. Aim for a random distribution where the same colors don’t touch too often. -
Seal the tape:
Lightly brush a small amount of the white base paint over the edges of your tape. This creative trick seals the tape edge so the colored paint won’t bleed underneath. -
Paint the trunk:
Fill in the trunk section with your medium brown paint. Use a brush for the edges and a small roller for the center if it’s wide enough. -
Fill the leaves:
Start applying your sage green, dark teal, and peach colors to their designated triangles. Use an angled sash brush to get crisp corners within the taped shapes. -
Second coats:
Depending on the opacity of your paint, apply a second coat to any colors that look streaky once the first layer is touch-dry. -
Paint ground shapes:
Fill in the geometric shapes at the bottom of the wall using the same color palette to tie the whole piece together.
Add Depth
Make the mural pop by using two shades of each color. Paint the upper triangles in lighter shades and lower ones in darker tones to simulate sunlight hitting the canopy.
Step 4: Finishing Touches
-
Remove tape:
This is the satisfying part. Carefully peel away the painter’s tape while the paint is still slightly tacky (not fully cured) to avoid pulling up chips of dried paint. -
Touch up lines:
Inspect the white lines between your shapes. If any color bled through, use a small detail brush and white paint to clean up the edges. -
Clean up trunk detail:
If you want the white grid lines to visually pass ‘through’ the trunk, use a thin brush to paint white lines connecting the branch divisions down the center of the brown trunk.
Step back and admire how simple geometric shapes have come together to create a stunning, modern tree feature for your space
Night-Sky Tree With Stars Hidden in the Canopy
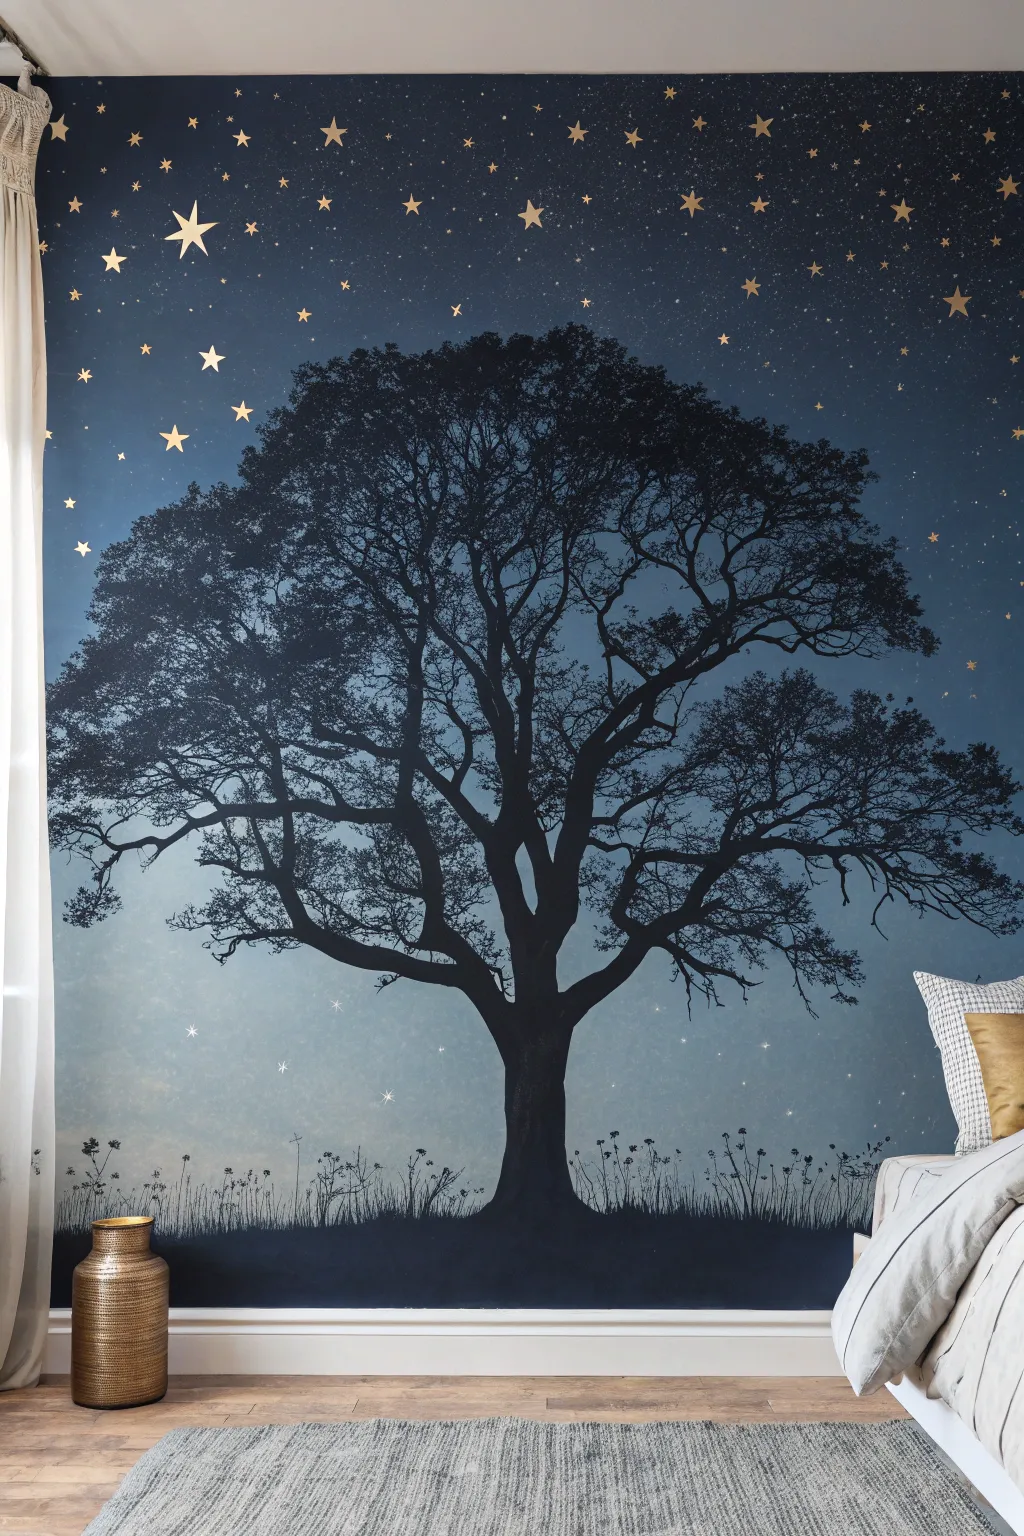

Transform an entire wall into a dreamy, midnight landscape with this striking mural project. Featuring a dramatic tree silhouette set against a gradient deep-blue sky and sprinkled with shimmering gold stars, this artwork brings the magic of the cosmos indoors.
How-To Guide
Materials
- Interior wall paint (navy blue, medium blue, light blue/white)
- Black acrylic paint or matte wall paint
- Gold metallic paint or gold leaf sheets
- Painter’s tape and drop cloths
- Paint rollers and trays
- Large sponge or blending brush
- Pencil and eraser
- Assorted paintbrushes (large flat, medium round, fine liner)
- Star stencils (optional)
- Overhead projector (optional)
Step 1: Setting the Scene
-
Prep the workspace:
Begin by clearing the wall area completely. Remove any outlet covers and apply painter’s tape to the baseboards, ceiling edges, and adjacent walls. Lay down a drop cloth to protect your flooring. -
Map out the gradient:
Visualize the gradient transition. You want the darkest navy at the very top, fading into a medium blue in the middle, and ending with a misty, pale blue near the bottom third where the horizon will be. -
Apply the dark sky:
Roller the top third of the wall with your darkest navy blue paint. Don’t worry about a perfect straight line at the bottom edge; an uneven edge helps with blending later. -
Add the mid-tones:
Apply the medium blue paint to the middle section of the wall. While the paint is still wet where it meets the navy section, use a clean, damp roller or a large sponge to gently blur the line between the two colors, creating a soft ombre effect. -
Create the horizon haze:
Paint the bottom section with your lightest blue or off-white mixture. Blend this upward into the medium blue using the same wet-on-wet technique so there are no harsh horizontal bands. -
Let it cure:
Allow the background gradient to dry completely, preferably overnight, before attempting to sketch or paint the foreground elements.
Uneven Gradients?
If your paint dries too fast while blending the sky, keep a spray bottle of water handy. Lightly mist the wall to reactivate the paint and extend your blending time.
Step 2: Painting the Tree Silhouette
-
Draft the tree shape:
Sketch the outline of your tree directly onto the dried wall using a light pencil. If you aren’t confident freehanding, I find using an overhead projector to cast a tree image onto the wall makes tracing the complex branch structure much easier. -
Focus on the trunk:
Start painting the trunk with black paint and a medium-sized brush. Build a solid, opaque base that anchors the tree to the bottom of the wall, widening slightly at the roots. -
Branch out:
Work your way up from the trunk, extending the main thick branches outward. Keep your strokes fluid and slightly irregular to mimic organic growth. -
Add fine details:
Switch to a fine liner brush to paint the smaller twigs and outer branches. The beauty of this mural lies in the intricate, lacy network of fine branches at the canopy’s edge, so take your time here. -
Paint the foliage mass:
Instead of painting individual leaves, use a stippling technique with a stiff brush or sea sponge dipped in black paint. Dab softly around the branches to create the illusion of dense clumps of leaves while leaving gaps for the ‘sky’ to peek through. -
Ground the image:
Paint a solid black undulating line across the bottom of the wall to represent the ground. Use a small detail brush to flick tiny vertical strokes upward from this ground line, creating the look of tall grass and wildflowers.
Add Dimension
Mix a tiny drop of glow-in-the-dark medium into your white star paint. The mural will look elegant by day and magically luminescent when the lights go out.
Step 3: The Starry Finish
-
Plan the constellations:
Decide where your largest stars will go. Typically, placing them near the top in the darkest part of the sky creates the best contrast. -
Paint the main stars:
Using gold metallic paint and a small detail brush (or a stencil), paint five-pointed stars of varying sizes scattered across the navy section. -
Add distant starlight:
Create a sense of depth by adding tiny dots or specs of gold paint around the larger stars. You can do this by gently dipping the tip of a brush handle in paint and dotting the wall. -
Highlight the horizon:
Add a few very faint, tiny white or silver stars in the lighter blue section near the horizon line to suggest stars just becoming visible through the atmospheric haze.
Step back and admire your peaceful, starlit sanctuary that invites calm into the room


Have a question or want to share your own experience? I'd love to hear from you in the comments below!