Trees are basically the perfect painting subject: forgiving, expressive, and beautiful even when you keep things simple. Here are some of my favorite tree painting ideas—starting with classic, beginner-friendly looks and gradually getting more playful and unexpected.
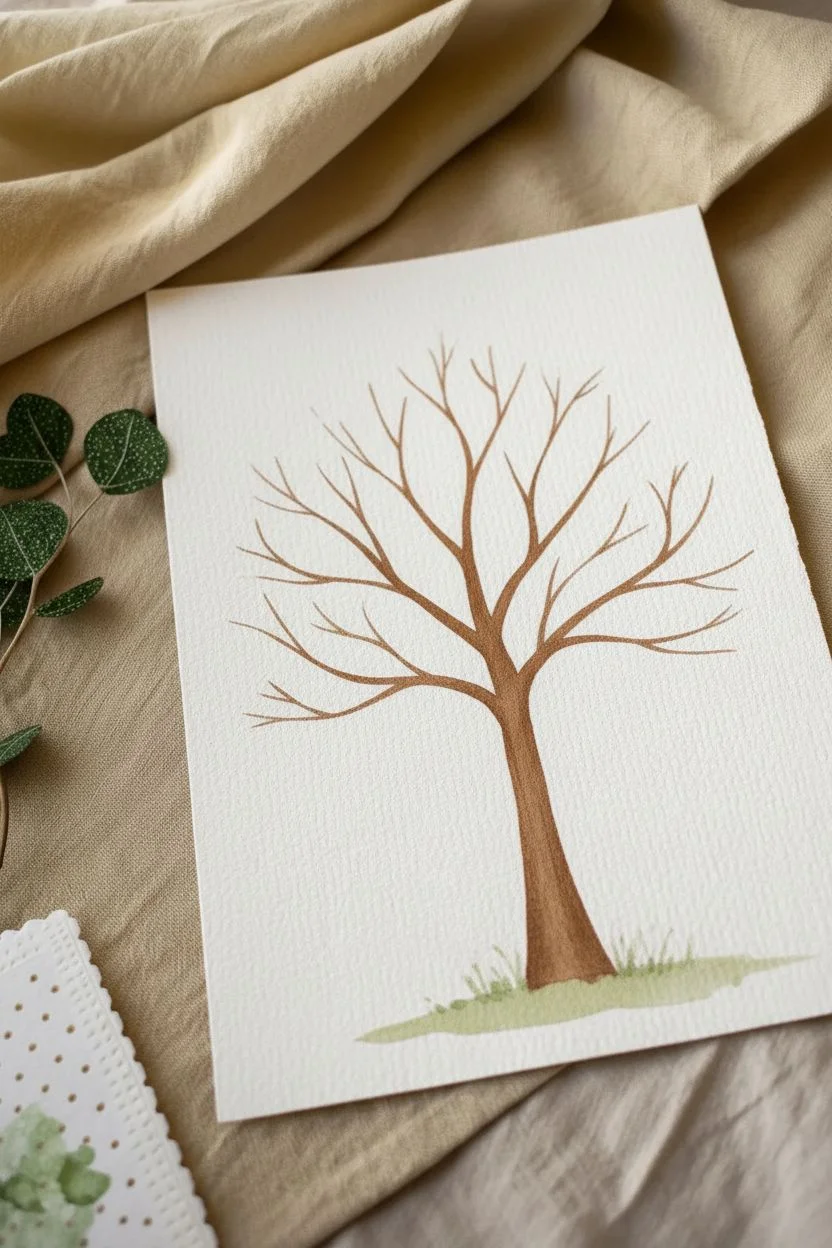
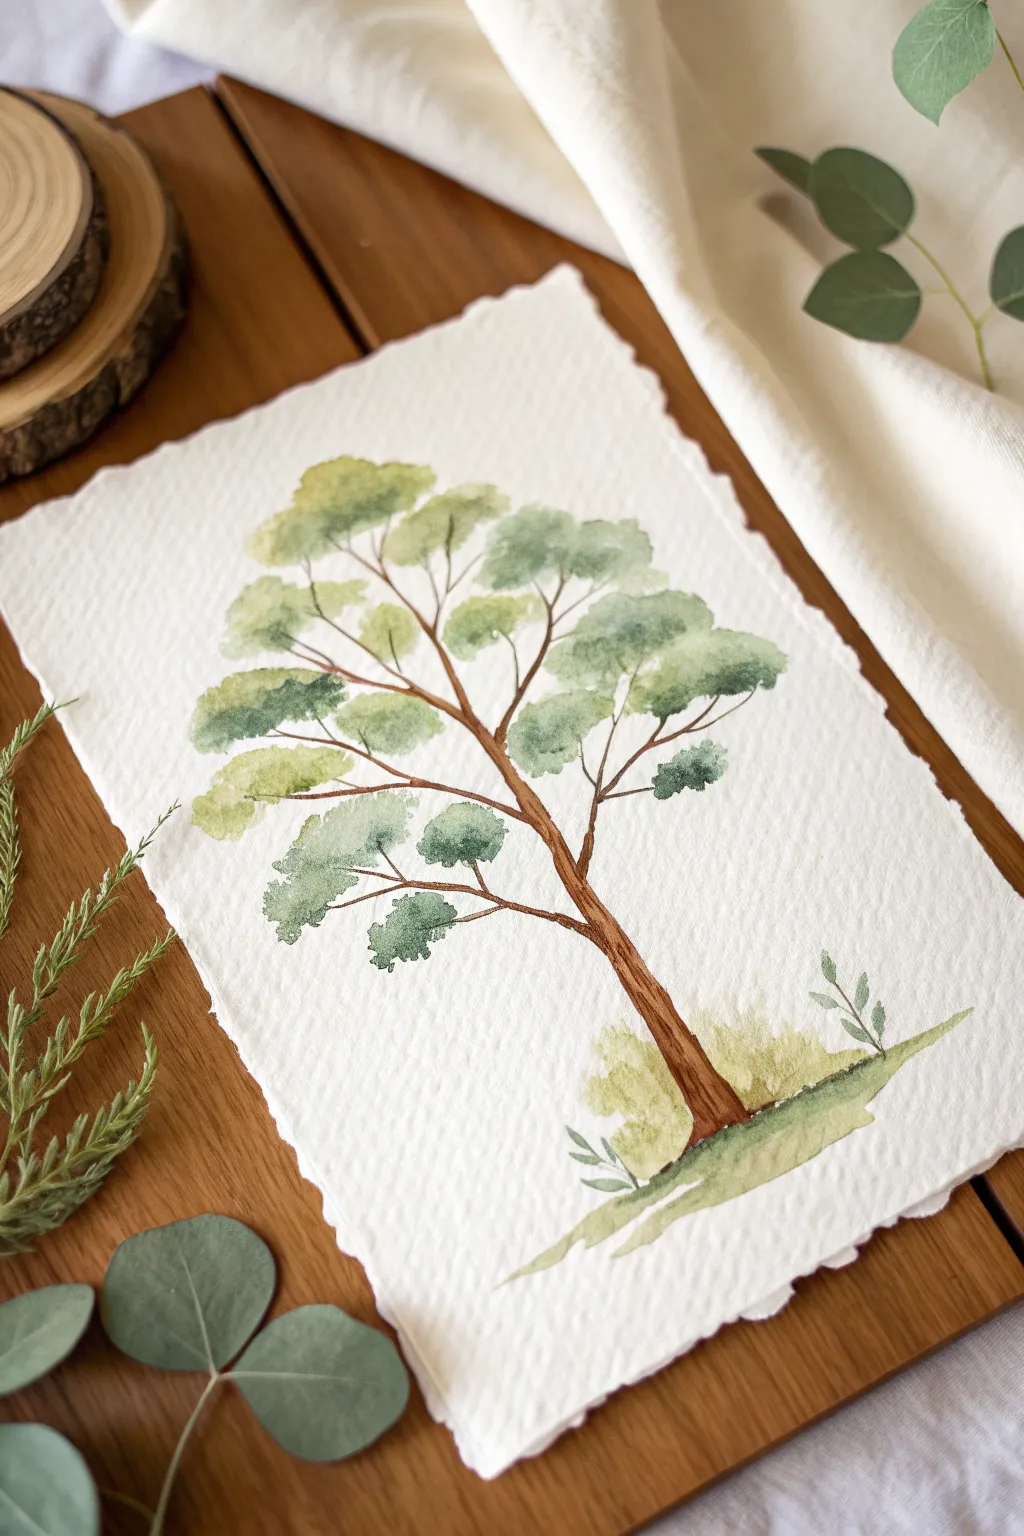
Block In a Simple Deciduous Tree With Big Leaf Masses
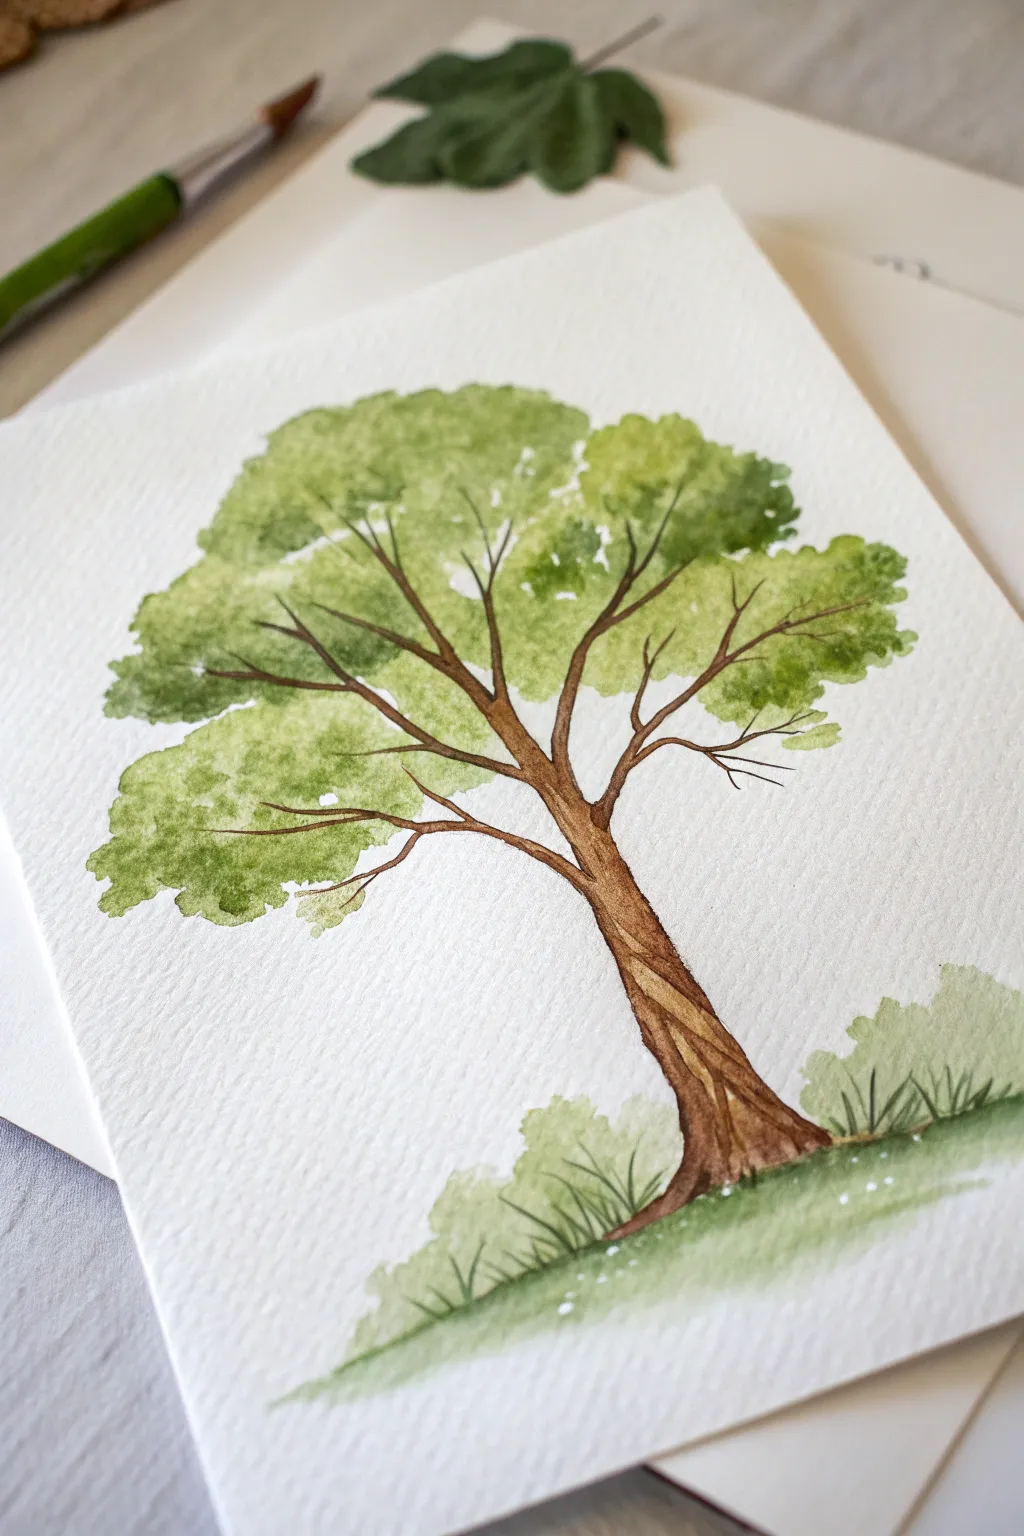
Capture the graceful sway of a deciduous tree using soft, semi-abstract leaf masses countered by a detailed, textured trunk. This project focuses on building form through loose watercolor washes and delicate brushwork to create a natural, airy canopy.
Detailed Instructions
Materials
- Cold press watercolor paper (300gsm)
- Round watercolor brushes (sizes 6 and 2)
- Watercolor paints: Sap Green, Olive Green, Burnt Sienna, Burnt Umber
- Pencil (HB or H)
- Eraser
- Clean water jar
- Paper towels
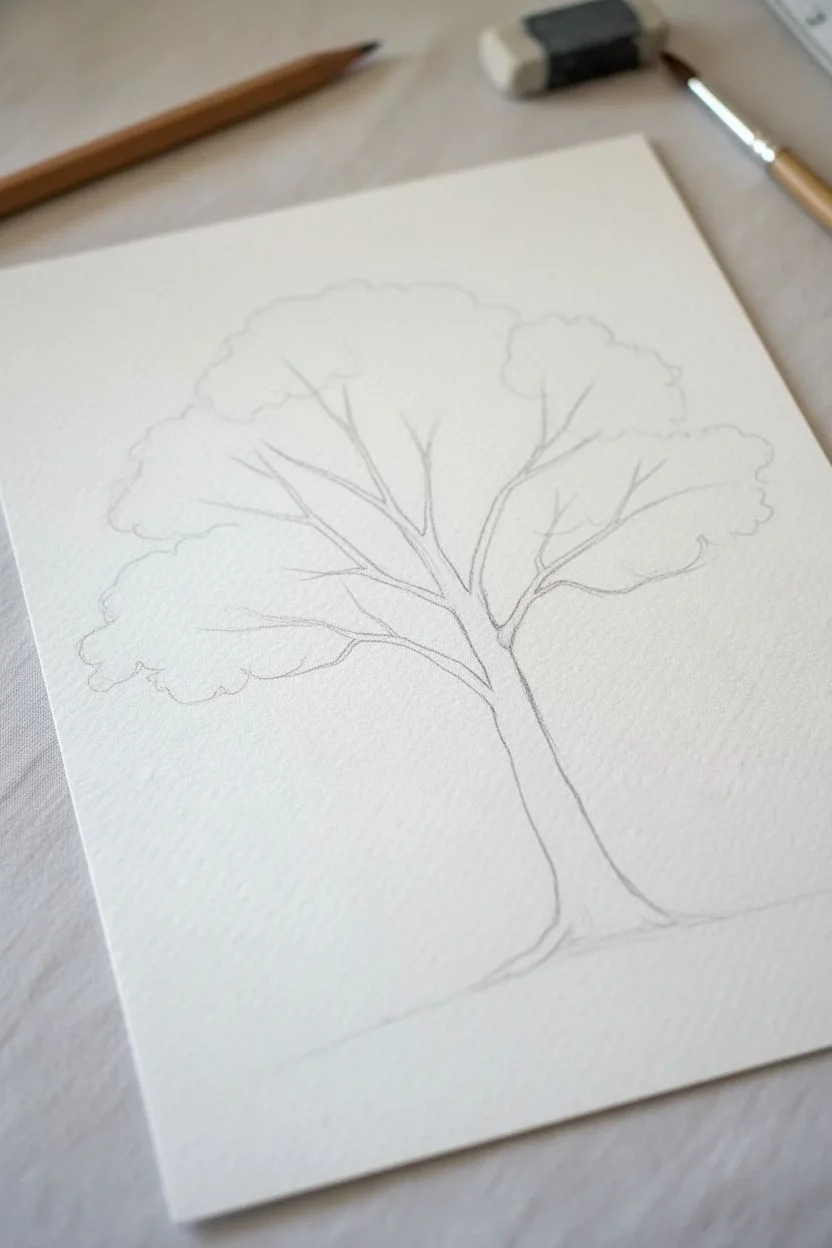
Step 1: Sketching the Skeleton
-
Establish the curve:
Begin by lightly sketching the main trunk with your pencil. Give it a gentle lean to the right to add character, rather than drawing it perfectly straight up and down. -
Map the branches:
Draw the primary branches extending outward from the upper trunk. Think of a ‘Y’ shape that splits and splits again, ensuring the branches taper as they reach outward. -
Outline leaf masses:
Very faintly sketch rough, cloud-like outlines where the main clusters of leaves will sit. You don’t need individual leaves; just map out the general zones of the canopy.
Muddy colors?
If your green leaves turn brown where they touch the branches, you didn’t let the canopy dry enough. Wait for the paper to be cool to the touch, not damp, before adding the trunk.
Step 2: Painting the Canopy
-
Mix your greens:
Prepare two puddles of green: a lighter, watery yellow-green (Sap Green with plenty of water) and a darker, deeper green (Olive Green or Sap Green mixed with a touch of brown). -
First wash:
Using your size 6 brush, load it with the lighter green mixture. Paint the large, irregular shapes of the leaf masses, keeping the edges soft and slightly uneven. -
Leave sky holes:
As you block in these green shapes, be intentional about leaving gaps of white paper between the clusters. These gaps represent the sky peeking through the canopy. -
Add depth while wet:
While the first layer of green is still damp, drop small amounts of your darker green mixture into the bottom/underside of each leaf cluster. This creates instant shadow and volume. -
Soften edges:
If an edge looks too hard, rinse your brush, blot it slightly, and gently run the damp bristles along the paint edge to diffuse it. -
Let it dry:
Allow the green canopy to dry completely before moving on to the branches. If you paint the brown too soon, it will bleed into the leaves.
Add some texture
Sprinkle a tiny pinch of table salt onto the wet leaf masses while they are drying. Brush it off later to create a mottled, leafy texture that looks incredibly realistic.
Step 3: Painting the Trunk and Ground
-
Base trunk layer:
Mix a warm brown using Burnt Sienna. With the size 2 brush, paint the trunk and main branches, following your pencil sketch carefully. -
Extend the branches:
Use the very tip of the brush to pull thin, delicate branches up into the green masses and out into the white gaps you left earlier. -
Add trunk texture:
Once the base brown is semi-dry, use a darker mix (Burnt Umber) to add diagonal, twisting lines up the trunk. This mimics the texture of bark wrapping around the tree. -
Darken the joints:
Add a tiny dot of the darker brown wherever a branch splits violently from the trunk; this accents the connection points. -
Paint the ground wash:
Wet the area at the base of the trunk with clean water. Drop in your light green mix to create a soft, grassy hill. -
Ground the tree:
While the ground wash is wet, add a stronger green right at the base of the trunk to show where the tree meets the earth. -
Create bushes:
Dab a few small, irregular shapes of light green on either side of the trunk base to suggest low bushes or shrubs. -
Detail the grass:
Once the ground is dry, use your smallest brush with dark green to flick quick, upward strokes for individual blades of grass and simple foliage.
Step back and admire how a few simple shapes have come together to form a living, breathing tree


Try a Soft Spring Blossom Tree With Loose Petal Dabs
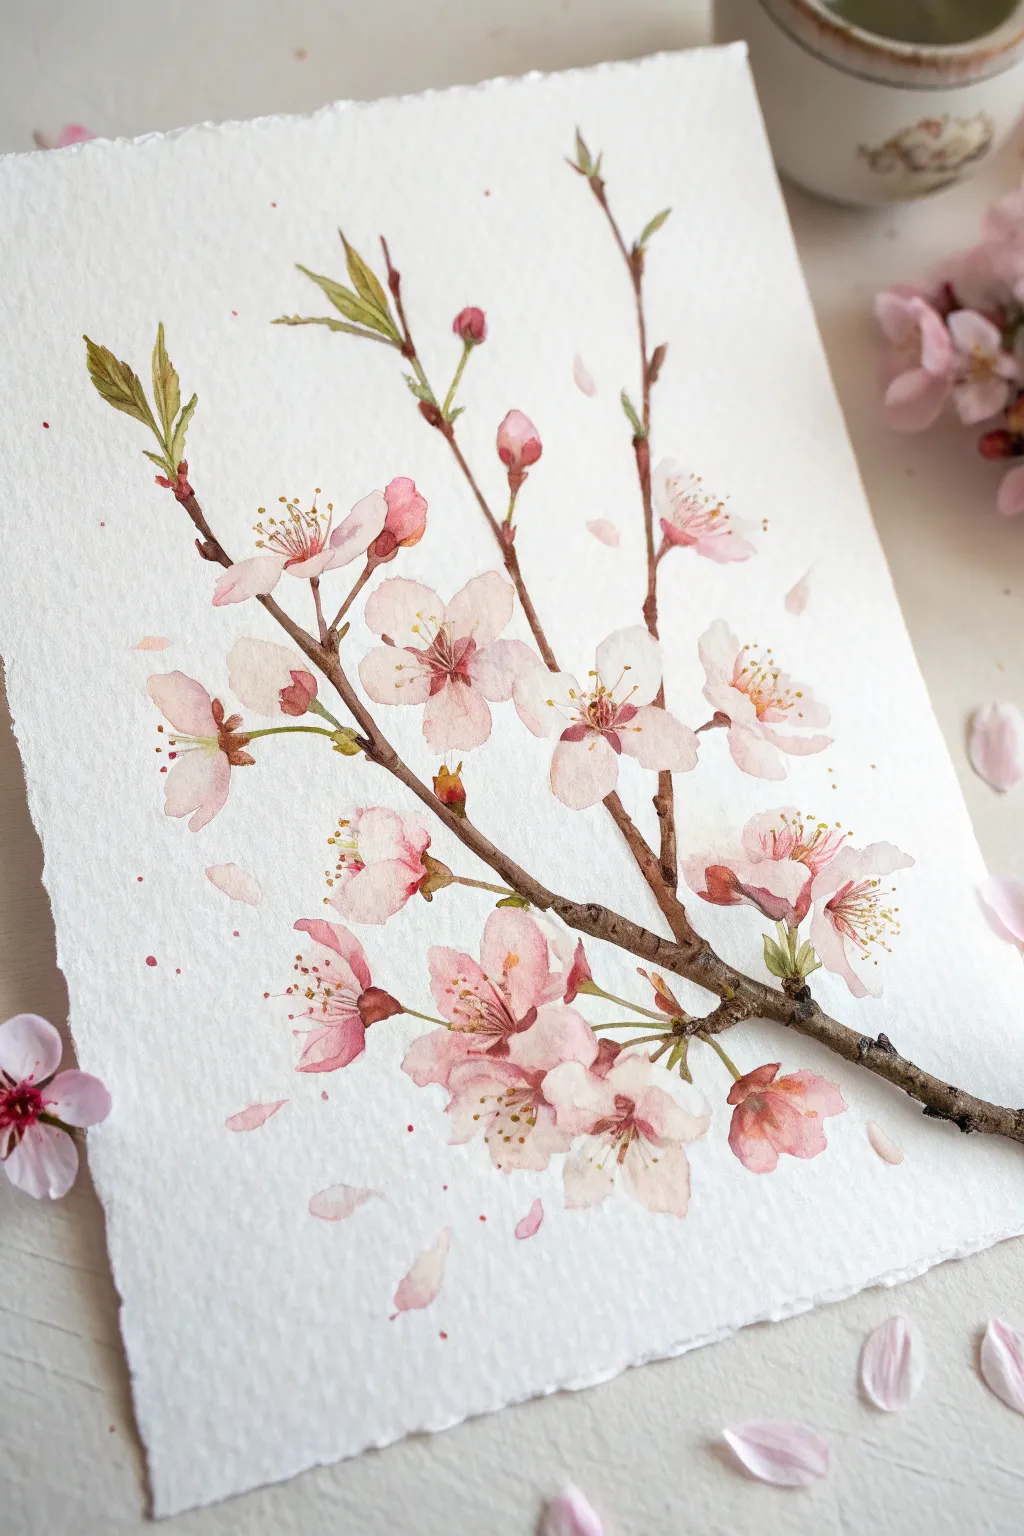
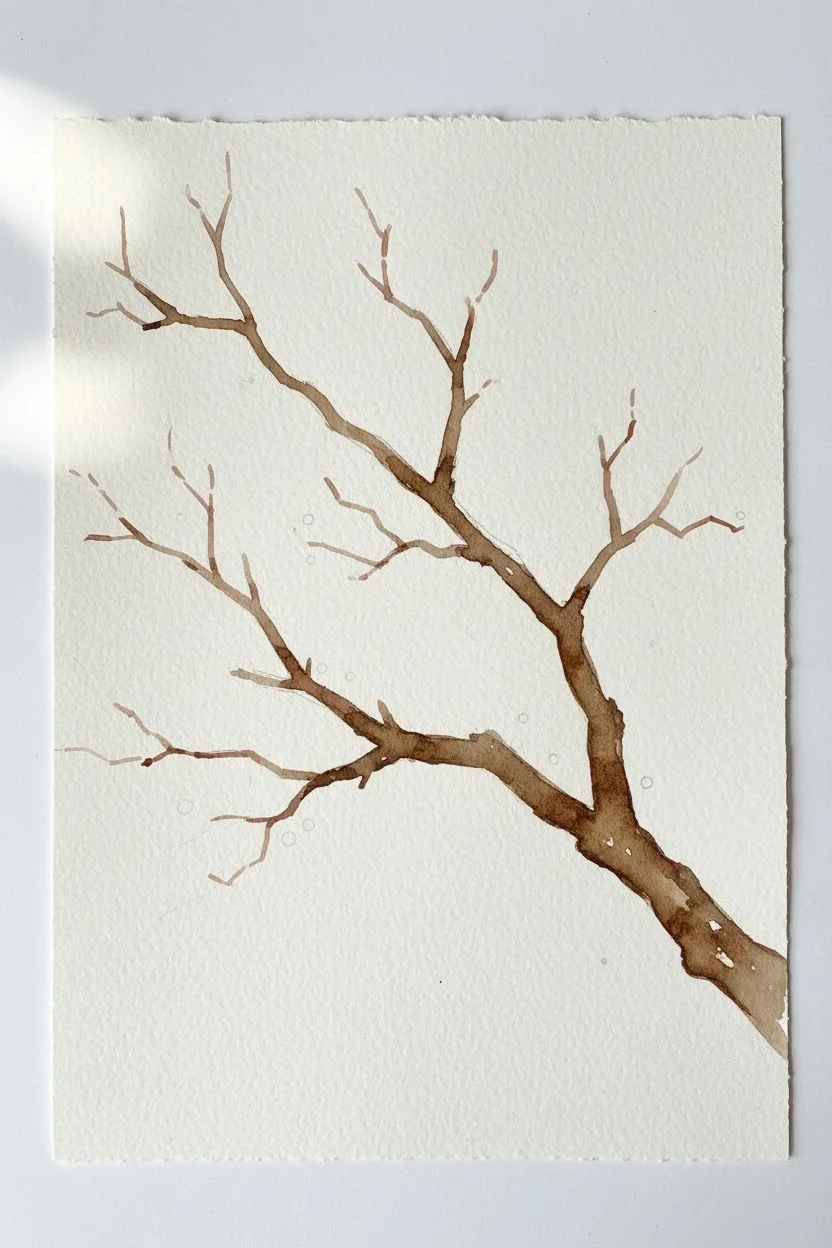
Capture the fleeting beauty of spring with this soft and detailed watercolor study. This project focuses on layering translucent pinks and rich browns to create a realistic cherry blossom branch that seems to float on the paper.
Detailed Instructions
Materials
- Cold press watercolor paper (300 gsm/140 lb)
- Watercolor paints: Alizarin Crimson, Rose Madder, Sap Green, Burnt Umber, Sepia, and Yellow Ochre
- Round watercolor brushes: Size 2, 4, and 6
- Fine liner brush or rigger brush (optional)
- Clean water jar
- Paper towels
- Pencil (HB or H) for light sketching
- Kneaded eraser
Step 1: Sketching and Main Branch
-
Lightly sketch the composition:
Begin with a very faint pencil sketch. Draw a diagonal line for the main branch stemming from the bottom right corner, reaching upwards towards the left. Mark small circles where the main flower clusters will sit, but keep the lines incredibly light so they don’t show through the transparent petals later. -
Paint the first branch layer:
Using your size 4 brush, mix Burnt Umber with a touch of Sepia. Paint the main branch structure with a watery consistency. Start from the bottom right and work your way up, letting the brush skip slightly over the paper’s texture to create natural bark effects. -
Build bark texture:
While the first layer is still slightly damp, drop in more concentrated Sepia into the shadowed areas (usually the underside of the branch). This wet-on-wet technique adds instant volume. Leave some gaps where the flowers will overlap the wood. -
Extend the smaller twigs:
Switch to a size 2 brush or liner. Use a mix of Burnt Umber and a tiny bit of Alizarin Crimson to paint the delicate, thinner offshoot branches that reach towards the top. These should feel jerky and angular, not perfectly smooth curves.
Step 2: Painting the Blooms
-
Mix your petal washes:
Prepare two puddles of pink: one very watery, pale Rose Madder for the base, and a slightly stronger Alizarin Crimson mix for depth. The key here is water control; the paint should be thin and transparent. -
Paint the base petals:
Using a size 6 brush, paint the five-petal shapes of the open blossoms. Use the pale mix first. Leave tiny slivers of white paper between some petals to define their individual shapes. Don’t worry about perfect symmetry; natural flowers are rarely perfect. -
Add wet-on-wet blushing:
While the petals are still wet, touch the tip of your brush loaded with the darker pink mix to the center of the flower or the tips of the petals. Let the pigment bleed naturally into the damp wash to create that soft, gradient look. -
Paint the closed buds:
For the buds near the top and tips of branches, use a more concentrated mix of Rose Madder. Paint small tear-drop shapes. Include a tiny touch of green at the very base where the bud meets the stem. -
Detail the flower centers:
Once the petals represent completely dry (this is crucial), use a mix of Alizarin Crimson and Burnt Umber to paint a tiny star shape in the center of the open blooms. This anchors the flower. -
Add the stamens:
With your finest brush (size 0 or liner), paint delicate, thread-like lines radiating from the center using a reddish-brown mix. I like to keep these lines very faint and fine. -
Dot the pollen:
Mix a thick, creamy Yellow Ochre. Carefully dab tiny dots at the ends of the stamens. This bright pop of yellow brings the flowers to life and adds contrast against the pinks.
Muddy Petals?
If your pinks look dirty or brown, you likely touched the wet flower paint to the wet branch paint. Always ensure the brown branch is 100% dry before painting pink flowers over or near it.
Step 3: Leaves and Final Touches
-
Add fresh spring leaves:
Mix Sap Green with a little Yellow Ochre for a fresh, spring green. Paint small, pointed leaves emerging from the branch tips and near the flower clusters. Keep the strokes quick and decisive. -
Define the sepals:
Where the flowers attach to the branch, paint the small green cup (calyx) and sepals using a darker green mix. This connects your floating flowers to the heavy wood. -
Deepen the branch contrast:
Revisit the main branch with your darkest Sepia mix. Add emphasize knot holes, intersections, and the roughest parts of the bark to give the painting weight. -
Scatter falling petals:
To create movement, paint a few loose, single petals falling or resting near the bottom of the paper. Keep these very pale and watery, almost fading into the white background. -
Add gentle splatter:
Load a brush with watery pink paint and tap it against another brush handle over the paper. This creates tiny droplets that mimic pollen or distant petals, adding atmosphere to the piece.
Add Soft Background
Before painting any details, you can wet the entire background and drop in very faint patches of blue or diluted pink. This creates an out-of-focus ‘bokeh’ effect behind your crisp branch.
Now you have a serene piece of spring that will last all year round.


Go Bold With an Autumn Maple Tree Color Palette
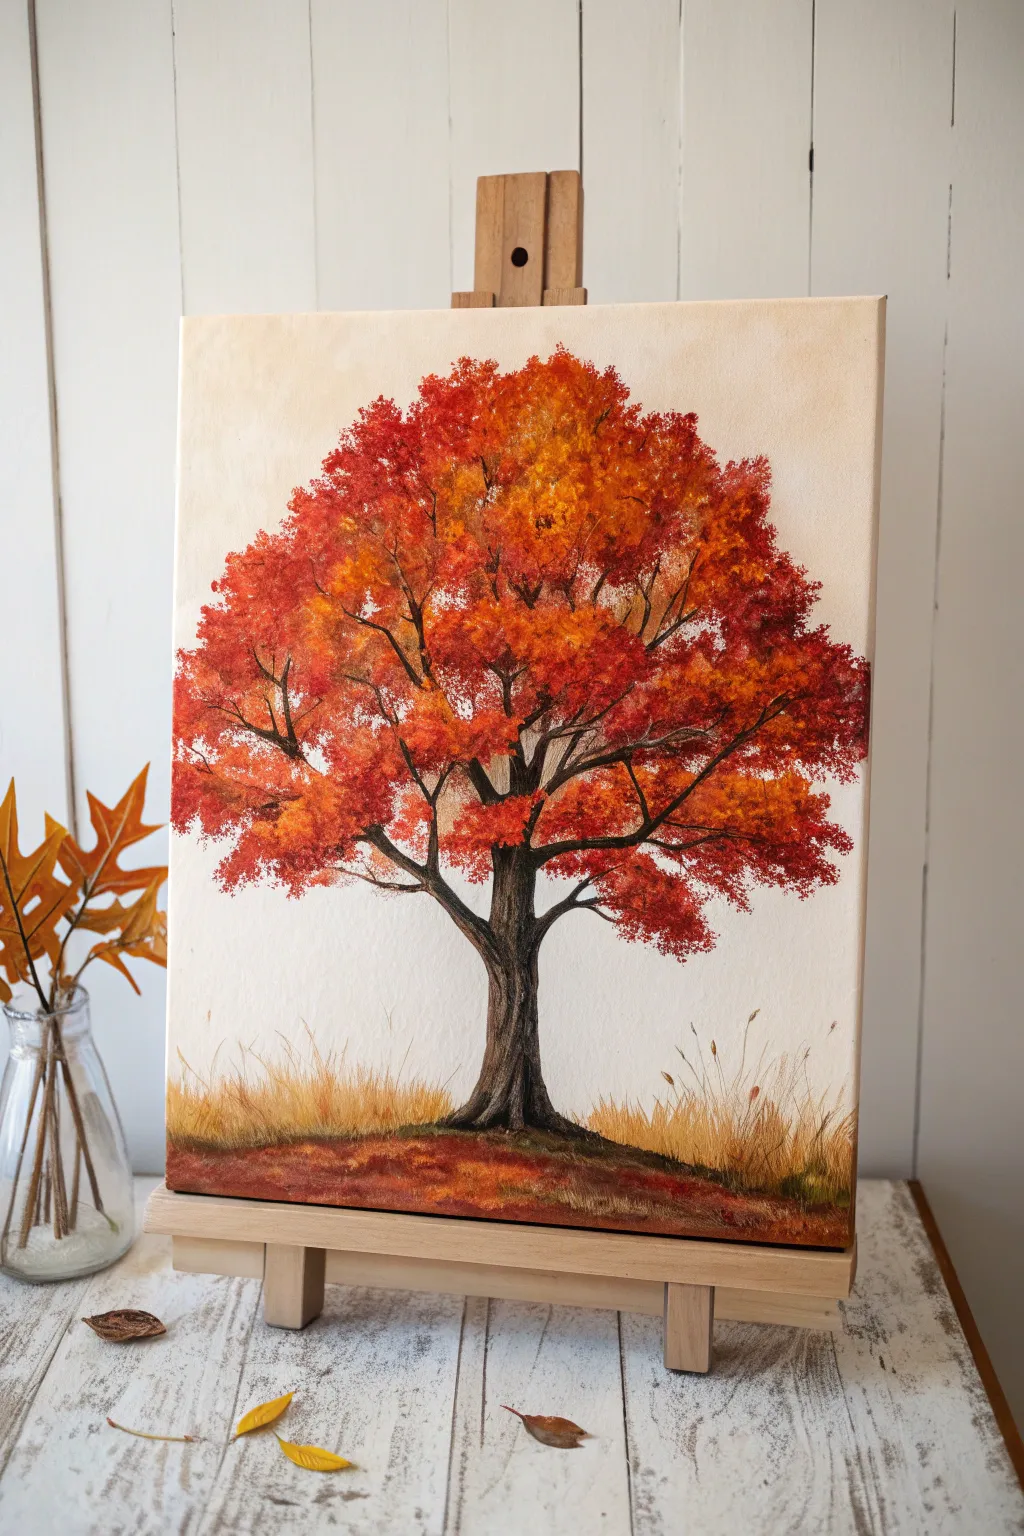
Capture the fiery spirit of fall with this bold tutorial featuring a statuesque maple tree draped in brilliant red and orange foliage. You will learn to layer warm tones to create depth in the canopy and ground the scene with distinct, swaying grasses.
Step-by-Step
Materials
- Stretched canvas (e.g., 11×14 or 16×20 inches)
- Acrylic paints (Titanium White, Mars Black, Burnt Umber, Cadmium Red, Cadmium Orange, Cadmium Yellow, Yellow Ochre)
- Flat shader brushes (medium and large)
- Round detail brushes (small)
- Fan brush (optional, for grass)
- Palette knife
- Water cup and paper towels
- Pencil for sketching
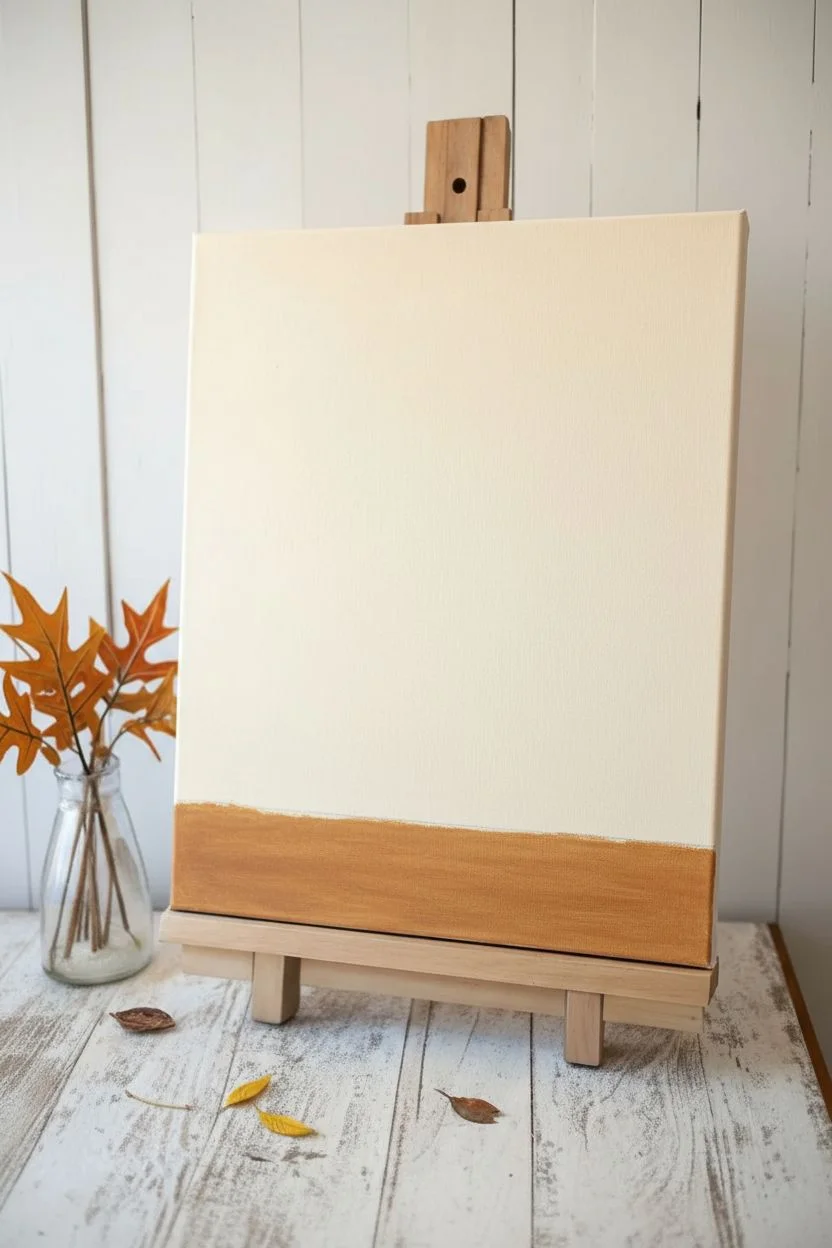
Step 1: Preparing the Background
-
Prime the canvas:
Begin by applying a very subtle wash to kill the bright white of the canvas. Mix a large amount of Titanium White with a tiny dot of Yellow Ochre and water. Apply this creamy, off-white mixture over the entire surface using a large flat brush. -
Establish the horizon:
Once the background is dry, lightly decide where your ground line will be. Keep it in the lower third of the canvas to give the tree plenty of height. A simple, faint pencil line works perfectly here. -
Lay the ground foundation:
Paint the area below your horizon line with a mix of Burnt Umber and a touch of Cadmium Red. This creates a warm, earthy base for the grass and fallen leaves that will come later.
Step 2: Constructing the Trunk
-
Sketch the skeleton:
Using a small round brush and thinned Burnt Umber paint, outline the trunk. Map out the main V-shape where the primary branches split. Don’t worry about perfect lines; trees are organic. -
Fill the trunk shape:
Fill in your sketched trunk with solid Burnt Umber. Widen the base where it meets the ground to act as the root flare, anchoring the tree firmly. -
Add bark texture:
Mix a dark grey using Mars Black and a little White. With a small detail brush, paint vertical, slightly wobbly lines up the trunk to simulate the craggy texture of maple bark. -
Highlight the wood:
On the left side of the trunk (or whichever side you choose as your light source), add lighter grey or beige highlights. I like to use a dry-brush technique here, dragging a mostly dry brush with light paint over the texture to catch the raised areas. -
Extend the branches:
Paint thinner branches reaching outward and upward. Use ink-consistency dark brown paint so the brush glides smoothly. Let these branches taper off into nothingness where the leaves will be.
Natural Sponges
Instead of a brush, use a natural sea sponge to apply the leaf layers. The irregular texture mimics foliage perfectly and prevents the ‘stamping’ look regular brushes can sometimes create.
Step 3: Creating the Foliage
-
Start with shadow leaves:
Mix a deep, dark red (Cadmium Red + a touch of Burnt Umber or Black). Using an old, scruffy brush or a sponge, stipple the general shape of the tree crown. Leave plenty of gaps so the sky and branches peek through. -
Apply mid-tone reds:
Switch to pure Cadmium Red. Stipple over the dark areas, concentrating on the edges of the leaf clumps. This layer establishes the main body of the autumn color. -
Introduce orange layers:
Mix Cadmium Red and Cadmium Orange. Dab this lighter color onto the tops of your leaf clusters where sunlight would naturally hit. Keep your hand loose and vary the pressure. -
Add yellow highlights:
For the brightest spots, use pure Cadmium Yellow or a Yellow-Orange mix. Apply this sparingly to the very tops of the tree and the outer tips of the branches to make them pop. -
Refining the canopy:
Step back and look at the overall shape. Add stray leaves drifting away from the main clumps using a small round brush to make the tree look natural and less like a solid ball.
Metallic Magic
Mix a tiny amount of gold acrylic paint into your final yellow highlight layer. When the light hits the painting, the leaves will literally shimmer like a sunlit autumn day.
Step 4: Ground Details and Finish
-
Paint the distant grass:
Mix Yellow Ochre with Titanium White. Using a fan brush or a small flat brush turned on its side, flick upward strokes along the horizon line to create tall, dry grasses in the distance. -
Add fallen leaves:
Use the same red and orange mixes from the tree to dab spots of color onto the dark ground base. Stipple these densely near the trunk and more sparsely as you move away. -
Define foreground grass:
In the immediate foreground, paint longer, sharper blades of grass using a liner brush and darker browns mixed with ochre. Cross some blades over others for a wild, unkempt look. -
Reconnect branches:
Sometimes the foliage painting covers up important branches. Go back with your dark brown detail brush and re-paint bits of twigs and branches peeking out through the leaf gaps. -
Final lighting check:
Add a few final dabs of your brightest yellow to the crown and a few bright strokes of highlight to the grass tips to unify the lighting.
Now step back and enjoy the warmth of your permanent autumn afternoon


Create a Calm Birch Grove With High-Contrast Trunks
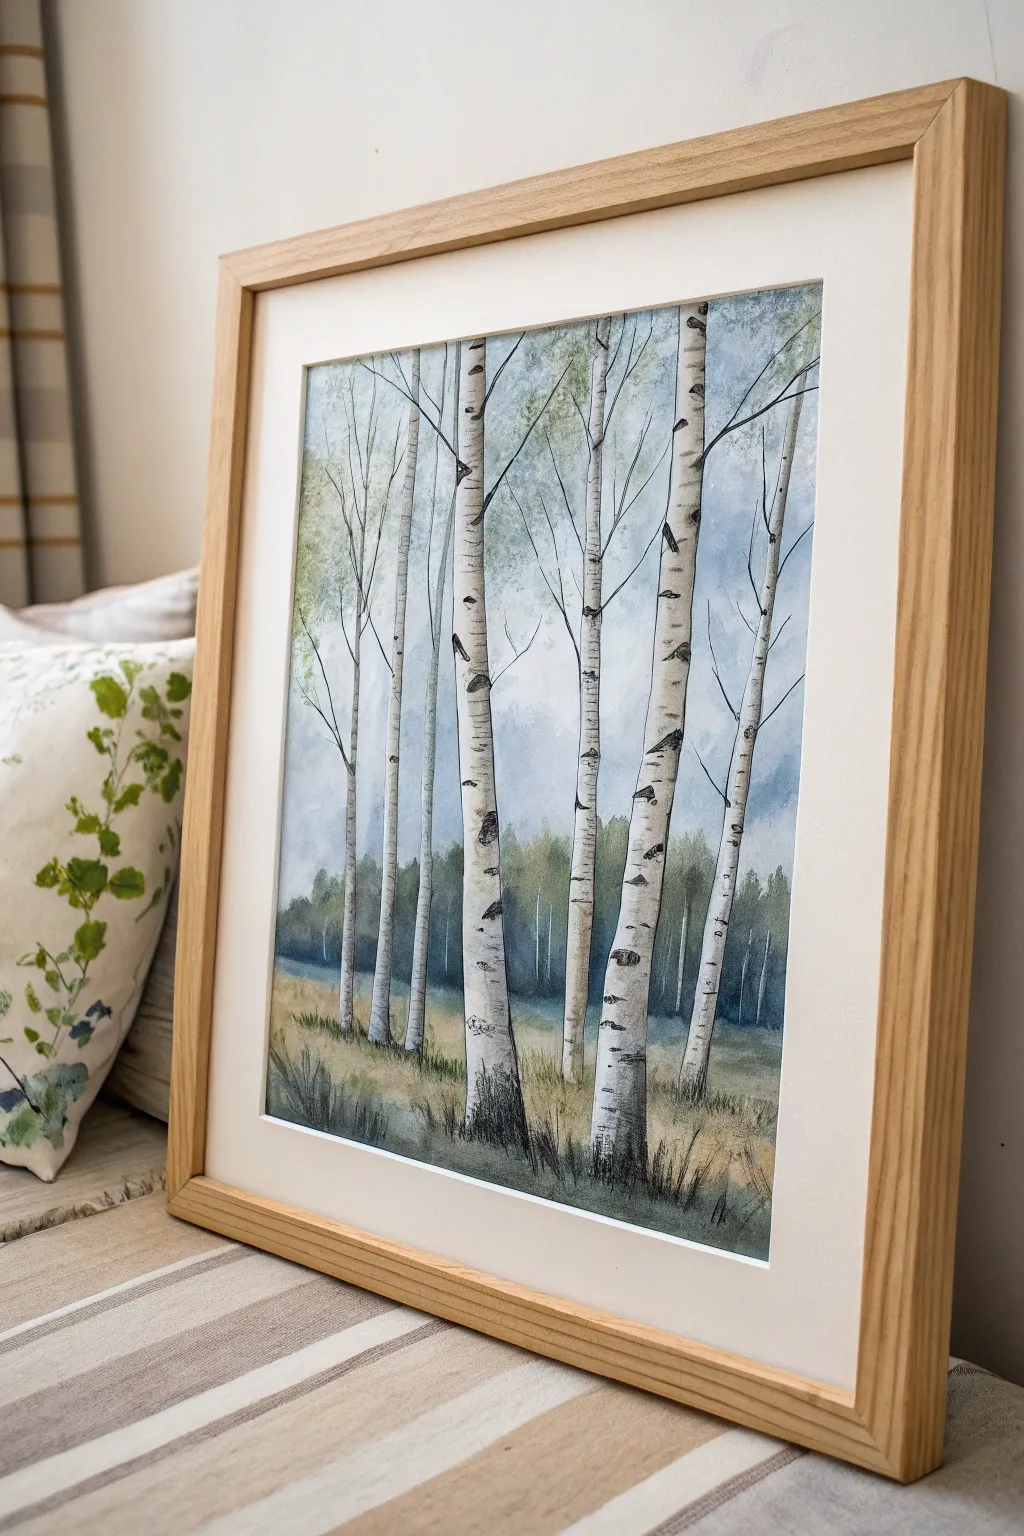

Capture the stillness of a forest with this elegant birch tree painting, featuring distinctive high-contrast trunks set against a soft, misty background. The vertical composition and muted palette create a peaceful, modern piece perfect for framing.
Step-by-Step
Materials
- Cold-pressed watercolor paper (300 gsm)
- Masking tape or painter’s tape
- Pencil (HB or H)
- Kneaded eraser
- Watercolor paints (Payne’s Gray, Indigo, Burnt Umber, Sap Green, Yellow Ochre)
- Round brushes (sizes 2, 6, and 10)
- Fine liner brush or rigger brush
- Clean water jars
- Paper towels
- Optional: Masking fluid
Step 1: Preparation and Sketching
-
Secure the paper:
Tape down all four edges of your watercolor paper to a board or table to create a crisp white border and prevent buckling when wet. -
Sketch the composition:
Lightly draw about 5-7 vertical lines to represent the birch trunks. Vary the spacing between them so they don’t look like a fence; group some closer together and leave wider gaps elsewhere. -
Add variance:
Draw slight wobbles and knots in the trunks to keep them organic, ensuring they taper very slightly as they go upward. -
Define the horizon:
Sketch a low horizon line about one-quarter of the way up the page to anchor the scene. -
Refine the lines:
Use a kneaded eraser to lift excess graphite until the lines are barely visible, just enough to guide your painting.
Step 2: Atmospheric Background
-
Mix subtle washes:
Prepare a very watery mix of Indigo and a touch of Payne’s Gray for the sky, and a muted Sap Green mixed with a little gray for the distant treeline. -
Paint around the trees:
Carefully paint the sky area using the size 10 brush, strictly avoiding the white paper inside your sketched tree trunks. This negative painting technique keeps the birches bright white. -
Add soft clouds:
While the sky wash is still damp, drop in slightly darker gray-blue pigment in random patches to create a misty, cloudy atmosphere. -
Create the distant forest:
Below the sky but above the horizon line, paint a soft, blurred band of muted greens and grays to suggest a dense forest in the distance. Let the bottom edge of this band fade out. -
Let it dry completely:
Wait until the paper is bone dry before proceeding to ensure crisp edges on your main trees.
Bleeding Edges?
If paint bleeds into your white trunks, blot it immediately with a clean paper towel. Once dry, you can use opaque white gouache to fix the edge.
Step 3: Adding Texture and Detail
-
Shadow the trunks:
Mix a very pale gray wash. Using a size 6 brush, paint a thin shadow line down usually the right or left side of each trunk to give them cylindrical volume. -
Paint the bark markings:
Switch to a smaller round brush (size 2) and concentrated Payne’s Gray or black. Paint the characteristic horizontal lenticels (strips) and eye-shaped knots on the trunks. -
Detail the knots:
Make sure the dark markings curve slightly around the trunk form rather than being flat straight lines, which helps the 3D effect. -
Add fine branches:
Using a rigger or fine liner brush, pull very thin, delicate branches extending from the upper trunks. Keep your hand loose and shaky for natural-looking twigs. -
Ground the trees:
Paint the base of the scene with washes of Yellow Ochre and Burnt Umber to represent dry grass. Use upward flicks to mimic blades of grass overlapping the bottom of the trunks. -
Add foreground depth:
Darken the bottom corners with a mix of green and Indigo to create a vignette effect that draws the eye upward. -
Final dry grass details:
I like to use a nearly dry brush with dark brown paint to add crisp, fine textures to the foreground grass so it doesn’t look too soft. -
Remove tape:
Once absolutely dry, peel the tape away slowly at a 45-degree angle to reveal your clean white border.
Level Up: Seasonal Shift
Add tiny dabs of bright yellow or orange near the branch tips to turn this winter scene into an autumn landscape, or pale pink for spring buds.
Frame your artwork in a simple wooden frame to complement the natural tones of the birch bark
BRUSH GUIDE
The Right Brush for Every Stroke
From clean lines to bold texture — master brush choice, stroke control, and essential techniques.
Explore the Full Guide
Layer a Pine Forest Using Atmospheric Depth
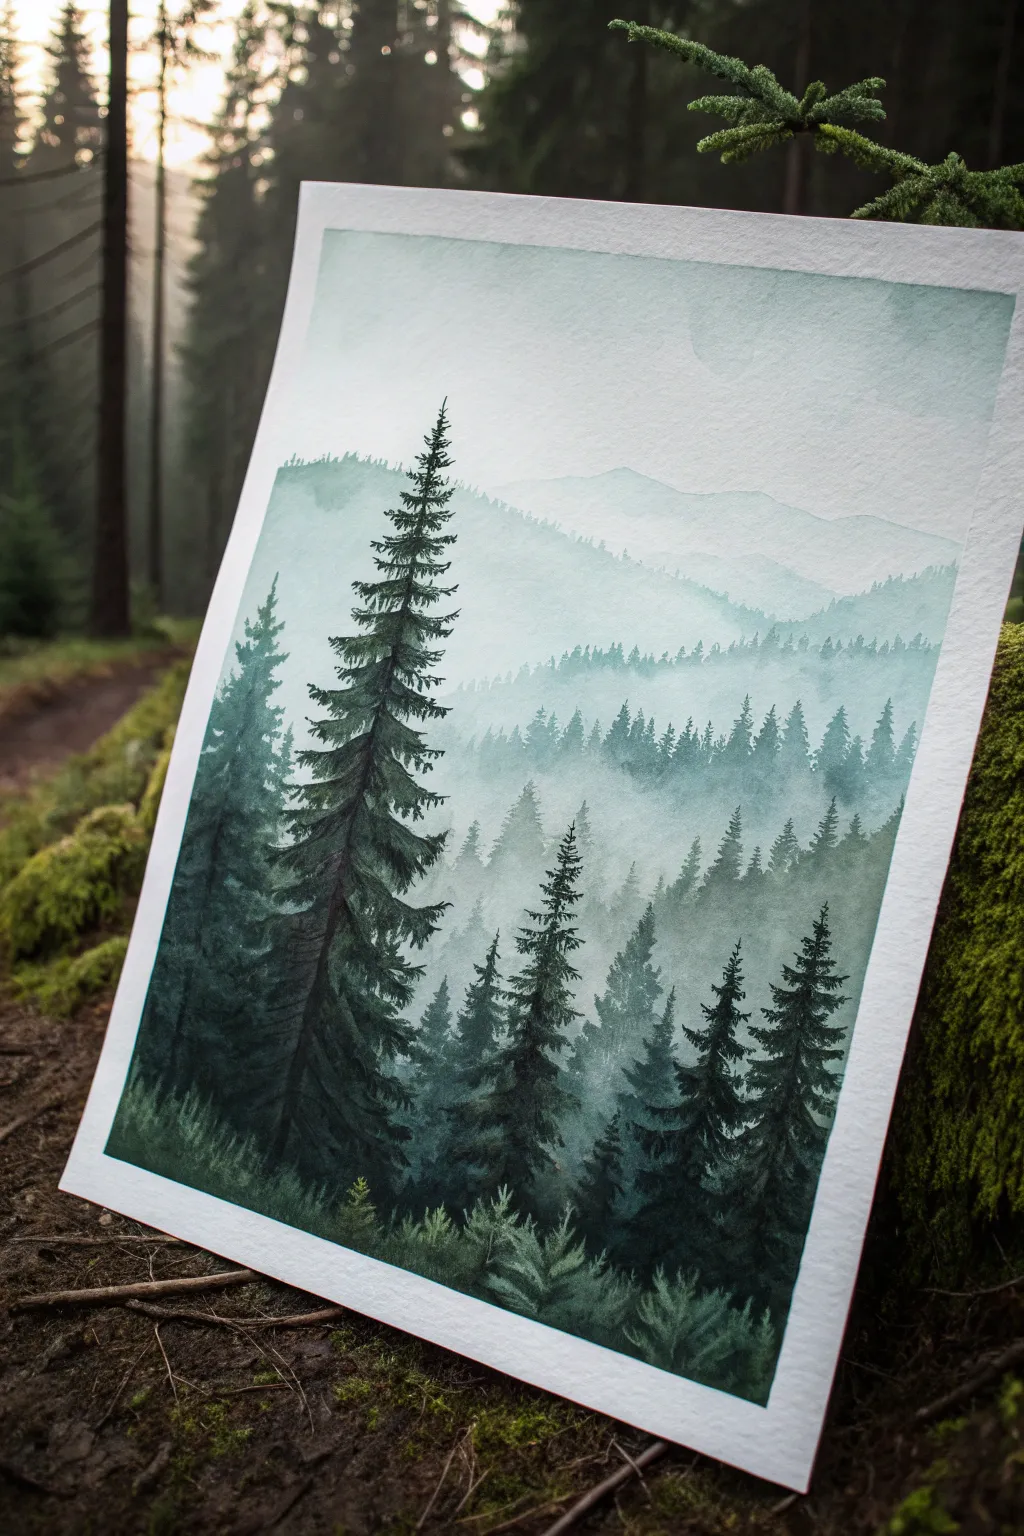
Capture the serene beauty of a foggy woodland by mastering the art of atmospheric perspective. This watercolor project uses gradient washes and layered values to create a stunning sense of depth, pulling the viewer deep into the misty mountains.
Step-by-Step Guide
Materials
- Cold Press Watercolor Paper (140lb/300gsm)
- Watercolor Paints (Indigo, Payne’s Grey, Hooker’s Green, Sap Green)
- Round Brushes (Size 8 for washes, Size 2 or 4 for details)
- Masking Tape
- Two Jars of Water (one clean, one dirty)
- Paper Towels
- Mixing Palette
Step 1: Setting the Scene
-
Prepare Your Workspace:
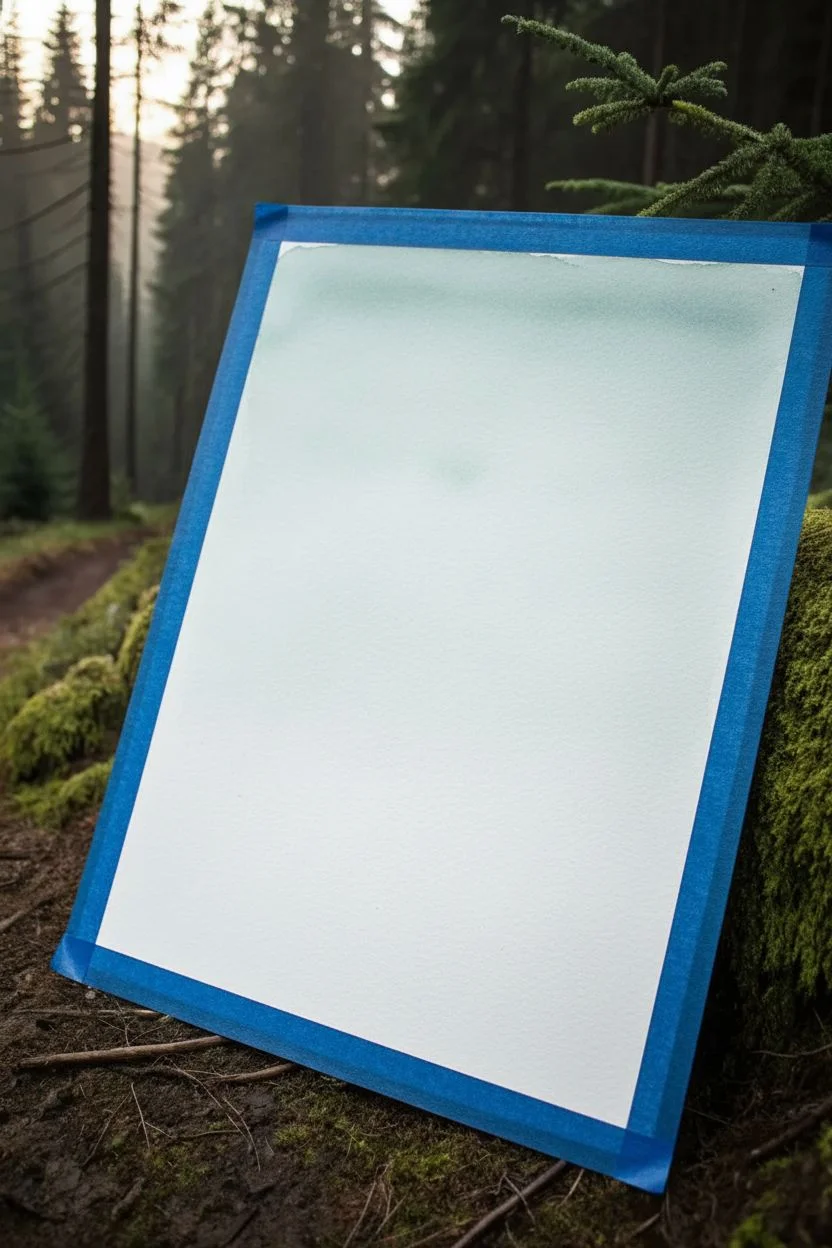
Secure your watercolor paper to a board or table using masking tape on all four sides. This prevents the paper from buckling when wet and creates that crisp, clean white border seen in the final piece. -
Mix Your Base Palette:
Prepare a large puddle of a cool, desaturated teal-grey on your palette. Mix a little Indigo with a touch of Sap Green and plenty of water. You want a very pale, watery consistency for the farthest mountains. -
First Sky Wash:
Using your largest brush, wet the top third of the paper with clean water. Apply a very faint wash of your lightest mix, letting the color fade out to almost white as it moves down the page to simulate mist.
Muddy Colors?
If your layers look muddy, you aren’t waiting long enough between drying times. Ensure each ridge is 100% dry before painting the one in front of it to keep edges crisp.
Step 2: Building Background Layers
-
Paint the Farthest Ridge:
While the sky is drying, mix slightly more pigment into your base puddle to make it a shade darker. Paint a soft, undulating mountain silhouette roughly across the upper third of the paper. -
Soften the Edge:
Immediately rinse your brush and run slightly damp bristles along the bottom edge of this mountain shape. This ‘wet-on-dry’ into ‘wet-on-wet’ technique blurs the bottom edge into the white background, creating instant fog. -
Dry Completely:
Wait for this first layer to be bone dry. If the paper is cool to the touch, it is still wet. Patience is key here to prevent layers from bleeding together. -
Second Mountain Layer:
Add a bit more Indigo and Payne’s Grey to your mix. Paint a second mountain ridge slightly lower than the first, depicting faint, tiny tree tops along the ridge line using the tip of your brush. -
Fade the Bottom:
Just like before, wash out the bottom edge of this new layer with clean water so it disappears into the white mist below. This gradation is the secret to atmospheric depth.
Pro Tip: Value Scale
Squint at your reference. The farthest mountains should be 20% opacity, mid-ground 50%, and foreground 100%. If the back is too dark, you lose the depth effect.
Step 3: Mid-Ground Trees
-
Define the Tree Line:
Darken your green-grey mixture further. Paint a more jagged horizon line in the middle of the paper, using short vertical strokes to suggest a dense forest canopy rather than a smooth mountain. -
Add Individual Pines:
While the shape is wet, switch to a smaller brush and pull up tiny triangular shapes from the ridge to form distinct tree peaks. Keep them soft and somewhat indistinct. -
Create the Mist:
Soften the bottom edge again with water. Let the pigment settle into the texture of the paper, which adds a natural graininess to the fog.
Step 4: The Foreground
-
Mix Deep Shadows:
For the closest trees, you need your darkest value. Mix a concentrated amount of Payne’s Grey and Hooker’s Green with very little water. It should be thick and intense. -
Paint the Main Tree:
Choose a spot just off-center for the prominent foreground pine. Use the tip of a size 4 brush to draw the thin trunk line extending nearly to the top of the paper. -
Developing Branches:
Starting from the top of the trunk, dab your brush in downward, zig-zag motions to create branches. Leave small gaps between branches to let the background ‘fog’ peek through. -
Fill the Lower Forest:
Using the same dark mixture, paint several smaller sharp pine trees around the main tree. Vary their heights to create a natural, organic composition. -
Blend the Roots:
Instead of painting detailed roots, let the bottoms of these dark trees merge into a dark, shadowy mass at the very bottom of the paper. -
Final Touches:
Add a few faint, grassy strokes at the very bottom right corner to ground the scene. I sometimes like to splatter tiny drops of clean water into the dark wet paint to create texture, but this is optional. -
Reveal the Border:
Wait until the painting is completely dry—no cool spots left! Carefully peel the tape away at a 45-degree angle to reveal your crisp white frame.
Step back and admire how simple layers of grey and green transform into a deep, misty valley landscape
Paint a Flowing Willow Tree With Draped Branch Shapes
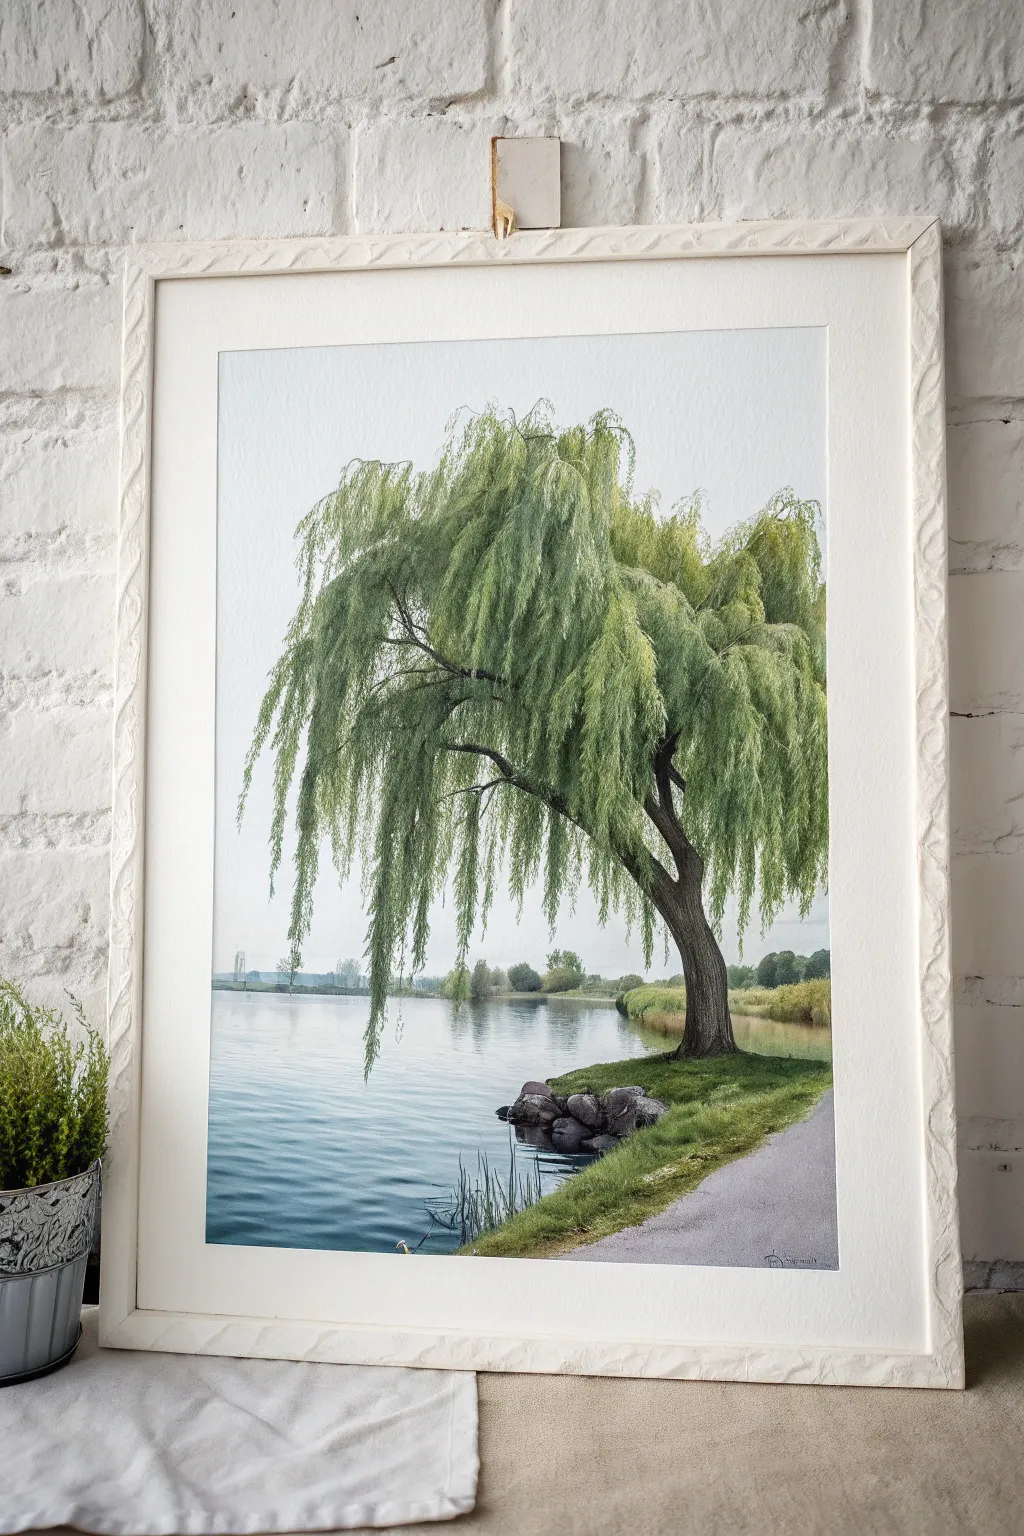
Capture the serene elegance of a weeping willow draping over a tranquil lake with this detailed painting project. Using subtle layering techniques, you will build up the cascading foliage and soft reflections to create a peaceful, natural scene.
Step-by-Step
Materials
- High-quality watercolor paper (cold press, 140lb or heavier)
- Watercolor paints (Sap Green, Hooker’s Green, Burnt Umber, Payne’s Grey, Cerulean Blue, Yellow Ochre)
- Drawing pencil (HB or H) and kneadable eraser
- Round brushes (sizes 2, 6, and 10)
- Rigger or liner brush (size 0 or 1)
- Masking fluid (optional)
- Clean water containers and paper towels
- White textured frame for finishing
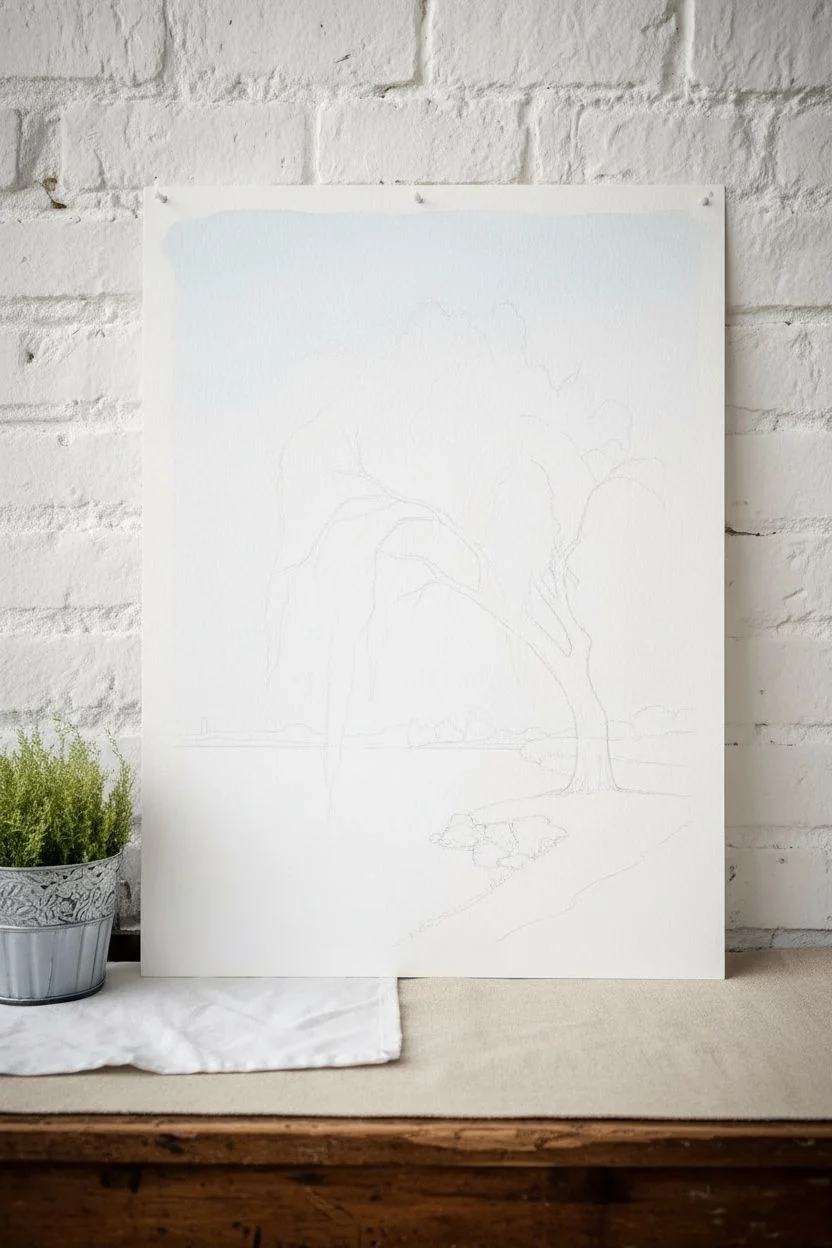
Step 1: Sketching and Sky
-
Sketch the composition:
Lightly sketch the horizon line about one-third up from the bottom of your paper. Outline the curve of the shoreline on the right and the main trunk of the willow tree leaning over the water. Mark the general shape of the canopy without drawing individual leaves. -
Add detail to the bank:
Sketch in the placement of the rocks at the water’s edge and the pathway curving along the bottom right. Keep these lines faint so they don’t show through the paint later. -
Prepare the sky wash:
Mix a very dilute wash of Cerulean Blue with plenty of water. You want a barely-there blue for a hazy, engaging sky. -
Paint the sky:
Wet the sky area of the paper with clean water first. Drop in your pale blue wash, letting it fade almost to white as it nears the horizon line. Allow this to dry completely before proceeding.
Rigger Brush Mastery
For the long, drooping willow branches, hold a rigger brush at the very end of the handle. This loosens your wrist and allows for longer, more fluid vertical strokes.
Step 2: The Water and Background
-
Paint the distant trees:
Mix a soft grey-green using Sap Green and a touch of Payne’s Grey. Paint the distant tree line along the horizon using a size 6 round brush. Keep the edges soft to suggest atmospheric perspective. -
Create the water base:
For the water, mix Cerulean Blue with a tiny bit of Payne’s Grey. Apply horizontal strokes across the lake area, leaving some white gaps near the foreground for sparkle. The color should be slightly darker than the sky but still transparent. -
Add water reflections:
While the water layer is damp but not soaking, drop in slightly darker horizontal streaks of blue-grey on the left side to simulate ripples. -
Paint the grass bank:
Use Yellow Ochre mixed with Sap Green to paint the grassy bank on the right. Use upward flickering strokes near the edge to suggest grass blades.
Muddy Greens?
If your foliage looks flat or muddy, let the paper dry completely between layers. Watercolor transparency relies on dry underlayers to keep colors crisp and vibrant.
Step 3: The Willow Tree
-
Paint the trunk:
Mix Burnt Umber with Payne’s Grey for a dark, rich brown. Using a size 6 brush, paint the trunk, starting thicker at the base and tapering as it splits into branches. Leave the paint textured to mimic bark. -
Establish the main branches:
Continue the dark brown color up into the canopy structure. The branches should curve outwards and downwards, supporting the weight of the weeping foliage. -
Start the foliage layer:
Mix a light, yellowish-green using Sap Green and Yellow Ochre. With a rigger brush or the tip of a round brush, paint long, vertical, cascading strokes from the branches downward. These are your lightest, outermost leaves. -
Build foliage density:
Once the first layer is dry, mix a mid-tone green (pure Hooker’s Green). Paint a second layer of cascading vertical lines, partially overlapping the first. This creates depth and volume in the tree. -
Add shadow depth:
Mix a dark green using Hooker’s Green and a touch of Burnt Umber. Apply this sparingly in the center of the tree and underneath the main branches where the shadows would naturally fall. -
Refine the draping effect:
Ensure the ends of your brushstrokes taper off gently. I like to flick the brush slightly at the end of the stroke to get that delicate, feathery look characteristic of willows.
Step 4: Foreground and Finishing Touches
-
Paint the rocks:
Paint the rocks at the water’s edge using varied greys. Paint the shadowed sides darker and leave the tops lighter. Add a thin dark line at the bottom of the rocks where they meet the water to ground them. -
Detail the pathway:
Wash a pale violet-grey over the pathway area. Add texture by spattering tiny dots of darker grey while covering the rest of the painting with paper. -
Add hanging branch tips:
Using your rigger brush and very dark green paint, add a few distinct, long, thin branches that hang low, almost touching the water. This adds realism to the ‘weeping’ effect. -
Final assessment:
Check the balance of the painting. If water reflections need strengthening, add faint vertical glazes of green below the willow over the dry blue water.
Once dry, place your artwork in a frame to highlight the serene beauty of your willow tree

PENCIL GUIDE
Understanding Pencil Grades from H to B
From first sketch to finished drawing — learn pencil grades, line control, and shading techniques.
Explore the Full Guide
Keep It Minimal With a Palm Tree and Clean Sky
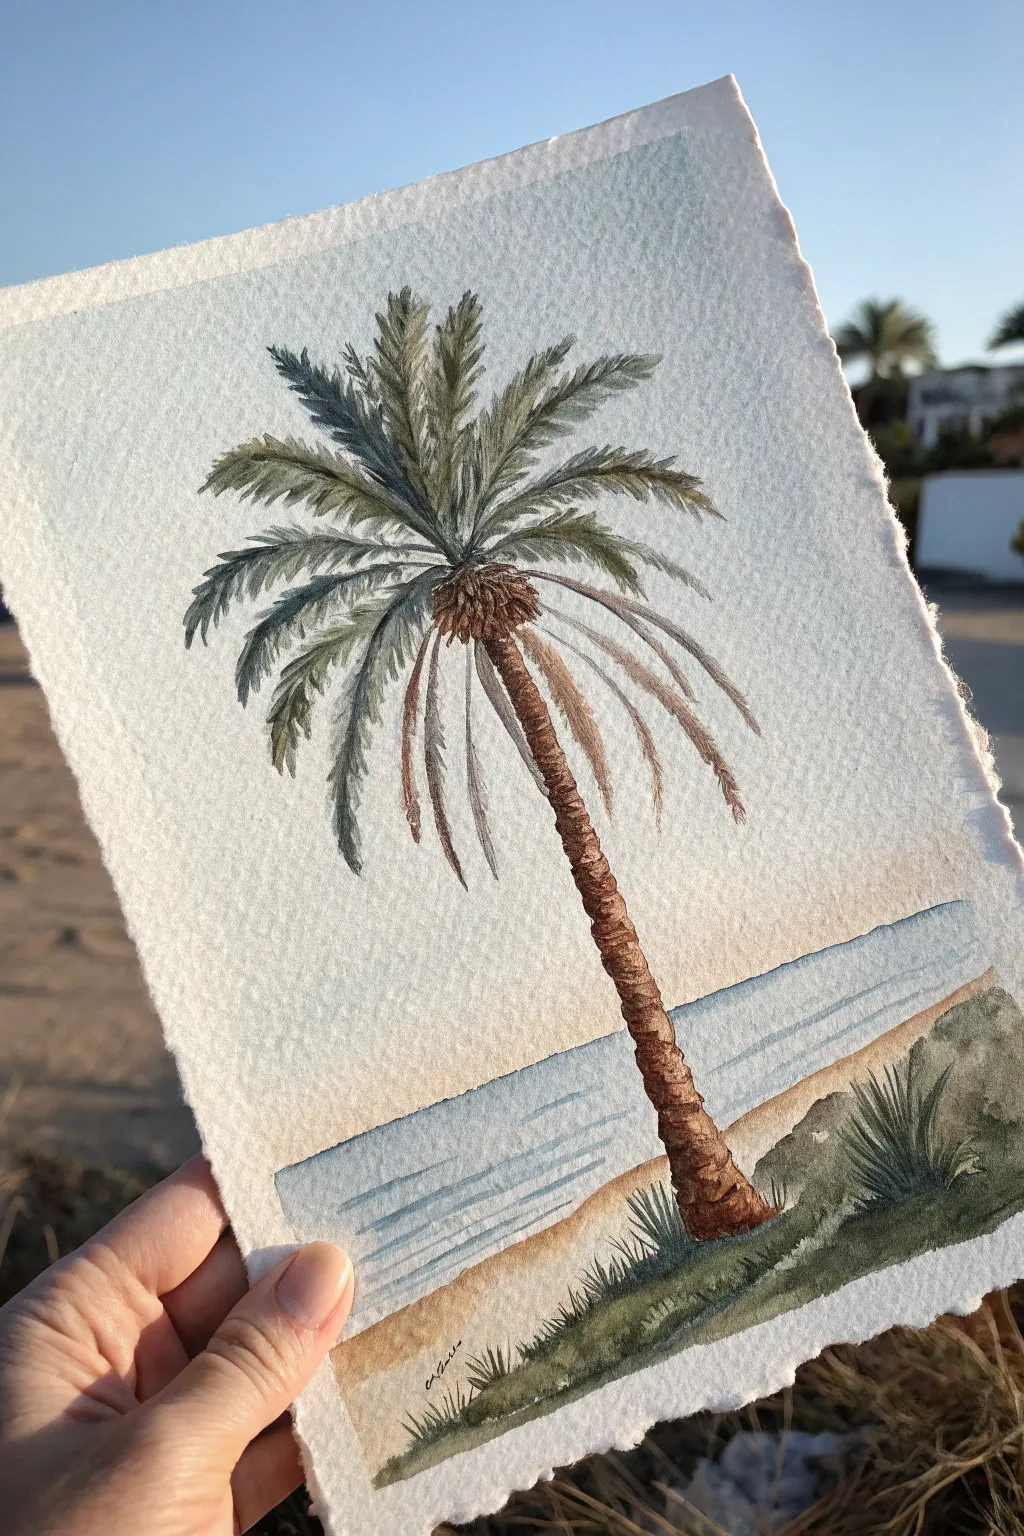
Capture the essence of a tranquil beach day with this detailed watercolor study of a solitary palm tree. Using textured paper and a muted color palette, you’ll learn to build up realistic bark layers and flowing fronds for a timeless piece of art.
Step-by-Step Tutorial
Materials
- Cold press watercolor paper (300 gsm or heavier, preferably with deckled edges)
- Watercolor paints: Burnt Umber, Burnt Sienna, Sap Green, Indigo, Yellow Ochre, Cerulean Blue
- Round brushes: Sizes 2, 6, and a fine liner (size 0 or 00)
- Pencil for sketching (HB)
- Kneaded eraser
- Two jars of water
- Paper towels
- Masking tape (optional)
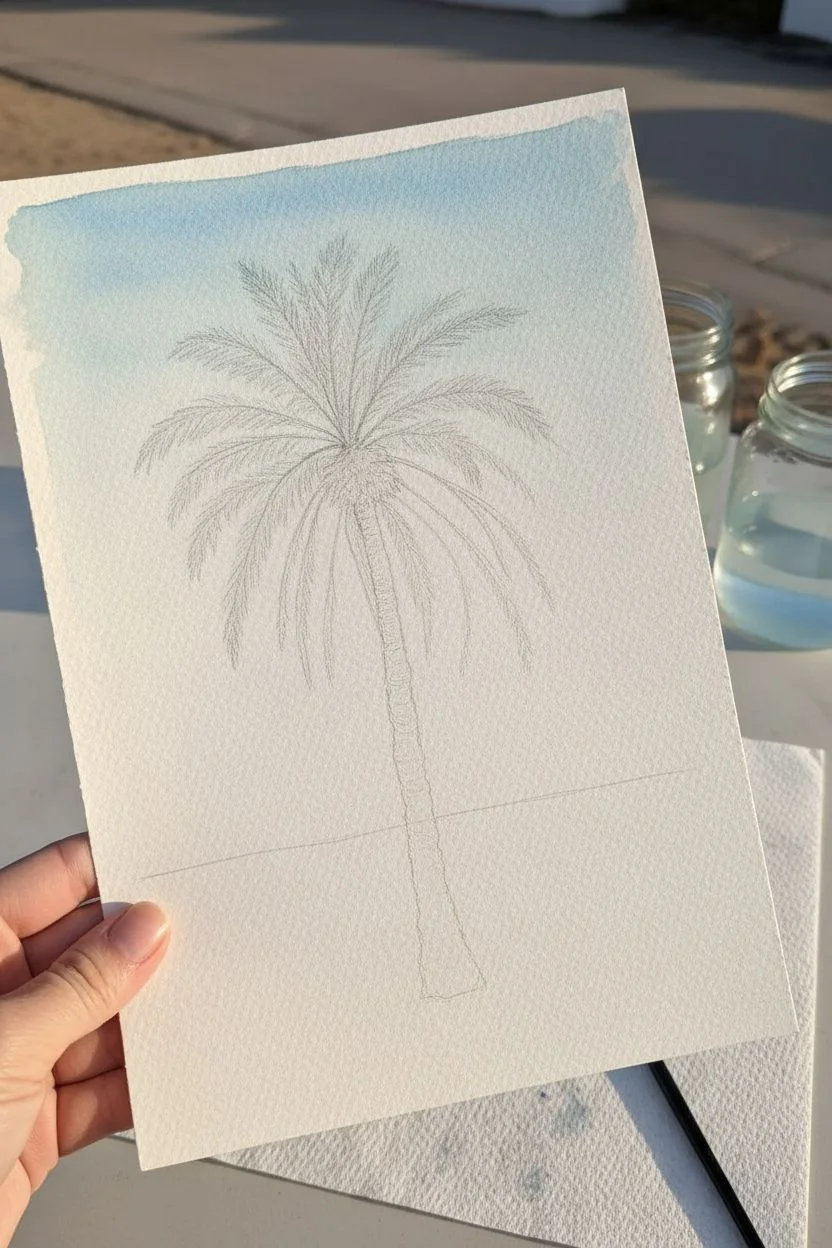
Step 1: Sketching and Sky
-
Light Sketch:
Start by lightly sketching the horizon line about 1/4 of the way up the page. Draw a gentle curve for the trunk, thinner at the top and slightly flared at the base, and mark a central point for the crown where the fronds will emerge. -
Frond Guidelines:
Pencil in the main spines of the palm fronds radiating from the center. Make sure some droop downwards to show gravity’s effect, while the top ones reach upward. -
Sky Wash:
Mix a very dilute wash of Cerulean Blue. Paint the sky area, starting stronger at the top corners and fading to almost clear water as you reach the horizon line to suggest atmospheric perspective.
Natural Frond tip
Fronds aren’t combs! Vary the length of your brush strokes. Make the leaflets shorter near the tip of the branch and longer near the base for a realistic shape.
Step 2: The Palm Trunk
-
Base Tone:
Mix Burnt Sienna with a touch of Yellow Ochre. Using a size 6 brush, paint the base layer of the trunk. While it’s still damp, drop in tiny touches of Burnt Umber on the shadowed side (usually the right) to create cylindrical volume. -
Texture Building:
Once the base is dry, use a size 2 brush and a thicker mixture of Burnt Umber to paint small, overlapping ‘V’ or ‘U’ shapes up the trunk. This mimics the rough, scaly texture of old frond scars. -
The Crown:
At the very top of the trunk, paint a dense cluster of textured dark brown (Burnt Umber + Indigo). Use a stippling motion to suggest the rough, fibrous mass where the fronds attach.
Muddy colors?
If your greens look dull, you’re likely overworking wet layers. Let each layer of faint fronds dry completely before painting darker ones on top to keep lines crisp.
Step 3: Palm Fronds
-
Green Mixes:
Prepare two green mixtures: a fresh, warm green (Sap Green + Yellow Ochre) for sunlit areas, and a cool, dark green (Sap Green + Indigo plus a touch of Burnt Umber) for shadows. -
Painting Leaves:
Starting from the central spine of each frond, use your fine liner brush to flick rapid, thin strokes outward. These individual leaflets shouldn’t be perfect; let them overlap and cross. -
Layering Depth:
Paint the background fronds first with the cooler, darker green to push them back. Paint the foreground fronds with the warmer, fresher green mix. -
Dried Fronds:
Don’t forget the dying leaves. Use a pale wash of Burnt Sienna to paint the droopy, lower fronds causing them to hang loosely beneath the green crown.
Step 4: Sea and Dunes
-
Ocean Horizon:
Mix a muted teal using Cerulean Blue and a tiny bit of Burnt Umber. Paint the sea in horizontal strokes, leaving the area closest to the beach lighter/white for foam. -
Sandy Beach:
Paint the beach area below the water with a dilute wash of Yellow Ochre and Burnt Sienna. Let this dry completely before moving to the foreground grasses. -
Dune Shadows:
Establish the grassy dune shape in the bottom right corner with a dark, earthy green mix. Keep the edges soft and organic. -
Grass Details:
Using your smallest liner brush, flick upwards from the dune base to create individual blades of sharp grass. Vary the pressure to make the tips taper naturally.
Step 5: Final Touches
-
Deepening Contrasts:
Review your painting for contrast is needed. Add a very dark mix of Burnt Umber and Indigo to the deepest crevices of the trunk bark and the underside of the main leaf cluster. -
Signature:
Sign your name small and discreetly near the bottom, perhaps following the angle of the dune.
Step back and admire your peaceful coastal scene, ready to frame or gift
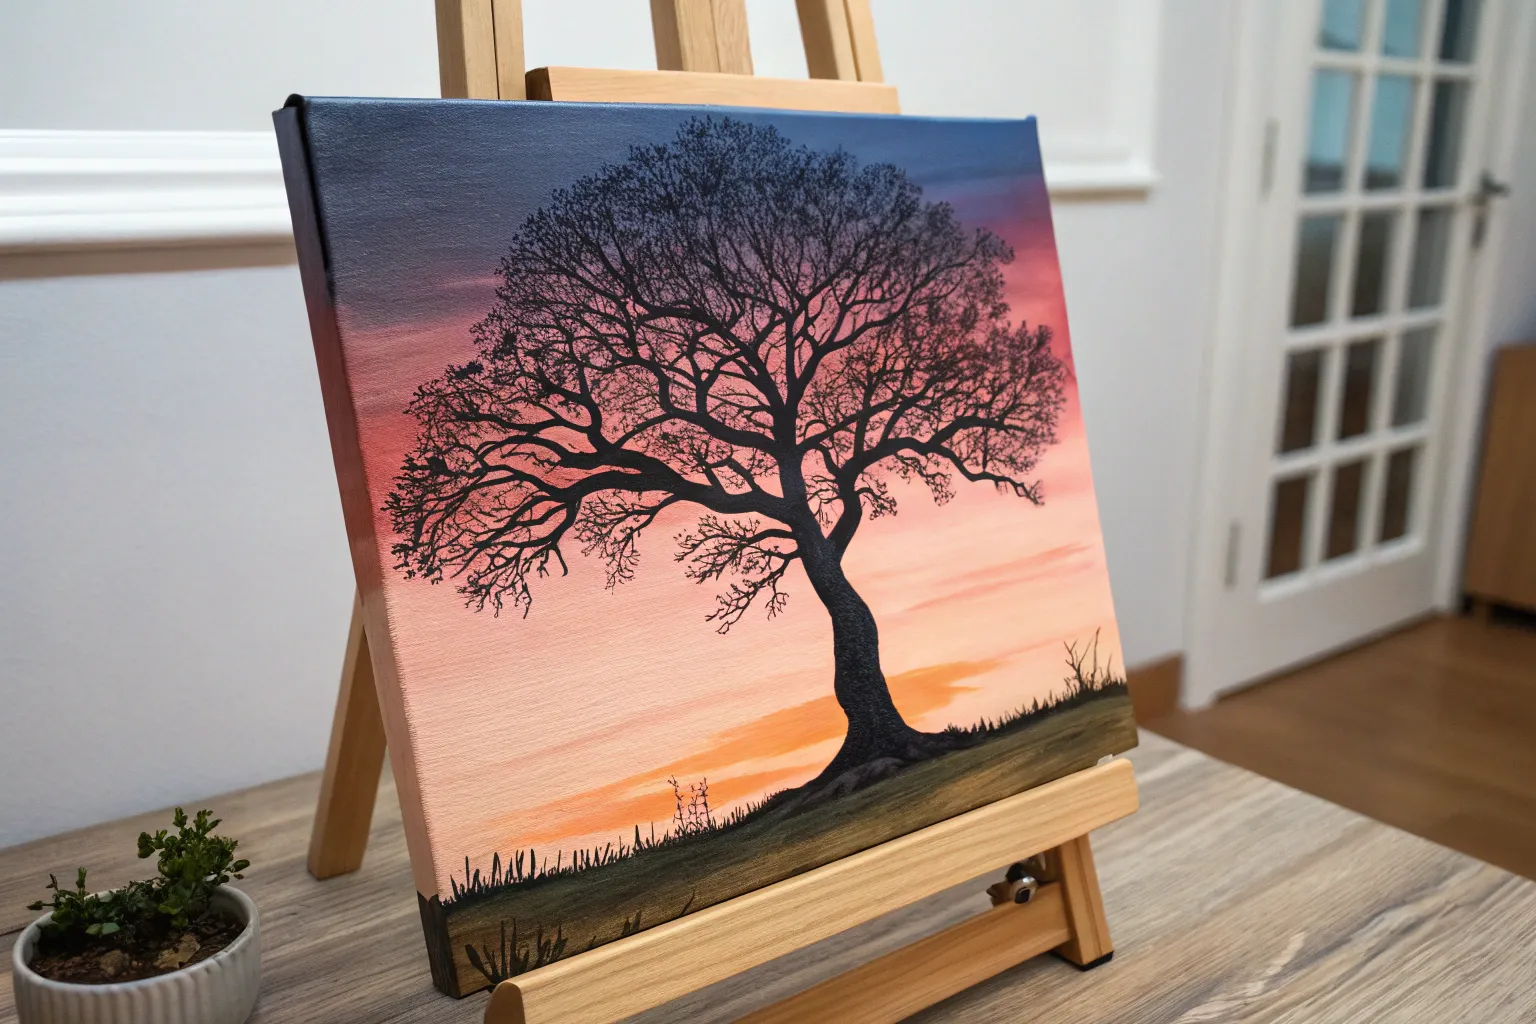
Frame a Giant Moon With a Moonlit Tree Silhouette
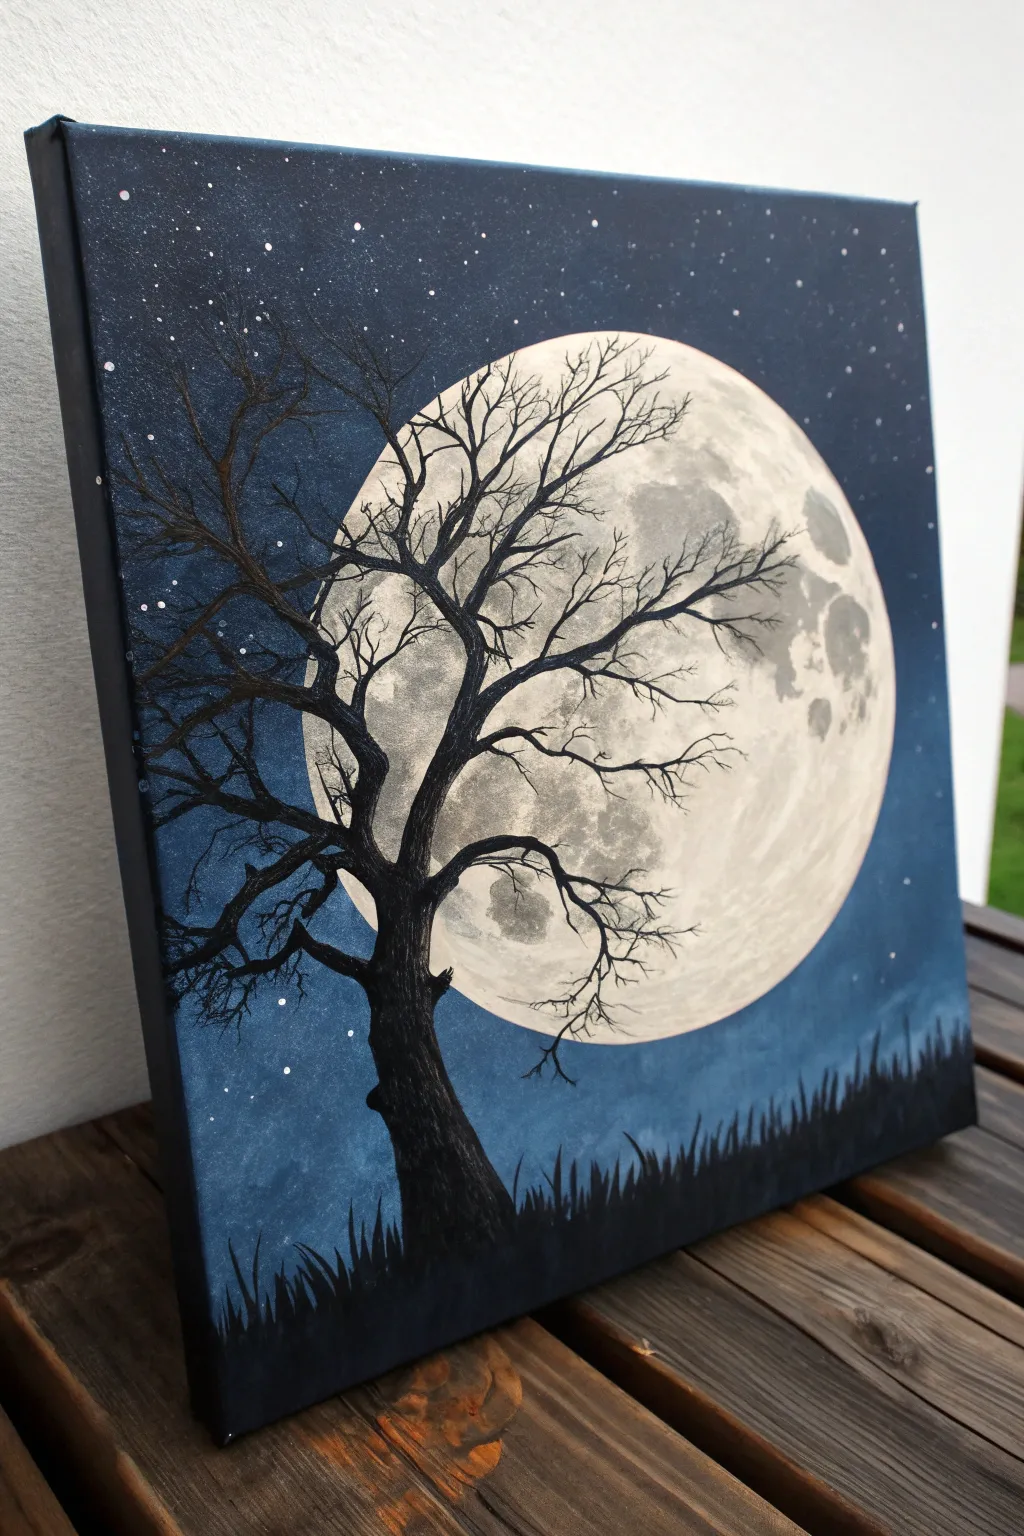
Capture the stark beauty of a winter night with this high-contrast acrylic painting. You’ll layer a glowing, cratered moon behind the twisting branches of a silhouetted tree for a dramatic piece of wall art.
Step-by-Step Guide
Materials
- Square stretched canvas (approx. 12×12 or similar)
- Acrylic paints: Black, Titanium White, Phthalo Blue (or similar deep blue), Ultramarine
- Large flat brush (1 inch)
- Medium round brush
- Fine detail liner brush (size 0 or 00)
- Round object for tracing (plate or bowl) or a compass
- Pencil
- Sponge or old rag
- Palette for mixing
- Water cup and paper towels
Step 1: Setting the Scene
-
Create the gradient background:
Start by mixing a deep night sky color using Phthalo Blue and a touch of Black. Paint the entire canvas, but create a subtle gradient: make the edges and corners the darkest (nearly black) and gradually blend in a bit of Ultramarine or plain blue towards the center where the moon will sit. -
Smooth the transition:
While the paint is still wet, use broad, horizontal strokes to ensure the background transition is smooth. Don’t worry about the perfect center, as the moon will cover it, but ensure the surrounding sky is rich and consistent. -
Splatter the stars:
Once the blue background is fully dry, dilute a small amount of White paint with water until it’s fluid. Dip a stiff brush or toothbrush into it and flick the bristles to spray fine stars across the sky. Let this dry completely before moving on to avoid smudging.
Moon is too messy?
If your grey crater sponging gets too dark, wait for it to dry and dry-brush pure titanium white over the top. This brings back the glow and softens the harsh grey spots.
Step 2: The Moon Phase
-
Outline the moon:
Place your round object (like a bowl or plate) slightly off-center on the canvas. Lightly trace around it with a pencil to create a perfect circle. -
Bloat in the base color:
Fill the circle with Titanium White. You will likely need two coats to fully cover the dark blue background. Let it dry between coats until you have a solid, opaque white disc. -
Mix shadow grey:
Mix a very light grey paint using mostly White and a tiny drop of Black. The moon in the reference image isn’t flat white; it has texture. -
Sponge on texture:
Dip a small piece of sponge or a scrunched-up rag into your light grey mix. Dab off most of the paint, then gently blot it onto the moon’s surface to create the look of craters and maria (the dark plains). -
Refine the craters:
I find it helpful to look at a photo of a real moon for this part. Use a smaller brush and a slightly darker grey to deepen specific areas, focusing on the right side and bottom edges to give the sphere some dimension.
Add a cosmic glow
Before painting the tree, glaze a very thin, watery layer of white or pale yellow around the outer rim of the moon to create a subtle atmospheric haze.
Step 3: The Dark Silhouette
-
Draft the trunk:
Using pure Black paint and a medium round brush, paint the trunk of the tree starting from the bottom center. Make the base wide and taper it as it moves upward into the lower portion of the moon. -
Add the grass line:
Paint a jagged, uneven horizon line at the very bottom of the canvas. Use short, upward flicking strokes to create the texture of grass blades silhouetted against the sky. -
Branch structure:
Extend two main thick branches from the trunk, splitting them off as they reach the middle of the moon. Keep your paint flow smooth; adding a drop of water to the black paint helps it glide. -
Add secondary branches:
From your main branches, paint medium-sized limbs reaching outward. Try to make them twist and turn rather than being perfectly straight, which adds a spooky, organic feel. -
Detail branch work:
Switch to your fine liner brush. Paint the thinnest twigs extending all the way to the edges of the canvas. These should be delicate lines that cross over the bright moon face for high contrast. -
Refine the intersections:
Where branches attach to the trunk, slightly thicken the joint to make it look sturdy and natural. -
Paint the canvas edges:
Don’t forget the sides of your canvas. Paint the edges black to continue the silhouette/frame, or continue the starry night pattern around the sides for a gallery-wrapped look. -
Final inspection:
Check for any pinholes of light showing through your black tree. Fill them in to ensure a solid, opaque silhouette.
Hang your finished painting on a light-colored wall to really make that dark silhouette pop


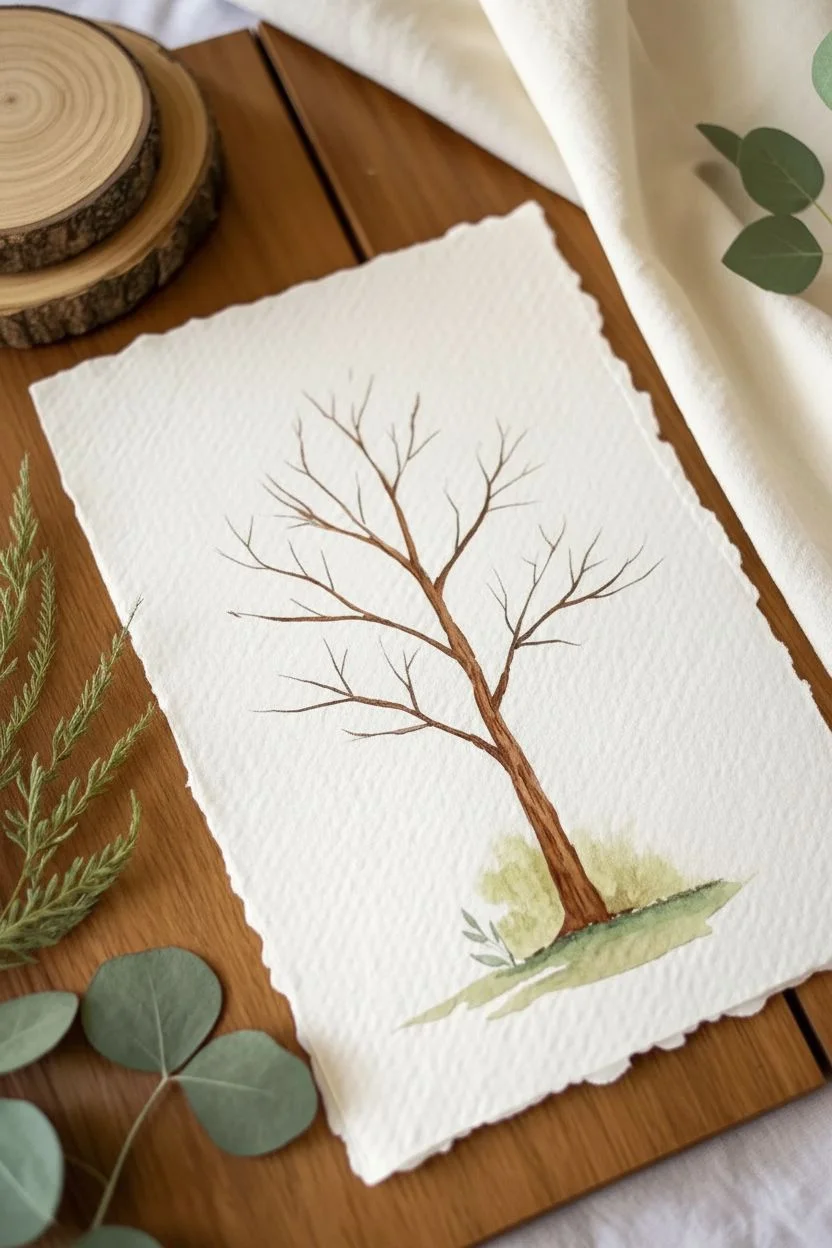
Try a Negative-Space Tree by Painting Around the Branches

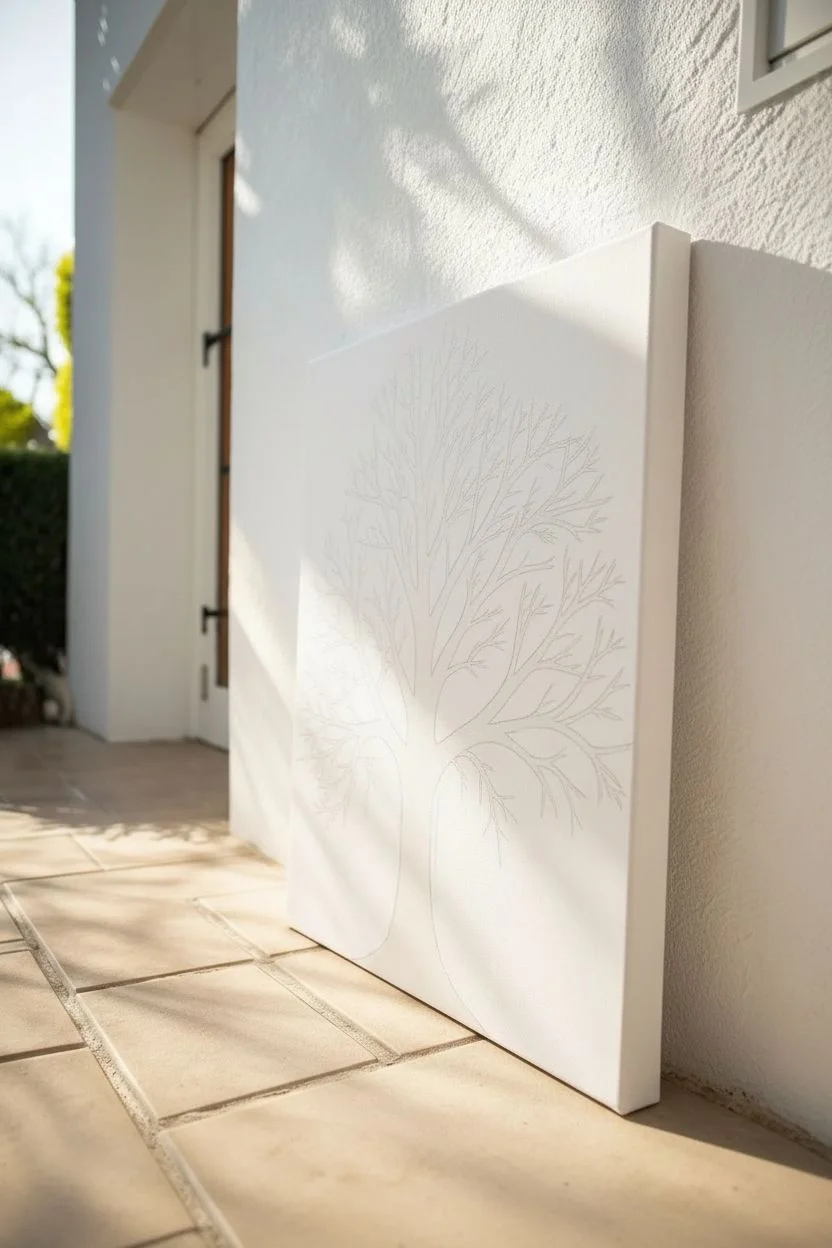
Capture the stark beauty of a leafless winter tree with this striking high-contrast canvas project. By utilizing negative space or careful layering, you’ll create a glowing white silhouette that pops dramatically against a deep cerulean background.
Detailed Instructions
Materials
- Stretched canvas (rectangular, approx 16×20 or 18×24 inches)
- Acrylic paints: Titanium White, Phthalo Blue, Ultramarine Blue
- Gesso (white)
- Assorted brushes: 1-inch flat brush, #0 or #1 liner brush, #4 round brush
- Pencil for sketching
- Palette or paper plate
- Jar of water
- Paper towels
- Easel or flat surface protector
Step 1: Preparation and Sketching
-
Prime the canvas:
Begin by applying a generous coat of white gesso to your canvas if it isn’t pre-primed. This ensures your white areas will be bright and the paint adheres well. Let this dry completely before moving on. -
Plan your composition:
Visualize the tree’s placement. The trunk should anchor the painting at the bottom center, taking up about 1/5th of the width, and the branches should fan out to fill the upper 2/3rds of the canvas. -
Sketch the trunk:
Using a light pencil, draw the outline of the main trunk. Curve the base slightly outward to suggest roots grounding the tree into the earth. -
Draft primary branches:
Extend 3-4 main branches upwards from the trunk. Keep your lines organic and slightly wavy; nature rarely produces perfectly straight lines. -
Add secondary branches:
From your main branches, sketch smaller offshoots that reach toward the edges of the canvas. Think of veins in a leaf or cracks in ice for inspiration. -
Fill in the twig details:
Complete your sketch by adding tiny, intricate twigs at the very tips. Ensure these reach high up, nearly touching the top edge of the canvas for a full, majestic look.
Clean Lines Hack
Accidentally painted over a branch? Don’t panic. Let the blue paint dry completely, then paint bright white over the mistake. Acrylic is forgivable once dry.
Step 2: Blocking the Negative Space
-
Mix your background color:
On your palette, combine Phthalo Blue with a touch of Ultramarine Blue. I find adding a tiny dot of white helps the blue feel airy rather than bottom-of-the-ocean dark. -
Outline the trunk:
Using a round brush (#4), carefully paint the blue background *around* the outside of your pencil lines at the base of the tree. You are defining the tree by what you don’t paint. -
Paint around main branches:
Continue painting the blue negative space between the large branches. Work slowly here to keep the edges of the ‘white’ wood crisp and sharp. -
Fill the large outer areas:
Switch to your 1-inch flat brush to quickly fill in the large expanses of blue canvas away from the tree. Use long, vertical strokes or cross-hatching to create a subtle texture in the background. -
Check for consistency:
Ensure the blue paint is opaque. If you can see the canvas weave too clearly or the color looks streaky, apply a second coat of blue once the first is dry to touch.
Step 3: Refining and detailing
-
Switch to the liner brush:
The upper canopy requires precision. Switch to your smallest liner brush (#0 or #1) to tackle the spaces between the smallest twigs. -
Define the delicate tips:
Instead of painting the twig itself, paint the blue specks and shapes *between* the desired white lines. This ‘carving out’ technique naturally creates thinner, more elegant branches than trying to paint white onto blue. -
Enhance the white silhouette:
Once the blue is fully dry, take pure Titanium White on a clean brush and paint inside the tree shape. This covers any pencil marks and makes the tree brilliantly bright. -
Texturize the bark:
While the white paint is wet, you can use a dry, stiff brush to lightly streak through it vertically. This adds a subtle bark-like texture without introducing a new color. -
Clean up edges:
Inspect your silhouette. If any blue paint accidentally crossed into the tree area, touch it up with opacity-rich white paint to reclaim the shape. -
Final inspection:
Step back five feet from your canvas. Look for any areas where the branches feel too thick or clunky, and use the blue paint to ‘shave’ them down to a thinner elegance. -
Paint the sides:
Don’t forget the edges of the canvas. Extend the blue background (or the bottom white of the trunk) around the sides for a professional, frame-ready finish.
Use Flow Aid
For the tiny spaces between twigs, mix a drop of water or acrylic flow improver into your blue paint. This helps the paint glide off the liner brush smoothly.
Hang your finished piece in a spot that gets morning light to let those textures shine
Dab Leaves With Cotton Swabs for Easy Foliage Texture
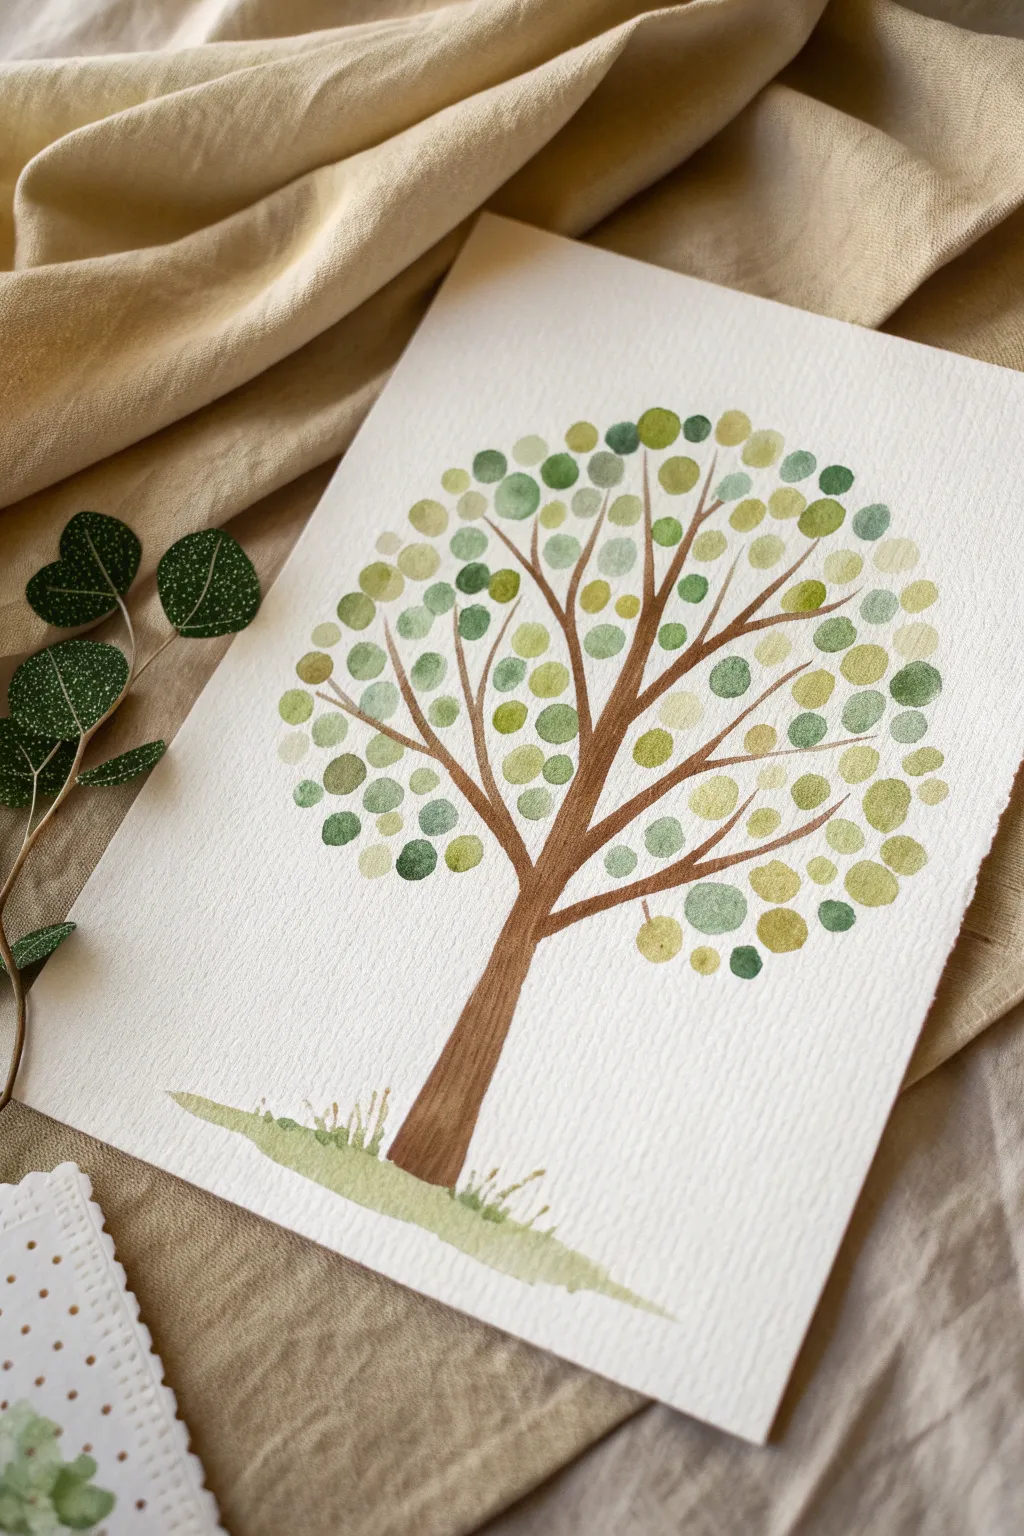
This charming project uses a simple household item to create a lush, stylized tree canopy full of texture and movement. By layering different shades of green using cotton swabs, you’ll achieve a perfect round leaf shape every time without needing advanced brush skills.
Step-by-Step
Materials
- Cold press watercolor paper (A4 or A5)
- Watercolor paints (tube or pan)
- Small round brush (size 2 or 4)
- Several cotton swabs (Q-tips)
- Palette or small dish for mixing
- Cup of water
- Paper towels
- Pencil (optional for sketching)
Step 1: Painting the Structure
-
Prepare the trunk color:
Mix a warm, medium-brown shade on your palette. You want a consistency that flows easily but isn’t too watery, similar to light cream. -
Draft the trunk shape:
Starting near the bottom center of your paper, use your small round brush to paint the main trunk. Make the base wider and taper it gently as you move upward toward the center of the page. -
Add main branches:
Extend 3 to 4 main branches outward from the top of the trunk. Keep your wrist loose to create natural, slightly curving lines rather than stiff, straight ones. -
Create secondary branches:
From your main branches, paint thinner offshoots reaching out in a fan shape. Imagine a rough circle or oval shape that the canopy will fill, and guide your branches to reach those outer edges. -
Paint the ground:
While you have paint on your brush, mix a watery light green. Paint a simple, jagged wash at the base of the trunk to suggest grass, flicking the brush upward slightly to create blades.
Fuzzy Circles?
If your dabs look fuzzy or shapeless, the cotton is too wet or frayed. Use a fresh swab and blot it slightly on a paper towel before pressing it to the paper for crisp edges.
Step 2: Dabbing the Foliage
-
Prepare your greens:
On your palette, mix at least three distinct shades of green: a light yellow-green, a medium leafy green, and a darker olive or forest green. Adding a tiny bit of brown to your green can make it look more natural. -
Load the cotton swab:
Dip the tip of a fresh cotton swab directly into your lightest green paint. Ensure the cotton is saturated but not dripping. -
Start with light dabs:
Press the swab strictly vertical onto the paper to create perfect circles. Place these randomly around the ends of your branches, leaving plenty of white space between them. -
Switch to medium green:
Using a clean end of a swab (or a new one), load up your medium green shade. Dab more circles, filling in some gaps but also overlapping a few of the lighter circles to create depth. -
Add the darkest tones:
Finally, use your darkest forest green for the third layer. Place these circles sparingly, focusing near the center of the tree where shadows would naturally fall. -
Refine the shape:
Step back and look at your tree’s overall shape. If it feels lopsided, add a few more green dabs to balance out the canopy, keeping the edges generally rounded. -
Connect floating leaves:
If you have leaf clusters that look like they are floating in mid-air, take your small brush with brown paint and draw very thin, delicate twigs connecting them back to the main branches. -
Paint falling leaves:
For a bit of whimsy, dab two or three circles near the grass at the bottom, as if a few leaves have just fallen from the tree. -
Enhance the grass:
Add a few darker green vertical strokes to the grass patch at the base to give it more texture and match the tones in the canopy. -
Final dry:
Let the painting sit undisturbed until completely dry. The cotton swab dabs can hold more water than brush strokes, so give it a few extra minutes.
Seasonal Shift
Change the season by swapping the greens! use pinks and whites for a spring cherry blossom tree, or burnt oranges, reds, and yellows for a vibrant autumn version.
Once dry, frame your artwork or turn it into a lovely homemade greeting card
Stamp a Canopy Using Sponge Dabbing for Leaf Clumps
Create a serene, nature-inspired artwork using a simple sponge technique to mimic the soft, clustered appearance of tree foliage. This approachable watercolor project captures the gentle swaying of a solitary tree on textured deckle-edge paper.
Detailed Instructions
Materials
- Cold press watercolor paper (deckle edge recommended)
- Small natural sea sponge or synthetic craft sponge
- Watercolor paints (burnt sienna, burnt umber, sap green, olive green, yellow ochre)
- Round brush (size 2 or 4)
- Liner brush (size 0 or 00)
- Mixing palette
- Two jars of water
- Paper towels
Step 1: Painting the Trunk and Base
-
Mix your trunk color:
Start by mixing burnt sienna with a touch of burnt umber on your palette. Aim for a warm, medium-brown consistency that flows easily but isn’t too watery. -
Establish the main line:
Using your size 2 or 4 round brush, paint a gently curving line starting from the bottom third of the paper upward. Let the line tape slightly as it reaches the top, forming the central trunk. -
Add main branches:
Branch off from the main trunk with thinner lines. Keep these movements organic, allowing some branches to reach high and others to stretch wide. -
Create secondary twigs:
Switch to your liner brush for fine details. Extending from the main branches, flick the wrist lightly to paint delicate twigs that will eventually hold the leaves. -
Ground the tree:
At the base of the trunk, paint a small, uneven patch of ground. Use a very watery mix of sap green and yellow ochre to create a grassy foundation. -
Enhance ground texture:
While the ground wash is still damp, drop in tiny touches of slightly darker green to suggest uneven terrain or small bushes near the roots. -
Add subtle shoots:
Painting wet-on-dry, use the liner brush and sap green to add tiny, singular vertical shoots or blades of grass poking out from the ground wash. -
Let the structure dry:
Allow the trunk and ground layer to dry completely. This ensures your sponge stamping won’t bleed uncontrollably into the brown wood tones.
Natural Sponges Win
Use a natural sea sponge rather than a synthetic kitchen sponge. The irregular holes create a much more realistic, organic leaf texture compared to uniform squares.
Step 2: Stamping the Canopy
-
Prepare the sponge:
Dip your small sponge into clean water and squeeze it out thoroughly until it is just barely damp. This prevents water drips on your paper. -
Load light greens:
Brush a mixture of yellow ochre and sap green directly onto the sponge, or dip the sponge lightly into a puddle of paint on your palette. -
Test the stamp:
Press the sponge onto a scrap piece of paper first. You want a distinct, textured impression, not a solid blob of color. -
Stamp the upper canopy:
Gently dab the sponge near the ends of your upper branches. Apply light pressure to create airy, sunlit clusters of leaves at the top of the tree. -
Load darker greens:
Without cleaning the sponge fully, pick up a slightly darker mix of olive green or sap green with a touch of blue. -
Create mid-tree volume:
Dab these darker tones in the middle and lower sections of the canopy. I like to overlap some of the lighter areas slightly to create depth and shadow. -
Vary the density:
Leave varying amounts of white space between clumps. Some areas should be dense with foliage, while others should reveal the paper or branches underneath. -
Connect floating leaves:
If you have stamped clumps that are floating in space without support, use your liner brush and the brown mix to paint tiny twigs connecting them back to the main branches. -
Final touches:
Add a few very faint sponge dabs near the base of the tree to represent low bushes, tying the canopy colors to the ground.
Too Much Paint?
If your sponge marks look like solid blobs, your sponge is too wet. Rinse, squeeze it very tight, and reload with thicker, less watery paint.
Frame this earthy piece in a floating glass frame to show off the beautiful deckled edges
Paint a Dripping Rainbow Tree Canopy for a Modern Twist
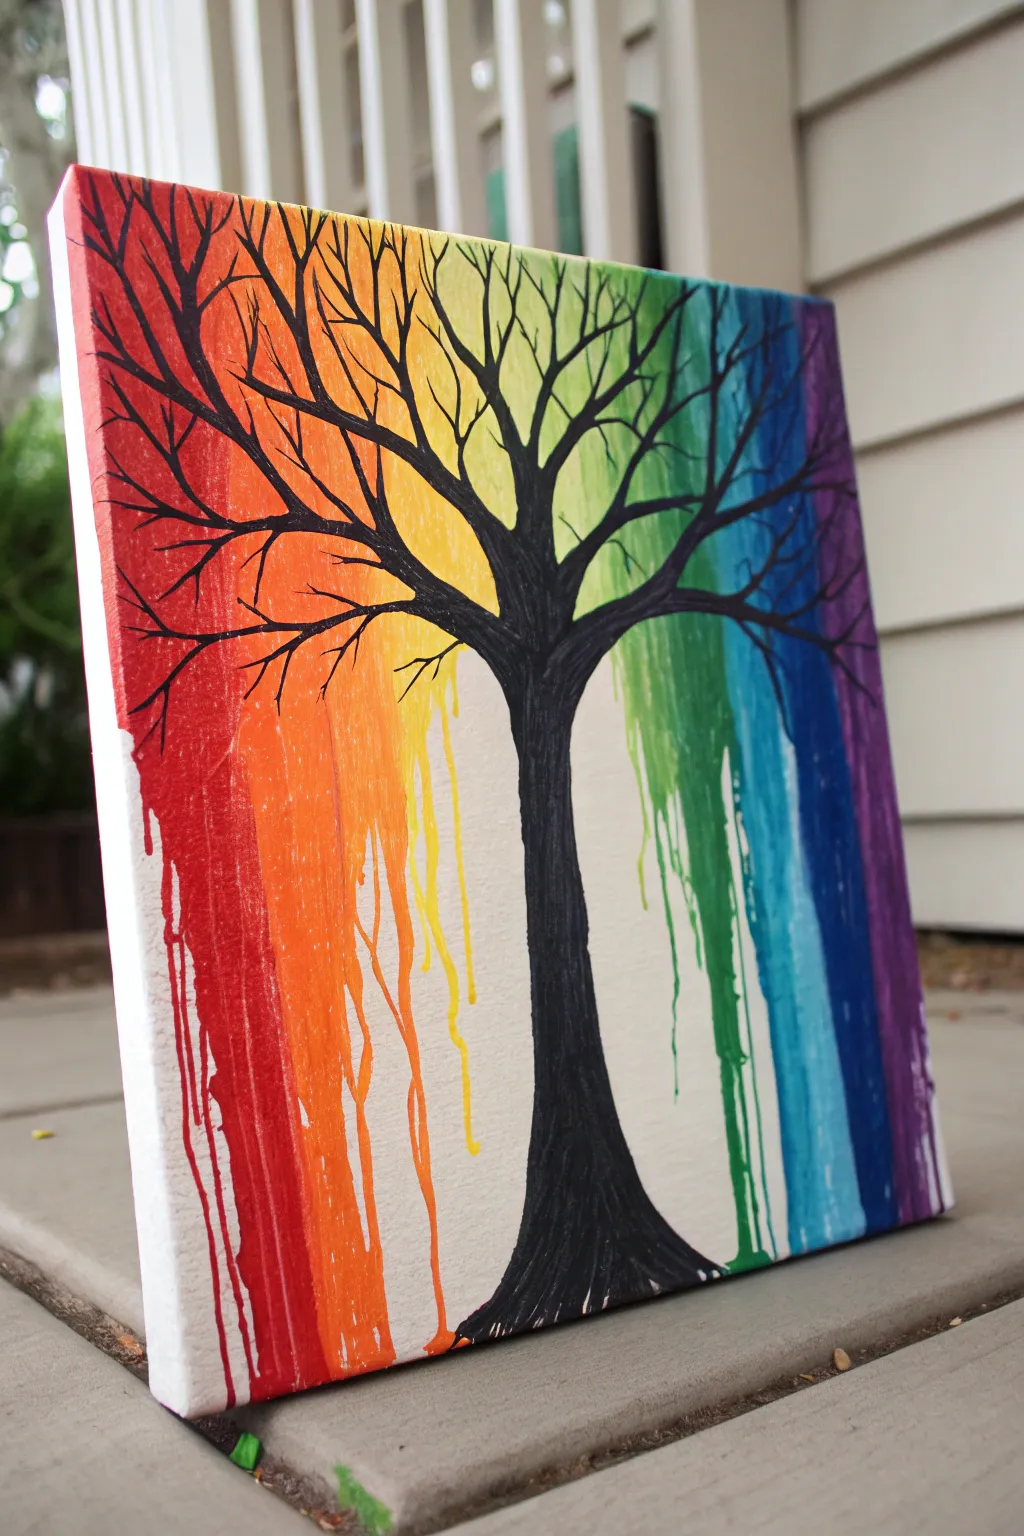
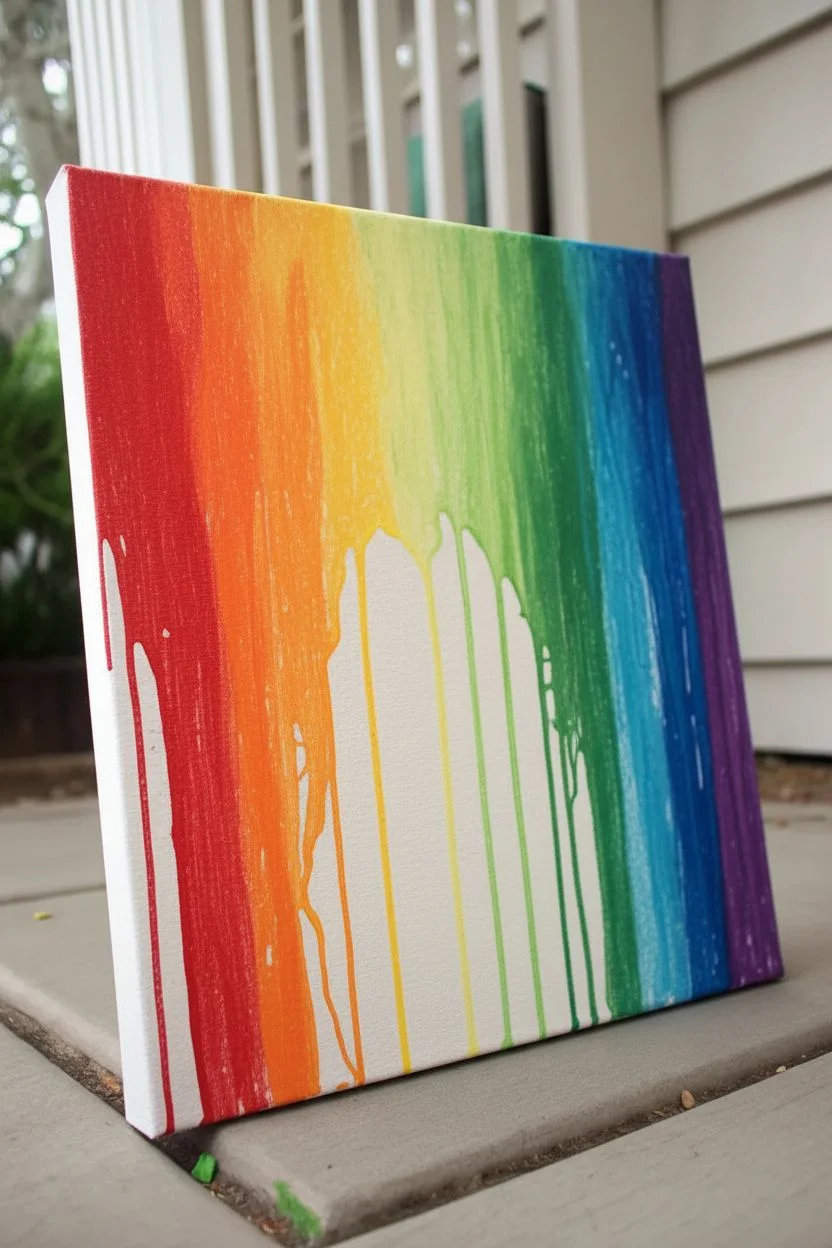
This striking canvas combines the bold simplicity of a silhouette tree with the messy fun of dripping paint. It creates a vibrant, modern piece where a rainbow canopy seems to melt down the canvas in colorful rivulets.
How-To Guide
Materials
- Stretched canvas (e.g., 10×12 or similar)
- Acrylic paints (Red, Orange, Yellow, Light Green, Dark Green, Blue, Purple)
- Black acrylic paint
- Medium flat paintbrush
- Fine liner brush
- Cup of water
- Spray bottle with water (or a pipette)
- Small painting palette or paper plate
- Pencil
- Easel (or a way to prop the canvas up securely)
Step 1: Creating the Background
-
Prepare your colors:
Squeeze out small amounts of your rainbow colors (red, orange, yellow, green, blue, purple) onto your palette. Keep them in order so you’re ready to grab the next shade quickly. -
Paint the top stripes:
Using your flat brush, paint a horizontal band of red across the very top left corner. Immediately follow it with orange next to it, moving towards the right. -
Blend the spectrum:
Continue painting vertical or slightly diagonal bands of color across the top 1/3 of the canvas. Move from red to orange, yellow, greens, blues, and finally purple on the far right edge. -
Smooth transition:
While the paint is still wet, lightly blend the edges where two colors meet to create a seamless gradient transition. -
Start the drips:
While the paint is wet, prop your canvas upright. Heavily load your brush with a watered-down version of the red paint and press it against the bottom of the red section. -
Encourage gravity:
Let the paint run down. If it’s moving too slowly, use a spray bottle to mist the paint lightly, or use a pipette to add a drop of water directly to the color band. -
Repeat for all colors:
Work your way across the rainbow, creating drips for each color section. I find varying the length of the drips makes it look more organic—some should reach the bottom, others can stop midway. -
Dry completely:
Once you are happy with the drips, lay the canvas flat to stop the running. Allow the background to dry completely, which is crucial before adding the black silhouette.
Drips not moving?
If paint won’t run, it’s too thick. Mix a 50/50 ratio of paint and water in a separate cup before applying to the canvas, or mist heavily with water.
Step 2: Painting the Silhouette
-
Sketch the tree:
Lightly use a pencil to sketch the outline of a tree trunk in the center. The trunk should be wider at the base and narrow as it goes up. -
Draft the branches:
Sketch main branches reaching up and out into the colored sections. You want them to fan out like veins, reaching towards the top corners. -
Fill the trunk:
Load your medium brush with black acrylic paint. carefully fill in the trunk shape you sketched, ensuring opaque coverage. -
Create main branches:
Switch to a smaller brush. Paint the thicker main branches extending from the trunk, ensuring the black paint covers over the colorful background clearly. -
Add fine details:
Using your liner brush (or the very tip of a small round brush), paint thin twigs growing off the main branches. -
Extend to the edges:
Bring the delicate black twigs all the way up to the top edge of the canvas, overlaying the rainbow gradient. -
Root the tree:
Paint the very bottom of the canvas black where the trunk meets the edge, creating a small mound or root system to ground the tree. -
Refine edges:
Check your black lines for sharpness. If the canvas texture made any edges rough, go back over them with the liner brush for a crisp silhouette.
Add some sparkle
Once the black paint is fully dry, paint a thin layer of clear glitter glue over the rainbow sections to make the canopy shimmer in the light.
Hang your masterpiece in a spot that needs a pop of color and enjoy the cheerful energy it brings to the room
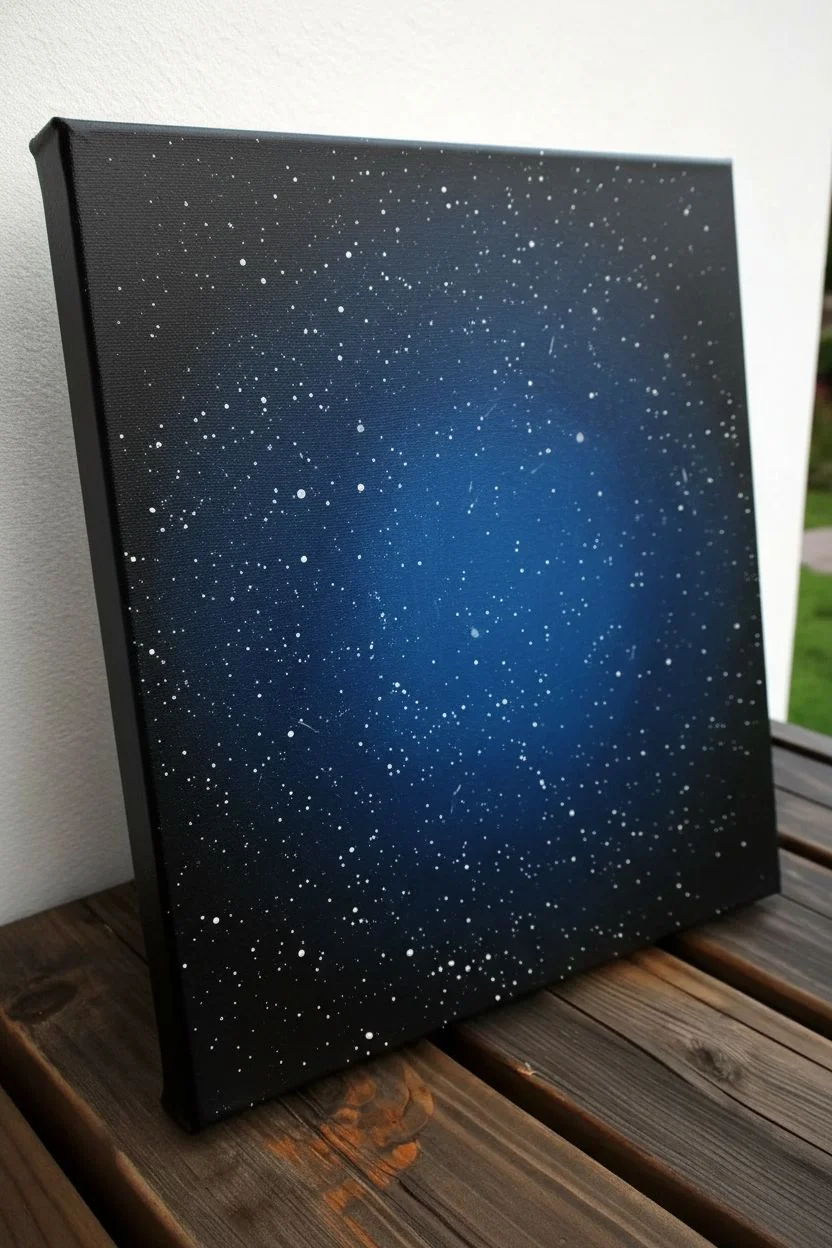
Turn the Canopy Into a Constellation Tree Under a Starry Sky
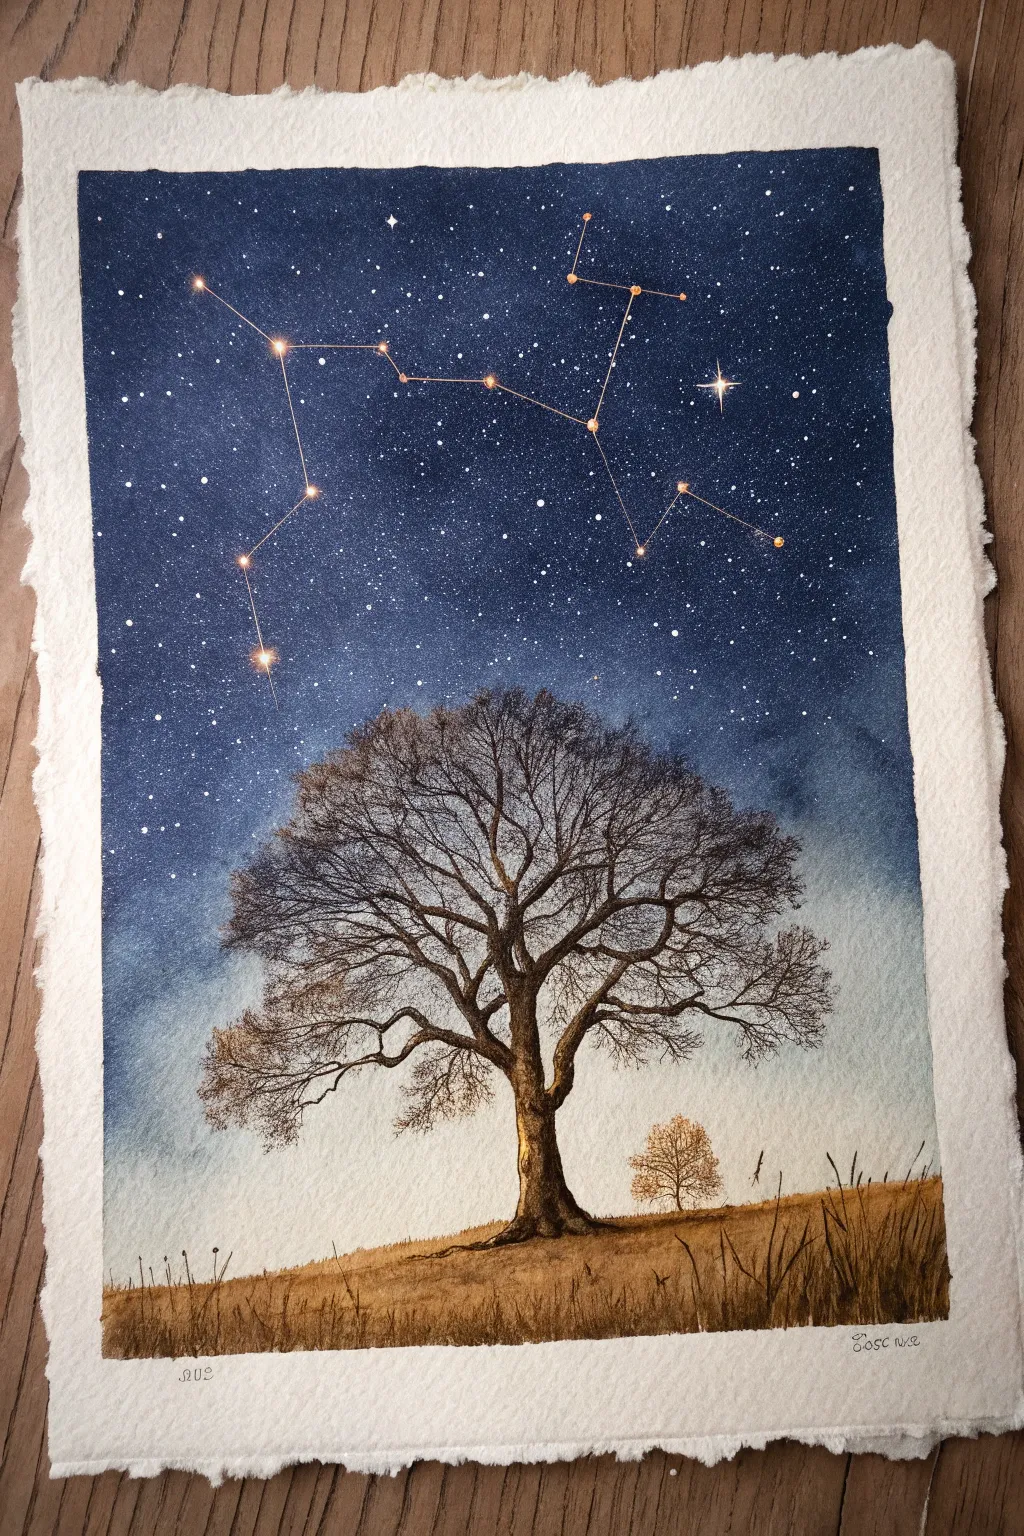
This stunning watercolor project merges the grounded beauty of a winter oak with the celestial wonder of the night sky. By layering deep indigo washes and adding delicate gold details, you will create a piece that feels both expansive and intimate.
Detailed Instructions
Materials
- Cold press watercolor paper (deckled edge preferred, 300gsm)
- Watercolor paints: Indigo, Prussian Blue, Burnt Umber, Yellow Ochre, Sepia
- White gouache or white ink
- Metallic gold watercolor paint or gold ink pen
- Masking fluid (optional)
- Round brushes: Sizes 8 or 10 (for washes), 4, and 00 (for details)
- Ruler
- Pencil and eraser
- Salt (table salt)
- Paper towels and two jars of water
Step 1: Setting the Scene
-
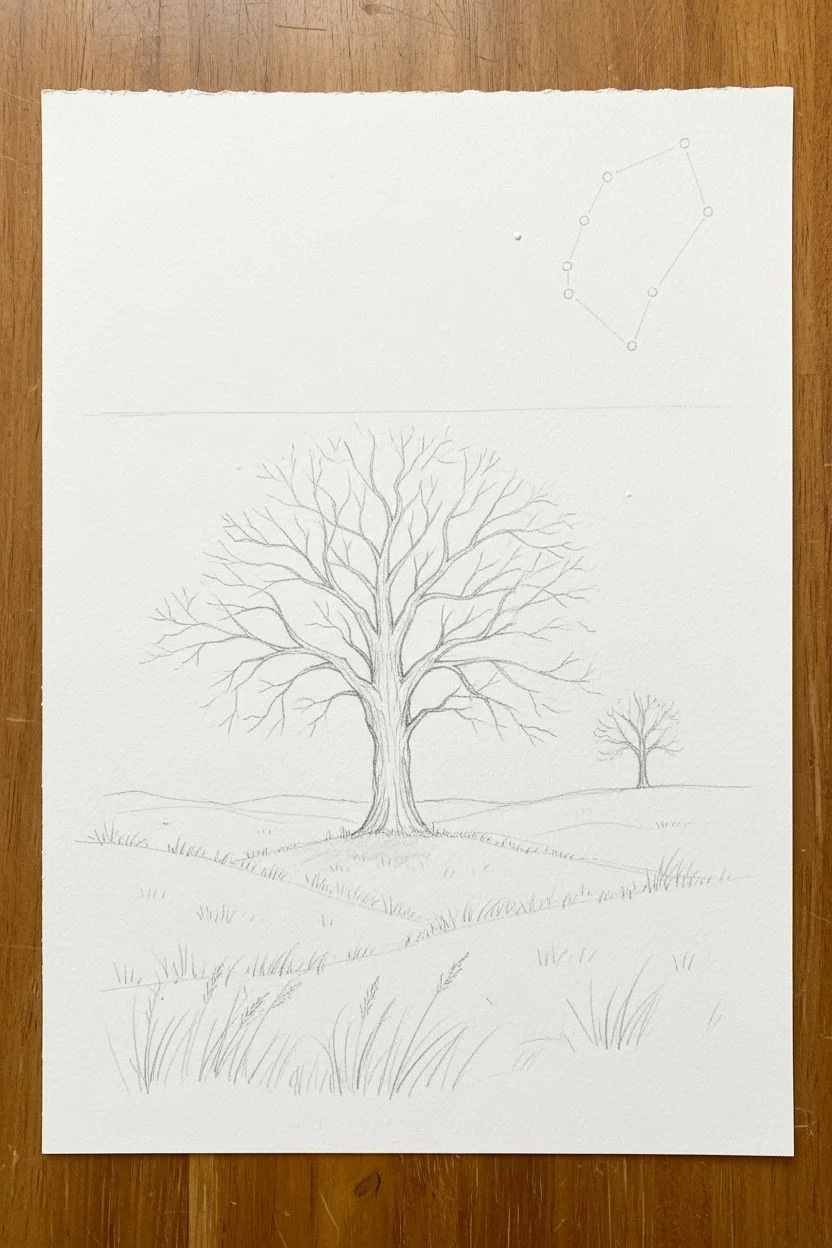
Plan your constellation:
Before wetting the paper, lightly sketch the horizon line about one-fifth of the way up the page. Choose a constellation—the Virgo constellation is used in the example—and lightly mark the position of its main stars in the upper sky with a pencil. -
Outline the tree:
Sketch the main trunk and primary branches of the large tree in the center. Don’t worry about the tiny twigs yet; just get the main skeletal structure down so you know where to preserve the lighter colors later. -
Masking stars (optional):
If you want pure white stars, use a fine applicator to dot masking fluid where your main constellation stars will be. Let this dry completely before painting.
Bloom Patrol
If you get ‘cauliflower’ blooms in your sky, don’t panic. They look like nebulas! If unwanted, wait until it’s dry and gently lift the edge with a damp stiff brush.
Step 2: Painting the Sky
-
Identify the light source:
Visualize a glow radiating from the horizon upward. We want the sky near the ground to be lighter and the top of the painting to be the deepest dark. -
Wet-on-wet technique:
With your largest clean brush, wet the entire sky area with clear water, stopping carefully at the horizon line. The paper should be glistering but not swimming in puddles. -
Apply the first wash:
Load your brush with a watery mix of Prussian Blue. Start brushing near the horizon, keeping it very pale, and gradually add more pigment as you move upward. -
Deepen the cosmos:
While the paper is still wet, mix a thick, creamy consistency of Indigo. Drop this dark color into the top third of the painting, tilting the board slightly to let it flow downward into the lighter blue. -
Create background stars:
Wait for the shine to *just* leave the paper (damp, not wet). Dip an old toothbrush or stiff brush into white gouache and flick tiny specks across the upper dark sky for distant stars. -
Let it dry:
Allow the sky layer to dry completely. This is crucial—if you paint the tree too soon, the brown will bleed into your beautiful blue sky.
Step 3: Painting the Earth & Tree
-
Paint the golden grass:
Mix Yellow Ochre with a touch of Burnt Umber. paint the foreground using upward, flicking strokes to mimic tall, dry grass. Let the color vary, adding more brown near the bottom edge. -
Add foreground texture:
While the grass is damp, use a detail brush with concentrated Sepia to flick in individual tall blades of grass in the bottom corners. -
Base layer of the tree:
Mix Burnt Umber and Sepia. Using a size 4 brush, paint the trunk and main thick branches. Keep the lighter side of the tree (left side in our example) slightly paler to suggest moonlight. -
Adding fine branches:
Switch to your size 00 or 000 brush or a rigger brush. With a very inky mix of dark brown/black, pull distinct lines outward from the main branches to create the delicate canopy. -
Connect the canopy:
The secret to a realistic winter tree is crossing branches. Don’t just paint them fanning out; ensure some cross over each other to create that dense, tangled look. -
Add the smaller tree:
Paint the smaller, distant tree using a lighter, more watered-down brown. This atmospheric perspective helps push it into the background.
Level Up: Zodiac Gift
Customize this for a birthday gift by painting the specific zodiac constellation of the recipient in gold over the tree canopy.
Step 4: Celestial Details
-
Reveal the stars:
If you used masking fluid, gently rub it away with your finger or a rubber cement pickup to reveal the white paper underneath. -
Enhance the constellation:
Using white gouache or a gel pen, add a tiny cross-shape sparkle to the brightest star. Dot over your masked stars to make them crisp. -
Map the connections:
With a ruler and a gold gel pen or a fine brush with metallic gold paint, draw very thin, straight lines connecting the stars of your chosen constellation. -
Highlighting the stars:
Add a small dot of gold paint directly on top of the main constellation stars. This makes them catch the light when viewed from an angle. -
Final tree highlights:
I like to take a tiny bit of the gold paint and dry-brush it strictly onto the right side of the tree trunk, suggesting a reflection of the starlight on the bark.
Step back and admire how a few simple splashes of color transformed into a vast, starlit evening


Have a question or want to share your own experience? I'd love to hear from you in the comments below!