
When I need an instant mood boost in the studio, I reach for tropical colors—those juicy greens, hot pinks, and glowing ocean blues. Here are my favorite tropical painting ideas, starting with the classics and ending with a few playful twists that’ll keep your brush curious.
Palm Tree Sunset Silhouettes
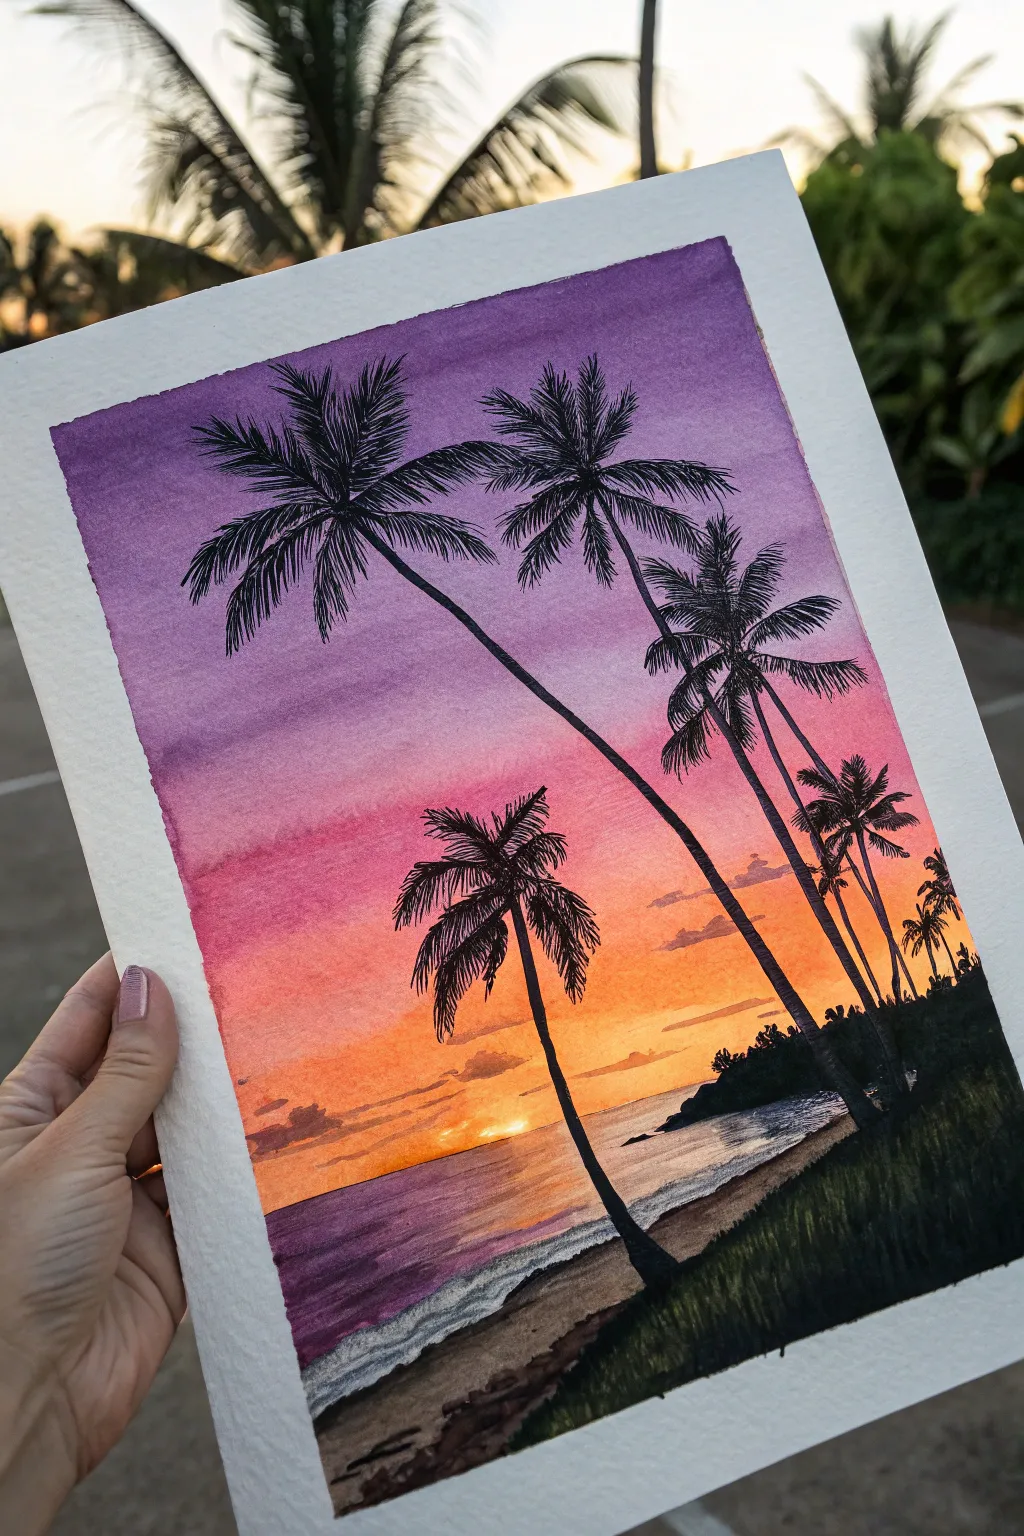
Capture the magic of a fading day with this vibrant watercolor tutorial featuring striking black palm silhouettes against a gradient sky. You’ll layer rich purples, pinks, and oranges to create a glowing sunset backdrop that perfectly frames the delicate foliage.
How-To Guide
Materials
- Cold press watercolor paper (140 lb/300 gsm)
- Watercolor paints (Violet, Magenta/Rose, Cadmium Orange, Yellow Ochre)
- Black gouache or waterproof black ink
- Masking tape
- Flat wash brush (3/4 inch)
- Small round detail brush (size 0 or 1)
- Medium round brush (size 6)
- Jar of clean water
- Paper towels
- Mixing palette
Step 1: Setting the Scene
-
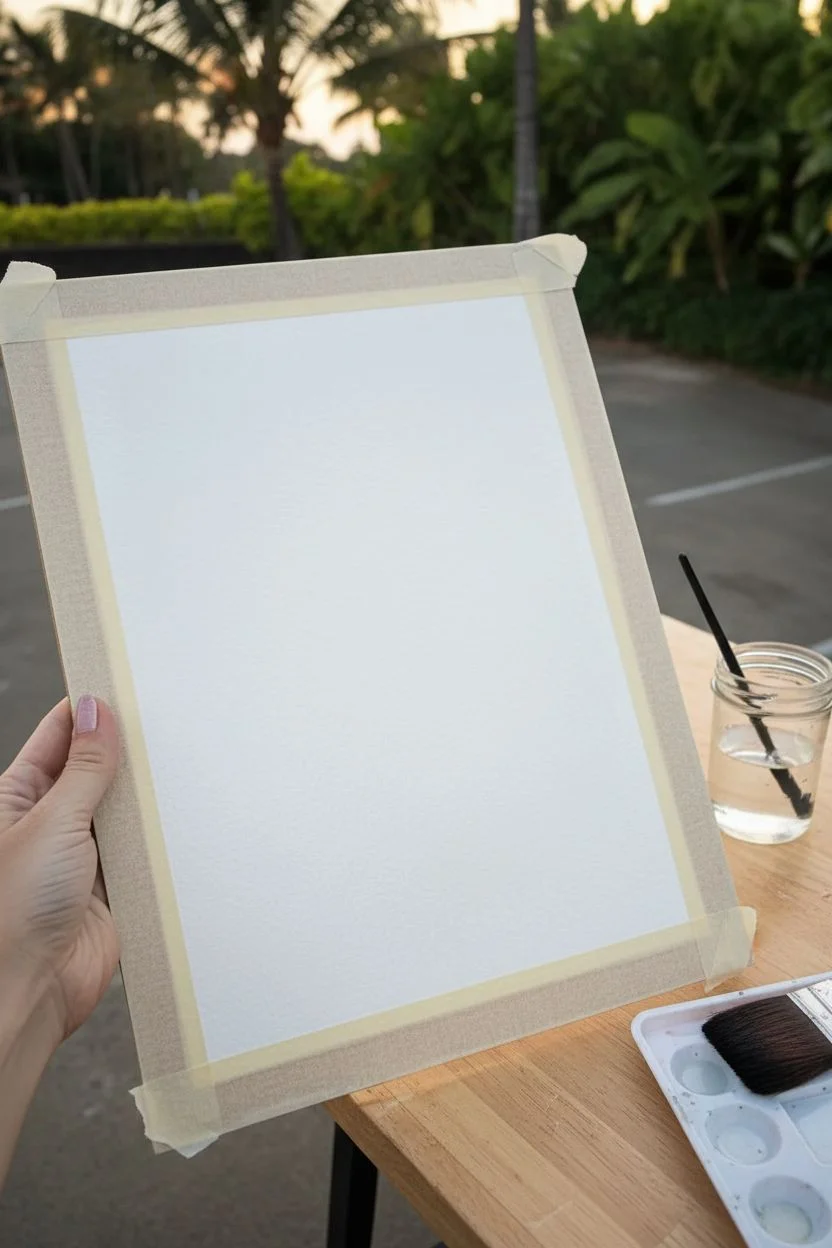
Tape and Prep:
Begin by taping down all four edges of your watercolor paper to a rigid board using masking tape. This creates a crisp clean border and prevents the paper from buckling during the heavy wash stage. -
Pre-wet the Sky:
Using your flat wash brush and clean water, gently wet the entire sky area, stopping about an inch above the bottom edge where the ocean will be. The paper should be glisten with sheen but not have puddles.
Don’t Fear the Dark
Use opaque black gouache instead of black watercolor for the trees. Gouache is matte and solid, creating a much stronger, flatter silhouette against the luminous sky.
Step 2: Painting the Gradient Sky
-
The Violet Top:
Load your flat brush with a saturated violet mix. Apply this to the top third of the paper, using horizontal strokes. Since the paper is wet, the edges will soften naturally. -
Transition to Pink:
Clean your brush slightly and pick up a vibrant magenta or rose color. Apply this directly below the violet, allowing the two colors to bleed together where they meet for a seamless purple-to-pink gradient. -
Adding the Glow:
Switch to Cadmium Orange. Paint the next section down, blending it upwards into the pink. Finally, near the horizon line, mix in a little Yellow Ochre for the brightest part of the sunset. -
Create Clouds:
While the sky is still damp, lift out a few soft shapes using a clean, slightly thirsty brush or a crumpled tissue to suggest distant clouds. You can also dab in faint touches of purple-grey for cloud shadows. -
Dry Completely:
This is crucial: let the sky wash dry completely. The paper must be bone-dry and flat before you add the horizon or silhouettes to prevent bleeding. I usually use a hair dryer on low heat to speed this up.
Step 3: Ocean and Sand
-
Painting the Ocean:
Mix a diluted purple-blue tone. Paint the water area below the horizon, leaving a small gap of white paper right at the sun’s reflection point. Keep your strokes horizontal to mimic waves. -
Sun Reflection:
Drop a tiny amount of concentrated orange into the wet paint right below the sun’s position on the horizon, letting it bleed downwards into the purple water for a glowing reflection. -
The Shoreline:
Once the water is semis-dry, paint a diagonal swoop of sandy brown (burnt sienna mixed with yellow ochre) across the bottom right corner for the beach. -
White Foam:
Leave a thin, jagged line of unpainted white paper between the purple ocean and the brown sand to represent the crashing wave foam.
Splatter Stars
For a night-time twist, wait until the sky is dry, cover the bottom half with paper, and flick white gouache or acrylic ink across the purple section to add stars.
Step 4: Silhouettes and Details
-
Outline the Trunk:
Using black gouache and your medium round brush, paint the trunk of the main palm tree starting from the bottom right, curving elegantly upwards and to the left. Taper the stroke so it’s thinner at the top. -
Secondary Trees:
Add two or three smaller, thinner trunks sloping towards the right side of the paper. Vary their heights and angles to make the composition feel natural. -
Frond Structure:
Switch to your smallest detail brush. At the top of each trunk, paint 5-7 curved lines radiating outward like a firework explosion. These are the spines of the palm fronds. -
Leaf Details:
Ideally, start from the spine and flick your brush outwards with quick, short strokes to create the jagged leaves. Keep these strokes very fine and close together. -
The Beached Slope:
Fill in the bottom right land mass with solid black. Use short, upward flicking strokes along the top edge of this black mass to simulate dune grass silhouetted against the light. -
Island Distances:
Paint a small, bumpy black shape on the distant horizon line to represent a far-off island. Keep it small to create a sense of depth. -
Final Reveal:
Wait for the black gouache to be fully dry. Carefully peel away the masking tape at a 45-degree angle to reveal your crisp white borders.
Frame your new tropical masterpiece and enjoy the warmth it brings to your space


Turquoise Shoreline With Gentle Waves
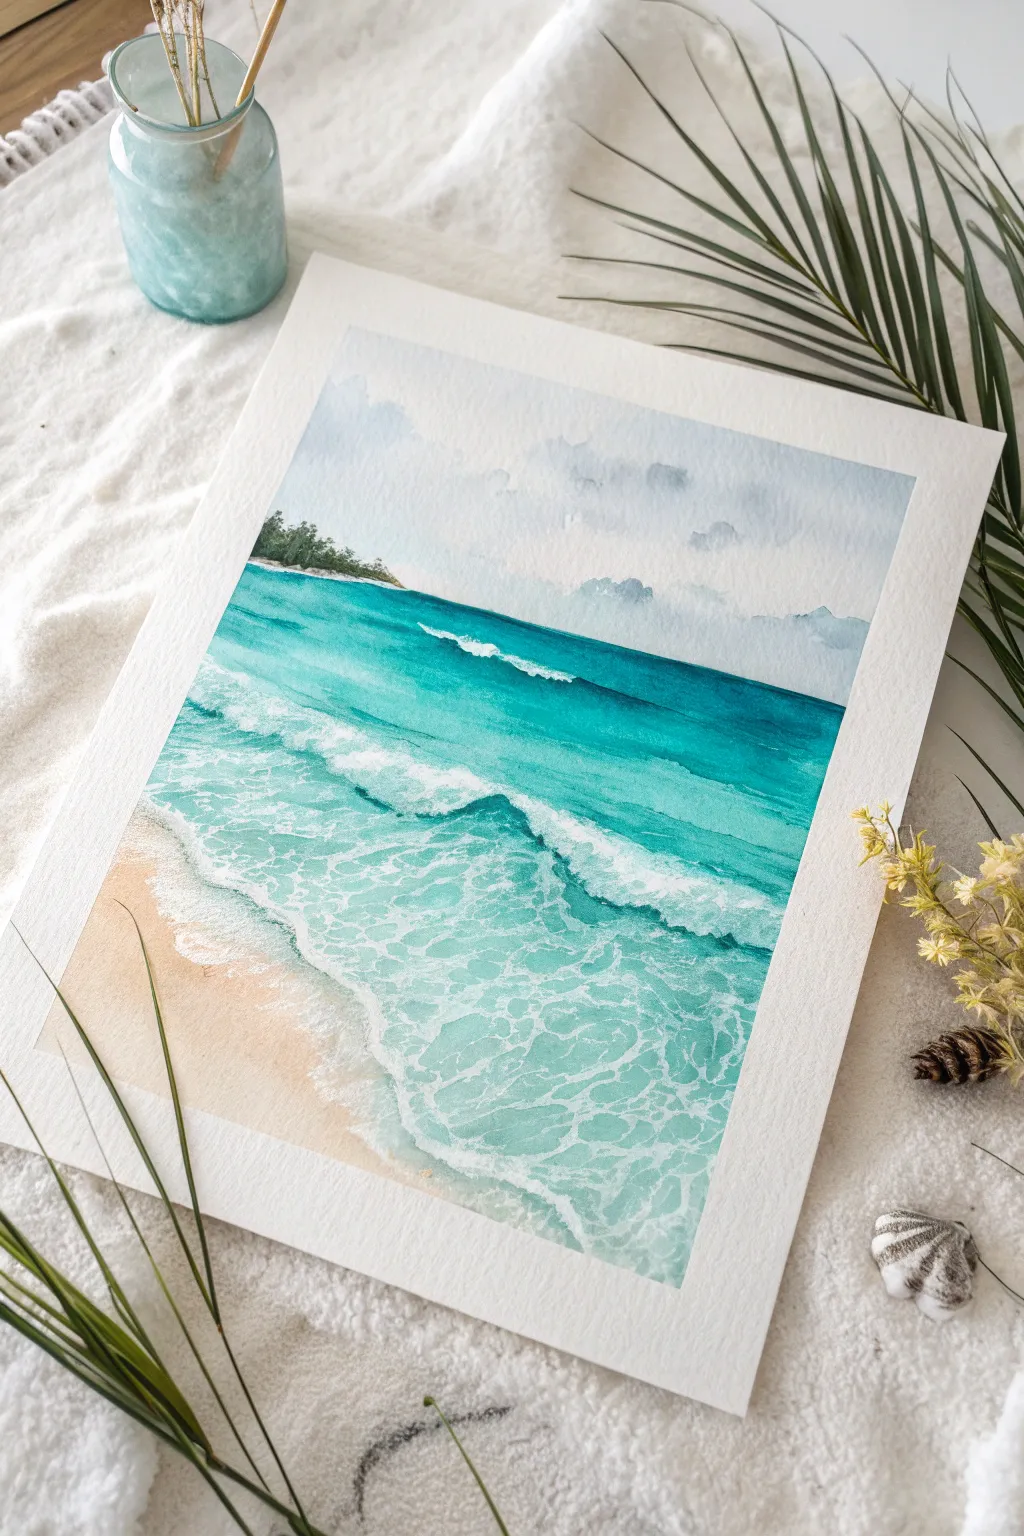
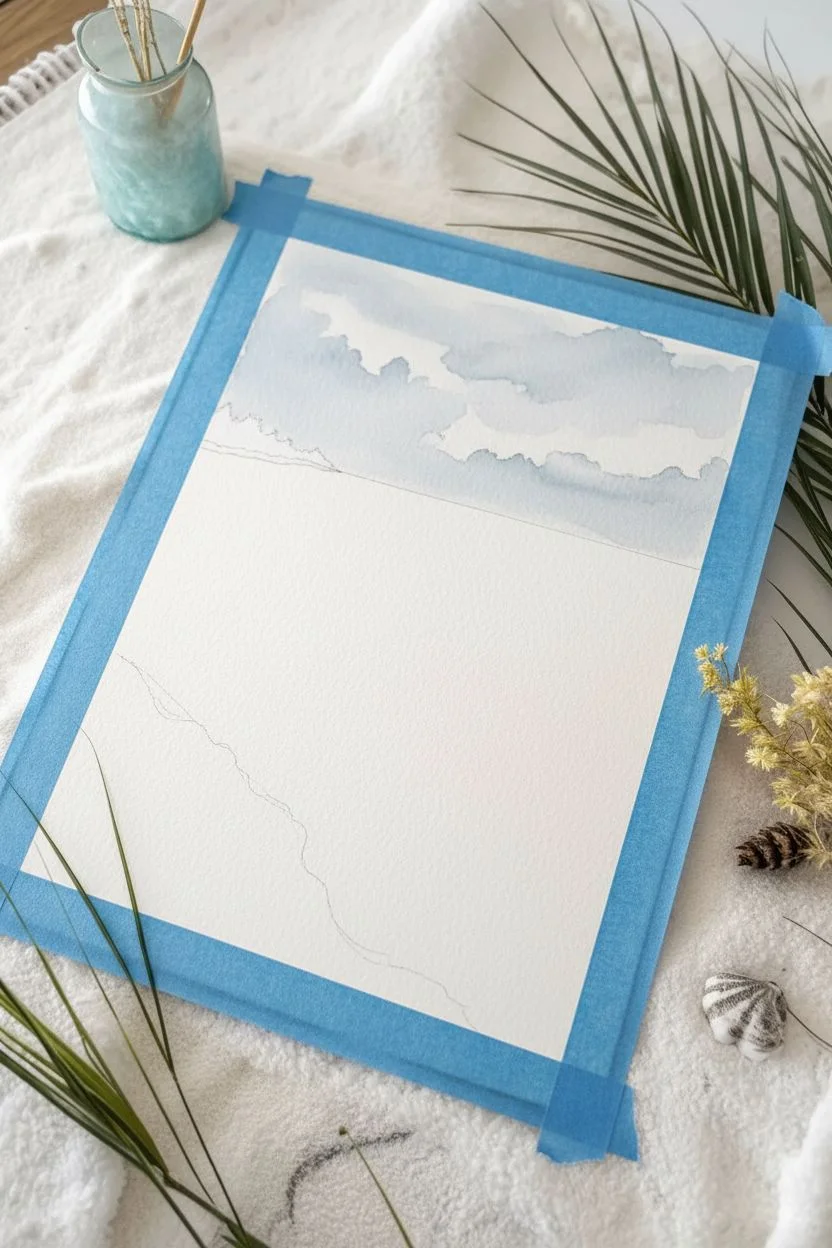
Capture the serene beauty of a tropical beach with this vibrant watercolor project that focuses on gradient washes and realistic foam textures. The striking contrast between the deep teal horizon and the translucent shoreline creates a mesmerizing depth, perfect for bringing a piece of paradise into your home.
Detailed Instructions
Materials
- Cold press watercolor paper (300 gsm or heavier)
- Painter’s tape or washi tape
- Watercolor paints: Phthalo Blue, Phthalo Green, Indigo, White Gouache, Yellow Ochre, Burnt Sienna
- Flat wash brush (large)
- Round brushes (sizes 4 and 8)
- Fine liner brush or rigger brush
- Two jars of water
- Paper towels
- Palette for mixing
- Pencil (HB)
Step 1: Preparation and Sky
-
Secure the paper:
Tape down all four edges of your watercolor paper to a board using painter’s tape. This prevents buckling and creates a crisp white border. -
Sketch the horizon:
Lightly draw a straight horizontal line about two-thirds up the paper for the horizon. Below that, sketch a gentle, curving diagonal line for the shoreline where the sand meets the water. -
Wet the sky area:
Using your large flat brush, apply clean water to the sky area above the horizon line. Ensure the paper is evenly damp but not soaking wet. -
Paint the clouds:
Mix a very dilute wash of Indigo and a touch of Burnt Sienna to create a soft grey-blue. drop this loosely into the wet sky, leaving plenty of white paper untouched to represent fluffy clouds. -
Refine the sky:
While the sky is still damp, you can soften any hard edges with a clean, damp brush. Let this section dry completely before moving on.
Step 2: The Deep Ocean
-
Mix the ocean deeps:
Combine Phthalo Blue, Phthalo Green, and a tiny bit of Indigo to create a rich, deep teal color for the furthest water. -
Paint the horizon line:
With a steady hand and a size 8 round brush, paint a sharp line right against the horizon. Fill usually the top distinctive band of water with this darkest mix. -
Create a gradient:
As you move downwards, add more water to your brush and slightly more Phthalo Green to the mix. This lightens the color as the water gets ‘shallower’ and closer to the viewer. -
Island detail:
While the ocean dries, paint the tiny island on the left horizon using a mix of Indigo and Sap Green. Use the tip of your brush to stipple tiny vertical strokes suggesting distant pine trees.
Gouache Too Transparent?
If your white foam disappears as it dries, your gouache is too watered down. Let it dry, then apply a second layer using paint straight from the tube with minimal water.
Step 3: Waves and Shoreline
-
Mid-ocean transition:
For the middle section of the water, use a bright turquoise (lots of Phthalo Green and Blue). Paint horizontal strokes, leaving occasional gaps of white paper where the wave crests will be. -
Paint the sand:
Mix a wash of Yellow Ochre with a tiny hint of Burnt Sienna. Apply this to the sand area at the bottom left, fading it out gently as it meets the future whitewater area. -
Shadowing the waves:
Once the base turquoise is dry, mix a slightly darker version of that color. Paint underneath the white gaps you left earlier to create the shadow of the rolling wave. -
The shallow wash:
For the water gliding over the sand, use a very watery, pale turquoise. Glaze this slightly over the edge of the sand to make it look wet.
Level Up: Splatter Texture
Load an old toothbrush with white gouache and flick it over the crashing wave area. Use a piece of paper to mask the sky so you only get spray on the water.
Step 4: Foam and Details
-
Prepare the gouache:
Squeeze out some white gouache. You want a creamy consistency—opaque enough to cover the blue, but fluid enough to flow off a liner brush. -
Paint the main wave crest:
Using a fine liner brush, paint the jagged, broken top edge of the crashing wave in the middle. Use quick, jittery strokes. -
Create sea foam patterns:
In the shallow turquoise area, paint interconnected, web-like shapes with the white gouache. These organic irregular shapes mimic sea foam cells. -
Enhance the shoreline:
Stipple white gouache along the very edge of the sand where the water laps up. I like to tap the paint with my finger slightly to soften it. -
Final highlights:
Add a few sparkles or distinct white lines on the distant deep blue waves to suggest movement further out to sea. -
Reveal:
Wait until the painting is bone dry. Carefully peel away the painter’s tape at a 45-degree angle to reveal your clean edges.
Frame your masterpiece in white or light wood to enhance those gorgeous tropical blues


Monstera Leaf Flat Lay Study
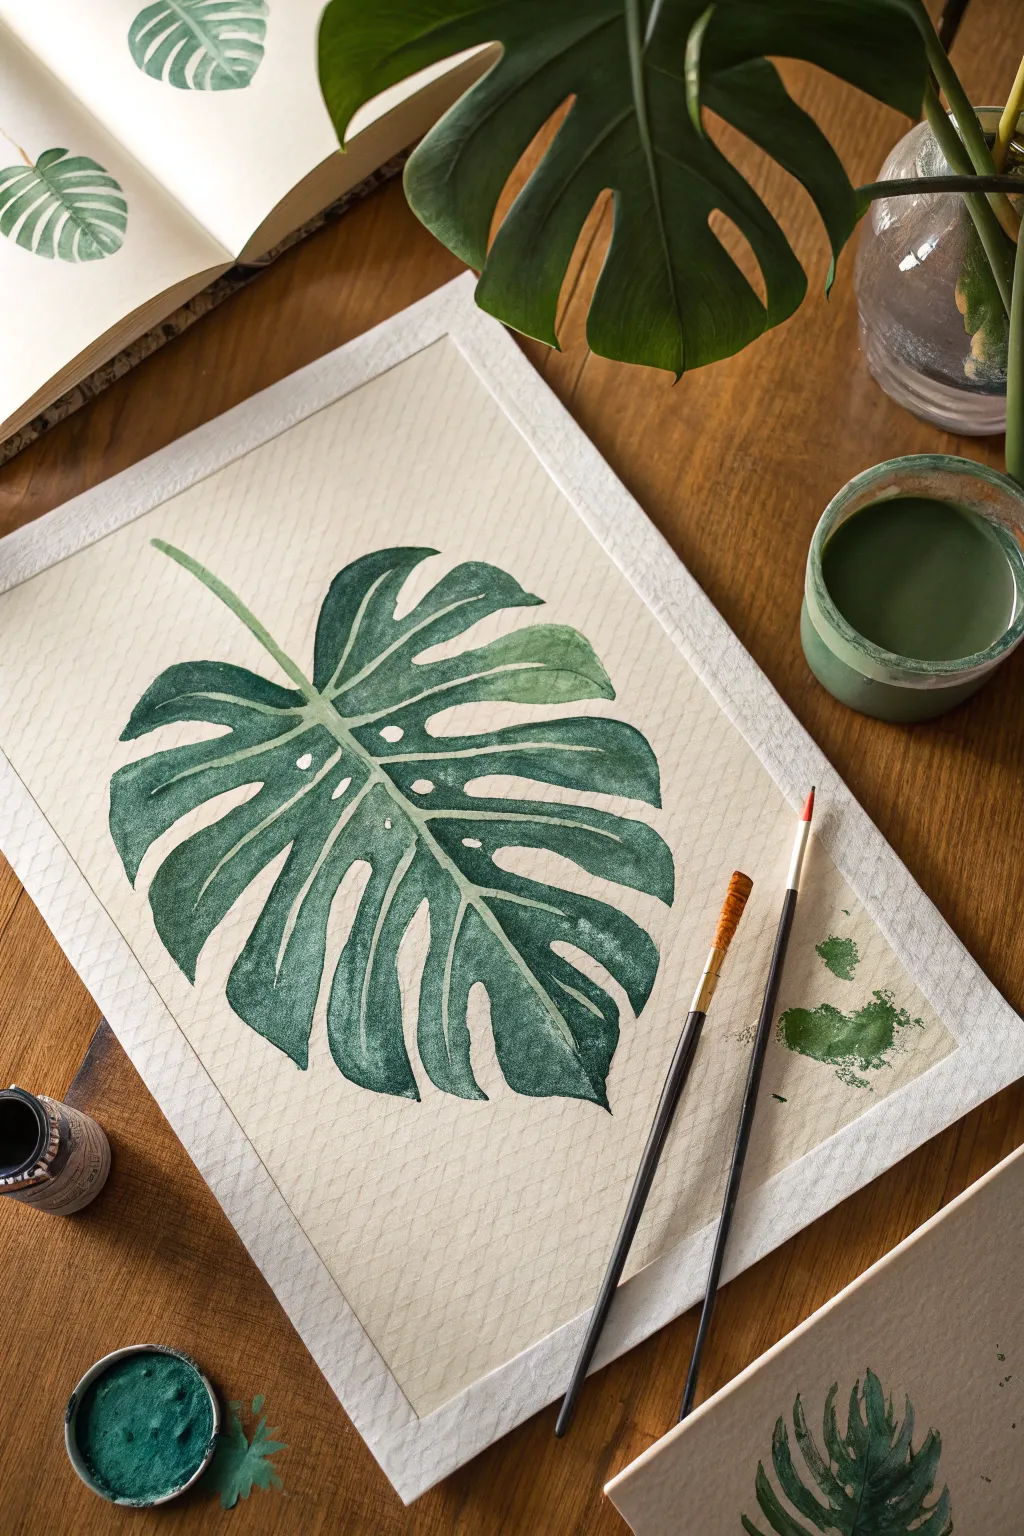
Capture the lush beauty of the tropics with this detailed watercolor study of a Monstera Deliciosa leaf. The finished piece features deep, verdant greens and delicate fenestrations, set against a creamy, textured background that evokes the charm of a vintage botanical print.
How-To Guide
Materials
- Cold press watercolor paper (A3 or similar large size)
- Masking tape or painter’s tape
- Watercolor paints (Sap Green, Hooker’s Green, Prussian Blue, Burnt Umber)
- Small jar of white gouache (optional for highlights)
- Round brushes (flats sizes 4, 8, and a fine liner for details)
- Pencil (HB or H for light sketching)
- Kneaded eraser
- Palette for mixing
- Two jars of water (one for clean, one for dirty)
- Paper towels
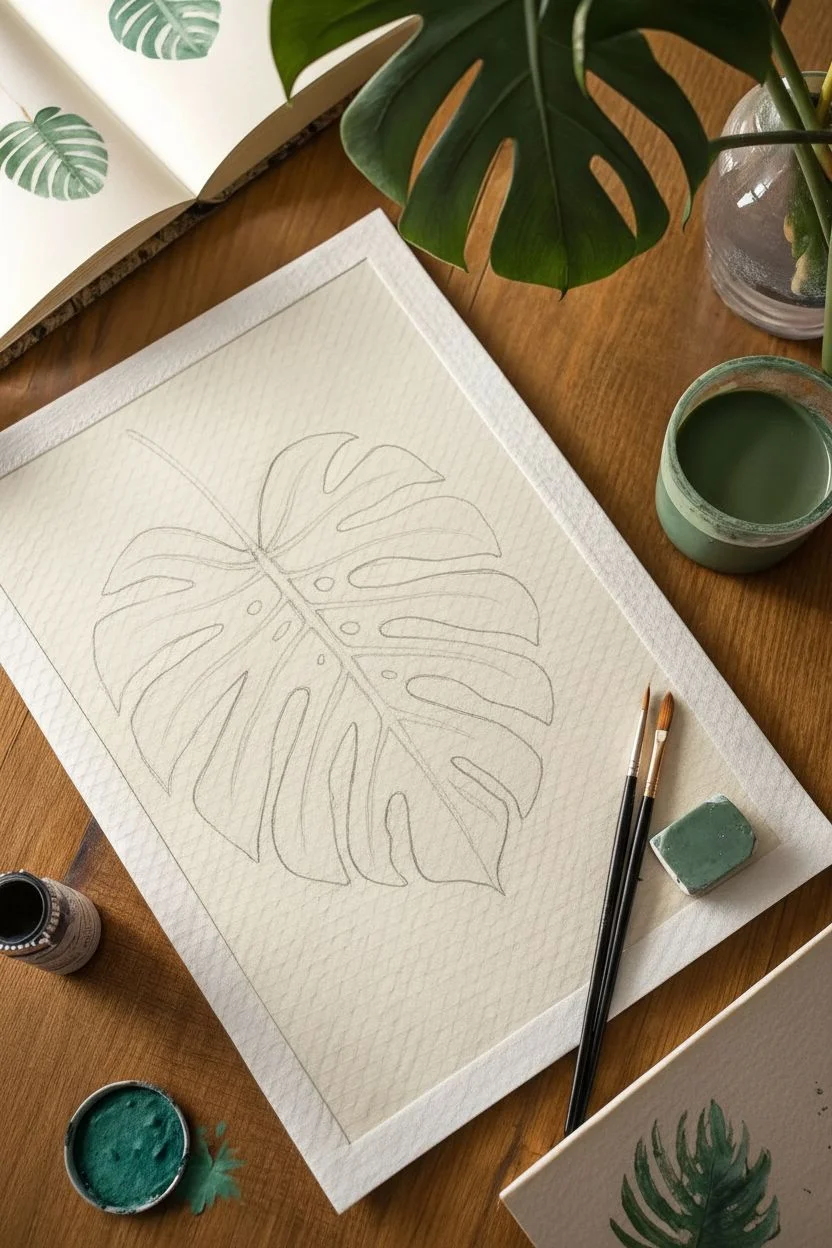
Step 1: Preparation & Sketching
-
Prepare your surface:
Begin by securing your watercolor paper to a board or table using masking tape around all four edges. This creates a clean white border and prevents the paper from buckling when wet. -
Map the central vein:
With a hard pencil like an H grade, lightly draw a curved line originating from the top left-center, swooping down towards the bottom right. This will act as the spine of your leaf. -
Outline the leaf shape:
Sketch a large, heart-shaped perimeter around the spine. Don’t worry about the holes yet; just focus on getting the broad, overall silhouette of the leaf centered on your paper. -
Add the fenestrations:
Now, carve out the iconic splits and holes. Draw deep indentations coming from the outer edge toward the midrib, leaving connecting tissue in between. Add a few oval holes (fenestrations) near the center spine. -
Refine and lighten:
Go over your sketch to refine the shapes of the leaf segments. Once happy, gently roll a kneaded eraser over the entire drawing to lift excess graphite, leaving only a faint guide visible.
Don’t rush the drying
Watercolor dries lighter than it looks when wet. If your greens look too dark initially, wait for them to dry before trying to lighten them.
Step 2: Painting the Base Layer
-
Mix your greens:
On your palette, prepare three pools of color: a light, watery yellow-green for the veins; a mid-tone sap green; and a dark mix using Hooker’s Green with a touch of Prussian Blue and Burnt Umber for shadows. -
Paint the midrib:
Using your size 4 brush and the lightest green mix, carefully paint the central stem and the main veins radiating into each leaf segment. Keep this layer pale and translucent. -
Start with a light wash:
While the veins are drying, lay down a very pale, watery wash of the mid-tone green over the entire leaf area, carefully painting around any internal white highlights if you plan to leave paper white. -
Dry completely:
Let this initial ‘tea wash’ layer dry completely. The paper should feel cool to the touch but not damp before you proceed to darker values to prevent unwanted bleeding.
Fixing bloom marks
If water drops create ‘cauliflower’ blooms on the leaf, wait for it to dry, then gently scrub the edge with a damp stiff brush to soften the hard line.
Step 3: Building Depth & Detail
-
Apply mid-tones:
Switch to a size 8 brush. Load it with your mid-tone sap green mix. Paint each leaf segment individually, starting from the center vein and pulling the color outward. -
Create gradients:
As you paint each segment, drop a tiny bit of water on the outer edge of the stroke to soften it, or add a dot of darker paint near the vein to start building a natural gradient. -
Define the veins:
Carefully paint negative space around the lighter veins you established earlier. By painting the leaf tissue darker while leaving thin strips of the pale under-layer untouched, the veins will emerge distinctly. -
Deepen the shadows:
Using your darkest green mixture (the one with Prussian Blue), glaze over the areas where the leaf would naturally curve away from the light. I tend to focus this dark pigment closest to the central midrib. -
Refine the edges:
Use the tip of your brush to crisp up the edges of the splits and holes. These edges should be sharp and clean to emphasize the graphic quality of the Monstera shape. -
Add texture:
Once the main layers are dry, dry-brush a little texture onto the larger leaf segments using a semi-dry brush with dark green paint. This mimics the subtle ridges and imperfections of a real leaf. -
Final highlights:
If you lost any highlights during the process, mix a tiny amount of white gouache with pale green and gently reinstate a few light spots or refine a lost vein line. -
Reveal the border:
Allow the painting to dry completely—ideally for at least an hour. Then, slowly peel away the masking tape at a 45-degree angle to reveal your crisp, clean white border.
Frame your new botanical study in a simple wood frame to complement the organic tones.


Palm Frond Brushstroke Practice Sheet
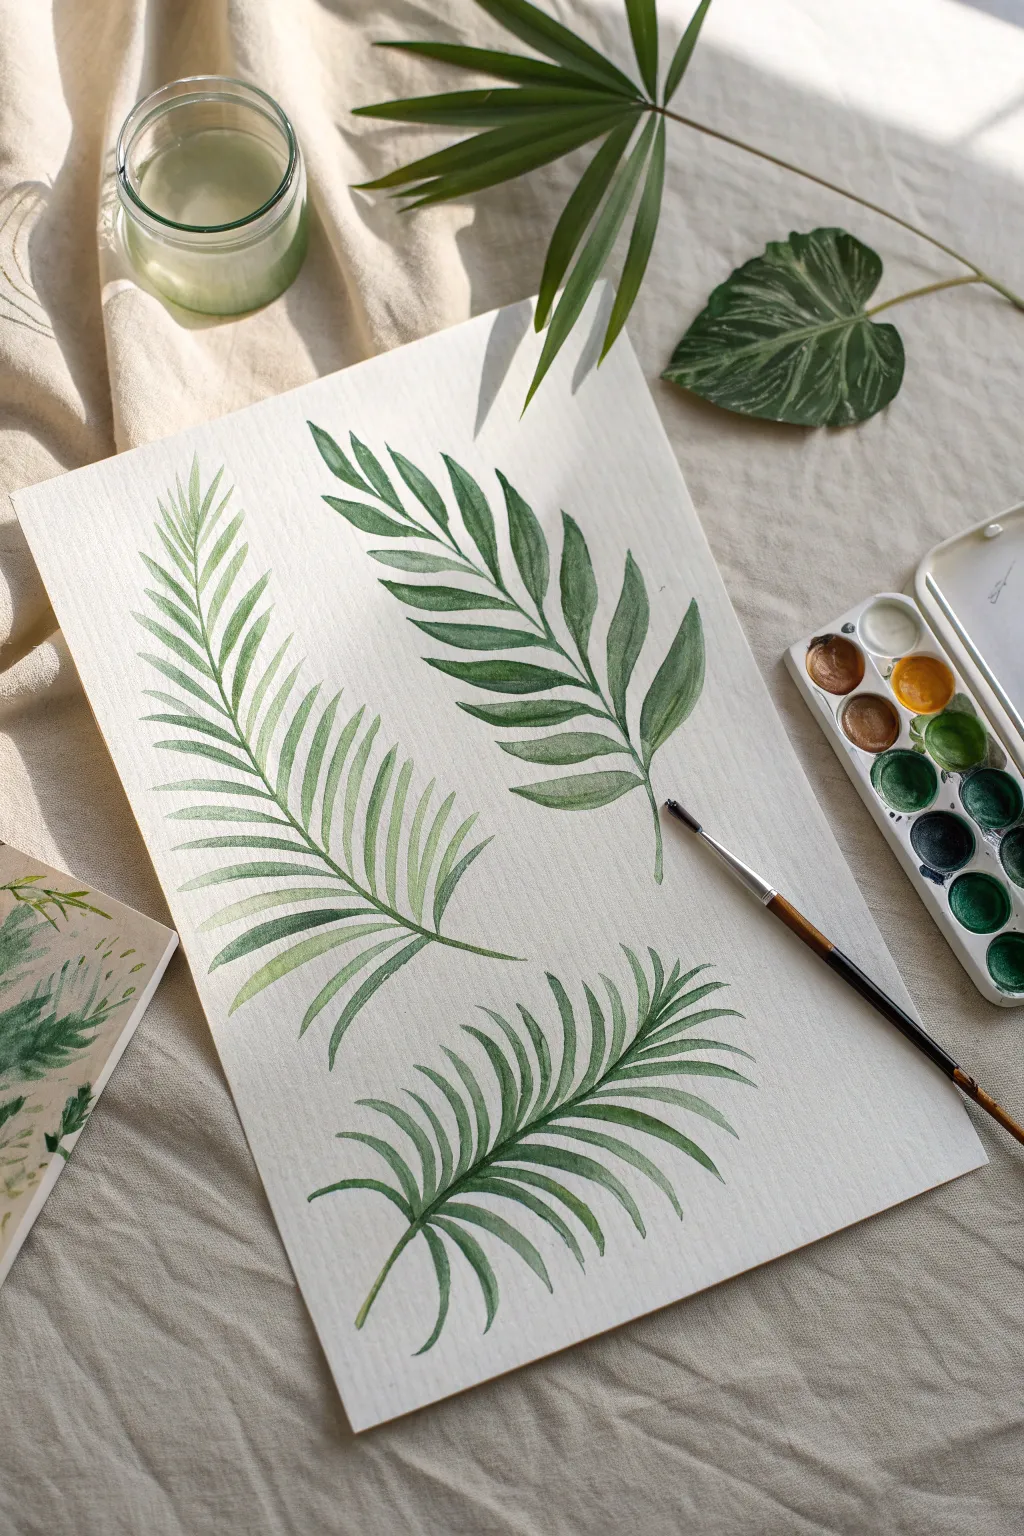
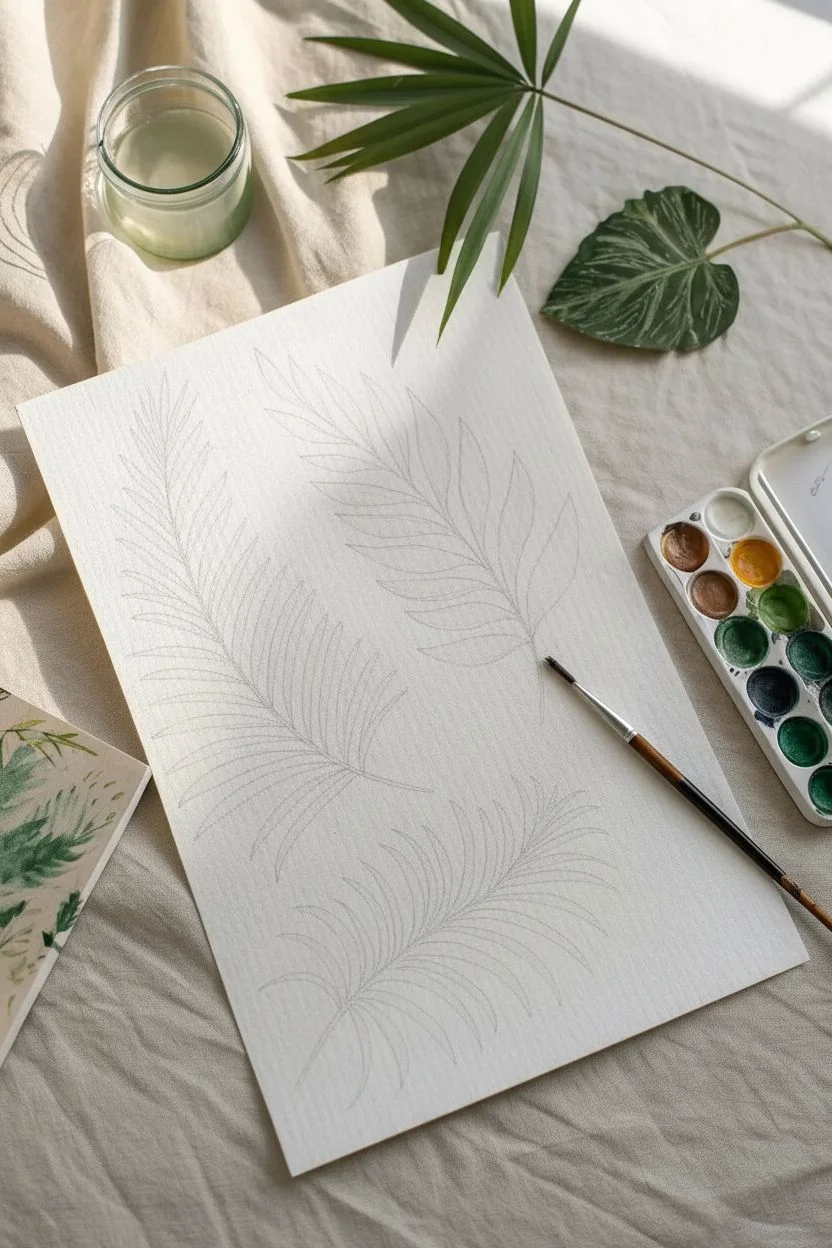
Master the art of botanical illustration with this calming study of three distinct palm leaf shapes. This practice sheet focuses on varying brush pressures and green tonal values to create realistic, feathery tropical foliage.
Step-by-Step Tutorial
Materials
- Cold press watercolor paper (approx. 300 gsm)
- Round watercolor brush (size 4 or 6)
- Small fine liner brush (size 0 or 1)
- Watercolor paints (Sap Green, Hooker’s Green, Burnt Umber, Yellow Ochre)
- Jar of clean water
- Paper towels
- Pencil (HB or H for light sketching)
- Mixing palette
Step 1: Preparation & Color Mixing
-
Pre-mix your greens:
Before touching paper, create three distinct puddles of green on your palette. Mix a bright, yellow-heavy green (Sap Green + Yellow Ochre), a deep shadow green (Hooker’s Green + tiny touch of Burnt Umber), and a standard mid-tone green. -
Sketch the spines:
Very lightly draw three curved lines on your paper to act as the central spines (rachis) for your leaves. Keep these lines faint so they don’t show through the final paint layer. -
Plan the leaflet direction:
Draw faint directional guides extending from the spines to map out where the leaflets will flow. The top left leaf should have long, upward-curving strokes; the top right is broader with wider leaves; the bottom one is more compact.
Fixing Blobs
If a leaflet ends in a round blob instead of a point, wipe your brush dry and use the tip to pull the puddle of paint outward into a sharp taper while it’s still wet.
Step 2: Painting the Long Fern-Like Frond (Left)
-
Start the central stem:
Using your fine liner brush and the mid-tone green, paint a very thin line over your first curved spine sketch. Let it taper off slightly at the top. -
Paint the bottom leaflets:
Switch to your round brush. Load it with the lighter yellow-green mix. Start at the bottom of the stem, press the belly of the brush down to create width, and lift as you pull outward to create a sharp point. -
Work your way up:
Continue painting leaflets on alternating sides of the stem. As you move higher, make the strokes shorter and more curved. I find rotating the paper helps me maintain a natural wrist angle for these curves. -
Add tonal variation:
While the paint is still damp on some leaves, drop a tiny bit of the darker green into the base where the leaflet meets the stem. This ‘wet-on-wet’ technique adds instant depth.
Add Dew Drops
To level up, create tiny dew drops by lifting a small circle of color with a clean, damp brush, then adding a focused dark shadow underneath it.
Step 3: Painting the Broad Leaf (Right)
-
Establish the structure:
Paint the central stem for the second leaf using a darker mix of green. This leaf feels heavier, so the stem can be slightly thicker at the base. -
Create broad strokes:
For the leaflets, use the full belly of your round brush. Press down firmly to create a wide, leaf-like shape that tapers dramatically at the tip. These leaves should look almost like individual feathers. -
Leave negative space:
Be careful not to crowd the leaflets. Leave small slivers of white paper between the individual leaves to keep the painting airy and distinct. -
Darken the tips:
Once the base layer is semi-dry, use a slightly drier brush with dark green to glaze over the tips or one side of the leaflets, suggesting shadow and dimension.
Step 4: Painting the Compact Frond (Bottom)
-
Paint the curved spine:
Create the final stem with a sweeping curve. This leaf is smaller, so keep the stem delicate. -
Execute short, sharp strokes:
Using the tip of your round brush, make shorter, punchier strokes for these leaflets. They should curve sharply downward, resembling a palm branch catching a breeze. -
Blend your greens:
I like to load my brush with two colors for this one—dip the whole brush in light green, then just the very tip in dark green. Each stroke will naturally blend the two colors. -
Refining details:
Once all leaves are dry, use your fine liner brush to sharpen any blurry stem connections or extend the very tips of the leaves for a crisper finish.
Let your work dry completely before erasing any visible pencil marks to avoid smudging the pigment
BRUSH GUIDE
The Right Brush for Every Stroke
From clean lines to bold texture — master brush choice, stroke control, and essential techniques.
Explore the Full Guide
Tropical Lagoon With Distant Islands
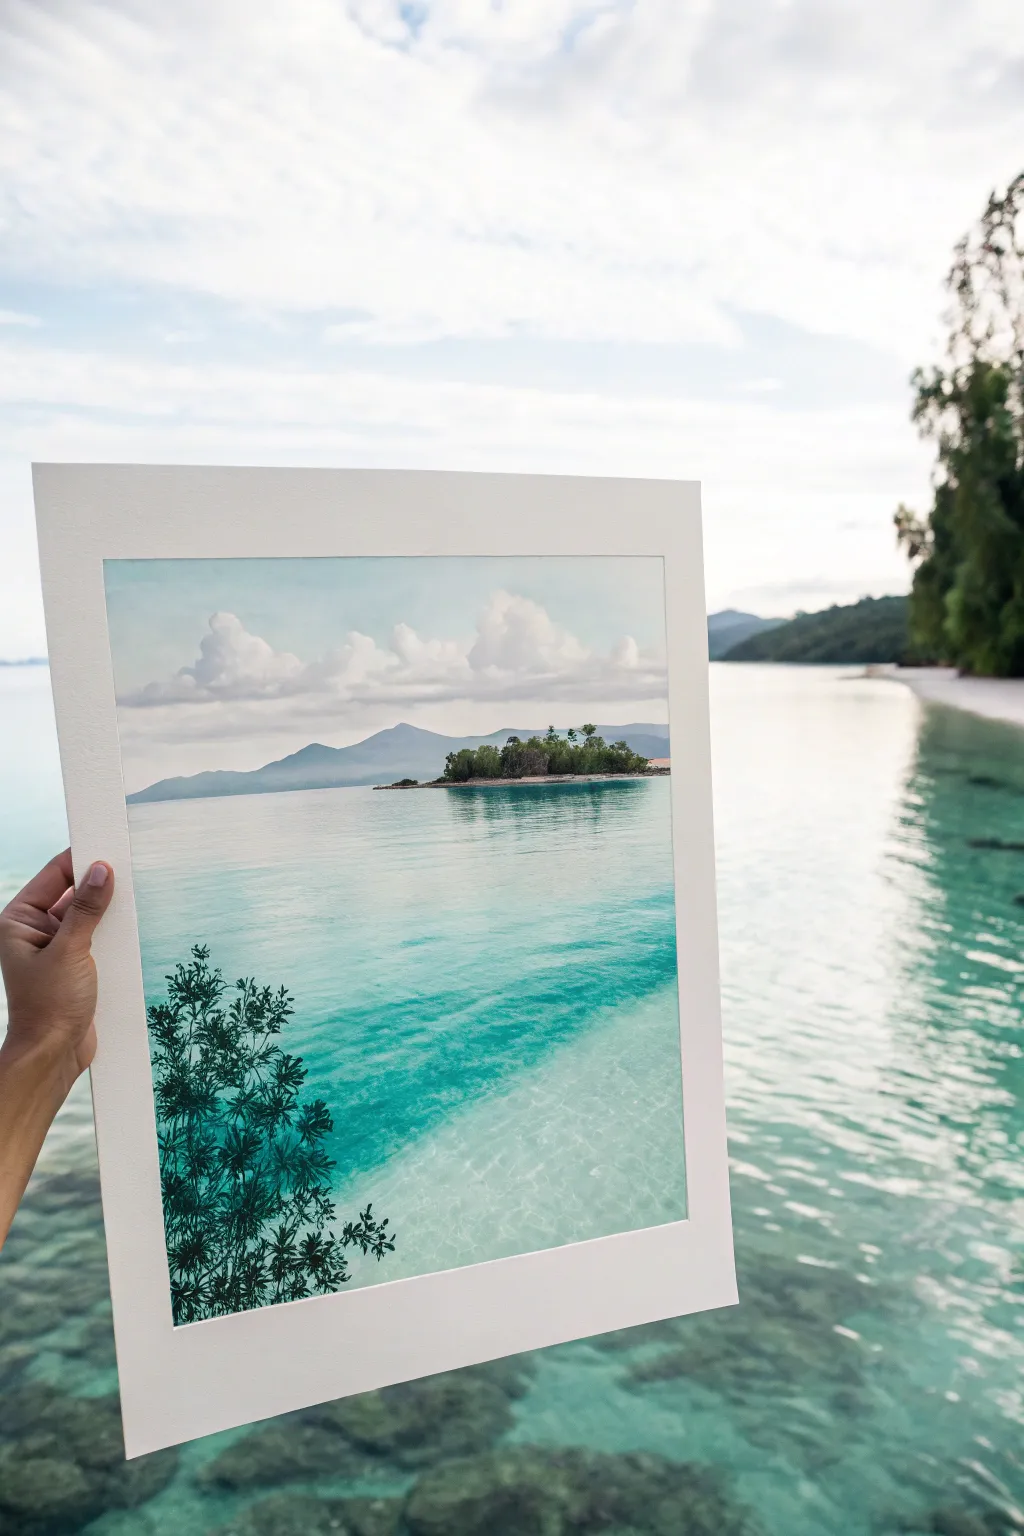
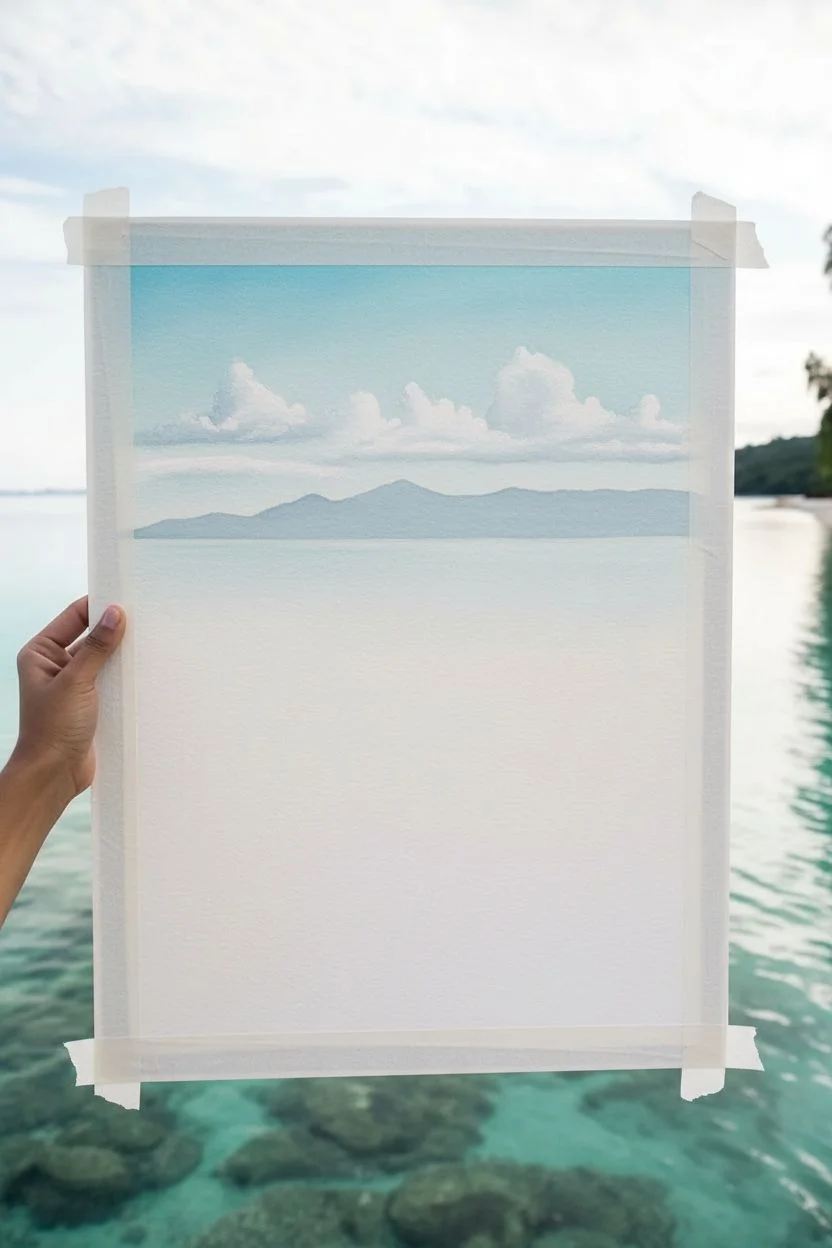
Capture the serenity of a crystal-clear lagoon with this layered acrylic painting on textured paper. You’ll build depth from a hazy mountain horizon down to vibrant, transparent shallow waters and a crisp foreground silhouette.
Step-by-Step
Materials
- Heavyweight watercolor paper or canvas sheet (9×12 inch)
- Acrylic paints: Titanium White, Phthalo Blue, Teal, Cerulean Blue, Sap Green, Burnt Umber, Payne’s Grey
- Wide flat wash brush (1 inch)
- Medium filbert brush (size 6)
- Small round detail brush (size 2)
- Cup of water and paper towels
- Masking tape
- Palette for mixing
Step 1: Setting the Scene
-
Prep the Surface:
Tape down all four edges of your paper to a hard board using masking tape. This creates that clean, crisp white border visible in the final photo and keeps the paper flat while wet. -
Sky Gradient:
Mix Titanium White with a tiny dot of Cerulean Blue. Using your wide wash brush, paint the entire sky area, starting with more blue at the top and fading to almost pure white as you reach the horizon line about one-third down the page. -
Fluffy Clouds:
While the sky is still slightly damp, load a filbert brush with pure Titanium White. dab in soft, irregular cloud shapes just above the horizon. Soften the bottom edges of the clouds with a dry brush to make them look distant and airy.
Keep it Fluid
Use a glazing medium or water to keep your acrylics fluid. This transparency helps achieve that glass-like tropical water effect better than thick, opaque paint.
Step 2: Islands and Water
-
Distant Mountains:
Mix a pale, hazy purple-grey using Titanium White, a touch of Payne’s Grey, and a speck of Phthalo Blue. Paint the furthest mountain range as a silhouette against the horizon. -
Middle Ground Hills:
Add slightly more Payne’s Grey and a hint of Sap Green to your mountain mix. Paint a second, lower layer of hills in front of the distant mountains to create atmospheric perspective. -
Central Islet Base:
For the small island in the middle, mix Sap Green with a little Burnt Umber. Paint the dark landmass and the dense tree shapes on top. Keep the edges ragged to suggest foliage. -
Islet Reflection:
Immediately beneath the island, use the same green-brown mix but watered down significantly. Pull vertical strokes downward into the water area to create a soft reflection.
Hard Line Fix
If your water gradient has harsh lines, wait for it to dry completely. Then, apply a very thin watery glaze of teal over the transition area to smooth it out.
Step 3: The Turquoise Lagoon
-
Deep Water:
Mix Teal with Phthalo Blue and white. Paint horizontal strokes starting at the horizon line, carefully cutting around the island and its reflection. -
Transition Zone:
As you move down the paper, gradually add more Titanium White and pure Teal to your mix. Blend this into the deeper blue while both paints are wet for a seamless gradient. -
Shallow Shallows:
For the bottom third of the water, mix a very pale aqua using mostly Titanium White with a tiny hint of Teal. Paint this area almost translucent to mimic shallow water over sand. -
Water Texture:
Using a clean, dry brush with a tiny amount of white paint, lightly dry-brush horizontal streaks across the water surface to suggest gentle ripples and light catching the waves. -
Submerged Reef Details:
I like to water down a mix of Teal and Burnt Umber until it’s very sheer (glaze consistency). Very lightly paint organic, blob-like shapes in the bottom right corner to hint at rocks or coral under the shallow water.
Step 4: Foreground Details
-
Silhouette Branch Structure:
Mix Payne’s Grey with Sap Green to create a near-black dark green. Using your smallest round brush, paint a thin, jagged tree trunk rising from the bottom left corner. -
Leaf Clusters:
Switch to the detail brush or the tip of the filbert. Drip and dab small clusters of leaves onto the branches using the dark green mix. Don’t overthink these shapes; random dabs look more natural. -
Final Highlights:
Add a tiny drop of yellow or white to your green mix. Touching only the top edges of a few foreground leaves, add subtle highlights to show where the sun hits. -
The Reveal:
Wait until the painting is completely dry to the touch. Carefully peel away the masking tape at a 45-degree angle to reveal the crisp white border.
Now you have a refreshing window to paradise that looks beautiful in a simple white frame
Underwater Coral Garden With Tropical Fish
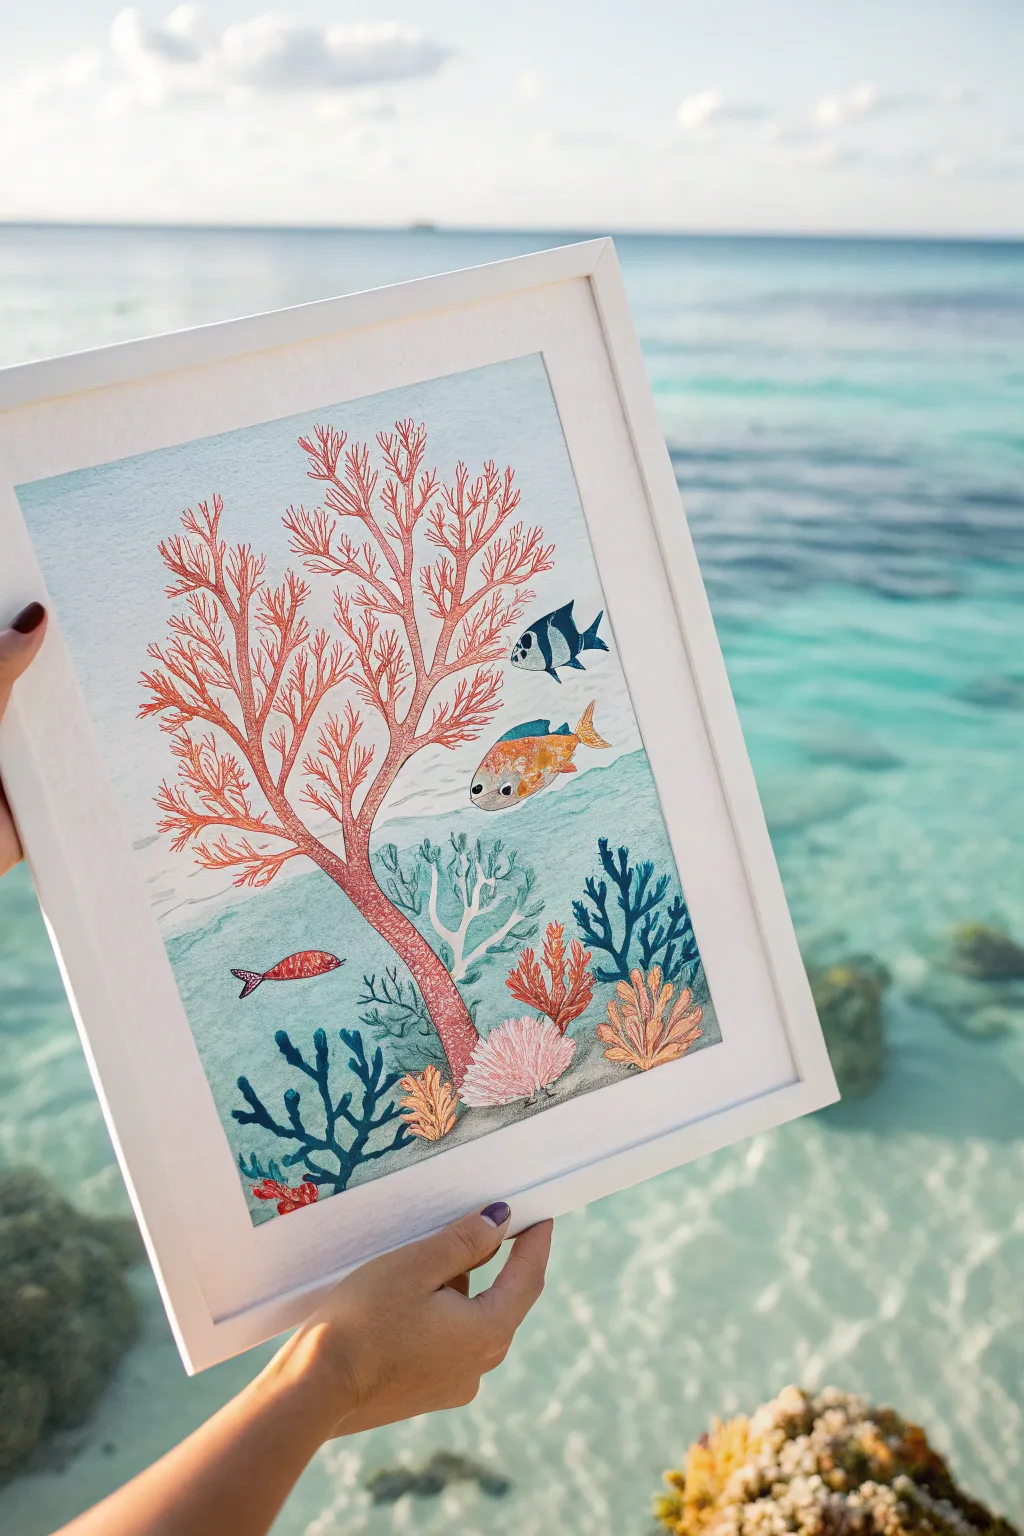
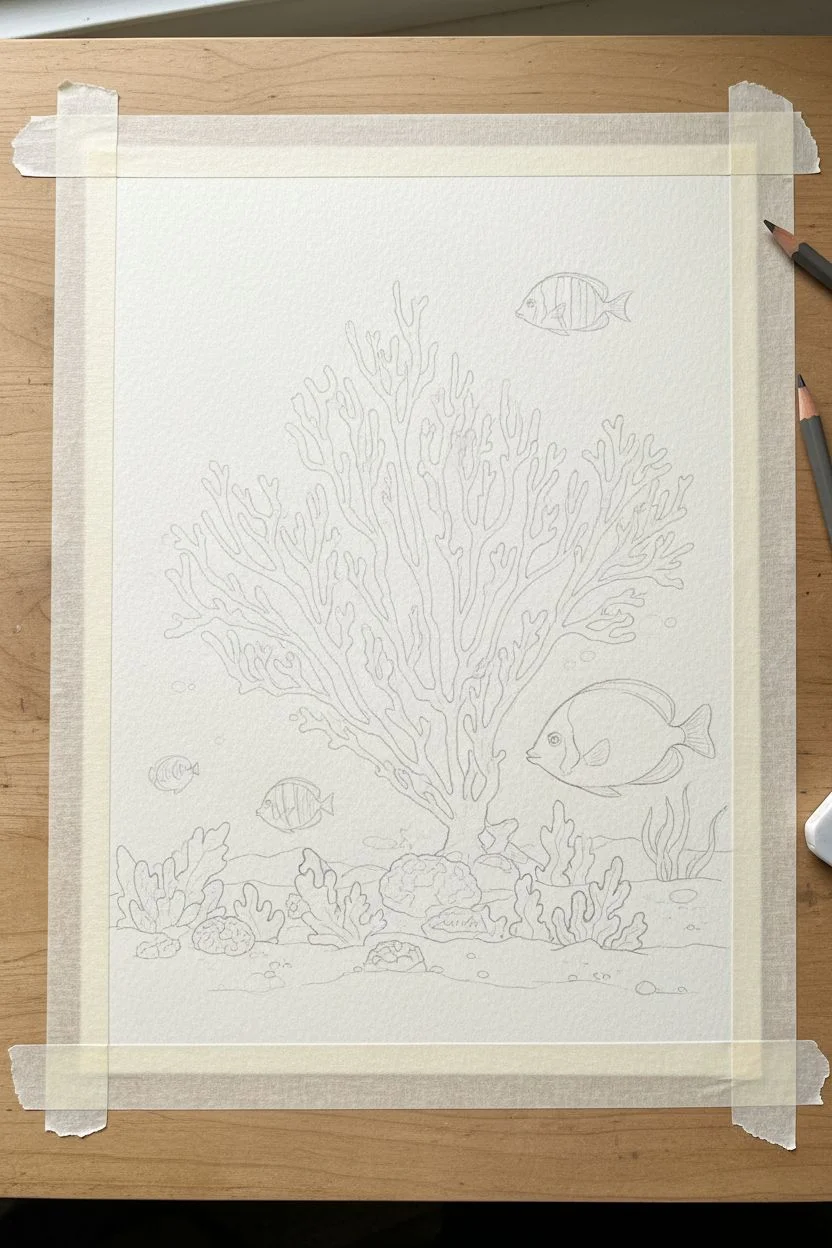
Capture the delicate beauty of a coral reef with this mixed-media project that combines soft watercolor washes with intricate pen detailing. The finished piece features a striking branching coral surrounded by playful tropical fish, perfect for bringing a piece of the ocean into your home decor.
Step-by-Step Guide
Materials
- Cold press watercolor paper (300 gsm)
- Watercolor paint set (focus on vermilion, teal, deep blue, orange, yellow)
- Fine liner pens (black, sizes 0.1 and 0.3)
- Round watercolor brushes (size 4 and 8)
- Pencil (HB) and eraser
- Masking tape
- Drawing board or hard surface
- Jar of clean water
- Paper towels
- White or light wood frame (optional)
Step 1: Sketching the Reef
-
Prepare your paper:
Tape your watercolor paper down to a board on all four sides. This prevents buckling when the paper gets wet and creates a crisp white border for framing later. -
Outline the main coral:
Using your HB pencil, lightly sketch the large, central branching fan coral. Start with the trunk near the bottom center and fan the branches out towards the top, occupying about two-thirds of the vertical space. -
Add sea floor details:
Sketch a sandy bottom area and populate it with smaller coral structures. Draw rounded brain corals, jagged staghorn shapes, and leafy sea plants around the base of your main fan. -
Place the fish:
Draw three fish swimming among the branches. Place a larger orange fish to the right of the main trunk, a striped fish slightly above it, and a smaller red fish swimming near the bottom left.
Bleeding colors?
If your coral paint bleeds into the blue water, blot it immediately with a clean tissue. Wait for it to dry 100%, then cover the mistake with opaque white gouache before repainting.
Step 2: Painting the Ocean
-
Paint the water background:
Mix a very watery wash of teal or light turquoise. Carefully paint around your coral and fish sketches, filling the negative space to create the water. Let the color fade out casually near the edges or fill the whole rectangle depending on your preference. -
Let it dry completely:
Wait for the blue background to be bone dry. If you paint the corals while the blue is wet, the colors will bleed into each other and ruin the crisp edges. -
Color the main fan:
For the large central coral, use a diluted vermilion or coral pink. Paint the entire structure with a flat wash. Don’t worry about texture yet; just get the base color down. -
Paint the smaller corals:
Fill in the bottom reef elements using varied colors like deep indigo for the leafy plants, bright orange for fan shapes, and soft pinks for the rounded corals. Varying the saturation helps add depth. -
Color the fish:
Paint the fish using brighter, more saturated pigments. Use yellow and orange for the middle fish, deep blue stripes for the top fish, and a solid red for the bottom swimmer.
Step 3: Adding Ink & Texture
-
Texture the main coral:
Once the red paint is dry, use your 0.1 fine liner to add texture to the large fan. I like to use tiny stippling dots along one side of each branch to suggest shadow and dimension. -
Outline the branches:
Go over the pencil lines of the main coral with the 0.1 pen. Keep the line slightly broken or wavy to mimic the organic, rough texture of real coral. -
Detail the fish:
Use the 0.3 pen to define the fish. Draw their eyes, outline their fins, and add scales. For the orange fish, draw small ‘U’ shapes to create a scaly body texture. -
Define the sea floor:
Outline the bottom corals. For the blue leafy plants, use smooth, flowing lines. For the brain corals, simple circular doodles work well to mimic their ridges. -
Add sand texture:
Stipple varying densities of dots along the bottom edge of the paper to simulate the sandy ocean floor, concentrating them under the corals to create grounding shadows.
Add some sparkle
Mix a tiny amount of iridescent medium or metallic watercolor gold into the fish scales. It catches the light just like real fish scales do underwater.
Step 4: Final Touches
-
Review and refine:
Step back and look for any areas that need more definition. You might want to darken the centers of the blue seaweed with a second layer of paint or add more ink dots to the darkest shadows. -
Remove the tape:
Carefully peel away the masking tape at a 45-degree angle away from the painting. This reveals your clean, sharp border. -
Frame your work:
Place your finished dry painting into a simple white frame to complement the bright, airy colors of the reef scene.
Hang your new underwater masterpiece in a bright spot to enjoy those tropical vibes all year round

PENCIL GUIDE
Understanding Pencil Grades from H to B
From first sketch to finished drawing — learn pencil grades, line control, and shading techniques.
Explore the Full Guide
Textured Mixed-Media Tropics With Sand and Leaf Prints

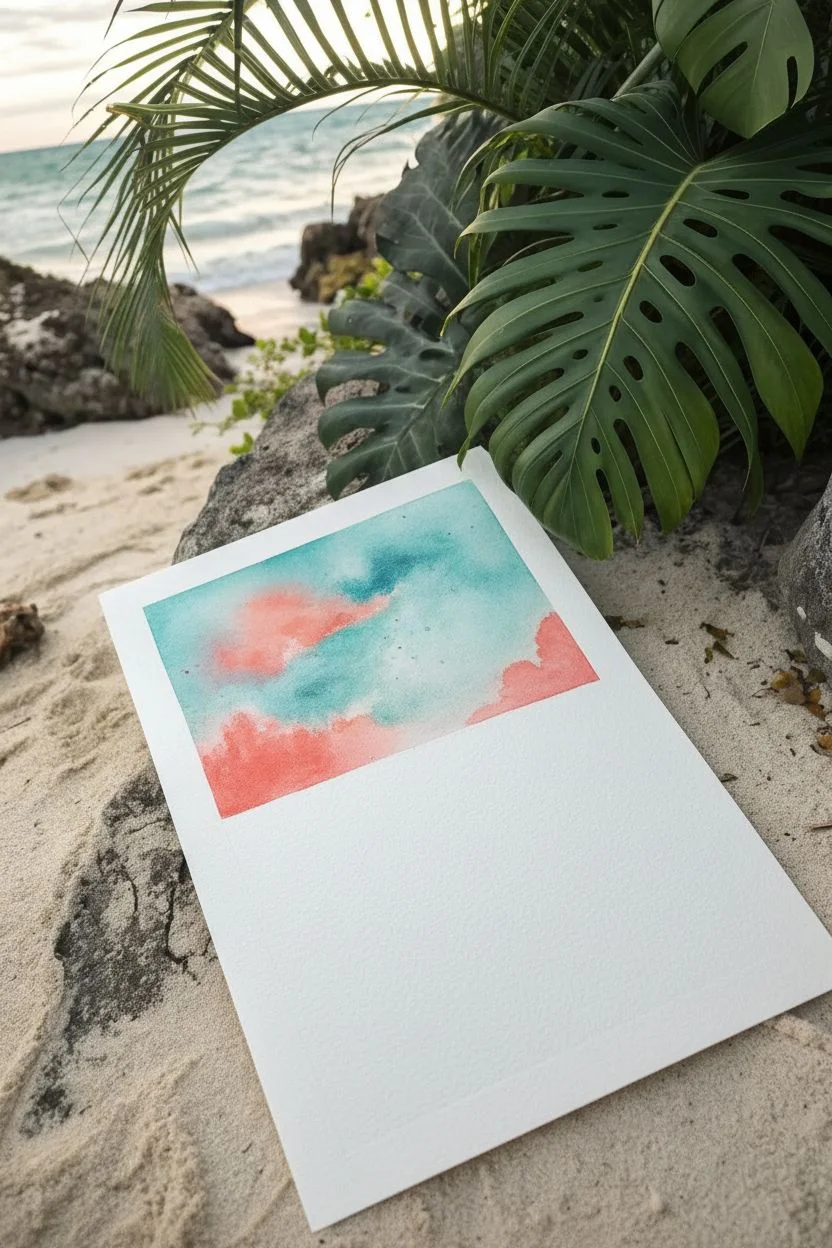
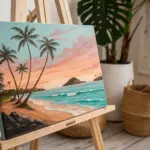
Capture the serene beauty of a tropical sunset with this vibrant watercolor project that emphasizes soft gradients and striking silhouettes. By blending warm coral skies with cool turquoise waters, you will create a dreamy island escape that looks stunning displayed right on the beach or in your home.
Step-by-Step Guide
Materials
- Cold press watercolor paper (300 gsm or heavier)
- Watercolor paints (turquoise/teal, coral pink, crimson, indigo/Payne’s grey, sap green)
- Masking tape
- Large flat wash brush
- Medium round brush (size 6 or 8)
- Fine detail brush (size 0 or 1)
- Clean water and mixing palette
- Paper towels
- Sea salt (optional for texture)
Step 1: Setting the Sky and Horizon
-
Prepare your surface:
Begin by taping down all four edges of your watercolor paper to a board. This creates the crisp white border seen in the example and prevents buckling as you apply heavy washes. -
Sketch the horizon:
Lightly draw a horizon line about one-third of the way up from the bottom of the paper. Keep the pencil marks very faint so they don’t show through the final paint. -
Wet the sky area:
Using your large flat brush, apply clean water to the entire sky area above the horizon line. You want the paper to be glistening but not forming puddles. -
Paint the turquoise sky:
Load your brush with a diluted turquoise or teal. Start at the very top of the paper and sweep across, allowing the color to fade naturally as you move downward towards the middle of the sky. -
Add the sunset clouds:
While the paper is still damp, mix a vibrant coral pink. Gently dab this color into the lower sky area to create fluffy cloud shapes. Let the pink bleed slightly into the turquoise for a soft, atmospheric look. -
Intensify the horizon glow:
Add a stronger band of coral or crimson right above the horizon line to suggest the sun’s last light. I like to keep this area quite saturated so it contrasts well with the water later.
Fixing Back-Runs
If you get ‘cauliflower’ blooms in your sky, wet the area again gently and lift the pigment with a tissue, or turn them into clouds by carefully dabbing darker paint into the center of the bloom.
Step 2: Painting the Ocean and Sand
-
Lay in the ocean color:
Once the sky is dry, wet the ocean section below the horizon. Apply a rich turquoise mix, making it darkest at the horizon line and gradually diluting it with water as you pull the color down toward the shore. -
Create wave movement:
While the ocean wash is still wet, lift out a few horizontal streaks using a thirsty (clean, slightly damp) brush or a paper towel to suggest whitecaps or light reflecting on gentle waves. -
Paint the wet sand:
Mix a diluted wash of crimson and a tiny touch of brown to create a pinkish-sand tone. Apply this to the bottom third of the paper, letting it meet the ocean wash. -
Blend the shoreline:
Where the turquoise water meets the pink sand, soften the edge with a clean, damp brush. You want a blurred transition that mimics the foam of a wave washing up on the beach. -
Add texture to the sand:
While the sand area is damp, splatter a few tiny drops of darker paint color or sprinkle a pinch of sea salt. This creates granulating textures that look like real grains of sand.
Step 3: Palm Trees and Details
-
Draft the tree trunks:
Ensure the background is completely dry. Using a medium round brush and a mix of indigo and brown, paint two slender, curving trunks on the right side. Make them lean slightly towards the ocean for a relaxed feel. -
Add palm fronds:
Switch to your fine detail brush. Mix a dark green (sap green with indigo). Paint the palm fronds exploding from the top of the trunks, using quick, flicking strokes to create the individual leaves. -
Detail the foreground foliage:
In the bottom right corner, paint larger, more detailed palm leaves reaching into the frame. Use the same dark green mix but vary the pressure to make the leaves look closer to the viewer. -
Refine the shadows:
Add deeper shadows to the underside of the palm fronds and the right side of the tree trunks to give them dimension. -
Scatter beach pebbles:
Paint a few tiny, dark irregularities on the sand to represent small rocks or debris. Keep these very loose and abstract. -
Reveal the border:
Wait until the painting is bone dry—patience is key here to avoid tearing. Slowly peel away the masking tape at a 45-degree angle to reveal your clean, professional white edges.
Level Up: Real Texture
Mix a small amount of fine, clean sand directly into your beach-colored paint before applying it. This creates a literal gritty texture on the paper that feels amazing to touch once dry.
Now you have a vibrant slice of paradise captured forever on paper.


Have a question or want to share your own experience? I'd love to hear from you in the comments below!