A turtle shell is basically nature’s perfect pattern template—those scute shapes beg for color, shading, and tiny details. Here are my favorite turtle shell painting ideas, starting with classic looks and moving into the fun, unexpected stuff.
High-Contrast Acrylic Highlights for a Glossy Shell
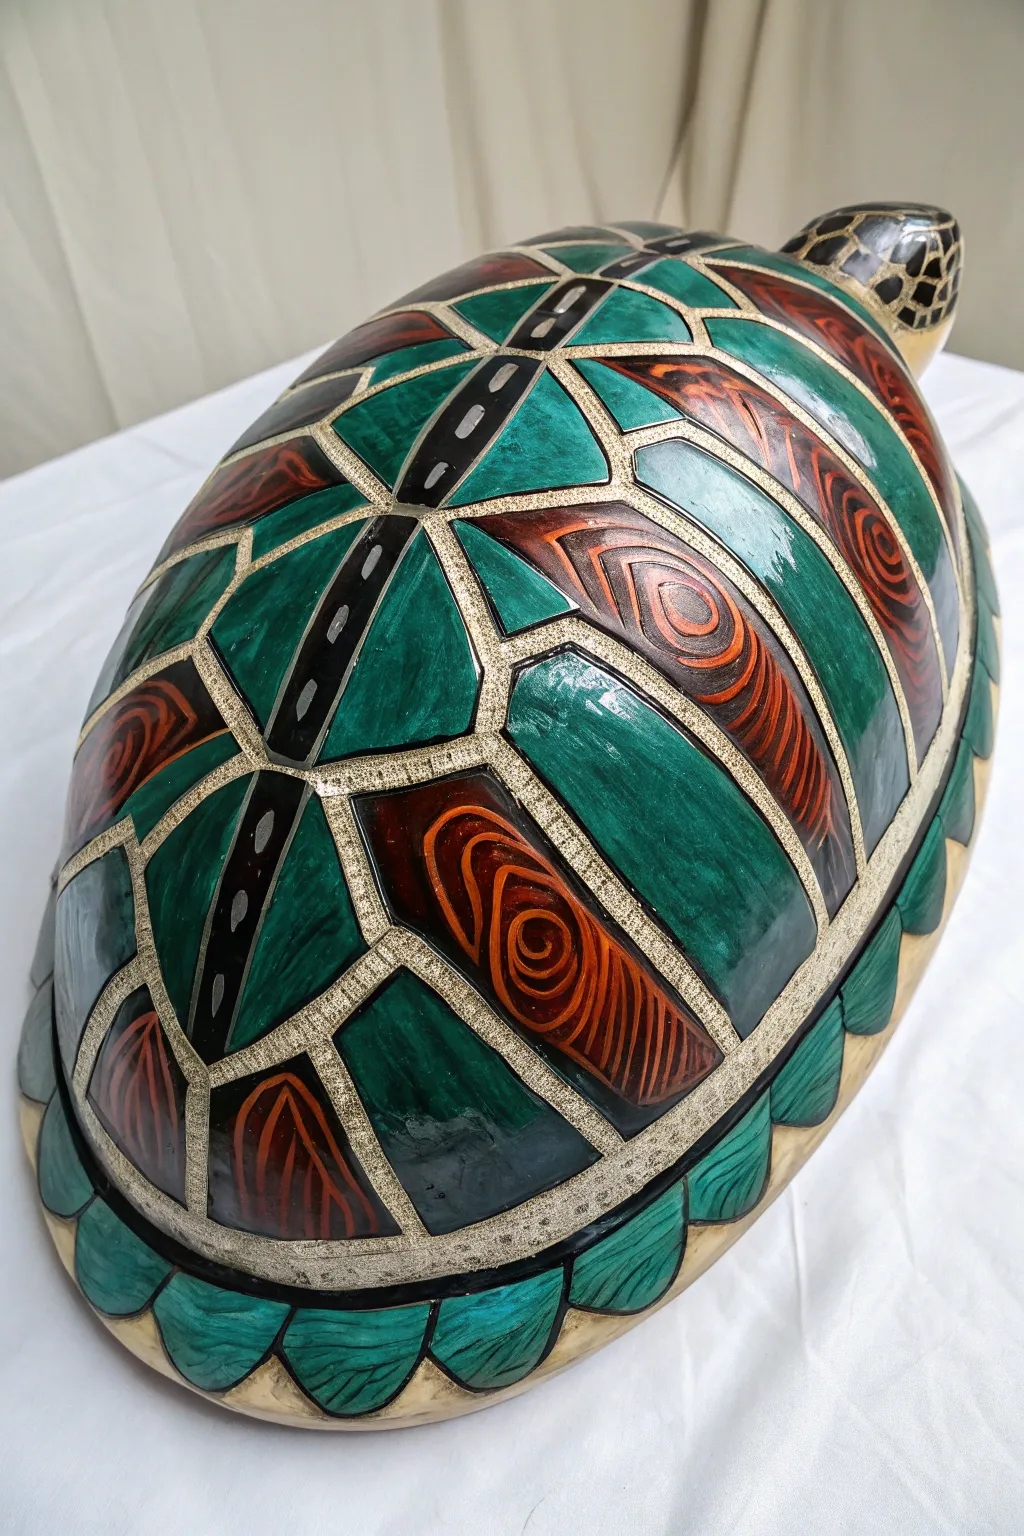
Transform a plain turtle shell base into a stunning work of art using deep jewel tones and high-contrast detailing. This project mimics the look of stained glass or polished stone with rich layers of emerald green and swirling copper patterns.
Step-by-Step
Materials
- Large turtle shell base (ceramic, resin, or real clean shell)
- High-quality acrylic paints (Phthalo Green, Burnt Sienna, Orange, Black, White, Metallic Silver/Champagne)
- Glazing medium
- High-gloss varnish or epoxy resin
- Fine detail brushes (sizes 0, 1, and 2)
- Flat shader brushes (sizes 4 and 6)
- Pencil or chalk for sketching
- Palette for mixing
- Water cup and paper towels
Step 1: Preparation and Base Patterns
-
Prepare the surface:
Begin by ensuring your turtle shell base is clean, dry, and free of dust. If you are working on a slick ceramic or plastic surface, lightly sand it with fine-grit sandpaper to help the paint adhere, then wipe it clean again. -
Sketch the scute outlines:
Using a pencil or light chalk, gently trace the natural geometric plates (scutes) of the shell. You want to define the thick separation lines between the plates, as these will be painted a metallic champagne color later. -
Block in the spine line:
Down the central spine of the shell, identify the row of scutes that will run vertically. Paint a base layer of black in the very center strip of these scutes to act as the ‘road’ line as seen in the reference.
Brush Control Tip
For the thin swirl lines, thin your acrylic paint with a few drops of water until it has an ink-like consistency for smoother flow.
Step 2: Painting the Green Scutes
-
Mix your emerald base:
Combine Phthalo Green with a tiny touch of black to create a deep, rich forest green. Apply this to the outer edges of the green scutes, leaving the centers slightly lighter. -
Create a gradient:
While the dark green is still wet, mix a lighter version of the green using a bit of white or yellow. Paint this into the center of each green plate, blending outward into the dark edges to create a curved, dimensional look. -
Add texture strokes:
Once the base green is dry, use a small brush to add thin, streak-like strokes of the lighter green across the plates. This mimics the fibrous texture of natural horn or shell.
Step 3: Creating the Copper Patterns
-
Base coat the accent scutes:
Select the specific scutes that will feature the woodgrain-like pattern (refer to the image for placement). Paint these with a solid coat of Burnt Sienna. -
Paint the swirls:
Mix a bright orange with a little brown. Using your finest liner brush (size 0), carefully paint concentric ovals and swirls on top of the Burnt Sienna base. These should look like fingerprints or wood knots. -
Deepen the contrast:
To make the orange pop, I sometimes outline the very edges of these swirls with a sheer wash of dark brown. This adds depth to the spiral designs.
Paint Looking Chalky?
If dark colors dry dull, don’t worry. Acrylics often dry flat. The final gloss varnish layer will restore the depth and richness.
Step 4: Detailing and Defining
-
Paint the dividing lines:
Mix a metallic silver with a drop of gold or beige to create a ‘champagne’ metallic tone. Take a steady hand and a size 1 or 2 brush to paint the thick grid lines between every scute. This ‘grout’ line separates the colors cleanly. -
Texture the dividing lines:
While the metallic paint is wet, stipple it lightly with a dry brush to give it a rough, stony texture compared to the smooth plates. -
Detail the spine:
Return to the black center strip down the spine. Paint small, light grey or white dashes down the center, resembling road markings. This adds a unique graphic element to the shell. -
Paint the rim:
For the fluted edges of the shell (the marginal scutes), paint them in a teal-green shade. Add scalloped black lines at the bottom of each rim piece to emphasize the overlapping shell structure.
Step 5: Final Glazing and Varnish
-
Apply a green glaze:
Mix a small amount of green paint with a large amount of glazing medium. Brush this sheer layer over the green scutes only. This unifies the brushstrokes and makes the color look deep and translucent. -
Add white highlights:
To make the shell look wet and glossy even before varnishing, add tiny, sharp dots or lines of pure white on the highest points of the curved plates. -
Seal with high-gloss:
Once the paint is fully cured (give it at least 24 hours), apply two coats of high-gloss varnish or a layer of art resin. This step is crucial to achieve the glass-like shine shown in the photo.
Place your finished shell in a well-lit spot where the glossy surface can catch the light and show off the intricate patterns


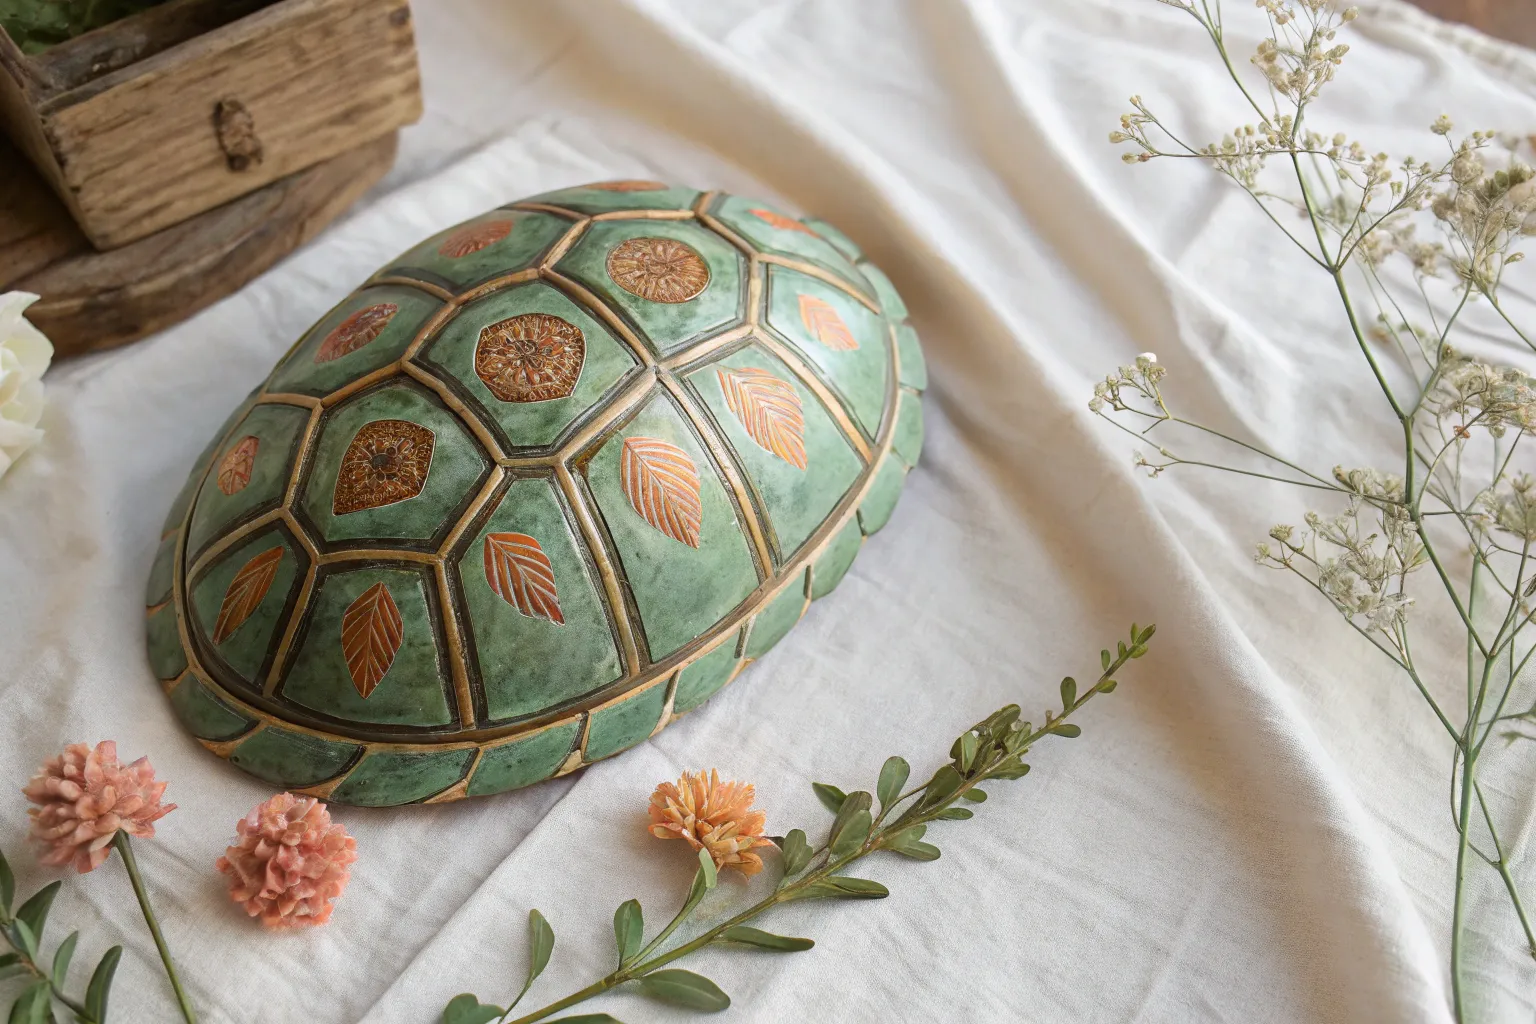
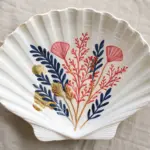
Metallic Accents and Antique Patina

Transform a plain turtle shell replica or ceramic base into a stunning artifact that looks like it belongs in a museum curio cabinet. This project combines rich, watery emerald tones with striking gold leaf accents to create a sophisticated piece of decor.
How-To Guide
Materials
- Turtle shell replica (resin, ceramic, or clean natural shell)
- Acrylic paints (Phthalo Green, Burnt Umber, Black, Teal)
- Gold leafing pen or liquid gold leaf
- Metallic antique gold acrylic paint
- Glazing medium or water
- Soft synthetic brushes (flat and detail sizes)
- Lint-free cloth or paper towels
- Spray sealant (gloss or satin)
Step 1: Base Coat & Texture
-
Prepare the surface:
Ensure your shell surface is clean and dry. If using a slick ceramic or resin base, give it a very light sanding with high-grit sandpaper to help the paint adhere, then wipe away any dust. -
Apply the dark undercoat:
Mix a small amount of Black with Phthalo Green to create a very dark, deep forest green. Apply this to the entire top of the shell, working it into the grooves. -
Wipe back for depth:
Before the dark paint dries completely, use a damp cloth to wipe the raised centers of the shell segments (scutes). This leaves the dark color in the deep crevices and texture lines, creating instant dimension. -
Let it dry:
Allow this base layer to cure completely for about 20-30 minutes.
Step 2: Color Glazing
-
Mix the emerald glaze:
Combine your Teal and Phthalo Green paint with a generous amount of glazing medium (or water) to create a semi-transparent wash. -
Brush on the color:
Apply this glaze over the scutes. Because it’s translucent, the dark shadows you established earlier will still show through, while the wiped areas will take on a brilliant jewel tone. -
Simulate natural grain:
While the glaze is wet, use a dry, stiff brush to drag lightly across the surface in the direction of natural growth. This creates subtle striations resembling real keratin layers. -
Add antique weathering:
Dilute a tiny drop of Burnt Umber with water. Dab this randomly onto a few spots on the shell and immediately blot it with a paper towel to create an aged, organic stained look. -
Dry thoroughly:
Let these aesthetic layers dry completely properly before moving to the metallics.
Paint sliding off?
If glazing on smooth resin, the paint might bead up. Mix a tiny drop of dish soap into your acrylic mix to break the surface tension.
Step 3: Metallic Detailing
-
Paint the rim:
Using the metallic antique gold acrylic paint, carefully fill in the segmented border (marginal scutes) around the edge of the shell. -
Weather the gold rim:
Once the gold rim is dry, apply a very thin wash of dark brown paint over it and wipe it back immediately. This settles into the rim’s grooves, making the metal look old and cast rather than freshly painted. -
Outline the scutes:
This is the most critical step. Shake your gold leafing pen well (or dip a fine liner brush into liquid gold leaf). Tracing strictly along the deep groove lines separating each plate on the shell’s back. -
Create broken lines:
I prefer to not make the lines perfectly continuous. Lift your pen occasionally to create small breaks or thinner spots; this simulates wear and prevents the piece from looking too mass-produced. -
Highlight the texture:
If your shell has significant texture on the high points, lightly dry-brush a tiny amount of gold on just the very peaks of the center scutes to catch the light.
More Opulence
For a heavier antique look, use Rub ‘n Buff in ‘Antique Gold’ for the rim instead of paint. Apply with a finger for a true metal finish.
Step 4: Finishing Touches
-
Clean up edges:
If any gold strayed onto the green sections, use a small brush with your teal mix to tidy up the lines. -
Seal the artwork:
Finish with a spray varnish. A gloss finish will make it look like polished ceramic or serpentine stone, while satin will look more like natural aged bone.
Place your finished shell on a stand or stack of books to enjoy its timeless glow


Tribal Dotwork and Symbol Panels
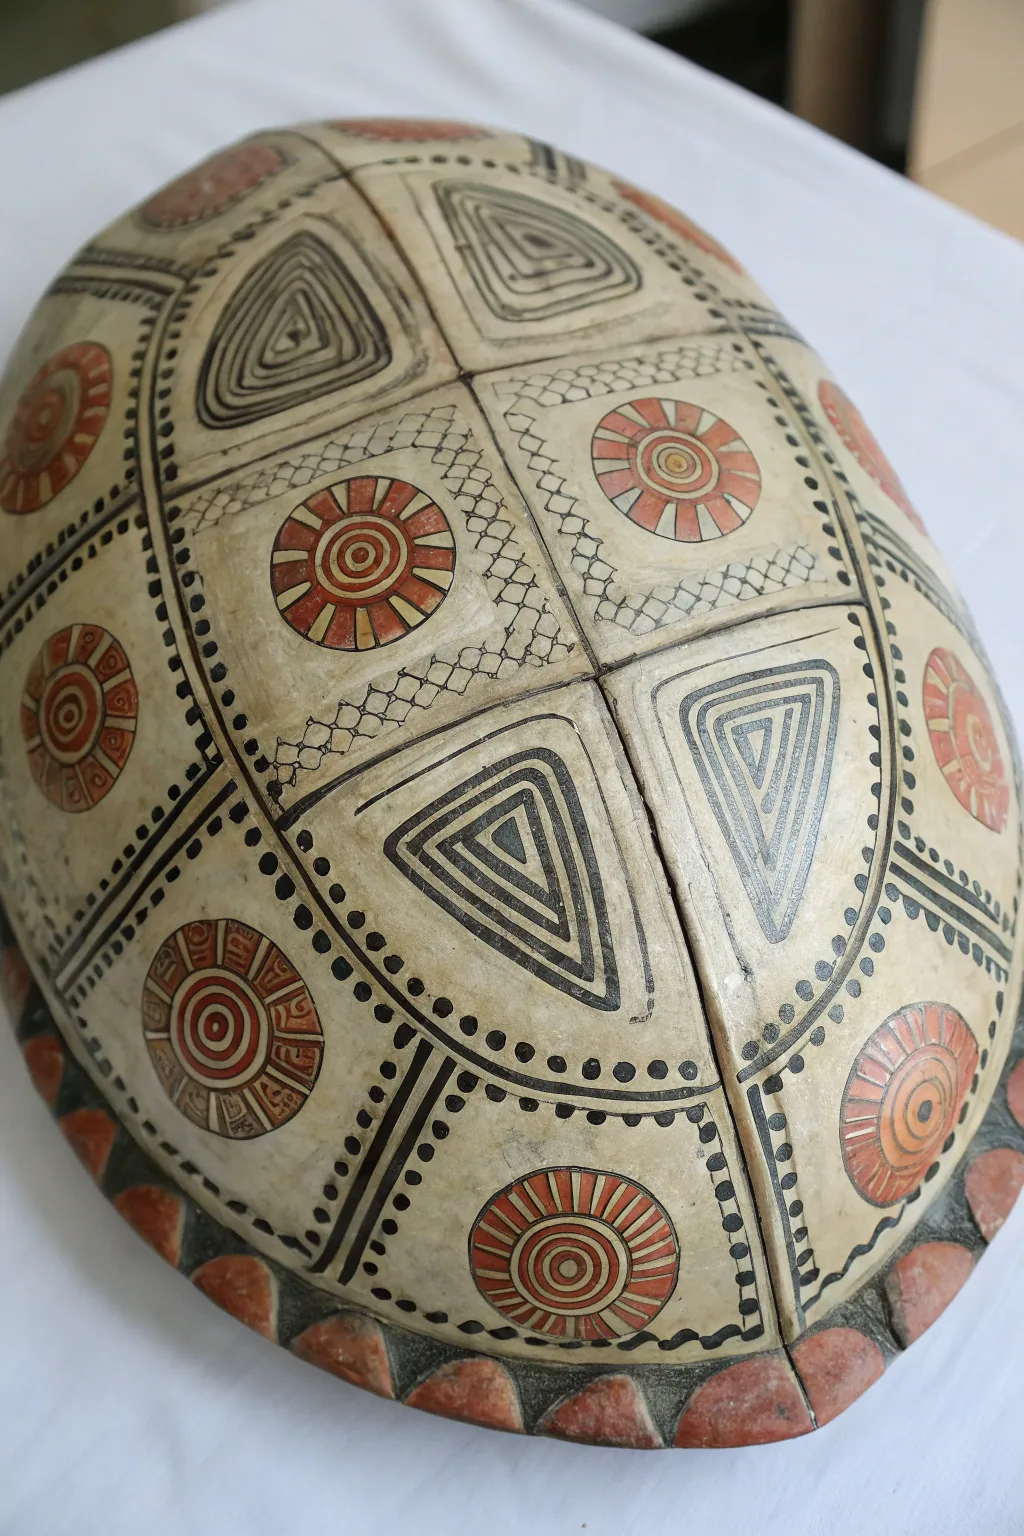
Transform a cleaned turtle shell into a stunning artifact featuring bold geometric panels, traditional sunburst motifs, and intricate dotwork borders. The combination of earthy red tones, stark black lines, and the shell’s natural texture creates a striking centerpiece that feels ancient and modern all at once.
Step-by-Step Guide
Materials
- Cleaned and dried turtle shell (ethically sourced)
- Fine-grit sandpaper (220-grit)
- Acrylic paints (bone white/beige, terracotta red, carbon black)
- Fine liner brushes (size 00 and 0)
- Small flat brush (size 2)
- Pencil and eraser
- Ruler or flexible measuring tape
- Matte spray varnish
Step 1: Preparation and Base Layout
-
Surface Prep:
Begin by gently sanding the shell with 220-grit sandpaper to create a smooth surface that helps the paint adhere. Wipe away all dust with a damp cloth and let it dry completely. -
Base Tone:
Using the flat brush, apply a very thin wash of bone white or beige paint over the scutes (the shell plates). You don’t want an opaque coat; the goal is to enhance the natural color and provide a unified, light background for your design. -
Mapping the Grid:
Observe the natural scutes of the shell. Use a pencil to lightly trace the natural grooves separating the plates, as these will form the boundaries of your design panels. -
Drafting the Design:
Lightly sketch your geometric motifs inside the panels. Alternate between concentric triangles and sunburst ‘wheel’ circles. Sketch a square border inside the sunburst panels to frame the circle.
Step 2: Painting the Motifs
-
outlining the Borders:
Load a fine liner brush with carbon black paint. Carefully paint over your pencil lines that separate the main panels. Keep these primary lines distinct but not too thick. -
Create the Triangle Panels:
For the triangular sections, paint a series of nested triangles using black. Start from the outside and work inward. Leave a gap between the black lines to show the beige background. -
Fill the Triangles:
Inside the nested black triangles, use the terracotta red to fill specific bands, or leave them neutral as seen in the reference. If you want depth, add fine hatching lines in black within the innermost triangle. -
Sunburst Circles:
Move to the square panels. Paint the central circular outline in terracotta red. Add a smaller circle in the absolute center. -
Adding Spokes:
Paint the radiating spokes of the sunburst using the red paint. Think of it like slicing a pizza—create even wedges around the center circle. -
Refining the Sunbursts:
Once the red dries, use your fine liner with black paint to outline the red circle and the individual spokes to make the design pop clearly against the background.
Steady Hand Trick
Rest your pinky finger on a dry part of the shell while painting fine lines. This anchors your hand and prevents the brush from shaking during delicate detailing.
Step 3: Detailing and Borders
-
Inner Frames:
In the panels with sunbursts, paint a thin black square border inside the panel edges. This creates a ‘frame within a frame’ look. -
Cross-Hatching Texture:
Between the inner square frame and the actual panel edge, use the 00 brush to paint tiny lattice or cross-hatch patterns in black ink. This adds that intricate, tribal texture. -
The Dotted Line Technique:
Along the thick black dividing lines you painted first, dip the handle end of a paintbrush or a dotting tool into black paint. Stamp a row of evenly spaced dots parallel to the main grid lines. -
Border Triangles:
Move to the outer rim of the shell (the marginal scutes). Paint small triangles in alternating red and black, or fill the entire rim scute with terracotta red. -
Rim Definition:
Outline these rim shapes with black to give the shell a finished, encased look. -
Cleanup:
Check for any stray pencil marks. If the paint is fully dry, gently erase them. Touch up any black lines that may have faded. -
Sealing:
Finish by applying a coat of matte spray varnish. I prefer matte over gloss here because it preserves the natural, earthy aesthetic of the bone and pigment.
Aged Patina Effect
Mix a tiny drop of brown paint with water to make a glaze. Brush it over the finished dry piece and wipe it off immediately to leave ‘age’ in the cracks.
Place your finished shell on a stand or hang it on the wall to display your beautiful handiwork


Psychedelic Neon Swirls Between Scute Lines
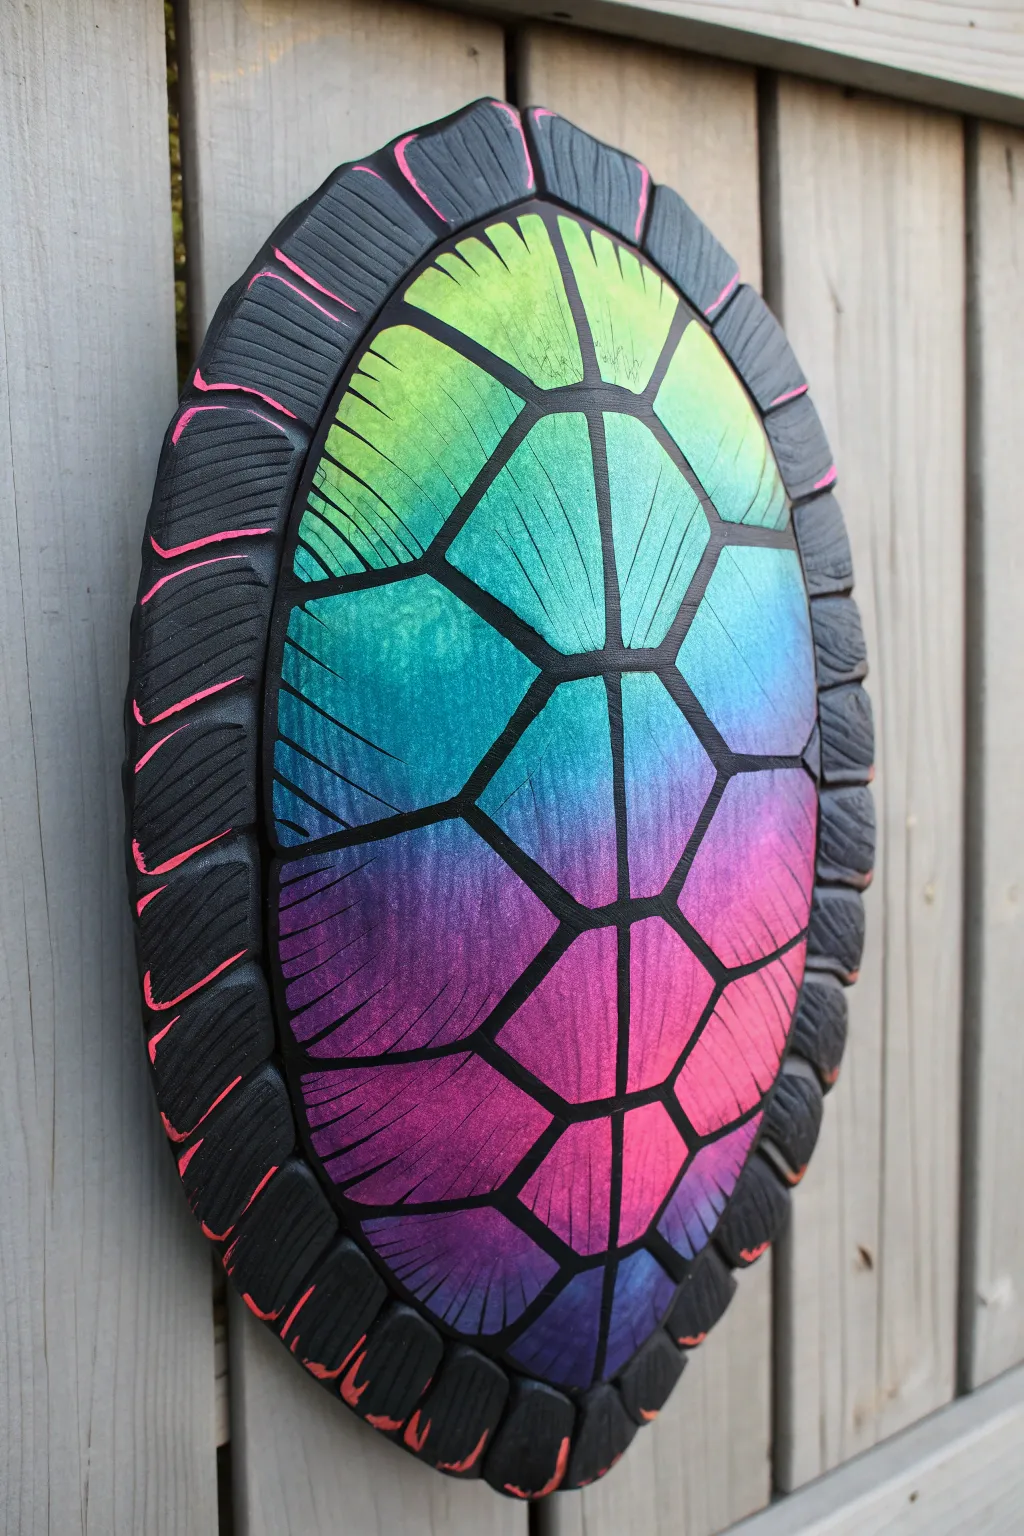
Transform a simple wooden carving or sturdy casting into a mesmerizing display of color with this neon-infused project. By blending a vibrant spectral gradient across the shell’s segments while keeping the dividing lines crisp and dark, you create a stunning 3D effect that looks almost luminescent.
How-To Guide
Materials
- Wooden or resin turtle shell carving (blank)
- Black acrylic gesso or matte black acrylic paint
- High-flow or fluid acrylic paints (neon green, turquoise, deep blue, purple, magenta, neon pink)
- Fine-grit sandpaper (320 grit)
- Wide flat brush for base coating
- Small angled shader brush
- Fine detail liner brush (size 0 or 00)
- Makeup sponges or soft blending wedges
- Matte or satin varnish spray
- Painters tape (optional)
Step 1: Preparation and Base Coat
-
Surface Prep:
Begin by inspecting your shell blank. If it feels rough, give it a quick pass with 320-grit sandpaper to ensure a smooth painting surface. -
Priming Black:
Coat the entire shell, front and back, with black acrylic gesso. This dark base is crucial because it makes the subsequent neon colors pop and serves as the dark dividing lines later. -
Second Coat:
Once dry, apply a second coat of black to ensure no raw material is showing through. Let this cure completely before moving to color. -
Rim Texture:
On the outer rim (the marginal scutes), take a small brush with just a hint of grey paint and dry-brush over the carved ridges. This highlights the texture slightly before we add the pink accents later.
Chalky Colors?
If your cheap neon paints dry looking chalky or dull, mix a drop of gloss medium into the paint before applying. It increases transparency but boosts vibrancy significantly.
Step 2: Creating the Gradient
-
Planning the Flow:
Visualize the gradient running from top to bottom. We want a transition from lime green at the top, moving into teal, blue, purple, and finally hot pink at the bottom. -
Top Section – Green:
Squeeze a small amount of neon green and turquoise onto your palette. Using a makeup sponge or soft flat brush, dab the green onto the top central scutes. -
First Transition:
Where the green ends, introduce the turquoise. While the paint is still wet, gently blend the two colors directly on the shell to create a soft teal transition. -
Middle Section – Blue:
Moving downward, bring in your deep blue. Blend this into the bottom edge of the turquoise area. Keep your layers thin; you can always add more intensity later. -
Lower Section – Purple/Pink:
As you reach the lower third of the shell, blend purple into the blue, and finally finish the bottom tip with magenta and neon pink. -
Avoiding the Lines:
Don’t worry too much about painting over the black dividing lines (scute seams) at this stage, but try to keep the general structure visible. It’s easier to repaint the black lines than to paint perfectly inside them. -
Intensifying:
I usually find neons need a second pass. Once the first layer is dry, repeat the sponge technique to brighten the gradient, making sure the colors glow.
Pro Tip: Masking
For ultra-crisp black lines without the steady hand anxiety, use thin graphic art tape or liquid masking fluid over the black primer lines before you start sponging the colors.
Step 3: Detailing and Definition
-
Redefining Boundaries:
Switch to your fine liner brush and fresh black paint. Carefully re-trace the thick black lines between each shell segment (scute) to cover any messy gradient blending. -
Adding Texture Lines:
To mimic the growth lines of a real shell, use a very fine brush with slightly thinned black paint. Paint delicate, sweeping curves inside each colored scute, radiating from the center outward. -
Rim Accents:
Focus on the black outer rim now. Using a small detail brush and neon pink paint, add small, sharp tick marks or cracks into the carved recesses of the marginal scutes. -
Rim Consistency:
Continue these pink accents all around the perimeter. They should look like glowing embers or cracks in charcoal. -
Clean Up:
Check the edges where the colored interior meets the textured black rim. Ensure this boundary is sharp and clean black. -
Sealing:
Once all paint is fully dry (give it a few hours), spray the entire piece with a matte or satin varnish to protect the finish without making it too glossy.
Hang your cosmic turtle shell on a garden fence or indoor wall to enjoy a splash of permanent color.


Have a question or want to share your own experience? I'd love to hear from you in the comments below!