If you’ve been craving underwater painting ideas easy enough for a chill art session, you’re in the right place. I’m sharing my go-to underwater concepts that look magical fast, even if you’re keeping things super simple.
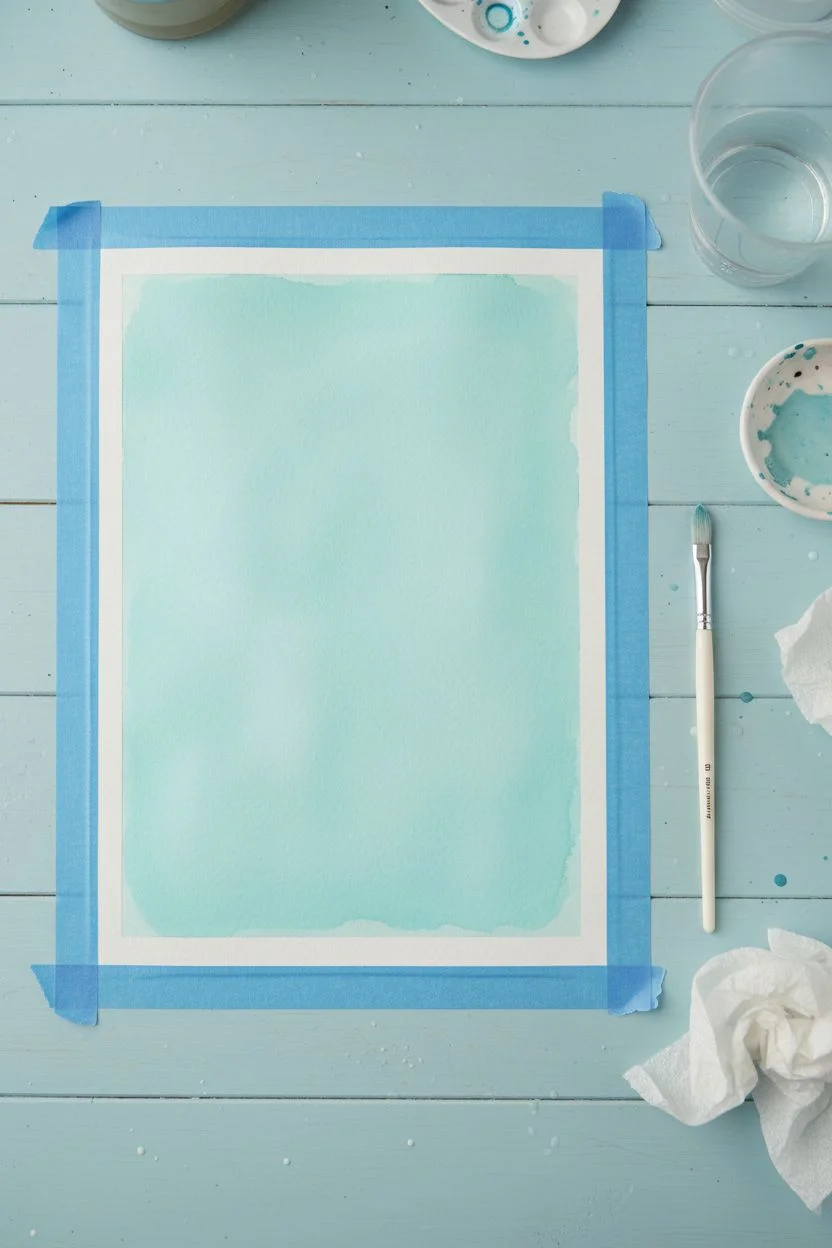
Classic Blue Ocean Gradient Background
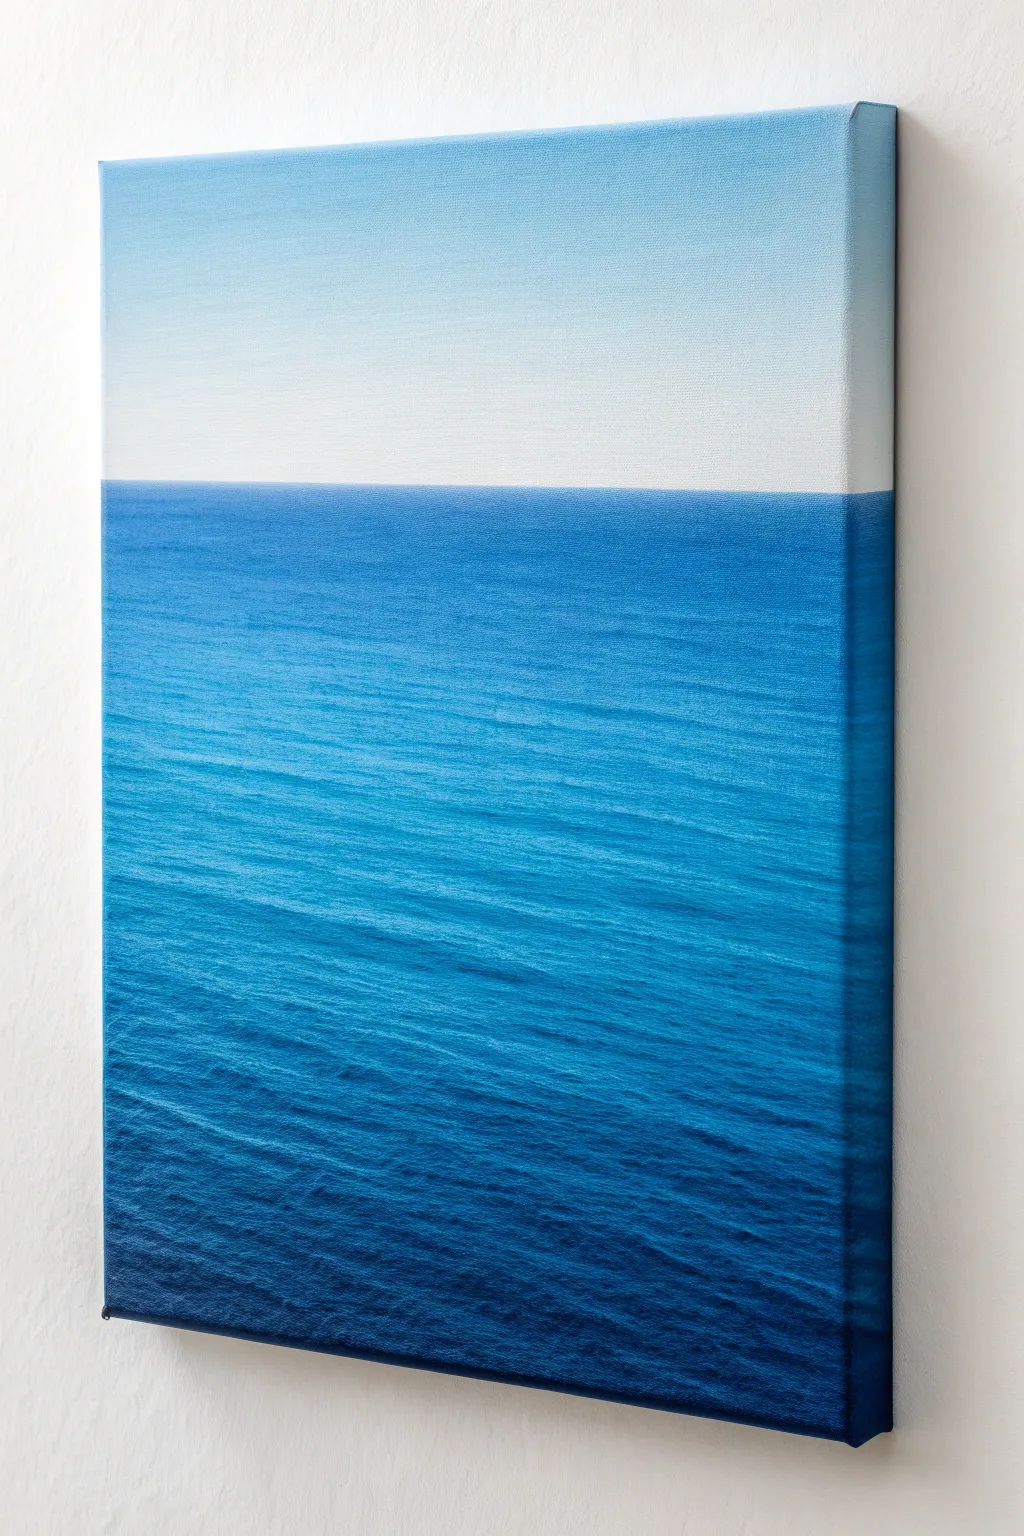
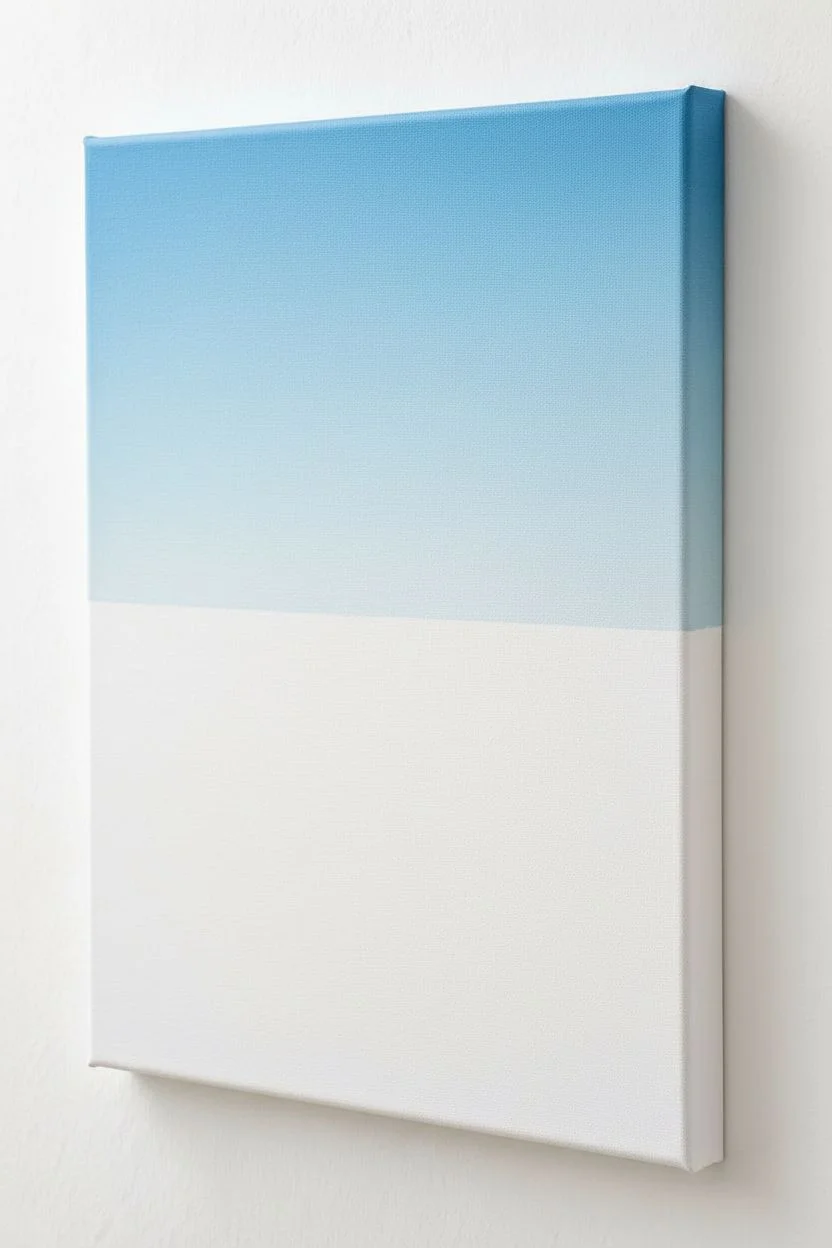
This minimalist seascape captures the calm vastness of the ocean using a soothing gradient technique. By carefully blending shades of blue from deep navy to airy sky, you can create a piece that feels both modern and timeless.
How-To Guide
Materials
- Rectangular stretched canvas (e.g., 16×20 inches)
- Acrylic paints: Phthalo Blue, Ultramarine Blue, Titanium White, and a tiny dot of Black
- Wide flat brush (2-3 inches) for blending
- Medium flat brush (1 inch)
- Fan brush (optional, for texture)
- Cup of water
- Palette or paper plate
- Painter’s tape (optional)
- Paper towels
Step 1: Setting the Sky
-
Establish the Horizon:
Decide where your horizon line will sit. For this composition, place it about one-third of the way down from the top edge. You can use a strip of painter’s tape to mark this line perfectly straight if you don’t trust your steady hand. -
Mix the Sky Blue:
On your palette, mix a large amount of Titanium White with just a whisper of Phthalo Blue. You want a very pale, crisp blue that looks almost white. -
Paint the Upper Sky:
Using your wide flat brush, paint the very top edge of the canvas with a slightly stronger mix of the light blue. Ensure you paint the sides of the canvas too, wrapping the color around the edge for a professional finish. -
Blend Downward:
Add more white to your brush without rinsing it. Paint the middle section of the sky area, blending it upwards into the first blue strip. Use long, horizontal strokes to ensure a smooth transition. -
Fade to White:
As you reach the horizon line, use almost pure Titanium White. Blend this upward into the pale blue so the sky looks brightest right where it meets the water. Let this sky section dry completely before moving on.
Step 2: Creating the Ocean Depth
-
Remove the Tape:
If you used painter’s tape for the horizon, peel it off gently now that the sky is dry. You should have a crisp, clean line. -
Mix the Deepest Blue:
Create your darkest ocean color by mixing Ultramarine Blue with a touch of Phthalo Blue and a tiny speck of Black. This deep navy will anchor the bottom of the painting. -
Paint the Bottom Edge:
Apply this dark navy mix to the bottom 2-3 inches of the canvas using the medium flat brush. Creating a solid dark base helps simulate the depth of the ocean. -
Transition to Mid-Tone:
Mix a medium blue using mostly Phthalo Blue and a little White. Paint the middle section of the water, blending it downwards into the dark navy while the paint is still wet. -
Approach the Horizon:
Mix a lighter blue (more white, less Phthalo) for the water just below the horizon line. Carefully paint right up to the sky edge. Using a smaller brush here gives you more control to keep that line sharp. -
First Blend:
Take a clean, slightly damp wide brush. Lightly sweep it horizontally across the entire water area to soften the transitions between your three blue zones (dark, medium, light).
Uneven Blending?
If your gradient looks blocky, your paint might be drying too fast. Mist the canvas lightly with water or add a slow-drying medium to your acrylics to keep them workable longer.
Step 3: Adding Texture and Waves
-
Create Water Texture:
Reload your medium flat brush with a slightly lighter shade of blue than the area you are working on. Hold the brush loosely and drag it horizontally across the canvas to create subtle streaks. -
Vary the Strokes:
I like to use shorter, choppy strokes near the bottom to simulate choppy foreground waves, and longer, smoother strokes near the horizon to suggest distance. -
Add Highlights:
Mix a light blue-white color. Using the very tip of a brush or a fan brush, graze the canvas horizontally in random patches to create the illusion of light catching the ripples. -
Refine the Horizon:
The horizon line is the focal point. If it got messy, take a small brush with your pure white sky color and carefully touch up the line from above to make it razor-sharp. -
Check the Edges:
Don’t forget the sides of the canvas! Extend your ocean gradients and wave textures around the edges. This ‘gallery wrap’ style means you won’t need a frame. -
Final Glaze (Optional):
Once the painting is 100% dry, you can mix a tiny drop of Phthalo Blue with a lot of water or glazing medium. Wash this over the water area to unify the colors, then let dry.
Make It Sparkle
For a magical touch, mix a tiny amount of iridescent or metallic pearl medium into your white paint when adding the final wave highlights. It catches the light beautifully.
Step back and admire the peaceful atmosphere you’ve created with just a few shades of blue


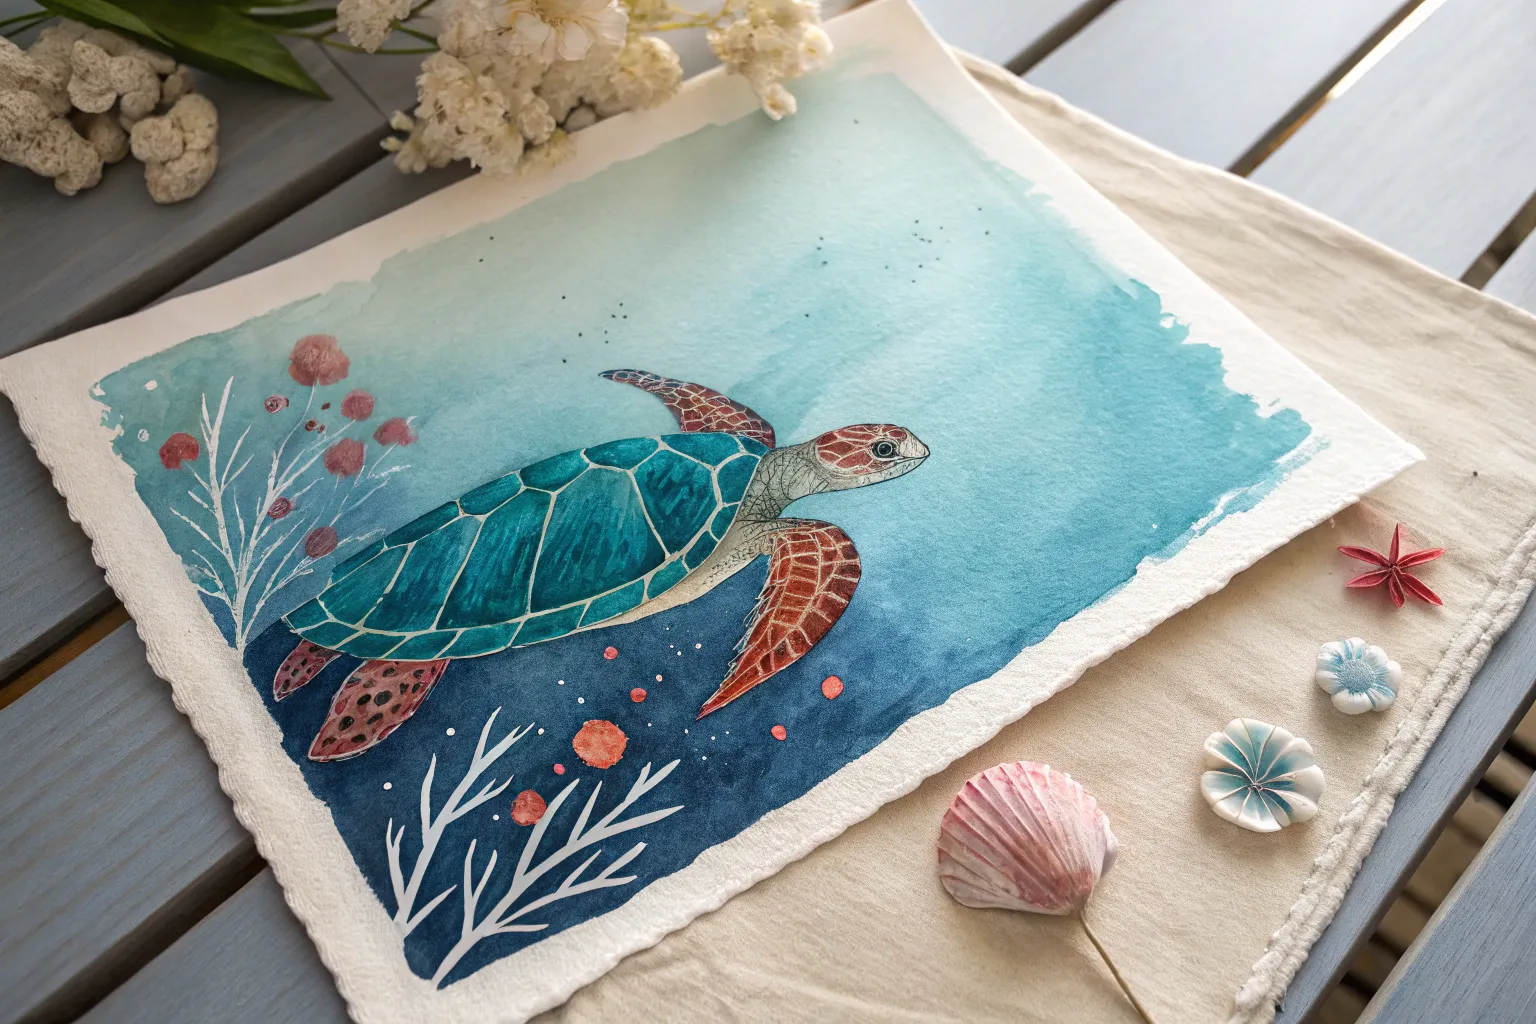
Sunlight Rays From the Surface
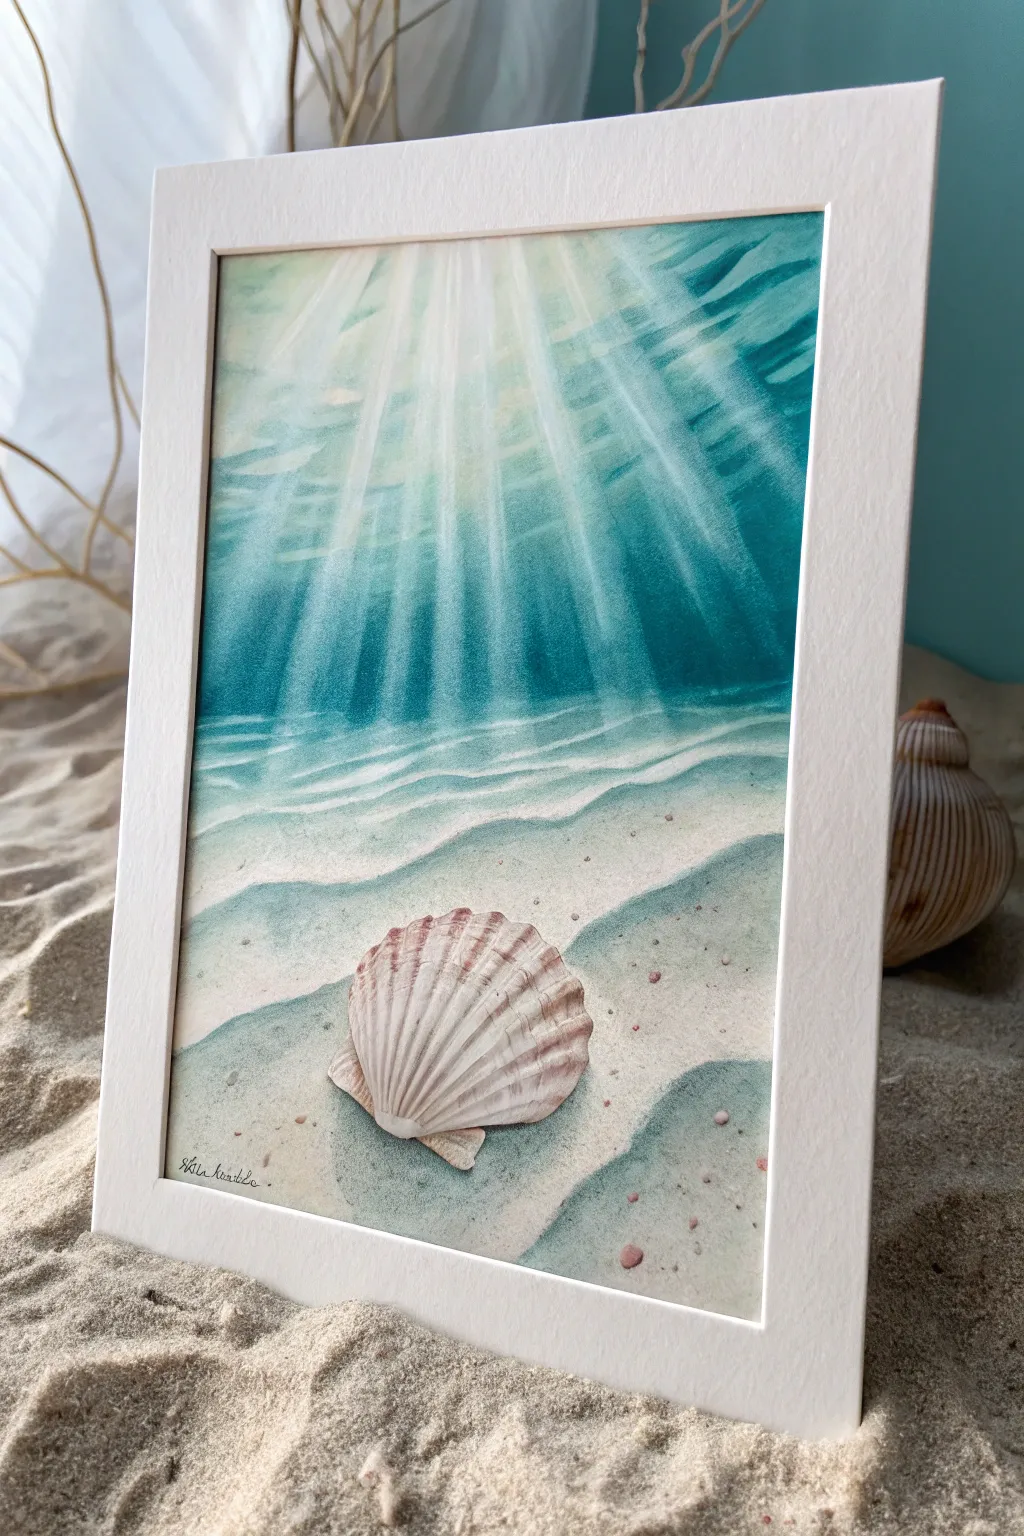
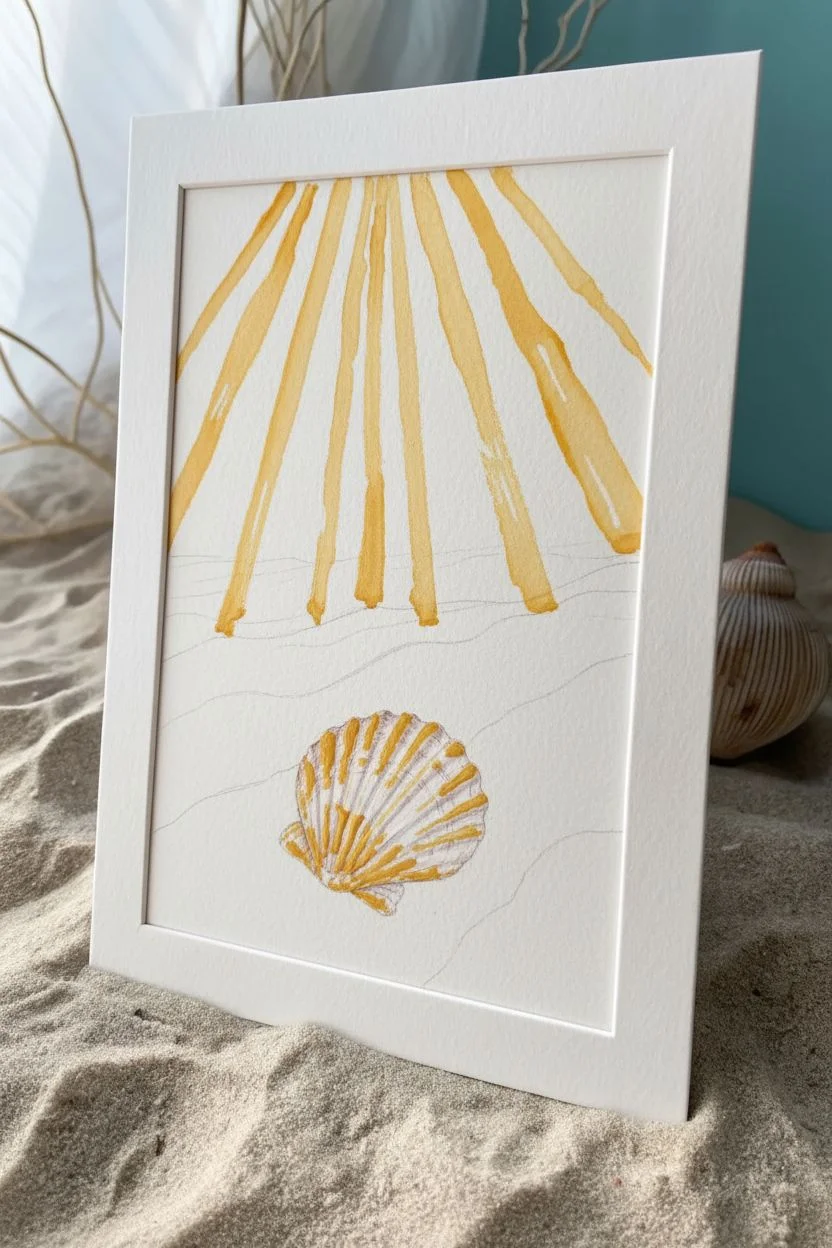
Capture the tranquil beauty of sunlight piercing through ocean waters with this luminous watercolor project. Using simple masking and glazing techniques, you’ll create soft rays of light dancing over a rippled sandy bottom and a delicate seashell focal point.
Step-by-Step Tutorial
Materials
- Cold press watercolor paper (300 gsm)
- Watercolor paints (Turquoise, Phthalo Blue, Burnt Sienna, Yellow Ochre, Paynes Grey, White Gouache or Acrylic)
- Masking fluid (drawing gum) and old brush or silicone applicator
- Soft synthetic watercolor brushes (large flat wash, medium round, size 0 detail)
- Clean water jars
- Paper towels
- Pencil and eraser
- Salt (optional for texture)
Step 1: Sketching and Masking
-
Composition Layout:
Begin by lightly sketching the horizon line where the water meets the sandy bottom, slanting it slightly for dynamic movement. Draw the outline of the large scallop shell in the foreground, focusing on its fan shape and ridges. -
Define the Rays:
Very lightly draw diagonal lines radiating from the top surface down towards the sand to guide where your light rays will fall. These shouldn’t be rigid, just gentle guides. -
Mask the Highlights:
Apply masking fluid to preserve the pure white paper for the brightest parts of the light rays. Use long, sweeping strokes starting from the top. Also mask the highlights on the shell’s ridges. -
Protect the Sand:
Mask the thin, wavy lines of the sand ripples to keep them crisp later. Let the masking fluid dry completely before touching the paper again.
Fixing Hard Edges
If your light rays look too stiff after removing masking fluid, scrub the edges gently with a damp stiff brush (like an acrylic brush) to blur the line.
Step 2: Painting the Ocean Depths
-
First Wet-on-Wet Layer:
Wet the entire water section of the paper with clean water. Drop in a very dilute wash of Turquoise and a touch of Yellow Ochre near the top to suggest sunlight warmth. -
Deepening the Blue:
While the paper is still damp, introduce Phthalo Blue into the darker areas between the light rays. Let the paint bleed softly, but try to keep the areas where you masked lighter. -
Defining the Rays:
Once the first layer is dry, mix a stronger teal color. Paint negative space around the light rays, making the water darker as you go deeper, creating distinct shafts of light. -
Creating Depth:
Add a third layer of deep teal or Phthalo Blue mixed with a tiny bit of Paynes Grey to the darkest water sections, reinforcing the contrast against the light rays.
Add Magic Sparkle
Mix a tiny amount of iridescent medium into your top water glaze or sprinkle a pinch of salt on the wet sand area for crystal-like texture.
Step 3: The Sandy Floor
-
Sand Base Coat:
Wash the bottom section with a mix of Yellow Ochre and a tiny dot of Burnt Sienna to create a warm, sandy beige. -
Shadows and Ripples:
While the sand wash is wet, drop in a cooler, grey-blue mix (using your water colors) into the valleys of the sand ripples to create soft shadows. -
Texture Time:
Splatter tiny specks of darker brown and blue paint onto the damp sand area to mimic pebbles and grain texture. Allow everything to bone dry. -
Reveal the White:
Gently rub away all the masking fluid with your finger or a rubber cement pickup tool to reveal the crisp white paper underneath.
Step 4: Shell and Finishing Touches
-
Softening Edges:
Use a damp, clean brush to gently soften the hard edges of the revealed light rays, blending them slightly back into the blue water for a glowing effect. -
Painting the Shell Base:
Paint the shell with a very pale wash of Burnt Sienna and rose. Let it dry. -
Shell Details:
Using your smallest detail brush and a mix of brown and purple, paint the shadows between the shell ridges to give it a 3D ribbed appearance. -
Enhancing Highlights:
If the sun rays aren’t bright enough, paint thin streaks of white gouache over the light areas to boost the luminosity. -
Final Shadow:
Add a cast shadow underneath the shell using a cool grey-blue tone to ground it on the sand and finish the piece.
Once dry, frame your masterpiece in a crisp white mat to make those ocean blues truly pop


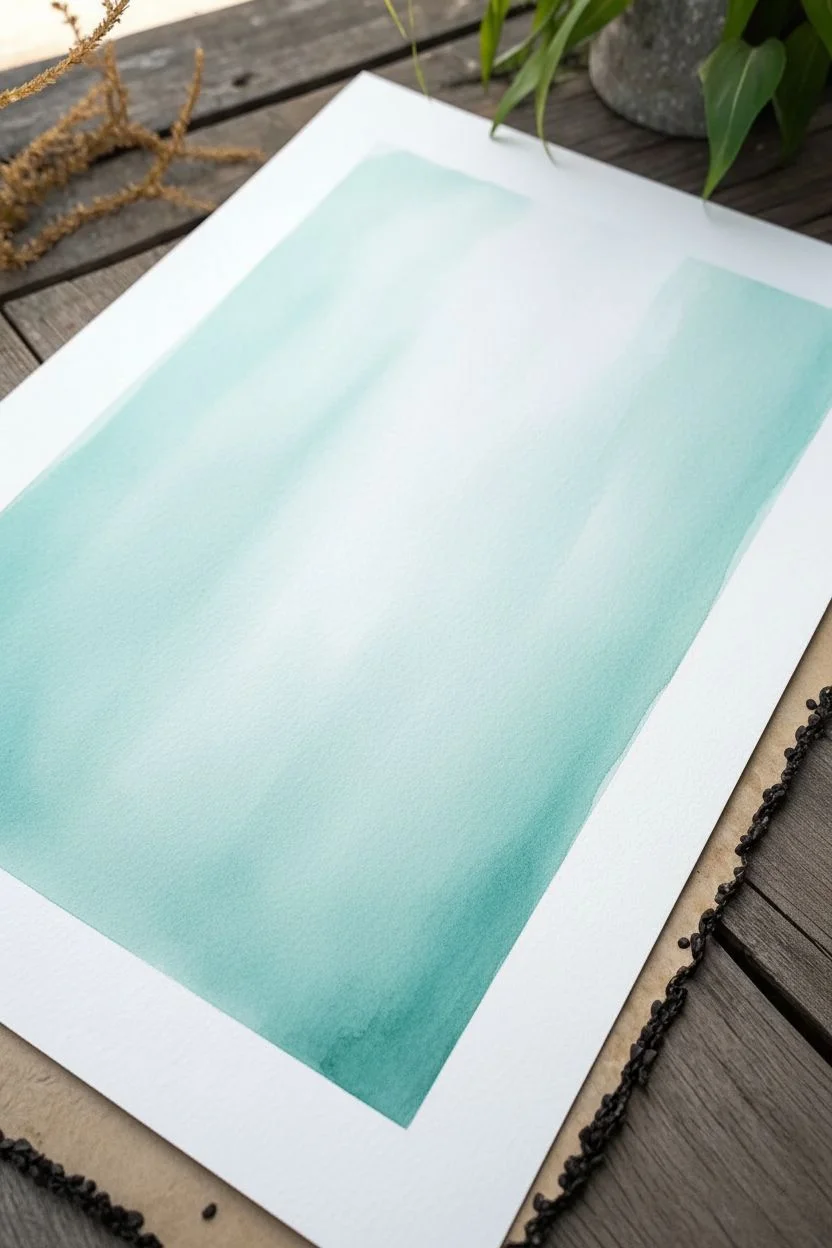
Bubbles That Instantly Say “Underwater”
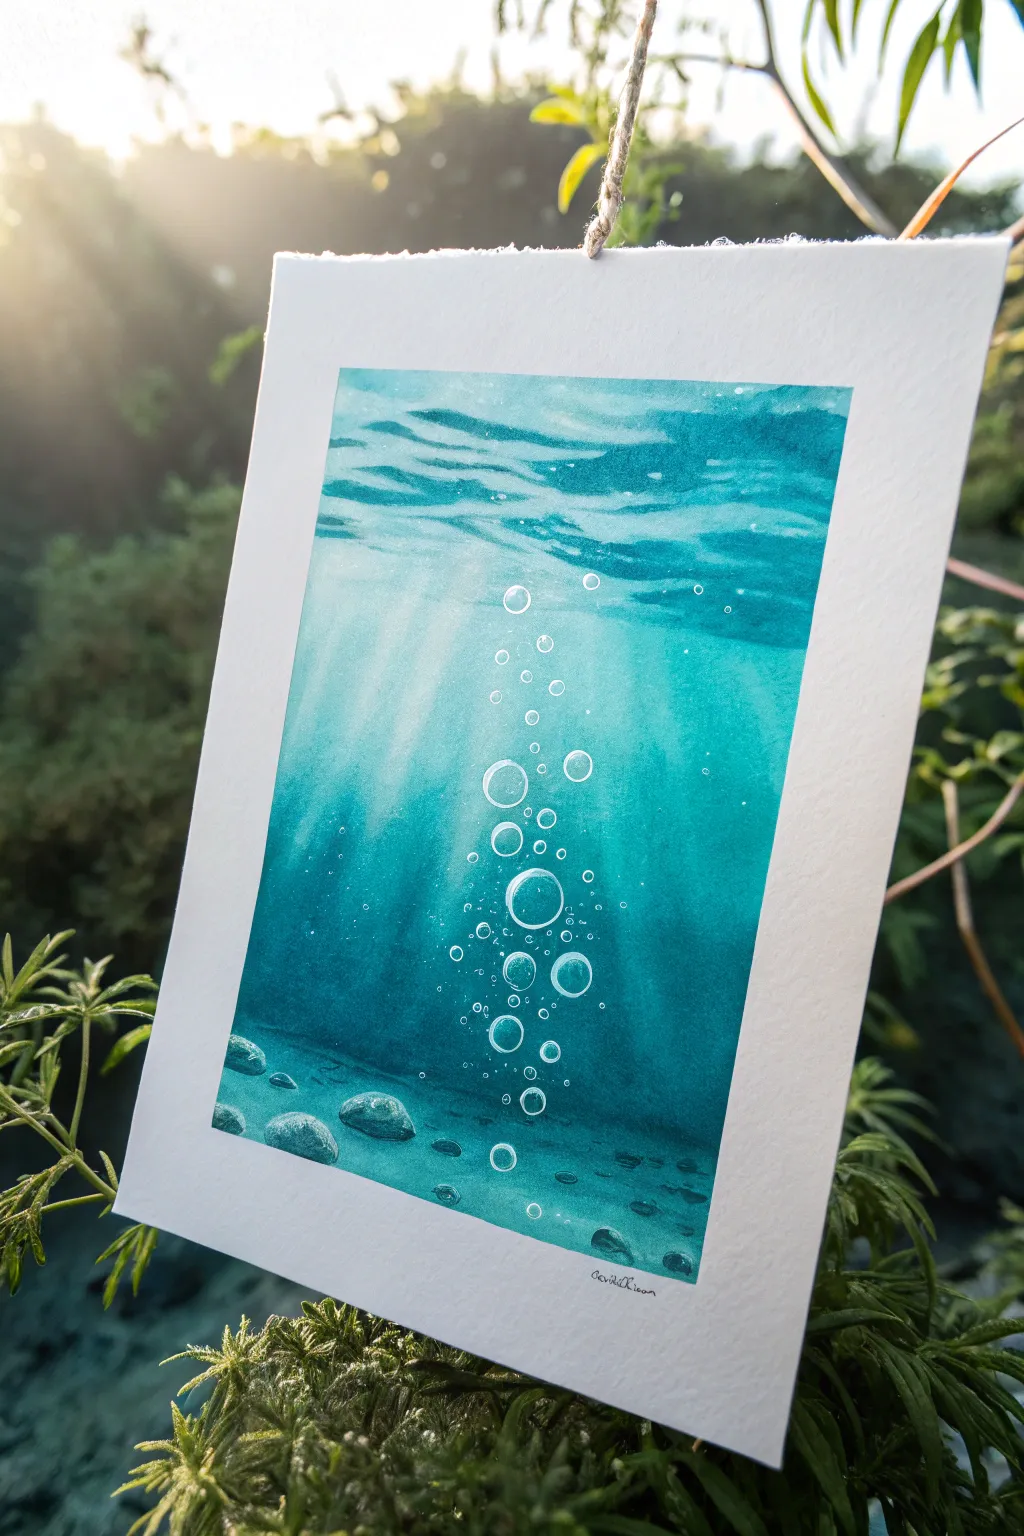
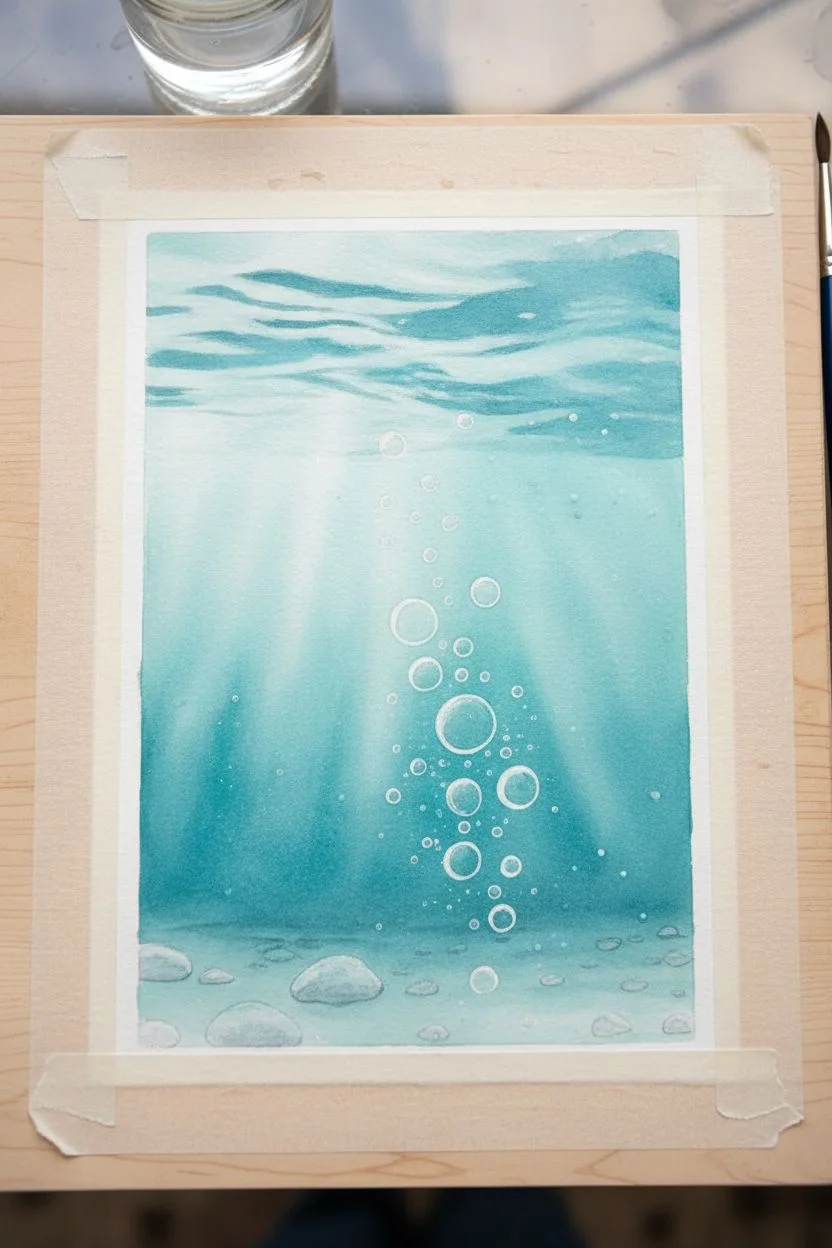
Capture the serene magic of the deep blue with this luminous watercolor study. By combining smooth gradients with crisp, negative-painted bubbles, you’ll create a convincing underwater atmosphere that glows with light.
Detailed Instructions
Materials
- Cold-pressed watercolor paper (300gsm)
- Painter’s tape or masking tape
- Watercolor paints (Turquoise, Pthalo Blue, Indigo, White Gouache)
- Flat wash brush (3/4 inch)
- Round brush (size 6 or 8)
- Detail brush (size 0 or 1)
- White gel pen (optional)
- Clean water jar
- Paper towels
Step 1: Setting the Scene
-
Prepare your paper:
Tape down all four edges of your watercolor paper to a board. This creates the crisp white border seen in the final piece and prevents the paper from buckling during the wet washes. -
Draft the composition:
Lightly sketch the horizon line of the water surface near the top third of the paper. Gently draw circles of various sizes rising from the bottom center to the top, representing the bubble stream. Sketch a few rock shapes at the very bottom. -
Masking fluid (optional):
If you struggle with painting around small shapes, you can apply masking fluid to the bubbles now. Otherwise, we will carefully paint around them or lift them out later. I prefer painting around them for softer edges.
Step 2: The Water Gradient
-
Mix your ocean palette:
Prepare three concentrations of paint: a light watery turquoise, a medium teal (turquoise + pthalo blue), and a deep shadow blue (pthalo blue + indigo). -
Wet-on-wet start:
Using your large flat brush, wet the entire paper area inside the tape with clean water until it glistens evenly but isn’t pooling. -
Apply the light wash:
Start at the top with your lightest turquoise mix. Paint horizontal strokes, letting the color flow down the wet paper. Keep this area pale to represent sunlight hitting the surface. -
Deepen the depths:
While the paper is still wet, switch to your medium teal. Start blending it in from the middle section downwards. As you reach the bottom third, drop in the deep shadow blue mix. -
Create the light rays:
Before the wash dries completely, use a clean, damp brush to ‘lift’ diagonal streaks of paint from the top left corner downwards. Firmly wipe the damp brush across the paper to remove pigment, creating soft sunbeams.
Natural Flow Pro Tip
Bubbles rarely rise in a perfectly straight line. Let your stream curve slightly in an ‘S’ shape to mimic water currents pushing them as they ascend.
Step 3: Surface & Details
-
Paint the water surface:
Once the background is barely damp or dry, use your round brush with a medium teal mix to paint wavy, horizontal lines near the top. Vary the thickness to mimic rippling water seen from below. -
Define the rocks:
At the bottom, paint the rock shapes using the indigo mix. Keep the tops of the rocks slightly lighter to suggest light hitting them, and darken the undersides and the sand around them for shadows.
Level Up: Surface View
Add a silhouette of a boat hull or duck feet at the very top water line to give the viewer a sense of scale and story.
Step 4: The Bubble Effect
-
Outline the bubbles:
If you didn’t obscure the bubbles with the background wash, simply refine their edges now. If you painted over them, use white gouache or a white gel pen to draw the circles. -
Add dimension to bubbles:
Bubbles aren’t solid white. Paint a thin white crescent on the lower left side of each bubble (where the light hits) and a smaller reflection dot on the upper right. Leave the center transparent. -
Connect the stream:
Add tiny clusters of microscopic bubbles (just dots) around the larger main bubbles. This variety in size makes the movement look natural. -
Enhance highlights:
Using opaque white gouache, add sharp highlights to the very top rippled surface water to make it sparkle. You can also add a faint white rim to the top of the rocks. -
Final adjustments:
Wait for everything to be bone dry. Carefully peel away the tape at a 45-degree angle to reveal your clean edges.
Now you have a refreshing portal to the ocean depths right on your wall


Easy Fish Silhouettes in a School
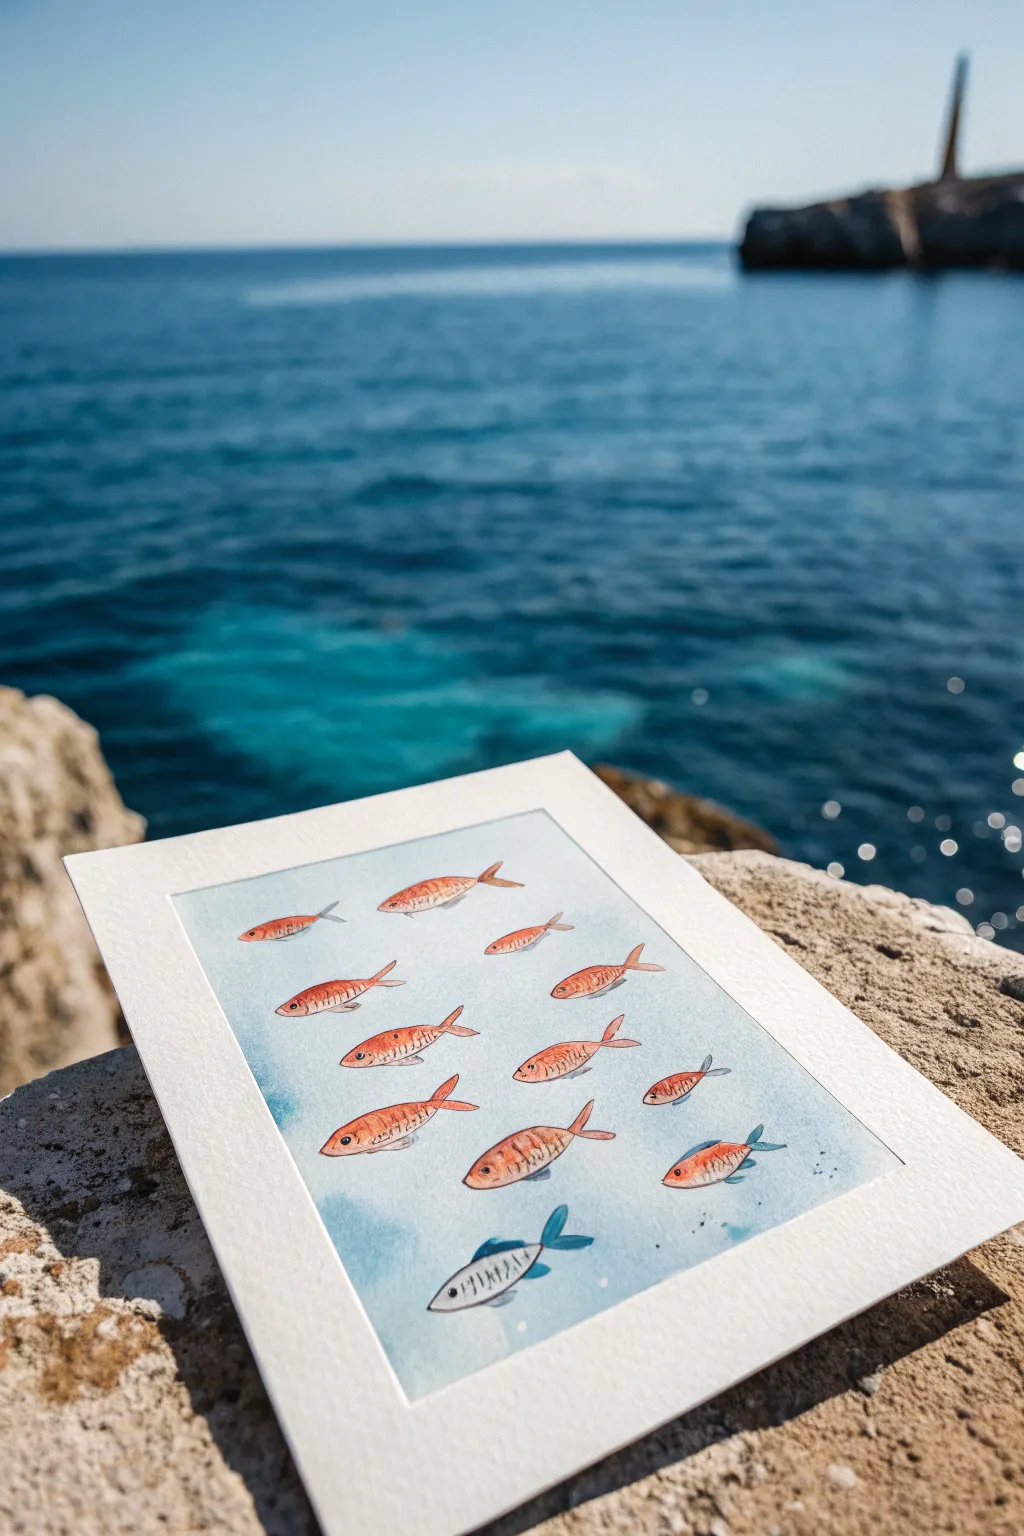
Capture the movement of the sea with this charming watercolor study featuring a synchronized school of small fish. The soft blue wash background and delicate red details create a peaceful, aquatic atmosphere perfect for beginner painters.
How-To Guide
Materials
- Cold press watercolor paper (approx. 5×7 inches)
- Watercolor paints (Cerulean Blue, Cadmium Red or Orange, Payne’s Grey, darker Blue)
- Round watercolor brushes (size 6 for washes, size 2 or 0 for details)
- Pencil (HB or H)
- Kneaded eraser
- Clean water
- Paper towel
- Masking tape (optional, to secure paper)
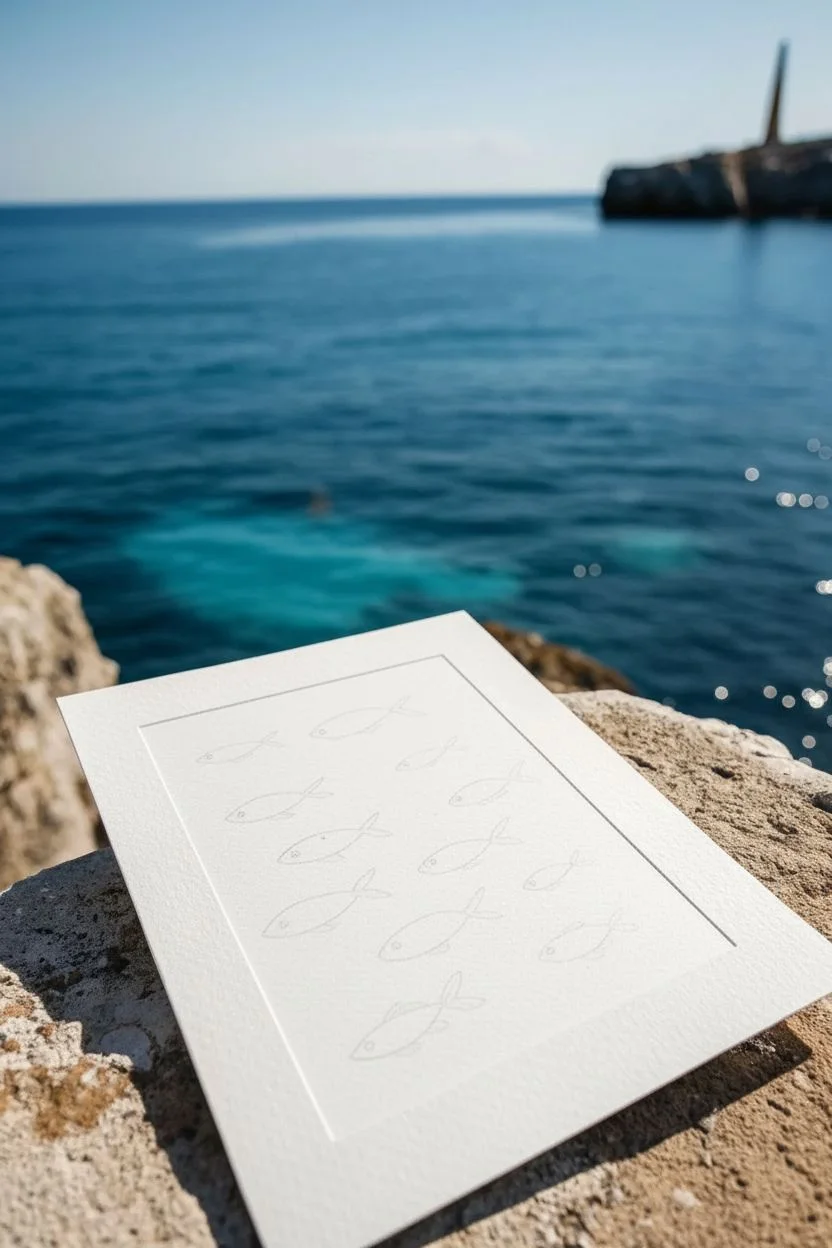
Step 1: Sketching the Composition
-
Observe the layout:
Before putting pencil to paper, look at how the fish are arranged. They are swimming diagonally upwards from left to right, creating a sense of unified movement. -
Lightly sketch the shapes:
Using a hard pencil like an H or HB, very faintly sketch small, almond-shaped ovals for the bodies of the fish. Vary their sizes slightly to make them look organic. -
Add tails and fins:
Draw simple triangle shapes for the tail fins. Add tiny dorsal fins on top and pectoral fins on the bottom. Keep these lines minimal as they are just guides. -
Position the unique fish:
At the very bottom, draw one slightly larger fish swimming in the opposite direction or slightly lower, which will be our distinct blue fish later. -
Clean up the sketch:
Roll a kneaded eraser over the drawing to lift up excess graphite. You want the lines to be barely visible so they don’t show through the transparent watercolor.
Bleeding Lines?
If your red fish bleed into the blue background, the blue wash wasn’t dry enough. Let it dry longer or use a hair dryer on low heat before painting the fish.
Step 2: Painting the Background
-
Prepare the blue wash:
Mix a very watery puddle of Cerulean Blue. You want a pale, transparent color that suggests water without overwhelming the fish. -
Apply the wet-on-dry wash:
Using your larger round brush (size 6), paint the blue wash over the entire paper *except* for the fish shapes. Carefully paint around your pencil outlines. -
Soften edges:
If you get hard lines where the blue paint dries, use a clean, slightly damp brush to gently soften the edges while the paint is still workable. -
Add subtle depth:
While the background is still slightly damp, you can drop in tiny amounts of slightly darker blue in random spots to create the texture of water, but keep it very subtle. -
Let it dry completely:
Patience is key here. Wait until the background is bone dry before touching the fish, otherwise the colors will bleed into the blue.
Pro Tip: Highlights
Leave tiny slivers of white paper unpainted on the top edge of the fish bodies. This creates a ‘specular highlight’ making them look wet and shiny.
Step 3: Bringing the School to Life
-
Mix the fish color:
Create a mix of Cadmium Red with a touch of Orange and plenty of water. You want a coral or salmon tone, not a solid opaque red. -
Paint the red fish bodies:
Fill in the bodies of the upper fish with this coral mix. As you paint, vary the pressure to make some areas slightly darker and others transparent. -
Paint the blue fish:
For the solitary fish at the bottom, use a mix of blue and a tiny touch of grey. Paint the body and tail, leaving the belly slightly lighter if possible. -
Wait for the base layer to dry:
Allow these base colors to dry completely. If the paper feels cool to the touch, it’s still wet.
Step 4: Adding Details and Contrast
-
Add texture to the red fish:
Switch to your smallest detail brush (size 0 or 2). Mix a more concentrated, less watery version of your red/orange paint. -
Paint scales and bones:
Paint fine vertical lines or little ‘v’ shapes along the bodies to suggest scales or skeletons. This adds that illustrative, textured look. -
Define the fins:
Outline the tails and dorsal fins with the concentrated red mix, leaving the centers of the fins lighter or empty. -
Detail the blue fish:
Using a dark blue or Payne’s Grey, add similar vertical striping details and outline the fins of the bottom blue fish. -
Add the eyes:
Dip the very tip of your small brush into concentrated black or dark grey paint. Dot a tiny eye onto the head of each fish. -
Final splatters:
I like to load a brush with watery blue paint and tap it against another brush handle to create tiny splatters near the bottom, mimicking bubbles or debris.
Once dry, frame your artwork with a wide white mat to make those bright colors really pop against the blue background
BRUSH GUIDE
The Right Brush for Every Stroke
From clean lines to bold texture — master brush choice, stroke control, and essential techniques.
Explore the Full Guide
Seaweed and Kelp Forest Strokes
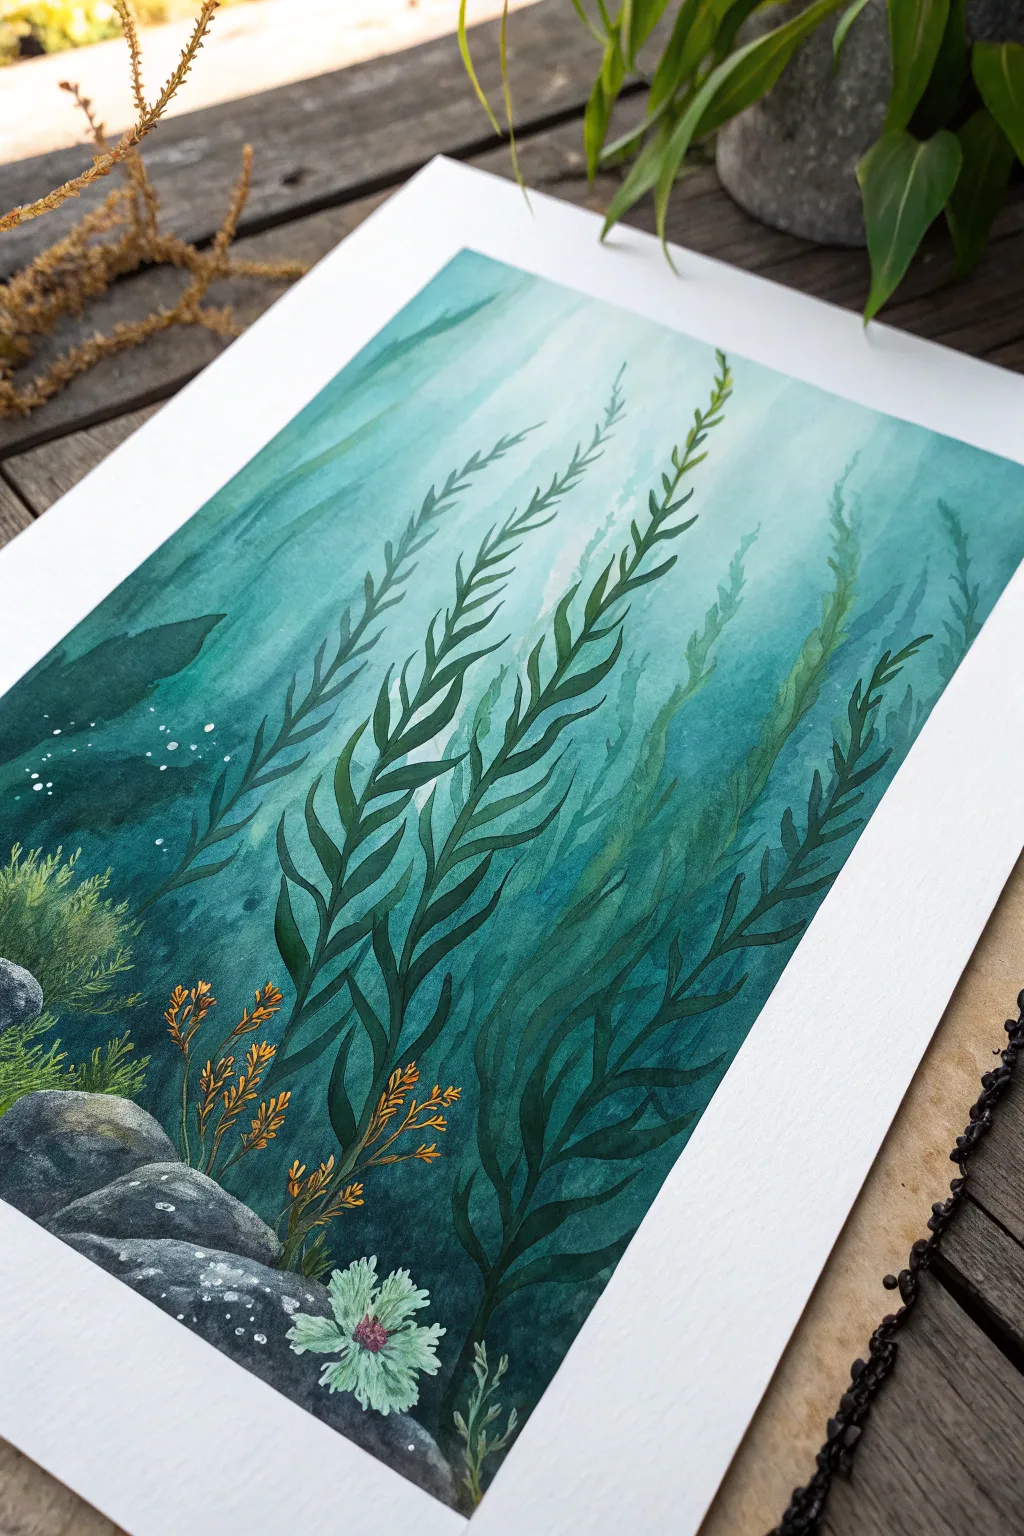
Capture the serene depth of an underwater world with this watercolor project that focuses on atmospheric perspective. By layering teal gradients and defining crisp kelp fronds, you’ll build a scene that feels both vast and intimate.
Step-by-Step
Materials
- Cold Press Watercolor Paper (300 gsm)
- Watercolor paints: Phthalo Blue, Phthalo Green, Indigo, Lemon Yellow, Burnt Sienna
- Gouache: White (optional for highlights)
- Large flat wash brush
- Medium round brush (size 6 or 8)
- Small liner or detail brush (size 0 or 2)
- Masking fluid (optional)
- Clean water and paper towels
Step 1: Setting the Atmosphere
-
Prepare the Gradient:
Mix a large puddle of a light turquoise color using Phthalo Blue, a touch of Phthalo Green, and plenty of water. You want this base layer to be very pale and transparent. -
Apply the Initial Wash:
Wet your entire paper surface with clean water. Apply your turquoise mix, starting darker at the bottom corners and fading upward towards the top right, leaving some white paper peeking through for the surface light. -
Create Depth Rays:
While the paper is still damp but not dripping, paint diagonal streaks from the top right corner downward using a slightly more saturated teal. Soften the edges with a clean, damp brush. -
Allow to Dry:
Let this first layer dry completely. The paper must be bone dry before adding defined shapes, or your kelp will blur into the background.
Pro Tip: Wet-on-Dry Control
For the sharpest foreground leaves, ensure your brush isn’t overloaded with water. Blot it on a towel after dipping in paint for crisper edges.
Step 2: Layering the Background Kelp
-
Mix Mid-Tone Teal:
Create a slightly darker version of your background color. It should be distinct but still feel ‘far away’ and watery. -
Paint Distant Fronds:
Using your medium round brush, paint long, wavy vertical lines to represent distant kelp. Keep these strokes fluid and organic, allowing them to fade out near the top. -
Add Leaf Details:
Along these distant lines, add simple, elongated leaf shapes. Don’t worry about perfect detail here; these shapes should feel somewhat hazy and atmospheric. -
Tint the Bottom:
Glaze a darker blue-green mix over the bottom third of the paper to deepen the ocean floor area, painting right over the dried distant kelp stems.
Level Up: Texture Trick
While the rock paint is still wet, sprinkle a tiny pinch of salt on it. Brush it off when dry for a natural, pitted stone texture.
Step 3: Constructing the Foreground
-
Mix Deep Green:
Combine Phthalo Green and Indigo to create a rich, deep sea-green. This will be your primary color for the main kelp strands. -
Paint Main Stalks:
Draw three or four prominent wavy lines rising from the bottom, curving slightly towards the light source. Vary the thickness of the lines to suggest movement. -
Add Serrated Leaves:
Paint the characteristic serrated leaves of the giant kelp. Start at the stem and pull outward with a flicking motion, tapering to a point. Make these crisp and dark. -
Overlap Your Shapes:
Ensure some of these dark foreground leaves cross over the lighter background ones. This overlapping is crucial for creating the illusion of deep water. -
Define the Rocks:
Mix a dark grey using Indigo and Burnt Sienna. Paint rounded rock shapes at the bottom left corner, leaving small slivers of white paper for highlights on the top edges.
Step 4: Adding Life and Details
-
Paint Sea Moss:
Using a lighter green mix, dab irregular, fluffy textures on top of the rocks to create a mossy underwater growth. -
Introduce Warm Accents:
Mix a golden orange using Burnt Sienna and Lemon Yellow. Paint delicate, branching coral-like weeds rising from behind the rocks to contrast the cool blues. -
Detail the Anemone:
Paint a small, spiky flower shape near the rocks using a pale green mix with a touch of pink or purple in the center. -
Add Bubbles:
Using opaque white gouache or white ink, dot tiny clusters of bubbles rising from the rocks and kelp leaves. -
Final Contrast Check:
Assess the painting. If the foreground kelp has dried too light, go back over the shadowed sides of the leaves with a concentrated Indigo mix to make them pop.
Step back and admire the tranquil underwater scene you have brought to life using simple layers and gradients
Friendly Shark in Simple Profile
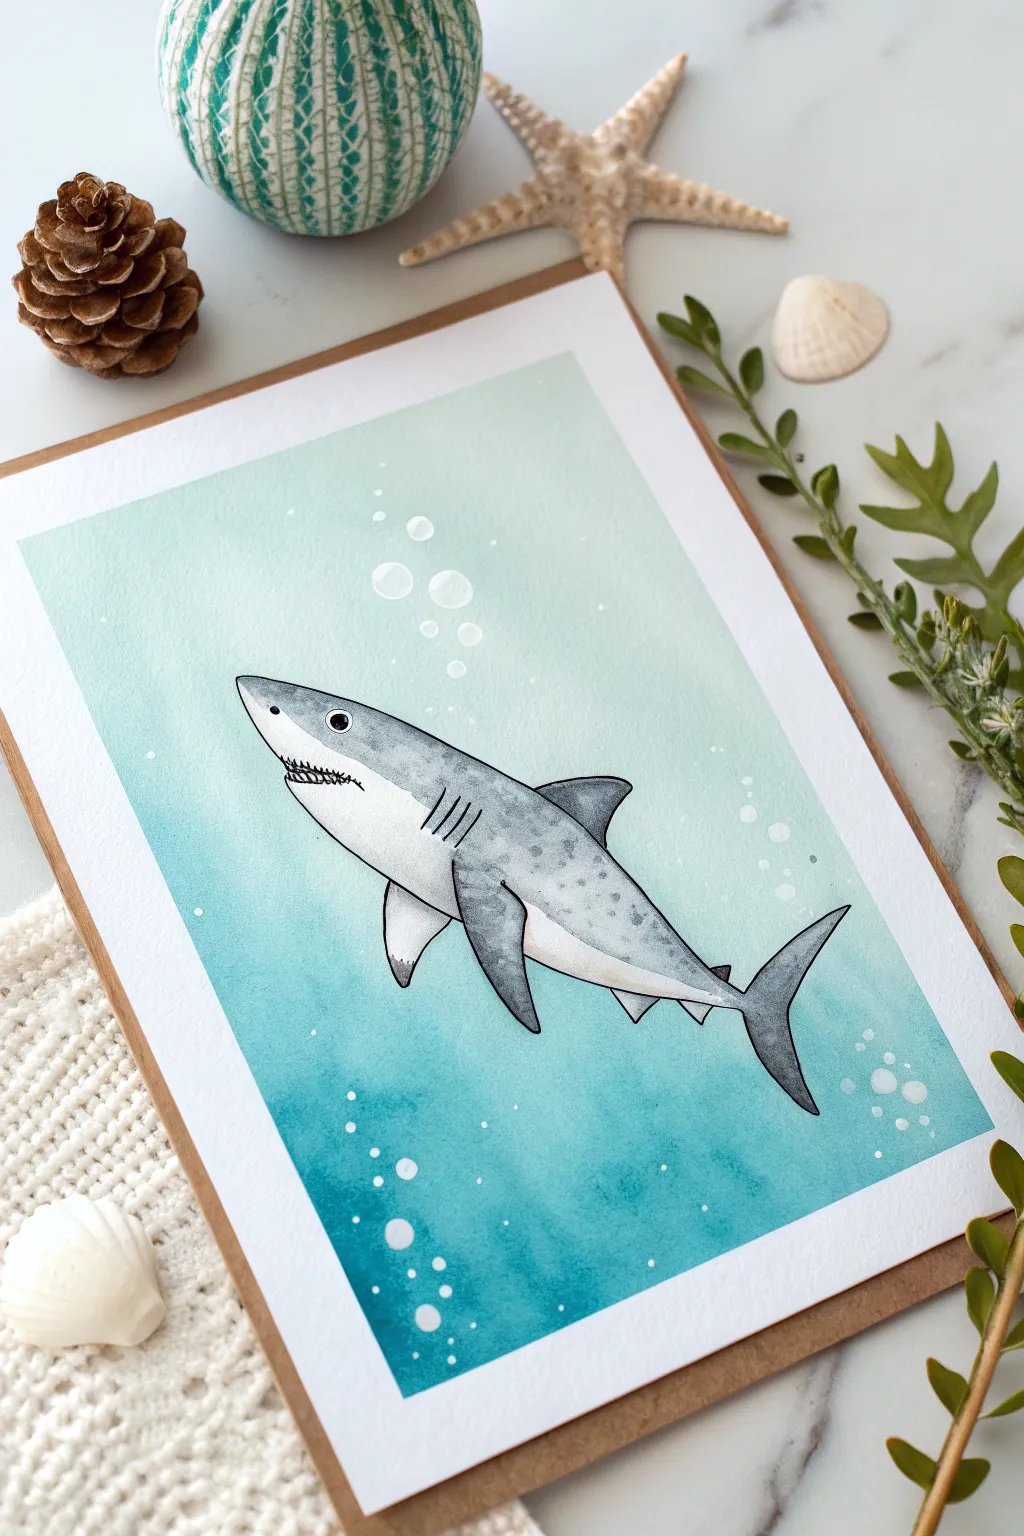
Dive into creativity with this charming underwater scene featuring a friendly shark profile gliding through bubbly depths. This project combines a simple ink illustration style with a vibrant watercolor wash to capture the serene movement of ocean life.
Detailed Instructions
Materials
- Cold press watercolor paper (A5 size recommended)
- Watercolors (Teal, Prussian Blue, Pale Turquoise, Payne’s Grey)
- Black waterproof fine-liner pens (sizes 0.3 and 0.5)
- White gel pen or white gouache
- Round watercolor brushes (sizes 4 and 8)
- Pencil and eraser
- Masking tape
- Jar of clean water
- Paper towel
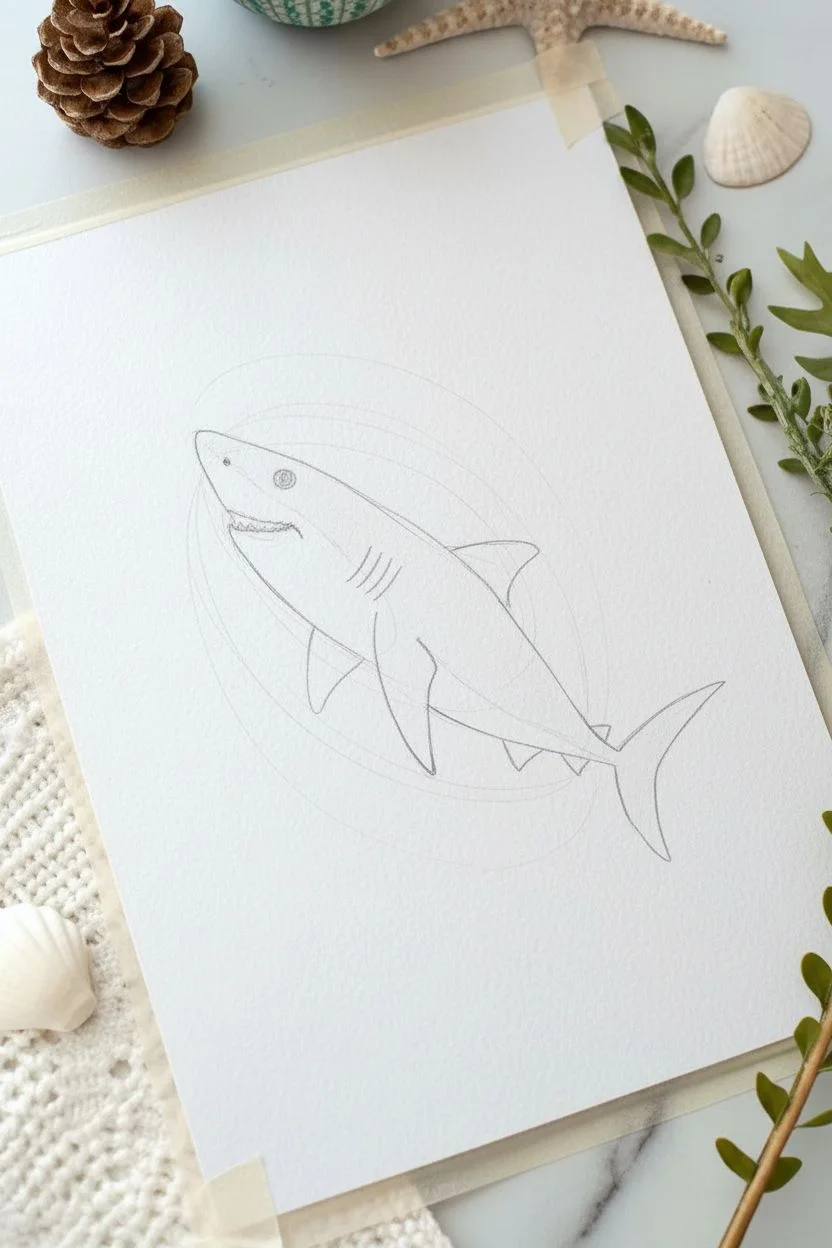
Step 1: Sketching the Shark
-
Draft the basic shape:
Start by lightly sketching a long, torpedo-like oval diagonally across the center of your paper. Make the left side slightly blunter for the nose and the right side tapered for the tail. -
Refine the profile:
Define the shark’s snout. Add the mouth slightly open to show a hint of teeth, but keep the line curving upward at the corner to maintain that ‘friendly’ appearance. -
Add the fins:
Sketch the large dorsal fin on top and the pectoral fin on the side. Add the smaller pelvic fins near the rear and draw the classic crescent-shaped tail fin at the back. -
Detail the gills and eye:
Place a small circle for the eye near the front. Just behind the head, draw five small, vertical curved lines for the gills.
Clean Edges Protocol
To prevent paper tearing, warm the masking tape with a hairdryer for a few seconds before peeling it off. This softens the adhesive instantly.
Step 2: Inking the Outline
-
Trace the drawing:
Using your 0.5 waterproof fine-liner, carefully trace over your pencil lines. Ensure the ink is fully waterproof so it won’t bleed when we paint later. -
Refine the details:
Switch to the finer 0.3 pen for delicate areas like the teeth and gills. Add small, scattered dots on the shark’s back for texture. -
Erase guidelines:
Once the ink is completely dry—give it a few minutes just to be safe—gently erase all the visible pencil marks to leave a clean black outline.
Step 3: Painting the Ocean
-
Prepare the background area:
It helps to tape down the edges of your paper to a board to create a crisp white border. This mimics the professional framed look in the photo. -
Mix your ocean gradience:
Prepare a watery mix of Pale Turquoise and a stronger mix of Teal or Prussian Blue. We want a gradient effect. -
Apply the wash:
Wet the entire background area around the shark with clean water first. Drop the dark Teal color at the bottom and let it fade upward into the Pale Turquoise, getting lighter as you reach the surface. -
Create soft textures:
While the wash is still wet, drop in tiny blooms of clean water or darker blue near the bottom to create organic underwater currents. -
Dry the background:
Let this layer dry completely. The paper must be bone-dry before you paint the shark to avoid colors bleeding into the animal.
Patchy Background?
If your ocean wash dries with unwanted hard lines, re-wet the entire background gently with a large brush and smooth out the transition while it’s damp.
Step 4: Coloring the Shark
-
Base grey layer:
Mix a very diluted wash of Payne’s Grey. Paint the upper half of the shark’s body, avoiding the belly and the area under the nose, which should remain white. -
Deepen the shadows:
While the grey is slightly damp, add a concentrated drop of Payne’s Grey to the tips of the fins and along the very top edge of the back to create volume. -
Add skin texture:
I like to use a nearly dry brush to dab small spots of darker grey along the shark’s flank, mimicking the speckled skin pattern shown in the reference. -
Paint the eye:
Fill in the eye with solid black ink or dark paint, leaving a tiny pinprick of white paper (or adding a white dot later) for a lively reflection.
Step 5: Final Touches
-
White belly shading:
Use a very watery, almost invisible grey to add just a hint of shadow along the bottom of the white belly, giving it roundness without darkening it too much. -
Adding bubbles:
Using white gouache or a white gel pen, draw circles rising from the depths. Vary the sizes, making some solid white and others just outline rings. -
Final highlights:
Add tiny white highlights to the top of the dorsal fin and nose if needed to separate the shark from the background water. -
Reveal the border:
Once everything is completely dry, slowly peel away the masking tape at a 45-degree angle to reveal your crisp, professional edges.
This serene shark is now ready to be framed or sent as a tranquil greeting card to an ocean lover

PENCIL GUIDE
Understanding Pencil Grades from H to B
From first sketch to finished drawing — learn pencil grades, line control, and shading techniques.
Explore the Full Guide
Whale Silhouette in Deep Water

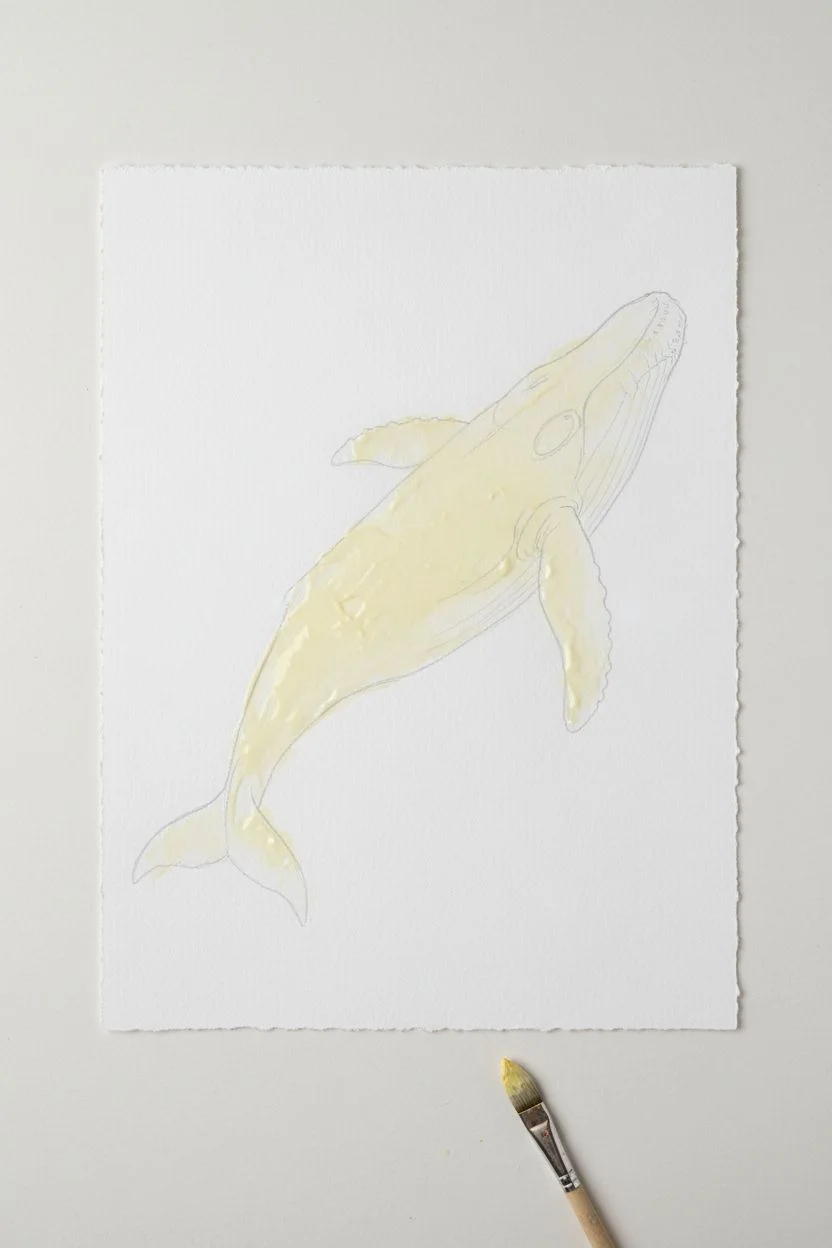
Dive into the depths with this atmospheric painting featuring a majestic whale silhouette rising toward the surface. By mastering wet-on-wet gradients and resist techniques, you’ll create a luminous underwater scene that looks beautifully complex but is surprisingly simple to achieve.
Step-by-Step Guide
Materials
- Cold press watercolor paper (deckled edge preferred for that rustic look)
- Watercolor paints: Turquoise, Cyan or Phthalo Blue, Prussian Blue, Indigo, Payne’s Grey
- Masking fluid (drawing gum) and old brush
- White gel pen or white gouache
- Round brushes: Size 8 or 10 for washes, Size 2 or 4 for details
- Jar of clean water
- Paper towels
- Pencil and eraser
- Salt (optional for texture)
Step 1: Preparation & Masking
-
Sketch the outline:
Begin by lightly sketching the outline of a humpback whale swimming diagonally upwards. Focus on the large curve of the back, the distinctive shape of the fluke (tail), and the long pectoral fin. Keep your pencil lines very faint so they don’t show through the lighter water later. -
Mask the whale:
Using an old brush (one you don’t mind ruining) or a silicone applicator, fill in the entire whale shape with masking fluid. This protects the white paper so we can paint the ocean background freely without worrying about the edges. -
Let it dry completely:
Wait until the masking fluid is entirely dry and rubbery to the touch. If you paint over it while wet, it will smear and ruin the resist effect.
Step 2: Creating the Ocean Gradient
-
Pre-wet the paper:
Using your large round brush and clean water, dampen the entire paper surface around the masked whale. It should be glistening with a sheen, but not forming puddles. -
Start with the light zone:
Load your brush with a watery mix of Turquoise or light Cyan. Apply this to the top third of the paper, letting the color bloom softly into the wet fibers. Keep this area quite pale to suggest sunlight filtering down. -
Deepen the mid-tones:
While the paper is still wet, mix a stronger blue like Phthalo or Prussian Blue. Introduce this color starting just below the turquoise area, blending it downwards. Use horizontal strokes to mimic water currents. -
Add the deep depths:
For the bottom third, use your darkest mix—Indigo combined with Payne’s Grey. Drop this concentrated pigment into the wet paper at the bottom, tilting your board slightly to help it flow upward into the mid-tones. -
Create texture while wet:
To create the feeling of churned water or bubbles, splatter a few drops of clean water into the drying paint, particularly near the bottom corners. The water will push the pigment away, creating soft blooms. -
Dry partially:
Let the background dry until it’s damp but no longer shiny. This is the perfect time to add a second layer of Indigo at the very bottom corners to intensify that abyssal darkness. -
Full dry:
Allow the painting to dry strictly and completely. It must be bone dry before the next step.
Clean Edges Pro-Tip
To get that beautiful deckled edge look without expensive paper, simply tear your watercolor paper against the edge of a ruler instead of cutting it with scissors.
Step 3: Revealing & Painting the Whale
-
Remove the mask:
Gently rub your finger or a rubber cement pickup eraser over the whale shape to peel away the masking fluid. You should be left with a stark white silhouette against your blue ocean. -
Base layer for the whale:
Mix a dark grey-blue using Indigo and a touch of water. Paint the entire whale shape, but leave the belly area slightly lighter or blotting it with a tissue to create a highlight. -
Detailing the belly:
Using fine lines of a lighter grey or diluted blue, paint the ventral pleats (the grooves) on the whale’s underside. These should follow the curve of the jaw toward the fin. -
Darkening the top:
Apply pure Indigo or Payne’s Grey to the top ridge of the whale’s back, the tail fluke, and the pectoral fin. This creates a rounded, 3D effect where the bottom stays lighter.
Level Up: Cosmic Ocean
Turn this into a space whale by swapping the bubbles for stars. Use concentrated purple in the deepest water and flick gold paint instead of white for a magical galaxy effect.
Step 4: Atmospheric Details
-
Adding barnacles:
Once the whale is dry, use your white gel pen or a tiny brush with white gouache to dot small clusters of barnacles on the chin, leading edge of the fins, and tail. -
Painting bubbles:
Using white gouache, paint varied circles rising from the depths. I like to make the ones near the bottom larger and more transparent (by diluting the white), and the ones near the whale smaller and brighter. -
Splatter stars:
Protect the whale with a scrap of paper if you want it clean, then flick some white gouache off a toothbrush or stiff brush to create fine sea-spray or tiny suspended particles in the water. -
Final assessment:
Step back and check your contrast. If the depths aren’t dark enough, you can carefully glaze another layer of Indigo over the bottom corners, painting around your new bubbles.
Peel off any remaining tape and admire the serene movement of your underwater giant
Easy Coral Reef Using Repeated Shapes
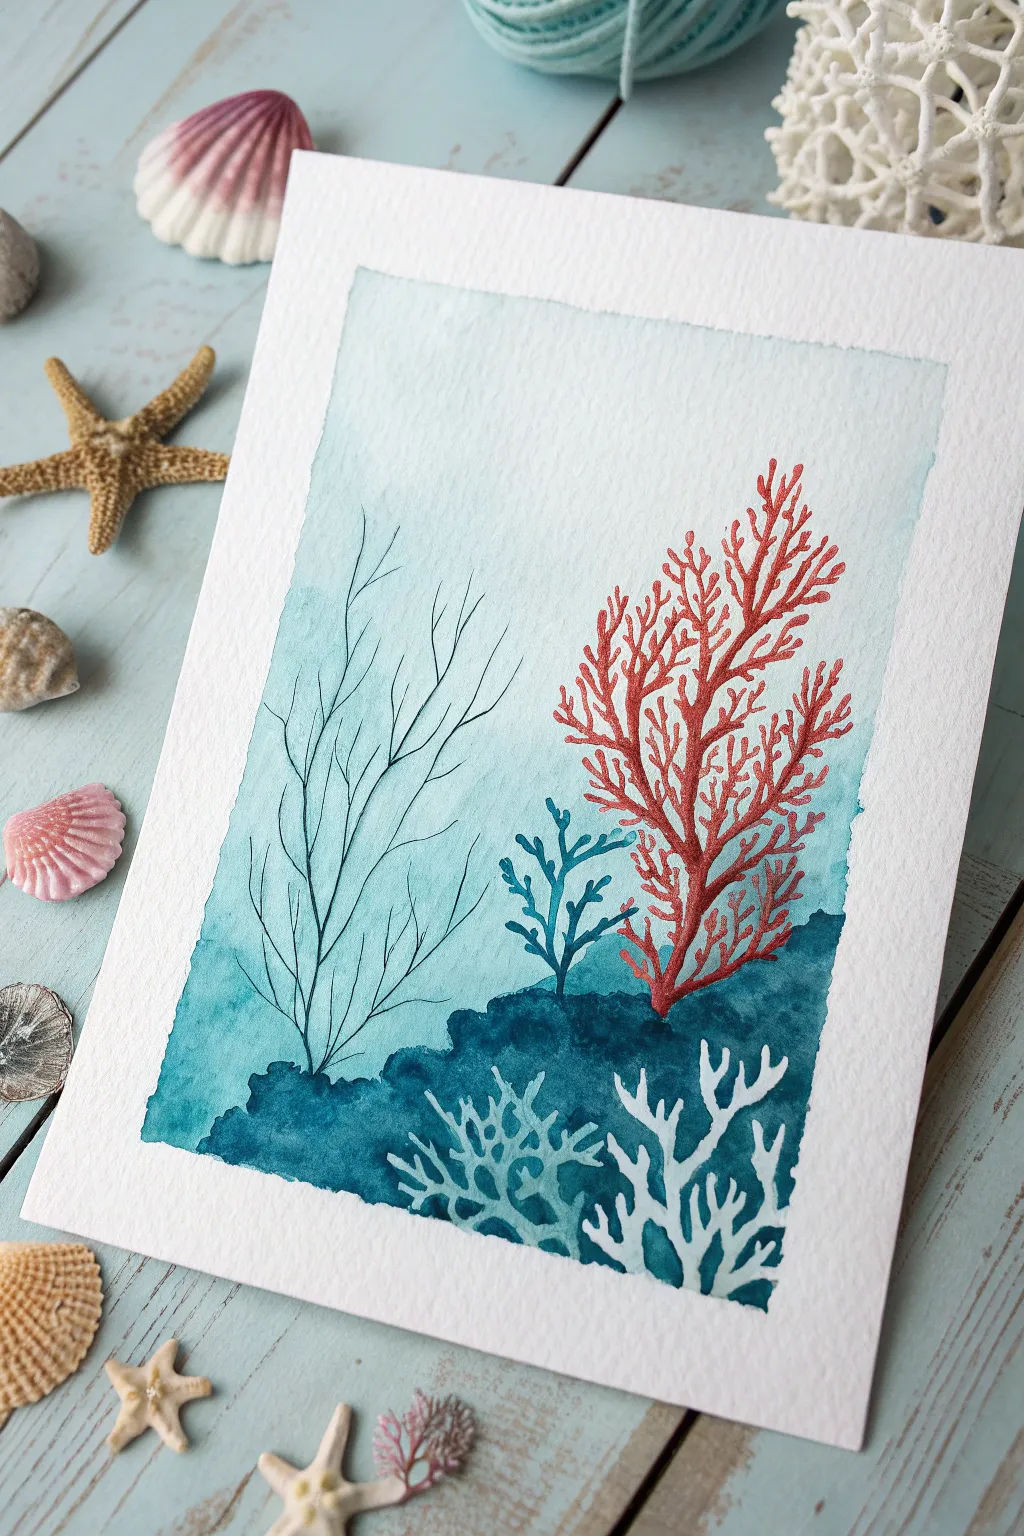
This vibrant watercolor project captures the serene beauty of a coral reef with a striking contrast between deep ocean blues and a fiery red focal point. By layering simple washes and repeated organic shapes, you’ll build depth and complexity without needing advanced drawing skills.
Detailed Instructions
Materials
- Cold press watercolor paper (approx. 5×7 inches)
- Watercolor paints (Indigo, Phthalo Blue, Turquoise, Red/Vermilion)
- White gouache or white ink
- Masking tape or painter’s tape
- Round brushes (sizes 2, 6, and 8)
- Fine liner brush or 00 round brush
- Water cups
- Paper towels
- Palette for mixing
Step 1: Setting the Scene
-
Tape the borders:
Secure your watercolor paper to a board or table using masking tape along all four edges. This creates that crisp, clean white border at the end and prevents the paper from buckling too much. -
Mix the background wash:
Prepare a very dilute, watery mix of turquoise or light teal blue. You want this to be quite pale, as it represents the filtered light of the upper ocean water. -
Paint the gradient sky:
Using your largest brush, apply the pale wash starting at the top of the paper. As you move downwards, gradually add a tiny bit more pigment to the mix, but keep the overall area light and airy. Stop about two-thirds of the way down the page. -
Let it dry completely:
This is crucial. The paper must be bone dry before adding the next layers to prevent the colors from bleeding into a muddy mess. You can use a hairdryer on a low setting to speed this up.
Bleeding Lines?
If your fine coral lines are spreading, your background paper is still too damp. Stop immediately and let it dry completely or use a hairdryer before trying again.
Step 2: Building the Ocean Floor
-
Mix the deep ocean color:
Create a rich, dark mixture using Indigo and a touch of Phthalo Blue. I like to keep this quite saturated to contrast with the light background. -
Paint the rock formation:
At the bottom third of the paper (covering the bottom edge of your light wash), paint an uneven, rocky silhouette. Make the top edge bumpy to simulate rocks and coral mounds. Fill in the entire bottom area with this dark blue. -
Add texture while wet:
While the dark blue paint is still damp, drop in small touches of pure water or slightly darker indigo in random spots. This creates blooms and texture that look like natural rock surfaces. -
Dry the base layer:
Wait for this dark section to dry completely before you start painting the coral on top. If it’s wet, your detailed lines will fuzz out.
Step 3: Painting the Coral Life
-
Sketch lightly (optional):
If you are nervous about freehanding, use a pencil to very faintly mark where your main red coral and the black branches will go. -
Paint the red coral structure:
Load a size 2 or 4 brush with bright red or vermilion paint. Start with a central vertical trunk on the right side of the composition. -
Add red branches:
Extend branches outward and upward from the main trunk. Use a ‘Y’ shape repeatedly to create natural-looking forks. Make the tips slightly thinner than the base. -
Create the black wire coral:
Switch to your finest liner brush and black paint (or very concentrated Indigo). On the left side, paint thin, wavy vertical lines that branch delicately. These should look like fine wires or sea fans. -
Add the mid-ground blue coral:
Mix a medium-tone teal or blue. Paint a smaller, branching coral shape nestled between the black and red corals. It should look like it’s sitting slightly behind the main rocks.
Make it Sparkle
Once fully dry, add tiny dots of metallic gold or silver watercolor to the tips of the red coral to suggest light catching the underwater textures.
Step 4: Highlights and Details
-
Paint the foreground white coral:
Using white gouache or opaque white ink, paint a branching coral shape in the bottom right corner, directly over the dark blue rock background. The opaque white will pop against the dark indigo. -
Add ghost coral:
Mix white gouache with a tiny bit of teal to make a pale, milky blue. Paint another small coral structure in the bottom center, overlapping the dark rocks slightly. -
Refine the edges:
Look over your work. If any coral stems don’t quite connect to the ground, extend them slightly so they look firmly rooted in the rock. -
The reveal:
Once the painting is 100% dry to the touch, carefully peel away the masking tape at a 45-degree angle to reveal your clean white border.
Frame your underwater masterpiece and admire the calm ocean vibes you’ve created


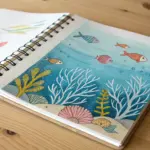
“Fish Tank” Window Composition
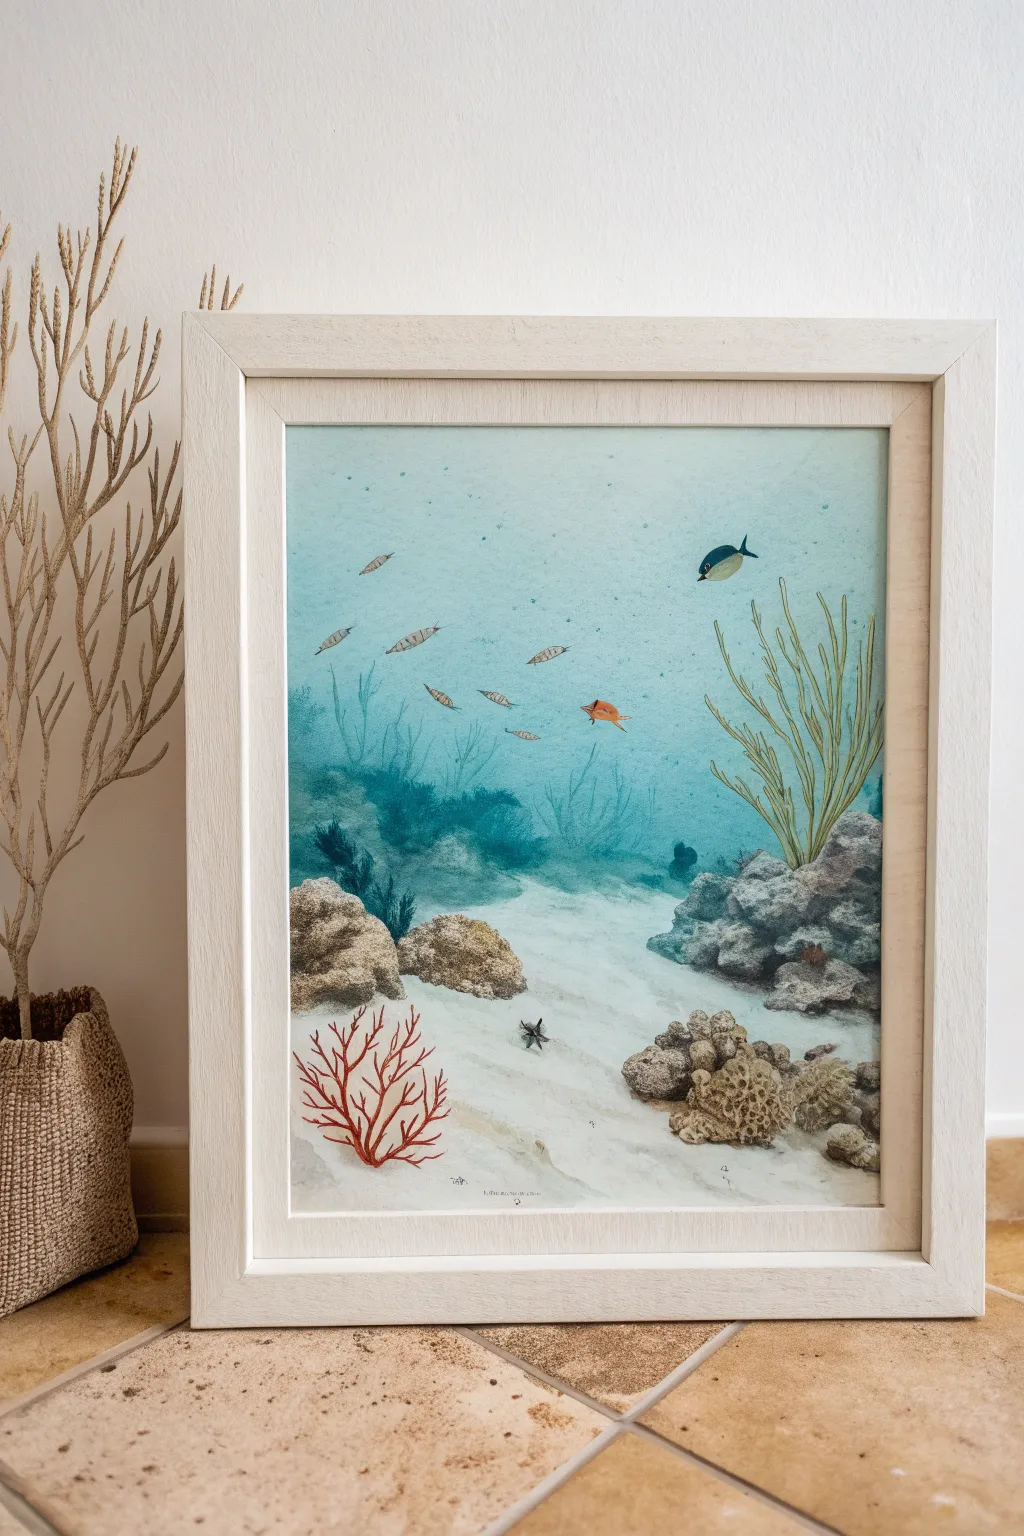
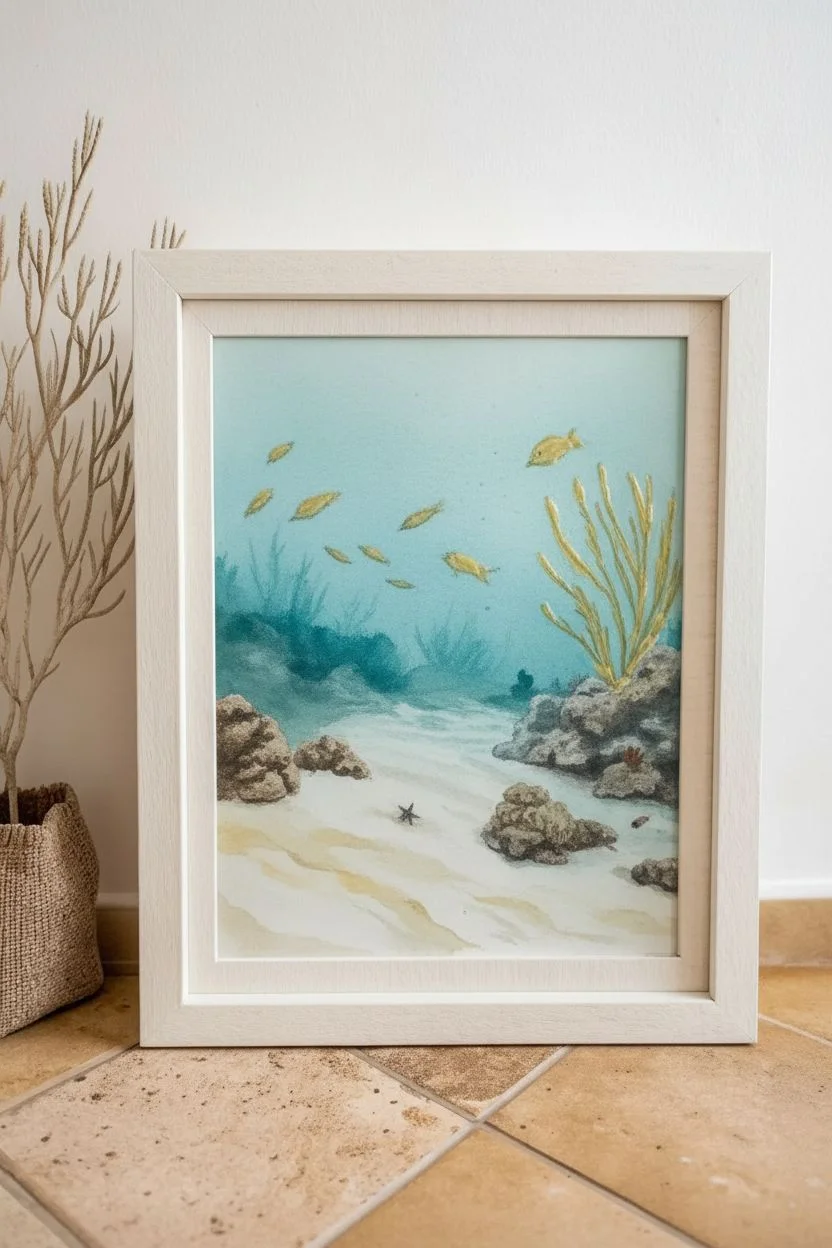
Transform a plain sheet of watercolor paper into a serene glimpse of ocean life that mimics the feeling of looking through a glass aquarium. This project uses soft washes and detailed brushwork to create depth, making your fish and coral seem suspended in clear blue water.
Step-by-Step Tutorial
Materials
- Cold press watercolor paper (300 gsm)
- Watercolor paints (phthalo blue, turquoise, burnt sienna, yellow ochre, cadmium red, payne’s gray)
- White gouache paint
- Masking fluid
- Round watercolor brushes (sizes 2, 6, and 10)
- Pencil (HB) and eraser
- Two jars of water
- Paper towels
- White or light wood frame
Step 1: Planning and Background
-
Sketch the layout:
Lightly sketch the horizon line about one-third up from the bottom of the paper. Outline the larger rock formations on the right and left foreground, leaving the center relatively open for the sandy bottom. -
Map out key elements:
Sketch the vertical seagrass/coral shape on the right side and the smaller red fan coral on the left. Indicate positions for a few fish swimming in the upper middle area. -
Protect the highlights:
Apply masking fluid carefully over the fish shapes, the red fan coral, and the tall seagrass strands on the right. This preserves the white paper so you can paint bright colors later. -
Paint the water gradient:
Prepare a very watery mix of turquoise and phthalo blue. Wet the paper above the sand line with clean water first (wet-on-wet technique), then drop in the blue paint at the top, fading it out as you reach the sandy bottom to create diffused light. -
Create distant reef shadows:
While the blue wash is still slightly damp, mix a darker blue-green using turquoise and a touch of payne’s gray. Dab this softly along the ‘horizon’ line to create blurry, distant coral reefs that recede into the background. -
Paint the sand bed:
Once the water is dry, mix a very pale wash of yellow ochre with a tiny dot of burnt sienna. Paint the bottom section, leaving some areas white to mimic sunlight hitting the sand dunes.
Depth Trick
Paint distant fish with fainter, cooler colors and less detail. This ‘atmospheric perspective’ makes them look much further away than the vibrant foreground fish.
Step 2: Rocks and Texture
-
Base layer for rocks:
Mix burnt sienna, payne’s gray, and a little blue to make a rocky grey-brown. Paint the base shapes of the large rock clusters on the right and left, keeping the edges rough and organic. -
Add texture with salt or lifting:
While the rock paint is wet, sprinkle a pinch of salt on them or dab with a crumpled tissue. This creates natural, craggy textures that look like weathered coral rock. -
Define rock shadows:
After the rocks dry, use a smaller size 6 brush with a darker version of your rock color to paint crevices and shadows on the underside of the stones. -
Paint the background plants:
Using a diluted blue-green, paint faint, ghostly seaweed shapes behind the main rocks. These should look soft and out of focus.
Step 3: Details and Wildlife
-
Reveal the masked areas:
Gently rub away the masking fluid once the entire background is bone dry. You should now have stark white shapes ready for color. -
Paint the tall seagrass:
Mix a fresh yellow-green and carefully paint the tall strands on the right side. Add a thin line of darker green along one side of each strand to give them a tubular, 3D appearance. -
Detail the red fan coral:
I like to use a vibrant red-orange for this focal point on the bottom left. Use your smallest brush (size 2) to paint the delicate, branching veins of the coral fan. -
Color the fish:
Paint the large fish with deep blue and yellow, and the schooling fish with silver-grey stripes. A tiny dot of white gouache on the eye brings the main fish to life. -
Add the starfish:
Paint a small, dark star shape on the sand in the foreground using a concentrated dark grey or black mix. -
Enhance with white gouache:
Dilute some white gouache and flick the brush bristles to splatter tiny white dots across the water area, mimicking suspended particles and ocean debris. -
Final shading touches:
Add very subtle cast shadows underneath the fish, the starfish, and the coral structures onto the sand to anchor them to the scene.
Collage It Up
Instead of painting everything, try cutting the rocks and coral out of textured colored paper and gluing them onto the watercolor background for a 3D effect.
Now you have a tranquil underwater view that never needs cleaning or feeding
Watercolor Wash Ocean With Soft Blooms
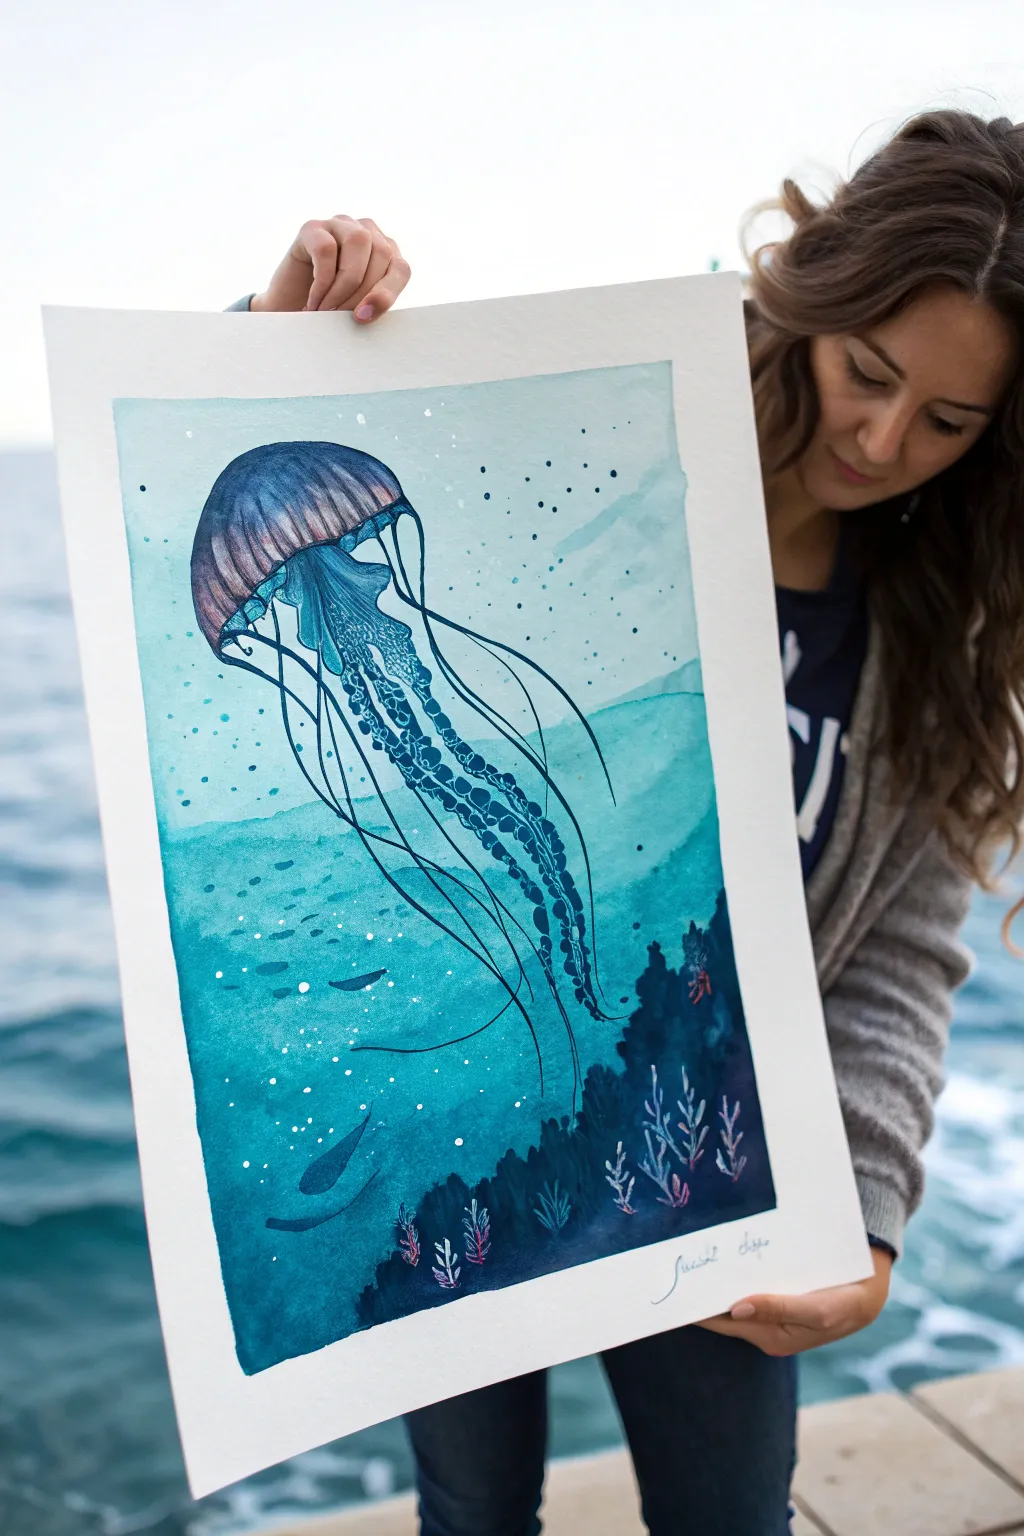
Capture the graceful movement of a jellyfish drifting through deep ocean currents with this layered watercolor project. You will create a stunning gradient wash background that sets the mood for fine, intricate line work and delicate organic shapes.
Step-by-Step Guide
Materials
- High-quality watercolor paper (cold press, at least 140lb/300gsm)
- Watercolor paints (Phthalo Blue, Prussian Blue, Turquoise, Indigo, Purple)
- White gouache or white gel pen
- Large flat wash brush
- Medium round brush (size 6 or 8)
- Fine liner brush (size 0 or 00)
- Masking fluid (optional)
- Two jars of water
- Painter’s tape and a drawing board
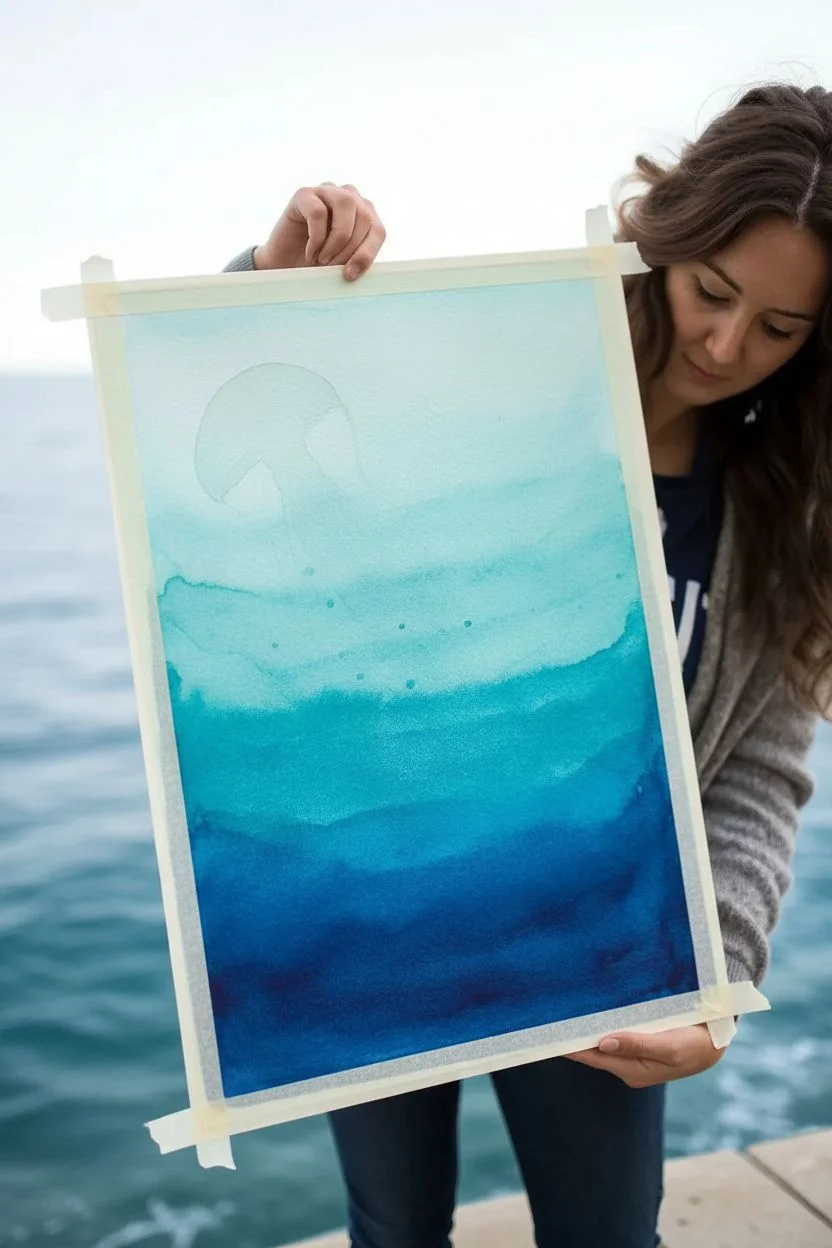
Step 1: Setting the Scene
-
Secure the paper:
Tape your watercolor paper down firmly to a board on all four sides. This is crucial because we will be using a wet-on-wet technique that can buckle the paper if it isn’t secured. -
Map out the composition:
Lightly sketch the large bell shape of the jellyfish in the upper-left quadrant. Keep your lines very faint so they don’t show through the translucent paint later. You can also lightly mark the horizon line where the water gets deeper. -
Create the initial wash:
Wet the entire paper surface with clean water using your large flat brush. Starting at the top, apply a very pale turquoise wash. -
Deepen the ocean:
While the paper is still damp, begin introducing darker blues (Phthalo and Prussian Blue) as you move down the page. Use horizontal strokes to mimic water layers. -
Build the abyss:
At the very bottom third of the paper, mix Indigo with your blue for a deep, saturated navy tone. Let this bottom section be the darkest part of the painting to anchor the scene. -
Lift out highlights:
Before the wash dries completely, use a thirsty (clean but damp) brush or a paper towel to lift a little pigment from the center of the jellyfish bell, keeping it lighter than the surrounding water. -
Let it dry totally:
Wait for the background to be bone dry. This is the hardest part, but painting on damp paper now will cause your jellyfish details to bleed uncontrollably.
Step 2: The Jellyfish & Details
-
Paint the bell:
Mix a watery purple-blue shade. Paint the jellyfish bell, leaving the very top edge extremely pale. Add darker vertical stripes following the curve of the bell to give it volume. -
Start the oral arms:
Using your medium round brush, paint the thick, ruffled tentacles (oral arms) hanging directly from the center. Use a mix of turquoise and indigo, stippling the texture to look like lace. -
Add the stingers:
Switch to your fine liner brush. With a dark, inky blue (almost black), draw the long, thin tentacles sweeping downward. Vary your pressure to make the lines thick and thin. -
Layer the seabed:
At the bottom, paint silhouette shapes of coral and seaweed using your darkest Indigo mix. These shapes should look like shadows against the deep water. -
Pop of color:
Once the dark seaweed silhouettes are dry, use opaque gouache or very concentrated watercolor (in pinks or whites) to add tiny highlights on the coral tips.
Fixing Back-runs
If ‘cauliflower’ blooms appear in your smooth wash, avoid adding more water. Wait for it to dry, then gently glaze over the area with a damp brush to soften the hard edges.
Step 3: Final Magic
-
Create bubbles:
Dip a brush in white gouache or use a white gel pen to add small clusters of bubbles rising from the deep. Vary the sizes for a natural look. -
Add sediment splatter:
Load a toothbrush or stiff brush with watered-down white gouache or dark blue. Run your thumb over the bristles to flick tiny specks across the painting, mimicking underwater particles. -
Enhance translucency:
If the jellyfish bell looks too flat, glaze a very thin layer of white gouache over the top curve to make it look like it’s glowing. -
Sign and reveal:
Sign your name in the bottom corner with a metallic pen or white ink. Once absolutely everything is dry, carefully peel off the tape at a 45-degree angle to reveal the crisp white border.
Luminescent Glow
Mix a tiny amount of iridescent medium into the paint used for the jellyfish bell. It will give the creature a subtle, pearlescent shimmer when the light hits the artwork.
Enjoy the calm feeling of accomplishment as you display your deep-sea masterpiece
Fantasy Glow: Bioluminescent Dots and Lines
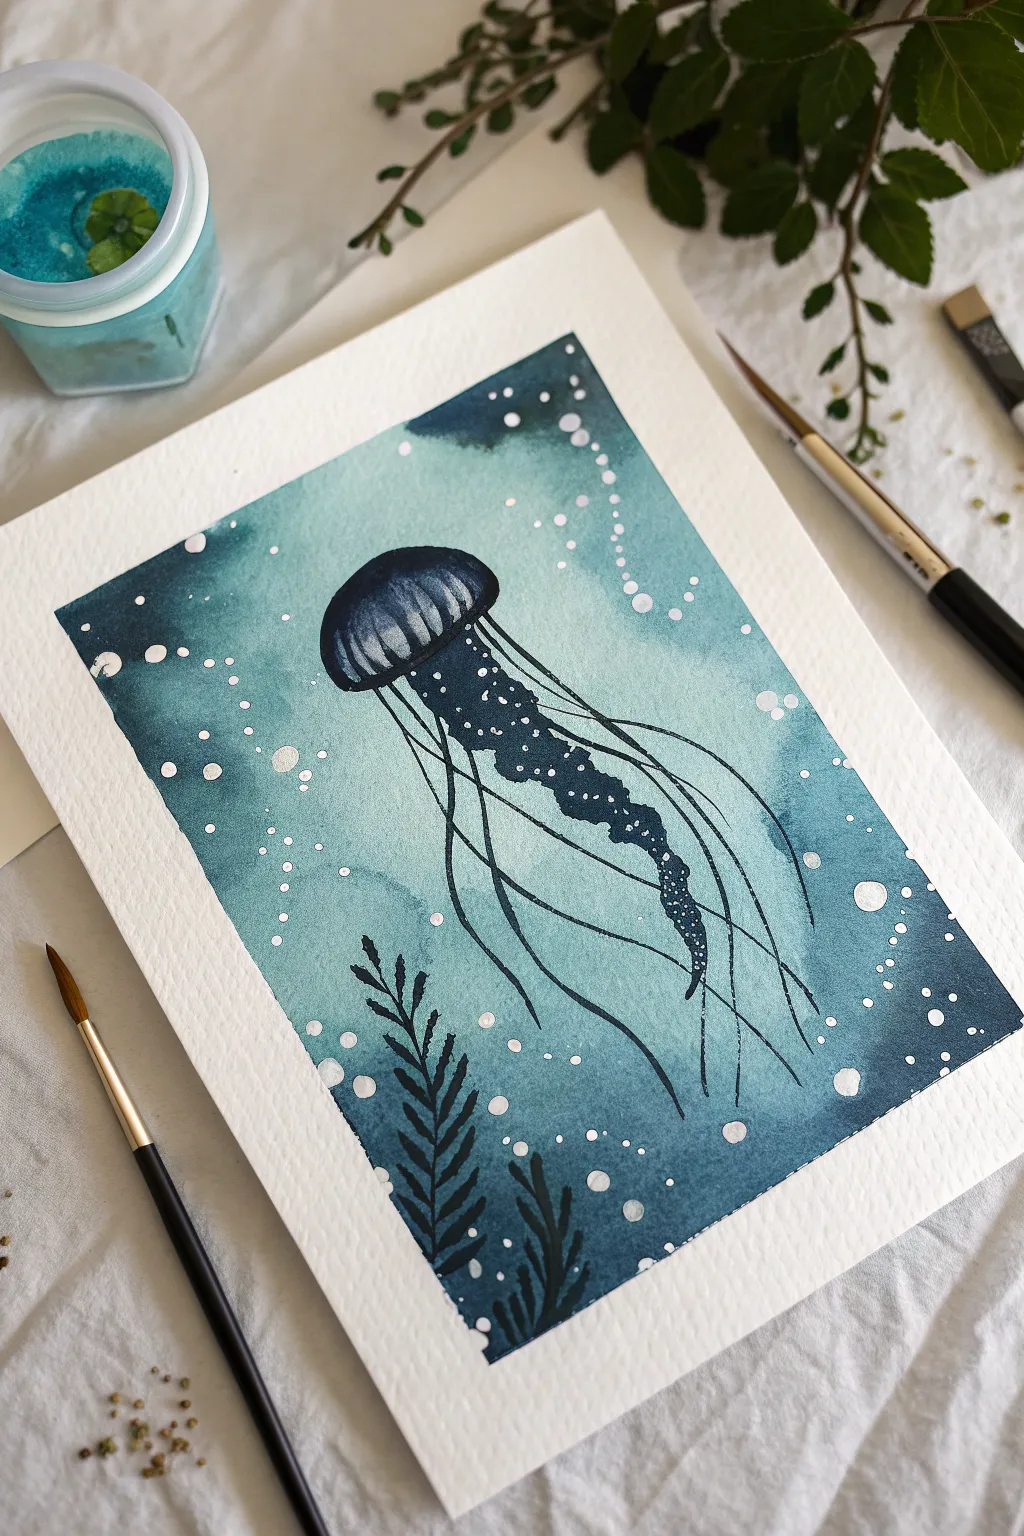
Capture the serene beauty of the deep ocean with this monochromatic watercolor study. By using masking fluid and layers of Prussian blue and teal, you’ll create a luminous jellyfish that appears to float effortlessly in a sea of bubbles.
Detailed Instructions
Materials
- Cold-pressed watercolor paper (140lb/300gsm)
- Watercolor paints (Prussian Blue, Indigo, Phthalo Turquoise/Teal)
- Masking fluid (drawing gum)
- Old round brush or dedicated applicator for masking fluid
- Medium round watercolor brush (size 6 or 8)
- Fine liner or rigger brush (size 0 or 1)
- White gel pen or white gouache
- Paper towels
- Two jars of clean water
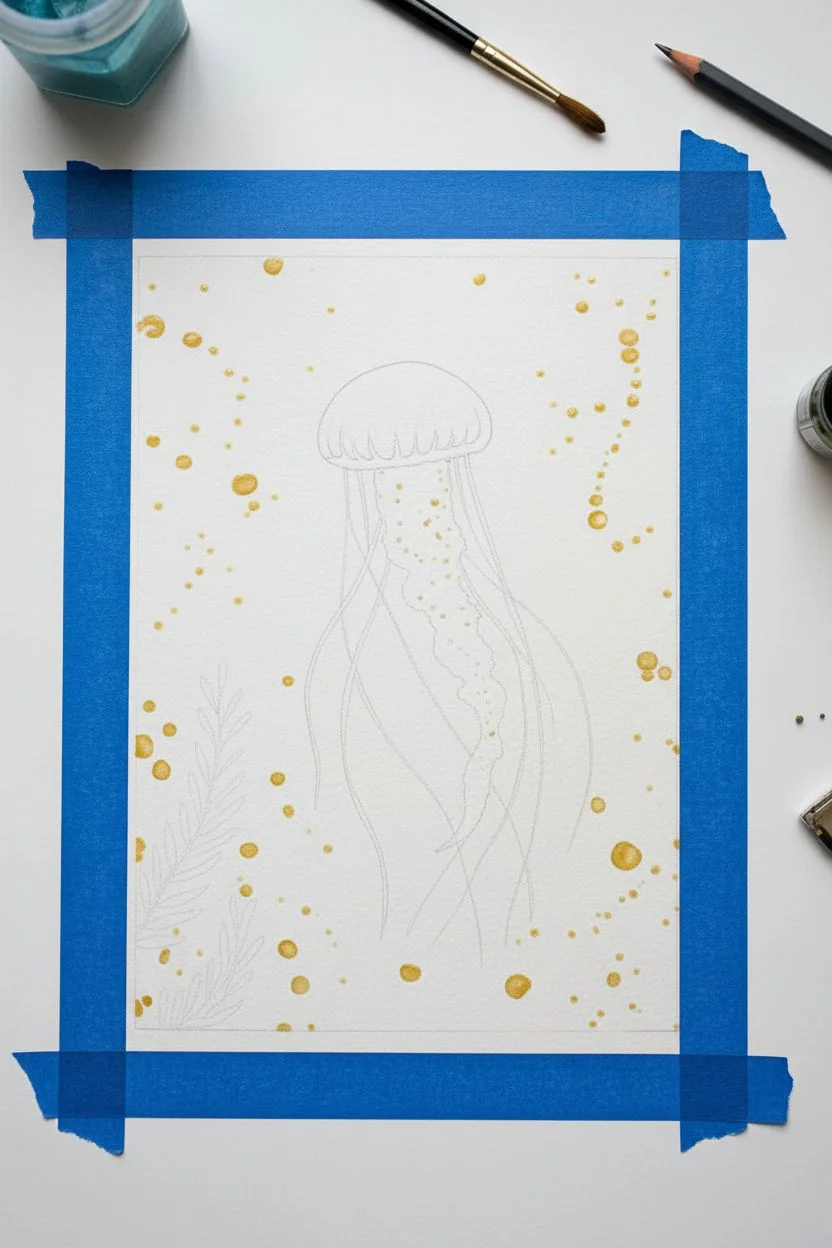
Step 1: Preparation and Masking
-
Tape the edges:
Secure your watercolor paper to a board or table using low-tack painter’s tape or washi tape. This creates that crisp, clean border you see in the finished piece. -
Lightly sketch outlines:
Using a hard pencil (like an H or 2H), very faintly sketch a simple dome shape for the jellyfish bell in the center. Add a few curving guidelines for the tentacles, but keep it loose. -
Protect the white areas:
Dip an old brush into soapy water first, then into masking fluid. Carefully dot the bubbles around the edges and through the center. Also mask tiny highlights inside the jellyfish bell if desired. -
Let the mask cure:
Allow the masking fluid to dry completely. It should feel rubbery and hard to the touch with no tackiness before you add any paint.
Step 2: Creating the Background Wash
-
Mix your ocean hues:
Prepare a generous puddle of teal or Phthalo Turquoise mixed with a little Prussian Blue. You want a watery, medium-strength consistency. -
Wet the paper:
With a large clean brush, wet the entire rectangular area inside the tape with clean water until it glistens evenly. -
Apply the light wash:
Drop your teal mixture into the wet paper, letting the color bloom and spread. Tilt the board slightly to encourage organic movement, keeping the center slightly lighter than the edges. -
Deepen the corners:
While the paper is still damp (wet-on-wet), drop concentrated Indigo or Prussian Blue into the corners and the bottom edge. -
Blend softly:
Use a clean, slightly damp brush to soften any hard lines where the dark blue meets the lighter teal. -
Patience is key:
Allow this background layer to dry completely. The paper must be bone-dry before you paint the details on top.
Sticky Situation?
Masking fluid ruining your brushes? Dipping the bristles in dish soap before the fluid creates a protective barrier. Rinse immediately after use, never letting it dry on the bristles.
Step 3: Painting the Jellyfish
-
Paint the bell:
Using a medium round brush and a dark mix of Indigo, paint the dome of the jellyfish. Leave small vertical gaps or lift color with a dry brush to suggest the ribbed texture of the body. -
Add the oral arms:
Beneath the bell, paint a thicker, textured central tentacle (the oral arm). Make this wavy and erratic, dabbing dots of dark pigment along it to create a bumpy texture. -
Draw fine tentacles:
Switch to your fine liner or rigger brush. Load it with inky Indigo paint and draw long, flowing lines extending from the bell’s rim. Vary your pressure to make the lines taper elegantly. -
Add seaweed silhouettes:
At the bottom of the painting, use the same dark Indigo to paint simple fern-like seaweed shapes. Press the belly of the brush down for the leaves and lift for the tips.
Pro Tip: Depth of Field
Paint over some of your white masked “bubbles” with a very diluted teal glaze after removing the mask. This pushes them into the distance, making the bright white ones pop forward.
Step 4: Final Details
-
Remove the mask:
Once the paint is totally dry, gently rub off the masking fluid with your finger or a rubber cement pickup tool to reveal the crisp white dots underneath. -
Enhance the highlights:
If any bubbles got painted over, or if you want extra sparkle, use a white gel pen or opaque white gouache to add tiny, sharp dots around the tentacles and in the dark water. -
Soften the edges:
If the white circles from the masking fluid look too stark, take a damp brush and gently soften one side of a few bubbles to make them look translucent. -
The reveal:
Carefully peel away the masking tape at a 45-degree angle, pulling away from the artwork to prevent tearing the paper.
Now you have a serene underwater scene that glows with life and depth


Have a question or want to share your own experience? I'd love to hear from you in the comments below!