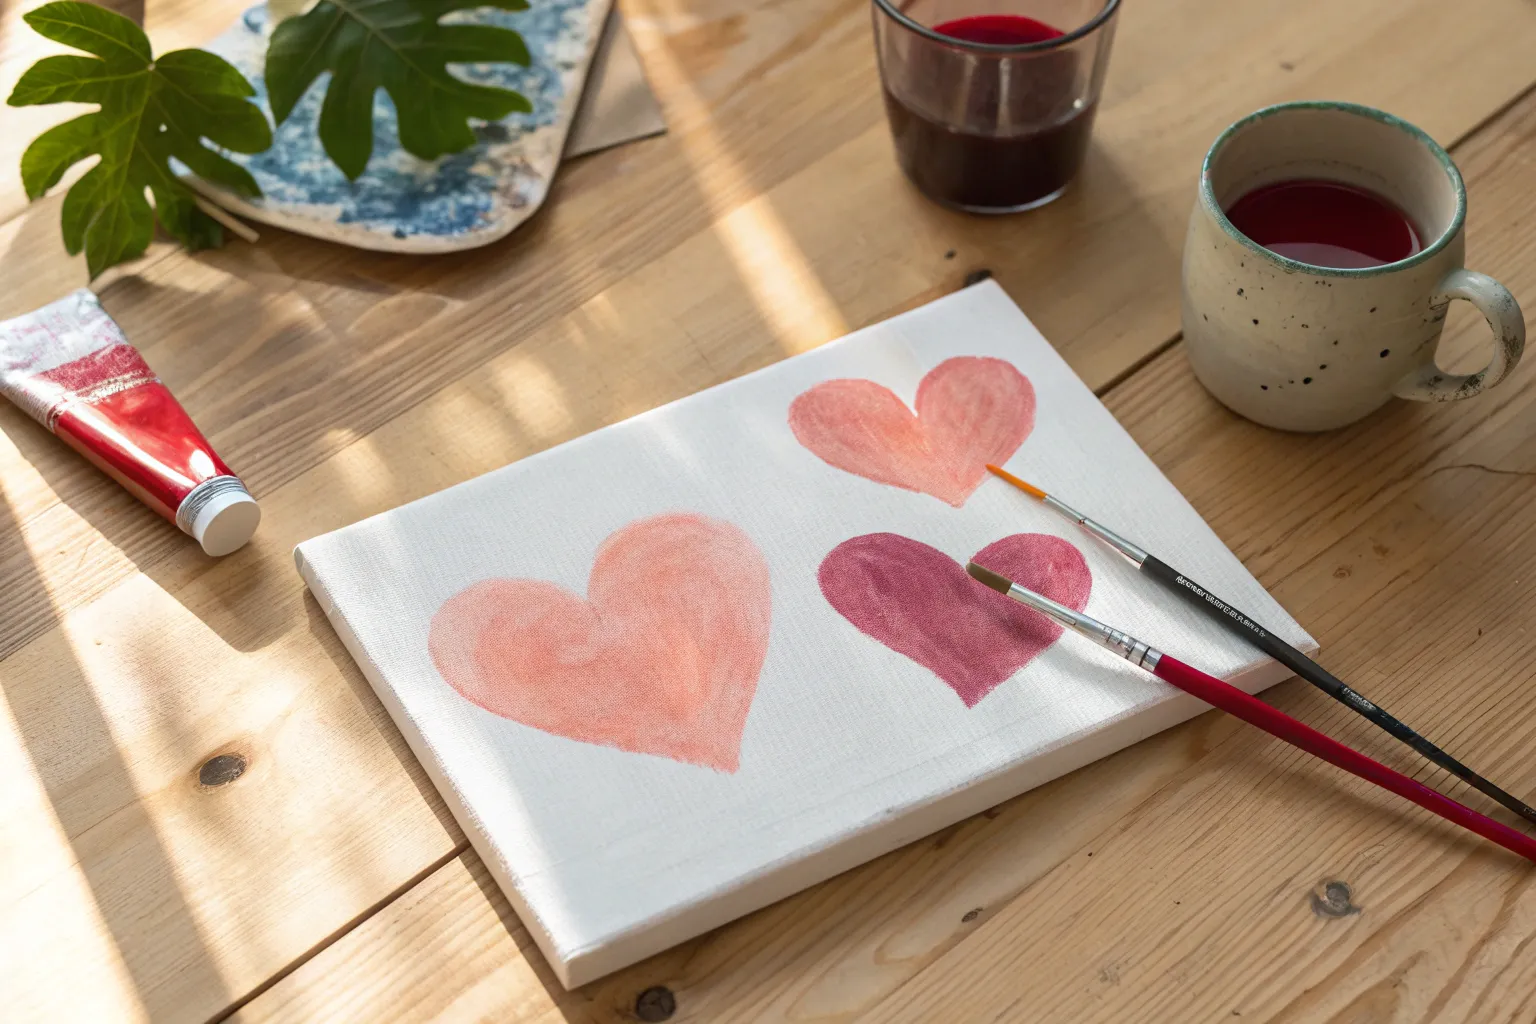
Valentine’s paint and sip nights are my favorite kind of creative hang—low-pressure, a little romantic, and honestly just plain fun. Here are beginner-friendly ideas that keep the vibe sweet while still giving you a finished piece you’ll actually want to display.
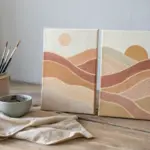
Split-Canvas Heart Sunset
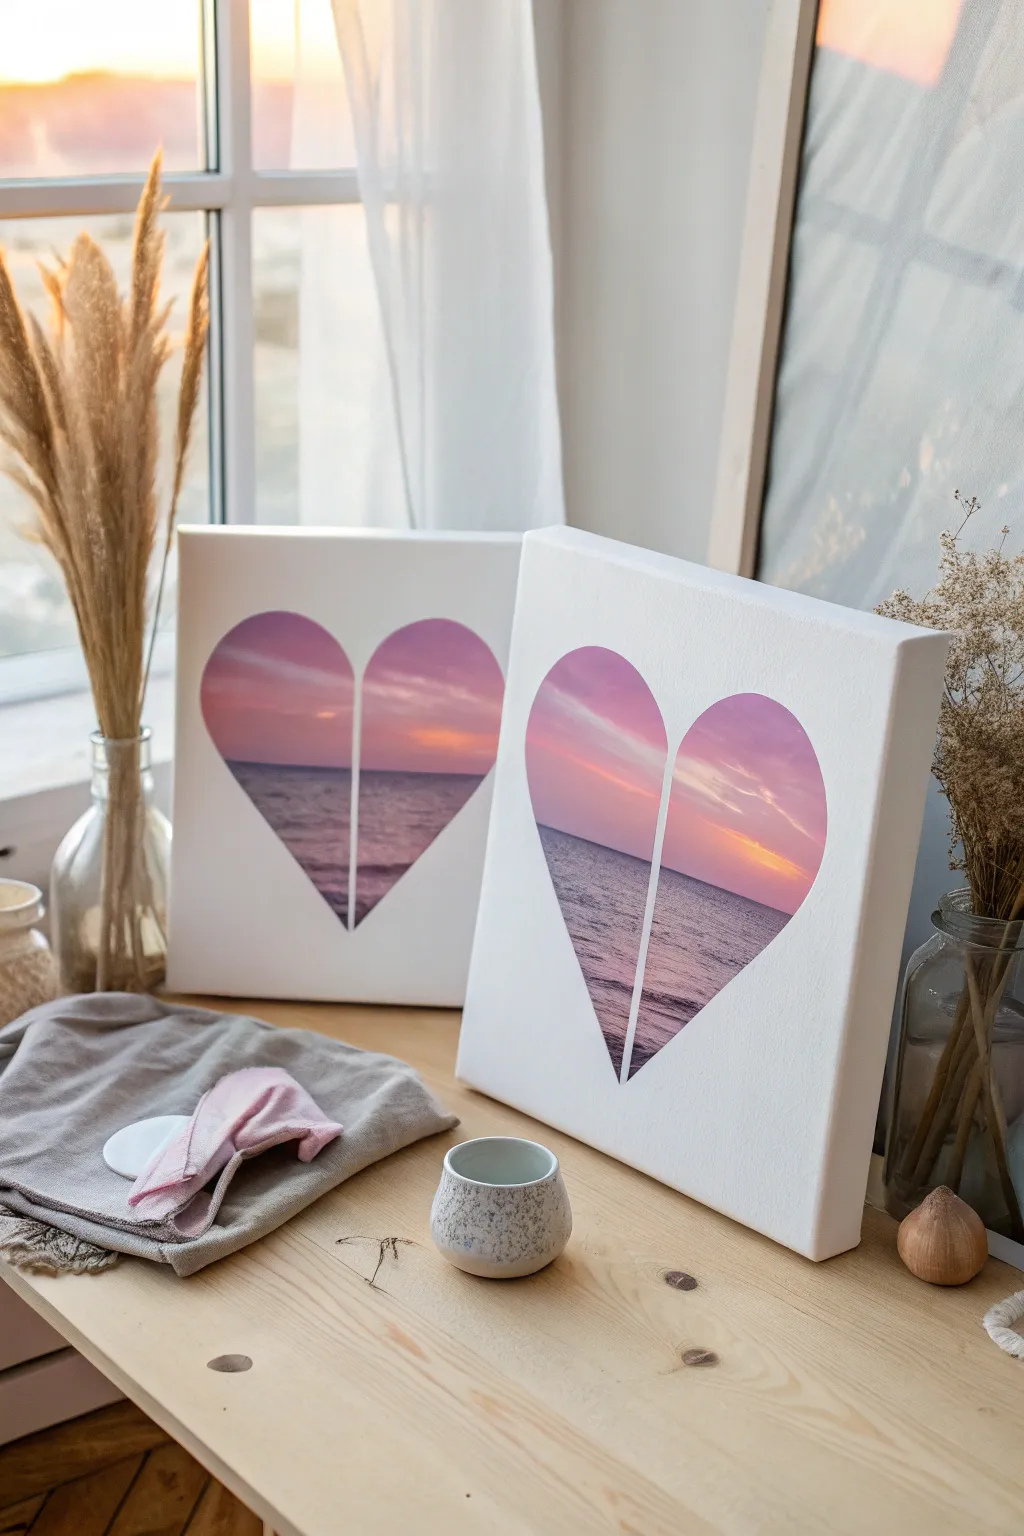
Create a romantic connection across two canvases with this beautiful split-heart sunset painting. This project uses negative space to frame a dreamy seascape in pinks and purples, perfect for couples painting side-by-side.
Step-by-Step
Materials
- Two 8×10 or 11×14 stretched canvases
- Acrylic paints (Titanium White, Magenta, Violet, Cadmium Orange, Phthalo Blue, Black)
- Painter’s tape or masking tape (1-inch width)
- Pencil
- Heart-shaped stencil or paper template (large enough to span both canvases)
- Flat paintbrushes (large and medium)
- Small round detail brush
- Palette or paper plate
- Cup of water and paper towels
Step 1: Preparation & Layout
-
Align the canvases:
Place your two canvases side-by-side on a flat surface so their edges are touching. This is crucial because your design needs to flow seamlessly from one to the other. -
Create the heart template:
Cut a large heart shape out of cardstock or stiff paper. The heart should be big enough to fill most of the space when centered across the joined canvases. -
Trace the shape:
Position your heart template directly in the middle of the two canvases. Lightly trace the outline with a pencil, ensuring the center point of the heart aligns with the gap between the canvases. -
Mask the negative space:
This is the most critical step for crisp lines. Apply painter’s tape to the *outside* of your heart outline. Cover the entire white background area with tape, or just tape along the line carefully if you trust your brush control later. -
Seal the refined edge:
Press the tape edges down firmly. I find that running a clean fingernail or a credit card over the tape edge helps prevent paint from bleeding underneath.
Bleeding Edges?
If paint seaps under your tape, wait for it to dry completely. Then, use a flat brush with heavy body white paint (undiluted) to carefully clean up the line.
Step 2: Painting the Sunset Sky
-
Mix the sky gradient:
On your palette, prepare your gradient colors: a deep violet for the top, transitioning into magenta, then orange, and finally a soft yellow-white near the horizon line. -
Paint the upper sky:
Starting inside the heart shape at the very top, apply the violet paint using a medium flat brush. Use horizontal strokes that span across both canvases if they are close, or paint each half to match. -
Blend downwards:
While the violet is still wet, introduce the magenta below it. Blend the two colors together where they meet using horizontal sweeping motions to create a soft transition. -
Add the sunset glow:
Continue down the heart shape, blending the magenta into orange. As you reach the middle of the heart, mix a little white into the orange to brighten it for the horizon line. -
Add cloud details:
While the sky is damp, use a smaller brush with a touch of purple or dark grey to streak in thin, wispy clouds. Keep the strokes horizontal and soft to mimic the look of a calming sunset.
Step 3: Painting the Ocean
-
Define the horizon:
Use a ruler or straight edge to lightly mark a straight horizon line across both canvases inside the heart shape, ideally about one-third up from the bottom point. -
Paint the water base:
Mix Phthalo Blue with a tiny drop of black and some violet to create a deep ocean color. Paint the water section below the horizon line, getting slightly darker as you move toward the bottom tip of the heart. -
Create water reflections:
Using a small flat brush and the light orange/white mixture from your sky, gently dab horizontal dashes onto the water surface, focused mostly in the center where the sun would reflect. -
Add movement:
Add faint lines of lighter blue or white near the bottom to suggest gentle waves or ripples coming toward the shore.
Add Texture
Mix a little sand or modeling paste into your ocean paint at the very bottom of the heart to give the beach or water texture a realistic, tactile feel.
Step 4: Finishing Touches
-
Let it dry completely:
Allow the paint to fully dry. This is important before removing any tape to ensure you don’t smudge the crisp edges. -
Paint the clean edges:
If you didn’t tape the entire background, now paint the area *outside* the heart with titanium white to cover any pencil marks or errant brushstrokes, ensuring a pristine contrast. -
Remove tape:
Slowly peel away your painter’s tape at a 45-degree angle. This reveal is always the most satisfying part. -
Touch up:
If any paint bled under the tape, use a small detail brush with white paint to crisp up the heart’s outline.
Hang these canvases side-by-side to symbolize two halves making a whole.


Lovebirds on a Branch at Dusk
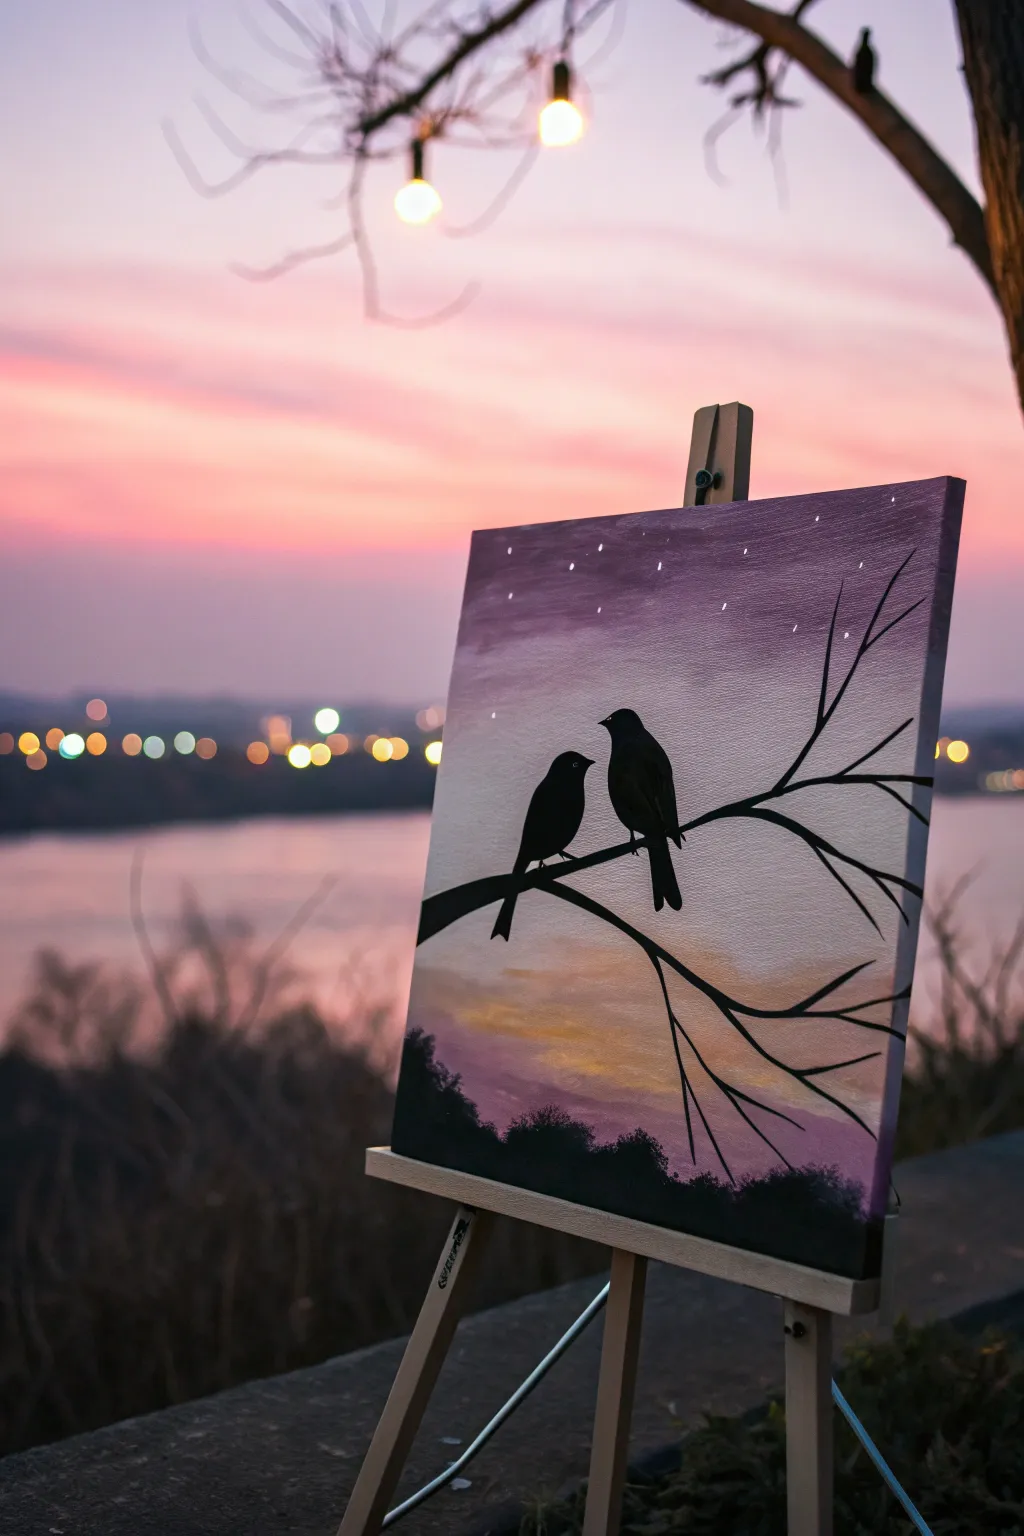
Capture the romantic serenity of twilight with this beautiful painting, featuring two silhouette lovebirds perched against a vibrant purple and pink ombre sky. This beginner-friendly project uses simple blending techniques to create a stunning backdrop for your delicate, shadowy subjects.
How-To Guide
Materials
- Canvas (11×14 or 16×20 inches recommended)
- Acrylic paints: Titanium White, Magenta or Deep Pink, Purple (Violet), Black, Yellow Ochre or Gold
- Large flat brush (1-inch or 2-inch) for background blending
- Medium round brush
- Small liner brush or detail brush
- Palette or paper plate
- Cup of water
- Paper towels
- Easel (optional)
Step 1: Setting the Sky Scene
-
Prepare the Palette:
Squeeze out generous amounts of purple, magenta, white, and a small touch of yellow ochre onto your palette. Keep black separate for later. -
Paint the Top Band:
Using your large flat brush, load it with the dark purple paint. Apply horizontal strokes across the top quarter of the canvas, ensuring solid coverage right to the edges. -
Blend in Magenta:
Without rinsing the brush, pick up some magenta paint. Start painting just below the purple section, overlapping slightly to blend the two colors together. Work your way down to the middle of the canvas. -
Add a Soft Glow:
Wipe your brush on a paper towel to remove excess dark color. Pick up white paint mixed with a tiny dot of yellow ochre or residual magenta. Paint horizontal strokes in the lower third to create a pale, glowing horizon line. -
Final Sky Blend:
Smooth out the transitions between the purple, pink, and pale glow by using long, continuous horizontal strokes while the paint is still wet. Aim for a seamless gradient effect. -
Create the Tree Line:
Mix a small amount of black with purple to create a deep indigo shade. Using a medium round brush, stipple or dab a rough, uneven line of vegetation across the very bottom edge of the canvas to simulate distant bushes or treetops.
Fixing Smudged Stars
If you flicked a star into a spot you don’t like or made a splatter too big, quickly use a damp Q-tip to lift the wet white paint off before it dries on the background.
Step 2: Adding Stars and Details
-
Let it Dry:
Allow the background layer to dry completely. This is crucial; if the sky is wet, your stars will smear and the black silhouettes won’t be crisp. -
Flick the Stars:
Mix a little water into your white paint until it has an inky consistency. Dip a clean brush (or an old toothbrush) into it, and gently tap the handle against a finger to flick tiny speckles of paint onto the upper purple section of the canvas. -
Highlight Specific Stars:
Use your smallest liner brush to manually add a few larger, deliberate stars by placing tiny white dots in the sky, particularly near the top corners.
Make It Personal
Add two tiny hearts floating above the birds’ heads in a faint white or gold outline, or paint your initials ‘carved’ into the black tree trunk using grey paint.
Step 3: Painting the Silhouette
-
Outline the Branch:
Load your medium round brush with pure black paint. Starting from the right side of the canvas about halfway up, paint a main branch line that extends diagonally downward and across the center. -
Thicken the Limb:
Go back over the main branch to thicken it, making it wider at the base (the canvas edge) and tapering it slightly as it reaches towards the left. -
Add Smaller Twigs:
Switch to your liner brush for finer control. Paint smaller, wispy twigs branching off the main limb, pointing upward and outward to fill the empty sky space on the right. -
Shape the First Bird:
Visualize an oval shape sitting on the branch. Paint the silhouette of the first bird on the right, giving it a rounded belly and a smooth head. I find it easiest to paint the overall shape first, then refine the edges. -
Shape the Second Bird:
Paint the second bird slightly to the left and perhaps a bit smaller or positioned slightly lower. Make sure their beaks are close or facing each other to create that “lovebird” connection. -
Refine Details:
Add the tails extending below the branch for both birds. Use the liner brush to crisp up the beaks and the curve of their heads. -
Add Final Twigs:
If the composition feels empty on the bottom right, add another small sub-branch curving downwards with a few spindly twigs. -
Final Checks:
Check for any see-through spots in your black silhouette and apply a second coat of black if needed to make it solid and opaque.
Now step back and admire the peaceful, romantic atmosphere you’ve created.


Kissing Silhouettes Under an Umbrella
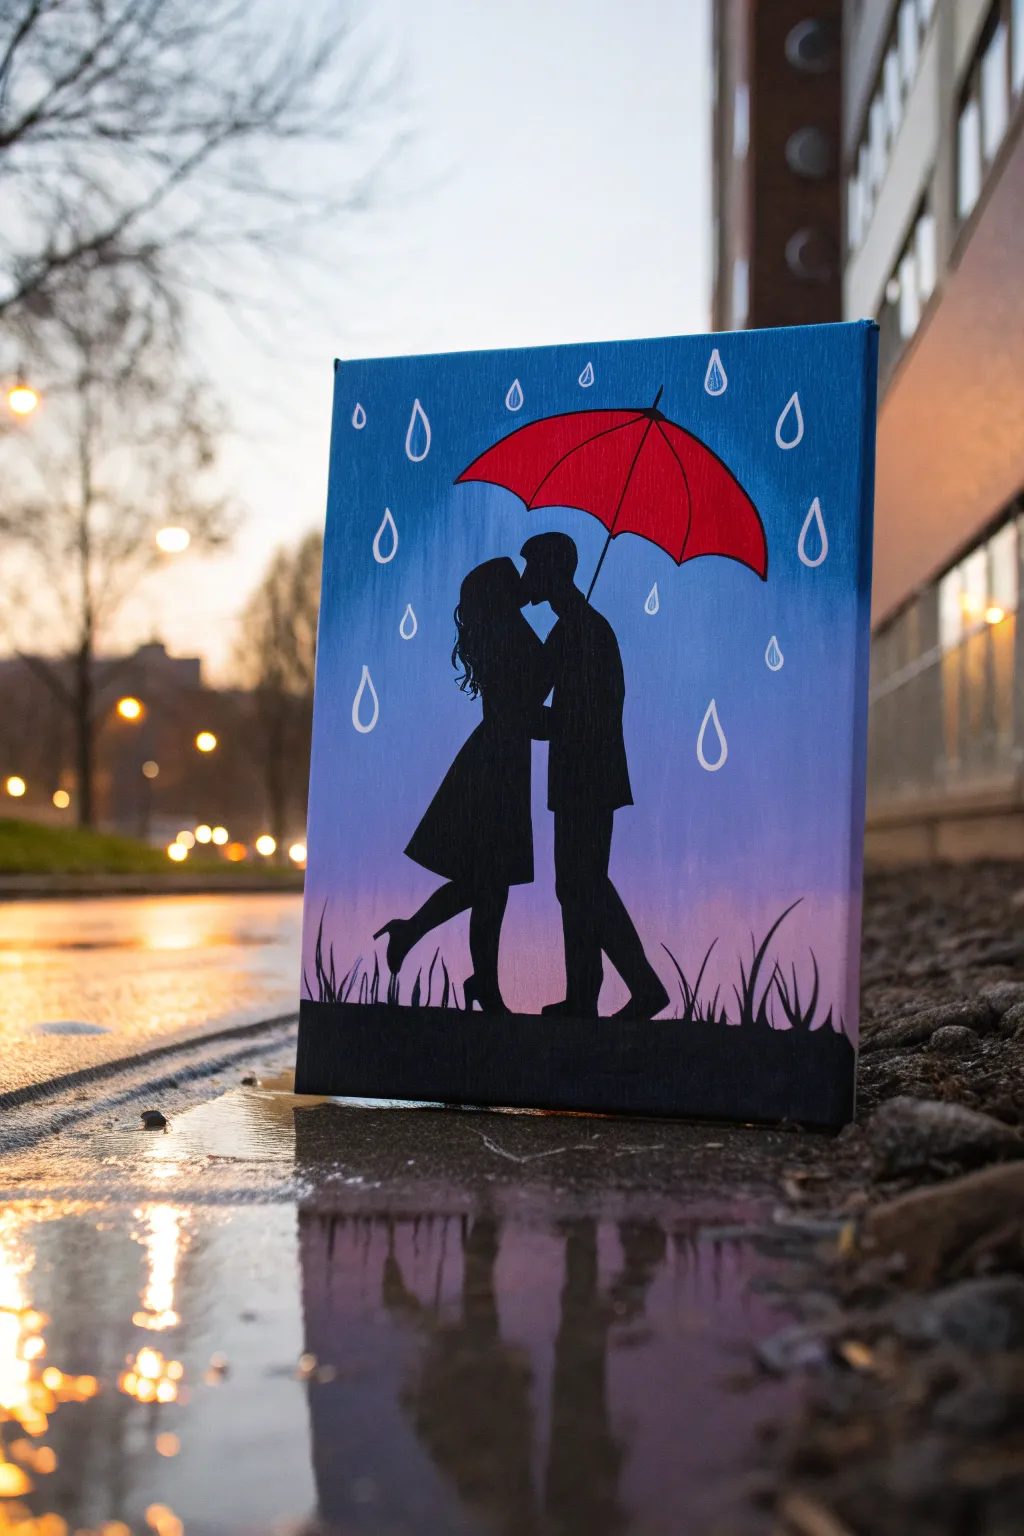
Capture a tender moment in the rain with this striking silhouette painting that plays with negative space and vibrant contrast. The gradient background mimics twilight hues, while the bold red umbrella acts as the perfect centerpiece for a Valentine’s masterpiece.
Step-by-Step Guide
Materials
- Canvas panel or stretched canvas (11×14 or similar)
- Acrylic paints: Ultramarine Blue, Sky Blue, White, Black, Red, Pink/Magenta
- Large flat brush (1 inch)
- Medium flat brush
- Small round detail brush
- Pencil for sketching
- Cup of water and paper towels
- Palette or paper plate
Step 1: Setting the Mood
-
Prepare the gradient:
Begin by squirting Ultramarine Blue, Sky Blue, Magenta (or Pink), and White onto your palette. We will use a blending technique to create an ombre effect from top to bottom. -
Paint the upper sky:
Load your large flat brush with Ultramarine Blue. Paint the top third of the canvas using long, horizontal strokes to ensure smooth coverage. -
Blend the middle tones:
Without washing your brush completely, pick up some Sky Blue. Paint the middle third of the canvas, brushing upwards into the darker blue to soften the transition line where they meet. -
Create the horizon glow:
Clean your brush thoroughly. Mix White with a touch of Magenta/Pink to make a very soft lavender-pink. Paint the bottom third of the canvas, blending it gently upwards into the Sky Blue section. -
Let it dry completely:
This step is crucial; if the background is wet, your sharp black silhouettes will get muddy. I like to take a quick break here or use a hairdryer on a low setting to speed things up.
Pro Tip: Sharp Profiles
If you struggle painting faces, print a silhouette template, cut it out, and trace the shape directly onto the canvas before filling it with black paint.
Step 2: Sketching the Figures
-
Outline the ground:
Using a pencil, draw a horizontal line roughly two inches from the bottom edge to establish the ground level. -
Position the umbrella:
Sketch a large semi-circle in the upper center of the canvas. This will be the canopy of the umbrella. Add the small point on top and the center rod extending downward. -
Draft the couple:
Lightly sketch the outlines of the two figures. Start with their heads under the umbrella center, leaning in for a kiss. Don’t worry about facial details; simply focus on the outer shape of the hair and profiles. -
Refine the bodies:
Draw the woman’s dress flaring out slightly and her leg popped back. Draw the man’s straight-legged stance and suit jacket shape. Ensure their feet connect solidly with your ground line.
Step 3: Painting the Details
-
Paint the umbrella:
Using your medium brush and bright Red paint, fill in the umbrella canopy. You might need two coats to make the red pop against the blue background. -
Add umbrella details:
Once the red is tacky-dry, mix a tiny bit of black into the red to create a darker shade. Use a small brush to paint thin, curved rib lines on the umbrella to give it dimension. -
Fill the ground:
Switch to Black paint. Fill in the entire ground area at the bottom. While the paint is wet, use the tip of a small brush to flick upward rapidly to create grass blades. -
Silhouette the figures:
Using a smaller round brush loaded with Black, carefully outline the couple. Fill in their shapes completely solid black. Take your time around the faces to keep the profiles distinct—this kiss is the focal point. -
Connect the umbrella:
With the detail brush and Black paint, draw the thin shaft (the stick) of the umbrella connecting the canopy to the man’s hand. -
Add blades of grass:
Use the very tip of your detail brush to add a few more distinct, taller blades of grass silhouetted against the pinkish horizon line.
Level Up: Glossy Finish
Once the painting is totally dry, apply a high-gloss varnish only on the raindrops and the red umbrella to make them look perpetually wet and shiny.
Step 4: The Final Raindrops
-
Prepare the rain color:
Mix a small amount of White with a drop of Blue for a very pale, icy blue color. It needs to be light enough to show up against the darker background. -
Paint the raindrops:
Using your smallest detail brush, paint teardrop shapes scattered randomly throughout the sky area. Keep the bottom of the drops rounded and the tops pointed. -
Define the drops:
For a stylized look like the example, outline each light blue raindrop with a fine line of pure White paint to make them look glossy. -
Final touches:
Check your red umbrella edges and reshape with a little red if the black silhouette painting overlapped it accidentally.
Step back and admire your romantic rainy day scene


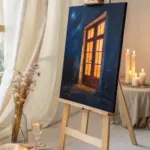
Moonlit Lake With a Heart Moon
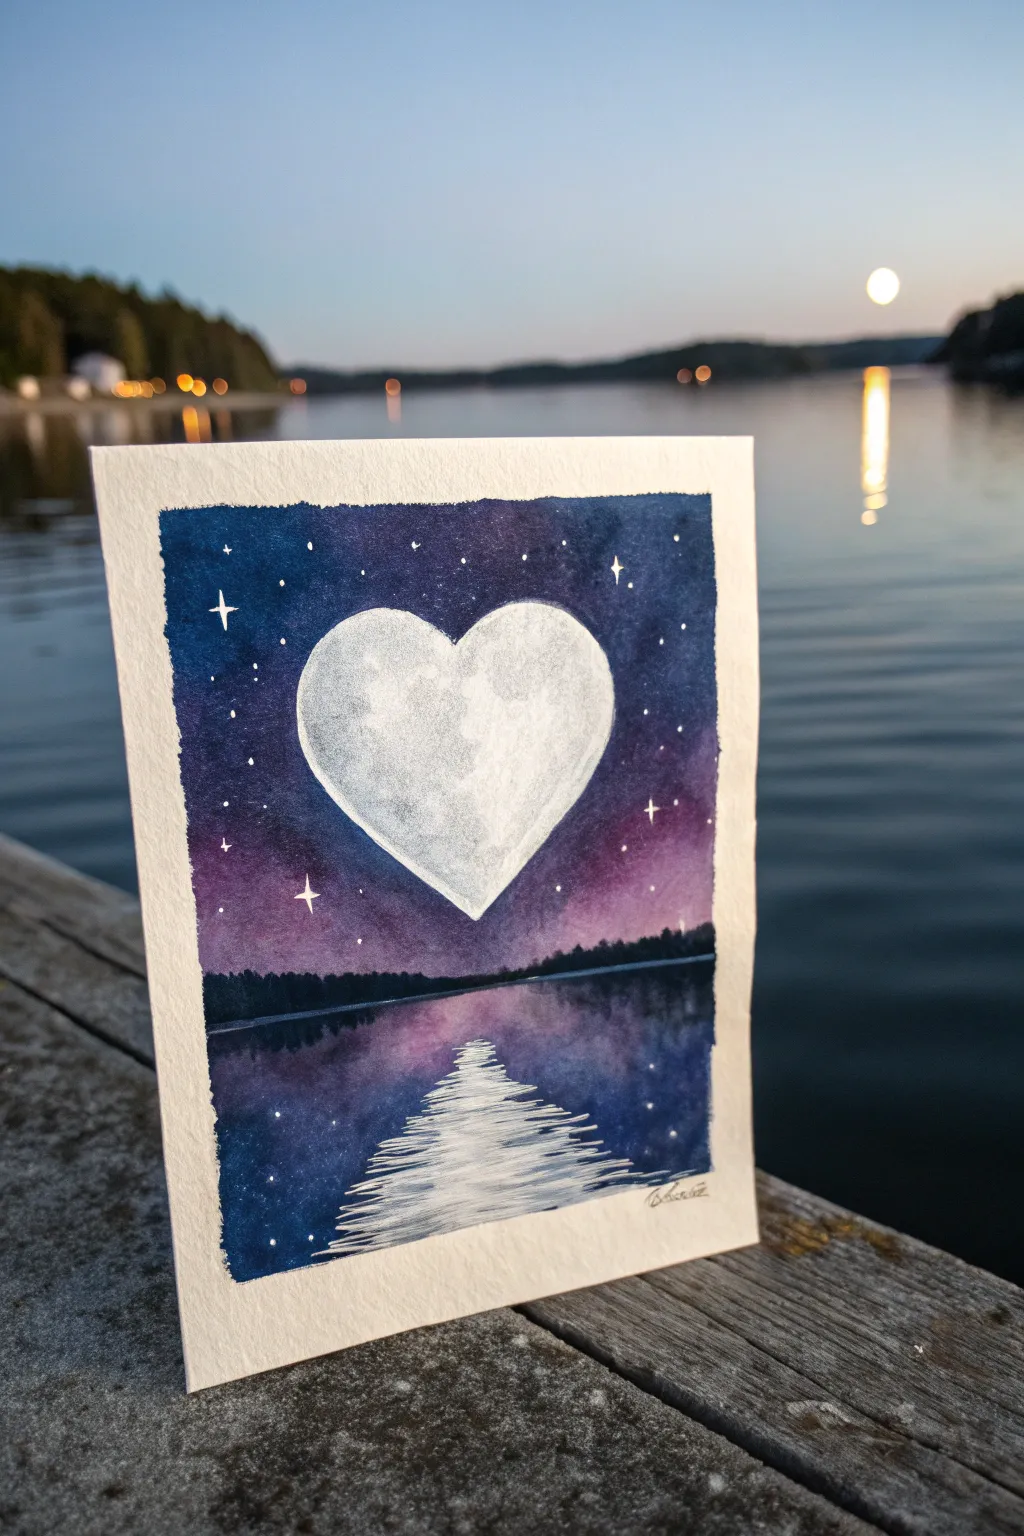
Capture the romance of a twilight sky with this dreamy watercolor landscape, featuring a glowing heart-shaped moon rising above tranquil water. The deep indigos and soft purples create a moody, magical atmosphere perfect for a Valentine’s paint night.
Step-by-Step Guide
Materials
- Cold press watercolor paper (approx. 5×7 inches)
- Painter’s tape or masking tape
- Watercolor paints: Indigo, Violet/Purple, Black, White Gouache
- Flat wash brush (1/2 inch or 3/4 inch)
- Round detail brushes (size 2 and size 0)
- Pencil and eraser
- Jar of clean water
- Paper towels
- Mixing palette
Step 1: Preparation & Sketching
-
Tape the Edges:
Secure your watercolor paper to a hard board or table using painter’s tape. Create a clean border by pressing the tape down firmly to prevent paint from seeping underneath. -
Sketch the Horizon:
Lightly draw a straight horizontal line about one-third of the way up from the bottom of the paper to separate the sky from the water. -
Outline the Moon:
In the center of the sky area, sketch a large, symmetrical heart shape. Keep your pencil lines very light so they won’t show through the paint later.
Uneven Gradients?
If your sky dries with harsh lines between colors, re-wet the area with a clean, damp brush and gently smooth the transition while the paper is still slightly moist.
Step 2: Painting the Sky
-
Mix Your Sky Colors:
Prepare a puddle of deep Indigo paint and a separate puddle of Violet. You want these to be fairly saturated but still fluid. -
Start at the Top:
Using your flat wash brush, load up the Indigo and start painting horizontally at the very top of the paper. -
Blend Downward:
As you work your way down towards the moon, clean your brush slightly and pick up the Violet paint. Blend the Indigo into the Violet, creating a gradient where the sky gets lighter and warmer closer to the horizon. -
Cut Around the Moon:
Carefully use a smaller round brush to paint the sky color around the edges of your heart sketch. Leave the inside of the heart completely dry and white for now. -
Atmospheric Glow:
Dilute your violet paint significantly with water so it is very pale. Wash this color right down to the horizon line, creating a soft, misty look just above the trees.
Use Two Water Jars
Keep one jar for rinsing dirty paint and one purely for clean water. This keeps your white gouache stars and moon brilliant and prevents muddy looking water reflections.
Step 3: Painting the Water
-
Mirror the Sky:
Clean your brush. Starting just below the horizon line, replicate the sky’s colors in reverse. Paint the water area with a wash of pale violet, transitioning into deeper indigo at the bottom edge. -
Leave the Reflection:
While painting the water, try to leave a rough, vertical gap in the center unpainted or very pale. This is where the moon’s reflection will go. -
Dry Completely:
Let the entire painting dry fully. This is crucial before adding crisp details like the trees and stars.
Step 4: Trees & Shadows
-
Mix a Shadowy Black:
Mix your Indigo with a touch of Black to create a very dark, cool tone for the treeline. -
Paint the Forest Silhouette:
Using a small round brush, paint a jagged line of trees sitting right on the horizon line. Vary the heights slightly to make it look like a natural forest. -
Add Water Reflections:
While the tree paint is still slightly damp, pull a little bit of that dark color downwards into the water to create soft shadow reflections along the shoreline.
Step 5: Celestial Details
-
Texture the Moon:
Dilute a tiny amount of grey or very watery indigo. Dab it gently inside the white heart to create craters and moon texture, keeping it subtle. -
Paint the Ripples:
Load a small detail brush with opaque White Gouache (or thick white acrylic). Paint horizontal, wiggly lines in the center of the lake to create the shimmering reflection. -
Narrow the Reflection:
Refine the reflection shape; make the white lines wider closer to the bottom of the page and narrower as they recede toward the horizon. -
Add the Stars:
Use your smallest brush or a toothpick dipped in white paint to dot stars into the dark indigo sky. Add a few cross-shaped sparkles for prominent stars. -
The Reveal:
Wait for the white details to dry, then slowly peel off the painter’s tape at a 45-degree angle to reveal your crisp white border.
Frame this celestial piece or gift it as a unique Valentine card to someone special
BRUSH GUIDE
The Right Brush for Every Stroke
From clean lines to bold texture — master brush choice, stroke control, and essential techniques.
Explore the Full Guide
Heart Balloon Bouquet Floating Up
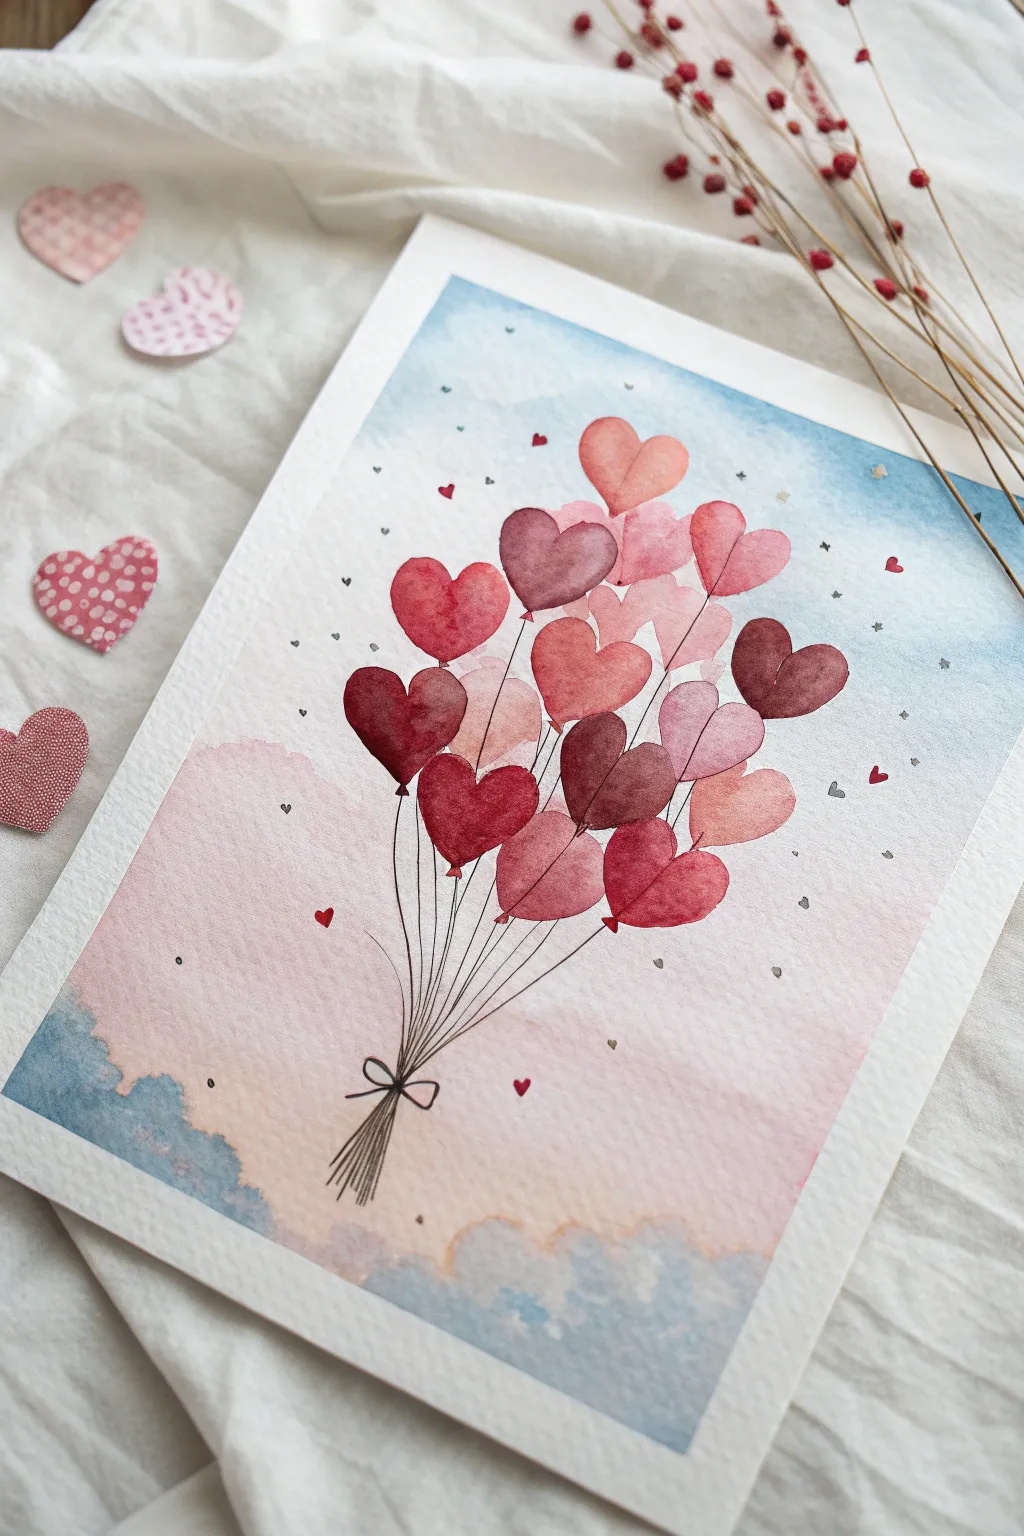
Capture the feeling of romance lifting off with this whimsical watercolor piece featuring a cluster of heart-shaped balloons. The soft pink and blue gradient background perfectly complements the deep reds and dusty roses of the balloons, creating a dreamy finished look.
Step-by-Step Guide
Materials
- Cold press watercolor paper (A4 or 9×12 inch)
- Watercolor paint set (focus on Alizarin Crimson, Cadmium Red, Burnt Sienna, Payne’s Grey, and Cerulean Blue)
- Round brushes (size 6 for balloons, size 2 for strings)
- Large flat wash brush (size 1/2 or 3/4 inch)
- Pencil (HB or 2H)
- Kneaded eraser
- Fine liner pen (black, waterproof, 0.1mm or 0.3mm)
- Palette for mixing
- Two jars of water
- Paper towels
- Painter’s tape or masking tape
Step 1: Preparation and Sketching
-
Tape the edges:
Secure your watercolor paper to a board or table using painter’s tape on all four sides. This creates a crisp white border and prevents the paper from buckling when we add the background wash. -
Sketch the bouquet shape:
Lightly sketch an inverted triangle shape in the center of the paper to guide where your balloons will go. This ensures the composition stays balanced. -
Draw individual balloons:
Fill your guide shape with slightly overlapping heart balloons. Vary the sizes and angles slightly so they look like they are jostling for space. About 15-18 balloons create a full bouquet. -
Add the gather point:
Mark a small focal point near the bottom center of the page where all the strings will eventually meet. Don’t draw the strings yet; just mark the destination.
Step 2: Painting the Sky Background
-
Prepare the wash colors:
Mix a watery pot of Cerulean Blue for the sky and a very diluted mix of Alizarin Crimson or Potter’s Pink for the lower clouds. -
Wet the paper:
With your clean flat brush, wet the entire background area around the balloons with clean water. Try to avoid getting water inside the heart shapes, but it’s okay if you touch the edges. -
Apply the blue gradient:
Start at the top right corner with your blue mix, painting broad horizontal strokes. Let the color fade out as you move diagonally down towards the left. -
Add the pink wash:
While the paper is still damp, introduce the soft pink wash starting from the bottom left, blending gently upwards where it meets the fading blue. -
Create cloud textures:
While the bottom wash is wet, drop in slightly concentrated blue spots near the bottom edge. The paint will bloom softly, creating a cloudy effect. Let this layer dry completely.
Bleeding Hearts?
If balloon colors bleed into each other, you’re painting adjacent shapes too quickly. Use a hairdryer on low heat for 30 seconds between painting neighbouring hearts.
Step 3: Painting the Balloons
-
Mix your balloon palette:
Prepare three distinct puddles of red: a deep maroon (Red + tiny bit of Green or Brown), a classic bright red, and a soft dusty rose (Red + lots of water). -
Paint the first layer:
Using your size 6 round brush, paint a few non-adjacent balloons using the dusty rose color. Painting non-touching shapes first prevents the colors from bleeding into each other. -
Add darker tones:
Once the first set is touch-dry, paint the next set of scattered balloons with your classic bright red. I like to drop a tiny dot of darker paint at the bottom of the wet heart to add dimension. -
Paint the deepest hearts:
Fill in the remaining balloons with the deep maroon mixture. These darker values act as anchors for the composition. -
Create highlights:
Observe where the light hits the curved tops of the hearts. While the paint is still damp, you can lift a tiny bit of color with a thirsty (clean, damp) brush, or just leave small white gaps initially. -
Layer for transparency:
For a translucent effect, you can glaze a light wash of red over where two balloons overlap, making that intersection slightly darker to show depth.
Level Up: 3D Pop
Use a white gel pen to add sharp little highlight curved lines on the upper right side of each balloon after the paint is fully dry for a glossy, inflated look.
Step 4: Details and Finishing Touches
-
Draw the strings:
Once balloons are 100% dry, use your fine liner pen or a very fine brush with concentrated black paint. Draw straight, taut lines from the base of each balloon down to your gather point. -
Add the bow:
Draw a neat little bow where the lines converge. Add short, flared lines below the bow to represent the ends of the bunch. -
Sprinkle confetti details:
Dip a small brush into your red paint and paint tiny floating hearts or dots in the background sky to add movement. -
Add metallic sparkle (optional):
If you have silver or gold watercolor, add tiny specks among the confetti for a little extra magic. -
Remove tape:
Gently peel away the painter’s tape at a 45-degree angle to reveal your crisp white border.
Step back and admire your uplifting bouquet that’s ready to float off the page
Cupid Arrow Through a Bold Heart
This striking watercolor project combines bold, flat color with intricate line work to create a classic symbol of romance. The simple yet impactful design features a vibrant red heart pierced by an arrow, with a clever negative-space detail that adds a touch of whimsy.
Step-by-Step Tutorial
Materials
- Cold press watercolor paper (A4 or 5×7 size)
- Pencil (HB or 2H)
- Eraser
- Watercolor paint (Alizarin Crimson or similar bold red)
- Black ink or heavy body black paint
- Fine liner brush (size 0 or 1)
- Medium round brush (size 4 or 6)
- Ruler
- Water jar
- Paper towel
Step 1: Sketching the Design
-
Outline the heart:
Start by lightly sketching a large, symmetrical heart in the center of your paper. Aim for a plump, rounded shape rather than a narrow one to give yourself plenty of space for the arrow details. -
Draw the arrow shaft:
Using your ruler, draw a straight diagonal line that passes through the heart. The line should enter from the bottom left and exit the top right, but don’t draw the line *inside* the heart yet. -
Add the central mini-heart:
Right where your ruler line crosses the center of the big heart, sketch a very small heart shape. This tiny heart will remain white later, acting as a connector for the arrow shaft. -
Connect the arrow shaft:
Draw the arrow shaft lines inside the large red heart, connecting from the outer edge of the big heart to the tips of the tiny white inner heart. This creates the illusion that the arrow turns into a heart as it passes through. -
Sketch the arrow head and fletching:
At the bottom left end of the shaft, sketch a triangular arrowhead shape. At the top right, sketch the fletching (feathers) with angled lines pointing back toward the shaft.
Step 2: Painting the Heart
-
Prepare your red wash:
Mix a vibrant, saturated red paint on your palette. You want a strong color, so don’t dilute it too much with water. Alizarin Crimson creates a lovely, deep romantic tone. -
Outline the perimeter:
Using your medium round brush, carefully paint along the inner pencil line of the large main heart. Keep your hand steady to maintain a crisp edge. -
Paint around the details:
Switch to your fine liner brush to paint carefully around the tiny inner heart and the black lines of the arrow shaft. You need to leave the tiny heart completely white. -
Fill the heart:
Switch back to the medium brush to fill in the rest of the large heart with your red paint. Work quickly while the paint is wet to avoid streaks, aiming for a consistent, flat wash of color. -
Let it dry completely:
Wait for the red paint to dry thoroughly. The paper must be bone dry before you add the black ink, or it will bleed into the red.
Bleeding Hearts?
If black ink bleeds into the red, your paint wasn’t dry enough. Blot immediately with a tissue corner but don’t rub. Let dry, then repaint the red edge.
Step 3: Inking the Arrow
-
Load the fine brush:
Dip your fine liner brush into black ink or slightly watered-down heavy body black acrylic. Roll the tip to a sharp point. -
Line the shaft:
Trace the straight line of the arrow shaft that goes through the red heart. Be meticulous here; I like to rotate the paper to get the most comfortable angle for my hand. -
Fill the arrowhead:
Paint the triangular arrowhead at the bottom left. You can make this a stylized, geometric shape with sharp points. -
Detail the feathers:
Paint the fletching at the top right. Use short, deliberate strokes to create the angled ‘V’ shapes of the feathers sticking out from the shaft. -
Refine the fletching tail:
Add the triangular tail detail at the very end of the arrow (bottom left in the image, separate from the head). Use solid black to give it visual weight equal to the arrowhead. -
Outline the tiny heart:
With the very tip of your smallest brush, outline the tiny white heart in the center. This black outline defines the shape clearly against the red background. -
Final erase:
Once the black ink is completely dry, gently erase any visible pencil marks, especially around the outer edges of the arrow.
Level Up: Metallic Touch
Swap the black ink for metallic gold gouache or paint pen for the arrow. The shimmer creates a stunning, luxurious contrast against the matte red heart.
You now have a charming piece of art perfect for framing or gifting to someone special

PENCIL GUIDE
Understanding Pencil Grades from H to B
From first sketch to finished drawing — learn pencil grades, line control, and shading techniques.
Explore the Full Guide
Candy-Color Conversation Hearts Pattern
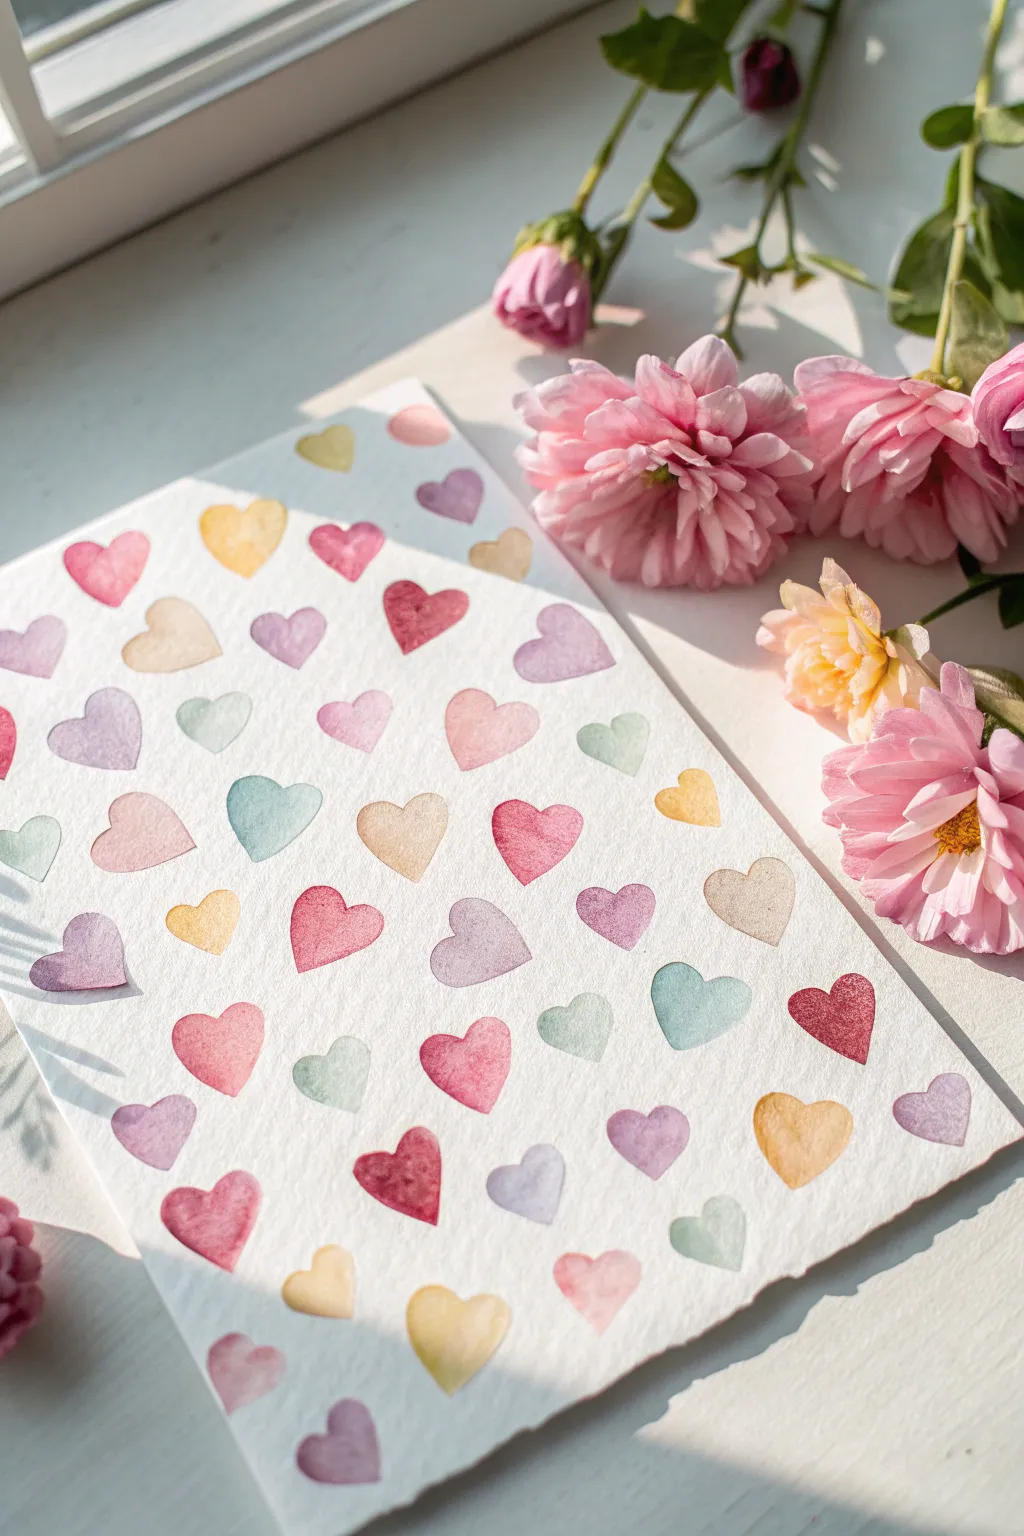
This charming project mimics the soft, sugary appeal of conversation hearts with a delicate grid of watercolor shapes. It transforms simple brushstrokes into a rhythmic pattern perfect for framing or turning into a custom card.
How-To Guide
Materials
- Cold press watercolor paper (140 lb/300 gsm)
- Watercolor paints (pan or tube set)
- Round watercolor brush (size 6 or 8)
- Jar of clean water
- Paper towels
- Pencil and ruler (optional, for guidelines)
Step 1: Preparation & Planning
-
Prepare your palette:
Mix up your candy-inspired colors in your palette wells. Aim for a soft pastel range: dusty rose, baby blue, pale lemon yellow, lavender, peach, and a light sage green. To get that translucent look, dilute your pigments with plenty of water. -
Test transparency:
Before hitting the main paper, swipe each color onto a scrap piece. You want the colors to be light and airy, not thick or opaque. If a color looks too dark, add more water to your mixture. -
Map the grid (optional):
If you’re worried about spacing, lightly mark a grid of small dots with a pencil to guide where the center of each heart will sit. I usually prefer to eyeball it for a more organic feel, but dots help keep things straight.
Oops, Puddles!
If a heart has too much water, dry your brush on a towel and touch the tip to the puddle. The brush will act like a thirsty sponge and soak up the excess.
Step 2: Painting the Hearts
-
Start the first stroke:
Load your brush with your first color, like a dusty rose. Starting at the top left, press the tip of the brush down and curve slightly to the left to form one half of the heart. -
Complete the shape:
Refill the brush slightly if needed, then make a mirroring stroke on the right side. Let the two strokes meet at the bottom point. It’s okay if they overlap and pool color at the tip; that adds character. -
Vary the colors:
Rinse your brush thoroughly and pick up a new color, perhaps the pale yellow. Paint the next heart to the right of the first one, leaving a comfortable white space between them. -
Create the first row:
Continue across the top of the paper, switching colors for every single heart. Try not to place two similar colors right next to each other. -
Start the second row:
Begin the next row below the first. You can either align them directly under the hearts above or offset them slightly (like bricks) to create a staggered pattern. The example uses a staggered alignment. -
Mind the edges:
When you reach the edges of the paper, let some hearts ‘fall off’ the page by only painting a partial shape. This makes the pattern look like it continues infinitely. -
Control the water:
As you work, watch how much water is on your brush. If a heart looks like a puddle, dab the excess water off your brush on a paper towel and touch the damp brush to the puddle to lift it out.
Pro Tip: Hard Edges
To get those crisp, defined edges on the hearts, ensure the paper is completely dry between rows so your hand doesn’t smudge wet paint.
Step 3: Details & Finishing
-
Add ‘blooms’ intentionally:
For a few select hearts, while they are still wet, drop a tiny dot of a darker shade or a different color into the center. Watch the pigment spread naturally for a lovely watercolor bloom effect. -
Correcting shapes:
If a heart looks lopsided, you can gently reshape it with a damp brush while the paint is still wet. But remember, the charm here lies in the slight imperfections of the hand-painted look. -
Let it dry completely:
Resist the urge to touch the hearts. Let the paper sit flat until every heart is bone dry. This prevents smearing and allows the watercolor ridges to dry crisply. -
Erase guidelines:
If you used pencil dots for spacing, wait until the paint is 100% dry, then very gently erase any visible marks. Be careful not to scrub over the paint itself. -
Flatten the paper:
Watercolor shapes can sometimes buckle the paper. Once dry, place your artwork under a heavy book overnight to flatten it out perfectly for framing.
Now you have a sweet, repeatable pattern that captures the romance of the holiday without being overly complicated
Sweet Valentine Gnome Holding a Heart
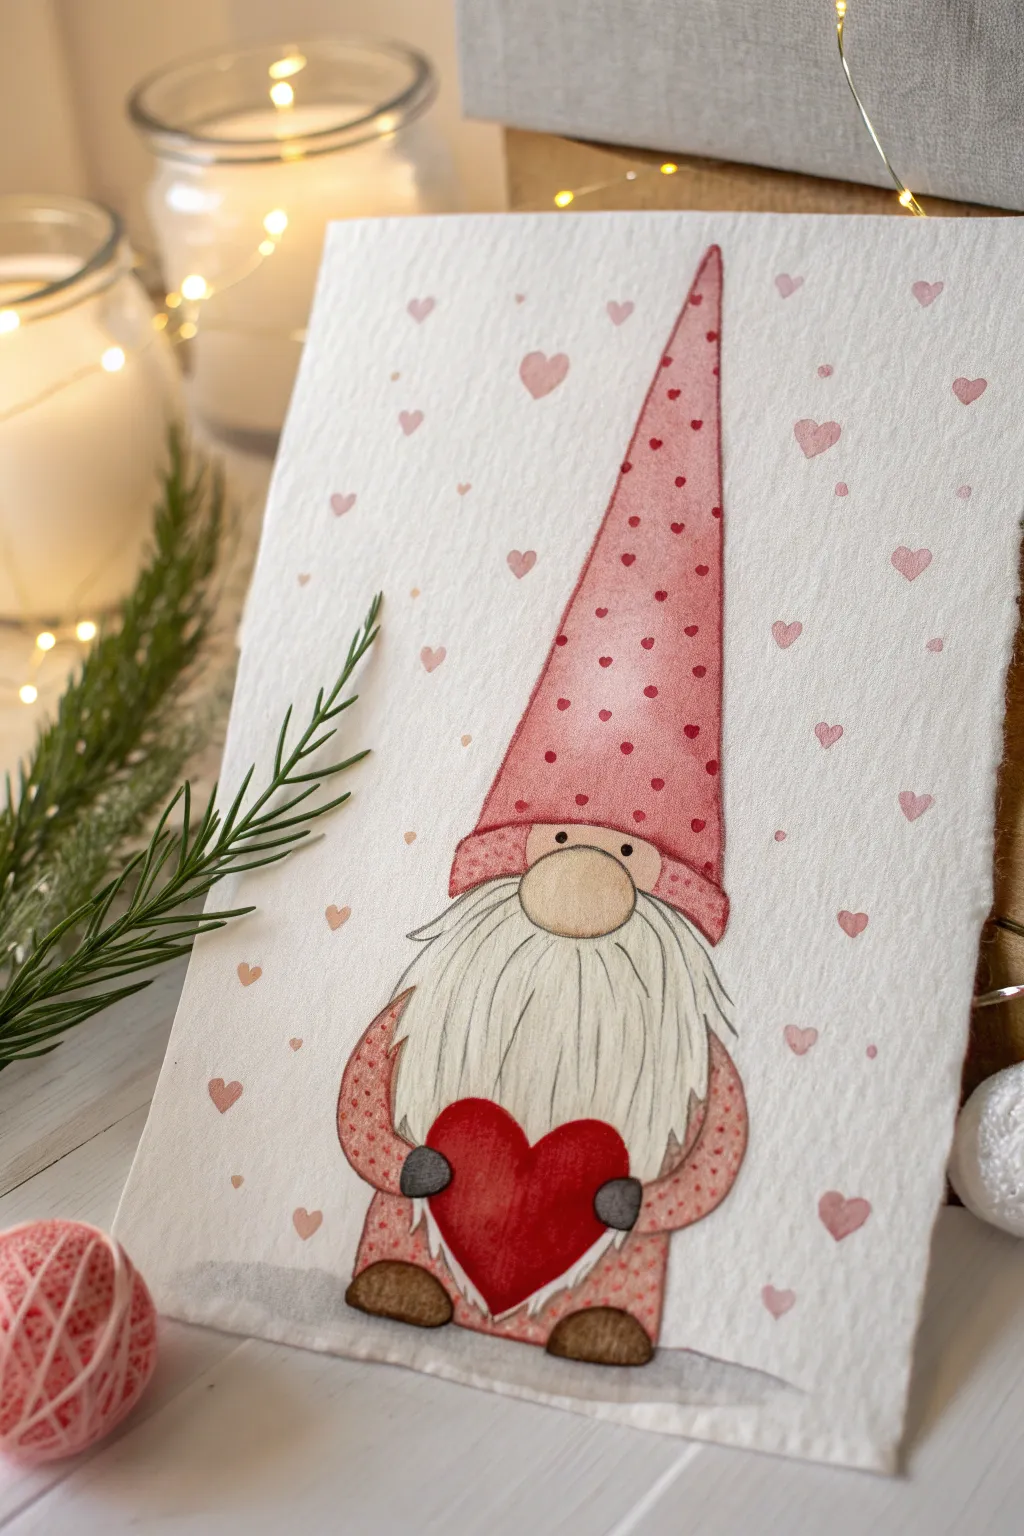
This charming project features an adorable gnome with a tall hat clutching a bright red heart, perfect for expressing affection. The gentle watercolor washes and whimsical details create a soft, illustrative look that’s ideal for a handmade Valentine’s card or framed gift.
How-To Guide
Materials
- Cold press watercolor paper (A5 or A4 size)
- Watercolor paints (Red, Pink, Brown, Grey, Peach/Flesh tone)
- Round watercolor brushes (Size 2, 4, and 6)
- Fine liner pen (Black or Dark Grey, waterproof)
- Pencil (HB) and eraser
- Jar of water and paper towels
- White gel pen (optional for highlights)
Step 1: Sketching the Outline
-
Center the gnome:
Start by lightly sketching a large oval shape for the gnome’s body near the bottom center of your paper. Leave plenty of room above for the tall hat. -
Draw the nose and beard:
Place a round oval for the nose near the top of the body oval. From under the nose, sketch a flowing beard shape that drapes down over the body, splitting slightly at the bottom. -
Add the hat:
Draw the rim of the hat directly above the nose, curving it slightly over the eyes (which remain hidden). Extend two long lines upward to form a tall, pointed cone shape, leaning just a little to one side for character. -
The heart and hands:
Sketch a large heart shape sitting centrally over the beard and body. Add two small mitten shapes gripping the sides of the heart. -
Finishing touches:
Add small feet poking out from under the body. Lightly erase your lines until they are faint guides, just visible enough to paint over.
Fixing Bleeds
If red paint bleeds into the white beard, quickly clean your brush, dampen it with clean water, and lift the unwanted color seamlessly with a paper towel.
Step 2: Painting the Gnome
-
Base tone for the hat:
Mix a watery light pink. Using your size 6 brush, fill in the entire hat shape. Keep the wash wet and even. While it’s still damp, drop in slightly darker pink spots near the edges to create a 3D effect. -
Painting the nose:
Use a pale peach or flesh tone for the nose. Paint a flat wash, then dab a tiny bit of diluted brown on the bottom edge to create a shadow while it’s still wet. -
The bright red heart:
Switch to a vibrant, saturated red. Carefully paint the heart held by the gnome. I like to keep the center slightly lighter or lift a little paint with a dry brush to make it look rounded. -
Beard texture:
The beard needs to look white but have depth. Use a very watery grey wash. Instead of filling it in completely, use your size 4 brush to paint loose, vertical strokes following the flow of the hair, leaving plenty of white paper showing. -
Body and mittens:
Paint the sleeves and body in a soft pink, similar to the hat but perhaps slightly darker. Paint the mittens a dark charcoal grey or black. -
Shoes:
Fill in the small shoe shapes with a warm brown paint.
Step 3: Adding Details & Background
-
Hat pattern:
Once the hat is completely dry, use a small brush (size 2) and a darker red-pink mixture to paint tiny hearts or polka dots scattered all over the hat. -
Beard definition:
Deepen the shadows in the beard. Take a slightly darker grey and paint thin lines between the clumps of hair to define the strands more clearly. -
Outlining:
Using your fine liner pen, carefully outline the main shapes—the nose, the beard, the hat rim, and the heart. Keep the lines delicate. Don’t outline every single hair, just the main shapes. -
Floating hearts:
Mix a very watery pink wash. Paint random small hearts floating in the background around the gnome. Vary the sizes and spacing to keep it looking organic. -
Ground shadow:
Add a simple wash of watery grey underneath the gnome’s feet to ground him so he isn’t floating in space. -
Final highlights:
If you have a white gel pen, add tiny highlight dots to the nose, the heart, and the mittens to make them pop.
Level Up: Texture
Add real texture to the beard by waiting for the paint to dry, then gluing on small wisps of cotton wool or white embroidery thread for a fuzzy 3D effect.
Allow your painting to dry completely before framing or writing a message inside for your vintage-style Valentine


Abstract Pink Pour With Heart Reveal
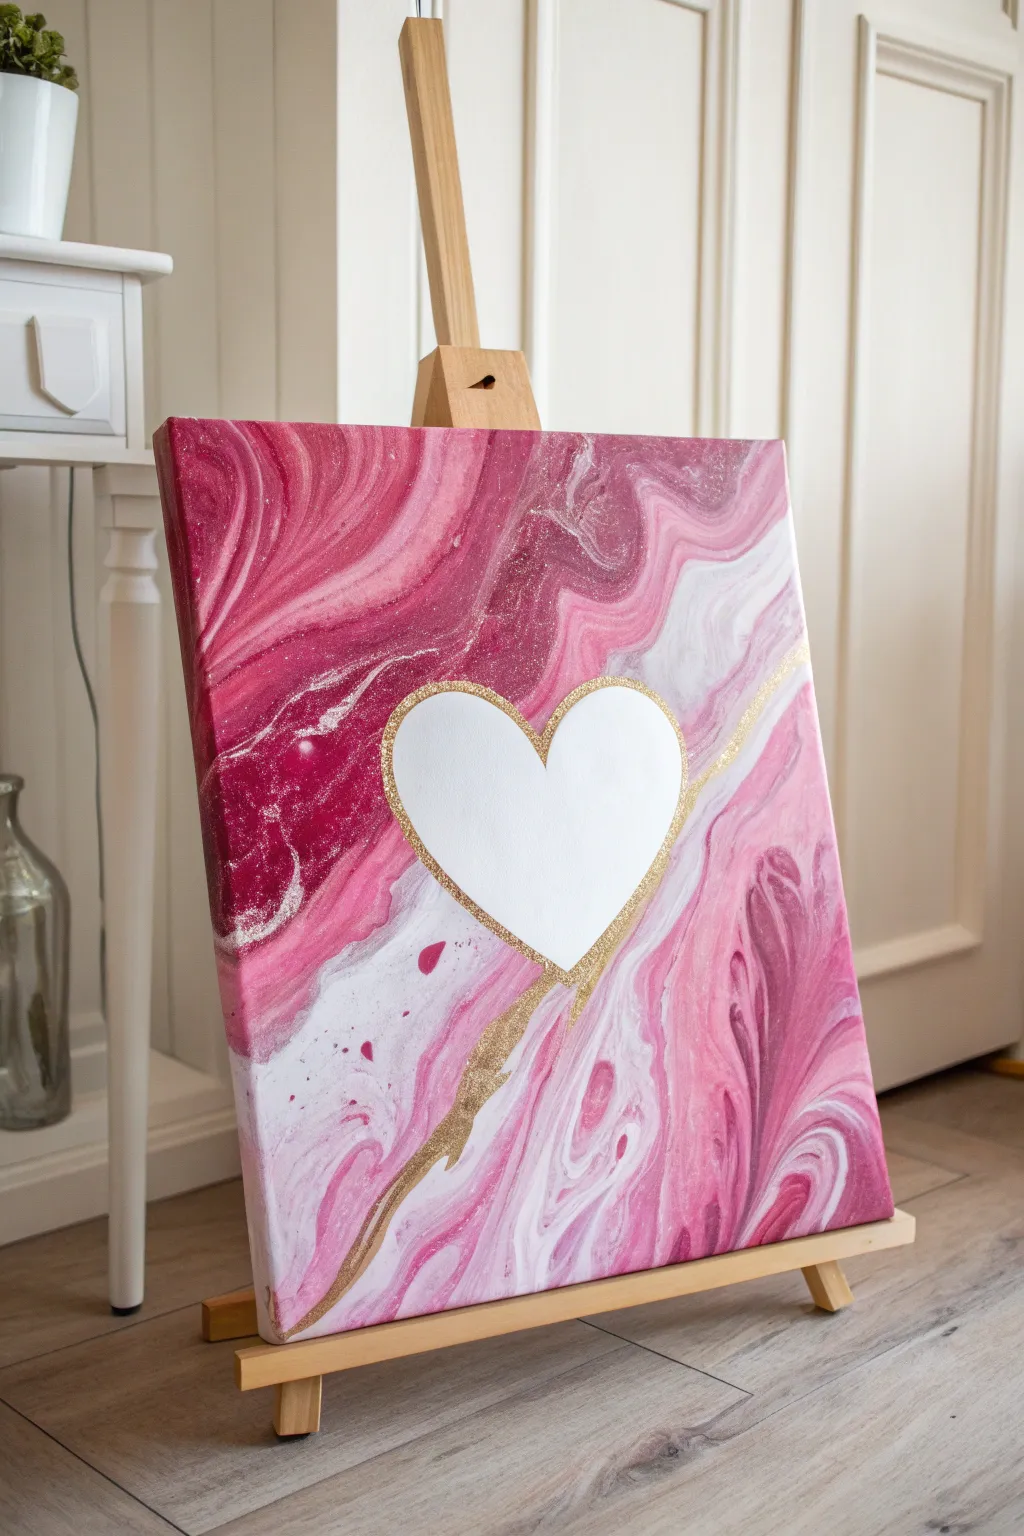
This romantic abstract piece captures the movement of love using pink, magenta, and white fluid acrylics swirled together on canvas. The standout feature is a pristine white heart in the center, framed by a delicate touch of gold glitter, creating a stunning negative-space effect.
Step-by-Step Tutorial
Materials
- Canvas (16×20 or similar size)
- Acrylic paints (Magenta, Bubblegum Pink, White)
- Pouring medium
- Adhesive vinyl or contact paper
- Scissors
- Gold glitter glue or fine gold glitter mixed with clear glue
- Plastic cups (one for each color)
- Stir sticks
- Hairdryer (optional, for moving paint)
- Table covering/drop cloth
Step 1: Preparation & Masking
-
Cut the heart stencil:
Cut a large, symmetrical heart shape out of your adhesive vinyl or contact paper. Make sure the edges are smooth and clean, as this will define the central negative space. -
Apply the mask:
Peel the backing off your vinyl heart and stick it firmly onto the center of your canvas. Press down thoroughly along the edges to ensure no paint can seep underneath creates a crisp seal. -
Mix your pouring paints:
In separate cups, mix your magenta, pink, and white acrylic paints with pouring medium. Aim for a consistency similar to warm honey—fluid enough to flow but thick enough to hold color separation.
Step 2: The Pouring Process
-
Apply base colors:
Start by pouring puddles of your darkest magenta and medium pink on various parts of the canvas around the heart, letting them touch and overlap slightly. -
Add white highlights:
Pour ribbons of white paint through the pinks and magentas. The white creates that marbled, creamy effect seen in the swirls. -
Tilt the canvas:
Gently lift the canvas and tilt it in different directions. Let the paint flow over the vinyl heart and all the way to the edges. Don’t worry about covering the heart completely; the vinyl protects it. -
Refine the flow:
If the paint is moving too slowly, you can use a hairdryer on a low, cool setting to push the colors around, creating softer gradients and interesting cells. -
Check the edges:
Ensure the sides and corners of the canvas are fully coated. You can use your finger to dab paint onto any bare spots along the rim.
Paint Consistency Check
Lift your stir stick from the cup; the paint should flow off in a steady, thin stream. If it drips, it’s too thick; add water. If it splashes, it’s too thin.
Step 3: The Reveal & Embellishment
-
Initial drying phase:
Allow the painting to dry until it is tacky but not fully hardened. This usually takes a few hours depending on the thickness of your paint layers. -
Remove the heart mask:
Carefully pick at the edge of the vinyl heart with a craft knife or fingernail. Slowly peel it away to reveal the clean, white canvas underneath. -
Let it cure:
Allow the painting to dry completely, usually overnight. This ensures the surface is firm before adding the final details. -
Outline with gold:
Using gold glitter glue or a fine brush with gold paint, trace the outline of the white heart. This hides any tiny imperfections from the peel and adds sparkle. -
Add the gold vein:
Extend a line of gold glitter from the bottom point of the heart down towards the corner of the canvas, mimicking a golden vein running through rose quartz. -
Final touches:
You can add a thin line of gold extending from the right side of the canvas toward the heart as well, balancing the composition.
Jagged Heart Edges?
If paint bled under the sticker, wait for it to fully dry. Then, paint over the bleed with white acrylic paint to clean up the heart shape before adding the gold outline.
Once the glitter dries, you’ll have a stunning abstract piece that radiates romance
Stamped Hearts With Bubble Wrap Texture

Transform everyday packaging material into unique stamps to create this textured, romantic canvas art. The honeycomb-like pattern of bubble wrap adds depth and intrigue to simple heart shapes, creating a sophisticated yet playful Valentine’s Day masterpiece.
Detailed Instructions
Materials
- Square stretched canvas (12×12 or similar)
- Acrylic paints (White, Red, Light Pink, Rose Gold/Metallic Pink)
- Small piece of bubble wrap (small bubbles)
- Cardboard or stiff cardstock
- Scissors
- Double-sided tape or glue stick
- Paint palette or paper plate
- Flat paintbrush or foam pouncer
- Pencil
Step 1: Stamp Creation
-
Prepare the Base:
Cut a few pieces of cardboard into rectangles slightly larger than the size you want your hearts to be. These will serve as the rigid backing for your stamps. -
Attach Bubble Wrap:
Cut pieces of bubble wrap roughly the same size as your cardboard rectangles. Use double-sided tape or a glue stick to firmly adhere the flat side of the bubble wrap to the cardboard, leaving the bubbly side facing up. -
Trace Heart Shapes:
On the back of the cardboard (the non-bubble wrap side), sketch out heart shapes. I like to make two or three slightly different sizes for variety. -
Cut Out Stamps:
carefully cut out your heart shapes with scissors, cutting through both the cardboard and the attached bubble wrap simultaneously. Trim any jagged bubble edges so the heart shape is clean.
Stamp Smearing?
If the bubble texture is blurry, you are likely using too much paint. Apply a thinner layer to the bubbles with a sponge rather than dipping the stamp.
Step 2: Background Preparation
-
Base Coat:
Paint your entire canvas with a layer of white acrylic paint. This creates a fresh, even surface and helps the subsequent colors pop. -
Add Subtle Texture:
While the white paint is still wet, dip a crumpled paper towel or a dry brush into a tiny amount of very pale metallic pink paint. -
Dab and texture:
Lightly dab this over parts of the white background to create a shimmering, uneven texture. Let the canvas dry completely before stamping.
Add Sparkle
Once the paint is dry, lightly brush clear glitter glue or a shimmer varnish over just the raised ‘bubble’ parts of the hearts for extra dimension.
Step 3: Stamping and Painting
-
Prepare Your Palette:
Squeeze out your red, various pinks, and rose gold paints onto your palette. You want a creamy consistency that isn’t too runny. -
Apply Paint to Stamp:
Take your first heart stamp. Instead of dipping it directly into the paint, use a flat brush or foam pouncer to apply a thin, even layer of paint onto the bubbles. This ensures the texture remains crisp and doesn’t get flooded. -
First Stamp:
Press the painted stamp firmly onto the canvas. Apply gentle pressure all over the heart shape to ensure every bubble makes contact. -
Lift Cleanly:
Lift the stamp straight up without dragging it to preserve the honeycomb pattern. -
Repeat with Variations:
Continue stamping hearts across the canvas. Alternate between your different stamp sizes and switch colors often. I find mixing a dark red heart next to a pale pink one creates great contrast. -
Mix Textures:
For some variety, you can use a regular paintbrush to hand-paint a few solid hearts without the bubble wrap texture, filling in spaces between the stamped ones. -
Fill the Gaps:
Look for empty spots and stamp partial hearts running off the edge of the canvas. This makes the composition feel professional and intentional. -
Final Touches:
If any stamped hearts look too faint, you can carefully re-align the stamp and press again, or use a small liner brush to touch up the edges. -
Dry Completely:
Allow the entire canvas to dry flat for at least an hour to prevent any drips.
Hang your textured heart canvas on the wall or prop it on a shelf for a lovely handmade touch
Hidden Heart in Cherry Blossom Branches
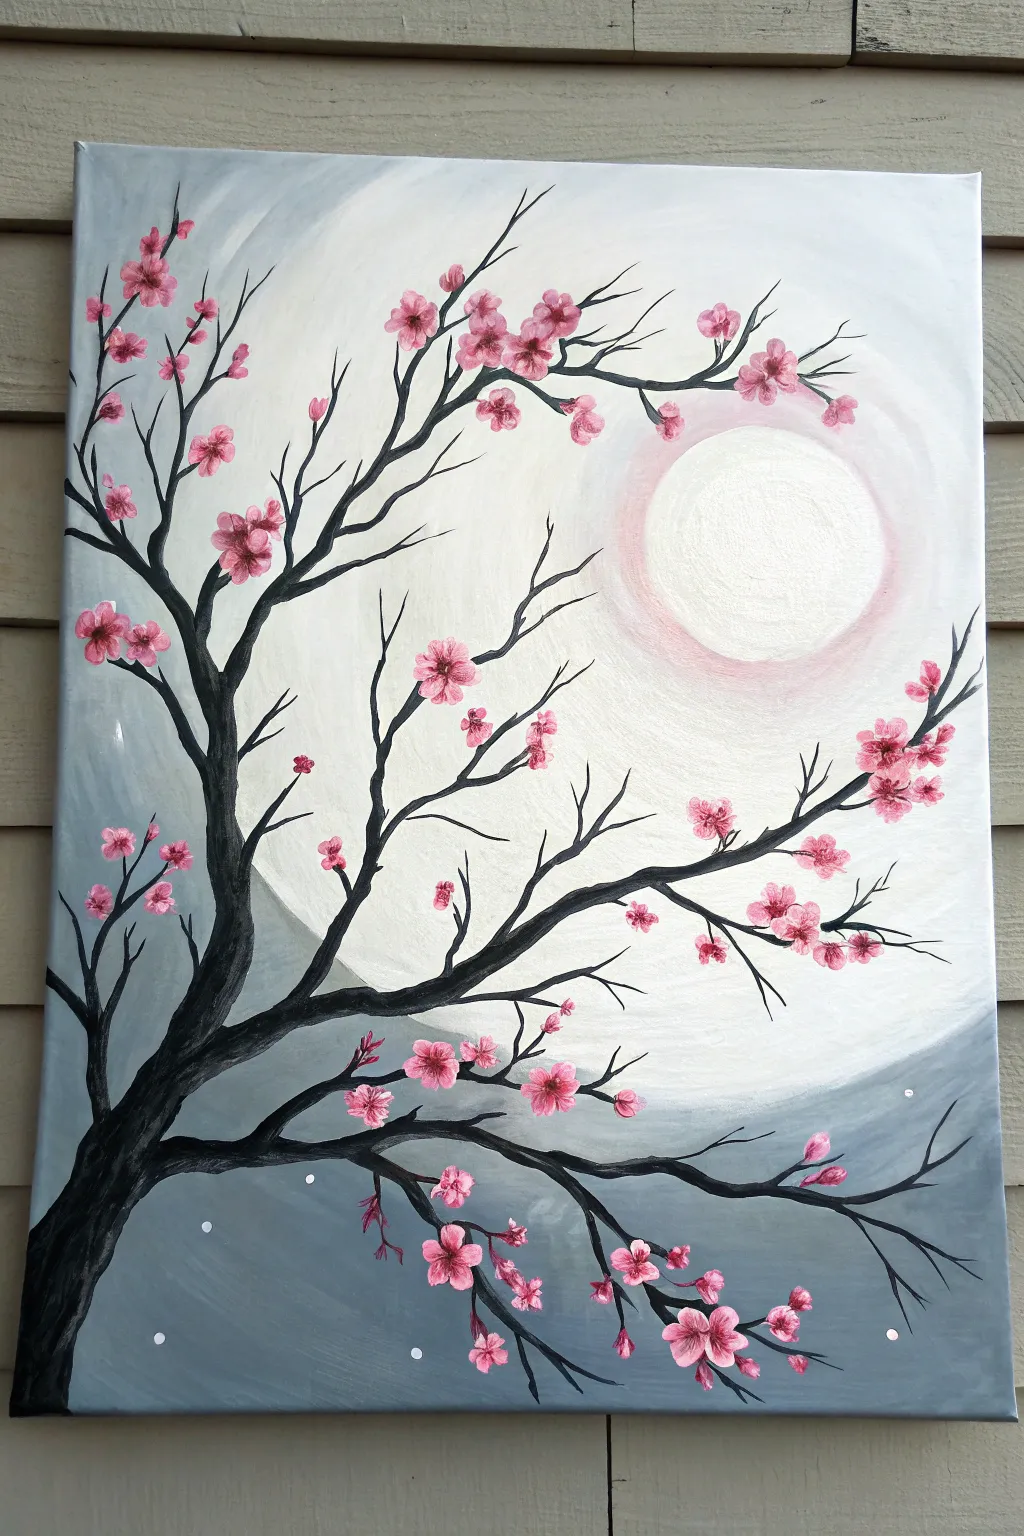
Set a romantic mood with this whimsical cherry blossom painting that reveals a subtle heart in its negative space. The high-contrast dark branches against the glowing, misty background create a striking silhouette effect perfect for a date night project.
How-To Guide
Materials
- Rectangular canvas (e.g., 16×20 inches)
- Acrylic paints: Titanium White, Mars Black, Cool Grey, Magenta/Pink
- Large flat brush (1-inch width)
- Medium round brush
- Small liner or detail brush
- Cup of water and paper towels
- Palette or paper plate
Step 1: Creating the Glowing Atmosphere
-
Establish the background gradient:
Start by mixing a light cool grey with plenty of white. Using your large flat brush, paint sweeping, curved strokes from the upper right corner outward. You want the upper right area to be nearly pure white to represent the light source. -
Darken the edges:
As you move toward the bottom left of the canvas, gradually mix in a slightly darker grey. Blend the transition areas while the paint is still wet to avoid hard lines, creating a misty, atmospheric look. -
Paint the luminous orb:
In the upper right quadrant (but not touching the edge), paint a clean white circle. This will serve as the sun or moon. While the white is wet, lightly dry-brush a tiny amount of diluted pink around its outer rim to give it a soft, glowing halo. -
Add the pink hazy rings:
Using a very sheer wash of pink and white, paint faint concentric rings rippling out from the orb. These should be extremely subtle, barely tinting the grey background.
Muddy Background?
If blending grey and white turns streaky, use a clean, dry brush to gently sweep over the wet paint boundary. This softens the transition instantly.
Step 2: Branching Out
-
Anchor the tree trunk:
Switch to a medium round brush and load it with black paint. Start at the bottom left corner and paint the thickest part of the trunk, extending it diagonally upward about one-third of the way across the canvas. -
Split the main branches:
From the main trunk, split the tree into three major directional flows. One large branch should reach high toward the top center, one should stretch across the middle right, and one lower branch should sweep horizontally across the bottom. -
Form the hidden heart:
This is the trickiest part. Direct the upper main branch and the middle main branch so that the empty space *between* them roughly forms the top curve of a heart shape. You are painting the frame, not the heart itself. -
Extend secondary branches:
Using the tip of your round brush, pull smaller branches off the main limbs. Keep your wrist loose and let the lines jag slightly; real trees aren’t perfectly straight. -
Add fine twigs:
Switch to your liner brush for the delicate tips. Flick the brush quickly at the ends of branches to create thin, tapering twigs that reach into the empty spaces.
Step 3: Blossoming Details
-
Base coat the flowers:
Mix a medium pink shade. identify clusters on your branches where you want flowers to sit. Using the small round brush, dab five small petals in a circular pattern for each flower. -
Layer light pink highlights:
Without cleaning your brush thoroughly, dip the tip into white paint. Add a small highlight stroke to the top edge of each petal to give them dimension and make them pop against the grey background. -
Add dark centers:
Mix a deep magenta or reddish-pink. Place a tiny dot or starburst shape in the center of each flower cluster to create depth. -
Balance the composition:
Step back and look at your scatter. Add single falling petals or small buds (just simple pink dots) on the branch tips to fill any awkward empty spots. -
Sprinkle falling snow or pollen:
Dip the handle end of a small brush into pure white paint. Gently dot random spots in the dark grey background areas, particularly near the bottom, to look like floating light particles or falling petals.
Branch Control Tip
Add a drop or two of water to your black paint until it feels like flowing ink. This helps the liner brush glide smoothly without skipping on the canvas texture.
Sign your name in the corner and enjoy your romantic masterpiece
Playlist-Inspired Color Bars Spelling Love
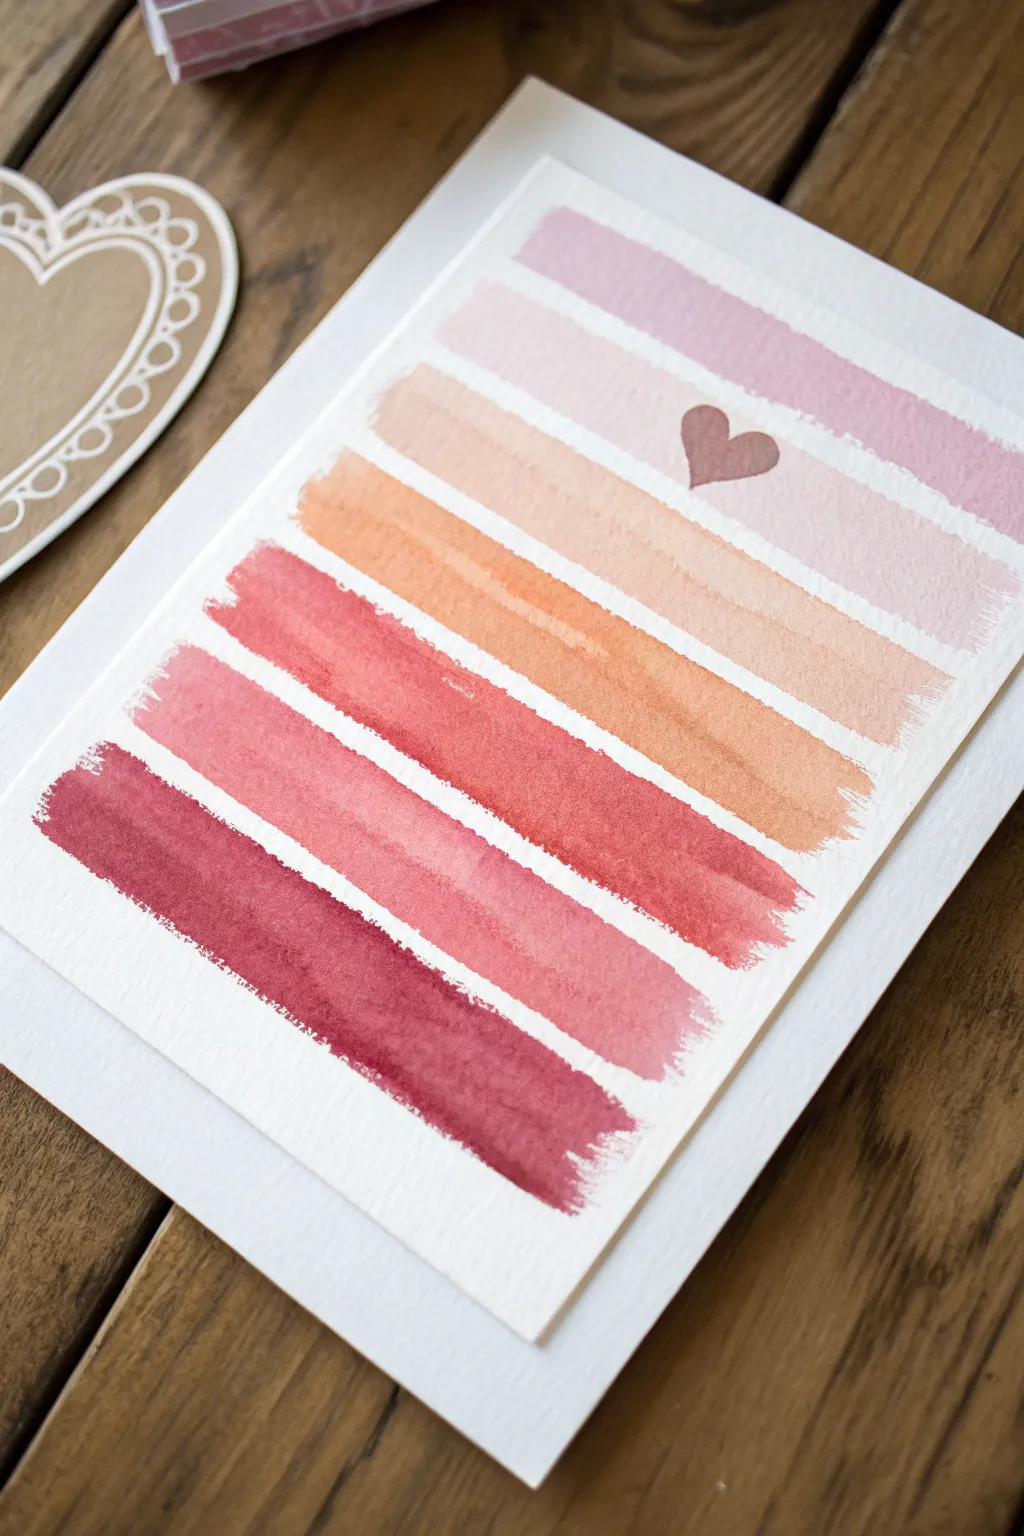
This minimalist watercolor project features soothing horizontal stripes in a warm gradient ranging from deep berry to soft blush. The composition is anchored by a single, delicate heart floating within the pastel tones, creating a modern and romantic piece of art.
Detailed Instructions
Materials
- Cold press watercolor paper (minimum 140lb)
- White cardstock or backing board
- Watercolor paints (Berry Red, Crimson, Orange, Peach, Pale Pink)
- Flat shader brush (size 1/2 inch or 3/4 inch)
- Small round detail brush (size 2 or 4)
- Washi tape or painter’s tape
- Clean water jar
- Paper towels
- Pencil and ruler
- Double-sided tape or glue roller
Step 1: Preparation and Layout
-
Paper selection:
Begin by selecting a high-quality cold press watercolor paper. The texture is crucial for achieving that lovely, ragged edge on your brushstrokes. -
Cut to size:
Trim your watercolor paper to a rectangle slightly smaller than your backing cardstock. A size of 5×7 inches works beautifully for a standard frame. -
Drafting guidelines (Optional):
If you struggle with straight lines, lightly mark horizontal guides with a pencil and ruler where you want your stripes to sit. Keep the spacing consistent, roughly a half-inch between bars. -
Prepare your palette:
Mix your colors before you start painting. You need a gradient from dark to light: Deep maroon/berry, crimson red, terracotta orange, soft peach, pale pink, and a very watery blush.
Uneven Stripes?
If freehand stripes feel too risky, apply strips of washi tape to mask off the white gaps. Paint over the exposed areas, then peel the tape away when damp.
Step 2: Painting the Gradient Stripes
-
Start dark:
Load your flat shader brush with the darkest berry color. Paint the bottom-most stripe first holding the brush horizontally. -
Brush technique:
Apply the stroke with confidence, starting from the left and sweeping to the right. Let the brush run slightly dry at the ends to create textured, rough edges rather than perfect squares. -
Second stripe:
Rinse your brush slightly and pick up the crimson red shade. Paint the next stripe up, leaving a clear gap of white space above the first dark bar. -
Transition to orange:
Move to the third stripe using your terracotta or deep orange mix. Try to keep the width of the stripe relatively similar to the previous ones. -
Soft peach layer:
Clean your brush thoroughly. Load it with the peach tone and paint the fourth stripe. The colors should be getting significantly lighter as you move upward. -
Pale pink stripe:
Apply the fifth stripe using a pale pink watercolor wash. This layer needs to be light enough that a darker detail painted over it will stand out later. -
Final top wash:
Finish with the top stripe in the lightest blush tone possible—add plenty of water to your mix for transparency. -
Drying time:
Allow the stripes to dry completely. Since the next step involves painting over one of them, the paper must be moisture-free to prevent bleeding.
Step 3: Adding Details and Assembly
-
Painting the heart:
Using your small round detail brush, pick up a medium-dark pink or dusty rose color. -
Placement:
Locate the second stripe from the top (the pale pink one). Paint a small, simple heart right in the center of this stripe. -
Drying the detail:
Let the heart detail dry. I prefer to wait about 10 minutes to ensure it doesn’t smudge during mounting. -
Flattening the art:
If your paper has buckled slightly from the water, place it under a heavy book for an hour once fully dry to flatten it out. -
Mounting:
Apply double-sided tape or a glue roller to the back of your painted watercolor paper. -
Final assembly:
Center the painting onto your larger white cardstock or backing board, pressing down firmly to secure it.
Add Sparkle
Mix a tiny amount of iridescent medium or gold metallic watercolor into the heart color to make the central focal point shimmer in the light.
Now you have a beautifully layered gradient art piece ready to frame or gift to someone special

Have a question or want to share your own experience? I'd love to hear from you in the comments below!