There is something truly magical about watching vibrant colors dance and blend across a fresh sheet of paper, turning a simple afternoon into a creative adventure. Whether you are looking to spark creativity in your little ones or just want a relaxing activity, these playful projects focus on the process rather than perfection.
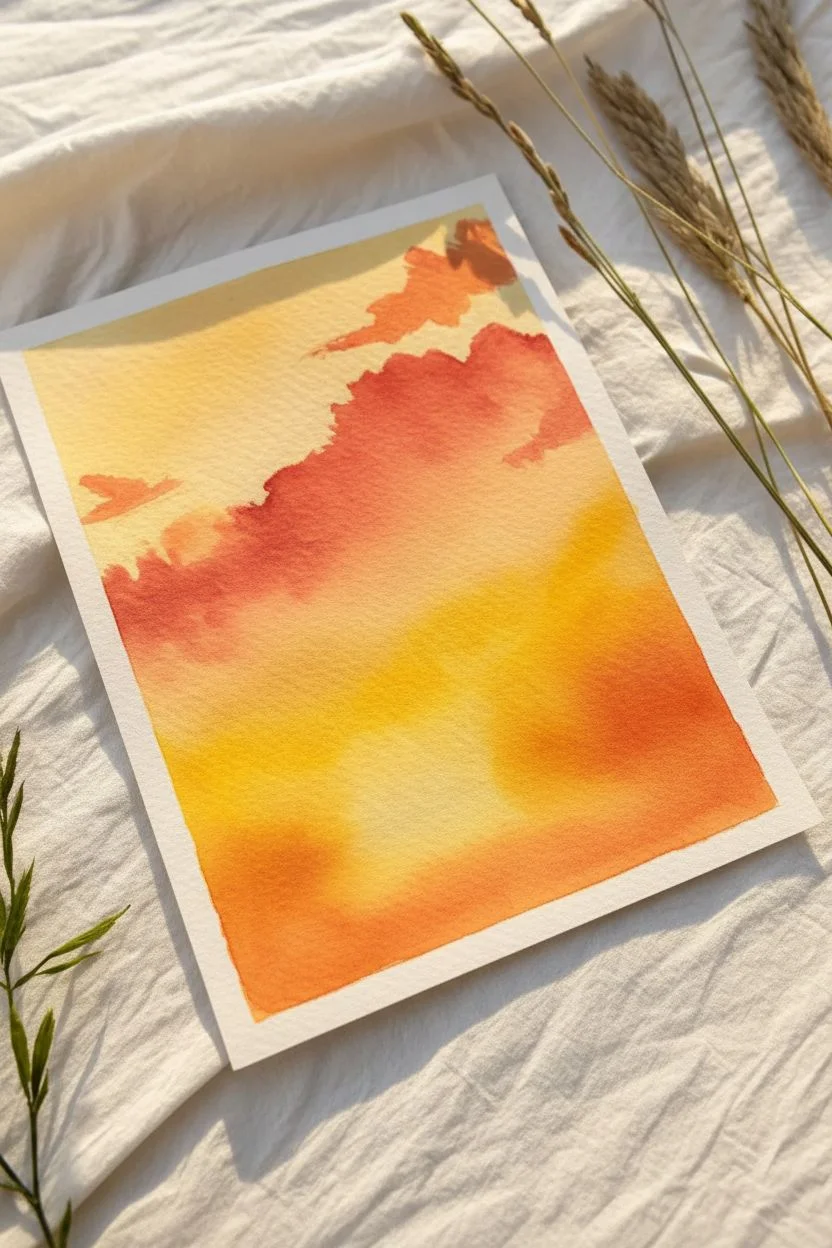
Classic Wet-on-Wet Rainbows
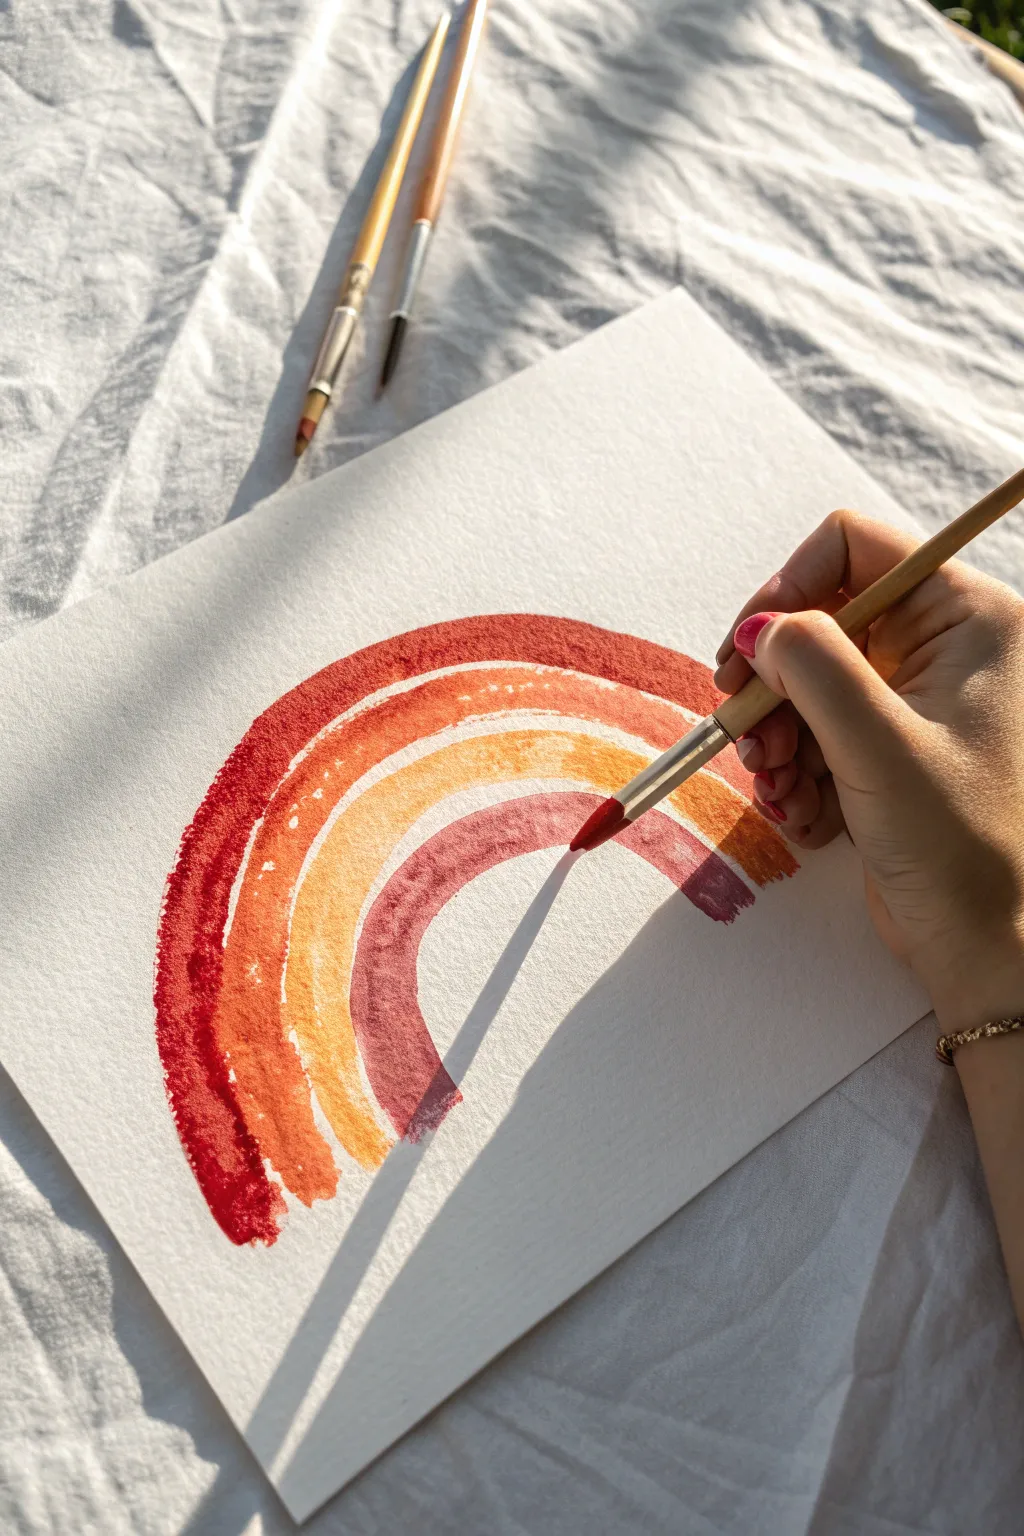
Move beyond standard primary colors with this warm, bohemian-style rainbow project that teaches color mixing and brush control. The result is a cozy, textured artwork with organic edges that mimics the soft glow of a sunset.
Step-by-Step Guide
Materials
- Cold-press watercolor paper (300gsm)
- Round watercolor brush (size 6 or 8)
- Watercolor paints (pan or tube)
- Cup of water
- Paper towel or rag
- Mixing palette
- Masking tape (optional)
Step 1: Mixing the ‘Boho’ Palette
-
Prepare your workspace:
Set up your paper on a flat surface. If you want clean borders, tape the edges of your watercolor paper down, though a loose sheet works fine for this freehand style. -
Activate the paints:
Add a few drops of water to your paint pans to soften them up. We want the paint consistency to be fluid but rich in pigment. -
Mix the Rustic Red:
To get the outer band color shown in the photo, mix a bright red with a tiny touch of brown or burnt sienna to deepen it. -
Create the Burnt Orange:
For the second color, mix standard orange with a little bit of your Rustic Red mix to make it warm and vibrant. -
Mix the Golden Yellow:
Combine yellow with a dot of orange or yellow ochre. You want a color that looks like golden honey rather than a bright lemon. -
Blend the Muted Mauve:
For the innermost arch, mix purple with a tiny dot of brown or gray. This desaturates the purple so it matches the earthy vibe of the other stripes.
Step 2: Painting the Arches
-
Load the brush with Red:
Saturate your brush with the Rustic Red mix. It should be juicy enough to glide, but not dripping wet. -
Paint the outer arch:
Start on the left side and paint a wide smooth curve to the right. Apply enough pressure so the bristles fan out slightly, creating a nice thick band. -
Create textured ends:
At the bottom of the arch strokes, lift your brush quickly or let the paint run out to create rough, ragged edges similar to the sample image. -
Rinse and switch:
Rinse your brush thoroughly in water and dab it on the paper towel until it runs clear. -
Apply the Orange band:
Load your brush with the Burnt Orange. Paint a second arch just inside the red one. I like to work while the red is still slightly damp. -
Encourage the bleed:
Let the orange stroke touch the edge of the red stroke. The colors will gently fuse together (the ‘wet-on-wet’ effect) without turning muddy. -
Add the Golden Yellow:
Clean your brush again, load up the Golden Yellow, and paint the third arch. Follow the curve of the orange band closely. -
Paint the final arch:
Rinse your brush and load the Muted Mauve. Paint the smallest, innermost arch. -
Refine the shape:
If the inner arch looks uneven, you can carefully go over the stroke once more to round it out, as seen in the photo. -
Add water blooms (optional):
While the paint is still drying, you can drop a tiny bit of clean water into the middle of a stripe to create texture. -
Let it dry completely:
Leave the painting flat to dry so the puddles of color settle evenly into the paper’s texture.
Brush Control Tip
Hold the brush higher up on the handle, away from the bristles. This loosens your grip and helps you paint smoother, more natural curves compared to holding it like a pencil.
Level Up: Sparkles
Once the watercolor is 100% dry, use a metallic gold pen or white gouache to add tiny stars, dots, or dashed lines over the rainbow for a magical finish.
Now you have a warm, modern artwork perfect for hanging on the wall or turning into a greeting card


Salt-Sprinkled Galaxy Skies
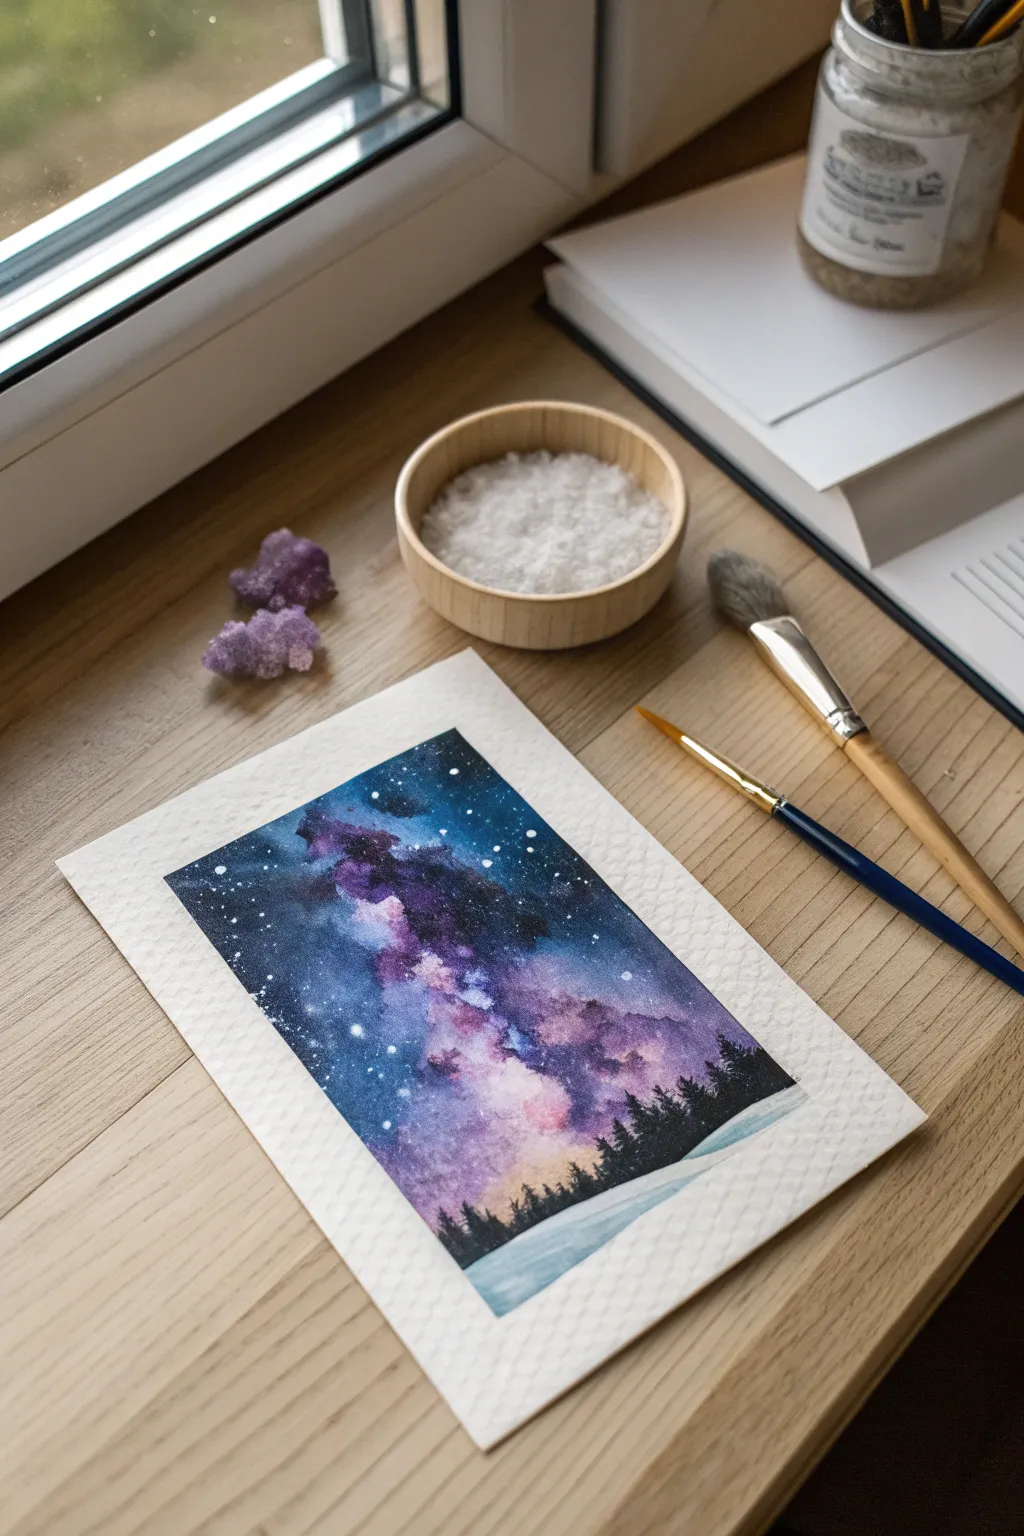
Transform a simple sheet of paper into a stunning deep-space nebula using a little science and creativity. By combining wet-on-wet watercolor techniques with common household salt, you’ll create unique starburst textures that look incredibly complex but are easy for kids to master.
Detailed Instructions
Materials
- Cold-press watercolor paper (300 gsm recommended)
- Watercolor paints (Indigo, Violet, Magenta, Black)
- White gouache or white gel pen
- Coarse sea salt or table salt
- Round brushes (large size 10 and small size 2)
- Masking tape
- Two jars of water
- Paper towels
- Wooden board or stiff cardboard
Step 1: Setting the Stage
-
Secure the paper:
Tape your watercolor paper down to a board on all four sides. This keeps the paper flat when wet and creates that crisp, professional white border shown in the finished piece. -
Horizon line:
Lightly sketch a very faint pencil line about one-fifth of the way up from the bottom of the page to mark where the snow stops and the sky begins. -
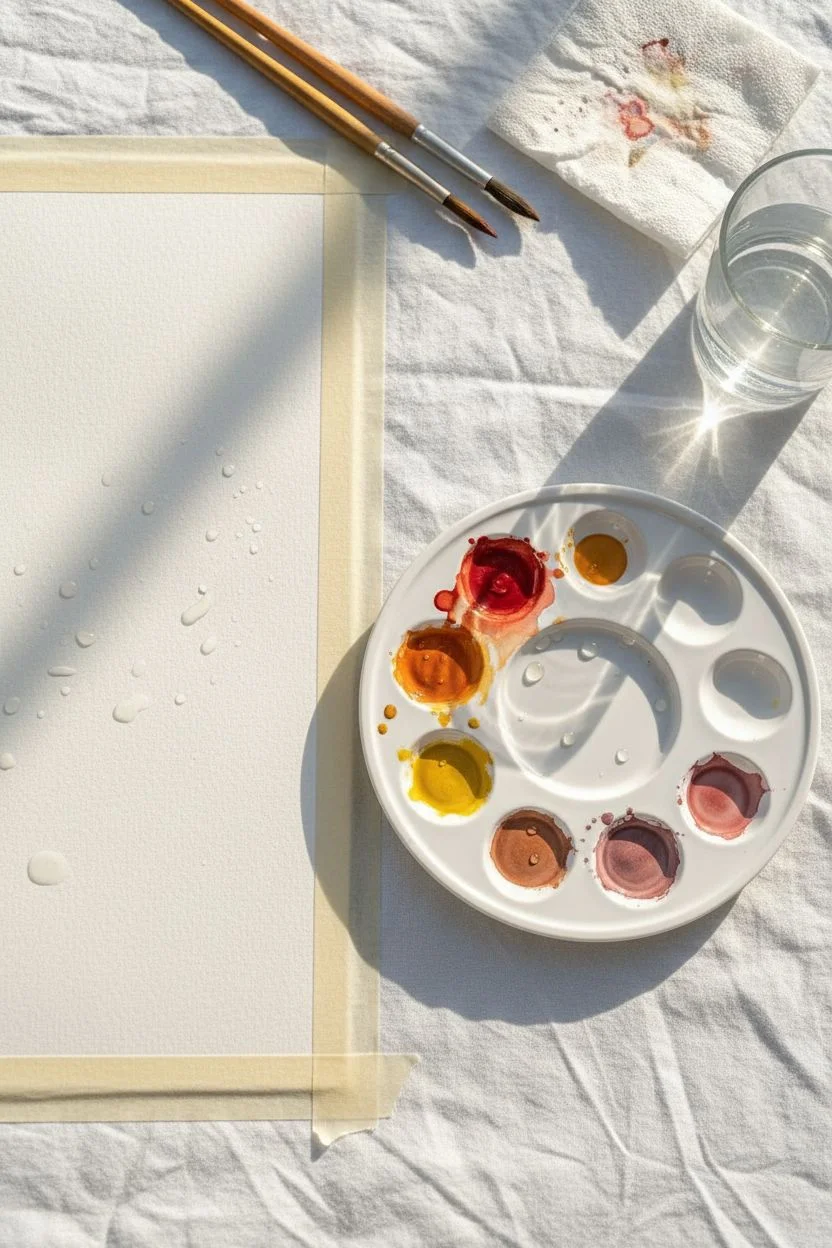
Prepare your palette:
Before wetting the paper, mix your puddles of paint. You want saturated, heavy mixtures of indigo, deep purple, and bright magenta ready to go so you don’t have to pause later.
Salt Crystal Troubleshooting
If the salt didn’t bloom, the paper was likely too dry when you sprinkled it. The paper needs to be glossy and wet. If it was too wet (puddles), the salt just dissolves without pushing the pigment.
Step 2: The Galaxy Sky
-
Wet the sky:
Using your large round brush and clean water, thoroughly wet the entire sky area above your pencil line until the paper has a consistent sheen but isn’t forming puddles. -
Lay the Milky Way:
Start with your lightest color, the magenta or pink. Dab this diagonally across the wet paper to form the bright core of the galaxy. -
Deepen the cosmos:
While the paper is still wet, drop in violet paint around the edges of the pink sections, letting the colors bleed into each other naturally. -
Add the darkness:
Fill the remaining corners and top edges of the sky with your darkest indigo or black watercolor to create the depth of space. -
The salt technique:
This is the magic moment. While the paint is still very wet and shiny, pinch a small amount of salt and sprinkle it over the purple and blue areas. I prefer to focus on the darker transition zones for the best contrast. -
Patience is key:
Let the painting dry completely undisturbed. As it dries, the salt crystals will absorb the pigment, pushing the color away to create beautiful starlike textures.
Step 3: Forest and Finish
-
Reveal the texture:
Once the paper is bone dry and warm to the touch, gently brush the salt crystals off the paper into a trash bin or sink with your hand. -
Paint the snow:
Dilute a tiny drop of blue paint with lots of water. Paint the snow area at the bottom, making it slightly darker right under the horizon line to suggest shadows. -
Tree silhouettes:
Load a small detail brush (size 2) with thick, concentrated black paint. Paint a jagged line along the horizon to start the forest base. -
Growing the forest:
Paint vertical lines for tree trunks, varying their heights so the forest looks natural and not like a fence. -
Adding branches:
Using the very tip of your brush, dab small horizontal strokes in a triangular shape down each trunk to create the pine tree branches. -
Splatter stars:
Cover the bottom tree area with a scrap paper to protect it. Dip an old brush in white gouache or slightly watered-down acrylic, tap the handle against a finger, and spray fine white mist over the sky. -
Brightest stars:
Use a white gel pen or a fine brush with white gouache to add a few larger, distinct stars manually in the darker areas of the sky. -
The final reveal:
Once everything is completely dry, slowly peel away the masking tape at a 45-degree angle to reveal your clean white edges.
Level Up: Texture Variety
Try mixing different salts for varied effects. Table salt creates tiny, dense star clusters, while coarse sea salt or rock salt creates large, dramatic flares resembling distant nebulae.
Now you have a mesmerizing galaxy painting that captures the vast beauty of the night sky


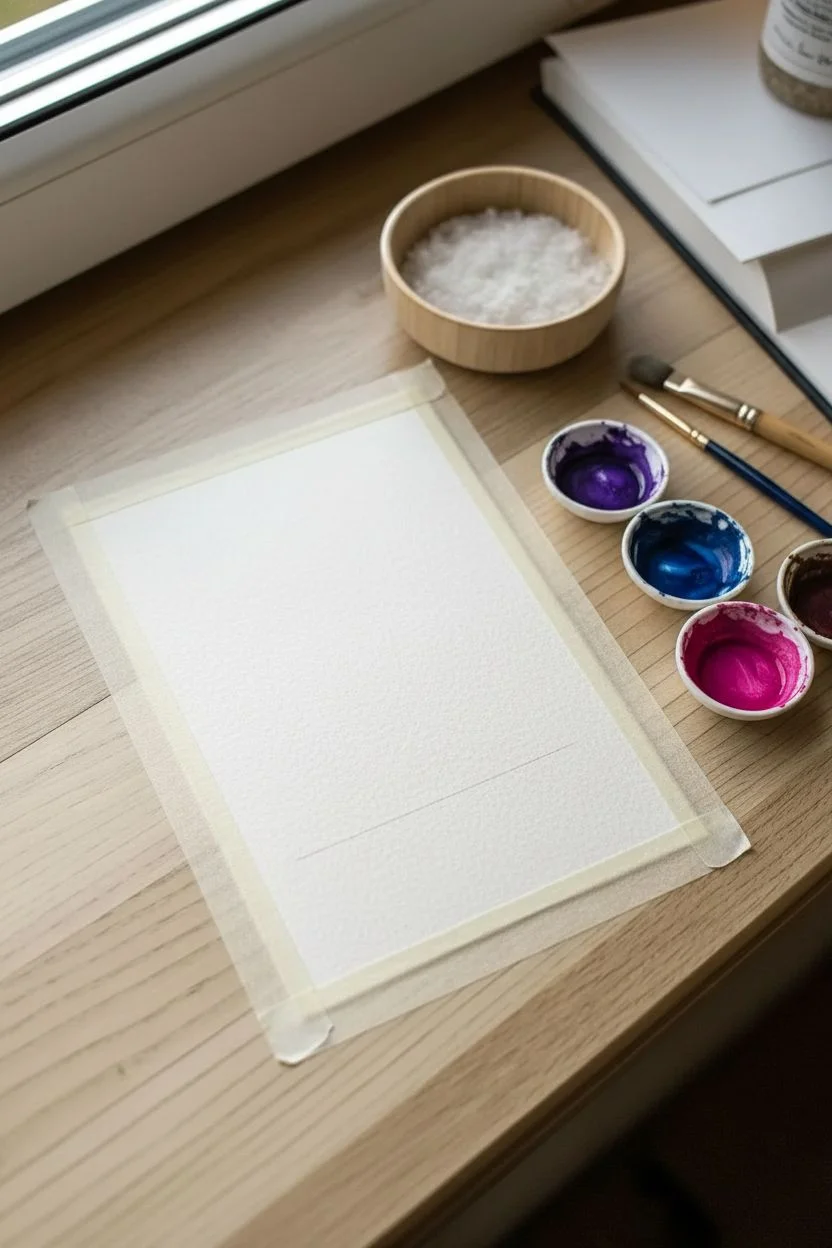
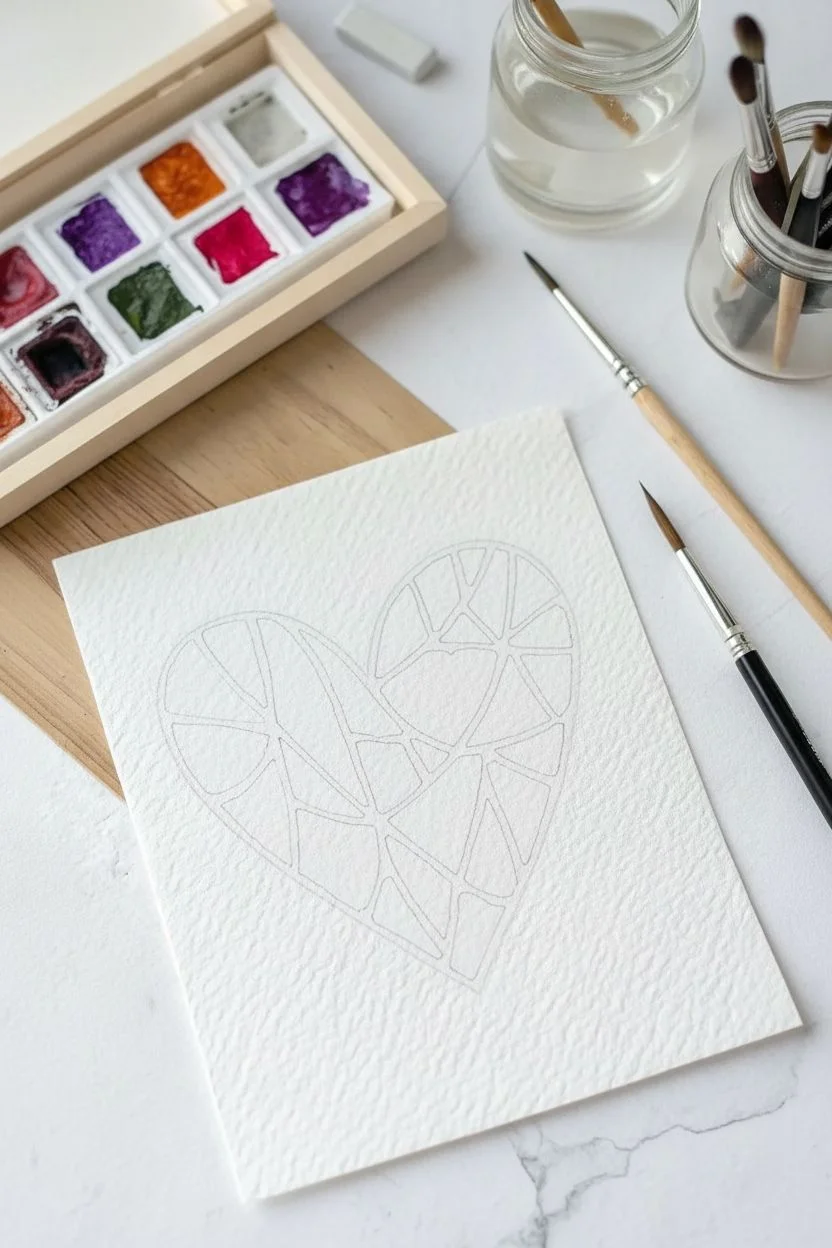
White Crayon Secret Messages
Create a magical starry night where your drawings appear out of thin air using the classic wax resist technique. By combining invisible crayon lines with deep blue watercolor washes, you’ll produce a whimsical, monochromatic masterpiece full of celestial charm.
Step-by-Step Guide
Materials
- Cold-press watercolor paper (A4 or square cut)
- White wax crayon (or white oil pastel)
- Watercolor paint set
- Round paintbrush (size 6 or 8)
- Jar of clean water
- Paper towel
Step 1: The Invisible Sketch
-
Clean your tool:
Before bending over the paper, check the tip of your white crayon. Ensure it is completely free of other stray colors so your lines stay pure white. -
Paper placement:
Place your watercolor paper on a flat surface. If you are using a loose sheet, you might want to tape the corners down, though a free-floating sheet works fine for this quick project. -
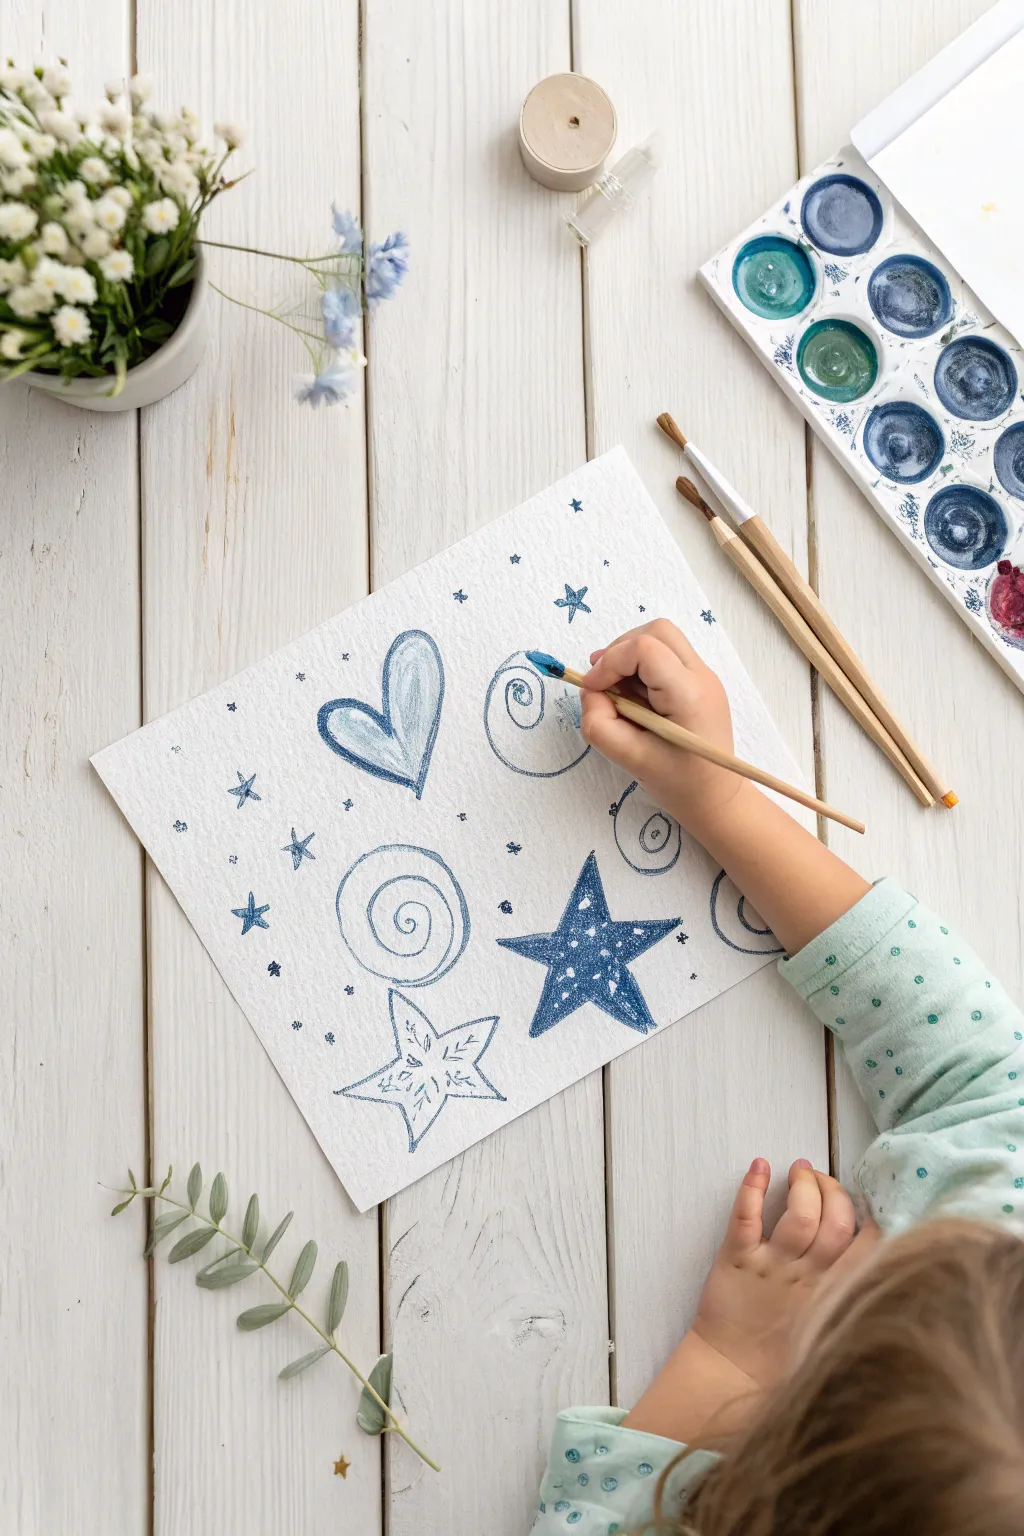
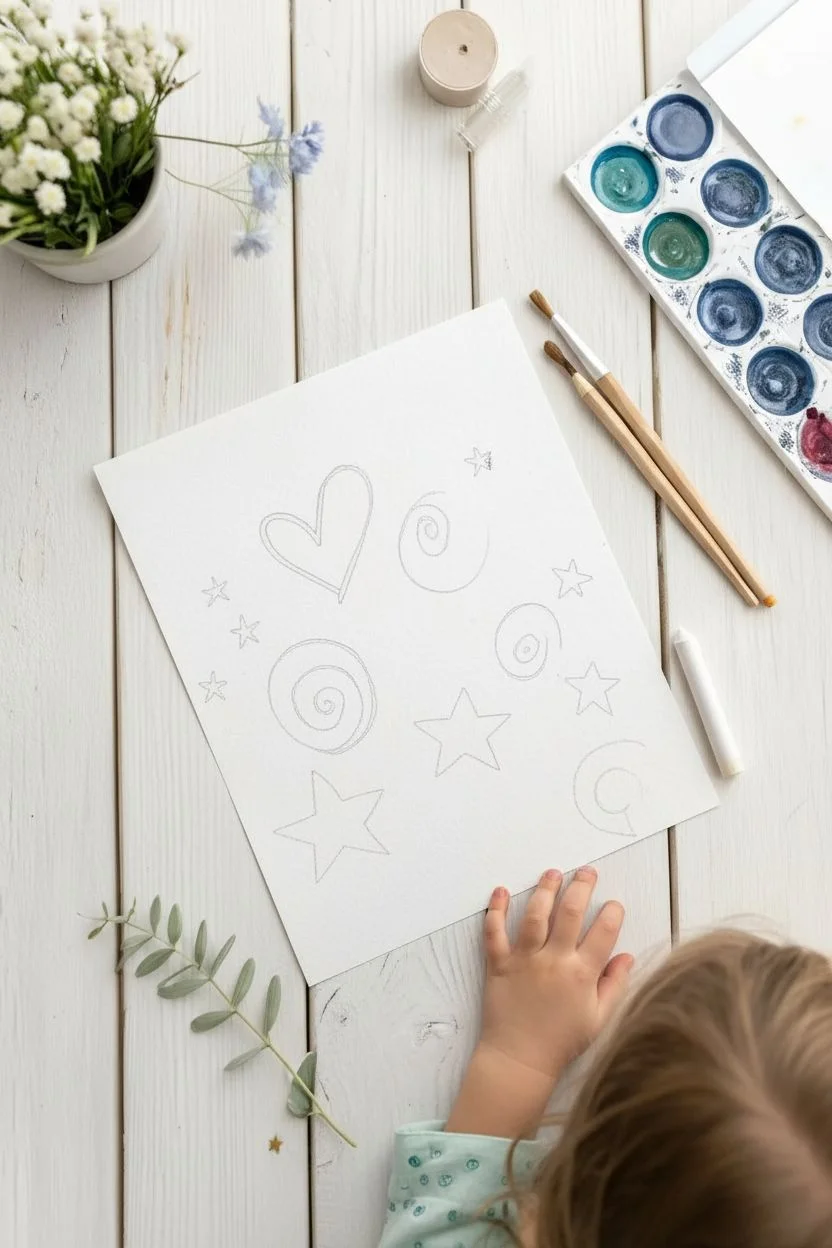
Draw the heart:
Start by drawing a large heart shape near the center-left of the page. It can be tricky to see white on white, so I like to tilt my head to catch the light reflection on the wax. -
Add floating spirals:
In the empty spaces, draw two or three loose spiral shapes. Press down firmly as you draw; a heavy hand applies enough wax to repel the water later. -
star outlines:
Draw the outlines of several five-pointed stars scattered across the page. Leave the insides of these stars empty for now. -
Verify the pressure:
Run your finger lightly over the lines. You should be able to feel a slight waxy ridge. If it feels too smooth, trace over your lines one more time to thicken the barrier.
Invisible Line Check
Only seeing faint lines? You likely didn’t press hard enough. The wax needs to really grip the paper grain to repel the water. Go heavy on the crayon step!
Step 2: The Watercolor Reveal
-
Prepare the paint:
Wet your brush and swirl it into a deep blue or indigo paint pan. You want a balance of pigment and water—aim for the consistency of thin milk, not heavy cream. -
Reveal the heart:
Load your brush and sweep it boldly across the heart drawing. Watch as the blue paint beads up on the crayon line, instantly revealing the white shape. -
Wash over spirals:
Continue painting over your spiral drawings. Try to use long, fluid strokes rather than scrubbing back and forth to keep the lines crisp. -
Fill the outlined stars:
Paint over and inside the star outlines you drew earlier. The paint will fill the shape but leave the bright white border visible. -
Create a solid star:
To create contrast like in the photo, mix a slightly darker, more saturated blue. Paint a solid five-pointed star freehand in an empty spot—no crayon underneath this one. -
Allow for texture:
When painting the solid star, let the rough texture of the paper show through slightly. This natural grain adds to the sparkly effect. -
Add mini stars:
Using the very tip of your brush, paint tiny, freehand stars or asterisks in the background using the darker blue shade. -
Sprinkle some dust:
Finish by dabbing clusters of small blue dots around the larger shapes to mimic distant stardust or snow. -
Let it settle:
Allow the paint to pool slightly in some areas for color variation, then let the artwork dry completely on a flat surface.
Color Magic
Try layering! After the blue dries, add a second wash of purple or watery black over the darkest areas to give your galaxy painting even more depth.
Enjoy watching your secret celestial messages appear as the paint washes over the page.


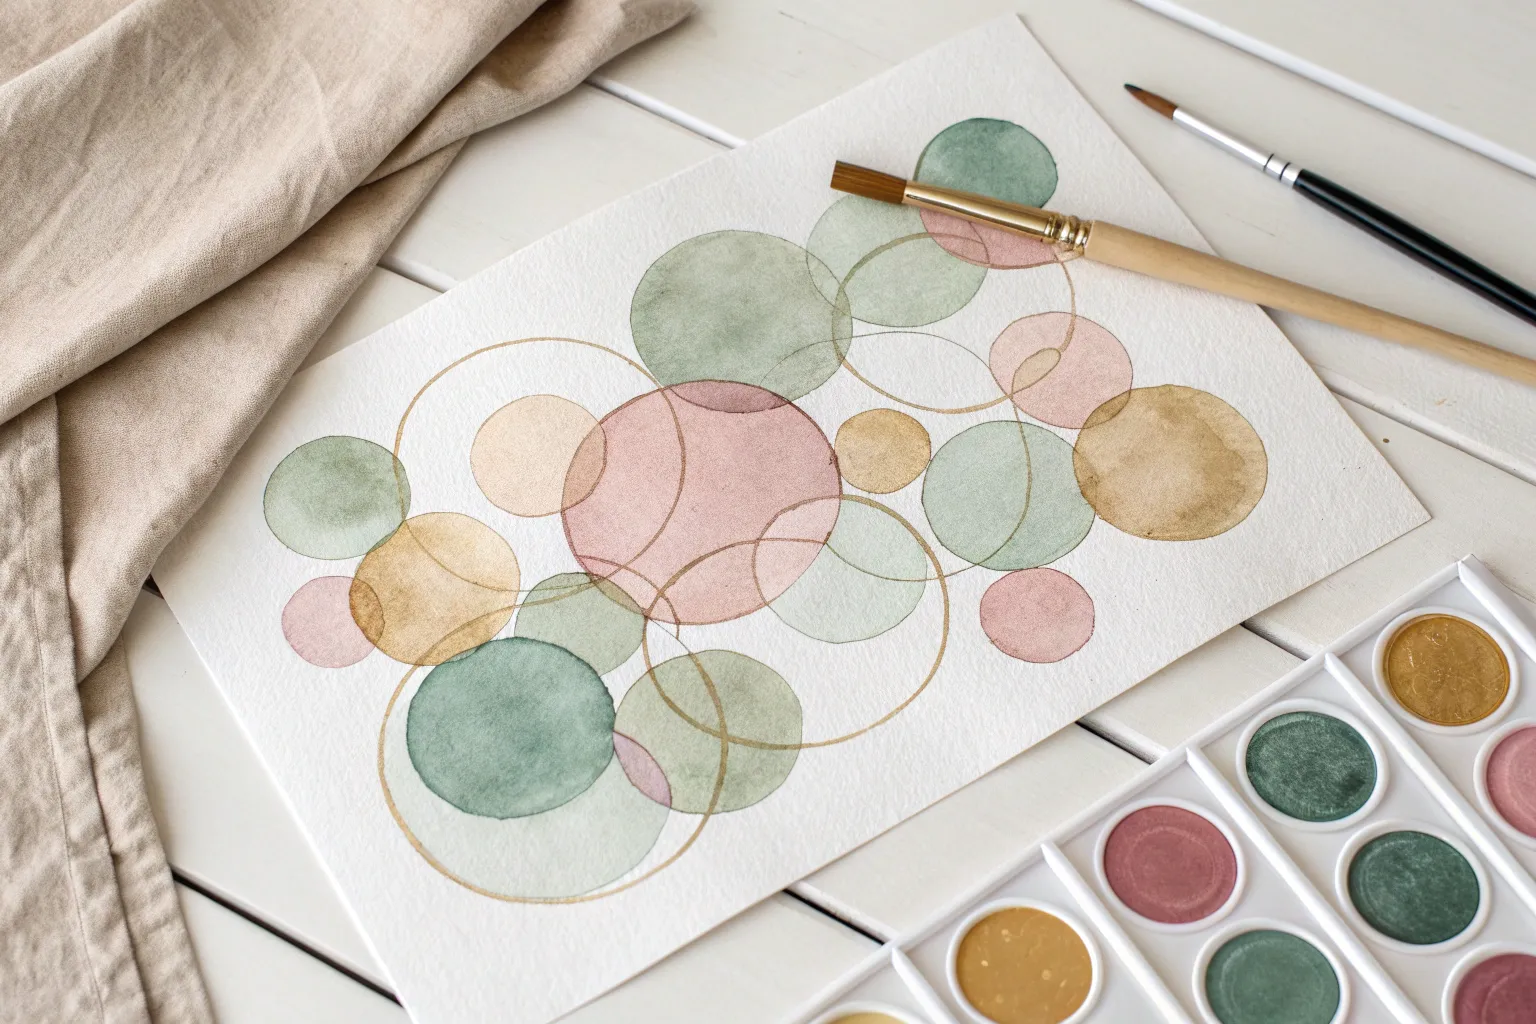
Geometric Tape Resist Art
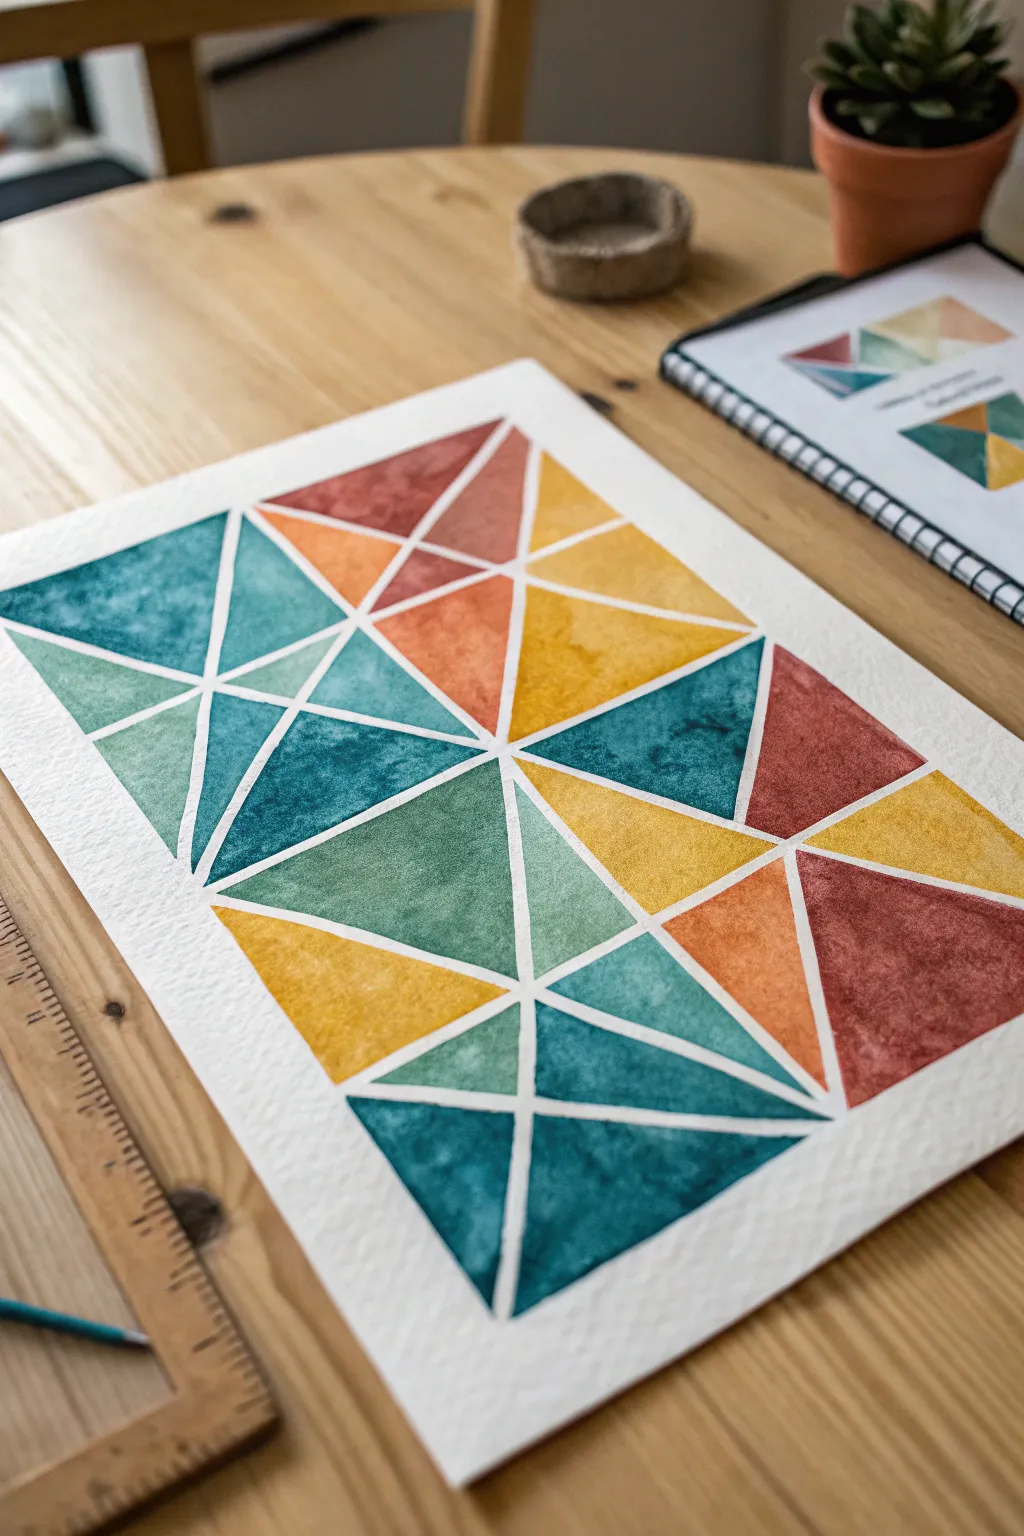
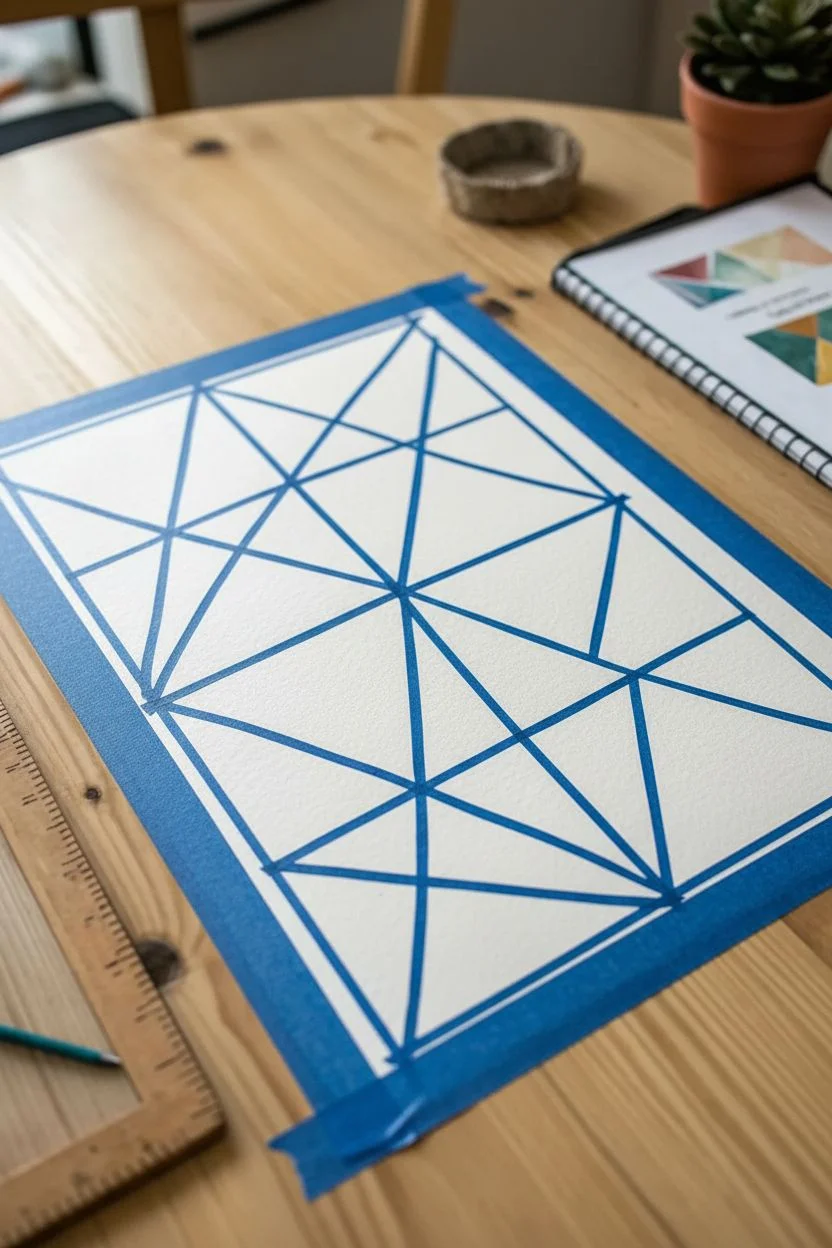
This project combines the flowing freedom of watercolor with the satisfying precision of geometric design. By using tape to mask off specific areas, you create a vibrant mosaic of triangles with crisp, clean white lines that look professionally framed.
Step-by-Step Tutorial
Materials
- Cold press watercolor paper (A4 or similar size)
- Low-tack artist tape or narrow masking tape (approx. 1/4 inch)
- Watercolor paints (pan or tube)
- Round watercolor brush (size 6 or 8)
- Water container
- Paper towels
- Ruler or bone folder
Step 1: Taping the Design
-
Secure the paper:
Tape your sheet of watercolor paper securely to your table or a drawing board to prevent it from buckling. -
Create a border:
Apply strips of tape along all four edges of the paper to create a clean, uniform white frame. -
Divide the space:
Place two or three long strips of tape across the paper at varying angles to divide the space into large sections. -
Form the triangles:
Add intersecting tape lines diagonally across the sections to break them down into smaller triangles. -
Check the density:
Continue adding strips until the whole page is a network of triangles, varying their sizes for visual interest. -
Seal the edges:
Run a ruler or the back of your fingernail firmly over every edge of tape; this burnishing step is crucial to stop leaks.
Crisp Line Secret
Make sure your tape is sealed tight! If your tape isn’t sticking well, run the back of a plastic card or spoon handle over the edges to lock them down before painting.
Step 2: Adding Color
-
Prepare the palette:
Mix your colors to match the earthy aesthetic: deep terracotta red, mustard yellow, teal blue, and sage green. -
Start with teal:
Load your brush with teal paint and fill in several non-adjacent triangles scattered across the page. -
Create texture:
I like to let the water pool slightly in some areas of the triangles to create a natural, mottled texture as it dries. -
Add the yellow:
Rinse your brush thoroughly and paint the next set of triangles with the mustard yellow. -
Fill the gaps:
Use the terracotta and sage green paints to fill the remaining white spaces, ensuring no two touching shapes are the same color. -
Review the balance:
Step back and check that the dark and light colors are distributed evenly across the composition.
Line Correction
If a little paint sneaks under the tape, don’t worry. Once the artwork is totally dry, you can tidy up the white lines using a white gel pen or a stiff brush with white gouache.
Step 3: The Reveal
-
Dry completely:
Allow the painting to dry until the paper no longer feels cool to the touch—patience here prevents smudging! -
Peel the tape:
Slowly peel up the inner tape strips, pulling them back at a sharp 45-degree angle to ensure a clean line. -
Remove the border:
Finally, remove the border tape last to reveal the pristine white frame around your colorful mosaic.
Display your geometric masterpiece in a spot that needs a splash of modern color.
BRUSH GUIDE
The Right Brush for Every Stroke
From clean lines to bold texture — master brush choice, stroke control, and essential techniques.
Explore the Full Guide
Sticker Silhouette Landscapes
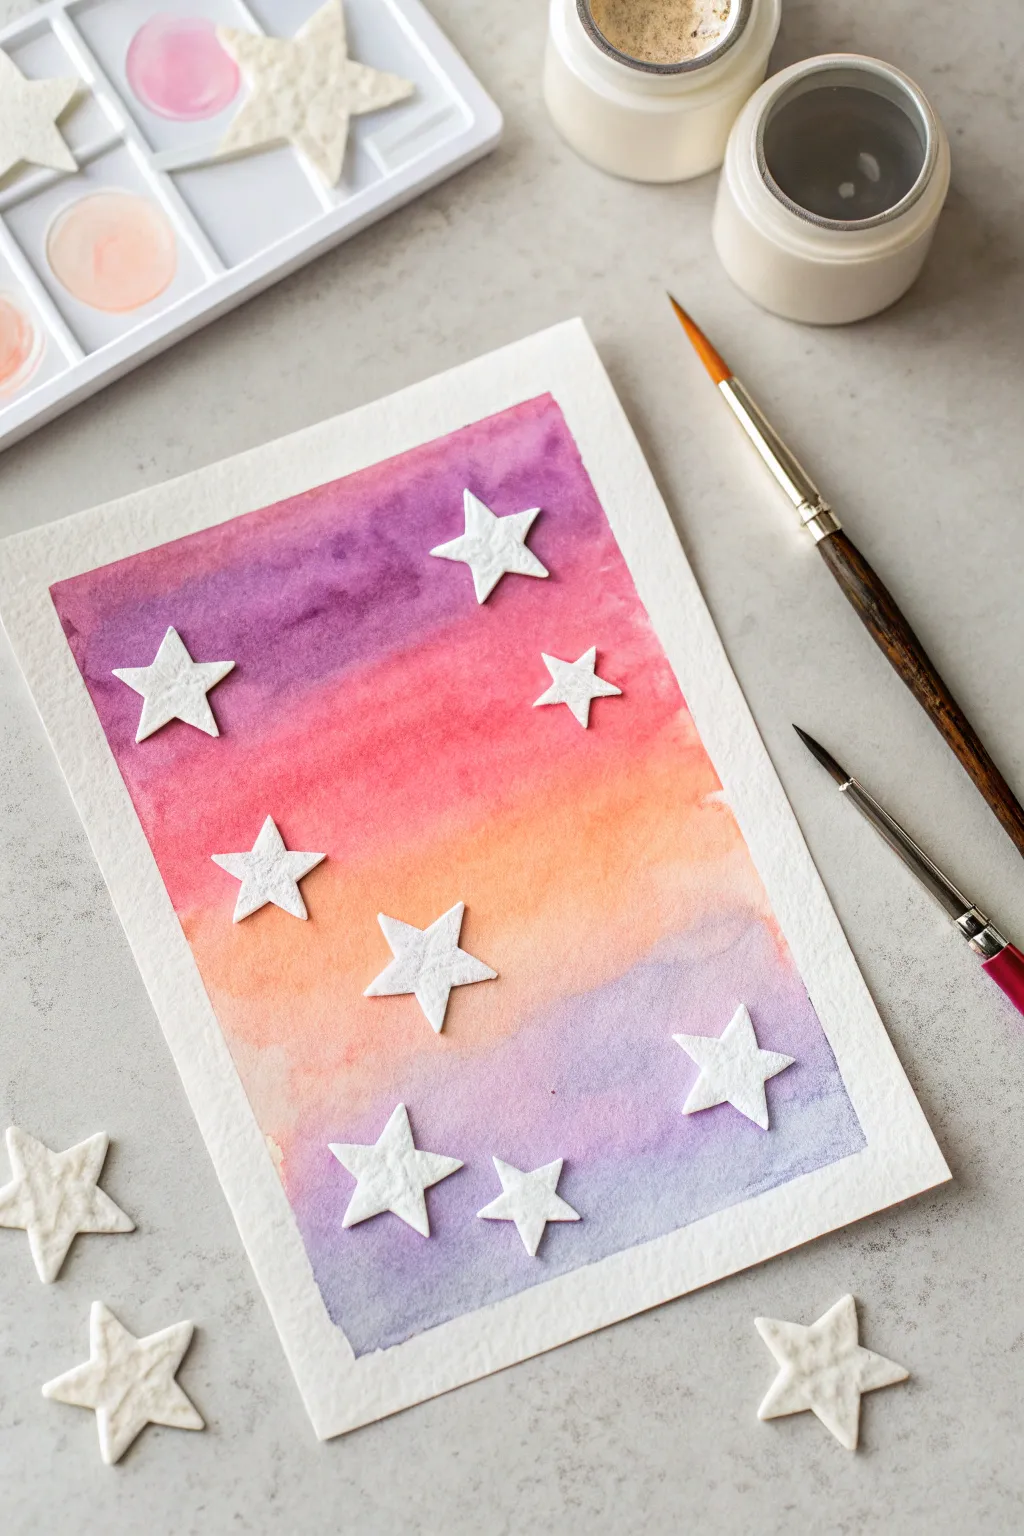
Capture the magic of a twilight sky with this satisfying sticker resist project. By blocking out star shapes before painting, you will create crisp, bright white stars that pop against a dreamy watercolor gradient.
Detailed Instructions
Materials
- Watercolor paper (cold press recommended)
- Watercolor paint set (pan or tube)
- Star-shaped stickers (or masking tape)
- Round watercolor brushes (medium and large)
- Jar of clean water
- Paper towels
- Painter’s tape or masking tape
Step 1: Setting the Scene
-
Secure the paper:
Tape down all four edges of your watercolor paper to your table or a board using painter’s tape. This keeps the paper flat and creates a clean white border later. -
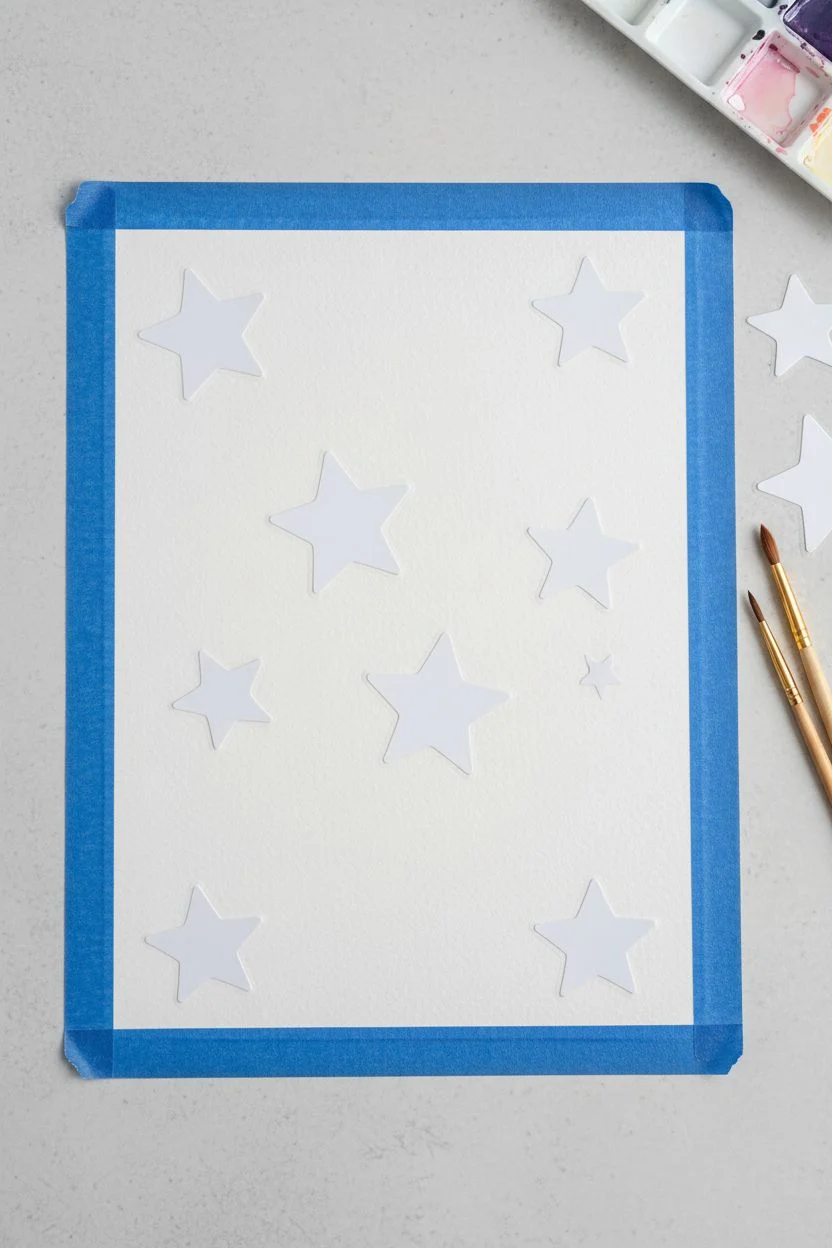
Plan the constellation:
Gather your star stickers. If you don’t have pre-cut stickers, you can cut simple star shapes out of wide masking tape. -
Apply the stars:
Place the stars randomly across the paper where you want your sky highlights to appear. -
Seal the edges:
Run your fingernail or a smooth tool handle firmly over the edges of each sticker. This step is crucial to prevent paint from sneaking underneath.
Step 2: Painting the Gradient
-
Prepare your palette:
Wake up your paints by adding a drop of water to your purple, pink, and orange pans. -
Start with purple:
Load a wet brush with deep violet or purple paint. Apply a horizontal band across the very top of the paper. -
Transition to pink:
Rinse your brush slightly and pick up a vibrant pink or magenta color. -
Blend the colors:
Paint directly below the purple band, letting the wet pink paint touch the wet purple slightly so they bleed together softly. -
Add the sunset glow:
Clean your brush and switch to bright orange. Paint the middle section of the paper, blending it upwards into the pink layer. -
Return to twilight:
For the bottom section, switch back to a lighter wash of purple or lavender to ground the composition. -
Cover the stars:
Paint freely right over the stickers. Don’t worry about staying inside the lines; the stickers are protecting the paper for you. -
Smooth the wash:
If I see any harsh lines between colors, I run a clean, slightly damp brush lightly across the seam to soften the transition.
Bleeding Edges?
If paint leaked under your stars, use a tiny brush with opaque white gouache or white acrylic to touch up the edges and bring back the crisp shape.
Step 3: The Big Reveal
-
Let it dry completely:
Wait for the paper to be bone dry. If the paper is cool to the touch, it’s still wet. -
Remove the stickers:
Carefully slide a fingernail under the edge of a star sticker and peel it away slowly to reveal the bright white paper beneath. -
Remove border tape:
Peel away the painter’s tape from the edges of your paper at a 45-degree angle to finish framing your artwork.
DIY Masking Tape Stars
No stickers? Layer strips of masking tape on parchment paper, cut out star shapes, and peel them off for custom-sized silhouettes.
Step back and admire your celestial masterpiece glowing with color.
Black Glue Stained Glass Hearts
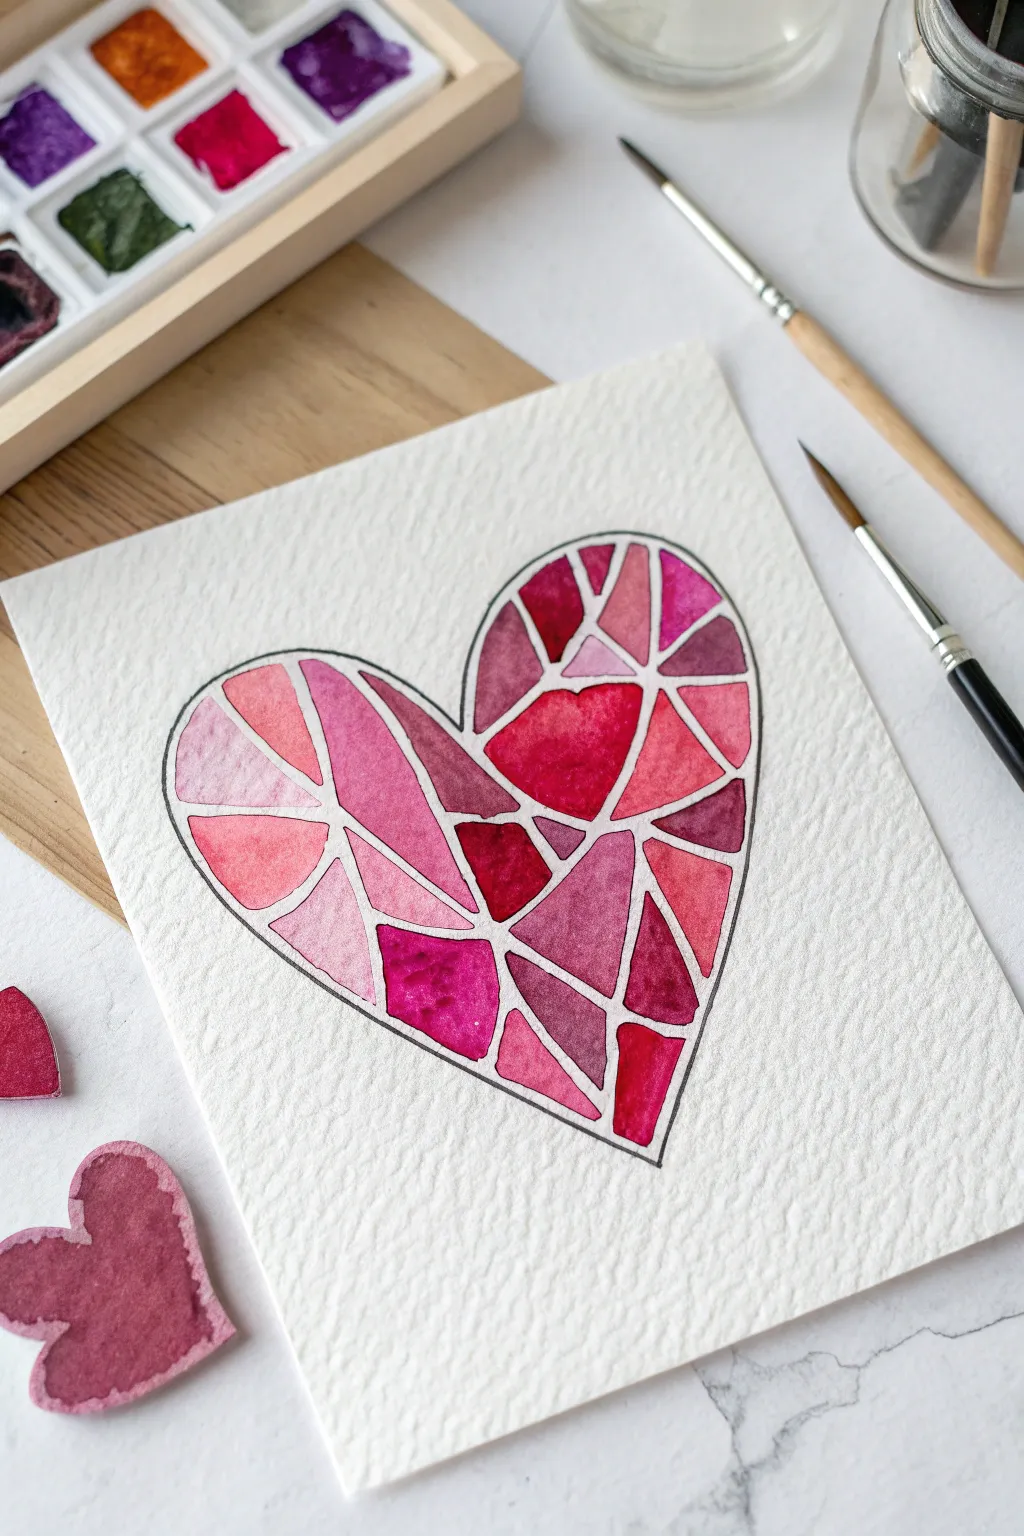
Create a vibrant, gemstone-like heart using a clever resist technique that mimics the look of real stained glass. This project combines glossy black outlines with lovely washes of pink, red, and purple watercolor for a stunning visual effect.
Step-by-Step Tutorial
Materials
- Cold press watercolor paper (textured)
- Pencil and eraser
- Black glue (or white school glue mixed with black acrylic paint)
- Fine-tip squeeze bottle (optional, for precise lines)
- Watercolor pan set
- Round watercolor brushes (sizes 4 and 6)
- Jar of water
- Masking tape
Step 1: Designing the Mosaic
-
Prepare the workspace:
Start by taping the edges of your watercolor paper down to a flat surface or drawing board to prevent buckling when the paper gets wet. -
Sketch the shape:
Lightly draw a large heart shape in the center of your paper using a pencil. -
Add geometric sections:
Inside the heart, draw intersecting straight lines to break the heart into smaller, angular geometric shapes like triangles and trapezoids. -
Refine the lines:
Ensure all your inner lines connect to the outer edge or to each other, creating fully enclosed distinct ‘shards’ of glass.
Troubleshooting
If the black glue smears while outlining, do not try to wipe it wet! Let it dry completely, then you can often carefully flake the mistake off with a craft knife.
Step 2: Creating the Lead Lines
-
Prepare the outline medium:
If you don’t have pre-made black glue, mix a small amount of black acrylic paint into a bottle of white PVA glue and shake well. -
Check the flow:
I usually test the squeeze bottle on a scrap piece of paper first to ensure the line comes out smooth and not too thick. -
Trace the outer edge:
Carefully squeeze the black glue along the main heart outline, keeping your hand steady and moving at a consistent pace. -
Trace the inner lines:
Go over your interior pencil lines with the black glue, connecting them to the outer border. -
Dry completely:
This is the most critical step: let the glue outline dry completely, preferably overnight, until it is hard and flat to the touch.
Pro Tip
For lines as thin and sharp as the photo, transfer your black glue into a needle-tip applicator bottle. Standard glue bottle caps often create much thicker lines.
Step 3: Painting the Glass
-
Prepare your palette:
Wake up your watercolor paints by adding a drop of clean water to the red, pink, purple, and magenta pans. -
Start with light pink:
Load your brush with a watery, light pink color and fill in 3-4 random geometric sections. -
Add contrast:
Switch to a deeper red or magenta and paint sections that are not touching the wet pink ones to keep colors distinct. -
Introduce purple tones:
Use a purple hue for a few remaining sections to add depth and shadow to your mosaic. -
Vary certain sections:
I like to drop a little extra pigment into the corner of a wet section to create a gradient effect as it dries, adding texture. -
Fill the gaps:
Continue painting until every white space inside the heart is filled, being careful not to paint over the black lines. -
Final drying:
Allow the watercolor paint to dry completely undisturbed. -
Reveal the art:
Once the paper is bone dry, carefully peel away the masking tape to reveal your crisp, finished stained glass artwork.
Hang this translucent-looking masterpiece in a bright spot to enjoy those vibrant colors every day

PENCIL GUIDE
Understanding Pencil Grades from H to B
From first sketch to finished drawing — learn pencil grades, line control, and shading techniques.
Explore the Full Guide
Plastic Wrap Textured Ocean
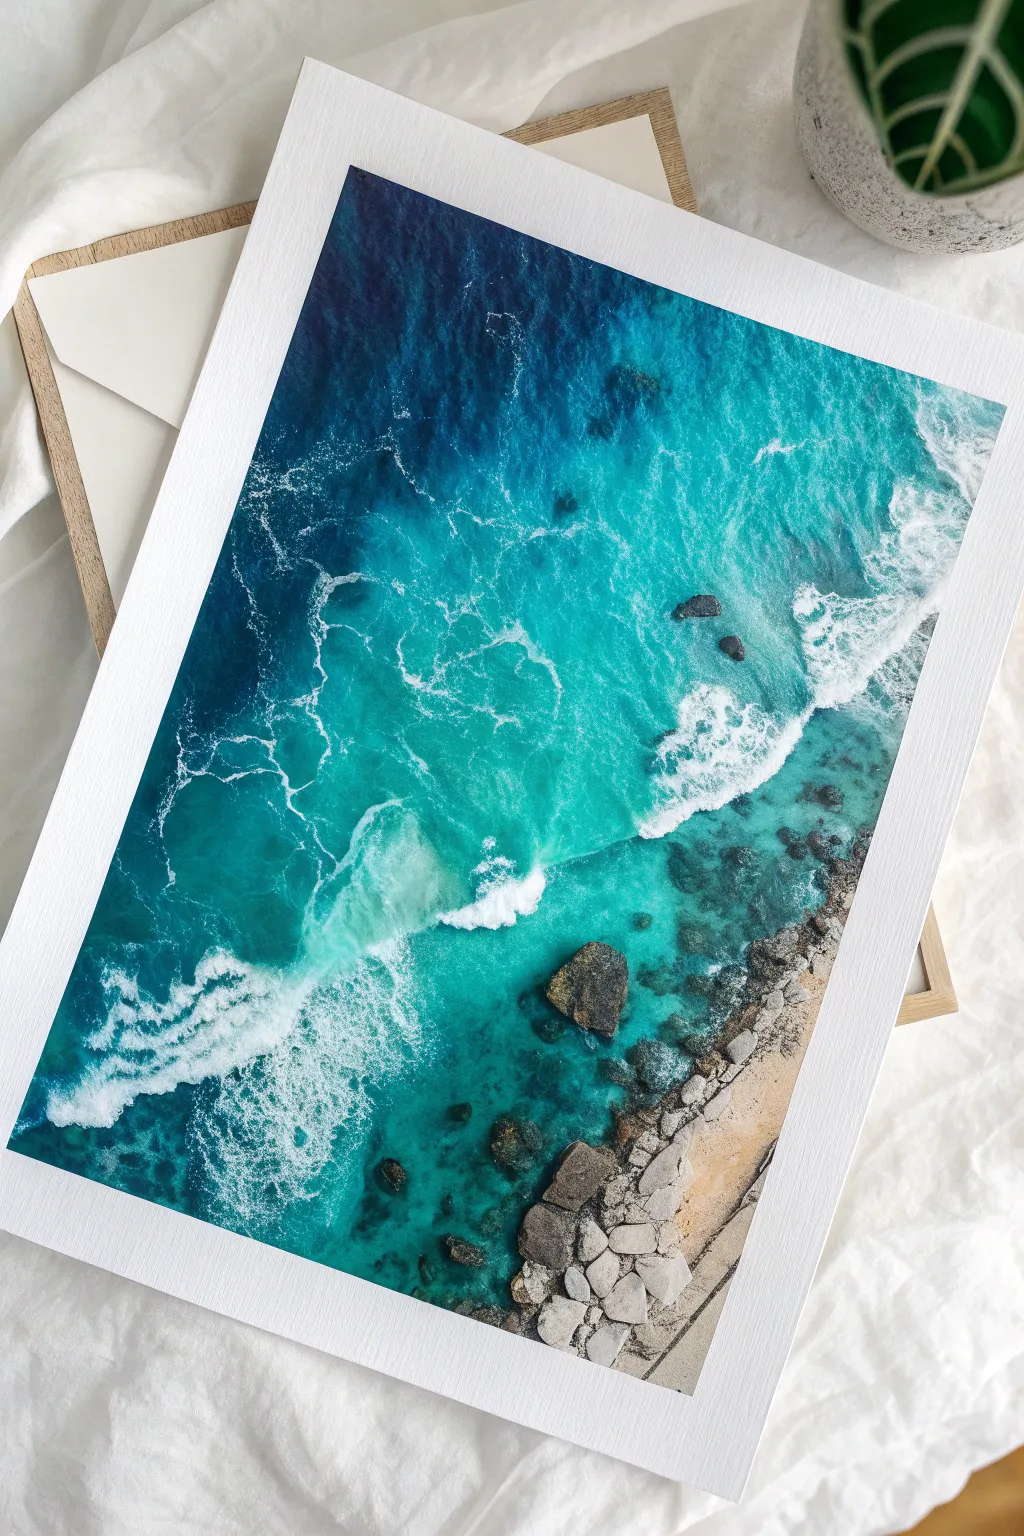
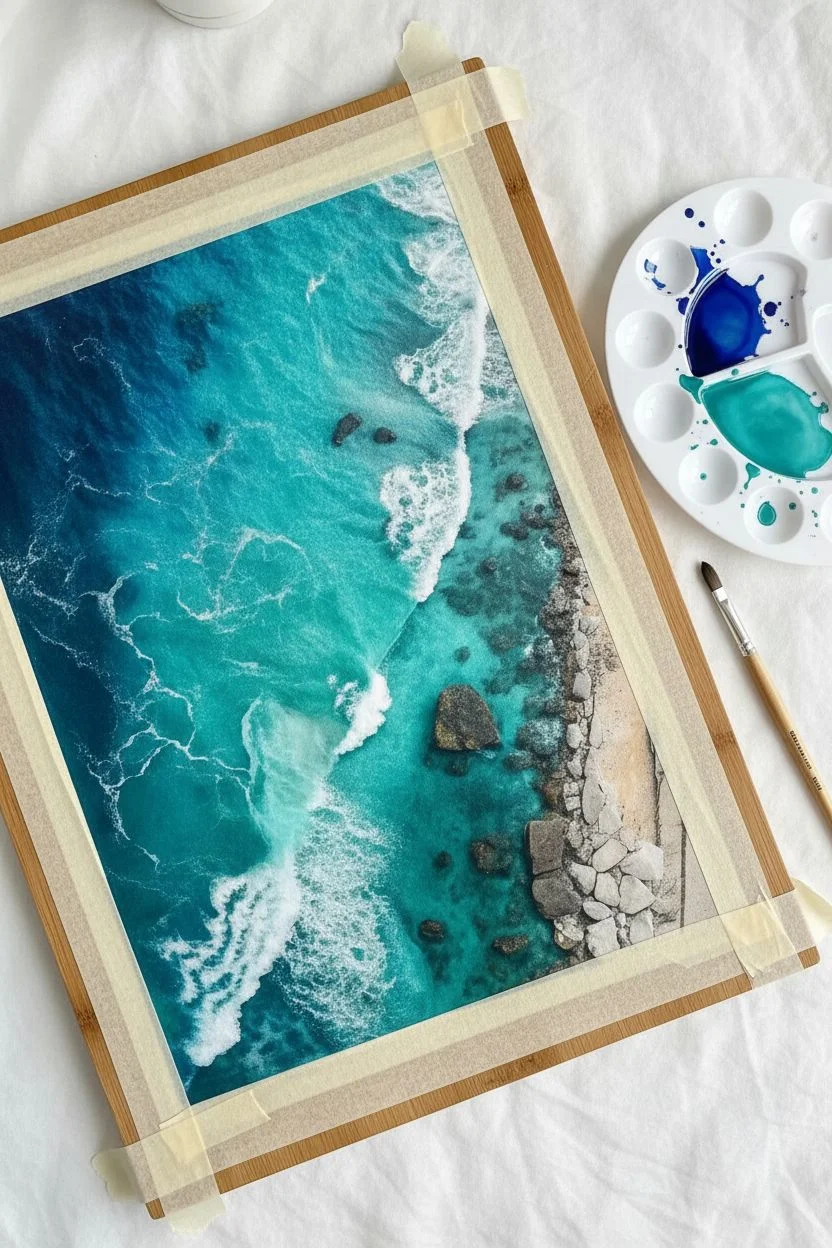
Capture the stunning depth of an aerial ocean view using a surprising kitchen staple to mimic water currents. The crinkled texture of plastic wrap creates organic patterns that look deceptively complex but are incredibly fun to reveal.
Step-by-Step
Materials
- Heavy watercolor paper (300 gsm)
- Watercolor paints (Phthalo Blue, Turquoise, Yellow Ochre, Burnt Umber)
- Kitchen plastic wrap (cling film)
- White gouache or white acrylic paint
- Painter’s tape and a hard board
- Soft round brushes (size 8 and 4)
- Palette for mixing
Step 1: Setting the Scene
-
Secure the paper:
Tape your watercolor paper down firmly to a board on all four sides. This prevents buckling when we use lots of water later. -
Sketch the coast:
Lightly draw a diagonal line across the bottom right corner to separate the sand from the sea. Add a few irregular oval shapes along this line to represent large coastal rocks. -
Mix your blues:
Prepare two large puddles of paint on your palette. One should be a deep, dark blue (like Phthalo or Prussian Blue) and the second a vibrant Turquoise or Aqua.
Low Texture?
If the pattern didn’t show up, the paint was likely too dry before you applied the wrap. Next time, make sure the surface is glistening with a puddle of water before covering it.
Step 2: The Plastic Wrap Technique
-
Wet the ocean area:
Use a clean, large brush to apply clean water to the entire ocean section of your paper, stopping right at the pencil line for the shore. -
Apply deep water:
Load your brush with the dark blue and drop it into the top left corner. Let it flow and spread, keeping the pigment heavy and juicy. -
Transition to shallows:
Switch to your Turquoise paint. Apply this closer to the shoreline, letting it blend naturally into the dark blue where they meet. -
Ensure wetness:
This is crucial: the paper must be very shiny and wet. If it has started to dry, drop in more clear water or pigment now. -
Apply the wrap:
Cut a piece of plastic wrap slightly larger than the painted area. Lay it directly onto the wet paint. -
Crinkle and squash:
Use your fingers to squish the plastic wrap, creating wrinkles and veins. I like to twist it slightly to mimic the chaotic movement of currents. -
The waiting game:
Leave the plastic wrap on while the paint dries completely. Do not peek! If you remove it while wet, the texture will disappear.
Step 3: Coastal Details
-
Reveal the texture:
Once the paper is bone dry to the touch, gently peel off the plastic wrap to reveal the crystalline water patterns. -
Paint the sand:
Mix a watery Yellow Ochre and paint the bottom right corner. Let the color vary in intensity to look like uneven sand. -
Add rocks:
Using Burnt Umber or a dark grey, paint the rock shapes you sketched earlier. Drop in a little black on one side of each rock to create shadows.
Level Up: Salt
While painting the rocks and sand, sprinkle a pinch of table salt onto the wet paint. As it dries, it pushes the pigment away, creating a gritty, stony texture perfect for the beach.
Step 4: Foam and Finish
-
Prepare the foam:
Squeeze out some white gouache or opaque white acrylic paint. Use it straight from the tube or slightly thinned—it needs to be opaque. -
Create the shoreline crash:
Dab the white paint along the border where the blue water meets the rocks and sand. Use a stabbing motion with an old brush to create a rough, foamy look. -
Add sea drift:
Paint thin, broken white lines curing out into the turquoise water to suggest waves rolling in. -
Splatter details:
Load a toothbrush or stiff brush with white paint and gently flick it over the rocks and shoreline to create the look of sea spray.
Remove the tape to see your beautiful aerial ocean view ready for framing
Sunset Silhouettes with Cutouts

Capture the vibrancy of a setting sun behind a bustling metropolis with this striking mixed-media project. By layering a detailed paper cutout over a loose watercolor wash, you achieve crisp architectural lines against a soft, glowing sky without needing complex painting skills.
Detailed Instructions
Materials
- Watercolor paper (cold press, heavy weight)
- Watercolor paints (Lemon Yellow, Orange, Alizarin Crimson)
- Black cardstock or heavy construction paper
- Craft knife or precision scissors
- Cutting mat
- White gel pen
- Glue stick or spray adhesive
- Flat wash brush and round brush (size 6)
Step 1: Painting the Sunset
-
Prepare the Base:
Cut your watercolor paper to your desired size, perhaps 5×7 inches, which usually works well for card-sized art. -
Establish the Glow:
Using a clean flat brush, apply a stripe of bright lemon yellow paint across the lower third of the paper. -
Create the Gradient:
While the yellow is still wet, mix a vibrant orange and brush it across the middle section, blending it slightly downwards into the yellow. -
Paint Cloud Shapes:
Switch to a round brush saturated with reddish-orange or crimson paint. -
Form the Clouds:
Dab the brush to create irregular, scalloped cloud shapes in the upper third of the paper, letting the edges bleed slightly if the paper is damp. -
Add Texture:
Use the tip of the brush to create smaller, broken cloud wisps on the left side for balance. -
Dry Completely:
Let the painting dry thoroughly. It must be bone-dry before you attach the paper overlay.
Clean Cuts Pro Tip
When cutting detailed antennas on the scraper, cut away from the detail rather than toward it to prevent ripping the delicate paper tip.
Step 2: Carving the Skyline
-
Measure the Frame:
Cut a piece of black cardstock to the exact same dimensions as your watercolor paper. -
Outline the Cutout:
On the black paper, lightly draw a rectangular border (about 0.5 inches wide) around the top and sides. -
Sketch the Buildings:
Along the bottom edge, sketch a rising cityscape silhouette connecting to the side borders. Include distinct shapes like the Empire State Building’s needle. -
Cut the Negative Space:
Place the cardstock on a cutting mat. I prefer using a craft knife with a fresh blade to carefully cut away the ‘sky’ area inside the frame. -
Refine Edges:
Ensure the corners of the buildings are sharp and the needle antennas are distinct.
Level Up: Depth
Use two layers of grey and black paper for the city. Cut a grey layer for ‘background’ buildings and place it behind the black silhouette.
Step 3: Illuminating and Assembling
-
Add Windows:
Before gluing, take a white gel pen and draw tiny grid patterns on the black cutouts to represent lit windows. -
Detail the Architecture:
Vary your marks; use vertical lines for taller skyscrapers and small dots for distant buildings to create depth. -
Prepare Adhesive:
Apply a thin, even layer of glue or double-sided tape to the back of the black cardstock frame. -
Align Layers:
Carefully align the black frame over the painted watercolor background. -
Press and Seal:
Press down firmly around the borders and the silhouette area to secure the two layers together. -
Final Flattening:
Place the finished piece under a heavy book for an hour to ensure the glue sets perfectly flat.
Display your shimmering city scene in a floating frame to show off those crisp edges.


Crazy Hair Blow Painting Monsters
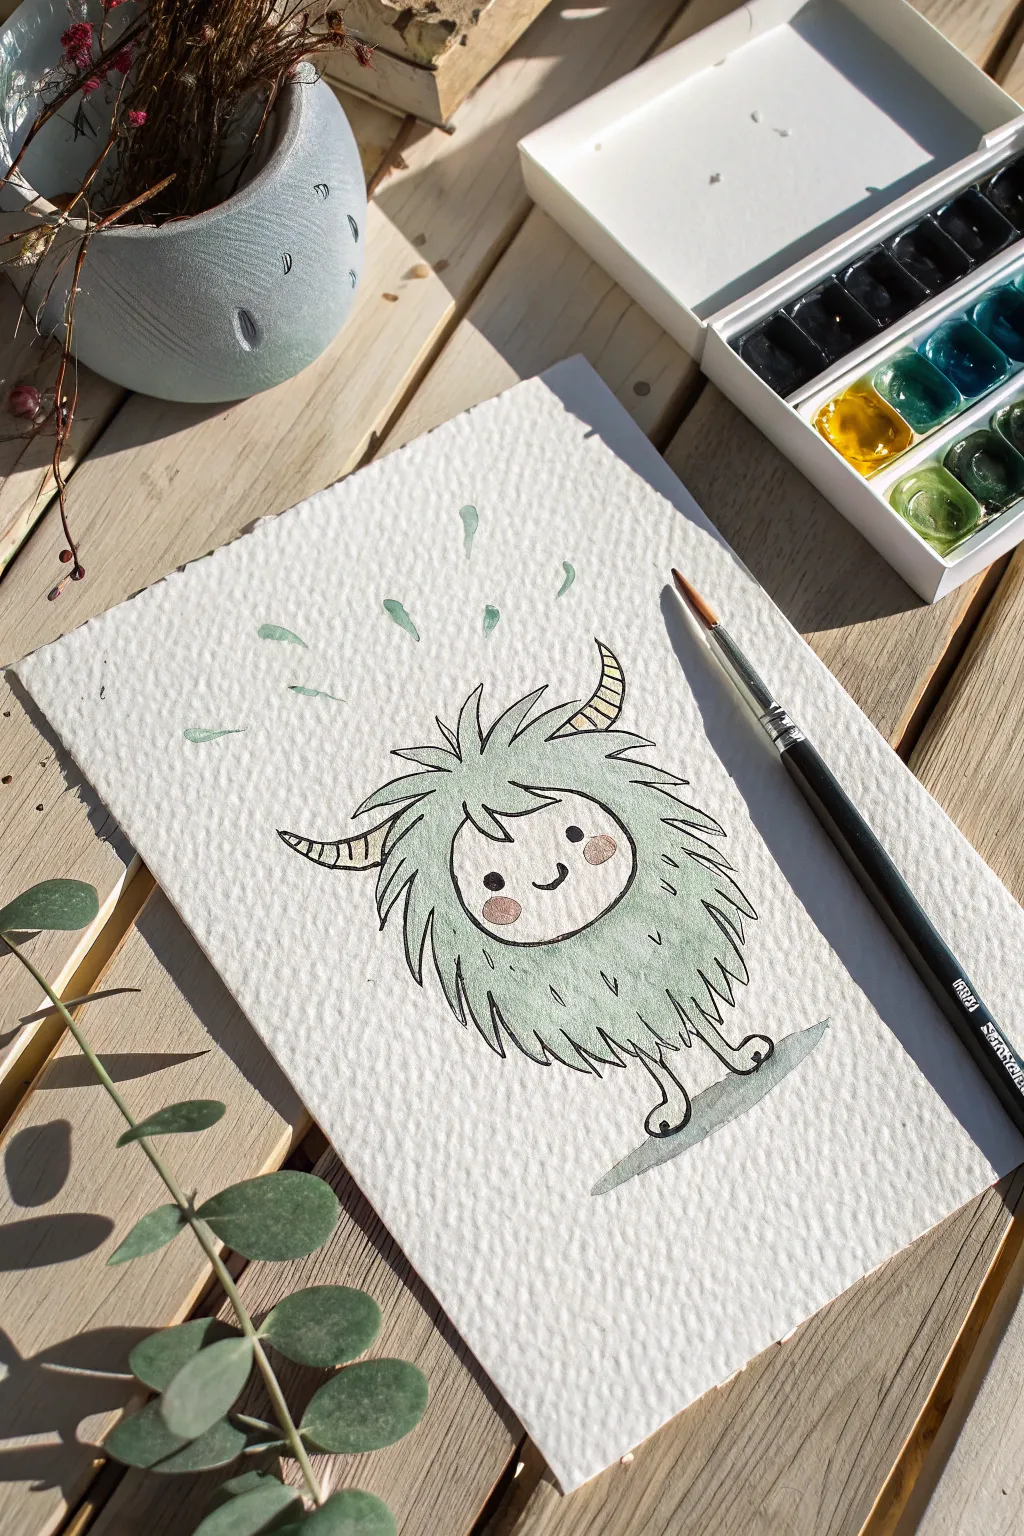
This adorable little creature combines simple doodle techniques with fresh watercolor washes for a charming result. It is a fantastic project for practicing brush control and getting comfortable with combining ink and paint.
How-To Guide
Materials
- Cold press watercolor paper (A5 size is perfect)
- Watercolor pan set
- Round paintbrush (size 4 or 6)
- Pencil and eraser
- Black waterproof fineliner pen (0.3mm or 0.5mm)
- Cup of water and paper towel
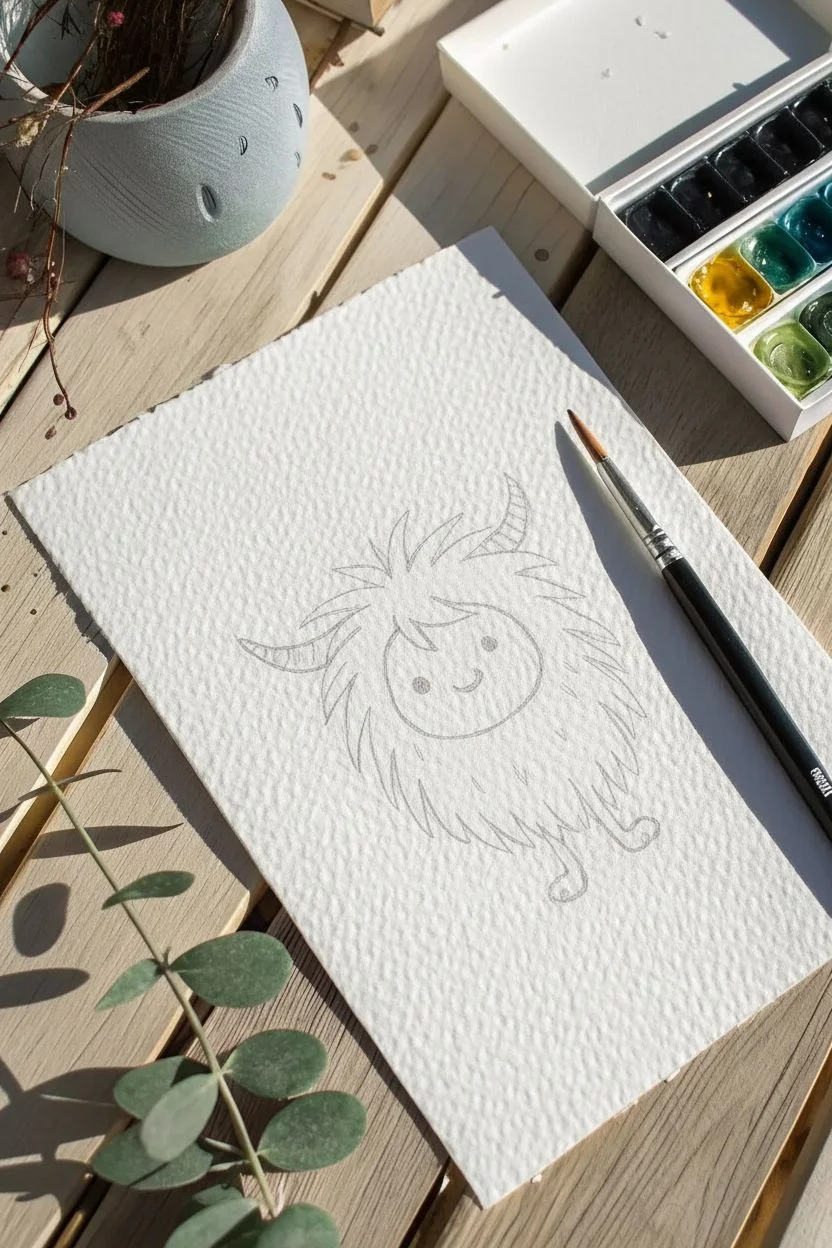
Step 1: Sketching the Shape
-
Outline the face:
Start by lightly drawing a smooth oval or circle in the lower center of your paper to represent the face. -
Draft the body guide:
Sketch a very faint, larger circle around the face to mark how wide the fur should be. -
Create the fur texture:
Draw jagged, zigzag lines connecting the face circle to your outer guide line, creating a spiky mane all around. -
Add the horns:
Sketch two curved, triangular horn shapes sticking out from the top of the monster’s head. -
Draw the limbs:
Add two simple stick legs at the bottom, finishing them with small oval shapes for feet. -
Map the features:
Inside the face oval, lightly mark two dots for eyes and a small curve for the smile.
Step 2: Applying Watercolor
-
Paint the face:
Mix a watery pale cream or peach color and gently fill in the central face circle. -
Mix the fur color:
Create a sage or mint green shade by mixing green with a touch of blue and plenty of water. -
Fill the body:
Paint the spiky fur area with your green mix, being careful not to let it bleed into the wet face paint. -
Touch up the horns:
Use a yellow ochre or visible gold tone to paint the two horns. -
Add rosy cheeks:
Dip your tip into pink and dab two small circles onto the face while it creates a soft, blended look. -
Ground the monster:
Mix a diluted grey or watery black and paint a thin, loose shadow underneath the feet. -
Add movement splashes:
Using the green mix, paint a few floating teardrop shapes or dots above the head to look like popping bubbles or movement. -
Let it dry completely:
Wait until the paper is bone dry and flat before moving to the next step to prevent ink smudging.
Pro Tip
To check if your paint is truly dry before inking, touch it with the back of your hand. If it feels cool to the touch, it still holds moisture and needs more time.
Step 3: Inking Details
-
Outline the fur:
Take your black fineliner and trace over the zigzag pencil lines of the fur, making the spikes sharp and crisp. -
Define the horns:
Ink the outline of the horns and add small horizontal stripes inside them for extra texture. -
Trace face and legs:
Go over the outline of the face oval and the stick legs and feet. -
Fill the eyes:
Color in the circular eyes with solid black ink to make them pop against the pale face. -
Draw the smile:
Trace the small U-shaped mouth in the center. -
Clean up:
I prefer to wait a few minutes for the ink to set, then gently erase any remaining pencil marks for a polished look.
Level Up
Try painting a whole family of monsters in different colors like lavender or sky blue, and give them different accessories like glasses or bow ties!
You now have a quirky little monster friend ready to brighten up your sketchbook
Simple Oval Farm Animals
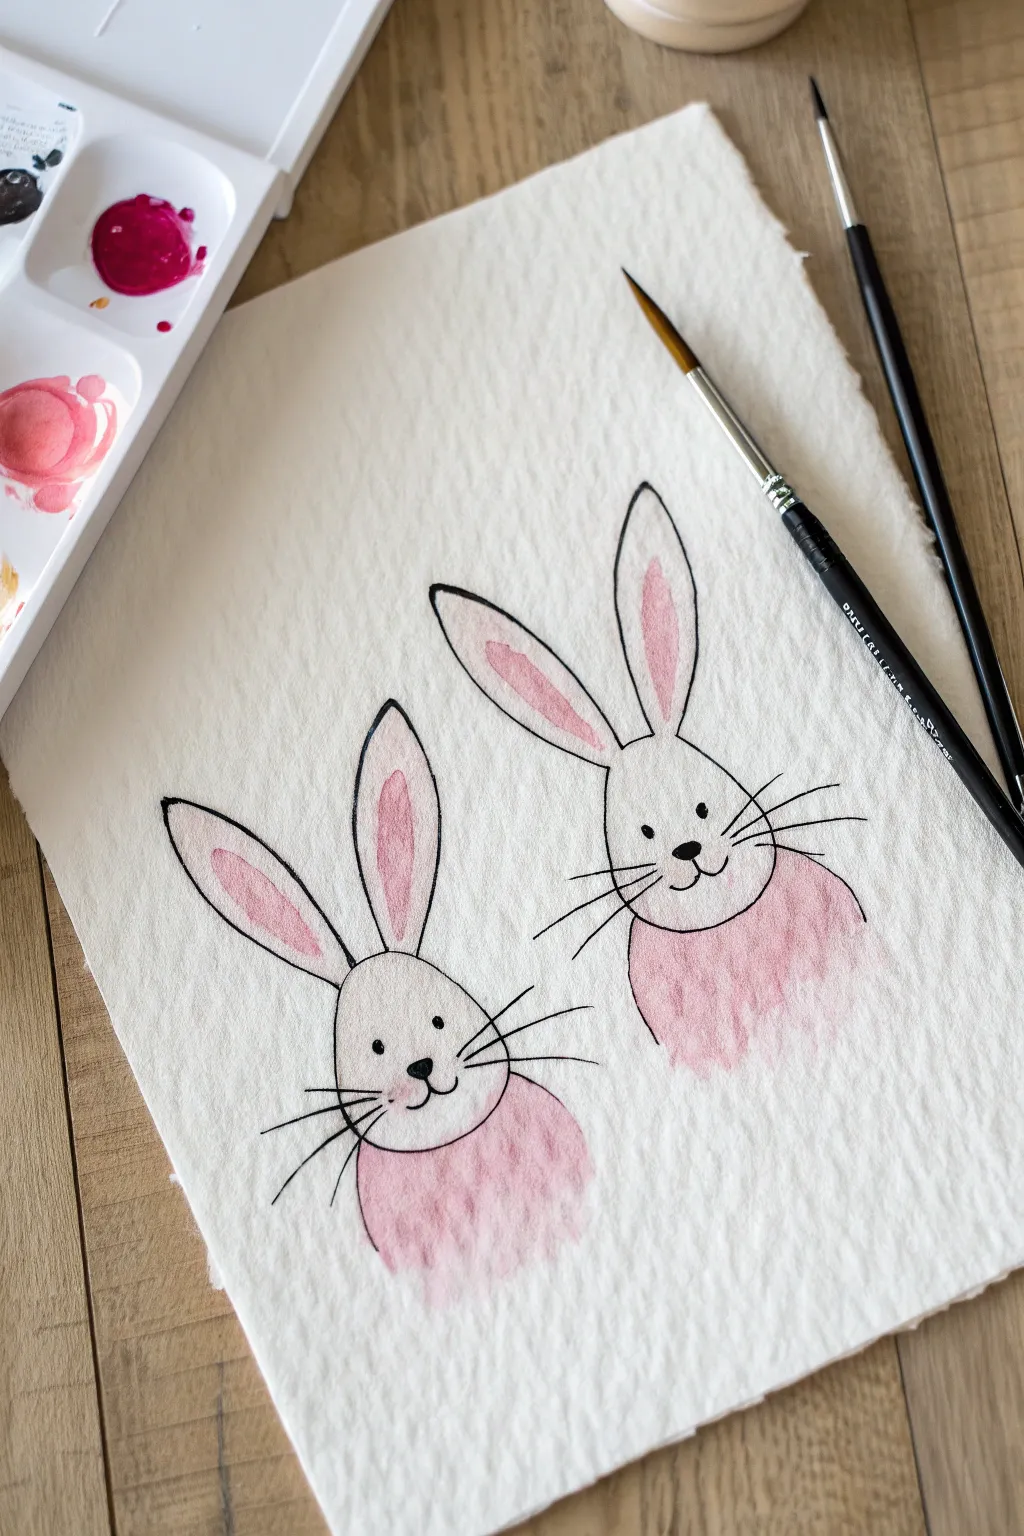
These adorable bunnies combine simple drawing techniques with loose watercolor washes for a charming result. By mixing precise pen lines with soft, flowing paint, you create a lovely contrast that captures the softness of the animals.
Detailed Instructions
Materials
- Cold press watercolor paper (300gsm)
- Waterproof black fine liner (0.5mm or 0.8mm)
- Watercolor paints (Pink or Magenta)
- Round brush (size 6)
- HB Pencil
- Eraser
- Water jar
- Paper towel
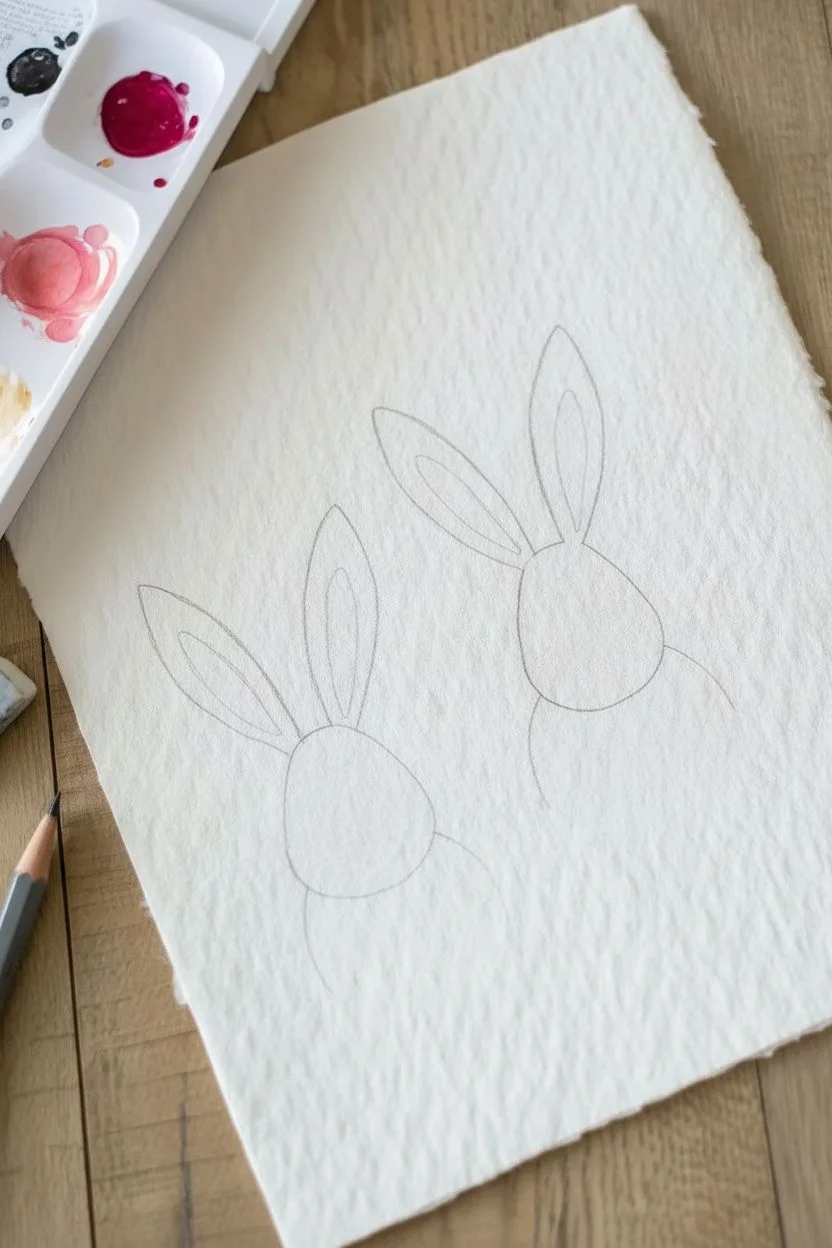
Step 1: Sketching the Shapes
-
Position the first bunny:
Start by lightly sketching a simple oval shape near the bottom left of your paper to serve as the first rabbit’s head. -
Add the ears:
Draw two long, tapered loops extending upward from the top of the oval to create the ears. -
Position the second bunny:
Place the second rabbit’s head slightly higher and to the right of the first one, using the same oval shape. -
Draw the second pair of ears:
Sketch the ears for the second bunny, perhaps tilting one slightly to make them look like they are interacting or listening. -
Refine the composition:
Take a moment to check the spacing between your rabbits to ensure they aren’t crowded before we move to ink.
Ink Smearing?
Check if your pen is waterproof. If not, simply reverse the process: paint the pink shapes first, let them bone-dry, and then draw your black outlines on top.
Step 2: Inking the Details
-
Outline the main shapes:
Using your waterproof black fine liner, carefully trace over the pencil lines for the heads and ears. -
Add the eyes:
Draw two small, solid black circles in the center of the face for the eyes, spacing them somewhat wide apart for a cute look. -
Draw the nose and mouth:
Place a small rounded triangle for the nose between the eyes, connecting it to a small ‘w’ shape for the mouth. -
Add whiskers:
Now for the whiskers; use quick, confident flicks of your wrist so the lines taper off naturally at the ends. -
Repeat for the second bunny:
Ink the face details on your second rabbit, giving them a similar expression to match their friend. -
Clean up:
Wait a minute for the ink to dry completely, then gently erase all the underlying pencil marks.
Step 3: Adding Watercolor
-
Prepare the color:
Mix a small amount of pink or magenta paint with plenty of water on your palette to create a soft, transparent wash. -
Paint the inner ears:
Dip your round brush into the pink mix and paint a smaller, inner loop shape inside each ear. -
Leave a gap:
Try to leave a thin strip of white space between your pink paint and the black ink outline to keep the look airy. -
Start the body wash:
Reload your brush with the pink wash to paint the fluffy chest area below the first rabbit’s head. -
Create texture:
I like to use the tip of the brush to create a jagged, uneven bottom edge on this wash, simulating the look of soft fur. -
Paint the second body:
Repeat the body wash process for the top-right rabbit, making sure the color saturation matches the first. -
Add variance:
While the pink paint is still wet, you can dab a tiny bit more concentrated pigment into the bottom of the body area for a subtle gradient. -
Let it dry:
Allow the paper to dry flat completely to ensure the watercolor settles into the paper texture without running.
Spring Scene
Turn this into a garden scene by painting simple green grass blades or orange triangular carrots around the bottom once the bunnies are finished.
Now you have a sweet pair of bunnies perfect for a greeting card or bedroom wall decoration
Juicy Watermelon Slices

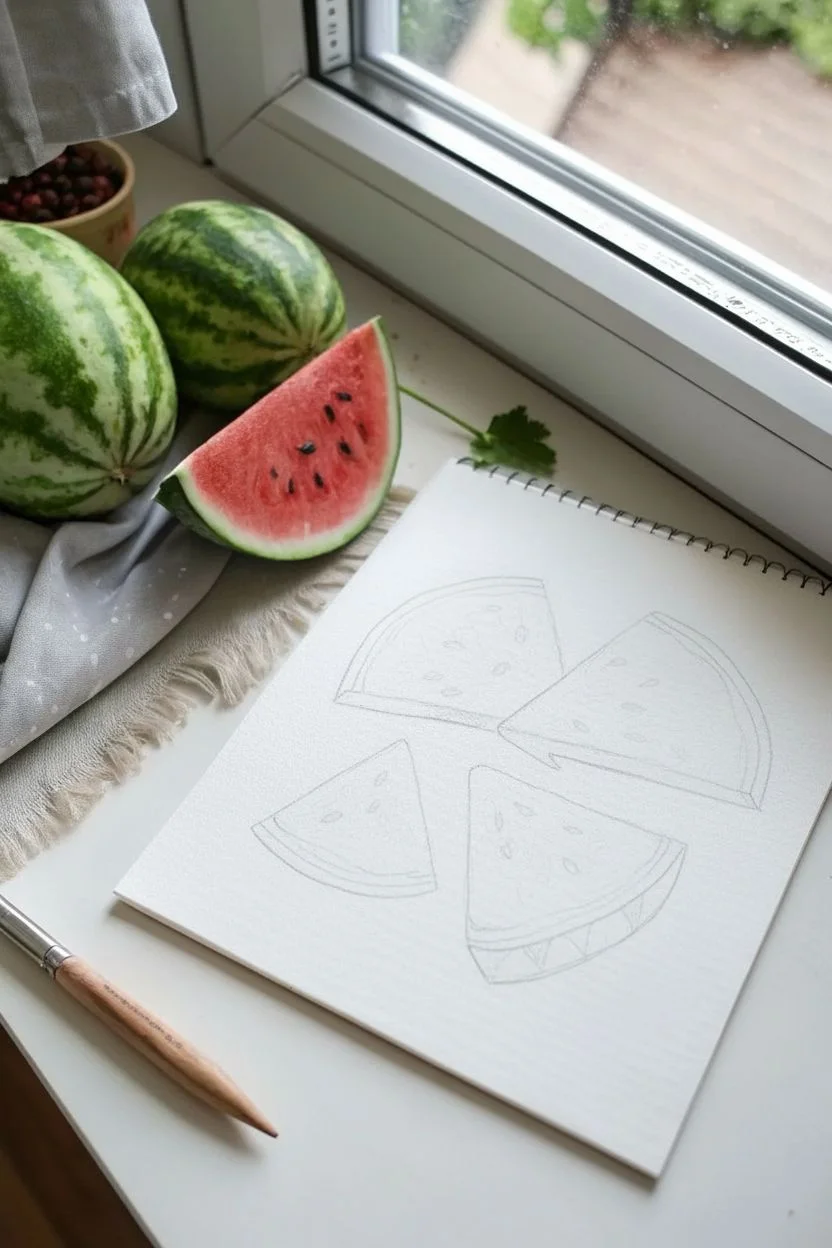
Capture the freshness of summer with this bright and juicy watercolor project suitable for young artists. You will learn how to control water and pigment to give your watermelon slices a realistic, mouth-watering gradient.
How-To Guide
Materials
- Watercolor paper (cold press texture works best)
- HB Pencil and eraser
- Round watercolor brush (size 6 or 8)
- Watercolor paints (Crimson Red, Sap Green, Black)
- Water jar and paper towels
- Optional: White gel pen
Step 1: Sketching the Composition
-
Outline the slices:
Using your pencil, lightly draw four watermelon shapes arranged in a loose circle. Make three of them triangular slices and one a thicker wedge shape showing the rind. -
Define the rind:
Sketch a thin line parallel to the curved bottom of each slice to mark where the green rind will go, but keep your pencil marks very faint so they don’t show through the paint.
Mind the Gap
Leaving that thin white stripe between the red and green is the secret to realism. It stops the colors from mixing into a muddy brown mess!
Step 2: Painting the Fruit
-
Mix your red:
On your palette, mix a generous amount of red paint with water. You want a color that looks like bright watermelon juice. -
Paint the first slices:
Fill in the red fleshy part of the top two triangles. I like to drop a little extra pigment into the wet paint near the center to make it look juicier. -
Paint the bottom slices:
Continue painting the red sections for the bottom left triangle and the bottom right wedge. Remember to stay inside your pencil lines. -
Create the gradient:
While the paint is still damp, gently lift a little color from the center of each slice with a thirsty, clean brush to create a diverse texture. -
Let it dry completely:
This is crucial! Wait until the red paint is bone dry to the touch before moving to the next step to prevent colors from running.
Water Control
If your red paint creates a ‘cauliflower’ bloom edge, you likely added water when the paper was half-dry. Try to work quickly while wet, then stop.
Step 3: Adding the Rind and Sprig
-
Mix your green:
Prepare a nice medium green color. It shouldn’t be too dark yet, as we want the distinct fresh look of the rind. -
Paint the rind curves:
Carefully paint a green strip along the bottom curve of the triangular slices. -
The vital gap:
Ensure you leave a tiny sliver of dry, white paper between the red fruit and the green rind. This represents the white pith. -
Detailing the wedge:
For the bottom right wedge, paint the outer skin area green. While it’s wet, drop in darker green triangles or zig-zags to mimic the striped pattern of a whole watermelon. -
Add the greenery:
Using the very tip of your brush and a lighter watery green, paint the small fern or herb sprig at the bottom right corner.
Step 4: Seeds and Final Touches
-
Prepare the black:
Mix a concentrated black or very dark brown paint. It should be thicker than your previous washes so it doesn’t spread. -
Paint the seeds:
Using the fine tip of your brush, press and lift to create small teardrop shapes on the red flesh. Scatter them randomly. -
Loose seeds:
Paint a few loose black seeds on the white paper background to make the composition feel playful and artistic. -
Add shadows:
For the wedge slice, you can add a darker green shadow on the side of the rind to show dimension. -
Highlights (Optional):
If you have a white gel pen, add tiny white dots to the black seeds to make them shine. If not, just leave them matte black.
Now you have a delicious-looking page of watermelon art that looks good enough to eat.
Fall Leaf Negative Space Art
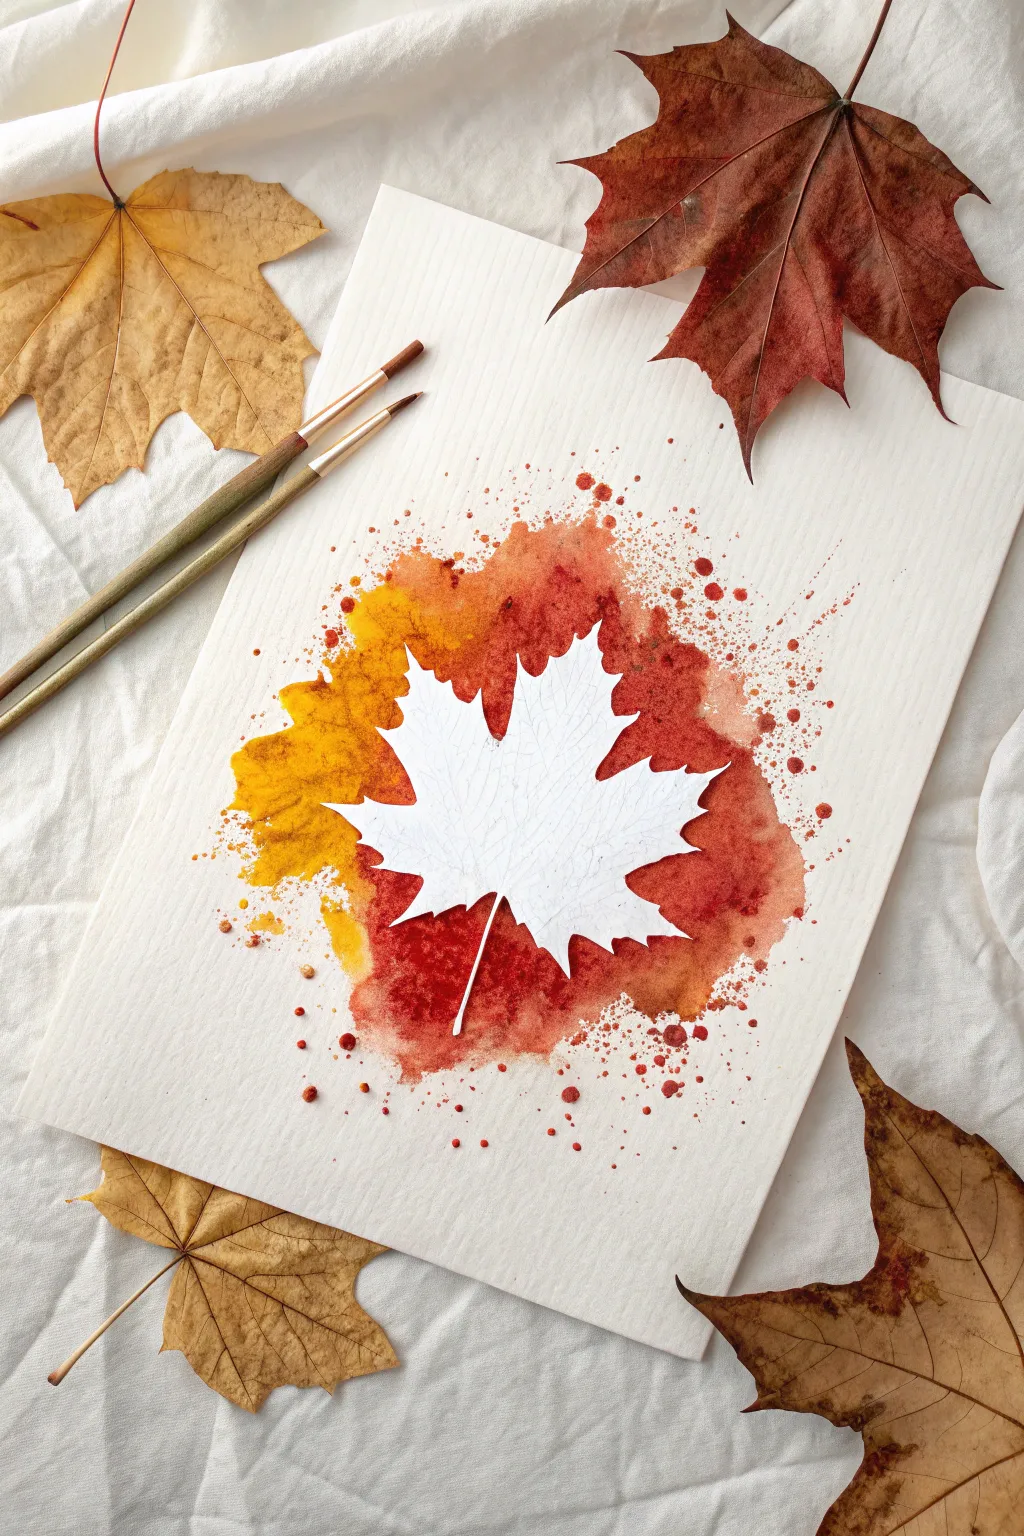
Capture the glowing essence of autumn with this striking negative space watercolor project. By masking off the center, you create a crisp, white leaf silhouette surrounded by an explosion of warm, festive colors.
Step-by-Step Tutorial
Materials
- Heavyweight watercolor paper (cold press, 300gsm)
- Watercolor paints (palettes or tubes)
- Round watercolor brushes (size 6 and 10)
- Cardstock or thick paper
- Removable adhesive putty or painter’s tape
- Scissors
- Pencil
- Water cup
- Paper towels
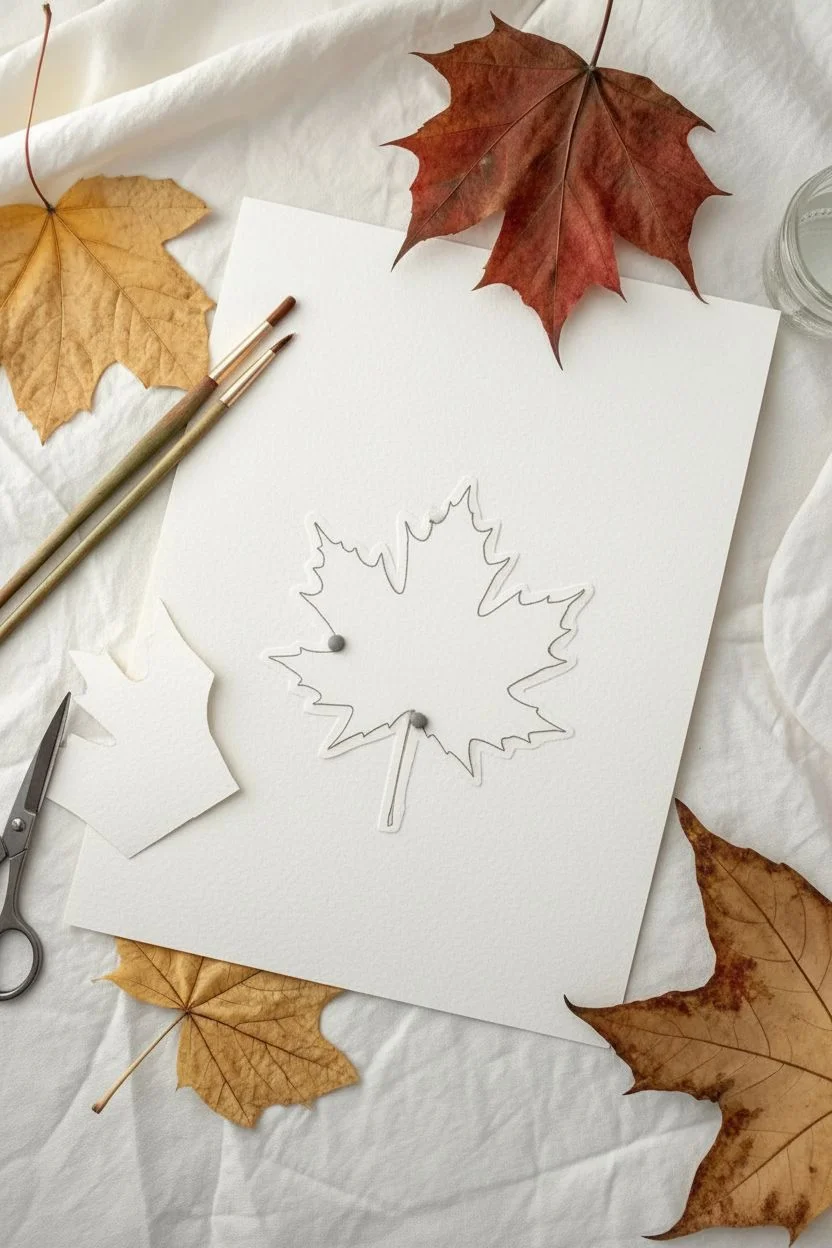
Step 1: Preparing the Mask
-
Create the Template:
Draw a maple leaf shape on a piece of cardstock, or trace a real leaf if you have one handy. -
Cut the Shape:
Carefully cut out your leaf shape with scissors, making sure to keep the edges as smooth and crisp as possible. -
Prepare Adhesion:
Roll small pieces of removable adhesive putty into balls or create loops of painter’s tape (sticky side out). -
Secure the Mask:
Stick the adhesive to the back of your paper leaf and press it firmly onto the center of your watercolor paper. -
Seal the Edges:
Run your finger along the edges of the cutout to ensure it is sitting completely flat against the watercolor paper to prevent leaks.
Clean Up Crew
Did paint seep under your leaf mask? Don’t worry! Wait for it to dry completely, then use a white gel pen or a tiny dab of white gouache to tidy up the edges of the silhouette.
Step 2: Applying the Autumn Wash
-
Prepare the Colors:
On your palette, prepare three puddles of paint: a bright yellow ochre, a vibrant orange, and a deep rusty red. -
Start with Yellow:
Using your larger brush, load it with yellow paint and outline the left side of the paper leaf, painting directly onto the background paper. -
Blend in Orange:
Pick up the orange paint and apply it to the top and right sections, letting it touch the wet yellow so the colors bleed together naturally. -
Add Depth with Red:
Use the deep red or brown shade to paint the outer edges of your color cloud, creating a rich contrast against the lighter center. -
Soften the Edges:
I prefer to use a clean, damp brush to fuzz out the outer edges of the paint so it looks like an abstract splash rather than a hard shape.
Sparkle & Shine
For a magical touch, mix a tiny bit of gold metallic watercolor or gold ink into your yellow paint puddle. The finished piece will shimmer beautifully when it catches the sunlight.
Step 3: Texture and Reveal
-
Create Large Splatters:
Load a wet brush with red or brown paint and gently tap the handle against your finger over the artwork to create larger droplets. -
Create Fine Mist:
For smaller speckles, run your thumb across the bristles of the brush to flick a fine mist of paint around the perimeter. -
Concentrate the Texture:
Focus the splatters near the transition area where the paint fades to white paper, adding energy to the composition. -
The Drying Phase:
Let the painting dry completely. This is crucial—if the paper is damp, peeling the mask might tear surface fibers. -
Remove the Mask:
Gently lift one edge of the paper leaf and slowly peel it away to reveal the pristine white shape underneath. -
Add Vein Details:
Using a sharp pencil with very light pressure, sketch delicate skeletal veins inside the white leaf space for a realistic finishing touch.
Frame your beautiful negative space leaf and enjoy the warm autumn vibes it brings to the room.
Rubbing Alcohol Bloom Flowers
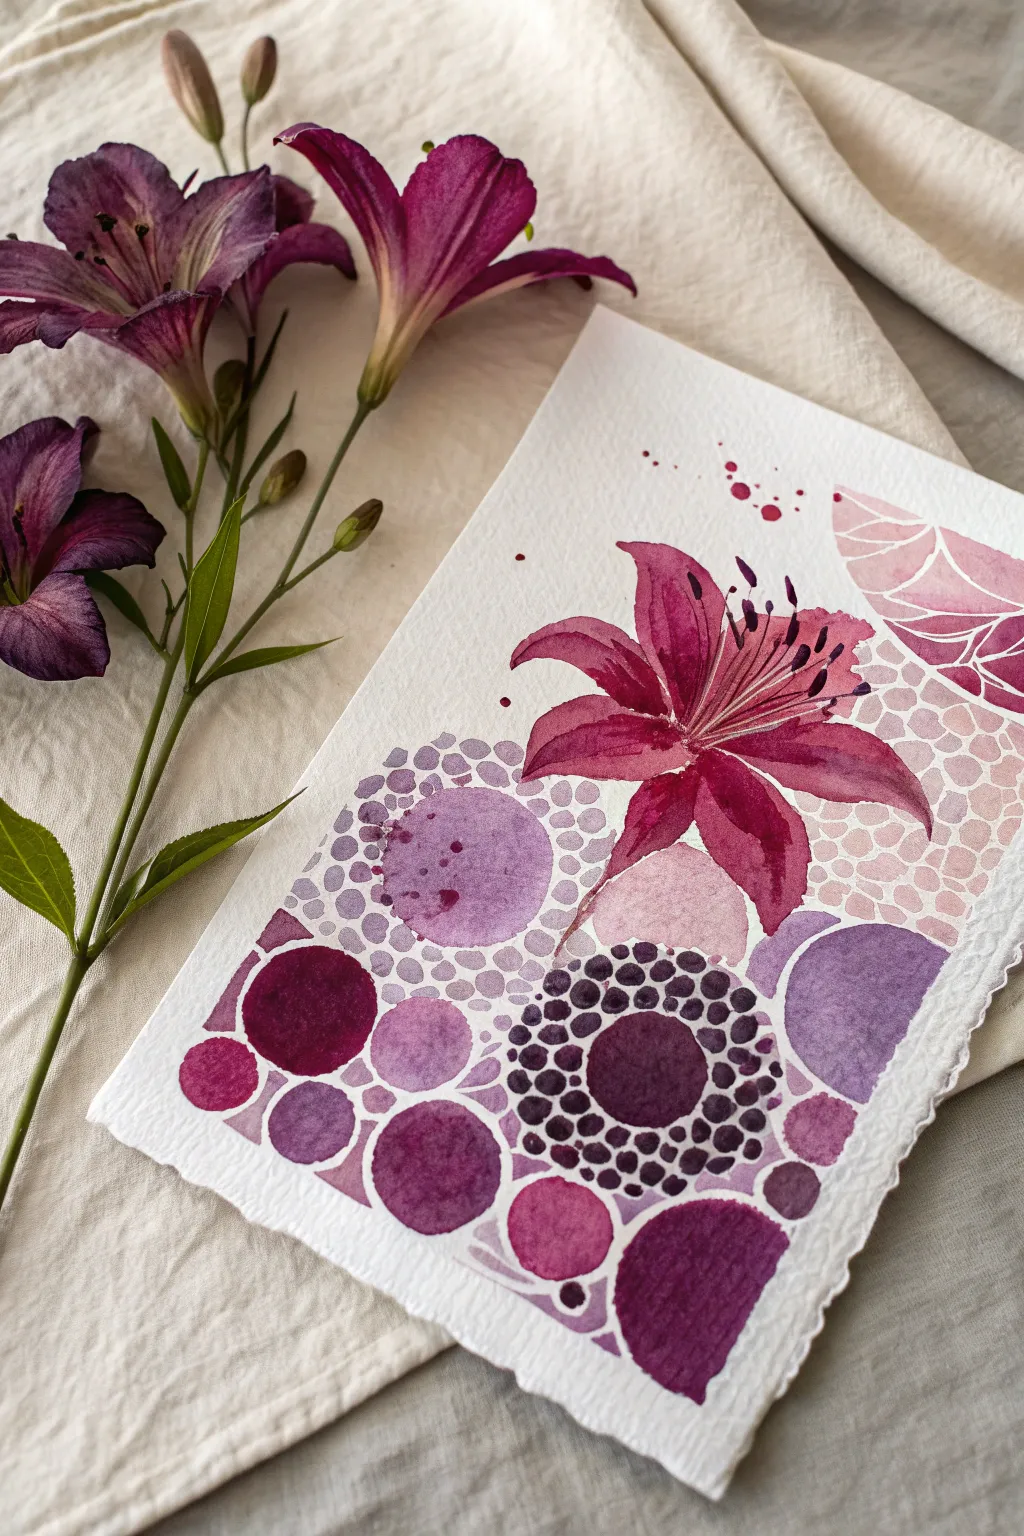

This project combines realistic floral painting with a fun, abstract background of geometric shapes and textures. It captures a beautiful balance between organic petals and playful, bubbly mosaics using purple and magenta hues.
Step-by-Step Guide
Materials
- Cold press watercolor paper (300gsm)
- Watercolor paints (Magenta, Violet, Purple)
- Round brushes (sizes 4 and 8)
- Rubbing alcohol (70% or higher)
- Q-tips or a clean eye dropper
- Pencil and eraser
- Paper towel
- Water cups
Step 1: Sketching the Layout
-
Outline the flower:
Start by lightly sketching a large lily on the right side of the paper. Draw six pointed petals fanning out from a central point. -
Add the background shapes:
Around the flower and drawing down to the bottom left, sketch various circles and semi-circles. Make them different sizes, like bubbling fizzy water. -
Create the mosaic look:
In the remaining empty spaces on the right, sketch a ‘cobblestone’ pattern by drawing small, irregular block shapes, leaving narrow gaps between them.
Bloom Troubleshooting
If the alcohol doesn’t make a spot, your paint creates a barrier. Ensure the wash is very wet. If it’s already drying, re-wet the area with pigment before dropping alcohol.
Step 2: Painting the Lily
-
Base petal layer:
Mix a watery magenta. Paint one petal at a time, covering the whole shape with this light wash. -
Deepen the color:
While the petal is still damp, pick up concentrated purple paint on your brush tip and touch it to the center of the flower, letting it bleed outward. -
Defining the edges:
Use a smaller brush to paint thin lines of darker magenta along the center of each petal to create veins. -
Repeat for all petals:
Continue this process for all six petals. If two petals touch, wait for one to dry before painting the neighbor to prevent merging. -
Adding stamens:
Once the flower is completely dry, use your smallest brush and dark violet paint to draw thin lines curving out from the center, topped with small oval anthers.
Step 3: Creating Texture Bubbles
-
Solid circles:
Paint a few of your sketched circles with a solid, flat wash of purple. Vary the shades so some are reddish-purple and others are blue-purple. -
The alcohol bloom technique:
Choose a large circle sketch. Paint it with a very wet, juicy layer of violet paint. It needs to be shiny with moisture. -
Drop the alcohol:
Dip a Q-tip or dropper into rubbing alcohol and gently touch the wet paint in the circle. Watch the pigment push away to create light ‘blooms’ or spots. -
Stippled circles:
For a different texture, fill a circle with clear water first, then dab in dots of different purple shades, letting them spread slightly for a soft, dotted look. -
Polka dot details:
On a dry circle area, use a fine brush to paint distinct, dark purple dots close together to create a dense pattern.
Level Up
Use a white gel pen or white gouache to add tiny highlights to the stamen tips or to clean up the edges between your mosaic shapes.
Step 4: Filling the Mosaic
-
Painting the stones:
Move to the ‘cobblestone’ section on the right. Paint each small shape with a pale pink wash. -
Mind the gap:
I find it crucial to keep a thin white gap of unpainted paper between these shapes to maintain the mosaic effect. -
Splatter finish:
Cover your flower with a scrap piece of paper. Load a brush with watery red paint and tap it against your finger to splatter small droplets over the top right corner. -
Final dry:
Let the entire piece dry completely before gently erasing any visible pencil lines that weren’t covered by paint.
Frame this lovely purple study to add a splash of color to any room
Mixed Media Oil Pastel Fireworks
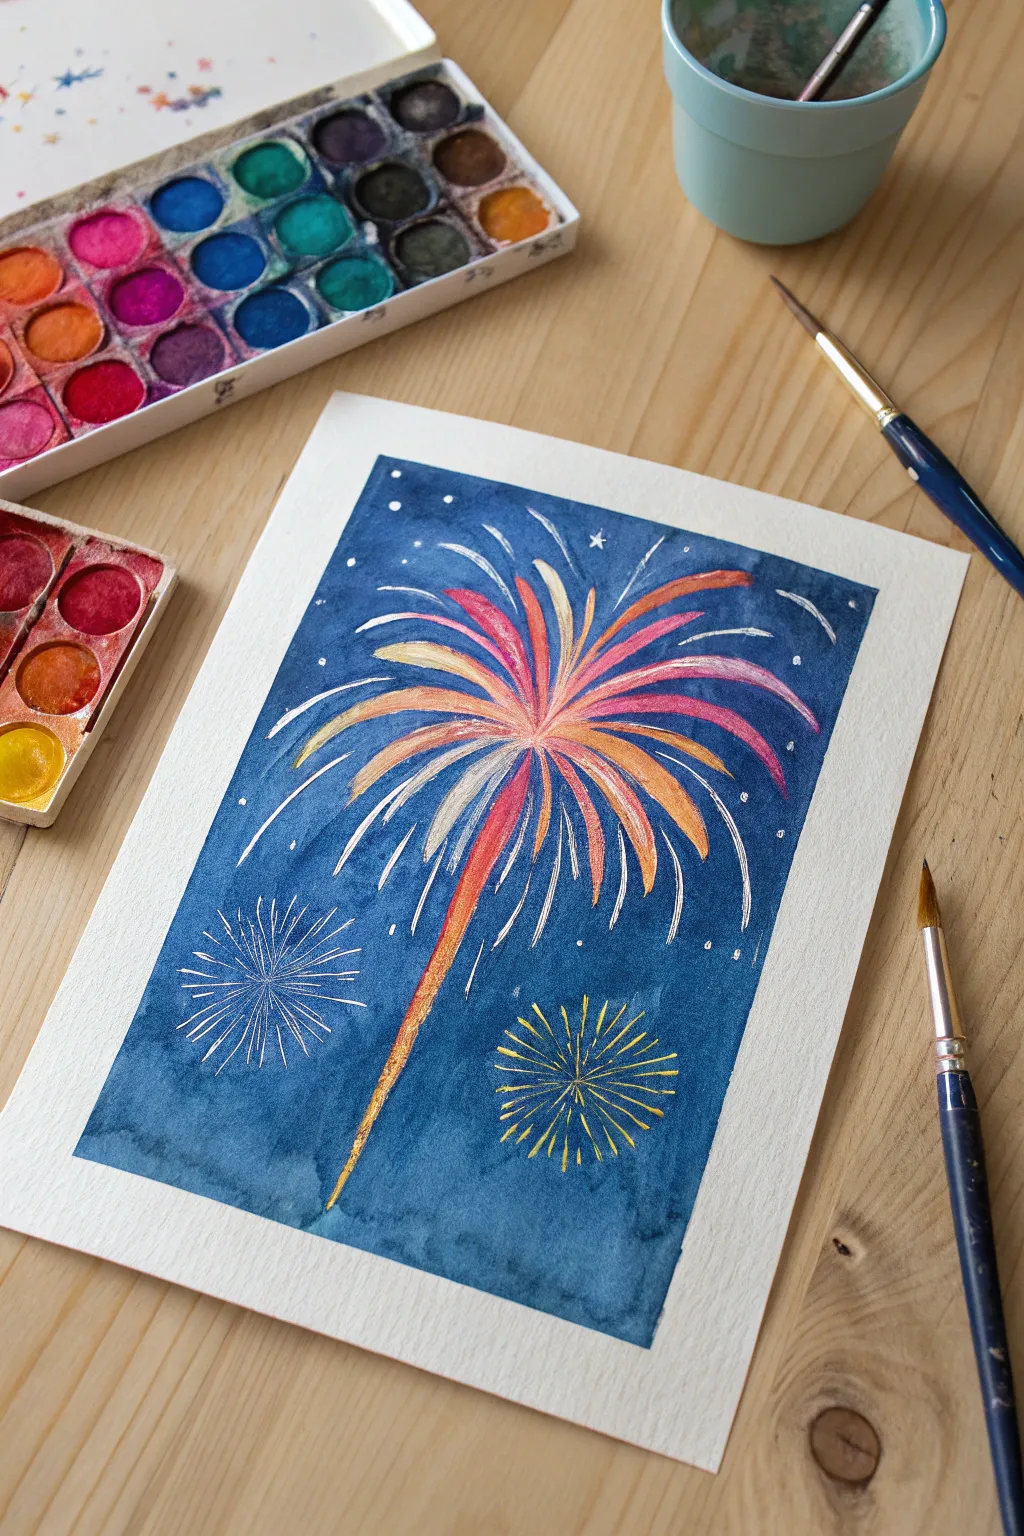
Capture the explosive magic of a fireworks display using a clever wax resist technique. By layering bright oil pastels under a wash of deep indigo watercolor, you create a vibrant night scene where the colors seem to glow against the dark sky.
Detailed Instructions
Materials
- Cold press watercolor paper (A4 or A5)
- Oil pastels (red, pink, orange, yellow, white, gold)
- Watercolor paints (Indigo or dark Prussian Blue)
- Round watercolor brush (size 6 or 8)
- Jar of water
- Paper towel
- Masking tape (optional for borders)
Step 1: Drawing the Display
-
Plan the composition:
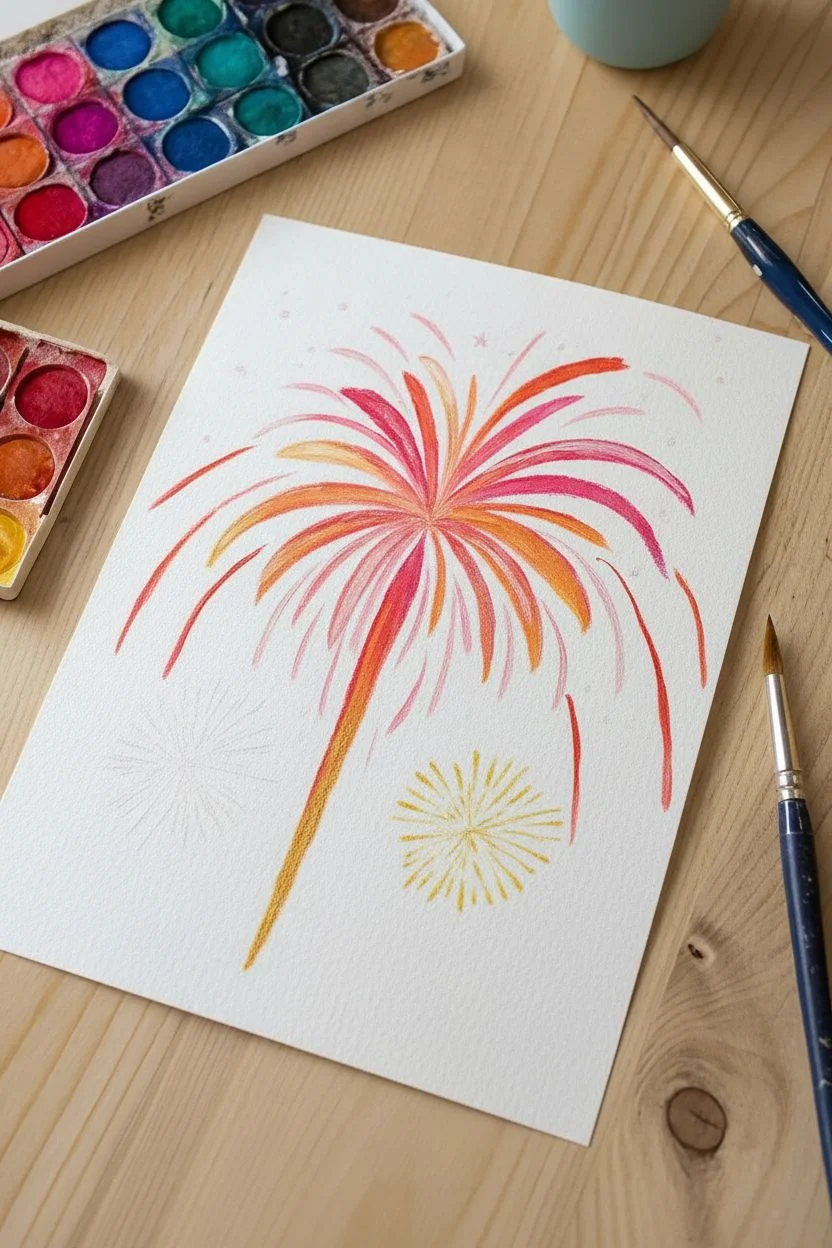
Visualize where your main firework will explode; place it slightly off-center in the upper half of the paper for a dynamic look. -
Start the center burst:
Using a pink or red oil pastel, draw curved lines radiating outward from your center point. -
Add heavy pressure:
Press down firmly as you draw. You want a thick layer of oily wax on the paper to repel the water later. -
Layer warm colors:
Draw orange and yellow streaks in between your pink lines, extending them slightly further out to mimic an exploding shape. -
Create the falling sparks:
Add longer, arching lines curving downward on the sides using red and orange pastels to show gravity pulling the sparks down. -
Add highlights:
Intersperse strokes of white and gold pastel throughout the burst to add brightness and contrast. -
Draw the trail:
Sketch a thick, textured line trailing downwards from the center burst using gold or orange to represent the rocket’s path. -
Create secondary fireworks:
Draw a smaller starburst shape in the bottom left corner using only white pastel for a silver sparkle effect. -
Add a third burst:
In the bottom right area, draw another small radiating starburst using yellow or gold pastel. -
Scatter the stars:
Dot the remaining empty spaces with a white oil pastel or wax crayon to create distant stars in the background.
Step 2: Painting the Sky
-
Mix the night sky:
On your palette, mix a generous puddle of deep blue paint. I like to use Indigo or mix Prussian Blue with a tiny touch of black. -
Begin the wash:
Load your brush with the dark paint and start applying it at the very top of your paper. -
Paint over the wax:
Boldly brush the watercolor right over your oil pastel drawings. The wax will repel the water, keeping your colors bright. -
Work quickly:
Continue painting downwards, maintaining a ‘wet edge’ to ensure the background color remains smooth and even. -
Dab excess paint:
If beads of blue paint sit on top of your pastel wax, gently dab them off with a clean paper towel to reveal the bright color underneath. -
Deepen the contrast:
While the paper is still damp, drop a little more concentrated pigment into the corners to create a moody vignette effect. -
Dry flat:
Allow the painting to dry completely on a flat surface to prevent runs and let the texture settle.
Pro Tip: Clean Colors
Before drawing, wipe the tips of your oil pastels with a paper towel. This prevents smudges of other colors from muddying your bright fireworks.
Level Up: Metallic Pop
Once the blue paint is fully dry, use a metallic gold gel pen or gold watercolor paint to add tiny, shimmering dots to the ends of the firework rays.
Now you have a dazzling light show captured on paper that glows beautifully against the dark night.


Have a question or want to share your own experience? I'd love to hear from you in the comments below!