Whimsical paintings are where your imagination gets to drive, and realism can take a little nap in the back seat. If you’re craving playful fantasy, dreamlike color, and scenes that feel like tiny stories, these ideas will keep your brush happily wandering.
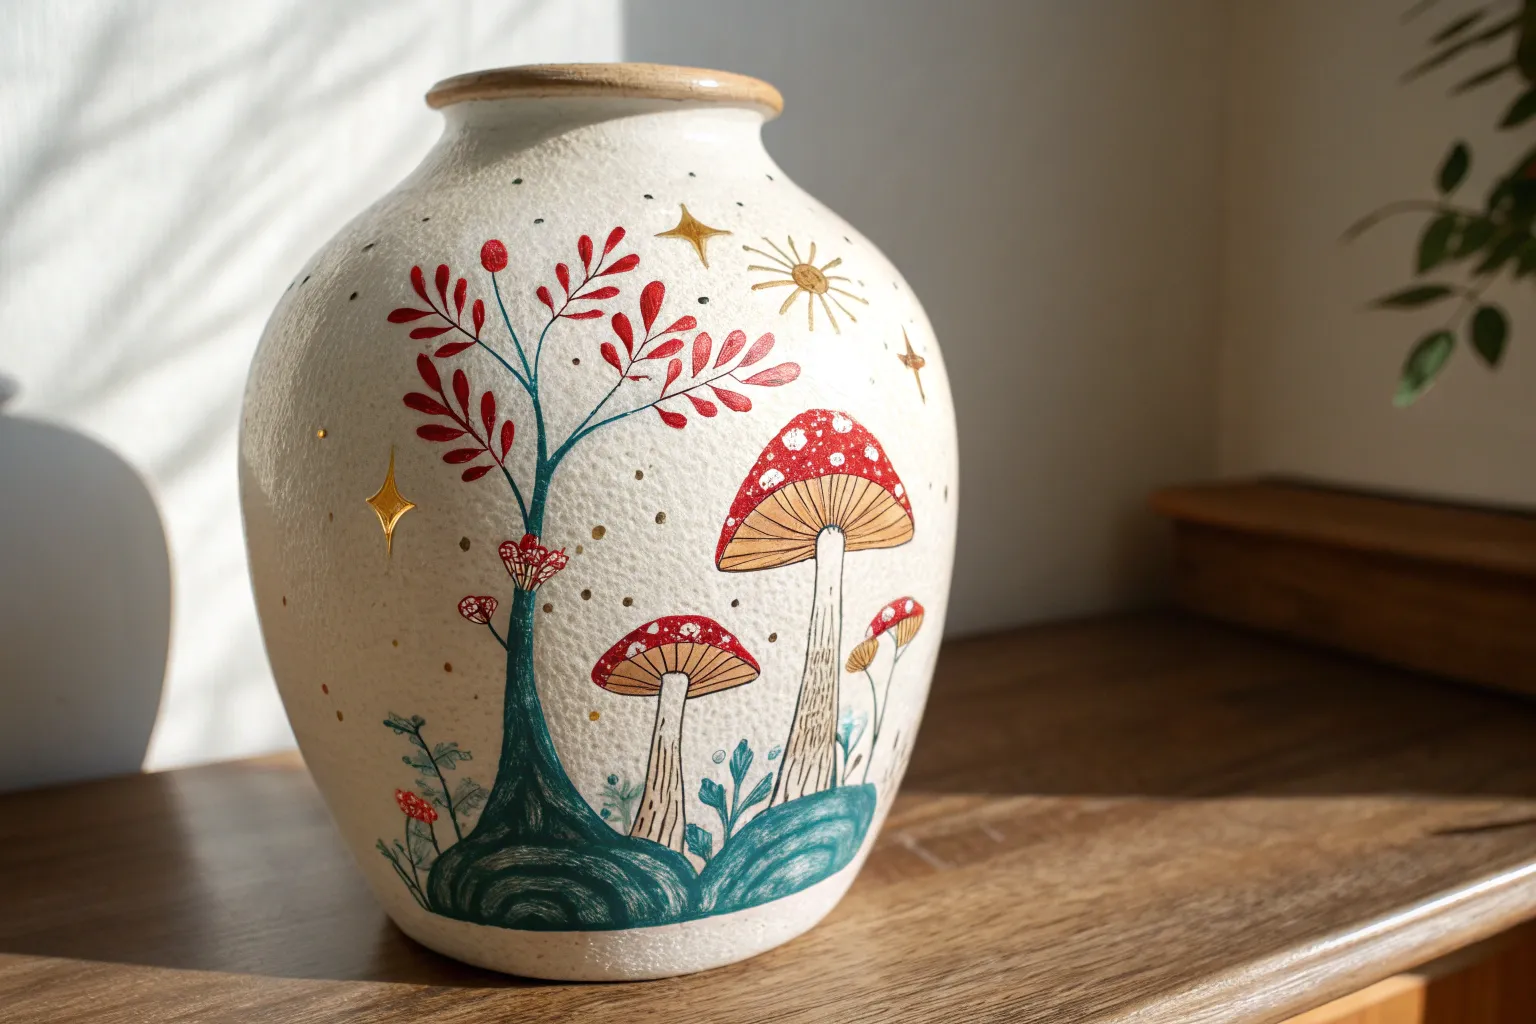
Enchanted Forest With Oversized Mushrooms
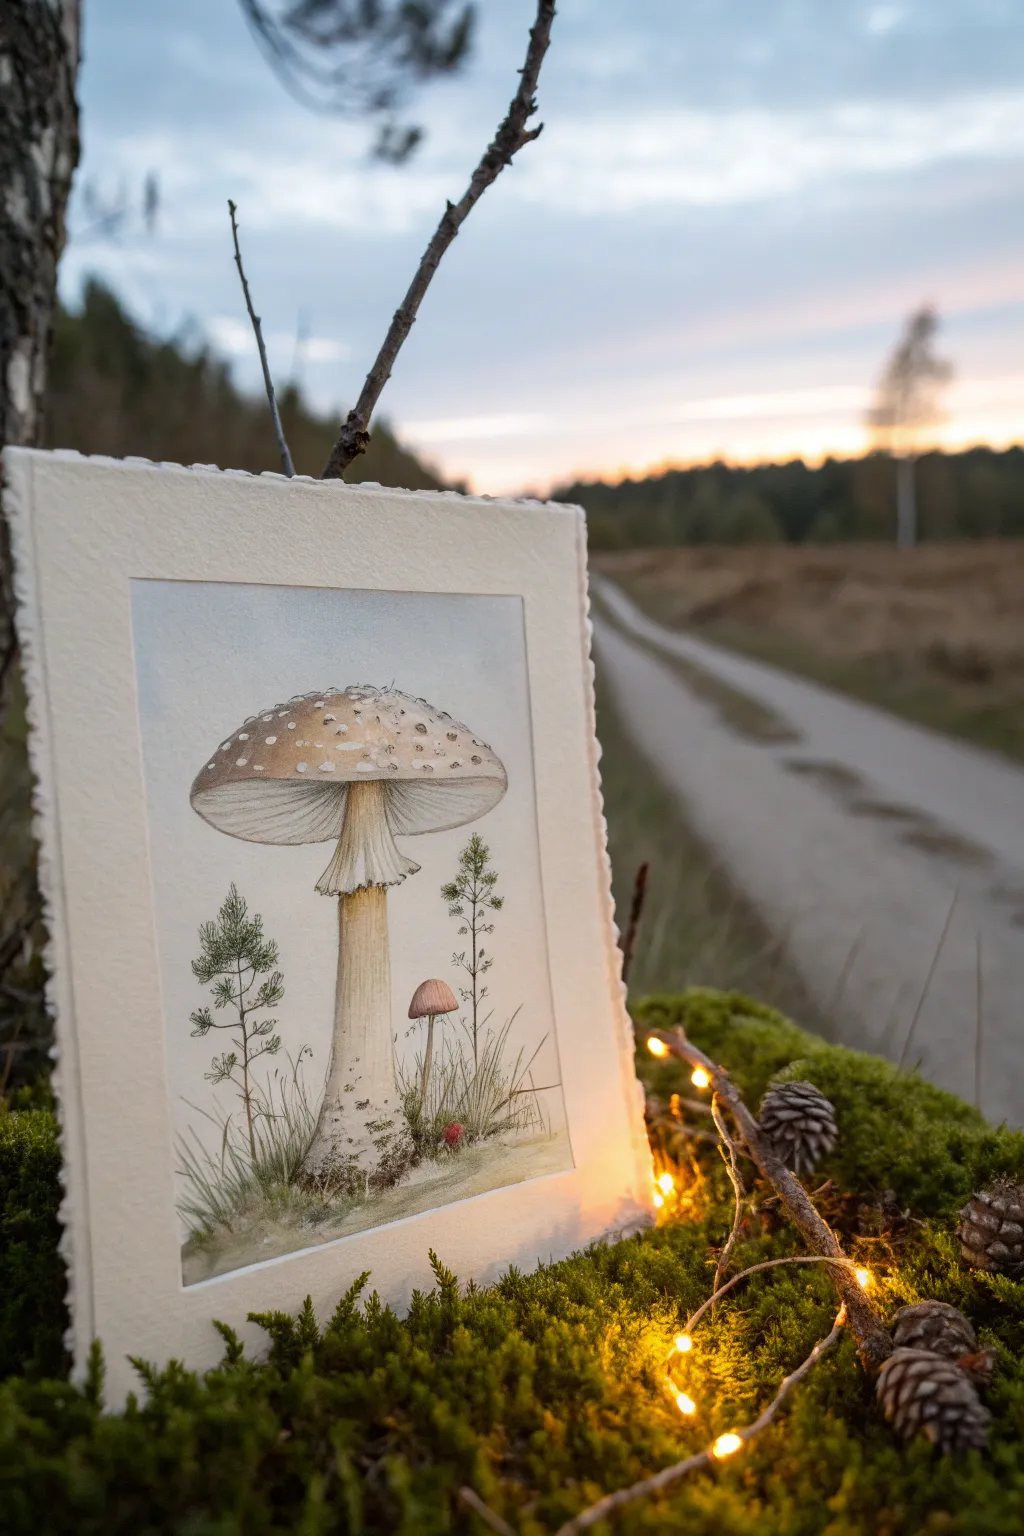
Capture the quiet magic of the forest floor with this detailed botanical study of a towering mushroom. Using watercolor and fine liner pens, you will create a piece that feels both scientifically precise and whimsically enchanted.
Step-by-Step
Materials
- Cold press watercolor paper (deckle edge preferred)
- Pencil (HB or H)
- Kneaded eraser
- Waterproof fine liner pens (0.05mm and 0.1mm, brown or sepia)
- Watercolors: Burnt Umber, Yellow Ochre, Sap Green, Payne’s Grey, Alizarin Crimson, Sepia
- Round watercolor brushes (sizes 2, 4, and 6)
- White gouache or white gel pen
- Clean water and paper towels
- Painting board and masking tape
Step 1: Planning the Composition
-
Outline the main subject:
Lightly sketch the large central mushroom using an H pencil. Start with a wide, slightly convex cap shape, then draw the sturdy stem (stipe) descending from the center. Add the distinctive skirt-like ring (annulus) about a third of the way down the stem. -
Add secondary elements:
To the right of the giant mushroom, sketch a smaller, younger mushroom with a rounded, reddish cap. On the left side, lightly draw the spindly structure of a small pine sapling. Add tufts of grass at the base to ground the subjects. -
Refine the details:
Go back over your sketch to define the gills under the main cap and the rough, scaly texture on the stem base. Keep your pencil lines faint so they won’t show through the transparent watercolor later.
Step 2: Inking the Structure
-
Trace with sepia ink:
Instead of black, use a brown or sepia 0.05mm fine liner to trace your pencil lines. This keeps the look organic and earthy. Use broken, shaky lines for the ground and grass texture to mimic nature’s randomness. -
Detail the gills:
Carefully draw the fine lines of the gills under the mushroom cap, radiating from the stem outward. Keep these lines extremely light and close together. -
Add texture marks:
Stipple small dots on the mushroom cap to suggest warts or scales. Add short, irregular vertical lines on the stem to create a fibrous texture.
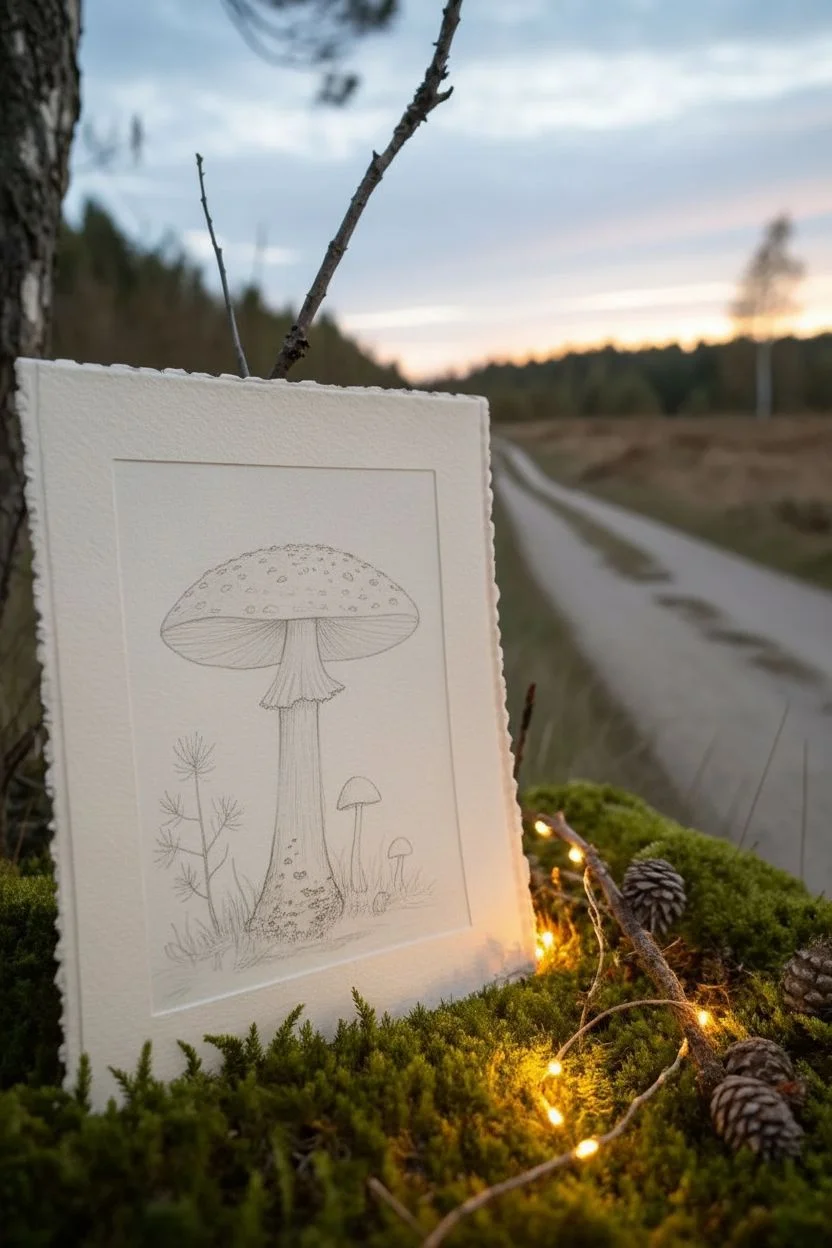
Deckled Edge Trick
Don’t have deckle-edge paper? Fold heavy watercolor paper back and forth sharply along a ruler, then carefully tear it while wet to create that soft, torn edge look.
Step 3: Watercolor Washes
-
Paint the cap base:
Mix a very watery wash of Yellow Ochre and lightly paint the entire cap. While it is still wet, drop in hints of Burnt Umber near the center to create a gradient effect, leaving the edges pale. -
Shadow the gills:
Mix a cool gray using Payne’s Grey and a touch of Burnt Umber. With a size 2 brush, gently glaze the area under the cap where the gills are, darkening the area closest to the stem. -
Color the stem:
Wash the stem with a pale mix of Yellow Ochre and Sepia. I like to keep the right side slightly lighter to indicate a light source coming from that direction. Let the paint pool slightly at the bulbous base for a darker, earthier tone. -
Paint the small mushroom:
Use Alizarin Crimson toned down with a little Burnt Umber for the small mushroom cap. It should be a warm, rusty red tones contrasting with the beige giant next to it.
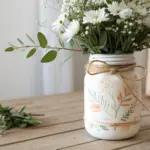
Fairy Light Display
Once painted, frame your piece in a floating glass frame and wrap tiny copper-wire LED lights around the base to mimic the magical glow in the reference photo.
Step 4: Botanical Details
-
Greenery accents:
Mix Sap Green with a touch of Sepia for a muted, realistic green. Paint the pine sapling on the left using quick, short strokes for the needles. Paint the taller, thin stems on the right with a delicate touch. -
Ground the scene:
Paint the grassy base using a mix of your greens and browns. Use upward flicking motions with your brush to mimic blades of grass growing around the mushroom stems. -
Deepen the shadows:
Once the first layers are completely dry, mix a darker Sepia tone. Add shadows directly under the mushroom’s skirt and at the very bottom where the stem meets the earth.
Step 5: Final Touches
-
Highlighting:
Use white gouache or a white gel pen to add tiny specks (the universal veil remnants) on top of the large mushroom cap. You can also add a few highlights on the edge of the skirt. -
Atmospheric sky:
For the background, wet the paper around the mushrooms with clean water. Drop in a very faint, watery mix of blue-grey just at the top edge, fading to nothing as it moves down, keeping the background minimal.
Now you have a serene piece of the forest floor captured forever on paper


Whimsical Tree of Life With Rainbow Leaves
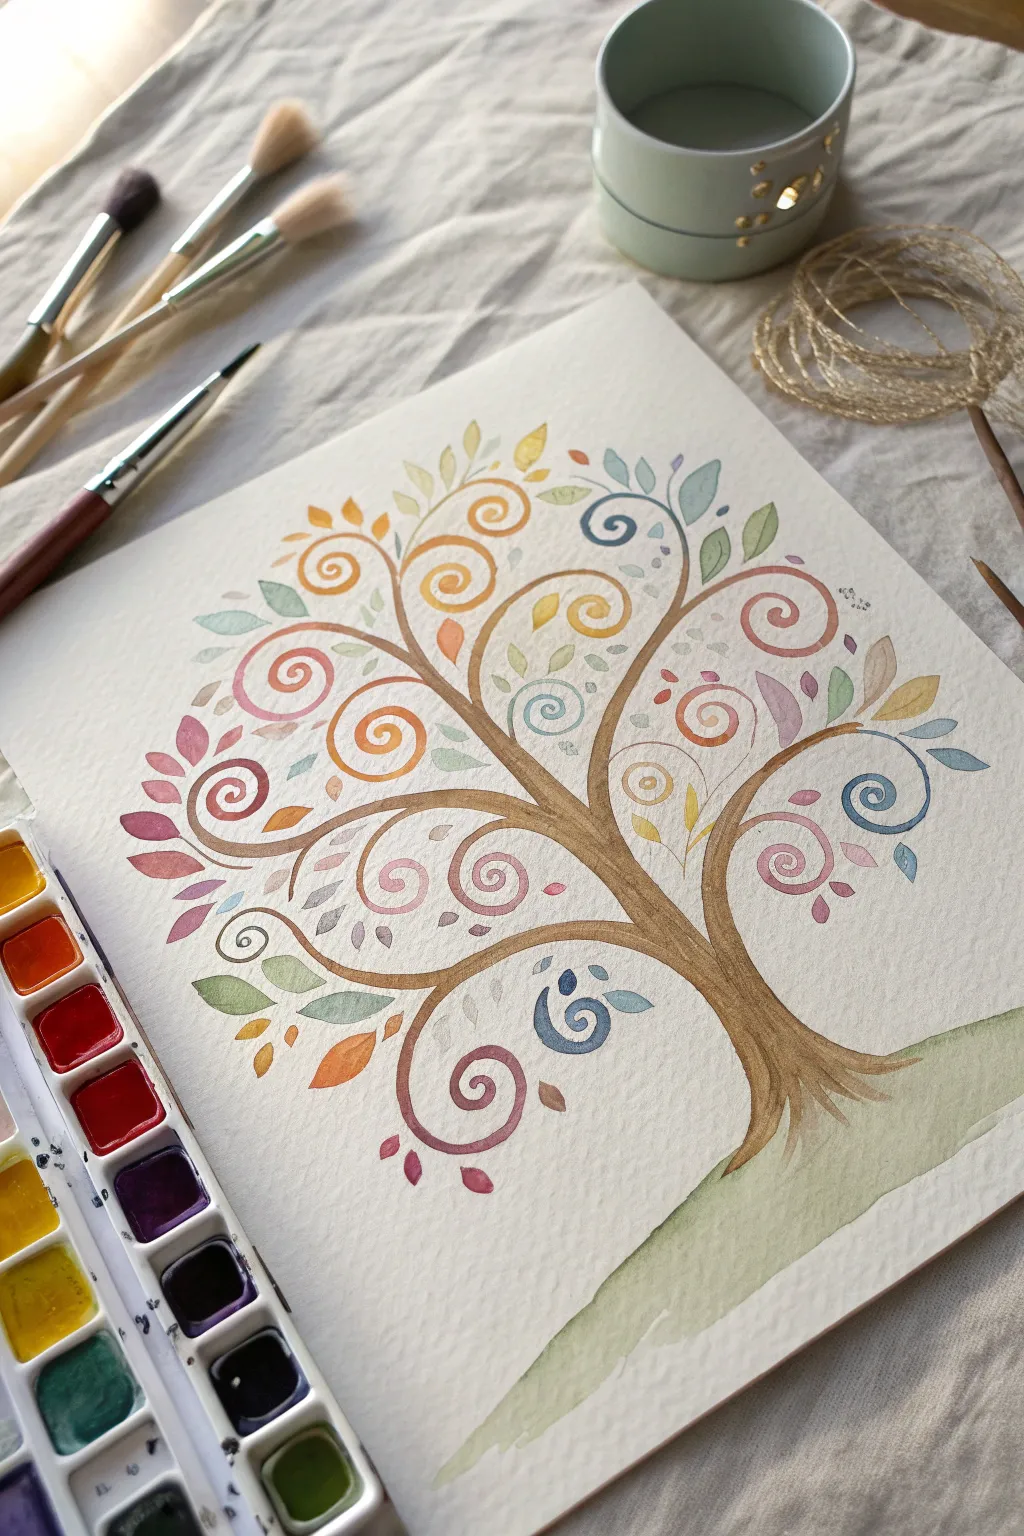
This delightful watercolor project captures the essence of whimsy with its spiraling branches and soft, rainbow-hued foliage. The gentle curves and playful colors make it a perfect exercise in brush control and color blending.
Step-by-Step Guide
Materials
- Cold press watercolor paper (140 lb/300 gsm)
- Watercolor pan set (including warm browns, rainbow spectrum)
- Round watercolor brushes (sizes 2, 4, and 6)
- Pencil (HB or H) for light sketching
- Kneaded eraser
- Two jars of water (one clean, one for rinsing)
- Paper towels
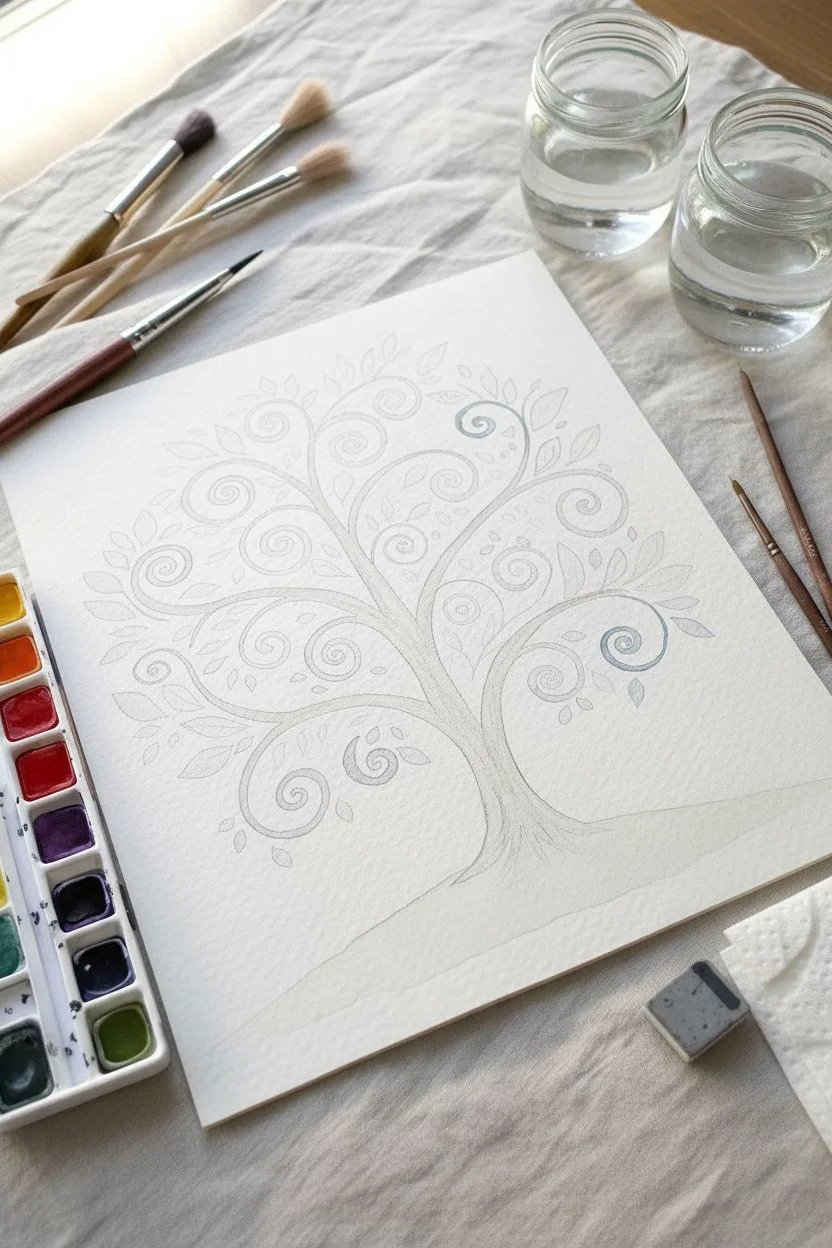
Step 1: Sketching the Structure
-
Establish the trunk base:
Begin by lightly sketching the trunk’s base near the bottom third of your paper. Draw a gently curved flare for the roots, making one side slightly wider to ground the tree. The trunk shouldn’t be perfectly straight; give it a slight, organic curve as it rises. -
Branch out the spirals:
From the top of the trunk, split your line into two main branches that curl outward in opposite directions. Instead of ending in points, turn the ends of these lines into large, loose spirals. These are the ‘bones’ of your tree. -
Fill the canopy:
Add secondary branches extending from the main trunk and primary branches. Draw these as additional spirals, varying their sizes—some tighter and smaller, others loose and sweeping. Aim to fill the upper space of the paper in a rounded, canopy-like shape. -
Sketch the ground line:
Draw a faint, sloping horizon line behind the trunk to anchor the tree in the landscape. Keep it simple so it doesn’t distract from the intricate branches.
Step 2: Painting the Tree
-
Mix your trunk color:
Load your size 4 or 6 brush with a medium brown tone. I prefer mixing Burnt Sienna with a touch of Yellow Ochre to keep the wood looking warm and inviting. -
Paint the trunk:
Start at the base of the trunk and paint upwards, using the full belly of the brush for the wider sections. As you reach the branches, lift slightly to taper the strokes. -
Follow the spirals:
Switch to a smaller brush (size 2 or 4) for the branches. Carefully trace your sketched spirals with the brown paint. Try to paint these in long, continuous strokes for smoothness rather than short, choppy dashes. -
Add floating spirals:
Notice the disconnected spirals floating among the branches in the reference? Paint these now using various rainbow colors—soft pinks, blues, and oranges. Keep the paint watery so they look delicate and ethereal.
Clean Line Technique
To get smooth spirals, lock your wrist and move your entire arm from the shoulder. This creates fluid curves rather than shaky, jagged lines.
Step 3: Leaves and Details
-
Prepare a rainbow palette:
Identify the colors you want for the leaves. You’ll need a spectrum: muted reds, oranges, yellows, sage greens, light blues, and soft purples. Pre-wet these pans so the color is ready to lift. -
Paint single-stroke leaves:
Using a size 4 round brush, press the belly of the brush down near a branch and lift quickly as you pull away to create a leaf shape with a pointed tip. This ‘press and lift’ technique creates organic leaf shapes naturally. -
Distribute colors evenly:
Work one color at a time. Paint five or six orange leaves scattered across the canopy, then clean your brush and switch to blue. This ensures a balanced distribution of color without muddying your water too quickly. -
Add accent dots:
Dip the very tip of your smallest brush into saturated paint and dot tiny circles around the spirals and leaves. These whimsical ‘pollen’ specks add texture and magic to the open spaces. -
Layer the ground:
Wash a very diluted, pale green across the bottom section for the hill. Let it be transparent enough that the bottom of the brown trunk shows through slightly, grounding the tree. -
Define the roots:
Once the brown trunk is dry, use a slightly darker brown mix to add thin, vertical lines at the base of the trunk to suggest bark texture and root flair. -
Final drying check:
Let the entire piece dry completely. If any pencil lines are still visible and distracting, gently lift them with your kneaded eraser, being careful not to rub off any paint.
Add Metallic Sparkle
Once the paint is totally dry, trace over the internal spirals or outline specific leaves with metallic gold watercolor or a gold gel pen for extra magic.
Now step back and admire how your simple spirals have blossomed into a vibrant, life-affirming forest scene


Quirky Animal Portrait With Human Accessories
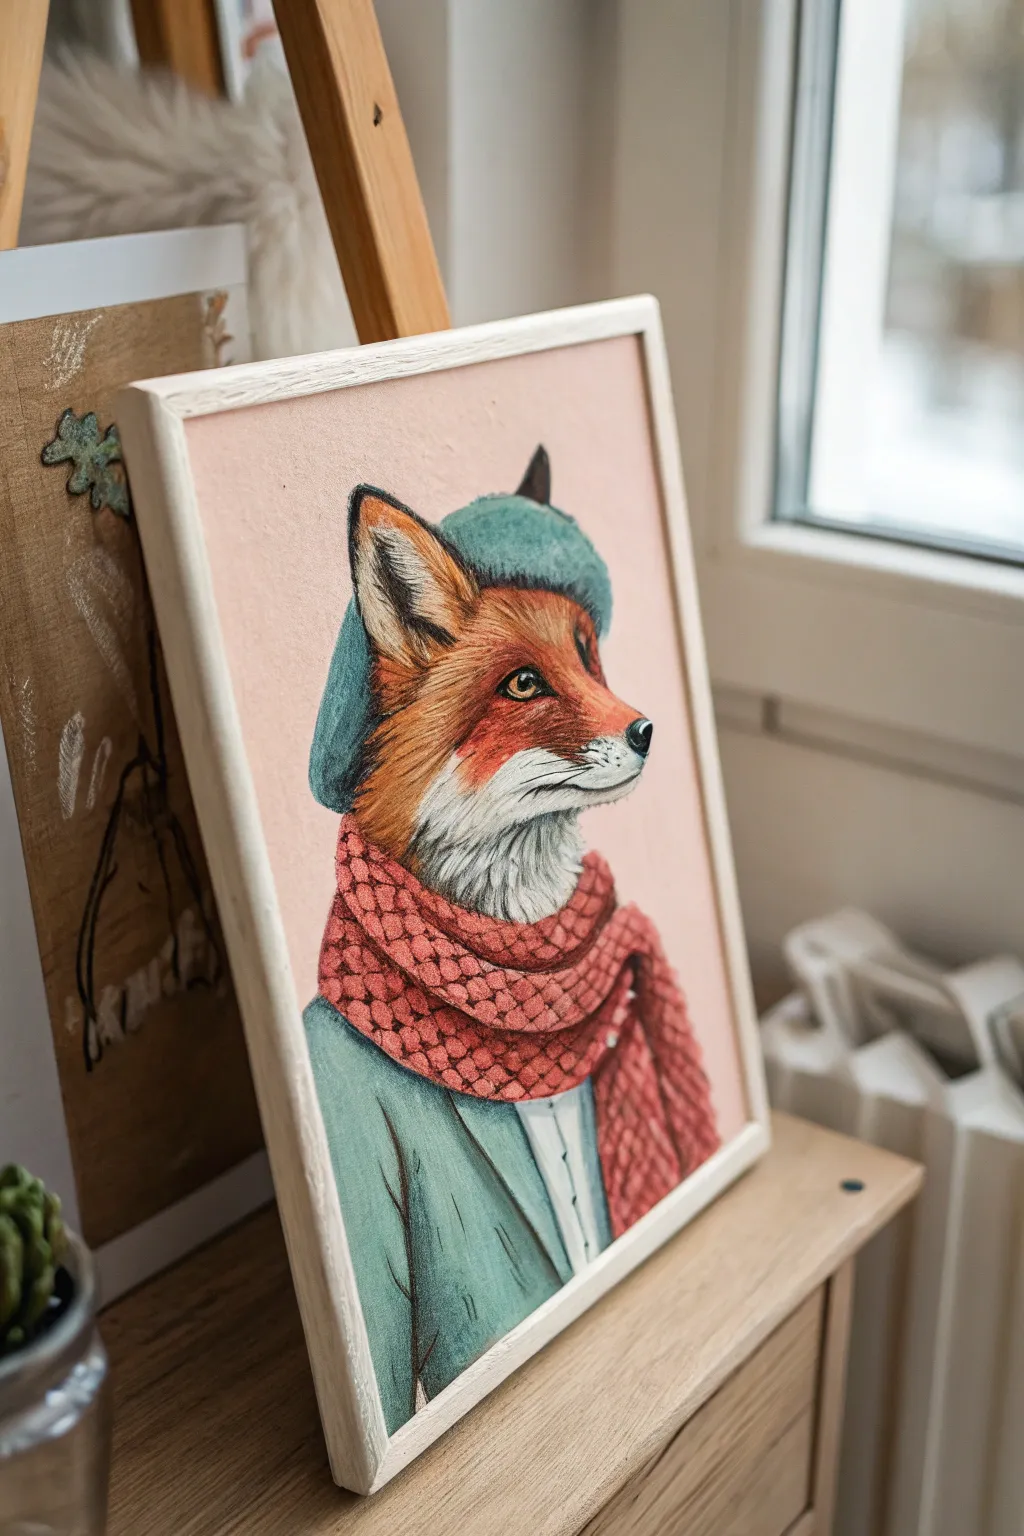
Capture the charm of woodland whimsy with this delightful portrait of a fashion-forward fox. Using colored pencils on a soft pink background creates a warm, illustrative style perfect for adding character to any corner of your home.
Step-by-Step
Materials
- Heavyweight drawing paper or illustration board (light pink toned)
- High-quality colored pencils (wax or oil-based)
- Graphite pencil (HB) and kneaded eraser
- White gel pen or white gouache (for highlights)
- Blending stump or colorless blender pencil
- Workable fixative spray
- Light wooden frame (optional)
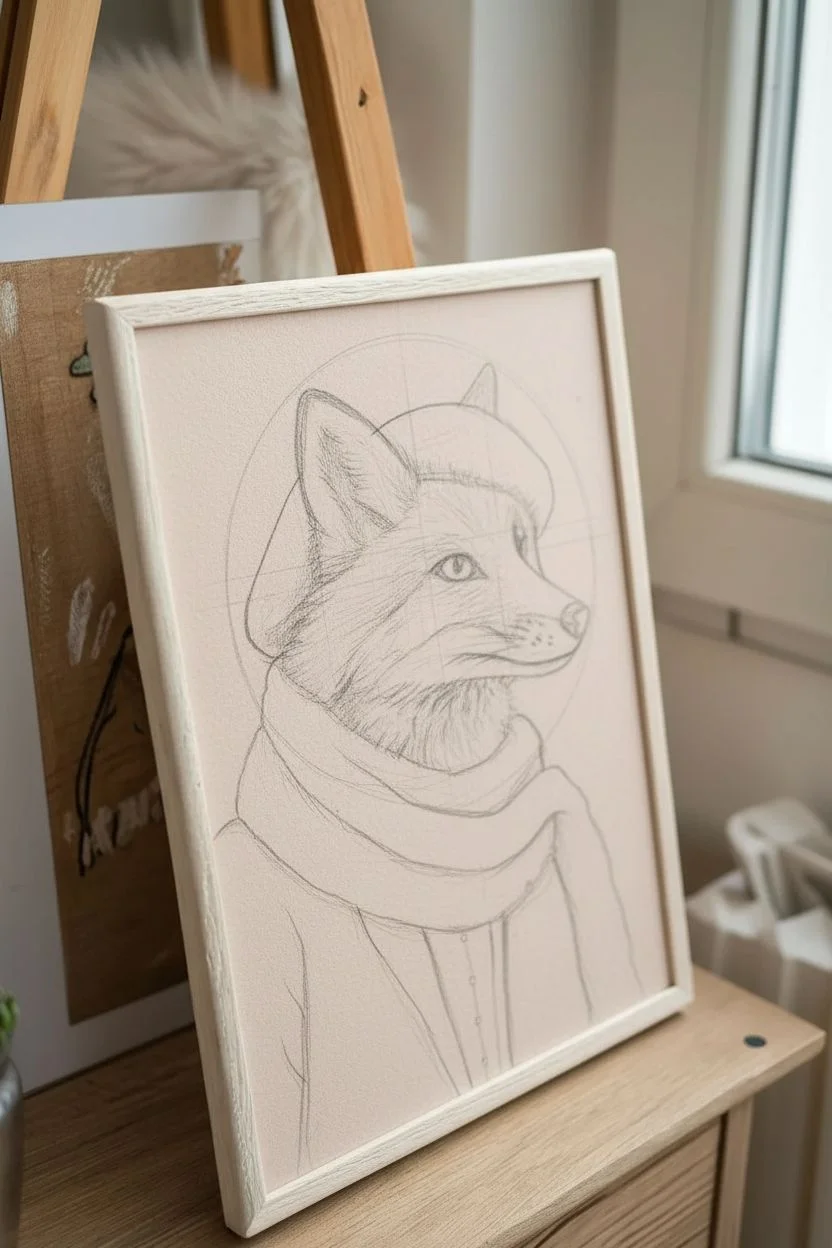
Step 1: Sketching the Composition
-
Establish the Foundation:
Begin lightly with your HB pencil to map out the basic shapes. Draw a circle for the head and an elongated oval for the muzzle. Add a rounded triangle shape on top for the beret sitting at a jaunty angle. -
Define the Features:
refine the fox’s face. Place the eye carefully—foxes have sharp, intelligent eyes—and sketch the nose tip. Draw the large, triangular ears perking up through the hat’s brim. -
Outline the Wardrobe:
Sketch the chunky, looped shapes of the knitted scarf wrapping snugly around the neck. Below that, outline the collar of the coat and the shirt underneath. Keep these lines comprehensive but faint.
Fur Texture Magic
Don’t press hard immediately. Build fur texture by layering many light strokes. It creates a much softer, realistic depth than one heavy layer.
Step 2: Layering the Fur & Face
-
Base Tone for Fur:
Start coloring the fox’s face with a light orange-brown pencil. Use short, directional strokes that mimic the growth of fur, moving outward from the nose toward the ears. -
Deepening Shadows:
Layer a darker rust or burnt sienna in the shadowed areas—under the hat brim, around the eye, and along the jawline. This builds dimension immediately. -
Adding White Fur:
For the muzzle and cheek area, use a white or cream pencil. Apply heavy pressure to make it opaque against the pink paper background. Blend the transition where the white fur meets the orange fur using gentle, feathery strokes. -
The Eye and Nose:
Use a sharp black pencil for the pupil and the nose. Add a touch of golden brown to the iris. Leave a tiny speck of white paper—or add a dot of white gel pen later—for the catchlight in the eye to bring him to life.
Step 3: The Textured Accessories
-
Coloring the Beret:
Select a muted teal or slate blue for the beret. Color in circular motions to create a felt-like texture. Darken the bottom edge where it meets the fur to show the hat’s volume. -
Knitting the Scarf:
This is the most time-consuming but rewarding part. Using a brick red pencil, draw small, interlocking ‘U’ or ‘V’ shapes to mimic the knit pattern. Fill the scarf area with these repetitive loops. -
Shading the Knits:
Go back into the scarf with a dark maroon or deep red. Shade the spaces between the loops to create depth, making the ‘yarn’ look chunky and three-dimensional. -
The Coat and Shirt:
Fill in the coat using the same teal family as the hat but perhaps a shade lighter or greener. Use long, smooth vertical strokes for the fabric of the coat, and keep the shirt stark white with faint grey lines for shadows.
Personality Swap
Change the vibe by swapping the beret for different hats! A tiny bowler hat or a floral crown completely changes the character’s story.
Step 4: Final Touches
-
Refining Details:
Sharpen your black pencil to a fine point. Add defining whiskers on the muzzle and delicate hairs inside the ears. Strengthening the black outline around the eye creates that piercing fox gaze. -
Highlighting:
Use a white gel pen or a fine brush with white gouache to add the final bright highlights—on the nose tip, the eye, and perhaps a few stray glistening hairs on the white muzzle. -
Clean Up:
Use a kneaded eraser to lift any stray pigment from the pink background. Keep the background clean and flat to maintain the illustrative look. -
The Finisher:
Once you are happy with the saturation, spray a light coat of workable fixative to prevent smudging. I like to let this dry fully outside before framing it in a simple light wood frame.
Now you have a charming woodland companion ready to brighten your wall with his quiet sophistication


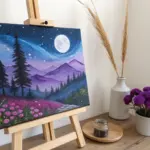
Candy-Colored Meadow With Impossible Flowers
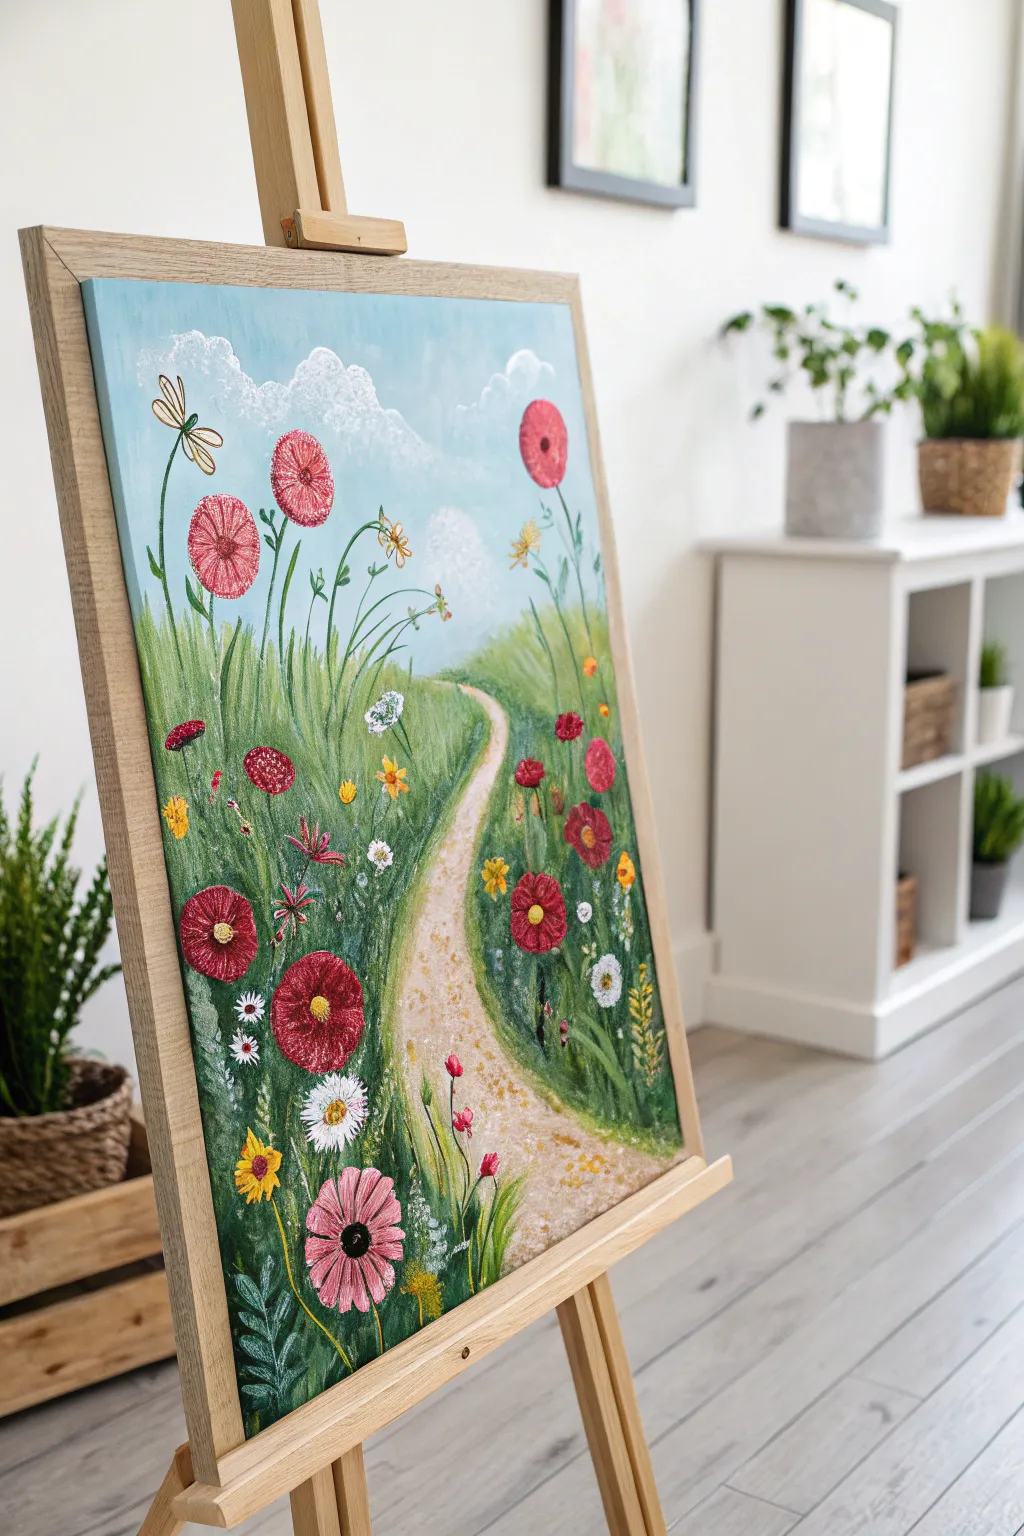
Step into a world of pure imagination with this vibrant, textural painting featuring stylized blooms and a winding path to nowhere. This project focuses on layering bright acrylics and adding playful details to create a cheerful, dreamlike landscape.
How-To Guide
Materials
- Stretched canvas (approx. 16×20 inches)
- Acrylic paints (Phthalo Blue, Titanium White, Sap Green, Yellow Ochre, Cadmium Red, Magenta, Lemon Yellow, Burnt Sienna)
- Set of brushes (1-inch flat, medium filbert, small round/detail liner)
- Palette knife (optional, for texture)
- Water cup and paper towels
- Pencil for sketching
- White or metallic paint pen (optional)
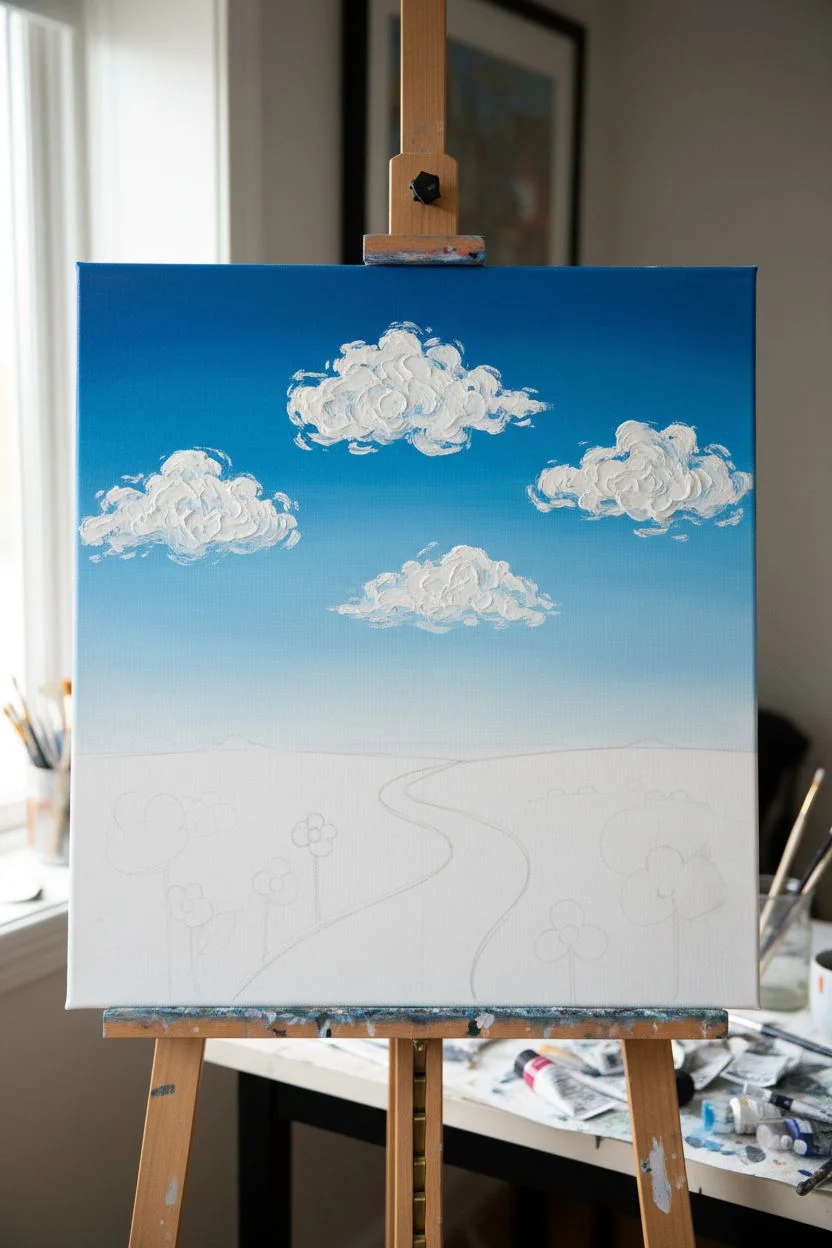
Step 1: Planning and Sky
-
Sketch the Composition:
Begin by lightly sketching your horizon line about two-thirds up the canvas. Draw a winding S-curve starting wide at the bottom center and narrowing as it meets the horizon to create the path. Mark the general locations for your largest flowers. -
Paint the Base Sky:
Mix Titanium White with a small touch of Phthalo Blue. Using a large flat brush, paint the entire sky area. Keep the blue slightly darker at the top and add more white as you approach the horizon for atmospheric perspective. -
Add Fluffy Clouds:
While the sky is still slightly tacky, load a filbert brush with pure Titanium White. Use a circular dabbing motion to create three distinct cloud clusters. Layer the white thickly in the center of the clouds for a textured, fluffy appearance.
Step 2: The Grassy Foundation
-
Block in the Background Hills:
Mix Sap Green with a little White and Blue to create a cool, distant green. Paint the rolling hills just below the horizon line, blending slightly into the sky for a soft edge. -
Paint the Meadow Base:
For the main grass area, switch to a mix of Sap Green and Yellow Ochre. Fill in the space on either side of the path. Don’t worry about individual blades yet; just cover the canvas with a solid mid-tone green. -
Create the Path:
Mix Titanium White, Yellow Ochre, and a tiny dot of Burnt Sienna to get a sandy beige. Fill in the winding path. I like to let this dry briefly and then drag a dry brush with slightly lighter beige over the top to simulate dirt texture. -
Add Grassy Texture:
Using a smaller flat brush turned vertically or a fan brush, flick short strokes upward using different shades of green (mix in lemon yellow for highlights and blue for shadows). Focus these strokes where the grass meets the path and the bottom of the canvas.
Textured Centers
Mix a pinch of baking soda or sand into your acrylic paint for the flower centers. This creates a grainy, 3D pollen texture that pops off the canvas.
Step 3: The Impossible Flowers
-
Paint Tall Stems:
Using a liner brush and thinned dark green paint, draw long, flowing lines rising from the grass. Vary the heights, with the tallest stems reaching up into the sky area. -
Create Lollipop Flowers:
For the signature tall red flowers, mix Cadmium Red with a touch of White. Paint perfect circles atop the tallest stems. Apply the paint thickly or use a palette knife to give them a raised texture. -
Add Flower Details:
Once the red circles are dry, use a small brush to add darker red centers or radiating lines to make them look like pinwheels or lollipops. Add small yellow dots to the very centers. -
Paint Low-Lying Blooms:
Scrub in smaller patches of color near the path using Magenta and Yellow. Use a stippling motion (dabbing straight down) to create clusters of wildflowers without defining every petal. -
Detail the White Daisies:
With a small round brush and pure white paint, create starburst shapes for the daisies in the foreground. Add yellow or dark centers once the white is dry. -
Add the Dragonfly:
In the upper left sky, paint a simple dragonfly silhouette using brown or gold paint. You can use two long ovals for wings and a thin line for the body.
Fantasy Bloom Upgrade
Instead of red, try metallic gold or silver for the tall lollipop flowers to make the meadow look like an alien planet or a fairy garden.
Step 4: Final Touches
-
Highlight the Grass:
Mix Lemon Yellow with a tiny bit of Green. Add sharp, distinct blades of grass in the immediate foreground (bottom of the canvas) to create depth. overlap some of these blades over the bottom of the path. -
Define the Path Edges:
Use a mix of dark green and burnt sienna to deepen the shadows right where the grass creates a wall against the path. This makes the path look like it is cut into the landscape. -
Add Sparkle:
If you have a metallic pen or white paint pen, add tiny dots for pollen in the air or subtle outlines on the dragonfly wings for a magical finish.
Step back and enjoy the playful energy of your permanently blooming meadow
BRUSH GUIDE
The Right Brush for Every Stroke
From clean lines to bold texture — master brush choice, stroke control, and essential techniques.
Explore the Full Guide
Underwater Garden With Floating Lantern Fish
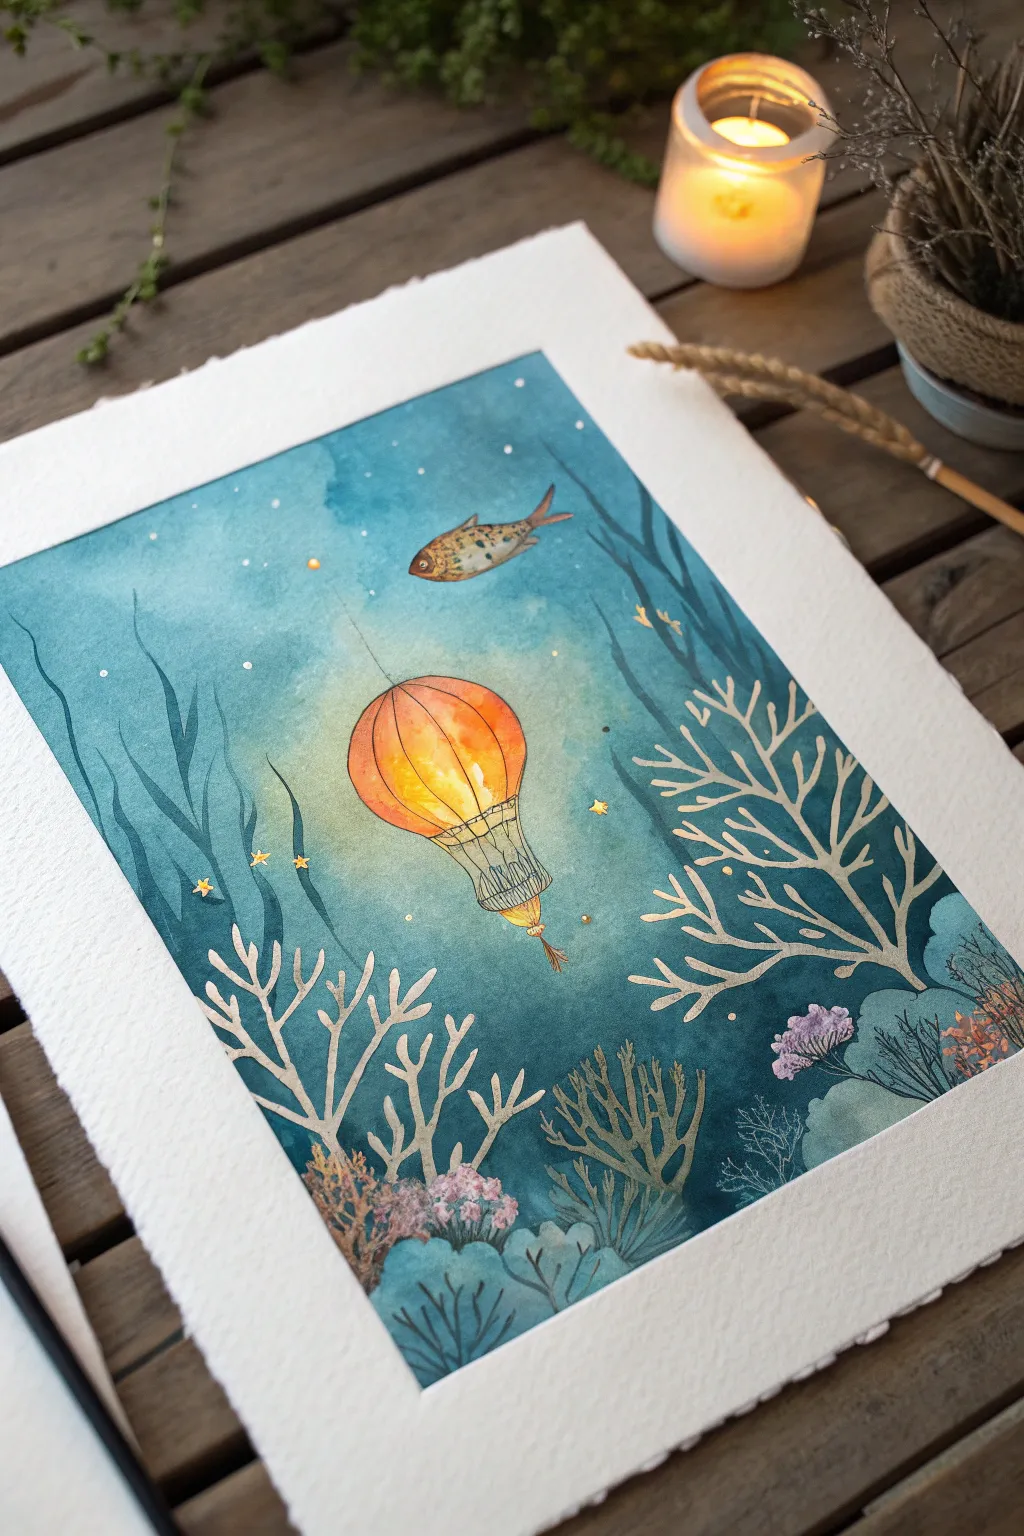
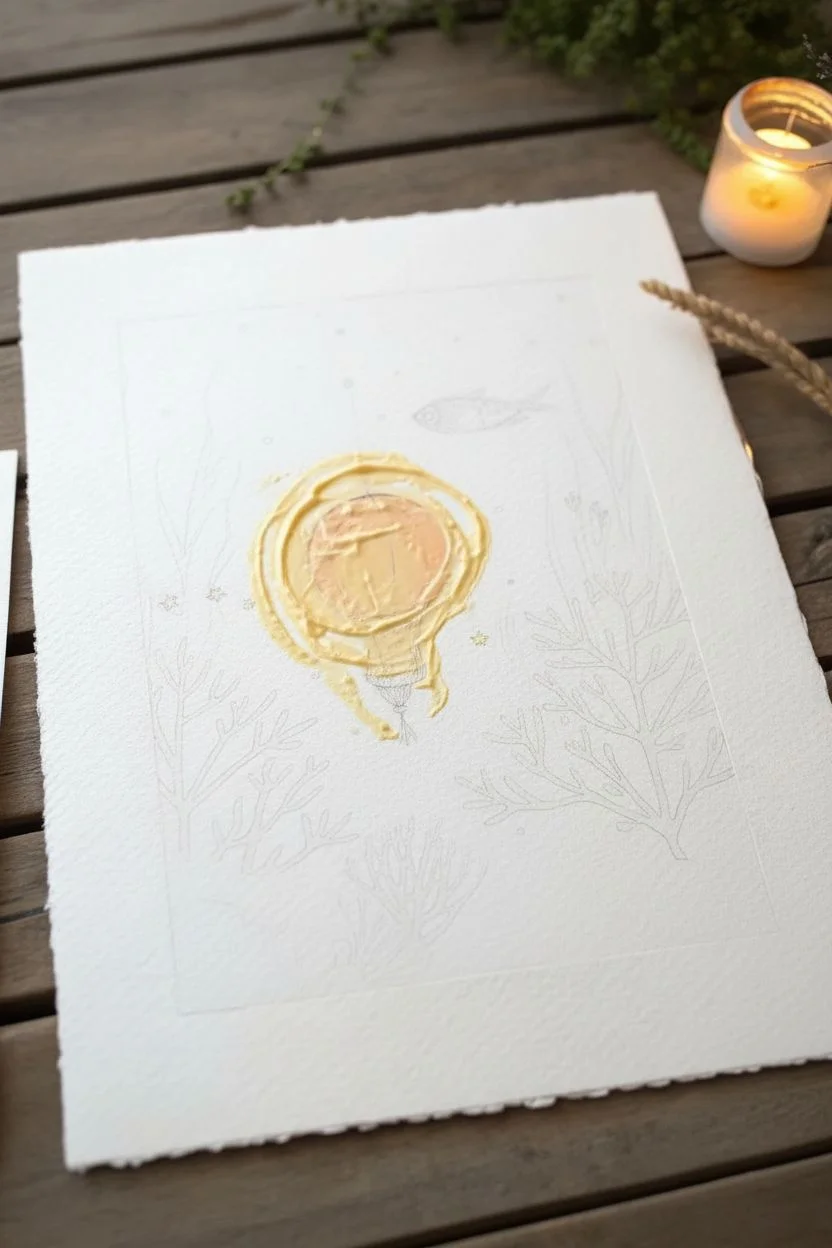
Dive into a surreal underwater world where soft lantern light meets the cool depths of the ocean. This watercolor piece combines gentle washes with precise details to create a magical scene featuring a glowing lantern, a solitary fish, and a coral garden.
Step-by-Step Guide
Materials
- Cold press watercolor paper (300 gsm)
- Watercolor paints (phthalo blue, indigo, teal, orange, yellow ochre, burnt sienna, sepia)
- White opacity marker or white gouache
- Gold metallic paint or gel pen
- Round watercolor brushes (size 8 for washes, size 2 for details)
- Masking fluid (optional)
- Pencil and eraser
- Clean water and palette
- Paper towels
Step 1: Sketching and Masking
-
Draft the composition:
Begin by lightly sketching the central lantern shape in the middle of your paper. Draw a simple sphere with a slightly pointed top and a basket detail hanging below. -
Add flowing elements:
Sketch the wavy, vertical coral shapes rising from the bottom corners. Keep lines organic and upward-reaching to mimic buoyancy. -
Include the wildlife:
Draw the small fish swimming near the top right of the lantern. Add the small star shapes scattered in the deep water. -
Protect the light:
If you are using masking fluid, apply it carefully over the lantern, the fish, and the star shapes. This preserves the bright white paper for later luminous colors. Let it dry completely.
Step 2: Creating the Deep Blue Background
-
Prepare the background gradient:
Mix a generous amount of teal and phthalo blue. You want a gradient that is lighter near the lantern and darker towards the edges. -
Wet-on-wet technique:
Wet the entire background area with clean water, avoiding the lantern if you didn’t use masking fluid. Drop in your teal paint, letting it bloom softly. -
Deepen the ocean:
While the paper is still damp, introduce indigo and darker blue hues at the very edges and bottom corners to create a vignette effect that focuses attention on the center. -
Lift out highlights:
With a damp, clean brush or a twisted paper towel, gently lift a little pigment from the area immediately surrounding the lantern to create a subtle glow halo. -
Let it dry:
Allow the background layer to dry completely. If you used masking fluid, gently rub it away with your finger once the paper is bone dry.
Fixing “Cauliflowers”
If water blossoms form in your background wash, don’t panic. Wait for it to dry, then gently scrub the edge with a damp stiff brush to soften the unintended texture
Step 3: Illuminating the Lantern
-
First glow layer:
Paint the body of the lantern with a dilute wash of yellow ochre, keeping the center slightly lighter to suggest volume. -
Adding warmth:
While the yellow is damp, drop concentrated orange paint into the edges and bottom curves of the lantern segments. Let the colors blend naturally. -
Detailing the structure:
Using your smallest brush and a mix of sepia and burnt sienna, paint the delicate vertical ribs of the lantern and the basket structure below. -
The basket weave:
Add tiny cross-hatching marks on the basket area and draw a little tassel hanging from the bottom using the detailed brush.
Level Up: Bioluminescence
Mix a tiny amount of iridescent medium into your teal paint for the background. The water will shimmer subtly when viewing the painting from different angles
Step 4: Painting the Foreground
-
Coral base layers:
Paint the coral shapes using a mixture of indigo and teal. Vary the opacity—some fronds should be darker and opaque, while others can be translucent. -
Adding texture to the reef:
For the bottom-most plants, dab in slightly different textures like small dots or ruffled edges to distinguish the mossy sea floor from the tall kelp. -
Defining the white branches:
For the skeletal white coral branches seen in the foreground, use white gouache or simply leave negative space if you planned ahead. I find using an opaque white pen over the dark background is easiest here. -
Painting the fish:
Fill in the fish with a soft brown wash. Add tiny dark spots and define the fins with sepia once the base layer is dry.
Step 5: Final Magical Touches
-
Stars and sparkles:
Paint the scattered stars with opaque yellow or gold paint. Add tiny white dots around the lantern to represent dust motes catching the light. -
Golden accents:
Use metallic gold paint to highlight the fish scales and add tiny glowing specks to the tips of the coral branches. -
Stringing it up:
Draw the very fine, vertical line extending upwards from the top of the lantern, suggesting it is suspended in the water.
Step back and enjoy the calming, fantastical deep-sea scene you have created on paper
Spiral Pumpkin Patch With Warm Inner Glow
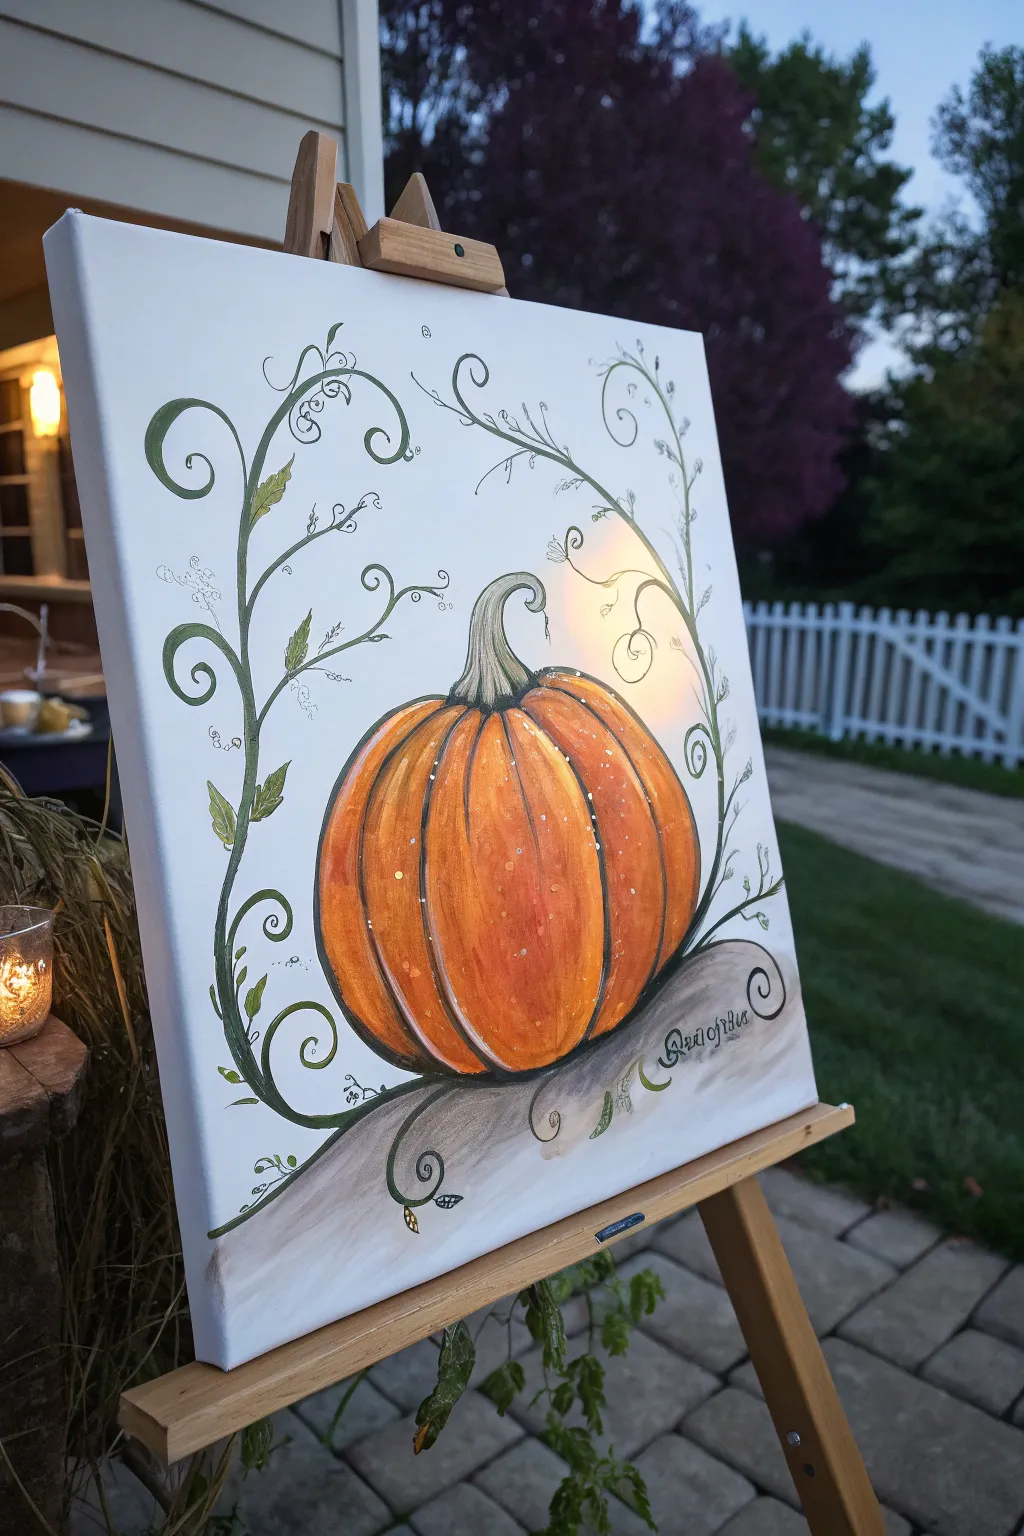
This charming canvas captures the essence of autumn with a stylized pumpkin surrounded by playful, swirling vines and delicate leaves. The painting balances realistic shading on the gourd with a decorative, illustrative style for the foliage, creating a piece that feels both grounded and magical.
Step-by-Step Guide
Materials
- Stretched canvas (rectangular format)
- Acrylic paints (Titanium White, Burnt Umber, Burnt Sienna, Cadmium Orange, Yellow Ochre, Sap Green, Dark Green)
- Round brushes (sizes 2, 6, and 10)
- Fine liner brush (size 0 or 00)
- Pencil for sketching
- Palette and water cup
- Paper towels
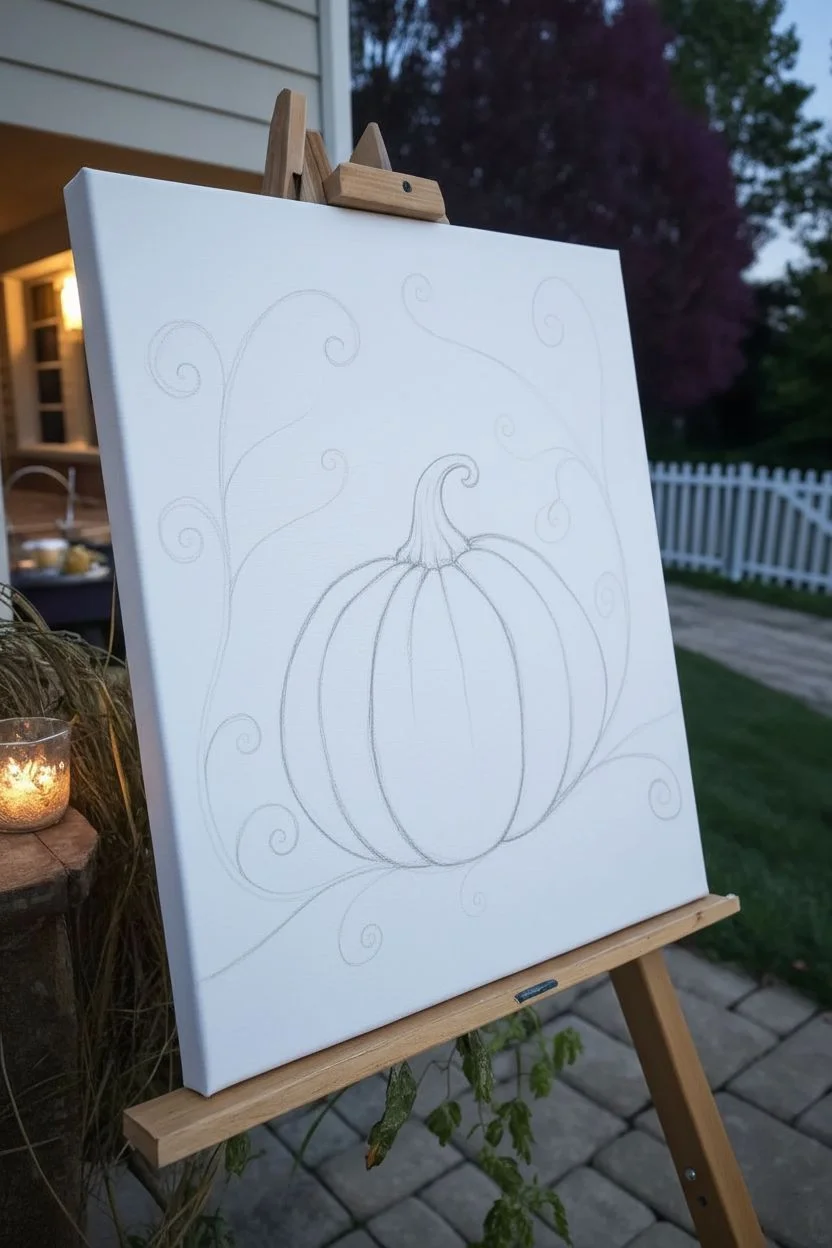
Step 1: Forming the Sketch
-
Establish the pumpkin shape:
Begin by lightly sketching the central pumpkin shape using a pencil. Draw a wide, slightly flattened oval in the lower center of the canvas. Add vertical curved lines to define the segments (ribs) of the pumpkin, making them wider in the middle and tapering at the top and bottom. -
Add the stem:
Sketch a thick, curved stem at the top of your oval. Let the tip curl elegantly to the left or right, giving it a bit of personality. -
Map out the vines:
Draw two main curling lines emerging from behind the pumpkin—one reaching up to the left, and one swooping up to the right. Add smaller spirals branching off, but keep the lines fluid and loose. -
Define the ground:
Sketch a gentle, sloping hill or mound underneath the pumpkin so it isn’t floating in space. Curve the ends of this ground line into little spirals for a whimsical touch.
Smooth Operator
To get those vine curls perfectly smooth, thin your green paint with a few drops of water until it has an ink-like consistency, allowing the liner brush to glide.
Step 2: Painting the Pumpkin
-
Base coat the pumpkin:
Mix Cadmium Orange with a touch of Yellow Ochre. Using a size 10 round brush, paint the entire body of the pumpkin. Don’t worry about shading yet; just get a solid, warm color down. -
Paint the stem:
While the orange dries, mix Sap Green with a little White and Burnt Umber to make a muted, earthy green. Paint the stem, following the twist of your sketch lines. -
Add deep shadows:
Mix Burnt Sienna into your orange to create a darker rust tone. Use a size 6 brush to paint along the vertical rib lines you sketched earlier. Blend these dark lines slightly outward into the orange segments to create curved volume. -
Deepen the crevices:
Take straight Burnt Umber or a very dark orange and re-trace the very deepest part of the crevices between the ribs with a smaller brush to separate the segments distinctly. -
Create highlights:
Mix White with a tiny bit of Yellow Ochre. Apply this highlight color to the center of each pumpkin rib (the ‘bulging’ part). I find it helps to use a dry brush technique here to softly blend the light into the orange. -
Add speckles:
Dip a toothbrush or stiff brush into watery white paint. Gently flick tiny droplets onto the pumpkin surface to give it texture and a magical, dewy look.
Make It Glow
Glaze a transparent layer of bright yellow or gold over the highlighted center of the pumpkin ribs after they dry to intensify the ‘inner glow’ effect.
Step 3: Vines and Details
-
Paint the main vines:
Load a size 2 brush with dark green paint (Sap Green with a touch of Burnt Umber). Trace your pencil lines for the main thick vines on the left and right, ensuring the spirals are smooth. -
Add the leaves:
Paint jagged pumpkin leaves attached to the vines. vary the colors—use fresh green for some, and mix in yellow or brown for others to show autumnal decay. -
Draw delicate tendrils:
Switch to your fine liner brush. Using a thinned, inky green paint, add very fine, looping tendrils branching off the main vines. These should look like elegant handwriting curls. -
Add wispy background details:
Using a very pale grey or watered-down black, add faint, ghost-like floral silhouettes or smaller vines in the background. These should be barely visible to add depth without distracting from the main subject. -
Paint the ground:
Fill in the ground area beneath the pumpkin with a wash of watered-down Burnt Umber and grey. Keep it translucent so it looks like a shadow or a watercolor wash rather than solid earth. -
Final highlights:
Add tiny touches of pure white to the tops of the vines and the highest point of the stem to make them look wet or shiny. -
Sign your work:
Use the fine liner brush and black or dark brown paint to add your signature, perhaps incorporating a small spiral flourishing off the last letter to match the theme.
Step back and admire your handiwork, noticing how the spiraling vines draw the eye right to your vibrant autumn centerpiece

PENCIL GUIDE
Understanding Pencil Grades from H to B
From first sketch to finished drawing — learn pencil grades, line control, and shading techniques.
Explore the Full Guide
Stairway Path Leading to a Pocket Universe
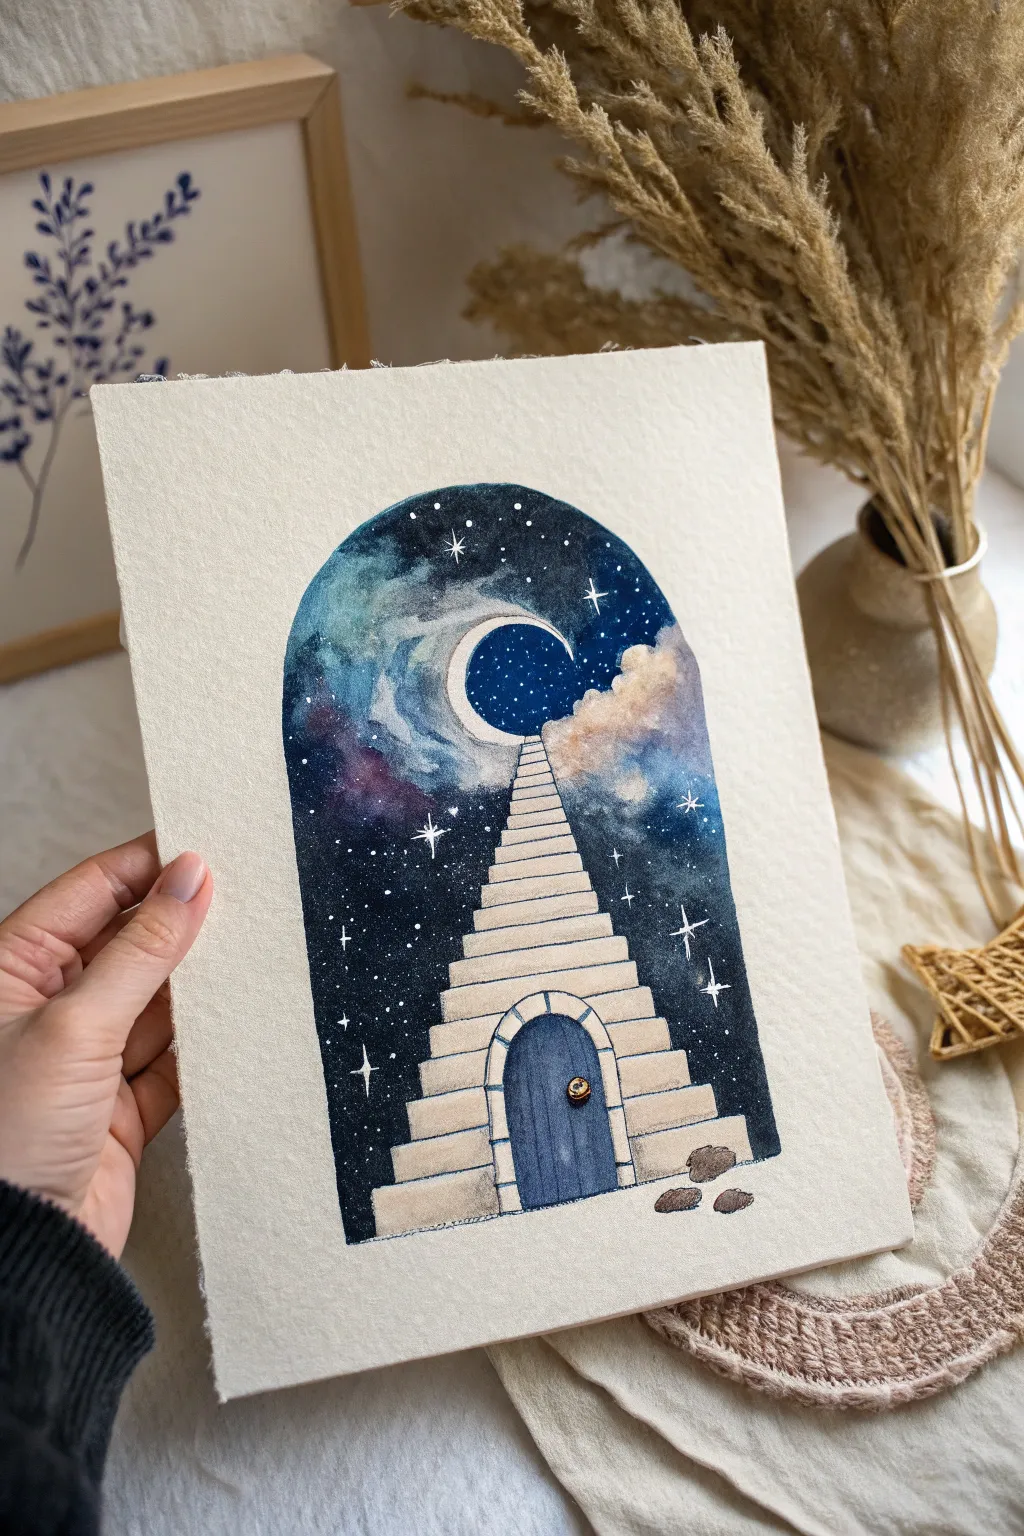
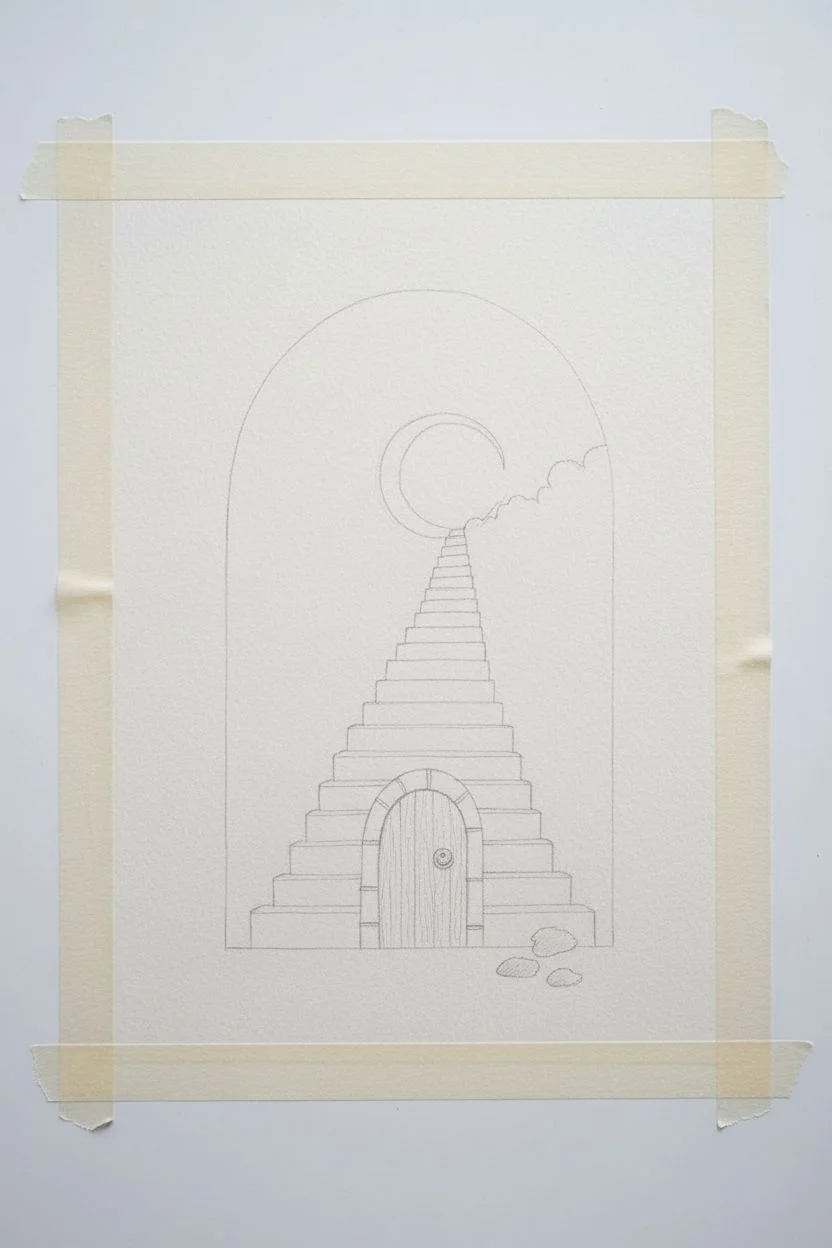
Capture the magic of a secret universe with this enchanting watercolor painting, featuring a stone staircase climbing toward a luminous crescent moon. The arch-shaped composition creates a portal-like effect, drawing the viewer into a deep, starry night sky.
Step-by-Step
Materials
- Cold press watercolor paper (300 gsm)
- Masking tape
- Pencil (HB or H)
- Ruler
- Watercolor paints (Indigo, Payne’s Grey, Prussian Blue, Turquoise, Violet, Raw Umber, Burnt Sienna)
- White gouache or white gel pen
- Round brushes (sizes 2, 6, and 10)
- Fine liner brush or rigger brush
- Jars of clean water
- Paper towels
Step 1: Drawing the Portal
-
Draft the arch shape:
Start by finding the center of your watercolor paper. Use a ruler to draw a vertical rectangle, but instead of a top line, freehand a gentle semi-circle curve to create the classic arch window shape. Keep your pencil lines very light so they don’t show through the paint later. -
Sketch the staircase:
Draw the staircase starting wide at the bottom and narrowing significantly as it ascends, which creates a sense of steep perspective. The top of the stairs should curve slightly to the left, disappearing near the center of the arch. -
Add the doorway and moon:
At the base of the stairs, sketch a small, rounded wooden door with a stone frame. Near the top of the stairs, draw a crisp crescent moon shape, slightly overlapping the path. -
Detail the stones:
Lightly draw horizontal lines across the stair path to mark individual steps. Add a few small rocks on the ground to the right of the stairs for balance.
Uneven Edges?
If painting a perfect arch freehand is tough, mask the outside area with drawing gum or masking fluid before you start. Peel it off at the end for a crisp edge.
Step 2: Painting the Galaxy Sky
-
Wet-on-wet background:
Carefully wet the sky area with clean water, avoiding the moon and the staircase. You want a sheen on the paper, but no puddles. -
Drop in dark blues:
While the paper is wet, drop in concentrated Indigo and distinct patches of Payne’s Grey around the edges of the arch. This frames the scene in darkness. -
Create the nebula clouds:
Rinse your brush and pick up some Prussian Blue and Turquoise. Let these colors bleed into the darker edges but keep them lighter near the moon and the cloud formations on the right. -
Add hints of purple:
While the sky is still damp, dab small amounts of Violet into the transition zones between the dark blue and the lighter areas to add cosmic depth. -
Lift out clouds:
Using a clean, damp brush or a thirsty tissue, gently lift some pigment on the right side of the staircase to create soft, fluffy cloud textures. -
Dry the sky:
Let this layer dry completely. If the paper feels cold to the touch, it’s still wet.
Step 3: Building the Stairway
-
Base wash for the path:
Mix a very watery wash of Raw Umber and Burnt Sienna. Paint the entire staircase and the stones at the bottom, keeping it quite pale. -
Shadowing the steps:
Once the base is dry, mix a slightly darker, cooler beige. Paint thin horizontal strips just under the edge of each step to give them dimension and height. -
Painting the arched door:
Fill in the small door at the bottom with a deep Indigo or Navy Blue. Leave a tiny frame around it unpainted or paint it pale grey to represent the stone casing. -
Adding texture:
Use a fine brush to add tiny dots or cracks to the stone steps using a grey-brown mix, giving the structure an ancient, weathered feel.
Pro Tip: Glowing Moon
For a true glow, verify the paper is 100% dry, then dry-brush a tiny amount of white gouache around the crescent moon to create a hazy atmospheric halo.
Step 4: Magical Details
-
Stars and sparkles:
Load a small brush or toothbrush with white gouache diluted slightly with water. Cover the staircase with a piece of paper to protect it, then tap the brush handle to splatter tiny stars into the dark sky. -
Hand-painted stars:
Use a white gel pen or a fine liner brush with opaque white gouache to draw larger four-pointed stars and specific constellations manually. -
Highlighting the moon:
Paint the crescent moon with pure white gouache. If you want a softer glow, gently blend a tiny bit of the white slightly outward into the surrounding blue. -
Final touches:
Add a tiny gold or bronze dot for the doorknob on the blue door. Finally, define the edges of the large arch with a very steady hand and dark blue paint if the edges look ragged.
Now you have your own pocket universe leading to wherever your imagination desires


Have a question or want to share your own experience? I'd love to hear from you in the comments below!