Transforming a plain white surface into a canvas is one of the most satisfying ways to spark creativity during the day. Whether you are in a classroom or an office, these sketches prove that dry-erase markers can produce surprisingly artistic results.
Simple Kawaii Characters
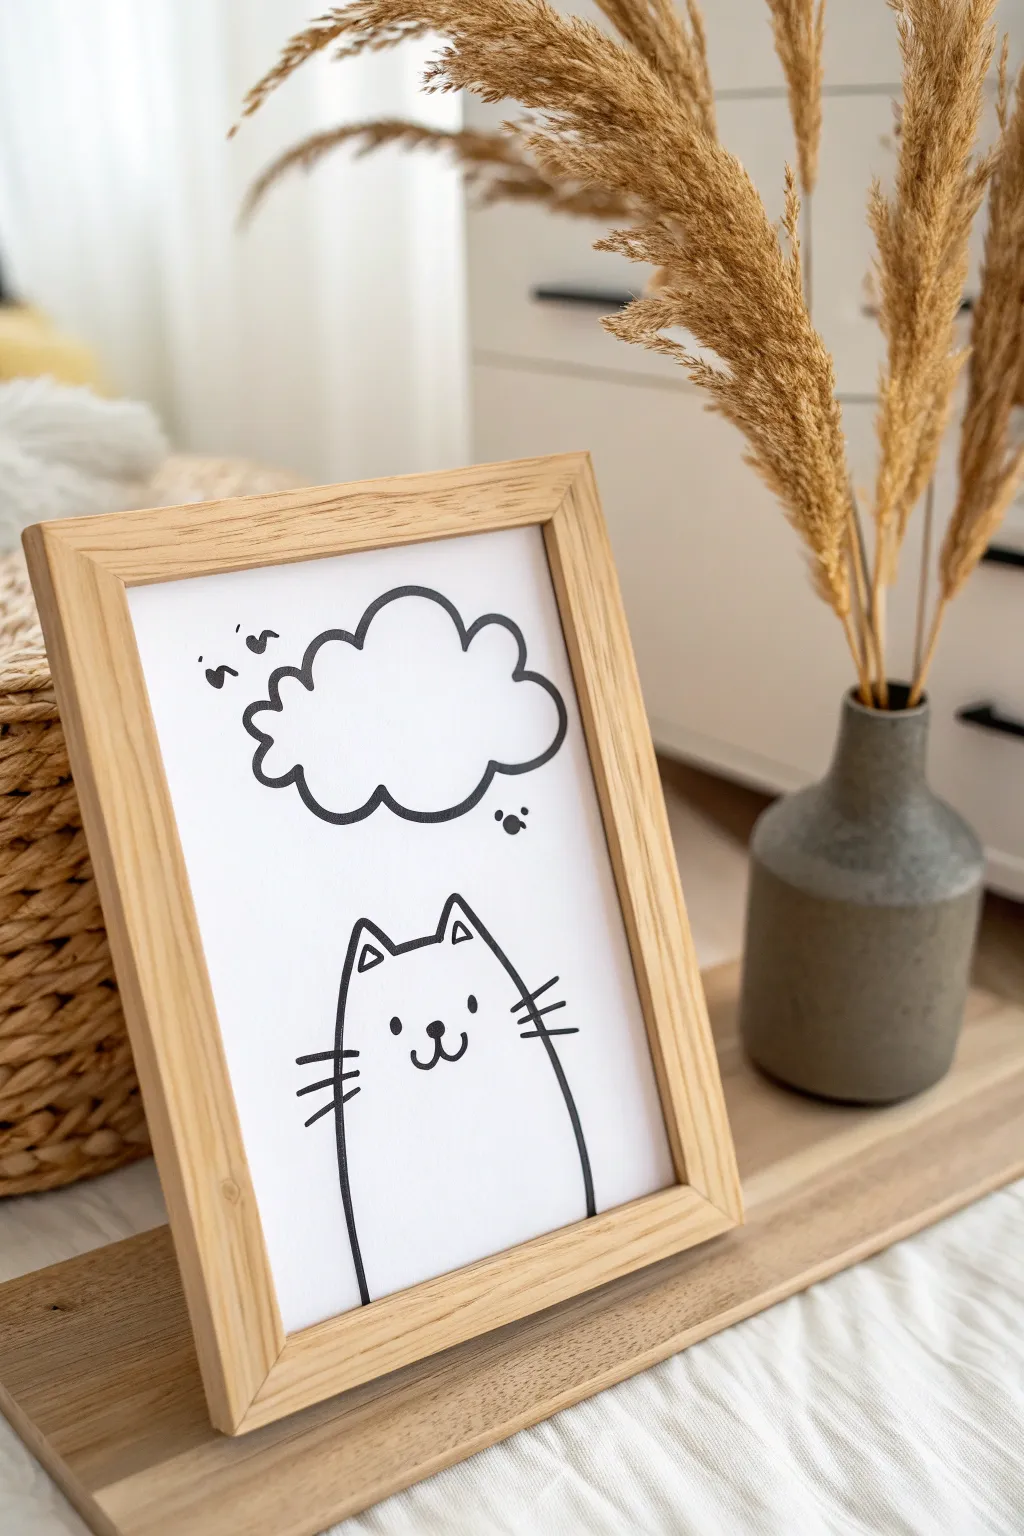
Capture the essence of a lazy afternoon with this clean, kawaii-style line drawing. This project uses bold, simple strokes to create a charming piece of art that looks professionally printed when displayed in a natural wood frame.
Step-by-Step Guide
Materials
- Heavyweight white cardstock (A4 or letter size)
- Black felt-tip marker (medium bullet nib)
- HB Pencil
- High-quality eraser
- Ruler (optional)
- Light wood photo frame
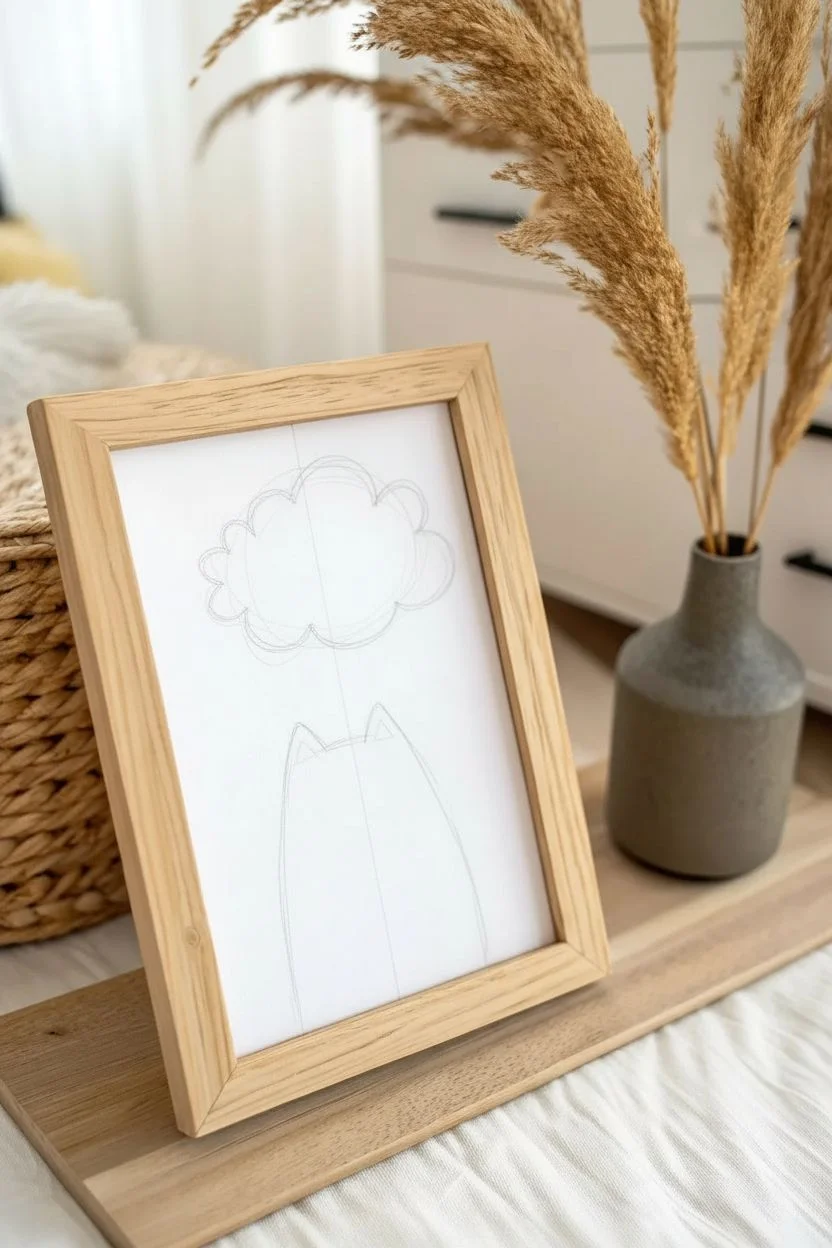
Step 1: Sketching the Layout
-
Prepare the surface:
Place your cardstock on a flat, clean table. Ensure the texture is smooth so your marker lines won’t bleed or skip. -
Mark the center:
Using your pencil lightly, draw a faint vertical line down the middle of the paper to help align the cat and the thought bubble. -
Outline the head:
In the lower third of the page, sketch a soft, rounded trapezoid shape for the cat’s head. The top line should be slightly curved, not perfectly flat. -
Add the ears:
Draw two distinct triangles on top of the head. Make them fairly large and pointed to capture that alert feline look. -
Draft the body:
From the widest part of the head, draw two long, vertical lines extending downward off the page to suggest the body. -
Sketch the thought bubble:
In the upper half of the paper, sketch a large, puffy cloud shape. Don’t worry about perfect symmetry here; organic lumps look better.
Pro Tip: Clean Curves
When drawing the bumpy cloud shape, rotate the paper as you work. Pulling the pen toward your body usually results in smoother, more controlled curves than pushing it away.
Step 2: Inking the Character
-
Start carefully:
Switch to your black felt-tip marker. I like to test the flow on a scrap piece of paper first to ensure the black is solid. -
Ink the ears:
Trace the outer triangles of the ears first. Inside each ear, draw a smaller, floating triangle for detail. -
Connect the head:
Draw the line connecting the ears across the top of the head, then trace the side contours of the face. -
Draw the body lines:
Trace the vertical body lines you sketched earlier. Keep your pressure consistent so the line width doesn’t fluctuate. -
Create the face:
Place two small, solid black dots for eyes. Position them widely apart to enhance the cute, kawaii aesthetic. -
Add the mouth and nose:
Draw a small anchor shape or a rounded ‘w’ centered between the eyes for the mouth. It should be small and dainty. -
Whiskers technique:
Add three whiskers on each cheek. Draw these with quick, confident flicks so the lines taper naturally at the ends.
Step 3: Background & Final Touches
-
Trace the cloud:
Ink the thought bubble outline using connected semicircles. Vary the size of the bumps slightly for a fluffy appearance. -
Connect the thoughts:
Draw two small swooshes or comma shapes to the left of the cloud to suggest movement or floating. -
Add the paw print:
Below the right side of the cloud, add a tiny cluster of three dots or a simplified paw print icon for balance. -
Dry properly:
Wait at least five minutes for the ink to dry completely. This prevents smearing during the next step. -
Erase guidelines:
Gently run your eraser over the whole drawing to remove the pencil sketch and the center guide line. -
Frame the art:
Place your finished drawing into the light wood frame to complete the modern, minimalist look.
Level Up: Interactive Art
Instead of drawing on paper, draw this on the glass of the frame using a dry-erase marker. This turns the thought bubble into a reusable message board for daily reminders!
Hang your new artwork in a cozy reading nook or set it on a desk for a daily dose of cuteness.


Aesthetic To-Do Lists


Transform a boring whiteboard task list into a piece of functional art with this warm, botanical design. This project combines clean hand-lettering with autumn-inspired foliage to make your daily goals feel a little more inviting.
Detailed Instructions
Materials
- Fine-tip dry erase marker (Black)
- Chisel-tip dry erase marker (Burnt Orange or Terracotta)
- Chisel-tip dry erase marker (Forest Green)
- Microfiber cloth
- Cotton swabs (for precise erasing)
Step 1: Setting the Structure
-
Center layout:
Start by identifying the center of your whiteboard space to ensure the list is balanced. -
Title lettering:
Using the black marker, write ‘To Do!’ in a tall, loose script at the top center. Keep the letters airy and slightly separated. -
Faux calligraphy:
Go back over your title and thicken only the downstrokes (the lines where your pen moved downward) to create a calligraphy effect without special tools. -
Checkbox column:
Draw a vertical column of seven small squares below the title, aligned to the left of the center. Round the corners slightly for a softer look. -
Task lines:
Draw dashed horizontal lines extending from each checkbox to the right. I find that making the dashes short and evenly spaced keeps the look delicate.
Smudge Prevention
Work from the top down or left to right (if you are right-handed) to avoid dragging your hand through the fresh ink. Let color fills dry for 10 seconds before outlining.
Step 2: The Left Vine
-
Stem curve:
Draw a long, thin black line starting near the bottom left corner, curving gently inward toward the list and hooking slightly outward at the top. -
Base leaves:
At the bottom of the stem, draw three leaf shapes and fill them in completely with the burnt orange marker. -
Outline leaves:
Moving up the stem, draw two leaves using only the black fine-tip marker. Draw a line down the center of each, but do not fill them in. -
Green accents:
Above the outline leaves, add a pair of smaller leaves filled in with forest green or black if you lack green. -
Berry details:
At the very top of the left vine, near the title, draw delicate branching lines and add small orange dots to resemble berries.
Level Up: Gradient Leaves
While the orange ink is still wet on the board, quickly swipe a bit of red or brown into the base of the leaf. The solvents will blend on the surface creating a cool ombre effect.
Step 3: The Right Vine
-
Mirror stem:
Draw a mirroring black stem on the right side, following the shape of the left side but curving it to frame the end of the dashed lines. -
Base foliage:
Fill in large, teardrop-shaped leaves at the bottom right using the burnt orange marker, pointing them horizontally. -
Mid-section leaves:
In the middle section, alternate the direction of the leaves. Use the green marker here for solid, filled-in leaves to add contrast. -
Upper outlines:
Near the top right, switch back to the black fine-tip marker to draw open, outlined leaves similar to the ones on the left. -
Top sprigs:
Finish the right vine curve with another cluster of fine stems and orange berry dots to balance the composition.
Step 4: Finishing Touches
-
Active checks:
Use the orange marker to add bold checkmarks to two or three boxes to make the board look ‘lived in’ and functional. -
Clean up:
Use a cotton swab to erase any overdrawn lines where the coloring went outside the leaf shapes or where your hand might have smudged the whiteboard.
Now you have a beautifully organized space ready to tackle your daily tasks with style.


Morning Coffee Doodles
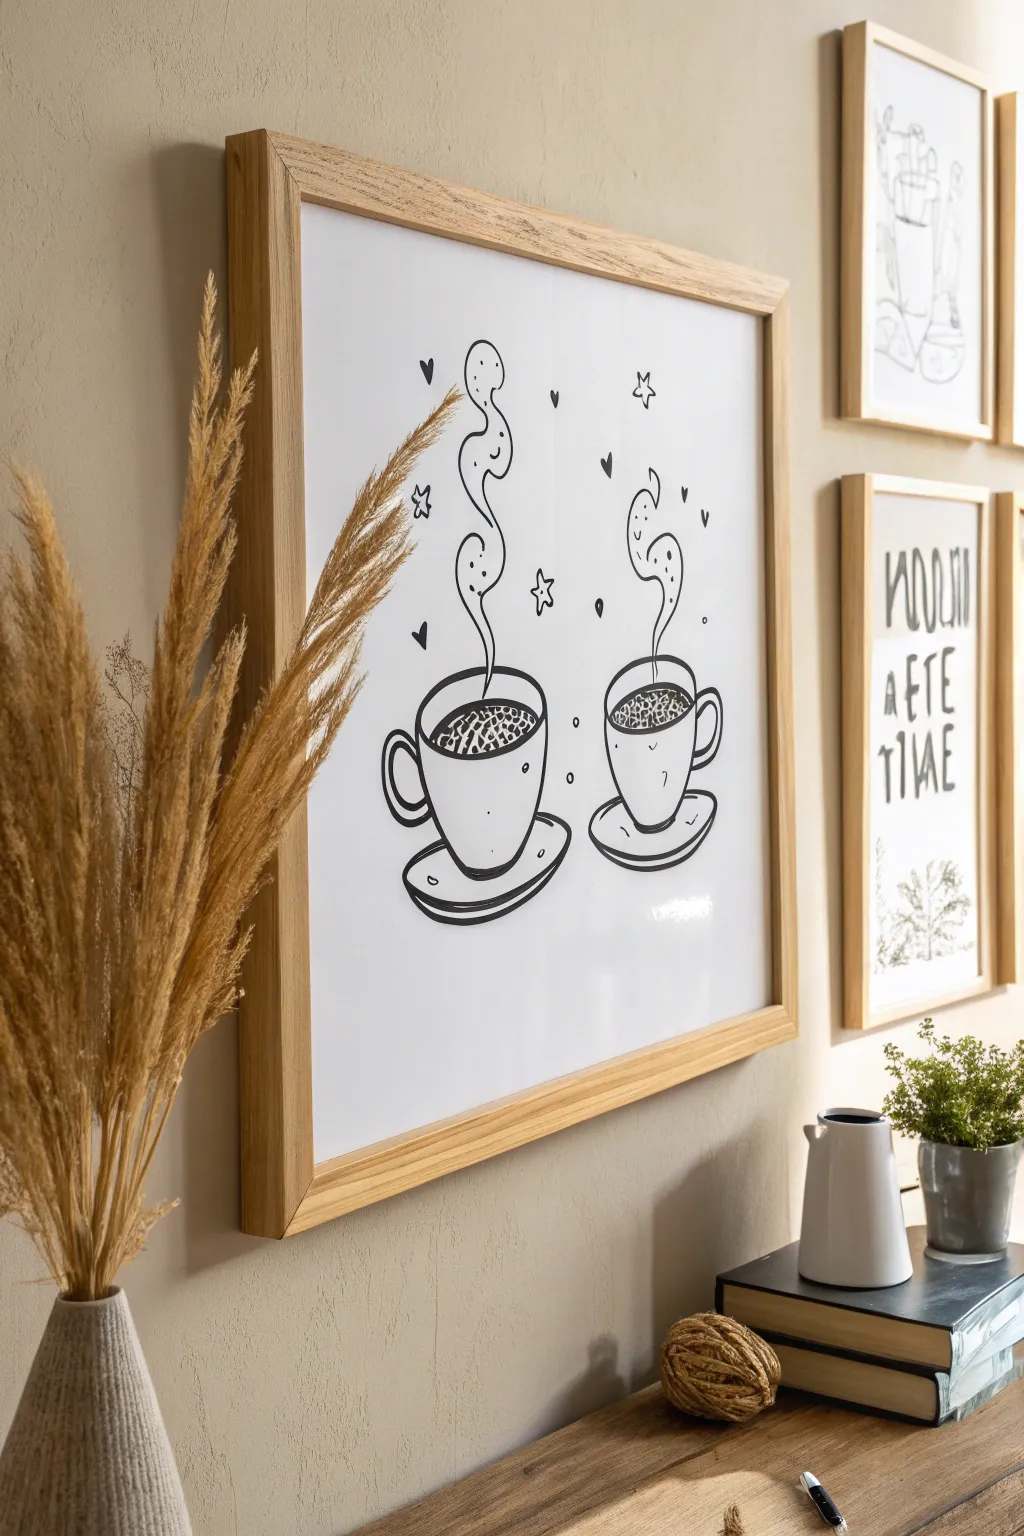
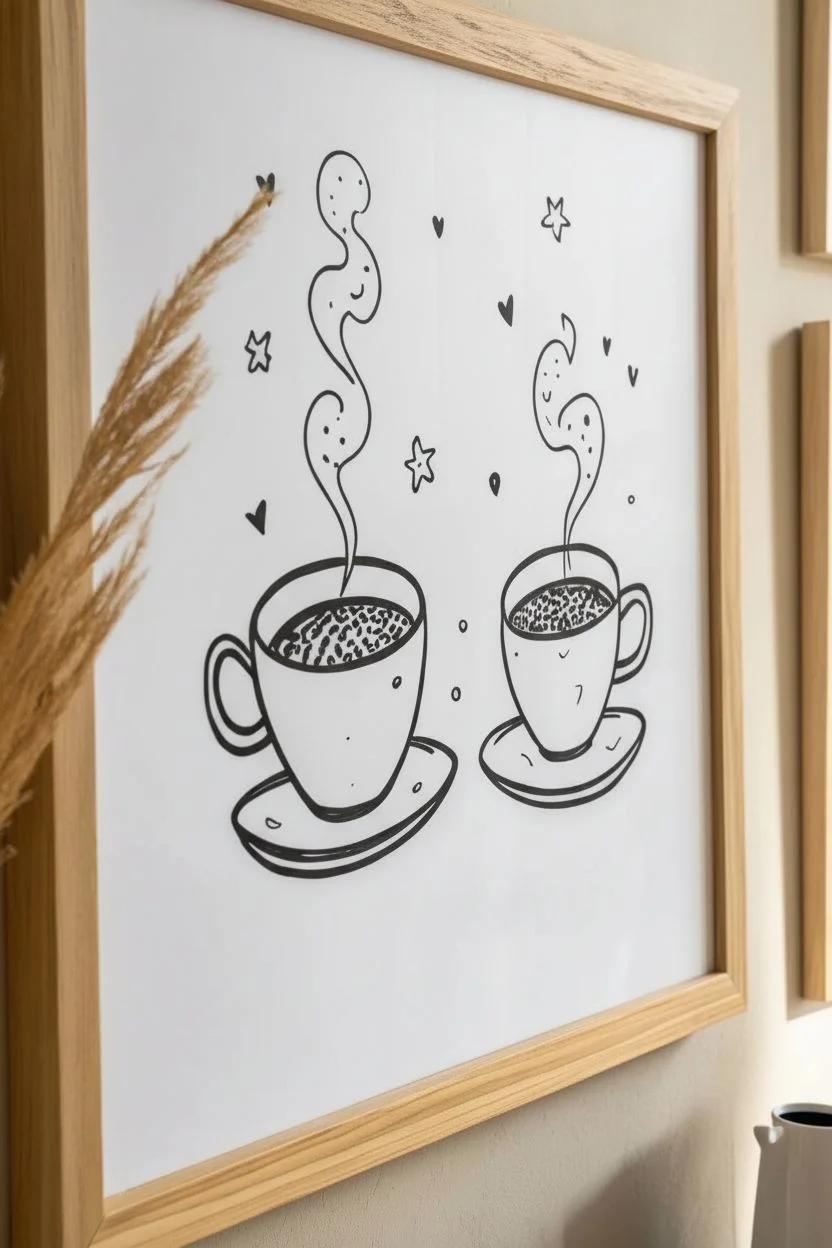
Capture the warmth of a morning brew with this playful, hand-drawn illustration. The bold black lines against a clean white background create a modern, minimalist look perfect for kitchen decor or a cheerful message board art.
Step-by-Step Tutorial
Materials
- White art paper, cardstock, or whiteboard
- Thick black marker (bullet or chisel tip)
- Fine tip black marker
- Pencil and eraser (if working on paper)
- Ruler (optional)
Step 1: Brewing the Cups
-
Positioning:
Visualize two focal points in the lower center of your workspace, leaving plenty of vertical space above for the steam trails. -
Left Cup Base:
Draw the first mug on the left by creating a wide, deep U-shape for the bowl of the cup. -
Right Cup Base:
Draw the second mug on the right, perhaps making it slightly smaller or narrower to add organic variety. -
Rim Ovals:
Top each U-shape with a flattened oval to close the form and create the rim of the mug. -
Coffee Level:
Inside each rim oval, draw a slightly smaller curve parallel to the bottom edge to indicate the liquid level. -
Coffee Texture:
Fill the inner liquid area with tight, scribbly loops or dense stippling to mimic foam or dark coffee texture. -
Left Handle:
Add a C-shaped handle to the left side of the first mug, drawing a double line to give the handle thickness. -
Right Handle:
Draw a mirrored C-shaped handle on the right side of the second mug.
Step 2: Saucers and Steam
-
Saucer Bottoms:
Underneath the left mug, draw a wide, shallow curve that extends slightly past the width of the cup. -
Closing the Plates:
Connect the ends of the saucer curve back to the mug’s base with short, soft lines. Repeat for the right cup. -
Rising Steam:
Starting from the center of the left cup, draw a vertical wavy line that rises and balloons out into a loop at the top. -
Steam Shape:
Close the steam shape by drawing a second wavy line coming down, creating a form that looks like a whimsical ghost. -
Second Steam:
Repeat the steam process for the right cup, varying the curves slightly so it doesn’t look like a carbon copy. -
Hidden Faces:
I like to add two dots and a tiny curve inside the top loop of each steam cloud to create subtle, hidden smiley faces.
Wobbly Lines?
Don’t stress if your circles aren’t perfect! The charm of this style is the hand-drawn feel. Simply go over wobbly areas a second time to thicken the line and hide any shakes.
Step 3: Atmosphere & Polish
-
Solid Hearts:
Draw small, solid black hearts floating near the steam trails to fill the negative space. -
Outline Hearts:
Intersperse a few open, outlined hearts among the solid ones for visual balance. -
Starry Accents:
Doodle simple five-pointed stars near the top; keep the lines loose and unjoined for a sketchy aesthetic. -
Sprinkled Dots:
Add tiny black dots or small circles in empty areas to unify the composition. -
Final Bold Lines:
Retrace the outer edges of the mugs and saucers with your thickest marker to make them pop against the background.
Add Some Shine
If this is permanently framed art, trace over the stars and steam outlines with a metallic gold or copper paint pen to give the piece a chic, cafe-style glow.
Hang your finished artwork near your coffee station to start every morning with a smile.


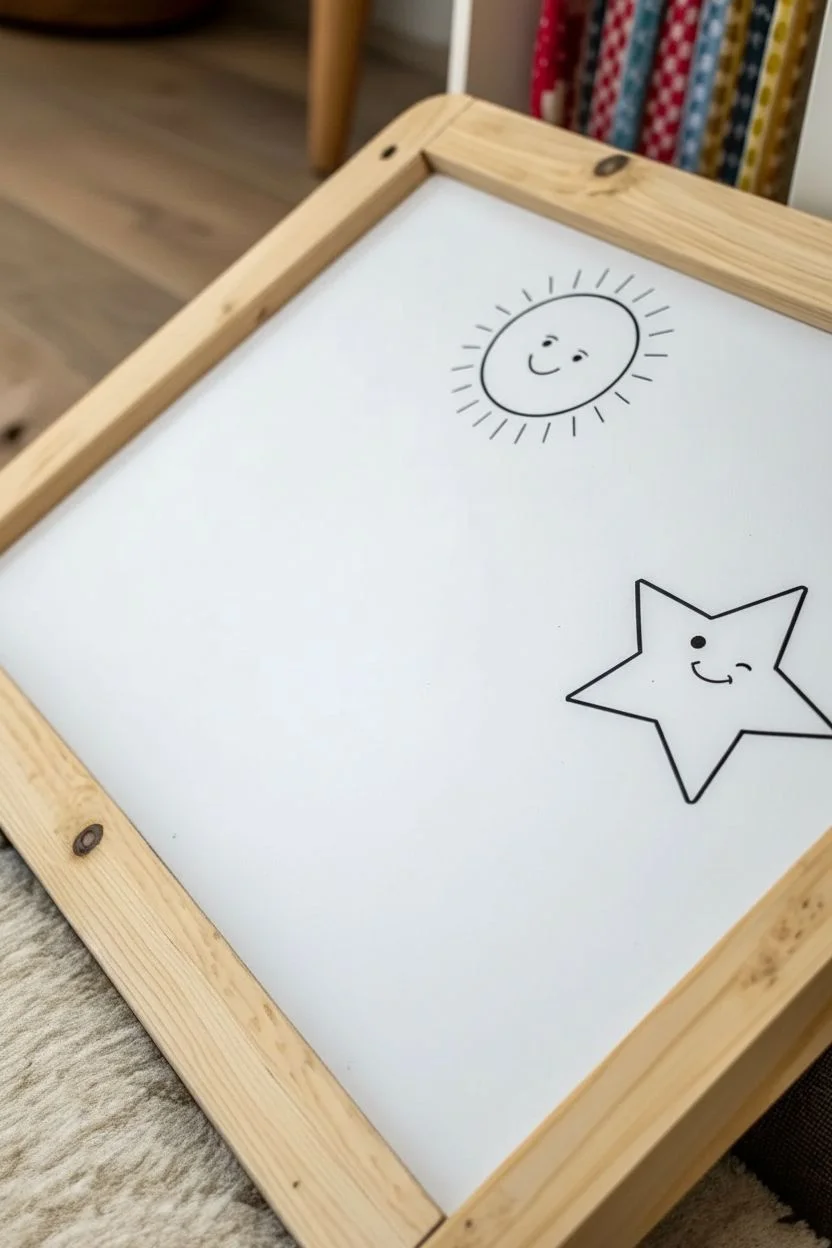
Whimsical Weather Icons
Brighten up your workspace or kitchen with this charming set of hand-drawn weather icons. Using simple lines and minimalist shapes, you will create a playful weather station display perfect for teaching kids or just decorating a plain board.
How-To Guide
Materials
- Small square whiteboard (framed)
- Black dry-erase marker (fine bullet tip)
- Microfiber cleaning cloth
- Cotton swabs (for fine corrections)
Step 1: Setting the Sky
-
Clean the canvas:
Wipe your whiteboard thoroughly with a microfiber cloth to ensure no grease or old marker dust remains. A clean surface ensures crisp black lines. -
Visualize the grid:
Mentally divide your square board into four equal quadrants. This helps in balancing the positioning of the drawings and the text labels.
Smudge Prevention
To avoid smearing your work, draw starting from the top-left and work your way down to the bottom-right (if right-handed). Lefties should work right-to-left.
Step 2: Sunny Days
-
Label the sun:
In the top-left quadrant, write the word “Sun” using a relaxed, sans-serif handwriting style. Keep the letters slightly rounded for a friendly look. -
Draw the sun outline:
To the right of the text, draw a simple circle. It doesn’t need to be geometrically perfect; a hand-drawn wobble adds character. -
Add a smile:
Place two small dots in the upper half of the circle for eyes, and draw a wide, shallow U-shape for the smile. -
Create the rays:
Draw short, straight lines radiating outward from the circle. Leave a small gap between the circle’s edge and the start of each ray.
Step 3: Cloudy Forecast
-
Label the cloud:
In the top-right quadrant, write “Rain Cloud” slightly higher up to leave room for the drawing below it. -
Outline the cloud:
Draw a fluffy cloud shape using connected C-curves. Create a continuous loop of bumps until the shape is closed. -
Add texture:
Gently tap the tip of your marker against the board to create random dots inside the cloud. I like to concentrate a few more dots near the bottom edge for shading.
Pro Tip: Precision Erasing
If your lines overlap or a curve goes wonky, don’t erase the whole thing. Use a dry cotton swab to erase tiny mistakes without ruining the rest of the drawing.
Step 4: Stormy Elements
-
Label the lightning:
Write “Lightning Bolt” across the middle section of the board. This text acts as a divider between the top and bottom rows. -
Start the umbrella:
In the bottom-left area, draw a large distinct arch or semicircle to form the top dome of the umbrella. -
Scallop the edge:
Connect the two ends of the arch with a line made of three small connected curves (scallops) facing downward. -
Add the ribs:
Draw curved lines extending from the very top center of the dome down to the points where the bottom scallops meet. -
Draw the handle:
Extend a line straight down from the center bottom and hook it to the left to create the J-shaped handle. -
Let it rain:
Add several solid dots falling beneath the umbrella to simulate raindrops. -
Strike the lightning:
In the bottom-right quadrant, draw the lightning bolt. Start with a diagonal line down, jag sharply left, and then draw a long sharp point downward. -
Close the bolt:
From the bottom point, draw a line back up, jag right, and connect to the start to close the shape.
Hang your new weather board in a spot where you can admire your delightful handiwork.

PENCIL GUIDE
Understanding Pencil Grades from H to B
From first sketch to finished drawing — learn pencil grades, line control, and shading techniques.
Explore the Full Guide
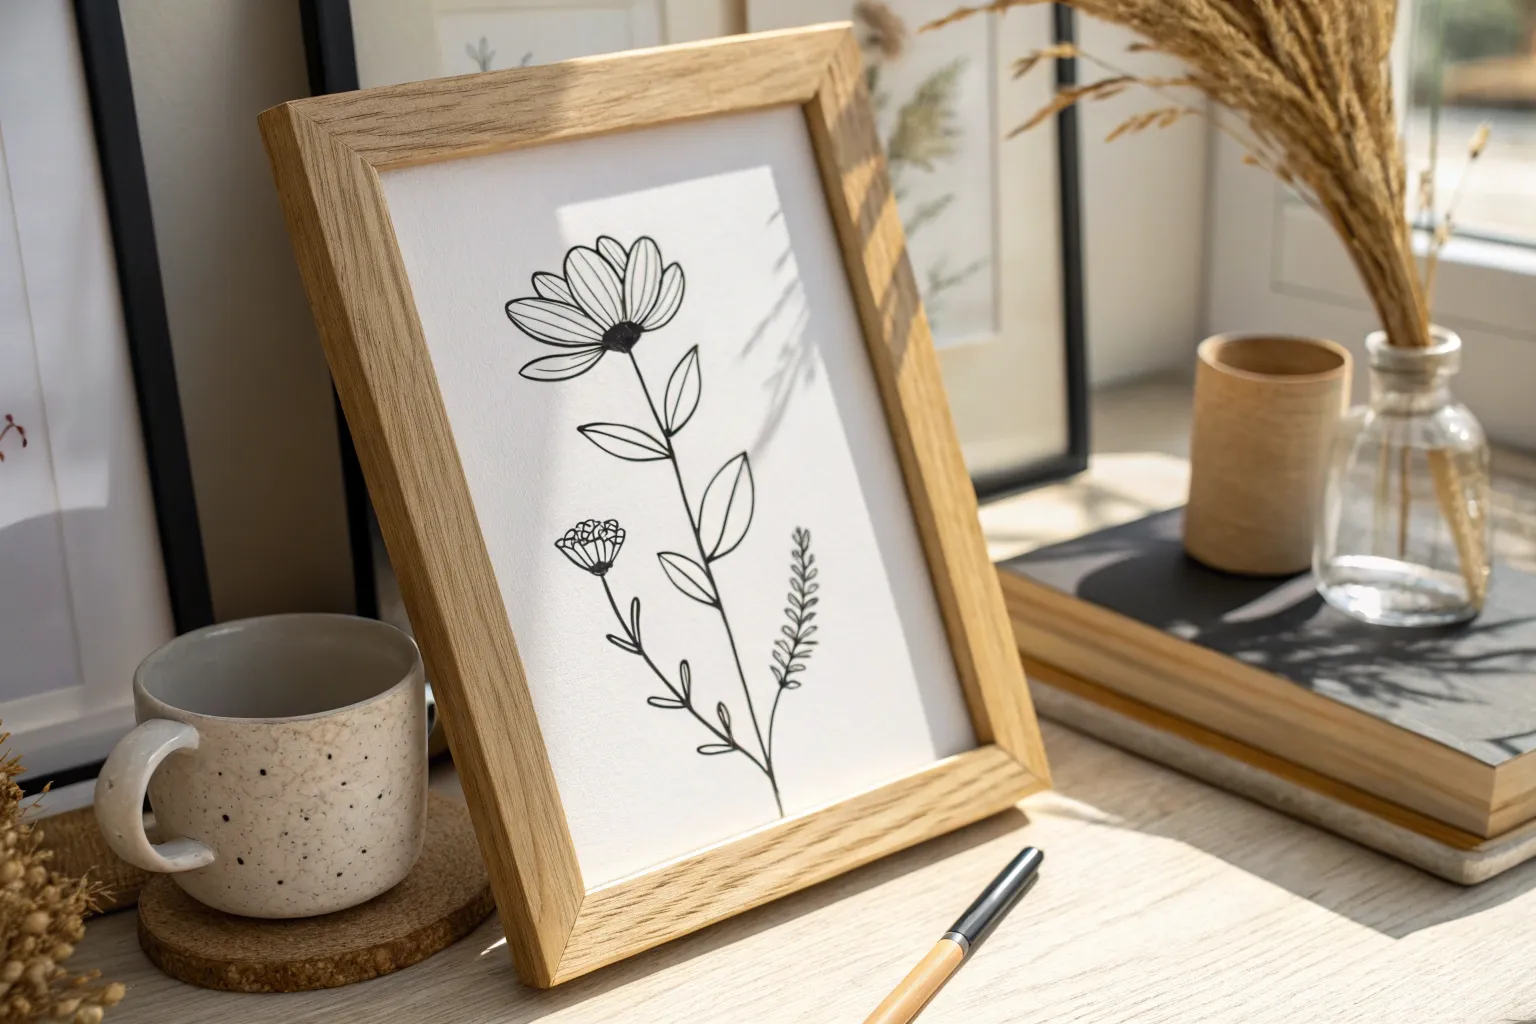
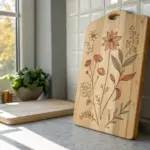
Floral Board Borders
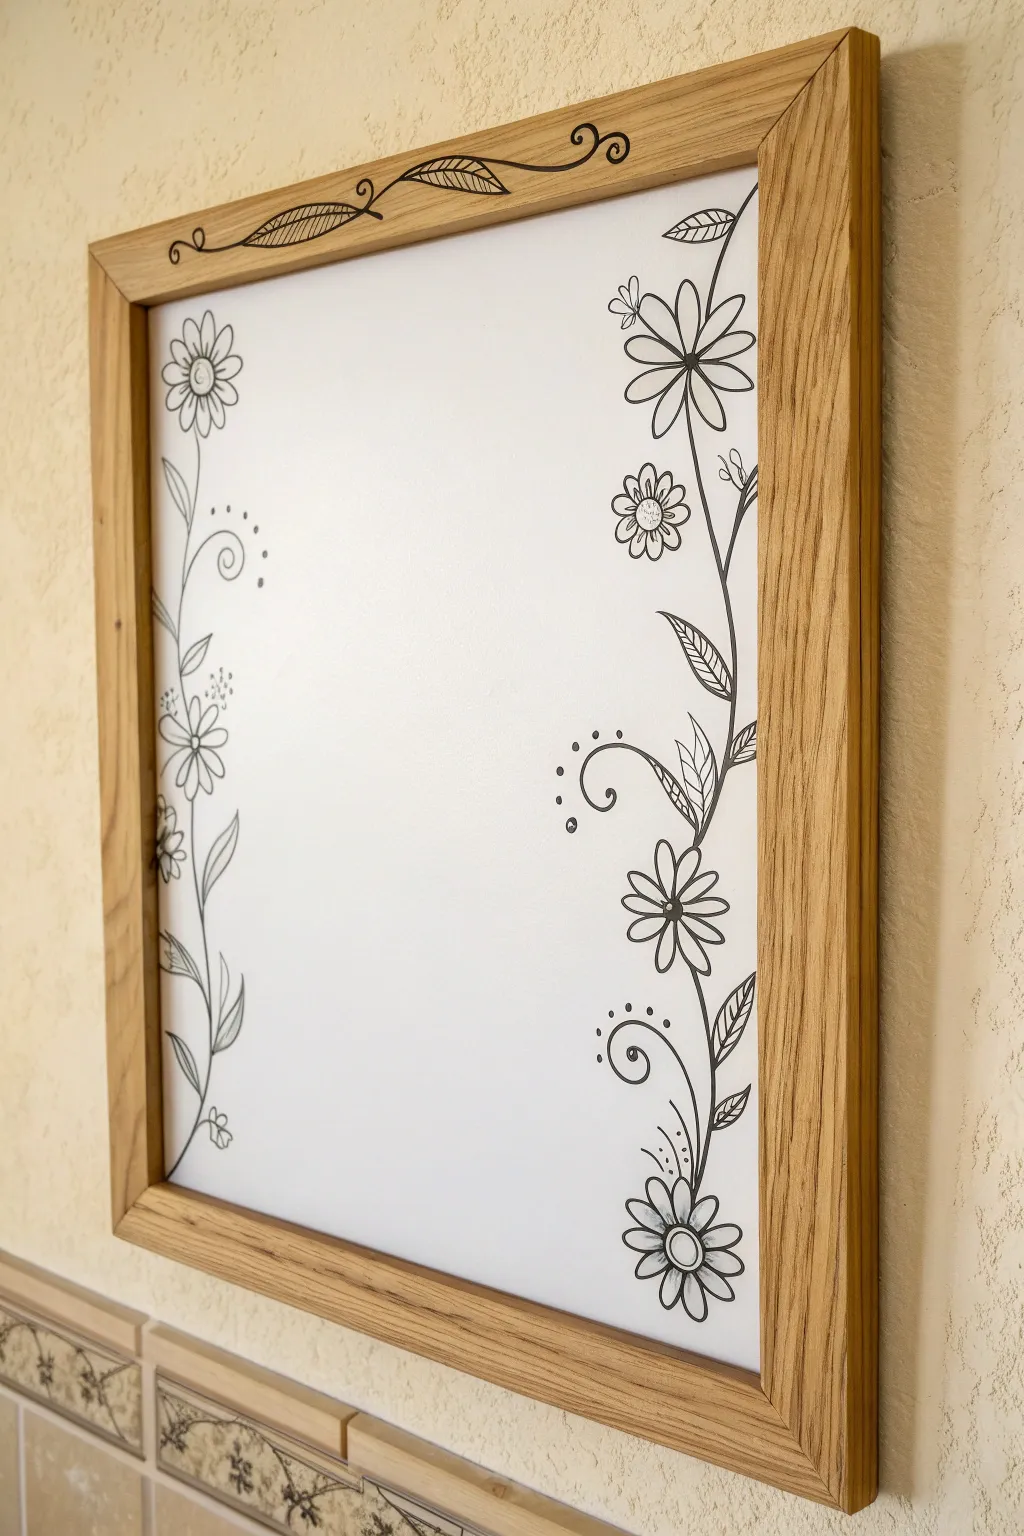
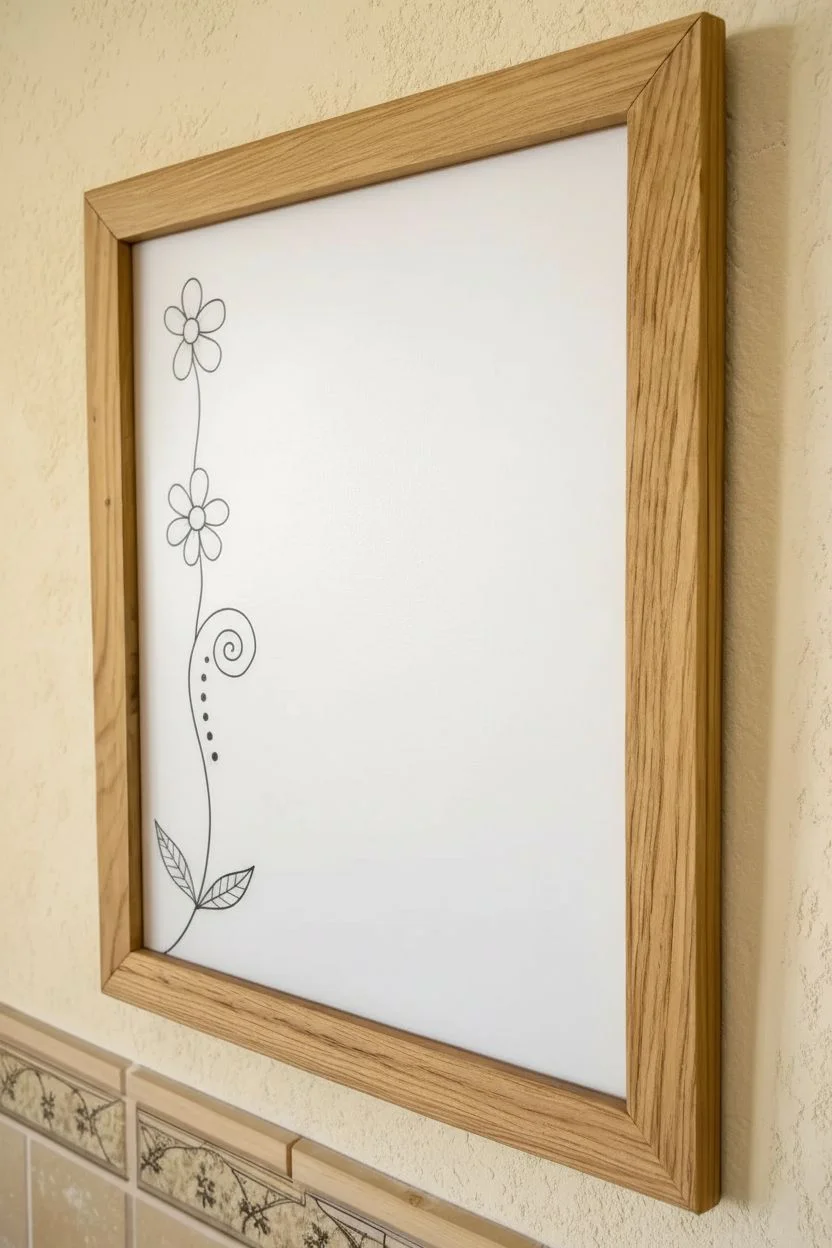
Transform a plain whiteboard into a framed piece of functional art with these elegant, hand-drawn floral borders. Using simple line work and negative space, you will create a permanent-looking garden that leaves plenty of room for your daily notes.
Step-by-Step Guide
Materials
- Whiteboard cleaner
- Microfiber cloth
- Black fine-tip dry-erase marker
- Black medium-tip dry-erase marker
- Cotton swabs (for precision erasing)
Step 1: Preparation & Left Vine
-
Clean the surface:
Spray the whiteboard thoroughly with cleaner and wipe it down with a microfiber cloth to remove all dust and old marker residue, ensuring a crisp canvas. -
Start the left stem:
Using the fine-tip marker, begin at the bottom left corner. Draw a single, slightly wavy vertical line reaching about halfway up the board to serve as the main vine. -
Add lower leaves:
Near the base of your stem, draw two simple, elongated ovals for leaves, one on each side of the vine. -
Draw the left flower:
About a third of the way up the stem, sketch a small circle for a flower center. Surround it with five simple, rounded petals. -
Extend and curl:
Continue the stem line upwards past the flower, ending it with a dramatic spiral curl that loops inward toward the center of the board. -
Add whimsical dots:
Place three or four small dots following the curve of the spiral, graduating them in size from largest to smallest.
Step 2: The Lush Right Garden
-
Anchor the right side:
Move to the bottom right corner. Draw a larger flower here using the medium-tip marker. Start with a round center and add longer, daisy-like petals. -
Detail the first flower:
Switch back to the fine-tip marker to draw short, radiating lines inside each petal, starting from the center and flicking outward to add depth. -
Wind the main stem:
Draw a long, curving line originating from behind the bottom flower, winding its way up roughly three-quarters of the board’s height. -
Add the middle bloom:
Halfway up the right stem, draw a second daisy-style flower. I like to angle this one slightly inward so it looks like it’s facing the notes you will write later. -
Create textured leaves:
Along the right stem, add several large leaves. Instead of leaving them empty, draw a center vein and diagonal hatching lines inside for a sophisticated look. -
Insert filler accents:
Draw a smaller, swirling fern-like sprig branching off the main stem between the two flowers to fill the empty space. -
Top flourish:
At the very top of the right vine, draw a final small bud and a few loose, floating petals to suggest movement.
Precision Tool Tip
Keep a Q-tip dampened with rubbing alcohol nearby. It acts as a precision eraser, allowing you to sharpen petal tips or remove tiny accidental smudges without wiping away the surrounding art.
Step 3: Refinement & Accents
-
Add ornamental spirals:
Draw large, decorative ‘S’ shaped swirls branching off the main stems on both sides, letting them curl deeply into the white space. -
Decorate the spirals:
Add a series of small, solid dots along the outer curve of your new spirals to mimic the look of pollen or dew. -
Thicken main lines:
Go back over the main stem lines with the medium marker. double-trace the curves to give them varied line weight, making the drawing look less uniform. -
Clean up edges:
Take a damp cotton swab and carefully erase any overdrawn lines where stems cross over leaves or petals. -
Top frame detail (Optional):
If you are feeling adventurous, you can draw a purely horizontal vine with two simple leaves right along the top edge of the board to connect the sides visually.
Make It Last
Use black wet-erase (transparency) markers instead of dry-erase for the border art. This ensures your lovely floral design won’t accidentally wipe off when you erase your daily notes.
Now you have a beautifully framed workspace ready for your brightest ideas
Cartoon Animal Friends
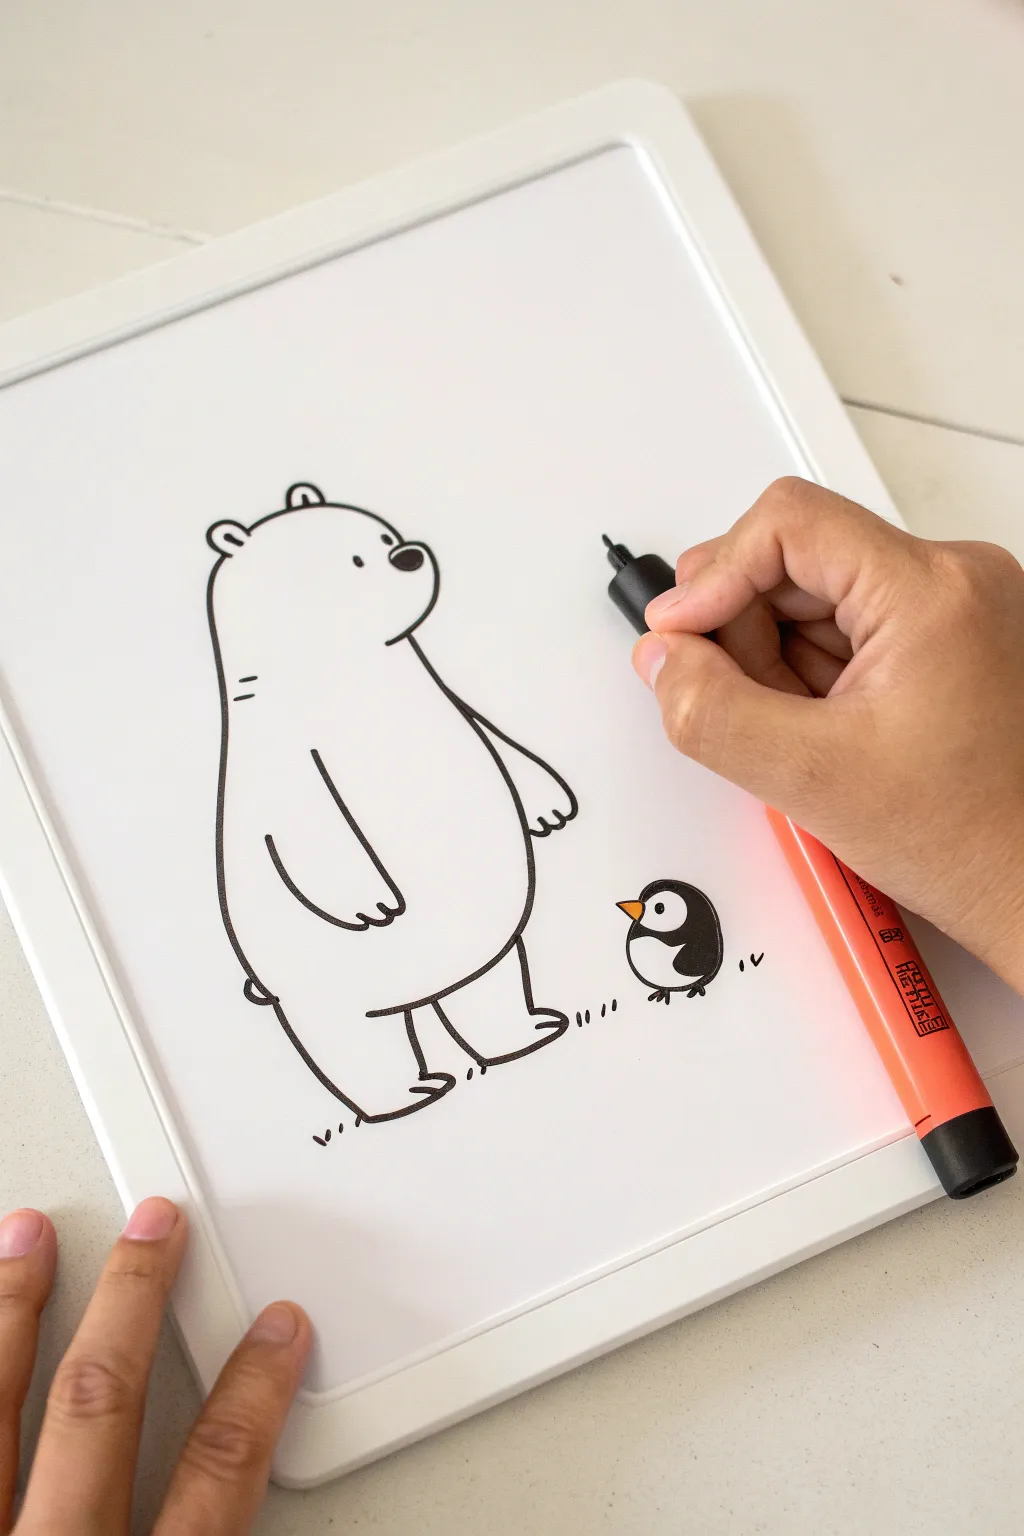
This charming whiteboard sketch features a towering but gentle bear looking down at a tiny penguin friend. Using clean, confident lines and minimal color, this doodle adds a perfect touch of whimsy to your daily message board.
Step-by-Step
Materials
- Whiteboard (small framed version works great)
- Black dry-erase marker (bullet or fine tip)
- Orange dry-erase marker
- Microfiber cloth or eraser
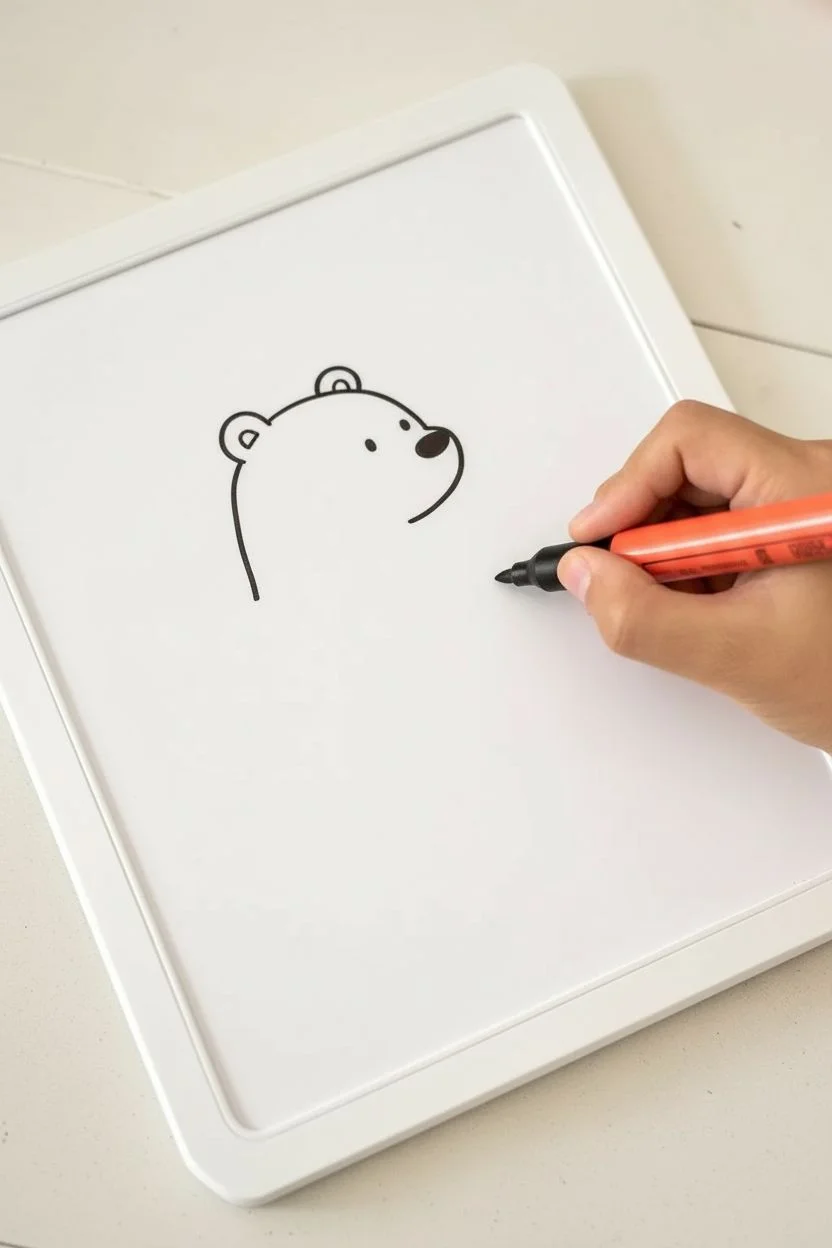
Step 1: Drawing the Bear’s Head
-
Start with the ears:
Near the top left of your board, draw two small, rounded semi-circles spaced slightly apart to create the ears. -
Connect the crown:
Draw a smooth, slightly curved line connecting the tops of the two ears to form the crown of the head. -
Outline the face:
From the right ear, extend a line downward and curve it slightly outward to create the snout. -
Add facial features:
Draw a small horizontal oval for the nose at the tip of the snout, and place a solid black dot just behind it for the eye.
Marker Mastery
Rotate your marker slightly in your hand every few strokes. This keeps the tip rounded and prevents flat spots, ensuring your lines stay crisp and consistent.
Step 2: Shaping the Body
-
Draw the back curve:
Starting from the left ear, draw a long, smooth line curving outward and down to form the bear’s back. -
Sketch the chest:
From underneath the snout, draw a line curving downward and inward to create the neck and chest area. -
Add the main arm:
Draw a long, tube-like shape for the arm hanging down the side of the body, curving the end for the paw. -
Detail the paw:
Add two tiny tick marks on the end of the paw to suggest fingers or claws. -
Finish the belly:
Continue the chest line past the arm, curving it outward to create a round, full belly. -
Form the legs:
Draw two short, stumpy legs at the bottom, connecting the back line and the belly line. -
Add the second arm:
Draw a small curve protruding from the right side of the back to show the other arm tucked behind. -
Clean up details:
I like to add two small horizontal dashes on the back to suggest fur texture.
Step 3: Adding the Penguin Friend
-
Outline the body:
To the right of the bear, draw a small oval shape that is slightly wider at the bottom. -
Define the markings:
Draw a curved line inside the oval, framing the face and belly, to separate the white front from the dark back. -
Fill the darks:
Use your black marker to carefully fill in the outer area of the penguin’s body, leaving the belly white. -
Add the beak:
Switch to your orange marker for a moment to draw a tiny triangle beak pointing up toward the bear. -
Draw the eye:
Place a single black dot on the white part of the face, right near the beak. -
Add wings:
Draw a tiny triangular wing sticking out from the black side of the body. -
Sketch the feet:
Draw two tiny W-shapes at the bottom of the penguin for its feet.
Level Up
Give them a conversation! Draw an empty speech bubble above the bear or penguin so you can write a new daily reminder or greeting inside it every morning.
Step 4: Grounding the Scene
-
Add ground lines:
Draw short, dashed vertical lines underneath the feet of both animals to simulate grass. -
Check visibility:
Step back to ensure the eyes are distinct; if the ink spread too much, quickly wipe and re-dot them.
Enjoy the company of these quiet, illustrated friends on your desk
BRUSH GUIDE
The Right Brush for Every Stroke
From clean lines to bold texture — master brush choice, stroke control, and essential techniques.
Explore the Full Guide
Festive Seasonal Corners
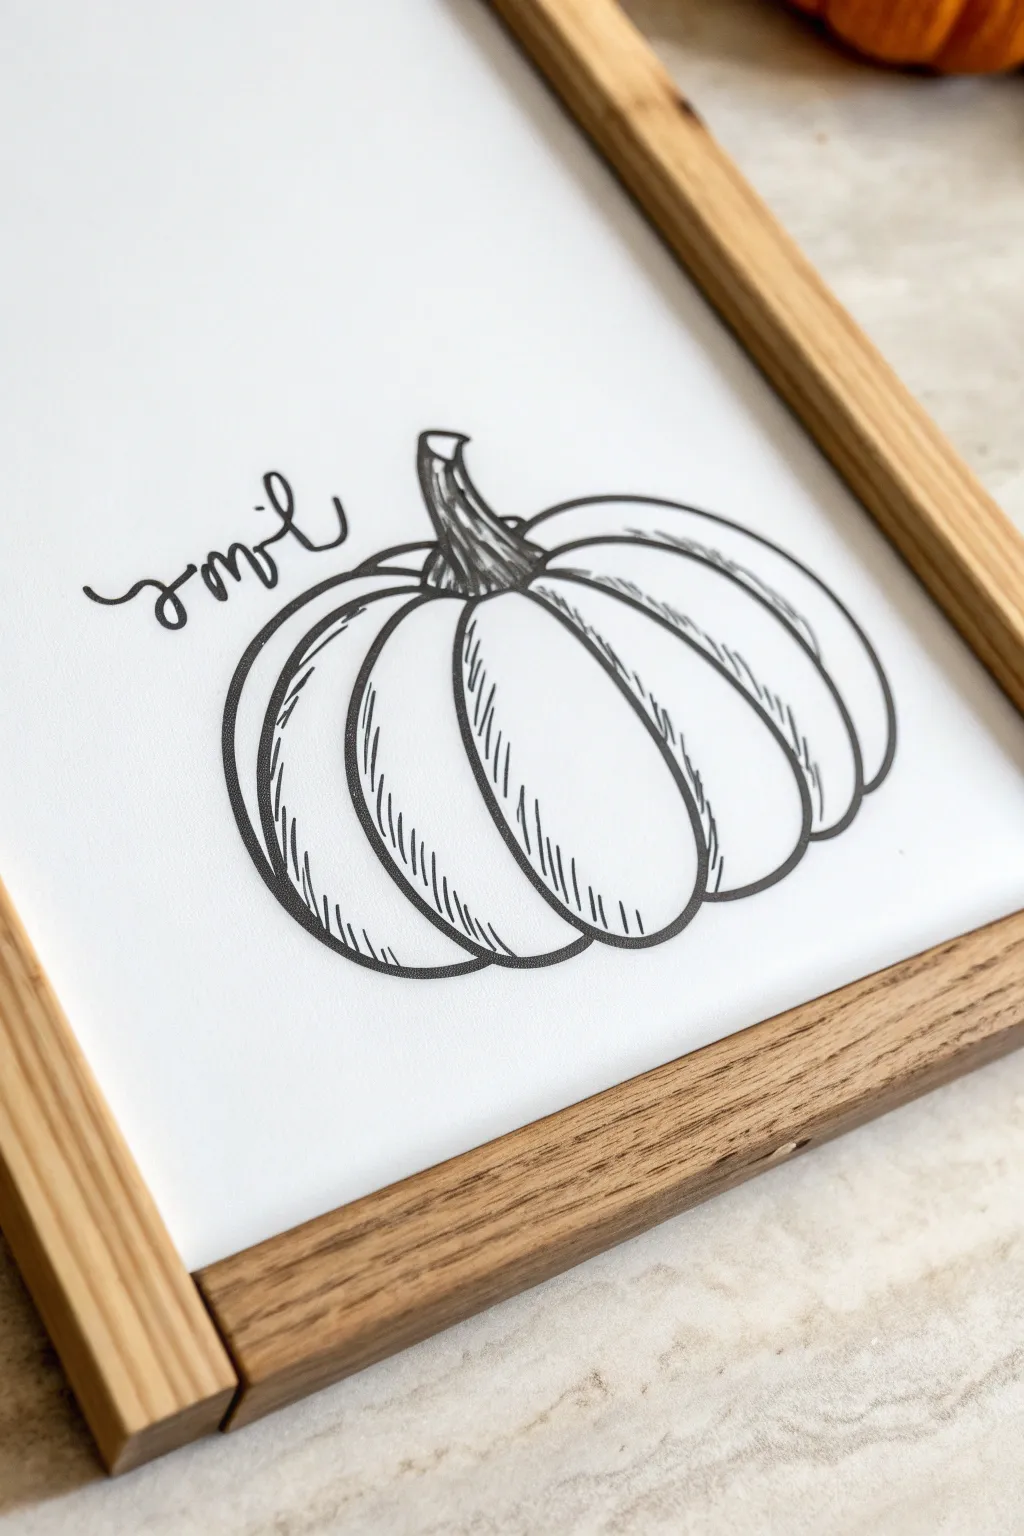
Bring a touch of rustic autumn charm to your space with this clean, hand-drawn illustration. The beauty of this project lies in its sketchy, imperfect lines that mimic a pen-and-ink drawing on a crisp white background.
Step-by-Step Guide
Materials
- Fine-tip black dry-erase marker
- Standard chisel-tip black dry-erase marker (optional)
- Whiteboard surface
- Microfiber cloth or precision eraser
- Paper towel (hand rest)
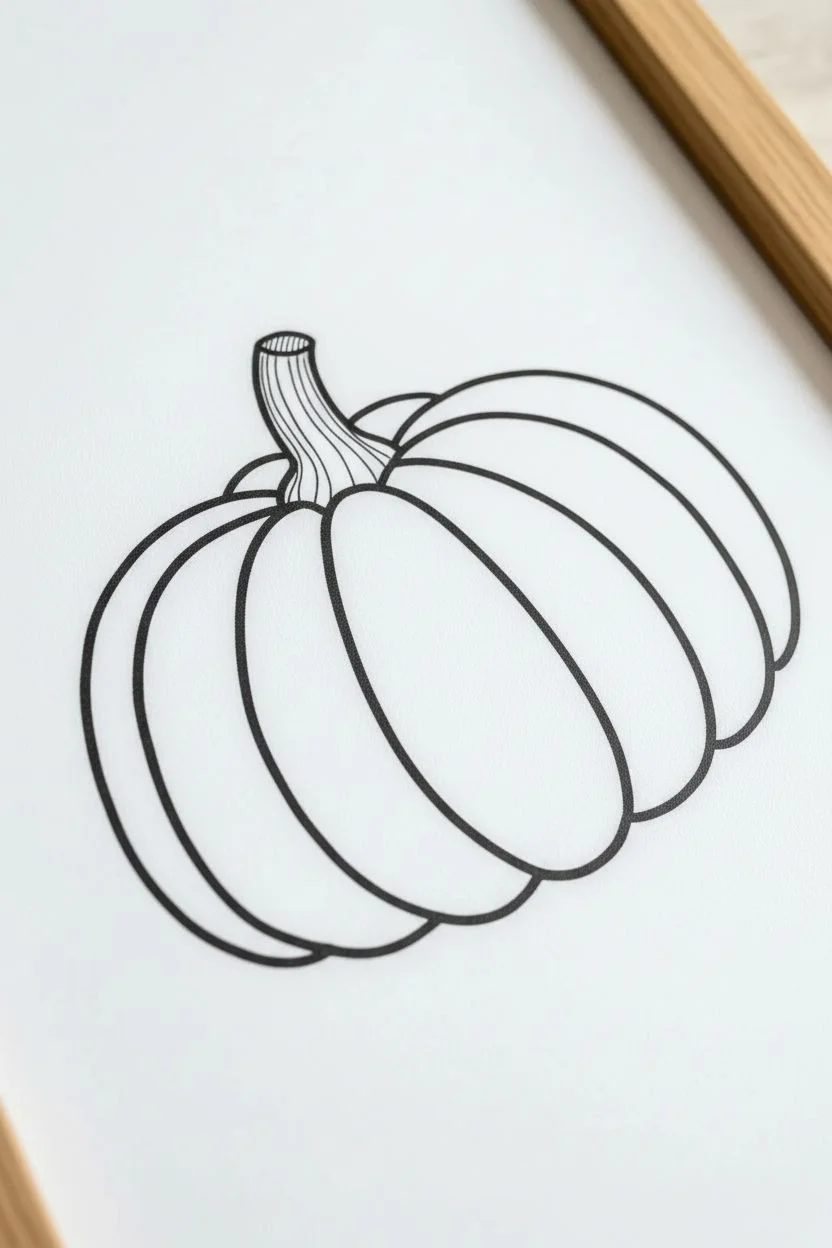
Step 1: Drawing the Core Structure
-
Anchor with the stem:
Start near the upper middle of your space. Draw a slightly curved, rectangular shape that widens just a bit at the top. -
Detail the stem texture:
Add a few vertical, shaky lines inside the stem contour to mimic wood grain. -
Create the center oval:
Directly below the stem, draw a tall, narrow oval that connects to the base of the stem. This is the front-most rib of the pumpkin. -
Draft the left ribs:
Start at the base of the stem (left side) and draw a curved ‘C’ line that extends out and hooks back to the bottom of the center oval. -
Expand the left side:
Draw another curved line starting from behind the previous one, swinging out wider and ending slightly lower. -
Draft the right ribs:
Mirror the process on the right side. Draw a backward ‘C’ curve connecting the stem base to the bottom center. -
Expand the right side:
Add the final outer curve on the right, ensuring the overall shape looks somewhat squat and heavy rather than perfectly round.
Step 2: Adding Sketchy Shading
-
Establish the light source:
Imagine the light coming from the top right. We will place shadows mostly on the left sides of the ribs. -
Hatch the center rib:
Using the fine-tip marker, draw short, quick diagonal hash marks along the left inner edge of the center oval. -
Shade the valleys:
Where the ribs overlap, add clusters of hash marks in the crevices to create depth. -
Define the bottom volume:
Add curvature lines at the very bottom of each rib section. These should curve upward slightly to show the roundness. -
Darken the stem base:
I prefer to add denser hatching right where the stem meets the pumpkin body to create a deep shadow. -
Intensify contour lines:
Go back over the outer edges of the pumpkin with a second pass to thicken line weight, making the object pop against the white background.
Smudge Prevention
Since you are working your way across the board, start drawing from the center outwards or rest your hand on a clean paper towel to avoid smearing fresh ink.
Step 3: Finishing Touches
-
Add highlights:
Ensure the tops of the ribs remain completely free of ink to simulate a bright highlight. -
Start the script:
To the left of the stem, place your marker tip to begin a decorative word or flourish. -
Draw loose loops:
Write a short word like ‘fall’ or simply draw loopy abstract cursive shapes. Keep the line flowing and continuous. -
Connect the elements:
Extend the tail of your script so it nestles close to the pumpkin’s left side without touching it. -
Clean the perimeter:
Use a precision eraser or the corner of a cloth to sharpen any outer lines that became too fuzzy. -
Final spot check:
Step back and look for balance. If one side looks too light, add a few more quick hatching flicks to weigh it down.
Make it Pop
To mimic the framed look in the photo, simulate a mat board by drawing a clean, single-line square border around your pumpkin leaving generous white space.
Now you have a stylish seasonal sketch that looks deceptively complex but is built on simple shapes
Minimalist Space Scenes


Transform your blank whiteboard into a window to the cosmos with this charming doodle. This project uses bold outlines and varied structural shapes to create a lively, retro-style space scene that pops against the white surface.
Detailed Instructions
Materials
- Whiteboard (clean surface)
- Black dry-erase marker (chisel tip favored)
- Microfiber cloth or whiteboard eraser
Step 1: The Ringed Giant
-
Planet Dome:
Start in the upper left quadrant by drawing a smooth, convex curve for the top half of the planet’s body. -
Ring Outline:
Draw a wide, flattened oval cutting across the bottom of the dome to form the primary shape of the planetary orbit rings. -
Planet Base:
Complete the planet’s sphere by drawing a deeper, U-shaped curve extending below the ring structure. -
Ring Dimension:
Add depth to the ring by drawing a second, inner curve parallel to the front edge, giving it a thick, 3D rim. -
Surface Detail:
Sketch wiggly, horizontal broken lines across the planet’s body to mimic the bands of a gas giant. -
Texture:
Use the tip of your marker to stipple small dots onto the surface of the ring, suggesting space dust and rock texture.
Smudge Guard
Rest your pinky finger on a clean part of the board or hold a tissue under your hand while drawing. This prevents your palm from erasing the work you’ve just finished.
Step 2: Blast Off
-
Fuselage:
Move to the bottom right area and sketch a tilted bullet shape for the rocket body, pointing diagonally upward. -
Porthole:
Draw a circle near the top third of the rocket for a window, then outline it again to create a frame. -
Rivets:
Add three small circles vertically below the window for functional detail. -
Fins:
Sketch curved, triangular fins attached to the left and right sides of the rocket base. -
Engine Nozzle:
Draw a ribbed rectangle or trapezoid at the very bottom connects to the fuselage. -
Exhaust Flames:
Create the exhaust plume by drawing long, jagged lightning-bolt shapes trailing behind the engine. -
Motion Lines:
I like to add a few loose, interior jagged lines within the flame outline to emphasize energy and movement.
Line Weight Pop
Go over the outer edges of the main planet and the rocket body a second time to thicken the lines. This makes the main subjects stand out clearly against the background stars.
Step 3: The Starfield
-
Distant Planet:
In the upper right, draw a smaller planet with a simple ring orbiting it vertically to balance the composition. -
Major Stars:
Draw a large, five-pointed star near the bottom center using distinct, open strokes rather than one continuous line. -
Diamond Stars:
Scatter a few four-pointed stars (stretched diamond shapes) around the empty spaces for variety. -
Constellations:
Add smaller, standard five-pointed stars in the remaining larger gaps between elements. -
Vast Distance:
Finish the atmosphere by randomly placing single dots throughout the scene to represent distinctive stars in the background.
Step back and admire your hand-drawn galaxy without worrying about perfect symmetry


Silly Monster Doodles
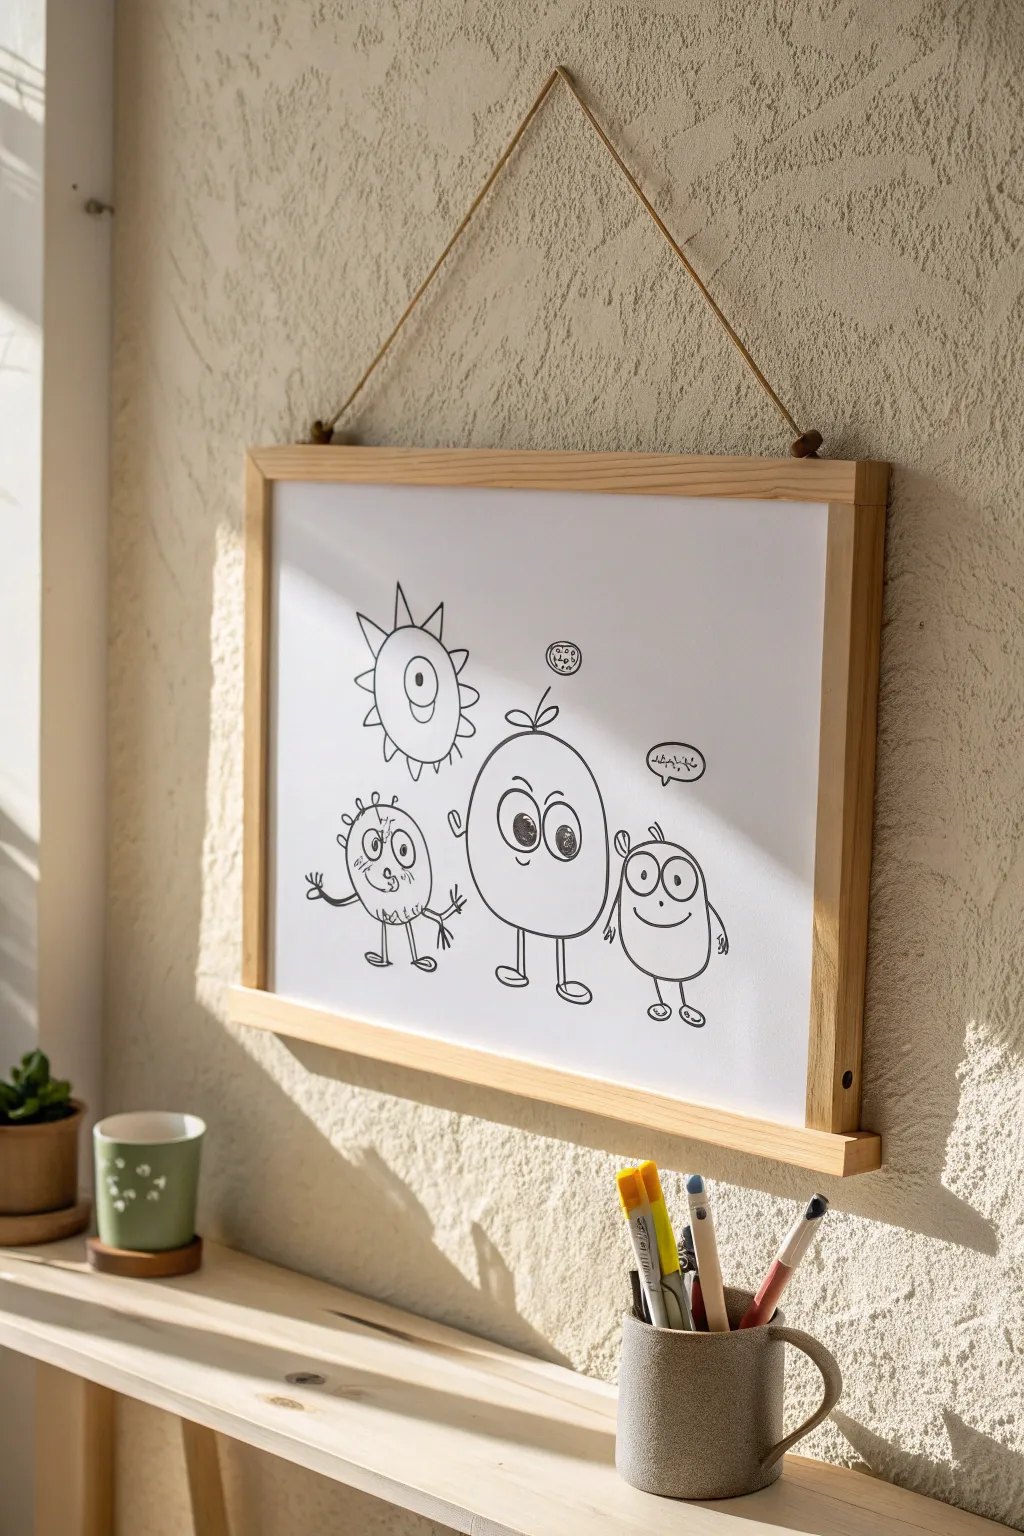

Brighten up your workspace or kitchen with these adorable, quirky doodle monsters. This simple line art project uses basic shapes to create a trio of characters full of personality, perfect for a quick creative break.
Step-by-Step Tutorial
Materials
- Whiteboard (framed or wall-mounted)
- Fine-tip black dry-erase marker
- Microfiber cloth or whiteboard eraser
- Q-tips (for precision corrections)
Step 1: The Central Character
-
Draw the body shape:
Start in the middle of your board and draw a large, smooth oval. This will be the body of the main monster. -
Add the eyes:
Draw two large circles in the upper center of the oval. I like to make them touch slightly to keep the expression cute. -
Draw the pupils:
Place a solid black dot in each eye circle. Position them slightly to the right so the monster looks like it’s glancing at its neighbor. -
Sketch the sprout:
Add a small stem with two leaves—like a little seedling—sticking straight up from the top of the monster’s head. -
Create the mouth:
Draw a small, curved smile just below the eyes to give it a friendly smirk. -
Add legs and feet:
Draw two straight lines coming down from the body, finishing each with a simple, rounded loop for feet.
Smudge Prevention
Make sure to rest your drawing hand on a clean paper towel or piece of scrap paper while you work to avoid smearing the dry-erase ink with your palm.
Step 2: The Little Sidekick
-
Outline the smaller body:
To the right of the main monster, draw a smaller, kidney-bean shape. -
Add facial features:
Give this little guy two tall oval eyes and a wide, U-shaped mouth connecting them. -
Draw the hair:
Sketch three simple spikes on top of its head for a playful hairdo. -
Draw legs and shoes:
Add short stick legs. For the feet, draw oval shapes with little “x” marks or lines to look like shoelaces. -
Include dialogue:
Draw a small speech bubble above his head containing a doodle word or scribbles.
Step 3: The Scruffy Friend
-
Create the textured body:
On the left side, draw a circle that isn’t perfectly smooth. Add small bumps on the left edge to suggest fur or texture. -
Make the crazy eyes:
Draw two mismatched circles for eyes—one slightly larger than the other—with tiny dot pupils to make him look surprised. -
Add spiky details:
Draw several small spikes or hairs sticking out from the top left of the curve. -
Draw waving arms:
Sketch two thin lines extending outward for arms, adding simple three-fingered hands at the ends. -
Finish the legs:
Add two short stick legs with flat feet at the bottom.
Color Pop
Once the black outline is dry, use colored dry-erase markers to fill in the bodies—try lime green for the center monster and orange for the sidekick!
Step 4: Atmospheric Details
-
Draw the sun-clops:
In the upper left corner, draw a circle with a single large eye in the center. -
Add sun rays:
Surround the sun circle with triangle spikes to create the rays. -
Add the floating bug:
Draw a tiny circle with dots inside clearly above the center monster to represent a flying bug or spore. -
Clean up:
Use a Q-tip to carefully sharpen up any lines where the marker might have bled or overlapped unintentionally.
Step back and enjoy your quirky hand-drawn monster family hanging on the wall
Geometric 3D Shapes
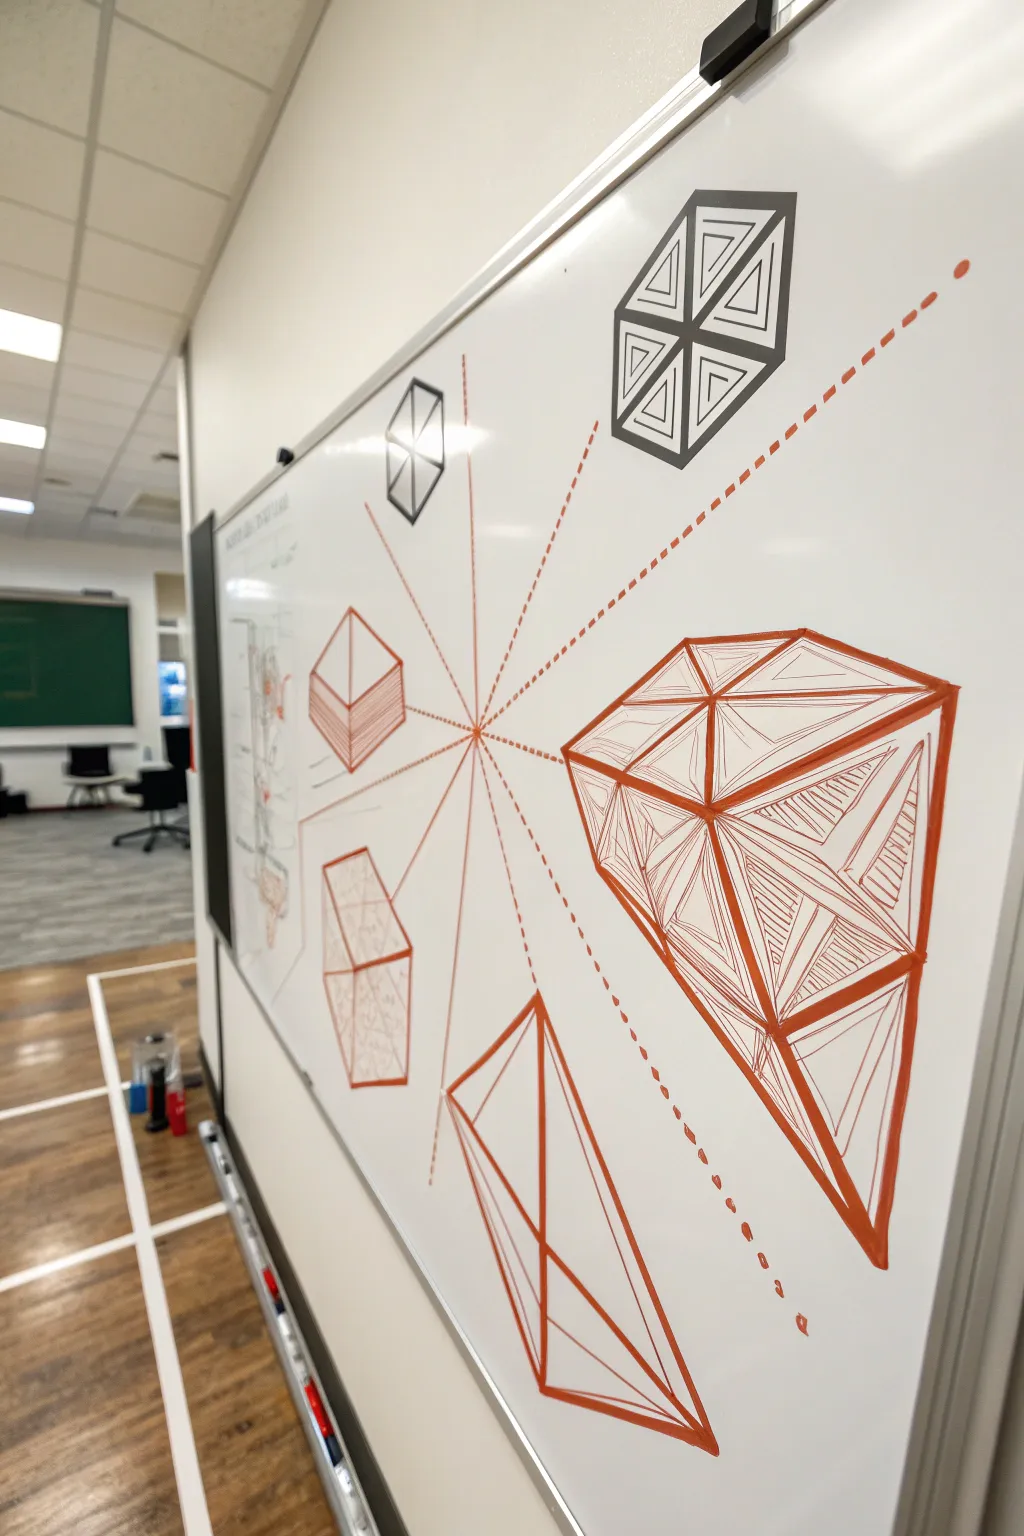
Transform a blank whiteboard into a dynamic study of space and geometry using simplistic one-point perspective techniques. This project creates an energetic illusion of shapes bursting outward from a central point, perfect for a classroom or office brainstorming space.
Step-by-Step Guide
Materials
- Red dry-erase marker (chisel tip)
- Black dry-erase marker (chisel tip)
- Whiteboard eraser or microfiber cloth
- Long ruler or straight edge (optional)
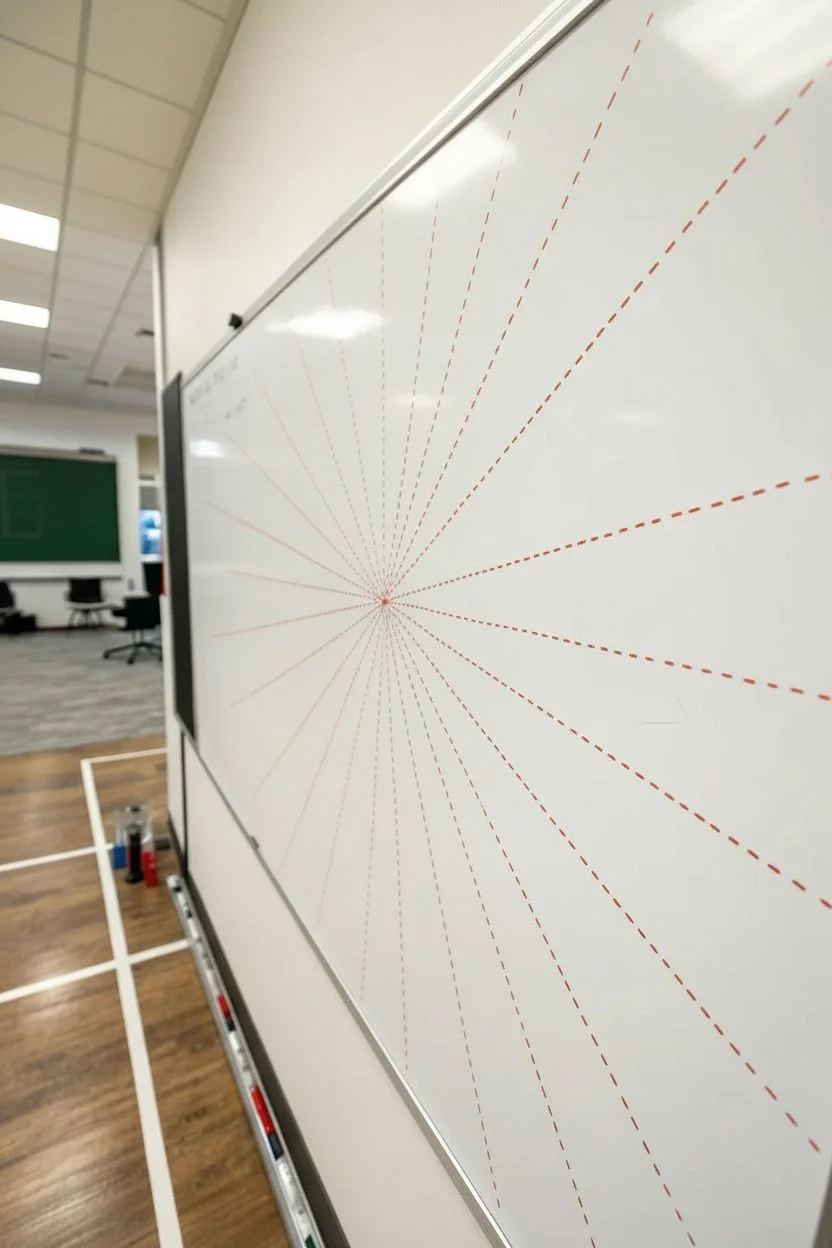
Step 1: Setting the Radial Grid
-
Establish the vanishing point:
Locate the approximate center of your drawing area. You don’t need to draw a heavy dot, but keep a mental fix on this spot as the origin point for the entire composition. -
Draw the main axis lines:
Using your red marker, draw dashed lines radiating outward from that center point toward the edges of the board. These don’t need to be perfectly straight, but they should act as the ‘spines’ for your shapes. -
Vary the line length:
Extend some dashed lines further than others to create an asymmetrical, interesting composition. Leave plenty of white space between them for the actual 3D objects.
Step 2: Constructing the Red Shapes
-
Outline the large crystal:
Focusing on the right side, draw a large, irregular hexagonal outline at the end of one of your perspective lines. -
Create the facets:
Draw interior lines connecting the corners of your outline to a central point on the shape’s face. This creates varied triangular facets. -
Add dimension with hatching:
Fill alternating triangular sections with closely spaced parallel lines. I find that changing the angle of these hatch lines for each facet really helps distinct surfaces pop visually. -
Draft the bottom pyramid:
Below the crystal, draw a tall, narrow diamond shape along a radial line. -
Define the pyramid ridge:
Draw a solid vertical line down the center of the diamond shape to turn it from a flat shape into a sharp, 3D shard. -
Sketch the translucent cube:
On the bottom left, draw a simple box shape. Instead of solid lines, sketch the edges loosely to give it a lighter, wireframe appearance. -
Texture the cube:
Add light, scribbly texture to the side planes of the cube, leaving the front face clear to suggest transparency. -
Draw the stacked squares:
To the left of the center, draw a flattened box that looks like a stack of papers or a sandwich, orienting it so the corner points back toward the center.
Troubleshooting Perspective
If shapes look ‘flat,’ check your angles. All diagonal lines on the sides of your shapes should angle back vividly toward that single imaginary center point you picked in step one.
Step 3: Adding High-Contrast Black Accents
-
Switch markers:
Cap your red marker and grab the black one to introduce strong contrast to the composition. -
Draw the top geometric prism:
In the upper right corner, outline a hexagon. Divide it into three diamond shapes meeting in the center to create an isometric cube effect. -
Detail the prism interior:
Inside each of the three diamond sections, draw smaller concentric triangles. This creates a mesmerizing tunnel effect. -
Add the distant floater:
Draw a small, simple wireframe cube in black near the top left. Keep it small to make it look further away in the distance. -
Integrate the diagram:
If you have space on the far left, feel free to sketch a faint vertical diagram or list to balance the heavy visual weight of the right side.
Pro Tip: Line Weight
Use the broad side of the chisel tip for outer borders and the very point of the marker for internal hatching. This contrast prevents the drawing from becoming a messy blur.
Step 4: Final Definition
-
Thicken the perimeter:
Go back over the outermost outline of the large red crystal. Making the silhouette line twice as thick as the interior lines separates the object from the background. -
Reinforce the dashed lines:
Ensure your red dashed guidelines from Phase 1 visually connect to the corners or centers of your new shapes, grounding them in the perspective. -
Clean the edges:
Use the corner of your eraser or a cloth to sharpen up any corners where line strokes overlapped too far.
Step back and admire purely geometric depth created with just a few well-placed lines.
Cross-Hatching for Depth
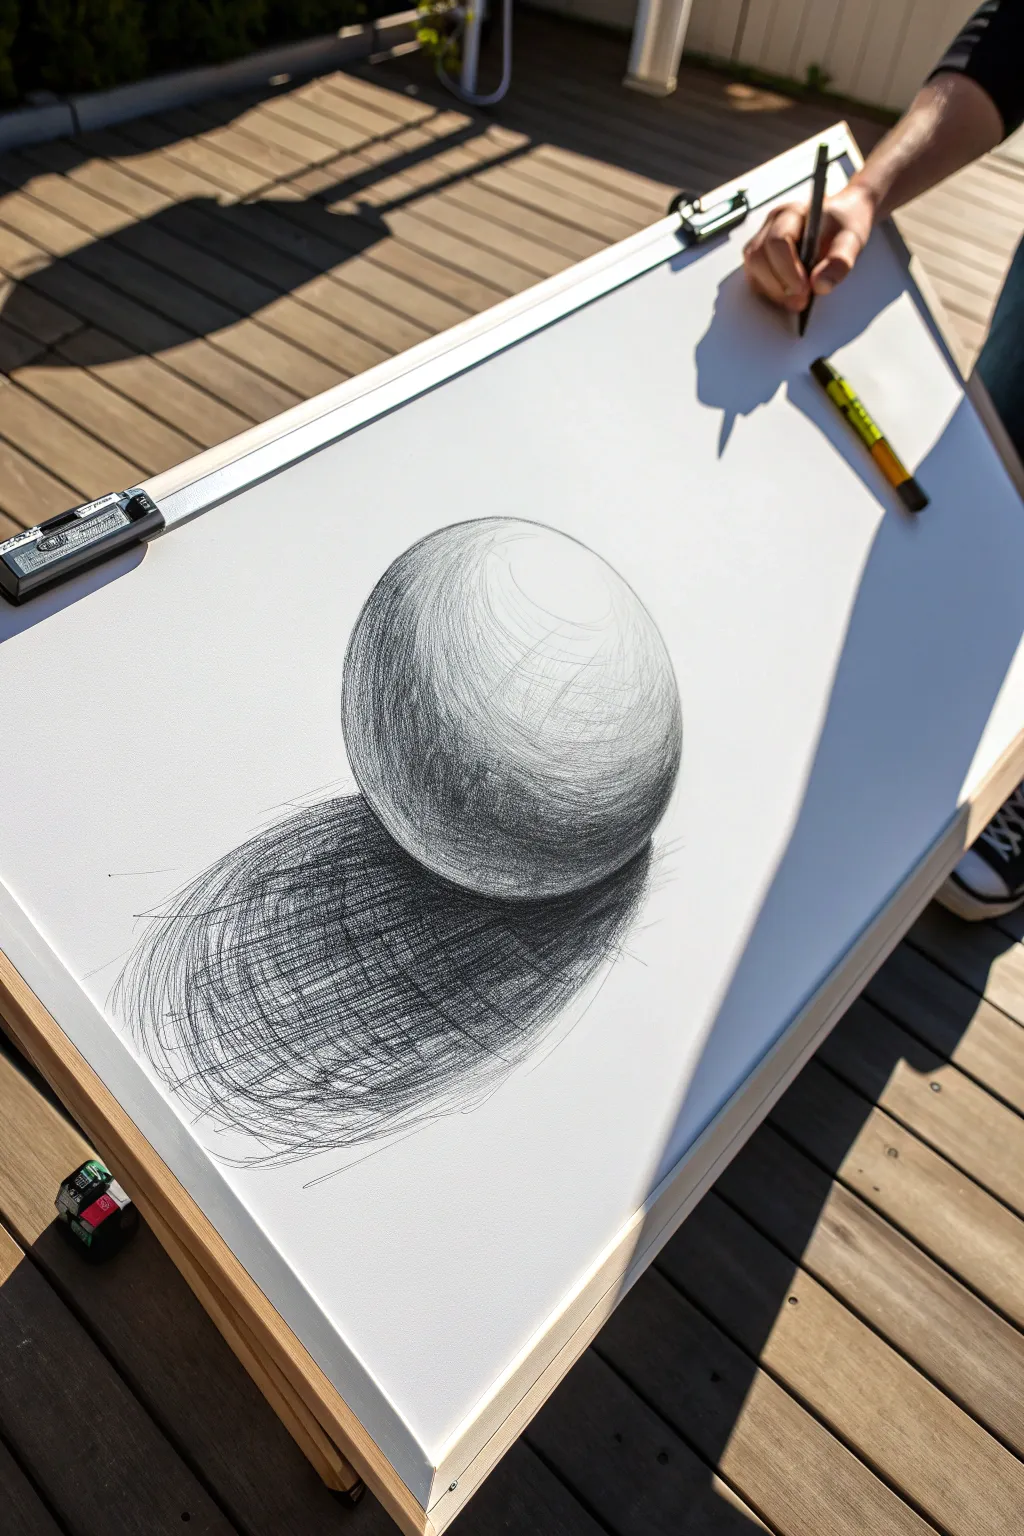
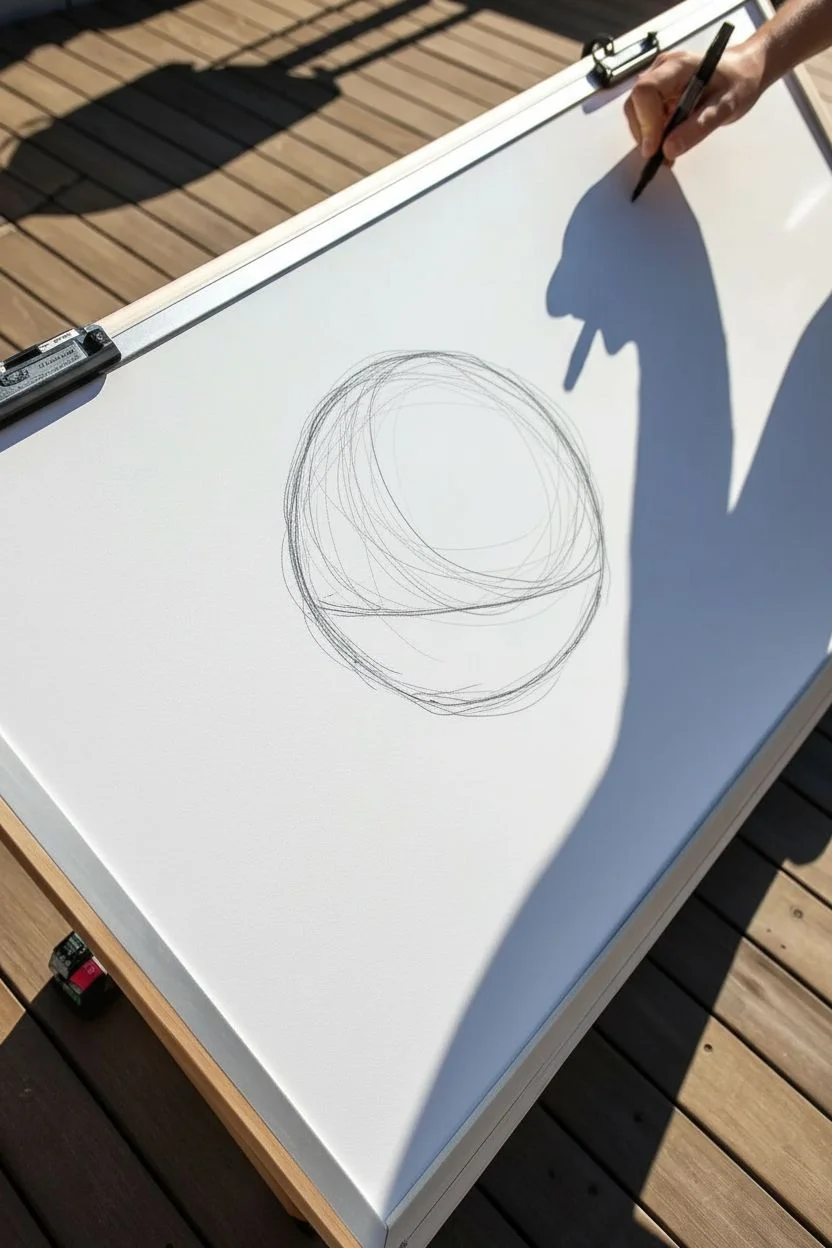
Transform a simple circle into a three-dimensional object using only line direction and density. This detailed whiteboard sketch uses cross-hatching to build deep shadows and realistic volume.
Step-by-Step Tutorial
Materials
- Whiteboard or dry-erase surface
- Fine-tip black dry-erase marker
- Microfiber cleaning cloth
- Whiteboard eraser
Step 1: Establishing the Form
-
Clean the canvas:
Ensure your whiteboard surface is completely free of dust and oil strokes so the fine marker lines adhere crisply. -
Sketch the circle:
Draw a loose circle in the center of the board. Don’t worry about it being perfect; using multiple loose lines adds to the sketched aesthetic. -
Define the light source:
Decide where your light is coming from. In this image, the light hits the top right, meaning shadows will fall to the bottom left. -
Mark the shadow line:
Lightly sketch a curved line across the lower third of the sphere to separate the light side from the shadow side.
Ink Layering Tip
Let the first layer of ink dry for a few seconds before cross-hatching over it. If the ink is still wet, the new stroke might erase the one underneath.
Step 2: Building Volume on the Sphere
-
First hatch layer:
Start shading the dark side of the sphere using diagonal parallel lines. Keep your strokes quick and light. -
Cross the lines:
Add a second set of lines striking through the first set at a perpendicular angle. This creates the ‘cross-hatch’ texture. -
Deepen the core shadow:
Add density to the ‘equator’ of the shadow area by scribbling tight, overlapping loops. This should be the darkest part of the ball. -
Reflected light:
I like to leave the very bottom rim of the sphere slightly lighter than the core shadow. This suggests light bouncing off the table. -
Mid-tone scribbles:
Extend lighter, more spaced-out lines up toward the highlighted area, fading the texture out as you approach the bright top right. -
Highlight preservation:
Ensure the top right circle area remains pure white to represent the strongest reflection.
Level Up: Color Accent
Use a colored marker (like blue or purple) for the darkest shadows instead of black to add artistic flair and vibrancy to the sketch.
Step 3: Grounding with Cast Shadow
-
Outline the cast shadow:
Draw an elongated oval shape stretching out from the base of the sphere toward the bottom left. -
Base shadow layer:
Fill this oval with long, horizontal strokes. This helps differentiate the ground plane from the round object. -
Darken the contact point:
Apply heavy, dense scribbles right where the sphere touches the ground. This occlusion shadow anchors the object. -
Cross-hatch the shadow:
Layer diagonal strokes over the horizontal ones in the cast shadow to create a mesh-like, dark texture. -
Fade the edges:
Allow your marker strokes to become looser and sketchier at the furthest tip of the shadow to soften the effect.
Step 4: Final Textures
-
Add surface noise:
Throw in some random, loose curved lines around the form to mimic the erratic energy seen in the reference image. -
Refine the contour:
Go back over the outer edge of the sphere on the shadow side to maintain a crisp separation from the background. -
Adjust contrast:
Step back to view the drawing. If the shadow looks too grey, add another layer of dense scribbles to make it pop. -
Clean up:
Use the corner of your cloth to wipe away any unintentional smudges outside the main drawing area.
Now you have a dynamic, 3D sketch that jumps right off the board.
Short Comic Strips
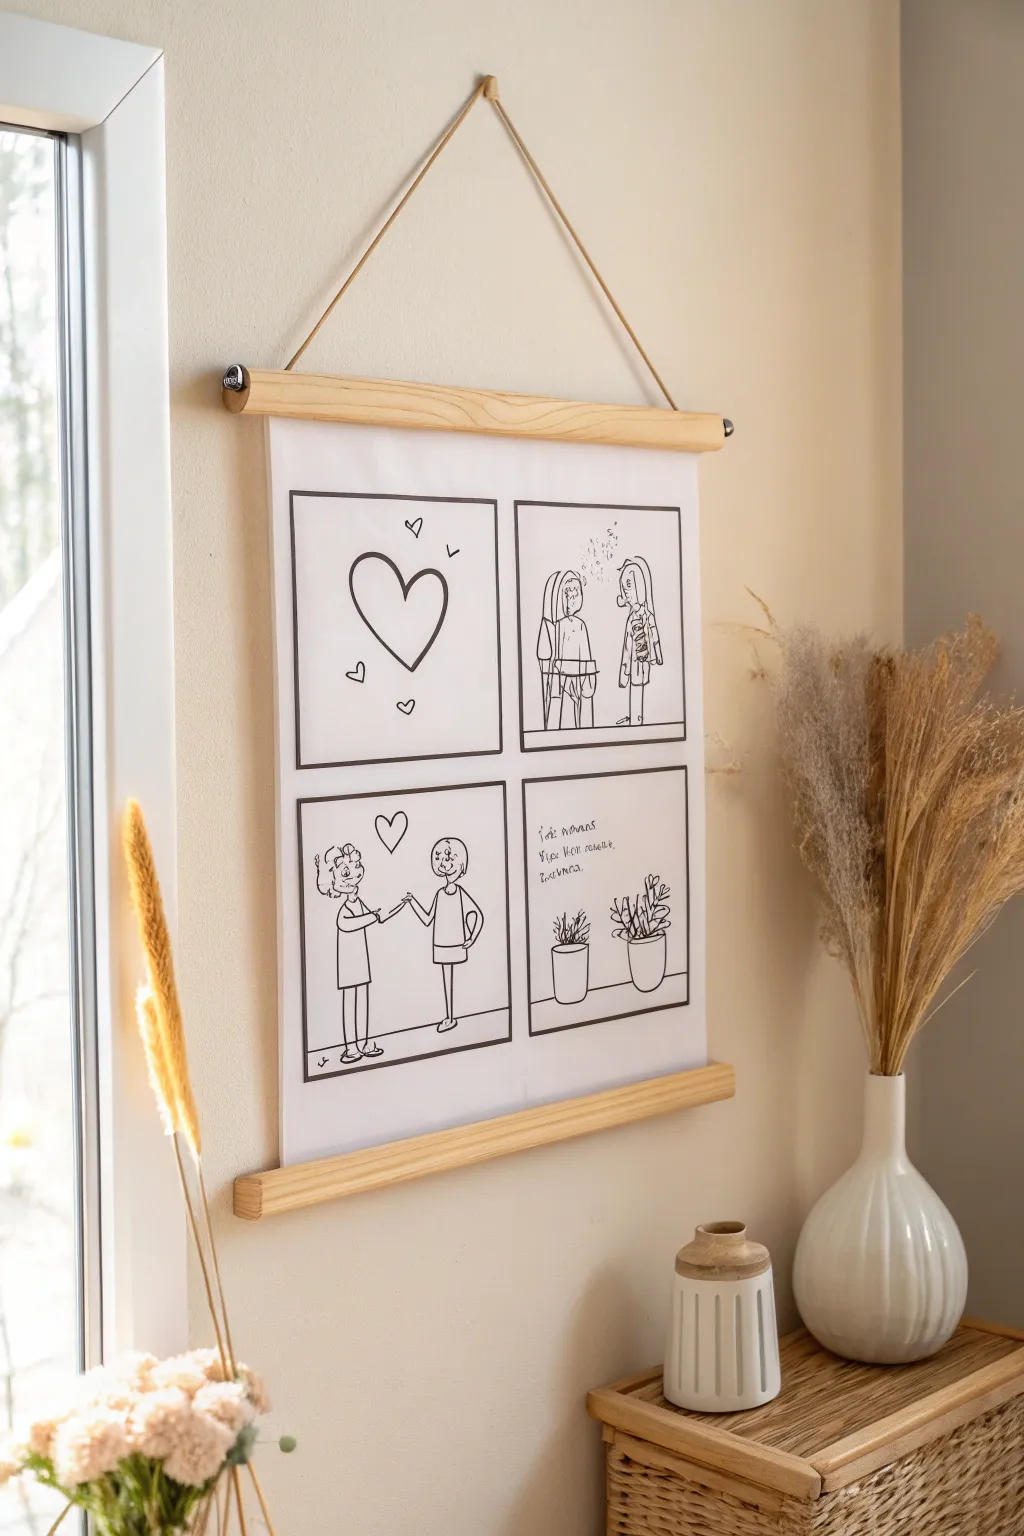
Transform a fleeting whiteboard doodle into a permanent piece of wall art with this charming four-panel comic strip display. Using a simple wooden poster hanger and minimalist line work, you will create a heartwarming story that adds a personal, hand-drawn touch to any room.
Step-by-Step Guide
Materials
- High-quality white paper roll or heavy cardstock (A3 or similar size)
- Wooden magnetic poster hanger frame (with string)
- Black permanent marker (fine tip)
- Black permanent marker (medium or broad tip)
- Pencil
- Eraser
- Long ruler
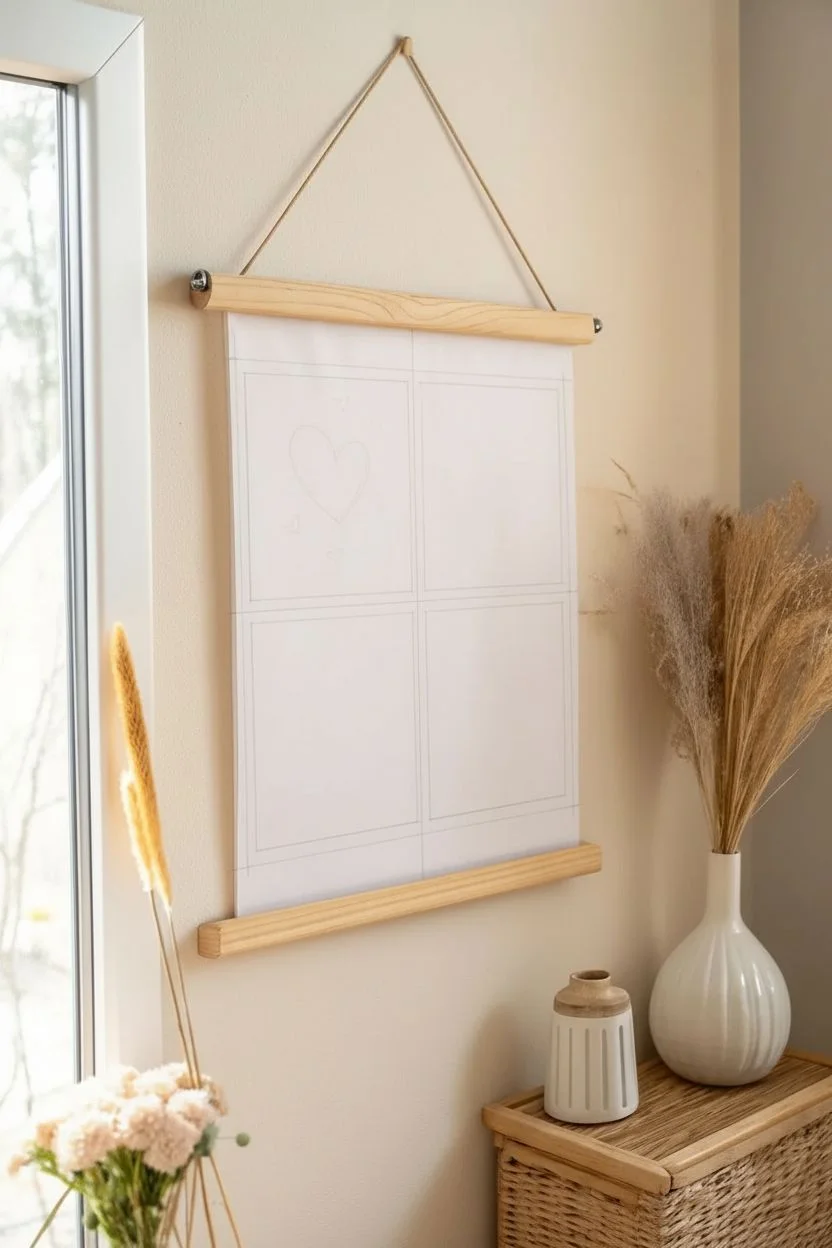
Step 1: Setting the Scene
-
Prepare the canvas:
Cut your paper or cardstock to the width of your wooden hanger. A standard sizing is roughly 12 inches wide by 16-18 inches long to accommodate four square panels vertically. -
Mark the margins:
Using your pencil and ruler, lightly mark a consistent margin around the edges of the paper. Leave a bit more space at the top and bottom where the wood bars will clamp. -
Draw the grid:
Sketch a large outer rectangle within your margins. Measure the center point both vertically and horizontally, then draw a cross to divide the large rectangle into four equal square panels. -
Thicken the borders:
I like to go over these grid lines with the ruler immediately to ensure they stay straight. Use the medium tip pencil for now to define the separate storytelling zones clearly.
Pro Tip: Paper Choice
Use hot-press watercolor paper for this project. It is thick enough to hang flat without curling and smooth enough for crisp marker lines without bleeding.
Step 2: Drafting the Story
-
Panel one: The symbol:
In the top-left square, lightly sketch a large, slightly asymmetrical heart in the center. Add three tiny floating hearts around it to suggest affection or excitement. -
Panel two: The characters:
Moving to the top-right square, sketch two standing figures facing each other. Keep the style loose and cartoonish—stick legs, simple tunics, and distinctive hairstyles (like curly and straight) help differentiate them. -
Panel two details:
Add small details like a dialogue sparkle or confusion lines above their heads to imply interaction. Draw a horizontal line behind them to ground the figures. -
Panel three: Connection:
In the bottom-left square, draw the same two figures closer together. Sketch their arms reaching out to hold hands in the center. Place a small doodle heart floating just above their clasped hands. -
Panel four: Atmosphere:
For the final bottom-right square, sketch two potted plants side-by-side on the floor. Vary the foliage—one spiky, one leafy—to add visual interest. -
Panel four text:
Above the plants, lightly pencil in a few lines of text. You can write a real quote or just use loopy scribbles to represent ambient conversation or thoughts.
Step 3: Inking and Assembly
-
Ink the frame:
Switch to your broad or medium tip black marker. firm up the four box outlines using the ruler to keep lines crisp and bold. This creates the classic comic strip look. -
Outline the first scenes:
Using the fine tip marker, trace over your pencil sketches in the top two panels. Don’t worry about perfect lines; a slightly wavering hand adds to the charming, hand-drawn aesthetic. -
Outline the bottom scenes:
Continue inking the bottom panels. When drawing the plants in the last panel, use quick jagged strokes for the leaves to differentiate texture from the smooth pots. -
Finalize text:
Go over the text or scribbles in the final panel with the fine marker. Keep the lettering loose and casual to match the drawing style. -
Clean up:
Allow the ink to dry completely for several minutes to prevent smudging. Once safe, gently erase all remaining pencil marks until the white background is spotless. -
Attach the top rail:
Take the top piece of your wooden poster hanger. Open the magnetic strips or clamp mechanism and center the top edge of your paper inside, then snap it shut. -
Attach the bottom rail:
Repeat the process with the bottom wooden rail. This piece acts as a weight, keeping your paper hanging flat and straight against the wall. -
Hang it up:
Find a suitable spot on your wall. Use the attached cord at the apex of the hanger to suspend your artwork on a nail or hook.
Level Up: Color Pop
After the black ink dries completely, use watercolor or diluted acrylic to add a single accent color—like soft pink inside the hearts or green on the plants.
Step back and enjoy your custom comic strip that adds a playful and personal narrative to your decor.
Creative Visual Flowcharts
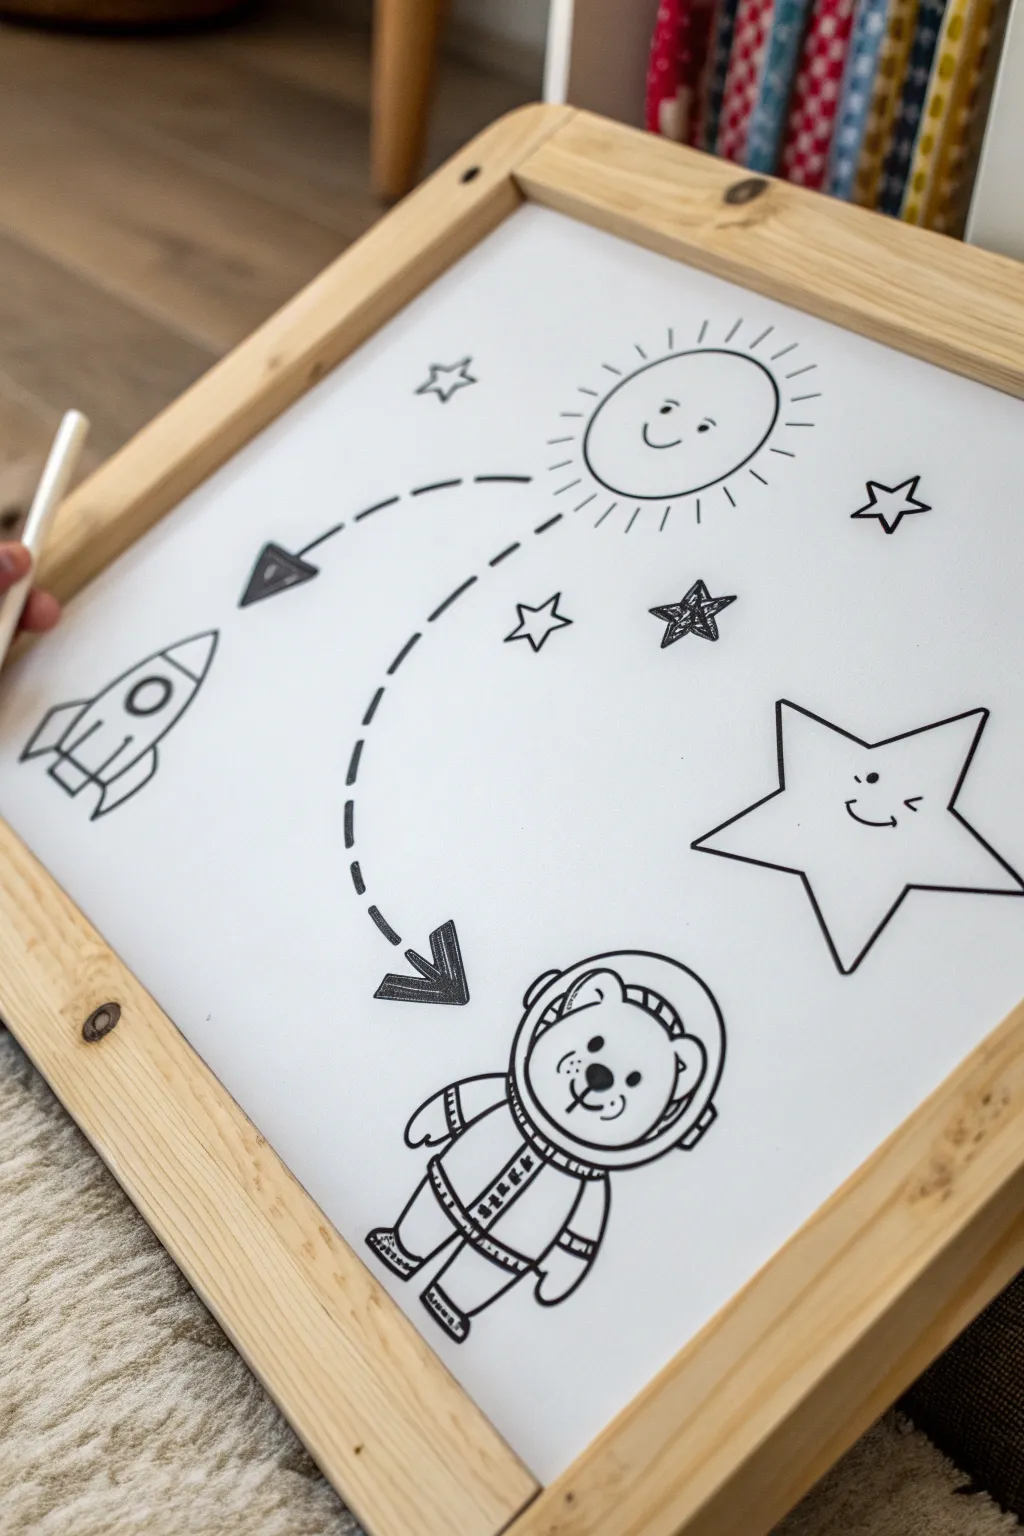
Turn a simple whiteboard session into an intergalactic adventure with this cute visual storytelling piece. Detailed cartoon icons connect via directional paths, turning a standard drawing into a playful narrative flowchart.
Detailed Instructions
Materials
- Whiteboard (framed easel or wall-mounted)
- Black dry-erase marker (bullet tip preferred)
- Microfiber cloth or felt eraser
- Fine-tip black marker (optional for small details)
Step 1: Setting the Celestial Scene
-
Draw the sun:
Start in the upper right quadrant by drawing a clean circle for the sun’s main body. -
Add solar rays:
Sketch short lines radiating outward around the entire circumference, keeping them relatively evenly spaced. -
Sun face details:
Give the sun personality by adding two small dots for eyes and a simple, upward-curving smile. -
The winking star:
Move lower down on the right side and outline a large five-pointed star. I like to draw this in one continuous motion to keep the points sharp. -
Star expression:
Draw a kawaii-style face on the star using a dot for one eye, a sideways ‘V’ for a wink, and a tiny smile.
Ghosting Lines?
If you make a mistake and the erased line leaves a ‘ghost’ mark, draw over it heavily with fresh marker ink, wait ten seconds, and erase again to lift the old pigment.
Step 2: Launching the Rocket
-
Rocket outline:
On the left side of the board, draw the rocket fuselage; shape it like a large bullet pointing diagonally upward. -
Fins and nose:
Add a small triangle at the very top for the nose cone, and two angled fins at the base of the rocket. -
Rocket details:
Draw a concentric circle in the middle for a window and add small horizontal stripes on the fins.
Interactive Story
Turn this into a chore chart or routine tracker! Write ‘Wake Up’ near the sun and ‘Bedtime’ near the stars, using the flow arrows to guide children through their daily tasks.
Step 3: The Astronaut Bear
-
Helmet shape:
In the bottom center, draw a large circle to serve as the astronaut’s bubble helmet. -
Bear head:
Inside the helmet circle, draw the outline of a bear’s head with two round ears perking up. -
Bear face:
Add facial features inside the head outline: two dark eyes, and an oval snout containing a nose and mouth. -
Space suit body:
Draw a rectangular shape with rounded corners directly beneath the helmet for the torso. -
Limbs:
Attach simple tube-like arms and legs to the torso, rounding off the ends for hands and boots. -
Suit texture:
Add a vertical zipper line down the chest and small hash marks across the torso and cuffs for texture.
Step 4: Connecting the Flow
-
Upward trajectory:
Draw a dashed line arching from the rocket tip towards the center of the board, indicating the launch path. -
First arrow:
Cap the rocket’s path with a bold, open-triangle arrowhead pointing generally towards the sun. -
Downward curve:
Start a second dashed line near the sun, curving it downwards toward the astronaut bear. -
Second arrow:
Finish this path with a scribbled-in arrowhead pointing directly at the bear’s helmet. -
Starry filler:
Fill the empty background space with small scattered stars; try mixing simple outlined stars with messy, scribbled-in stars for variety.
Step back and admire your adorable space-themed narrative map
Collaborative Group Murals
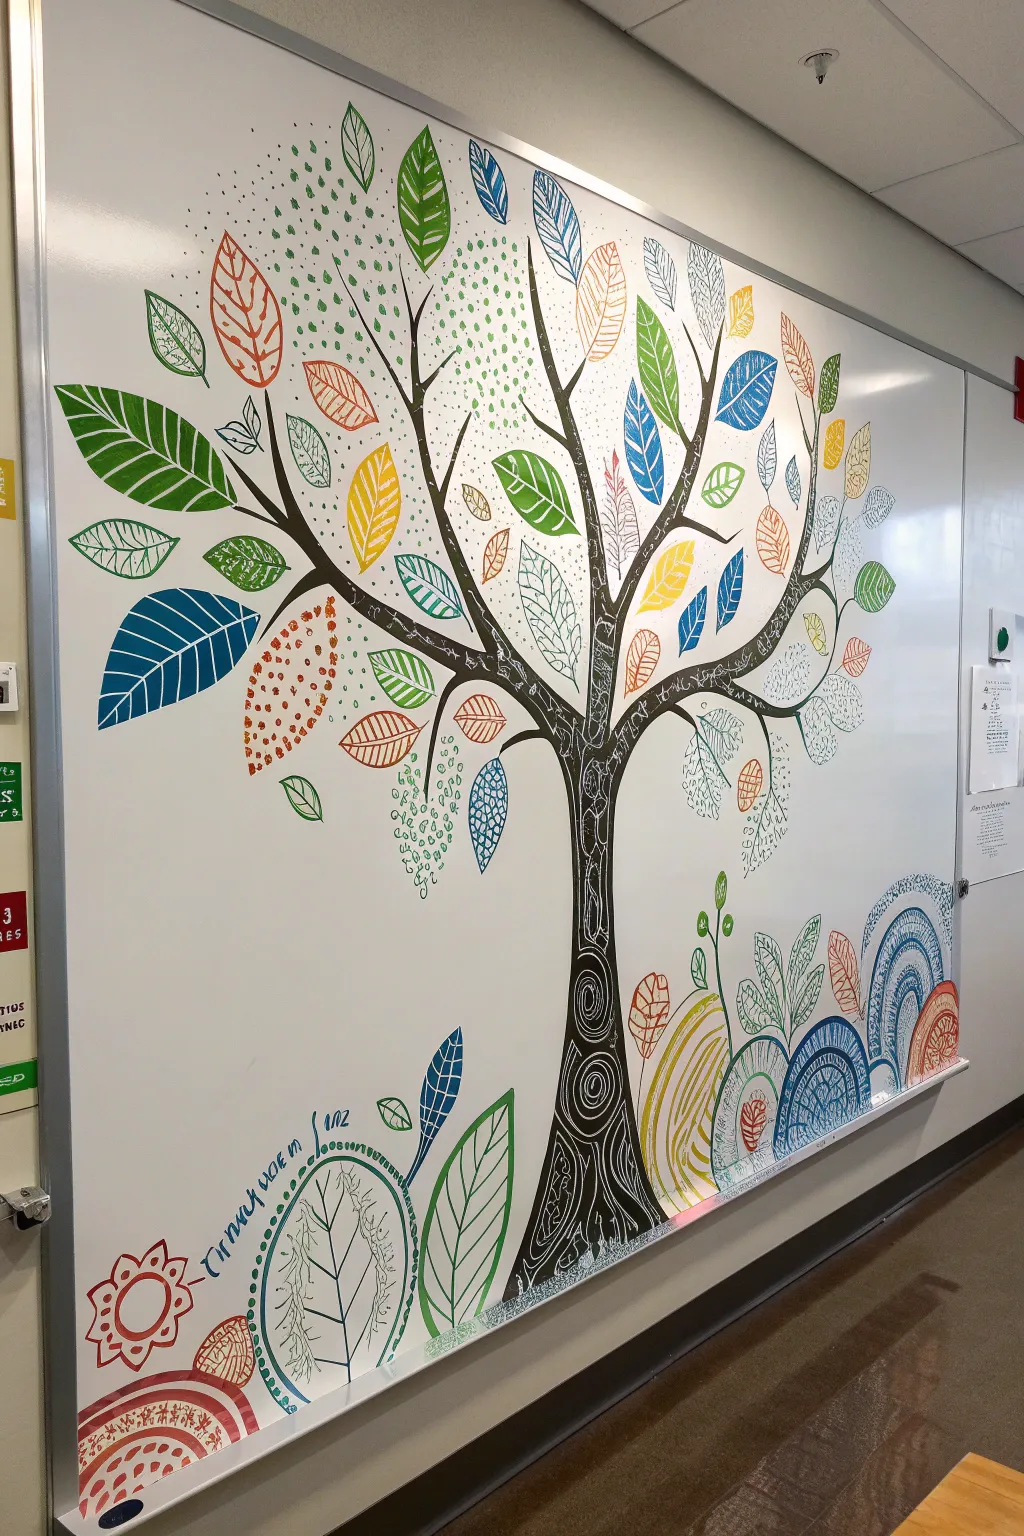
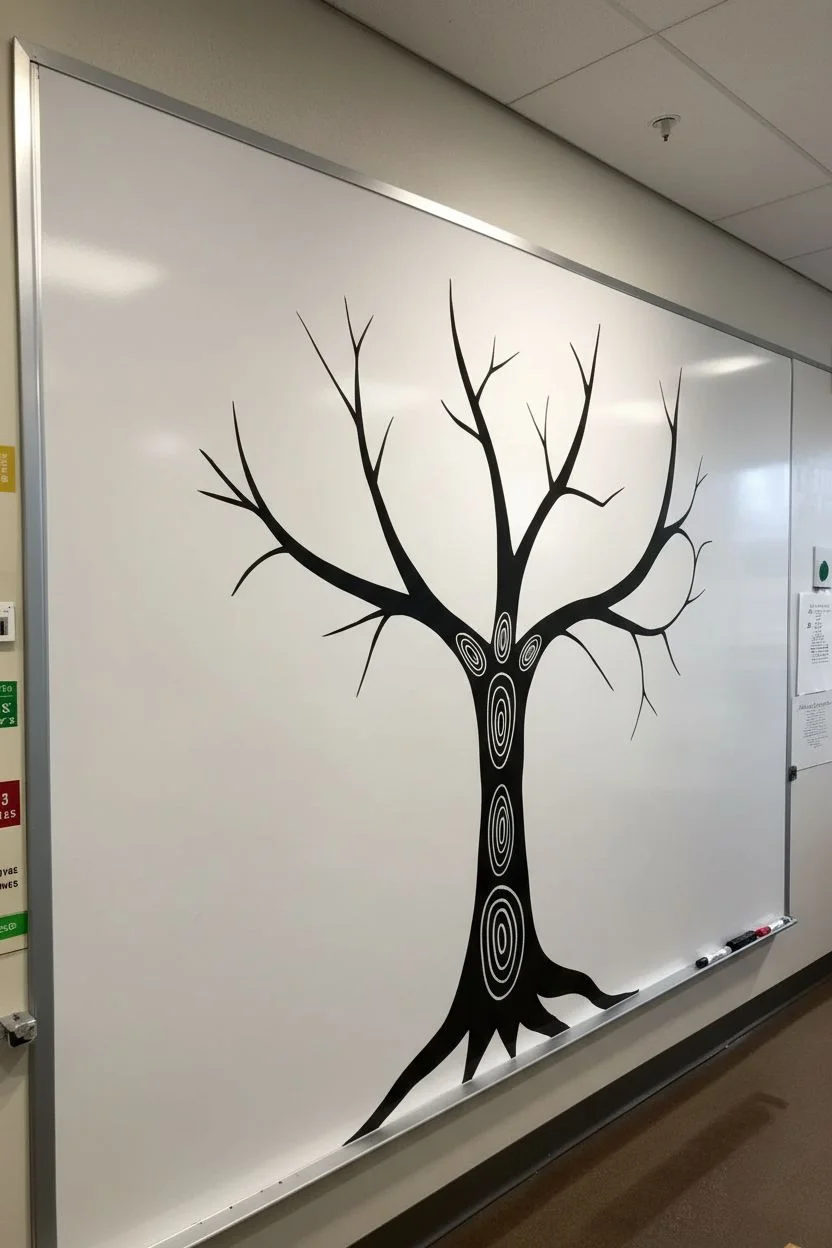
Transform a plain whiteboard into a vibrant mural of growth and creativity using simple dry-erase markers. This project combines bold outlines with intricate Zentangle-inspired patterns, making it perfect for a group activity where everyone contributes a unique leaf or design. The result is a high-contrast, colorful centerpiece that brightens up any classroom or office space.
Step-by-Step Guide
Materials
- Whiteboard cleaner and microfiber cloth
- Chisel-tip dry erase markers (Block, Green, Blue, Orange, Yellow, Red)
- Fine-tip dry erase markers (Black, Blue, Green)
- Cotton swabs (Q-tips) for detailing
- Paper towels
Step 1: Roots and Reach
-
Prepare the canvas:
Spray and wipe the whiteboard completely clean to ensure your colors pop and the black lines stay crisp without picking up old residue. -
Outline the trunk:
Using a thick black marker, start at the bottom center of the board. Draw a wide, flared base for the roots that narrows as it moves upward to form the trunk. -
Branch out:
Extend the trunk into two or three main large branches. From these, split off into smaller, thinner branches that reach toward the top corners of the board. -
Thicken the lines:
Go back over your initial trunk and main branch lines to make them bold and heavy, providing a strong skeleton for the artwork. -
Add wood grain texture:
Inside the black trunk layout, draw white swirling, concentric oval patterns. You can achieve this by drawing clear boundaries or by filling the trunk black and using a cotton swab to erase the ‘grain’ lines immediately while the ink is wet.
Step 2: A Canopy of Patterns
-
Draft leaf placements:
Scatter large, almond-shaped leaf outlines across the branches using a black marker. Vary the sizes, making some as large as your hand and others smaller. -
Design solid leaves:
Select a few leaves to be solid blocks of color (like the large blue one on the left). Fill them in completely, but leave thin strips of white board exposed to represent the veins. -
Create striped leaves:
On other leaves, draw diagonal stripes using alternating colors, such as dark green and lime green, to create visual vibration. -
Doodle internal patterns:
For the ’empty’ leaves, use fine-tip markers to draw intricate patterns inside. Try grids, small circles, zig-zags, or fish scales. -
Mix warm and cool tones:
Distribute your colors to balance the composition. If you have a cluster of cool blues and greens, add a bright orange or yellow patterned leaf nearby for contrast. -
Add floating leaves:
Draw a few smaller leaves disconnected from the branches, seemingly floating in the air, to give the tree a sense of movement. -
Stipple the atmosphere:
Using a green marker, gently dot the area around the upper branches. I like to cluster the dots densest near the leaves and spread them out as they move away, creating a misty, magical energy.
Smudge Prevention
Work from the top of the board down whenever possible. If working on the bottom details, rest your hand on a clean microfiber cloth rather than directly on the board to protect your work.
Step 3: The Landscape Base
-
Outline the mounds:
At the bottom of the board, draw several large, overlapping semi-circles and humps to create a stylized ground or hill effect. -
Pattern the hills:
Treat these mounds like the leaves. Fill one with concentric rainbow arches, another with vertical hatching, and another with large organic leaf shapes. -
Draw the corner flower:
On the bottom left, draw a stylized flower with a circular center and radiating petals. Use red or orange to anchor the corner visually. -
Sketch tall grasses:
Add large, leaf-shaped blades of grass rising from the mounds on the right side. Fill these with geometric grids or line work. -
Refine edges:
Take a tissue or cloth wrapped around your finger and carefully clean up any smudges around the outside of your main drawings to sharpen the silhouette. -
Final touches:
Look for any empty gaps that feel unbalanced and add small floating leaves, dots, or subtle patterns to tie the whole piece together.
Make It Interactive
Turn this into a team exercise by leaving the leaves empty. Have each team member or student pick one leaf to fill with their own unique doodle pattern or favorite color scheme.
Step back and enjoy the vibrant, communal forest you’ve grown right on your wall
The Reverse Erasure Technique
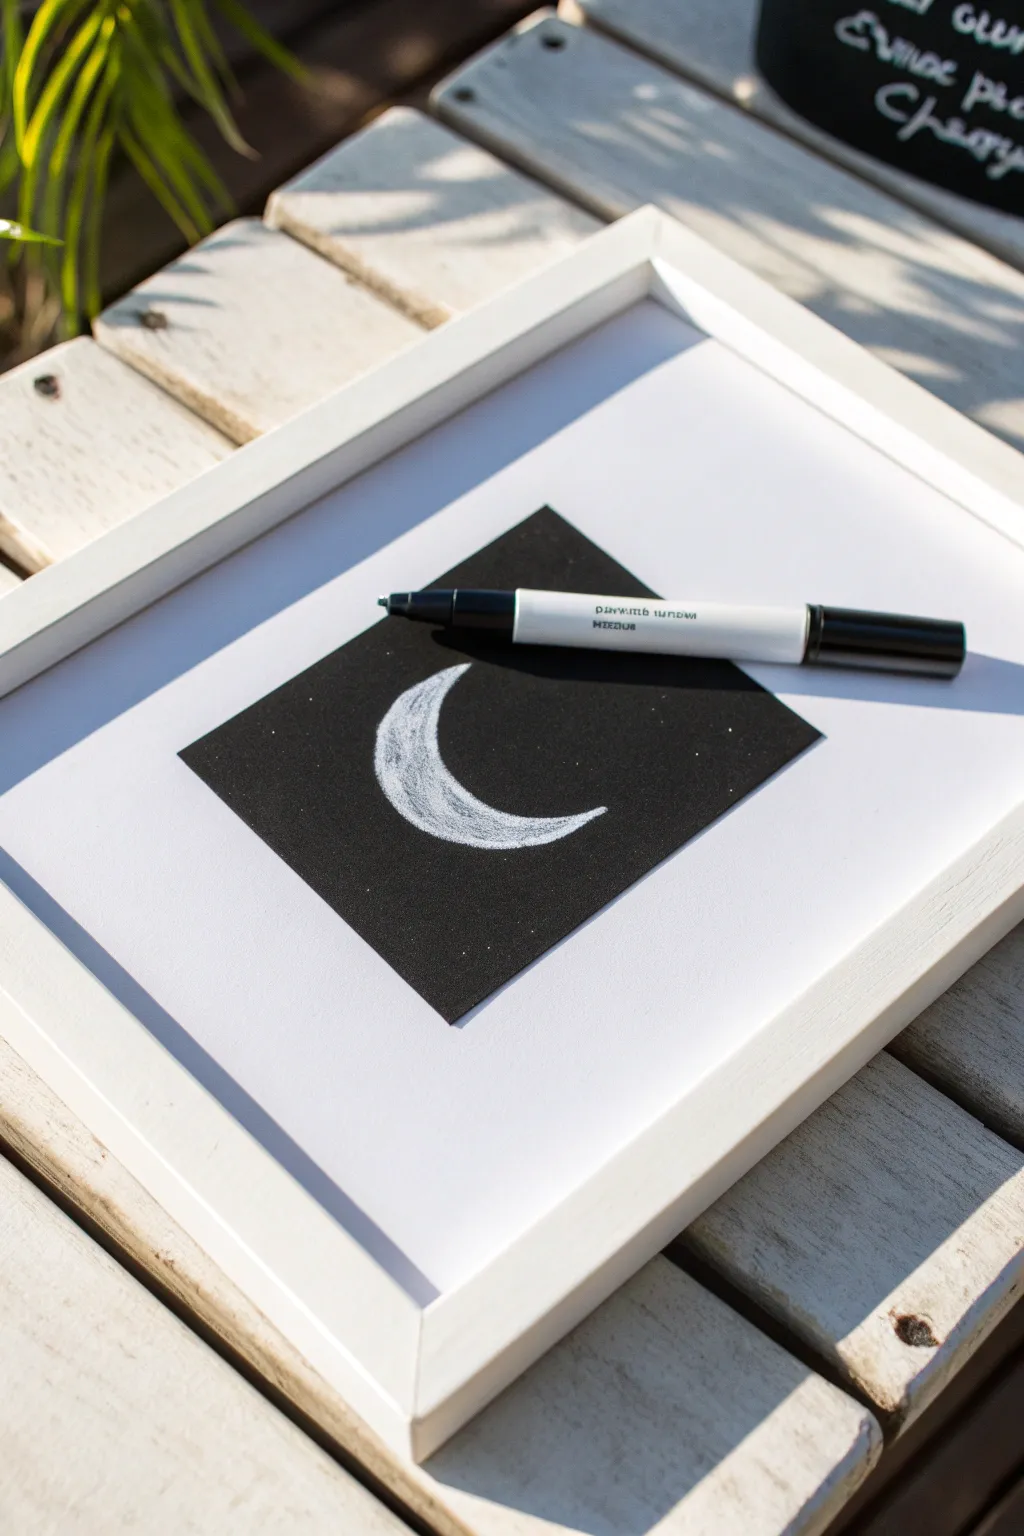
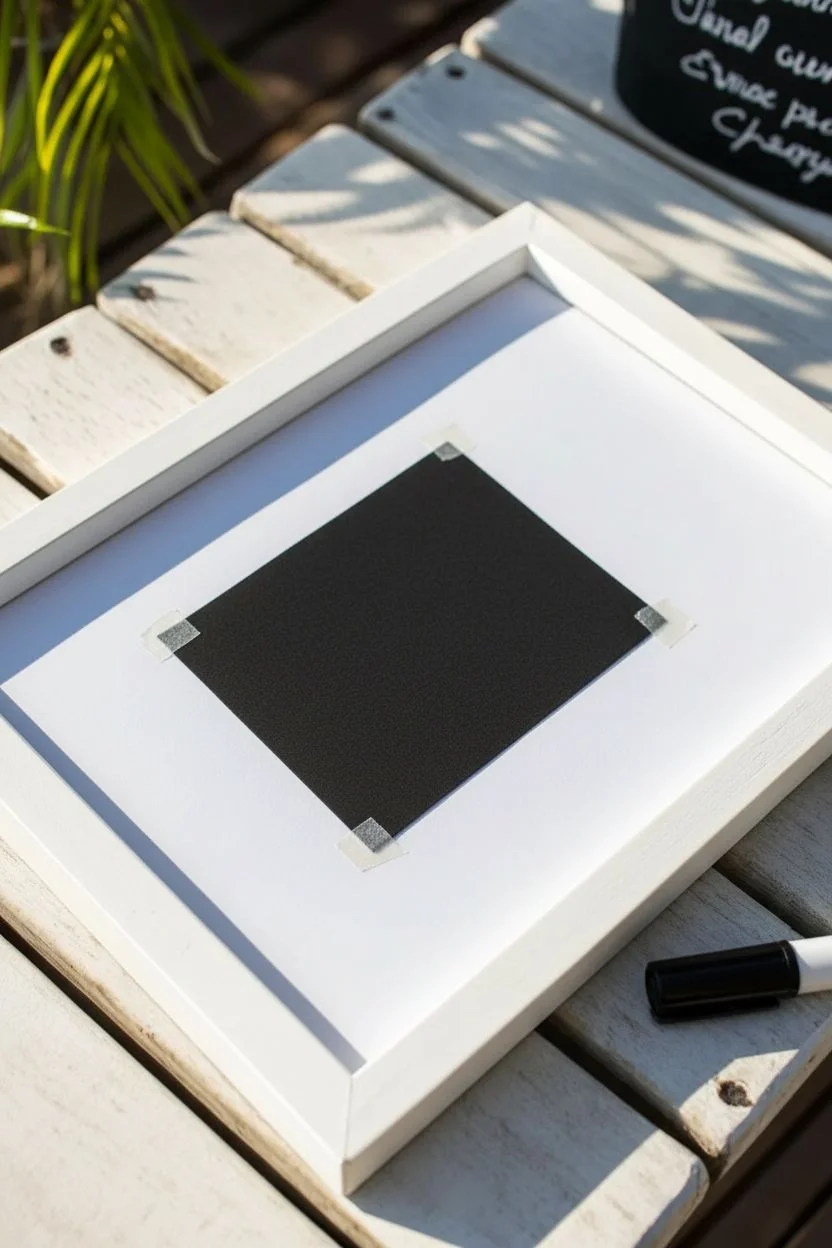
This striking piece plays with negative space and high contrast to create a serene celestial focal point. By mounting deep black paper against a stark white background, the sketch-style crescent moon seemingly glows within the frame.
Step-by-Step Tutorial
Materials
- White shadow box frame (square)
- Heavyweight white backing board or cardstock
- Smooth black cardstock (lighter weight than the backing)
- White opaque water-based paint marker (fine to medium tip)
- Ruler
- Craft knife or paper trimmer
- Double-sided tape or glue stick
- Glass cleaner and microfiber cloth
Step 1: Preparing the Canvas
-
Disassemble the frame:
Flip your frame over and lift the tabs to remove the backboard and the glass. -
Size the backing:
Cut your heavy white cardstock to fit exactly inside the frame. If your frame came with a clean white insert, you can use that instead. -
Measure the focal point:
Decide on the size of your central black square. For a balanced look, leave a generous border of white space—about 2 to 3 inches on all sides. -
Cut the black square:
Using your ruler and craft knife, cut the black cardstock into a precise square based on your measurements. -
Center the paper:
Place the black square onto the center of the white backing board. Use a ruler to ensure the margins are even on all sides. -
Secure the layers:
Apply double-sided tape to the back corners of the black square and press it firmly onto the white backing to secure it.
Marker Flow Tip
To get that chalk-like texture without using actual chalk, move the marker quickly. Fast strokes deposit less ink, leaving tiny gaps that mimic the surface of the moon.
Step 2: Drawing the Moon
-
Prime the marker:
Shake your white paint marker well and press the tip on a scrap piece of paper until the ink flows opaque and bright. -
Outline the curve:
Lightly sketch the outer ‘C’ shape of the crescent moon in the center of the black square. Keep the line very faint initially. -
Define the inner arch:
Draw the inner curve, connecting it to the top and bottom tips of the outer curve to form sharp points. -
Begin filling:
Start filling the shape using short, scratchy strokes rather than solid coloring. This creates the textured, crater-like surface visible in the photo. -
Layer the ink:
Go over the wider middle section of the moon a second time to make it brighter white, leaving the edges slightly sketchier. -
Refine the points:
Use the very tip of the marker to sharpen the upper and lower cusps of the moon so they look crisp against the dark background. -
Add celestial dust:
Gently tap the tip of the marker randomly on the black paper around the moon to create tiny, distant stars.
Step 3: Final Assembly
-
Allow to cure:
Let the ink dry completely for at least 30 minutes. Paint markers can smear easily on non-porous paper if rushed. -
Clean the glass:
Wipe the inside of the frame glass efficiently to remove any dust or fingerprints that might mar the clean high-contrast look. -
Insert artwork:
Place your mounted artwork face down into the frame. -
Secure the back:
Replace the frame backing and lock the tabs or clips in place. -
Display:
Stand the frame on a desk or hang it in a well-lit area where the white moon will pop against the black void.
Ink Transparency?
If the white ink looks gray as it dries, the black paper is absorbing it. Wait for the first layer to dry fully, then add a second layer to boost opacity.
Now you have a piece of modern, minimalist art that brings a touch of the midnight sky indoors.
Mind-Bending Optical Illusions
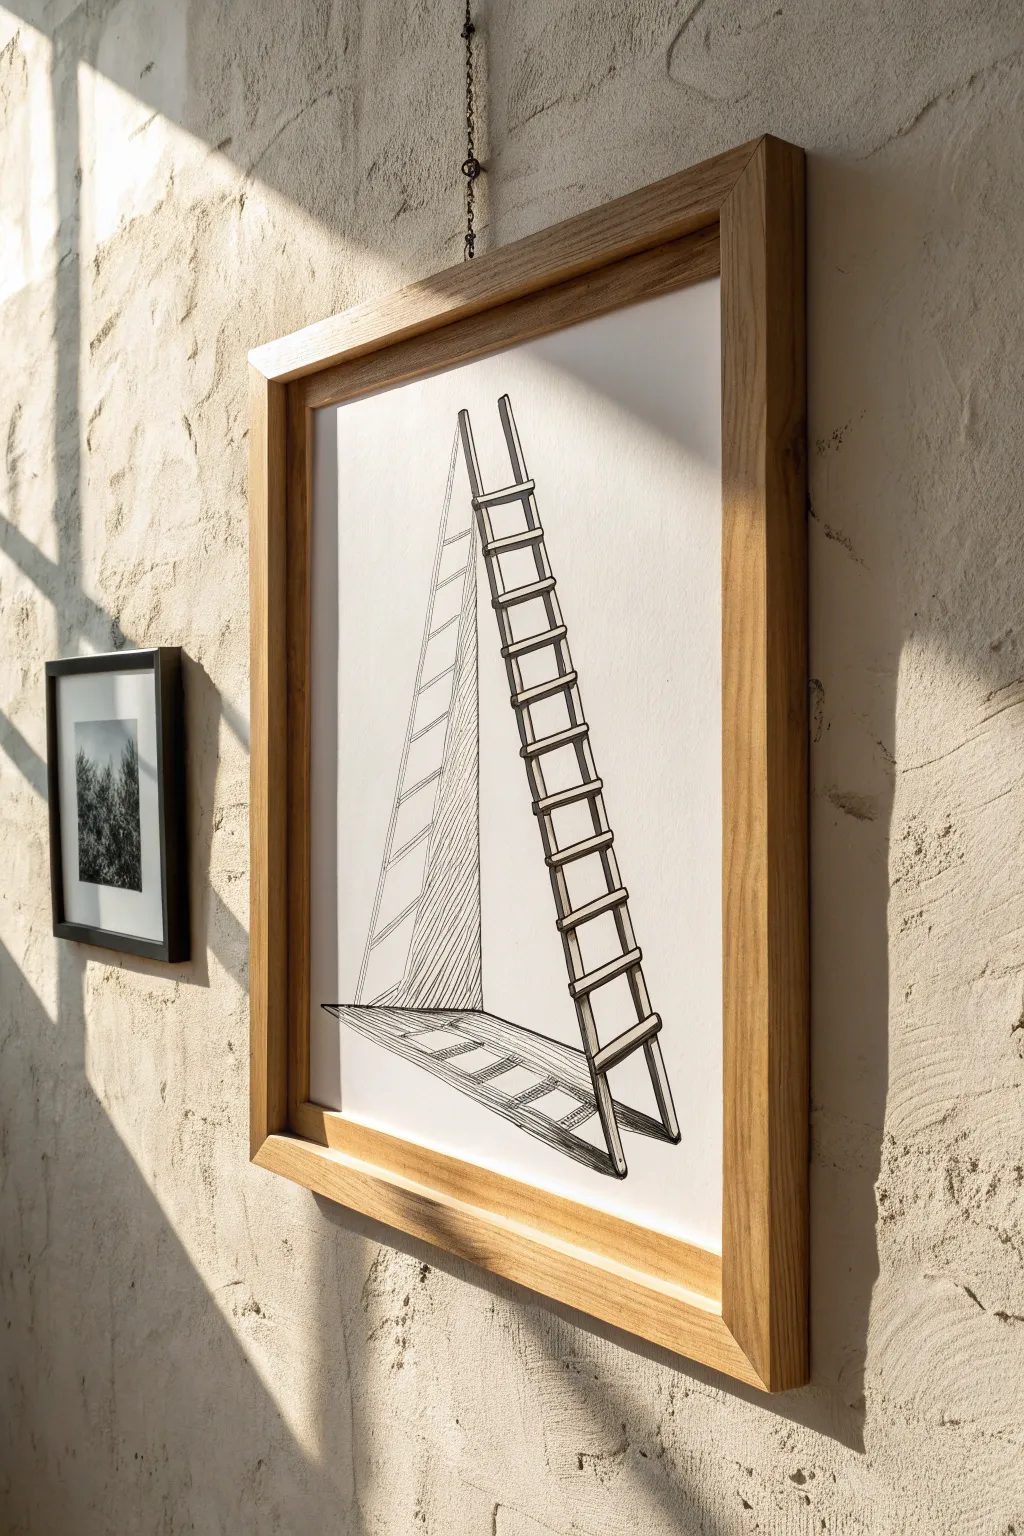
Create a sophisticated piece of optical art that challenges the eye and focuses on perspective. This minimalist pen-and-ink drawing depicts a ladder that seems to exist in two dimensions simultaneously, making for a striking framed conversation piece.
Detailed Instructions
Materials
- Smooth bristol board or heavy drawing paper (A3 size recommended)
- HB graphite pencil
- High-quality eraser
- Clear ruler (12-inch or longer)
- Black fine liner pens (sizes 01, 03, and 05)
- Light wood frame (optional)
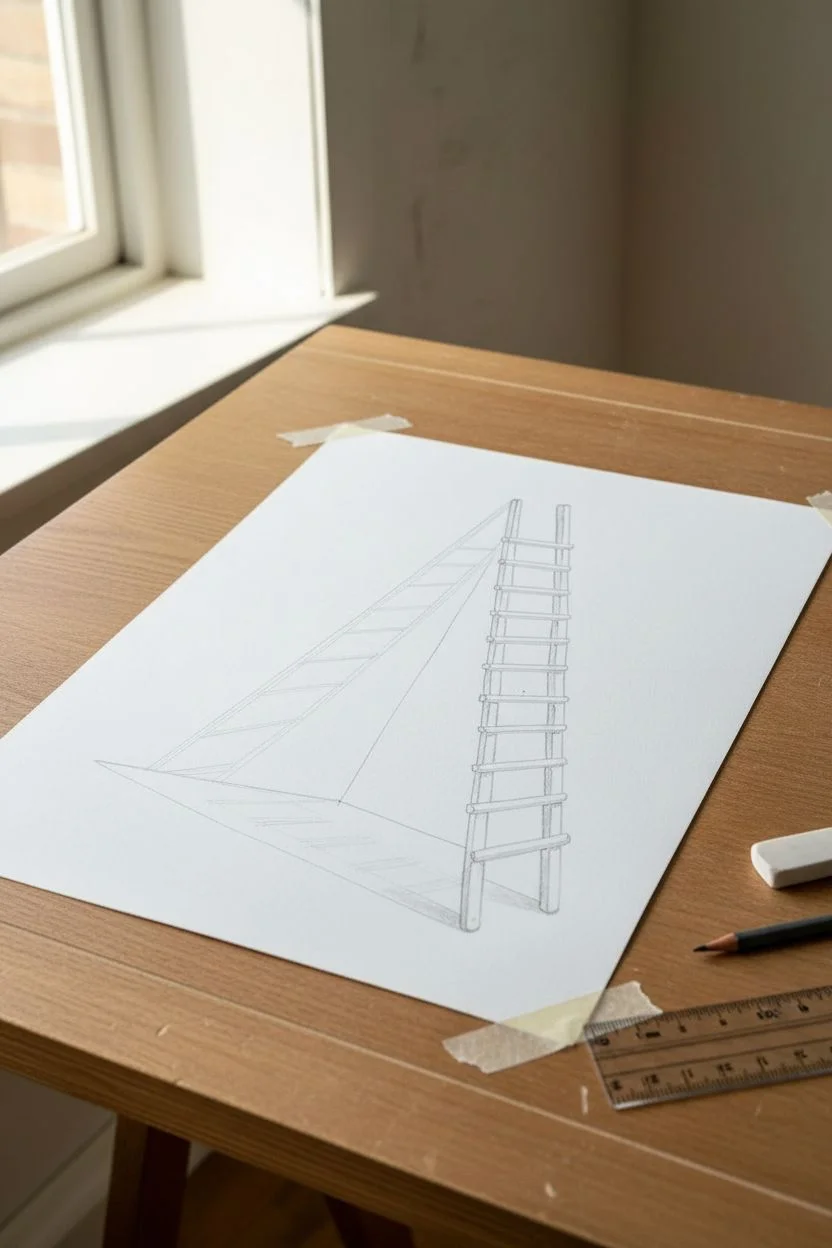
Step 1: Drafting the Skeleton
-
Secure the paper:
Tape the corners of your bristol board to a flat table to prevent shifting while you measure your perspective lines. -
Draw the vertical rails:
Using your pencil and ruler, lightly draw two long, parallel lines angling slightly toward the top right. These form the main upright ladder. -
Mark rung spacing:
Place tick marks along the left rail every 2-3 centimeters to ensure your ladder rungs will be evenly spaced. -
Draft the ‘floor’ shadow:
From the bottom of the upright rails, draw lines extending diagonally down to the left. This creates the illusion of the ladder’s shadow on the floor. -
Outline the ‘wall’ shadow:
Sketch a long, tall triangle extending from the left side of the upright ladder. This represents the shadow cast against the wall. -
Connect the impossible angle:
Carefully sketch where the floor shadow meets the wall shadow. This is the ‘impossible’ joint where the perspective trick happens.
Smudge Prevention
Wipe the edge of your ruler with a paper towel after every few ink lines. Ink accumulates on the ruler’s edge and can easily drag across the paper, ruining the clean white background.
Step 2: Inking the Lines
-
Outline the main shape:
Switch to your 05 fine liner. Place your ruler against your pencil lines and ink the long vertical rails of the ladder first. -
ink the transverse rungs:
Draw the horizontal rungs connecting the rails. Keep the pen upright to ensure consistent line weight. -
Define the shadows:
Outline the perimeter of the shadow shapes on both the floor and the wall sections using the same 05 pen to keep the style graphic and bold. -
Add dimension:
Draw a secondary inner line inside the ladder rails to give them thickness, rather than just single stick lines. -
Let it set:
Allow the ink to dry for at least 15 minutes. If you erase too soon, the heavy lines will smear. -
Erase guidelines:
Gently remove all underlying graphite pencil marks with a clean eraser, leaving only the crisp black ink.
Step 3: Shading and Texture
-
Hatch the wall shadow:
Switch to a finer 01 pen. Fill the tall triangular wall shadow with closely spaced, vertical hatching lines. -
Detail the floor shadow:
Use horizontal hatching lines for the floor shadow area. Changing the direction of the lines helps distinguish the floor plane from the wall plane. -
Darken the rungs:
I like to add a second layer of ink to the underside of each rung to suggest weight and cylindrical volume. -
Refine the edges:
Use the 03 pen to touch up any corners where lines didn’t quite meet, ensuring every intersection is sharp and deliberate. -
Frame the work:
Once fully dry, place the drawing into a natural wood frame to match the organic, minimalist aesthetic shown in the sample.
Level Up: Surreal Scale
Add a tiny, realistic silhouette of a person standing on one of the bottom rungs or looking up at the ladder. This instantly changes the scale and adds a narrative element.
Hang your new optical illusion in a well-lit spot where the clean lines can really pop.


Have a question or want to share your own experience? I'd love to hear from you in the comments below!