
Window painting is one of my favorite ways to make a space feel instantly festive, cozy, or just plain more “you,” without committing to a permanent change. Here are some window painting ideas you can totally pull off—whether you’re decorating at home, dressing up a classroom, or creating a bold storefront display.
Classic Snowflakes and Frosted Corners
Bring the magic of a winter wonderland indoors with these crisp, clean snowflake decals that brighten up your view regardless of the weather outside. Using simple materials, you can create a flurry of intricate designs that look like professional vinyl clings but are entirely hand-painted.
Step-by-Step Tutorial
Materials
- White window marker (chalk marker) or white acrylic paint
- Fine-point paintbrush (if using acrylics)
- Snowflake stencils or printed templates
- Painter’s tape
- Glass cleaner
- Lint-free cloth
- Cotton swabs
- Rubbing alcohol
Step 1: Preparation and Planning
-
Clean the Surface:
Before thinking about paint, the glass needs to be pristine. Spray your window panes thoroughly with glass cleaner and wipe them down with a lint-free cloth to remove dust and fingerprints. -
Degrease for Adhesion:
Take a paper towel dampened with a little rubbing alcohol and quickly wipe the areas where you plan to place your snowflakes. This removes invisible oils and ensures your paint or marker lines stay crisp without beading up. -
Plan Your Flurry:
Step back and look at your window grid. Decide on a balanced composition; notice how the example image places larger, more intricate flakes in the center of panes and smaller, simpler stars near the edges or corners for depth. -
Prepare Templates:
If you aren’t freehanding, print out snowflake designs in varying sizes. Cut the paper roughly around each design so they fit easily behind the glass or can be taped to the outside.
Uneven Ink Flow?
If your marker leaves streaks, store it tip-down for 10 mins. If using a brush, mix a tiny drop of water into acrylics to improve glide without losing opacity.
Step 2: Creating the Snowflakes
-
Position the Template:
For the most accurate result, tape your stencil or template to the *outside* of the window facing in. This allows you to trace the lines directly onto the indoor glass surface without the paper getting in your way. -
Prime the Marker:
If using a chalk marker, shake it vigorously and press the tip on a scrap piece of paper until the white ink flows smoothly. I prefer to test the flow every few minutes to keep the lines opaque. -
Draw the Central Cross:
Start every snowflake by drawing a simple vertical line, followed by a horizontal line intersecting in the middle. This “plus sign” anchors your design. -
Add Diagonal Spines:
Draw two diagonal lines through the center point, creating an ‘X’ over your ‘plus’. You should now have an eight-pointed star shape as your skeleton. -
Thicken the Main Lines:
Go back over your main structural lines to thicken them slightly. The lines should be bold enough to be seen from a distance but sharp enough to look delicate. -
Add the Branching details:
On each of the eight spines, draw small “V” shapes pointing outward. For variety, place some ‘V’s near the center and others near the tips. -
Create Hexagon Connectors:
For the more complex flakes shown in the center panes, connect the spines with small straight lines to form a hexagon shape near the middle. This adds a crystalline, geometric look. -
Fill the Tips:
Add small dots or diamond shapes at the very end of each spine to finish off the snowflake arms elegantly.
Step 3: Refining and Finishing
-
Freehand Small Fillers:
Once the large snowflakes are done, remove the templates. Now, freehand small, six-pointed stars or simple distinct dots in empty negative spaces to mimic distant falling snow. -
Correcting Mistakes:
If a line goes rogue, don’t panic. Dampen a cotton swab with water (or window cleaner) and essentially use it as an eraser to tidy up edges while the paint is still tacky. -
Review Contrast:
Step back about five feet. If any snowflakes look translucent, wait for the first layer to dry completely (about 10-15 minutes) and carefully trace over them again for a solid, bright white finish. -
Final Cleanup:
Check for any smudges your hand might have left on the glass while drawing. Buff these away gently with a dry cloth, being careful not to touch your fresh artwork.
Add Some Frosty Sparkle
While the white paint is still wet, gently blow a pinch of clear or iridescent glitter onto the glass. It will stick to the paint for a shimmering, icy effect.
Enjoy your cozy, custom winter view that won’t melt away until you are ready for spring


Pumpkins and Fall Leaves for an Autumn Splash
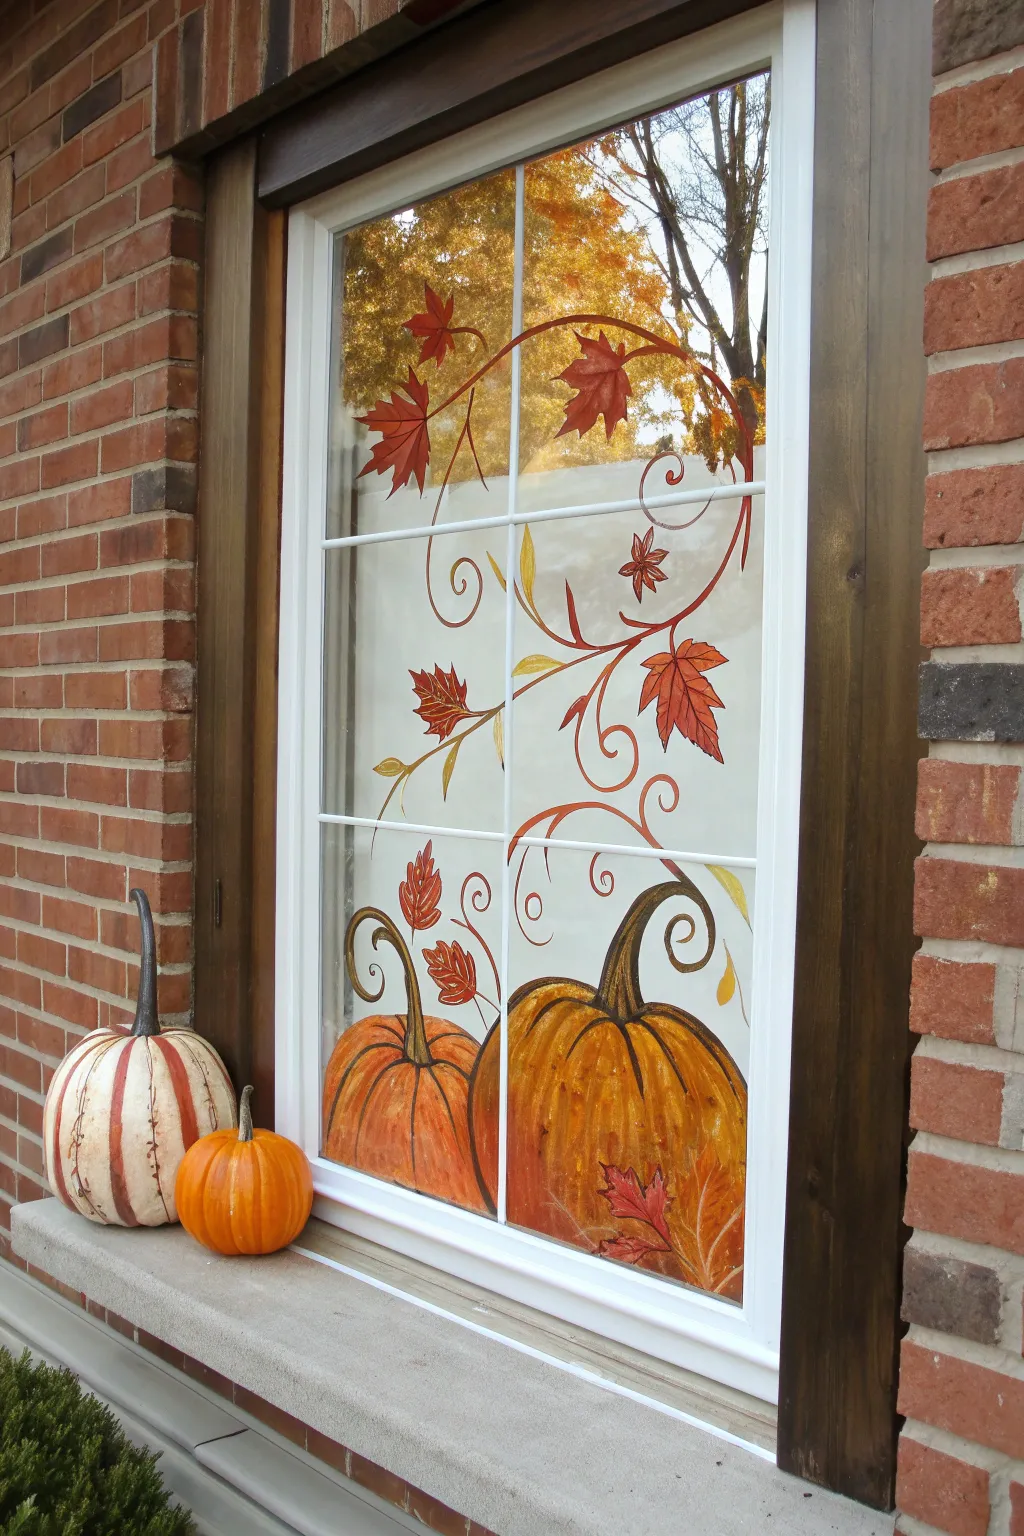
Transform a plain window pane into a cozy harvest scene featuring two large pumpkins resting at the bottom and elegant vines climbing upward. The translucent quality of the paint allows sunlight to filter through the oranges and reds, creating a stained-glass effect that glows beautifully.
Step-by-Step
Materials
- Acrylic craft paints (orange, deep red, yellow, brown, burnt sienna, white)
- Window cleaner and paper towels
- Rubbing alcohol
- Assorted paintbrushes (medium flat brush, small round detail brush, liner brush)
- Painter’s tape (optional)
- Paper plate or palette
- Cup of water
- Chalk marker or dry-erase marker
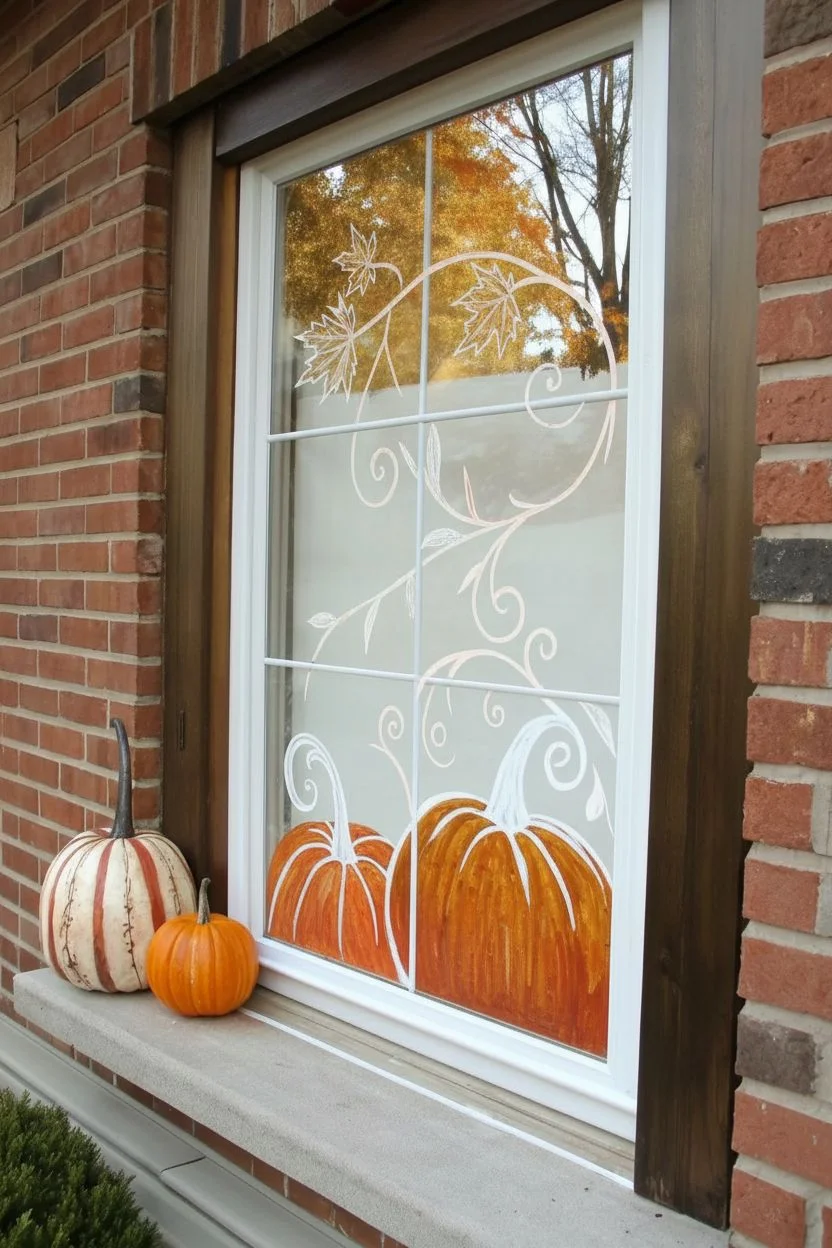
Step 1: Preparation and Sketching
-
Clean the glass:
Start by thoroughly cleaning the window pane inside and out to ensure there is no dust or grease. Give the inside surface (where you will paint) a final wipe with rubbing alcohol for better paint adhesion. -
Plan your composition:
Visualize where the pumpkins will sit. Notice in the example that they anchor the bottom corners, with the larger pumpkin on the right overlapping the frame slightly. The vines swirl upward to the top panes. -
Sketch the outlines:
Using a chalk marker or dry-erase marker, lightly draw the basic shapes of the two pumpkins at the bottom. Then, draw loose, swirling S-curves rising from the pumpkins toward the upper window sections to map out your vines.
Let the Light In
Don’t paint the pumpkins solid opaque. Leave brushstrokes visible and the paint slightly thinner in the center of the pumpkin ribs so the sun glows through.
Step 2: Painting the Pumpkins
-
Base coat the pumpkins:
Using a medium flat brush, fill in the pumpkin shapes with a base layer of orange paint. Don’t worry if it looks streaky at first; acrylics on glass often need a second coat or benefit from the texture. -
Add definition lines:
Mix a little brown into your orange or use burnt sienna. While the base is tacky but not fully wet, paint the vertical curved ribs of the pumpkin to give it a spherical shape. -
Layer highlights and shadows:
On the top curves of the pumpkin distinct sections, dab a bit of yellow or white mixed with orange to create a highlight where the light hits. Add darker burnt sienna near the bottom for shadow. -
Paint the stems:
Design the stems to be thick at the base and taper off, curling playfully at the end. Use dark brown paint for the main stem, adding a thin streak of lighter brown or tan on one side for dimension. -
Refine the edges:
Once the main pumpkin color is dry, use a small round brush with dark brown paint to outline the entire pumpkin and the individual ribs, giving it a crisp, illustrative look.
Background Contrast
Tape a piece of white paper to the OUTSIDE of the glass while you paint. This helps you see your colors clearly without the distraction of the outdoor scenery.
Step 3: Creating the Vines and Leaves
-
Paint the main vine stems:
Using a liner brush loaded with thinned brown paint, trace over your swirling vine sketches. Vary the pressure—press down for thicker sections and lift up for delicate, wispy ends. -
Add decorative swirls:
Branch off from the main vines with tighter spirals and curlicues. These decorative flourishes fill the negative space in the upper window panes without blocking the view. -
Block in the leaves:
Paint maple leaf shapes along the vines. I like to use a mix of rusty red and orange for variety. Some leaves should look like they are attached to the vine, while others can be ‘falling’ nearby. -
Detail the leaves:
Once the red leaf shapes are dry, take your liner brush with dark brown paint and add a central vein and smaller side veins to each leaf. -
Add yellow accents:
Paint a few smaller, simpler leaf shapes in yellow or pale gold to balance the color palette and add brightness against the darker red leaves.
Step 4: Finishing Touches
-
Clean up edges:
If you made any smudges or have shaky lines, wait for the paint to dry completely, then gently scrape the excess away with a fingernail or a craft knife. -
Check transparency:
Step back and look at the window from a distance. If the pumpkins look too washed out, add another layer of paint to the darkest shadow areas to increase contrast. -
Optional sealing:
Since this is indoors, sealing isn’t strictly necessary, but if you want it to last through condensation, you can brush a clear acrylic medium over the painted areas once fully dry.
Enjoy the warm autumn atmosphere your new window art brings to the room


Sunny Citrus Slices and Summer Stripes
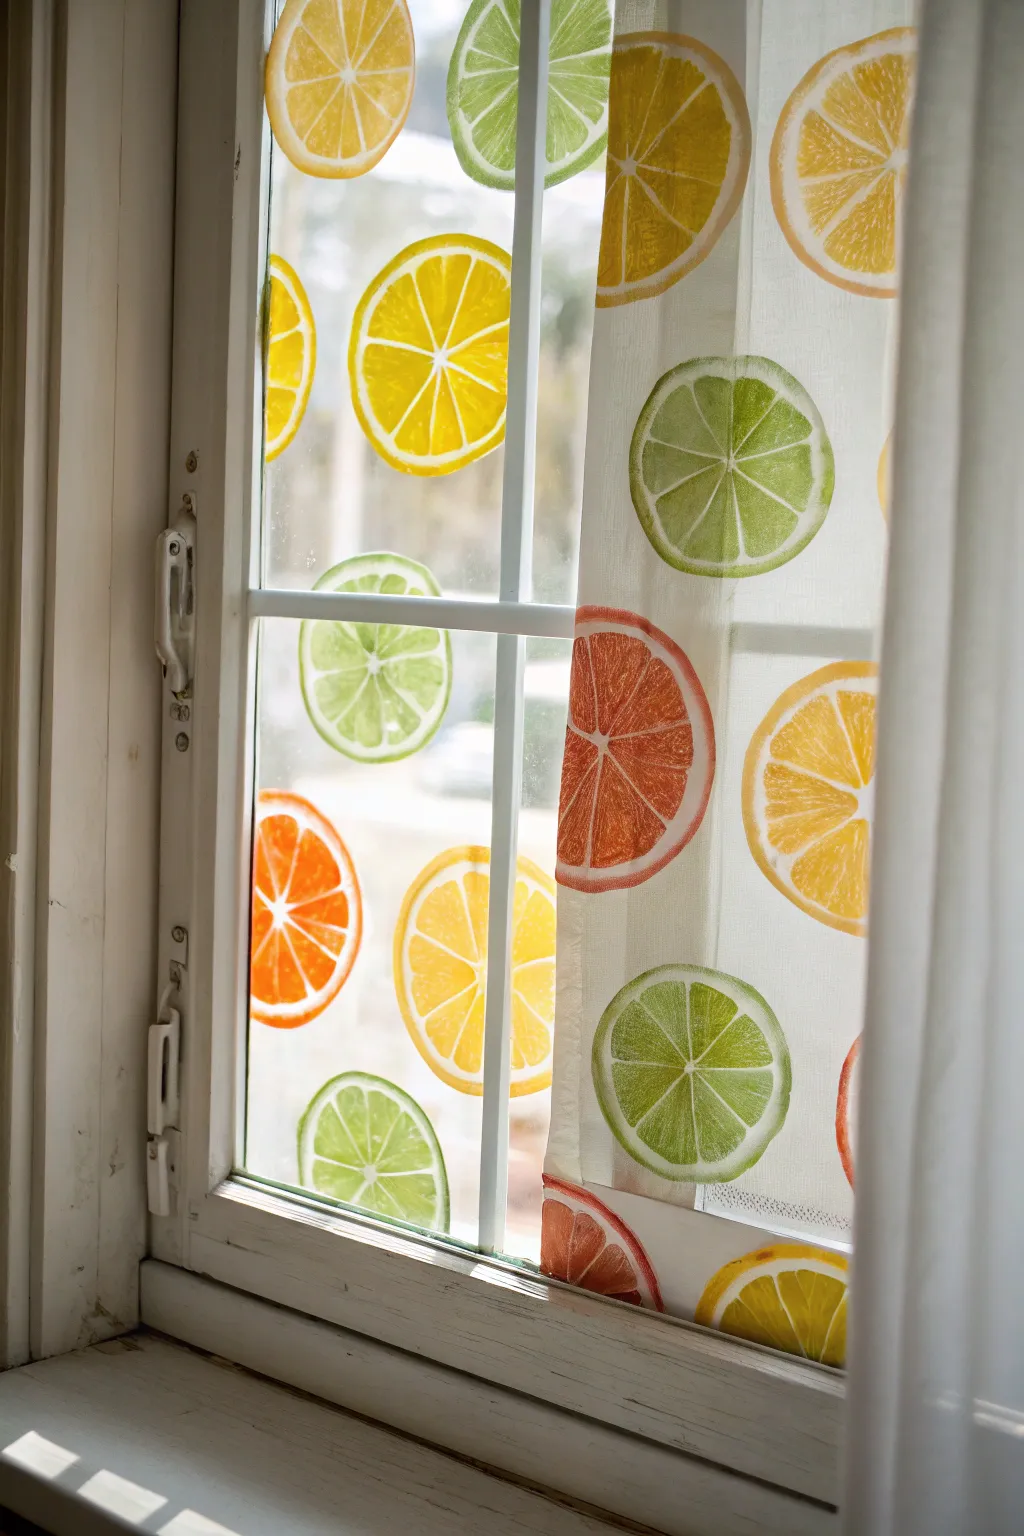
Brighten up your kitchen or sunroom with these vibrant, translucent citrus slices that look just like stained glass when the sun hits them. This project uses glass paints to create peel-and-stick clings, allowing you to rearrange your sunny fruit salad whenever the mood strikes.
Step-by-Step Tutorial
Materials
- Gallery Glass or similar window color paint (Lemon Yellow, Lime Green, Orange, White, Clear)
- Liquid Lead gallery glass outline (black or clear)
- Plastic sheet protector or heavyweight acetate sheet
- Printed template of citrus slice shapes (circles of various sizes)
- Toothpicks
- Paper towels
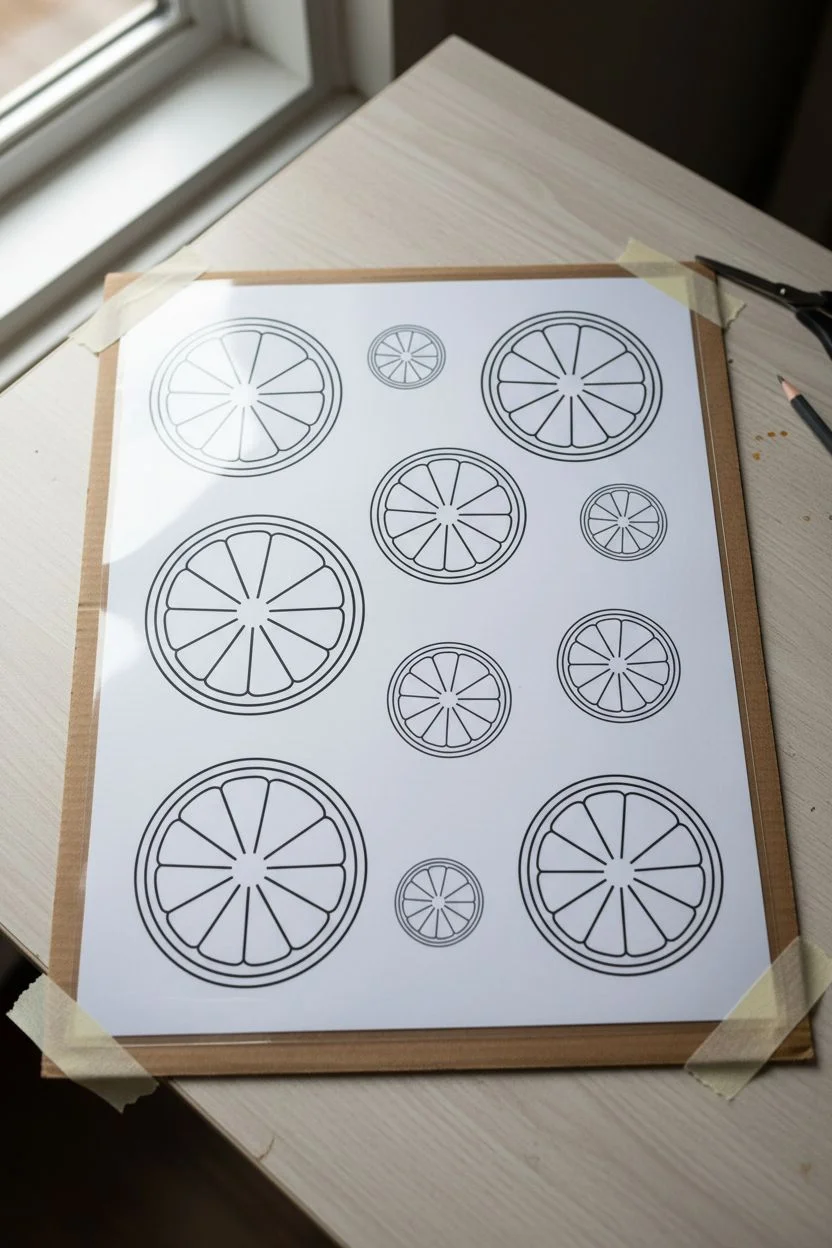
Step 1: Preparation
-
Prepare your template:
Print out a sheet with several circles ranging from 3 to 5 inches in diameter. You can draw dividing lines inside to mark the citrus segments—usually 8 or 9 wedges per slice. -
Set up the workspace:
Slide your pattern sheet inside a smooth plastic sheet protector. If the protector is flimsy, tape it down to a piece of cardboard to keep it flat and stable while you work.
Mix It Up
For a pink grapefruit slice, mix a drop of pink or red into your orange paint. Don’t mix it completely; leaving it slightly swirled mimics the natural color variation.
Step 2: Outlining
-
Trace the rind:
Using the bottle tip of your window color or liquid lead, trace the outer circle of the fruit slice. Keep a steady pressure on the bottle to ensure an even line thickness. -
Define the segments:
Draw the inner ‘spokes’ or wedge lines that separate the fruit segments. I usually leave a small gap between the outer rind and the inner segments to fill with white pith later, which adds realism. -
Initial drying time:
Let these outline borders dry for about 2 to 4 hours until they are firm to the touch. This creates a dam that will hold the liquid paint in place.
Sticky Situation?
If the clings are hard to remove from the sheet protector, place the whole sheet in the freezer for about two minutes. They will pop right off without stretching.
Step 3: Filling the Fruit
-
Start with the pith:
Use white window paint to fill the thin area between the outer rind and the inner segments. Also, run a thin line of white along the segment dividers if you didn’t use white for the outline itself. -
Flood the segments:
Squeeze a generous amount of your fruit color (yellow, orange, or green) into the center of a wedge. You want enough paint so it pools slightly, which gives that rich, juicy look when dry. -
Spread into corners:
Use a toothpick to gently push the wet paint into the sharp corners of the wedge, ensuring it touches the outline completely so there are no gaps. -
Add texture:
While the paint is still wet, swirl a tiny drop of clear or a lighter shade of the main color into the center of each wedge to mimic the fleshy texture of real fruit. -
Create the rind:
Fill the outermost ring with the same color as the fruit segments, or a slightly darker shade if you have it, to represent the skin of the lemon, lime, or orange.
Step 4: Finishing and Application
-
Remove air bubbles:
Inspect your wet paint closely. If you see tiny bubbles, pop them instantly with a clean toothpick to prevent imperfections in the final cling. -
Dry completely:
Allow the clings to dry undisturbed for 24 to 48 hours. The paint will turn from opaque to beautifully translucent as it sets. -
Peel carefully:
Once fully cured, gently bend the plastic sheet protector to pop up an edge of the citrus slice and slowly peel the cling off the backing. -
Clean the window:
Wipe your window glass with rubbing alcohol or a glass cleaner to remove any dust or grease, ensuring the best possible adhesion. -
Arrange the slices:
Press the smooth side of the cling onto the window pane. Smooth it from the center outward to push out any trapped air. -
Refresh if needed:
If a cling isn’t sticking well, wipe the back with a slightly damp cloth to reactivate its tackiness before pressing it back onto the glass.
Enjoy the colorful glow these slices cast across your room whenever the sun shines through


Birthday Confetti and a Big Name Banner
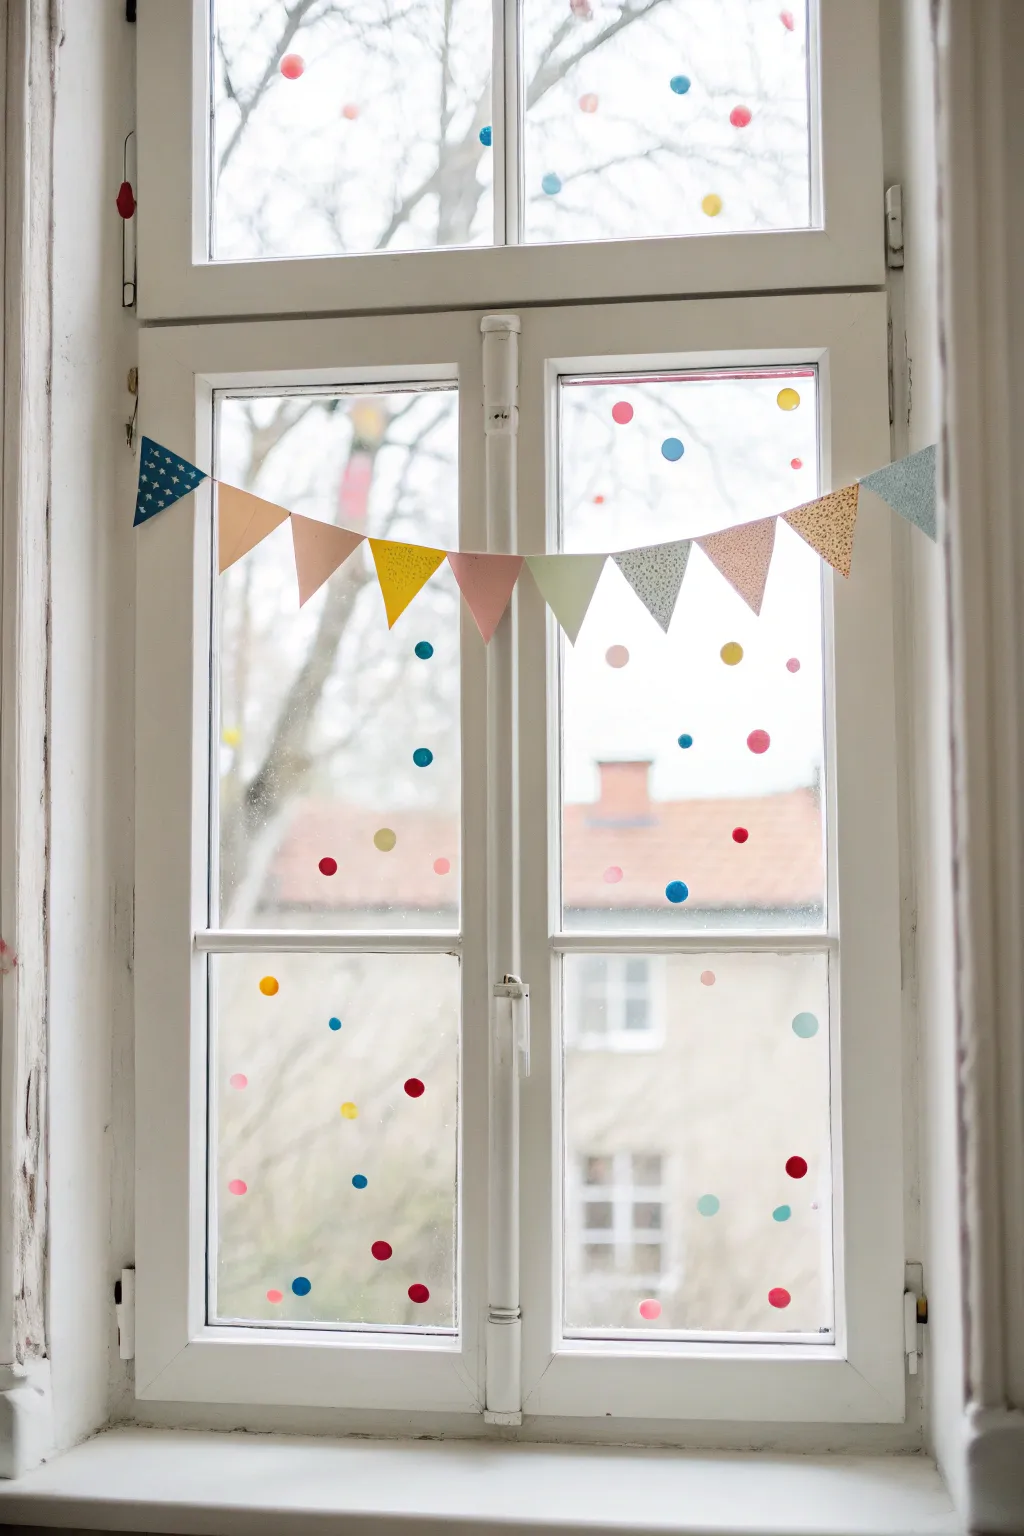
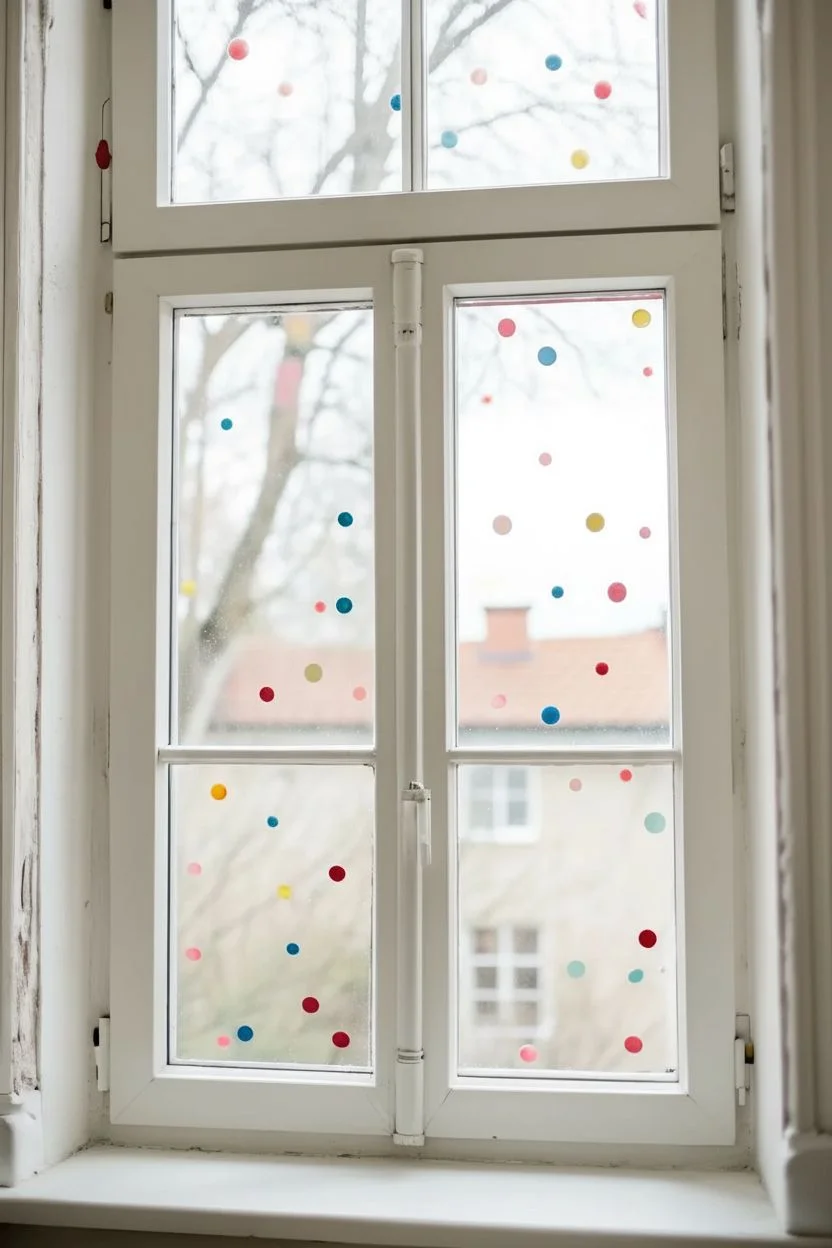
Transform an ordinary window into a cheerful celebration centerpiece with this delightful combination of floating confetti dots and a classic triangle bunting. This festive display lets the natural light shine through while adding pops of color perfect for birthdays or just brightening up a dreary day.
Step-by-Step Guide
Materials
- Construction paper, cardstock, or patterned scrapbook paper (various colors)
- Scissors or a triangle paper punch
- Circle punch (approx. 1 inch) or removable circle stickers/window clings
- Baker’s twine, thin ribbon, or string
- Double-sided tape or clear glue stick
- Clean window surface
- Rubbing alcohol and cloth (for prep)
- Clear transparent tape
Step 1: Preparation & Confetti
-
Clean the surface:
Start by thoroughly cleaning the window pane inside and out. Use a cloth with a bit of rubbing alcohol to ensure the glass is completely free of dust and grease so your decorations stick reliably. -
Create the dots:
If you aren’t using pre-made window clings or stickers, take your colored paper and punch out several dozen small circles. I like to use a mix of primary colors and pastels for a classic birthday look. -
Plan the scatter:
Visualize how the confetti has fallen. The distribution should look random but balanced. Avoid clustering too many of the same color together. -
Apply the first dots:
Start applying your circle stickers or paper dots to the glass. If using paper, apply a very small dab of glue stick or a tiny piece of double-sided tape to the back of each dot. -
Work in sections:
Tackle one window pane at a time. Place a few dots high up, resembling floating balloons or falling confetti, and scatter others lower down. -
Vary the density:
Unlike real gravity, you can keep the distribution fairly even, but leave plenty of negative space so the window doesn’t look cluttered. -
Check from a distance:
Step back occasionally to look at the window as a whole. Fill in any large empty gaps with a contrasting color dot.
Sticky Situation?
If using paper dots, stick double-sided tape only to the very center. This makes removal much easier later and prevents sticky residue on the glass edges.
Step 2: Crafting the Bunting
-
Cut the triangles:
Cut out approximately 10-12 triangles from your patterned paper or cardstock. An isosceles triangle shape (two equal long sides) works best for this classic pennant style. -
Mix patterns and solids:
Alternate between solid colors (like the pink and peach in the photo) and subtle patterns (like polka dots or stars) to create visual interest without overwhelming the eye. -
Measure the twine:
Cut a length of baker’s twine or string that is about 6 inches wider than your window frame. This gives you enough slack for the swag effect and securing the ends. -
Attach flags to string:
Lay your string flat on a table. Apply a strip of tape to the back top edge of each paper triangle and adhere it directly to the string. -
Space them out:
Leave a tiny gap—about 1/4 inch—between the top corners of neighboring flags. This allows the bunting to drape naturally without the paper bunching up. -
Secure the ends:
Ensure the first and last flags are securely taped, as these often take the most tension when hanging.
Level Up
Make it personal by writing one letter of the birthday child’s name on each triangle flag using a gold or silver paint marker for a custom touch.
Step 3: Assembly
-
Position the banner:
Hold the bunting up against the window frame to find the perfect height. It usually looks best strung across the upper third of the window pane. -
Create the swag:
Don’t pull the string tight. Allow it to dip slightly in the middle for that relaxed, celebratory feel. -
Attach to the frame:
Use clear tape or a small command hook to secure the ends of the twine to the side edges of the window frame or the wall immediately adjacent. -
Adjust flags:
Once hung, gently adjust the angle of the flags if they have twisted slightly, ensuring the patterned side faces into the room. -
Add final confetti:
Now that the banner is up, add a few more confetti dots around the string line to integrate the two elements, making it look like the confetti is falling behind the bunting.
Step back and enjoy the festive atmosphere you’ve created with just paper and light
BRUSH GUIDE
The Right Brush for Every Stroke
From clean lines to bold texture — master brush choice, stroke control, and essential techniques.
Explore the Full Guide
Kid-Friendly Fingerpaint Dots and Handprint Critters
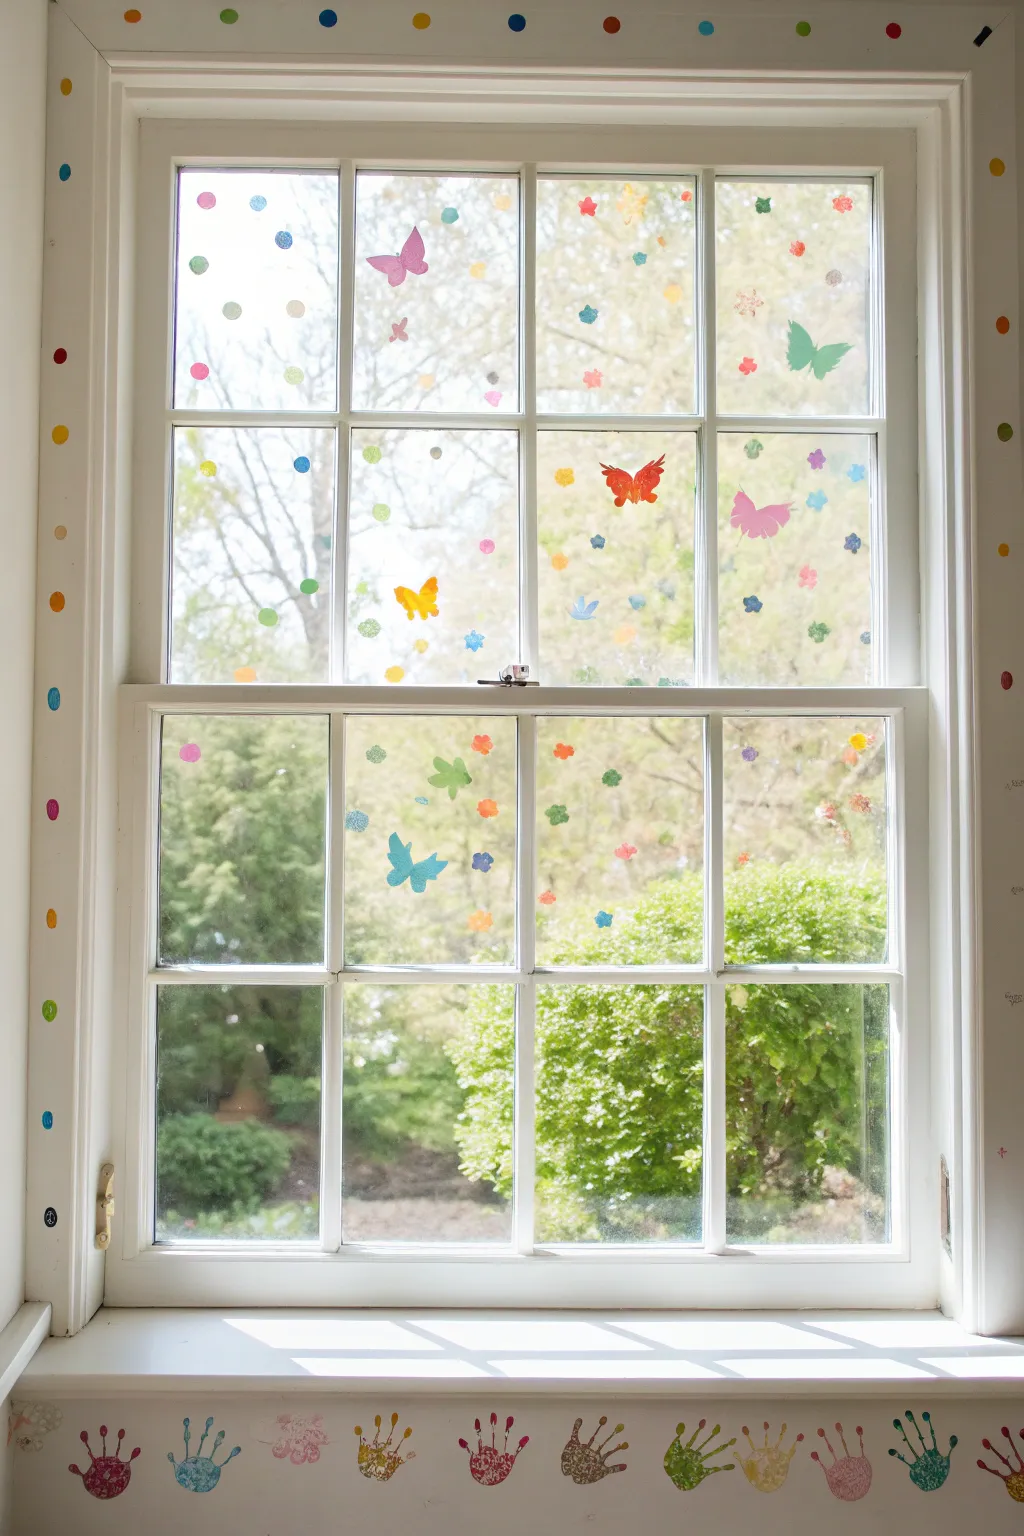
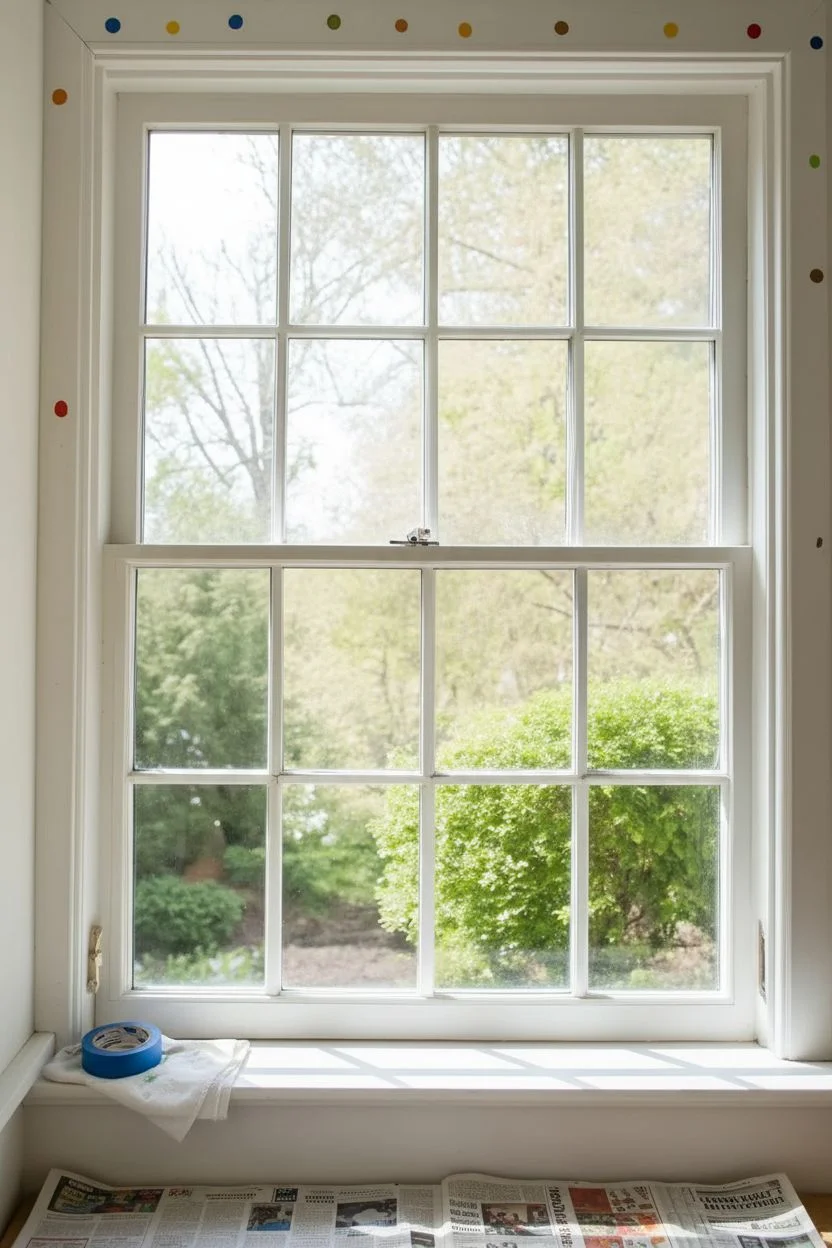
Brighten up any room with this cheerful combination of colorful fingerprint dots, whimsical window clings, and a playful border of handprints. This project transforms a standard sash window into a vibrant canvas that celebrates creativity and adds a pop of joy to your view.
How-To Guide
Materials
- Acrylic craft paints (various bright colors)
- Window cling stickers (butterflies, flowers, dots)
- Small round sponge dobber or paintbrush (optional)
- Mild soapy water and cloth
- Painter’s tape or masking tape
- Drop cloth or old newspaper
- Paper plate or palette
- Baby wipes or damp paper towels
Step 1: Preparation
-
Clean surface:
Begin by thoroughly cleaning the window glass and the wooden frame surrounding it. Use mild soapy water and a lint-free cloth to remove any dust, grease, or fingerprints. -
Dry completely:
Wipe everything dry with a clean towel. It is crucial that both the glass and the wood trim are completely dry so the paint and clings adhere properly. -
Protect area:
Lay down a drop cloth or old newspaper on the floor beneath the window sill to catch any accidental drips or spills during the painting process.
Clean Edges Pro-Tip
If you’re nervous about free-handing the handprints, place a strip of painter’s tape below where the palms will go to keep the bottom alignment straight.
Step 2: Applying Window Clings
-
Plan layout:
Before peeling any stickers, hold the sheets up to the window to visualize where you want your main elements like large butterflies or flower clusters to go. -
Place main icons:
Peel off the larger window clings first—specifically the butterflies—and place them scattered across the upper panes. Aim for a natural, floating look. -
Add floral details:
Fill in the gaps around the butterflies with medium-sized flower clings. Vary the colors and heights to mimic a gentle breeze carrying petals. -
Scatter small dots:
Use the smallest dot or confetti-style clings to fill empty negative space on the glass, creating a sense of movement and whimsy throughout the panes. -
Smooth out bubbles:
Gently press down on each cling from the center moving outward to push out any trapped air bubbles, ensuring they lay flat against the glass.
Step 3: Painting the Dot Border
-
Prepare paint:
Squeeze small amounts of various acrylic paint colors onto a paper plate or palette. I like to keep colors separated to prevent muddying. -
Start at top:
Dip your index finger or a small round sponge dobber into your first color. Press it gently onto the top wooden casing of the window frame. -
Create pattern:
Continue adding dots along the top and side frames, spacing them about 2-3 inches apart. Switch colors frequently to create a random, festive confetti pattern. -
Maintain spacing:
Keep the dots relatively uniform in size, but don’t worry about perfection; the handmade look is part of the charm. -
Let dry:
Allow the dot border to dry completely before moving on to the bottom section to avoid smudging your work.
Smudged Print?
If a handprint smears, quickly wipe it away with a damp cloth while the paint is wet. If it stains, wait for it to dry and paint over it with wall paint.
Step 4: Creating the Handprint Parade
-
Coat hand:
Generously paint the palm and fingers of one hand with a single color of acrylic paint. Ensure the coverage is thick but not dripping. -
First impression:
Firmly press the painted hand onto the flat surface below the window sill (the apron). Hold still for a second to get a clear print. -
Lift carefully:
Lift the hand straight back from the wall to avoid smearing the fingers. Use a baby wipe to clean the hand immediately. -
Repeat sequence:
Switch colors and repeat the process, placing the next handprint a few inches to the right of the first one. -
Complete the row:
Continue painting, pressing, and cleaning until you have a full row of colorful handprints stretching across the entire width of the window apron. -
Touch up:
Once dry, you can use a small brush to touch up any missing areas in the handprints if you want them to look more solid, though the texture adds character.
Enjoy the playful light filtering through your new, cheerful window art display
Rainbow Window Painting That Acts Like a Light Filter
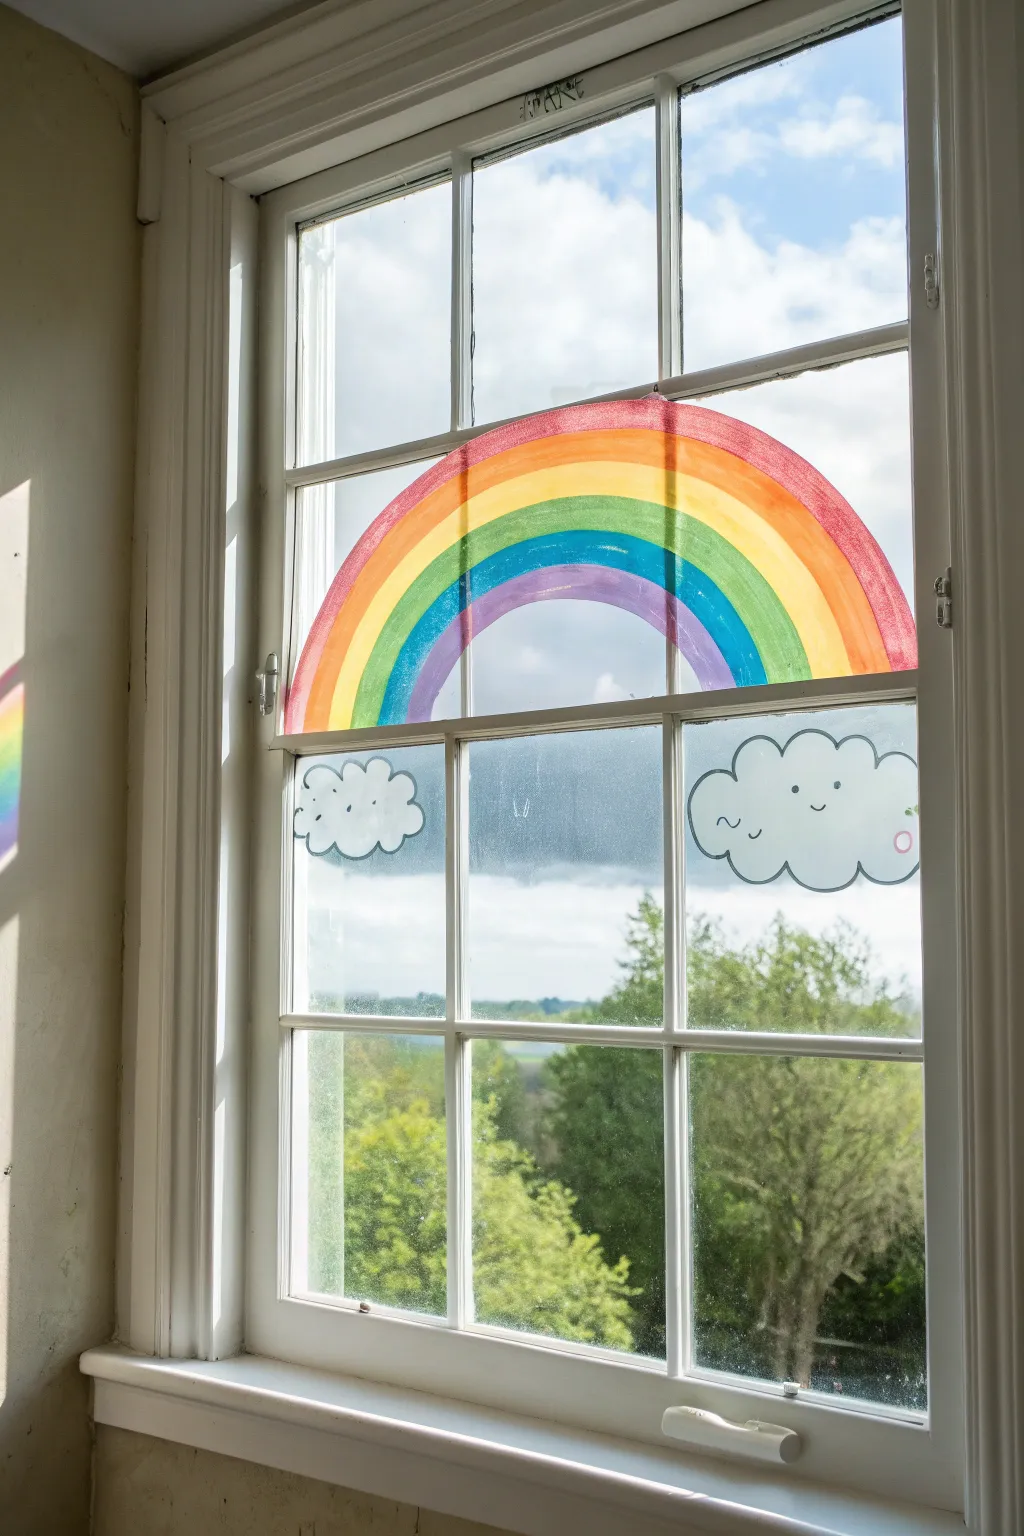
Transform your view with this cheerful, light-filtering rainbow that brightens even the cloudiest days. By using translucent paints directly on the glass, you create a stained-glass effect where the colors glow beautifully when the sun hits them.
Step-by-Step Tutorial
Materials
- Glass window (clean and dry)
- Window markers or washable window paints (translucent finish)
- Liquid chalk marker (white and black)
- Damp cloth or sponge
- Paper towels
- Ruler (optional)
- Painters tape (optional)
Step 1: Preparation & Outline
-
Clean surface:
Begin by thoroughly cleaning the window pane where you plan to paint. Any dust or grease will prevent the paint from adhering smoothly. -
Determine placement:
Decide where your rainbow will sit. In the example, the rainbow arches over the upper sash bar, creating a sense of scale. -
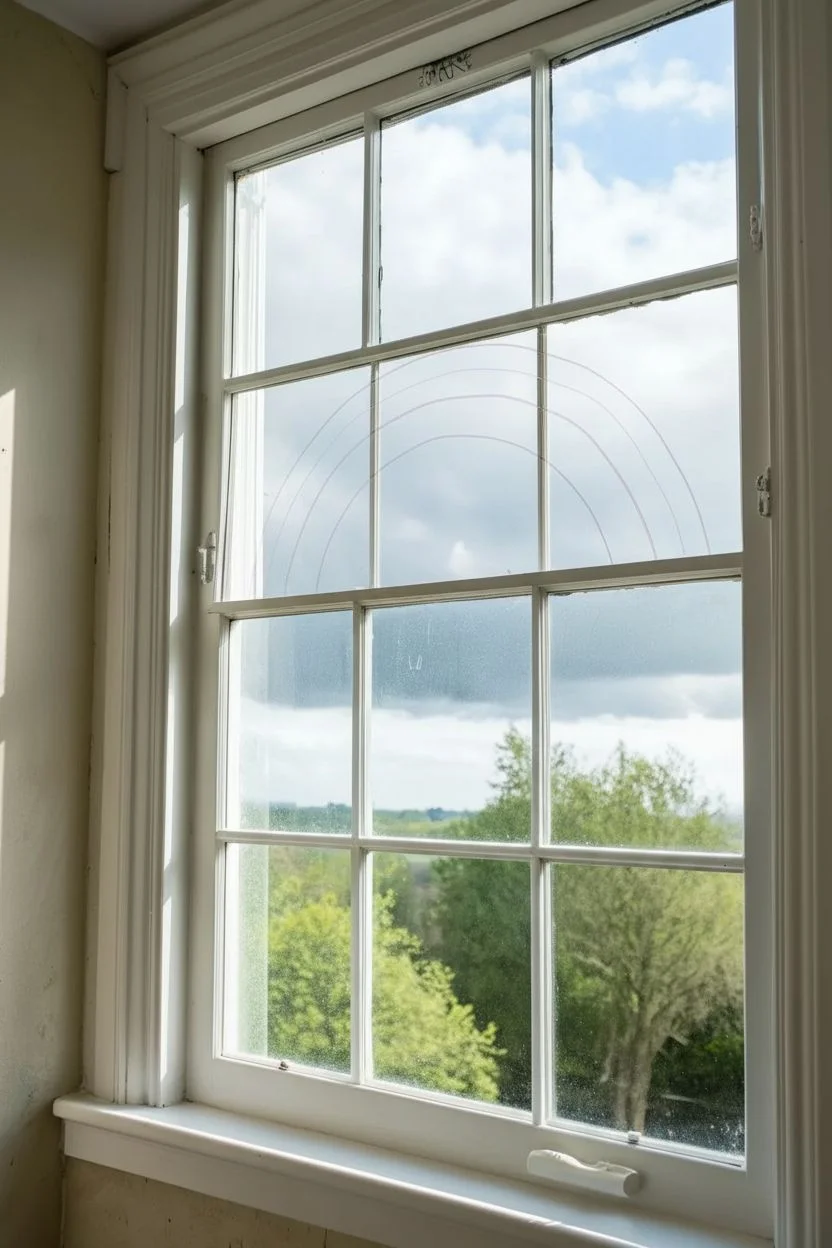
Draft the arc:
Using a very light touch with a window marker or dry erase marker, sketch the large outer arch of your rainbow to establish the size.
Transparency Tip
To ensure the rainbow filters light effectively, avoid piling on thick layers of paint. One even coat is usually enough to get that stained-glass look.
Step 2: Painting the Rainbow
-
Start with red:
Begin painting the outermost band with red window paint. Apply it in a smooth, continuous stroke following your guide line. -
Add orange:
Paint the orange stripe directly beneath the red one. Allow the edges to touch slightly; this helps create a cohesive look without gaps. -
Paint yellow:
continue with the yellow band. If your paint is very runny, give the previous layer a moment to set so colors don’t muddy. -
Apply green:
Add the green arch next. I find that keeping a consistent width for each stripe really helps the professional look of the piece. -
Paint blue:
Follow with a vibrant blue stripe. Ensure the opacity is similar to the other colors for an even light-filtering effect. -
Finish with violet:
Paint the innermost arch in violet or purple. Let the entire rainbow dry completely before touching it again.
Step 3: Adding the Clouds
-
Outline left cloud:
On the window pane below the left side of the rainbow, use a black liquid chalk marker or fine-tip window paint to draw a fluffy cloud outline. -
Fill gently:
Use a white window marker or paint to scumble in the cloud’s interior. You want this to be semi-transparent, not solid white, so some background shows through. -
Outline right cloud:
Repeat the process on the right side, drawing a slightly larger cloud outline with your black marker. -
Fill right cloud:
Lightly fill this cloud with white as well, keeping the texture airy and light. -
Add faces:
Once dry, use a fine black marker to draw cute kawaii faces. Add simple dots for eyes and a small ‘u’ shape for a smile. -
Detail the cheeks:
Add tiny pink circles or ovals for blushing cheeks on the clouds for extra character. -
Final clean up:
Step back and check your work. Use a damp Q-tip or a cloth wrapped around your finger to wipe away any stray smudges or uneven edges.
Rainy Day Upgrade
Add tiny blue teardrops falling from the clouds using translucent blue paint to turn your cheerful rainbow into a cozy rainy-day scene.
Now you have a vibrant piece of art that interacts beautifully with the changing daylight outside

PENCIL GUIDE
Understanding Pencil Grades from H to B
From first sketch to finished drawing — learn pencil grades, line control, and shading techniques.
Explore the Full Guide
Minimal Botanical Line Art Using Negative Space
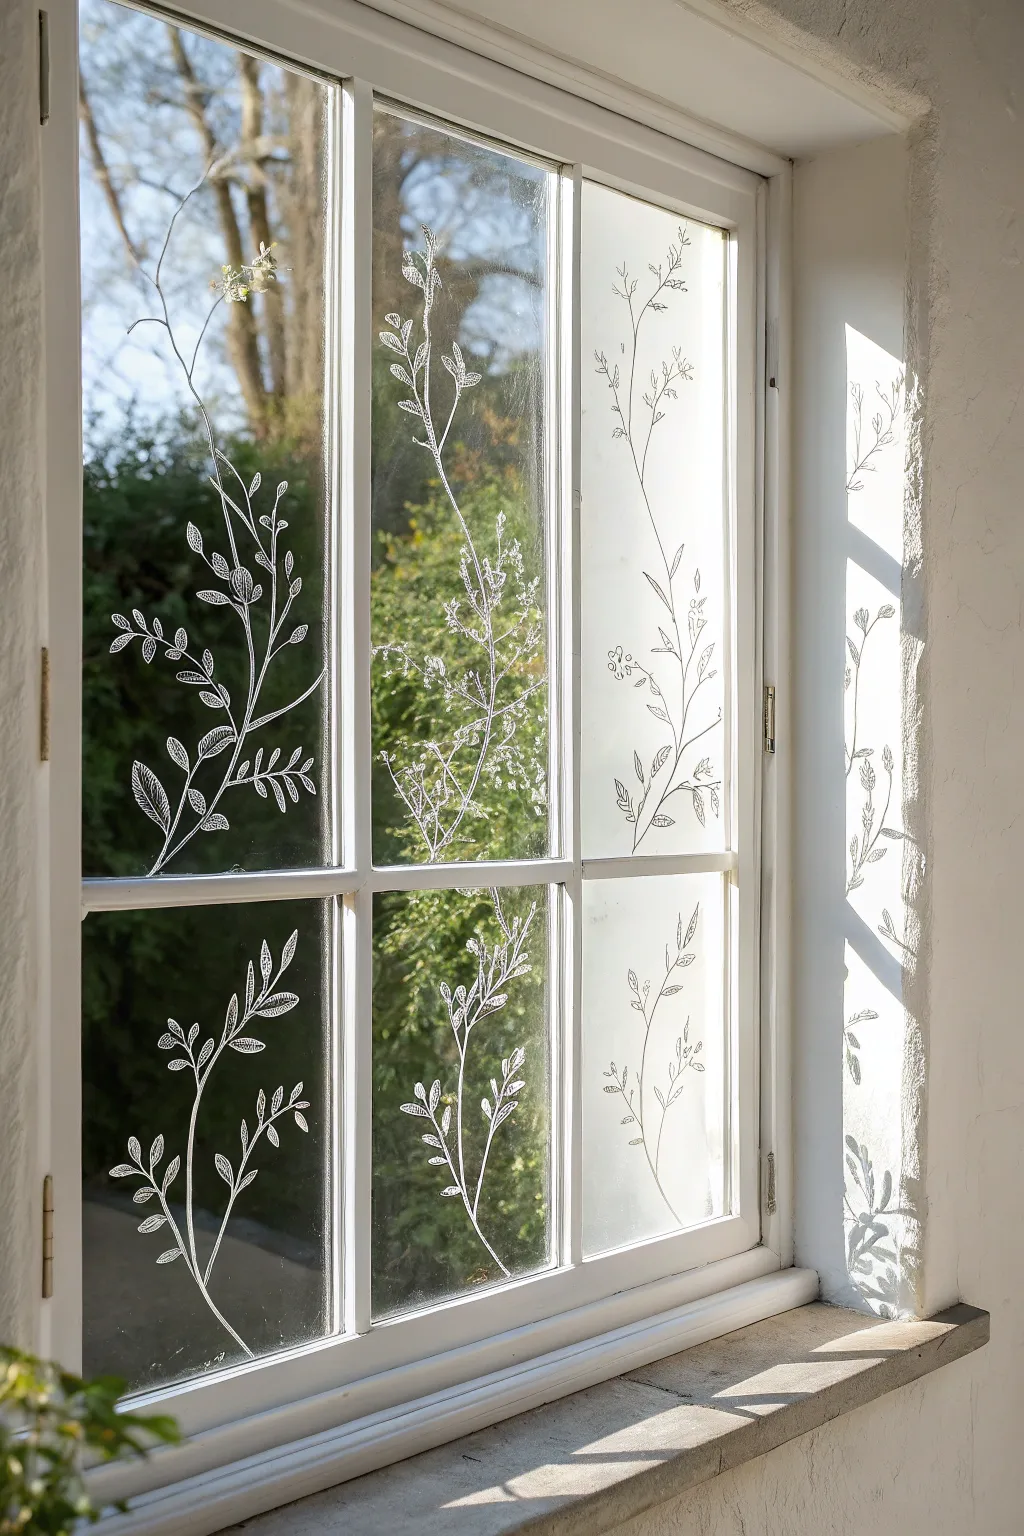
Transform a plain window into a serene botanical display with this elegant, minimalist drawing technique. By sketching delicate plant stalks directly onto the glass with white ink, you create a light and airy aesthetic that beautifully framed the view outside without blocking the light.
Step-by-Step Guide
Materials
- White liquid chalk marker (fine tip, 1-2mm)
- White broad tip chalk marker (optional, for thicker stems)
- Glass cleaner
- Lint-free microfiber cloth
- Scrap paper and pencil (for drafting)
- Masking tape (optional)
- Reference photos of wild grasses or herbs
- Cotton swabs
- Water
Step 1: Preparation & Planning
-
Clean the surface thoroughly:
Begin by spraying your window pane generously with glass cleaner. Wipe it down with a lint-free microfiber cloth to ensure there are no streaks, dust, or oily fingerprints, as these can prevent the chalk marker from adhering smoothly. -
Choose your botanical subject:
Decide on a theme for your foliage. The example uses simple meadow grasses and leafy stems. It helps to look at reference photos of tall grasses, wheat, or eucalyptus stems to understand how leaves attach to the main stalk. -
Draft on paper:
Before touching the glass, sketch a few ideas on paper. Practice drawing long, sweeping curved lines for stems and alternating patterns for leaves. This muscle memory will help when you switch to the vertical glass surface. -
Prime the marker:
Shake your white fine-tip chalk marker vigorously. Press the nib down on a piece of scrap paper repeatedly until the white ink flows freely and saturates the tip. Test a few lines to ensure the flow is consistent.
Ink Flow Issues
If the marker streaks or stops flowing on vertical glass, re-prime it on paper. Keep the pen horizontal when not drawing to prevent the tip from drying out.
Step 2: Drawing the Base Structure
-
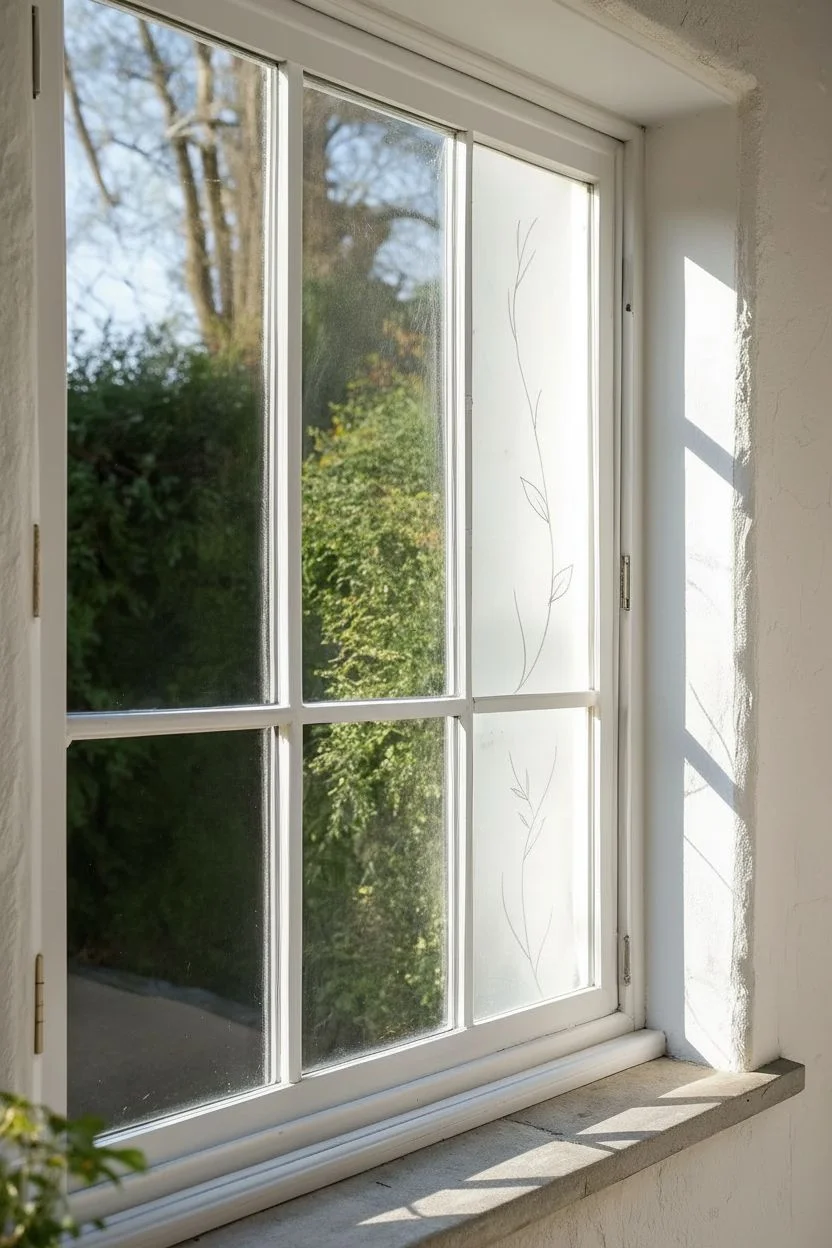
Establish the main stem:
Start at the bottom of a window pane. Draw a single, long, gently curving line upwards to represent the main stalk. Let your hand move fluidly rather than stiffly; natural plants rarely grow in perfectly straight lines. -
Add secondary branches:
From your main stem, draw smaller offshoot lines. Angle these upwards, as most plants grow toward the sun. Keep these lines slightly thinner or shorter than your main stalk to maintain realistic proportions. -
Create variation:
If you are painting multiple panes, vary the height and curve direction of each plant. Have some curve left and others curve right to create a dynamic, organic rhythm across the whole window.
Step 3: Adding Foliage & Details
-
Outline the leaves:
Starting near the bottom, draw the outline of your leaves attaching to the stems. For the look in the image, use a simple almond or lanceolate shape. Keep the outlines clean and crisp. -
Detail the leaf veins:
Inside each leaf outline, draw a very fine center line (the midrib) and tiny diagonal veins branching off it. I find that holding the pen lightly helps achieve these super-fine interior details. -
Incorporate different textures:
Mix up your botanical types. In one pane, draw broad leaves with veins; in another, try creating feathery textures or tiny clusters of dots to mimic seeds or flowers at the tips of the stems. -
Use hatching for shading:
To give the drawing depth without coloring it in solid, use small diagonal hatch marks on one side of a leaf or stem. This suggests shadow and dimension while keeping the artwork transparent. -
Correct mistakes immediately:
If a line goes wonky, don’t panic. Quickly dip a cotton swab in water and wipe away the error while the ink is still wet. Dry the spot with a tissue before re-drawing.
Level Up: Seasonal Swap
Change the botanicals with the seasons! Use holly leaves for winter, blossoms for spring, or ferns for summer. Just wash off with water and start fresh.
Step 4: Refinement
-
Thicken base lines:
Go back over the very bottom of your main stems. Adding a second pass of ink here to slightly thicken the stalk grounds the plant and adds visual weight to the bottom of the composition. -
Check for consistency:
Step back about five feet from the window. Look for any areas that feel too sparse or too cluttered. You can easily add a floating leaf or an extra branch to balance the negative space. -
Clean up edges:
Once the drawing is completely dry, use a dry cotton swab to gently sharpen any smudged lines or crisp up the points of your leaves. -
Final wipe down:
Check the surrounding glass for any palm prints or smudges left by your hand while drawing. Carefully buff these away with your microfiber cloth, avoiding the actual ink.
Enjoy the interplay of light and shadow as the sun moves through your new botanical window garden
Bold Storefront Sale Lettering With Illustrated Accents
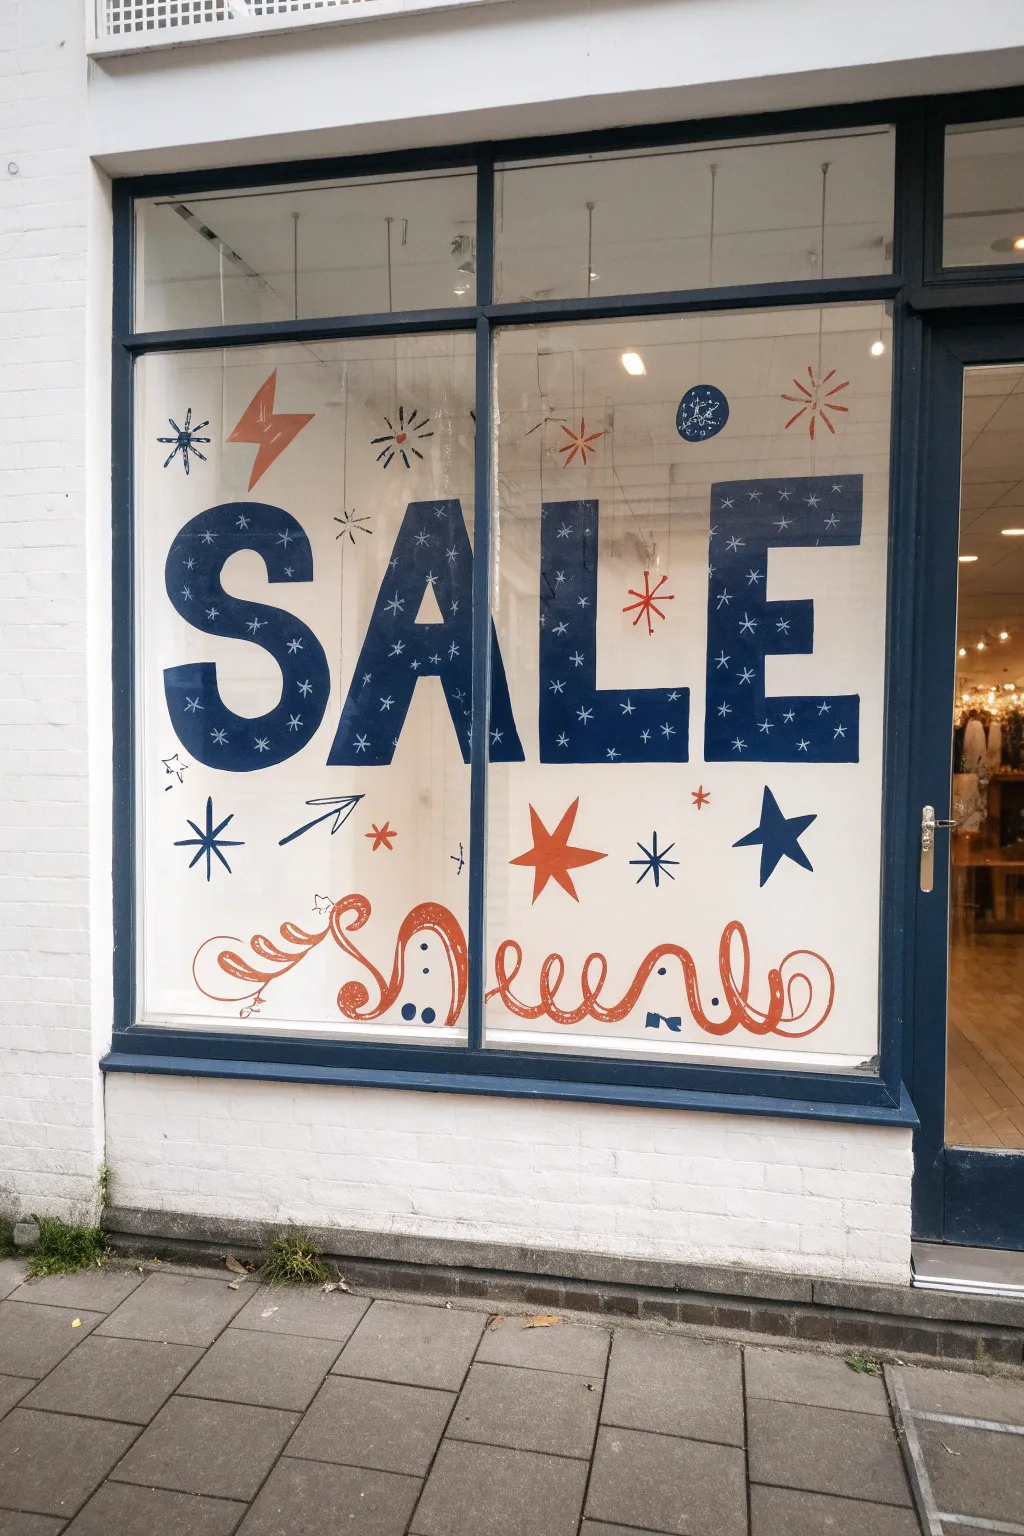
Grab every passerby’s attention with this bold, starry-themed window display that combines massive typography with playful doodle accents. The deep navy blue and burnt orange color palette creates a striking contrast against the glass, perfect for announcing a special promotion with style.
How-To Guide
Materials
- Window glass cleaner and microfiber cloth
- Liquid window chalk markers (jumbo tip: Navy Blue, Burnt Orange)
- Liquid window chalk markers (fine tip: White, Navy Blue, Burnt Orange)
- Painter’s tape or masking tape
- Measuring tape
- Level
- Paper towels (wet and dry for corrections)
Step 1: Planning and Layout
-
Clean surface:
Begin by thoroughly cleaning the window glass inside and out. Any dust or grease will prevent the paint from adhering smoothly, so ensure it is completely dry and streak-free before starting. -
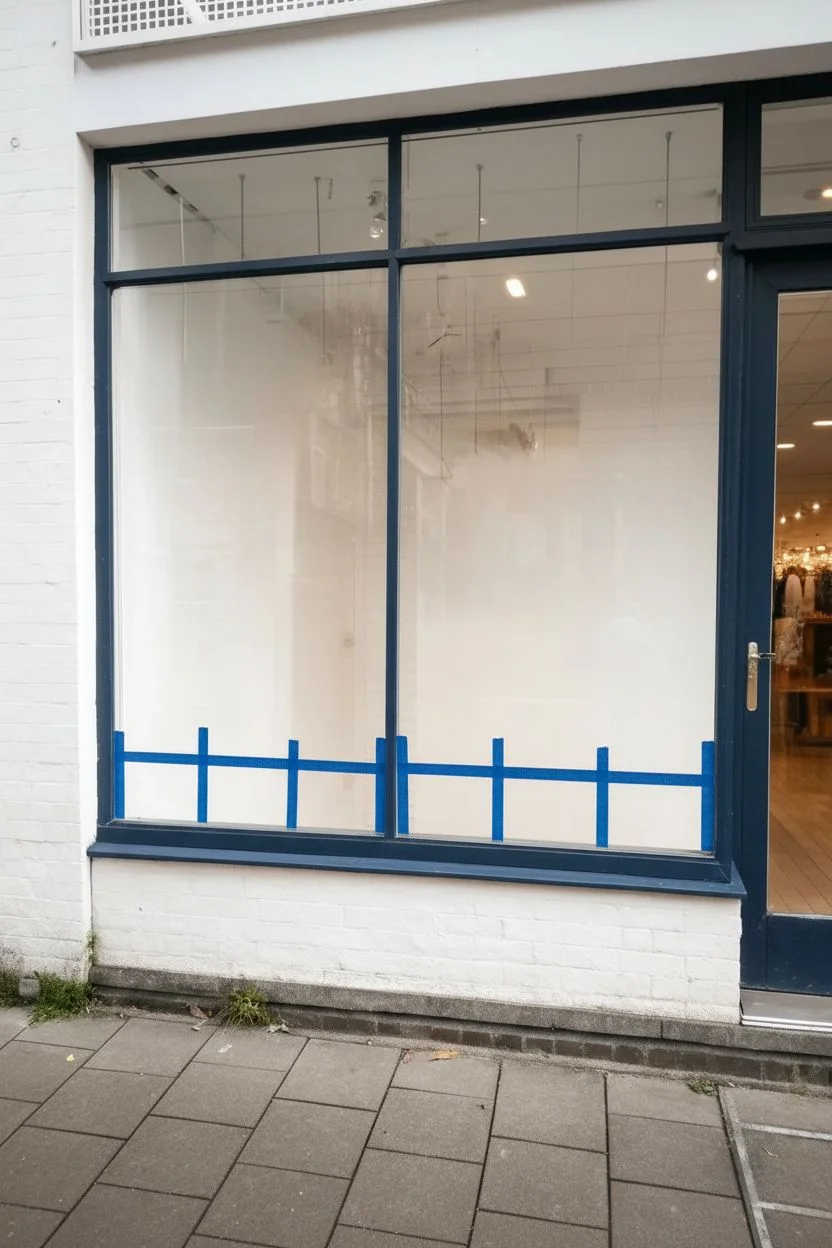
Measure the baseline:
Decide on the height for your ‘SALE’ text. Use measuring tape to determine the center of the window space, then apply a long strip of painter’s tape horizontally to serve as the bottom baseline for your letters. -
Mark letter width:
Using small pieces of tape or faint dots with a marker, map out the width of each letter (S-A-L-E) to ensure they are evenly spaced and centered within the window frames.
Step 2: Painting the Main Text
-
Outline the letters:
Using the jumbo Navy Blue marker, draw the outline of the block letters first. I find it easiest to start with the two middle letters ‘A’ and ‘L’ to anchor the spacing, then move outward to ‘S’ and ‘E’. -
Fill in the blue:
Fill the inside of your letter outlines with the jumbo blue marker using long, vertical strokes to minimize streakiness. You may need a second coat once the first is dry to get that solid, opaque look. -
Add the starry details:
Once the blue paint is fully dry to the touch, take your fine-tip White marker and draw small asterisks and dots scattered randomly inside the blue letters to create a night-sky effect.
Paint Streaking?
If the large blue letters look patchy, wait for them to dry completely (about 15 mins) and apply a second coat. Don’t overwork wet paint or it will lift.
Step 3: Adding Illustrated Accents
-
Draw large stars:
Switch to your medium or fine-tip Navy Blue marker to draw large, five-pointed stars around the text. Place one near the bottom right and smaller starbursts near the top left. -
Add orange highlights:
Use the Burnt Orange marker to add contrasting elements. Draw a lightning bolt near the top left and a solid orange star near the bottom center to balance the blue elements. -
Create starbursts:
Draw simple line-burst stars (asterisk style) in both blue and orange floating in the empty spaces above and below the letters. -
Sketch the bottom scrollwork:
At the very bottom of the window, beneath the text, freehand a long, looping scroll line in Burnt Orange. Think of it like a loose ribbon unspooling across the glass. -
Thicken the scroll:
Go back over your orange ribbon line, thickening the downstrokes to give it a calligraphy-style weight variation. -
Add decorative flourishes:
Using the fine-tip Blue marker, add tiny details near the orange scrollwork, such as small dots or little bow-tie shapes, to integrate the two colors.
Level Up: Depth Effect
Add a simple drop shadow to the ‘SALE’ letters using a grey or light blue marker on one side to make the text pop off the glass.
Step 4: Final Touches
-
Remove tape:
Carefully peel away your baseline painter’s tape. If any paint bled under the tape, use a slightly damp cotton swab or the edge of a paper towel to wipe the line crisp. -
Refine edges:
Step back to view the window from the sidewalk. Look for any uneven edges on the main letters and sharpen them up with the fine-tip blue marker. -
Clean up stray marks:
Wipe away any temporary guide marks or accidental smudges with a damp cloth to insure the glass around the art is crystal clear.
Step back and admire how your vibrant new window display transforms the street view


Have a question or want to share your own experience? I'd love to hear from you in the comments below!