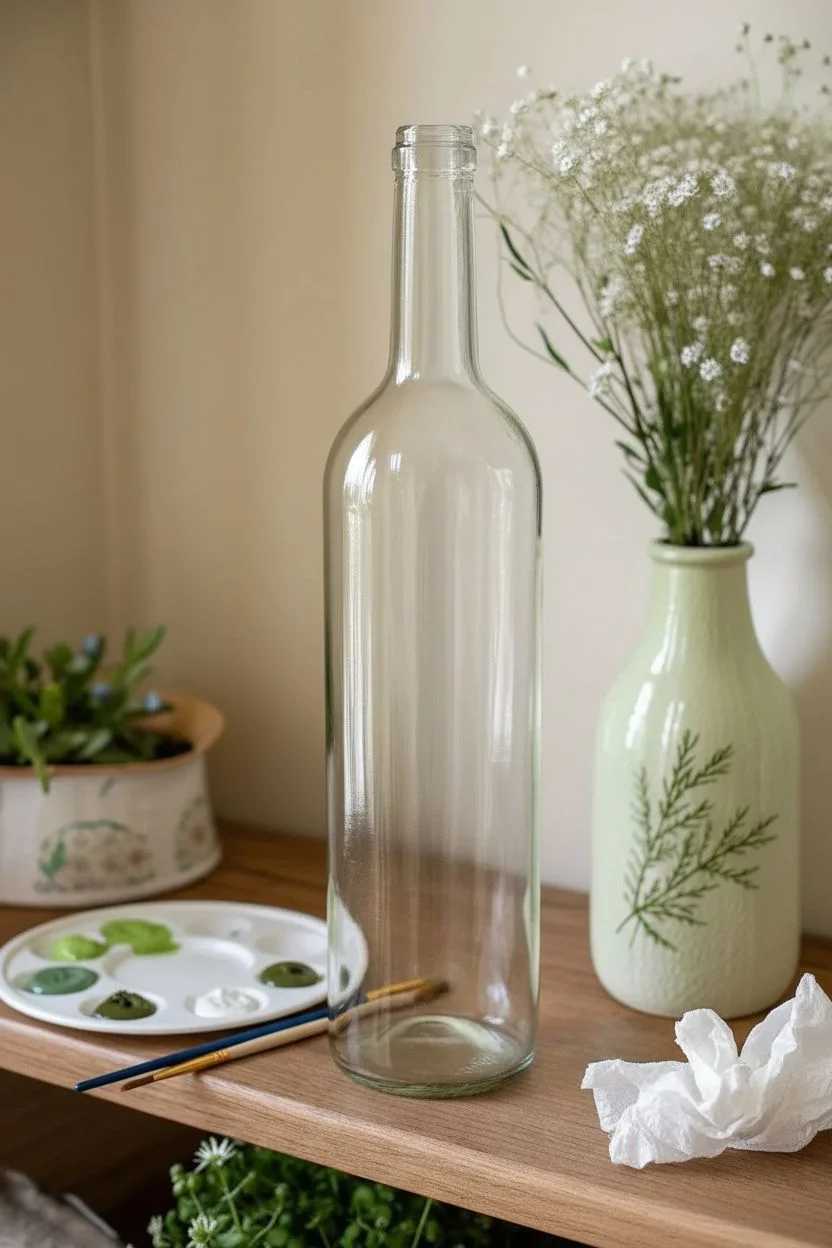
A plain glass wine bottle is basically a free canvas, and I love how quickly it can turn into real, display-worthy home decor with just a little paint. Here are my favorite wine bottle painting ideas—starting with the classics you’ll want to try first, then moving into the fun, unexpected techniques once you’re warmed up.
Simple Wildflower Wraparound

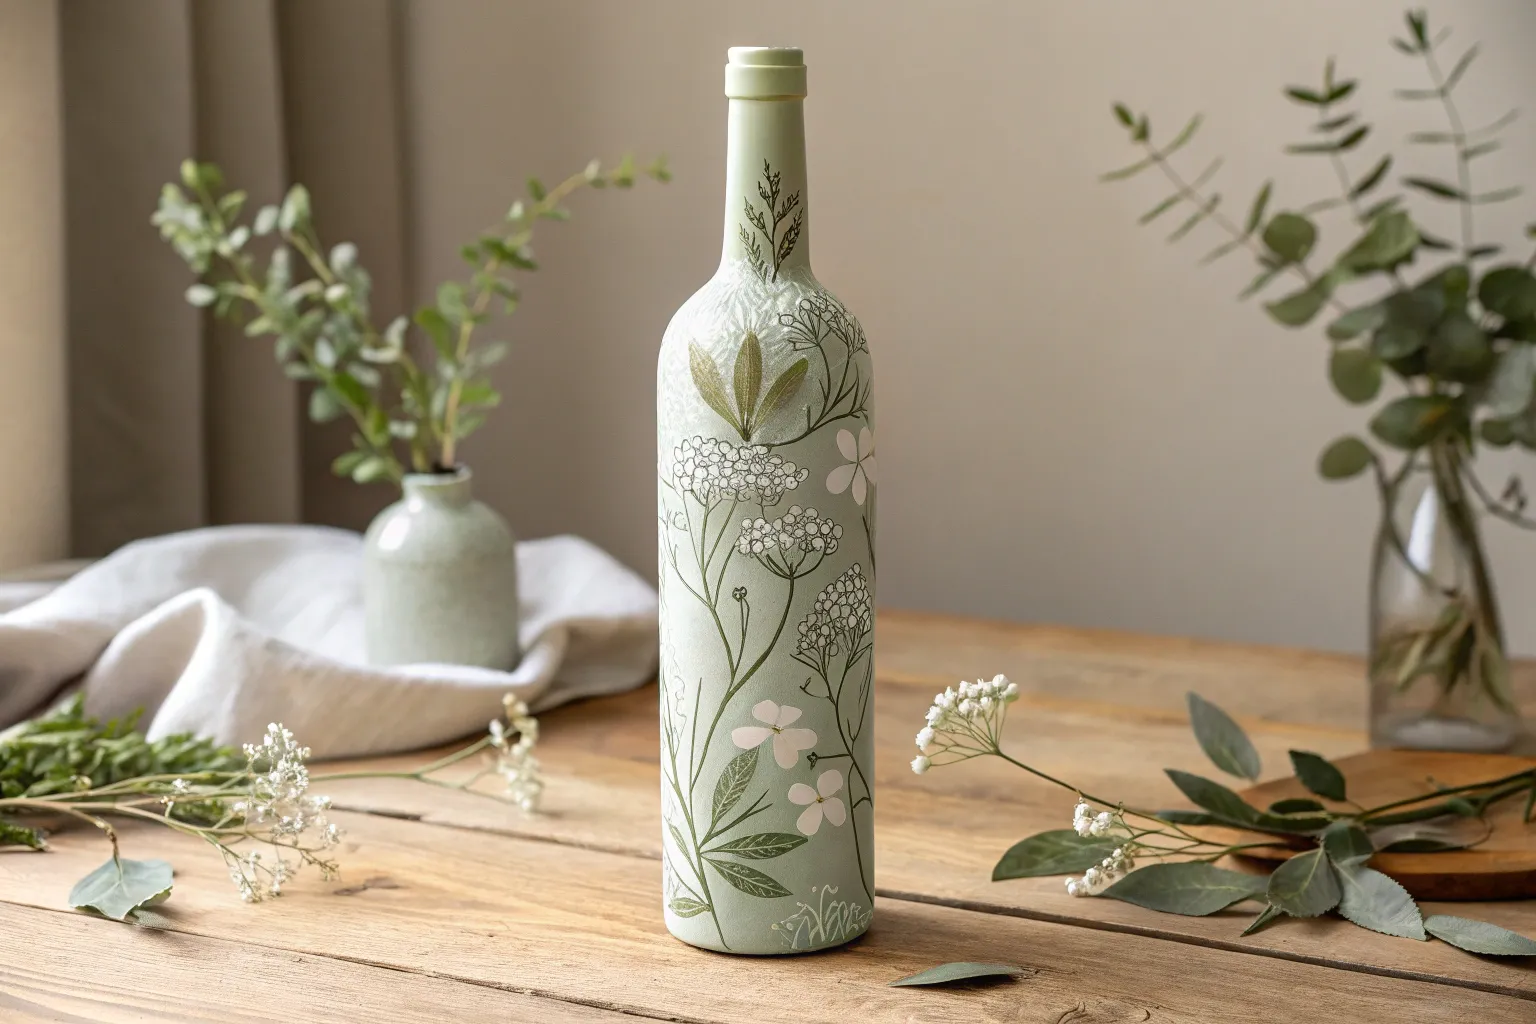
Transform an empty wine bottle into a charming piece of décor with this delicate wildflower wraparound design. The clear glass backdrop allows the simple white petals and green stems to seemingly float, creating a light and airy aesthetic perfect for any bright corner of your home.
How-To Guide
Materials
- Clean, clear wine bottle (labels removed)
- Rubbing alcohol and cotton pads
- Multi-surface acrylic craft paint or glass paint (White, buttery Yellow, sap Green, olive Green)
- Fine detail brush (liner brush)
- Small round brush (size 2 or 3)
- Black or dark grey fine-tip paint marker (water-based or oil-based)
- Palette or small plate
- Paper towels
- Clear acrylic sealant spray (gloss finish)
Step 1: Preparation & Planning
-
Clean the surface:
Before painting, ensure your glass surface is pristine. Wash the bottle with warm soapy water to remove any sticky residue from labels. Once dry, wipe the entire surface rubdown with rubbing alcohol on a cotton pad to remove oils and fingerprints. -
Visualize the layout:
Look at your bottle and imagine a spiraling vine or scattered placement. You don’t need to sketch on the glass, but mentally placing your three largest flowers—one high, one middle, one low—helps balance the composition before you start.
Step 2: Painting the Stems & Leaves
-
Mix your greens:
On your palette, place a dollop of sap green and a smaller amount of olive green. I like to keep them slightly separate so I can dip into both for natural color variation on the brush. -
Draft the main stems:
Using your fine liner brush and the lighter sap green, paint thin, curving lines upward from the bottom of the bottle. Let them cross over each other slightly to create depth. These will be the anchors for your flowers. -
Add leafy details:
Switch to the small round brush. Load it with the olive green mixture. Press the belly of the brush against the stem and lift as you pull away to create tapered leaves. Vary the direction and size of the leaves for a more organic, wild look. -
Layering foliage:
Go back in with your liner brush and add very thin, wispy stems of grass in between the main stalks. This fills out the ‘bouquet’ without making the design look too heavy. -
Let the greenery dry:
Allow the green layer to dry completely for about 15-20 minutes. If the paint is still wet, your white flower petals might turn muddy if they touch the green.
Pro Tip: Transparency Trick
Place a piece of white paper inside the bottle while you paint. It acts as a high-contrast background so you can clearly see your strokes and color density as you work.
Step 3: Adding the Blooms
-
Paint petal base layers:
Using the small round brush and white paint, create the flower shapes. Start at the center of where a flower head should be and pull strokes outward. Don’t worry about perfect opacity yet; a slightly sheer look can be lovely on glass. -
Build petal opacity:
Once the first layer of white is tacky or dry, go over the petals again to brighten them up. Leave small gaps between petals to distinguish them. -
Add the centers:
Dip the handle end of a small brush or a dotting tool into your yellow paint. Dot the center of each white flower generously to create a textured, raised pollen center. -
Highlight the centers:
While the yellow is wet, take a tiny speck of orange or a darker yellow on your liner brush and tap it onto the bottom edge of the yellow center to give it a little 3D dimension. -
Dry thoroughly:
This is crucial: Let the paint dry completely. Since glass is non-porous, this might take an hour or more depending on how thick your paint application is. Consider using a hair dryer on a cool setting to speed this up carefully.
Troubleshooting: Paint Sliding?
If acrylic paint slides around on the glass without sticking, your brush is too wet. Dry your brush thoroughly and use undiluted paint straight from the tube for better grip.
Step 4: Detailing & Sealing
-
Outline the petals:
Take your fine-tip black paint marker. Very gently outline the white petals. Keep your hand loose; broken or jittery lines actually add to the charming, sketched aesthetic of wildflowers. -
Define the centers:
Draw small stippled dots or tiny circles around the yellow centers with the paint marker to define the seed texture. -
Add vein details:
Use the marker to draw a central vein line down some of the larger leaves. This connects the painted style with the outlined style. -
Clean up errors:
If you made any slip-ups with the marker, you can usually scratch them off gently with a fingernail or a damp Q-tip before they cure. -
Seal the artwork:
Take the bottle outside or into a well-ventilated area. Apply a light, even coat of clear acrylic gloss spray. This protects the paint from chipping and gives the glass a uniform finish. -
Final cure:
Let the bottle sit undisturbed for 24 hours before handling extensively or displaying.
Place your finished bottle on a sunny windowsill where the light can shine through the painted petals


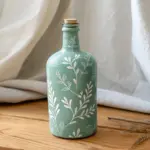
Sunflower Statement Bottle

Transform a plain green wine bottle into a rustic masterpiece featuring a bold, hand-painted sunflower. This project combines a soft, buttery background with detailed botanical line work for a charming vintage aesthetic.
Step-by-Step Tutorial
Materials
- Clean empty wine bottle (dark green glass recommended)
- Rubbing alcohol and cotton pads
- Gesso or multi-surface primer (white)
- Acrylic paints: Cream/Off-White, Cadmium Yellow, Yellow Ochre, Burnt Sienna, Burnt Umber, Sap Green, Olive Green
- Synthetic brushes: 1 inch flat brush, small round brush (size 2 or 4), fine liner brush (size 0 or 00)
- Black waterproof fine-tip paint pen or permanent marker
- Matte spray varnish or sealer
- Palette or paper plate
- Water cup and paper towels
Step 1: Preparation & Base Coat
-
Clean the glass:
Begin by removing all labels and adhesive from your bottle. Once clear, wipe the entire surface down with rubbing alcohol to remove any oils or fingerprints, ensuring the paint adheres properly. -
Mask the neck:
For this design, the neck remains the original green color. Use painter’s tape or simply be careful with your brush to stop the base coat right where the bottle’s shoulder begins to curve upward. -
Apply the primer:
Paint a thin layer of gesso or white primer on the main body of the bottle. Don’t worry about full opacity yet; this layer just gives the acrylics something to grab onto. Let this dry completely. -
Paint the background:
Mix a Cream or Off-White acrylic paint. Apply a smooth coat over your primed area. I prefer to use vertical strokes to mimic a canvas texture. You may need two to three coats to get a solid, opaque finish. Allow drying time between each coat.
Uneven Background?
If you struggle with streakiness in the cream background, use a small sponge applicator instead of a brush for the final coat to create a smooth, eggshell-like finish.
Step 2: Sketching the Design
-
Lightly sketch the flower:
Using a very light pencil or a diluted mix of yellow ochre paint, sketch the large sunflower head. Place the center circle slightly above the middle of the painted area, leaving room for the stem below. -
Outline the petals:
Draw the petals radiating outward. Make them imperfect and slightly ragged for a natural look. Some petals should overlap others. -
Add stem and leaves:
Sketch a long, curving stem traveling down from the flower head. Add large, broad leaves branching off the stem near the bottom and middle sections. Also pencil in a few smaller filler leaves near the top shoulder.
Step 3: Painting the Sunflower
-
Base coat the petals:
Fill in the petals with a solid coat of Cadmium Yellow. It’s okay if this looks flat initially; we will build dimension later. -
Paint the center:
Fill the center circle with Burnt Sienna. While the paint is still slightly wet, dab in some Burnt Umber around the outer edges of the center to create depth. -
Add petal depth:
Mix a little Yellow Ochre with water to create a glaze. Brush this from the base of the petals (near the center) outward, fading it about halfway up the petal. This creates a shadow effect. -
Highlight the tips:
Mix a tiny amount of white into your bright yellow. Paint the very tips of the petals to catch the ‘light’.
Pen & Paint Tip
If your paint pen stops flowing over the acrylic, the surface might be too rough. Lightly sand the painted area with a brown paper bag to smooth it without removing color.
Step 4: Leaves and Details
-
Base coat the greenery:
Paint the stem and leaves with a mix of Sap Green and a touch of white to lighten it slightly. Ensure smooth coverage. -
Review edges:
Add smaller filler sprigs or buds near the top of the design using the same green mix, perhaps adding a touch of brown for contrast. -
Outline with ink:
Once all paint is perfectly dry, take your black fine-tip paint pen. Carefully outline every petal, the center, the leaves, and the stem. Keep your hand loose; shaky or broken lines add to the illustrative style. -
Add texture lines:
Use the pen to draw veins inside the leaves and vertical striations on the petals. Stipple small dots into the brown center of the flower to mimic seeds. -
Add decorative pollen:
With the tip of your green paintbrush or a stylus, add tiny dots of green or black floating around the leaves and stem for a whimsical finish.
Step 5: Finishing Touches
-
Dry completely:
Allow the bottle to cure for at least 24 hours. This ensures the paint hardens and the ink won’t smear during sealing. -
Seal the artwork:
Take the bottle outside or to a well-ventilated area. Spray a light, even coat of matte varnish over the painted section. This protects your work from scratches and dust.
Place your finished sunflower bottle on a mantel or use it as a striking centerpiece for your next dinner gathering


Lavender Fields in Miniature
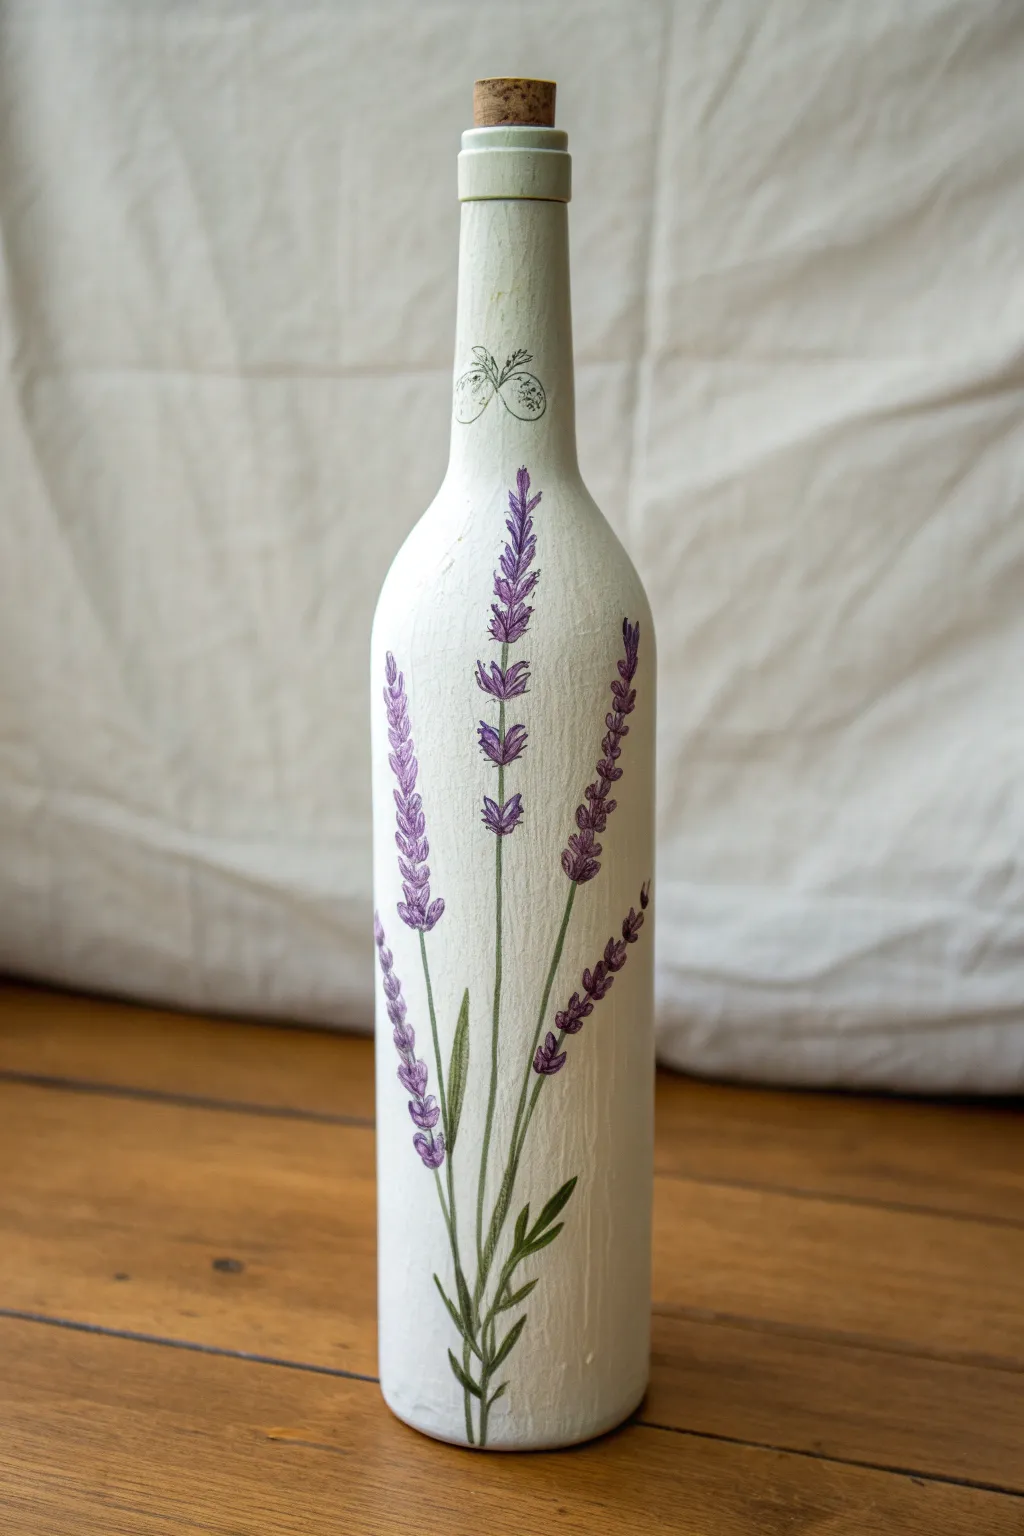
Transform an ordinary glass bottle into a charming piece of French country decor with this elegant lavender design. The textured, creamy background provides the perfect vintage-style canvas for delicate purple sprigs that seem to sway in a gentle breeze.
Detailed Instructions
Materials
- Clean glass wine bottle (label removed)
- Rubbing alcohol
- Gesso primer (white)
- White or cream matte acrylic paint
- Acrylic paints: Violet, Lavender, Deep Purple, Olive Green, Forest Green
- Texture medium or sponge applicator
- Fine liner brush (size 0 or 00)
- Small round brush (size 2)
- Black fine-point pigment pen (optional)
- Matte varnish or sealer
- Cork stopper
Step 1: Preparation & Base Coat
-
Clean the surface:
Begin by thoroughly washing your wine bottle to remove any label residue. Wipe the entire surface with rubbing alcohol on a cotton pad to eliminate oils and fingerprints, ensuring the paint adheres perfectly. -
Prime the glass:
Apply a coat of white gesso primer to the bottle. Since glass is slippery, this step gives your acrylics something to grip onto. Let this initial layer dry completely, usually about an hour. -
Create the texture:
Mix your cream acrylic paint with a small amount of texture medium if you have it. If not, use a sponge applicator or a stiff bristle brush and dab the paint onto the bottle rather than stroking it smooth. This creates that lovely, slightly rough, stony finish. -
Layering up:
Apply a second coat of the cream paint using the same dabbing motion to ensure opacity. You want the glass to be completely hidden. Allow this base to cure fully, preferably overnight, so the surface is hard and ready for detail work.
Paint Sliding Off?
If paint slips off the glass, your primer layer wasn’t dry enough or was too thin. Let the paint cure for 24 hours, lightly sand the spot, and re-prime before painting again.
Step 2: Painting the Stems
-
Map out the composition:
Lightly sketch the position of your three main lavender stems with a pencil. Aim for a variety of heights, keeping the central stem tallest and the side stems slightly curved outward for a natural look. -
Mix your greens:
On your palette, blend Olive Green with a touch of Forest Green to get a natural, muted stem color. You don’t want a bright, artificial green for this vintage style. -
Paint the main stems:
Using your fine liner brush, paint thin, long lines following your pencil marks. Keeping your hand loose will help prevent the lines from looking too rigid or shaky. -
Add side branches:
From the main stems, paint very short, tiny branches angling upwards. These will serve as the anchor points for your flower buds later. -
Paint the leaves:
Switch to the small round brush. At the base of the stems, paint long, slender leaves. Press down at the start of the stroke and lift up as you drag to create a tapered point.
Scented Surprise
Before sealing, mix a drop of lavender essential oil into your final varnish layer. The bottle will carry a faint, lovely scent of lavender for weeks.
Step 3: Adding the Blooms
-
Start the flower base:
Using a dark violet color, dab small, teardrop-shaped spots along the upper portions of the stems. Cluster them closer together at the top and space them out slightly as you move down. -
Layer mid-tones:
Once the dark violet is touch-dry, dip your brush into a true lavender shade. Paint slightly smaller dabs directly over the dark ones, leaving some of the dark color showing at the bottom for shadow. -
Highlighting:
Mix a tiny bit of white into your lavender paint to create a highlight shade. Add tiny dots to the very tips of the flower clusters to simulate sunlight hitting the petals. -
Adding the dragonfly detail:
Near the neck of the bottle, use a very fine liner brush or a black pigment pen to draw a small, delicate butterfly or dragonfly outline. Keep the lines broken and faint to maintain that sketchy, organic feel. -
Refine the details:
Step back and look at the bottle. If the lavender looks too uniform, add a few stray flower buds floating near the stems or darken the base of the leaves for more contrast.
Step 4: Finishing Touches
-
Seal the artwork:
Protect your painting with a coat of matte varnish. A glossy finish would distract from the rustic look, so stick to matte. Apply it gently to avoid smearing the fine lines. -
Top it off:
Insert a simple cork stopper into the bottle neck to complete the rustic farmhouse aesthetic.
Place your finished bottle on a wooden shelf or windowsill to enjoy a touch of purple all year round


Dragonfly and Meadow Greens
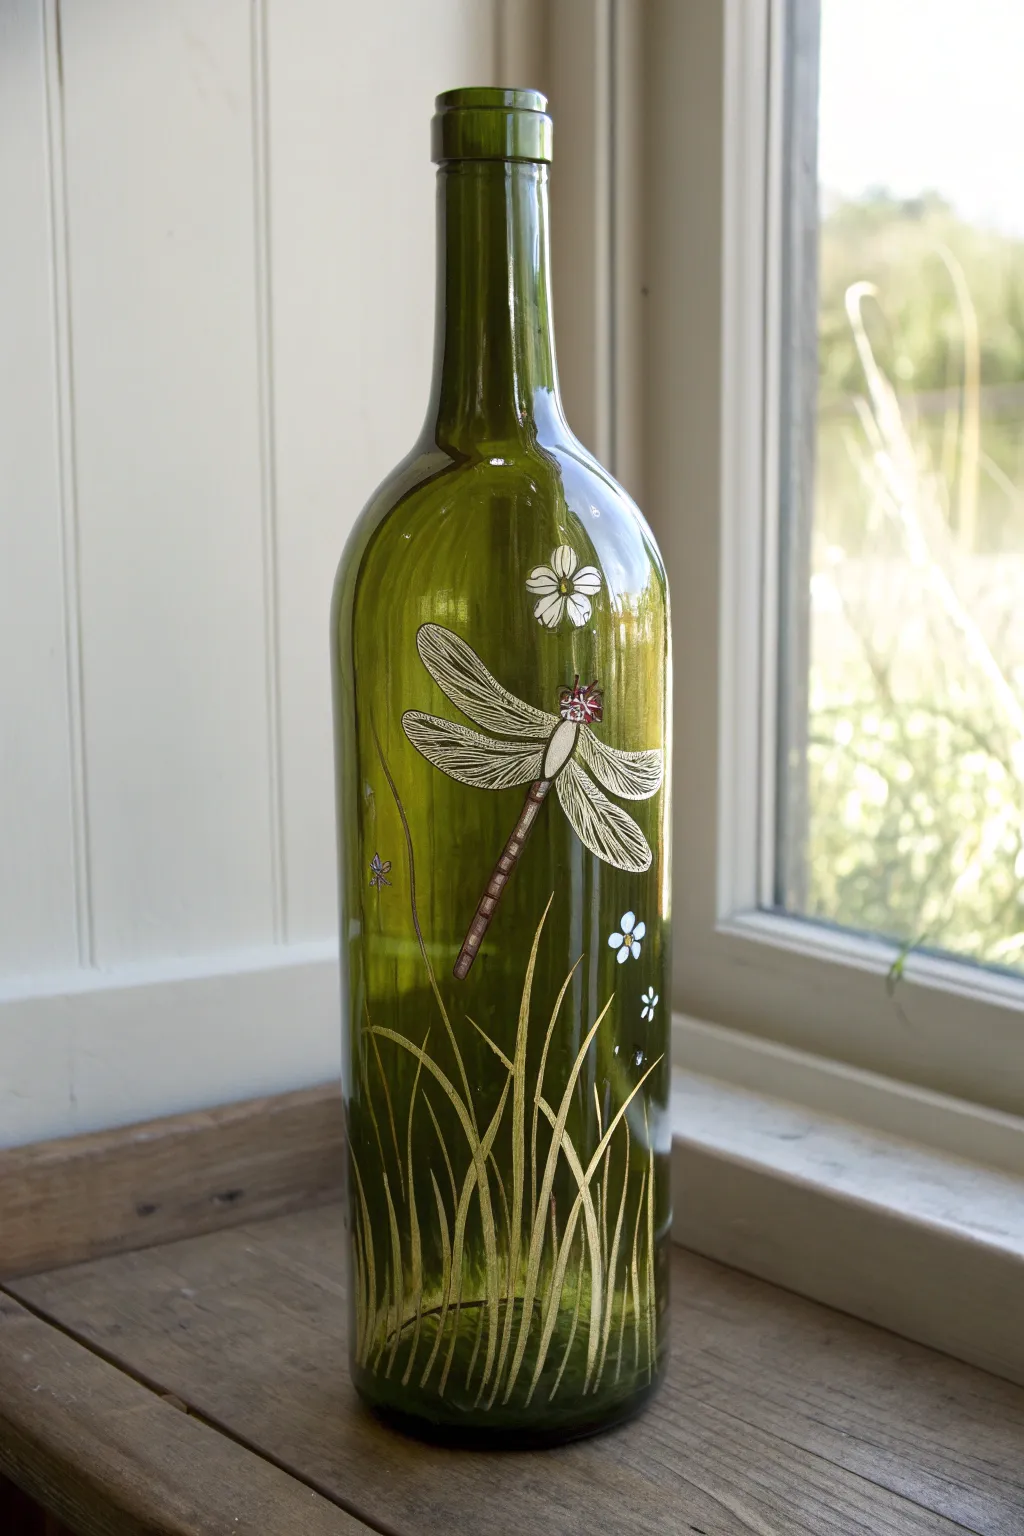
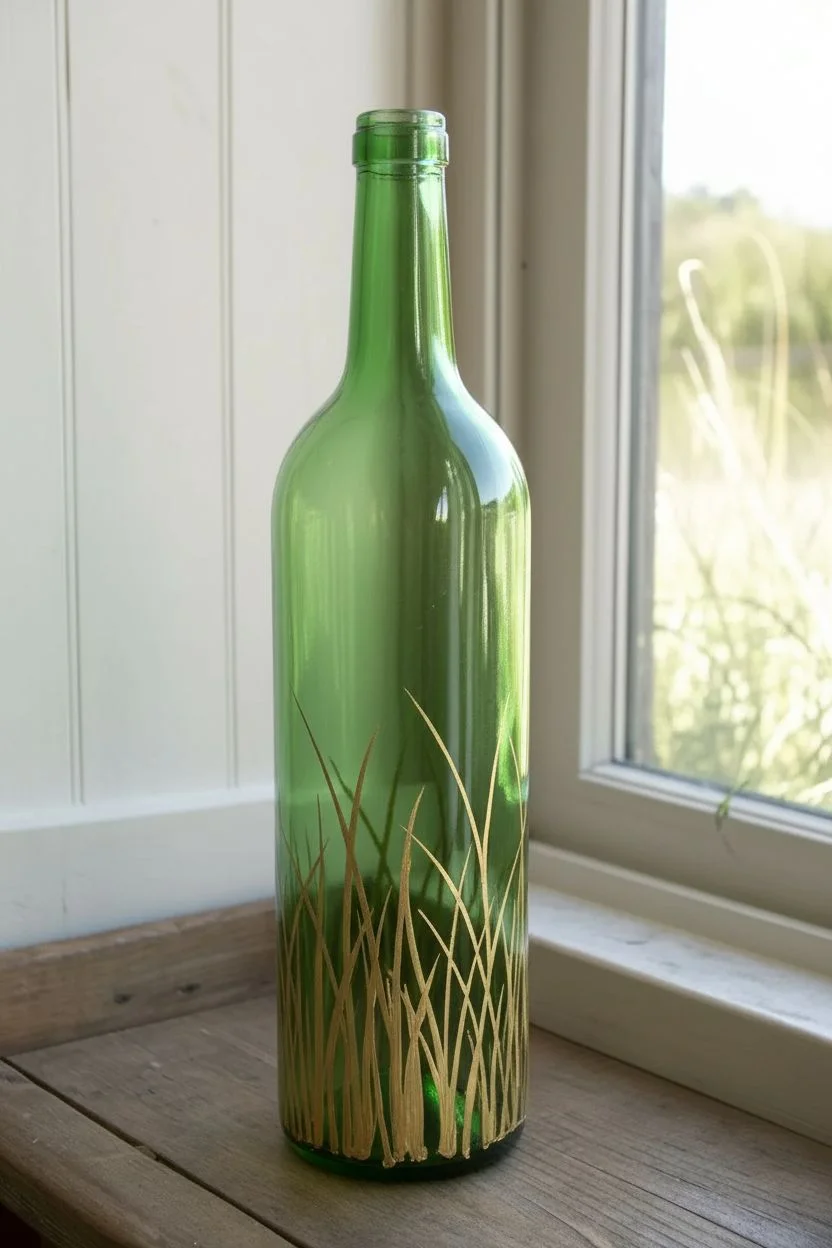
Transform a simple green wine bottle into a serene meadow scene featuring slender grasses and a striking dragonfly. The natural transparency of the glass enhances the delicate wings and floating flowers, creating a lovely piece of backlit decor.
Step-by-Step Tutorial
Materials
- Clean, empty green wine bottle (label removed)
- Rubbing alcohol and cotton pad
- Enamel glass paints (White, Gold or Metallic Olive Green, Dark Brown, Red/Maroon)
- Fine liner brush (size 0 or 00)
- Small round brush (size 1 or 2)
- Paper plate or palette
- Paper towels
- Water cup
Step 1: Preparation and Grass Base
-
Clean surface:
Begin by wiping down your entire bottle with rubbing alcohol on a cotton pad. This removes oils and fingerprints, ensuring your paint adheres properly to the glass surface. -
Mix grass color:
On your palette, prepare your metallic olive or gold paint. If you want more depth, mix a tiny drop of brown into the gold to create an antique bronze look for the reeds. -
Paint base strokes:
Starting at the very bottom edge of the bottle, use your fine liner brush to pull long, slender strokes upward. These should vary in height, reaching about one-third up the bottle. -
Vary thickness:
Apply slightly more pressure at the base of each grass blade and lift off quickly at the tip to create a sharp, tapered point. Crossed blades look more natural. -
Add layers:
Painting wet-on-wet is tricky on glass, so let the first layer of grass dry for about 10 minutes before adding a few more overlapping blades for density.
Step 2: Painting the Dragonfly
-
Outline the body:
Locate a spot in the center of the bottle, above the grass line. Using the fine liner brush and dark brown paint, draw a long, segmented tail line at a diagonal angle. -
paint the thorax:
At the top of the tail, paint an oval shape for the body segment using white paint mixed with a tiny touch of brown create a creamy off-white. -
Detail the head:
Above the body, paint a small round head. Add small dots of red or maroon for the eyes to give the insect a pop of color. -
Draft the wings:
Using pure white paint on your finest brush, carefully outline four long, narrow wing shapes extending from the thorax. The top pair should point slightly upward, the bottom pair slightly down. -
Fill the wings:
Fill in the wing outlines with a very thin, semi-transparent layer of white. You want the green bottle to show through slightly. -
Add wing veins:
Once the white wing base is fully dry (give it some time), use your finest liner brush and slightly watered-down brown paint or a fine-tip permanent marker to draw the delicate vein webbing inside the wings. -
Add stripe details:
Return to the tail and paint small horizontal white stripes across the brown segments to add dimension.
Clean Lines Tip
If you smudge a line, don’t wipe it immediately. Let it dry slightly, then use a damp toothpick or Q-tip to scrape away the excess paint cleanly.
Step 3: Floral Accents and Finishing
-
Paint large flower:
Near the top shoulder of the bottle, paint a simple five-petal flower using white paint. Keep the petals round and open. -
Detail the center:
Add a tiny circle of lines in the center of the flower using your dark brown or black paint to mimic stamens. -
Add floating blooms:
Scatter two or three smaller white flowers lower down, near the grass line, to balance the composition. -
Include buds:
Paint a few tiny white dots or teardrop shapes floating around the grass tips to represent unpopped buds or pollen. -
Final cure:
Allow the bottle to cure according to your paint manufacturer’s instructions. Some require air drying for 21 days, while others need baking in a home oven.
Add Sparkle
For a magical evening look, mix a tiny amount of glitter medium into the white wing paint. When you put fairy lights inside, the wings will shimmer.
Place near a sunny window to let the light shine through your new meadow scene
BRUSH GUIDE
The Right Brush for Every Stroke
From clean lines to bold texture — master brush choice, stroke control, and essential techniques.
Explore the Full Guide
Clean Color-Block Modern Bottle
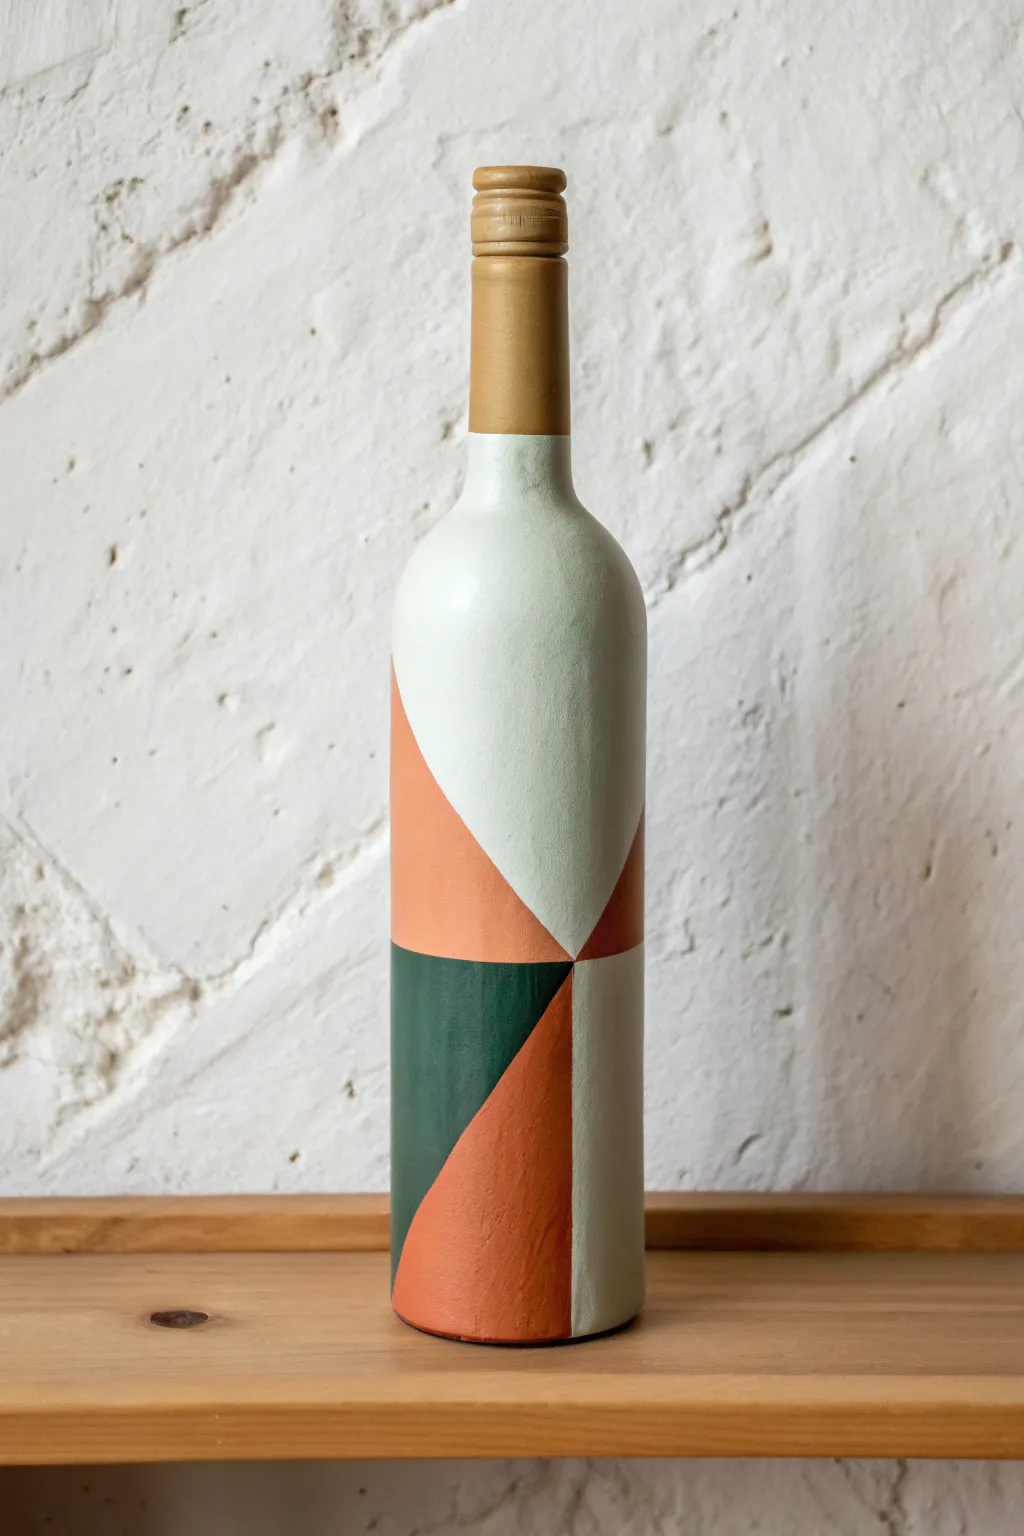
Transform an ordinary wine bottle into a striking piece of modern decor with this geometric color-block design. The combination of matte earthy tones and sharp angles creates a sophisticated look that mimics high-end ceramic vases.
Detailed Instructions
Materials
- Clean, empty wine bottle (labels removed)
- Rubbing alcohol and cotton pad
- Gesso or multi-surface primer (white)
- Acrylic paints: Cream/Off-White, Terra Cotta/Burnt Orange, Deep Forest Green
- Metallic Gold acrylic paint or spray paint
- Painter’s tape (low-tack delicate surface tape is best)
- Flat paintbrushes (medium and small sizes)
- Palette or paper plate
- Matte finish clear sealant spray
Step 1: Prep and Prime
-
Clean the surface:
Start by thoroughly washing your wine bottle to remove all label residue. Once dry, wipe the entire surface with rubbing alcohol on a cotton pad to remove invisible oils that might repel paint. -
Apply the base coat:
Using a flat brush, apply a coat of white gesso or multi-surface primer over the entire bottle, including the neck. This provides a tooth for the paint to grip onto. -
Let it cure:
Allow the primer to dry completely according to the manufacturer’s instructions. A second coat may be necessary if the glass is still showing through. -
Paint the background:
Paint the entire body of the bottle (below the neck) with your Cream/Off-White acrylic paint. Don’t worry about the neck area yet. Let this layer dry thoroughly before moving to the taping phase.
Tape Like a Pro
For ultra-crisp lines on a curved surface like a bottle, cut your tape into thinner strips. Thin strips conform to the curve better than wide ones, reducing ripples.
Step 2: Designing the Geometry
-
Establish the first angle:
Cut a long strip of painter’s tape. Place it diagonally across the bottle, creating a sharp line that divides a triangular section. Press the edge down firmly with your thumbnail to prevent bleed-under. -
Create intersecting lines:
Apply additional strips of tape to form the other geometric shapes seen in the reference image. You want to create triangles and trapezoids that intersect. I find it helpful to look at the bottle from a distance to ensure the proportions feel balanced. -
Seal the tape edges:
To get perfectly crisp lines, brush a very thin layer of your base Cream color over the edges of the tape. This seals the tape so any paint that bleeds underneath matches the background.
Step 3: Blocking in Color
-
Apply the Terra Cotta:
Select the specific triangular sections for the orange hue. Using a small flat brush, carefully paint inside the taped area with the Terra Cotta paint. -
Add opacity:
Acrylics can be translucent, especially reds and oranges. Let the first coat dry to the touch, then add a second or third coat until the color is solid and opaque. -
Paint the Forest Green:
Move to the adjacent geometric section meant for the green. Apply the Deep Forest Green paint, being careful not to mix it with the wet orange paint if the sections touch. -
Review coverage:
Check your work for brushstrokes or thin spots. Apply additional coats of green or orange as needed to achieve a smooth finish. -
The crucial reveal:
While the final coat of paint is still slightly damp (not soaking wet, but not fully cured), carefully peel back the painter’s tape at a 45-degree angle. This prevents the paint from chipping.
Texture Twist
Want a true pottery feel? Mix a teaspoon of baking soda into your acrylic paints before applying. This adds a grainy, stone-like texture that looks amazing matte.
Step 4: Finishing Touches
-
Address the neck:
Once the body is dry enough to handle, use painter’s tape to mask off the shoulder of the bottle where the cream paint ends. This protects your hard work. -
Gild the top:
Paint the neck and the rim of the bottle with Metallic Gold acrylic paint. This usually takes 2-3 coats to look like solid metal. Keep your brush texturing minimal. -
Touch-ups:
Inspect your lines. If any paint bled or a line looks wobbly, use a tiny detailed brush and the background Cream color to carefully clean up the edges. -
Matte finish:
To replicate the ceramic look in the photo, take the bottle outside and spray it with a matte clear sealant. This knocks back any glossiness from the acrylics and unifies the surface texture.
Place your new vase on a shelf or mantel to enjoy that modern pop of color and geometry
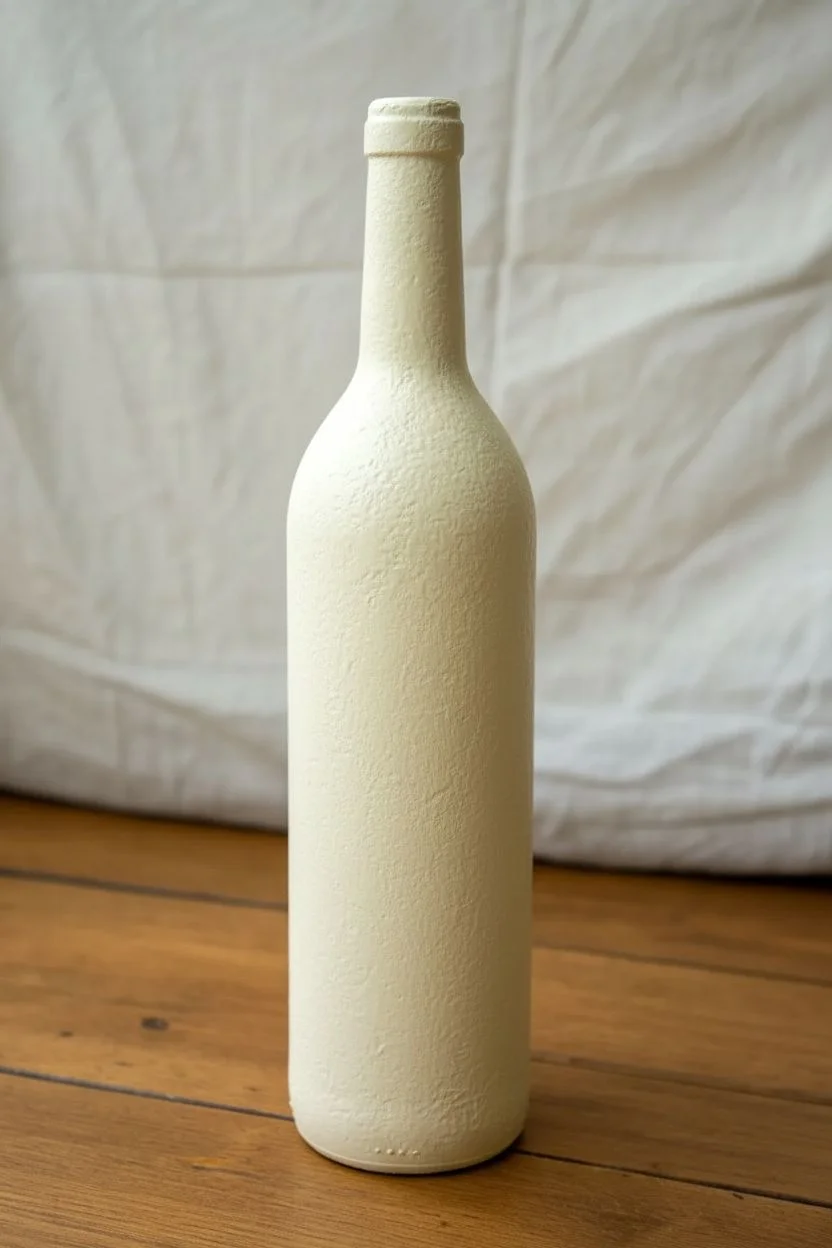
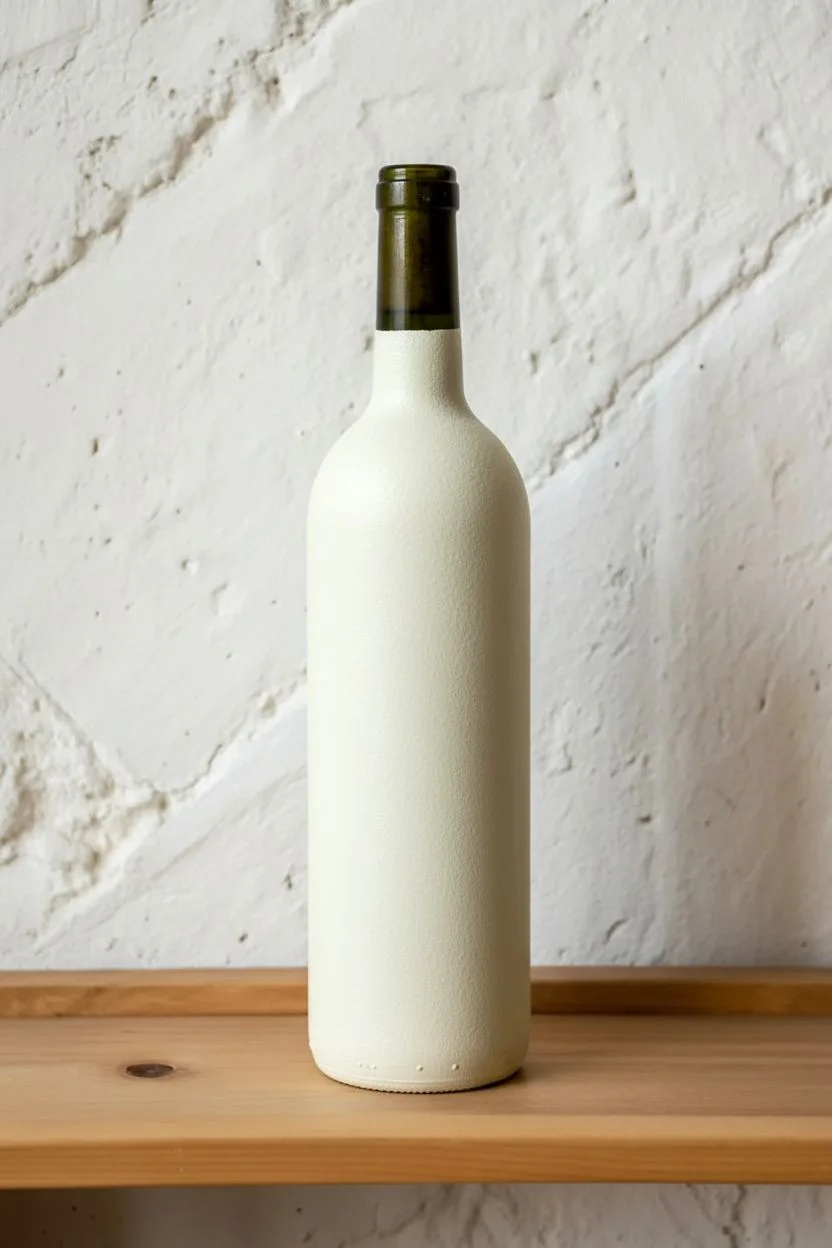
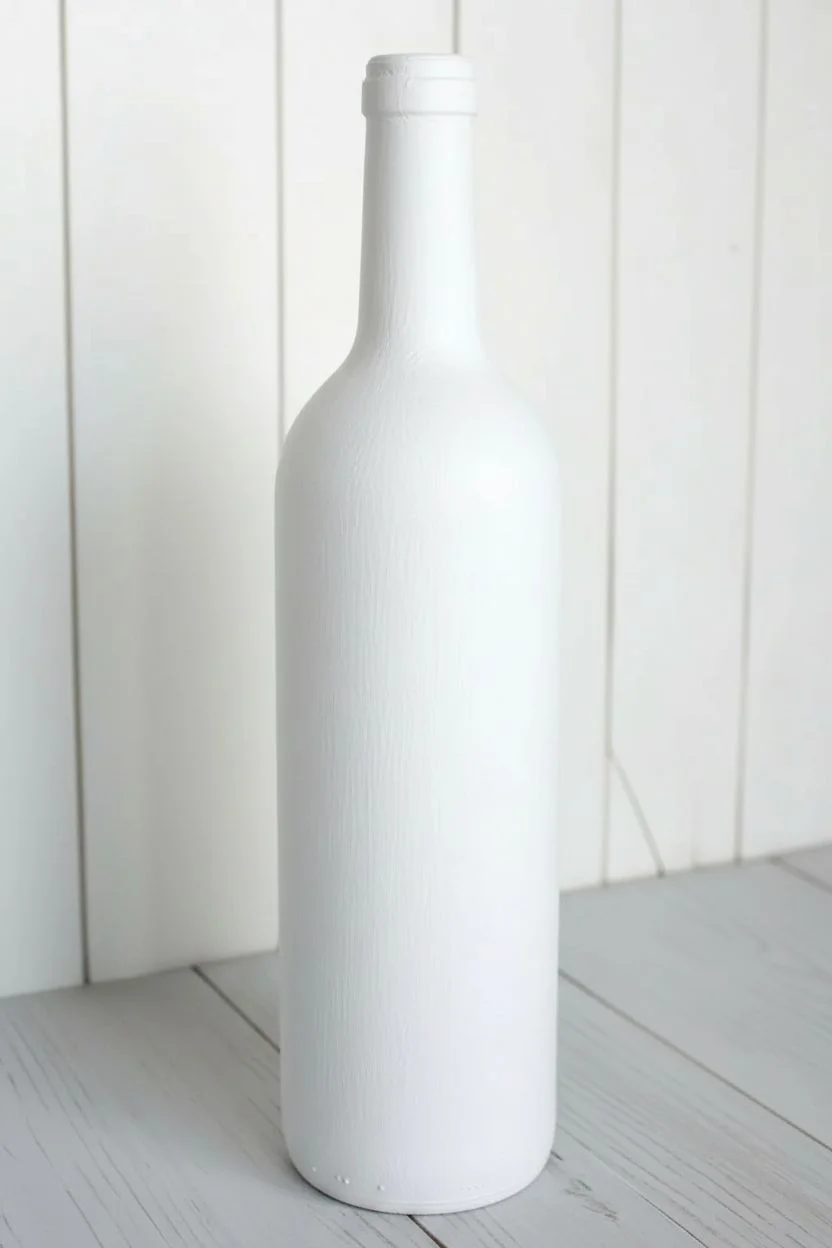
Matte Chalky Farmhouse Finish
Transform an empty wine bottle into a stunning vase with plenty of rustic charm. This project features a textured, matte finish accented with natural twine for that perfect vintage farmhouse aesthetic.
Step-by-Step Tutorial
Materials
- Empty wine bottle (washed and dried, labels removed)
- Rubbing alcohol
- Chalk paint (cream or off-white)
- Medium flat synthetic paintbrush
- Foam pouncer or sponge brush (optional)
- Jute twine
- Hot glue gun and glue sticks
- Dark brown or grey acrylic paint (for distressing)
- Paper towel
- Sandpaper (fine grit)
Step 1: Preparation and Base Coat
-
Clean surface:
Begin by thoroughly cleaning your glass bottle with warm soapy water to remove any label residue. Once dry, wipe the entire surface with rubbing alcohol to ensure no oils remain. -
First coat application:
Dip your flat brush into the cream chalk paint. Apply a thin, even coat over the body of the bottle, starting from the neck down to the base. -
Build opacity:
Allow the first layer to dry completely (usually about an hour). You will notice it looks streaky, but don’t worry—chalk paint is forgiving. Apply a second coat using long, vertical strokes. -
Add texture:
For the third coat, I prefer to use slightly thicker paint application. When brushing it on, intentionally leave subtle brush marks vertically to simulate a wood-grain or hand-painted texture. -
Drying time:
Let the bottle sit overnight or for at least 4-6 hours to ensure the paint has fully cured and hardened on the glass surface.
Paint Adhesion Tip
If your chalk paint slips around on the glass too much, dab the first coat on with a cosmetic sponge rather than brushing. This creates ‘tooth’ for the next layer.
Step 2: Distressing and Detailing
-
Create weather marks:
To give the bottle a worn, vintage look, dry brush a tiny amount of dark brown or grey acrylic paint near the very bottom edge. -
Feathering technique:
Immediately wipe most of the dark paint away with a paper towel, leaving only faint scuffs and marks that mimic dirt or chipped paint. -
Wrap the neck:
Apply a small dab of hot glue to the back of the bottle’s neck, just where the curve begins. Secure the end of your jute twine. -
Wind the twine:
Tightly wrap the twine around the neck about 6-8 times, creating a cohesive band. Ensure the loops are pressed firmly against each other with no gaps. -
Secure the top:
Once you have a band about an inch wide, cut the twine and secure the end with another small dot of hot glue on the back side. -
Lower accent wrap:
Move about halfway down the body of the bottle. Create a second band of twine, but this time, wrap it loosely about 4-5 times. -
Add the bow:
Tie the ends of this middle twine section into a simple shoelace bow. Trim the tails so they hang naturally but aren’t too long. -
Secure the bow:
If the bow feels loose or slides down the smooth glass, place a tiny drop of hot glue behind the knot to keep it perfectly positioned. -
Final touches:
Inspect the bottle for any stray glue strings or uneven paint spots. Lightly sand any areas that feel too rough, but be careful not to strip the paint entirely.
Make It Waterproof
Want to use real flowers? Coat the inside with a swish of polyurethane or ensure your flowers are in floral tubes to prevent water from lifting the exterior paint.
Place your favorite faux stems inside and enjoy your new farmhouse accent piece

PENCIL GUIDE
Understanding Pencil Grades from H to B
From first sketch to finished drawing — learn pencil grades, line control, and shading techniques.
Explore the Full Guide
Faux Sea Glass Bottle Makeover
Transform an ordinary recycling bin find into a stunning piece of coastal decor with this faux sea glass technique. The result features a dreamy frosted texture and a soothing teal gradient that mimics a bottle tumbled by the ocean for decades.
Detailed Instructions
Materials
- Clean wine bottle (label removed)
- Rubbing alcohol
- Cotton pads
- Sea glass spray paint (Krylon or Rust-Oleum, in Sea Foam/Aqua)
- White acrylic craft paint
- Teal or Turquoise acrylic craft paint
- Makeup sponges (wedges)
- Paper plate or palette
- Old toothbrush
- Water cup
- Newspaper or drop cloth
Step 1: Preparation & Base Coat
-
Clean the surface:
Begin by thoroughly washing your wine bottle with warm soapy water to remove any label residue. Once dry, wipe the entire surface with rubbing alcohol on a cotton pad to remove oils and fingerprints, ensuring the paint adheres perfectly. -
Set up your workspace:
Lay down newspaper or a drop cloth in a well-ventilated area, preferably outdoors or near an open window, as spray paint fumes can be strong. -
Apply the first frosted layer:
Shake your can of sea glass spray paint vigorously for at least one minute. Hold the can about 10-12 inches away from the bottle and apply a very light, even mist coating. Do not try to get full opacity yet; you want a sheer, frosted look. -
Let it cure:
Allow this initial coat to dry for about 15 minutes. It should look dry to the touch before you proceed. -
Apply the second frosted layer:
Apply a second light coat of the sea glass spray paint. This builds up that characteristic semi-opaque, tumbled texture. Let this layer dry completely for at least an hour.
Step 2: Creating the Ombré Effect
-
Prepare your palette:
Squeeze a nickel-sized amount of teal acrylic paint and a separate dollop of white acrylic paint onto your paper plate. -
Mix a mid-tone:
Take a makeup sponge and dab it into the teal paint, then lighter dabs into the white to create a soft, sea-foam green on the sponge surface. Blot excess paint onto the paper plate; the sponge should be relatively ‘dry’. -
Sponge the bottom:
Starting at the very bottom of the bottle, gently tap the sponge against the glass. Work in quick, up-and-down dabbing motions to deposit the darker teal color. -
Fade upward:
As you move up the bottle (about 1/3 of the way up), use less pressure and mix in more white paint on your sponge. The goal is to have the color fade out into the frosted glass background, rather than having a hard line. -
Blend the transition:
I like to take a clean side of the makeup sponge (or a fresh sponge) with just a tiny bit of white paint and dab over the transition line where the teal ends. This softens the gradient significantly. -
Dry the gradient:
Let the sponged acrylic layer dry for about 20 minutes. The texture of the sponge mimics the pitted surface of real sea glass.
Don’t Rush the Frosting
Apply the sea glass spray in many thin, dusty coats rather than one heavy wet one. Heavy coats will drip and look like plastic, whereas thin mists build up genuine-looking texture.
Step 3: Adding Salt Spray Splatter
-
Dilute white paint:
Mix a small amount of white acrylic paint with a few drops of water. You want a consistency similar to heavy cream or thin yogurt—fluid enough to fly off a brush, but thick enough to stay white. -
Load the tool:
Dip the bristles of an old toothbrush into this thinned white paint. Tap off any large drips on your paper towel. -
Test your splatter technique:
Before hitting the bottle, practice flicking the bristles with your thumb over a piece of scrap paper to gauge the spray pattern. -
Apply the sea spray:
Hold the toothbrush near the bottom darker section of the bottle. Flick the bristles to spray fine white speckles over the teal gradient. Concentrate the heavier speckles at the base and let them thin out as you go higher. -
Create larger droplets:
For variety, dip the handle end of a paintbrush into the white paint and gently dot a few specific spots near the bottom to look like larger foam bubbles. -
Final drying time:
Allow the entire bottle to cure for 24 hours before handling extensively. This ensures the acrylics and the spray base bond together permanently.
Add Netting Texture
Wrap parts of the bottle in mesh fruit netting or fishnet stockings before sponging on the teal paint. Remove it when wet to reveal a cool scale-like pattern in the gradient.
Place your finished bottle near a window where the light can catch the frosted texture and soft gradient colors
Stencil Silhouettes for Crisp Shapes
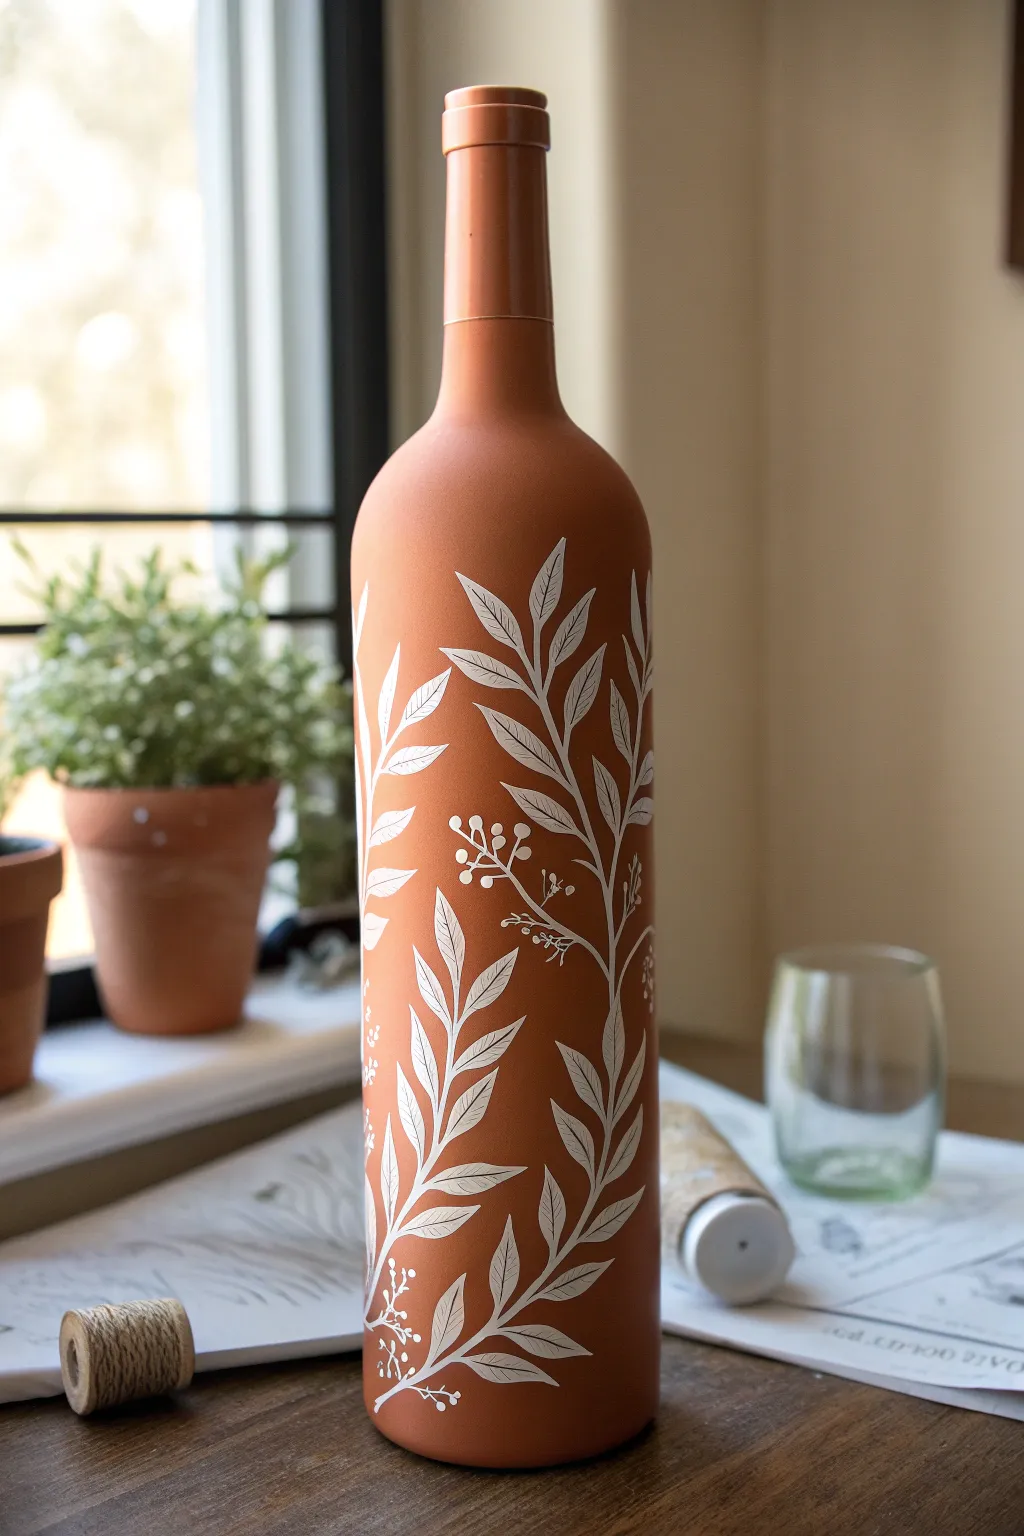
Transform a simple glass bottle into a piece of warm, rustic decor with this faux-ceramic technique. By combining a matte terracotta base with crisp white botanical stencils, you’ll achieve an elegant look that mimics expensive pottery.
Step-by-Step Tutorial
Materials
- Clean wine bottle (labels removed)
- Rubbing alcohol
- Terracotta or burnt orange acrylic paint
- Baking soda or plaster of paris (for texture)
- White or cream liquid acrylic paint
- Adhesive plant stencil
- Flimsy stencil brush (or makeup wedge sponge)
- Flat paintbrush (medium width)
- Matte finish sealer spray
- Painters tape (optional)
- Palette or small dish
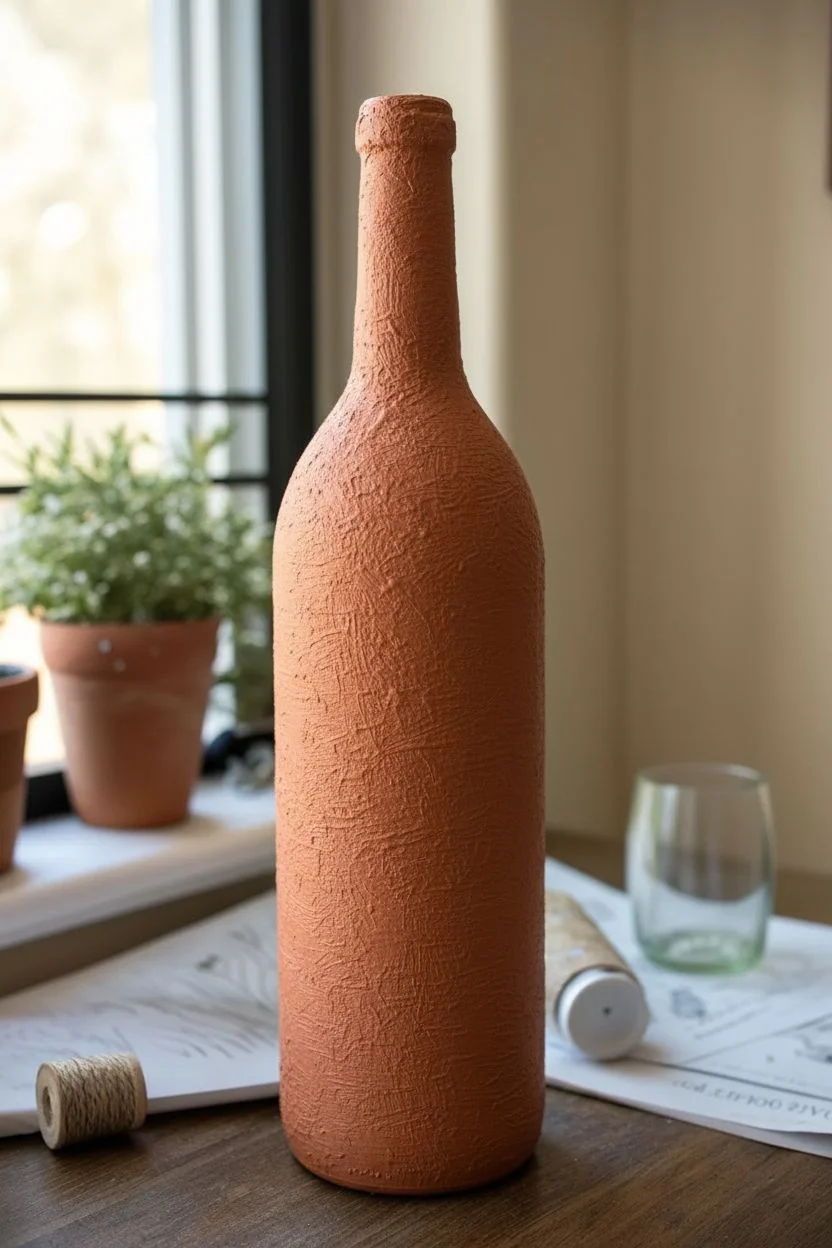
Step 1: Preparation & Base Coat
-
Clean surface:
Begin by thoroughly washing your wine bottle to remove any label residue. Wipe the entire surface down with rubbing alcohol on a paper towel to remove invisible oils, ensuring the paint adheres perfectly. -
Mix textured paint:
To create that realistic faux-clay look, mix your terracotta acrylic paint with baking soda. Aim for a 1:1 ratio, stirring until the consistency resembles fluffy frosting or thick mousse. -
Apply first textured layer:
Using a flat paintbrush, apply the mixture to the bottle. Don’t worry about brushstrokes showing; texturing is the goal here. Cover the body and neck completely, but avoid the very top rim if you plan to re-cork it. -
Let dry fully:
Allow this first thick coat to dry completely. This usually takes about an hour, depending on humidity. It will look chalky and matte as it dries. -
Second coat application:
Apply a second layer of your textured paint mixture. If the first coat was horizontal, try painting vertically this time to create a cross-hatched, natural pottery texture. -
Final dry time:
Let the bottle sit overnight or for at least 4-6 hours. The paint needs to be rock-hard before we apply any stencils, or the adhesive might peel up your beautiful texture.
Bleeding Lines?
If paint bleeds under the stencil, wait for it to dry. Then, use a small brush with your original terracotta mixture to carefully ‘erase’ the white bleed.
Step 2: Stenciling the Design
-
Prepare the stencil:
Choose an adhesive stencil with long, leafy vines. If the stencil is new and very sticky, press it against jeans or a towel once to reduce the tackiness before placing it on the painted bottle. -
Position the design:
Press the stencil firmly onto the bottle, smoothing it down from the center outward. Pay special attention to the edges of the leaves to prevent paint bleed. -
Load the sponge:
Dip a stencil brush or makeup sponge into white acrylic paint. Dab the excess off onto a paper towel until the sponge is almost dry—this ‘dry brush’ technique is crucial for crisp lines. -
Apply the white paint:
Gently dab—do not drag—the white paint over the stencil openings. Use an up-and-down pouncing motion. Apply a thin layer first, let it dry for a minute, then add a second thin layer for opacity. -
Peel and reveal:
While the white paint is still slightly tacky (not fully wet, but not bone dry), carefully peel back the stencil. Pull it slowly at a sharp angle close to the bottle’s surface. -
Repeat the pattern:
Once the first section is dry to the touch, reposition the stencil to continue the vine pattern around or up the bottle. I like to vary the height slightly so the pattern feels organic rather than rigid. -
Hand-paint details:
If there are small gaps where the stencil didn’t reach, or if you want to extend a stem, use a very fine liner brush and the white paint to connect the design elements manually. -
Add berries (optional):
To mimic the image perfectly, use the handle end of a paintbrush dipped in white paint to dot small ‘berries’ onto the stems for added detail.
Step 3: Sealing
-
Examine the work:
Check for any unwanted smudges. You can gently scrape away small white mistakes with a toothpick if the base coat is fully hardened. -
Apply sealer:
Take the bottle to a well-ventilated area. Spray the entire bottle with a clear matte sealer. This protects the textured paint from chipping and keeps the white design bright.
Add Depth
Before removing the stencil, lightly dab a tiny bit of light grey paint at the base of the leaves to create a subtle shadow effect.
Place your finished vase near a window to let the natural light highlight that beautiful matte texture


Ombre Sunset with Tree Silhouettes
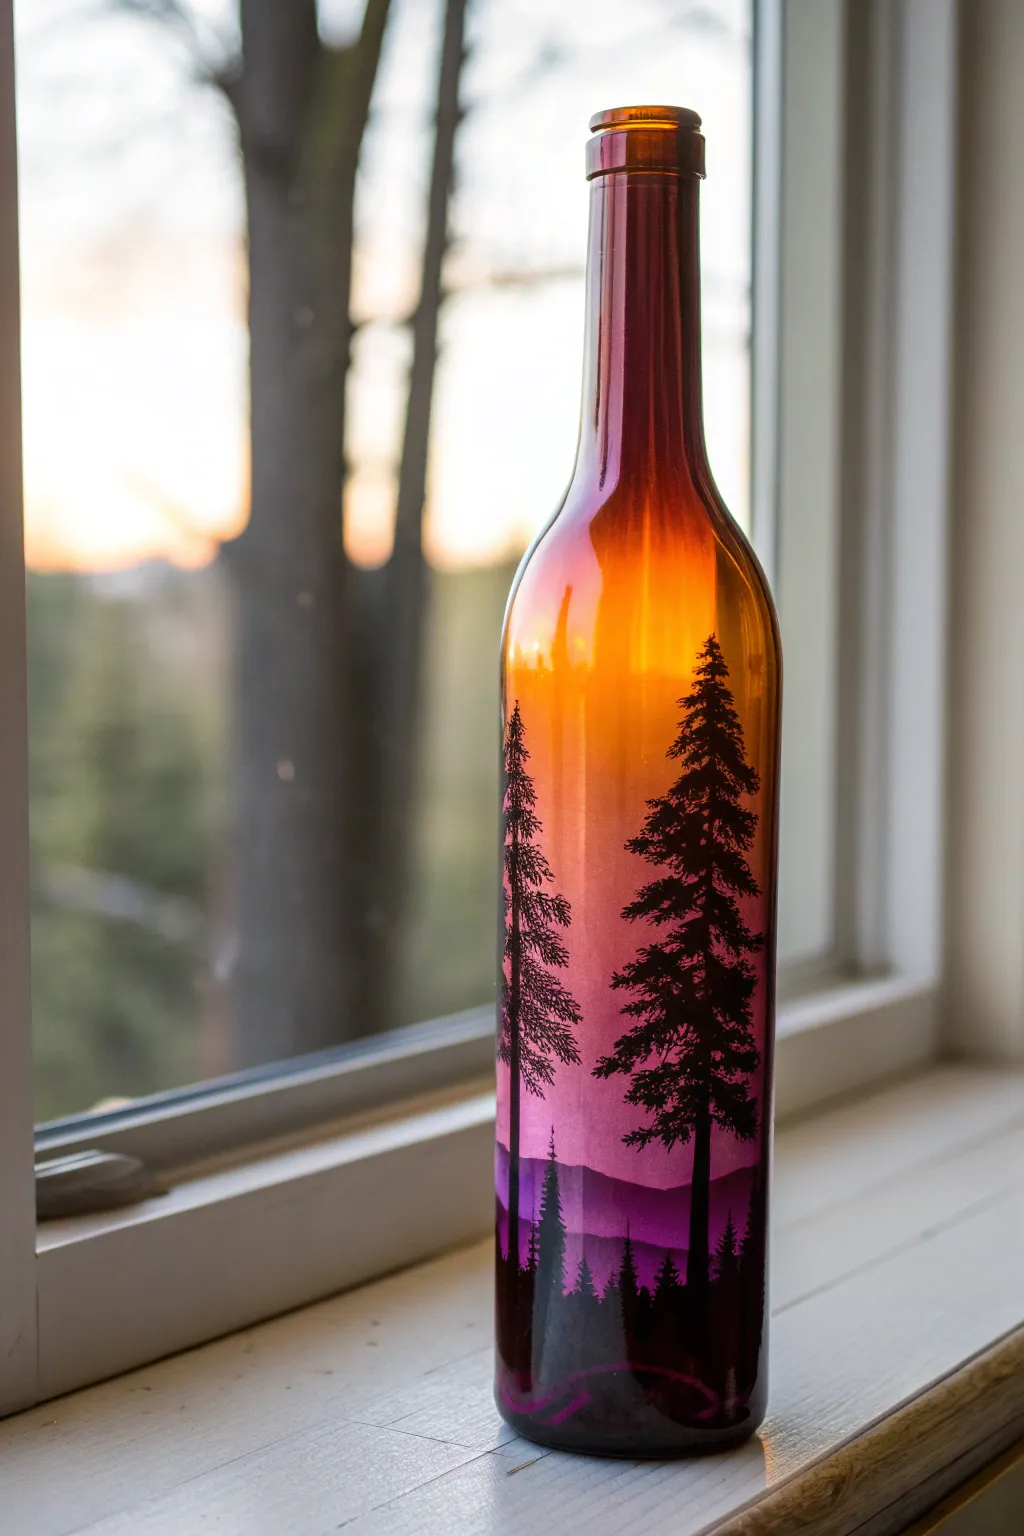
Capture the serene beauty of twilight with this painted wine bottle project, featuring a warm ombre sunset that glows beautifully when backlit. The stark contrast of black pine trees against the vibrant gradient creates a stunning piece of decor perfect for a windowsill or mantel.
Step-by-Step Guide
Materials
- Clean, empty wine bottle (clear or amber glass works best)
- Rubbing alcohol
- Cotton pads
- Acrylic craft paints (warm yellow, orange, magenta, deep purple, black)
- Makeup sponges or sea sponges
- Small round detail brush (size 0 or 1)
- Medium liner brush
- Paper plate or palette
- Water cup
- Clear acrylic sealer spray (gloss or matte)
Step 1: Preparing the Canvas
-
Clean the glass:
Start by thoroughly washing your wine bottle with warm, soapy water to remove any labels and glue residue. Once dry, wipe the entire surface with rubbing alcohol on a cotton pad to remove invisible oils, ensuring the paint adheres perfectly. -
Set up your palette:
On your paper plate, squeeze out generous amounts of your sunset colors: warm yellow, orange, magenta, and deep purple. Group them in that order so they are ready for blending.
Let the Light In
For a magical glowing effect, leave the paint slightly thinner in the yellow sections or insert a string of battery-operated fairy lights inside the finished bottle.
Step 2: Creating the Ombre Sunset
-
Sponge the yellow layer:
Load a slightly damp makeup sponge with warm yellow paint. Dab this onto the upper-middle section of the bottle, starting where the neck widens into the body. Use a pouncing motion rather than brushing to create texture. -
Add the orange:
Pick up orange paint with the same sponge (or a fresh one if it’s too saturated) and sponge it directly below the yellow. While the paint is wet, pounce over the line where the two colors meet to blend them into a soft transition. -
Introduce magenta:
Moving downward, sponge on the magenta paint. Overlap it slightly with the orange section above, tapping repeatedly to blur the boundary between the fiery orange and the pinker tones. -
Finish with purple:
Apply the deep purple paint to the bottom quarter of the bottle. Blend it upward into the magenta. You want a gradient that mimics the sky darkening as it reaches the horizon line. -
Add distant mountains:
Using a lighter wash of purple (mix a tiny bit of white or water if needed), lightly paint soft, rolling hill shapes just above the solid purple bottom layer. Let this background dry completely before moving on.
Sticky Sponge Struggles?
If the sponge pulls paint off the glass instead of laying it down, you are likely overworking it. Let that layer dry for 5 minutes, then apply a second coat gently.
Step 3: Painting the Silhouettes
-
Draft the main trunks:
Load your medium liner brush with black acrylic paint. Paint a few vertical lines of varying heights to establish where your main pine trees will stand. Staggering their placement creates depth. -
Start the tree tops:
Switch to your small detail brush. Starting at the very tip of your tallest trunk, paint tiny, downward-angled dashes to create the pointed top of the pine tree. -
Build the branches:
Work your way down the trunk, making the branches wider as you go. Use a jagged, irregular motion—nature isn’t perfect, and rougher brushstrokes look more like realistic needles. -
Fill in the canopy:
Continue painting branches all the way down. I find it helps to leave small gaps of the sunset showing through near the trunk, so the tree doesn’t look like a solid black triangle. -
Add smaller trees:
Paint smaller, shorter trees in the background or between the large ones. These should be slightly less detailed to push them visually into the distance. -
Ground the scene:
Use the black paint to fill in the very bottom of the bottle, creating a solid ground line that connects the bases of all your trees. You can add small tufts of grass or uneven terrain here for realism.
Step 4: Finishing Touches
-
Review and refine:
Take a step back and look at your composition. If any branches look too sparse, dab on a little more black paint to bulk them up. -
Clean up edges:
If you accidentally got black paint in the sky area, use a clean, damp brush or a toothpick to gently scrape it away before it cures. -
Seal the artwork:
Allow the bottle to cure for at least 24 hours. Once fully dry, spray the painted area with a clear acrylic sealer to protect against scratches and fading.
Place your finished bottle on a bright windowsill and watch how the changing daylight interacts with your painted sunset
Minimal White Line Art on Dark Glass
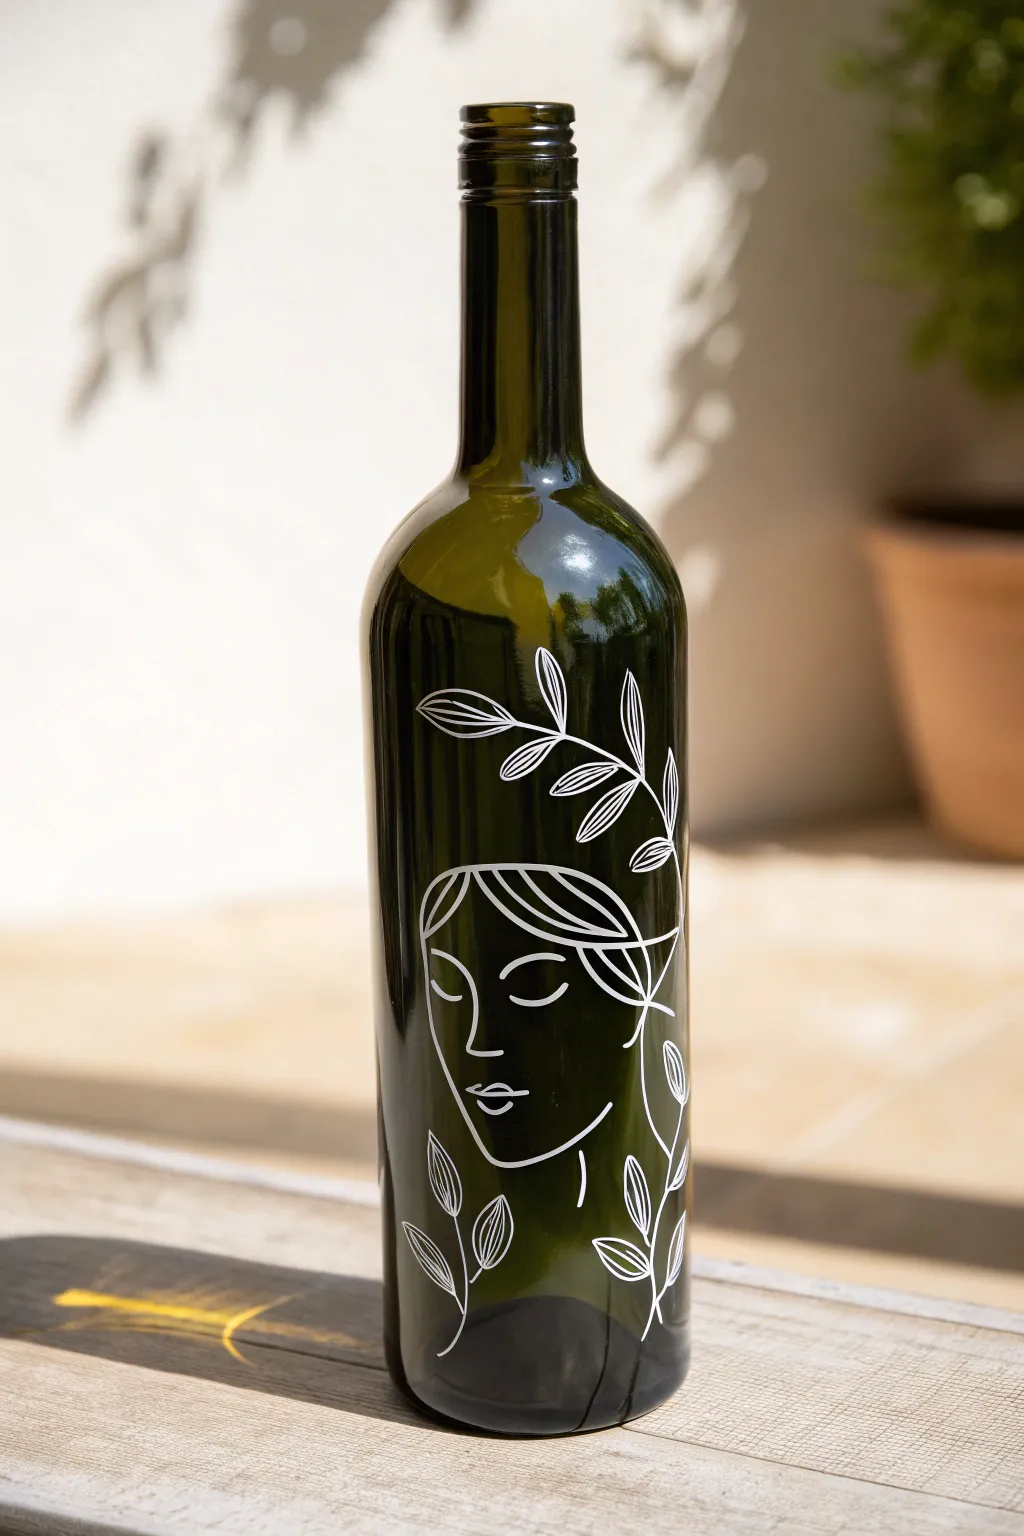
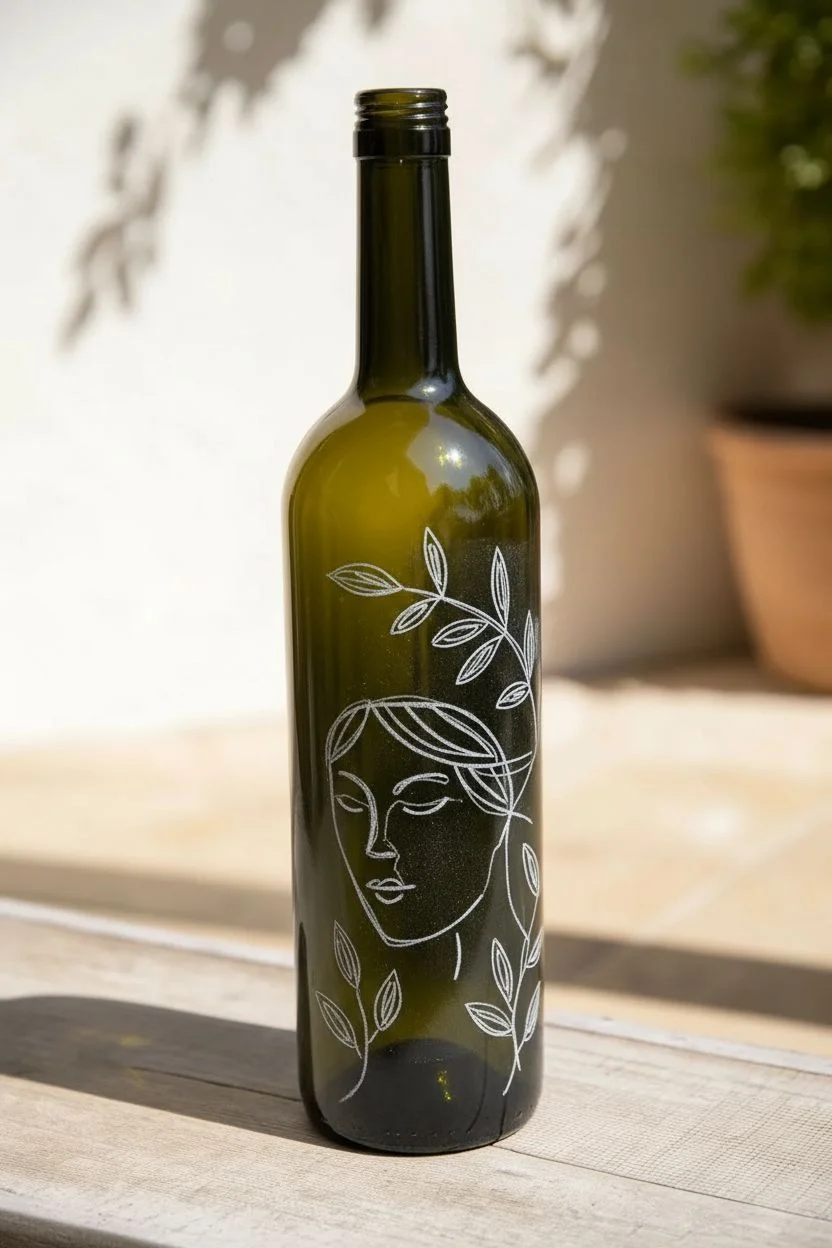
Transform a simple dark glass bottle into a piece of modern decor with this minimalist white line art project. The contrast between the deep green glass and the crisp white marker creates a sophisticated, continuous-line aesthetic that looks effortlessly chic.
Step-by-Step
Materials
- Clean, empty dark green wine bottle (label removed)
- Rubbing alcohol and cotton pads
- White oil-based paint marker (fine tip, 0.7mm – 1mm)
- White chalk marker or white charcoal pencil (for sketching)
- Paper towel or rag
- Cotton swabs
- Printed reference image or stencil (optional)
- Masking tape (optional)
Step 1: Preparation
-
Clean the surface:
Start by ensuring your bottle is completely free of adhesive residue from the original label. Soak it in warm soapy water if needed, then scrub clean. -
Degrease the glass:
Wipe the entire surface of the bottle with rubbing alcohol using a cotton pad. This removes invisible oils from your fingerprints that can prevent the paint from adhering properly. -
Plan placement:
Visualize where the face will sit. The eyes should be roughly in the middle of the bottle’s vertical body to create a balanced composition.
Steady Hand Trick
Rest your painting hand on a stacked book or a small box while you work. This elevates your wrist to the same level as the bottle, giving you smoother control.
Step 2: Drafting the Design
-
Sketch the outline:
Using a white chalk marker or charcoal pencil, lightly sketch the design directly onto the glass. I find charcoal pencils are easier to wipe away if you make a mistake. -
Start with the eyes:
Draw two closed, curved eyelids in the center. Keep the lines simple and serene, ensuring they are level with each other. -
Define the nose and mouth:
Draw an ‘L’ shape for the nose, connecting slightly to the brow line. Below that, add the lips with two small curves. Keep the features minimalist. -
Frame the face:
Sketch the jawline and hair. The hair should sweep across the forehead in wavy lines, extending out towards the sides of the bottle. -
Add foliage elements:
Draw leaf stems extending upwards from the hair and downwards near the jaw. These organic shapes fill the negative space beautifully.
Fixing Smudges
If you smudge wet paint, don’t wipe it! Let it dry completely, then use a toothpick or cotton swab dipped in nail polish remover to erase just that spot.
Step 3: Inking the Artwork
-
Prime the paint marker:
Shake your white oil-based paint marker well. Press the tip down on a scrap piece of paper until the ink flows smoothly and consistently. -
Trace the main features:
Begin tracing over your chalk sketch with the paint marker. Start with the central facial features—eyes, nose, and lips—to anchor the design. -
Commit to the jawline:
In one smooth motion if possible, trace the curve of the jaw and neck. Confidence in your stroke helps achieve that ‘continuous line’ look. -
Detail the hair:
Go over the wavy hair strands. Don’t worry if lines overlap slightly; it adds to the artistic sketch style. -
Ink the upper leaves:
Trace the leaves extending from the top. For the leaf veins, use a very light touch to keep the lines thinner than the outer leaf shapes. -
Ink the lower leaves:
Complete the bottom foliage. Ensure the leaves curve naturally around the side of the bottle, following the glass’s contour. -
Clean up edges:
If your marker skipped or pooled, use a damp cotton swab to tidy up the wet paint immediately. For dried mistakes, carefully scrape with a fingernail or craft knife.
Step 4: Finishing Touches
-
Remove sketch lines:
Allow the paint marker to dry completely (waited at least 30 minutes). Once dry, gently wipe away any visible chalk or charcoal guidelines with a soft, dry cloth. -
Second coat (optional):
If the white looks translucent against the dark glass, carefully go over the lines a second time for a brighter, more opaque finish. -
Let it cure:
Let the bottle sit undisturbed for 24 hours to allow the oil paint to fully cure and bond to the glass. -
Bake to set (optional):
For extra durability, you can place the bottle in a cold oven, heat to 350°F (175°C), bake for 30 minutes, and let it cool inside the oven.
Place your finished art piece on a sunlit windowsill where the light can catch the white lines against the dark glass
Winter Pines and Snowy Speckles
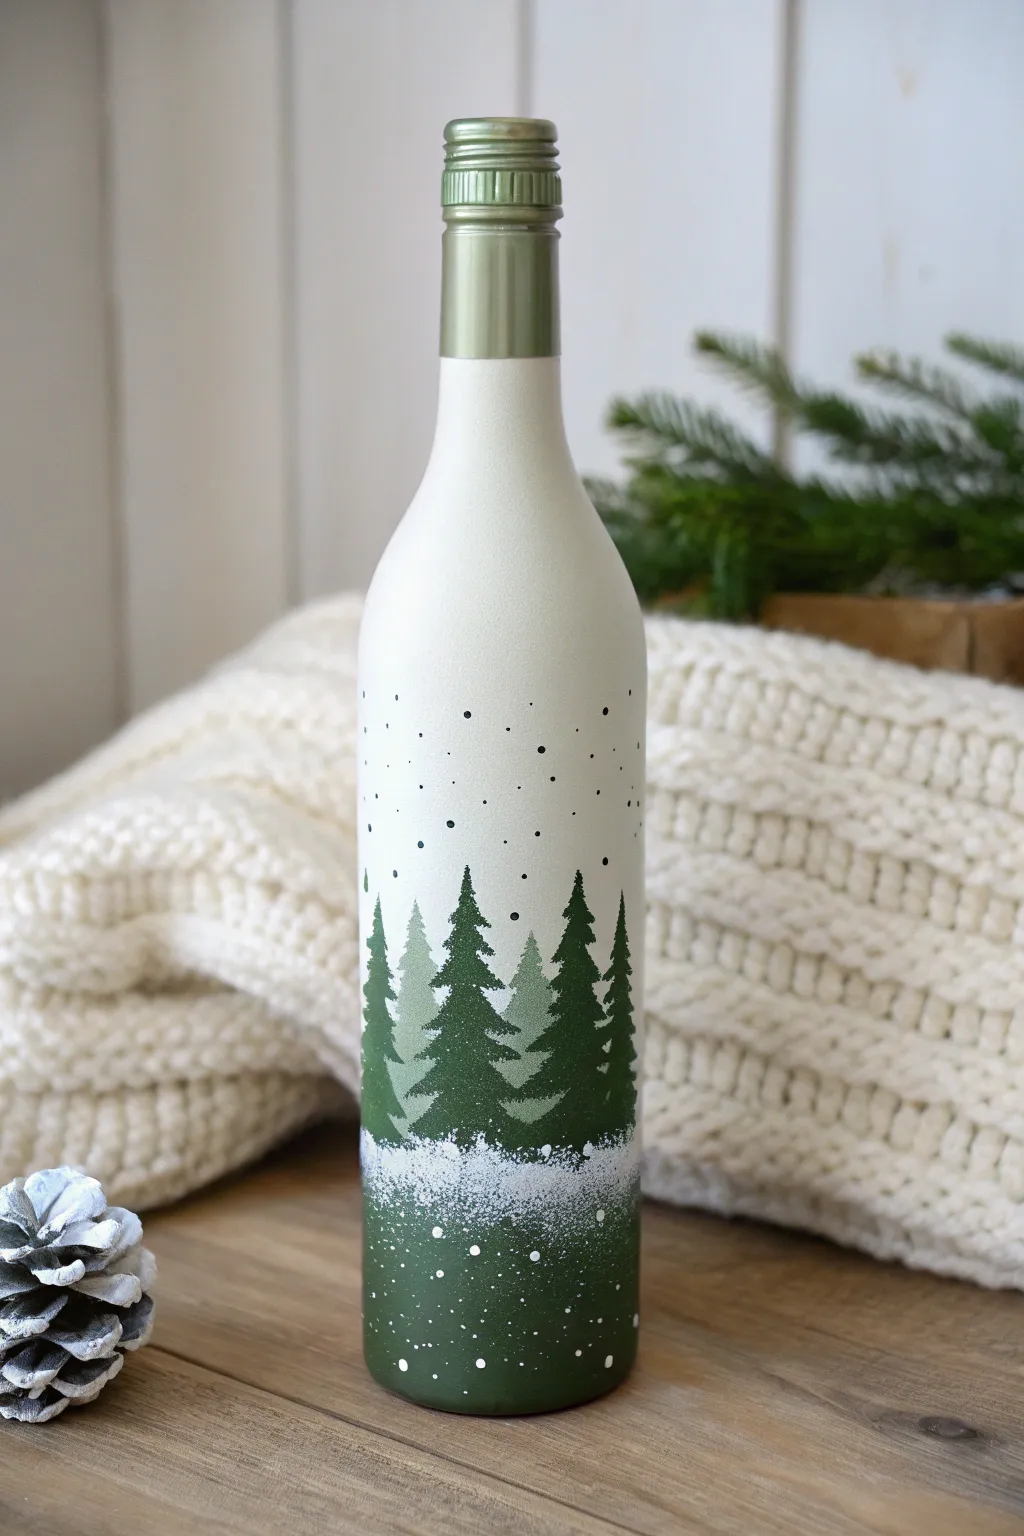
Transform an ordinary wine bottle into a serene winter landscape with this elegant painting project. The matte white base provides a perfect snowy backdrop for layered pine trees and delicate speckles, creating a sophisticated piece of seasonal decor.
Detailed Instructions
Materials
- Clean, empty wine bottle (label removed)
- Rubbing alcohol
- Matte white spray paint (or white chalk paint)
- Acrylic paints: Forest Green, Sage Green, White
- Fan brush (small)
- Detail liner brush
- Old toothbrush or stiff bristle brush
- Matte clear sealant spray
- Palette or paper plate
- Paper towels
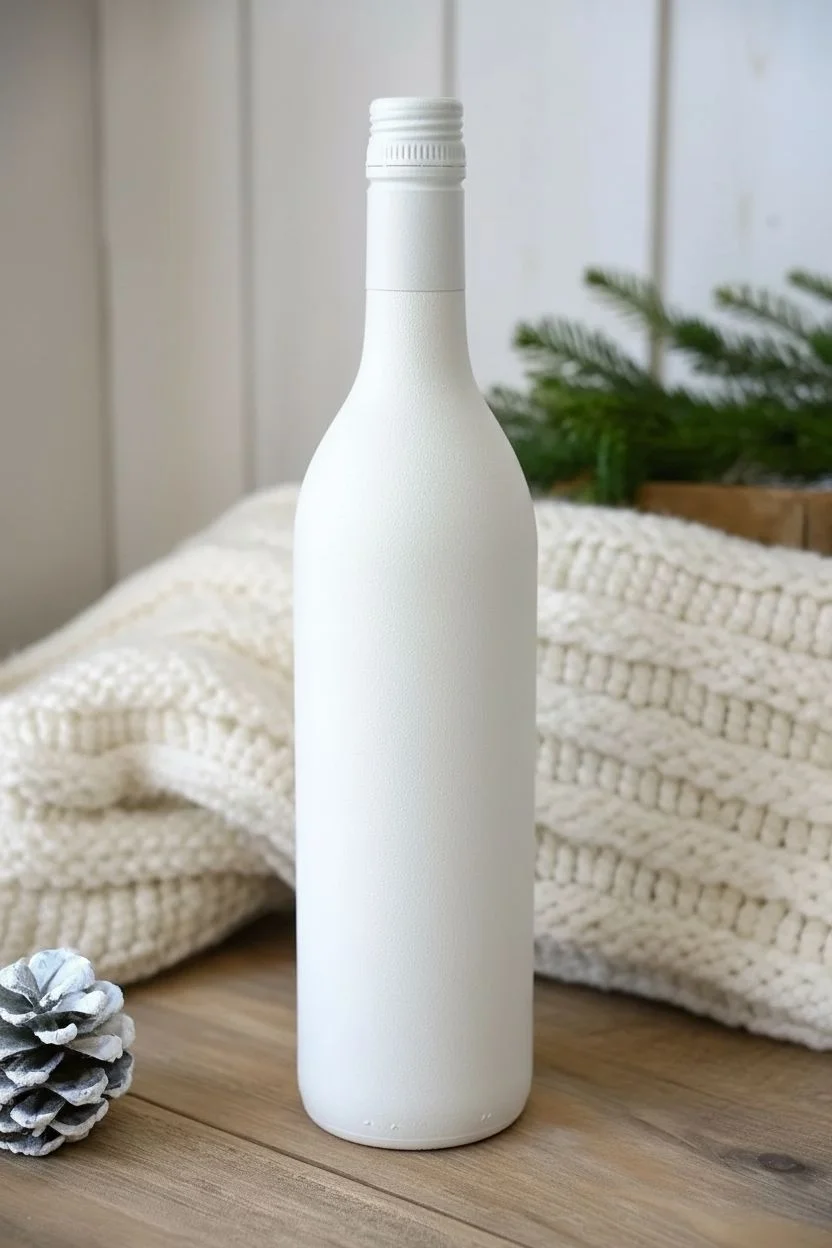
Step 1: Preparation & Base Coat
-
Clean the surface:
Thoroughly wash your wine bottle with warm soapy water to remove any label residue. Once dry, wipe the entire surface with rubbing alcohol on a paper towel to remove oils and fingerprints, ensuring the paint adheres perfectly. -
Prime the bottle:
Take the bottle outside or to a well-ventilated area. Apply a coat of matte white spray paint. Hold the can about 8-10 inches away and use sweeping motions to avoid drips. You want a solid, opaque coverage. -
Apply a second coat:
Let the first coat dry completely according to the can’s instructions—usually about 15-20 minutes. If you can still see glass showing through, apply a second thin coat. This matte white base is crucial for that snowy, frosted look.
Step 2: Painting the Pine Trees
-
Mix your lighter green:
Start with the background trees first. Mix a little white into your Sage Green acrylic paint to soften it further. These trees should look slightly distant and faded compared to the foreground. -
Paint the background tree silhouette:
Using a small liner brush, paint a thin vertical line to act as the trunk guide for your first background tree. Keep these trees slightly shorter than where you plan your foreground trees to be. -
Add background branches:
Switch to a fan brush or keep using the liner brush if you prefer control. Use quick, downward dabbing motions starting from the top of the trunk and widening as you go down. Don’t worry about perfect details; these are the backdrop. -
Complete the background forest:
Repeat this process to add 3-4 light green trees around the lower third of the bottle. Space them out irregularly so the forest looks natural. Let this layer dry to the touch, about 10 minutes. -
Start the foreground trees:
Dip your fan brush into the darker Forest Green paint. You don’t need to mix this one unless you want an even deeper shade. Paint the central guide lines for your foreground trees between the lighter ones. -
Layer the dark branches:
Using the corner of the fan brush, tap in the branches for these dark trees. Start with tiny taps at the top and create broader, sweeping branches near the bottom. Make sure these dark trees slightly overlap the lighter ones to create depth. -
Ground the forest:
Extend the dark green paint all the way down to the bottom edge of the bottle, filling in the space below the tree line to create a solid dark base. This anchors your scene visually.
Paint sliding off?
Glass is slippery! If your acrylics aren’t sticking, paint a layer of Mod Podge over the white base coat before starting your trees to give the surface more ‘tooth.’
Step 3: Snowy details & Finishing
-
Add snow to the ground:
Pour a small amount of white acrylic paint onto your palette. Using a dry, stippling brush or a sponge, gently dab white paint along the bottom edge where the trees meet the solid green base. Create a misty, uneven line to look like a snowbank. -
Prepare the speckle tool:
Dilute a small amount of white acrylic paint with a few drops of water until it has an inky consistency. Dip an old toothbrush or a stiff bristle brush into this mixture. -
Create the falling snow:
Hold the brush near the bottle and run your thumb across the bristles to flick tiny droplets of paint onto the surface. Focus the heavier speckles near the bottom snowbank and lighter speckles toward the top neck of the bottle. -
Add specific snowflakes:
I like to take a dotting tool or the back of a paintbrush handle to add a few deliberate, larger white dots among the spray. This varies the texture and makes the snowfall look more realistic. -
Paint the snow line detail:
If you want the transition between the trees and the green base to look frostier, dab a little more concentrated white paint right at that horizon line, blending it slightly downward into the dark green. -
Let it cure:
Allow the bottle to dry completely, preferably overnight. Acrylic on glass can be fragile until fully cured. -
Seal the artwork:
Finish by spraying the entire bottle with a clear matte sealant. This protects your painted forest from scratches and keeps that lovely frosted finish intact.
Level Up: Light It Up
Before painting, buy a cork-style beautiful LED fairy light string. Once the bottle is finished, drop the lights inside to illuminate the frosted glass from within.
Place your finished bottle on a mantelpiece or table for a lovely homemade winter accent.
Nautical Buoy Stripes and Rope Details
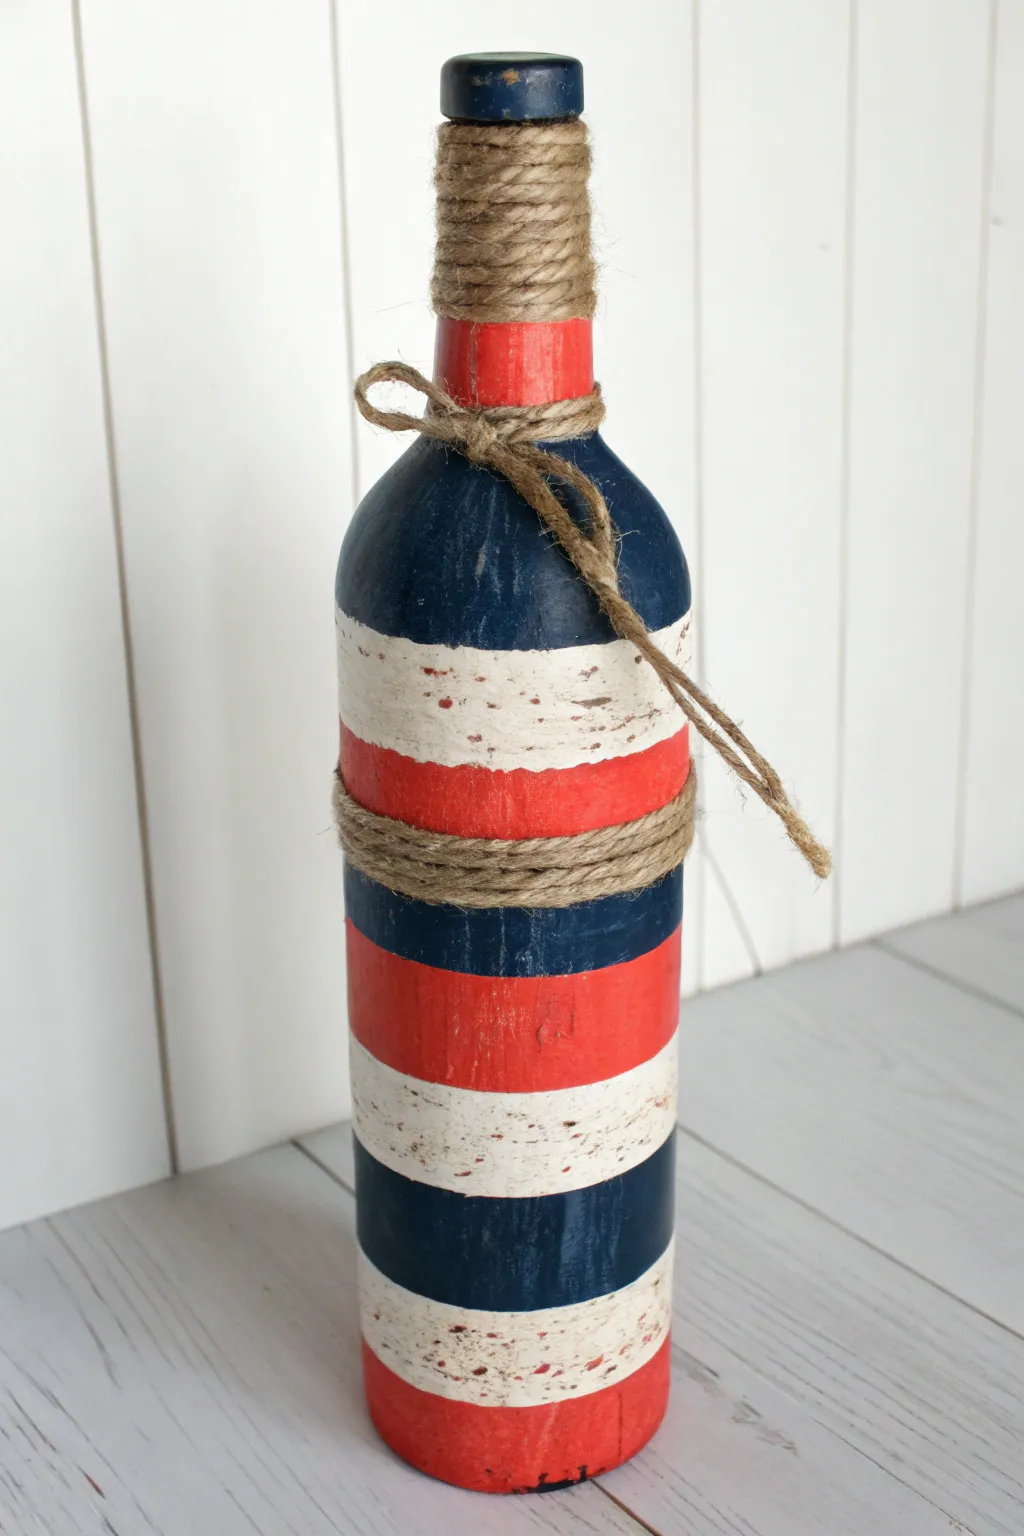
Transform an ordinary wine bottle into a charming seaside accent with classic red, white, and blue stripes. The distressed finish and rustic jute twine give it the look of a weathered buoy found washed up on a sandy shore.
Step-by-Step Tutorial
Materials
- Clean glass wine bottle (labels removed)
- White chalk paint or matte acrylic paint
- Navy blue chalk paint or matte acrylic paint
- Bright red chalk paint or matte acrylic paint
- Painter’s tape (various widths)
- Sanding block or medium-grit sandpaper
- Jute twine or rustic hemp cord
- Hot glue gun and glue sticks
- Paintbrushes (flat shader and small detail)
- Matte clear sealer spray (optional)
Step 1: Base and Prep
-
Clean surface:
Begin by removing all labels and adhesive residue from your bottle. Wash it thoroughly with warm soapy water and dry completely. A quick wipe with rubbing alcohol removes any lingering oils, ensuring the best paint adhesion. -
Initial white coat:
Apply a base coat of white chalk paint over the entire bottle, from the bottom rim all the way to the top lip. Chalk paint is ideal here because it sticks well to glass and distresses easily later. -
Dry and repeat:
Let this first layer dry completely. If the glass is still showing through, add a second coat of white for solid coverage. Don’t worry if the brushstrokes are slightly visible; this adds to the painted wood effect.
Step 2: Striping
-
Tape the design:
Once the white base is bone dry (give it at least an hour), use painter’s tape to mark off your stripes. For the look in the photo, you want sections of varying widths, so don’t be afraid to eyeball it. -
Press the edges:
Run your thumb firmly along the edges of the tape to seal it tight. This prevents paint from bleeding underneath and ruining your crisp lines. -
Paint the red:
Identify the sections that will be red—specifically the neck area and the wider stripes near the center and base. Apply two coats of bright red paint, letting the first dry before adding the second. -
Paint the blue:
Now fill in the remaining exposed sections with navy blue paint. I like to focus on the curved shoulder of the bottle and the alternating stripes near the bottom. -
Remove tape:
Carefully peel off the painter’s tape while the final coat is still slightly tacky. This helps prevent the paint from chipping or pulling up with the tape. -
Touch-ups:
If any paint bled through, use a small detail brush dipped in white to clean up the lines. Let the entire bottle cure for several hours or overnight.
Clean Lines Hack
Before painting your colored stripes, paint a quick layer of white *over* the tape edges. This seals the tape, meaning any bleed-through is just white on white.
Step 3: Distressing and Details
-
Sand for texture:
Take a sanding block and gently scuff the entire surface of the bottle. Focus on the high points and where the colors meet to reveal the white layer or even bits of glass underneath. -
Create weather spots:
For that authentic speckled look seen in the white stripes, use the sandpaper to create random abrasions, simulating paint that has chipped away from salt spray. -
Wrap the neck:
Apply a dab of hot glue at the very top of the bottle neck. Secure the end of your jute twine and begin wrapping it tightly downward, covering about 1.5 to 2 inches of the neck. -
Secure the twine:
Cut the twine and tuck the end under the previous wrap with a small dot of hot glue to hide it. This creates the ‘handle’ look of a buoy. -
Add the center accent:
Create a second band of twine around the middle of the bottle, right over a stripe transition. Wrap it three or four times for thickness and secure it with glue on the back. -
Tie the knot:
Cut a separate length of twine about 12 inches long. Tie it around the neck of the bottle in a simple knot or bow, letting the ends hang loose for a relaxed finish. -
Seal (Optional):
If you plan to display this outdoors or handle it frequently, spray the painted areas with a matte clear sealer to protect the finish.
Make it a Lamp
Drill a hole near the base using a glass bit and feed a string of fairy lights inside. The lights will glow warmly through the distressed patches of paint.
Place your finished buoy bottle on a mantelpiece or windowsill to bring a breath of fresh ocean air into your home
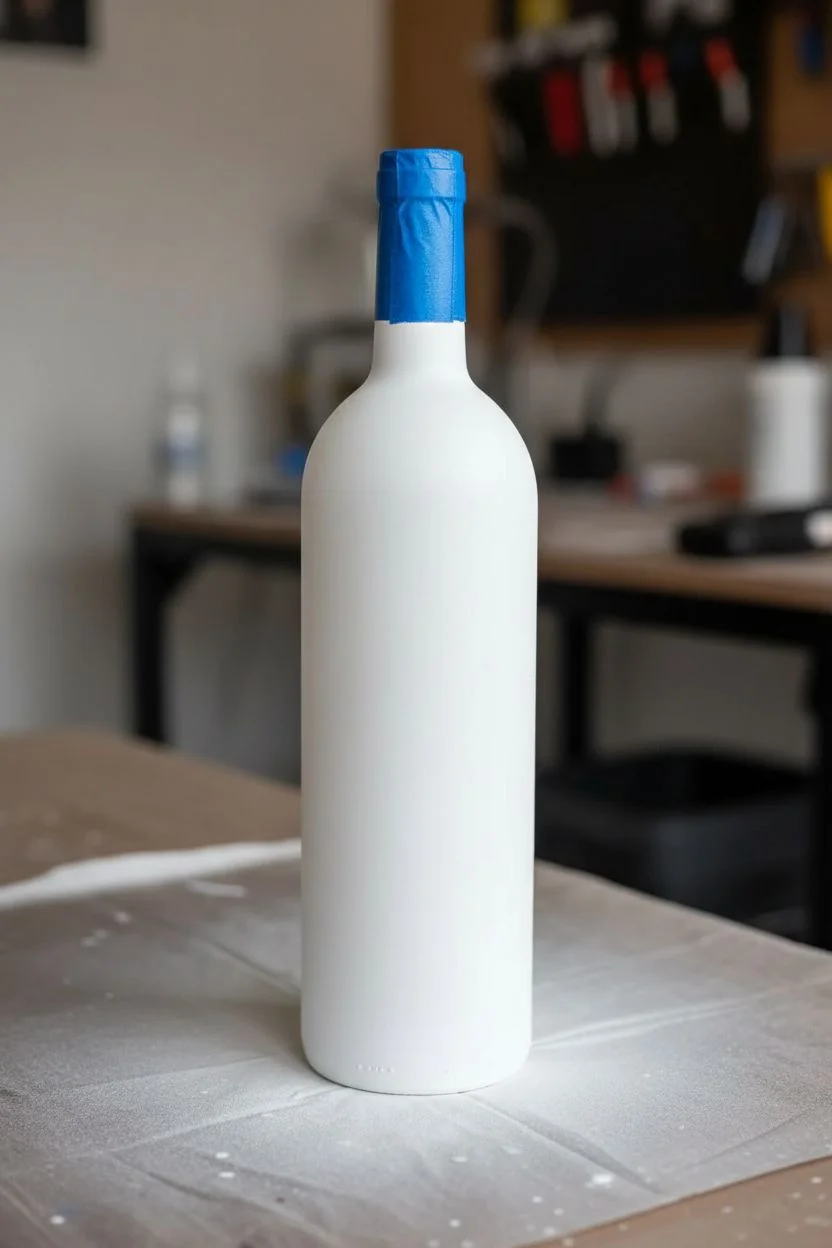
Swirls and Marbling with Water-Dip Color
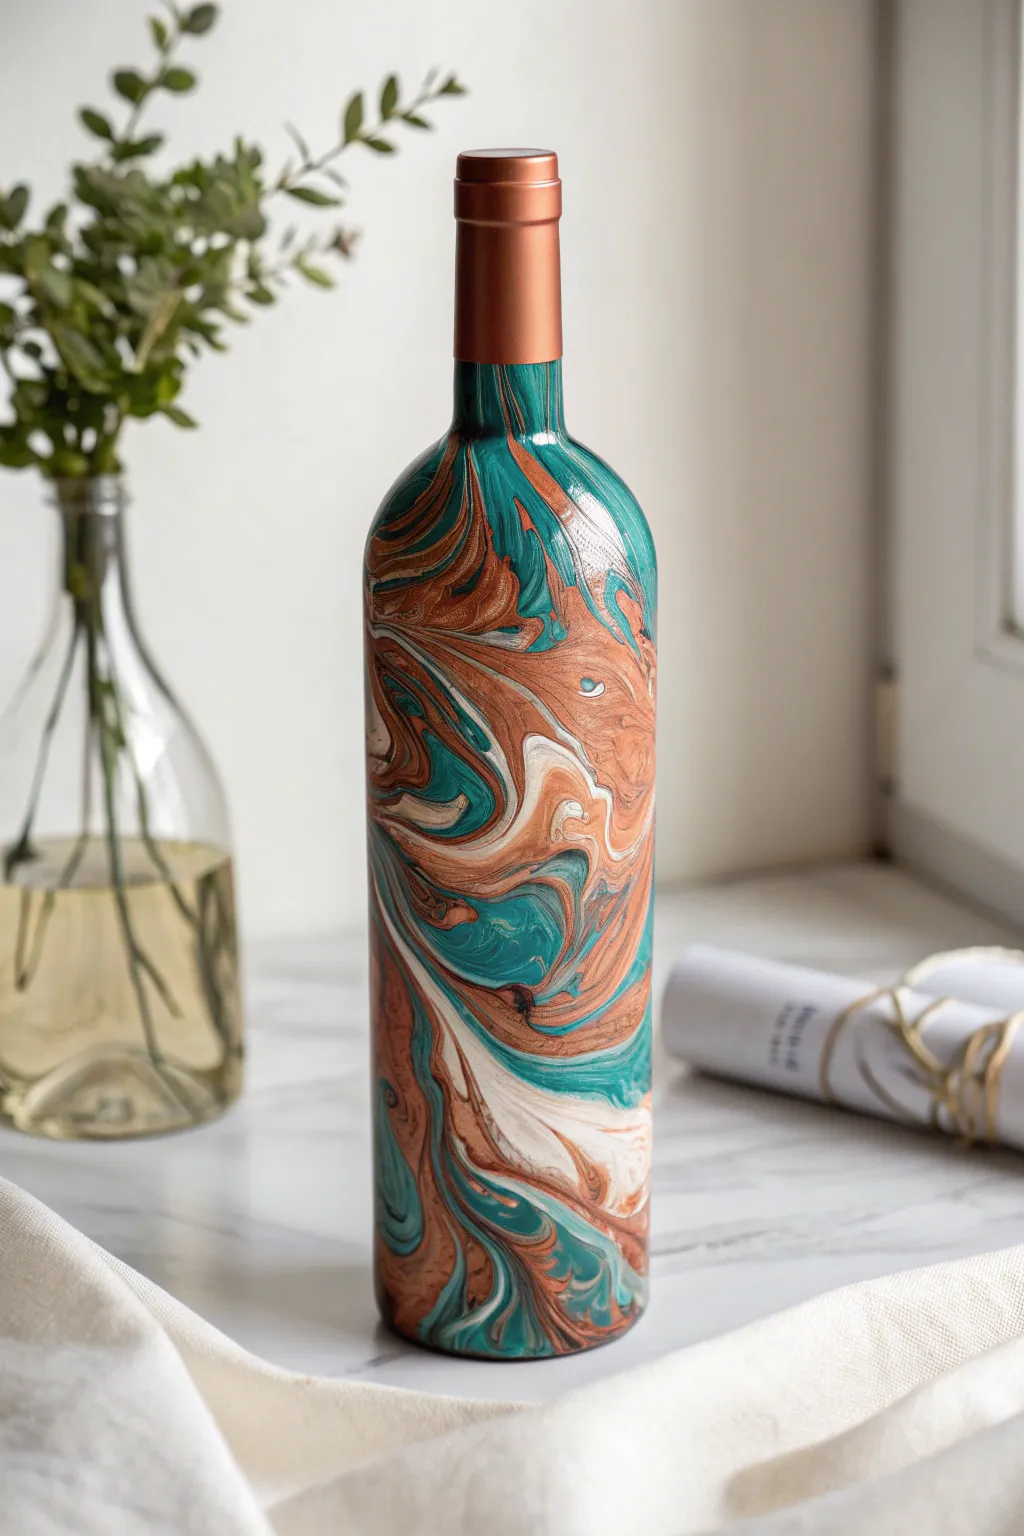
Transform a plain glass bottle into a piece of fluid art with stunning swirls of teal, shimmering copper, and creamy white. This hydro-dipping technique creates organic, marble-like patterns that ensure no two bottles are ever exactly alike.
Step-by-Step Guide
Materials
- Clean empty wine bottle (labels removed)
- White spray paint primer (matte)
- Spray paints (teal/turquoise, metallic copper, dark bronze, warm white)
- Large plastic bin or bucket (deep enough to submerge most of the bottle)
- Water (room temperature)
- Gloves (latex or nitrile)
- Painter’s tape
- Skewers or a stick for stirring
- Clear acrylic sealer spray (gloss)
- Copper metallic spray paint (for cap area)
- Drop cloth
Step 1: Bottle Preparation
-
Clean surface:
Begin by removing all labels and adhesive residue from your wine bottle using warm soapy water. Dry it thoroughly with a lint-free cloth to ensure the paint adheres properly. -
Wipe down:
Give the glass a final wipe with rubbing alcohol to remove any lingering oils from your fingerprints. -
Mask the neck:
Use painter’s tape to wrap the very top neck area where the foil seal usually sits. We want to paint this a solid metallic color later, so keep it protected for now. -
Prime the base:
In a well-ventilated area, spray the entire bottle (below the tape) with a matte white primer. This base coat makes the colored swirls pop and prevents the glass from showing through. -
Let it dry:
Allow the primer to dry completely according to the can’s instructions, usually about an hour.
Step 2: The Hydro-Dip Technqiue
-
Set up the bath:
Fill your plastic bin with room temperature water. It should be deep enough to dip the bottle up to the neck line. -
Start spraying color:
Put on your gloves. Shake your spray paint cans vigorously. Hold the metallic copper can about 8 inches from the water surface and spray a generous burst into the center. -
Layer the colors:
Immediately follow with a burst of teal directly into the center of the copper ring. Repeat this bullseye pattern with white, bronze, and more teal. -
Create the marble:
Use a skewer or stick to gently drag through the floating paint rings. Don’t overmix; simple swirls work best to create that distinct marbled agate look. -
The dip:
Holding the bottle by the taped neck, slowly but steadily lower it into the water at a slight angle. The paint skin on the surface will wrap around the bottle as it submerges. -
Clearing the water:
While the bottle is fully submerged, blow across the water’s surface or use your hand to sweep away the remaining paint film so it doesn’t double-coat the bottle when you pull it out. -
Remove and dry:
Lift the bottle out of the clean water. Stand it upright on a drop cloth and let the marbled paint dry completely, preferably overnight.
Paint Clumping?
If the paint clumps on the water, your water is too cold or you waited too long to dip. Use tepid water and work fast—spray, swirl, and dip immediately before the film dries.
Step 3: Final Touches
-
Clean off water spots:
Once fully dry, gently pat the surface with a paper towel if any water droplets remain trapped on the surface. -
Paint the cap:
Remove the painter’s tape from the neck. Mask off the newly marbled area below the neck line with tape and paper to protect your design. -
Copper finish:
Spray the exposed glass neck with the metallic copper spray paint to create a faux-foil seal look that matches the marble veins. -
Remove masking:
Carefully peel away the tape while the copper paint is tacky but not fully wet to get a crisp line. -
Seal the art:
Finish by spraying the entire bottle with a clear gloss acrylic sealer. This protects the delicate dip layer and gives it a shiny, glass-like finish.
Add Metallic Leaf
Once the marbling is dry but before sealing, gently brush some gold or cpper leaf adhesive onto specific veins, then apply metallic leaf for an extra 3D pop of luxury.
Now you have a stunning, sophisticated centerpiece that looks like expensive polished stone


Have a question or want to share your own experience? I'd love to hear from you in the comments below!