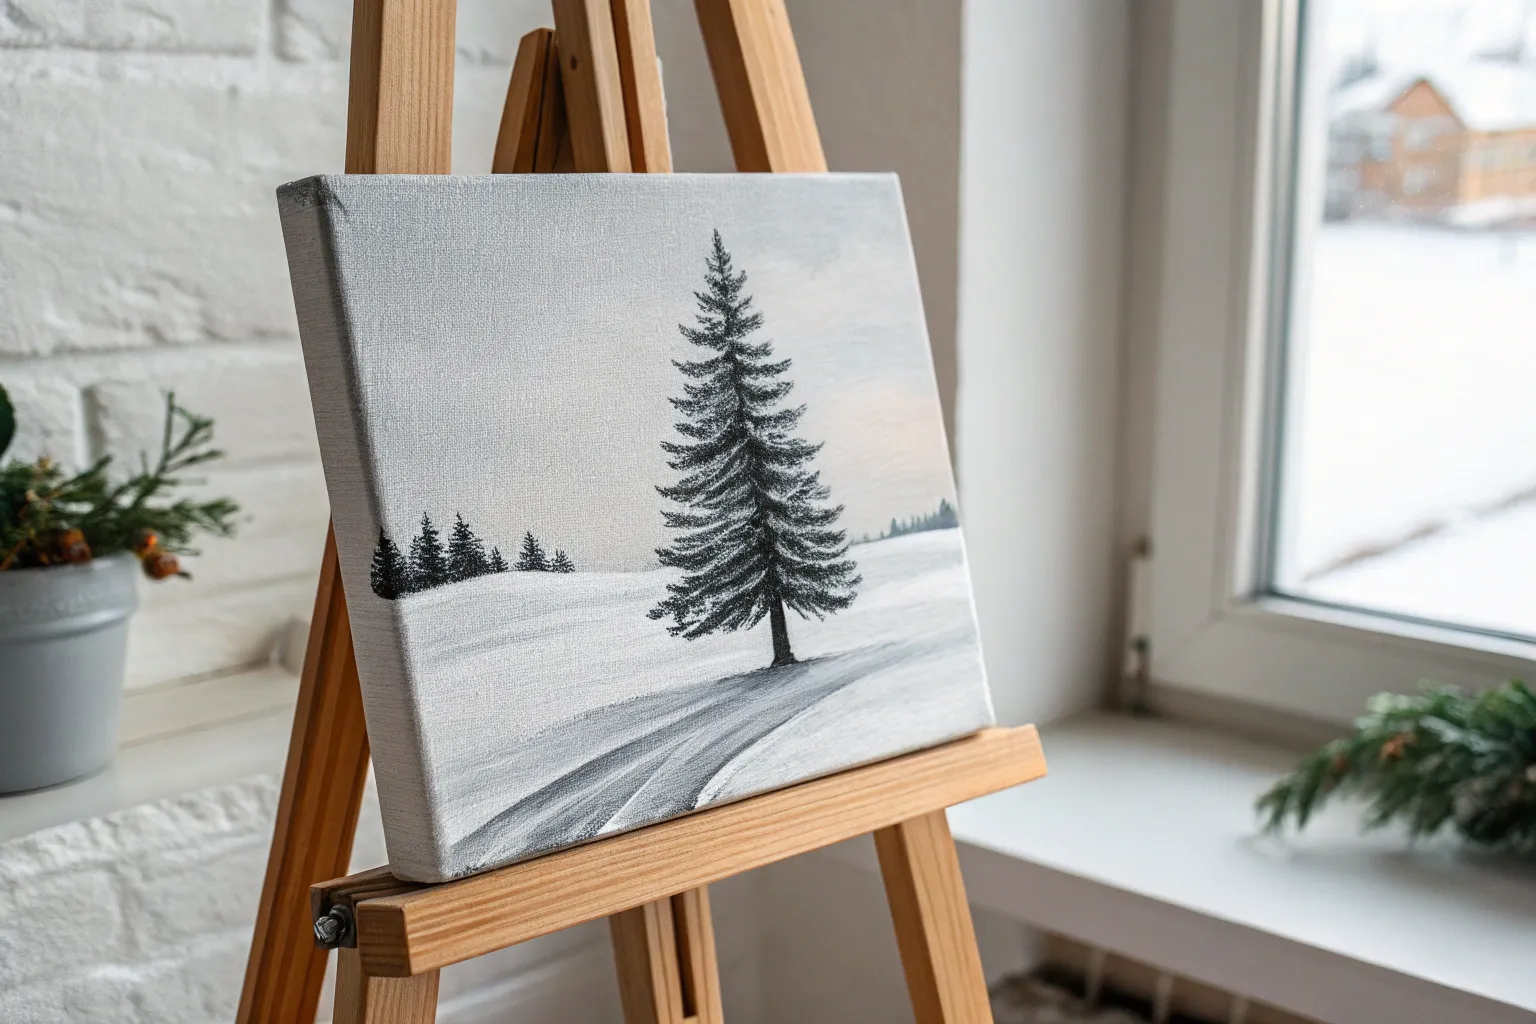
When the temperature drops and the world turns white outside, I love retreating to the studio to capture that quiet stillness on canvas. These painting concepts focus on the beautiful aesthetic contrast between cold, snowy textures and the cozy warmth of inviting light sources to inspire your next masterpiece.
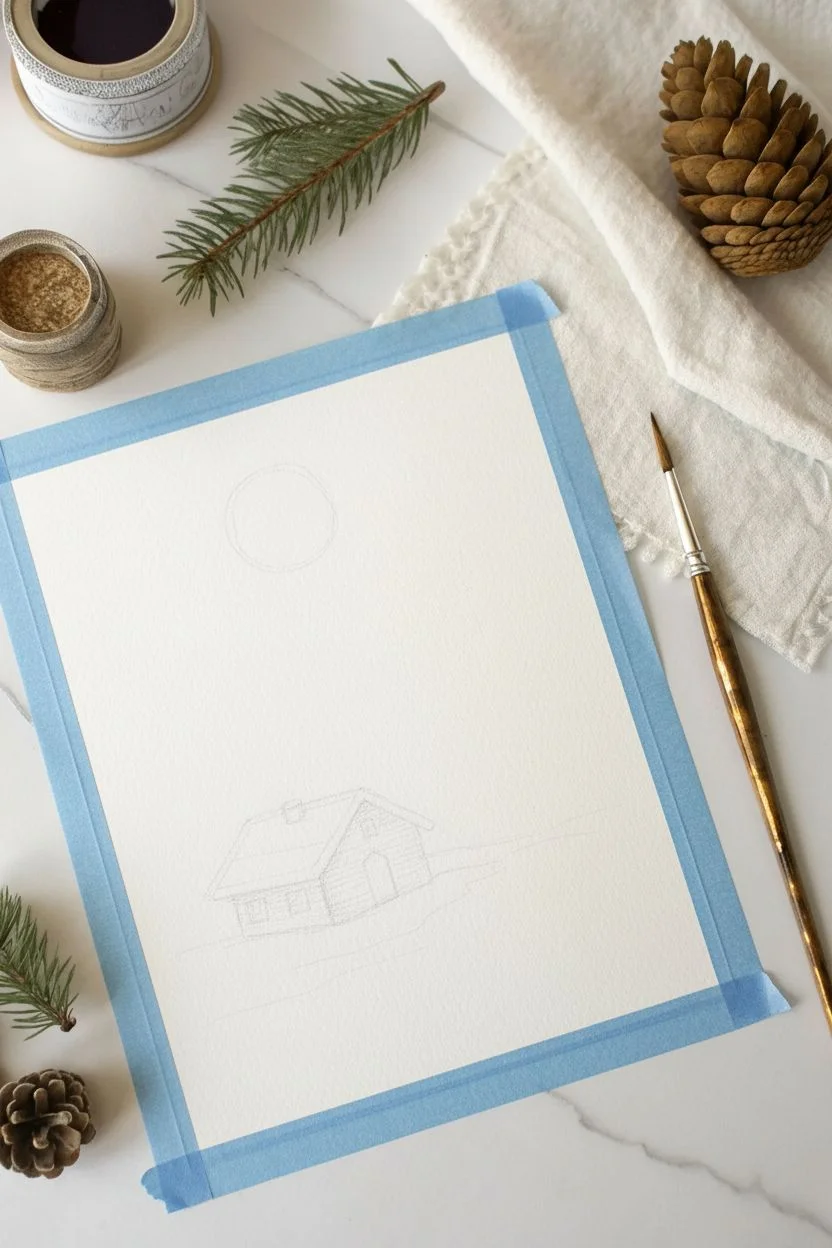
Cozy Cabin in the Woods
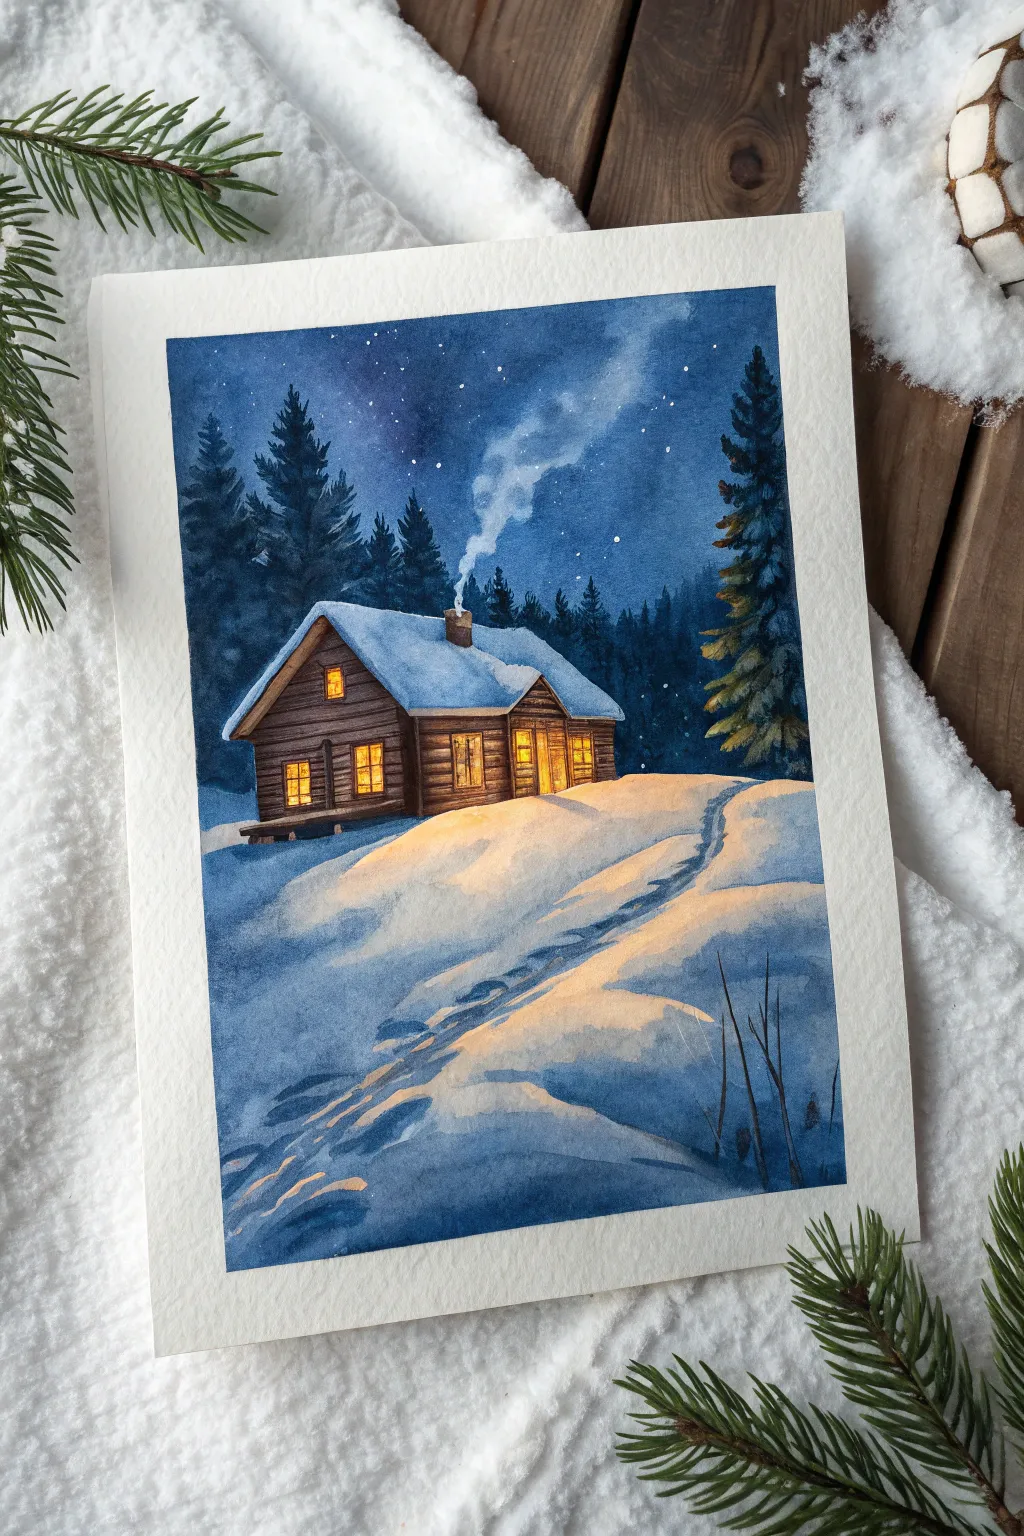
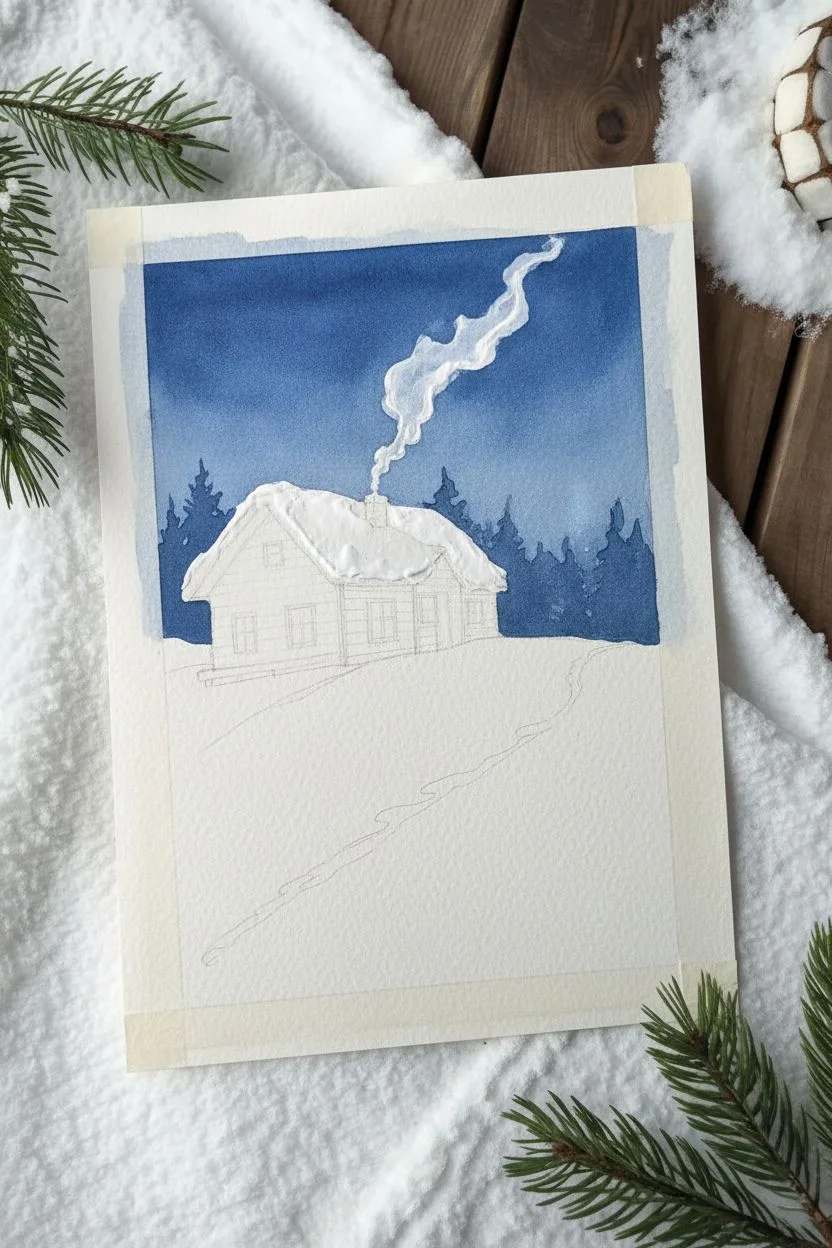
Capture the serenity of a snowy evening with this watercolor tutorial. You will learn to balance deep, cool indigo shadows with the inviting warmth of amber light spilling from a cozy log cabin.
Step-by-Step Tutorial
Materials
- Cold press watercolor paper (300 gsm)
- Watercolor paints (Indigo, Prussian Blue, Burnt Umber, Burnt Sienna, Cadmium Yellow, Orange)
- White Gouache
- Round brushes (sizes 8, 4, and 0 for details)
- Masking fluid (drawing gum)
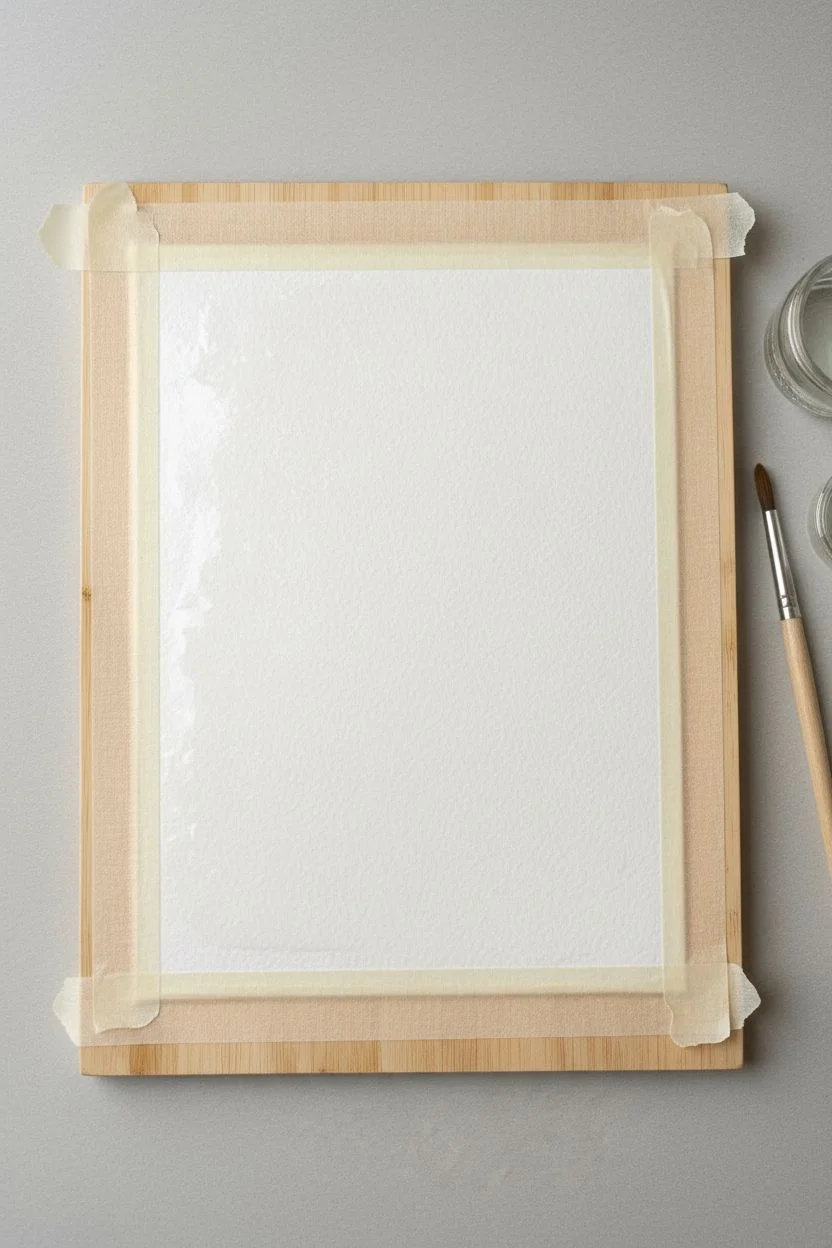
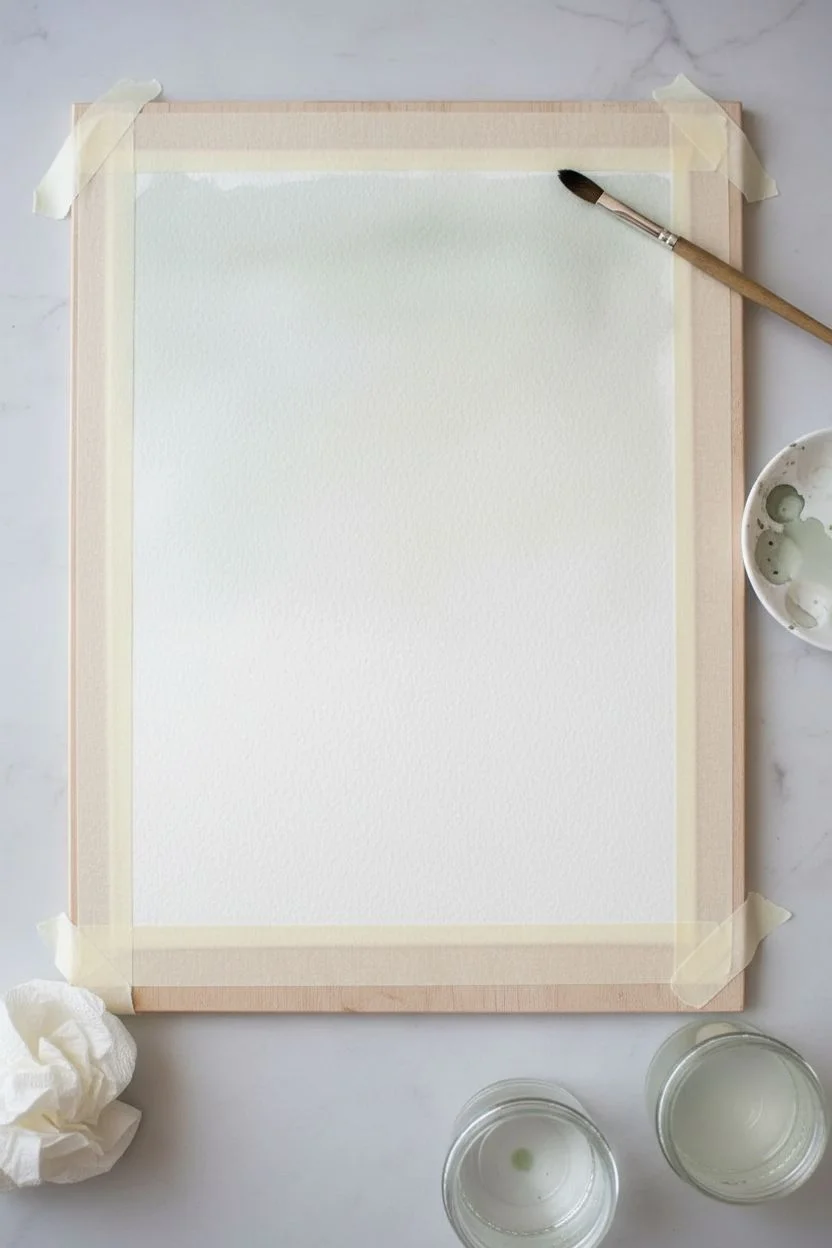
- Painter’s tape and clean water jars
Step 1: Setting the Scene
-
Preparation:
Tape your watercolor paper down to a board on all four sides to prevent buckling. Sketch the outline of the cabin, the horizon line, and the path leading up the hill lightly with a HB pencil. -
Masking:
Apply masking fluid to the heavy snow sitting on the cabin’s roof and the chimney top. This preserves the pure white of the paper. Allow it to dry completely. -
Sky Wash:
Wet the entire sky area with clean water. Drop in a mix of Indigo and Prussian Blue, making it darker at the top and slightly lighter near the horizon. -
The Smoke:
While the sky wash is still damp, use a clean, thirsty brush to lift out a winding ribbon of paint above the chimney. This creates the soft, semi-transparent smoke effect. -
Stars:
Let the sky dry completely. If you want subtle stars, you can lightly speckle clean water on the dry sky and dab with a tissue, or wait to use gouache later.
Muddy Snow?
If your warm yellow light turns green when touching the blue snow shadows, let the yellow wash dry completely before applying the blue shadow paint nearby.
Step 2: Forest and Cabin
-
Distant Trees:
Mix Prussian Blue with a touch of Burnt Umber to get a muted dark green. Paint the uneven tree line behind the cabin. Keep the edges slightly soft to suggest distance. -
Cabin Logs First Pass:
Using Burnt Sienna, paint the walls of the cabin. Be careful to paint around the window squares, leaving them white for now. -
Log Details:
Once the base brown is dry, use a smaller brush with Burnt Umber mixed with Indigo to paint the lines between the logs and add wood texture. -
Glowing Windows:
Paint the window interiors with bright Cadmium Yellow. While wet, touch the edges with a little Orange to create a warm, glowing gradient. -
Window Panes:
With your smallest detail brush (size 0) and thick dark brown paint, carefully draw the grid lines inside the windows.
Texture Trick
For the roof texture, try the ‘dry brush’ technique. Load your brush with thick white gouache, wipe most of it off, and drag it lightly over the blue roof shadows.
Step 3: Foreground and Atmosphere
-
Foreground Pine:
On the right side, paint the large pine tree using a saturated mix of Indigo and Green. Use quick, short strokes to mimic pine needles, leaving gaps for the background to peek through. -
Tree Highlights:
Mix a little yellow ochre with white gouache and brush it lightly onto the pine branches facing the cabin to reflect the warm light. -
Snow Shadows Base:
The snow needs form. Mix a watery wash of Prussian Blue and Violet. Paint the right side of the snowy hill and the dips in the foreground. -
The Path:
Paint the trodden path leading to the door using the blue shadow mix. Use a slightly jagged stroke to suggest footprints and uneven snow. -
Projected Light:
Paint a wash of watery Yellow Ochre on the snow directly in front of the cabin, blending it softly into the blue shadows where the light fades. -
Roof Snow:
Rub off the masking fluid from the roof. Paint a very pale blue shadow on the underside of the snow clumps to give them volume and dimension.
Step 4: Final Details
-
Dry Weeds:
Using a rigger brush or size 0 round, flick in some fine, dark lines in the bottom right corner to represent dry winter grasses poking through the snow. -
Starry Night:
Dilute white gouache slightly and tap your brush over the sky area to create crisp, bright stars. I like to add a few manually with a precise dot to control the constellations. -
Refining Smoke:
Enhance the chimney smoke by adding a little white gouache to the lifted area if it isn’t distinct enough, softening the edges with water. -
Unmasking:
Once absolutely everything is dry, carefully peel off the painter’s tape to reveal the crisp white border.
Now you have a tranquil winter hideaway that looks warm enough to step right into.


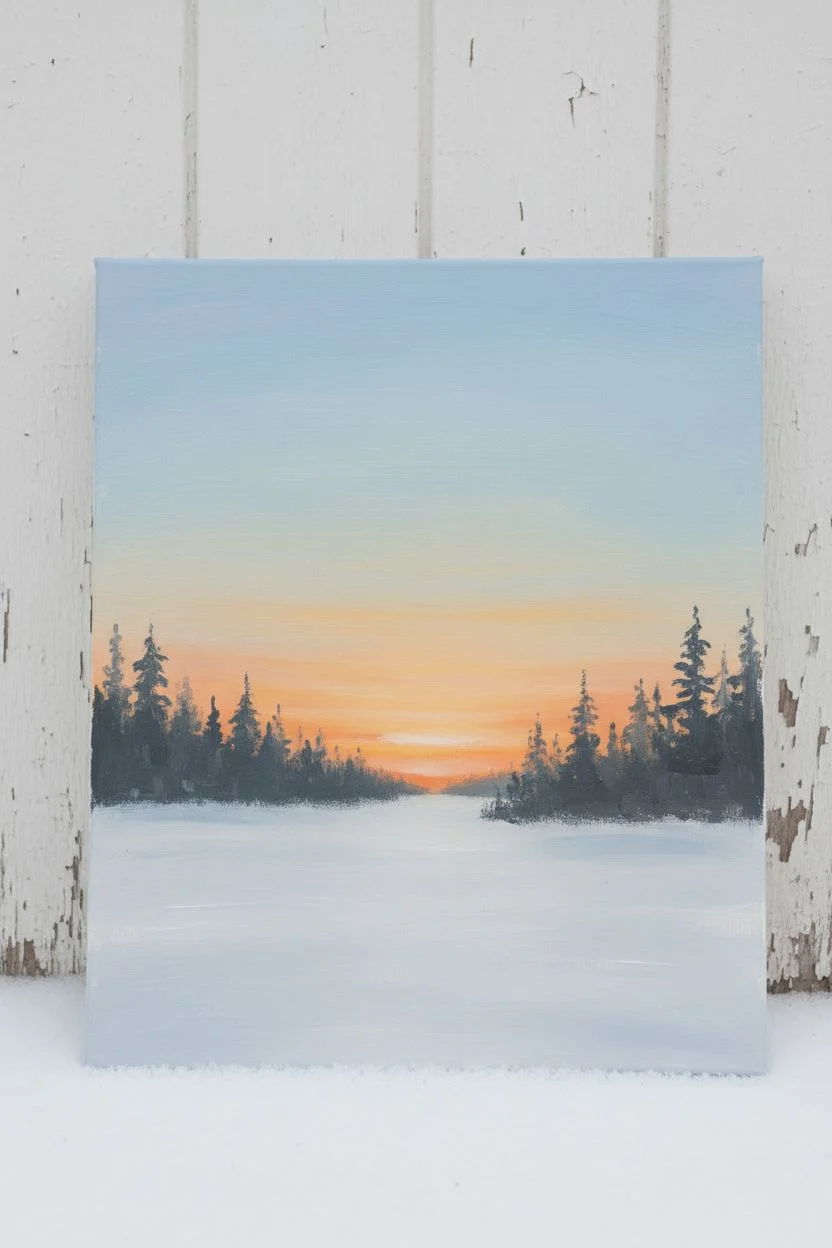
Pastel Winter Iconic Sunset
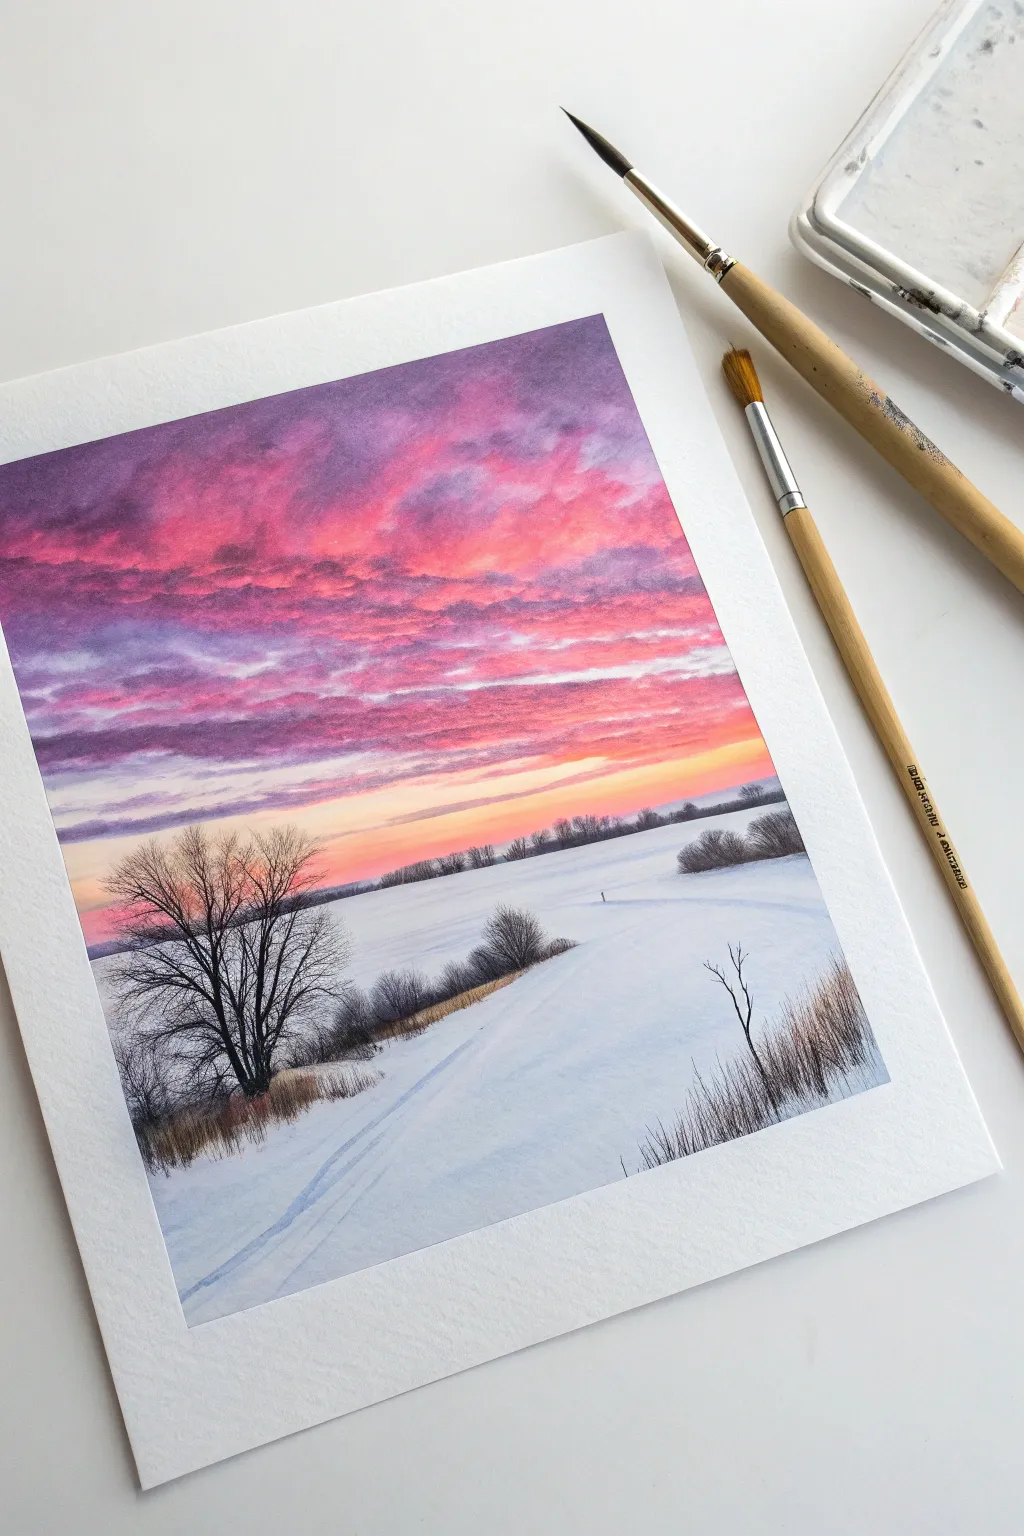
Capture the breathtaking beauty of a winter evening where fiery skies meet cool, snowy ground. In this tutorial, we will focus on wet-in-wet blending to achieve that vibrant, cloud-streaked sky before anchoring the scene with crisp, silhouetted details.
Detailed Instructions
Materials
- Cold press watercolor paper (140lb/300gsm)
- Watercolor paints (Lemon Yellow/Naples Yellow, Alizarin Crimson, Dioxazine Purple, Ultramarine Blue, Burnt Umber)
- Large flat brush or wash brush
- Round brush (size 8)
- Rigger or liner brush for fine branches
- Masking tape and board
- Two jars of water
- Paper towels
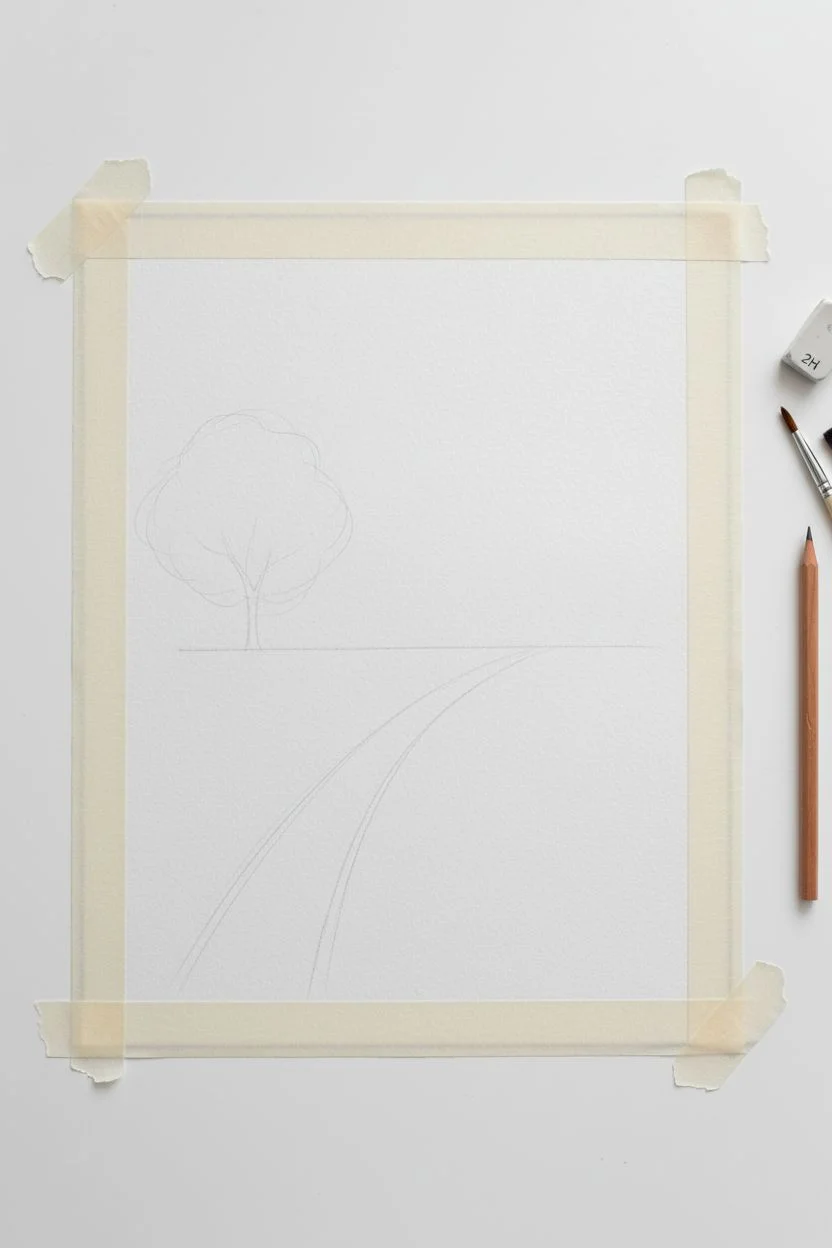
Step 1: Preparation & Sketching
-
Secure the Paper:
Tape your watercolor paper down to a board on all four sides. This ensures a clean white border and prevents buckling when we apply heavy washes to the sky. -
Light Sketching:
Using a hard pencil (like 2H), very lightly sketch the horizon line about one-third of the way up from the bottom. Mark the position of the large tree on the left and the path of the tracks leading into the distance.
Pro Tip: Cloud Control
If your clouds are spreading too wildly, your paper is too wet. Wait thirty seconds for pure evaporation, then try adding the paint again with a brush that isn’t overloaded with water.
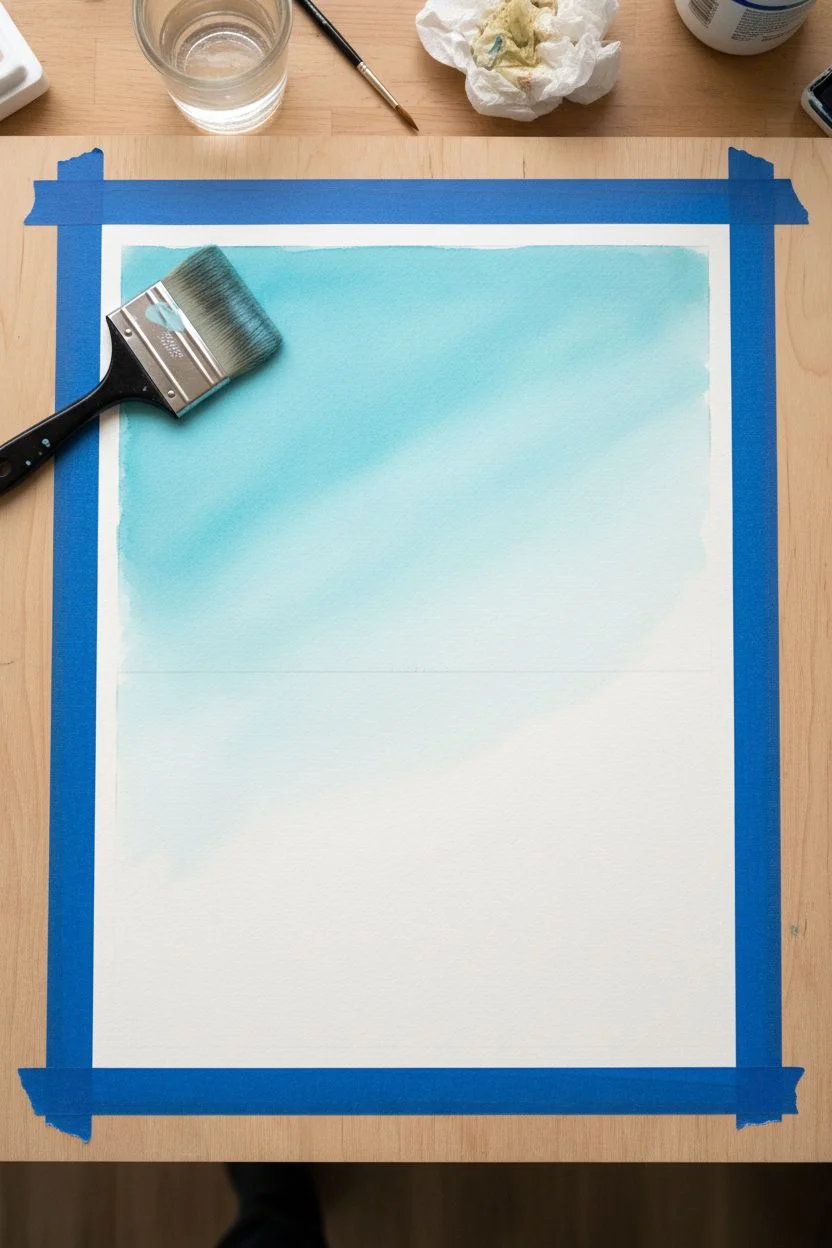
Step 2: The Vibrant Sky
-
Wet the Surface:
With your large clean brush, apply a generous coat of clean water to the entire sky area, stopping exactly at the horizon line. The paper should be glistening but not forming puddles. -
Warm Horizon:
While the paper is wet, load your brush with a bright yellow or yellow-orange mix. Paint a horizontal strip just above the horizon line, letting it bleed slightly upwards. -
Transition to Pink:
Quickly rinse your brush and pick up Alizarin Crimson. Apply this above the yellow, blending them gently where they meet to create a soft orange transition. -
Deepening the Top:
Move to the top of the paper with a mix of Dioxazine Purple and a touch of Ultramarine Blue. Paint the upper sky, bringing the color down to meet the pinks. -
Creating Cloud Texture:
I like to wait a moment until the paper sheen turns to a dull satin finish. Then, take a thicker, creamy mix of purple and magenta on a round brush and dab in the cloud shapes, allowing the damp paper to soften the edges naturally. -
Refining Clouds:
Add smaller, elongated streaks of purple near the horizon to suggest distant perspective. Ensure you leave gaps of the brighter underlying color showing through. -
Complete Drying:
This is crucial: Let the sky dry completely before moving on. The paper must be room temperature to the touch to prevent bleeding into the snow.
Step 3: Snow & Horizon
-
Distant Tree Line:
Mix a muted purple-grey using Ultramarine Blue and Burnt Umber. With a smaller round brush, paint the low, jagged line of trees along the horizon, varying the height slightly to look natural. -
Snow Shadows:
Prepare a very watery, pale wash of Ultramarine Blue. Paint the shadows on the ground, specifically along the left side of the path/tracks and under the future tree locations. -
Defining the Tracks:
While the snow wash is still damp or just after it dries, deepen the blue slightly and define the tire tracks or ski lines curving from the bottom left toward the center. -
Dry Brush Texture:
Use the side of a damp brush with barely any paint to drag lightly across the white paper areas, creating the texture of wind-swept snow.
Level Up: Magic Dust
Once the painting is 100% dry, load a toothbrush with white gouache and lightly flick it over the scene to add a gentle splatter of falling snow, giving the landscape a magical winter feel.
Step 4: Silhouettes & Details
-
Mixing Dark Tones:
Mix a strong, dark color for the foreground trees. I prefer combining Burnt Umber with Ultramarine Blue until it looks nearly black, rather than using black straight from a tube. -
The Main Tree:
Using the tip of your round brush, paint the trunk of the large tree on the left. Press down for the base and lift as you go up to taper the trunk. -
Fine Branches:
Switch to your rigger or liner brush. With a loose grip on the handle, paint the thin branches reaching up into the sky. Let the lines jitter slightly; nature isn’t perfectly straight. -
Mid-ground Vegetation:
Dab in some clumps of bushes in the middle distance along the path using the belly of your brush to create organic, rounded shapes. -
Foreground Grasses:
In the bottom right corner, use quick, upward flicking motions with the rigger brush to paint dry winter grasses. Add a touch of Burnt Sienna to your dark mix here for warmth.
Peel off the tape carefully to reveal those crisp edges and enjoy your serene winter evening scene.


Frozen Lake Reflections

Capture the stillness of a winter morning with this serene monochrome watercolor project. Using a limited palette of cool teals and deep indigos, you will create a crisp landscape featuring evergreens reflecting across a partially frozen lake.
How-To Guide
Materials
- Cold press watercolor paper (140lb/300gsm)
- Masking tape and rigid board
- Paints: Phthalo Turquoise, Prussian Blue, Payne’s Gray
- Large flat wash brush
- Round brush (size 6 or 8)
- Small detail or rigger brush
- Clean water jars and paper towels
- White gouache (optional)
Step 1: Setting the Scene
-
Secure the paper:
Tape your watercolor paper down firmly to your board on all four sides. This creates a clean white border and prevents buckling when the paper gets wet. -
Establish the horizon:
Lightly sketch a horizontal line roughly one-third of the way up from the bottom. This will mark the snowy bank where the trees stand. -
Wet the sky:
Using your large flat brush, apply clean water to the upper two-thirds of the paper, stopping just short of your pencil line to leave a dry gap for the snow. -
Sky wash:
Load your brush with a watery mix of Phthalo Turquoise. Apply it starting at the top left corner, sweeping diagonally downwards. -
Create atmosphere:
Add a touch of water to dilute the paint on your brush as you move closer to the horizon line, letting the color fade into white just above your pencil mark.
Reflective Thinking
Make your reflections slightly lighter in value than the actual trees. Water absorbs some light, so the reflection should never be darker than the object casting it.
Step 2: The Icy Waters
-
Wet the lake area:
Once the sky is barely damp (no longer shiny), wet the bottom section of the paper, below your pencil line. -
Apply base water color:
Paint horizontal strokes of the Turquoise mix across the bottom section. Make this area slightly more saturated than the sky to show depth. -
Add ice texture:
While the paint is prolonged wet, lift out a few horizontal streaks using a thirsty (clean, damp) brush or a scrunched paper towel to suggest ice floes. -
Essential drying time:
Let the paper dry completely. If you touch it and it feels cool, it’s not ready. The paper must be bone dry before starting the crisp trees.
Hard Lines?
If you get hard edges in your sky where you wanted a smooth fade, your paper dried too fast. Next time, re-wet the entire sky area with clean water before adding pigment.
Step 3: The Evergreen Forest
-
Mix the tree color:
Create a rich, dark value by mixing Phthalo Turquoise with Payne’s Gray or Prussian Blue. The consistency should resemble milk. -
Start the tree line:
Using the tip of your round brush, tap in the pointed tops of the pine trees, varying their heights to keep the composition natural. -
Build the branches:
Work your way down each tree with small zig-zag motions. Press harder as you go lower to widen the base of the firs. -
Group the trees:
Paint the trees in clusters of varying density. Allow them to merge into a solid dark mass right at the pencil line. -
Preserve the snow:
Ensure the bottom edge of your tree line is sharp against the white paper strip you left unpainted. This contrast creates the illusion of a snowy bank.
Step 4: Reflections & Frost
-
Invert your view:
I like to turn the board upside down for this step; it helps paint the mirror image without overthinking the shapes. -
Paint the reflection:
Using the same dark mixture, paint the trees ‘growing’ downwards into the water. Keep these shapes looser and slightly less detailed than the real trees. -
Distort the image:
Before the reflection paint dries, run a clean, damp brush horizontally through the dark paint to break up the image and create a rippled, watery look. -
Ice cracks:
Turn the board right-side up. Use your smallest detail brush with pure Phthalo Turquoise to paint very thin, jagged horizontal lines in the white foreground area to look like cracked ice. -
Final reveal:
Once absolutely everything is dry, carefully peel off the masking tape at a 45-degree angle to reveal your crisp white border.
Frame your frozen landscape in a simple white mat to enhance those cool blue tones.


Winding Forest Path
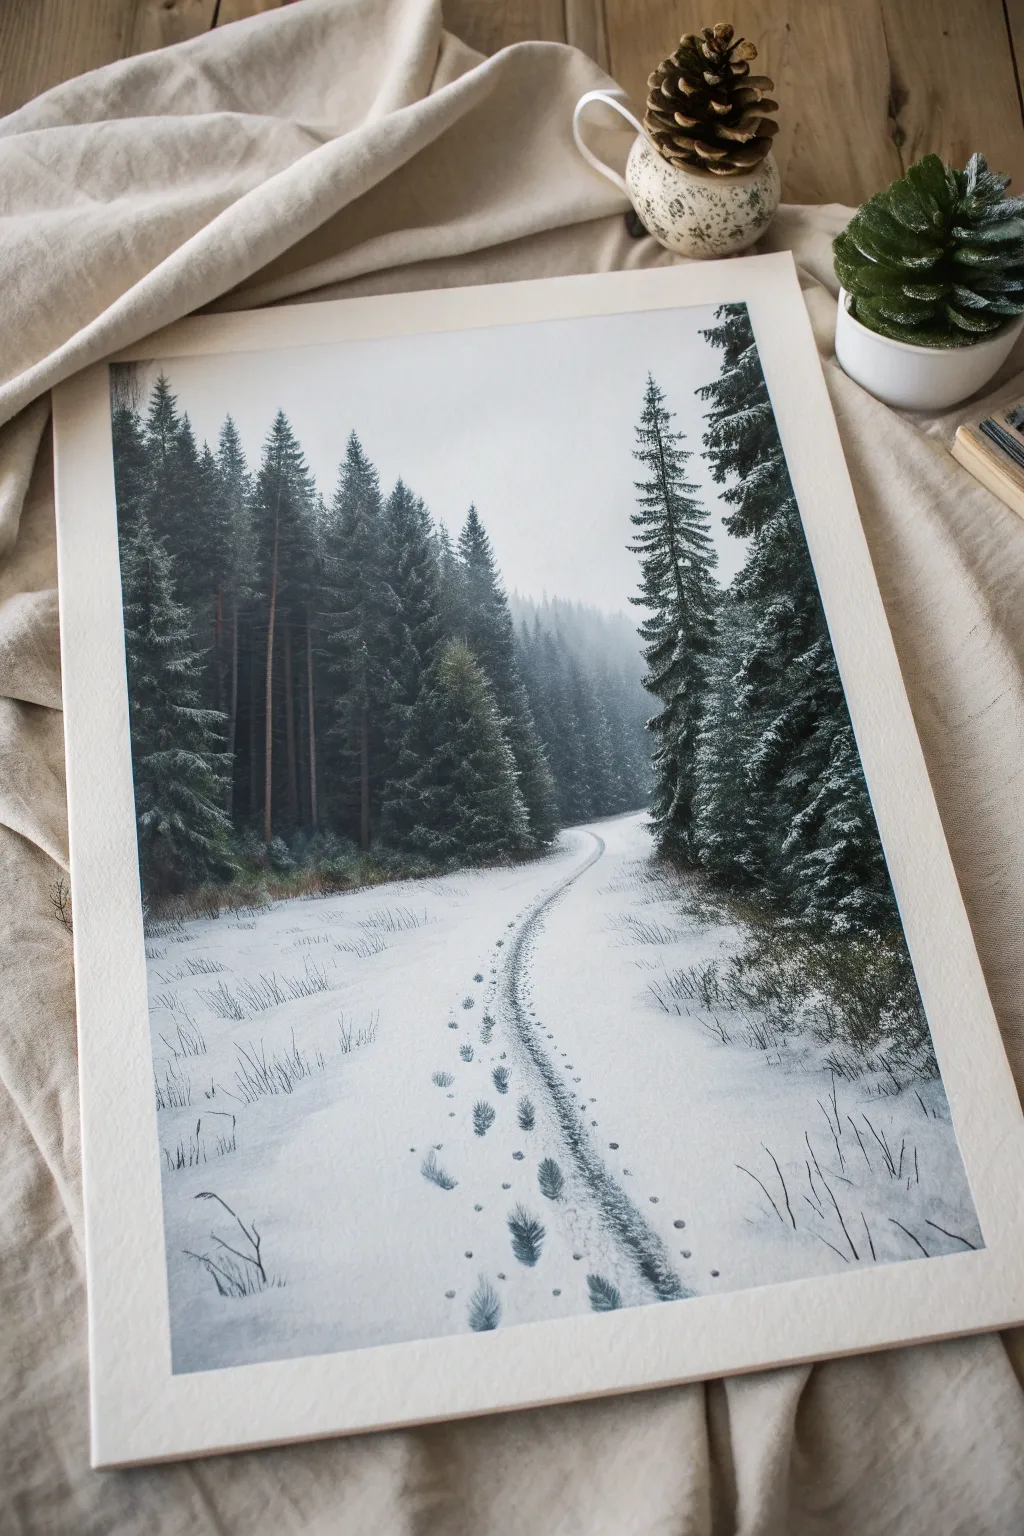

Capture the hush of a solitary winter walk with this atmospheric landscape painting. Using a combination of watercolor washes and opaque gouache, you will create depth through misty horizons and crisp, snowy foreground details.
Step-by-Step Guide
Materials
- Cold-press watercolor paper (140lb/300gsm)
- Watercolor paints: Payne’s Gray, Indigo, Sepia, Sap Green
- White Gouache (opaque watercolor)
- Brushes: Large flat wash, round size 6, liner or rigger brush
- Masking tape and board
- Pencil (HB) and eraser
- Paper towels
Step 1: Sketching and Atmosphere
-
Prepare the surface:
Tape your paper securely to a board on all four sides. This ensures a clean border and keeps the paper flat during wet washes. -
Draft the composition:
Lightly sketch the horizon line about two-thirds up the paper. Draw the winding path starting wide at the bottom center and narrowing deeply into the forest, disappearing toward the right. -
Block in tree shapes:
Sketch the vertical lines for the pine trees, placing a dense cluster on the left and a few taller sentinels on the right. Keep pencil pressure light so lines don’t show later. -
Paint the misty sky:
Wet the sky area with clean water. Drop in a very dilute wash of Payne’s Gray, keeping it palest near the horizon to mimic winter mist. -
Create distant trees:
While the sky is still damp, paint the furthest background trees with a watery grey-blue mix. Let the edges bleed slightly to create an out-of-focus, foggy effect.
Muddy colors?
If your snow shadows look muddy or grey rather than crisp, you likely reworked the paint while wet. Lay down your pale blue wash in one confident stroke and let it dry completely without touching it again.
Step 2: The Dark Forest
-
Mix your forest greens:
Create a deep, dark green by mixing Sap Green with Indigo and a touch of Sepia. The contrast is vital against the white snow. -
Establish the trunks:
Starting with the prominent trees on the left, use the tip of your round brush to paint thin vertical trunks. Allow these to dry completely. -
Paint the pine boughs:
Using a dry-brush technique, dab dark green paint horizontally from the trunks outward. Leave gaps between branches; don’t paint solid triangles, as we need space for snow later. -
Add right-side trees:
Repeat the process for the tall pines on the right side. Make these slightly darker and sharper than the background trees to pull them forward visually. -
Deepen the shadows:
Once the green layer is dry, go back in with a nearly black mix (Indigo + Sepia) to add depth to the inner parts of the trees where light doesn’t reach.
Step 3: The Winding Path
-
Shadowing the snow:
Use a very watered-down blue-grey wash to define the shape of the path. Paint the subtle shadows along the banks where the snow creates undulations, leaving the rest of the paper white. -
Adding texture to the track:
Mix a light watery grey. dragging the side of your brush lightly down the center of the path to suggest the rough texture of trodden slush without painting a solid line. -
Painting the footprints:
Using a smaller brush, dab small, dark grey spots in the foreground to create footprints. I like to make the marks smaller and fainter as they recede up the path to enhance perspective. -
Adding dormant grass:
Switch to your liner or rigger brush. With disjointed, quick upward flicks using watery Sepia, add tufts of dry grass poking through the snow on the path’s edges and in the foreground.
Level Up: Falling Snow
For a blizzard effect, load a stiff brush with watered-down white gouache. Tap the handle against another brush to splatter fine droplets over the dry painting, concentrating on the dark tree areas.
Step 4: Winter Details
-
Snow on branches:
Squeeze out fresh White Gouache. Using a clean brush with very little water, dab thick white paint onto the tops of your dried evergreen branches. -
Refine the snow clumps:
Ensure the white gouache sits ‘on top’ of the dark branches. Vary the size of the snow clumps so they look organic rather than uniform polka dots. -
Final highlights:
Add a few sharp strokes of white gouache to the foreground tufts of grass or the edges of the footprints to simulate sunlight hitting the disturbed snow. -
Review and remove tape:
Allow the painting to dry thoroughly. Gently peel away the masking tape at a 45-degree angle to reveal your crisp, clean snowy border.
Enjoy the quiet beauty of your newly created winter landscape.
BRUSH GUIDE
The Right Brush for Every Stroke
From clean lines to bold texture — master brush choice, stroke control, and essential techniques.
Explore the Full Guide
Majestic Mountain Peaks
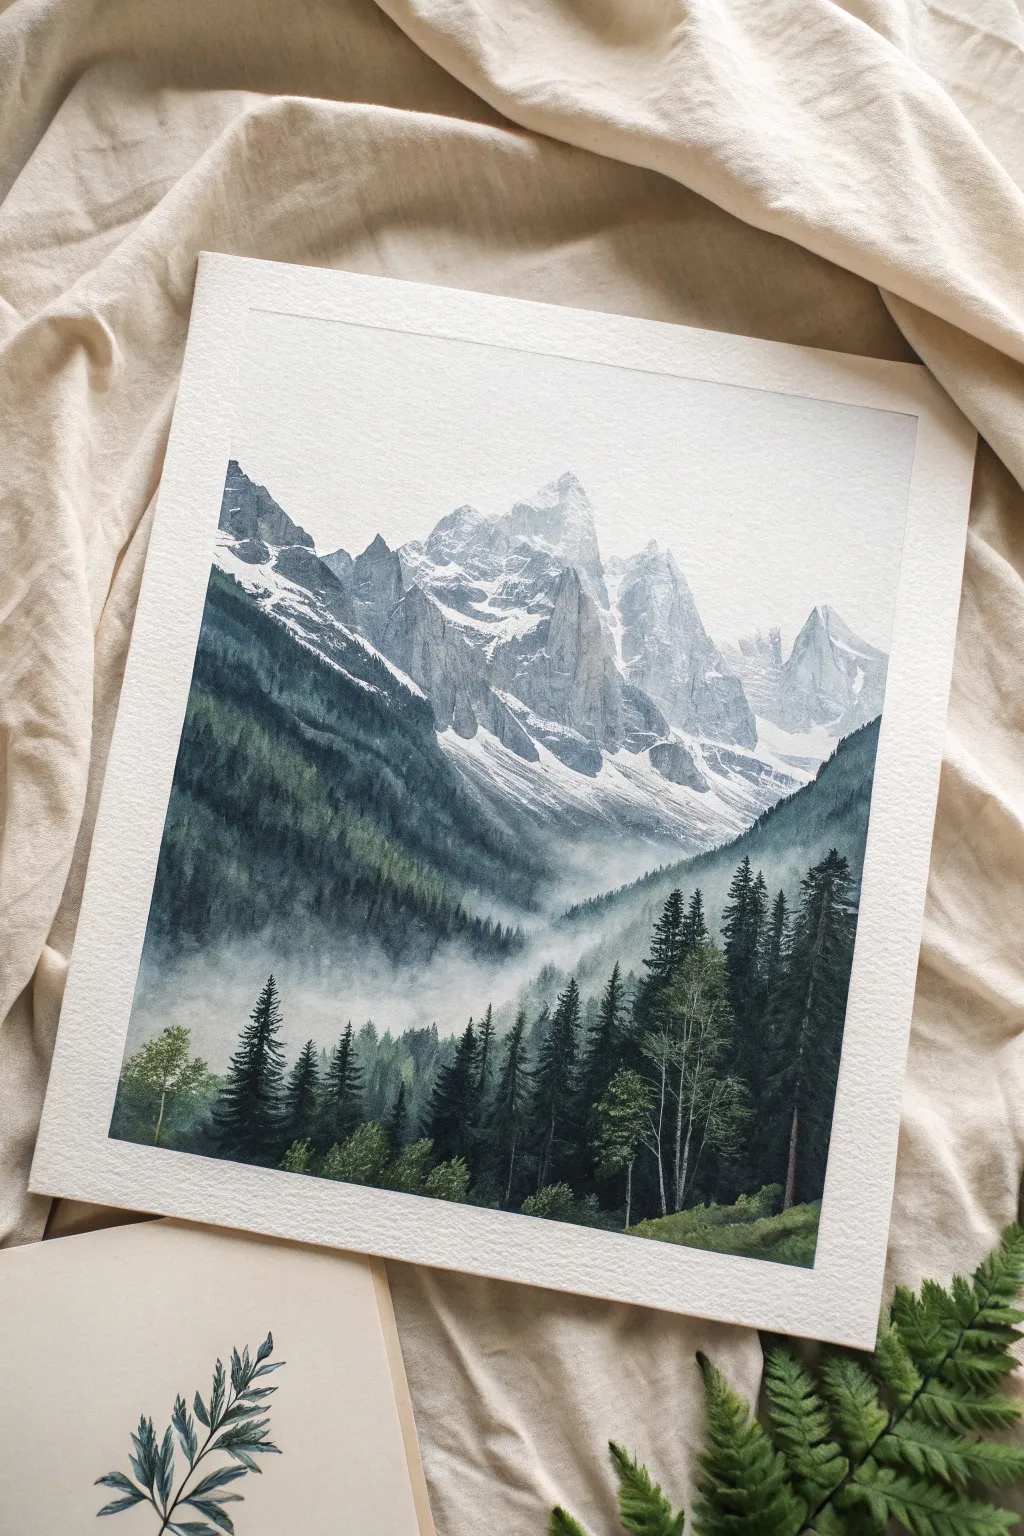
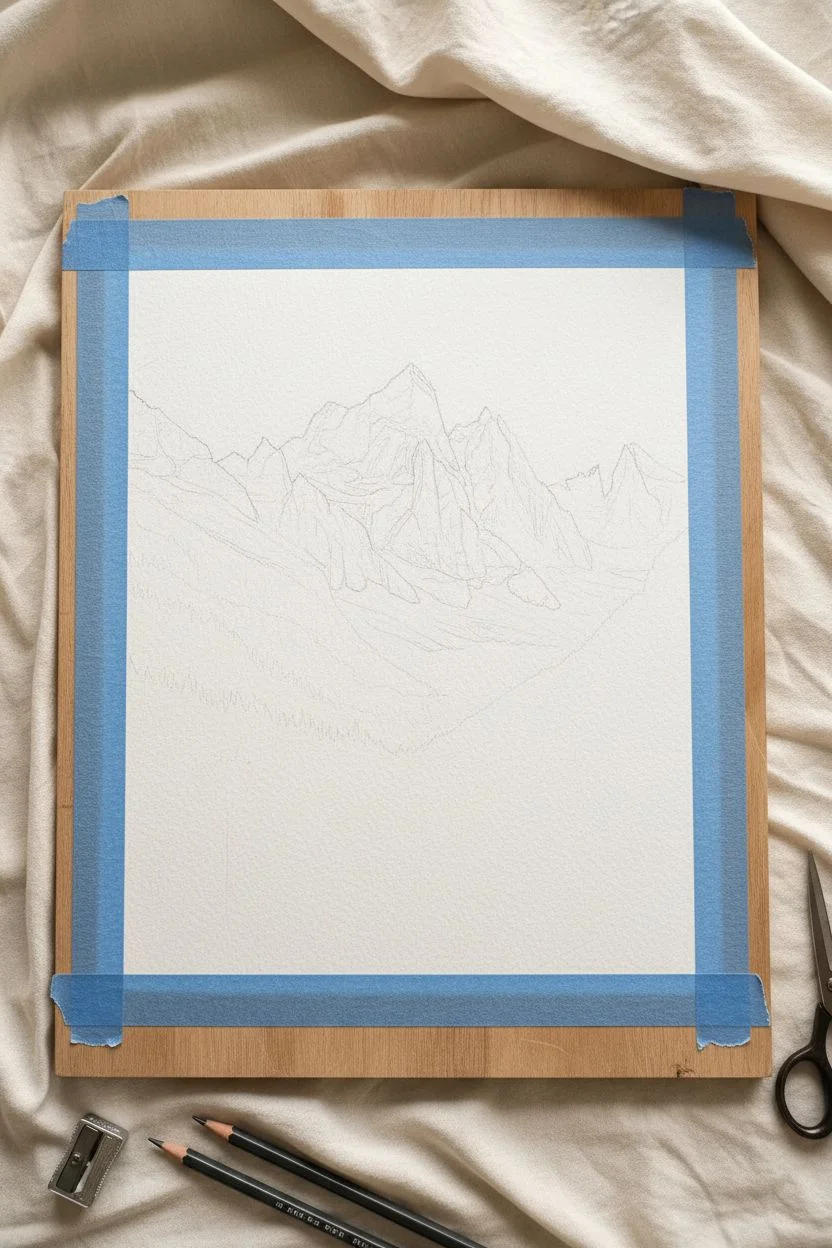
Capture the serene grandeur of high-altitude peaks rising above a foggy valley with this atmospheric watercolor tutorial. You will learn to balance crisp rock details with soft, diffused mists to create depth and drama.
Step-by-Step Tutorial
Materials
- Cold-press watercolor paper (300gsm/140lb)
- Watercolor paints: Indigo, Payne’s Grey, Sap Green, Burnt Umber
- White Gouache (for opaque highlights)
- Round brushes (sizes 8, 4, and 0)
- Masking tape and mounting board
- Two jars of water
- Paper towels
Step 1: Preparation & Sketching
-
Secure the paper:
Tape your watercolor paper down firmly to a board on all four sides. This prevents buckling when we add water for the mist later. -
Outline the peaks:
Using a hard pencil (like 2H), very lightly sketch the jagged outline of the mountains and the V-shape of the valley. Keep lines faint so they disappear under the paint. -
Map shadow areas:
Lightly mark where the major rock faces and shadows will fall on the mountains, leaving large blank areas for the snow.
Pro Tip: Clean Water
Keep one water jar strictly for clean water. When blending the dark trees into the white mist, dirty water will turn your fog brown or grey and ruin the ethereal effect.
Step 2: The Majestic Peaks
-
Mix the rock color:
Create a cool, stony grey mix using Payne’s Grey with a tiny touch of Indigo. It should be diluted enough to be transparent but strong enough to contrast with the white paper. -
Paint rock faces:
Using the size 4 brush, paint the rocky, shadowed sides of the peaks. Use choppy, angular strokes to mimic the texture of stone. -
Reserve the snow:
Be careful to paint around the white areas; leaving the bare paper visible is the best way to represent bright sunlight on snow. -
Soften the base:
As you reach the bottom of the mountain range, rinse your brush and use clean water to fade the grey paint out into nothingness, creating the first layer of atmospheric distance.
Troubleshooting: Hard Edges
If your mist dries with a hard line instead of a soft fade, wet a stiff brush and gently scrub the edge, then dab with a paper towel to lift the pigment and soften the transition.
Step 3: The Valley & Mist
-
Mix valley greens:
Mix Indigo and Sap Green to create a cool, deep teal-green. Start painting the sloping valley walls below the mountains using a size 8 brush. -
Create the gradient:
Paint the upper sections of the tree line darker, and as you move toward the center of the valley, dip your brush in water to dilute the pigment significantly. -
Form the fog:
With a brush holding only clean water, drag the bottom edge of your green paint downward so it blurs seamlessly into the white of the paper. This creates the ‘rising mist’ effect. -
Layering depth:
Once the initial wash is dry, add a second, darker layer of undefined tree textures on the valley slopes, again fading them out at the bottom into the mist.
Step 4: The Foreground Forest
-
Mix deep forest tones:
Prepare a very concentrated mix of Sap Green and Payne’s Grey (or a touch of Burnt Umber) for the darkest foreground trees. This high contrast brings the trees forward. -
Paint distant pines:
Using the size 4 brush, paint the tops of the pine trees that are poking out of the mist in the mid-ground. Keep these slightly lighter and softer than the foreground. -
detail the main forest:
Switch to your darker mix and paint the tall evergreen trees in the immediate foreground. Use the tip of the brush to create jagged, downward-sloping branches. -
Vary the heights:
Ensure the treetops are uneven in height and spacing to look natural. I like to group two or three trees close together, then leave a gap. -
Add deciduous accents:
On the left or right edge, use a slightly lighter, yellow-green mix to dab in a few leafy deciduous trees for variety.
Step 5: Final Highlights
-
Refine trunks:
Use a size 0 or liner brush with dark brown/grey to draw delicate vertical trunks visible through the pine branches and for the deciduous trees. -
Add snow highlights:
If you accidentally covered too much of the mountain snow, use a small amount of white gouache to reclaim those crisp, white peaks. -
Enhance the mist:
Run a very dilute wash of white gouache or simply clean water along the base of the foreground trees to settle them into the scene.
Remove the tape carefully to reveal your crisp borders and enjoy your serene mountain landscape
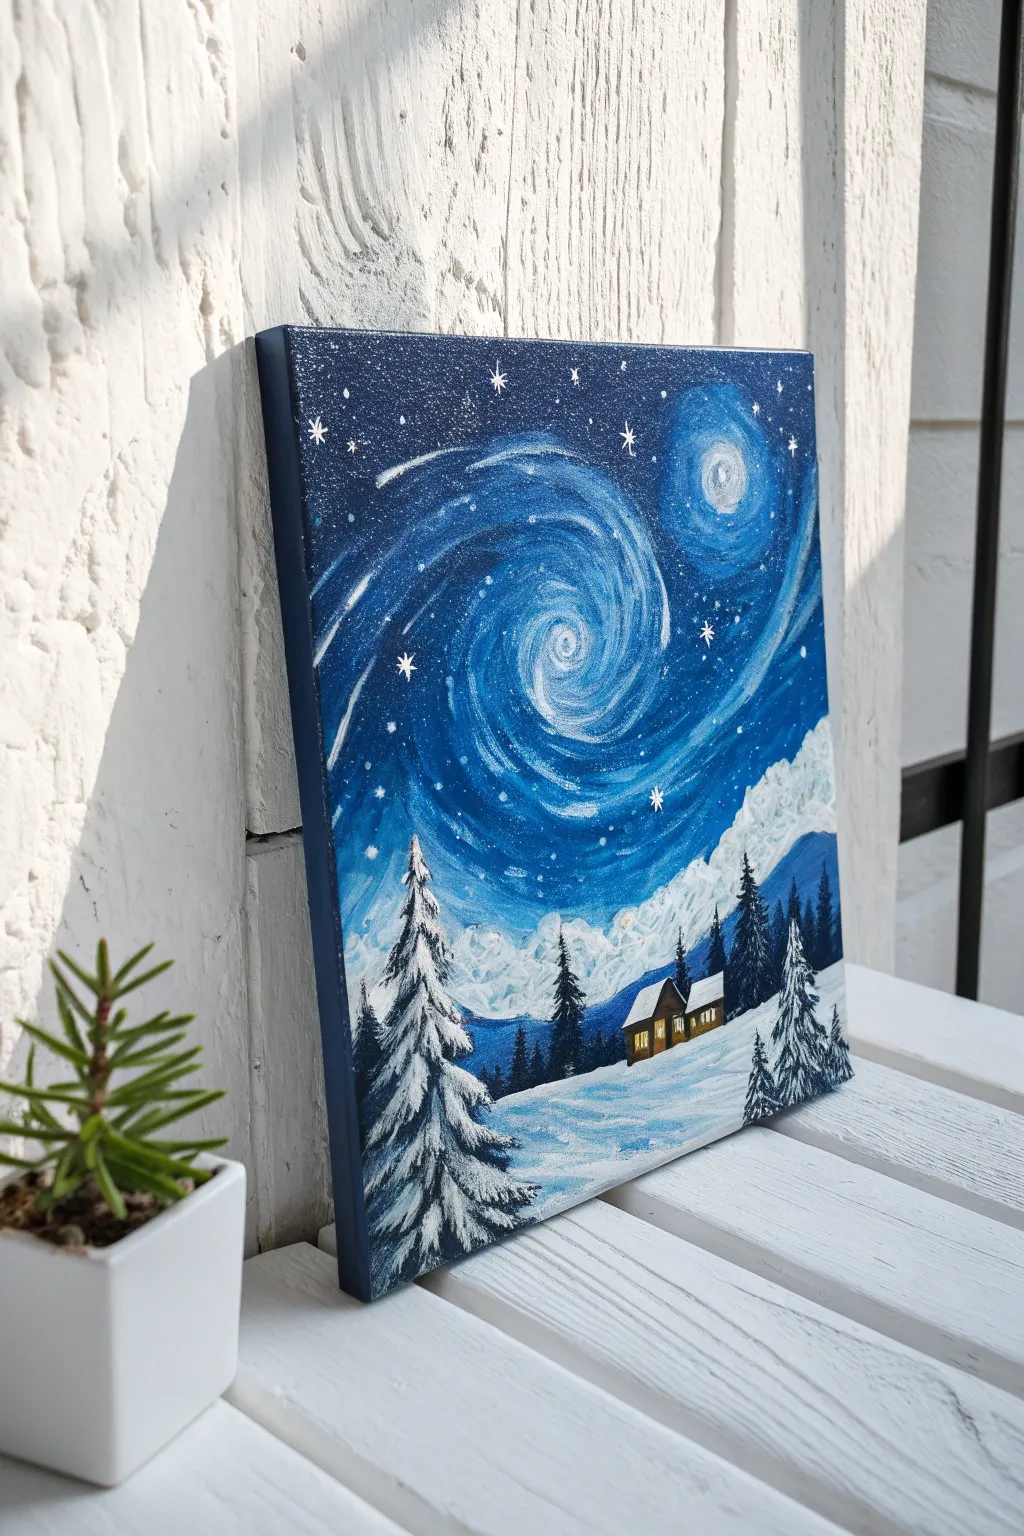
Northern Lights Night Sky
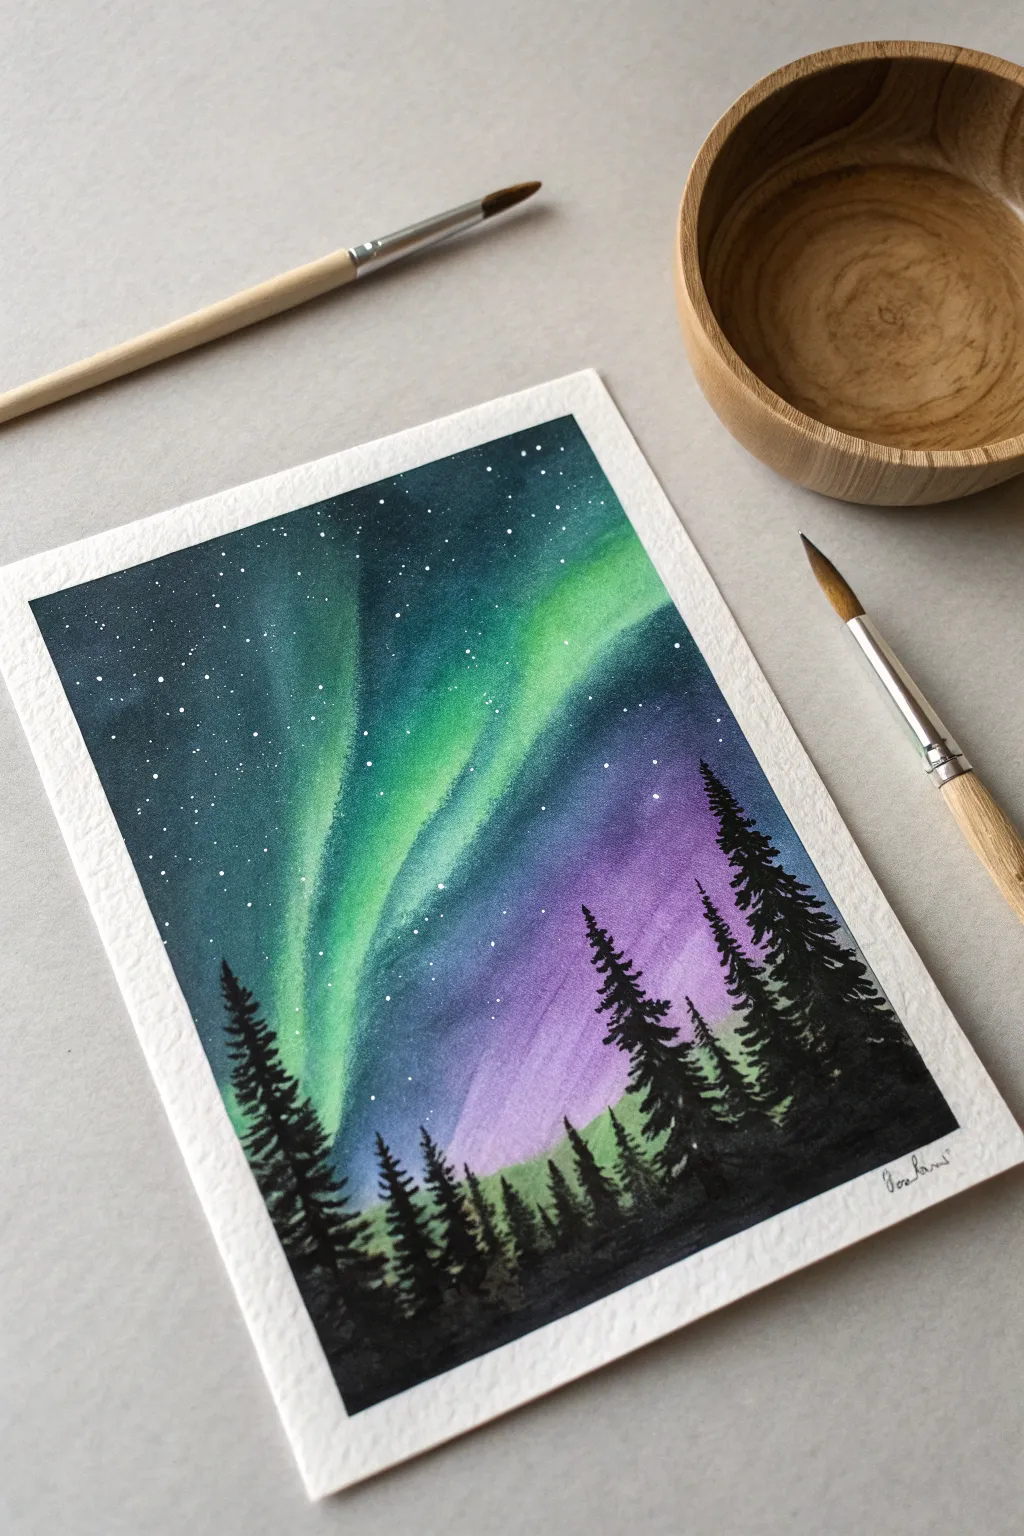
Capture the elusive magic of the Northern Lights with this vibrant watercolor project. By balancing wet-on-wet blending with crisp silhouettes, you will create a stunning contrast between a luminous atmosphere and the quiet forest below.
Detailed Instructions
Materials
- Cold-press watercolor paper (300gsm)
- Watercolor paints (Phthalo Green, Purple/Magenta, Indigo, Lamp Black)
- White opacity gouache or white gel pen
- Round brushes (size 8 for washes, size 2 for details)
- Masking tape
- Two jars of water
- Paper towels
- Old toothbrush (optional for splattering)
Step 1: Setting the Scene
-
Secure the edges:
Begin by taping down all four edges of your paper to a flat board using masking tape, which creates the crisp white border seen in the final piece. -
Wet the paper:
Load your large size 8 brush with clean water and apply an even, glistening sheen across the entire paper surface. -
Check moisture:
Tilt your head to check the sheen; the paper should be evenly damp but not forming large puddles.
Step 2: Painting the Aurora
-
Lay the light foundation:
While the paper is wet, drop in a vibrant Phthalo Green in a diagonal, wavy swoosh starting from the bottom left pushing toward the center. -
Add transition tones:
Immediately alongside the green, brush in a soft purple or magenta, allowing the edges to blur slightly into the green naturally. -
Deepen the cosmos:
Saturate your brush with Indigo or Prussian Blue and fill in the upper corners and the top right section, surrounding the colored lights. -
Blend carefully:
Gently manipulate the dark blue to touch the purple and green edges, but stop painting once they meet to avoid creating muddy colors. -
Intensify darkness:
Drop more concentrated Indigo into the very top corners to simulate the depths of space, keeping the horizon area lighter.
Clean Water Tip
I prefer using two water jars: one strictly for rinsing dark blues and blacks, and a second one kept pristine for wetting the paper and activating the bright yellow-greens.
Step 3: Stars and Details
-
Allow to dry:
Let the paper utilize its drying time completely; the paper must be bone dry and room temperature before the next step. -
Prepare the stars:
Dilute a small amount of white gouache with water until it reaches a creamy, splatter-able consistency. -
Splatter constraints:
Cover the bottom green area with a scrap paper mask if you want to keep the aurora fog-free, then tap your brush handle to splatter white specs across the dark blue sky. -
Detail stars:
Use a fine liner brush or a white gel pen to place a few larger, more specific stars in the darker areas for variety.
Fixing Back-Runs
If you see ‘cauliflower’ blooms in your sky, you likely added water to shrinking damp paint. Don’t fight it—these textures can actually enhance the atmospheric aurora effect.
Step 4: The Silhouettes
-
Mix the darkest dark:
Prepare a thick, creamy mixture of Lamp Black or Payne’s Grey with very little water to ensure full opacity. -
Establish the tree line:
Using your size 2 brush, paint an uneven, jagged horizon line near the bottom of the paper for the distant forest floor. -
Draw center trunks:
Paint vertical lines of varying heights rising from the horizon to act as the trunks for your pine trees. -
Stipple foliage:
Starting at the top of a trunk, use the very tip of your brush in a zigzag or stippling motion to create pine branches, getting wider as you move down. -
Vary the density:
Leave some gaps in the branches so the aurora background peeks through, and make sure the trees are different heights for realism. -
Ground the forest:
Fill in the bottom area solidly black where the trees meet the ground to anchor the composition. -
Final reveal:
Once the black paint is completely cured and dry, carefully peel away the masking tape at a 45-degree angle.
Enjoy the peaceful contrast of your glowing sky against the dark forest shadows.

PENCIL GUIDE
Understanding Pencil Grades from H to B
From first sketch to finished drawing — learn pencil grades, line control, and shading techniques.
Explore the Full Guide
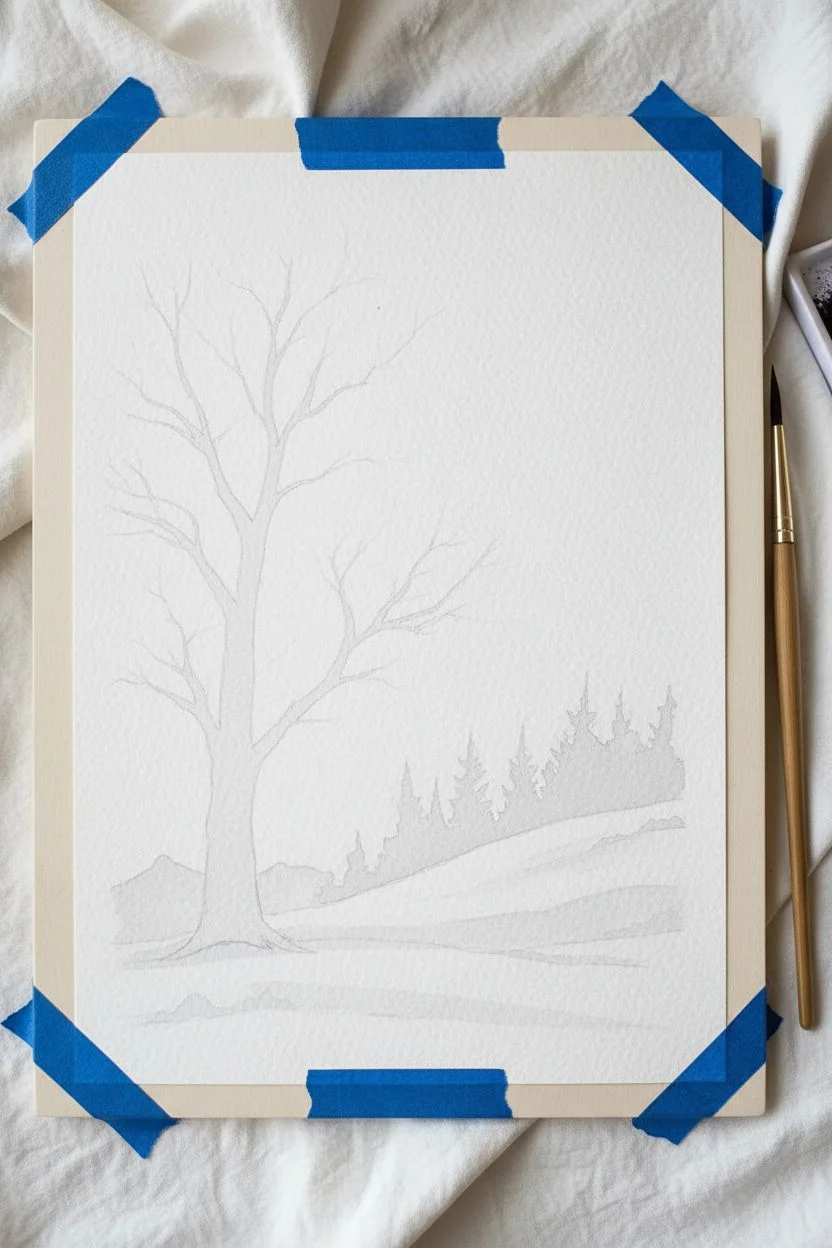
Misty Morning Forest
This atmospheric watercolor project captures the stillness of a winter morning using simple layering techniques. By controlling the water-to-paint ratio, you will build incredible depth, transforming a flat sheet of paper into a deep, foggy woodland scene.
Step-by-Step Guide
Materials
- Cold press watercolor paper (300gsm)
- Watercolor paints (Payne’s Gray, Hooker’s Green, Indigo)
- Round brushes (sizes 4 and 8)
- Masking tape
- Mixing palette
- Paper towels
- Two jars of water
Step 1: Setting the Scene
-
Secure the paper:
Tape your watercolor paper down to a hard board on all four sides. This prevents buckling when we add water and creates a crisp, professional border later. -
Mix your palette:
Prepare a puddle of very light grey-green by mixing a touch of Payne’s Gray and Hooker’s Green with plenty of water. You want this first mix to be tea-like in consistency. -
Wet the paper:
Using your larger brush, apply clean water to the upper two-thirds of the paper. It should be evenly shiny, but not forming puddles.
Mastering the Mist
The secret to the foggy effect is the “thirsty brush” technique: after painting a tree row, immediately run a clean, damp brush along the bottom edge to pull the pigment down and fade it into white.
Step 2: Background Layers
-
Apply the first wash:
While the paper is still wet, drop in your light grey-green mix near the top-middle, allowing the paint to spread naturally to create soft, diffused clouds of mist. -
Paint faint tree silhouettes:
While the paper is damp but losing its sheen, use the smaller brush to suggest faint, distant tree tops in the background using the same light mixture. These should look out of focus. -
Soften the edges:
I like to rinse my brush and run the clean, damp bristles along the bottom edge of these distant shapes to blur them downward into the white paper, creating the first layer of fog. -
Allow to dry completely:
Let this layer bone-dry. If the paper is cool to the touch, it is still wet; waiting prevents the distinct layers from bleeding into a muddy mess.
Step 3: The Middle Ground
-
Darken the mixture:
Add a bit more pigment to your green mix. It should now be the consistency of milk—slightly darker than the background but not fully opaque. -
Paint the second row:
Paint a jagged row of evergreen trees about halfway down the paper. Start with the pointed tip and widen your strokes as you move down. -
Create the fade:
Before the paint dries, quickly wash a clean, wet brush along the bottom of this new tree line to fade the color out into the white area below. -
Vary strong and soft edges:
As you paint these middle trees, keep the tops crisp against the sky, but ensure the bottoms remain soft and blurry to maintain the misty illusion. -
Dry again:
Wait for this layer to dry thoroughly before starting the foreground.
Hard Water Lines?
If your background layers dry with harsh edges where you wanted soft mist, gently scrub the hard line with a stiff, damp brush to reactivate the paint and smooth the transition.
Step 4: Foreground Details
-
Prepare the darkest value:
Mix a concentrated dark green using Indigo and Hooker’s Green. This should be thick, with very little water, to create strong contrast. -
Outline the hero tree:
On the right side of the paper, paint a tall, dominant spruce tree. Start with a thin vertical line for the trunk referencing the image for height. -
Add texture to branches:
Using the tip of your small brush, paint short, downward-sloping scribbles moving outward from the trunk to create the look of heavy pine needles. -
Fill the bottom corners:
Paint shorter, darker trees in the bottom left corner to balance the composition, making sure these trees are the darkest objects on the page. -
Connect the foreground:
Allow the bottoms of the foreground trees to merge into a dark, shadowy mass at the very bottom edge of the paper. -
Final assessment:
Step back and look at the painting. If the foreground needs more depth, add a second coat of your darkest green to the lowest branches once dry. -
Remove the tape:
Once the painting is 100% dry, peel the masking tape away at a 45-degree angle to reveal your crisp white border.
Frame your foggy forest behind glass or lean it on a mantle to bring a touch of woodland calm to your space.
View Through a Frosty Window
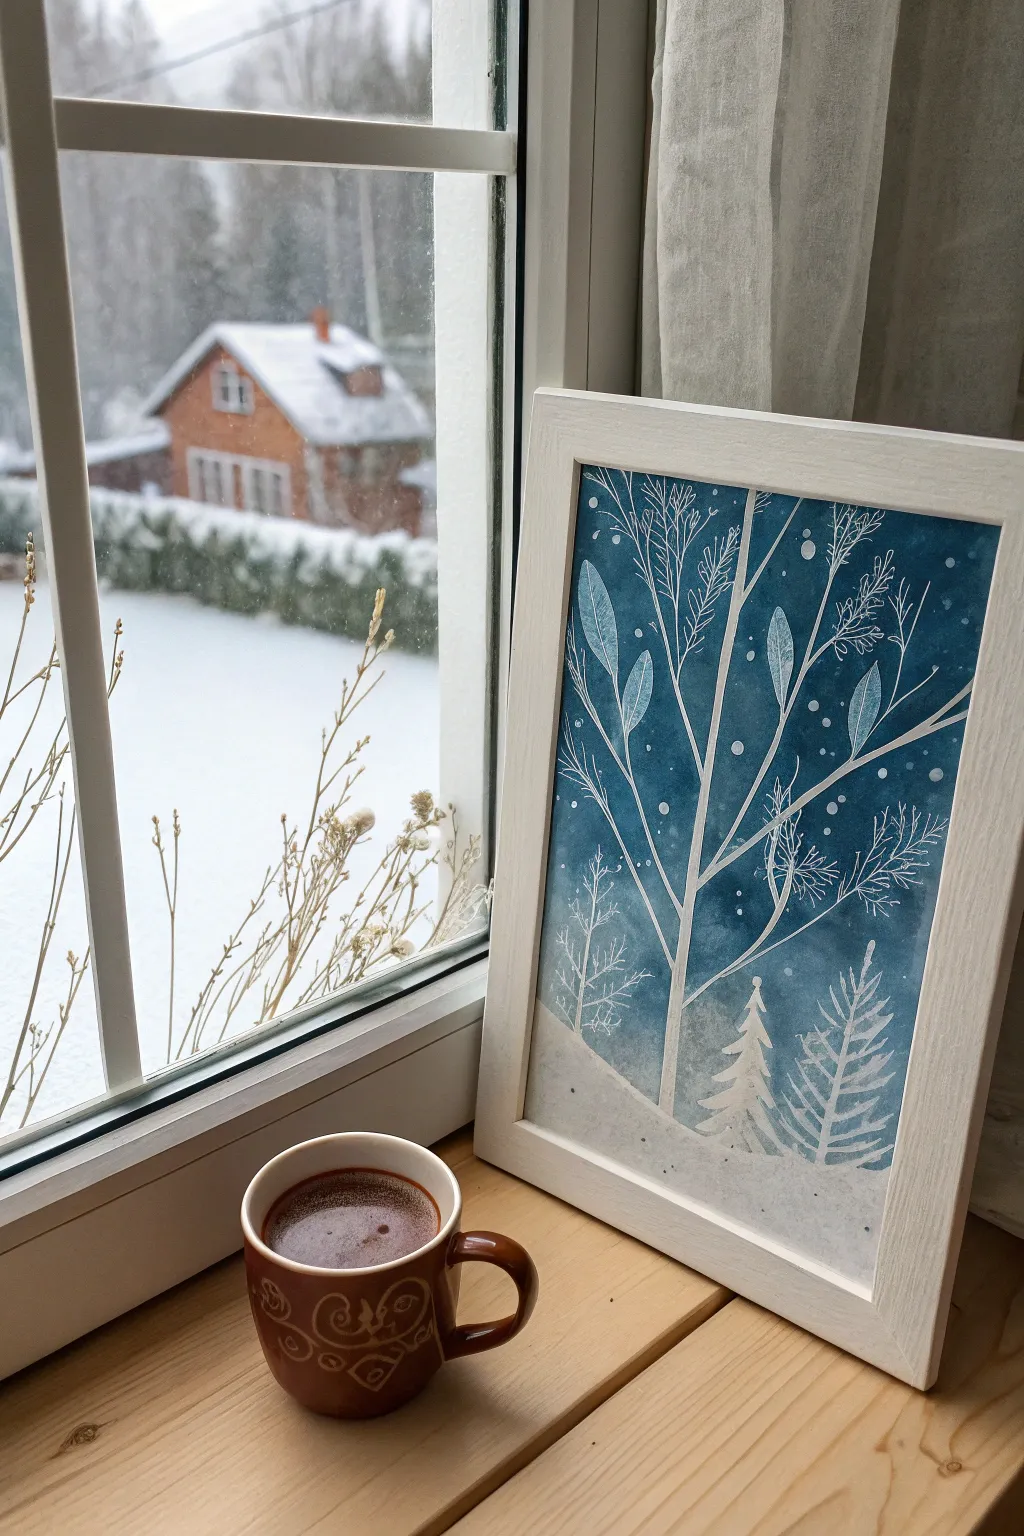
Capture the serene beauty of a winter evening with this striking resist-art project. By combining deep indigo watercolors with crisp white space, you’ll create a stylized woodland scene that looks beautiful in a simple white frame.
Detailed Instructions
Materials
- Cold press watercolor paper (300 gsm)
- Masking fluid (drawing gum)
- Old synthetic brush or silicon applicator
- Watercolor paints (Indigo, Payne’s Gray, Prussian Blue)
- White gouache or opaque white ink
- Large round watercolor brush (size 8 or 10)
- Small detail brush (size 0 or 1)
- Masking tape
- Rubber cement pickup (optional)
Step 1: Planning and Masking
-
Secure the paper:
Tape your watercolor paper down to a hard board on all four sides using masking tape to prevent buckling and create a clean white border. -
Sketch the composition:
With a very light pencil touch, draw a large Y-shaped tree structure slightly off-center, extending from the bottom third to the top of the page. -
Prepare for masking:
Dip an old brush into dish soap before dipping it into the masking fluid; this pro-move saves your bristles from being ruined by the drying gum. -
Apply the mask:
Carefully paint the masking fluid over your penciled tree trunk and branches. Apply it thickly enough to cover the paper completely. -
Add foliage shapes:
Paint large, oval leaf shapes attached to the ends of your branches with the fluid, keeping the edges smooth. -
Create fine details:
Use a toothpick or the very tip of your brush to pull thin lines of masking fluid outward from the branches to mimic fine twigs or pine needles. -
Let it cure:
Allow the masking fluid to dry completely. It should feel hard and room temperature to the touch, not cool or tacky.
Clean Lines Pro-Tip
Make sure your masking fluid is relatively fresh. Old, thick fluid creates clumpy lines. If yours is goopy, add a few drops of water and stir gently with a toothpick before applying.
Step 2: The Wintery Wash
-
Mix your palette:
Create a puddle of deep, saturated blue. I prefer mixing Indigo with a touch of Prussian Blue to get that cold, night-sky look. -
Begin the wash:
Using your large round brush, start painting at the very top of the paper, moving horizontally across. -
Create gradients:
As you move down the paper, dip your brush in water occasionally to vary the intensity of the blue, creating a slightly uneven, atmospheric sky effect. -
Paint over the mask:
Fearlessly paint directly over your dried masking fluid lines. The gum will protect the white paper underneath. -
Fade the bottom:
Stop painting about two inches from the bottom tape line to leave space for the snowbank, fading the blue out gently with clean water. -
Dry thoroughly:
Let the paint dry 100%. If the paper is even slightly damp when you remove the mask, it may tear.
Step 3: The Reveal and Frosty Details
-
Remove the mask:
Gently rub your finger or a rubber cement pickup over the masking fluid to peel it away, revealing the crisp white paper below. -
Paint the snowbank:
Using white gouache, paint a rolling hill shape at the bottom of the page, covering the faded blue edge you left earlier. -
Add background trees:
Mix a small amount of white gouache with a tiny drop of blue water to make a pale, semi-transparent grey-blue. -
Paint ghost trees:
Paint small pine tree silhouettes sitting on the snowbank using this pale mix; they should look like they are in the distance behind the main white tree. -
Define the leaves:
Use a fine liner brush and watered-down blue paint to draw delicate central veins inside the large white leaves you revealed earlier. -
Let it snow:
Dip a dedicated toothbrush or stiff brush into thick white gouache and flick the bristles to splatter snow dots across the entire sky. -
Final touches:
Add a few specific, larger snowflakes by hand using the tip of your smallest brush to balance the composition.
Level Up: Metallic Magic
Once the piece is dry, trace one edge of the white tree trunk with a silver gel pen or metallic watercolor. It adds a subtle shimmer that mimics moonlight hitting the frost.
Place your dried masterpiece in a light wood or white frame to complete this cozy winter aesthetic.


Starry Winter Night Swirls
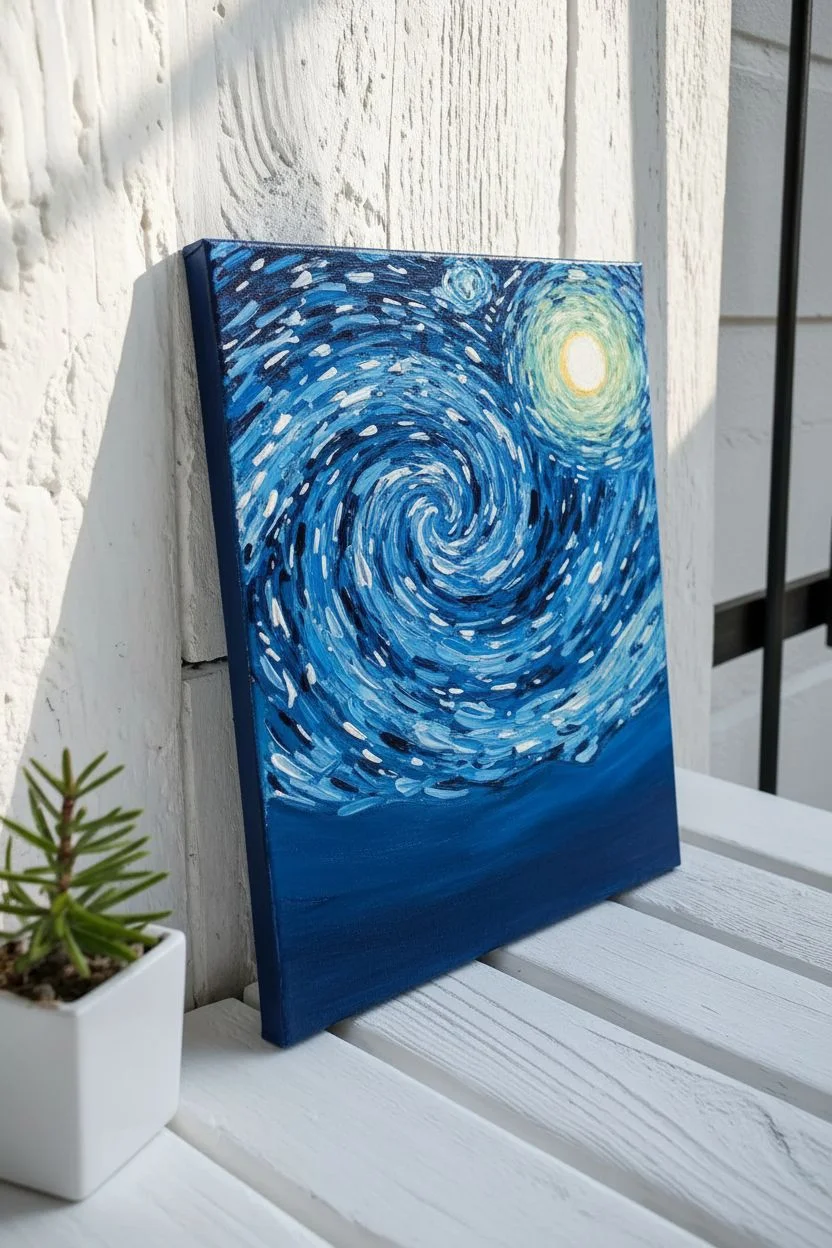
Capture the magic of a crisp winter evening with this Van Gogh-inspired acrylic painting. You’ll layer rich blues and bright whites to create movement in the sky before grounding the scene with cozy, glowing cabins and snow-laden pines.
Step-by-Step Guide
Materials
- Square canvas (e.g., 12×12 inch)
- Acrylic paints: Phthalo Blue, Ultramarine Blue, Titanium White, Mars Black, Burnt Umber, Cadmium Yellow
- Wide flat brush (1 inch)
- Medium filbert brush
- Small round brush
- Fine liner brush
- Palette and water cup
- Paper towels
Step 1: Painting the Sky
-
Base layer:
Mix Phthalo Blue with a tiny touch of black to create a deep midnight blue. Use your wide flat brush to cover the top three-quarters of the canvas, using horizontal strokes for smooth coverage. -
Mapping the swirls:
While the background is still slightly wet, load a medium filbert brush with pure Phthalo Blue. Paint a large spiral shape in the center and a circular shape in the top right for the moon. -
Adding texture:
Mix a lighter shade by adding Titanium White to your blue. Using short, curved brushstrokes, follow the path of your spiral and moon circle, leaving gaps so the dark background peeks through. -
Highlighting movement:
Clean your brush and pick up almost pure Titanium White. Apply smaller, distinct dashes along the curves of the big spiral and the moon orb to create a sense of glowing motion. -
The moon core:
Paint a solid white circle in the center of your top-right swirl. Once dry, wash a very thin layer of yellow over it if you want a subtle glow, or keep it bright white as shown.
Flow & Precision
Add a drop of water or flow medium to your white paint when doing the stars. This helps the paint glide off the liner brush smoothly, giving you sharp, crisp points instead of broken lines.
Step 2: Mountains and Ground
-
Distant mountains:
Mix white with a small drop of blue. Below the sky, paint jagged, irregular shapes to form the mountain range. The paint should be lighter than the sky to stand out. -
Snowy ground:
For the foreground, mix a fresh batch of white with the tiniest hint of blue (so it isn’t stark white). Fill in the bottom section of the canvas, sweeping the brush slightly upward on the left side where the tall tree will sit. -
Ground shadows:
Add subtle horizontal streaks of light blue across the snow to suggest uneven terrain and snowdrifts.
Step 3: Forest and Cabins
-
Tree silhouettes:
Mix black with blue (or green if you have it) to make a very dark shadow color. Using a round brush, paint a vertical line for the trunk of the large left tree, and smaller lines for the distant trees. -
Foliage shape:
Use the tip of your brush to tap distinct branches extending from the trunks. Make the large left tree wide at the bottom and tapered at the top, creating a solid dark silhouette. -
Cabin structure:
Using Burnt Umber and a small flat brush, paint two small rectangular shapes in the middle ground for the cabin walls. -
Cabin roofs:
Paint triangular roofs on top of the brown rectangles. Once the brown is dry, add a thick layer of white on the roofs to look like heavy snow accumulation. -
Glowing windows:
Mix Cadmium Yellow with a touch of white. Use a fine liner brush to paint small squares on the cabins. I like to dab the paint on thickly here so the light looks intense.
Muddy Snow?
If the white snow highlight turns grey when you apply it to the trees, the underlayer is still wet! Stop immediately, let the dark tree layer dry completely, and then try applying the snow again.
Step 4: Final Details
-
Snow on trees:
Ensure the dark tree paint is completely dry. Load a small round brush with thick Titanium White. Gently dab paint onto the tips of the branches, focusing on the top of the boughs where snow would settle. -
Heavy texture:
On the large left tree, layer the white heavily to create texture. Leave the undersides of the branches dark to maintain depth and dimension. -
Twinkling stars:
Dilute white paint with a drop of water until it is inky. Use your liner brush to paint small 4-point crosses scattered through the dark blue sky areas. -
Starry dust:
Dip a stiff brush (or toothbrush) into the watered-down white paint and gently flick the bristles to splatter tiny dots across the sky, adding magical stardust to the scene.
Step back and admire your glowing winter wonderland, rich with texture and movement
Icy Stream with Snow-Capped Rocks
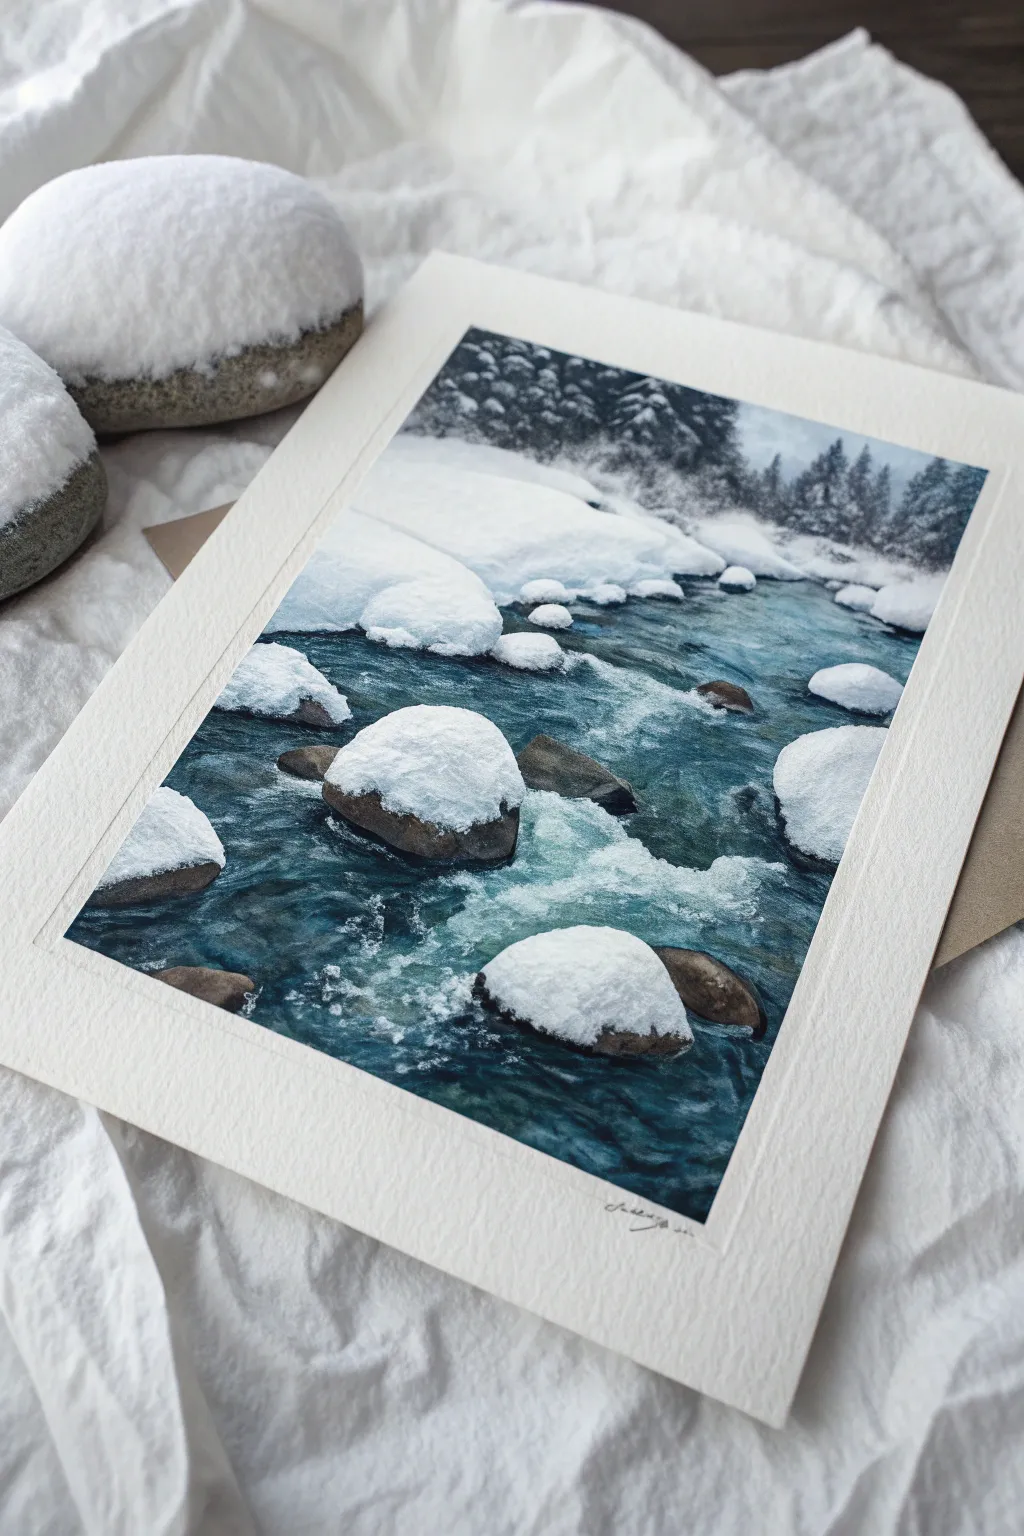
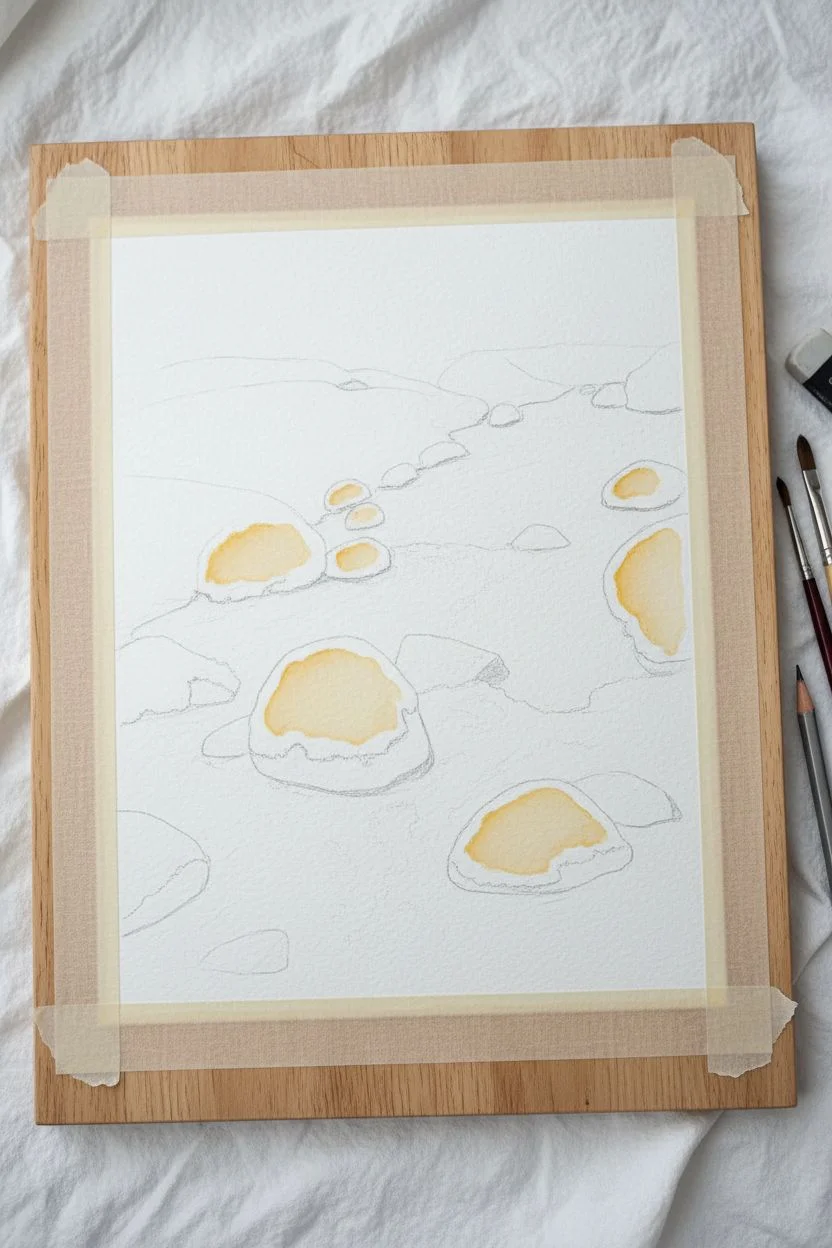
Capture the serene chill of a frozen creek with this step-by-step watercolor tutorial. By combining fluid washes with opaque gouache details, you will recreate the stunning contrast between deep, rushing water and soft, pillowy snow caps seen in the reference image.
How-To Guide
Materials
- Cold Press watercolor paper (300 gsm or heavier)
- Watercolor paints (Indigo, Phthalo Blue, Sap Green, Burnt Umber, Sepia)
- Opaque White Gouache
- Masking fluid (optional)
- Round brushes (size 8 for washes, size 2 for details)
- Flat brush (1/2 inch)
- Two jars of water
- Paper towels
- Painter’s tape and drawing board
Step 1: Preparation & Sketching
-
Secure the paper:
Tape your watercolor paper down on all four sides to a board. This prevents buckling and leaves a crisp white border around your finished piece. -
Map the scene:
Using a hard pencil (like 2H), lightly sketch the composition. Focus on drawing the oval, pillow-like shapes of the snow that sit on top of the rocks. -
Define the stream:
Outline the winding edges of the riverbanks and the placement of the submerged rocks. Keep lines faint so they disappear under the paint. -
Protect the white (Optional):
If you struggle to paint around small shapes, apply masking fluid to the snow caps on the rocks in the middle of the river. Let it dry completely.
Clean Water Secret
Use two water jars: one for rinsing dirty brushes and one strictly for clean water. This ensures your snow highlights and lighter washes stay crisp and don’t turn muddy grey.
Step 2: Background & Forestry
-
Wet the sky area:
Use your clean flat brush to dampen the top third of the paper with clean water, stopping just above the snowy riverbanks. -
Paint the distant trees:
Mix Indigo with a touch of Sap Green to create a deep, cool forest color. Drop this into the wet paper, allowing the pigment to bloom and create soft, out-of-focus tree shapes. -
Darken the forest:
While the paper is still damp, dab concentrated Indigo near the horizon line to suggest the density of the deep woods. Let this section dry completely.
Step 3: The Icy River
-
Base water wash:
Mix a vibrant teal using Phthalo Blue and a tiny amount of Green. Dilute it ensuring it’s translucent, and paint the entire water surface, carefully working around the snow-capped rocks. -
Add depth and flow:
While the blue wash is wet, charge in darker Indigo and Sepia mixture into the corners and around the base of the rocks. This creates the illusion of depth. -
Create current:
Use a damp, clean brush to lift out horizontal streaks in the water paint. This ‘thirst’ technique mimics the motion of fast-flowing water. -
Paint the rock bases:
Once the water is damp (not soaking), mix Burnt Umber and Indigo for a dark stone color. Paint the visible bottom edges of the rocks that peek out from under the snow.
Troubleshooting: Flat Snow?
If your snow caps look like flat circles, you likely missed the shadow. Add a crescent of pale blue-grey to the bottom of each snow pile to curve it instantly into a sphere.
Step 4: Snow & Details
-
Shadowing the snow:
Snow isn’t purely white. Mix a very watery, pale purple-blue. Gently paint the bottom curves of the snow caps on the rocks to give them volume and a 3D rounded look. -
Enhance the banks:
Apply stronger blue shadows to the snowbanks on the side of the river, defining the undulating drifts. -
Deepen contrast:
I find that remixing a concentrated dark blue/black and outlining the waterline right next to the snow makes the white pop intensely. Do this carefully with your size 2 brush. -
Texture the rocks:
Dry brush a little lighter brown over the dark rock bases to suggest rough texture and mineral deposits.
Step 5: Finishing Touches with Gouache
-
Highlight the caps:
Take your White Gouache directly from the tube (do not dilute too much). Paint over the tops of the rock snow-caps. This opacity creates the thick, heavy snow texture shown in the photo. -
Frost the trees:
With a dry brush and a tiny bit of white gouache, scumble (lightly scrub) over the dark background trees to create the effect of frosted branches. -
Rushing water foam:
Use the fine point of your brush and white gouache to paint thin, wiggly lines around the rocks where the water churns and creates foam. -
Final assessment:
Step back and check your values. If the water looks too pale compared to the photo, add a final glaze of Phthalo Blue over the dark areas once everything is bone dry.
Peel off your tape to reveal those crisp edges and enjoy your personal winter wonderland.
Monochromatic Black and White Landscape
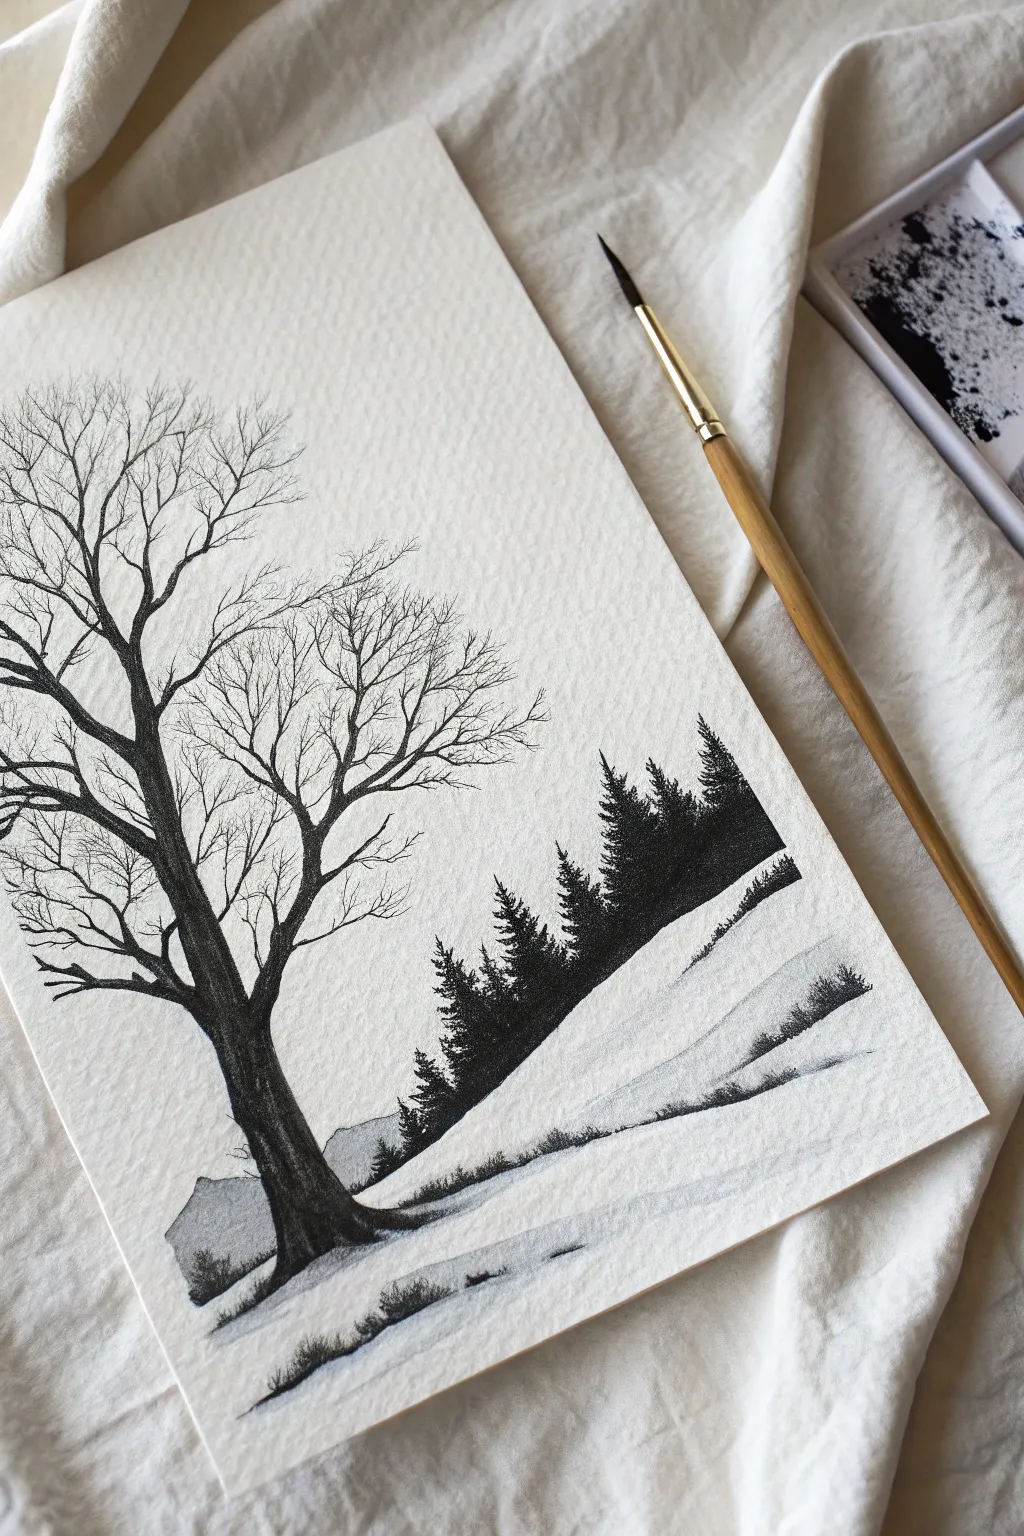
Capture the serene silence of a winter’s day with this dramatic black and white landscape. Using simple ink or watercolor washes, you will learn to build depth through contrast, creating a detailed old-growth tree against a snowy backdrop.
Step-by-Step
Materials
- Cold press watercolor paper (140lb/300gsm)
- Black watercolor paint or India ink
- Round watercolor brush (size 6)
- Rigger or liner brush (size 0 or 1)
- Mixing palette
- HB Pencil and eraser
- Painter’s tape
- Two jars of water
Step 1: Sketching and Background Layers
-
Prepare your canvas:
Tape your watercolor paper down to a board on all four sides. This ensures a clean white border and prevents buckling when we add water. -
Map the composition:
Lightly sketch a diagonal line sloping upwards from left to right to create the snowy bank. Sketch the rough outline of the large foreground tree on the left and the distant mountains at the bottom left. -
Mix a light wash:
On your palette, dilute a drop of black paint with plenty of water to create a very pale, transparent grey. Test the value on a scrap piece of paper first. -
Paint the mountains:
Fill in the distant mountain shapes with your pale grey wash. Keep the edges soft to suggest distance and atmospheric perspective. -
Define the snow ridge:
Using the same pale grey, paint a sweeping shadow line under the diagonal crest of the hill. This shadow tells the viewer the ground is white snow without actually painting the snow itself. -
Add texture to the snow:
While the shadow is damp, touch in a slightly darker grey in a few random spots within the shadow to create the look of uneven terrain.
Ink Control
If your fine branches are looking blurry or bleeding into the sky, your background paper is likely slightly damp. Wait for it to be bone-dry before attempting the fine liner work.
Step 2: The Evergreen Forest
-
Mix a midnight black:
Prepare a mixture of paint that is much darker than your mountains but not quite fully opaque black. It should flow easily but hold a strong dark value. -
Start the pine trees:
Along the snowy ridge line, use the tip of your round brush to draw vertical lines of varying heights. These will serve as the trunks for the distant evergreens. -
Foliage texture:
Using a stippling motion (dabbing the brush tip up and down), tap bristles outward from the top of the trunks down to the bottom to create the jagged silhouette of pine branches. -
Group the trees:
Cluster the trees together, allowing them to overlap. Make sure the ‘forest’ is dense black near the ground, leaving no white gaps between the trunks at the base.
Level Up
Once fully dry, load a toothbrush with diluted white gouache and flick it over the painting to create a gentle, falling snow effect over the dark tree trunk and evergreens.
Step 3: The Foreground Tree
-
Base of the trunk:
Switch to your purest, darkest black ink or paint. Paint the main trunk of the large tree on the left, pressing down on the brush to make the trunk thick at the bottom. -
Building texture:
Before the trunk dries completely, I like to drop in even more saturated pigment on the shadowed side (the right side) to give the bark a rounded, 3D appearance. -
Main branches:
Extend thick branches upwards from the trunk. Remember that branches get thinner the further they grow from the center. Make them gnarled and twisty rather than perfectly straight. -
Detailed branch structure:
Switch to your rigger or liner brush. Gently pull paint from the main branches to create secondary limbs. Use a very light touch, barely grazing the paper. -
Fine twigs:
This step requires patience. Fill the canopy with hundreds of tiny, hair-thin lines intersecting and reaching upward. The complexity of these twigs is what gives the painting realism. -
Negative space check:
Step back and look at your tree. Ensured there are open ‘windows’ of sky between branches so the tree doesn’t look like a solid blob.
Step 4: Foreground Details
-
Ground connections:
Paint the roots of the main tree spreading slightly into the snow. Add a cast shadow on the ground extending to the right, matching the angle of the slope. -
Textured shrubbery:
Using the tip of your small brush, paint tiny, erratic tufts of grass and small bushes poking out of the snow along the bottom edge and the ridge line. -
Final assessment:
Let the painting dry completely. If the foreground tree looks pale when dry, carefully apply a second layer of black to the trunk to ensure deep contrast against the white paper.
Peel off the tape to reveal your crisp edges and enjoy the stark beauty of your winter scene.
Golden Hour Sunlight Beams
Capture the breathtaking contrast of a winter sunset with this acrylic painting tutorial. You will learn how to balance warm orange light against cool purple shadows to create a dramatic, glowing landscape.
Step-by-Step Tutorial
Materials
- Canvas (portrait orientation, e.g., 24×36″)
- Acrylic paints: Titanium White, Ultramarine Blue, Dioxazine Purple, Cadmium Yellow, Cadmium Orange, Burnt Umber, Mars Black
- Large flat brush (2 inch)
- Medium filbert brush
- Small rigger or liner brush
- Palette knife
- Piece of string or ruler
- Water container and mixing palette
Step 1: Setting the Scene: Sky and Horizon
-
Define the Horizon:
Draw a faint pencil line across the canvas, roughly one-third of the way up from the bottom. This separates your snowy ground from the sky. -
Paint the Upper Sky:
Mix Titanium White with a small amount of Ultramarine Blue and a tiny touch of Dioxazine Purple. Paint the top third of the canvas using the large flat brush, using horizontal strokes. -
Blend the Sunset:
While the blue is still wet, mix Titanium White with Cadmium Orange and a touch of Cadmium Yellow. Apply this to the lower sky area, blending upward into the blue to create a soft, hazy transition. -
Create the Distant Forest:
Mix a dark, cool grey using Ultramarine Blue, Burnt Umber, and a little Purple. Using a medium brush, tap in a jagged tree line along the horizon, making the trees taller on the right side and fading them out towards the left.
Shadow Precision
Tape a piece of string to the ‘sun’ spot on your canvas. Use it as a movable ruler to ensure every single shadow radiates perfectly from that one light source.
Step 2: Laying the Snow and Guide Lines
-
Base Coat the Snow:
Cover the bottom third of the canvas with Titanium White mixed with a very small amount of Dioxazine Purple to knock back the brightness. It should look like a pale, cool grey-white. -
Locate the Light Source:
Decide exactly where your sun is peeking through the trees (in this image, it is low on the right side just above the distant tree line). Mark this spot lightly. -
Map the Shadow Angles:
From your marked sun spot, lightly sketch diagonal lines radiating outward toward the bottom and left edges of the canvas. These lines will guide your long tree shadows. -
Mix the Shadow Color:
Create a rich, translucent shadow color using Dioxazine Purple, Ultramarine Blue, and Titanium White. It should be significantly darker than your snow base. -
Paint the Shadows:
Using a flat brush, paint stripes of your shadow mixture following the radiating guide lines. I like to keep the edges slightly soft to mimic the diffusion of light on snow.
Step 3: The Birch Grove
-
Position the Trunks:
Paint the main birch trunks using the filbert brush and a mixture of Titanium White and a tiny drop of Burnt Umber. Place the base of each tree at the starting point of your shadow lines. -
Vary Height and Width:
Make the trees on the right slightly thicker and closer, while the trees on the left appear slightly thinner. Ensure the trunks extend all the way off the top of the canvas. -
Add Texture and Bark:
Mix Mars Black with a little Burnt Umber. Using the edge of a palette knife, scrape horizontal markings across the trunks to create the characteristic birch bark texture. -
Paint the Branches:
Switch to your rigger or liner brush. With thinned dark paint (inky consistency), add fine branches reaching upward. Let your hand shake slightly to create natural, jagged lines rather than straight sticks. -
Overlap the Sky:
Ensure the fine branches cross over the sky area. The contrast of the dark branches against the light orange sky is crucial for realism.
Sparkle Level Up
Mix iridescent medium or a tiny sprinkle of fine diamond dust into your white paint for the sunlit snow areas. It creates a magical frost effect as you walk by.
Step 4: Atmosphere and Sunlight
-
The Sunburst:
Mix pure Titanium White with a dot of Cadmium Yellow. Paint a small, bright circle at your light source point, right between the tree trunks. -
Create the Glare:
Dry brush a very thin haze of Cadmium Orange and Yellow around the sun circle, glazing over the adjacent tree trunks slightly to make them look like they are enveloped in light. -
Warm Highlights:
Mix a warm peach color (White + Orange). Paint horizontal highlights on the snow *between* the purple shadows to show where the sunlight hits the ground. -
Final Contrast Check:
Refine the shadows where they meet the tree bases—this anchor point should be the darkest purple to ground the trees effectively.
Hang your finished canvas where it can catch natural light to enhance the golden hour glow you’ve created.
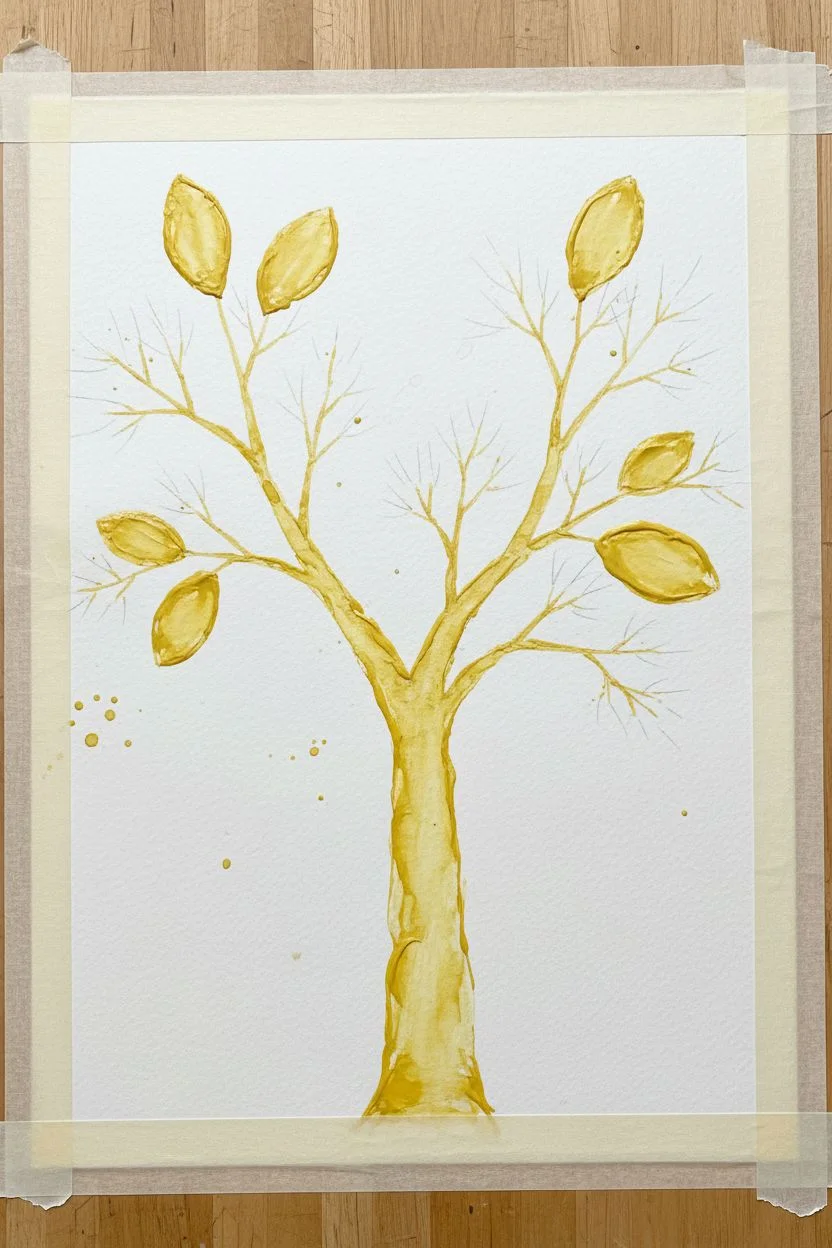
Abstract Winter Galaxy Silhouette
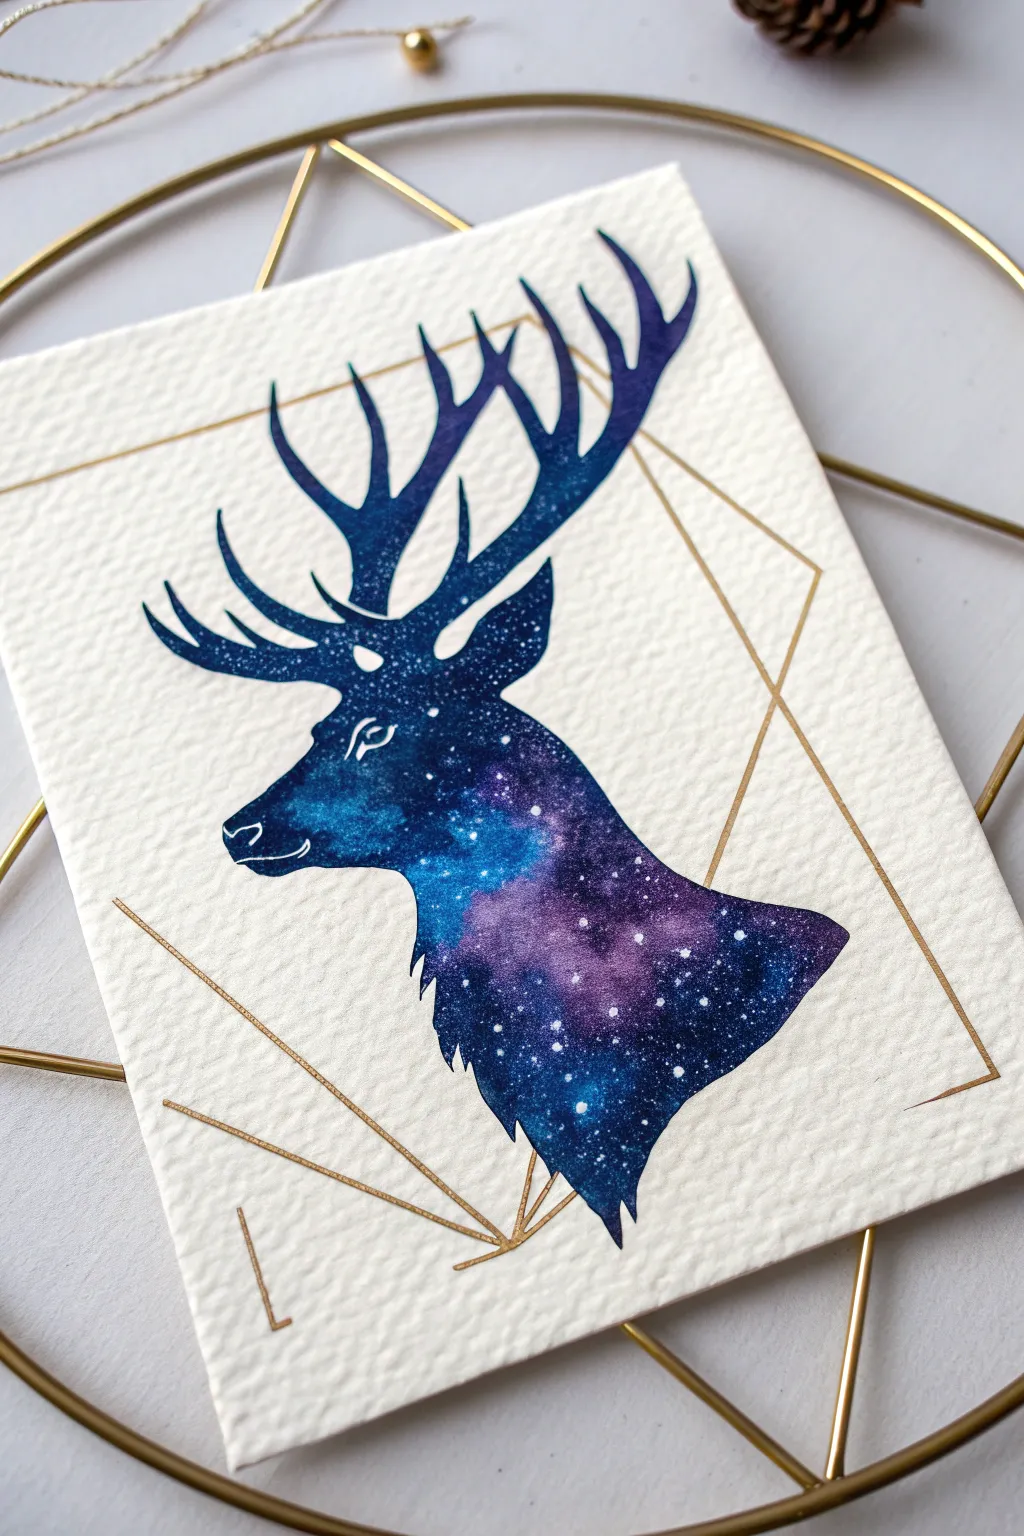
Combine the organic beauty of nature with the mystery of the cosmos in this striking watercolor project. By balancing a fluid, galaxy-filled deer silhouette against sharp gold geometric lines, you creates a modern and magical winter art piece.
How-To Guide
Materials
- Cold press watercolor paper (300 gsm)
- Watercolor paints (Indigo, Violet, Turquoise, Black)
- White gouache or white ink
- Round watercolor brushes (sizes 2 and 6)
- Metallic gold paint marker
- Pencil and eraser
- Ruler
- Masking tape
- Old toothbrush (optional)
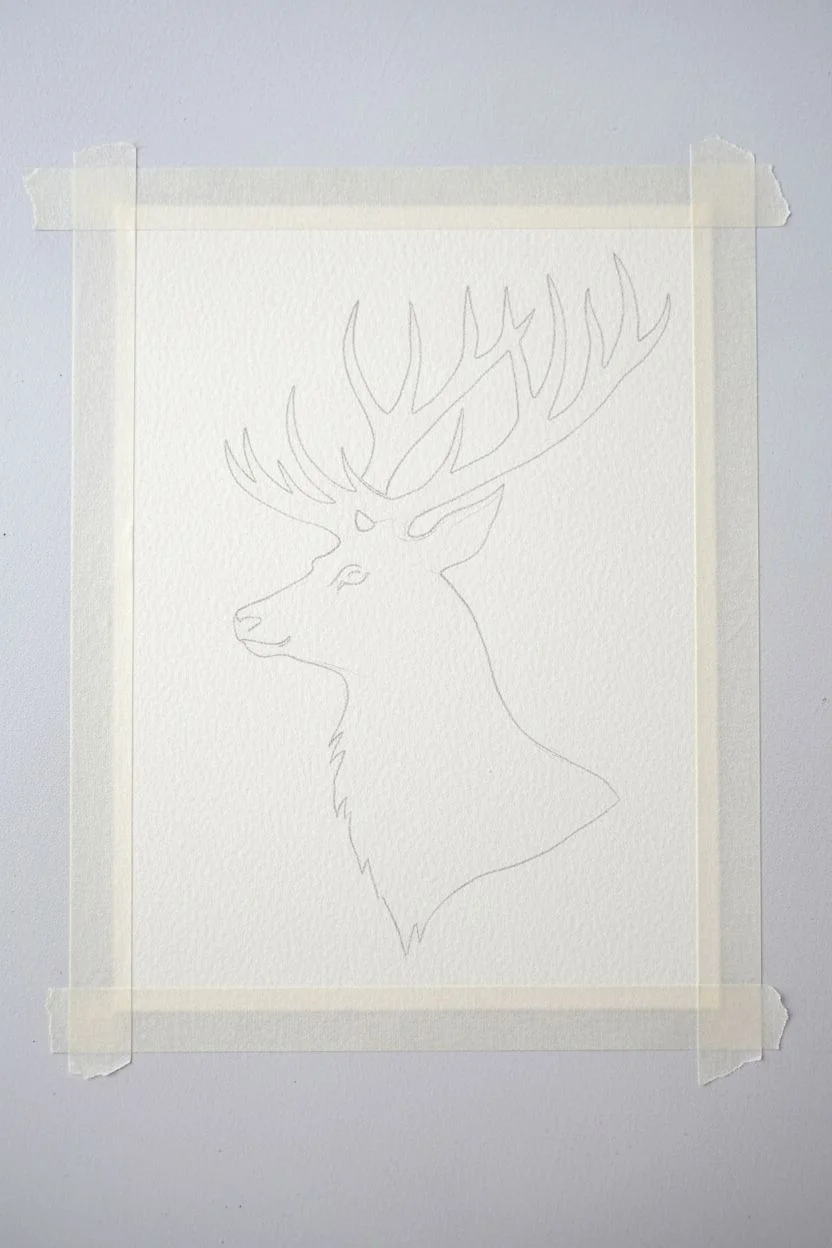
Step 1: Sketching the Silhouette
-
Secure the paper:
Begin by taping down all four edges of your watercolor paper to a hard surface. This prevents the textured paper from buckling when we add heavy washes of water later. -
Outline the subject:
Using a pencil, lightly sketch the profile of a deer head and antlers. If you aren’t confident drawing freehand, print a silhouette from the internet and trace it using a light box or a window. -
Refine the edges:
Go over your sketch to ensure the lines are clean, specifically defining the sharp points of the antlers and the curve of the neck. Keep the pencil pressure light so graphite doesn’t show through the paint.
Bleeding Edges?
If your watercolor bleeds outside the pencil line, wait for it to dry completely, then carefully paint over the mistake with opaque white gouache to clean up the silhouette.
Step 2: Painting the Galaxy
-
Prepare the wet base:
Dip your clean size 6 brush in water and carefully wet the inside area of the deer shape. You want the paper glistening but not forming a puddle. -
Drop in light colors:
Load your brush with turquoise or bright blue. Touch the wet paper in the center of the chest and near the snout, allowing the pigment to bloom naturally across the surface. -
Add deep purples:
While the paper is still wet, drop in violet or purple paint around the blue areas. Let the colors bleed into each other to create that nebula effect, but try not to over-mix them into a muddy brown. -
Create contrast:
Use indigo or a mix of blue and black to paint the edges of the silhouette and the tips of the antlers. This dark border frames the glowing lighter colors in the center. -
Fill the antlers:
Switch to your smaller size 2 brush to guide the dark blue paint into the narrow tines of the antlers, being very careful to stay within your pencil lines. -
Let it cure:
Allow the paint to dry completely. The paper must be bone-dry before the next steps to prevent smudging.
Step 3: Stars and Details
-
Protect the background:
Place scraps of paper or paper towels over the white area surrounding the deer to protect it from stray paint droplets. -
Create the stars:
Dilute a small amount of white gouache with water. Load an old toothbrush or stiff brush, and flick the bristles with your thumb to spray a fine mist of white stars over the dried deer. -
Add distinct stars:
Here I prefer to use a fine-tip brush or a white gel pen to add a few larger, purposeful dots to represent major stars or planets within the galaxy. -
Define facial features:
Using your white gel pen or fine brush with gouache, carefully draw the outline of the deer’s eye, inner ear detail, and a small line for the mouth/nose.
Make it Shine
Mix a small amount of iridescent medium or metallic watercolor into your blue and purple paints. This gives the finished galaxy a subtle shimmer that changes as you move the paper.
Step 4: Geometric Gold Finish
-
Plan the frame:
Lay your ruler across the paper to visualize where your geometric lines will go. Aim for an asymmetric layout that intersects with the antlers. -
Draw the gold lines:
Using the gold paint marker and ruler, draw straight lines framing the deer. You can draw right up to the paint edge, or even overlap the artwork slightly for a layered look. -
Final touches:
Add a few disconnected parallel lines or angles near the bottom corner to balance the composition, then gently peel away the masking tape once the marker ink is dry.
Display your celestial masterpiece in a simple floating frame to let the textured paper and gold accents truly stand out.
Gold Leaf Winter Accents
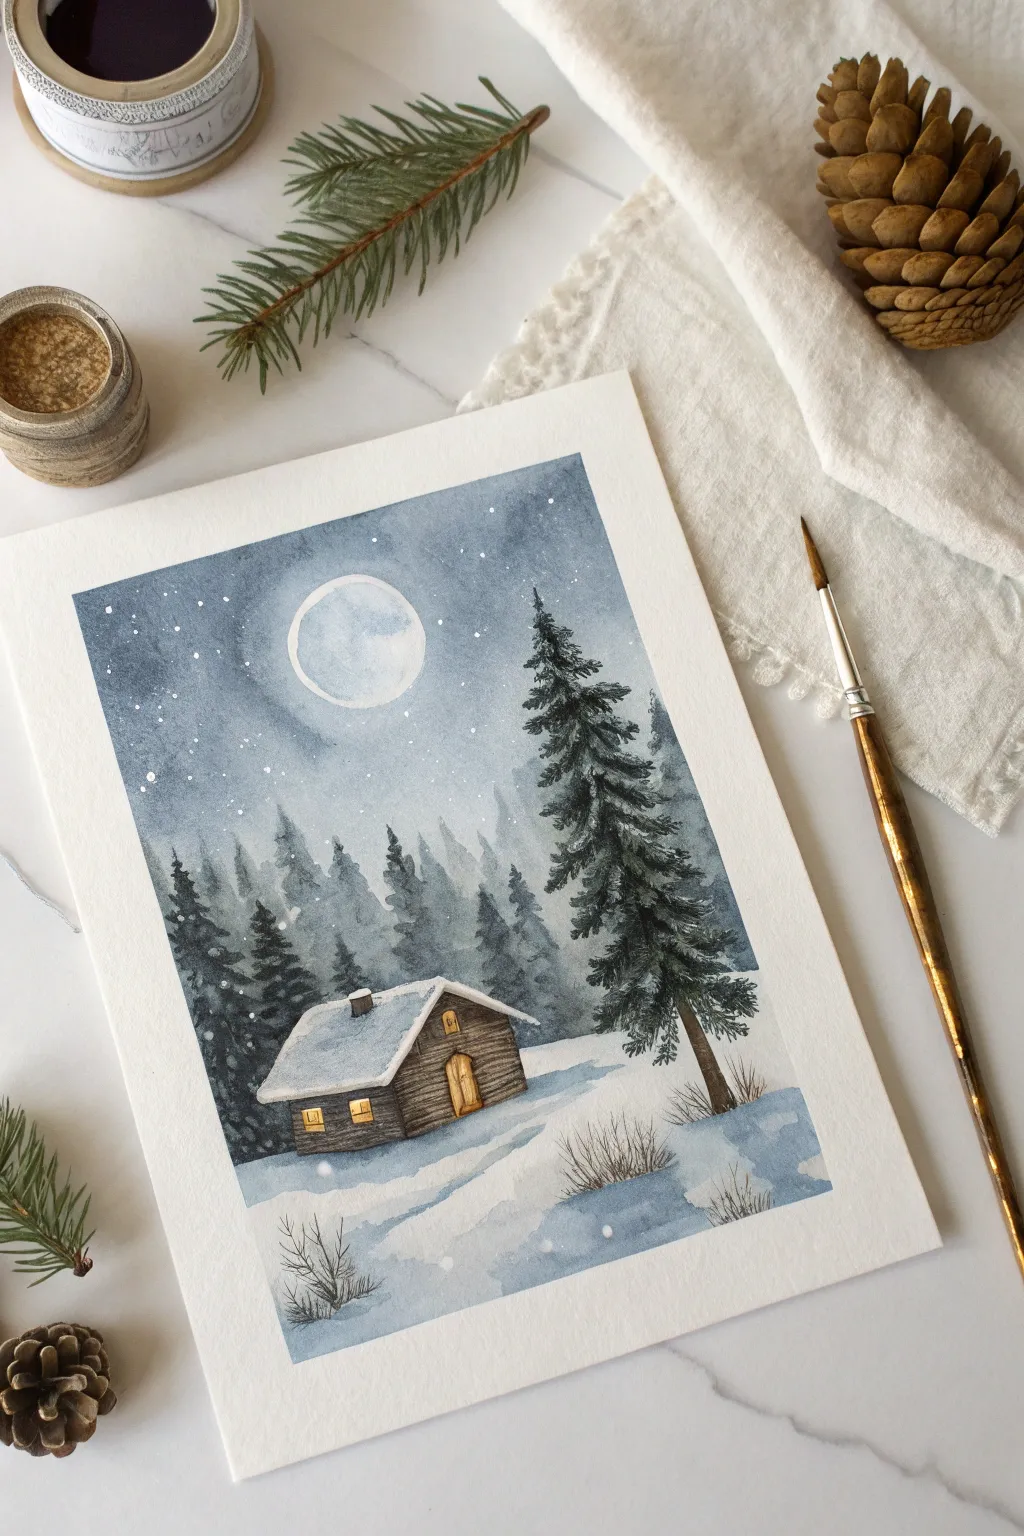
Capture the stillness of a winter night with this serene watercolor project that balances cool indigo tones with the warmth of metallic accents. The contrast between the misty forest background and the crisp, gold-leafed cabin windows creates a truly magical holiday scene.
Step-by-Step Guide
Materials
- Cold press watercolor paper (300 gsm)
- Watercolor paints: Indigo, Payne’s Grey, Sepia, Burnt Umber
- Metallic gold watercolor paint or liquid gold leaf
- White gouache
- Round brushes (sizes 2, 6, and 10)
- Rigger brush or fine liner
- Painter’s tape and mixing palette
- Two jars of water
Step 1: Setting the Scene
-
Prepare the canvas:
Secure your watercolor paper to a board using painter’s tape on all four sides. This creates a clean border and prevents buckling when we apply heavy washes. -
Sketch the layout:
Using a hard pencil (like an HB), lightly sketch the outline of the cabin, the horizon line, and the circle for the moon. Keep the lines very faint so they disappear under the paint.
Pro Tip: Glowing Moon
To make the moon really shine, stroke a damp, clean brush gently around the outer edge of the moon circle after the sky is dry to lift a tiny bit of pigment, creating a soft halo effect.
Step 2: The Sky and Distance
-
Paint the night sky:
Wet the sky area with clean water, avoiding the moon circle. Drop in a mix of Indigo and Payne’s Grey, keeping the color darkest at the top and fading slightly as you approach the horizon. -
Create the moon:
While the sky is drying, paint the interior of the moon with a very diluted, watery grey wash. Leave a thin dry sliver of white paper on the right side to suggest a crater highlight. -
Starry details:
I like to do this step before painting trees so the stars appear behind them. Load a small brush with white gouache and tap the handle against another brush to splatter tiny stars across the dry sky. -
Misty background trees:
Mix a watery, pale grey-blue. Paint the silhouette of distant pine trees along the horizon line. These should be soft and lack detail to create atmospheric depth. -
Adding depth:
Once the first layer of trees is dry, paint a second row of slightly darker, more defined trees in front of them to build up the forest density.
Step 3: The Foreground
-
Paint the large pine:
Mix a saturated, dark Indigo with a touch of Sepia. Using a size 6 brush, paint the large pine tree on the right, starting with the tip and using a zigzag motion to create downward-sloping branches. -
Texture the branches:
Allow the brush to run slightly dry near the tips of the branches to create a rough, needle-like texture. Repeat this process for the darker cluster of trees on the left side. -
Cabin siding:
Using Burnt Umber or Sepia, paint the wooden walls of the cabin using horizontal strokes. Leave the windows and door completely unpainted (white) for now. -
Roof shadows:
Leave the roof mostly white to represent snow. Mix a faint blue-grey and paint a shadow line underneath the eaves and along the right edge of the roof for dimension. -
Chimney details:
Paint the small chimney rectangle, adding a tiny highlight of white gouache on top to mimic a cap of snow.
Level Up: Real Gold Leaf
Instead of metallic paint, use gold leaf size (glue) on the windows. Let it dry until tacky, then carefully press a sheet of real gold leaf over it for a shine that reflects light brilliantly.
Step 4: Snow and Shine
-
Snowy ground:
With a dilute blue-grey mix, paint sweeping, organic shapes on the white ground to suggest shadows in the snowdrifts and a path leading to the door. -
Winter grass:
Using a rigger brush or fine liner with Sepia paint, flick quick, thin strokes upward from the snowdrifts to create dry winter grass poking through the snow. -
The golden glow:
This is the best part: Use your metallic gold paint or liquid gold leaf to carefully fill in the window squares and the arched door. Apply it thick enough to be opaque. -
Heavy snow details:
Load a brush with thick white gouache. Dab snowy patches onto the tops of the dark pine branches and dust the tops of the dry grass tufts. -
Final touches:
Add a crisp white gouache line along the rim of the roof and a few larger, distinct snowflakes falling in the foreground to finish the piece.
Now you have a tranquil winter scene that literally glows when it catches the light.


Have a question or want to share your own experience? I'd love to hear from you in the comments below!