
When I want quick, satisfying painting inspiration, I always reach for winter watercolor—it’s the perfect mix of simple shapes and dreamy atmosphere. Here are my favorite ideas to paint everything from soft snowfall to bold, icy skies, with plenty of room to make each one your own.
Simple Snowy Landscape Wash
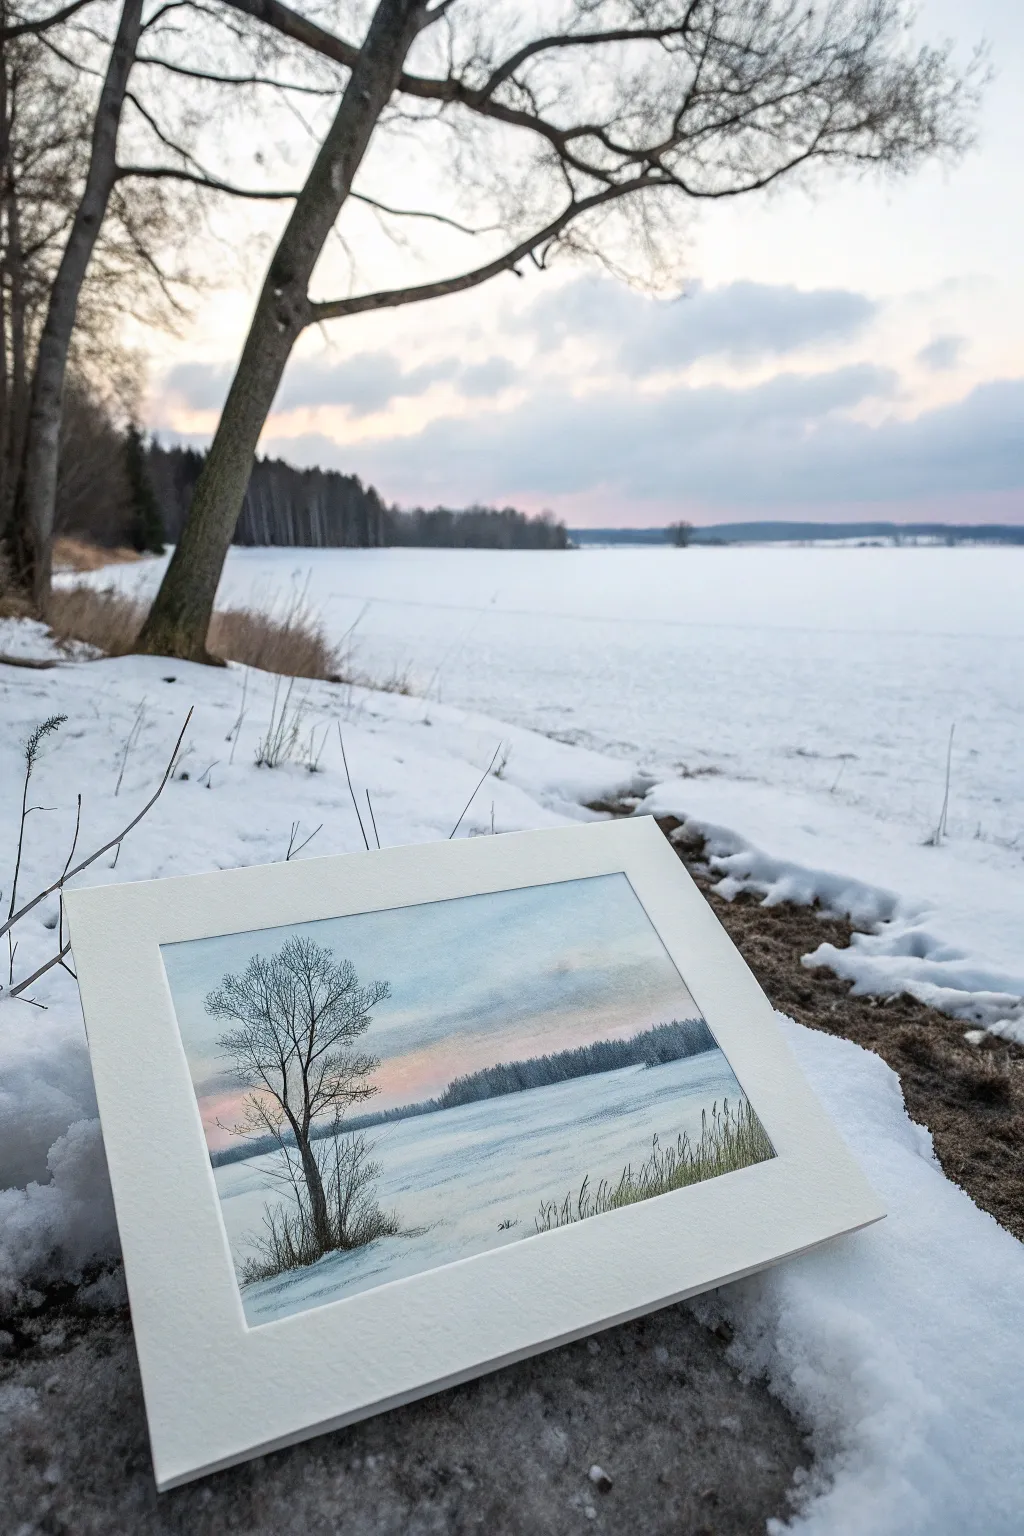
Capture the serene beauty of a frozen lake at twilight with this delicate watercolor landscape. This project focuses on soft wet-into-wet washes to create glowing skies and crisp, detailed foreground elements.
How-To Guide
Materials
- Cold Press watercolor paper (140lb/300gsm)
- Watercolor paints (Cerulean Blue, Cobalt Blue, Rose Madder or Alizarin Crimson, Burnt Sienna, Payne’s Grey, Yellow Ochre)
- Masking fluid (optional)
- Large flat brush or mop brush
- Round brushes (size 6 and size 0 or 2 for details)
- White gouache
- Pencil and kneaded eraser
- Two jars of water
- Paper towels
- Painting board and tape
Step 1: Preparation and Sky Wash
-
Sketch the horizon:
Begin by lightly taping down your watercolor paper to a board to prevent buckling. With a pencil, very faintly sketch your horizon line about one-third of the way up the paper. Add a light suggestion of where the main foreground tree will stand on the left. -
Wet the sky area:
Using your large clean brush, apply a generous coat of clean water to the entire sky area, stopping just short of the horizon line to keep a crisp edge. -
Paint the upper sky:
Load your brush with a watery mix of Cerulean Blue. Start at the very top edge and paint horizontally, letting the color fade naturally as you move downward toward the middle of the sky. -
Add the sunset glow:
While the paper is still damp, rinse your brush and pick up a pale, watery mix of Rose Madder or Alizarin Crimson. details Gently brush this into the lower third of the sky, allowing it to meet and softly blend with the blue without turning purple. -
Soften the horizon:
Add a tiny touch of Yellow Ochre right near the horizon line for warmth. Let the sky layer dry completely before moving on.
Muddy Sky Fix
If your pink and blue mix into a muddy purple, let it dry completely. Then, gently lift the muddy area with a damp sponge and re-apply pure color once dry.
Step 2: Snowy Ground and Tree Line
-
Establish the snow:
The snowy ground isn’t pure white; it reflects the sky. Wet the bottom section of the paper and drop in extremely pale washes of blue and cool violet. Leave patches of dry white paper to represent the brightest snow highlights. -
Create distant texture:
While the snow wash is damp, use a slightly stronger mix of Cobalt Blue to add horizontal streaks across the lake surface, suggesting shadows on the ice. -
Paint the distant forest:
Once the sky and ground are dry, mix Payne’s Grey with a touch of Cobalt Blue. Using a size 6 round brush, paint the distant tree line along the horizon. Keep the top edge ragged to suggest tree tops and the bottom edge flat. -
Fade the distance:
I like to take a clean, slightly damp brush and run it along the bottom edge of that distant tree line to soften it, making it look like it’s receding into the snowy mist.
Sparkling Snow
Sprinkle a pinch of table salt onto the wet snow wash in the foreground. Once dry, brush it off to create crystal-like ice textures on the paper.
Step 3: Foreground Details
-
Mix the tree color:
For the foreground tree, you need a strong, dark color. Mix Burnt Sienna with Payne’s Grey to create a deep, near-black brown. The paint consistency should be like light cream. -
Paint the main trunk:
Using your size 6 brush, paint the main trunk of the tree on the left. Start from the bottom and pull upward, lifting pressure as you go to taper the trunk. -
Add main branches:
Switch to a smaller round brush (size 2) to pull out the main branches. Remember that branches generally grow upward and outward, getting thinner as they extend. -
Create fine twigs:
Use your smallest brush (size 0) or a rigger brush for the delicate outer twigs. Use quick, light flicks of the wrist to keep lines spontaneous and natural. -
Paint foreground grasses:
Using a dark greenish-brown mix, add tufts of grass poking through the snow in the bottom right corner and around the base of the tree. Vary the height and direction of the blades. -
Add snow texture:
Mix a small amount of white gouache with a tiny bit of water. Splatter or stipple a few flakes onto the dark tree branches to simulate frost catching the light. -
Final touches:
Stand back and assess your values. If the foreground needs more contrast, darken the base of the grasses or the shadowed side of the tree trunk with a second layer of your dark mix.
Once fully dry, remove the tape carefully to reveal perfect white borders around your chilly winter scene


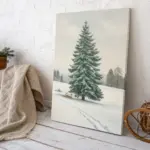
Snow-Covered Pine Forest Layers
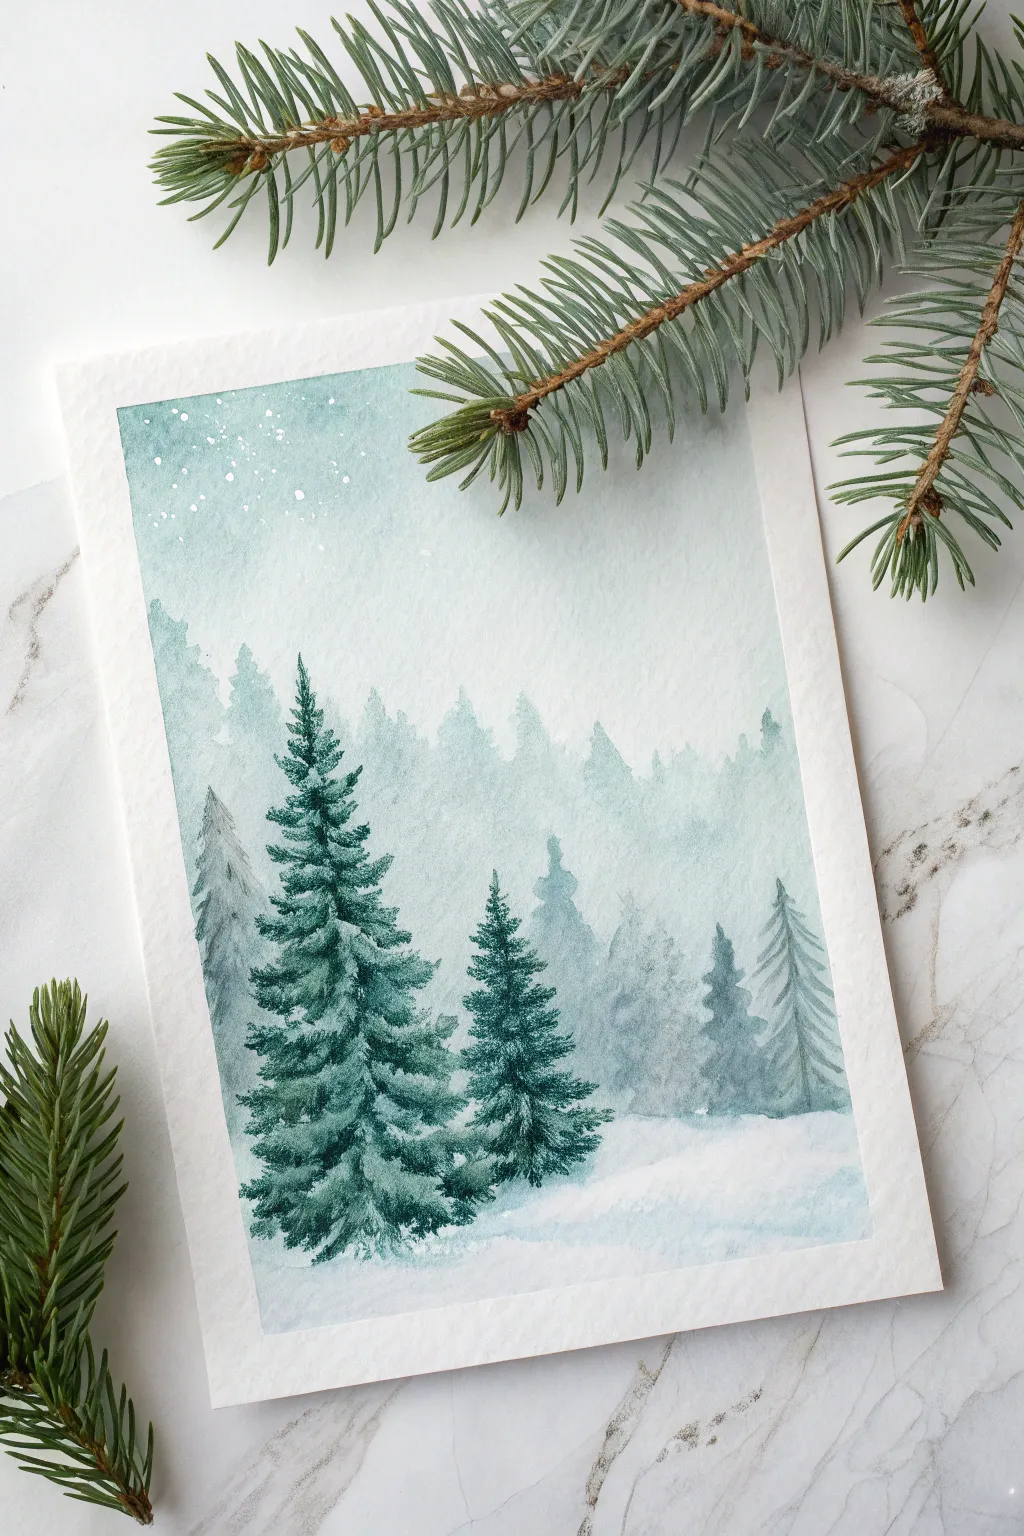
This serene watercolor project captures the ethereal beauty of a snow-covered forest using atmospheric perspective. By layering misty, pale washes for the background and crisp, saturated details for the foreground, you’ll create a stunning sense of depth and winter calm.
Detailed Instructions
Materials
- Cold Press Watercolor Paper (140lb/300gsm), taped down
- Watercolors: Indigo, Payne’s Gray, Viridian Green, Sap Green, and White Gouache
- Round Brushes: Size 8 (for washes), Size 4 or 2 (for details)
- Clean water and mixing palette
- Paper towel or rag
- White gel pen (optional)
- Masking tape
Step 1: Setting the Atmosphere
-
Prepare the paper:
Begin by taping the edges of your watercolor paper securely to a board. This ensures clean white borders and prevents buckling when we apply the wet washes. -
Mix the sky color:
Create a very dilute wash of Indigo mixed with a touch of Viridian. The mixture should be 90% water to create a barely-there, icy teal blue. -
Paint the gradient sky:
Wet the upper two-thirds of the paper with clean water. Apply your pale blue mix at the top, allowing it to fade naturally into white as you pull the color downwards towards the horizon line. -
Add gentle splatter:
While the sky is still damp, load a small brush with clean water or slightly more concentrated white gouache and tap it against another brush handle to create soft, diffused blooms that mimic falling snow.
Muddy colors?
If your tree layers are blending into one big blob, you likely didn’t let the paper dry fully between layers. Use a hairdryer on low heat to speed up the process.
Step 2: The Distant Forest
-
Mix a ghost color:
Combine Payne’s Gray and a tiny hint of your green to create a very pale, muted tone. This will be for the furthest treeline. -
Paint the first layer:
Using the size 8 brush, paint a jagged silhouette of treetops about halfway down the paper. Keep this layer exceedingly pale and wet; use just enough pigment to distinguish the shapes from the sky. -
Enhance the mist:
Before the first tree shapes dry completely, gently run a clean, damp brush along their bottom edge to blur them into the white paper below, creating a foggy effect. -
Dry completely:
Let this layer dry fully. If the paper is cool to the touch, it’s still wet. This pause is crucial to prevent the layers from bleeding together.
Add some sparkle
Once the painting is 100% dry, add tiny dots of silver iridescent watercolor medium or glitter glue to the snow on the branches for a magical frost effect.
Step 3: Building the Middle Ground
-
Darken the mix:
Add a bit more Payne’s Gray and Viridian to your previous mix. The value should be slightly darker than the ghost trees but still transparent. -
Add the second range:
Paint a second row of trees lower down, overlapping the faint background trees. Focus on simple, triangular shapes without much internal detail. -
Define secondary shapes:
While moist, drop a slightly darker value into the tips of these trees to add subtle volume, then blur the bottoms out into the snow line again. -
Second drying phase:
Allow this middle layer to dry entirely. I find patience here really pays off for achieving that crisp layered look.
Step 4: The Focal Trees
-
Mix deep evergreen:
Create a rich, saturated mixture using Indigo, Sap Green, and Payne’s Gray. This should be a creamy consistency, not watery. -
Start the main tree:
Using your size 4 or 2 brush, paint the large pine on the left. Start with a thin vertical line for the trunk guide, then use short, downward-flicking strokes to create branches. -
Detail the branches:
Work your way down the tree, making the branches wider at the bottom. Leave small white gaps between branches to represent snow resting on the boughs. -
Add the companion tree:
Paint the slightly smaller pine to the right using the same technique and dark mixture. Ensure its base sits slightly higher or lower than the first tree to keep the composition dynamic. -
Ground the trees:
Use a diluted version of the evergreen mix to paint soft shadows underneath the trees, pulling the color horizontally to suggest uneven snowy terrain.
Step 5: Snowy Highlights
-
Prepare white gouache:
Squeeze out a small amount of white gouache. It needs to be thick enough to cover the dark green paint. -
Apply snow caps:
Using your smallest brush, carefully dab thick white gouache onto the tops of the dark branches on your foreground trees. -
Final snow splatter:
Dip an old toothbrush or stiff brush into watery white gouache and flick a fine mist of snow over the entire painting, focusing on the dark trees for contrast.
Peel off the tape carefully to reveal those crisp edges and enjoy your serene winter landscape


Cozy Cabin With Warm Windows
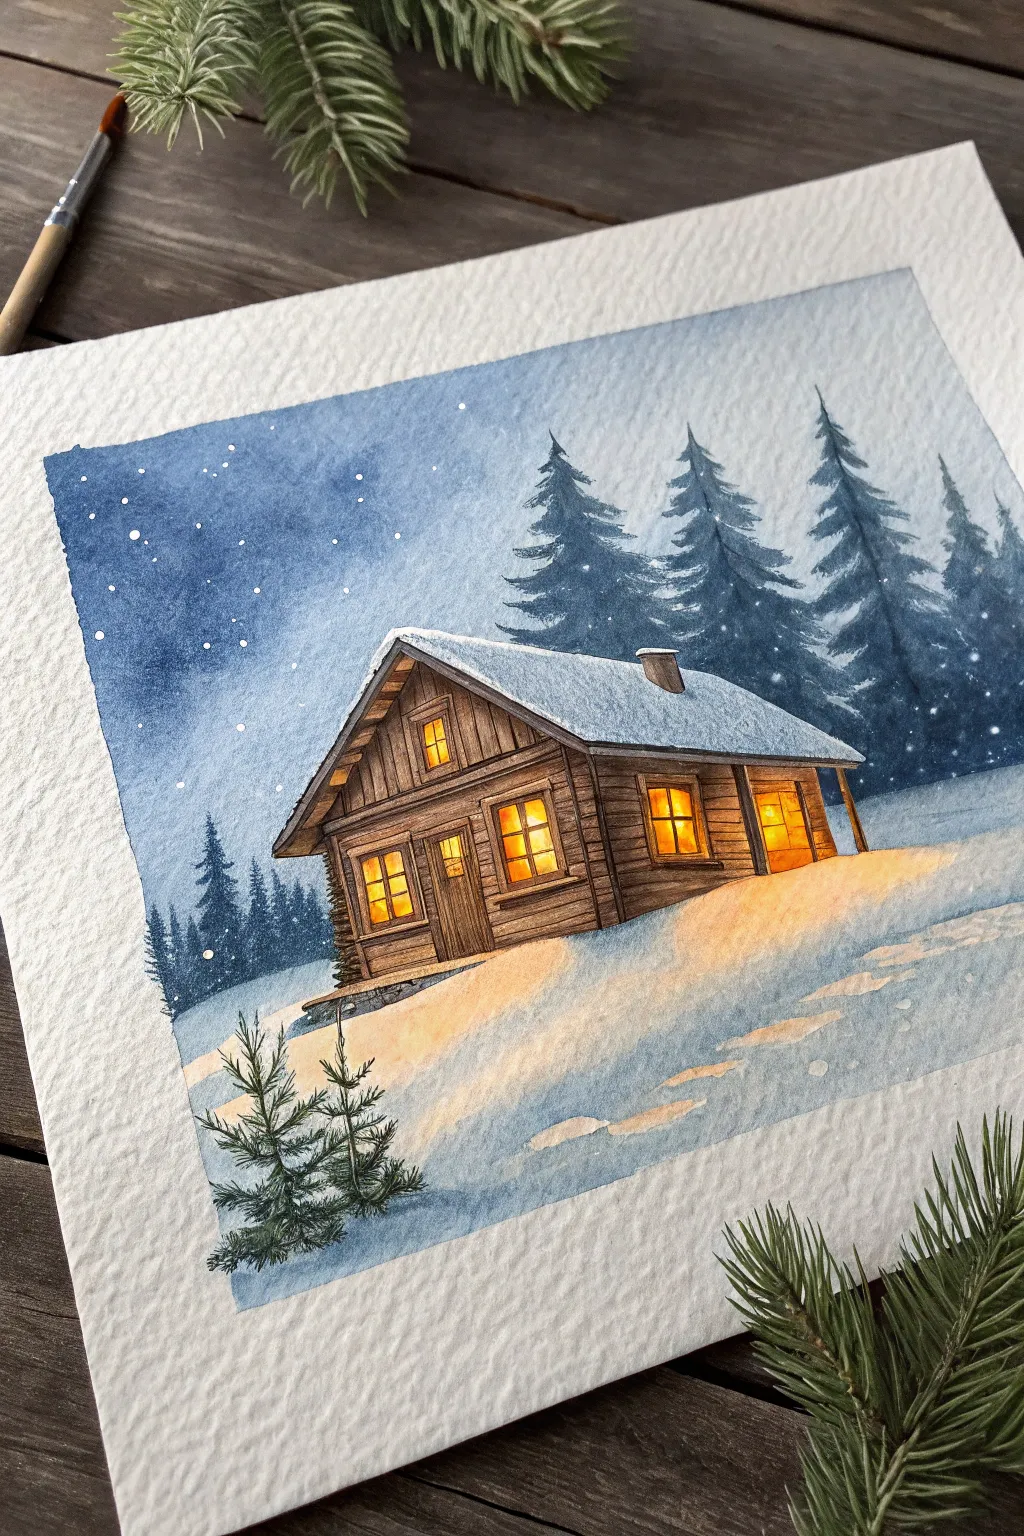
Capture the magic of a silent winter night with this watercolor painting of a rustic wooden cabin glowing warmly against the snow. You’ll learn how to balance cool blues with warm yellows to create an inviting contrast that practically radiates heat from the windows.
Step-by-Step Guide
Materials
- Cold press watercolor paper (300gsm)
- Watercolor paints (Indigo, Payne’s Gray, Burnt Umber, Yellow Ochre, Cadmium Orange, White Gouache)
- Round brushes (sizes 2, 6, and 10)
- Masking tape
- Pencil (HB) and eraser
- Two water jars
- Paper towels
Step 1: Sketching and Preparation
-
Tape the edges:
Begin by taping down all four edges of your paper to a sturdy board. This creates the crisp white border seen in the example and prevents the paper from buckling under heavy washes. -
Draw the cabin:
Lightly sketch the cabin’s outline using an HB pencil. Focus on the main shapes: the slanted roof covered in snow, the rectangular walls, and the chimney. Don’t press too hard, as you want the graphite to disappear under the paint. -
Add details:
Sketch the window panes, the door, and the wooden plank texture on the walls. Lightly mark the horizon line where the snow meets the sky and indicate the position of the background trees.
Window Contrast Tip
Make the window frames and mullions extremely dark brown or black. This high contrast against the bright yellow paint makes the ‘light’ look significantly brighter and more realistic.
Step 2: The Wintry Background
-
Sky wash:
Wet the sky area above the cabin and trees with clean water. Load your size 10 brush with a mix of Indigo and a touch of Payne’s Gray. Start at the top left corner with concentrated pigment and let it fade slightly as you move down and to the right. -
Create falling snow:
While the sky is still slightly damp but losing its sheen, splatter a tiny amount of clean water to create soft blooms. For distinct stars or snow, wait until it’s fully dry and splatter white gouache. -
Background trees:
Using a size 6 brush and a diluted mix of Indigo and Payne’s Gray, paint the distant pine trees wet-on-dry. Keep the edges soft to push them into the background. Let the shapes be loose and slightly transparent. -
Mid-ground trees:
Once the first layer of trees is dry, mix a slightly darker, more saturated blue-gray. Paint the trees closer to the cabin, defining their pine branches more clearly. This layering creates depth. -
Left-side pines:
Add the smaller, faint tree silhouettes on the far left horizon using a very watery blue-gray mix to show atmospheric perspective.
Magic Snow Effect
Sprinkle a pinch of table salt onto the wet sky wash. As it dries, the salt pushes the pigment away, creating beautiful, crystalline textures that look exactly like frosty snowflakes.
Step 3: The Warm Cabin
-
Window glow:
This is the most crucial step for the ‘cozy’ effect. Use clean water to wet the window squares. Drop in bright Yellow Ochre, concentrating the pigment in the center. While wet, touch the edges with a bit of Cadmium Orange to create a glowing gradient. -
Base wood tone:
Paint the cabin’s wooden walls with a light wash of Burnt Umber. Be careful to paint around the glowing windows, leaving a tiny crisp edge to separate the frame from the light. -
Building texture:
Once the base wash is dry, switch to a size 2 brush. Mix a darker brown using Burnt Umber and a touch of Payne’s Gray. Paint thin horizontal lines to represent the logs or planks, varying the pressure to create a natural wood grain look. -
Deepen shadows:
Add darkness under the roof eaves and in the corners of the cabin to anchor it. Contrast is key here; the darker the wood near the windows, the brighter the light will appear. -
Roof base:
Paint the snow on the roof with a very pale wash of Indigo, leaving plenty of white paper for the brightest snow highlights. Add a slightly darker blue shadow along the bottom edge where the snow is thickest.
Step 4: Foreground and Final Touches
-
Snow shadows:
The snow on the ground isn’t just white; it refects the sky and the warm light. Paint broad, sweeping shadows in the foreground using a diluted Indigo mix. Leave white channels to suggest uneven terrain or paths. -
Warm reflections:
While the snow wash is wet, gently drop in a very diluted orange/yellow mix right in front of the cabin. This mimics the warm light spilling out onto the snow. -
Foreground saplings:
Using your smallest brush and a dark green-black mix, paint the tiny pine saplings in the bottom left corner. Use quick, upward strokes for the needles. -
Chimney smoke and stars:
Add final details: splatter white gouache over the sky and roof for fresh snow. Use a tiny touch of white gouache or a gel pen to highlight the window frames if they got lost. -
Reveal:
Wait until the paper is completely bone-dry. Gently peel away the masking tape at a low angle to reveal your crisp, professional border.
Now you have a serene winter scene that captures the perfect feeling of coming home from the cold


Aurora Over A Snowfield
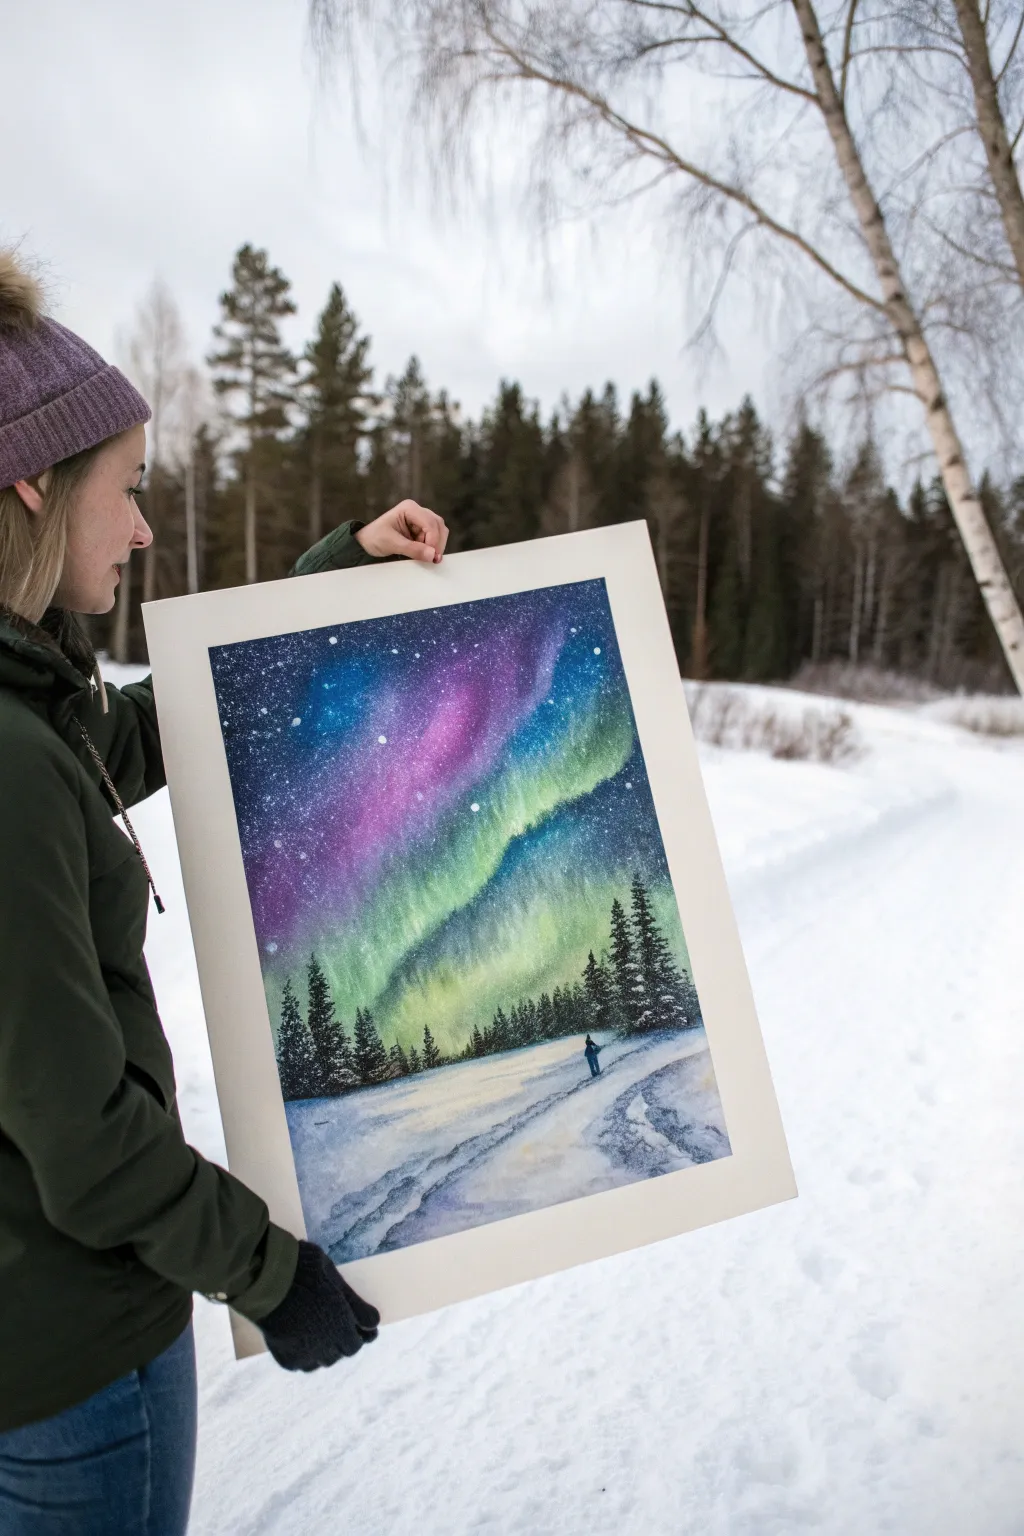
Capture the breathtaking magic of an Arctic night with this vibrant watercolor project that contrasts the luminous dance of the aurora against a still, snowy forest. You’ll learn how to blend intense pigments for the sky while preserving the soft, pristine white of the snowfield below.
Step-by-Step
Materials
- High-quality watercolor paper (cold press, at least 300 gsm)
- Painter’s tape or masking tape
- Watercolor paints (Indigo, Phthalo Blue, Dioxazine Purple, Magenta, Viridian Green, Lemon Yellow)
- White gouache or white ink
- Large flat wash brush
- Round brushes (sizes 6 and 2)
- Fine liner brush
- Old toothbrush (for spatter)
- Clean water jars
- Paper towels
Step 1: Setting the Scene
-
Tape it down:
Secure your paper to a flat, movable board using painter’s tape on all four sides. This prevents buckling when we apply heavy washes and gives you that crisp, clean border seen in the photo. -
Light sketch:
Using a faint H pencil, lightly sketch the horizon line about a third of the way up the paper. It shouldn’t be perfectly straight; simulate uneven snowy ground sloping slightly downward from right to left. -
Masking snow:
Since watercolors are transparent, the white paper is your light. Ensure the entire area below your horizon line stays strictly clean for now. You won’t be painting any dark colors there yet.
Step 2: The Aurora Sky
-
Pre-wetting the sky:
Using your large flat brush, apply clean water to the entire sky area above the horizon line. The paper should be glisten, but not hold standing puddles. -
Laying the lights:
Start with your lightest colors. Drop streaks of Lemon Yellow and Viridian Green diagonally across the wet paper. Let them bleed and bloom naturally; these are the brightest parts of the northern lights. -
Adding the violet:
While the paper is still wet, introduce Magenta and Dioxazine Purple adjacent to the green streaks. Allow the purple to touch the green slightly, but be careful not to overmix, or you’ll get mud. -
Deepening the night:
Now for the drama. Load your brush with a thick mixture of Indigo and Phthalo Blue. Paint the corners and the spaces between the colored ribbons. The dark paint will push the bright colors forward, making them glow. -
Softening edges:
If hard lines form between the aurora colors and the dark sky, rinse your brush and use it slightly damp to gently feather the edges. I find lifting the board and tilting it slightly helps the colors flow organically. -
Allow to dry:
This step is crucial. Let the sky dry completely. If you touch it while damp, you’ll ruin the smooth gradients. Using a hairdryer on a low setting can speed this up.
Wet-on-Wet Magic
Work fast on the sky! The paper needs to stay wet for the colors to blend seamlessly. If it dries too fast, mist it lightly with a spray bottle.
Step 3: Stars and Trees
-
Starry spatter:
Mix white gouache with a tiny bit of water until it has a creamy consistency. Load an old toothbrush, hold it over the dry sky, and flick the bristles with your thumb to create a galaxy of stars. -
Foreground stars:
Use a small round brush to manually tap in a few larger, brighter stars in the darkest blue areas for variety. -
Tree placement:
Mix a very dark green-black using Indigo and Viridian. With a size 6 round brush, paint a vertical line for the trunk of the first tree on the horizon. -
Painting pine branches:
Using the tip of the brush, work your way down the trunk with zig-zag motions that get wider towards the bottom. Leave small gaps between branches so the trees don’t look like solid triangles. -
The tree line:
Continue painting trees of varying heights along the horizon line. Group some together and leave gaps elsewhere. Make the trees on the right side slightly taller to balance the composition.
Make it Sparkle
Sprinkle a tiny pinch of salt onto the wet sky paint before it dries. The salt pushes pigment away, creating crystalline textures that look like distant stars.
Step 4: Snowy Foreground
-
Shadows on snow:
Dilute your Indigo/Purple mix with lots of water to create a very pale, watery wash. Paint soft, curved shadows on the white snowfield, mimicing drifts and a path leading into the forest. -
Defining the path:
Add slightly darker, bluish shadows along the right side of the path to suggest foot traffic and depth. -
The solitary figure:
Once the snow is dry, use a size 2 brush and dark blue paint to add a tiny silhouette of a person standing on the path. A simple shape works best—just a body and legs to give the scene scale. -
Final reveal:
Wait until everything is bone dry. Slowly and carefully peel off the tape at a 45-degree angle to reveal those satisfying crisp white edges.
Step back and admire how the vibrant celestial colors transform the quiet winter landscape you have created
BRUSH GUIDE
The Right Brush for Every Stroke
From clean lines to bold texture — master brush choice, stroke control, and essential techniques.
Explore the Full Guide
Starry Winter Night And Snow Splatters
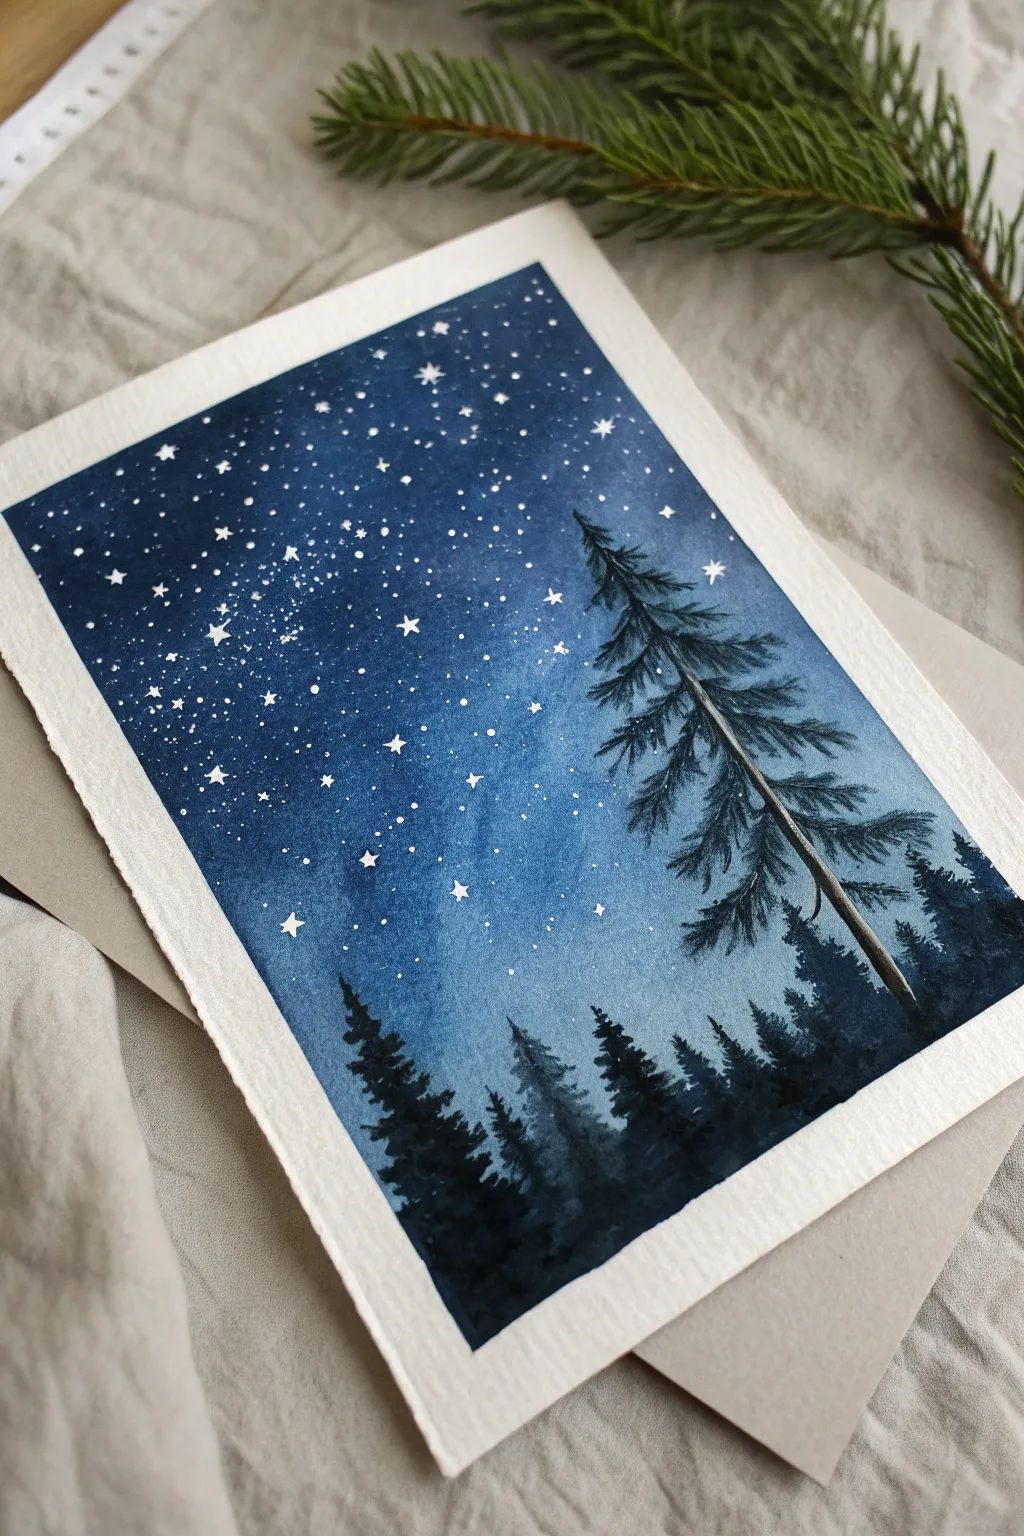
Capture the magic of a clear winter sky with this deep blue night scene featuring silhouetted pine trees. Using simple wet-on-wet techniques and masking fluid, you’ll create a glowing, atmospheric backdrop for bright, twinkling stars.
Step-by-Step Guide
Materials
- Cold press watercolor paper (300gsm/140lb)
- Watercolor paints (Indigo, Prussian Blue, Payne’s Gray, Lamp Black)
- White gouache or white ink
- Masking fluid (drawing gum)
- Round brushes (large size 10-12 for washes, small size 0-2 for details)
- Old toothbrush or stiff bristle brush
- Painter’s tape or masking tape
- Board for taping down paper
- Paper towels and two jars of water
Step 1: Preparation and The Stars
-
Tape it down:
Secure your watercolor paper to a board using painter’s tape on all four sides. Press the edges firmly to ensure a clean white border later. -
Map the big stars:
Before wetting the paper, use a fine tip dip pen or a very small brush to apply tiny dots of masking fluid where you want your brightest, most defined stars to be. Focus on the upper half of the paper. -
Create the smaller stars:
Dip an old toothbrush into the masking fluid. Hold it over the paper and run your thumb across the bristles to flick tiny speckles onto the dry paper. This creates the distant star clusters. Let this dry completely before painting.
Step 2: The Night Sky Gradient
-
Wet the paper:
Once the masking fluid is rock hard, use a large clean brush to wet the entire surface of the paper with clean water. The paper should be glisten, but not hold puddles. -
Start with the light:
Load your brush with a diluted, watery Prussian Blue. Apply this roughly in the middle-right section of the sky and near the horizon line where the trees will eventually go. This creates the ‘glow’ effect. -
Deepen the blue:
While the paper is still wet, introduce a stronger mix of Indigo and Prussian Blue. Start painting from the top edge, visualizing the darkness of space descending. -
Add intensity:
Mix Indigo with a touch of Payne’s Gray for a very dark navy. Drop this color into the top corners and edges, letting it bleed naturally into the lighter blue center. -
Create texture:
If you want a more galaxy-like texture, tilt your board slightly to let the pigments move, or dab excess water gently with a paper towel in the lighter areas to lift paint. -
Let it dry completely:
This is crucial. The paper must be bone dry before the next step. If it feels cool to the touch, it’s still damp. Using a hairdryer on a low setting can speed this up.
Starry Pro Tip
For varying star sizes, tap two brushes together over the paper rather than flicking. The distance from the paper controls the spread: closer guarantees dense clusters, higher creates scattered stars.
Step 3: The Dark Forest
-
Mix the tree color:
Prepare a saturated, dark mixture using Payne’s Gray and Lamp Black. You want this paint to be thick and creamy, not watery, to ensure opacity. -
Paint the background treeline:
Using a medium round brush, dab in ragged, uneven shapes along the bottom edge to suggest a distant forest. Vary the heights to keep it looking natural. -
Paint the tall pine:
Switch to a smaller brush (size 2 or 4). On the right side of the paper, paint a tall, slender vertical line for the trunk of the main tree. It should reach about halfway up the sky. -
Add branches:
Starting from the top of the trunk, paint downward-sloping branches. Use short, quick strokes that fan outward. The branches should get wider and heavier as you move down the trunk. -
Detail the needles:
Go back over your main branches and add tiny, flicking strokes to simulate pine needles. Don’t make the tree a perfect triangle; leave some gaps for the sky to peek through. -
Refine the forest:
Add a few mid-sized trees on the left side to balance the composition. Ensure the bottom edge is completely filled with black/dark gray to ground the scene.
Bloom Troubles?
If you get cauliflower-like edges (blooms) in your sky, you added water when the paper was drying. Fix it by gently scrubbing with a damp brush to soften the edge, or cover it with a painted constellation.
Step 4: Finishing Touches
-
Reveal the stars:
Once the paint is 100% dry, gently rub your finger or a rubber cement pickup over the masking fluid dots to remove them, revealing the crisp white paper underneath. -
Add extra sparkle:
Sometimes the masking fluid stars aren’t enough. Dip a small brush into white gouache and hand-paint a few cross-shaped stars or add a few fresh white splatters over the dark trees for depth. -
Remove the tape:
Ideally, peel the tape away from the center of the painting at a 45-degree angle to prevent tearing the paper.
Frame this serene winter night scene to bring a touch of quiet wilderness into your home
Minimal Mountains With Misty Fade
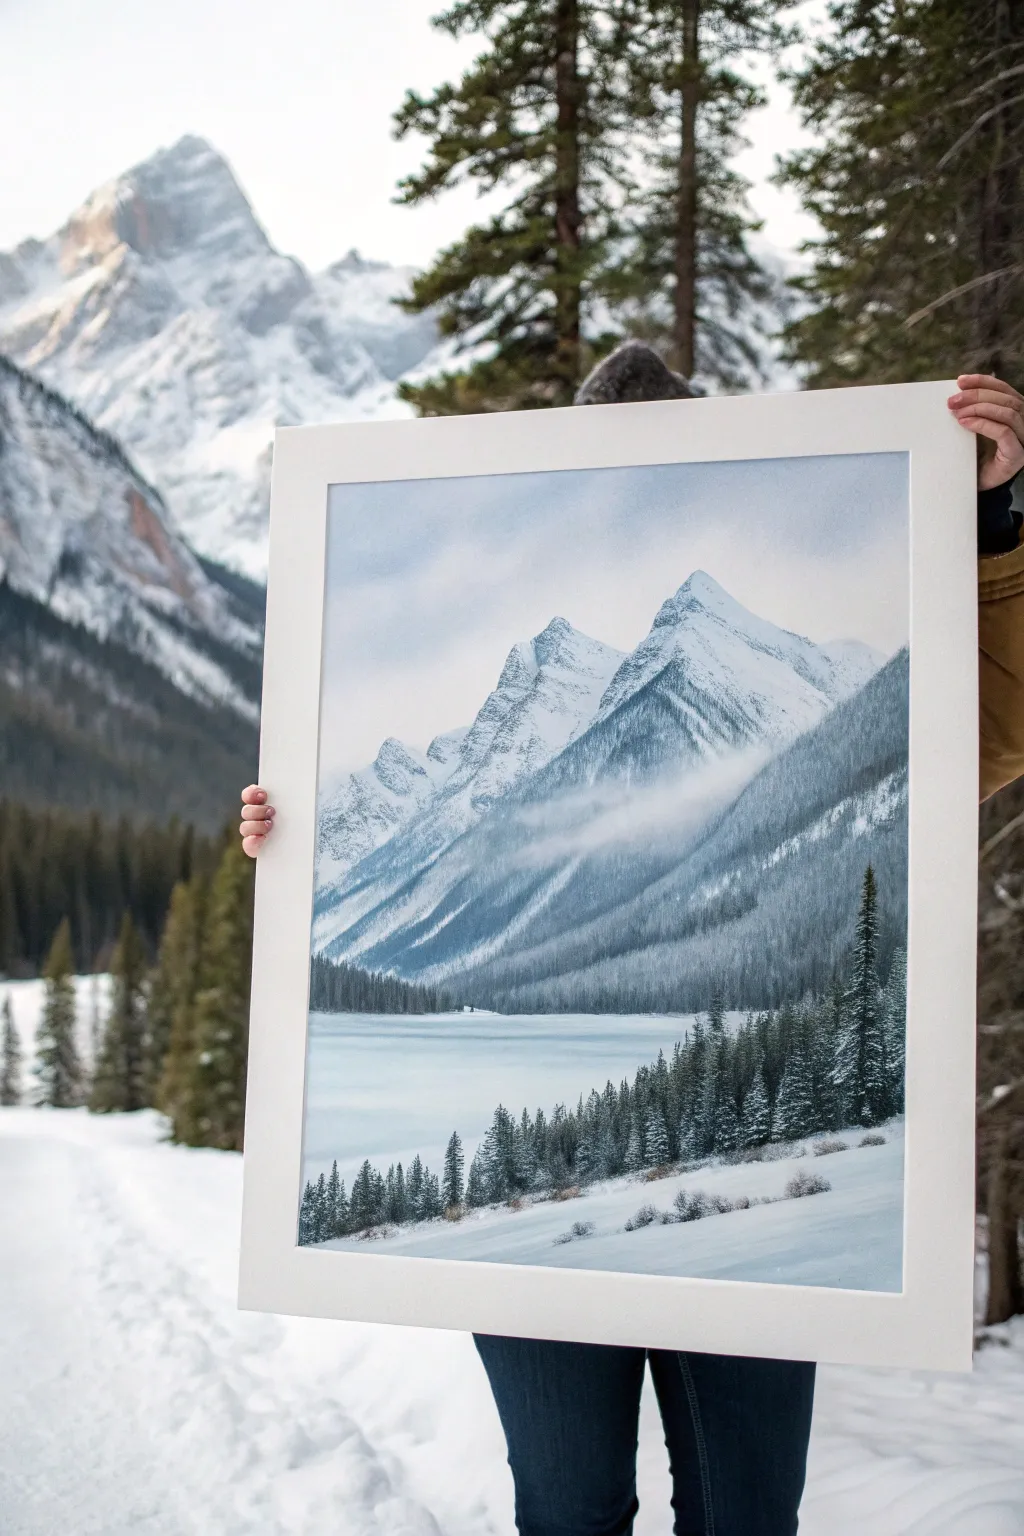
Capture the serene chill of high-altitude winter with this monochromatic landscape painting. Utilizing soft washes and sharp details, you’ll create depth that makes the mountains feel vast and the air feel crisp.
How-To Guide
Materials
- Cold press watercolor paper (140 lb or heavier)
- Watercolor paints: Indigo, Prussian Blue, Payne’s Grey, Titanium White (gouache or watercolor)
- Flat wash brush (1 inch)
- Round brushes (sizes 4 and 8)
- Detail liner brush (size 0 or 00)
- Masking tape
- Paper towels
- Two jars of water
- Pencil (HB or lighter)
Step 1: Sketch and Sky
-
Secure Your Paper:
Tape your watercolor paper down firmly to a board. This prevents buckling and leaves you with that crisp white frame later. -
Light Outline:
Using an HB pencil, very lightly sketch the main triangle shapes of the mountains. Draw a horizon line about one-third of the way up from the bottom to separate the lake from the peaks. -
Wet-on-Wet Sky:
Brush clean water across the entire sky area. While wet, drop in a very diluted wash of Prussian Blue mixed with a dot of Indigo. It should be barely there—just a hint of heavy winter atmosphere. -
Soften the Clouds:
While the sky layer is still damp, lift out a few areas with a clean, dry paper towel to create soft, diffused cloud shapes near the top left.
Muddy colors?
If your grey shadows look brown or dirty, avoid mixing complementary colors (like orange) into your blues. Stick to cool tones like Indigo + Black.
Step 2: Mountain Foundations
-
First Mountain Wash:
Mix a medium-strength Indigo. Paint the shadowed side of the mountain peaks (the right side in this reference). Use a jagged motion to mimic rough rock faces. -
Snowy Highlights:
Leave the left-facing slopes mostly white paper. If the paint spreads too much, use a damp brush to push it back, maintaining hard edges where the sun hits the snow. -
Creating Texture:
Where the rock is exposed on the peaks, use a ‘dry brush’ technique. Load your brush with thicker pigment, dab it on a towel to remove excess moisture, and drag it lightly over the paper grain. -
Mid-Ground Slopes:
As you move down the mountain, dilute your blue-grey mix. Paint the large sloping foothills that lead toward the lake. -
The Misty Fade:
This is crucial: before the mid-ground paint dries, take a clean, damp brush and blur the bottom edge completely. This ‘mist’ separates the mountains from the treeline below.
Step 3: Lake and Atmosphere
-
Frozen Lake Surface:
Once the mountains are dry, wet the lake area. Apply a horizontal wash of very pale blue-grey, lighter than the sky. Keep your brush strokes strictly horizontal to suggest flat ice. -
Adding Fog:
I like to create a diagonal band of fog cutting across the mountain base. To do this, simply lift pigment with a damp brush or apply a thin wash of white gouache if the watercolor is too dark.
Sparkle effect
Sprinkle a tiny pinch of salt onto the wet paint of the frozen lake heavily while it dries. Brush it off later to create crystal-like ice textures.
Step 4: Forest Details
-
Distant Trees:
Mix a dark, saturated Payne’s Grey. With a size 4 brush, paint the dense forest line at the very base of the mountain. These should just be vertical suggestions of trees, not detailed contents. -
Foreground Pine Outline:
Switch to your darker Indigo mix. On the bottom right and sweeping left, paint the vertical lines for the trunks of the foreground pines. Vary their heights to look natural. -
Foliage Texture:
Use the tip of a round brush to dab downward-sloping branches onto your tree trunks. Keep the tops pointy and let the bases flare out wider. -
Snow on Trees:
For the snowy look on the branches, either leave tiny gaps of white paper as you paint the green sections, or go back in with opaque white gouache after the trees are fully dry. -
Ground Shadows:
Add faint blue shadows beneath the trees on the snowy bank in the immediate foreground. Soften the edges so they blend into the snow. -
Final Touches:
Use your smallest liner brush to add tiny details—a few scraggly branches or precise rocky outcrops near the peaks. Remove the tape carefully only when the paper is 100% dry.
Step back and admire your frosty window into the mountains which brings a calm chill to any room

PENCIL GUIDE
Understanding Pencil Grades from H to B
From first sketch to finished drawing — learn pencil grades, line control, and shading techniques.
Explore the Full Guide
Birch Trees With Scraped Trunks
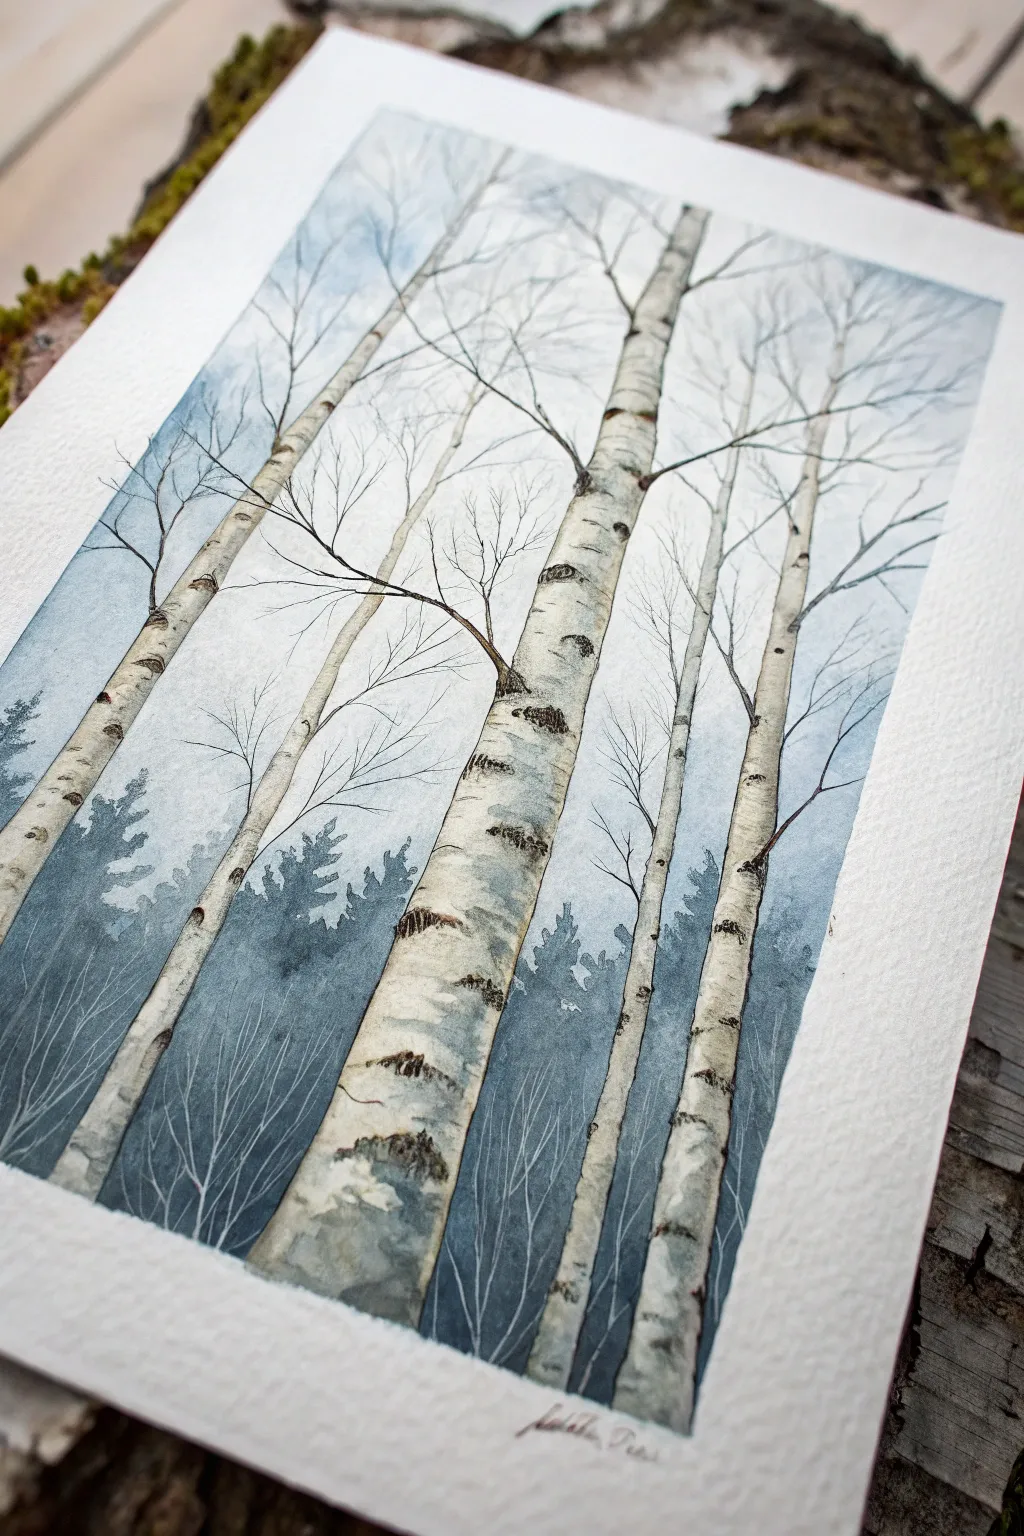
Capture the serene stillness of a winter forest with this elegant watercolor painting featuring towering birch trees against a misty background. The contrast between the pale, textured bark and the atmospheric blue-gray woods creates a stunning sense of depth and chill.
Detailed Instructions
Materials
- Cold press watercolor paper (140lb/300gsm)
- Watercolor paints (Payne’s Grey, Indigo, Burnt Umber, Sepia)
- Masking fluid (drawing gum)
- Old brush or ruling pen for masking fluid
- Large flat wash brush
- Round brushes (flats suitable too, sizes 4 and 8)
- Fine liner brush (size 0 or 00)
- White gouache or white gel pen (optional)
- Plastic card or palette knife (for scraping texture)
- Two jars of water
- Paper towels
- Masking tape
Step 1: Preparation and Masking
-
Secure the paper:
Tape down all four edges of your watercolor paper to a board. This prevents buckling when we add wet washes later and creates a crisp white border. -
Sketch the composition:
Lightly sketch the outlines of several birch trees. Vary their widths and angles slightly to make them look organic. Place one large, dominant tree in the foreground and push others further back. -
Apply masking fluid:
Using an old brush or a dedicated applicator, fill in the sketched tree trunks completely with masking fluid. This preserves the white of the paper so you can paint the background freely. -
Let it dry completely:
Allow the masking fluid to dry fully. It should feel transparent or slightly yellow and not tacky to the touch before you proceed.
Step 2: Atmospheric Background
-
Prepare the background mix:
Mix a watery wash of Payne’s Grey with a touch of Indigo. You want a cool, wintry blue-grey tone that isn’t too dark yet. -
Wet-on-wet wash:
Wet the entire paper surface over the dried masking fluid with clean water. While wet, drop in your blue-grey mix, starting darker at the bottom and letting it fade to a very pale wash near the top to simulate sky. -
Paint distant evergreens:
While the background is still damp (but not soaking), load a round brush with a thicker mix of Indigo and Payne’s Grey. Paint loose, jagged shapes along the lower third to suggest a distant tree line. -
Create soft edges:
Because the paper is damp, these evergreen shapes will bleed slightly, creating a misty, out-of-focus look typical of winter fog. -
Scratch in background brush:
Once the shine has just left the paper but it’s still cool to the touch, use a rigger brush or a sharp tool to gently scratch fine white lines into the damp dark paint at the bottom, suggesting frosted undergrowth.
Natural Looking Branches
Avoid straight lines. Hold your brush loosely near the end of the handle and let it ‘wiggle’ or twitch slightly as you pull it to create organic, knotty growth patterns.
Step 3: Birch Tree Details
-
Remove the mask:
Once the background is bone dry, gently rub off the masking fluid with your finger or a rubber cement pickup tool to reveal the stark white paper trunks. -
Add bark shading:
Mix a very watery grey. Paint a vertical strip along the right side of each trunk to give them rounded volume, softening the inner edge with clean water. -
Create bark markings:
Using a small brush and a concentrated mix of Sepia and Payne’s Grey (almost black), paint horizontal dashes and curved ‘eye’ shapes up the trunks. I find varying the pressure creates more natural, rugged textures. -
Texture scrape technique:
For extra realism, while a patch of dark bark paint is wet, lightly scrape across it with the edge of a plastic card to smear the pigment slightly, mimicking peeling birch bark. -
Paint the main branches:
Switch to your fine liner brush. Using the dark brown-black mix, pull uneven, twitchy lines extending from the trunks. Remember that birch branches often angle upward. -
Add fine twigs:
Continue dividing the branches into thinner and thinner twigs. Use a light touch and let lines break occasionally. -
Refine the base:
At the very bottom of the trunks, dampen the paint slightly to blend them into the snowy ground, perhaps adding a touch of white gouache if you need to re-establish snow over the dark background.
Torn Paper Fix
If masking fluid tears your paper upon removal, the paper was likely too soft or the fluid stayed on too long. Next time, remove it within 24 hours and try a harder sized paper.
Step 4: Final Touches
-
Enhance contrast:
Step back and look at the painting. If the trees look too flat, add darker darks to the bark markings on the foreground tree. -
Remove tape:
Carefully peel away the masking tape at a 45-degree angle to reveal your crisp edges.
Frame this piece behind glass to highlight the delicate interplay between the stark trees and the misty winter atmosphere
Evergreen Winter Wreath Study
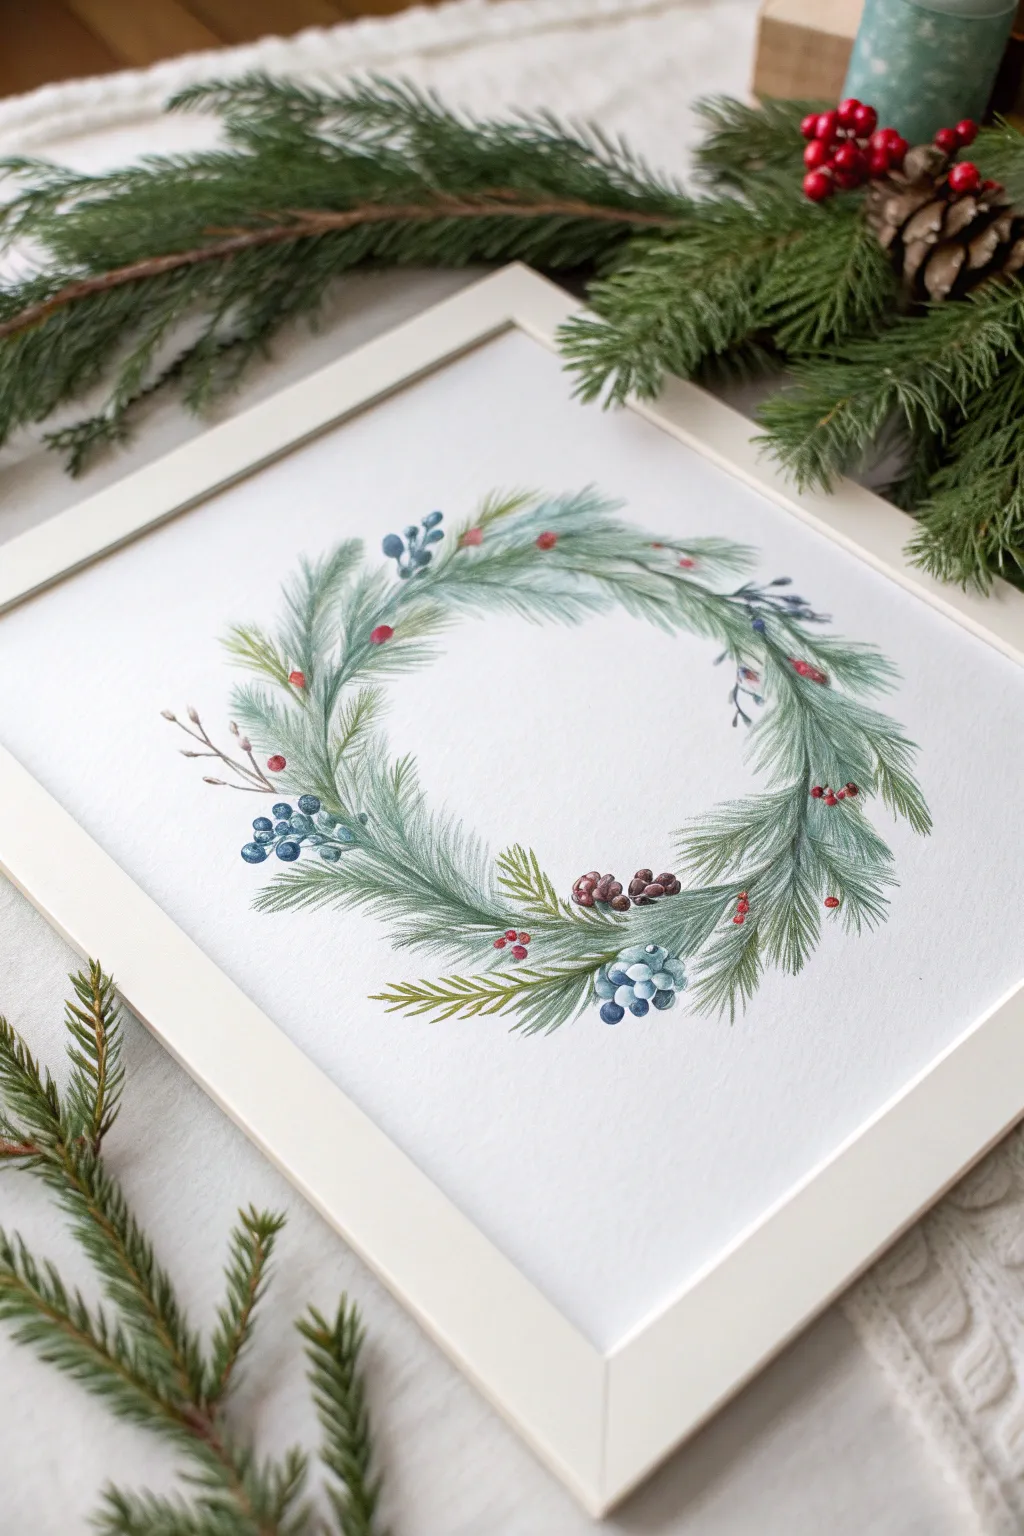
Capture the stillness of the season with this delicate watercolor study of mixed evergreens. This project combines loose, feathery pine needles with crisp berries to create a perfectly balanced winter composition.
How-To Guide
Materials
- Cold press watercolor paper (140lb/300gsm, white)
- Pencil (HB or H) for light sketching
- Kneaded eraser
- Round watercolor brushes (Size 2 and 6)
- Fine liner brush (Size 0 or 00)
- Watercolor paints: Sap Green, Hooker’s Green, Perylene Green, Indigo, Alizarin Crimson, Burnt Sienna, Burnt Umber
- Palette for mixing
- Two jars of water
- Paper towels
Step 1: Sketching the Framework
-
Establish the circle:
Begin by lightly tracing a circle on your paper to serve as a guide. You can use a bowl or a compass, but keep the pencil line extremely faint so it won’t show through the transparent watercolors later. -
Plan the flow:
Lightly sketch the main directional flow of the branches. Instead of a stiff circle, draw short, curved lines that overlap and follow a clockwise or counter-clockwise motion to give the wreath movement. -
Mark focal points:
Sketch small circles where clusters of berries or cones will sit. This helps you avoid painting greenery over these areas, keeping the paper white for bright colors later.
Step 2: Layering the Greens
-
Mix your base greens:
Prepare three puddles of green: a light, yellow-leaning Sap Green; a medium cool Hooker’s Green; and a deep, shadowy Perylene Green. Keep them quite watery at first. -
Paint fir branches:
Using the size 6 round brush, paint the fir sprigs. Start with a thin stem in brown or dark green, then use short, quick strokes outward to create soft needles. Let the ends of the strokes feather out. -
Add long pine needles:
Switch to your fine liner brush. Mix Sap Green with a touch of blue. Paint long, sweeping clusters of pine needles, flicking your wrist at the end of each stroke to get a tapered point. -
Vary the values:
drop deeper green pigment into the wet base of the needle clusters while they are still damp. This creates natural depth near the stem without hard edges. -
Include distinct foliage:
Paint a few ‘cypress’ style flat leaves using a slightly drier brush to get a bit of texture. Vary the green shades so no two neighboring branches look exactly the same.
Natural Variation
Don’t clean your palette completely between green mixes. Letting old colors muddy the new ones creates more realistic, earthy tones than fresh tube colors.
Step 3: Adding Berries and Cones
-
Paint the blue berries:
Mix Indigo with a lot of water for a powdery blue. Fill in the berry shapes, leaving a tiny spot of dry white paper on each as a highlight. -
Shadow the blue berries:
While the blue berries are still damp, touch the bottom right edge with a more concentrated Indigo mix to give them roundness and volume. -
Paint the red berries:
Use Alizarin Crimson to paint the small red berries scattered throughout. These are smaller than the blue ones. I like to keep these quite vivid to contrast the muted greens. -
Create the cones:
Mix Burnt Umber with a touch of Indigo for a dark brown. Paint the small cones using tiny, dabbed strokes that stack on top of each other like scales, leaving tiny gaps of white paper for definition.
Bleeding Colors?
If green bleeds into your berries, the greenery was too wet. Let the greens dry completely before painting adjacent berries, or leave a tiny white gap between them.
Step 4: Refining Details
-
Connect the elements:
Use a mix of Burnt Sienna and thin water to paint fine twigs connecting your berries to the main wreath structure. Don’t let them float in space. -
Deepen the shadows:
Once the first layers are totally dry, use your darkest Perylene Green to paint a few sharp, distinct needles behind the lighter ones. This adds dimension. -
Add texture to cones:
Use your finest brush and a dark mix to add tiny dots or lines on the cones to define the individual scales further. -
Review the balance:
Step back and look at the overall shape. If a section looks too thin, add a faint, watery wash of pine needles to fill the gap without making it heavy. -
Final touches:
Add a few stray twigs sticking out from the main circle to break up the perfect roundness and make it look organic and wild.
Once dry, frame your artwork to bring a permanent touch of winter calm into your home


Red-Breasted Birds On Bare Branches
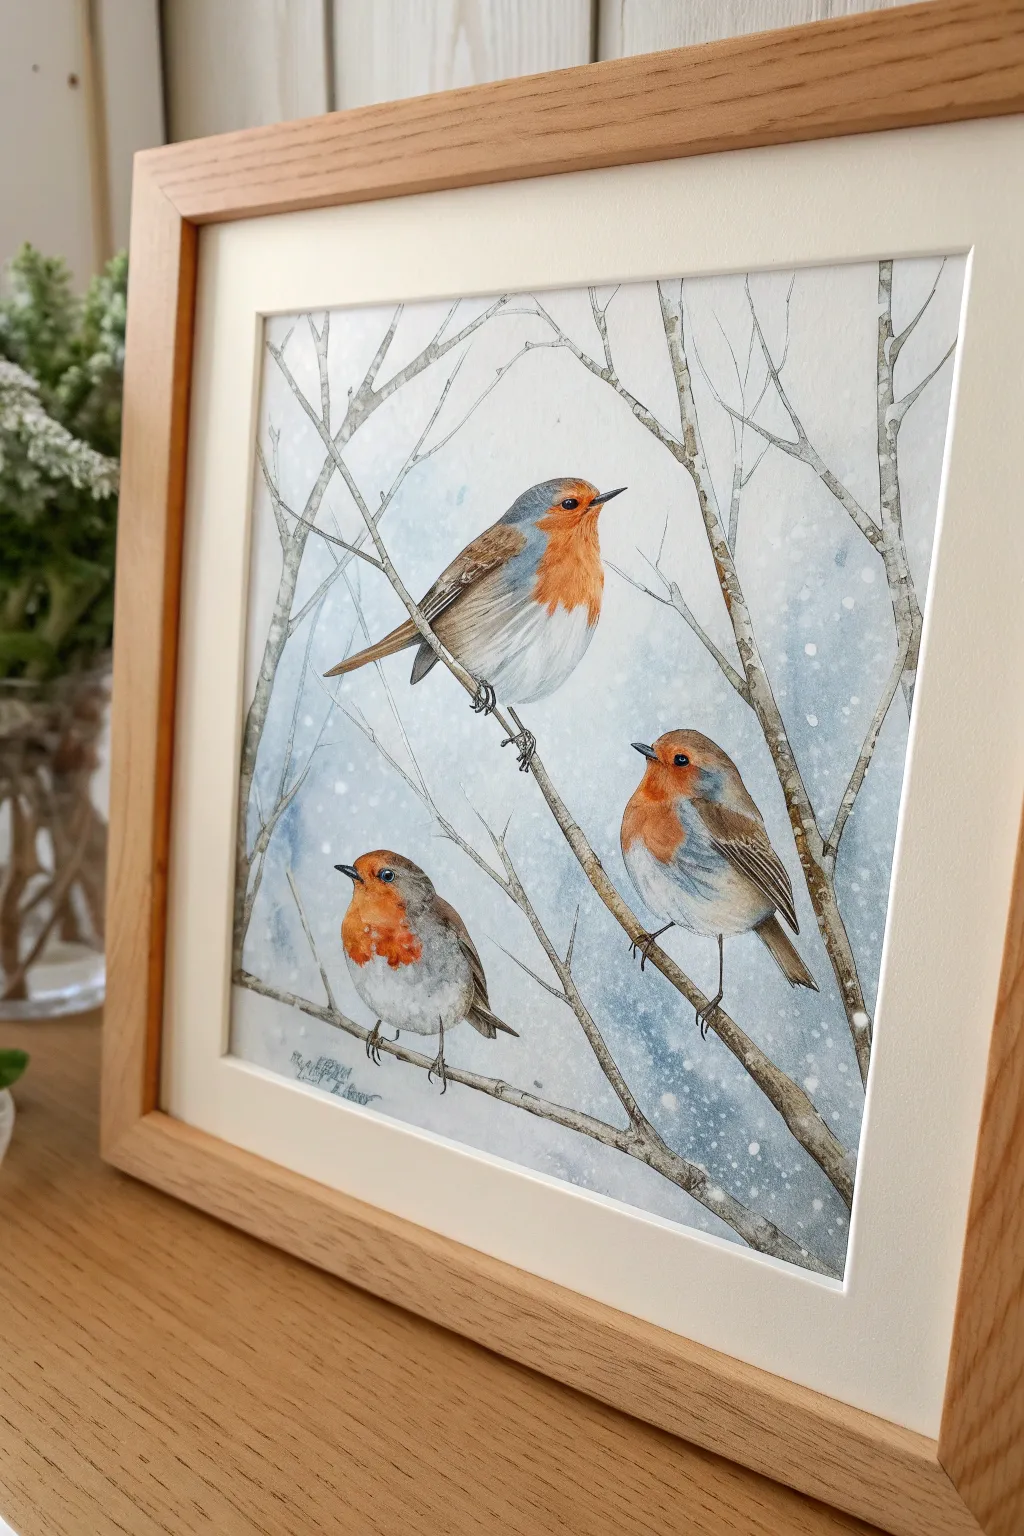
Capture the stillness of a snowy day with this delicate watercolor painting featuring three charismatic robins perched on bare branches. The composition balances the warmth of their signature red breasts against a cool, atmospheric winter background.
Step-by-Step Tutorial
Materials
- Cold press watercolor paper (300 gsm)
- Watercolor paints (Ultramarine Blue, Burnt Sienna, Cadmium Red/Orange, Payne’s Grey, Yellow Ochre)
- White gouache or white ink
- Pencil (HB or 2H) and kneaded eraser
- Masking fluid (optional)
- Round brushes: size 6 for washes, size 2 for details, size 0 for fine lines
- Palette for mixing
- Two jars of water
- Paper towels
Step 1: Sketching and Preparation
-
Map the Composition:
Begin by lightly sketching the main branches. Draw a diagonal branch structure rising from the bottom right to the top left, and another intersecting from the left. Keep lines faint to avoid showing through the final paint. -
Outline the Robins:
Place your three birds. Position the top bird facing right, the middle bird facing left, and the bottom bird facing left. Focus on their plump, rounded shapes, marking the beak, eye placement, and wing curves. -
Protect Highlights:
If you are using masking fluid, apply small dots on the paper where the falling snow will be. Also, mask a tiny glint in each bird’s eye to keep it pure white. Let this dry completely before painting.
Muddy Colors?
If your robin’s red breast looks dull, you likely mixed too much blue or green into the shadows. Keep the red pure and use a clean, damp brush to blend the edges rather than mixing a shadow color directly.
Step 2: The Atmospheric Background
-
Mix a Winter Sky Tone:
Create a dilute wash of Ultramarine Blue with a tiny touch of Payne’s Grey. You want a very pale, cool blue that suggests a overcast winter sky. -
Apply the Wash:
Using your size 6 brush, dampen the background area around the birds and branches with clean water (wet-on-wet technique). Drop in your pale blue mix, letting it bloom softly. Keep the area around the birds slightly lighter to make them pop. -
Create Depth:
While the paper is still damp, dab slightly stronger concentrations of the blue-grey mix in the corners and between branches to suggest depth and distant foliage.
Seasonal Switch
Change the season by removing the snow and painting small green buds or pink blossoms on the branches. This turns the winter scene into a spring celebration instantly without redrawing the birds.
Step 3: Bringing the Birds to Life
-
The Signature Red Breast:
Mix Cadmium Red with a touch of Burnt Sienna or Orange for a natural look. On dry paper, paint the chest area of each robin. Keep the edges soft where the red meets the white belly by using a damp, clean brush to feather the color. -
Painting the plumage:
For the wings and back, mix brown (Burnt Sienna) with a drop of blue to create a warm grey-brown. Paint the wings with directional strokes following the feathers. Leave some areas lighter to show the feather texture. -
Belly and Shadows:
The white bellies aren’t pure white; use a very watery grey wash to add roundness to the underside of the birds, blending it gently up toward the red chest. -
Facial Details:
Switch to your size 0 brush or a fine liner. Use a concentrated mix of Payne’s Grey (almost black) to paint the beaks and the dark eyes. Careful with the eyes—they bring the expression to life. -
Refining Feathers:
Once the base layers are dry, dry-brush fine lines over the wings using a darker brown to suggest individual feathers. Add small, curved strokes on the grey belly to simulate fluffiness.
Step 4: Branches and Snow
-
Base Tree Color:
Mix a neutral grey-brown using your brown and blue paints. Paint the branches with a shaky, organic hand to mimic natural bark texture. Vary the pressure to create thick and thin spots. -
Adding Bark Texture:
While the branch paint is semi-dry, drop in darker pigment on the shadowed side (usually the bottom) of the branches. Use the tip of your size 0 brush to add little knots and cracks. -
Falling Snow:
If you used masking fluid, rub it off now to reveal the white dots. If not, load a stiff brush or toothbrush with white gouache and flick it over the painting to create a splatter of snow. -
Accumulated Snow:
Using the white gouache or undiluted white ink, paint small patches of settled snow on the tops of the branches and perhaps a little dusting on the birds’ backs. -
Final Touches:
Darken the bird’s feet with the fine brush, anchoring them firmly to the branches. Ensure the tiny claws wrap convincingly around the wood.
Frame your piece in light wood to complement the natural tones of the birds and enjoy your winter scene
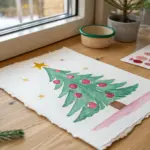
Loose Snowy Village Rooftops
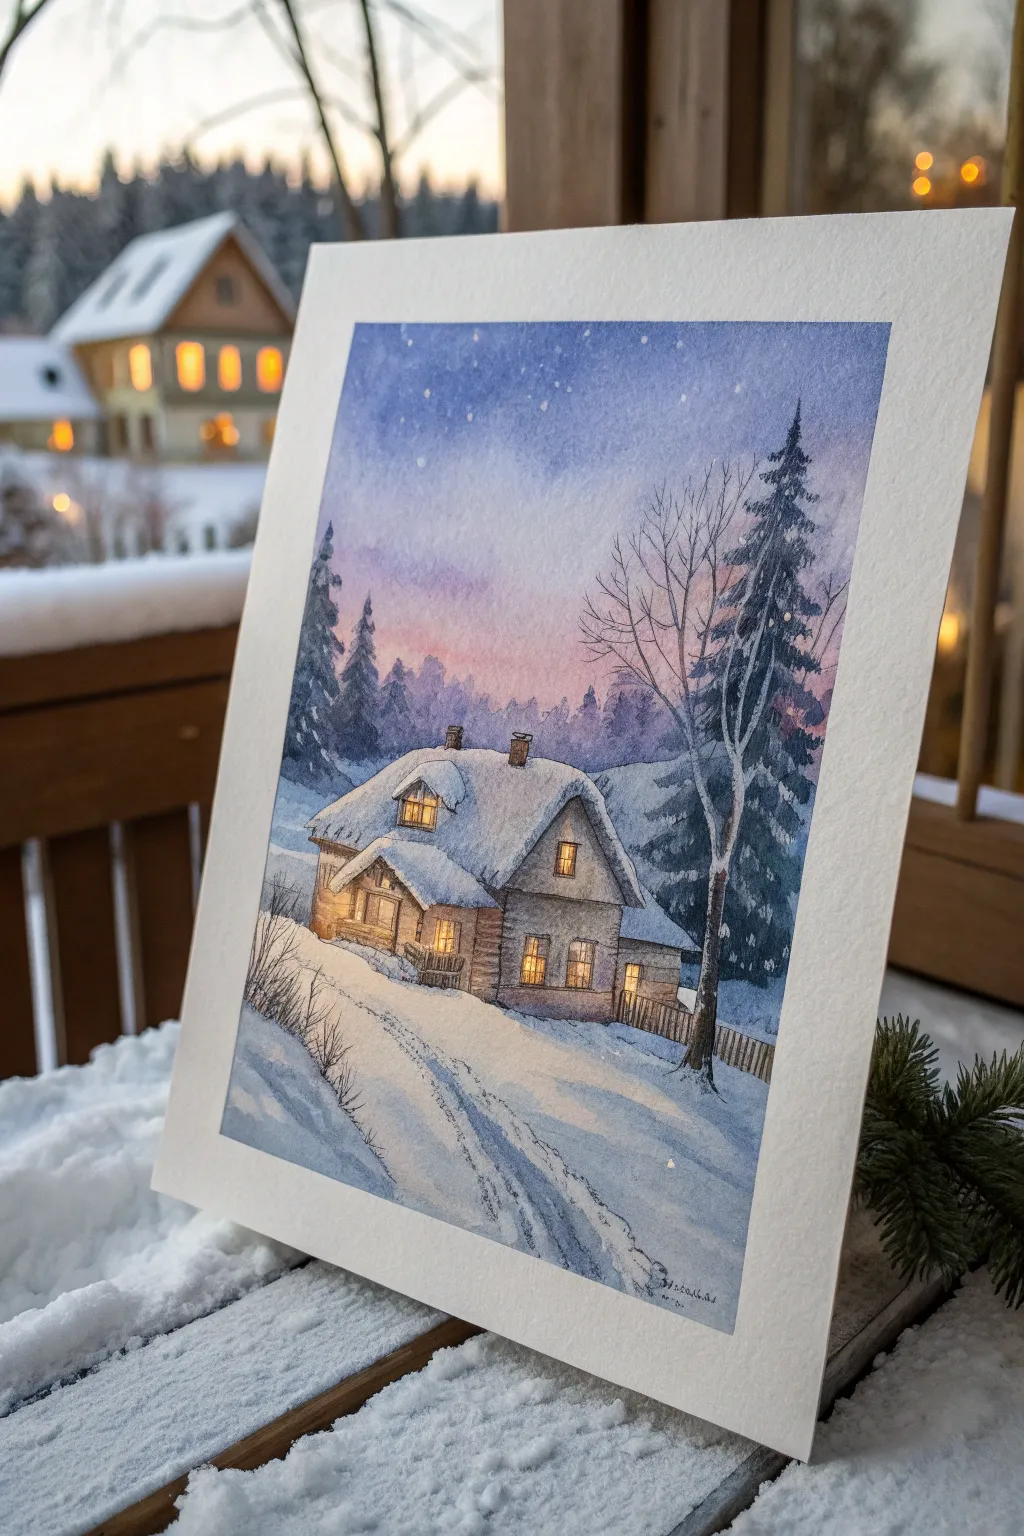
Capture the serene magic of a winter evening with this cozy watercolor scene featuring a snow-laden cabin nestled among pines. You’ll layer soft twilight gradients with crisp architectural details to create a piece that feels both chilly and inviting.
How-To Guide
Materials
- Cold press watercolor paper (300 gsm)
- Watercolor paints (Indigo, Payne’s Gray, Ultramarine Blue, Alizarin Crimson, Burnt Sienna, Yellow Ochre, Sepia)
- White gouache or white gel pen
- Round brushes (sizes 2, 6, and 10)
- High-quality rigger brush (optional but helpful for branches)
- Pencil (HB or 2B) and kneaded eraser
- Masking fluid (optional)
- Paper towels
- Two jars of water
Step 1: Basic Sketch & Masking
-
Establish the horizon:
Lightly sketch a sloping horizon line about a third of the way up from the bottom of your paper. This will be the main snowy bank leading to the house. -
Draw the cottage:
Sketch the outline of the cottage in the center. Focus on the distinct A-frame roof shapes and the heavy accumulation of snow on top. Don’t worry about tiny details yet, but get the windows and chimney in place. -
Place the trees:
Mark the positions of the tall pine trees on the right and the smaller fir trees in the background on the left. Keep these lines very faint. -
Protect the highlights:
If you are using masking fluid, apply it carefully to the snow on the roof edges and the window panes to keep them pristine white. If not, just be mindful to paint around these areas.
Glow Up
Make the windows truly shine by painting a tiny rim of orange around the edge of the yellow panes, mimicking the intensity of firelight within.
Step 2: The Twilight Sky
-
Wet the sky area:
With your large round brush, apply clean water to the entire sky area, stopping just at the roofline and tree tops. -
Apply the first wash:
Drop in a dilute mix of Alizarin Crimson and a touch of Yellow Ochre near the horizon line to create that soft pink twilight glow. -
Deepen the zenith:
While the paper is still wet, introduce Ultramarine Blue and a bit of Indigo at the very top of the sky, letting it blend downward into the pink to form a smooth purple transition. -
Add distant trees:
While the lower sky is just starting to lose its shine (damp, not soaking), use a dilute mix of Ultramarine and Alizarin Crimson to dab in the soft, blurry tree line in the background. This wet-in-wet technique pushes them into the distance.
Step 3: Cottage & Foreground
-
Paint the wooden siding:
Once the sky is dry, mix Burnt Sienna with a touch of Sepia. Paint the wooden walls of the house, leaving the window rectangles unpainted (or masked). -
Shadow the snow:
Mix a cool shadow color using Ultramarine Blue and a tiny bit of Payne’s Gray. Paint the shadowed sides of the snowy roof, keeping the top edges white to show thickness. -
Create the snowy path:
Using the same cool shadow mix but much more diluted, paint swooping strokes in the foreground to suggest tracks and uneven terrain in the snow. Leave plenty of white paper for the sunlit snow.
Level Up: Texture
Sprinkle a pinch of salt onto the wet foreground shadows. As it dries, it creates unique crystal-like blooms that look exactly like frosted ice.
Step 4: Trees & Details
-
Paint the main pine:
Mix a strong, dark green using Indigo and Sepia. Paint the large pine tree on the right. Use the tip of your brush to create jagged, downward-sloping branches that mimic heavy snow-laden boughs. -
Add the bare tree:
Using a rigger brush or a very fine round brush with a mix of Sepia and Payne’s Gray, carefully draw the delicate, bare deciduous tree intertwined with the pine. -
Paint the background firs:
Use a slightly lighter mix of Indigo and Ultramarine to paint the fir trees on the left side. These should be sharper than the distant blur but less detailed than the foreground pine. -
Detail the cottage:
Use a small brush to add architectural details: the wood grain on the walls, the chimney bricks, and the dark frames of the windows. -
Light the windows:
Paint the window panes with a warm, glowing Yellow Ochre or light Orange. If you masked them, remove the fluid first.
Step 5: Winter Magic
-
Enhance the shadows:
Strengthen the blue shadows on the snow where the house and trees cast them. This contrast makes the light look brighter. -
Add tree snow:
Use thick white gouache to paint patches of snow sitting on the dark pine branches and the roof of the cottage if you lost any whites. -
Create the stars:
Load a toothbrush or stiff brush with white gouache and gently flick it over the sky area to create a dusting of stars and falling snow.
Step back and enjoy the peaceful winter solitude you have created on paper
Salt And Bloom Frost Textures
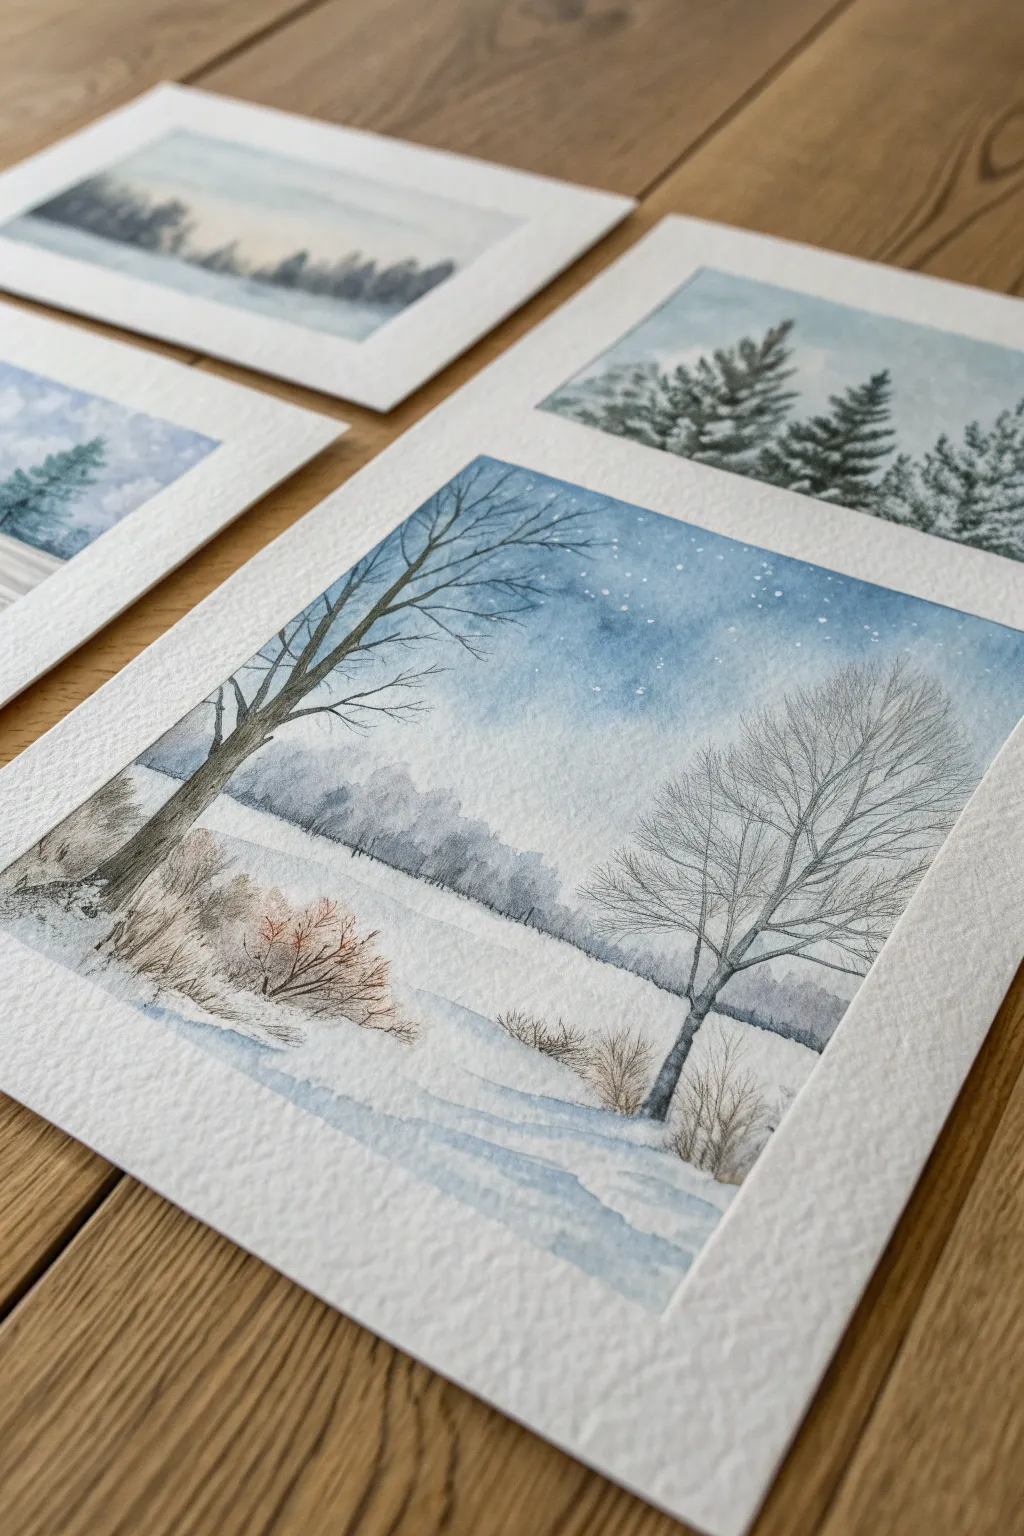
Capture the hush of a winter morning with this delicate watercolor landscape featuring bare trees against a soft, textured sky. The piece relies on subtle washes and precise brushwork to create depth between the snowy foreground and the misty, distant treeline.
Step-by-Step
Materials
- Cold pressed watercolor paper (140lb/300gsm)
- Watercolor paints (Indigo, Payne’s Gray, Burnt Umber, Ultramarine Blue, Alizarin Crimson)
- Masking fluid and an old brush or applicator
- Round brushes (sizes 2, 6, and 10)
- Rigger or liner brush for fine branches
- Table salt (fine grain)
- White gouache or white ink
- Two jars of water
- Paper towels
- Board and painter’s tape
Step 1: Preparation and Sky
-
Secure the paper:
Tape your watercolor paper down firmly to a board on all four sides. This creates that crisp white border seen in the reference image and prevents buckling during the wet washes. -
Sketch the composition:
Lightly sketch the horizon line about one-third up from the bottom. Mark the positions of the two main trees—one on the left leaning slightly in, and a larger, spreading one on the right. Keep pencil lines faint so they disappear later. -
Mask the snow (optional):
If you want perfectly crisp white snow sparkles, flick a tiny amount of masking fluid onto the sky area now. Let it dry completely before painting. -
Wet the sky:
Using your largest round brush, wet the entire sky area above the horizon line with clean water. The paper should be glistening but not forming puddles. -
Paint the sky wash:
Mix a watery wash of Ultramarine Blue with a touch of Indigo. Drop this color into the wet sky, starting darker at the top and fading out as you reach the horizon line. -
Add salt texture:
While the sky wash is still wet (the timing is crucial here—it should lose its sheen just slightly), sprinkle a pinch of table salt over the upper right area. This creates the frost-like blooming effect seen in the reference.
Salt Woes?
If the salt sticks to the paper, your wash was likely too wet. Wait until the shine just begins to dull before sprinkling. Only brush off salt once the paper is bone dry.
Step 2: Background and Middle Ground
-
Paint the distant trees:
Once the sky is bone dry, brush off the salt. Mix a very pale, grayish-blue using Indigo and plenty of water. Paint a soft, uneven band along the horizon line to represent distant woods. -
Softening the edge:
While the distant tree line is still wet, take a clean, slightly damp brush and run it along the bottom edge of the paint. This feathers the color into the white snow, creating a misty transitions. -
Snow shadows:
Mix a very diluted cool blue (Ultramarine). Using the side of your size 10 brush, sweep in broad, horizontal shadows across the white foreground. Leave plenty of paper white to represent the brightest snow.
Level Up: Morning Light
Add a faint wash of very diluted Yellow Ochre or Naples Yellow near the horizon line before painting the distant trees to simulate a warm winter sunrise glow.
Step 3: Foreground Trees and Details
-
Mix tree colors:
Create a dark, neutral mix for the tree trunks using Burnt Umber and Payne’s Gray. The mixture should be creamy, not too watery. -
Paint the main trunks:
Start with the left tree, painting from the base upward, tapering as you go. Repeat for the tree on the right. Vary the pressure to create natural, organic unevenness in the bark. -
Adding branches:
Switch to your rigger or liner brush. Pull fine lines outward from the main trunks. Remember that branches get thinner as they move away from the trunk. I like to hold the brush loosely at the end of the handle to keep the lines jittery and natural. -
Create fine twigs:
Add the finest twigs at the very ends of the branches using a ghostly pale version of your tree color. These should look like a delicate web against the sky. -
Paint the scrubby bushes:
At the base of the trees, use a size 2 brush to flick upward strokes using a mix of Burnt Umber and Alizarin Crimson. This reddish-brown warmth contrasts beautifully with the blue snow. -
Falling snow:
Finally, load a small brush with opaque white gouache. Tap the handle against another brush to splatter tiny white dots over the trees and sky for a falling snow effect. -
The reveal:
Wait for everything to be completely dry. Gently peel off the masking tape at a 45-degree angle to reveal your clean, crisp edges.
Frame your wintry scene or gift it as a seasonal card to share the quiet beauty of winter
Abstract Ice Crystals And Winter Patterns
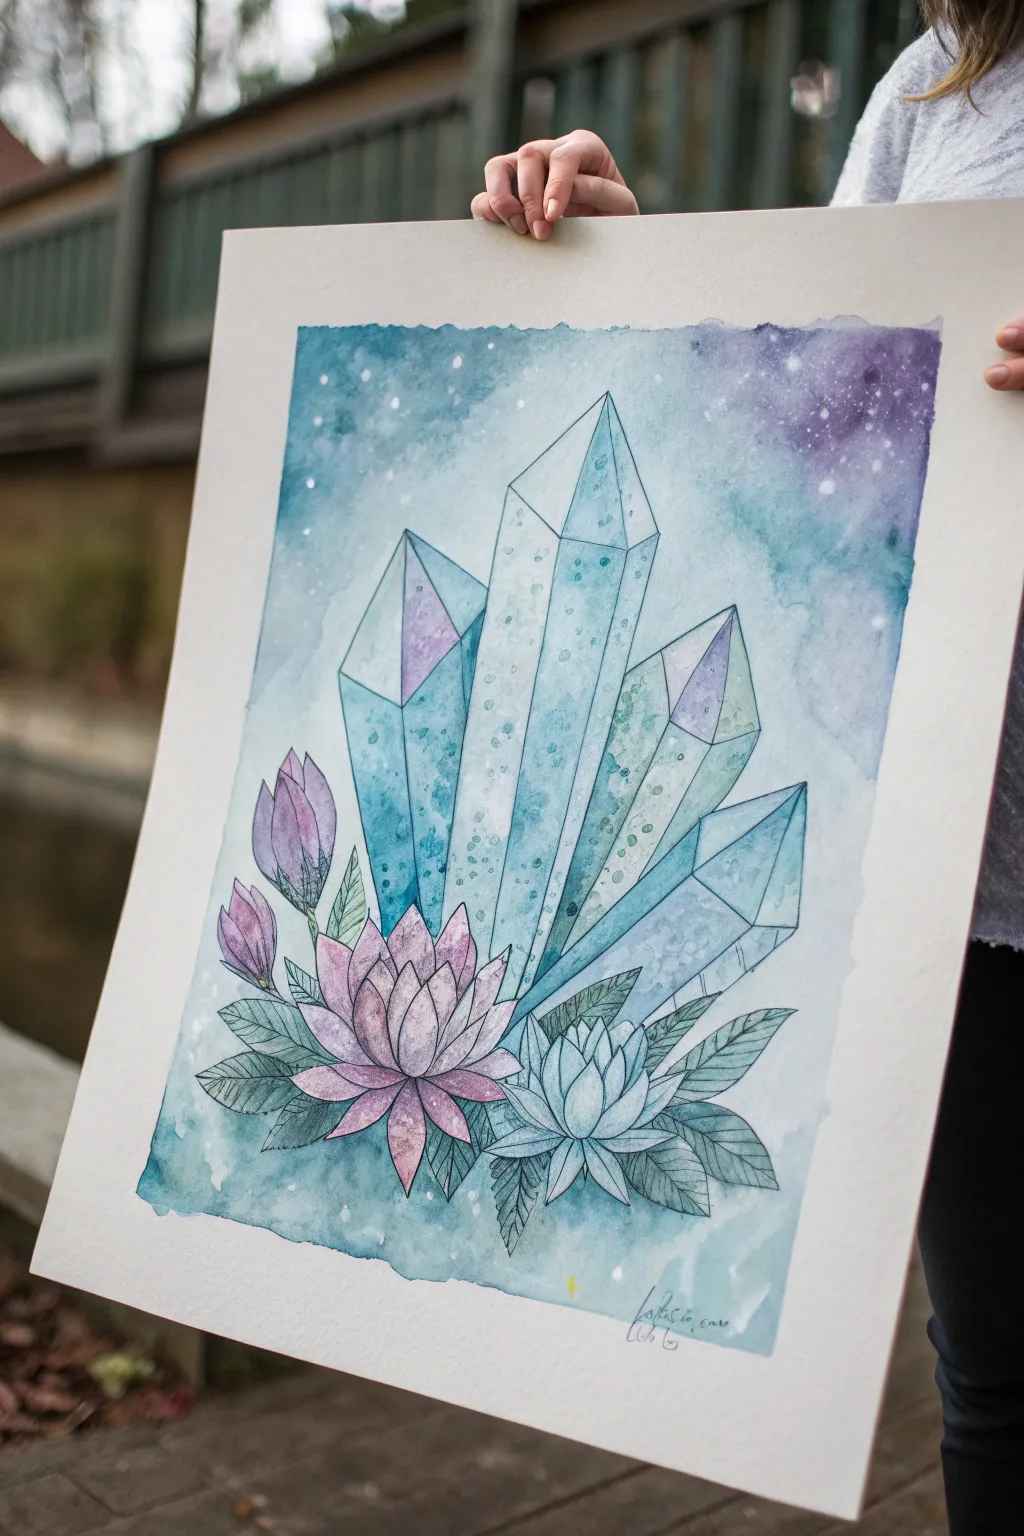
This ethereal watercolor composition combines sharp geometric crystal formations with the soft, organic curves of lotus flowers. Using a cool, wintry palette of teals, purples, and blues, you’ll create a piece that feels both icy and magical.
How-To Guide
Materials
- Cold press watercolor paper (block or taped down)
- Watercolor paints (phthalo blue, turquoise, purple, indigo, magenta)
- Waterproof fine liner pens (0.3mm and 0.5mm, black)
- Round watercolor brushes (sizes 4, 8, and 12)
- White gouache or white gel pen
- Pencil and eraser
- Masking fluid (optional)
- Sea salt (optional for texture)
- Two jars of water
- Paper towels
Step 1: Sketching the Framework
-
Rough Layout:
Begin by lightly sketching the central crystal cluster in the middle of your paper. Draw a large central shard flanked by two medium shards and one smaller, angled shard on the right. Keep the lines very faint. -
Adding Florals:
At the base of the crystals, sketch two open lotus flowers. Place the main one slightly left of center and a smaller, blue-toned one to its right. Add unopened tulip-like buds rising on the far left side. -
Refining Geometries:
Use a ruler to straighten the edges of your crystals. Draw the internal facet lines that give the crystals their 3D dimension, ensuring they converge at the pointed tips. -
Inking the Outline:
Once satisfied with the pencil sketch, go over your lines with a waterproof fine liner pen. Use a slightly thicker nib for the main outlines and a thinner one for delicate details like leaf veins or internal crystal facets. Let the ink dry completely before erasing pencil marks.
Don’t rush the ink
Ensure your waterproof pen outline is 100% dry before adding any water. Even ‘waterproof’ inks can smudge if you paint over them immediately after drawing.
Step 2: Painting the Backdrop
-
Wet-on-Wet Sky:
Wet the entire background area around the crystals and flowers with clean water. Do not wet the inside of your drawing yet. -
Dropping in Color:
While the paper is wet, drop in a mix of turquoise and indigo at the top edges, letting it fade into a lighter teal as you move down. Add touches of purple in the upper right corner to suggest a galaxy or night sky. -
Creating Stars:
While the background wash is still damp, splatter clean water droplets or sprinkle a pinch of salt to create star-like blooms. Alternatively, splatter white gouache once the layer is dry.
Step 3: Crystals and Ice
-
Base Crystal Wash:
Mix a very watery, pale teal. Paint the entire body of the crystals with this wash to establish a unifying undertone. Let this layer dry completely. -
Defining Facets:
Mix a slightly darker, cooler blue. Paint specific facets of the crystals—usually the sides that would be in shadow—leaving the front-facing facets lighter. This contrast creates volume. -
Adding Gradients:
While a facet is still wet, drop a tiny amount of purple or deep teal into the bottom corner of the shape. I find this creates that lovely, magical gradient effect seen in quartz. -
Texture details:
Once the crystals are dry, use a diluted darker blue paint to dab small spots or ‘imperfections’ onto the crystal surfaces, mimics the natural inclusions found in stone.
Metallic Magic
Use metallic silver watercolor paint for the crystal highlights instead of white. It catches the light beautifully and reinforces the ‘magical ice’ theme.
Step 4: Floral Foundations
-
Painting the Main Lotus:
For the left lotus, use a watery mix of magenta and purple. Paint the petals starting from the tip and dragging the pigment down. Keep the tips darker and the base near the center lighter. -
Painting the Blue Lotus:
For the right-side flower, use a cool, icy blue. Keep it very pale to differentiate it from the green leaves later. -
Greenery and Leaves:
Mix a desaturated jagged green (mix green with a touch of red or grey). Paint the leaves surrounding the flowers. Use the tip of your brush to carefully fill in the serrated edges you inked earlier.
Step 5: Final Magical Touches
-
Deepening Shadows:
Mix a strong indigo. glaze over the areas where the crystals meet the flowers to create depth and separate the foreground from the background objects. -
Highlighting:
Using white gouache or a white gel pen, add sharp highlights along the edges of the crystals and the tips of the lotus petals to make them sparkle. -
Atmospheric Splatter:
Load a toothbrush or stiff brush with white gouache. Flick a mist of tiny white stars across the top of the painting, concentrating on the darker purple areas for contrast.
Now you have a stunning, mystical centerpiece ready to be framed or gifted to a crystal lover


Have a question or want to share your own experience? I'd love to hear from you in the comments below!