Drawing on wood just hits different—the grain, the knots, and that cozy rustic vibe do half the storytelling for you. Here are my favorite wood drawing ideas that look amazing on wood slices and wooden surfaces, from classic beginner-friendly designs to more experimental studio-play territory.
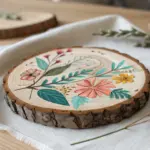
Simple Wildflower Bouquet on a Wood Slice
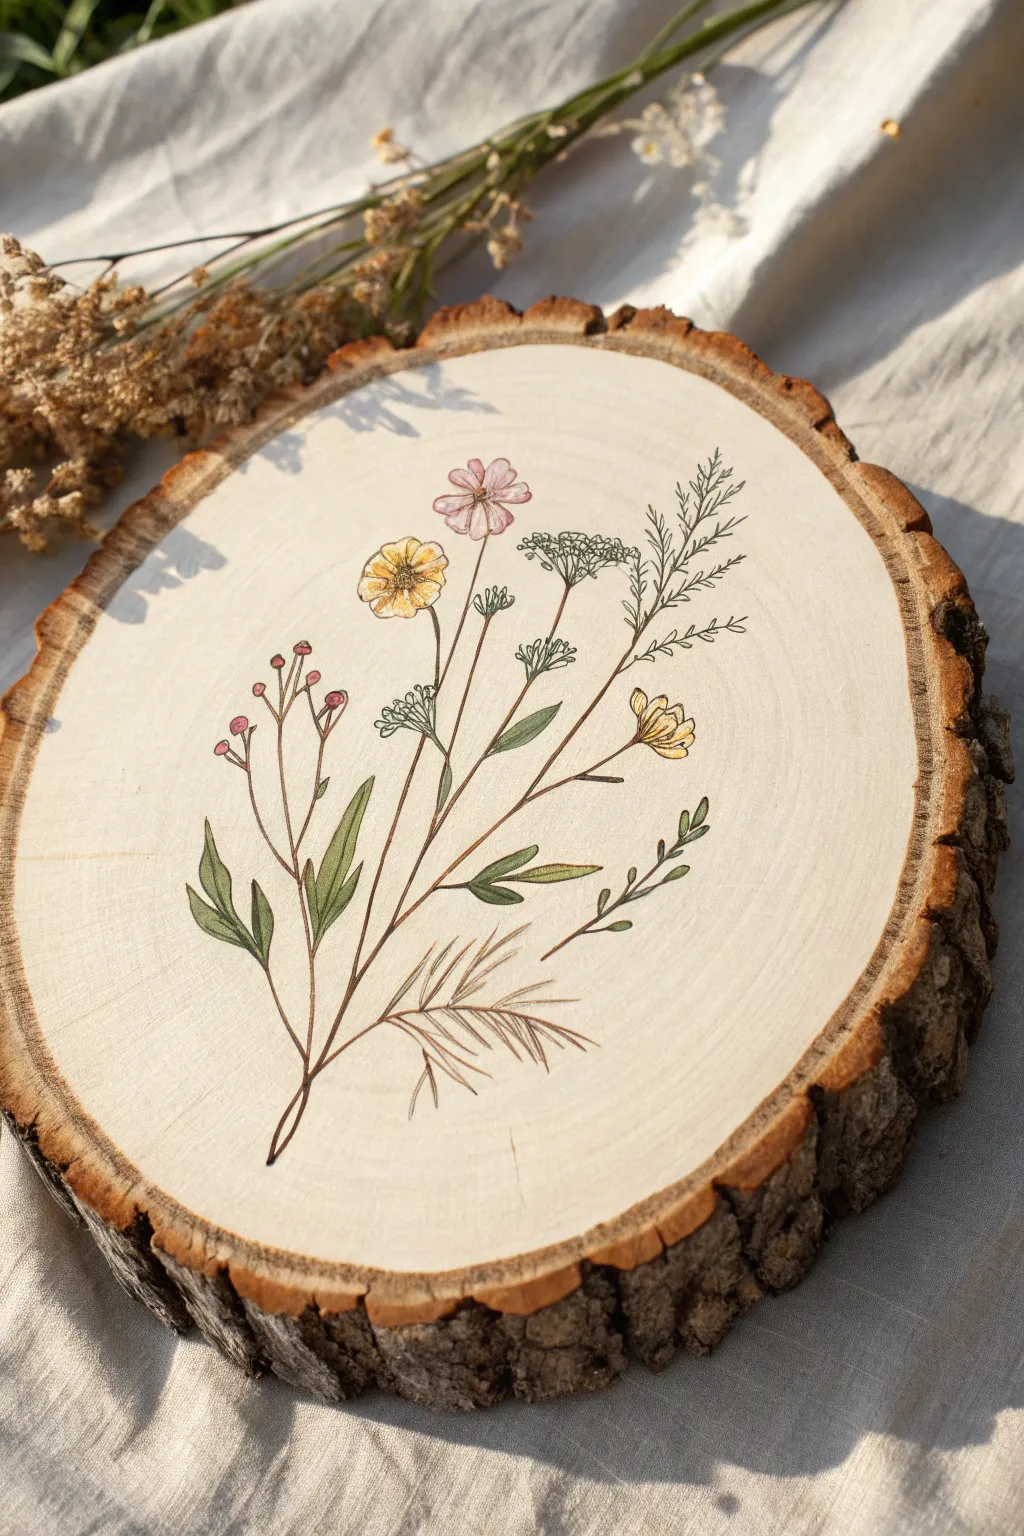
Bring a touch of the meadow indoors with this delicate wildflower bouquet drawn directly onto rustic wood. The natural grain of the timber serves as a warm, textured backdrop for dainty stems of cosmos, buttercups, and feathery foliage.
Detailed Instructions
Materials
- Basswood round with bark edge (approx. 6-8 inches)
- Fine grit sandpaper (220-400 grit)
- Pencil and kneadable eraser
- Fine liner pens (0.05mm and 0.1mm, waterproof archival ink)
- Colored pencils or watercolor pencils (soft hues: pink, yellow, sage green, brown)
- Matte spray varnish or clear sealer
- Soft brush primarily for sweeping away eraser dust
Step 1: Preparation & Sketching
-
Sand the surface:
Before you begin drawing, the wood surface needs to be incredibly smooth. Sand the face of the wood slice with fine-grit sandpaper until it feels like paper to the touch. This prevents your pen tips from snagging on rough grain later. -
Clean the dust:
Wipe away all sawdust with a dry cloth or use compressed air. Even tiny particles can ruin a fine line drawing. -
Establish the main stem:
Using a light pencil grip, draw a central, slightly curved vertical line starting from the bottom center. This will be the anchor for your bouquet. -
Map out the flowers:
Sketch small circles or ovals where the main flower heads will go. Place the cosmos (pink flower) near the top, a buttercup (yellow flower) slightly lower to the left, and a smaller bud on the right to balance the composition. -
Add secondary stems:
Draw thin, branching lines radiating from your main stem cluster. Include a tall stem on the right for the fern-like leaves and a stem on the left for the budding pink sprigs. -
Draft the foliage:
Lightly pencil in the shapes of the leaves. Use long, lance-like shapes for the base foliage and feathery, triangular outlines for the taller filler greens.
Bleed Prevention
Wood acts like a sponge. If using liquid ink or markers instead of pens, prep the wood with a clear acrylic gesso or matte medium first to stop the ink from ‘spiderwebbing’ along the grain.
Step 2: Inking the Outline
-
Start with the flowers:
Switch to your 0.1mm fine liner. Carefully trace over the cosmos petals, giving them slightly ruffled edges. Add the center details with tiny stippled dots. -
Define the stems:
Ink the main stems. Instead of one perfectly straight line, broken or slightly wavering lines can look more organic and natural, mimicking real plant growth. -
Ink floral details:
Draw the details of the yellow buttercup, emphasizing the cup shape. For the bud on the right, keep the lines tight and closed. -
Detail the berries:
On the left stem, draw small circles for the pink buds. Connect them to the main branch with very thin, delicate lines using the 0.05mm pen if you have one. -
Draw the leaves:
Ink the lower leaves with a steady hand. Drawing the central vein first often helps with alignment, then adding the outer edges. -
Add texture to the fern:
For the feathery foliage on the top right, use short, quick hatching strokes to create the needle-like texture rather than outlining individual leaves. -
Erase pencil marks:
Wait at least 10 minutes to ensure the ink is bone dry. Gently erase all visible pencil lines with a kneadable eraser to avoid smudging or damaging the wood surface.
Step 3: Adding Color
-
Color the cosmos:
Take a soft pink colored pencil and lightly shade the petals of the top flower. Keep the pressure very light to let the wood grain show through, intensifying color only near the center. -
Brighten the buttercup:
Use a warm yellow pencil for the middle flower. Add a tiny touch of orange or light brown at the base of the petals to give it depth. -
Tint the stems and leaves:
Use a sage or olive green pencil for the leaves. I find that layering a bit of brown over the green at the bottom of the stems helps ground the plant visually. -
Highlight the berries:
Add small pops of pink or reddish-orange to the small round buds on the left stem. -
Add brown accents:
Use a light brown pencil to color the dried, feathery plant element at the very bottom right, giving the bouquet a varied, autumnal feel. -
Seal the artwork:
Once fully satisfied, spray the piece with a clear matte varnish. Do this in a well-ventilated area to protect the porous wood from humidity and keep your colors vibrant.
Erasing Woes
If you erase too vigorously and lift the wood fibers, don’t draw over the fuzz. Sand that specific spot lightly again with high-grit paper before re-inking to ensure a crisp line.
Display your rustic botanical art on a shelf or attach a sawtooth hanger to the back for a charming wall accent


Single Rose With Bold Outline
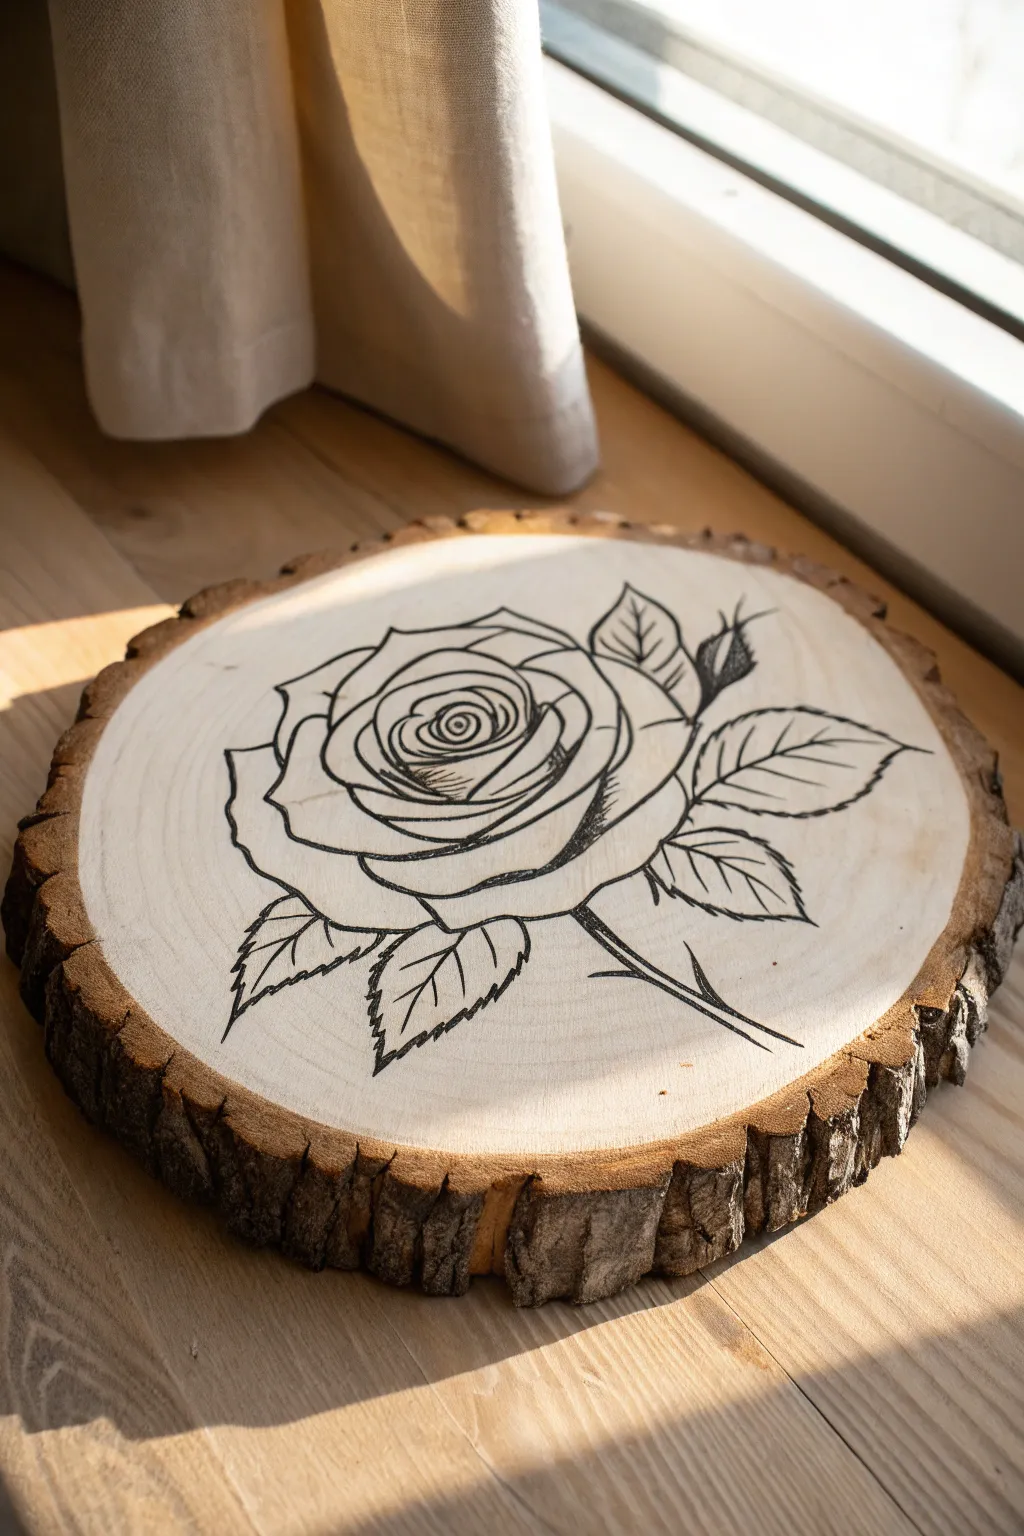
Using the natural warmth of a basswood round, this project captures the elegance of a classic rose with bold, graphic lines. The contrast between the light wood grain and the deep black ink creates a striking, rustic piece perfect for shelf decor or coasters.
How-To Guide
Materials
- Basswood round with bark edge (approx. 8-10 inches)
- Fine-grit sandpaper (220 grit)
- Pencil (HB or lighter)
- Black archival ink fine liner pens (various sizes: 0.1mm, 0.5mm, 0.8mm or similar)
- Clean eraser
- Clear matte varnish or spray sealant
Step 1: Preparing the Wood Surface
-
Sand for smoothness:
Before you even pick up a pencil, ensure your wood slice is perfectly smooth. Sand the surface with 220-grit sandpaper, moving with the grain, until it feels almost polished to the touch. This prevents your pen nibs from snagging on rough fibers. -
Clean the dust:
Wipe the surface thoroughly with a dry microfiber cloth or use a tack cloth to remove every speck of sawdust. Ink can bleed unpredictably if it hits loose dust.
Bleeding Lines?
If ink feathers into the grain, the wood is too porous. Prime the area first with a clear matte medium or very diluted PVA glue, let it dry, sand lightly, then draw.
Step 2: Sketching the Rose Structure
-
Define the center:
Using a light pencil touch, lightly mark the center of the wood slice so your composition stays balanced. Draw a small, tight spiral slightly off-center to represent the innermost petals of the rose. -
Petal layering:
Sketch the surrounding petals by drawing overlapping curved shapes that get progressively larger as they move outward from the spiral. Think of them like cups hugging the center. -
Add outer petals:
Draw the largest, outermost petals with slightly wavier, organic edges. Let one or two droop slightly to give the flower a natural, heavy look. -
Stem and leaves:
Extend a thin line downward for the stem. Add two large, serrated leaves on either side of the main bloom, and perhaps a small rosebud tucked near the top right for added interest. -
Refine the sketch:
Step back and look at your composition. Erase any heavy guide lines, leaving only faint traces to guide your ink.
Step 3: Inking the Outline
-
Start the bold outline:
Switch to your thickest pen (around 0.8mm). Begin tracing the outermost edges of the petals. Use confident, sweeping strokes rather than short, scratchy ones to keep the lines clean. -
Line weight variation:
As you ink the inner petals, try to vary your pressure slightly. Thicker lines on the shadowy undersides of petals and thinner lines on top edges help create instant dimension. -
Serrated leaves:
Ink the leaves carefully, emphasizing the jagged, serrated edges. Draw the central vein of each leaf clearly, but leave the smaller veins for a finer pen later. -
The stem and bud:
Outline the stem and the small bud. Add tiny thorns to the stem if you wish, though a smooth stem offers a more stylized graphic look.
Burn It Instead
Swap the pens for a pyrography tool. Use a universal tip for the outlines and a shader tip for the hatching to create a permanent, textured wood-burned version.
Step 4: Adding Detail and Texture
-
Switch to fine liner:
Change to a finer pen (0.3mm or 0.5mm). Inside the center spiral, add very thin lines following the curve of the petals to suggest tightness. -
Hatching for shadows:
This is where the drawing comes to life. Use simple hatching—parallel lines close together—where petals overlap. Focus these shadows at the base of the petals where they meet the center. -
Petal texture:
Add a few broken, curved lines on the large open petals to suggest the velvet texture and curvature of the rose. Don’t overdo it; white space is essential here. -
Leaf details:
Draw the secondary veins in the leaves using your finest pen (0.1mm). Instead of straight lines, curve them slightly toward the leaf tip to show the leaf’s contour. -
Deepen contrast:
Go back to your thickest pen and re-darken the deepest crevices between the petals. This high contrast makes the drawing pop against the pale wood.
Step 5: Finishing Touches
-
Let the ink cure:
Patience is key. Allow the ink to dry completely for at least 30 minutes. If the wood is porous, ink takes longer to set than on paper. -
Erase pencil marks:
Gently erase any remaining pencil sketches. Be careful not to scrub too hard over the inked areas, although quality archival ink should hold fast. -
Seal the artwork:
Apply a light coat of matte clear spray varnish. I prefer doing several light mists rather than one heavy coat to prevent the ink from bleeding or the wood from yellowing too much.
Now you have a stunning botanical art piece grounded in natural materials, ready to bring organic charm to any corner


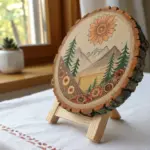
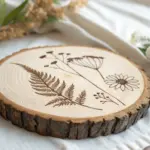
Leaf Wreath That Follows the Circle
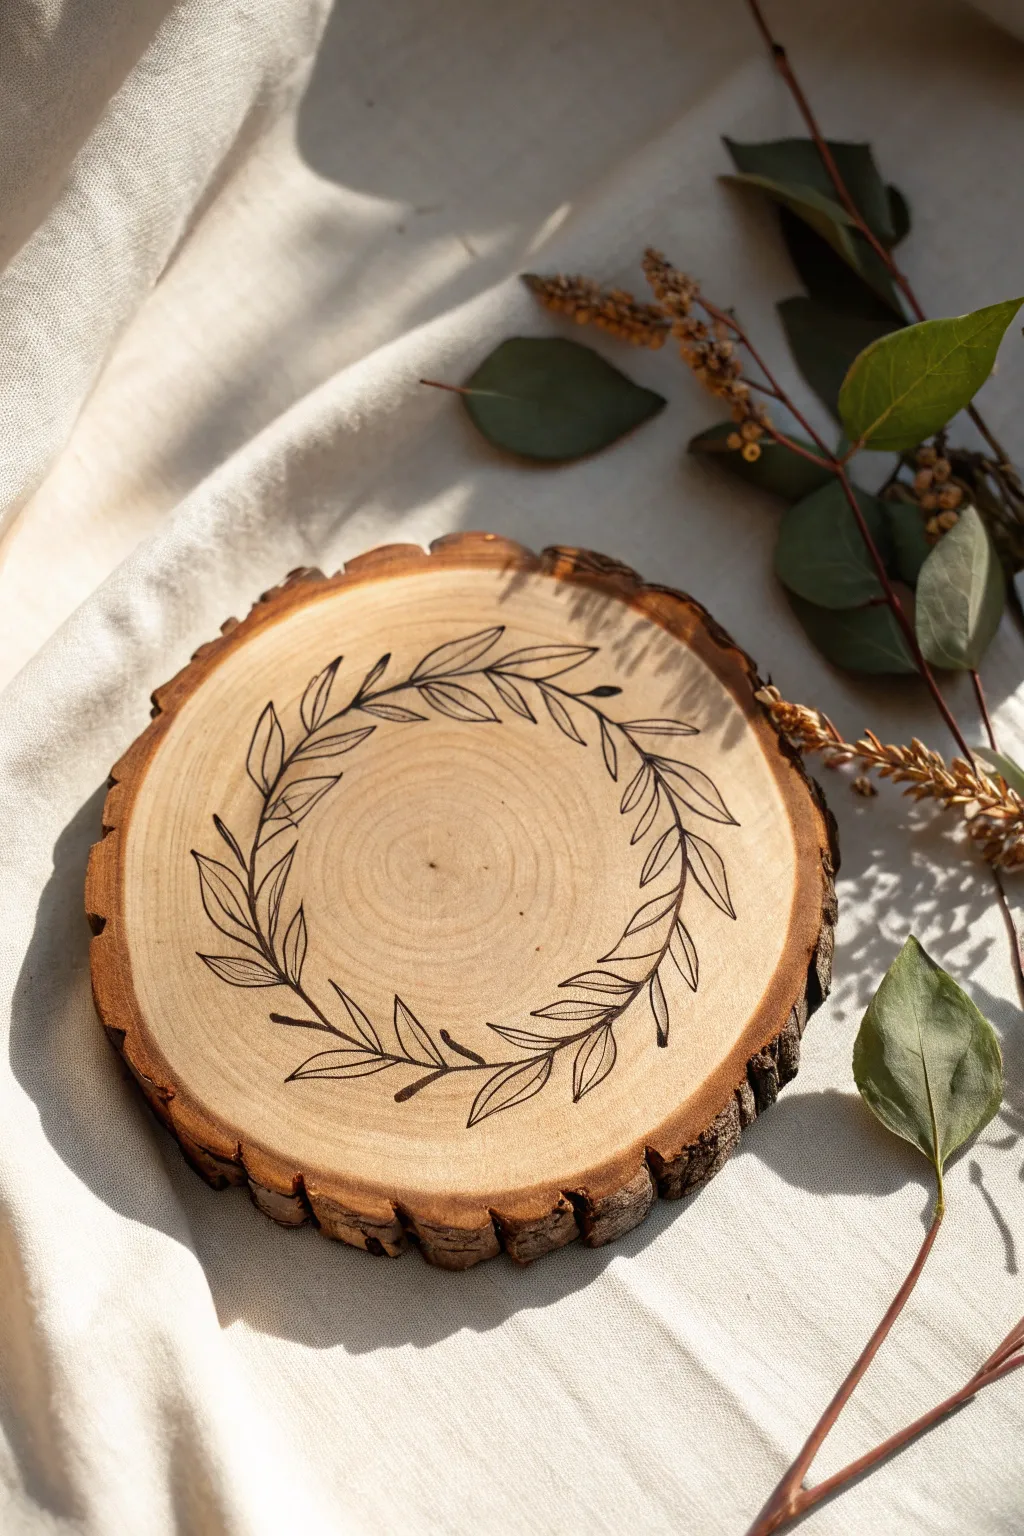
Capture the simple elegance of nature with this wood-burning project featuring a delicate leaf wreath design. The natural rings of the wood slice guide your placement, creating a harmonious frame that looks beautiful on any mantle or wall.
Step-by-Step Guide
Materials
- Medium-sized wood slice (approx. 6-8 inches diameter) with bark intact
- Sandpaper (fine grit, 220-320)
- Pencil for sketching
- Soft eraser
- Pyrography tool (wood burning pen)
- Small round nib or universal point nib
- Compass or round object for tracing (optional)
- Clear matte wood sealer or varnish
Step 1: Preparation
-
Clean the surface:
Begin by wiping down your wood slice with a dry cloth to remove any loose dust or debris. If the bark feels loose in any areas, you can gently secure it with a tiny drop of wood glue. -
Sand until smooth:
Using fine-grit sandpaper, buff the surface of the wood slice in circular motions. The smoother the surface, the easier your pen will glide, so take your time here until it feels satin-soft to the touch. -
Wipe away dust:
Ensure absolutely no sawdust remains on the surface, as this can burn unevenly. A microfiber cloth or a quick blast of compressed air works perfectly for this.
Low & Slow
Keep your heat setting lower than you think you need. It’s easier to darken a light line by going over it twice than to fix a deep scorch mark.
Step 2: Sketching the Design
-
Establish the circle:
Lightly sketch a circle roughly one inch inward from the bark edge. This will serve as the ‘spine’ or central stem for your wreath. You can freehand this by following the wood’s growth rings or use a compass for precision. -
Draw the main stems:
Over your guide circle, draw two long, curving stems that meet at the bottom center and curve upward, leaving a small open gap at the very top. -
Add leaf placement lines:
Sketch small, curved lines branching off the main stem to indicate where each leaf will sit. Alternating them left and right creates a natural, organic flow rather than a rigid pattern. -
Refine the leaf shapes:
Flesh out your leaves. Draw them as simple, elongated tear-drop shapes with pointed tips. Keep the leaves slightly smaller near the top of the wreath and larger near the bottom for visual balance. -
Add central veins:
Draw a single, gentle line down the center of each leaf. I find it helpful to keep these lines very faint, just enough to guide the burning tool later.
Step 3: Burning the Design
-
Heat your tool:
Plug in your pyrography pen and let it heat up. A medium-high setting is usually best for this type of wood, but test it on the back of the slice first to ensure it creates a dark line without gouging. -
Burn the main stems:
Using a universal or flow point nib, carefully trace the main central stems first. Use a slow, steady dragging motion to get a consistent dark line. Pull the pen toward you rather than pushing it away. -
Outline the leaves:
Trace the outer edges of your leaves. Start from the stem and curve out to the tip, then lift slightly and do the other side of the leaf. Don’t worry if lines aren’t perfectly joined; small gaps add character. -
Add the veins:
Burn the central vein line inside each leaf. Apply slightly less pressure here than you did for the outline so the vein appears more delicate. -
Detail the leaf tips:
Go back and sharpen the very tips of the leaves with a quick touch of the hot nib to ensure they look crisp and distinct. -
Thicken accent areas:
To add depth, re-trace the bottom curve of a few lower leaves or the main stem junctions. This subtle thickening simulates a shadow and makes the design pop.
Add Subtle Color
Use watercolor pencils to lightly shade the inside of the leaves with pale sage green, then seal it for a soft, botanical illustration look.
Step 4: Finishing Touches
-
Erase pencil marks:
Once the wood is completely cool to the touch, use a soft eraser to gently remove any remaining graphite sketch lines. Be careful not to smudge the carbon from the burn. -
Seal the wood:
Apply a thin layer of clear matte varnish or wood sealer. This preserves the light color of the wood and prevents the bark from shedding over time. -
Let it cure:
Allow the sealer to dry completely according to the manufacturer’s instructions before displaying your artwork.
This charming rustic piece is now ready to bring a touch of the outdoors into your home


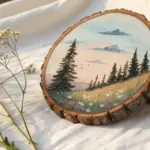
Mountain Mini Landscape in a Round Frame
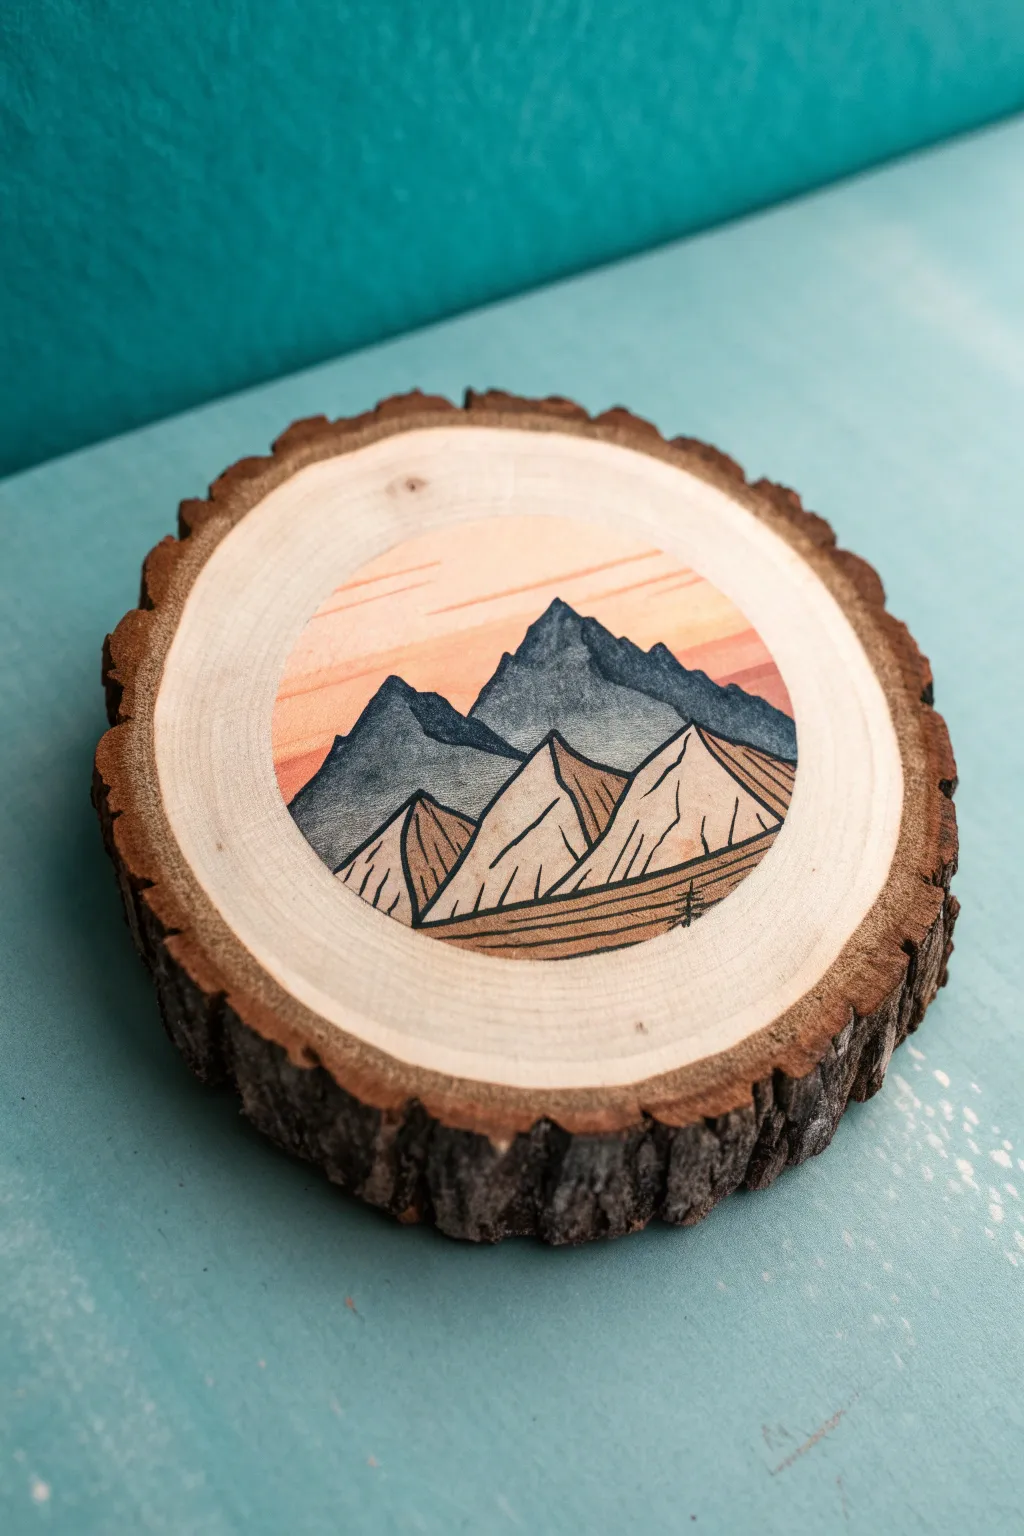
Capture the serene beauty of a mountain range at dusk with this charming wood slice art project. The natural grain of the wood perfectly complements the stylized peaks and warm, gradient sky, creating a rustic yet modern decorative piece.
How-To Guide
Materials
- Round wood slice with bark (natural craft wood)
- Fine-grit sandpaper (220-300 grit)
- Pencil and eraser
- Compass or round object for tracing
- Waterproof fine liner pens (black, sizes 01 and 05)
- Watercolor paints or diluted acrylics
- Small round paintbrushes (sizes 0 and 2)
- Masking tape (optional)
- Clear matte varnish or sealant spray
Step 1: Preparation & Sketching
-
Prepare the surface:
Begin by sanding the face of your wood slice gently. You want the surface as smooth as possible to prevent your ink from bleeding into the grain later. Wipe away any dust with a dry cloth. -
Define the frame:
Using a compass or a perfectly round object (like a cup or jar lid), lightly draw a circle in the center of the wood slice. Leave a generous margin of natural wood between your circle and the bark edge to frame the artwork. -
Sketch the foreground:
Inside your circle, start sketching the mountains. Draw three jagged, triangular peaks in the immediate foreground. These should look rocky and angular. -
Sketch the background peaks:
Behind the first set of peaks, draw a second, taller range of mountains. These should loom larger and feel more distant, creating depth in your composition. -
Add sky details:
lightly sketch a few horizontal lines in the sky area to indicate drifting clouds. Keep these lines faint as they will guide your painting, not serve as final outlines.
Bleeding Lines?
If ink ‘feathers’ into the wood grain, apply a thin layer of clear gesso or matte medium to the sanded area before drawing. This seals the pores for crisp lines.
Step 2: Inking the Outlines
-
Outline the foreground:
Using your thicker fine liner (size 05), trace over the pencil lines of the foreground mountains. Be confident with your strokes to avoid shaky lines. -
Detail the rocks:
Switch to a thinner pen (size 01). Add vertical, jagged contour lines inside the foreground peaks to suggest rocky textures and shadows. These lines should generally follow the slope of the mountains. -
Define the ground:
Draw horizontal, slightly wavy lines at the very bottom of the circle to create the ground beneath the mountains. I like to add a tiny, solitary pine tree silhouette here for scale. -
Outline the background range:
Outline the taller, background mountains with the 05 pen. Do not add the internal texture lines to these yet; we want them to look deeper and softer than the foreground.
Make It 3D
Before painting, use a wood burning tool for the main outlines instead of a pen. The burned grooves add physical texture and a beautiful scent to the piece.
Step 3: Adding Color
-
Paint the background mountains:
Mix a deep slate-blue watercolor. carefully fill in the large background mountains. The texture of the wood might soak up paint quickly, so work efficiently to avoid harsh drying lines. -
Texturize with paint:
While the blue paint is still slightly damp, dab a little concentrated dark blue or black near the peaks and valleys to create natural shadows. -
Paint the foreground peaks:
For the front rocky peaks, use a very diluted tan or beige wash. You want this to be subtle, letting the wood grain show through slightly. Paint carefully around your ink lines. -
Create the sunset sky:
Start at the horizon line behind the mountains with a soft peach or light orange color. Paint horizontal strokes across the sky section. -
Blend the gradient:
As you move upward, dilute your brush with more water to fade the orange into the natural wood color at the top of the circle. This creates a soft, glowing effect. -
Paint the ground:
Fill in the bottom ground strip with a warm brown tone to anchor the image. -
Dry thoroughly:
Let the paint dry completely. Wood holds moisture longer than paper, so give it at least an hour.
Step 4: Finishing Touches
-
Re-ink if necessary:
If the paint has dulled any of your black lines, gently go over them again with your fine liner to make them pop. -
Stipple the background:
Add tiny dots (stippling) with your fine pen on the blue background mountains to suggest distant texture without adding full lines. -
Seal the artwork:
Once absolutely dry, apply a light coat of matte varnish spray. This protects the wood and keeps the colors vibrant without adding a glossy shine that distracts from the natural texture.
Place your finished mountain landscape on a small easel or attach a hook to the back to bring a bit of the outdoors inside
BRUSH GUIDE
The Right Brush for Every Stroke
From clean lines to bold texture — master brush choice, stroke control, and essential techniques.
Explore the Full Guide
Pine Trees Silhouette at Sunset
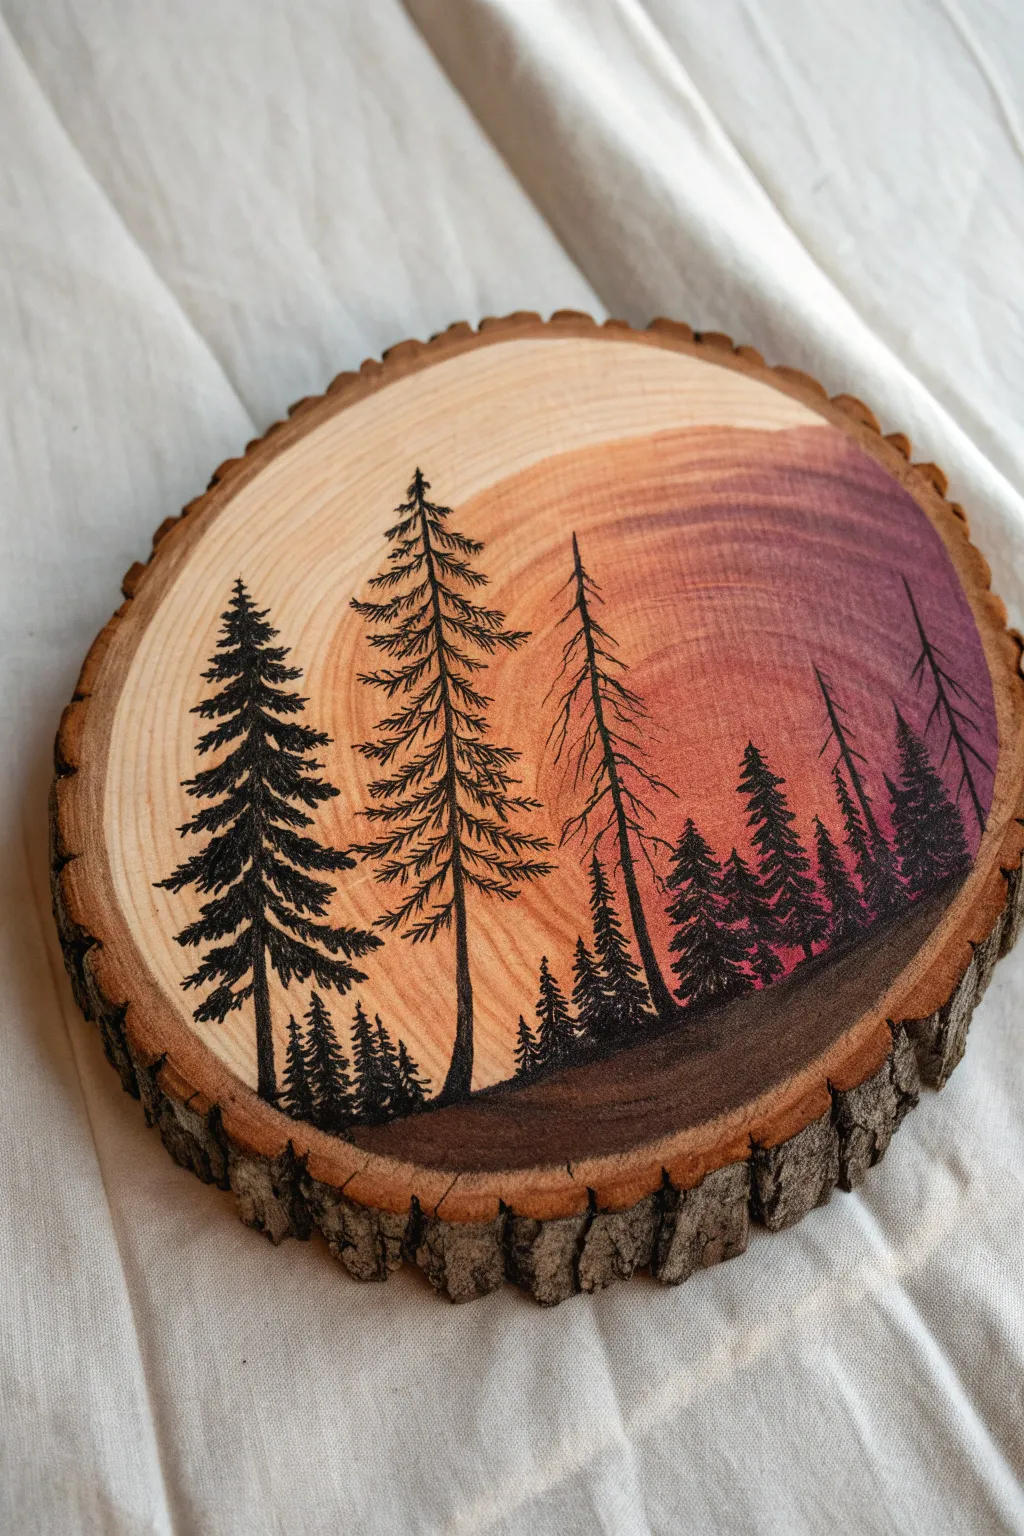
Capture the serene beauty of twilight in the forest with this mixed-media wood slice project. By combining the rich, dark lines of pyrography or ink with a soft, painted gradient sky, you’ll create a striking piece of rustic decor that highlights natural wood grain.
Step-by-Step
Materials
- Round wood slice with bark edge (approx. 6-8 inches diameter)
- Fine-grit sandpaper (220 grit)
- Pencil and eraser
- Black archival ink pen (0.5mm and 0.8mm) or wood burning tool with fine point tip
- Acrylic paints (Titanium White, Cadmium Orange, Burnt Sienna, Dioxazine Purple)
- Small flat brush
- Detail round brush
- Water cup and paper towels
- Clear matte acrylic sealer (spray or brush-on)
Step 1: Preparation and Sketching
-
Surface Prep:
Begin by sanding the face of your wood slice with 220-grit sandpaper until it feels completely smooth to the touch. Remove all sawdust with a clean, dry cloth or tack cloth to ensure your pens and paint glide effortlessly. -
Drafting the Horizon:
Lightly sketch a curved horizon line about one-third of the way up from the bottom of the slice. This will be the ground where your trees stand. -
Positioning Trees:
Sketch vertical lines to mark the placement of your main trees. Place the tallest, most detailed tree on the left side, slightly off-center, and a secondary tall tree next to it. Mark smaller trees on the right to create depth.
Grain Direction Matters
Work with the wood grain, not against it. When inking fine branches, pull your pen strokes in the direction of the grain to prevent the ink from bleeding into tiny timber cracks.
Step 2: Painting the Sunset Sky
-
Initial Wood Zone:
Leave the leftmost section of the sky—behind the large trees—unpainted to let the natural light wood grain represent the brightest part of the sunset. -
Mixing the Orange:
Mix a small amount of Cadmium Orange with a touch of Titanium White and water to create a translucent wash. Apply this starting near the unpainted zone, blending outward toward the right. -
Adding Warmth:
While the first wash is still damp, introduce a slightly deeper orange mixed with a tiny drop of Burnt Sienna. Paint this into the middle section of the sky, blending it softly into the lighter orange. -
Creating the Purple Haze:
For the far right side of the sky, mix Dioxazine Purple with a little water. Paint this section, gently blending it back into the orange middle ground to create a seamless transition. -
Softening Edges:
Use a clean, damp brush to feather the edges where the paint meets the raw wood, ensuring there are no harsh lines. I find creating a soft fade here makes the sunset look much more natural. -
Painting the Ground:
Mix Burnt Sienna with a little purple to create a dark, earthy brown. Paint the ground area below the horizon line solid, providing a heavy base for your silhouette trees. Let all paint dry completely.
Step 3: Drawing the Silhouettes
-
Main Tree Trunks:
Using your 0.8mm black pen or wood burning tool, draw the thick central trunks over your initial pencil guides. Make the bases slightly wider where they meet the ground. -
Primary Branches:
Starting from the top of the largest tree, draw short, downward-sloping branches. Keep them uneven and jagged to mimic the organic growth of a pine tree. -
Building Needle Texture:
Switch to a finer tip (0.5mm) to add density. Use quick, scribbling motions along the main branches to suggest clusters of pine needles, making the tree darker and fuller towards the bottom. -
The Dead Tree:
Draw the thinner, scraggly tree next to the main pine. Keep its branches sparse, angular, and sharp, with no needle texture, to represent a dead or dormant spruce. -
Background Forest:
Fill in the smaller trees on the right side. These should be less detailed and slightly more solid black to act as a distant treeline against the purple sky. -
Ground Integration:
Darken the painted ground with your black ink or burning tool just at the base of the trees to root them into the landscape.
Ink Bleeding into Wood?
If your ink feathers into the wood fibers, try sealing the wood with a clear matte medium or slight layer of gesso *before* drawing. This creates a barrier for crisp lines.
Step 4: Finishing Touches
-
Cleanup:
Once the ink is fully set, gently erase any visible pencil marks that weren’t covered by the drawing. -
Sealing:
Apply a clear matte acrylic sealer over the entire face of the wood slice to protect the colors and prevent the ink from fading over time.
Now you have a tranquil forest scene that brings a touch of wilderness into your home
Cozy Cabin Window Scene
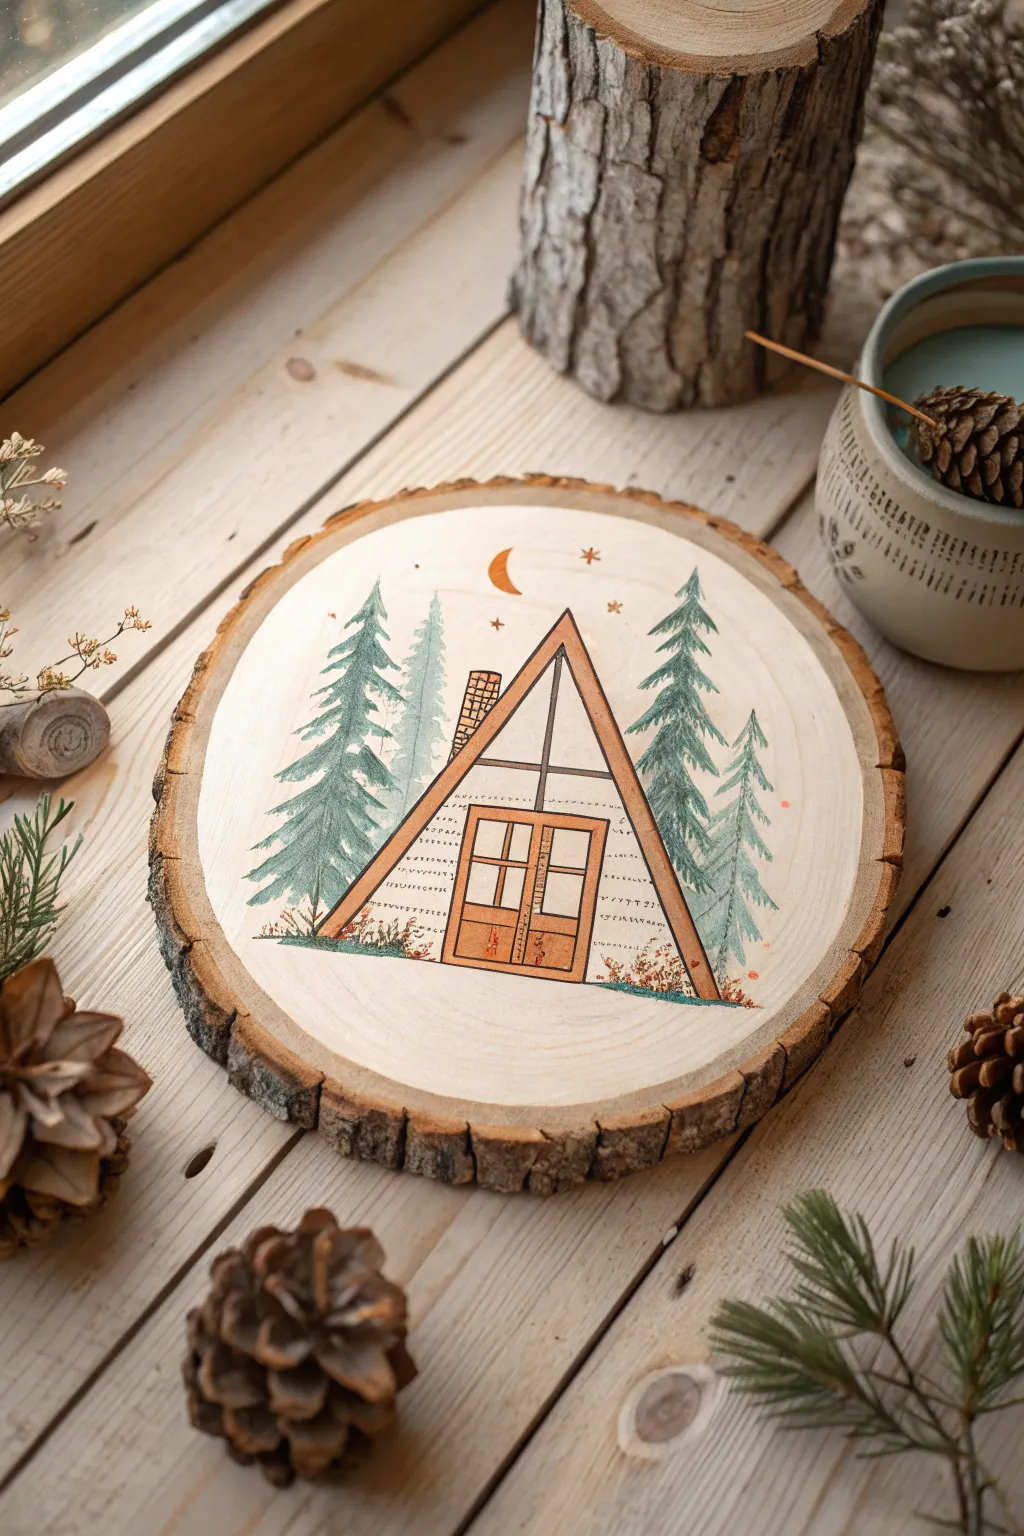
Capture the serenity of a mountain getaway with this rustic wood slice project. Combining simple geometric lines with pine tree motifs, this piece uses wood burning and touches of acrylic to create a warm, decorative accent.
How-To Guide
Materials
- Medium-sized wood slice (basswood or birch)
- Sandpaper (220 to 400 grit)
- Pencil and eraser
- Ruler
- Wood burning tool (pyrography pen)
- Universal point and shading point tips
- Carbon paper (optional)
- Acrylic paints (dark green, light green, orange-brown, white)
- Fine detail paintbrushes
- Clear matte varnish or sealant
Step 1: Preparation & Sketching
-
Smoothing the Canvas:
Begin by sanding the surface of your wood slice until it is extremely smooth to the touch. This is crucial because any rough grain will snag your pyrography pen later. Wipe away all dust with a tack cloth or slightly damp paper towel. -
Drafting the Cabin:
Using a ruler, lightly sketch a large triangle in the center of the wood slice. This forms the main A-frame structure. Draw a smaller triangle inside it to create the thick roofline border. -
Adding Architectural Details:
Sketch the horizontal beams, the vertical center beam, and the rectangular door frame at the bottom. Add the grid for the window panes on the door and the small chimney stack on the left roof slope. -
Planning the Forest:
Lightly draw the outlines of evergreen trees flanking the cabin. Place taller trees closer to the foreground on the left and right, and smaller, fainter trees slightly behind them to suggest depth. -
Celestial Accents:
Complete your pencil sketch by adding a small crescent moon and a few twinkling stars in the open sky above the roof peak.
Step 2: Burning the Design
-
Outlining the Structure:
Install the universal point (chiseled tip) on your wood burning tool and let it heat up to a medium-high setting. Carefully burn the straight lines of the A-frame roof and the door frame. -
Burning the Siding:
Turn the heat down slightly. Using a lighter touch, burn the horizontal siding lines across the front of the cabin. Making these lines slightly broken or uneven adds a nice rustic texture. -
Detailing the Chimney:
Use the very tip of the pen to stipple or draw tiny bricks on the chimney rectangle. Keep the heat controlled so the lines don’t bleed into each other. -
Tree Placement:
Switch to a lighter hand or lower heat setting to outline the trees. You don’t need to burn every needle; just establish the main trunk lines and the general shape of the boughs. -
Sky Elements:
Quickly tap the stars and carefully trace the crescent moon. I find it helpful to rotate the wood slice as I curve around the moon to keep the line smooth.
Smoother Burns Pro Tip
Work with the wood grain whenever possible. If your pen gets stuck in a grain ridge, lift it immediately rather than forcing it, which causes scorch blobs.
Step 3: Painting & Finishing
-
Warm Wood Tones:
Dilute your orange-brown acrylic paint with a little water to create a semi-transparent wash. Paint the thick roof beams, the door frame, and the chimney. The wood grain should still show through slightly. -
Primary Pine Trees:
Mix a deep forest green. Using a fine brush, paint the two prominent foreground trees using downward, feathery strokes to mimic pine needles. -
Background Trees:
Add white to your green mix to create a pale, misty sage color. Paint the trees that sit behind the cabin using this lighter shade. This value difference instantly pushes them into the background. -
Adding Highlights:
Once the green paint is dry, use a very fine brush with white paint to add delicate ‘snow’ or highlight accents to the tips of the tree branches. -
Golden Details:
Paint the crescent moon and the tiny stars with a solid orange-yellow or gold paint to make them pop against the pale wood. -
Grounding the Scene:
Dab small spots of brown and green along the base of the cabin and trees to simulate forest floor vegetation and ground the structure. -
Final Cleanup:
Once all paint is completely dry, gently erase any visible pencil lines that weren’t covered by burning or paint. -
Sealing:
Apply a thin coat of matte clear varnish over the face of the wood slice to protect the paint and prevent the wood from aging unevenly.
Level Up: 3D Texture
Glue dried moss or tiny faux pine sprigs at the base of the cabin instead of painting the ground for a fun mixed-media texture effect.
Hang this charming piece near a window or lean it on a bookshelf to bring a little bit of the outdoors inside

PENCIL GUIDE
Understanding Pencil Grades from H to B
From first sketch to finished drawing — learn pencil grades, line control, and shading techniques.
Explore the Full Guide
Moon Phases Across the Grain
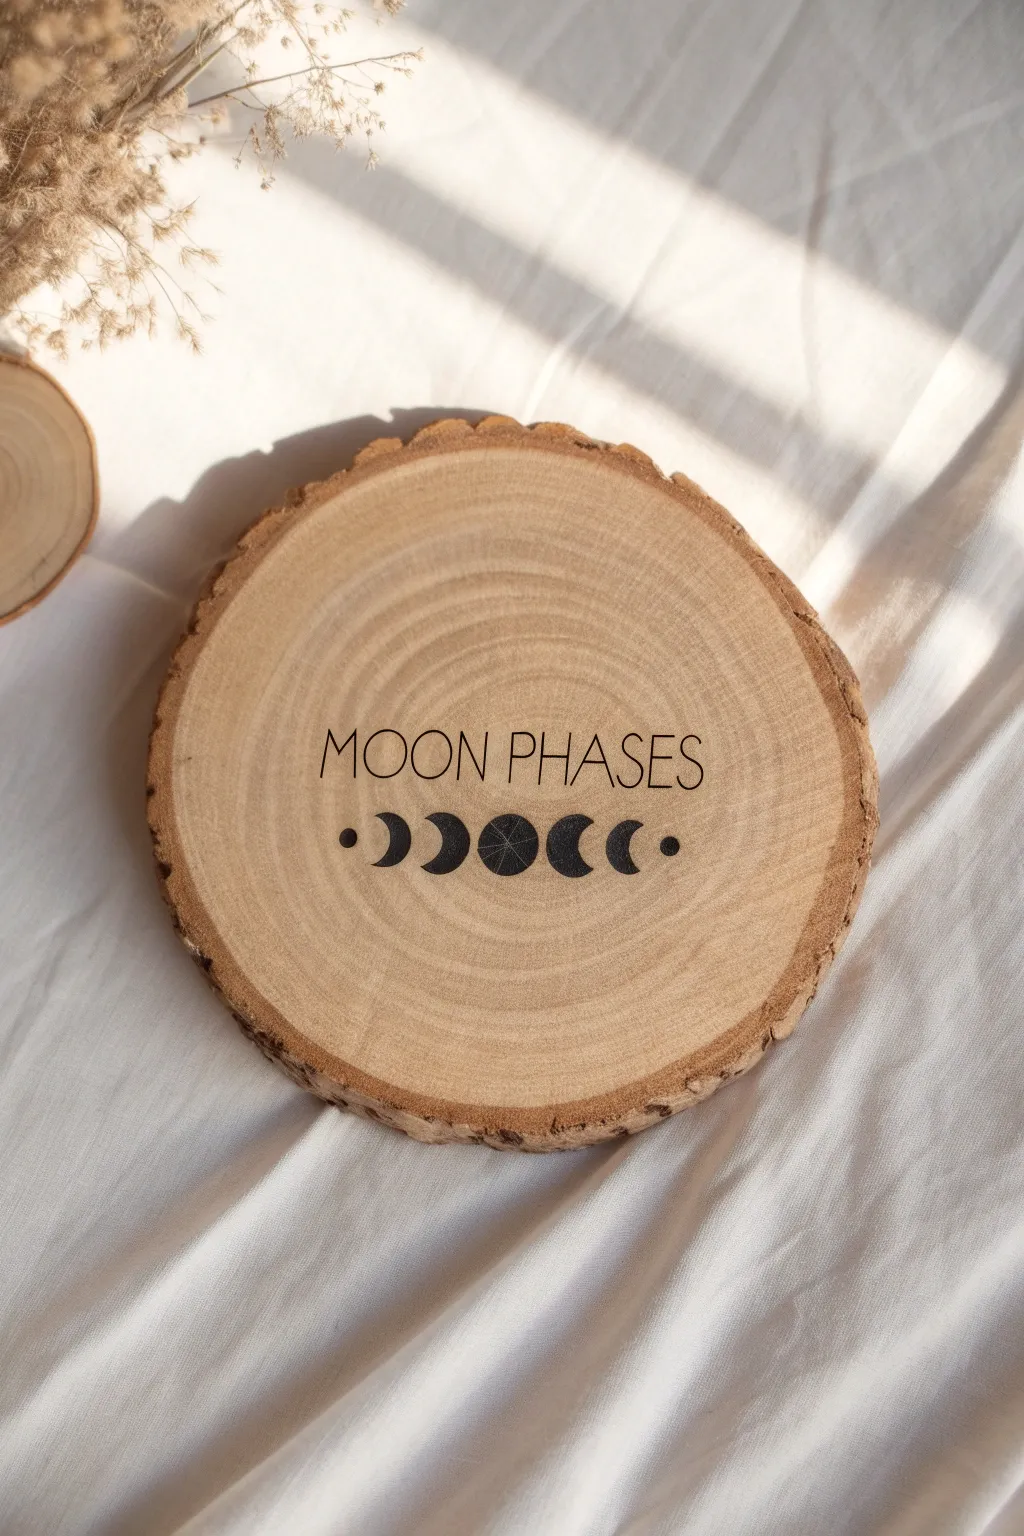
Capture the mystic cycle of the moon with this beautifully rustic wood burning project. Using precise lines and solid shading on a natural wood slice creates a stunning piece of decor that bridges earthy textures with celestial themes.
Step-by-Step
Materials
- Large round wood slice (basswood or birch, approx. 6-8 inches)
- Sandpaper (220 and 400 grit)
- Wood burning tool with multiple tips (universal and shading)
- Pencil
- Ruler or straight edge
- Carbon transfer paper or graphite paper
- Washi tape or masking tape
- Printed moon phase template
- Polycrylic or matte wood sealer (optional)
- Small lint-free cloth
Step 1: Surface Preparation
-
Sand the surface:
Begin by sanding the face of your wood slice thoroughly. Start with 220 grit to remove any rough saw marks, then switch to 400 grit for a silky smooth finish that will allow the burner to glide effortlessly. -
Wipe it clean:
Remove all sawdust using a lint-free cloth or a tack cloth. Any remaining dust can singe and create unintended specks during the burning process.
Clean Lines Secret
Keep a piece of fine sandpaper or a brass brush nearby to frequently clean carbon buildup off your nib. A clean tip ensures consistent heat and prevents dragging.
Step 2: Transferring the Design
-
Prepare your template:
Create or print a design featuring the words ‘MOON PHASES’ in a clean, thin sans-serif font, accompanied by a row of moon icons: waxing crescent, first quarter, full moon, last quarter, and waning crescent, plus two decorative dots on the ends. -
Align the artwork:
Center your paper template on the wood slice. Use a ruler to ensure the text line is level relative to the natural shape of the slice. -
Secure the template:
Once satisfied with the placement, tape the top edge of the paper to the wood using Washi tape to create a hinge. -
Insert transfer paper:
Slide a piece of carbon or graphite paper, dark side down, between the wood and your template. -
Trace the design:
Using a pencil or stylus, trace over every line of the text and the outlines of the moon shapes with firm, consistent pressure. Check your progress by lifting the paper occasionally.
Gold Leaf Accent
For a magical touch, apply gold leaf to the ‘lit’ parts of the moon phases instead of leaving them as bare wood. It adds a beautiful shimmer against the dark burned areas.
Step 3: Burning the Outline
-
heat up your tool:
Install a fine detail tip or a universal point on your wood burning tool and let it heat up to a medium setting. Test the heat on the back of the slice first. -
Outline the text:
Burn the letters of ‘MOON PHASES’ first. Use a light touch and slow, steady movement to keep the lines crisp. Don’t press hard; let the heat do the work. -
Outline the moons:
Carefully trace the perimeter of each moon shape and the small decorative dots on the ends. Rotating the wood slice as you curve around the circles often helps maintain a smoother line.
Step 4: Filling and Finishing
-
Switch tips:
Once the outlines are complete, switch to a shading tip or a spoon shader. Wait for the tool to reach the correct temperature again. -
Fill the dark areas:
Fill in the solid black sections of the moon phases. I find that moving in small circular motions creates a more uniform dark texture than straight strokes. -
Check for consistency:
Ensure all filled areas are solidly black without lighter patches showing through. Go over any spots that look uneven. -
Erase guidelines:
Once the wood has cooled completely, use a high-quality eraser to gently remove any remaining graphite or carbon transfer lines. Sand lightly if a mark is stubborn, but be careful of your burn. -
Seal the wood:
Apply a thin layer of matte polycrylic or a natural wood oil to protect the piece and enhance the grain contrast without making it glossy.
Display your new celestial artwork on a shelf or hang it as a serene reminder of nature’s rhythms
Starry Sky Galaxy in a Wood Round
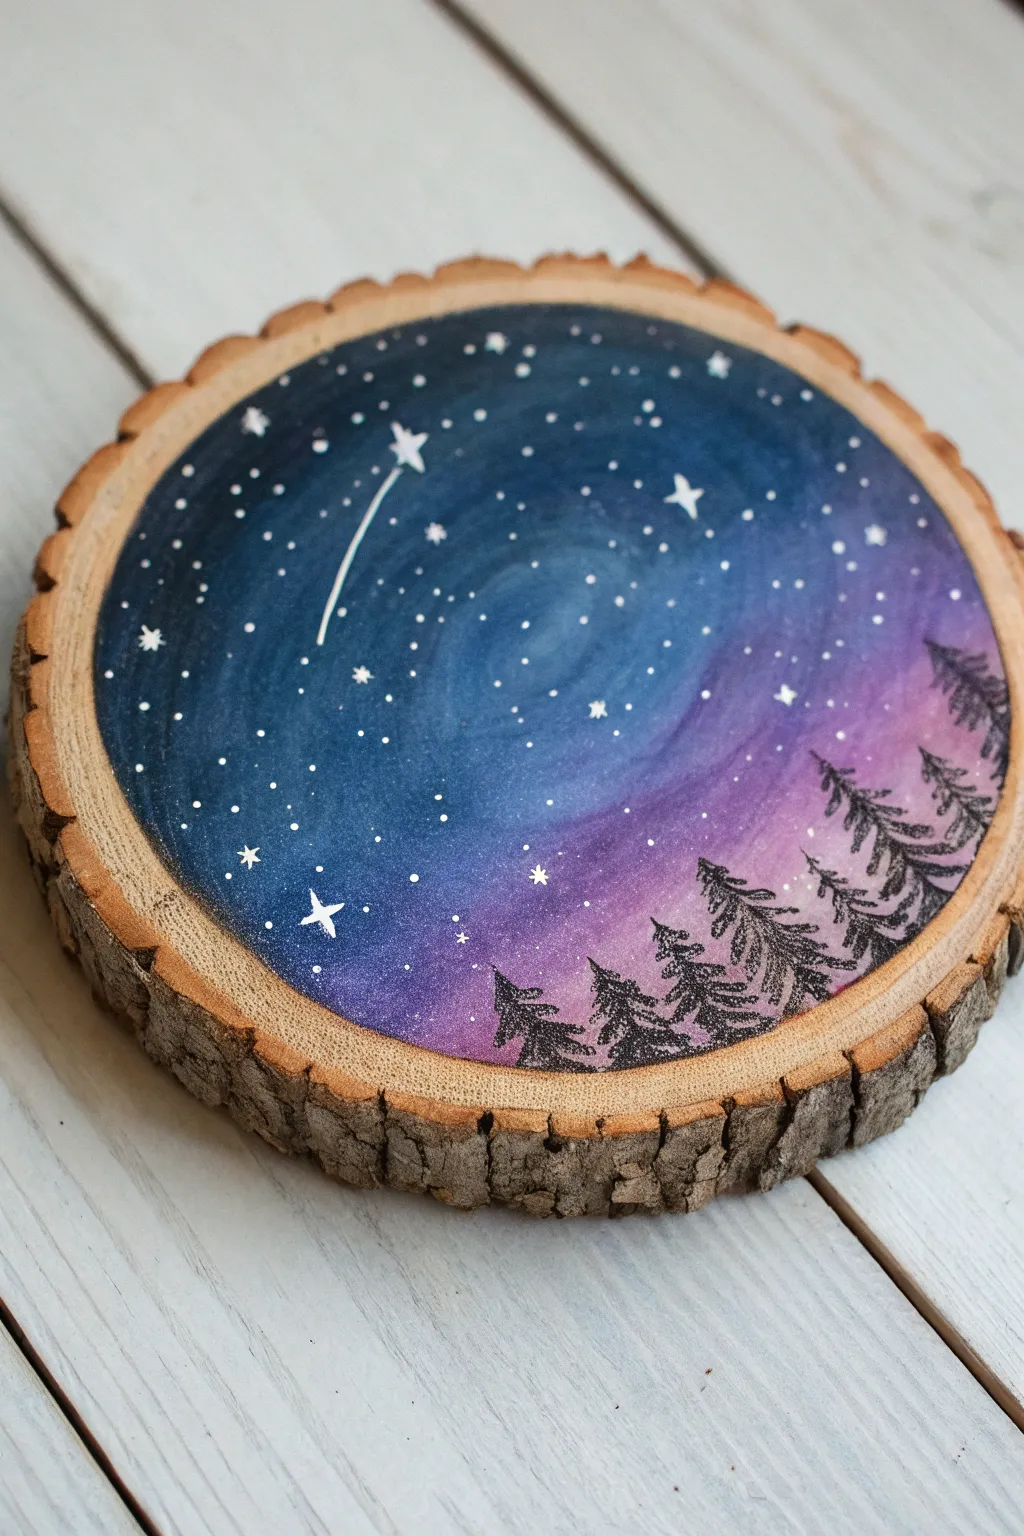
Transform a rustic slice of wood into a window to the cosmos with this stunning galaxy painting. The natural bark edge frames a swirl of deep blues and purples, punctuated by twinkling stars and silhouetted pine trees.
Step-by-Step Guide
Materials
- Wood slice (round with bark edge, approx. 4-6 inches)
- Sandpaper (220 grit)
- Acrylic craft paints (Dark Blue, Phthalo Blue, Purple, Magenta, White, Black)
- Flat shader brush (medium)
- Small round detail brush (size 0 or 00)
- Old toothbrush (optional for stars)
- Water cup and paper towels
- Matte or satin spray varnish
Step 1: Preparation and Base Coat
-
Surface Prep:
Begin by lightly sanding the face of your wood slice with 220 grit sandpaper. You want a smooth surface so the paintbrush glides easily, but be careful not to damage the bark edge. -
Clean Up:
Wipe away all sawdust with a slightly damp cloth or paper towel. Any dust left behind will create a gritty texture in your smooth sky. -
Base Layer:
Paint the entire face of the wood slice with a thin coat of white acrylic paint. This acts as a primer and ensures your blue and purple colors will pop vibrantly rather than soaking into the wood grain. Let this dry completely.
Step 2: Painting the Galaxy Sky
-
Establishing the Horizon:
Using your medium flat brush, mix a deep purple with a touch of magenta. Paint a curved band along the bottom third of the wood slice, where the treeline will eventually sit. -
Applying the Dark Sky:
While the purple is still wet, clean your brush and pick up your darkest blue. Paint the outer upper edges of the circle, leaving the center somewhat empty for now. -
Creating the Nebula Swirl:
Mix a lighter blue (using Phthalo Blue and white). Apply this to the center area in a circular motion, blending it outwards into the dark blue edges and downwards into the purple horizon. -
Wet-on-Wet Blending:
The key to the galaxy look is blending while the paint is wet. Use a slightly damp brush to blur the lines between the dark blue, light blue center, and purple bottom, creating a smooth, dreamy transition. -
Deepening the Contrast:
If the sky looks too flat, add a tiny bit of black to your dark blue and darken the very top edge of the sky. This vignette effect draws the eye toward the brighter center. -
Drying Time:
Allow the background gradient to dry completely. If you engage the next steps while the sky is tacky, you risk muddying the crisp white of the stars.
Sticky Brush Drag?
If your brush drags or sticks while painting details, your paint is too thick. Add a tiny drop of water to improve flow, especially for fine lines like tree branches.
Step 3: Adding Stars and Details
-
Creating the Starfield:
Thin down some white acrylic paint with a few drops of water until it has an ink-like consistency. -
Splatter Technique:
Dip an old toothbrush or a stiff bristled brush into the thinned white paint. Using your thumb, flick the bristles over the painting to create fine, random specks that resemble distant stars. -
Hand-painting Larger Stars:
Switch to your size 00 detail brush. Dip it in un-thinned white paint and carefully dot specific brighter stars throughout the sky, varying their sizes slightly for depth. -
The Shooting Star:
Choose a spot in the upper left quadrant. Draw a small bright star, then drag a faint, tapering tail behind it toward the center to create a shooting star effect. -
Adding Twinkle:
Select 3-5 of your larger dots and turn them into twinkling stars. Use the very tip of your detail brush to pull tiny vertical and horizontal lines outward from the center dot.
Starry Depth Tip
Paint your stars in two layers. Do one splatter layer, let it dry, then do a second. The variance in brightness creates a 3D effect, making some stars look further away.
Step 4: Silhouettes and Finish
-
Drafting the Trees:
Once the stars are dry, load your detail brush with black paint. Start on the right side of the purple horizon and paint a vertical line for the trunk of the first pine tree. -
Filling in Branches:
Using a stippling or tapping motion, paint the branches starting narrow at the top and getting wider toward the base. Leave small gaps between branches so the purple sky peaks through. -
Completing the Forest:
Continue adding trees along the bottom curve. Vary their heights—make some tall enough to reach into the blue section and others shorter to create a sense of perspective. -
Grounding the Scene:
Connect the bases of the trees with filled-in black paint along the very bottom edge to create a solid ground line. -
Sealing the Art:
Let the black paint cure fully (at least an hour). Finish by spraying a light coat of matte or satin varnish over the wood slice to protect the paint and seal the bark.
Hang your finished piece on the wall or display it on a small easel to bring a quiet night vibes to your room


Cute Woodland Animal Portrait
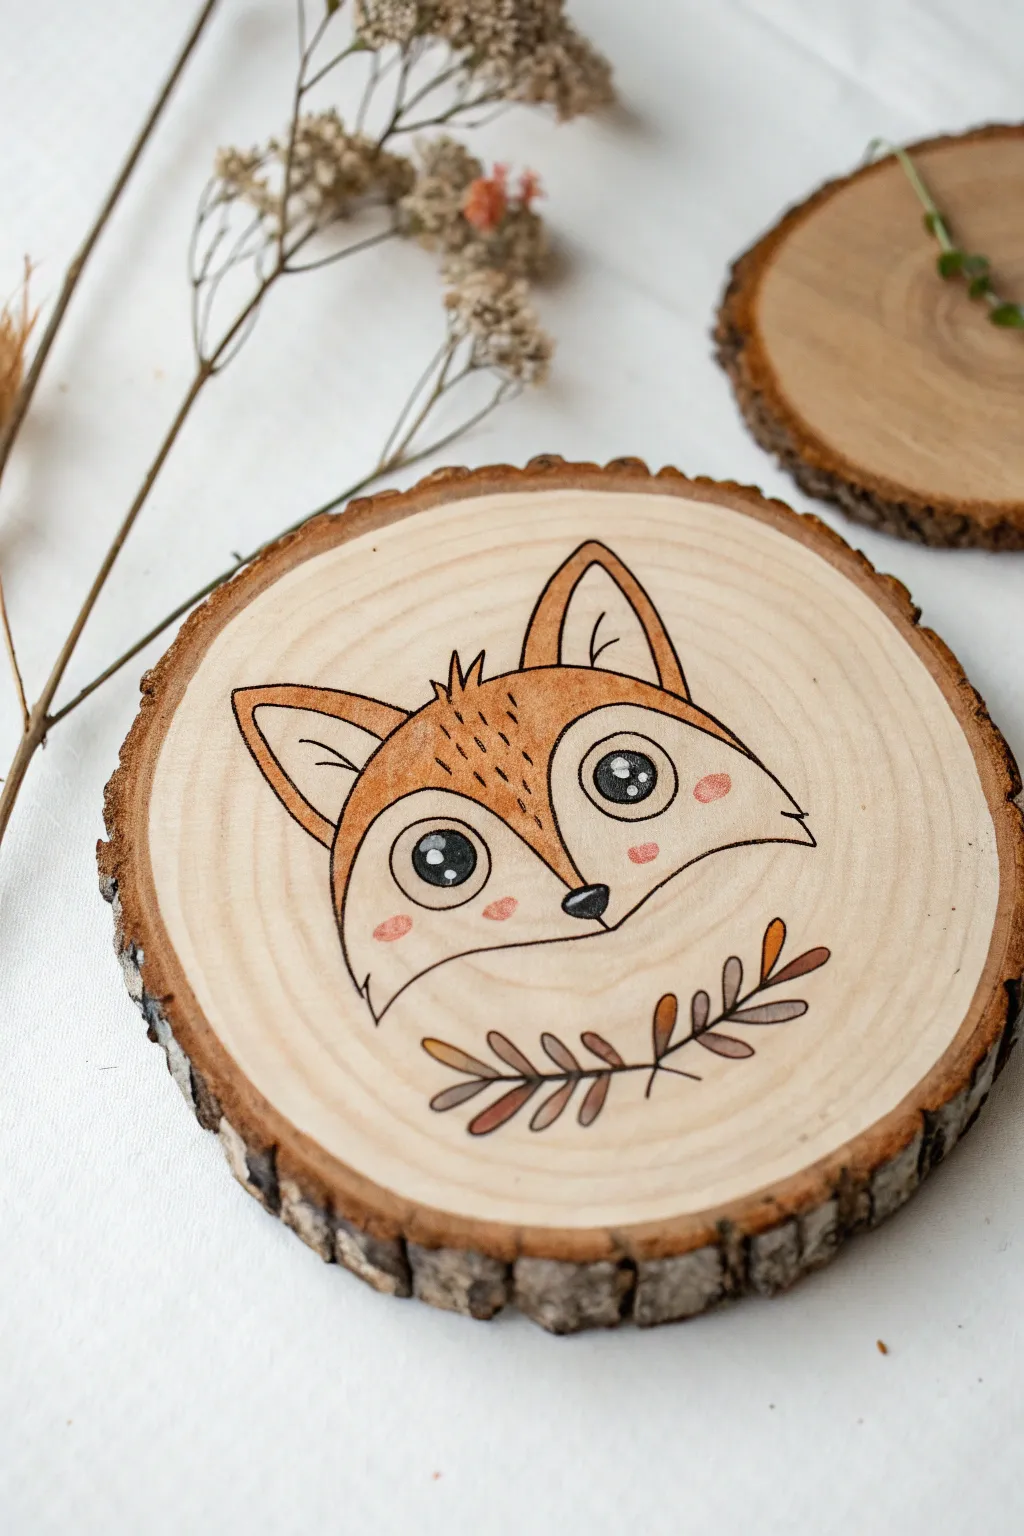
Bring the charm of the forest indoors with this adorable wood slice art featuring a sweet-faced fox. Using simple drawing techniques and soft colors, you’ll transform a rustic piece of wood into a heartwarming piece of decor.
Step-by-Step Tutorial
Materials
- Wood slice with bark (approx. 4-5 inches diameter)
- Fine grit sandpaper
- Pencil and eraser
- Fine liner pen (black, archival ink) or fine tip pyrography tool
- Colored pencils or watercolor pencils (orange, rust, brown)
- White gel pen or white acrylic paint
- Matte spray varnish or sealant
- Small paintbrush (optional, for blending)
Step 1: Preparation & Sketching
-
Smooth the surface:
Before starting any artwork, ensure your wood slice is perfectly smooth. Sand the face of the wood with fine-grit sandpaper until it feels silky to the touch. Wipe away all dust with a dry cloth. -
Mark the center:
Lightly mark the vertical center of the wood slice with your pencil. This will help you keep the fox’s face symmetrical as you build the drawing. -
Draft the head shape:
Start by drawing a wide, inverted triangle shape with rounded corners for the fox’s main head structure. Keep your pencil pressure very light so mistakes are easy to erase. -
Add the ears:
Sketch two large triangles on top of the head. Curve the outer lines slightly outward and the inner lines inward to give them organic character. Draw smaller triangles inside for the inner ear detail. -
Define the face mask:
From the inner base of each ear, draw a curved line swooping down towards the nose area, creating the classic ‘M’ shape of a fox’s white face mask. -
Complete the facial features:
Draw two large circles for eyes within the white mask area. Add a small, rounded triangle for the nose at the bottom tip of the face. Don’t forget the little tuft of fur on top of the head between the ears. -
Sketch the foliage:
Below the fox’s chin, lightly sketch two simple branches with leaves curving upwards, framing the bottom of the portrait.
Wood Grain Wisdom
Work with the grain, not against it. When drawing fine lines with ink, moving the pen perpendicular to the grain can cause the ink to bleed slightly into the wood fibers.
Step 2: Inking & Coloring
-
Outline the design:
Using your black fine liner (or a wood burning tool if you prefer pyrography), carefully trace over your pencil lines. Variating your line weight slightly—making some lines thicker than others—adds visual interest. -
Fill the eyes:
Color in the eyes with solid black ink. Leave two small white circles in each eye uncolored to create the ‘sparkle’ or reflection, which brings the character to life. -
Erase pencil marks:
Wait until the ink is completely dry to avoid smudging. Then, gently erase all visible pencil guidelines. -
Base coat the fur:
Take an orange colored pencil and gently shade the upper part of the face (the forehead and ears). Use light, circular motions to build up color gradually rather than pressing hard. -
Deepen the shading:
Layer a slightly darker rust or brown pencil over the orange, specifically near the edges of the face and the tips of the ears, to create dimension. -
Add texture details:
Using your black pen again, add tiny, dashed lines on the forehead to simulate fur texture. Add three small dots on each cheek for freckles. -
Color the cheeks:
Use a pink pencil to add soft, oval blush spots right under the eyes. I find a soft circular motion creates the perfect rosy glow here. -
Color the leaves:
Fill in the leaf sprigs using alternating autumn tones—browns, muted oranges, and tans—to match the woodland theme. -
Highlighting:
If the eye reflections aren’t bright enough, touch them up with a white gel pen or a tiny dot of white acrylic paint for a sharp contrast. -
Seal the piece:
Once you are happy with the coloring, protect your work by spraying a thin, even coat of matte varnish over the wood surface.
Make It Hangable
Drill a small hole near the top edge before you start drawing. Thread a piece of jute twine or ribbon through it to turn your fox portrait into a rustic ornament.
Now your charming fox is ready to be displayed on a shelf or hung as a warm seasonal accent
Bee and Honeycomb Pattern Border
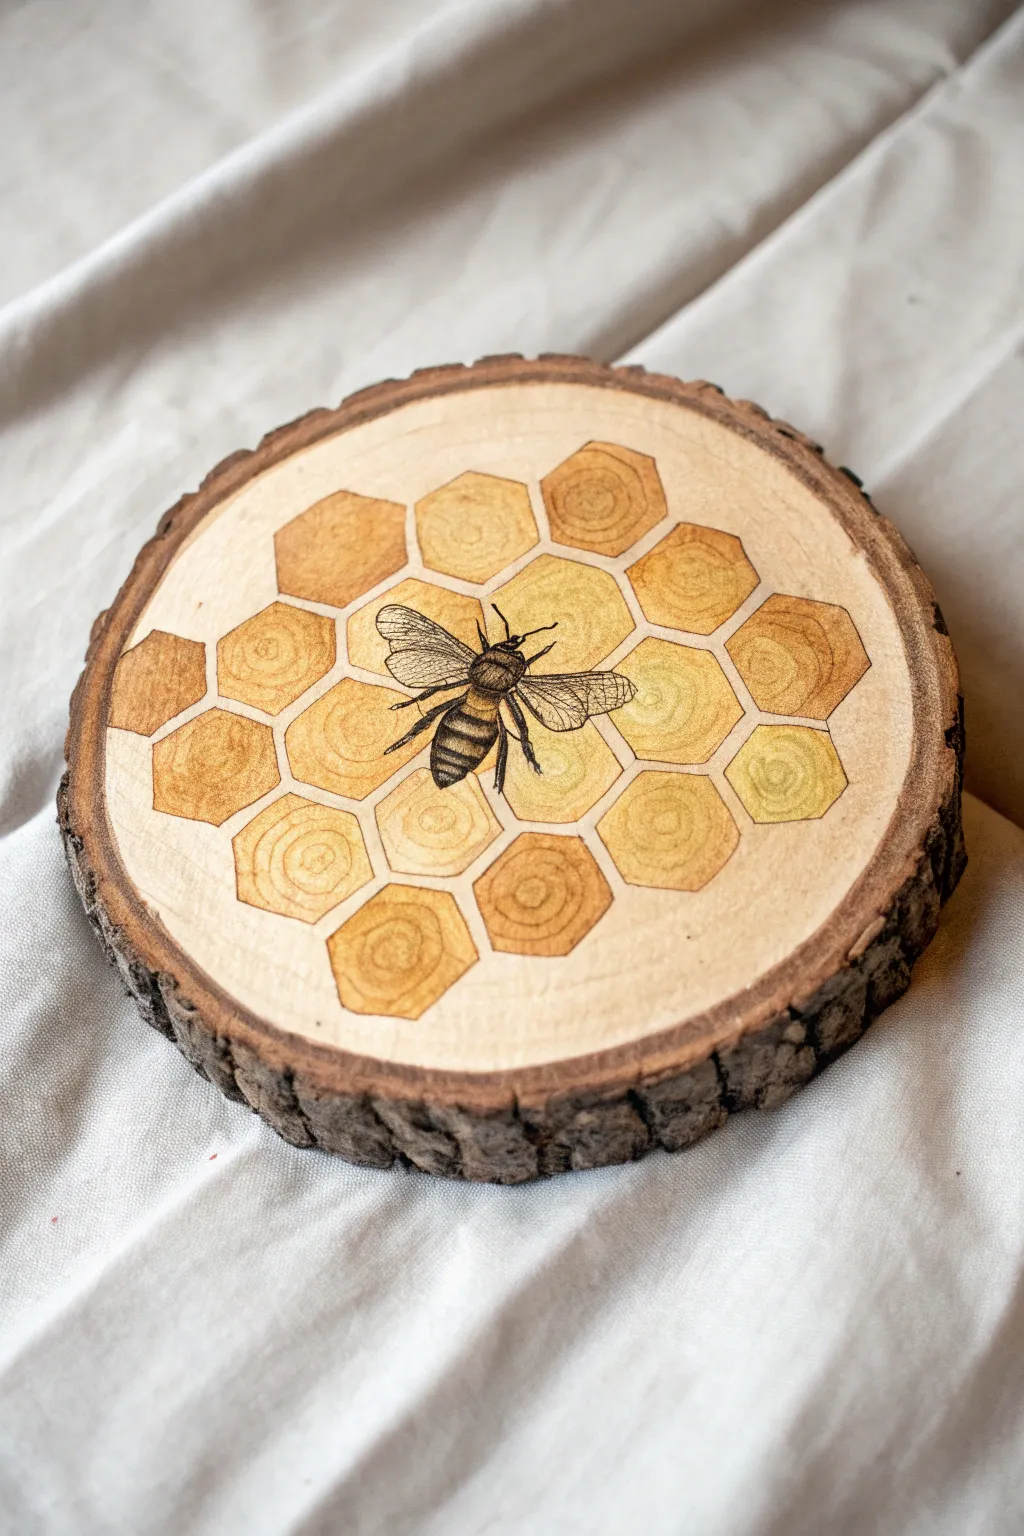
Bring the warmth of the hive into your home with this beautiful mixed-media wood slice art. Combining the crisp lines of pyrography with soft washes of amber and yellow, this project captures the delicate intricacy of a honeybee at work.
How-To Guide
Materials
- Round wood slice with bark (basswood or birch recommended)
- Sandpaper (220 and 400 grit)
- Pencil and eraser
- Ruler
- Pyrography tool (wood burner) with universal tip
- Watercolor paints or watercolor pencils (yellow, ochre, amber, brown)
- Fine detail paintbrush
- Black fine-liner pen (optional, for bee details if not burning)
- White gel pen (for highlights)
- Spray varnish or wood sealer
Step 1: Preparation & Sketching
-
Surface Prep:
Begin by sanding the face of your wood slice until it is buttery smooth. Start with 220 grit to remove saw marks, then finish with 400 grit for a polished surface that won’t snag your burner tip. -
Dust Removal:
Wipe the wood thoroughly with a dry cloth or tack cloth to remove all sawdust. Any lingering dust will carbonize and create stray black specks. -
Center the Design:
Locate the approximate center of the wood slice lightly with your pencil. This is where your bee will land. -
Drafting the Honeycomb:
Using a ruler or a hexagon stencil, lightly sketch a cluster of hexagons around the center point. Don’t worry about perfect symmetry; an organic cluster looks more natural. -
Refining the Grid:
Add a second layer of hexagons radiating outward from the center cluster, leaving plenty of empty wood space toward the bark edge. -
Drawing the Bee:
Sketch the bee directly over the center combs. Start with the thorax, add the abdomen, and then sketch the delicate wings extending outward. Don’t press too hard with the pencil.
Step 2: Pyrography (Wood Burning)
-
Burning the Outlines:
Heat up your pyrography tool. Using a universal or fine point tip, carefully burn the outlines of the hexagons first. Keep your hand steady and move at a consistent pace to avoid deep burn blotches. -
Bee Outline:
Switch to a finer tip if available, or use the very edge of your universal tip to outline the bee’s main body parts and wings. -
Bee Details:
Burn the stripes on the bee’s abdomen using short, dense strokes. Leave the light stripes empty or burn them very lightly for contrast. -
Wing Veins:
With a very light touch and low heat setting, draw the delicate veins inside the wings. These lines should be significantly thinner than the body outline. -
Erase Guidelines:
Once the burning is complete and the wood has cooled, gently erase any visible pencil marks.
Burner Control Tip
If you are new to wood burning, practice your hexagon lines on the back of the wood slice first to find the right heat setting and hand speed.
Step 3: Adding Color & Finish
-
Base Honey Color:
Load your brush with a watered-down yellow watercolor. Paint the inside of random honeycombs, leaving some totally unpainted for variety. -
Deepening Values:
While the first layer is still damp, drop in touches of amber or ochre paint near the edges of the filled hexagons to create a 3D, pooled honey effect. -
Wood Grain Enhancement:
I find that lightly painting concentric circles inside the hexagons with a slightly darker shade mimics the natural wood rings and adds texture. -
Coloring the Bee:
Add very faint washes of brown to the bee’s body and a translucent grey-blue to the wings. Keep this subtle; let the wood burning do the heavy lifting. -
Highlights:
Once the paint is completely dry, use a white gel pen to add tiny highlights to the bee’s eyes and the curve of the abdomen. -
Sealing:
Finish the piece by applying a spray varnish. Use light, even coats to avoid smearing the watercolor or raising the wood grain.
Paint Bleeding?
If watercolor bleeds into the wood grain, switch to watercolor pencils. Draw the color on dry, then activate it carefully with a very slightly damp brush.
Now you have a charming piece of rustic nature art to display on a shelf or hang on your wall
Botanical Mushroom Cluster

Marrying rustic charm with scientific illustration, this project features a detailed cluster of mushrooms drawn directly onto a raw wood slice. The fine black linework contrasts beautifully with the pale wood grain, while subtle touches of mossy green ground the composition.
Step-by-Step Guide
Materials
- Basswood country round (approx. 7-9 inches, with bark)
- Fine-grit sandpaper (220 and 400 grit)
- Pencil (HB or 2H)
- Kneaded eraser
- Fine liner pens (sizes 005, 01, 03, and 05 – waterproof/archival ink)
- Green colored pencil or thin green marker (moss/olive tone)
- Matte spray varnish or workable fixative
- Lint-free cloth
Step 1: Preparing the Canvas
-
Initial Sanding:
Begin with the 220-grit sandpaper to remove any rough fibers from the face of the wood slice. Sand in circular motions until the surface feels relatively consistent. -
Fine Smoothing:
Switch to the 400-grit sandpaper for the final polish. This step is crucial because pen nibs can snag on rough grain; you want the surface as smooth as paper. Wipe away all dust with a lint-free cloth. -
Sealing (Optional):
If your wood feels very porous, apply a very light coat of matte spray fixative and let it dry. I sometimes do this to prevent ink from bleeding into the grain, ensuring crisp lines later.
Step 2: Structuring the Sketch
-
Drafting the Main Stems:
Using a light hand and your pencil, draw a central, curved vertical line for the tallest mushroom. Add three smaller, slightly curved lines flanking it to establish the positions of the companion fungi. -
Shaping the Caps:
Sketch broad, umbrella-like shapes on top of your stems. The central cap should be the largest and flattest, while the side mushrooms can have rounder, more bell-shaped caps to show variety in growth stages. -
Adding Details:
Lightly outline the gills underneath each cap and sketch the slender, curved stems of the wispy grass rising from the base. -
Cleaning the Sketch:
Use the kneaded eraser to lift as much graphite as possible, leaving only the faintest ghost of an image as your guide. Heavy graphite can repel water-based ink.
Bleeding Lines?
If ink spreads into the wood grain (feathering), stop immediately. Apply a clear matte acrylic medium over the area, let dry completely, then draw on top of that sealed layer.
Step 3: Inking the Drawing
-
Outlining the Primary Shapes:
Switch to an 03 pen. Carefully trace the outer contours of the mushroom caps and stems. Keep your lines confident but organic—slight wobbles actually help it look more natural. -
DETAILING THE GILLS:
Using the 005 (your finest) pen, draw the gills under the main caps. These are tightly packed, fine lines radiating from the stem to the cap’s edge. Break the lines occasionally to simulate texture. -
Texturing the Stems:
Switch to the 01 pen. Add vertical hatching lines running up the stems to create shadow and form. Concentrate these lines at the base and under the caps where shadows naturally fall. -
Cap Details:
Add small stippled dots and tiny broken dashes to the tops of the mushroom caps using the 01 pen. This suggests the speckled texture often found on woodland fungi. -
Drawing the Base Mess:
Use a scribbling, erratic motion with the 01 pen at the very bottom where the stems meet. create a dense patch of scribbles to represent a mossy, earthy floor.
Texture Trick
Vary your line weight constantly. Use the thickest pen for the darkest shadow areas on the stem and the thinnest pen for the delicate gills to create instant 3D depth.
Step 4: Botanical Accents & Finishing
-
Adding Ink Grass:
Draw the thin, sweeping sprigs of grass extending outward from the base using the 005 pen. Keep these lines swift and fluid. -
Applying Color:
Take your green colored pencil or marker. Very delicately color the mossy base scribbles and the tiny leaves on the grass sprigs. Keep the color muted and transparent so the ink work shines through. -
Final Ink Touch-ups:
Once the green is applied, you might notice the base looks a bit washed out. Go back in with the 05 pen to darken the deepest shadows in the moss for contrast. -
Review and Correct:
Step back and look at the composition. If one side feels too light, add a few more stippling dots or hatching lines to balance the visual weight. -
Sealing the Art:
Allow the ink to cure for at least an hour. Finish by spraying a light coat of matte varnish over the wood slice to protect the drawing from moisture and UV light.
Display your rustic mushroom study on a shelf or attach a sawtooth hanger to the back for instant wall art
Herb Labels and Tiny Sprigs
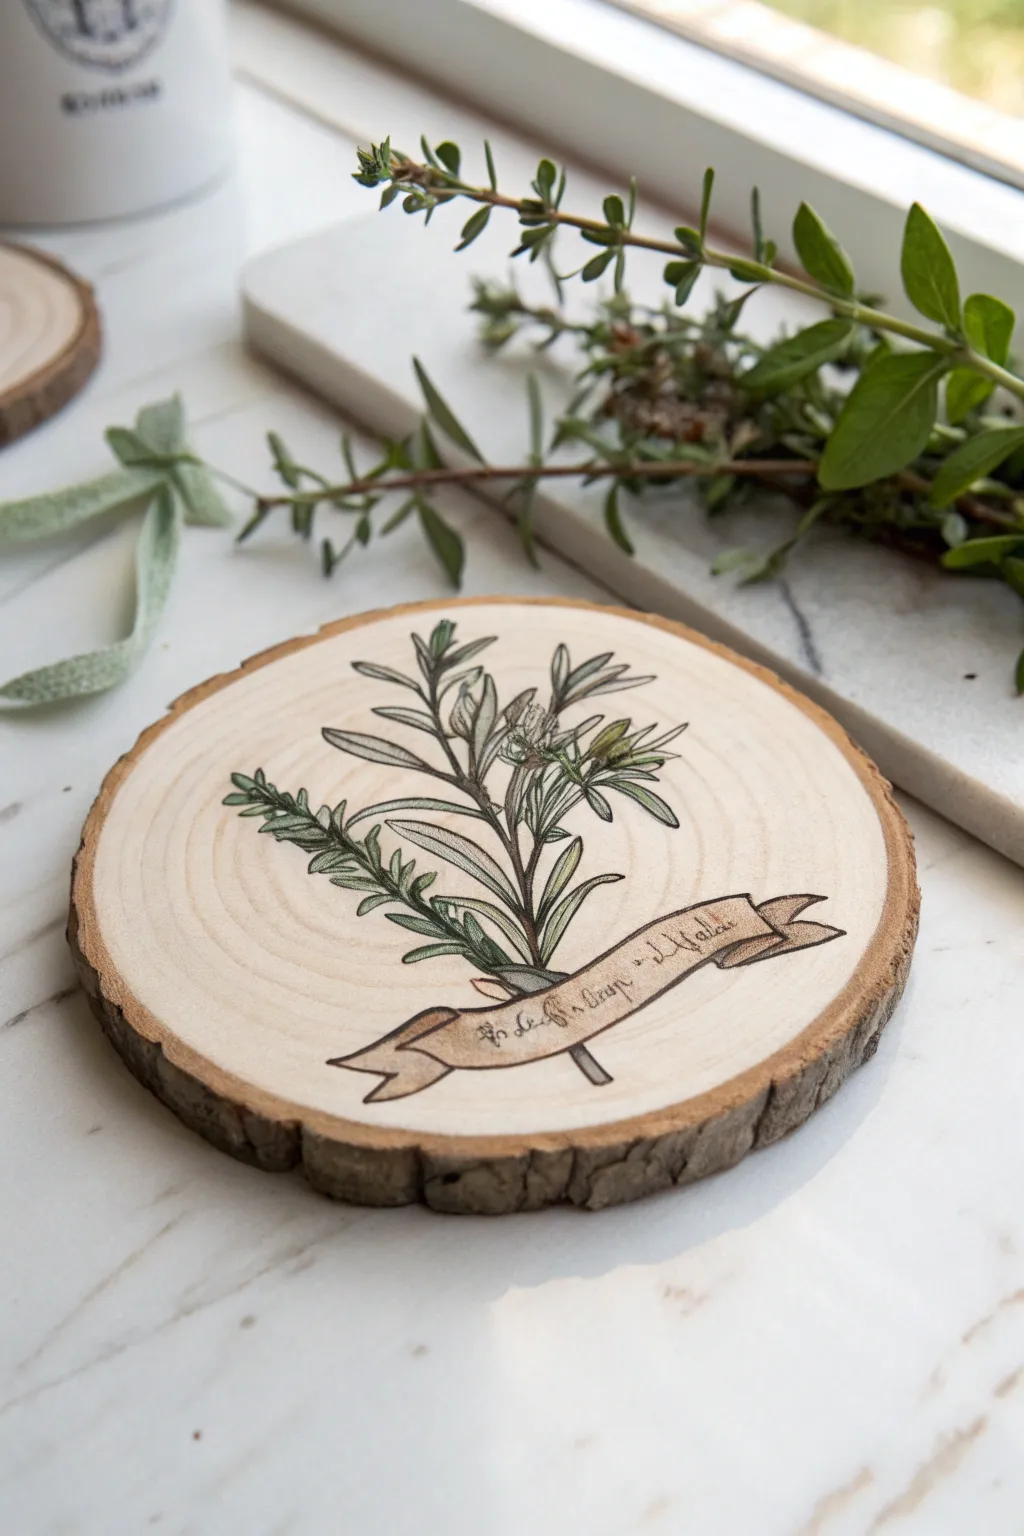
Capture the delicate beauty of a kitchen herb garden with this botanical wood slice project. Using simple fine-line drawing and soft shading, you’ll transform a raw timber round into a charming piece of rustic decor perfect for coasters or wall hanging.
Step-by-Step
Materials
- Unfinished wood slice (appx. 4 inches diameter) with bark edge
- Fine-grit sandpaper (220 grit)
- Pencil (HB or H)
- Kneaded eraser
- Waterproof archival ink pen (0.1mm and 0.3mm nibs)
- Colored pencils (olive green, sage green, forest green, light brown)
- White gel pen or white colored pencil (optional for highlights)
- Spray matte varnish or clear acrylic sealer
Step 1: Preparing the Canvas
-
Sand the surface:
Begin by sanding the top face of your wood slice. Even if it looks smooth, give it a good rub with 220-grit sandpaper to remove any microscopic fibers that could snag your pen tip later. Wipe away all dust with a dry cloth. -
Plan the composition:
Visualize the center of the wood slice. You want the main stem of the herb to rise vertically from the bottom center, with the banner floating just below the stems near the bottom third of the circle.
Step 2: Sketching the Design
-
Establish the main stem:
Using a light pencil touch, draw a central curved line branching upward. Don’t press hard, as erasing on raw wood can sometimes smudge graphite into the grain. -
Add secondary branches:
Sketch two or three smaller branches extending from the main stem. Keep the arrangement asymmetrical to mimic nature; let one side be slightly fuller than the other. -
Sketch the banner:
Draft a wavy ribbon banner across the bottom of the stem. Draw the front face of the ribbon first, then add the folded ‘tails’ curving underneath and behind. Ensure the center area is wide enough for your text. -
Flesh out the leaves:
Draw the rosemary-style needle leaves. These should grow in clusters along the stems, pointing generally upward and outward. Vary their lengths slightly for realism. -
Draft the text:
Lightly letter your chosen herb name or phrase inside the banner. A loose, cursive script works beautifully with the organic feel of the wood.
Ink Bleeding?
If your ink feathers into the wood grain, apply a coat of clear matte acrylic medium to the wood and let it dry completely BEFORE you start drawing. It creates a barrier.
Step 3: Inking the Outline
-
Trace the main lines:
Switch to your 0.3mm waterproof pen. Carefully go over the main outline of the banner first to anchor the image. Keep your hand relaxed to avoid shaky lines. -
Ink the botanical elements:
Outline the stems and leaves. I like to break the line occasionally on the leaves—don’t close every shape perfectly—to keep it looking like a sketch rather than a stamp. -
Add texture marks:
Use the finer 0.1mm pen to add tiny tick marks on the woody stems and subtle veins on the larger leaves. Ink the lettering now as well. -
Erase pencil guides:
Wait at least 15 minutes for the ink to fully dry. Then, gently roll a kneaded eraser over the surface to lift the graphite without damaging the wood fibers.
Sanding Secret
Sand in multiple directions. Wood slices often have end-grain which soaks up ink differently. A super smooth surface is key to crisp pen lines.
Step 4: Adding Color and Depth
-
Base layer for leaves:
Take your sage or light green colored pencil and fill in the leaves. Use a light circular motion to blend the pigment into the wood grain rather than harsh back-and-forth strokes. -
Deepen the shadows:
Use a darker forest green pencil to shade the base of each leaf cluster and the undersides of leaves. This creates volume and separates the drawing from the background. -
Color the stems:
Color the woody stems with a mix of light brown and olive green. Press slightly harder at the joints where branches meet. -
Shade the banner:
Lightly shade the ‘back’ folds of the ribbon with a tan or light brown pencil to make them recede. Leave the front face of the banner mostly the natural wood color, perhaps adding just a touch of shading at the edges. -
Add highlights:
If you have a white gel pen or pencil, add tiny dashes of light to the tips of the upper leaves to make them pop against the wood tone.
Step 5: Sealing
-
Final inspection:
Check for any loose graphite smudges or areas that need a bit more contrast with the black pen. Reinforce the outline if necessary. -
Apply finish:
In a well-ventilated area, spray a thin coat of matte sealer over the wood slice. This prevents the ink from bleeding if the wood gets wet and keeps the bark edge intact.
Now you have a timeless piece of botanical art that brings a touch of nature indoors
Minimal Line Art Face on Wood
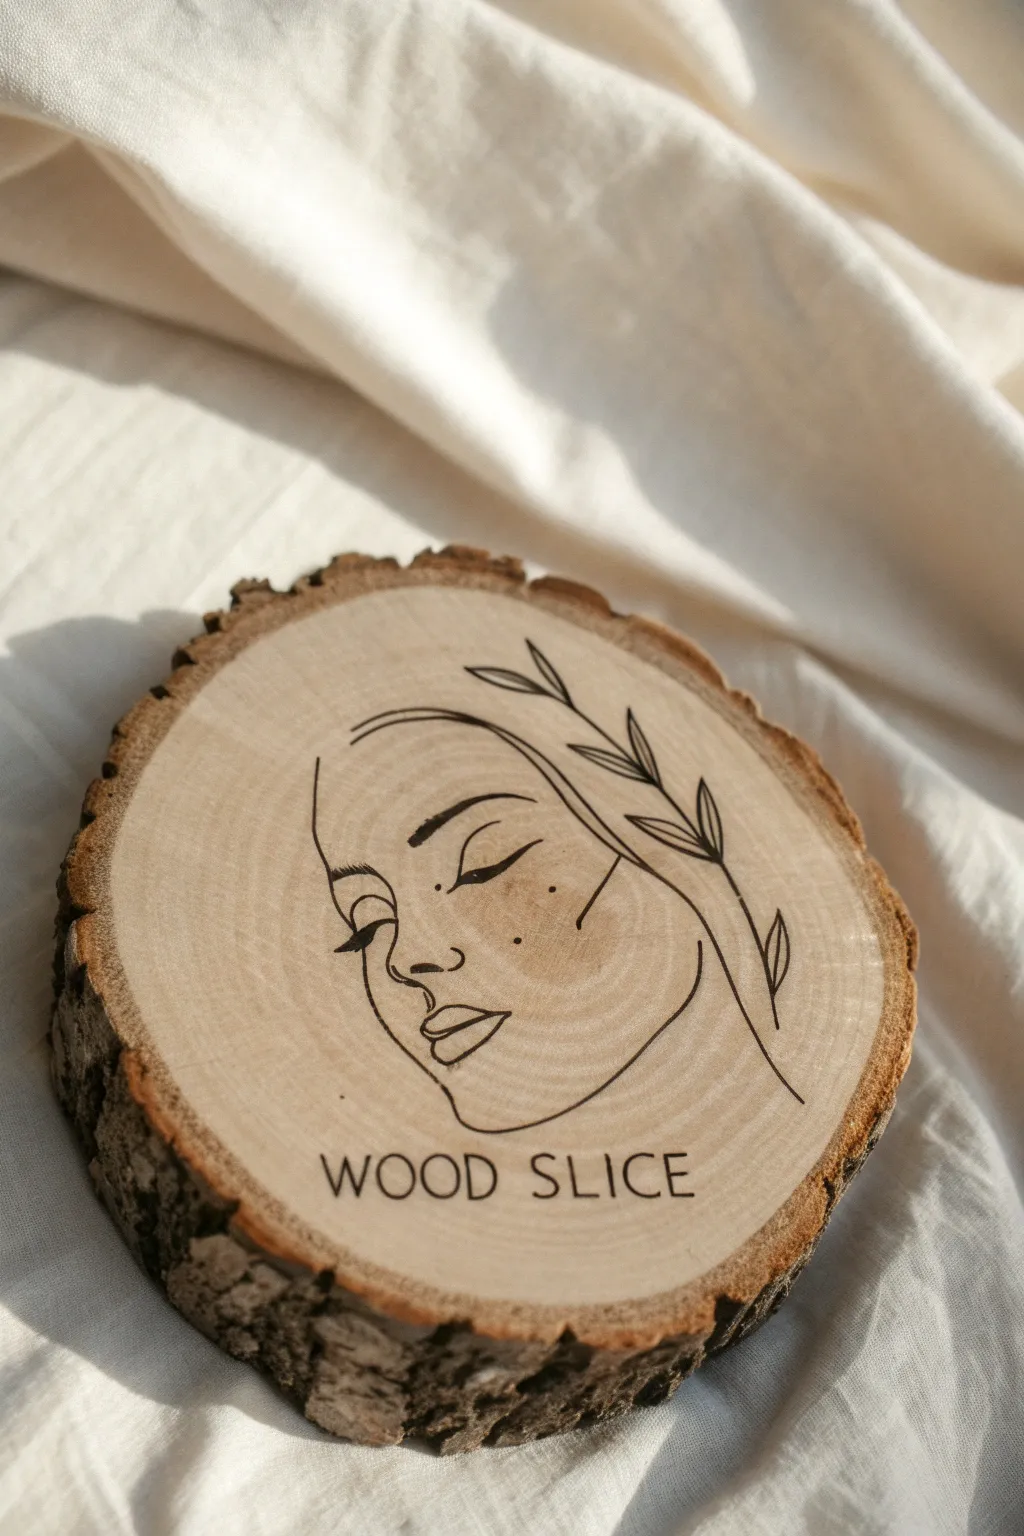
Transform a rustic piece of nature into a modern art piece with this minimalist line drawing project. Using just a few simple tools, you’ll capture a serene botanical portrait on a raw wood slice, letting the natural grain become part of the beauty.
Step-by-Step Guide
Materials
- Clean wood slice (approx. 4-6 inches in diameter, sanded smooth)
- Fine-grit sandpaper (220-grit)
- Pencil (HB or H for light lines)
- Eraser (kneaded eraser works best)
- Black fine-line permanent marker or acrylic paint pen (0.3mm or 0.5mm)
- Carbon paper (optional for tracing)
- Printed design template (optional)
- Clear matte sealant spray or brush-on varnish
Step 1: Preparation
-
Surface Smoothing:
Begin by assessing the smoothness of your wood slice. Even if it came pre-sanded, give the face of the wood a quick pass with 220-grit sandpaper to remove any tiny raised fibers that catch ink. -
Clean the Grain:
Wipe away every speck of sawdust using a dry microfiber cloth or a tack cloth. Dust is the enemy of clean lines, as it can cause ink to bleed or skip. -
Design Planning:
Decide on your composition. The goal is to place the face centrally but slightly offset, allowing the foliage elements to curve naturally with the wood’s rings.
Pro Tip: Stop the Bleed
If you notice ink feathering during your test, brush a thin layer of matte Mod Podge on the area where you’ll draw. Let it dry completely, then draw on top for crisp lines.
Step 2: Drafting the Design
-
Sketching the Outline:
Using a light hand and your pencil, sketch the basic contour of the face. Start with the forehead curve, sweeping down past the cheekbone to the chin. -
Adding Facial Features:
Place the eye closed with a gentle downward curve, adding thick lashes. Sketch the nose profile and the lips in a relaxed state. I find it helpful to keep these features simple rather than hyper-realistic. -
Incorporating Botanical Elements:
Draw the branch extending from the hair line. Let the leaves fan out towards the bark edge, mimicking the organic shape of the wood slice itself. -
Text Placement:
Lightly letter the words ‘WOOD SLICE’ (or your chosen phrase) at the bottom in a clean, sans-serif style to balance the organic lines above. -
Alternative Transfer Method:
If you aren’t confident sketching freehand, place a sheet of carbon paper on the wood, layer your printed design on top, and trace over the lines firmly with a pencil.
Level Up: Gold Accents
Use a metallic gold paint pen to trace just the leaves or add highlight accents to the eyelids. The shimmer against the raw wood creates a stunning, high-end contrast.
Step 3: Inking the Artwork
-
Testing the Pen:
Before touching the wood, test your marker on the back of the slice. Check if the ink bleeds into the grain. If it feathers too much, you may need a layer of clear sealant before drawing. -
Tracing the Face Contour:
Begin inking the main facial outline. Use a confident, consistent speed; hesitation often leads to shaky lines or ink pooling. -
Detailing the Eye:
Carefully draw the closed eyelid. Press slightly harder or go over the line twice to thicken the eyelashes, creating a focal point for the expression. -
Refining the Lips and Nose:
Ink the nose and mouth with thin, deliberate strokes. Keep the lines disconnected slightly at edges (like the corner of the mouth) to maintain that airy, minimalistic style. -
Inking the Foliage:
Trace the stem and leaves. Vary your line weight slightly—thicker at the stem base, thinner at the leaf tips—to add dimension to the simple drawing. -
Adding Freckles:
Dot the cheek area with the very tip of your pen to create freckles. Group them randomly rather than in a grid for a natural look. -
Lettering:
Trace your text carefully. Using a fine-tip pen here is crucial to keep the letters crisp against the porous wood grain.
Step 4: Finishing Touches
-
Drying Time:
Let the ink sit for at least 30 minutes. Wood absorbs ink differently than paper, and it can remain wet below the surface longer than you expect. -
Erasing Guides:
Gently erase any visible pencil marks. Be extremely careful not to smudge the ink or rub dirt into the raw wood pores. -
Sealing:
Finish by applying a thin coat of matte spray sealant. Hold the can 8-10 inches away and do light passes to prevent the ink from running.
Display your beautiful new wood slice art on a small easel or hang it as part of a gallery wall for an instant calm aesthetic
Heart Initials Carved-Look Drawing
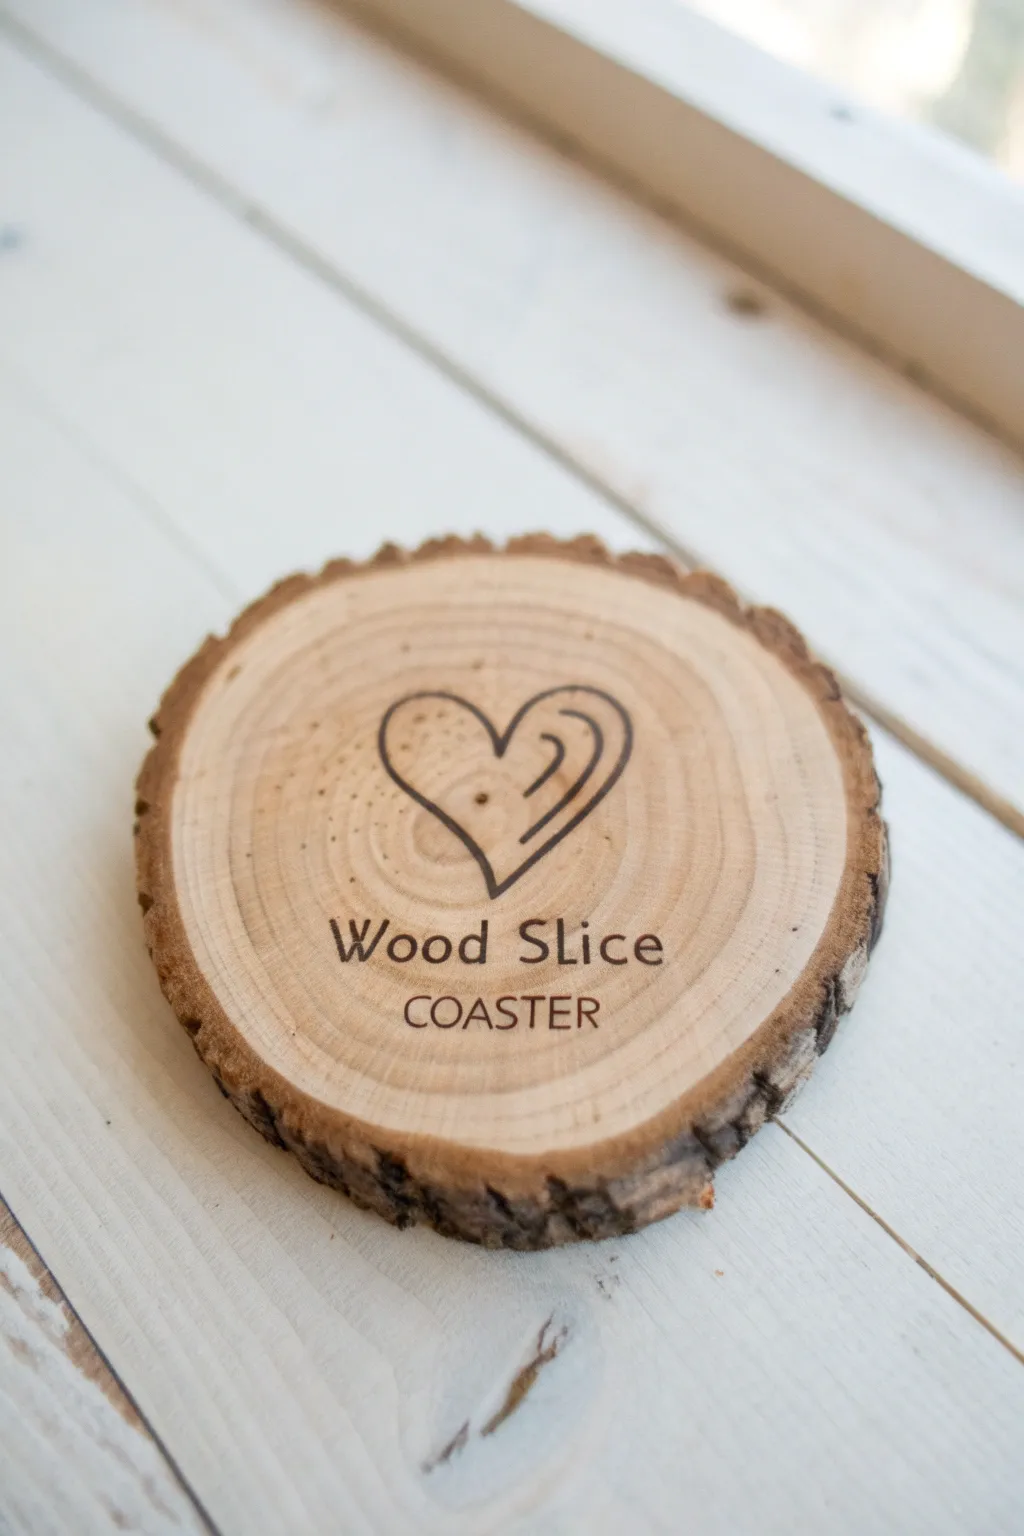
Embrace a charming, natural aesthetic with this simple yet beautiful wood burning project. You’ll transform a raw slice of timber into a functional piece of art featuring a stylized heart and classic typography, perfect for gifting or cozy home decor.
Step-by-Step Tutorial
Materials
- Wood slice coaster (approx. 3.5-4 inches diameter, with bark)
- Sandpaper (220 grit and 400 grit)
- Pencil
- Eraser
- Carbon transfer paper (optional)
- Wood burning tool (pyrography pen)
- Universal point tip or flow point tip for the wood burner
- Mineral oil or polyurethane sealant
- Clean rag or cloth
- Ruler
Step 1: Preparation
-
Surface smoothing:
Begin by sanding the top surface of your wood slice. Start with the 220-grit sandpaper to remove any rough saw marks, then switch to the 400-grit for a silky smooth finish that will make burning much easier. -
Clean up dust:
Wipe away all sawdust with a dry cloth or a tack cloth. Any leftover dust can burn unevenly and mess up your clean lines. -
Design orientation:
Examine the wood grain and the natural shape of the slice. Decide which way looks best as the ‘top’—usually, aligning the text with the grain direction looks most professional.
Smooth Operator
If you struggle with the tip snagging on the wood grain, try sanding the wood even smoother, up to 600 grit. A smoother surface allows the pen to glide like ink.
Step 2: Drafting the Design
-
Sketching the heart:
Using a pencil, lightly sketch a stylized heart in the upper center of the slice. For this specific look, draw the left side as a single stroke and the right side as a double stroke that curves inward, creating a playful, hand-drawn feel. -
Inner details:
Add the small detail lines inside the right lobe of the heart to give it movement similar to the reference photo. I find drawing these swiftly helps them look more natural. -
Text placement:
Use a ruler to lightly mark two horizontal guidelines for your text below the heart. This ensures your words won’t slant. -
Lettering draft:
Pencil in ‘Wood Slice’ in a serif font and ‘COASTER’ in a sans-serif font below it, just like the image. If you aren’t confident in your freehand lettering, you can print the text and use carbon paper to transfer it onto the wood.
Fixing Dark Blobs
If you pause and burn a dark blob by accident, don’t panic. Once cooled, use the tip of a craft knife to gently scrape away the charred area, then lightly resand.
Step 3: Burning the Design
-
Tool warm-up:
Plug in your wood burning tool and attach a universal point or a rounded flow tip. Let it heat up for about 5 minutes on a medium-high setting. -
Outline the heart:
Gently glide the hot tip over your pencil lines for the heart. Don’t press hard; let the heat do the work. Move at a slow, consistent pace to get a dark, even burn. -
Thickening strokes:
Go back over the heart outline to thicken the lines slightly, especially on the curves, giving it more visual weight. -
Burning the main text:
Burn the ‘Wood Slice’ text. Use the very tip of the tool for the thin parts of the letters and the side of the tip to fill in wider sections to create that serif font variation. -
Detailed lower text:
Switch to a finer point tip if you have one, or just use a very light touch, to burn the smaller ‘COASTER’ text. Keep these lines thin and crisp. -
Erase guidelines:
Once the wood has cooled completely, use a soft eraser to gently remove any remaining pencil marks. Be careful not to smudge the graphites into the wood grain.
Step 4: Finishing
-
Final wipe down:
Brush off any eraser shavings and inspect the design for any spots that need a quick touch-up with the burner. -
Sealing the wood:
Apply a coat of mineral oil or clear polyurethane to protect the wood and bring out the rich color of the grain. If using polyurethane, apply in thin layers. -
Drying:
Allow the sealant to cure fully according to the manufacturer’s instructions before using it as a coaster to prevent water rings.
Now you have a charming, personalized coaster ready to protect your table with rustic style
Hand-Lettered Quote With Floral Corners
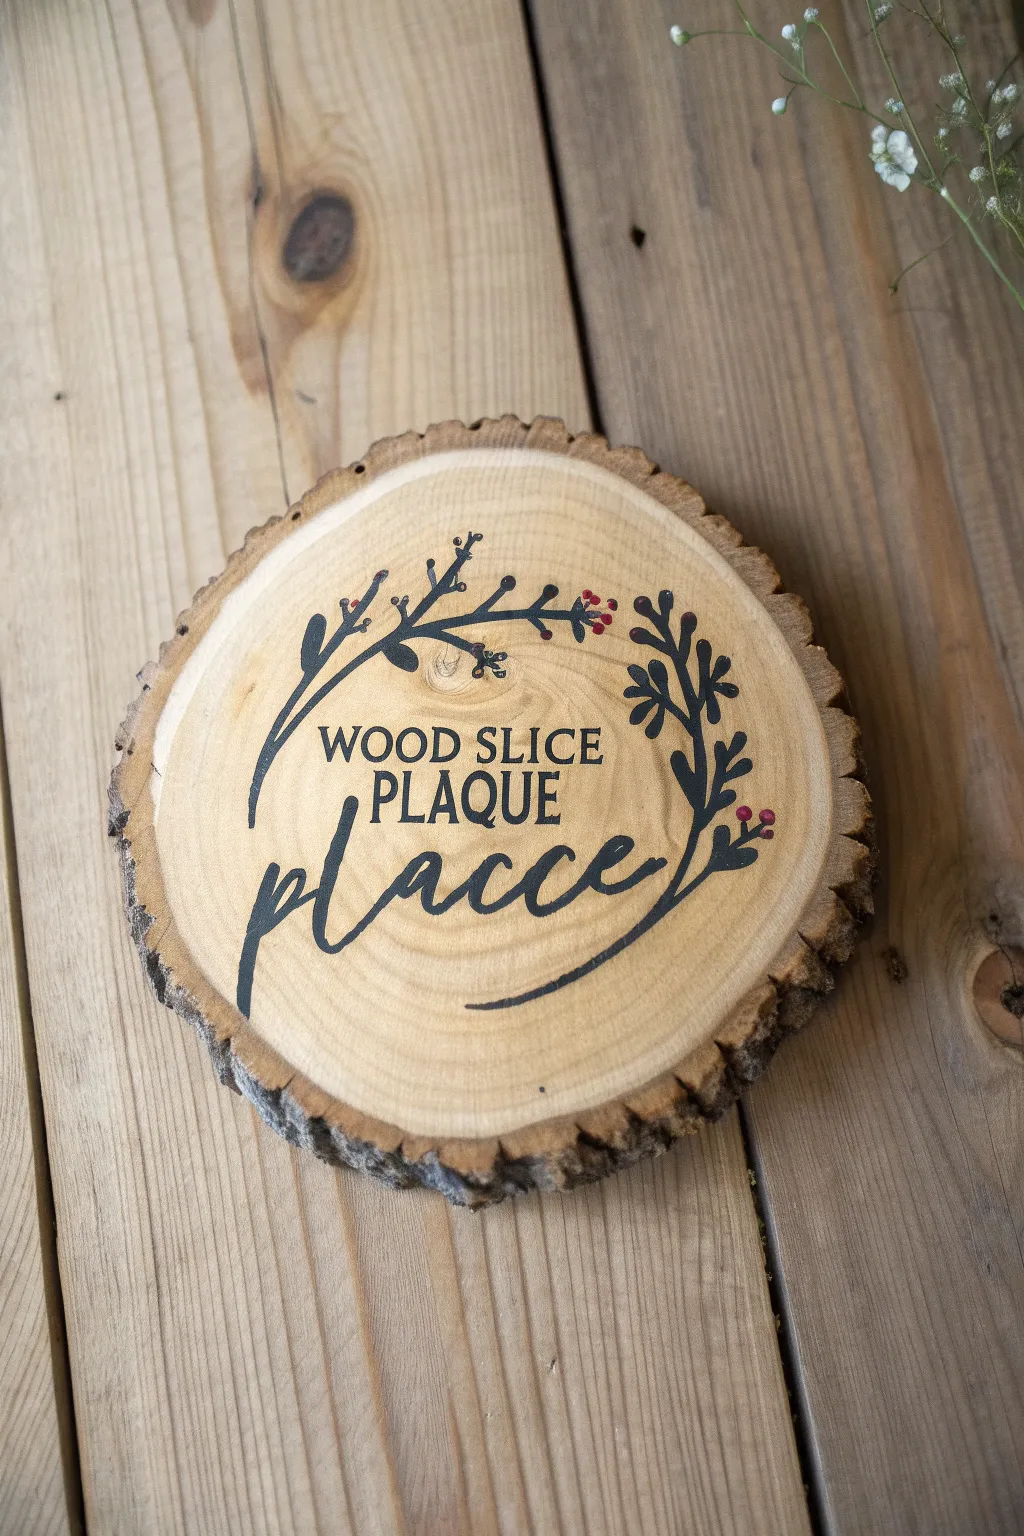
Embrace rustic charm with this beautiful wood slice plaque project featuring elegant typography and delicate botanical illustrations. The contrast between raw wood bark and crisp black lettering creates a timeless piece perfect for home decor or gifting.
How-To Guide
Materials
- Medium-sized wood slice (approx. 6-8 inches diameter) with bark intact
- Fine-grit sandpaper (220 grit)
- Pencil and eraser
- Black acrylic paint or fine-tip paint pens (Posca or similar)
- Red acrylic paint or paint pen
- Fine detail paintbrush (size 0 or 00)
- Clear matte acrylic sealer (spray or brush-on)
- Ruler (optional)
- Small palette or ceramic dish for paint
Step 1: Preparation
-
Smooth the Surface:
Begin by sanding the face of your wood slice thoroughly. You want the surface to be as smooth as possible so your paint pen or brush doesn’t snag on grain lines. -
Clean the Wood:
Wipe away all sawdust with a slightly damp cloth or tack cloth. Let the wood dry completely before moving to the next step, as moisture can cause ink to bleed.
Step 2: Drafting the Design
-
Sketch Layout Lines:
Using a light hand, sketch a gentle curve near the bottom one-third of the circle to guide your script text. Add faint horizontal guides above this for the serif text. -
Rough in the Botanical Stems:
Lightly draw two curved lines stemming from the imaginary center, sweeping upwards and outwards to the left and right borders. These will become your floral branches. -
Pencil the Block Letters:
In the upper center, sketch the words “WOOD SLICE” in a serif font. Keep the letters evenly spaced. Directly below that, pencil in “PLAQUE” in the same style. -
Pencil the Script Text:
Draft the bottom script word (like ‘place’ or your chosen word) in a loose, modern calligraphy style. Extend the tail of the last letter so it under-sweeps the whole word for a cohesive look.
Bleeding Lines?
If paint bleeds into the wood grain, apply a thin coat of clear matte medium or Mod Podge over the pencil sketch first. It seals the wood fibers before you paint.
Step 3: Painting the Lettering
-
Outline the Serif Text:
Using your fine-tip black paint pen or a size 0 brush with thinned black acrylic, carefully trace the outline of “WOOD SLICE” and “PLAQUE.” -
Fill the Serif Letters:
Go back and fill in the letters until they are solid black. Watch out for the serifs (the little feet on the letters); keep them sharp and squared off. -
Paint the Script Word:
Switching to a fluid motion, paint the script word at the bottom. Apply slightly more pressure on downstrokes to create variation in line thickness. -
Thicken Downstrokes:
If you are using a monoline pen, go back and artificially thicken the downward strokes of your script letters to mimic a calligraphy nib effect. -
Create the Swoosh:
Paint the long, decorative tail extending from the last letter, curving it gently underneath the word to frame the composition.
Make it an Ornament
Drill a small hole near the top edge before painting. Thread twine or a velvet ribbon through it to turn your plaque into a hanging decoration or oversized gift tag.
Step 4: Adding the Botanicals
-
Draw the Main Stems:
Trace over your pencil lines for the main floral branches on the left and right sides. Keep these lines relatively thin. -
Add Leaf Details:
Paint small, teardrop-shaped leaves along the stems. Vary their angles slightly to make them look organic and natural. -
Include Berry Clusters:
I like to add small groups of three dots near the ends of the branches using red paint. These tiny pops of color really bring the design to life. -
Refine Edges:
Look over the entire piece. Use your finest brush to sharpen any leaf tips or letter edges that look a bit fuzzy.
Step 5: Finishing Touches
-
Erase Guidelines:
Once the paint is absolutely bone dry (give it at least an hour), gently erase any visible pencil marks. -
Seal the Wood:
Apply a clear matte sealer over the face of the wood slice. This protects the unfinished wood from yellowing and keeps the paint from chipping over time.
Now you have a charming, hand-painted accent piece ready to display on a shelf or wall
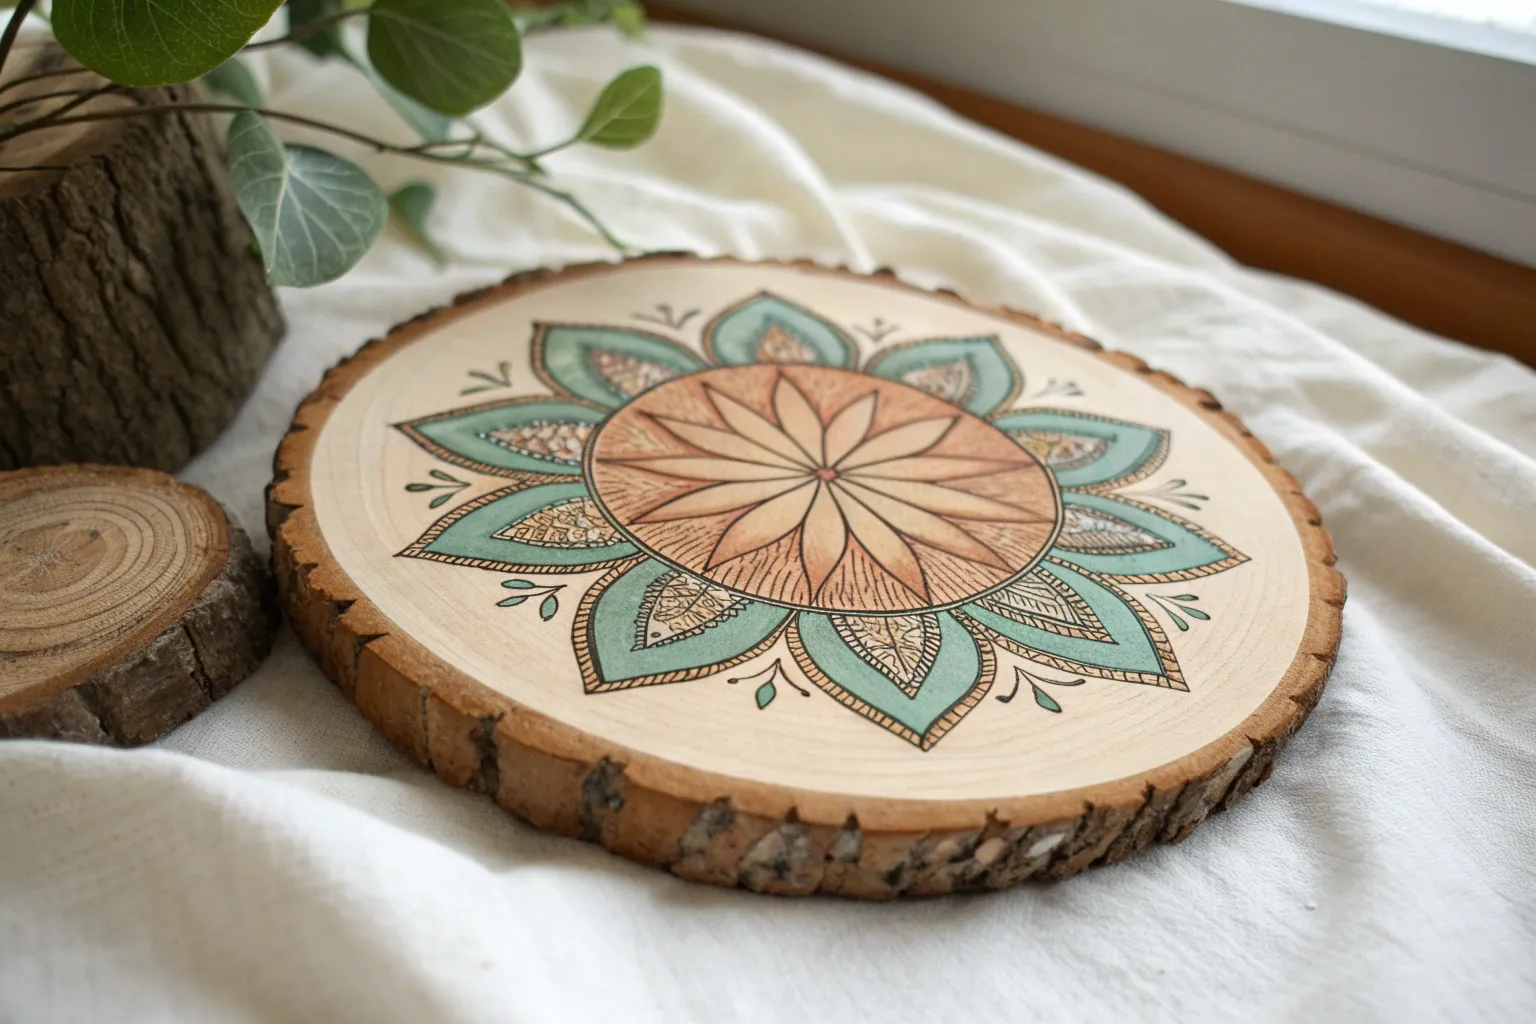
Mandala That Radiates From the Center
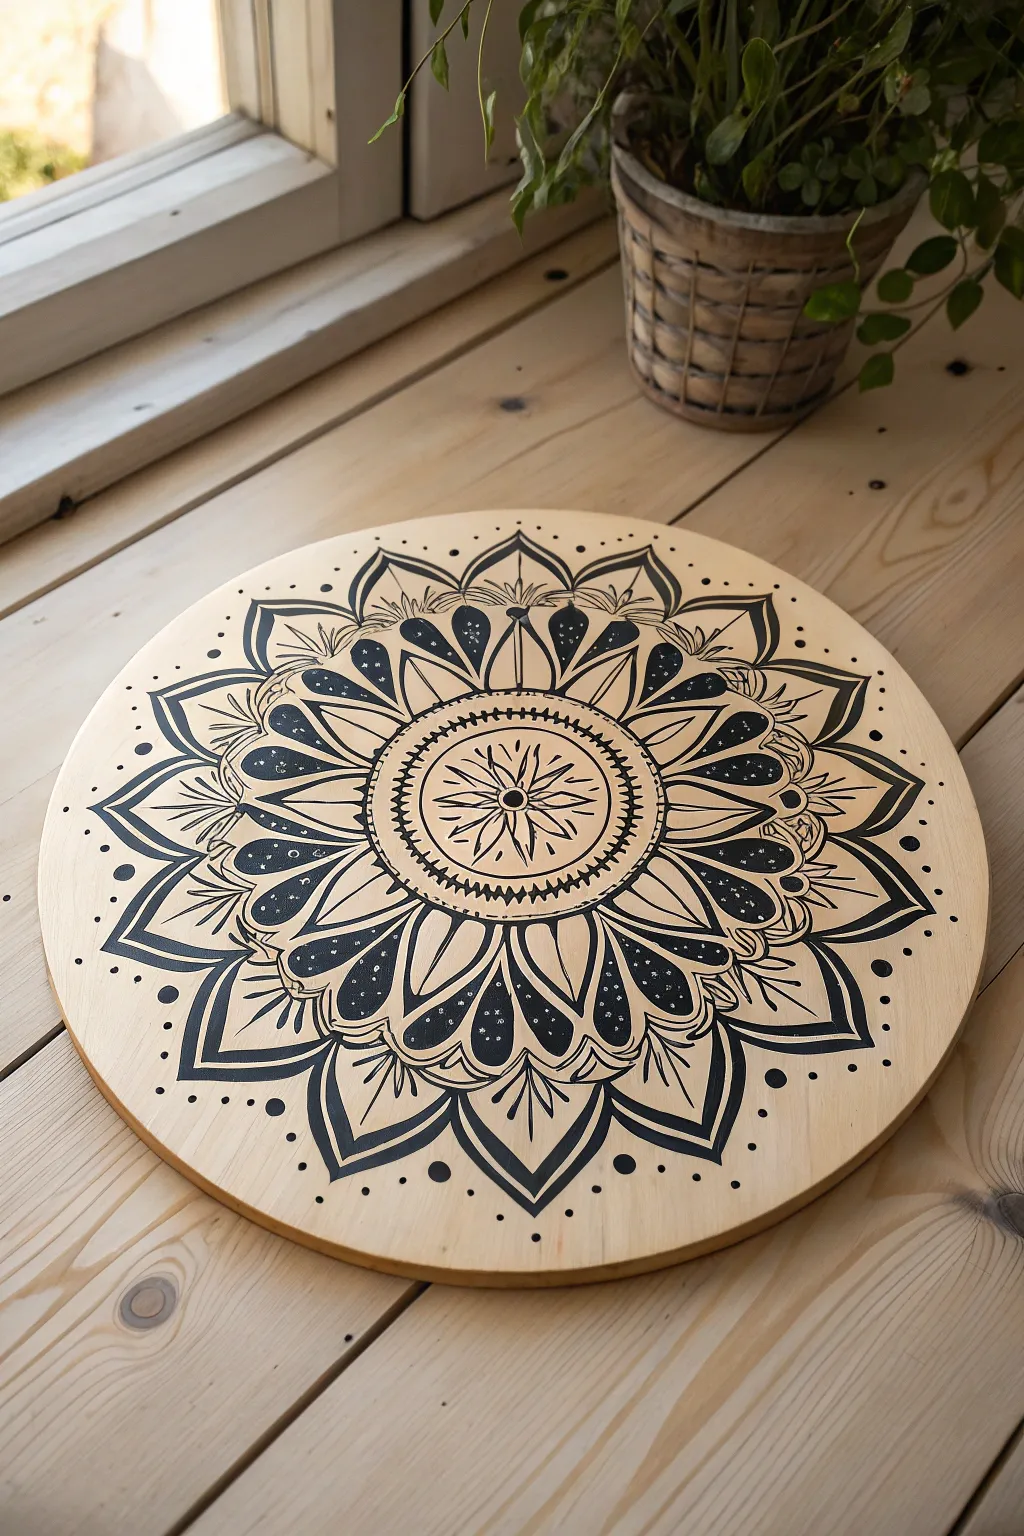
This project transforms a plain wooden round into a mesmerizing piece of art using nothing but black ink and steady handwork. The design radiates outward like a stylized sun, combining bold, filled petals with delicate line work for a striking contrast against the natural wood grain.
Step-by-Step Guide
Materials
- Unfinished wooden round (approx. 10-12 inches diameter)
- Fine-grit sandpaper (220 grit)
- Pencil and eraser
- Compass and ruler
- Protractor (optional but helpful)
- Black permanent marker or paint pen (medium tip)
- Black fine-liner pen (0.3mm or 0.5mm)
- White gel pen (optional for highlights)
- Clear spray sealant (matte or satin finish)
Step 1: Preparation & Mapping
-
Prepare the surface:
Begin by sanding your wooden round with fine-grit sandpaper. You want the surface to be buttery smooth so your pens don’t snag on the grain. Wipe away all dust with a clean, dry cloth. -
Find the center:
Use a ruler to lightly mark an ‘X’ or measure across the diameter to pinpoint the exact center of the circle. This is crucial for symmetry. -
Draw guide circles:
Using your compass, draw a series of concentric circles radiating from the center. Make a small center circle (about 1 inch), a middle band (about 3 inches), and a larger band extending toward the edge. These don’t need to be exact measurements, just boundaries for your petal layers. -
Mark radial lines:
Lightly sketch radiating lines like slices of a pie. Start with vertical and horizontal lines to make a cross, then divide each quadrant into three or four equal sections. This ensures your petals stay evenly spaced.
Step 2: Drawing the Core
-
Create the central flower:
In the very center circle, draw a small, solid black dot. Around it, sketch eight narrow, pointed petals. Use your fine-liner to outline them, adding a simple line down the center of each petal. -
Add the first border:
Enclose this central flower with a double circle. Inside this narrow track, draw small repetitive dashes or tick marks all the way around to create a textured border. -
Draw the secondary ring:
Add another concentric circle slightly further out. Fill the space between this and the previous border with small loops or scallops to soften the transition to the larger petals.
Ink Control Pro-Tip
Wood grains can sometimes ‘wick’ ink, causing fuzzy lines. Test your pen on the back of the wood first. If it bleeds, apply a clear matte sealer BEFORE drawing to create a barrier.
Step 3: The Main Layers
-
Outline the main petals:
Using your medium-tip marker, draw the primary layer of large, teardrop-shaped petals. Each petal should sit within one of your radial guide sections. Keep the tips pointed outward. -
Fill the detail petals:
Inside each large teardrop outline, draw a smaller, solid black teardrop shape. Leave a significant gap of wood showing between the solid shape and the outline. This negative space is key to the design’s lightness. -
Add floating dots:
Within the black solid teardrops you just drew, use a white gel pen (or leave tiny uncolored spots if you plan ahead) to add small speckles or ‘stars’ for texture. -
Create the outer spikes:
Between the tips of the main petals, draw sharp, V-shaped chevron lines that point toward the edge of the wood. These act as a frame for the inner flower.
Level Up: Gold Accents
Once the black ink is dry, trace the innermost circle or add tiny dots inside the solid black petals using a metallic gold paint pen for a luxurious, shimmering finish.
Step 4: Outer Details & Finishing
-
Draw the final petal layer:
Sketch the largest, outermost layer of petals. These should be wide and curve elegantly, mimicking the shape of lotus leaves. Use the fine-liner here for a more delicate touch. -
Detail the outer layer:
Inside these large outer petals, draw wispy internal lines—like veins on a leaf—curving from the base toward the tip. Avoid making these solid black; line weight variation adds visual interest. -
Add the dot border:
Around the very perimeter of the design, place solid black dots of varying sizes. I tend to put larger dots at the cardinal points and smaller ones in between to create a fading effect. -
Erase guidelines:
Once you are absolutely certain the ink is dry (wait at least an hour to be safe), gently erase all your pencil guides. Brush away the eraser crumbs carefully. -
Seal the wood:
To prevent the ink from bleeding over time or the wood from warping, take the piece to a well-ventilated area and apply a light coat of clear matte spray sealant.
Place your finished mandala on a stand or hang it on the wall to enjoy the calming symmetry you’ve created
Topographic Contour Lines on a Wood Slice
This project transforms the natural growth rings of a wood slice into a stunning piece of topographic art. by carefully tracing and enhancing the wood’s inherent patterns, you create a minimalist yet intricate design that mimics a geological map.
How-To Guide
Materials
- Large, clean wood slice (birch or pine works well)
- Sandpaper (120, 220, and 400 grit)
- Lint-free cloth
- Pencil (HB or H for light lines)
- Fine liner pens (black, archival ink, various sizes like 0.1, 0.3, 0.5)
- White gel pen (optional for highlights)
- Clear matte acrylic spray sealer
Step 1: Preparation
-
Assess the surface:
Examine your wood slice under good lighting. You want the face to be as smooth as possible to prevent your pen nibs from snagging on rough grain. -
Initial sanding:
Start with 120-grit sandpaper to remove any major saw marks or rough patches. Sand in a circular motion following the general shape of the rings. -
Refining the texture:
Switch to 220-grit paper. This step is crucial for knocking down the fibrous texture of softwoods. I like to run my fingers over the surface frequently to check for smoothness. -
Final polish:
Finish with 400-grit sandpaper. The wood should feel almost like glass to the touch. This ultra-smooth surface ensures crisp, non-bleeding ink lines. -
Clean the dust:
Use a lint-free cloth or a tack cloth to wipe away every speck of sawdust. Dust can clog fine pens instantly.
Step 2: Tracing the Topography
-
Identifying main rings:
Look closely at the natural rings. Identify the darkest, most prominent growth rings; these will serve as your primary ‘elevation’ lines. -
Pencil mapping:
Lightly trace these prominent rings with a pencil. Don’t worry about tracing every single line perfectly; you want to capture the general flow and notable quirks in the grain. -
Inking the center:
Using a slightly thicker pen (0.3 or 0.5), ink the very center rings—the ‘peak’ of your topographic map. Keep your hand steady but allow for natural wiggles. -
Expanding outward:
Move to a finer pen (0.1) for intermediate rings. Trace the lighter pencil lines you made, maintaining consistent spacing where possible to mimic map contours. -
Handling imperfections:
If you encounter a knot or a crack, embrace it. Draw lines that flow around the knot like water around a rock, creating density in that area. -
Varying line weight:
To enhance the 3D effect, select every fifth or tenth line and thicken it slightly with the 0.5 pen. This mimics the index contours found on real maps.
Bleeding Lines?
If ink ‘feathers’ into the wood grain, your surface isn’t smooth enough. Sand again with 400-grit, or apply a thin layer of clear gesso or matte medium before drawing.
Step 3: Finishing Touches
-
Checking for gaps:
Scan the entire piece. Fill in any areas that look too sparse with very delicate, broken lines to suggest minor terrain changes. -
Adding coordinates (opt):
For a true map aesthetic, you can penciling in tiny elevation numbers along the thicker index lines, then carefully inking them. -
Erase guidelines:
Wait at least 30 minutes to ensure the ink is completely dry. Gently erase any visible pencil marks, being careful not to smudge the ink. -
Sealing the art:
Take the slice to a well-ventilated area. Apply a light coat of clear matte spray sealer. Do not over-spray, as liquid pooling can cause the ink to run. -
Second coat:
Once the first coat is dry, apply a second light coat for durability.
Add a Route
Use a red fine-liner to draw a ‘hiking trail’ dashed line winding through the rings from the edge to the center for a pop of color.
Now you have a unique piece of organic art that highlights the hidden history of the tree
Knot-and-Grain Creature: Turn a Knot Into an Eye
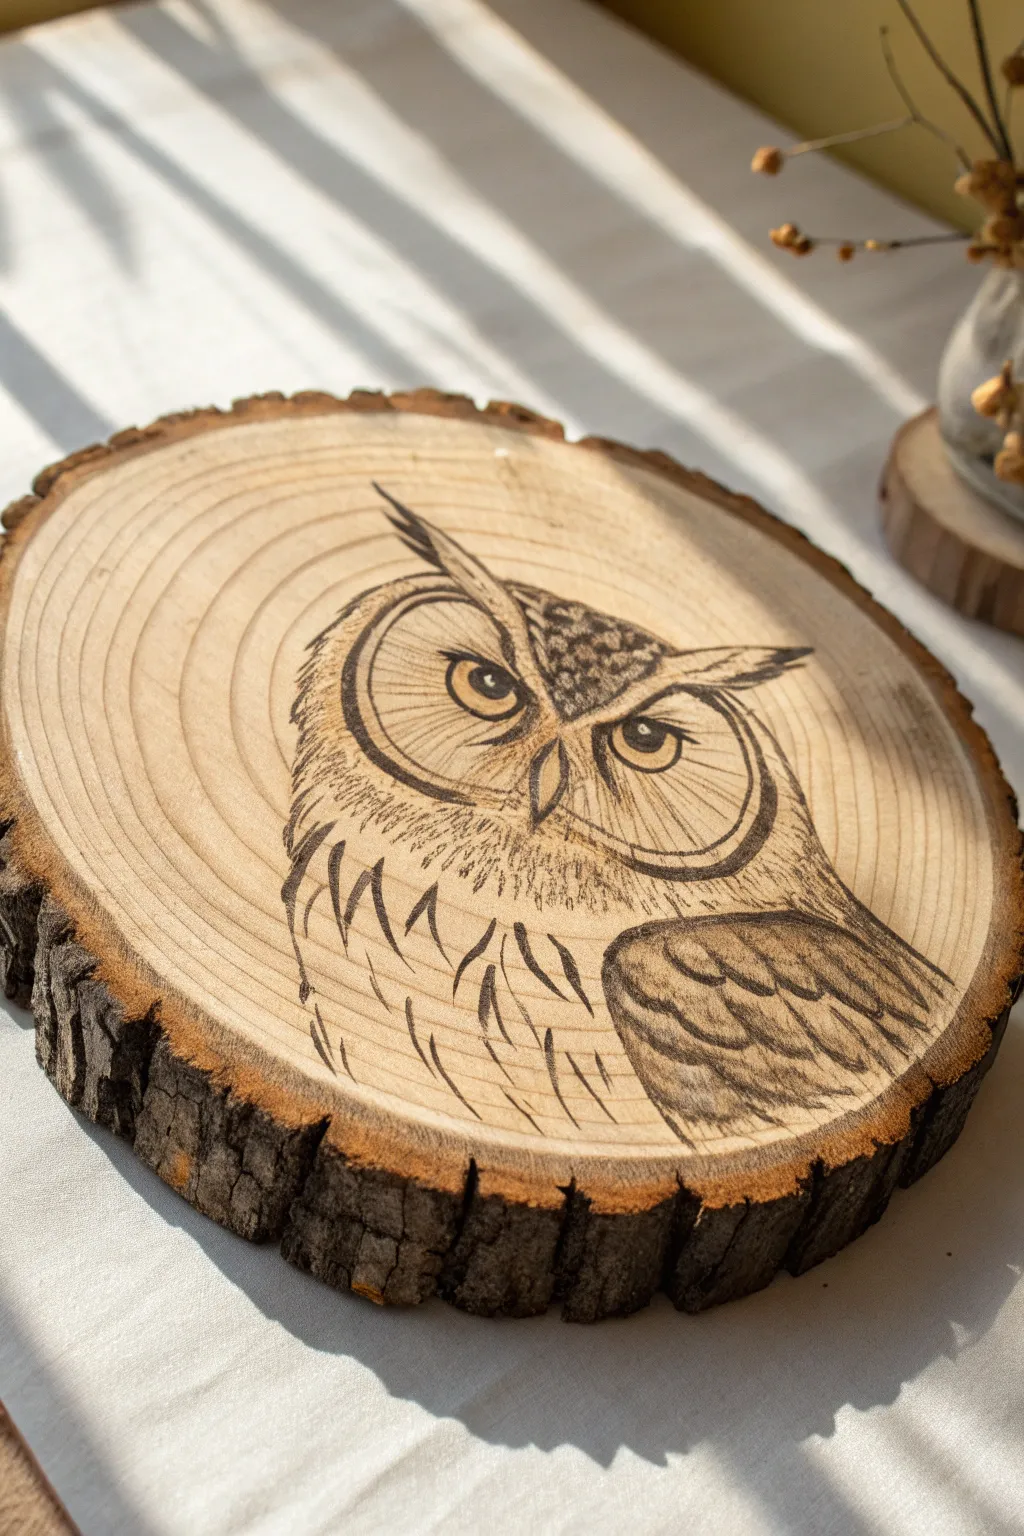
Harness the natural beauty of a raw wood slice to create a striking, rustic portrait of a great horned owl. Using pyrography, you’ll etch detailed feathers and piercing eyes that seem to emerge directly from the tree rings.
Detailed Instructions
Materials
- Large, raw wood slice (approx 8-10 inches, sanded smooth)
- Pyrography pen (wood burning tool) with variable heat settings
- Writing nib (standard point tip)
- Shading nib (spoon or flat tip)
- Fine skew nib (optional, for detailing)
- Graphite paper and pencil
- Reference image of a great horned owl head
- Sandpaper (220 grit or higher)
- Wood finish (polycrylic or tung oil, optional)
Step 1: Preparation and Sketching
-
Surface Prep:
Begin by ensuring the surface of your wood slice is incredibly smooth. Sand it thoroughly with high-grit sandpaper (220+) to remove any rough patches that could catch the burning tip. -
Positioning:
Examine the natural grain rings of your wood slice. Orient the slice so the rings curve nicely around where the owl’s head will be, creating a natural framing effect. -
Drafting the Design:
Lightly sketch the owl’s outline directly onto the wood with a pencil, or transfer your reference design using graphite paper. Focus on the large shapes: the circular facial discs, the beak, and the tufted ears. -
Refining the Eyes:
Pay special attention to the eyes and pupils. These are the focal point. Make sure they are symmetric and level before you ever turn on the heat.
Step 2: Burning the Outline
-
Setting the Heat:
Set your pyrography pen to a medium heat setting. You want a line that is dark brown, not charred black, allowing for better control. -
Facial Features:
Using a writing nib, carefully trace the outlines of the eyes, the curved distinctive ‘eyebrows’, and the beak. Keep your hand steady and move at a consistent pace to avoid blotches. -
Feather Outlines:
Outline the major feather groups around the facial disc and the wing. Use short, broken lines rather than a single continuous stroke to mimic the texture of plumage. -
Darkening the Pupils:
Switch to a higher heat or hold the pen longer to fill in the pupils, making them the darkest part of the piece. Leave a tiny speck of raw wood untouched for the highlight reflection.
Uneven Burning?
If the pen tip sinks into soft grain spots, causing blobs, lower your heat and move your hand faster. Sand off mistakes gently with 220-grit paper.
Step 3: Shading and Texture
-
Facial Disc Texture:
Lower the heat slightly. Inside the circular facial discs, create fine, radiating lines moving outward from the eyes. These should be delicate to represent the softest feathers. -
Wing Shading:
Switch to a shading nib (spoon tip). Shade the wing feathers at the bottom right, starting dark at the top of each feather loop and fading downwards to create depth and overlap. -
Forehead Patterning:
Stipple or use small, chaotic scribbles on the forehead area between the ear tufts to create the speckled look characteristic of great horned owls. -
Chest Feathers:
For the chest area below the neck, use quick, sweeping strokes that flick downwards. Don’t outline every feather here; just suggest the direction and flow of the plumage. -
Deepening Shadows:
Go back over the darkest areas—under the brow ridge and the edges of the facial disc—to increase contrast. I find that building up darkness in layers works better than trying to burn it black in one go. -
Ear Tufts:
Burn the ear tufts with sharp, upward strokes. Make the tips darker and the bases slightly lighter to separate them from the head.
Add Color
Dilute white acrylic paint with water and wash it lightly over the highlights in the eyes and chest feathers for a striking dimensional pop.
Step 4: Final Touches
-
Cleaning Up:
Once the wood has cooled completely, use a soft eraser to gently remove any remaining pencil lines from your initial sketch. -
Sealing:
Apply a clear finish like polycrylic or a natural oil to protect the wood and make the burn marks pop against the pale grain. Let it cure fully before display.
Place your finished wood slice on a stand or hang it to bring a touch of woodland wisdom to your decor
Burned-and-Drawn Mixed Media Wood Round
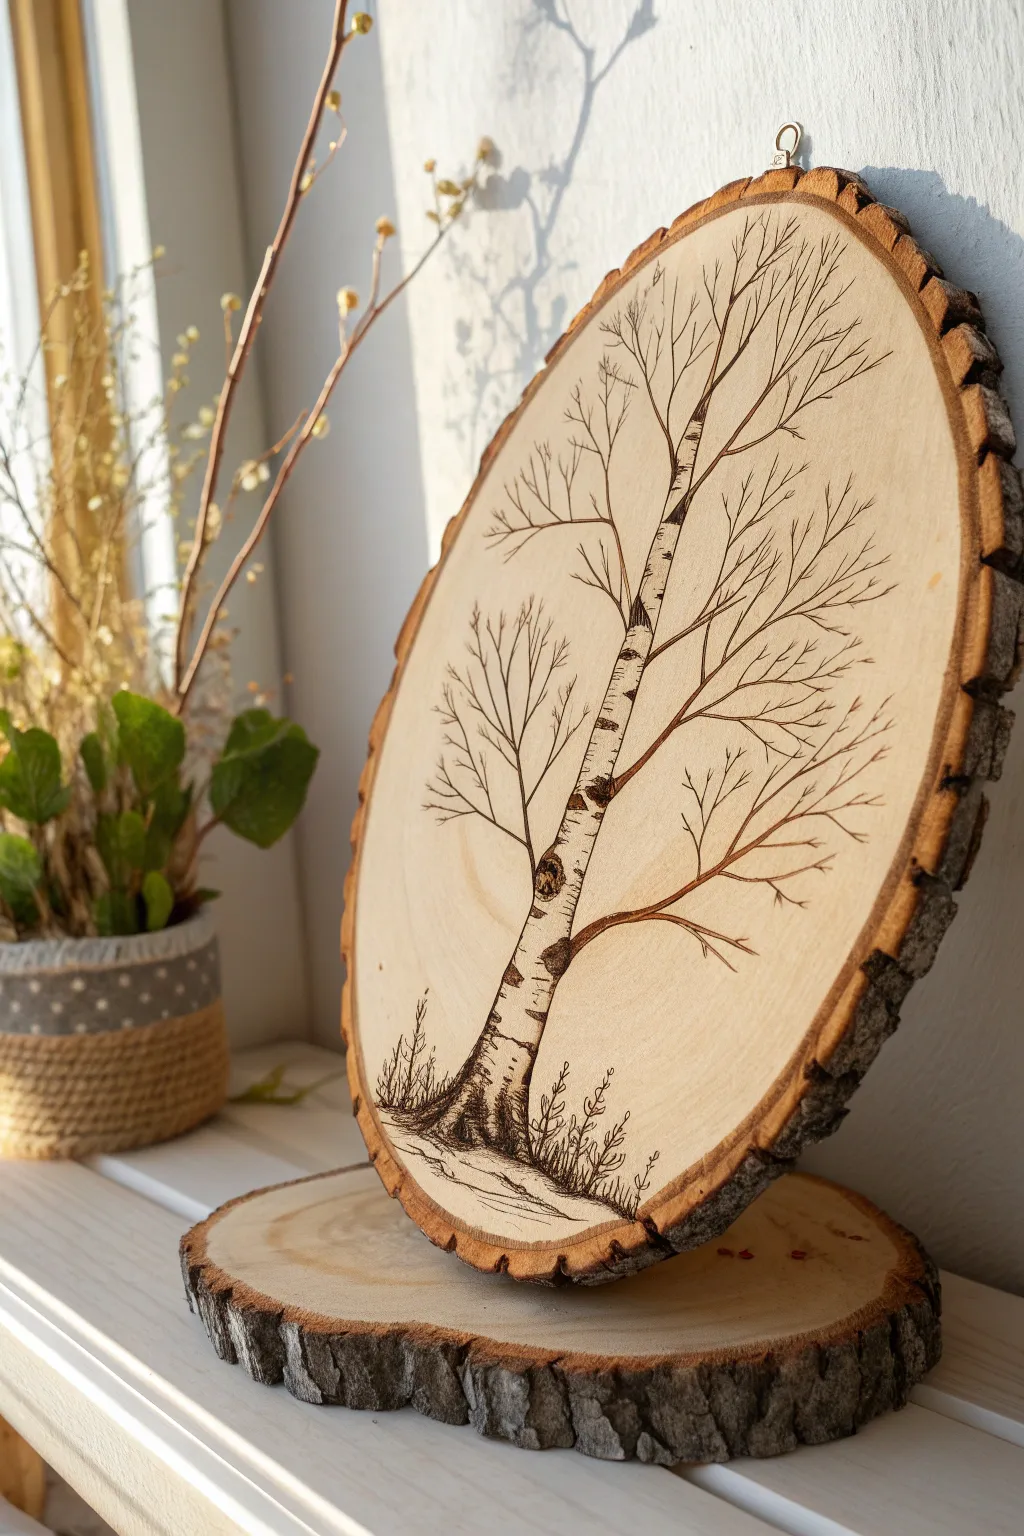
Capture the stark beauty of a birch tree on a rustic wood slice using wood burning techniques. This project combines the natural texture of raw wood with delicate line work for a stunning, minimalist display piece.
Step-by-Step
Materials
- Large wood slice (oval or round shape, at least 8-10 inches tall), basswood or birch preferred
- Smaller wood slice for the base (optional display stand)
- Wood burning tool with wire nibs or solid point tip
- Fine-grit sandpaper (220-400 grit)
- Pencil (HB or H)
- Carbon paper (optional for transfer)
- White charcoal pencil (optional)
- Poly-acrylic sealer or matte wood finish
- Small picture hanger hardware
Step 1: Preparation & Sketching
-
Sand the Surface:
Begin by sanding the face of your wood slice until it is perfectly smooth. This is crucial for pyrography; any bumps will catch your nib and create uneven lines. -
Clean the Wood:
Wipe away all sanding dust with a dry tack cloth or a slightly damp paper towel. Let it dry completely before drawing. -
Draft the Trunk:
Using a light pencil touch, draw the main trunk of the birch tree. Position it slightly off-center, leaning gently to the right to create dynamic movement. -
Add Main Branches:
Sketch the primary branches extending upward. Birch branches tend to reach up rather than out, creating a ‘V’ shape structure. -
Detail the Twigs:
Fill in the finer network of twigs and smaller branches at the crown. Keep these lines very faint as guides.
Keep it Smooth
If your pen tip keeps getting stuck in the grain, sand the wood again. The smoother the surface, the cleaner your lines will be.
Step 2: Burning the Design
-
Outline the Trunk:
Heat your wood burning tool to a medium-high setting. Carefully burn the outline of the trunk, using a steady hand to create a defined but not overly thick line. -
Create Birch Markings:
Turn down the heat slightly. Add the characteristic horizontal lenticels (the dark dashes) across the trunk. Vary their length and thickness for realism. -
Burn the Knots:
Identify where branches meet the trunk and draw the dark, triangular patches or ‘eyes’ typical of birch bark. I like to shade these areas darker to add depth. -
Shade the Bark:
Using a shader tip or the side of your nib on low heat, add very subtle shading to the shadowed side of the trunk (the left side in this reference) to give it cylindrical volume. -
Define the Branches:
Burn the main branches, tapering your lines as they move away from the trunk. Lift the pen tip quickly at the end of a stroke to create a sharp point. -
Execute Fine Twigs:
With a fine point tip and a light hand, burn the delicate canopy twigs. These should be wispy and erratic, capturing the sparse nature of a winter tree.
Add Winter Snow
Use a white charcoal pencil or diluted white acrylic paint to add highlights on the branches and ground for a snowy effect.
Step 3: Grounding & Finishing
-
Add Ground Detail:
At the base of the trunk, burn small, scratchy vertical lines to represent grass. Create a slightly uneven ground line to anchor the tree. -
Incorporate Weeds:
Add a few distinct weeds or wildflowers on either side of the trunk base using quick, decisive strokes. -
Clean Up Lines:
Once the wood has cooled, gently erase any visible pencil marks. Be careful not to smudge the graphit into the raw wood grain. -
Attach Hardware:
Screw a small triangle hanger or eye hook into the top edge of the bark rim. -
Seal the Wood:
Apply a thin coat of matte spray sealer or brush-on poly-acrylic to protect the burn without making it glossy. -
Set the Display:
Place the finished piece upright on the second, smaller wood slice to create a rustic tiered display on your shelf.
Step back and enjoy the elegant simplicity of your handmade botanical art piece
Painted “Portal” Scene With a Raw Wood Rim
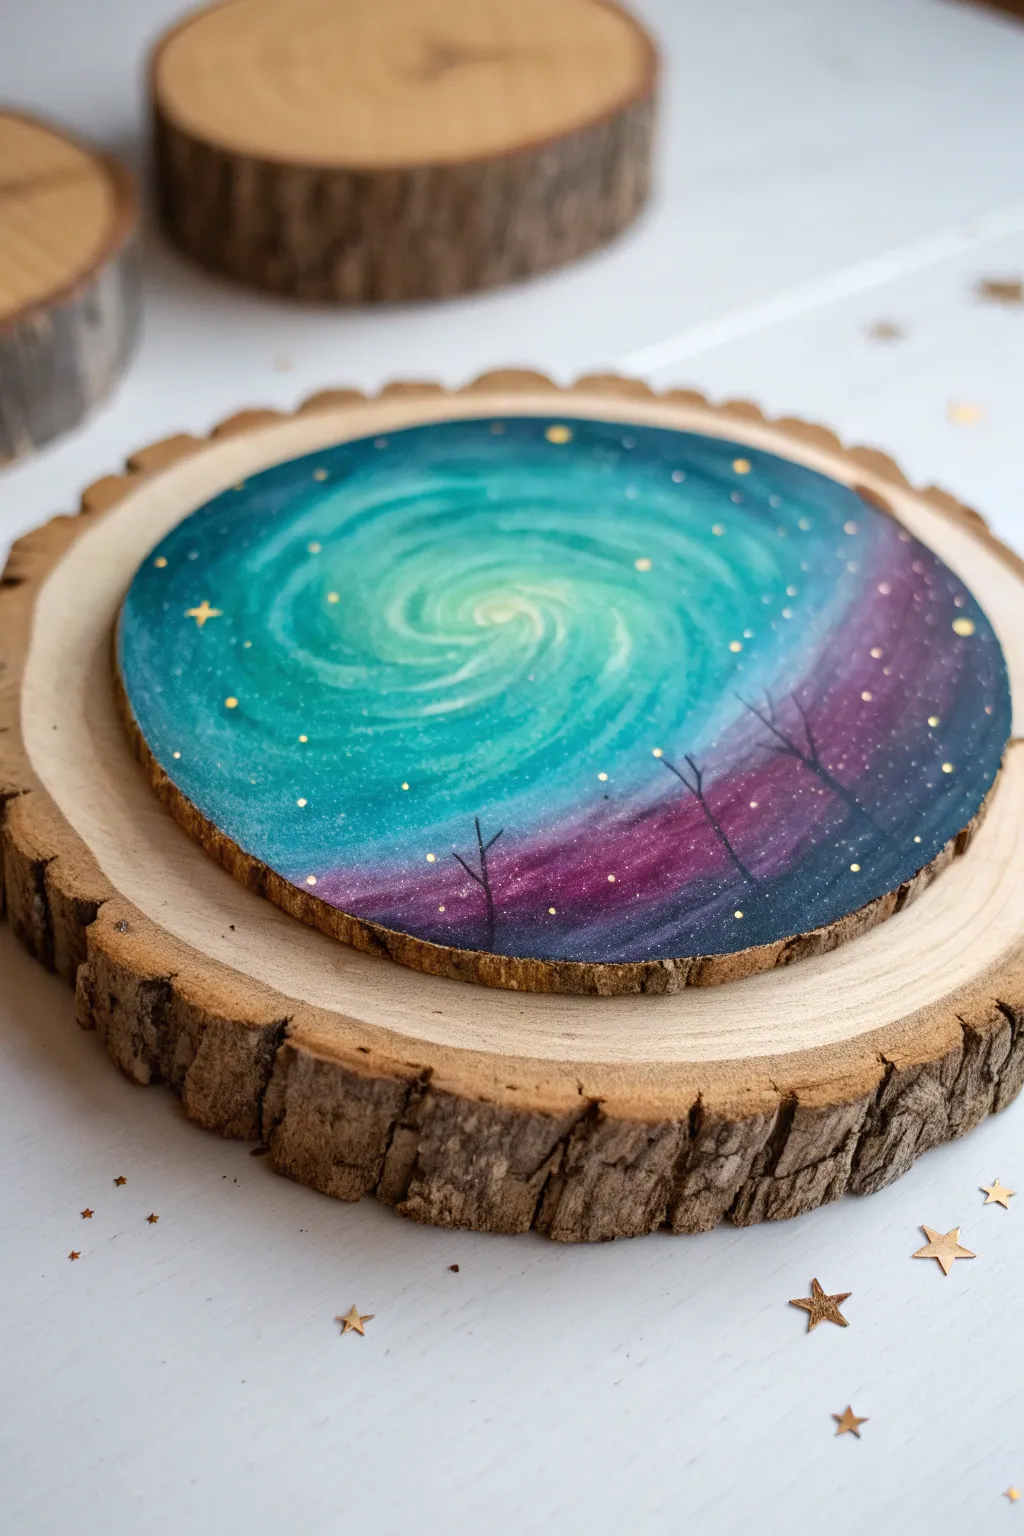
This project transforms a simple slice of wood into a breathtaking window to the cosmos, capturing the ethereal glow of an aurora Borealis Swirl. The contrast between the raw, rustic bark edge and the vibrant galaxy painting creates a striking natural frame for your celestial art.
Detailed Instructions
Materials
- Small to medium wood slice with bark intact (sanded smooth on the face)
- Larger wood slice (for display/base)
- Acrylic paints (Teal, Mint Green, Deep Violet, Indigo Blue, Titanium White, Black)
- Fine detail paintbrush (size 0 or 00)
- Medium flat brush
- Small round brush
- Gold metallic paint or gold paint pen
- Water cup and palette
- Clear matte or satin varnish (optional spray or brush-on)
- Small wooden star confetti (optional for staging)
Step 1: Preparing the Canvas
-
Select your slice:
Choose a wood slice that is clean and dry. The surface needs to be sanded until it feels very smooth to the touch, as rough grain will make blending your galaxy swirls difficult. -
Define the border:
Decide how much of the raw wood edge you want to leave visible. For the ‘portal’ effect shown here, you want to leave just a thin, irregular rim of unpainted wood right next to the bark. -
Base coat:
Paint a thin layer of Titanium White over the area you intend to paint. This acts as a primer and ensures your teal and purple colors will pop vividly against the wood rather than soaking in and turning dull.
Step 2: Painting the Galaxy Swirl
-
Establish the center:
Start with your Mint Green mixed with a generous amount of White. Paint a small, loose spiral in the upper-left center of your circle; this is the glowing heart of your galaxy. -
Expand with teal:
While the center is still wet, switch to your Teal paint. Blend it outwards from the mint center, following the spiral motion. The wet-on-wet technique helps create that soft, foggy transition. -
Add depth:
As you move toward the outer edges of the spiral, begin mixing Indigo Blue into your Teal. The color should get progressively darker the further you get from the light center. -
Introduce the violet horizon:
On the bottom right section and the edges opposite the spiral, blend in Deep Violet. Let the purple merge with the dark blue areas to create a rich, night-sky transition. -
Darken the edges:
Use pure Indigo or a mix of Indigo and a tiny touch of Black to paint the very outer rim of your circle. This vignette effect draws the eye inward toward the light. -
Refine the swirl:
Go back with a clean, slightly damp brush to soften any harsh lines where the colors meet. You want the galaxy to look like smoke or clouds, not stripes.
Blending Woes?
If acrylics dry too fast to blend, mist the wood slice lightly with water or mix a slow-drying medium into your paints to extend working time.
Step 3: Adding Celestial Details
-
Dry completely:
Wait for the background to be fully dry to the touch. If you paint the trees or stars too soon, they will bleed into the background. -
Paint silhouettes:
Using your finest detail brush and thinned Black paint (or a fine-tip black paint pen), draw three or four simple, bare trees rising from the bottom purple edge. Make the branches thin and wispy. -
Add the stars:
Dip the tip of a toothpick or your smallest brush into Gold metallic paint. Dot tiny stars throughout the sky, clustering a few near the dark edges for contrast. -
Highlight with larger stars:
Choose two or three spots to paint slightly larger four-point stars or diamonds in gold to represent brighter planets or distant suns. -
Final varnish:
Once all paint is cured, apply a coat of clear matte or satin varnish to protect the wood and unify the sheen of the different paints.
Paint Pen Precision
For the tiny tree branches, I actually prefer using a 0.5mm black archival ink pen instead of a brush for shakiness-free, crisp lines.
Place your finished cosmic slice on top of a larger raw wood round to complete the rustic layered look.


Have a question or want to share your own experience? I'd love to hear from you in the comments below!