There’s something so satisfying about turning rough, weathered shipping wood into art that feels cozy and personal. Wooden pallet projects give you built-in texture, natural lines, and that perfectly imperfect rustic vibe that makes painted designs pop.
Classic Flag-Inspired Pallet Wall Art
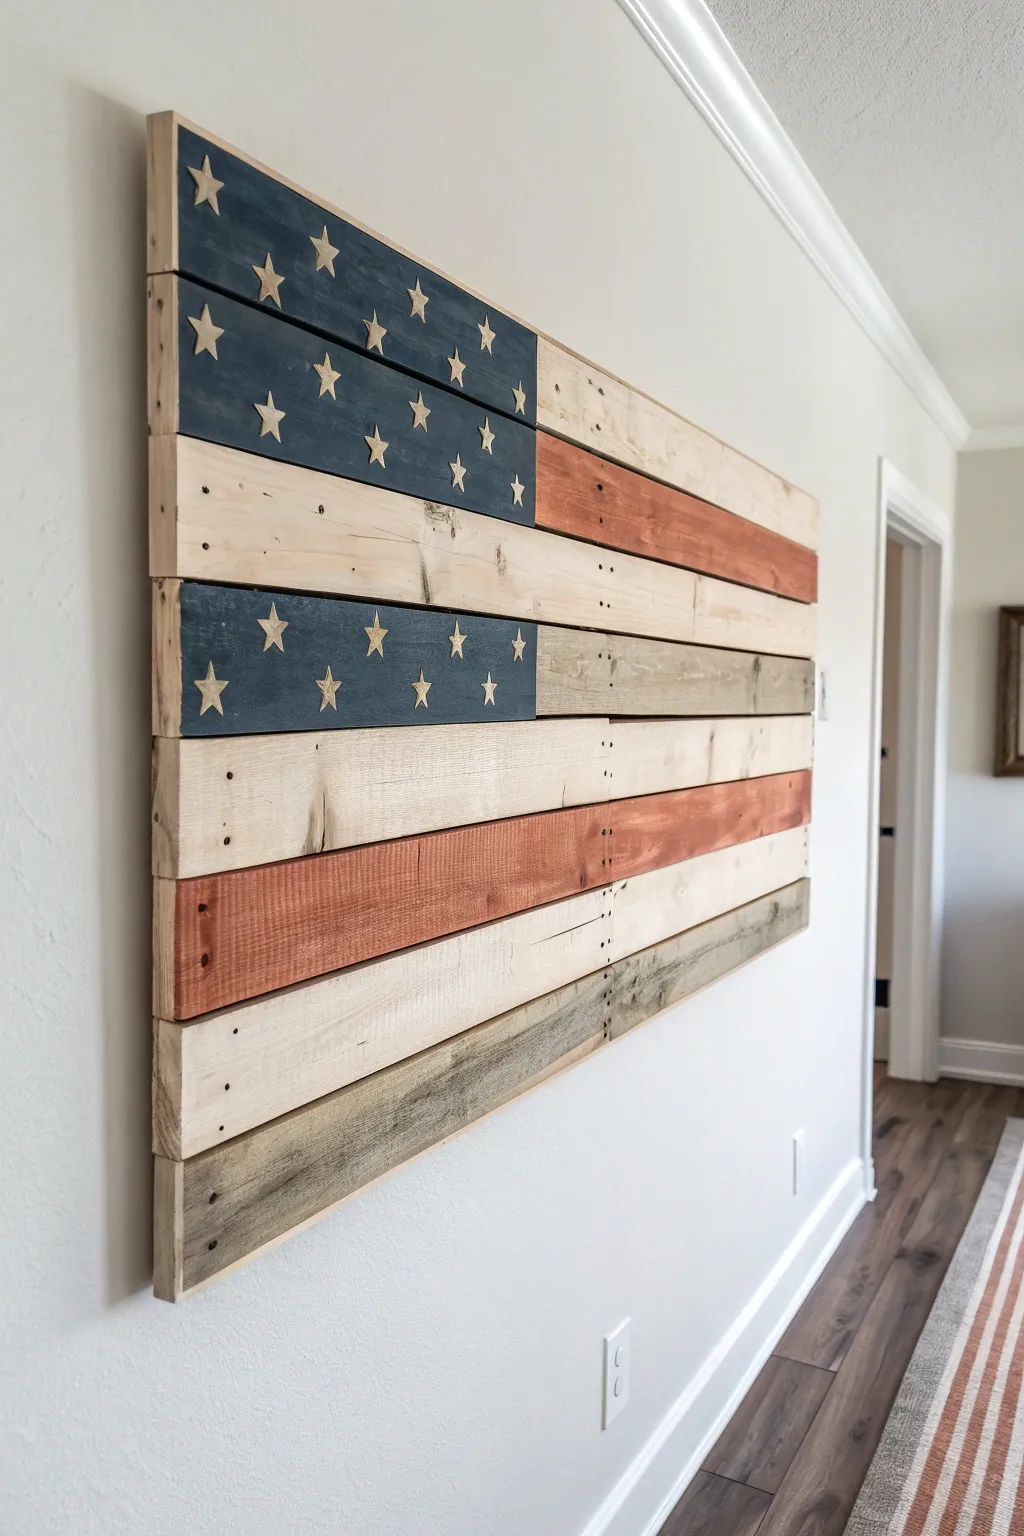
Transform reclaimed wood into a striking focal point with this large-scale wooden flag art. The design features a charmingly distressed finish and a unique two-tone blue field that adds visual depth to the classic patriotic symbol.
Step-by-Step
Materials
- Reclaimed pallet wood slats (approx. 4-inch width)
- Plywood backing board or vertical wooden supports
- Wood glue
- Brad nailer (or hammer and finish nails)
- Miter saw or hand saw
- Medium-grit sandpaper (80-120 grit)
- Water-based wood stains (Red oak or mahogany for stripes)
- White or cream latex paint (thinned)
- Navy blue wood stain or paint
- Small wooden star cutouts (1-2 inch size)
- Strong construction adhesive (e.g., Liquid Nails)
- Measuring tape and pencil
- Clear matte polyurethane (optional)
Step 1: Preparation and Cutting
-
Break down pallets:
Carefully dismantle your pallets if you haven’t already. Remove all old nails using a pry bar or hammer to ensure the wood is safe to cut. -
Select your best boards:
Sort through your reclaimed wood. Look for slats that are relatively straight but still have character—knots, nail holes, and grain variations are perfect for this rustic look. -
Measure the flag dimensions:
Decide on the overall size. A standard proportion is 1.9 times as wide as it is tall. For this project, aiming for roughly 36 inches wide by 19.5 inches tall works well with standard pallet widths. -
Cut the stripes:
You will need 13 strips of wood total. Cut the bottom 6 strips to the full 36-inch length. Cut the top 7 strips shorter (approx. 21.5 inches) to accommodate the blue field union. -
Create the union panel:
Cut pallet wood to fit the union area (the top left rectangle). You can either run these slats horizontally like the stripes or use a solid piece of plywood if you prefer a smoother look, though slats maintain the rustic texture.
Rustic Texture Tip
Don’t sand the pallet wood totally smooth before painting. The rough saw marks catch the paint and stain, creating that authentic, weathered farmhouse look automatically.
Step 2: Staining and Assembly
-
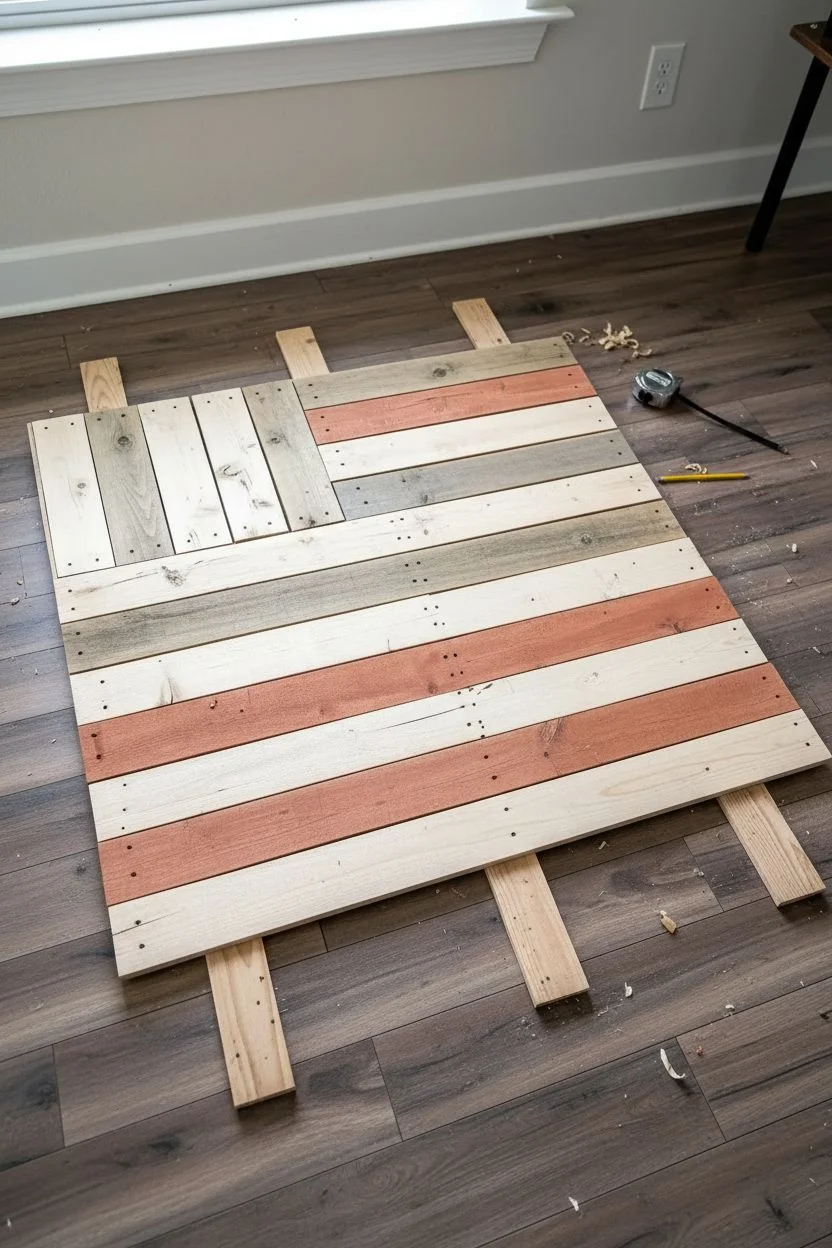
Establish the color pattern:
Before attaching anything, lay out your boards on the floor. Arrange them to alternate between ‘red’ and ‘white’ stripes to ensure you like the grain orientation of each piece. -
Stain the red stripes:
Apply a red-toned wood stain to the appropriate boards. Don’t aim for perfect coverage; I find that wiping the stain on and immediately wiping most off keeps the wood grain visible. -
Paint the white stripes:
Mix a little water into white or cream latex paint to create a wash. Brush this onto the remaining stripe boards, letting the natural wood color peek through slightly for an aged effect. -
Create a two-tone union:
For the blue field shown in the image, paint or stain the top section a slightly deeper navy and the lower section a lighter, faded denim blue. This subtle gradient adds dimension. -
Sand for distress:
Once dry, run sandpaper over the edges and surfaces of colored boards. Focus on the corners to reveal raw wood, enhancing the rustic aesthetic. -
Prepare the backing:
Lay down two or three vertical scrap wood strips (battens) behind your arranged flag. These will hold the structure together. -
Assemble the flag:
Apply wood glue to the back of each stripe and the union pieces, then nail them securely into the vertical support strips using a brad nailer.
Make It 3D
Instead of a flat union, build a small shallow box for the blue section. Fill it with painted wooden blocks or corks to create a deeply textured, mosaic-style field of blue.
Step 3: Finishing Details
-
Prepare the stars:
Using pre-cut wooden stars saves immense time. Lightly sand them and leave them raw or apply a very faint whitewash to make them pop against the blue. -
Plan star layout:
Arrange the stars on the blue union. For a traditional look, offset the rows, but feel free to space them evenly based on the size of stars you purchased. -
Adhere the stars:
Use a dab of strong construction adhesive or super glue on the back of each star. Press them firmly into place and let them set. -
Final coat:
Seal the entire piece with a clear matte polyurethane if desired. This protects the wood and enriches the colors without adding an unnatural shine.
Hang your new rustic flag proudly in an entryway or living room to add instant warmth and character to the space


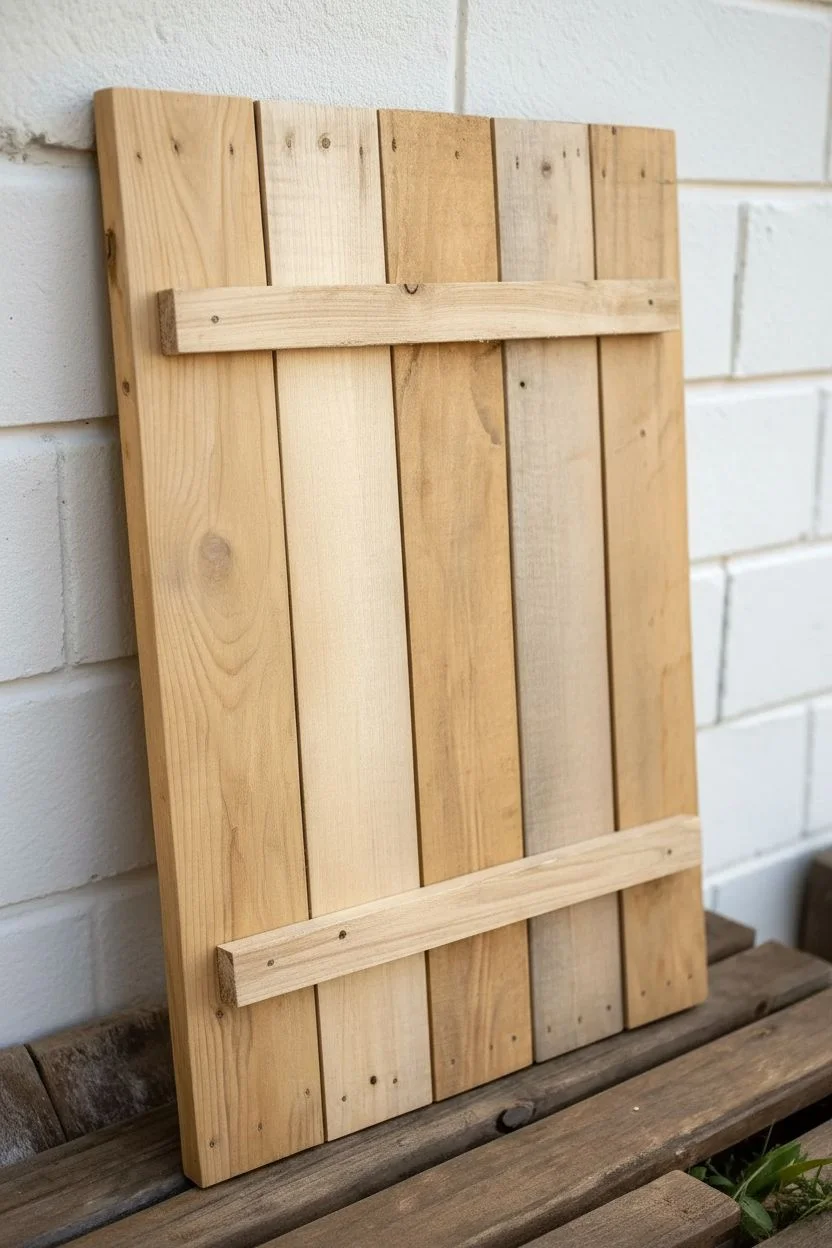
Dandelion Silhouette That Uses the Slat Gaps
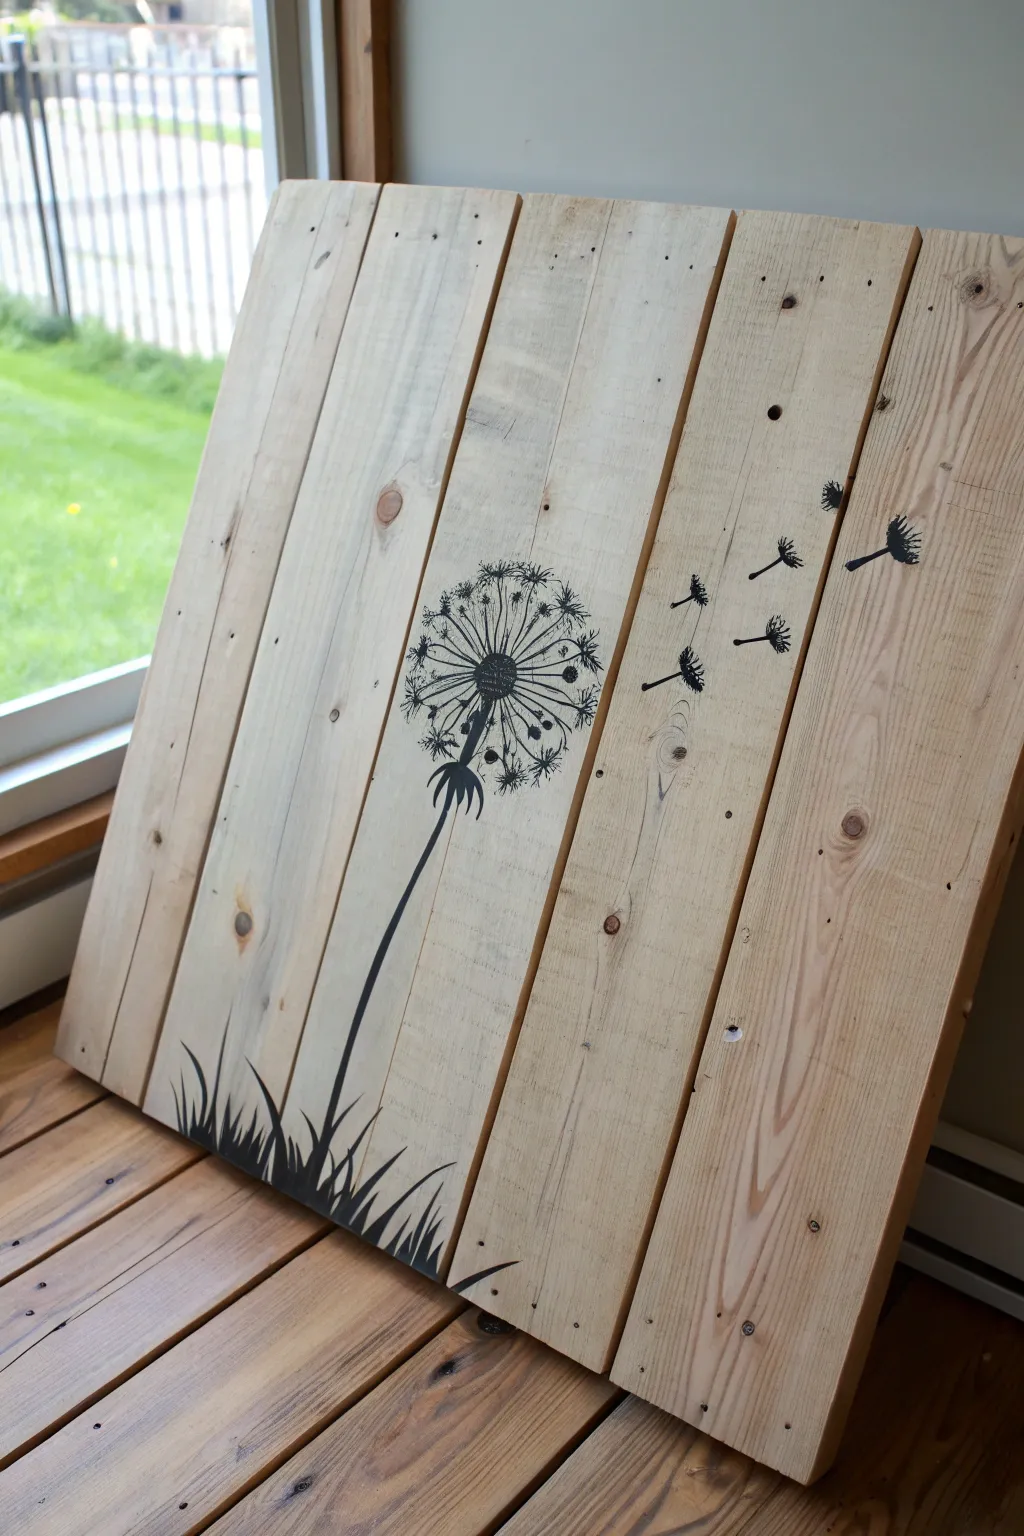
Capture the fleeting beauty of a dandelion wish with this rustic wooden sign project. Using the natural gaps between pallet slats adds depth and character to the simple black silhouette, creating a piece that feels both organic and modern.
Detailed Instructions
Materials
- 5 wooden pallet slats (approx. 3-4 feet long)
- 2 shorter support wood strips (for backing)
- Wood screws (1.25 inch)
- Sandpaper (80 and 150 grit)
- Black acrylic paint
- Small round paint brushes (sizes 2 and 4)
- Larger flat brush (for grass)
- Pencil
- Carbon transfer paper (optional)
- Dandelion stencil or printed template
- Clear matte polyurethane sealer
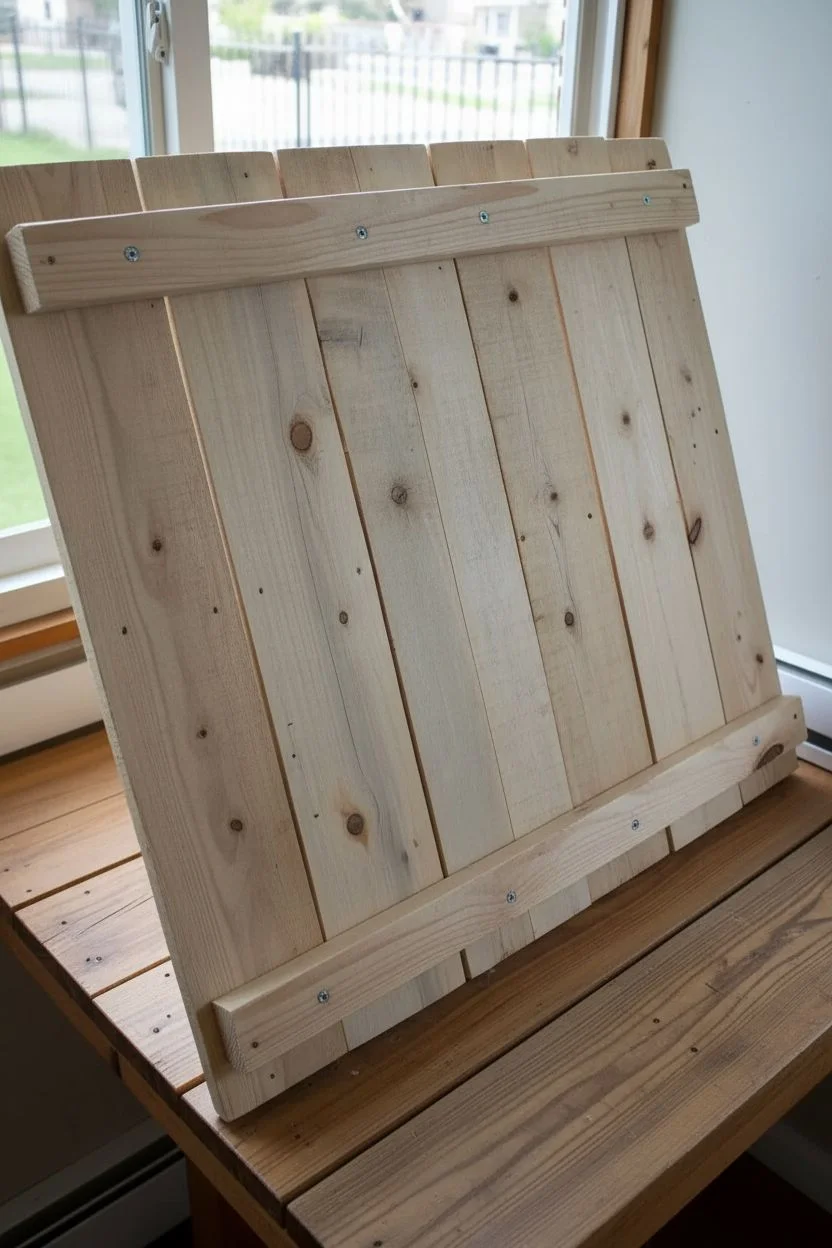
Step 1: Preparing the Canvas
-
Select your wood:
Choose five pallet boards that are relatively straight but still possess that rustic charm. Knots and nail holes add character, so don’t discard imperfect pieces. -
Sand the surfaces:
Give each board a good sanding with 80-grit paper to remove splinters and rough dirt. Follow up with 150-grit for a smoother painting surface, but don’t aim for perfection; you want to keep the wood grain visible. -
Arrange the layout:
Lay your five boards side-by-side on a flat workspace. I like to leave a tiny gap (about 1/8th inch) between them to emphasize the pallet look, rather than gluing them tight. -
Secure the backing:
Flip the arranged boards over carefully. Place your two shorter support strips perpendicular to the slats—one near the top and one near the bottom. -
Fasten the structure:
Drill pilot holes to prevent splitting, then secure the support strips to each individual slat using wood screws. Ensure every board is firmly attached.
Step 2: Drafting the Design
-
Plan the composition:
Mentally divide your canvas. The main dandelion stem should be slightly off-center to the left, with the seeds blowing across the right side boards. -
Sketch the grass:
Using a pencil, lightly sketch jagged grass blades along the bottom edge. Vary the heights and angles to make it look natural and wild. -
Draw the dandelion head:
Sketch the main dandelion puff. If you aren’t confident in your freehand skills, tape a printed template over the wood and slide carbon paper underneath to trace the design. -
Map the floating seeds:
Lightly mark where the flying seeds will go on the right side. Position them so they look like they are drifting across the gaps in the wood.
Sharper Lines on Rough Wood
If the wood is very textured, press your stencil down firmly and dab paint vertically (stipple) rather than brushing across, preventing paint bleed.
Step 3: Painting the Silhouette
-
Paint the stem:
Load a medium round brush with black acrylic paint. Paint the long, slender stem from the bottom grass up to the flower head in a single, confident stroke if possible. -
Fill in the grass:
Switch to your larger flat brush to fill in the grass blades at the bottom. Use upward flicking motions to keep the tips of the grass sharp and tapered. -
detail the seed center:
Use a small size 2 brush to paint the dark center of the dandelion. Create small radiating lines outward from the center to represent the structure holding the seeds. -
Add the fluff:
With the same small brush, paint the delicate ‘fluff’ of the dandelion head. Use very light pressure to make thin, wispy lines rather than solid blobs. -
Bridge the gaps:
When painting over the gaps between boards, dab the brush gently inside the side of the slat slightly so the image doesn’t abruptly disappear at the edge. -
Paint floating seeds:
Move to the right side and paint the individual flying seeds. Remember to paint the tiny parachute tops and the small seed hanging below them. -
Review and touch up:
Step back and look at the overall balance. If the silhouette looks too thin in places, add a second coat of black paint to make it opaque and bold.
Fixing Wobbly Lines
Did your hand shake slightly? Use a fine-grit sandpaper to gently sand away the errant black paint once it’s dry, effectively erasing the mistake.
Step 4: Finishing Touches
-
Dry thoroughly:
Allow the black paint to dry completely, which usually takes about an hour depending on humidity. -
Seal the wood:
Apply a thin coat of clear matte polyurethane over the entire piece. This protects the raw wood and prevents the paint from chipping over time.
Now hang your rustic masterpiece in a sunny spot and enjoy the breezy, natural vibe it brings to your room


Simple Botanical Stems for Minimal Pallet Art
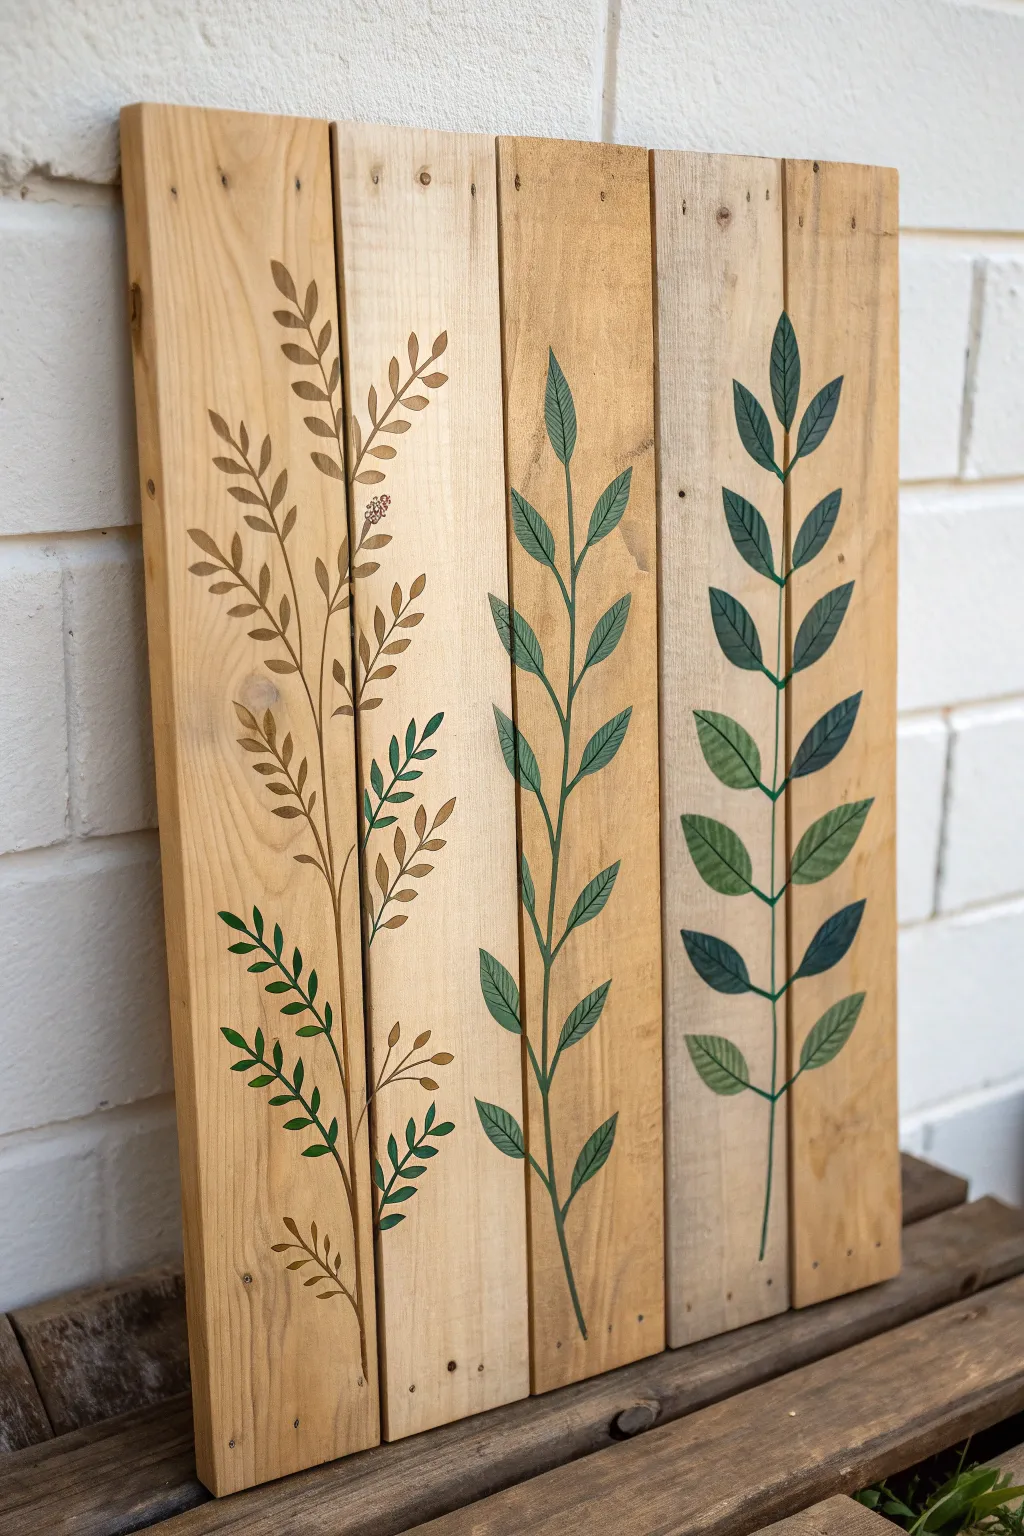
Bring a touch of nature indoors with this beautifully simple pallet wood project. Featuring three distinct leafy stems painted across four vertical planks, this piece balances rustic texture with delicate botanical illustrations.
How-To Guide
Materials
- 4 Wooden pallet planks (approx. 24-30 inches long)
- Wood glue
- 2 thinner wooden support slats (for the back)
- Sandpaper (80 and 120 grit)
- Acrylic paints (Dark hunter green, sage green, olive green, earthy brown)
- Small round paintbrushes (sizes 2 and 4)
- Fine liner brush (size 0 or 00)
- Pencil
- Ruler or straight edge
- Matte clear coat sealer (spray or brush-on)
- Brad nailer or small nails and hammer
Step 1: Preparing the Canvas
-
Select and Clean Planks:
Standard pallets often have rough wood, so choose four planks that are relatively straight and free of major rot. Give them a good scrub with a stiff brush to remove dirt and debris before starting. -
Initial Sanding:
Using 80-grit sandpaper, sand down the rough surfaces of all four planks. You want to remove splinters and major imperfections while keeping some of the wood’s natural character and grain visible. -
Fine Sanding:
Switch to 120-grit sandpaper for a finishing pass. This creates a smoother surface that will accept the paint much better without the brush snagging on rough fibers. -
Assemble the Panel:
Lay the four planks side-by-side on a flat surface, face down. Ensure the gaps between them are minimal, though small spaces add to the rustic charm. -
Secure the Backing:
Apply wood glue to your two thinner support slats. Place them horizontally across the back of the four planks—one near the top and one near the bottom. Secure them with brad nails or small hammer-in nails.
Wood Grain Pro-Tip
Don’t over-sand! Leaving some saw marks adds texture. When painting over a groove or knot, dab the paint in first, then smooth it out to ensure coverage.
Step 2: Drafting the Design
-
Establish Center Lines:
Turn the panel face up. Using a ruler and a pencil, lightly draw three vertical lines to serve as the main stems. Notice that the design spans across the planks, so don’t be afraid to let a stem cross a gap. -
Sketch the Left Stem:
Sketch a varied, bushy plant on the left side. Draw small, alternating branches extending outward, focusing on a looser, wilder structure compared to the others. -
Sketch the Center Stem:
For the middle stem, draw long, sweeping curves. The leaves here should be slender and pointed, arranged in pairs or alternating up the stalk. -
Sketch the Right Stem:
Draw the final stem on the right side with a more vertical, structured look. These leaves are larger, oval-shaped, and arranged symmetrically in pairs.
Bleeding Paint?
If paint bleeds into the wood grain, let it dry completely. Then, lightly sand the edges of the mistake with sandpaper to sharpen the line again.
Step 3: Painting the Botanicals
-
Paint the Main Stalks:
Mix a small amount of brown paint with a drop of water to improve flow. Using your fine liner brush, trace over your pencil lines for the main stems. I like to keep the pressure light here so the lines stay thin and delicate. -
Base Color – Left Plant:
Using a size 2 brush, paint the small leaves on the left stem. Use an olive green mixed with a touch of brown to give it an autumnal, dried-herb appearance. -
Adding Details – Left Plant:
Once the base green is dry on the left stem, use a darker green to add tiny lower leaves or veins near the bottom to ground the design. -
Base Color – Center Plant:
For the middle plant, mix a sage green. Use a size 4 brush to paint the long, slender leaves. Paint them with a single stroke if possible—press down near the stem and lift up as you reach the leaf tip to create a point. -
Adding Dimension – Center Plant:
Add a darker vein line down the center of each sage leaf using the liner brush to give them depth. -
Base Color – Right Plant:
Paint the large oval leaves on the right set using a deep hunter green. These leaves are visual anchors, so ensure they are fully opaque. -
Leaf Veining – Right Plant:
Mix a lighter green shade (or use the sage from the center plant). With the liner brush, carefully paint the central vein and diagonal ribs on each large dark leaf. -
Final Touch-ups:
Stand back and look at the composition. If any pencil marks are still visible, gently erase them. Fill in any patches of paint that look too thin. -
Sealing the Art:
Once the paint is completely cured (wait at least 24 hours), apply a matte clear coat over the entire piece to protect the wood and prevent the paint from fading.
Hang your new rustic masterpiece in a bright entryway or kitchen to enjoy that organic charm every day


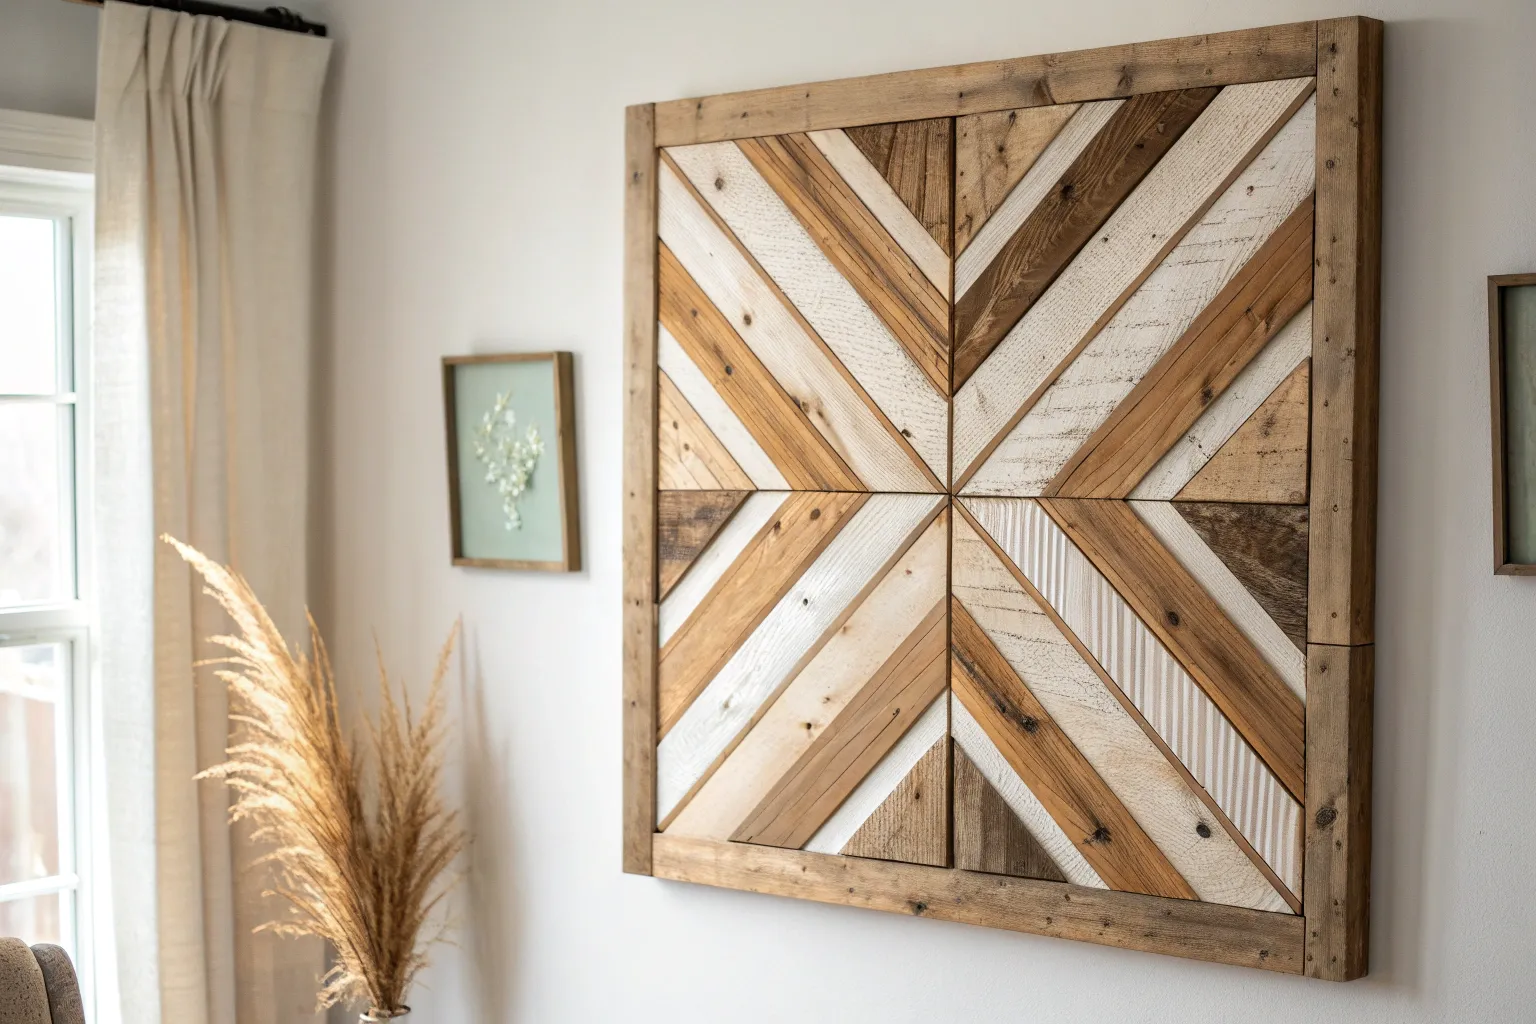
Chevron Pattern Pallet Panel With Two-Tone Stain and Paint
Transform reclaimed wood into a striking geometric statement piece with this chevron patterned panel. The interplay between dark stained wood, natural tones, and crisp white planks creates a sophisticated, rustic-modern aesthetic perfect for any entryway or living space.
Step-by-Step Guide
Materials
- Reclaimed pallet wood (dismantled and cleaned)
- Plywood backing sheet (1/2 inch thick)
- Dark wood stain (e.g., Dark Walnut or Espresso)
- White latex paint or chalk paint
- Clear matte polyurethane sealant
- Miter saw
- Wood glue
- Brad nailer with 1-inch nails
- Sandpaper (80, 120, and 220 grit)
- Tape measure
- Pencil
- Straight edge or long ruler
- Framing strips (1×2 pine boards)
Step 1: Preparation and Cutting
-
Prepare the backing:
Cut your plywood sheet to your desired final dimensions. A standard size like 24 x 48 inches works well for a panel of this proportion. -
Mark the center line:
Using a straight edge and pencil, draw a vertical line directly down the center of your plywood backing. This line is crucial for ensuring the chevron point stays perfectly aligned. -
Process pallet wood:
Select your best pallet slats. Remove all nails, plane them down if you have a thickness planer for uniform thickness, or sand them heavily with 80-grit paper to smooth out rough surfaces. -
Rip to width:
To ensure the pattern locks together tightly, rip all pallet boards to a consistent width (e.g., 3 inches) using a table saw. This eliminates the natural variance found in pallet wood. -
Set miter angle:
Set your miter saw to exactly 45 degrees. Cut the end of your first board at this angle. This angled cut will sit against the center line you drew earlier.
Step 2: Staining and Painting
-
Sort into groups:
Divide your cut boards into three piles based on the design: one for dark stain, one for white paint, and one for a natural/light finish. -
Apply dark stain:
Stain the first group using a dark walnut or espresso tone. wipe off excess stain immediately with a rag to let the wood grain show through, and let them dry completely. -
Paint the white planks:
Paint the second group white. I find that watering down the paint slightly (about 80% paint, 20% water) helps it soak into the wood texture rather than sitting on top like a plastic film. -
Sand for distress:
Once the white paint is dry, lightly sand the edges and surface with 120-grit paper to reveal bits of wood underneath, creating a weathered, farmhouse look. -
Seal the natural wood:
For the third group, simply sand them clean or apply a very light golden oak stain if you want to warm up the natural tone.
Use a Speed square
When laying your first ‘V’ shape, clamp a speed square to the center line. This acts as a physical barrier to press your wood against, guaranteeing a perfect 90-degree angle right from the start.
Step 3: Assembly and Framing
-
Dry fit the layout:
Before gluing, lay out your pattern on the floor. Arrange the colors in your desired sequence—notice how the image alternates between thick bands of dark wood, thin white strips, and natural accents. -
Secure the first V:
Start at the very top center. Apply wood glue to the back of two matching angled pieces. Place them so their points meet perfectly on your center line. Shoot a few brad nails to lock them in place. -
Continue the pattern:
Work your way down, row by row, pressing each new board tightly against the previous one. Ensure the center seam remains straight as you go. The ends of the boards will hang off the edge of the plywood—this is expected. -
Trim the edges:
Once all boards are glued and nailed, flip the entire panel over. Use a circular saw or track saw to cut off the overhanging wood flush with the plywood backing. -
Add the frame:
Measure the outer dimensions of your now-trimmed panel. Cut your 1×2 framing strips to size using 45-degree miter cuts at the corners for a professional finish. -
Attach the frame:
Stain or seal the frame pieces to match the natural wood tone in your pattern. Nail them into the sides of the plywood backing using finish nails. -
Final finish:
Apply a coat of clear matte polyurethane over the entire piece to protect the wood and unify the sheens of the different finishes.
Gaps appearing?
If gaps appear between rows, your boards might not be perfectly straight. Use a hand plane to shave down high spots on board edges, or fill small gaps with a mixture of sawdust and wood glue.
Hang your new chevron masterpiece in a well-lit area to let the textures and contrasting wood tones really shine
BRUSH GUIDE
The Right Brush for Every Stroke
From clean lines to bold texture — master brush choice, stroke control, and essential techniques.
Explore the Full Guide
Geometric Pallet Wood Mosaic in Sunset Colors

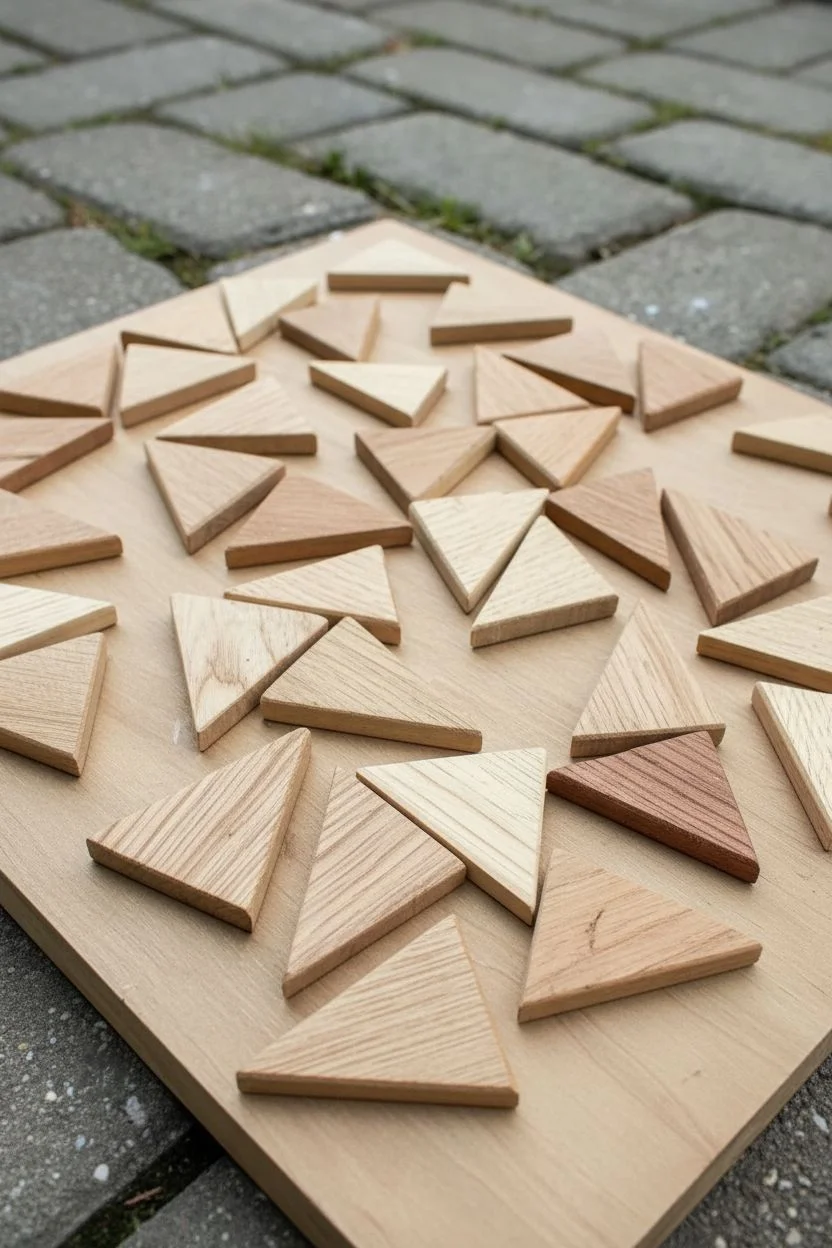
Transform humble pallet scraps into a stunning piece of geometric wall art that captures the warm hues of a setting sun. This project uses triangular cuts and gradient staining to create a modern, textured mosaic perfect for adding warmth to any room.
Step-by-Step Tutorial
Materials
- Reclaimed pallet wood slats (various species add character)
- Plywood backing board (approx. 12×12 inches or desired size)
- Wood glue
- Miter saw or miter box with hand saw
- Sandpaper (80, 120, and 220 grit)
- Wood stain or fabric dye (purple, orange, red, and natural tones)
- Rags or foam brushes for staining
- Clear matte polyurethane finish
- Frame clamps or heavy weights
- Framing lumber (optional, for the border)
Step 1: Preparation and Cutting
-
Select your palette:
Begin by sorting through your pallet wood. Look for slats that are relatively straight and free of major rot, though knots and nail holes add wonderful character. -
Plane and smooth:
Run your pallet slats through a planer if you have one to get a consistent thickness, or give them a thorough sanding with 80-grit paper to reveal the clean grain underneath the rough exterior. -
Rip strips to width:
Cut your pallet boards into long strips of equal width using a table saw. A width of 1.5 to 2 inches works well for the scale shown in the photo. -
Set the angle:
Set your miter saw to exactly 30 degrees. This angle is crucial because when six of these triangles meet at a center point, they form a perfect hexagon, a pattern hinted at in the layout. -
Cut the triangles:
Cut your strips into isosceles triangles. I prefer to set up a stop block on my saw fence to ensure every single triangle is identical in size, which is vital for a tight fit later. -
Sand the edges:
Lightly sand the cut edges of each triangle with 120-grit paper to remove splinters, but be careful not to round over the corners too much or you’ll lose the crisp geometric look.
Grain Direction Tip
Rotate the grain direction of adjacent triangles. Having the wood grain run at different angles enhances the geometric effect and catches light differently.
Step 2: Color and Composition
-
Sort by grain:
Group your raw wood triangles by color and grain pattern. Keep the lightest, clearest pieces for the ‘natural’ sections and reserve darker or grainier pieces for the deep purple and red tones. -
Apply the stains:
Using rags, apply your stains. You’ll need a gradient: deep purple/burgundy, reddish-orange, soft peach/orange, and natural/white. Water-based dyes are great here for vibrant coloring. -
Let them dry:
Allow the stained pieces to dry completely. If the grain raises, gently knock it back with 220-grit sandpaper, being careful not to sand through the color. -
Prepare the backer:
Cut your plywood backing board to your desired final dimensions. Leave a little excess room at the edges; you can always trim the plywood flush after gluing. -
Dry fit the pattern:
Arrange the triangles on the backing board without glue first. Start from the center and work outward, creating clusters of color to mimic the sunset gradient shown in the image. -
Adjust the fit:
If you find small gaps appearing during the dry fit, you may need to sand the sides of specific triangles slightly to get them to nestle together tightly.
Step 3: Assembly and Finishing
-
Glue the center:
Once happy with the layout, lift one piece at a time, apply a dab of wood glue to the back, and press it firmly onto the plywood. Start in the middle to confirm your alignment stays true. -
Work outward:
Continue gluing outward from the center. Press neighboring pieces tightly against each other as you go to minimize gaps between the wood shapes. -
Weight it down:
Place a flat board over your glued mosaic and pile on some heavy books or weights. This ensures all pieces bond flat against the backing while the glue sets. -
Trim the edges:
Once the glue is fully cured, use a track saw or table saw to trim the edges of the mosaic square, cutting through both the triangles and the backing for a perfect edge. -
Add a frame:
Measure the perimeter of your trimmed square and cut 1×2 lumber to create a simple frame. Miter the corners for a professional look and attach with brad nails. -
Seal the art:
Finish the entire piece with a coat of clear matte polyurethane. This protects the wood and enriches the stain colors without adding an artificial glossy shine.
Create Detail
Before staining, distress a few random triangles with a wire brush or awl. The stain will pool in these texture marks, adding instant age and depth.
Hang your finished sunset mosaic near natural light to watch the colors shift throughout the day
Pallet Frame Gallery Board for Mini Paintings
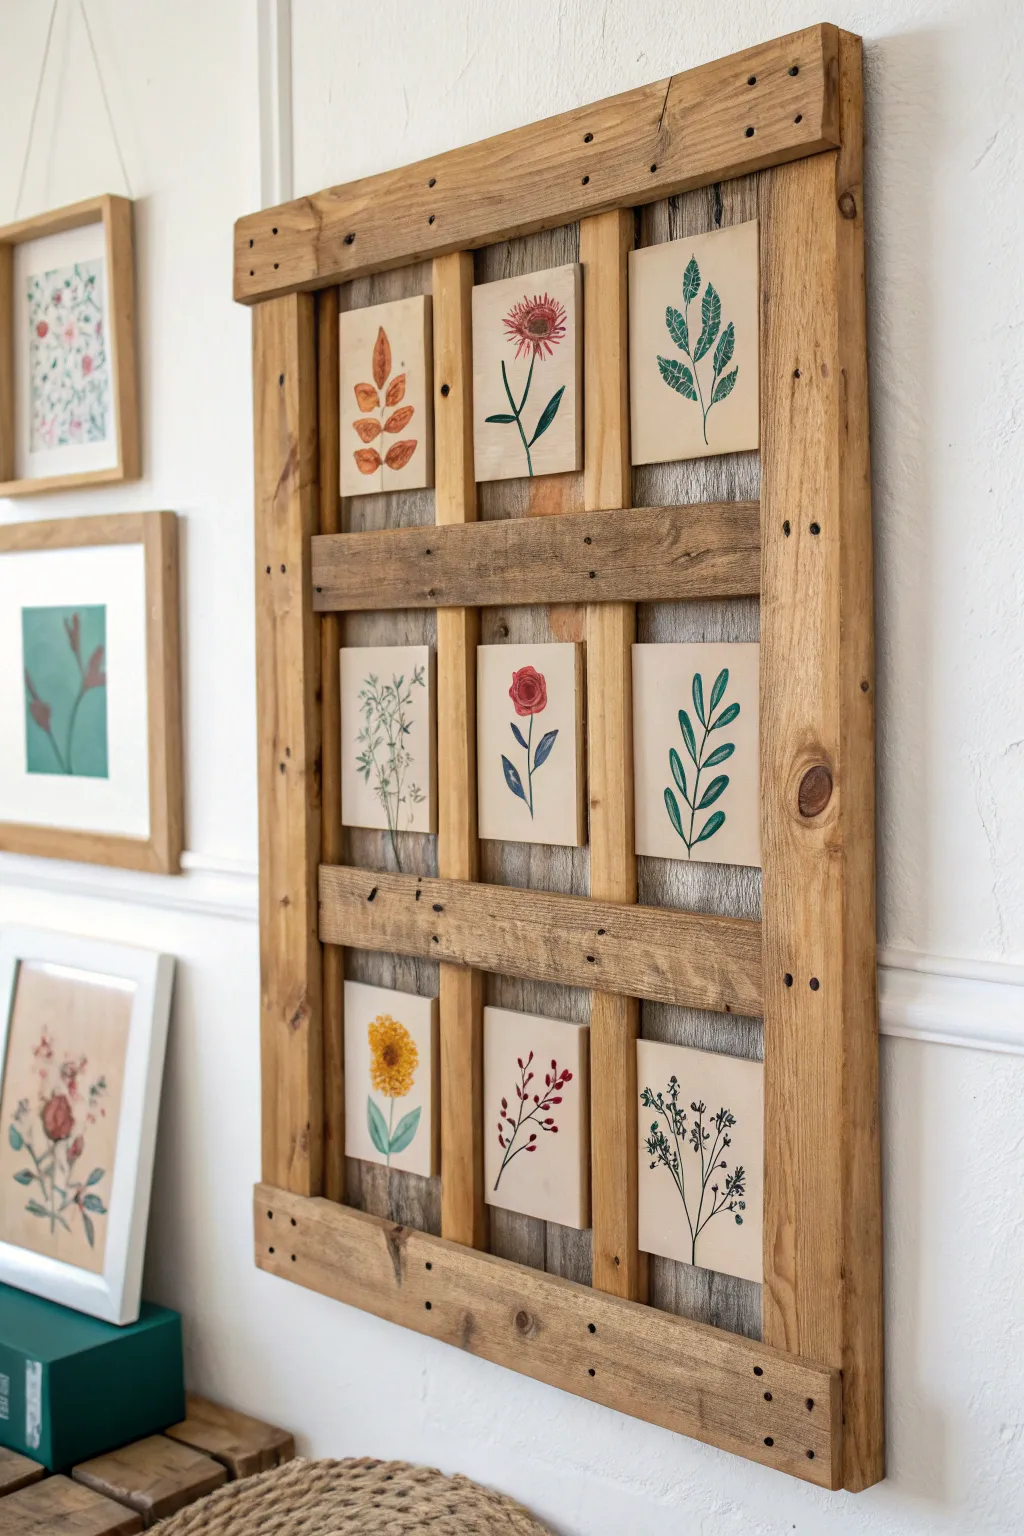
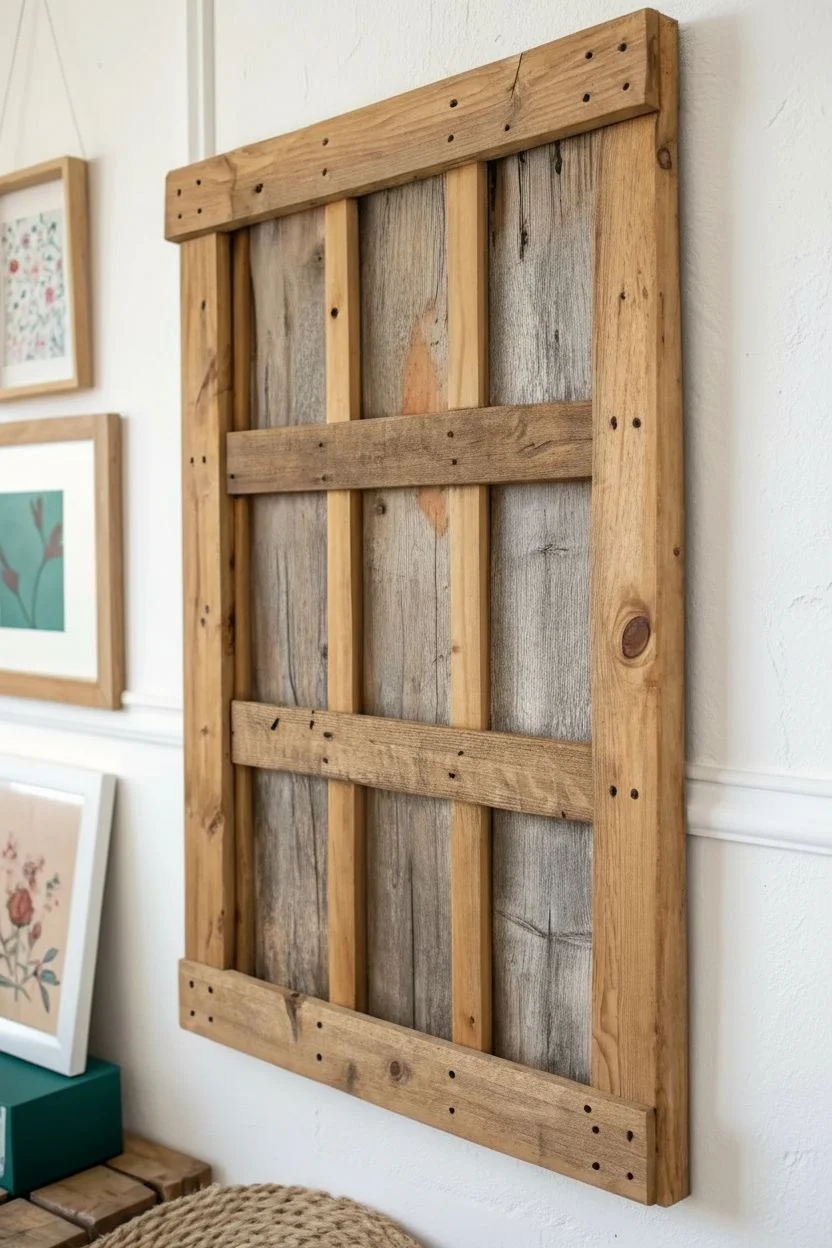
Transform reclaimed lumber into a stunning gallery wall feature with this grid-style display. The weathered wood texture creates the perfect contrast for delicate, hand-painted botanical tiles, bringing a touch of nature indoors.
How-To Guide
Materials
- Reclaimed pallet wood planks (varying widths)
- Small thin plywood squares or crafting wood tiles (approx. 4×4 inches)
- Acrylic paints (various greens, reds, yellows, browns)
- Fine detail paintbrushes (round size 0 and 2)
- Wood glue
- Pin nails or small finishing nails
- Hammer or nail gun
- Saw (hand saw or miter saw)
- Sandpaper (medium and fine grit)
- Wood stain (optional, depending on pallet wood color)
- Picture hanging hardware
- Pencil and ruler
- Clear matte sealer (spray or brush-on)
Step 1: Building the Grid Frame
-
Prepping the wood:
Disassemble your pallet carefully to harvest the planks. Select boards with character—knots and nail holes add charm. Sand them down enough to remove splinters but leave the rough texture intact. -
Cutting the main supports:
Cut two long vertical boards for the sides of your frame (approx. 24-30 inches) and two horizontal boards for the top and bottom headers (approx. 18-20 inches). -
The backing structure:
Measure the space between your side rails. Cut thinner pallet slats to run vertically behind where the art will sit. These act as the ‘backboard’ that holds the grid together. -
Creating the grid:
Cut two horizontal cross-pieces to fit snugly between the vertical side rails. These will create the three rows for your artwork. -
Cutting vertical dividers:
Cut short, vertical separator pieces that will fit between the horizontal cross-pieces. You need these to create the three distinctive columns. -
Assembling the skeleton:
Lay out all your pieces face down on a flat surface to check the fit. The structure should look like a window pane with nine openings. -
Securing the frame:
Using wood glue and pin nails, attach the horizontal cross-pieces to the vertical backing slats. Then, attach the vertical side rails and the top/bottom headers to lock everything in place. -
Adding texture:
If your cut ends look too fresh, dab a little stain or watered-down brown paint on them to match the aged wood patina.
Use A Spacer
Cut a scrap block of wood to the exact width needed between the grid slats. Use this block as a guide while nailing to ensure every artwork slot is perfectly identical.
Step 2: Creating the Botanical Tiles
-
Preparing the canvas:
Take your small wooden squares and sand the faces until they are very smooth, as this makes detailed painting much easier. -
Sealing the wood:
Apply a thin coat of clear matte sealer or gesso to the wood squares. This prevents the acrylic paint from bleeding into the wood grain. -
Sketching the designs:
Lightly sketch a different plant on each square using a pencil. Aim for variety: a single red rose, a sprig of lavender, fern leaves, and fall foliage. -
Painting stems and leaves:
Mix a few shades of green—olive, forest, and sage. Using a size 2 brush, paint the stems with confident, sweeping strokes. -
Adding the blooms:
Switch to your reds, yellows, and oranges for the flowers. Keep the paint relatively thin to mimic a watercolor look, layering color for depth. -
Refining details:
I find using the size 0 brush helps here to add tiny veins to leaves or pollen dots to the center of flowers. -
Final assembly:
Once the paintings are fully dry, apply a small amount of wood glue to the back of each tile. Center them within the grid spaces on your pallet frame and press firmly. -
Hanging:
Attach sturdy picture hanging hardware to the back of the heavy wooden frame. Ensure it is rated for the weight of the pallet wood.
Interchangeable Art
Instead of gluing the art tiles permanently, attach small adhesive velcro strips to the frame and tile backs. This lets you swap the botany art for seasonal themes.
Step back and admire how the rugged wood perfectly frames your delicate painted garden

PENCIL GUIDE
Understanding Pencil Grades from H to B
From first sketch to finished drawing — learn pencil grades, line control, and shading techniques.
Explore the Full Guide
Pallet Slat Mountain Landscape With Layered Peaks
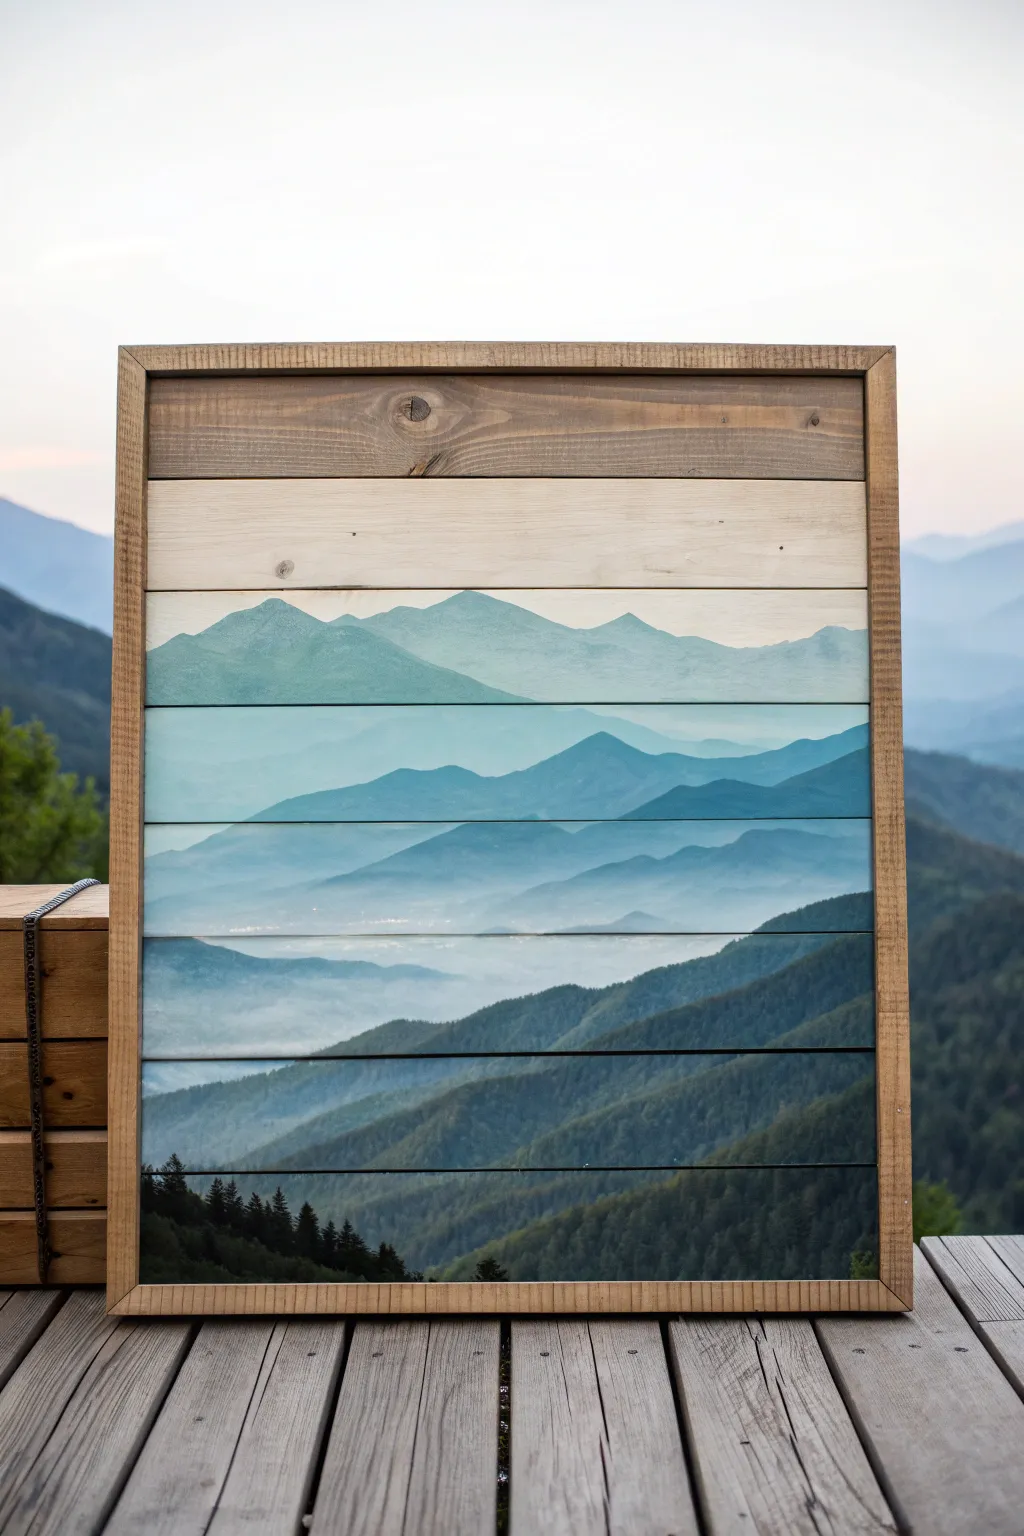
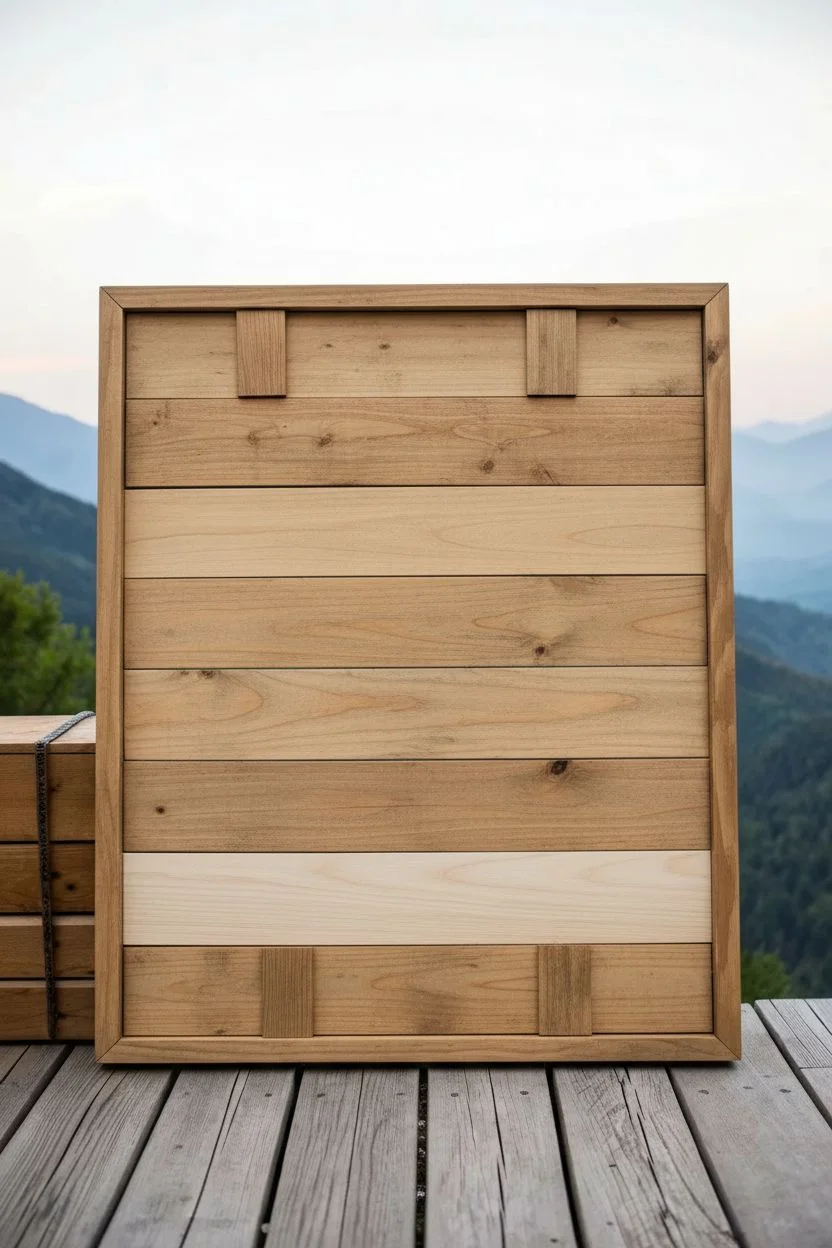
Capture the serene beauty of distant mountain ranges with this stunning horizontal slat art piece. By carefully applying a landscape image across multiple wooden boards, you create a rustic yet modern window into nature that adds depth and tranquility to any room.
Step-by-Step Guide
Materials
- Reclaimed pallet wood or 1×4 pine boards
- 1×2 wood strips (for the frame)
- Wood glue
- Brad nailer or finishing nails
- Sandpaper (80, 120, and 220 grit)
- Matte Gel Medium (for photo transfer)
- Laser-printed landscape image (reversed horizontally)
- Large sponge and bowl of water
- Soft cloth
- Matte clear coat sealer (spray or brush-on)
- Wood stain (dark walnut or similar for frame)
- Saw (miter saw or hand saw)
Step 1: Preparing the Wooden Canvas
-
Select and cut your slats:
Choose pallet boards that are relatively straight and uniform in width. Cut 8 to 10 boards to identical lengths, roughly 24 inches wide depending on your desired size. -
Sand for smoothness:
Since we are transferring a detailed image, surface texture matters. Sand the face of each board thoroughly, starting with 80 grit and working up to 220 grit until the wood is very smooth to the touch. -
Assemble the backing:
Lay the boards horizontally, edge-to-edge, face down on a flat surface. Use two vertical scrap wood strips glued and nailed across the back to hold them all together as a single solid panel. -
Clean the surface:
Wipe the front of your assembled panel with a tack cloth or slightly damp rag to remove every speck of sawdust. Any dust left behind will create bumps in your final image.
Step 2: Transferring the Image
-
Prepare your print:
Print your chosen mountain landscape on standard printer paper using a laser printer. You will likely need to tile the image across multiple sheets to match the size of your wood panel. Remember to mirror (flip) the image before printing. -
Apply the gel medium:
Brush a generous, even layer of matte gel medium directly onto the face of the wood. You want it thick enough to stay wet for a moment but not so thick that it globs up. -
Position the paper:
Immediately place your printed sheets face down into the wet gel. Be extremely careful to align the seams if you used multiple sheets of paper. -
Smooth it out:
Using a credit card or a brayer roller, start from the center and firmly smooth the paper outwards. This pushes out air bubbles and ensures the ink makes full contact with the wood fibers. -
Let it cure:
Patience is key here. Allow the piece to dry completely for at least 8 to 12 hours. I generally prefer to leave it overnight to ensure the bond is permanent.
Pro Tip: Printer Type
You MUST use a laser printer for the image transfer. Inkjet ink is water-soluble and will bleed or dissolve when you apply the gel medium, ruining the detail.
Step 3: Revealing the Scene
-
Wet the paper:
Once dry, soak a sponge in water and saturate the back of the paper. You’ll see the image start to show through as the paper becomes translucent. -
Rub away the pulp:
Using your fingers or a soft sponge, gently rub the wet paper in circular motions. The paper fibers will roll off, leaving the ink embedded in the gel on the wood. -
Repeat the process:
Let the wood dry for a few minutes; a white haze will likely appear, which is leftover paper fiber. Wet it again and gently rub until the image is crisp and clear. This usually takes 2-3 rounds. -
Slice the seams:
Run a sharp craft knife or razor blade along the gaps between the wooden slats to separate the image cleanly, restoring that authentic pallet-art look.
Troubleshooting: White Haze
If a foggy white layer persists after drying, apply a tiny drop of mineral oil or olive oil to a cloth and buff the image. It makes the remaining fibers transparent.
Step 4: Framing and Finishing
-
Cut the frame pieces:
Measure the height and width of your finished panel. Cut your 1×2 wood strips to create a simple box frame that fits snugly around the perimeter. -
Stain the frame:
Apply a wood stain to your frame pieces. A medium-dark tone contrasts beautifully with the blue hues of the mountain landscape. Wipe off excess stain and let it dry. -
Attach the frame:
Using wood glue and brad nails, attach the frame pieces to the outer edges of your panel. Ensure the front edge of the frame sits slightly proud of the artwork surface for depth. -
Seal the artwork:
Apply a final coat of clear matte sealer over the entire piece—image and frame included. This protects the transfer and unifies the sheen.
Hang your new mountain vista in a well-lit spot to enjoy the intricate layers of your handiwork
Beachy Horizon Scene With Weathered Driftwood Vibes
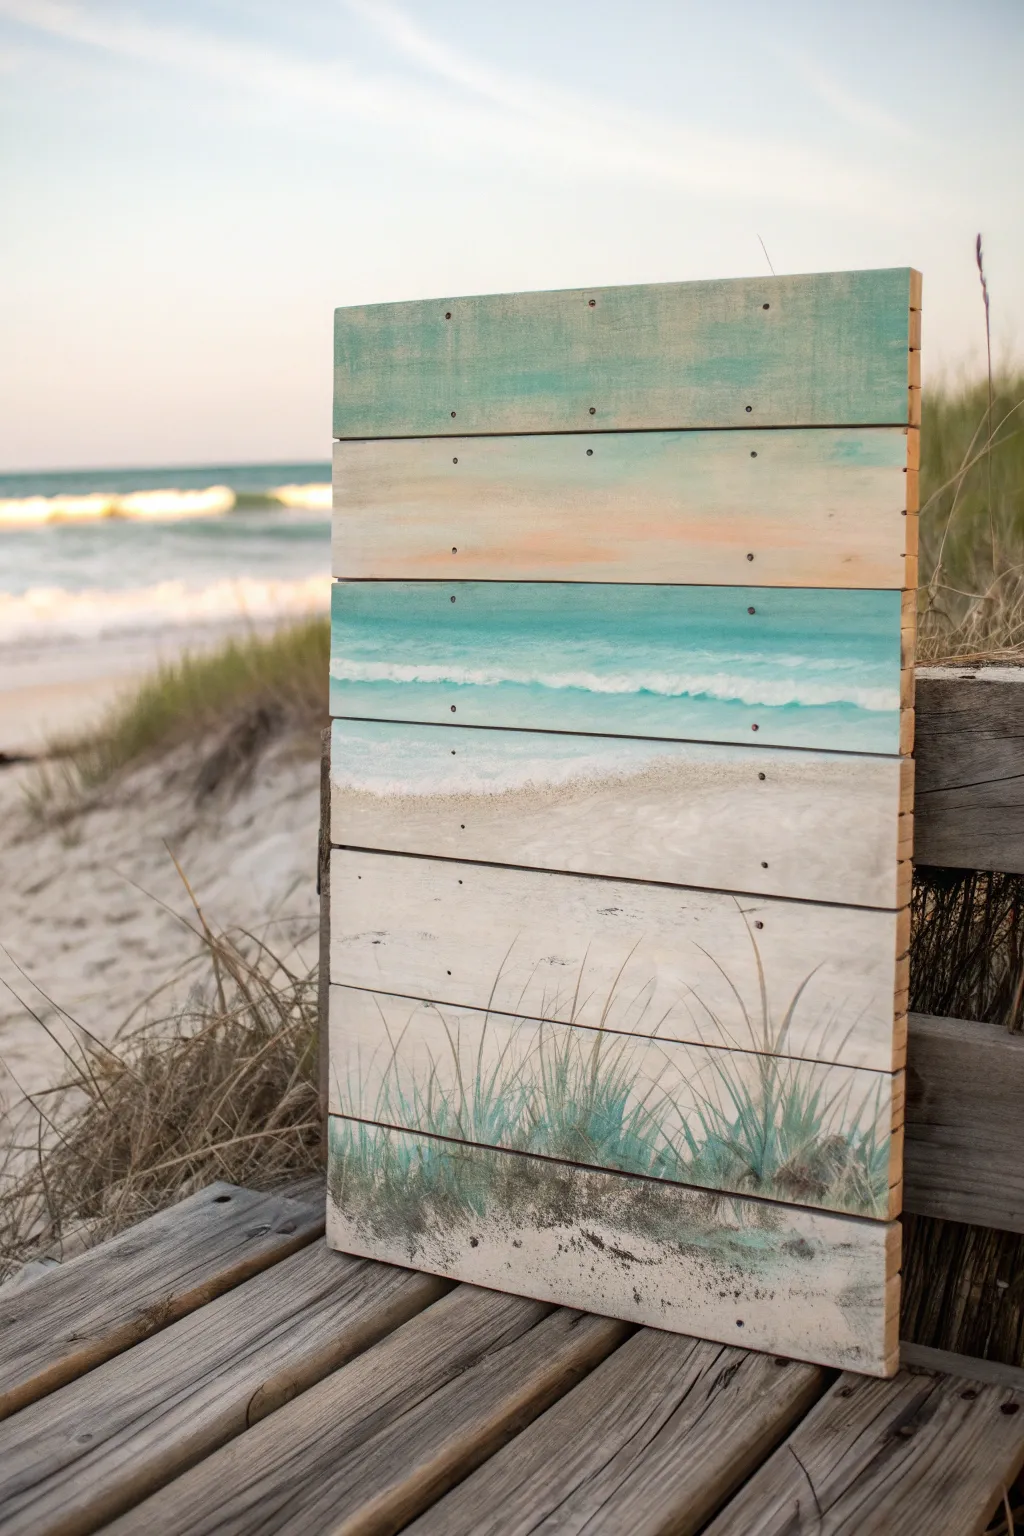
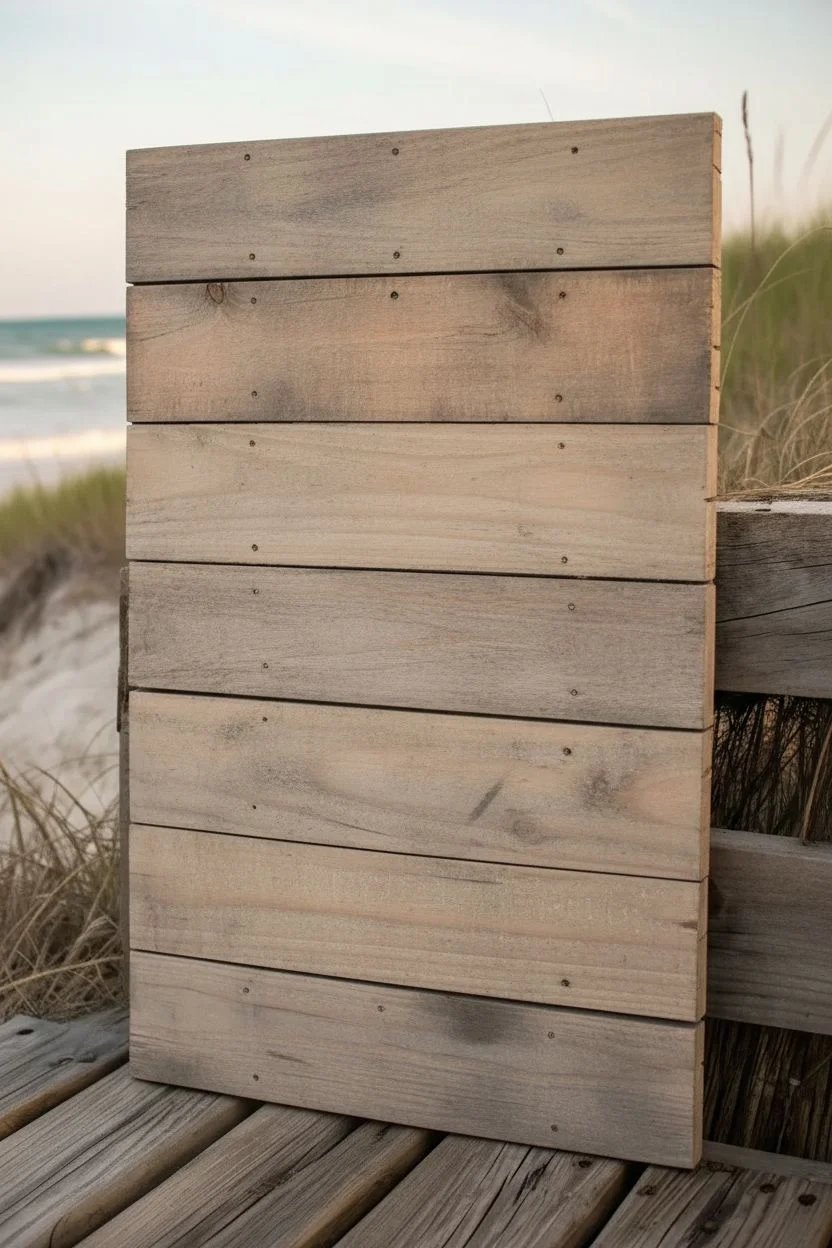
Capture the serene beauty of the shore with this rustic pallet art project, featuring a soothing horizon line that stretches across weathered wood planks. The soft blend of teal skies, foamy waves, and dune grasses creates a calm, breezy atmosphere perfect for any beach-themed decor.
Step-by-Step Tutorial
Materials
- Reclaimed wood planks or pallet wood (approx. 6 pieces of variable width)
- Two vertical support laths (for the back)
- Wood glue
- Nails or screws
- Rough grit sandpaper (80-100 grit)
- Acrylic paints: Teal/Aqua, White, Beige, Light Brown, Dark Green, Sage Green
- Wide flat paintbrush (2-inch)
- Medium flat paintbrush
- Small fine-liner brush
- Fan brush (optional)
- Small bowl of water
- Paper towels
Step 1: Building the Canvas
-
Select your timber:
Gather about six plank sections of reclaimed wood. Varying the widths of the planks slightly adds to the authentic, driftwood feel of the final piece. -
Arrange the surface:
Lay the planks horizontally side-by-side on a flat surface to form a vertical rectangle. Shuffle them until gaps are minimized and the wood grain flows nicely. -
Secure the backing:
Place your two vertical support laths perpendicular across the back of the planks. Apply wood glue between the laths and the planks for stability. -
Fasten the frame:
Using nails or short screws, secure the support laths to each horizontal plank from the back to keep the front face clean. Let the glue cure completely. -
Prep the surface:
Sand the front surface lightly with rough grit sandpaper. You want to remove splinters but keep the rustic texture and grain visible.
Paint Looking Too Solid?
If the colors look too opaque and blocky, dampen a paper towel and wipe away some paint while it’s still wet. This reveals the wood grain and restores that vintage, washed-out look.
Step 2: Painting the Horizon
-
Establish the sky:
Using the wide brush, paint the top two planks with a wash of teal mixed with plenty of water. Let the wood grain show through for a weathered sky effect. -
Create the sunset glow:
While the sky is still slightly damp, blend a very small amount of beige and faint orange-pink into the bottom of the second plank to suggest a soft sunset light. -
Define the water line:
On the third plank down, paint a solid, darker teal strip for the deep ocean water. Make the top edge straight to define the horizon. -
Add crashing waves:
Mix teal with white to create a lighter turquoise. Paint broad strokes below the deep water, then immediately use pure white to dab in seafoam where the waves crash. -
Paint the receding tide:
On the fourth plank, use a watery white wash to create the look of wet sand where the water is pulling back. Blur the edges where it meets the dry sand color.
Add Dimension
Glue actual tiny seashells or small pieces of dried sea grass to the bottom plank using a strong craft adhesive for a mixed-media 3D effect.
Step 3: The Foreground Details
-
Lay the sandy base:
Paint the bottom two planks with a mix of beige and white. Apply it somewhat unevenly so the darker wood underneath mimics the shadows in sand dunes. -
Map out the grass:
Using the dark green paint and a fine liner brush, paint long, sweeping upward strokes starting from the very bottom edge to create the dune grass spines. -
Layering lighter grass:
Mix sage green with a little white. Add a second layer of grass blades over the dark green ones to create depth and volume. -
Adding texture to the base:
Dip an old, dry brush or a stiff fan brush into dark brown paint. remove most of the paint on a paper towel, then stipple the bottom edge to simulate dirt and roots. -
Highlighting the dunes:
I like to add very faint touches of the sage green to the tips of the grass blades for a sun-kissed look. -
Distressing the finish:
Once the paint is fully dry, lightly sand over the painted seafoam and grass areas to reveal bits of wood, enhancing the weathered driftwood aesthetic.
Hang your seaside masterpiece in a well-lit spot to enjoy those calming beach vibes every day


Hanging Pallet Art With Rope and a Wooden Tag Detail
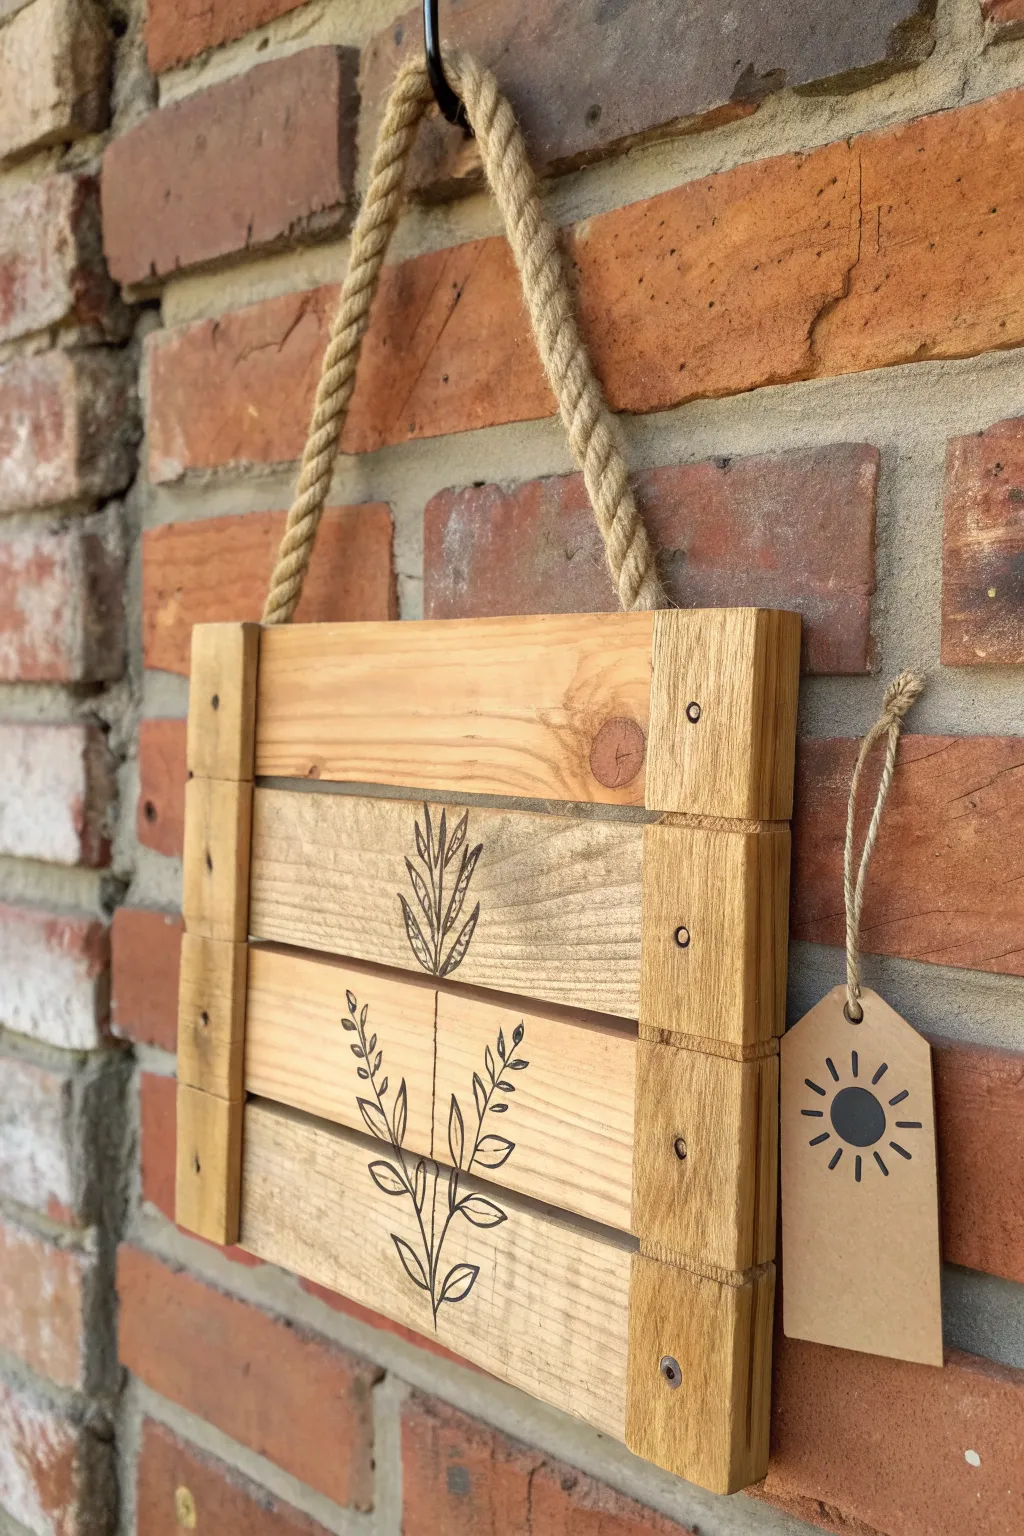

Embrace the charm of reclaimed wood with this simple yet elegant wall hanging featuring delicate botanical line art. The sturdy rope hanger and cute sun tag add the perfect finishing touches to this farmhouse-style decor piece.
How-To Guide
Materials
- Reclaimed pallet wood (or 1×4 pine boards)
- Thick jute or hemp rope (approx. 1/2 inch dia.)
- Pencil
- Black permanent marker or paint pen (fine tip)
- Handsaw or miter saw
- Power drill
- Wood screws (approx. 1 inch)
- Sandpaper (80 and 120 grit)
- Wood stain (optional, light oak recommended)
- Cardstock or thin wood veneer for the tag
- Thin twine
- Hot glue gun
Step 1: Preparing the Wood Base
-
Cut horizontal slats:
Start by cutting four equal lengths of wood for the main face of the sign. About 8-10 inches wide works well for a small sign like this. Don’t worry if the edges look a bit rough; it adds character. -
Cut vertical supports:
Cut two vertical strips that are the exact height of your four stacked horizontal slats. These will act as the frame to hold everything together. -
Sand the surfaces:
Give all your wood pieces a good sanding. I usually start with 80 grit to remove splinters and finish with 120 grit for a smoother surface to draw on. -
Arrange the layout:
Lay your four horizontal slats face down on a work surface, ensuring they are lined up evenly. -
Secure the backing:
Place the two vertical strips on top of the slats (which is actually the back of your sign), running along the left and right edges. -
Fasten with screws:
Drill pilot holes to prevent splitting, then secure the vertical strips to each horizontal slat using wood screws. You’ll need two screws per slat (one on each side). -
Flip and inspect:
Turn the assembly over. The front should now look like a solid mini-pallet. If desired, lightly stain the wood now and let it dry completely.
Ink Bleeding Pro Tip
Wood grain can act like a straw, pulling ink sideways. To prevent fuzzy lines, apply a very thin coat of matte clear sealer *before* drawing with your marker.
Step 2: Adding the Artwork
-
Sketch the design:
Using a pencil, lightly sketch a central vertical stem starting from the bottom slat and reaching up into the second slat from the top. -
Add leaves:
Draw simple, open leaf shapes branching off the main stem. Keep the lines clean and minimal. -
Sketch the top motif:
On the second slat from the top, draw a separate, wheat-like botanical shape centered above the lower stem. -
Finalize with ink:
Trace over your pencil lines with a black paint pen or permanent marker. Go slowly over the wood grain gaps to ensure the line stays distinct.
Uneven Slat Trouble?
If your pallet slats are slightly warped and won’t lie flat, use wood glue between the horizontal slats and clamp them tight overnight before screwing on the back supports.
Step 3: Assembly and Details
-
Attach the main rope:
Take your thick jute rope and cut it to your desired hanging length. Using a strong adhesive or heavy-duty staples (on the back), attach the ends of the rope to the top corners of the sign. -
Create the tag:
Cut a small rectangle with angled top corners out of thick cardstock or thin wood veneer to make a luggage-tag shape. -
Draw the sun symbol:
In the center of the tag, draw or stamp a solid black circle with radiating lines to create a simple sun icon. -
Punch a hole:
Punch a small hole at the top of the tag for the twine. -
Attach the tag:
Thread a piece of thin twine through the tag hole and tie it around the right side of the wooden sign, letting it dangle slightly.
Step 4: Finishing Up
-
Clean up sketch lines:
Once the marker ink is fully dry, gently erase any visible pencil marks. -
Seal the wood (optional):
If hanging outdoors, apply a clear matte aesthetic sealer to protect the wood and your drawing from the elements.
Hang your new rustic artwork on a sturdy hook and enjoy the natural warmth it brings to your space
Pallet Wood Growth Chart That Doubles as Wall Art
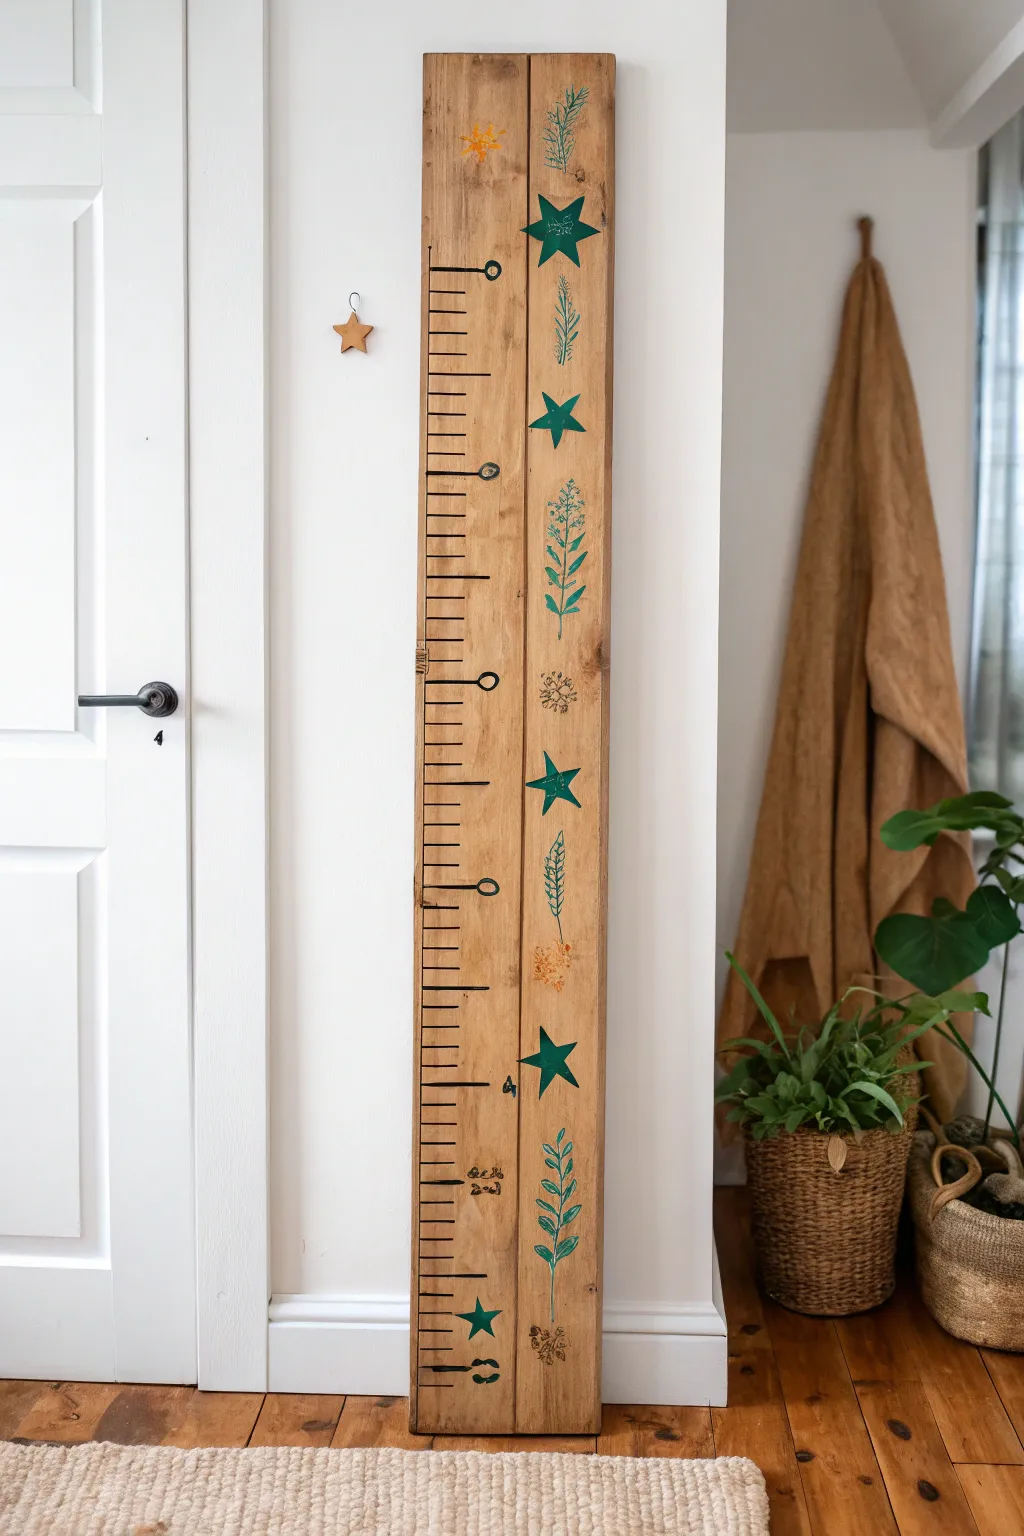
Turn reclaimed wood into a cherished family keepsake with this functional and decorative growth chart. Featuring hand-painted teal stars and botanical motifs on naturally weathered timber, it serves as both a measurement tracker and a charming piece of rustic wall art.
Step-by-Step
Materials
- Two reclaimed pallet wood planks (approx. 6ft long)
- Sandpaper (80 and 120 grit)
- Wood glue
- Flat mending plates or brackets (2-3)
- Measuring tape
- Carpenters square or T-square
- Deep teal acrylic paint
- Mustard yellow or gold acrylic paint
- Black permanent marker or paint pen (fine tip)
- Small stencil brushes or detail paintbrushes
- Star stencils (various sizes)
- Botanical/leaf stencils
- Clear matte polyurethane sealer
- Heavy-duty sawtooth hanger or French cleat
- Pencil
Step 1: Preparing the Canvas
-
Select your planks:
Choose two sturdy pallet planks of equal length, roughly 6 feet tall. Look for boards with interesting grain or knots, but ensure they are relatively straight so they sit flush against the wall. -
Join the boards:
Lay the planks side-by-side on a flat surface. Apply a thin bead of wood glue along the touching edges and clamp them together tightly. -
Reinforce the back:
Once the glue is tacky, flip the assembly over. Screw 2-3 flat mending plates across the seam on the backside to permanently secure the two boards together. -
Smooth the surface:
Sand the entire front surface, starting with 80-grit to remove splinters and rough patches, then finishing with 120-grit for a surface smooth enough to paint on but still rustic.
Bleeding Stencils?
If paint bleeds under your stencil, let it dry completely. Then, use coarse sandpaper to scrape away the messy edges, creating a deliberate ‘weathered’ look that hides the mistake.
Step 2: Creating the Ruler
-
Mark the measurements:
Use a measuring tape and pencil to mark inch increments along the left edge. IMPORTANT: Start your measurements at 6 inches (or whatever height your baseboard is) so the chart is accurate when hung above the skirting board. -
Draw the hash marks:
Using a carpenter’s square and a black paint pen, draw the horizontal lines. Make the foot marks the longest (approx. 2 inches), the half-foot marks slightly shorter, and the inch marks the shortest. -
Add the numbers:
At every foot mark (e.g., 1′, 2′, 3′), draw a small circle at the end of the line or write the number clearly. Hand-drawing these adds to the primitive, handmade aesthetic seen in the photo.
Add Dimension
Instead of stenciling perfectly flat stars, cut stars out of thin balsa wood, paint them teal, and glue them onto the board for a fun 3D relief effect.
Step 3: Adding Decorative Details
-
Plan the layout:
Lightly sketch where you want your stars and vines to go. Arranging them vertically in the center of the right plank creates a nice visual balance against the ruler markings on the left. -
Stencil the stars:
Using your deep teal paint and a stencil brush, apply the stars. Use a dry-brush technique—dip the brush and wipe most paint off—to prevent bleeding under the stencil edges. -
Add the greenery:
Stencil or freehand the leafy vine patterns between the stars using the same teal color. Vary the direction of the leaves for a more organic, flowing look. -
Incorporate accents:
Use the mustard yellow paint to add smaller details like tiny sunbursts or flower clusters in the empty spaces between the teal elements. This pop of color warms up the design. -
Refine the edges:
Once dry, you might want to lightly sand over the painted designs with high-grit sandpaper to distress them slightly, making them look like they’ve been there for years.
Step 4: Sealing and Hanging
-
Protect the wood:
Apply a coat of clear matte polyurethane over the entire front face. This seals the raw wood and prevents the marker lines from fading over time. -
Install hardware:
Attach a heavy-duty sawtooth hanger or a French cleat system to the top center of the back. Ensure it is level. -
Mount accurately:
Hang the chart on the wall. Use a tape measure to ensure the ‘1 foot’ mark on your board is exactly 12 inches off the floor (taking into account the gap you left for baseboards).
Now you have a beautiful, permanent record of your family’s growth that can move with you wherever you go.
Pallet Wall Organizer With Painted Sections and Hooks
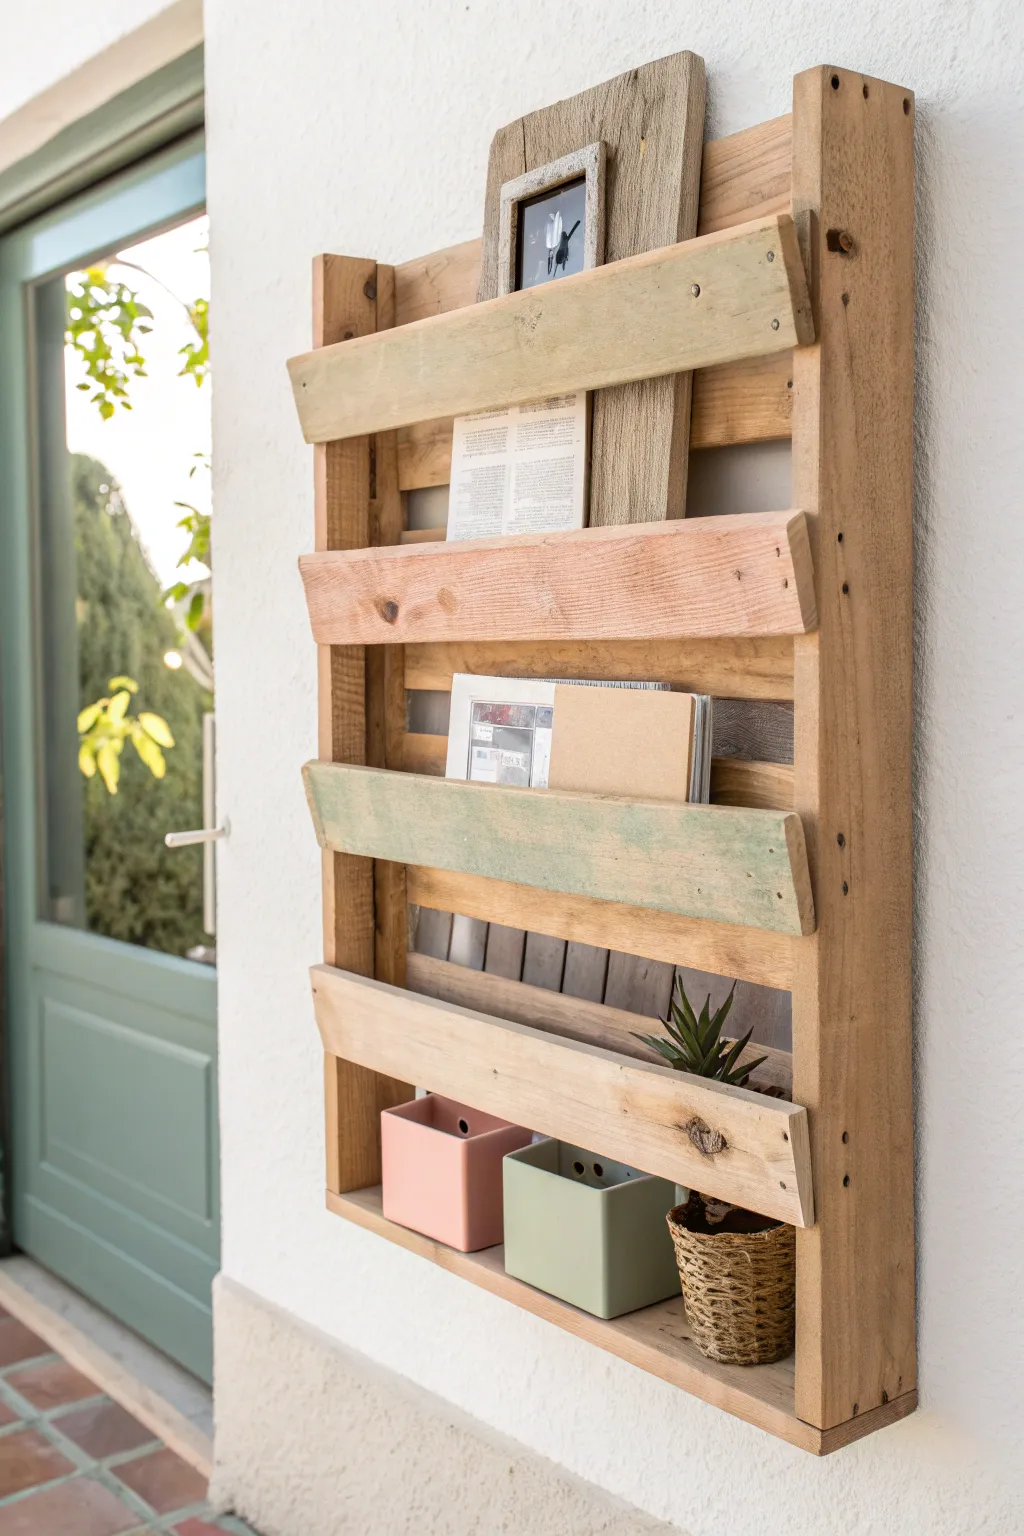
Transform rugged scrap wood into a functional vertical storage system that adds farmhouse charm to any entryway or patio. This project uses the natural structure of pallet slats to create deep pockets perfect for mail, magazines, planters, and decorative frames.
Step-by-Step Tutorial
Materials
- One wooden pallet (ideally HT – heat treated)
- Crowbar or pry bar
- Hammer
- Circular saw or hand saw
- Power drill with drill bits
- Wood screws (1 1/2 inch and 2 inch)
- Orbital sander with 80 and 120 grit sandpaper
- Acrylic or chalk paint (sage green and dusty pink)
- Paintbrush
- Measuring tape
- Level
- Wood glue
- Wall mounting hardware (heavy-duty anchors or french cleat)
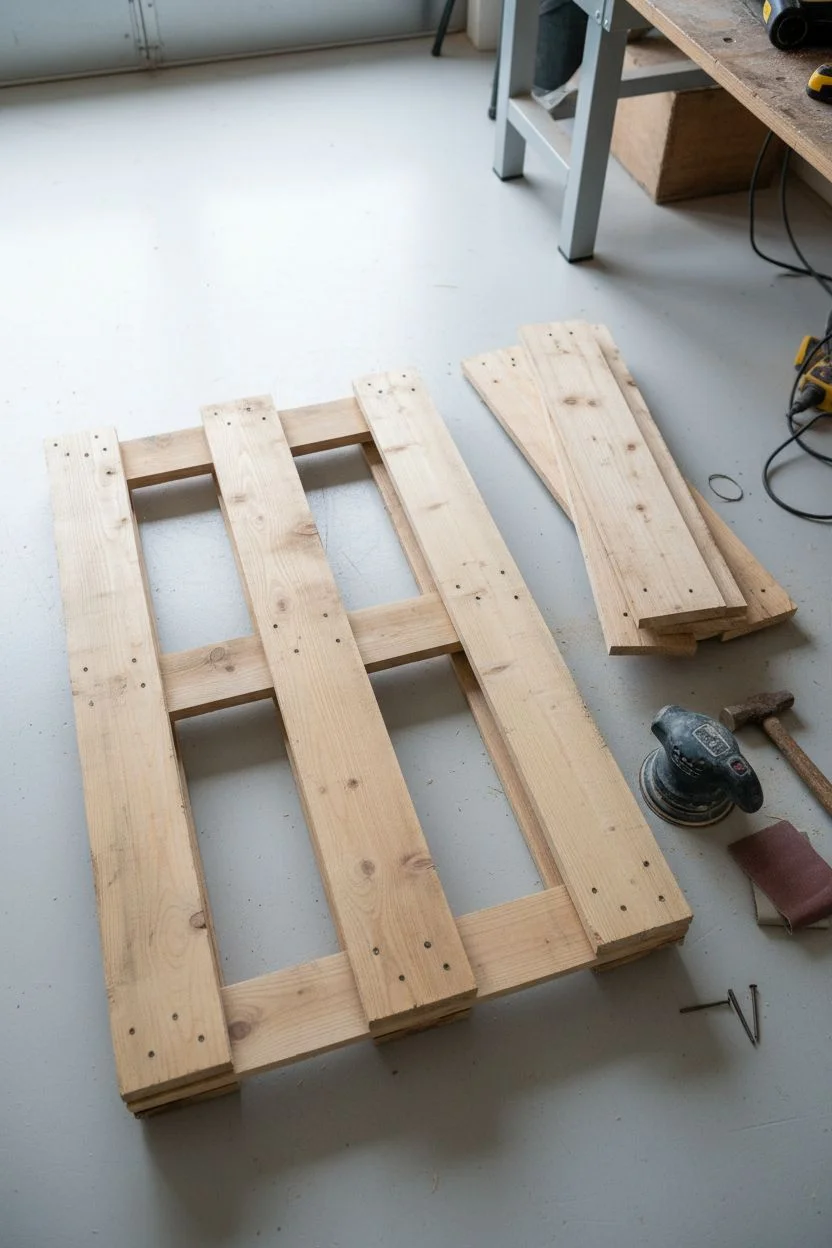
Step 1: Disassembly and Preparation
-
Select your pallet:
Begin by inspecting your pallet for usable sections. Look for a pallet with three sturdy ‘stringers’ (the thick vertical 2×4 beams) allowing you to cut a clean slice off one end to form your base structure. -
Isolate the main section:
Using your saw, cut through the top and bottom deck boards just inside the central stringer stringer. You want to keep one side section intact—this will act as the frame for your organizer. -
Harvest extra wood:
Pry off several deck boards from the remainder of the pallet using a crowbar. Remove all old nails carefully. You will need roughly 3-4 extra boards to create the front slats and bottom supports. -
Sand the surfaces:
Give all the wood a thorough sanding. Start with 80-grit to remove splintery rough patches, especially on edges you’ll touch frequently. Finish with 120-grit for a smoother feel while retaining the rustic character.
Step 2: Building the Structure
-
Adding the backstop:
Depending on your specific pallet cut, the back might be open. If gaps are too wide, nail vertical strips of scrap wood to the back of the stringers so your items don’t fall through against the wall. -
Create pocket bottoms:
Cut small blocks of wood to fit horizontally between the two vertical stringers. Screw or glue these in place to act as the ‘floor’ for each shelf level. -
Measure front slats:
Measure the width of your main frame. Cut your harvested deck boards to match this width exactly. -
Dry fit the layout:
Lay your frame flat and arrange the cut boards across the front. Space them out vertically to accommodate the height of the items you plan to store, like tall magazines or small pots.
Rustic Paint Tip
Don’t aim for perfect coverage. Leave some edges raw and sand lightly over the dried paint to distress it, enhancing the reclaimed wood aesthetic.
Step 3: Painting and Assembly
-
Select specific slats for color:
Pick two of your front-facing slats to paint. In the example, the top slat is a sage green and the third one down is also green, but you can alternate colors based on your preference. -
Apply a wash technique:
Dilute your acrylic or chalk paint slightly with water (about a 1:1 ratio). Brush this onto the selected slats. Wipe off excess immediately with a rag to let the wood grain show through the color. -
Let it dry:
Allow the painted slats to dry completely before handling them again to avoid smudges. -
Attach the front slats:
Position your slats back onto the frame. Pre-drill pilot holes to prevent splitting near the ends. Screw them securely into the vertical stringers. -
Angle check:
For a looser style, you can attach the slats flush. However, I often like to angle the top edge slightly outward by adding a small shim behind the top screw, though standard flush mounting works perfectly for books.
Functionality Upgrade
Screw small cup hooks into the underside of the bottom slat. This creates a perfect spot to hang keys, dog leashes, or dried flower bundles.
Step 4: Mounting and Styling
-
Install hanging hardware:
Because pallet wood is heavy, attach heavy-duty D-rings or a French cleat system to the back of the top horizontal bracing. -
Secure to the wall:
Use a level to mark your wall. Drill holes for wall anchors suited for the weight (plaster or drywall anchors), insert screws, and hang the organizer securely. -
Style usually:
Place taller items like picture frames or clipboards in the top compartments. Use the lower shelves for sturdier items like small ceramic planters or books. -
Final touch:
Add small items like the woven basket shown in the reference by simply tucking it into a pocket or hooking it over the edge of a slat.
Now you have a sturdy, custom-built organizer ready to declutter your space with rustic style
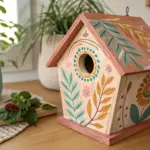
Pallet Planter Box With Painted Floral Motifs
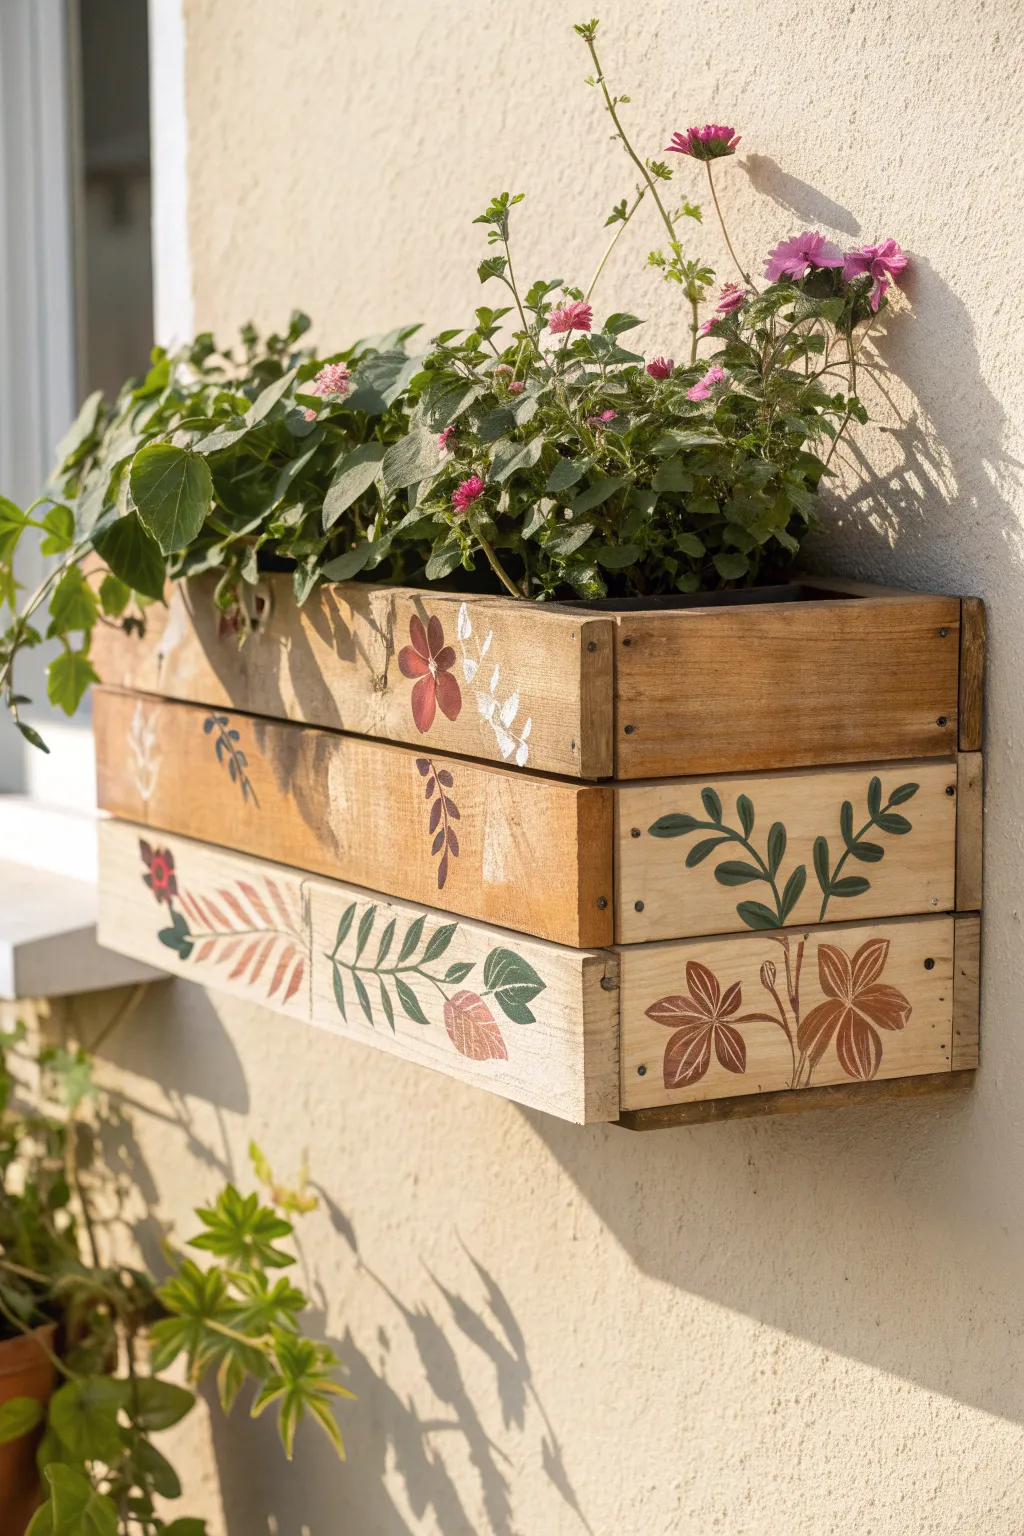

Transform rustic pallet wood into a charming tiered planter box that adds vertical interest to any wall. This project combines simple woodworking with delicate hand-painted floral motifs for a cozy, garden-inspired look.
Step-by-Step
Materials
- Discarded pallet wood or 1×4 rustic lumber
- Measuring tape and pencil
- Saw (circular saw or hand saw)
- Wood glue
- Nails or wood screws (1.5 inch)
- Drill with bits
- Medium-grit sandpaper
- Acrylic craft paints (creams, browns, burnt sienna, deep greens, olive)
- Small flat brushes and fine detail brushes
- Sealant (exterior varnish or polyurethane)
- Plastic planter insert or heavy duty plastic liner
- Wall mounting hardware (french cleat or heavy-duty D-rings)
Step 1: Constructing the Box
-
Select your timber:
Choose three boards of equal width for the front face. Pallet wood often varies, so look for pieces with interesting grain patterns but relatively straight edges. -
Measure and cut lengths:
Cut your three front boards and three matching back boards to your desired length (approx. 18-24 inches). Cut two shorter pieces for the sides (approx. 5-6 inches deep) and one bottom, making sure the bottom piece fits snugly between the sides. -
Sand the surfaces:
Give the exterior faces a quick sanding to remove splinters, but don’t over-sand; you want to maintain that rustic, textured character that catches the paint beautifully. -
Assemble the frame:
Create a simple box frame first. Attach the side pieces to the back panel using wood glue and screws. Pre-drill holes to prevent the dry pallet wood from splitting. -
Attach the bottom:
Insert the bottom board and secure it through the sides and back. Drill several small drainage holes in this bottom piece if you plan to plant directly (though a liner is recommended). -
Install the front slats:
Nail or screw the three front boards onto the side pieces. Stack them directly on top of each other to create a solid wall, or leave a tiny visible seam between them for visual definition.
Step 2: Painting the Motifs
-
Base coat touches (optional):
If you want a lighter background for your art, dry-brush a very thinned-down cream or white paint onto the wood. This brightens the surface while letting the wood grain show through. -
Outline the top tier flower:
On the top slat, paint a simple 5-petal flower shape in a burnt red or sienna shade. Keep the edges soft and slightly translucent to mimic a vintage style. -
Add white accents:
Next to the red flower, use white paint to create delicate, fern-like fronds or small stem shapes. Let the brush skip over the rough wood texture for an organic feel. -
Paint the middle tier vines:
On the middle board, dip a fine liner brush into dark brown or black. Sketch wandering vine lines that drape downward across the wood. -
Add falling leaves:
Using a brownish-red tone, add small teardrop leaf shapes hanging from your vine lines on the middle slat. -
Create the bottom tier olive branch:
For the bottom slat on the right side, paint a sturdy green stem that curves upward. Add pairs of oval leaves in a deep forest green. -
Layer the green tones:
Once the dark green dries, add a lighter olive highlight to the center of each leaf to give them dimension. -
Design the bottom left fern:
On the left side of the bottom slat, paint a long, horizontal fern or palm leaf. Use a mix of green and autumnal browns for the leaflets to create contrast. -
Refine and details:
Go back with a very fine brush to add darker veins to the larger leaves and centers to the flowers. I find that imperfect, sketchy lines look best on this rough medium.
Paint Bleeding?
If paint bleeds into the wood grain, use a stiffer, drier brush. Don’t overload bristles with water; thick acrylic sits better on rough surfaces.
Step 3: Finishing Up
-
Seal the wood:
Since this is an outdoor planter, apply two coats of exterior-grade matte varnish over the entire box, paying special attention to the painted areas. -
Add mounting hardware:
Attach heavy-duty D-rings or a French cleat system to the back. Ensure it is robust enough to hold the weight of wet soil. -
Line and plant:
Staple a heavy plastic sheet inside or insert a plastic trough planter before adding your soil and favorite trailing flowers.
Make it Bloom
Attach small hooks underneath the bottom slat to hang garden tools or a small wind chime for added utility and charm.
Now you have a stunning, handmade home for your favorite blooms that brings rustic warmth to your patio.
Round Pallet-Slat Clock Face as a Statement Art Piece
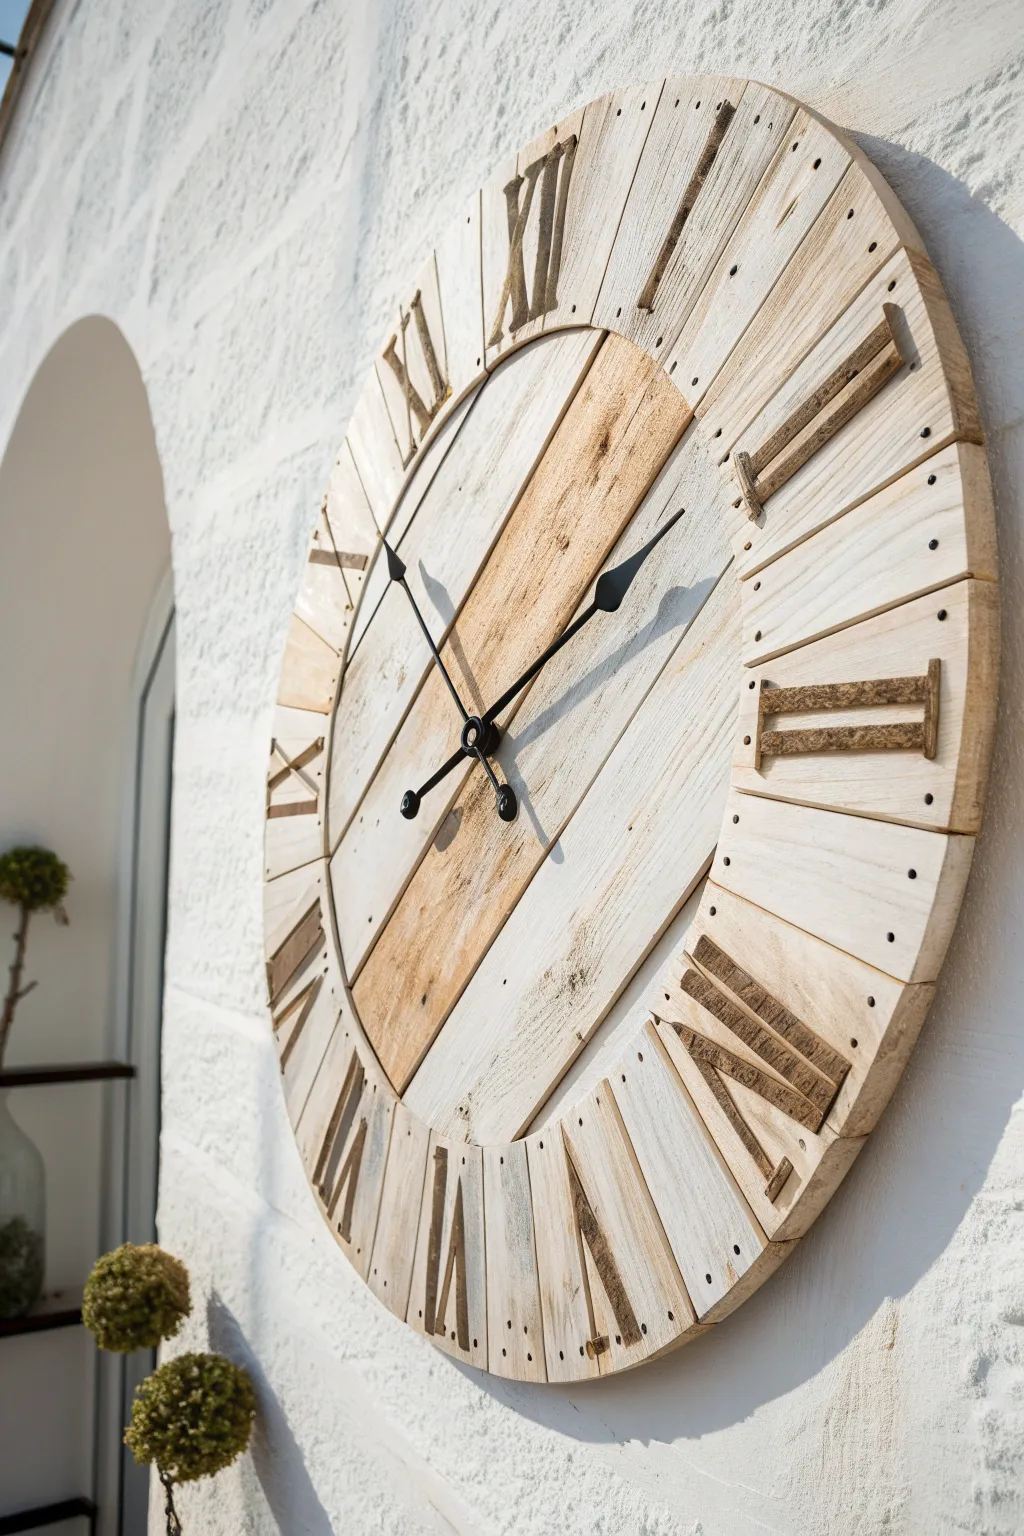
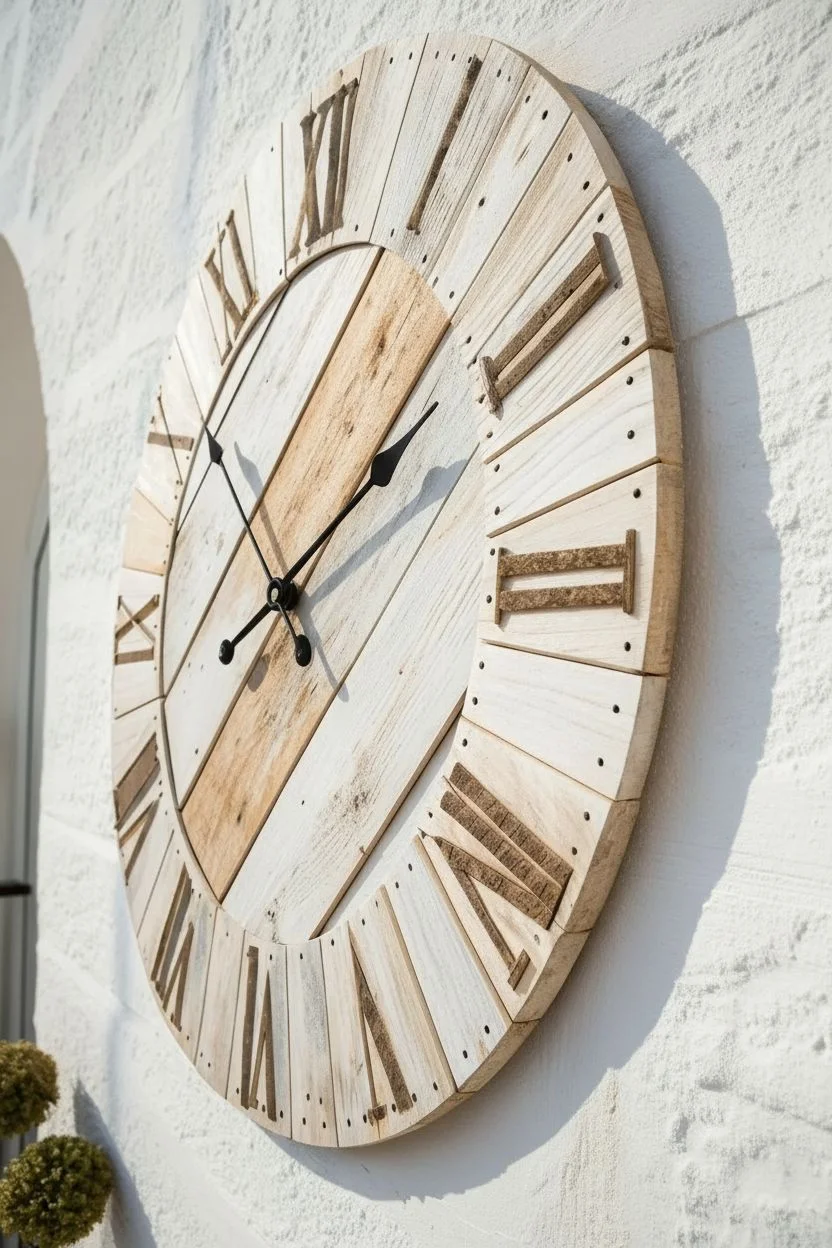
Transform humble pallet wood into a stunning oversized timepiece that blends farmhouse charm with modern simplicity. The varying bleached tones of the wood and raised Roman numerals create depth and texture, making this a functional focal point for any room.
Step-by-Step Tutorial
Materials
- Reclaimed pallet slats (dry and relatively straight)
- Plywood sheet (circles base)
- High-torque clock movement mechanism with long shaft
- Large black clock hands (spade style)
- Wood glue
- Jigsaw
- Brad nailer or small finish nails
- Sander and sanding discs (80-120 grit)
- White paint or white wash pickling stain
- Rags
- Drill with bit matching clock shaft diameter
- Compass or string and pencil
- Ruler or straight edge
- Dark wood stain (for numerals)
- Hanging hardware (heavy duty French cleat recommended)
Step 1: Preparing the Base
-
Cut the Base:
Determine the desired diameter of your clock (the one in the image looks to be about 30-36 inches). Mark this circle on your plywood sheet using a compass or a string-and-pencil jig, then cut it out carefully with a jigsaw. -
Prep the Pallets:
Dismantle your pallets and select slats that are relatively flat. Remove any old nails. It helps to run these through a planer if you have one, but heavy sanding works too. -
Lay Out the Face:
Arrange the pallet slats over your plywood circle. Aim for a mix of wood tones and tight seams. Let the ends of the slats hang over the edge of the circle initially. -
Secure the Slats:
Once you like the arrangement, glue the back of each slat and press it onto the plywood. Use a brad nailer to secure them in place from the top perfectly. -
Trim to Size:
Flip the entire assembly over so the plywood represents your cutting guide. Use the jigsaw to trace the circle’s edge, cutting off the excess pallet wood to create a perfect round face.
Stubborn Stains?
Since pallet wood is rough, paint might pool in divots. Use a dry brush to pull excess paint out of deep grain or cracks before it dries to prevent globs.
Step 2: Creating the Rustic Finish
-
Sand the Face:
Sand the entire face thoroughly. Start with 80 grit to even out any height differences between slats, then move to 120 grit for a smoother, yet still rustic, touch. -
Whitewash Application:
Mix white paint with water (about a 50/50 ratio) or use a pickling stain. Brush onto individual slats. I like to wipe it off almost immediately on some boards and let it sit longer on others to create that varied, multi-tonal bleached look. -
Create the Outer Rim:
Cut smaller slat sections to frame the outer edge of the face, creating a segmented border. These should be cut with angles to follow the curve, though straight segments works for a more geometric look. Glue and nail these around the perimeter. -
Add Decorative Nails:
If desired, hammer small black tack nails or decorative furniture tacks into the outer rim pieces for an industrial accent, just like in the photo.
Step 3: Numerals and Assembly
-
Make the Numerals:
For the Roman numerals, rip thin strips of leftover wood (approx. 0.5 to 0.75 inches wide). Cut them into small lengths to form the I, V, and X shapes needed. -
Stain the Numerals:
Stain these small pieces a darker wood tone to contrast against the white face. Antique walnut or espresso works well. Let them dry completely. -
Mark Positions:
Find the exact center of your clock face. Use a protractor to mark the 12 positions at 30-degree intervals so your timing is accurate. -
Attach Numerals:
Glue and pin-nail the Roman numeral strips onto the marked positions. Ensure ‘XII’ is at the top grain direction you prefer. -
Drill Center Hole:
Drill a hole through the exact center of the clock face. Ensure the hole is large enough for your clock mechanism’s shaft but not loose. -
Install Movement:
Insert the clock movement from the back. Since pallet wood plus plywood is thick, ensure you bought a ‘high torque’ movement with a long shaft. -
Attach Hands:
Secure the washer and nut on the front side, then press the hour hand and minute hand onto the shaft. Add the cap nut to secure them. -
Hang It Up:
Install a heavy-duty French cleat or large D-ring hanger on the back. Due to the weight of the wood, ensure you mount it into a wall stud.
Placement Pro Tip
When placing the ‘IV’ (4), check traditional clock faces. Many use ‘IIII’ instead of ‘IV’ for visual symmetry with the VIII on the other side.
Now you have a timeless piece of art that keeps you on schedule
Glow-in-the-Dark Constellation Pallet Night Art
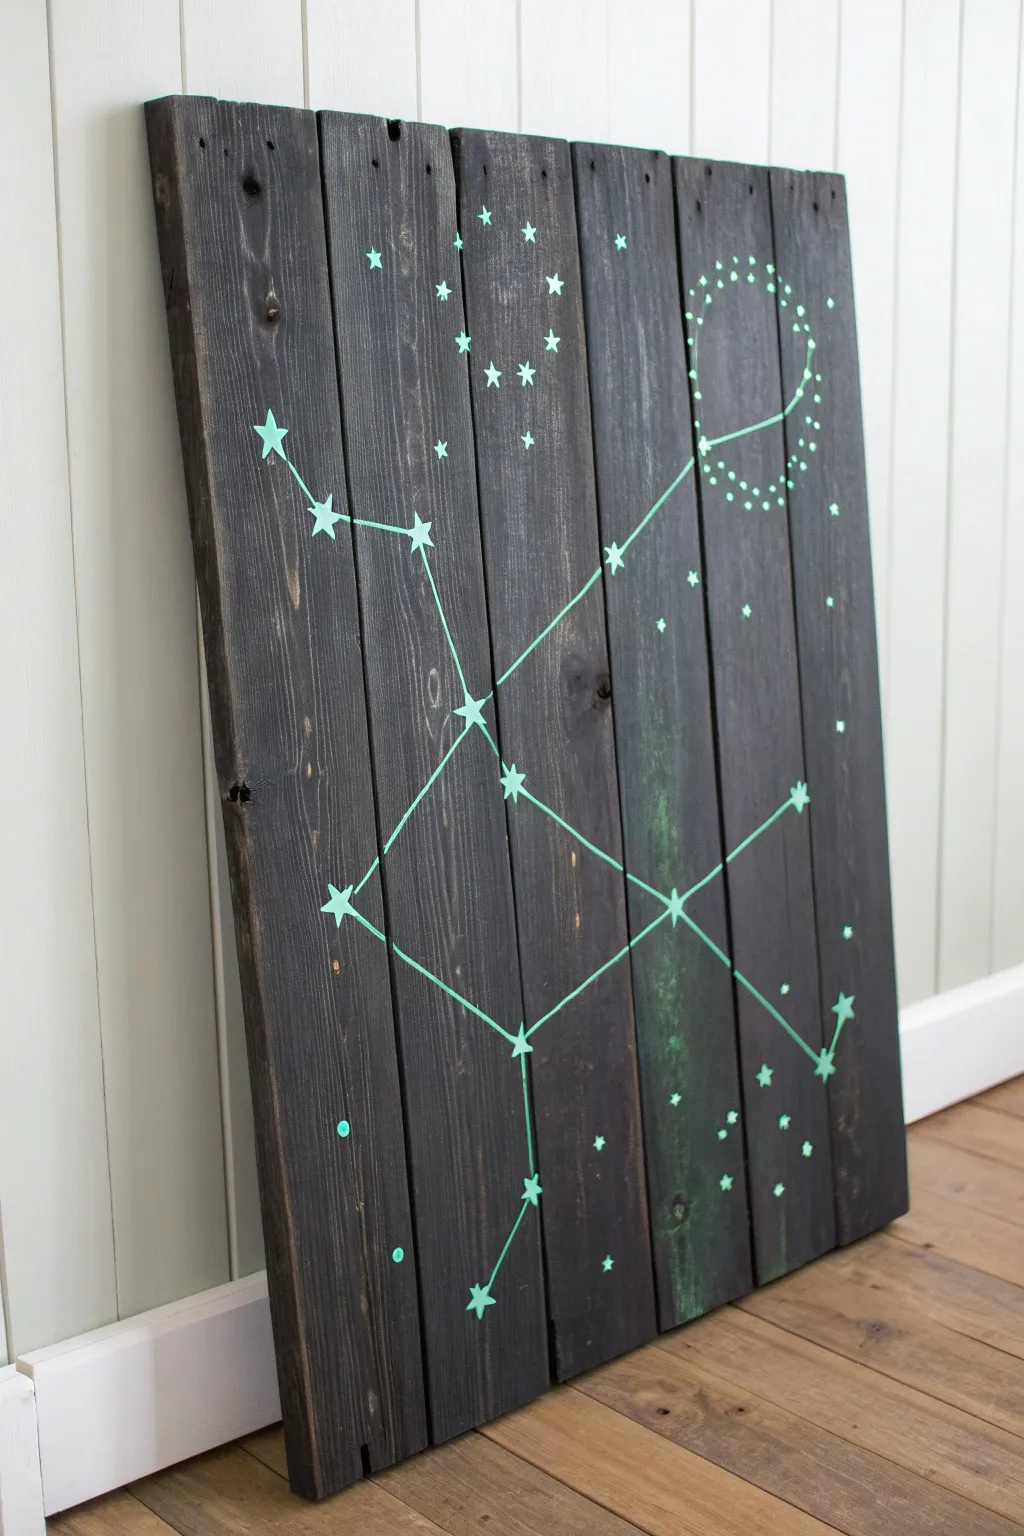
Transform rustic wood into a celestial masterpiece with this striking constellation night light project. The contrast between the dark, weathered grain and the luminous stars creates a dreamy atmosphere perfect for a bedroom or nursery.
How-To Guide
Materials
- Reclaimed wood pallet boards (approx. 5 boards)
- Sandpaper (80 and 120 grit)
- Dark wood stain (Espresso or Dark Walnut)
- Clean rags or staining sponge
- Glow-in-the-Dark acrylic paint (Phosphorescent)
- Light teal acrylic paint
- Small round detail brush
- Ruler or straight edge
- White chalk or pencil
- Wood glue
- Backing strips or mending plates
- Wall hanging hardware
Step 1: Preparing the Canvas
-
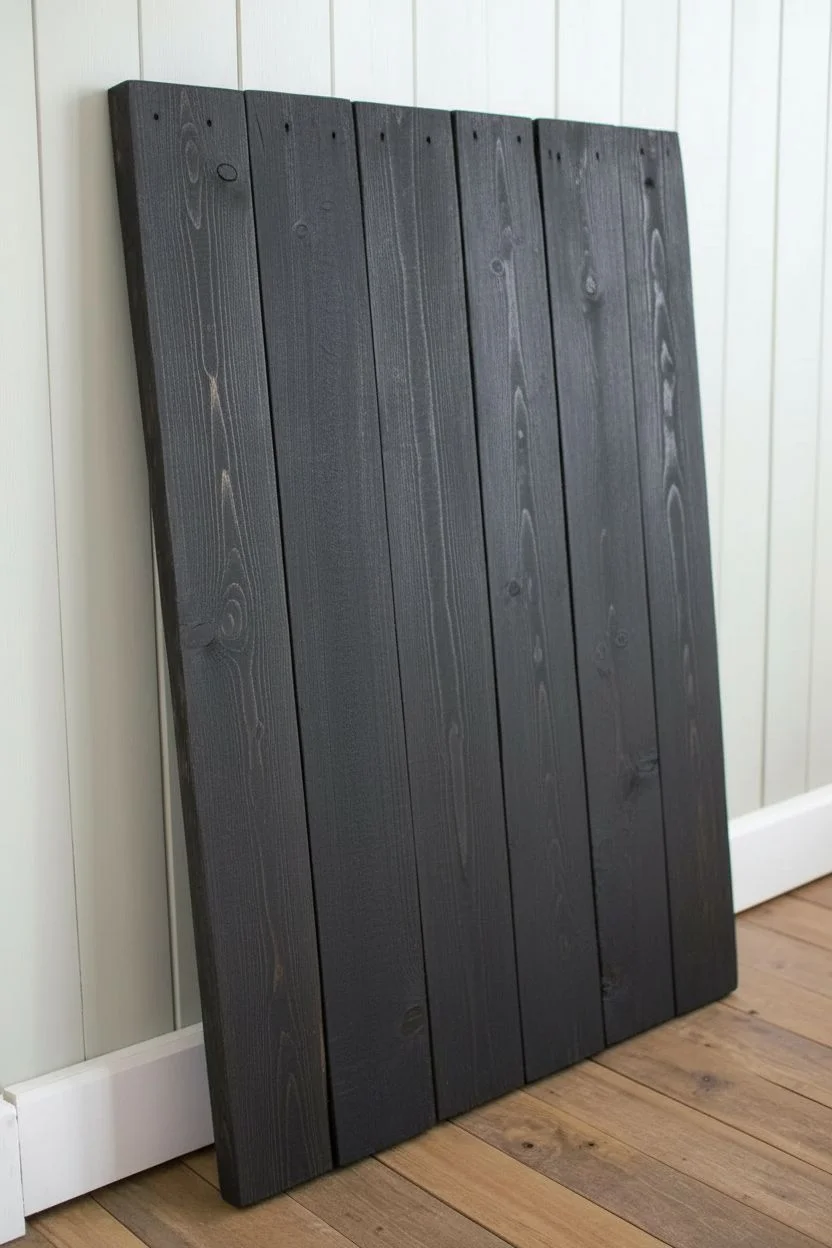
Prepare the boards:
Begin by selecting about five pallet boards of roughly equal width. Cut them to your desired height—around 30 inches works well for a statement piece. -
Sand the surface:
Using 80-grit sandpaper, remove the roughest splinters and dirt from the face of the boards. Switch to 120-grit for a smoother finish that will still take stain well, but isn’t too polished. -
Assemble the backing:
Lay the boards face down, side-by-side. Secure them together by attaching two to three perpendicular wooden strips across the back using wood glue and screws, or use metal mending plates for a flatter profile. -
Apply the stain:
Once assembled, wipe away any sawdust. Dip a clean rag into your dark wood stain and rub it generously into the wood grain. The dark espresso tone is crucial for making the stars pop later. -
Wipe and dry:
After letting the stain penetrate for about 5-10 minutes, wipe off the excess with a clean cloth. Allow the wood to dry completely, preferably overnight, to ensure the paint adheres properly.
Paint Absorption
If the dry wood soaks up your first layer of paint too quickly, apply a thin coat of matte clear sealer over the stain before painting. This creates a barrier so your stars stay crisp.
Step 2: Mapping the Stars
-
Plan your design:
Find a reference image of your favorite constellation (like Perseus shown here). You can print it out to scale or simply keep it on your phone for reference. -
Mark major stars:
Using a piece of white chalk, lightly dot the positions of the main stars onto the dark wood. Chalk is great here because it wipes right off if you make a placement mistake. -
Connect the dots:
Use a ruler and your chalk to lightly draw the connecting lines between the star points. This acts as your roadmap before any permanent paint touches the wood. -
Add decorative elements:
If your design includes star clusters or a dotted circle graphic like in the distinct design shown, sketch those lightly with the chalk now.
Starry Depth
Flick an old toothbrush loaded with thinned white paint across the board to create tiny, distant background stars and nebulae for extra cosmic depth.
Step 3: Painting the Galaxy
-
Mix your base color:
Mix a small amount of light teal acrylic paint. I find that applying a colored base layer first makes the glow-in-the-dark topcoat appear much brighter and more defined. -
Paint the stars:
Using a small detail brush, paint 5-point stars over your chalk marks. Vary the sizes slightly—make the main constellation stars larger and the surrounding decorative stars smaller. -
Paint the lines:
Carefully trace over your chalk connecting lines with the teal paint. Use a steady hand or use the ruler as a guide for the brush to keep lines straight. -
Create the dotted circle:
For the circular element at the top right, dip the handle end of your paintbrush into the teal paint and dot it onto the wood to create uniform, round points. -
Let the base dry:
Allow the teal base layer to dry completely to the touch. This usually takes about 20–30 minutes. -
Apply the magic:
Go over every painted teal area with the glow-in-the-dark paint. Apply it thickly; the more pigment you lay down, the stronger the glow will be when the lights go out. -
Second coat:
Once the first glow layer is dry, add a second coat for maximum luminosity. This is the secret to a glow that lasts longer into the night. -
Clean up:
Take a slightly damp cloth and gently wipe away any visible chalk lines that weren’t covered by paint.
Hang your new celestial artwork and enjoy the magical glow every time you turn out the lights


Have a question or want to share your own experience? I'd love to hear from you in the comments below!