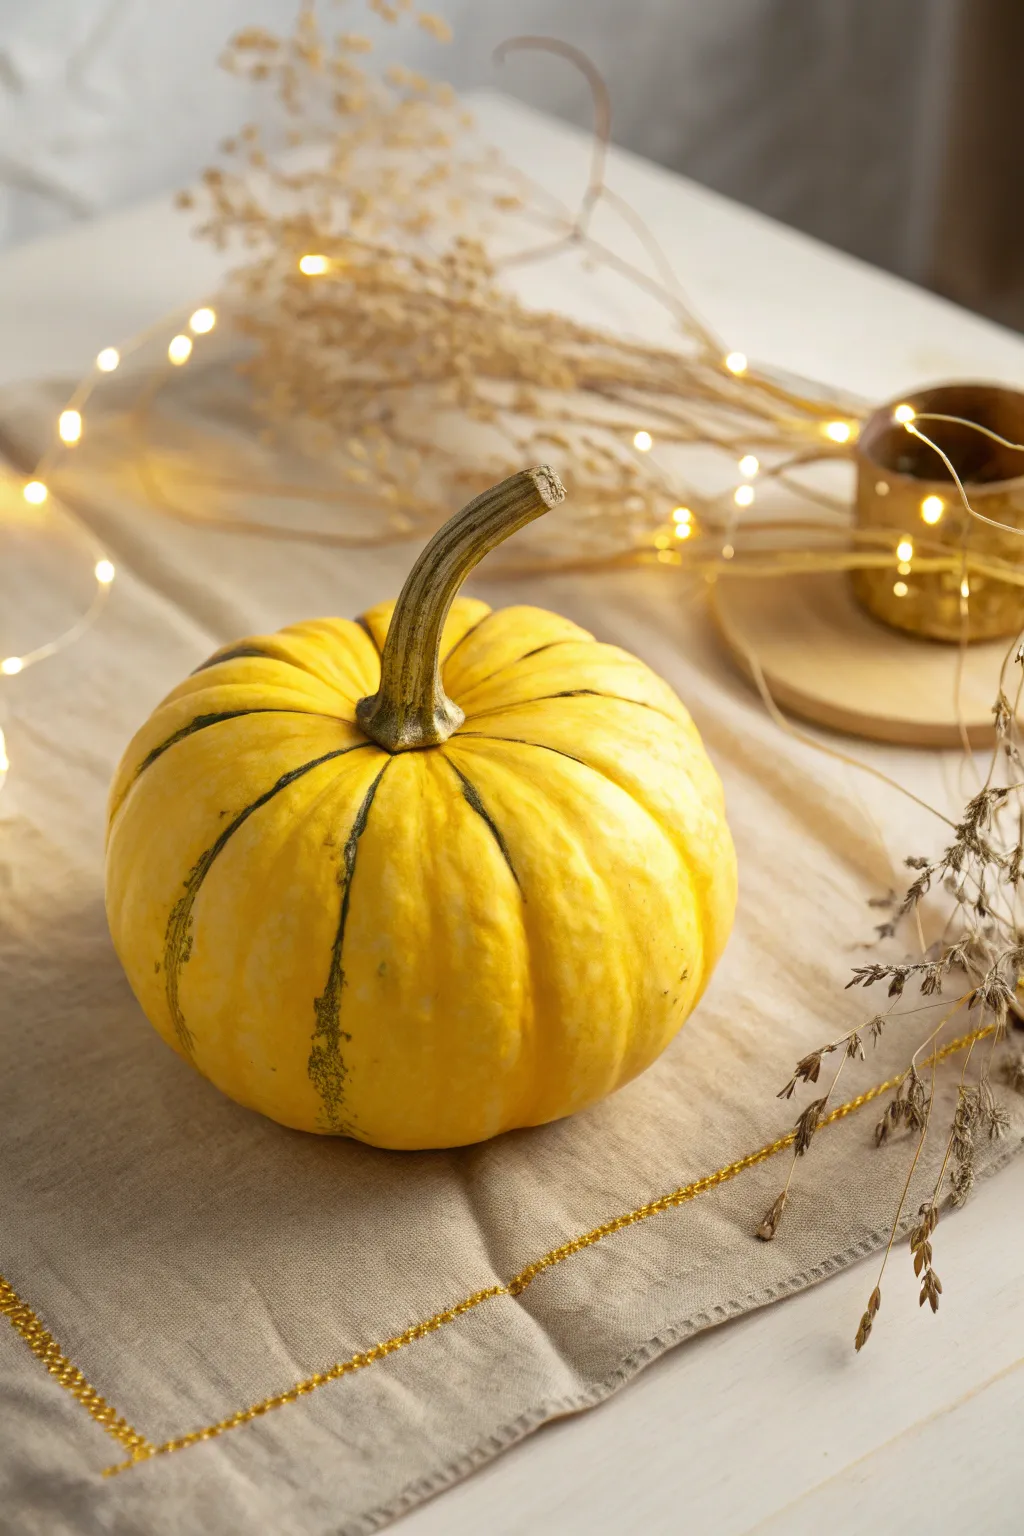
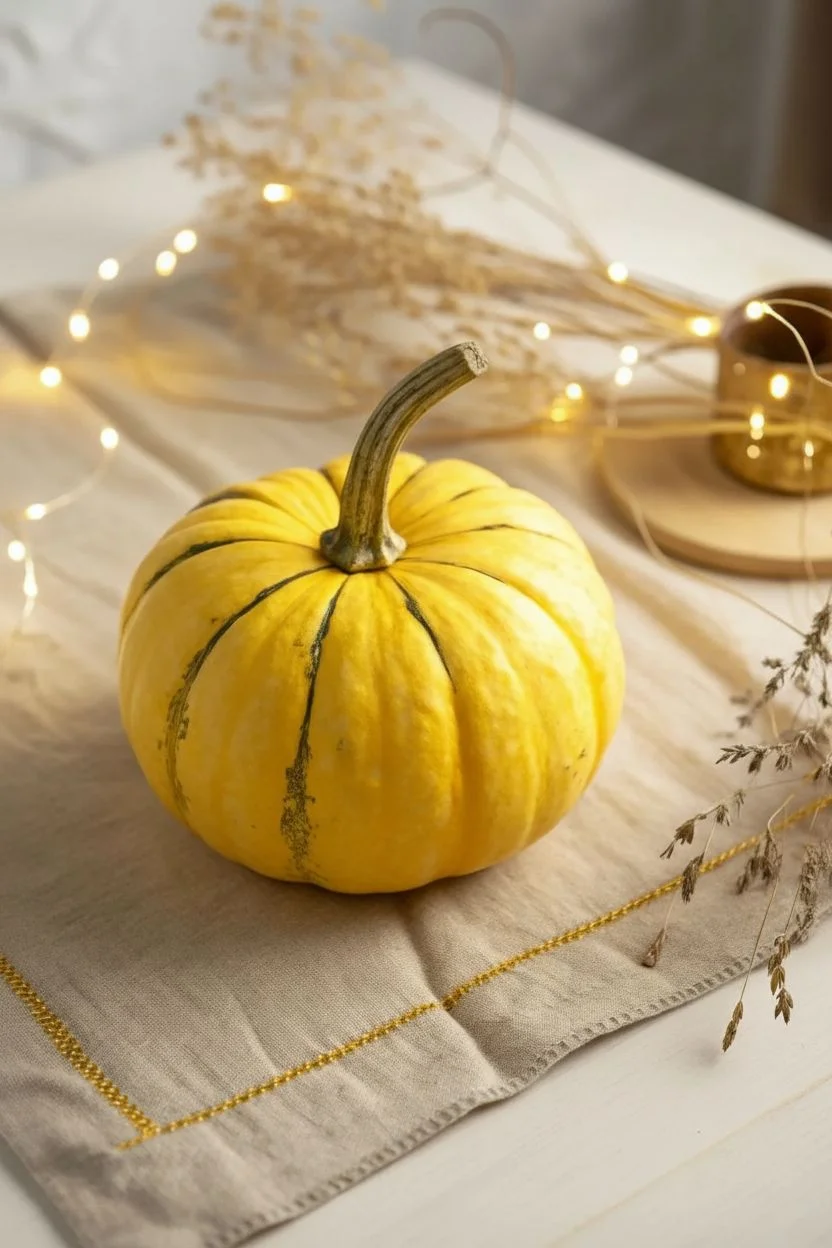
There’s just something instantly cheerful about a yellow pumpkin—it turns fall decor into pure sunshine. I’ve pulled together my favorite yellow pumpkin ideas that lean heavily on paint, patterns, and easy details you can totally pull off in an afternoon.
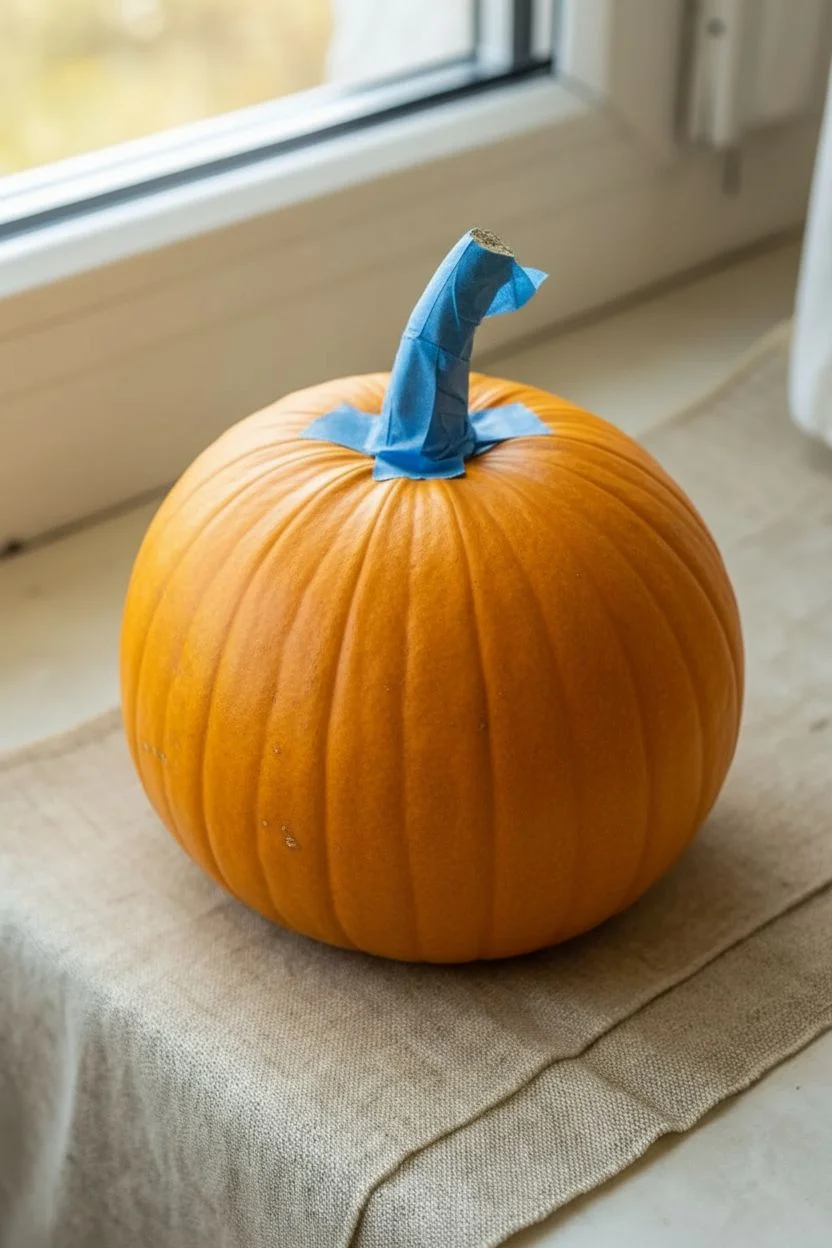
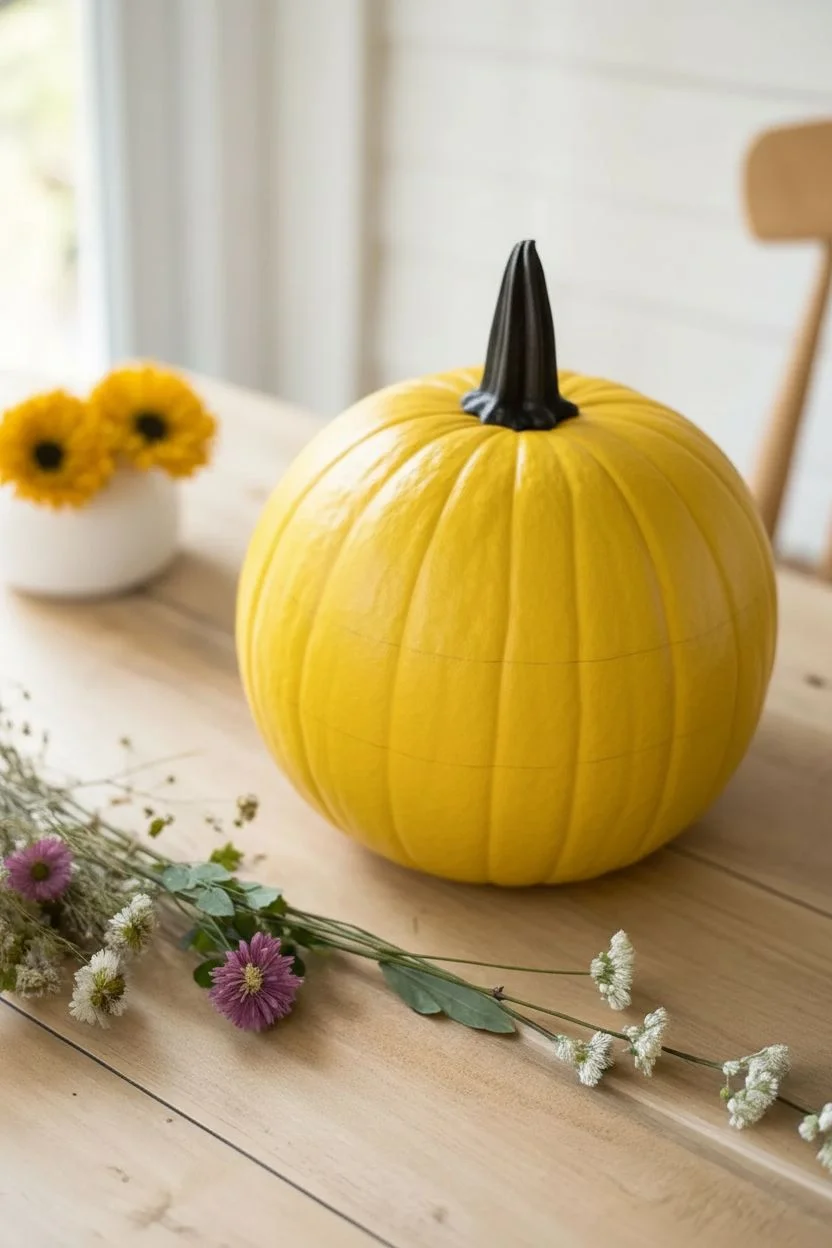
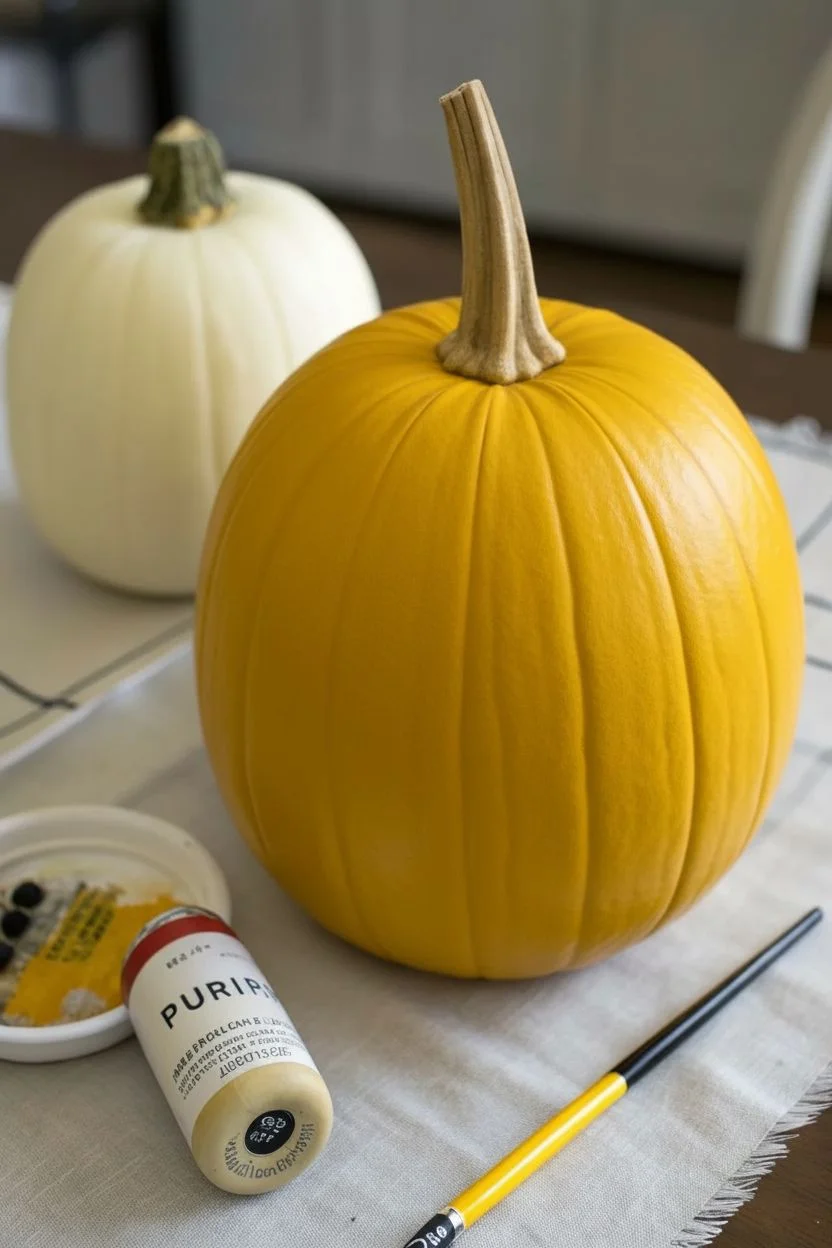
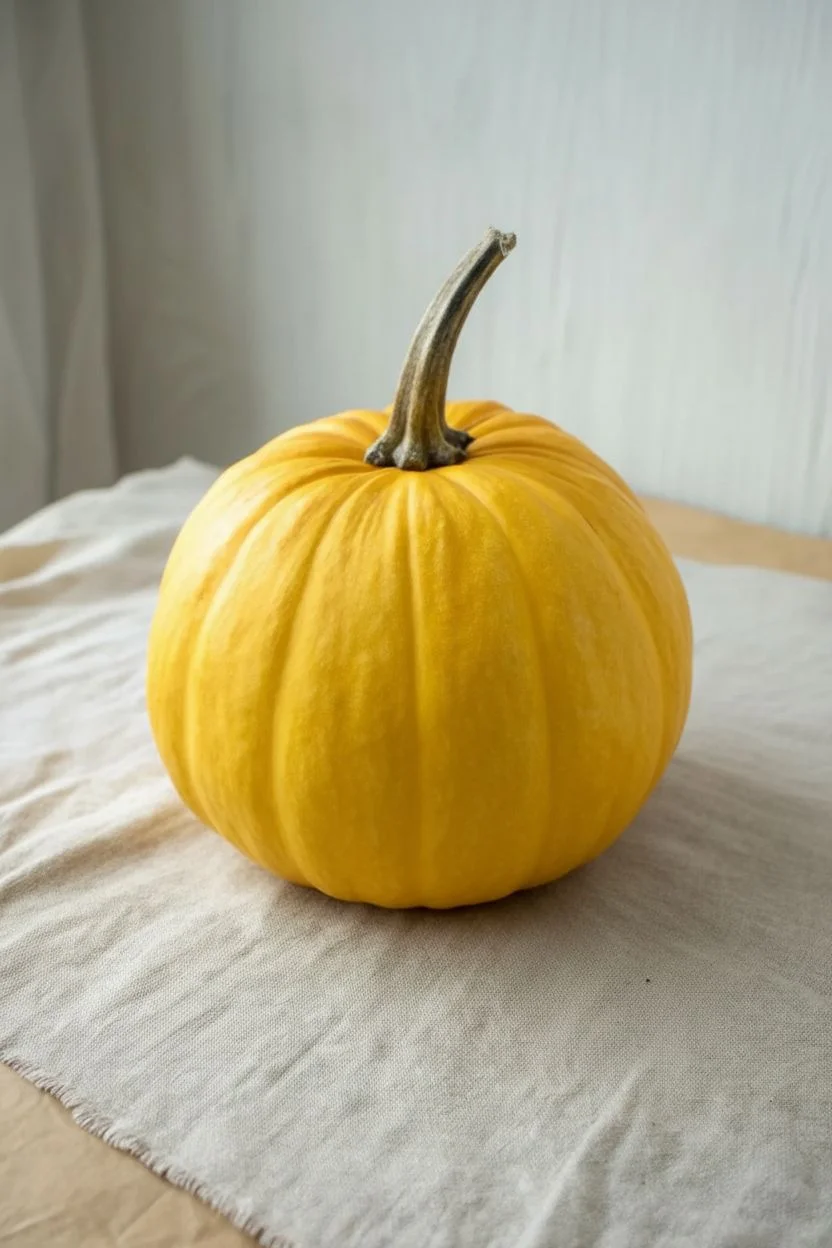
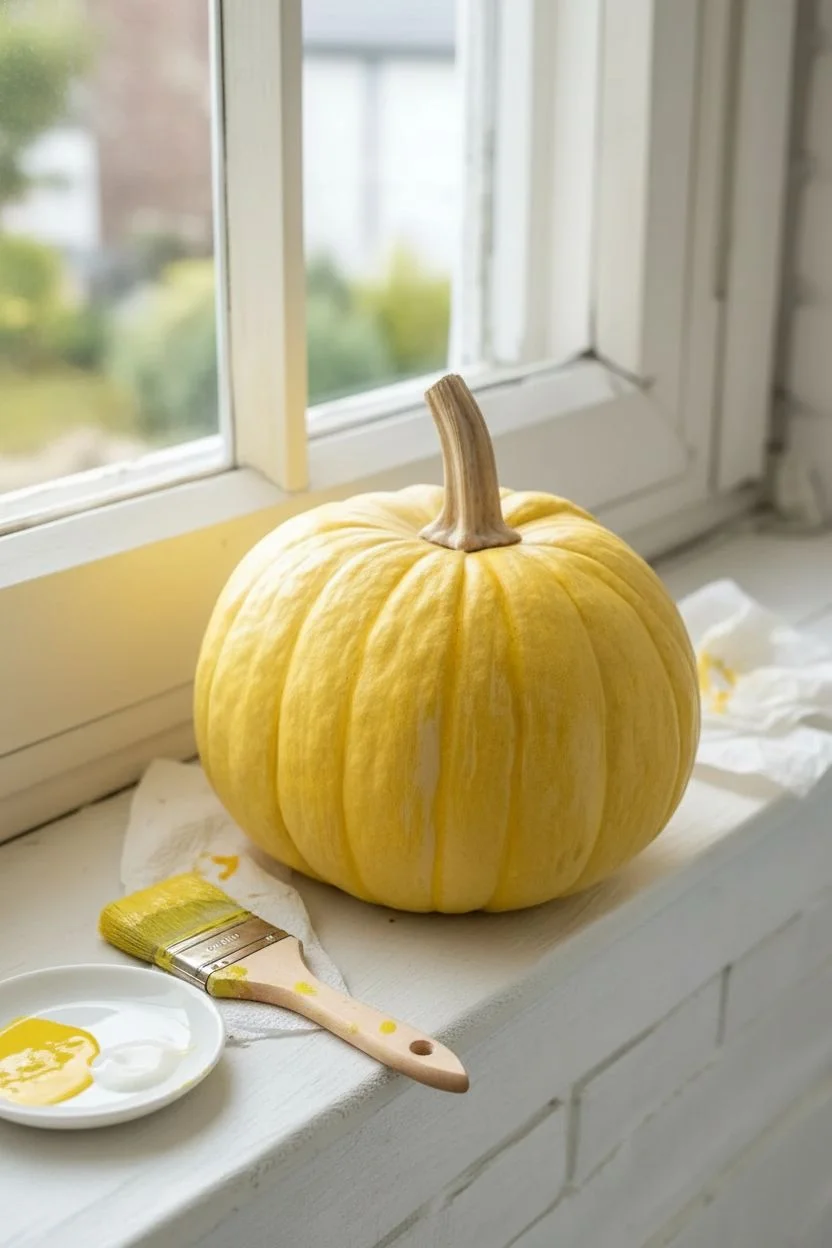
Classic Bright Yellow Full-Cover Paint Finish

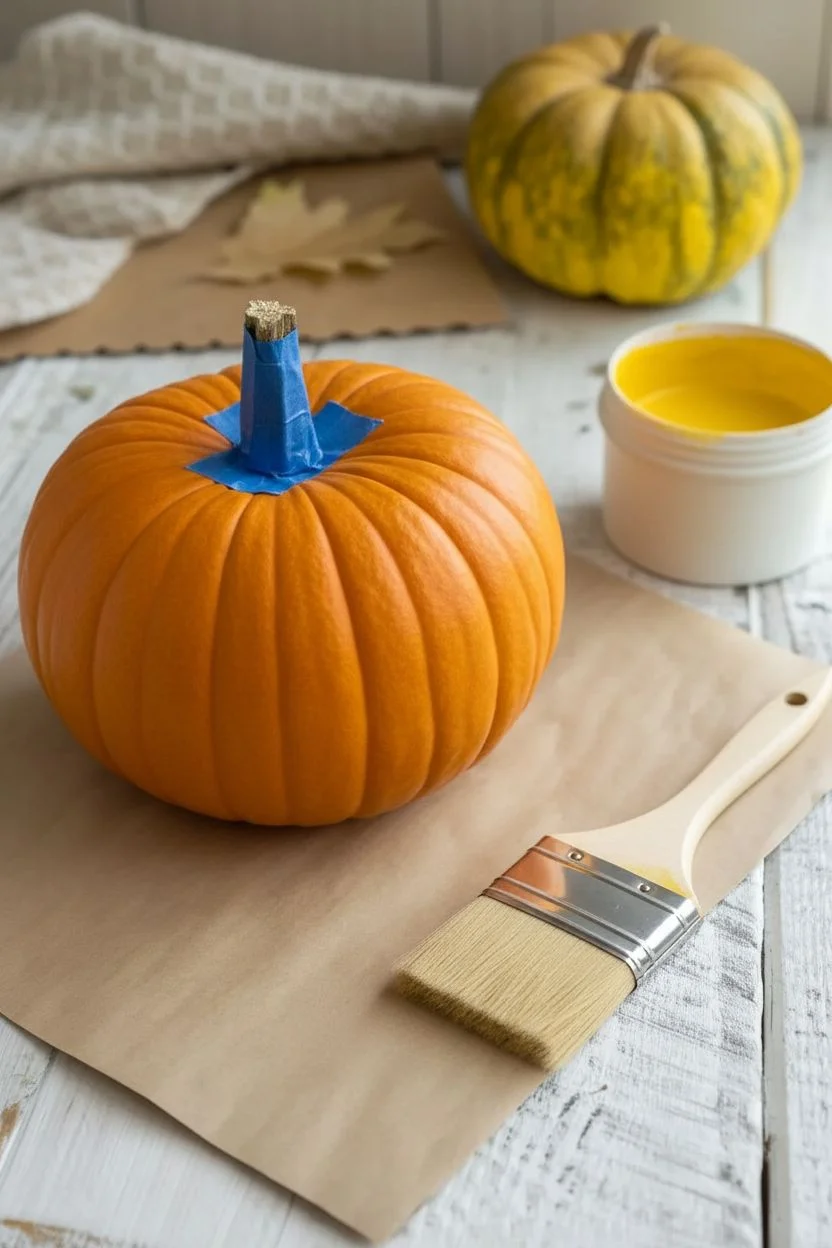
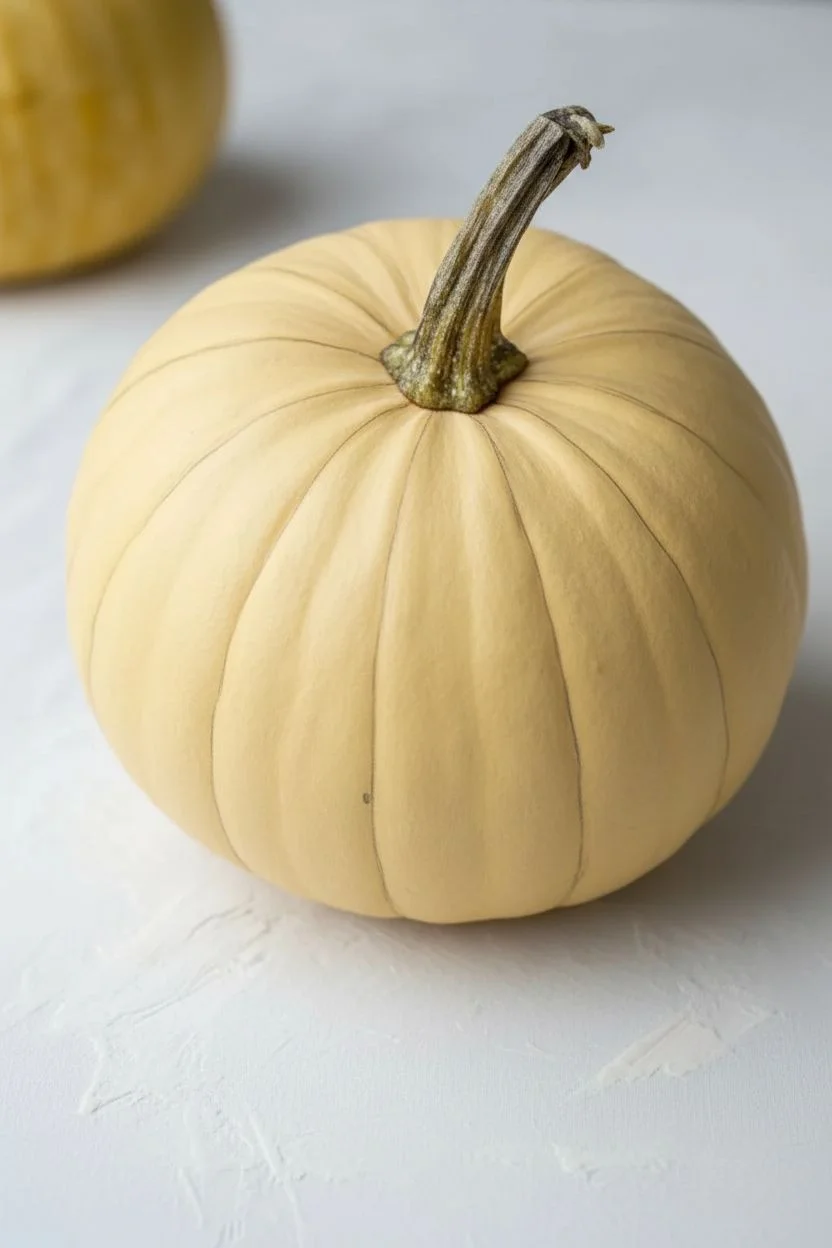
Transform a simple pumpkin into a beacon of cheer with this classic full-cover paint project. The result is a smooth, satiny finish that radiates warmth and pairs beautifully with rustic fall decor.
How-To Guide
Materials
- Small to medium round pumpkin (real or faux)
- Bright yellow acrylic paint (satin or matte finish)
- White acrylic paint or gesso (primer)
- Wide, flat paintbrush (1-inch width)
- Small detail brush
- Brown Kraft paper or newspaper (for surface protection)
- Paper towel or rag
- Clear matte sealer spray (optional)
Step 1: Preparation
-
Clean the Surface:
Begin by wiping down your pumpkin with a damp cloth to remove any dirt, dust, or oils. If you are using a real pumpkin, ensure it is completely dry before moving on, as moisture can trap under the paint and cause rot. -
Protect the Stem:
Carefully wrap the stem in painter’s tape or simply keep a steady hand. The goal is to keep that beautiful natural stem texture paint-free for a nice organic contrast. -
Set the Workspace:
Lay down a sheet of brown Kraft paper or newspaper to catch drips. Position your pumpkin in the center so you have plenty of room to rotate it.
Step 2: Priming (Optional but Recommended)
-
Apply a Base Coat:
If your pumpkin is dark orange or green, paint a thin layer of white acrylic paint or gesso first. This neutralizes the background color so your yellow pops vividly later. -
Let it Dry:
Allow the white base coat to dry completely to the touch. This usually takes about 15-20 minutes depending on humidity.
Brushstroke Pro Tip
To get that super smooth finish, dip your brush in a tiny bit of water before picking up paint. It helps the acrylic flow better and reduces visible bristle marks.
Step 3: Painting the Pumpkin
-
Load the Brush:
Dip your wide flat brush into the bright yellow paint tub. You want a generous amount, but not so much that it drips instantly. -
Vertical Strokes:
Start at the top near the stem (without touching it) and pull the paint down vertically following the pumpkin’s natural ribs. Long, smooth strokes help minimize brush marks. -
Work in Sections:
Paint one section of the pumpkin at a time, turning it slowly as you go. I prefer to leave the very bottom unpainted for now so I have a stable place for it to sit. -
Get into the Crevices:
Make sure to push the bristles gently into the deep grooves between the ribs so no orginal skin shows through. -
First Coat Drying:
Let the first coat dry for at least 30 minutes. Yellow pigment is often semi-transparent, so don’t worry if it looks streaky right now. -
Apply Second Coat:
Apply a second layer of yellow paint using the same vertical technique. This layer will provide that solid, opaque coverage seen in the photo. -
Check for Transparency:
Hold the pumpkin up to the light. If you still see shadows of the underlying skin, a third thin coat might be necessary for a truly professional look.
Level Up: Ombré Effect
While the yellow paint is wet, blend a touch of white at the top near the stem and a dark orange at the bottom for a subtle, dimensional sunset gradient.
Step 4: Refining Details
-
Detailing the Top:
Switch to your small detail brush. carefully paint the rim of skin right where it meets the stem, ensuring a crisp, clean line without getting yellow on the brown stem. -
Paint the Bottom:
Once the sides are fully dry, gently flip the pumpkin over. Paint the bottom surface to seal the entire vegetable. -
Inspect the Finish:
Look for any drips that may have gathered at the bottom of the ribs and smooth them out with a slightly damp brush before they harden.
Step 5: Sealing
-
Protective Coat:
For longevity, especially if sticking this outdoors, spray a light coat of clear matte sealer over the yellow paint. -
Final Dry:
Let the pumpkin sit undisturbed for a full hour to cure the paint and sealer.
Now you have a brilliantly cheerful pumpkin ready to brighten any corner of your home


Yellow Pumpkin With Simple Black Outline Face
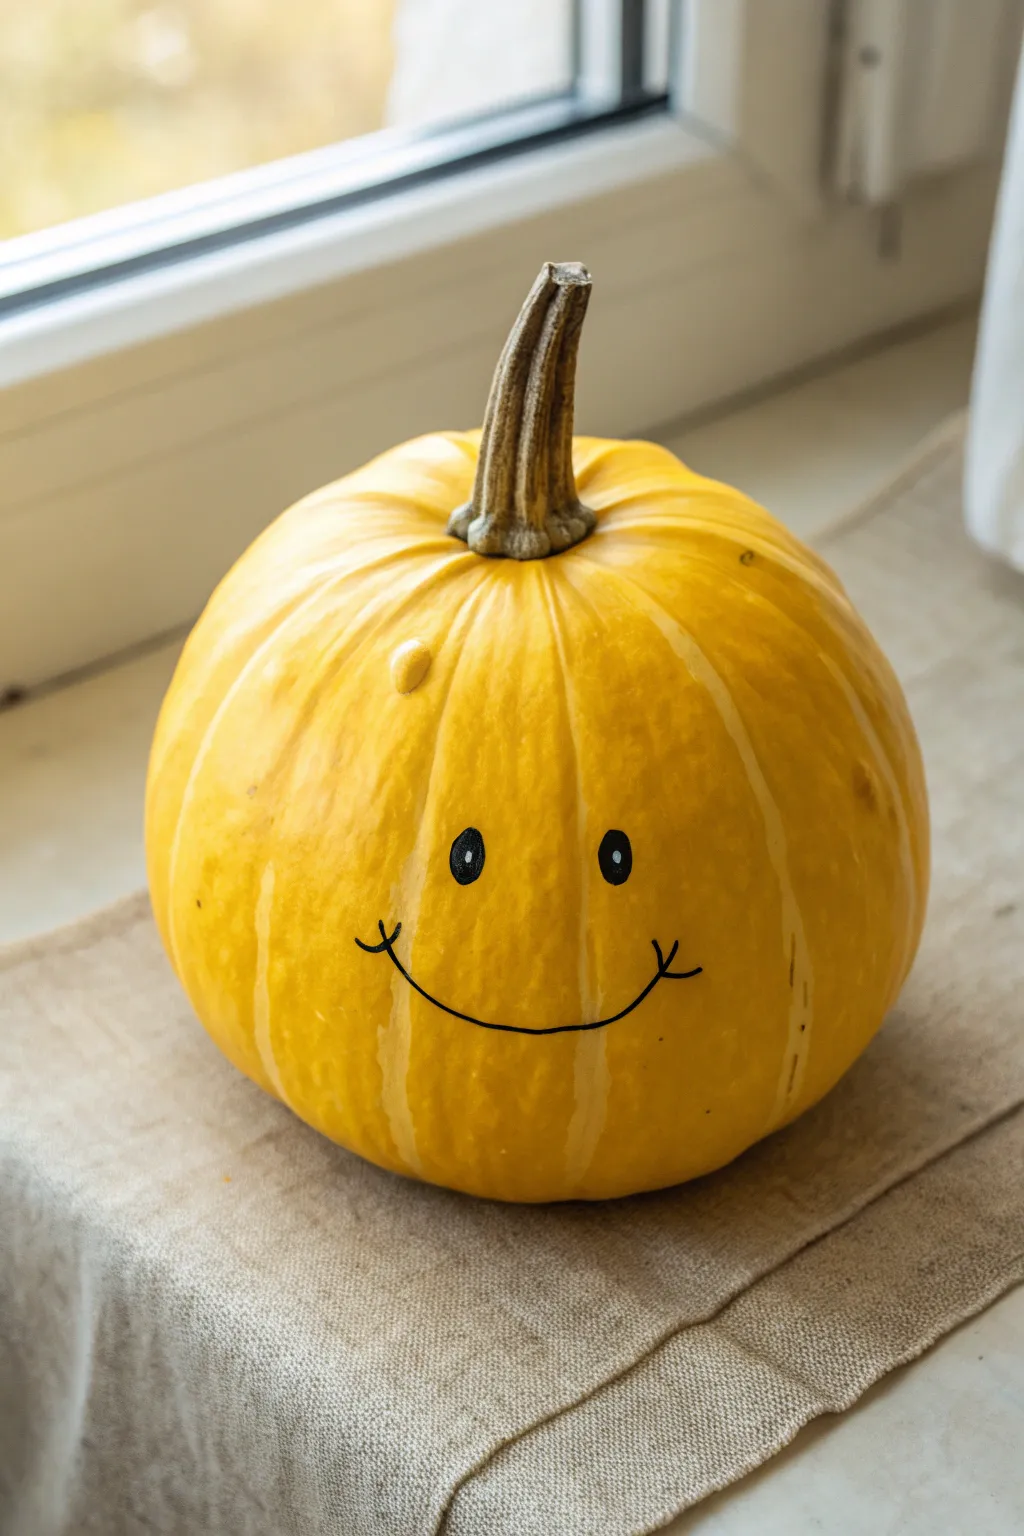
Bring instant cheer to your autumn decor with this adorable sunshine-yellow pumpkin project. This minimalist design features a friendly drawn-on face that transforms a simple gourd into a happy companion for your windowsill.
Detailed Instructions
Materials
- Small to medium round pumpkin (real or faux)
- Bright yellow acrylic craft paint (satin or matte finish)
- White acrylic paint
- Wide flat synthetic paintbrush (about 1 inch)
- Black Posca paint pen or permanent marker (medium tip)
- Fine-point paintbrush (for touch-ups)
- Dish soap and water (for real pumpkins)
- Paper towels or cloth
- Clear spray sealant (optional, matte finish)
Step 1: Face Preparation
-
Selecting the canvas:
Choose a pumpkin with a relatively smooth surface on at least one side. Deep ridges can make drawing the face tricky, so look for a ‘front’ face that is somewhat flatter. -
Cleaning the surface:
If using a real pumpkin, wash it thoroughly with mild dish soap and water to remove any dirt or oils. -
Drying completely:
Dry the pumpkin entirely with a towel. Let it sit for 30 minutes to ensure the stem area is moisture-free so your paint adheres properly. -
Protecting the stem:
Wrap the stem carefully with painters tape if you want to keep its natural color, or just rely on a steady hand to paint around the base.
Step 2: Base Coat Application
-
Mixing the yellow:
Squeeze your bright yellow acrylic paint onto a palette or plate. If the yellow looks too transparent, mix in a tiny drop of white to increase opacity. -
First layer application:
Using the wide flat brush, apply a generous coat of yellow paint. Use vertical strokes that follow the natural ribs of the pumpkin from top to bottom. -
Handling the bottom:
Paint down to the curve, but don’t worry about the very bottom surface just yet. Let the pumpkin sit upright to dry. -
Drying time:
Wait about 20-30 minutes for the first coat to dry to the touch. Yellow is notoriously translucent, so patience is key here. -
Second coat:
Apply a second layer of yellow using the same vertical stroke technique. I find this second coat usually provides that rich, solid color coverage you see in the photo. -
Check for streaks:
Inspect the pumpkin for brush strokes. If needed, a third thin coat can smooth everything out perfectly.
Paint Pen Pro Tip
Before drawing on the pumpkin, prime your paint marker on a scrap piece of cardboard to ensure the ink flows smoothly and doesn’t blob unexpectedly.
Step 3: Adding the Personality
-
Locating the face:
Identify the smoothest vertical section (rib) on the front of your pumpkin to serve as the center of the face. -
Planning the placement:
Visualize the face placement low on the pumpkin belly, which makes it look cuter. The eyes should sit just above the pumpkin’s equator. -
Drawing the eyes:
Using your medium-tip black paint pen, draw two vertical ovals. Fill them in completely solid black. -
Drafting the smile:
Draw a wide, shallow U-shape for the smile. Keep the line thin and consistent. -
Adding cheek details:
At the very ends of the smile line, draw small, short tick marks crossing the smile to create dimples or cheek creases. -
Creating the sparkle:
Once the black eye paint is 100% dry, dip the handle end of a fine paintbrush into white paint. Dot a tiny highlight onto the upper right side of each black oval. -
Sealing the work:
If this pumpkin is going outside, give it a light mist of clear matte sealant to protect your handiwork from the elements.
Level Up: Rosy Cheeks
Mix a tiny bit of pink paint and use your finger or a sponge dabber to add soft, circular rosy cheeks just outside the smile lines for extra charm.
Place your happy creation in a sunny spot to welcome guests with a smile


Yellow Pumpkin Bumblebee Stripes (No-Carve)
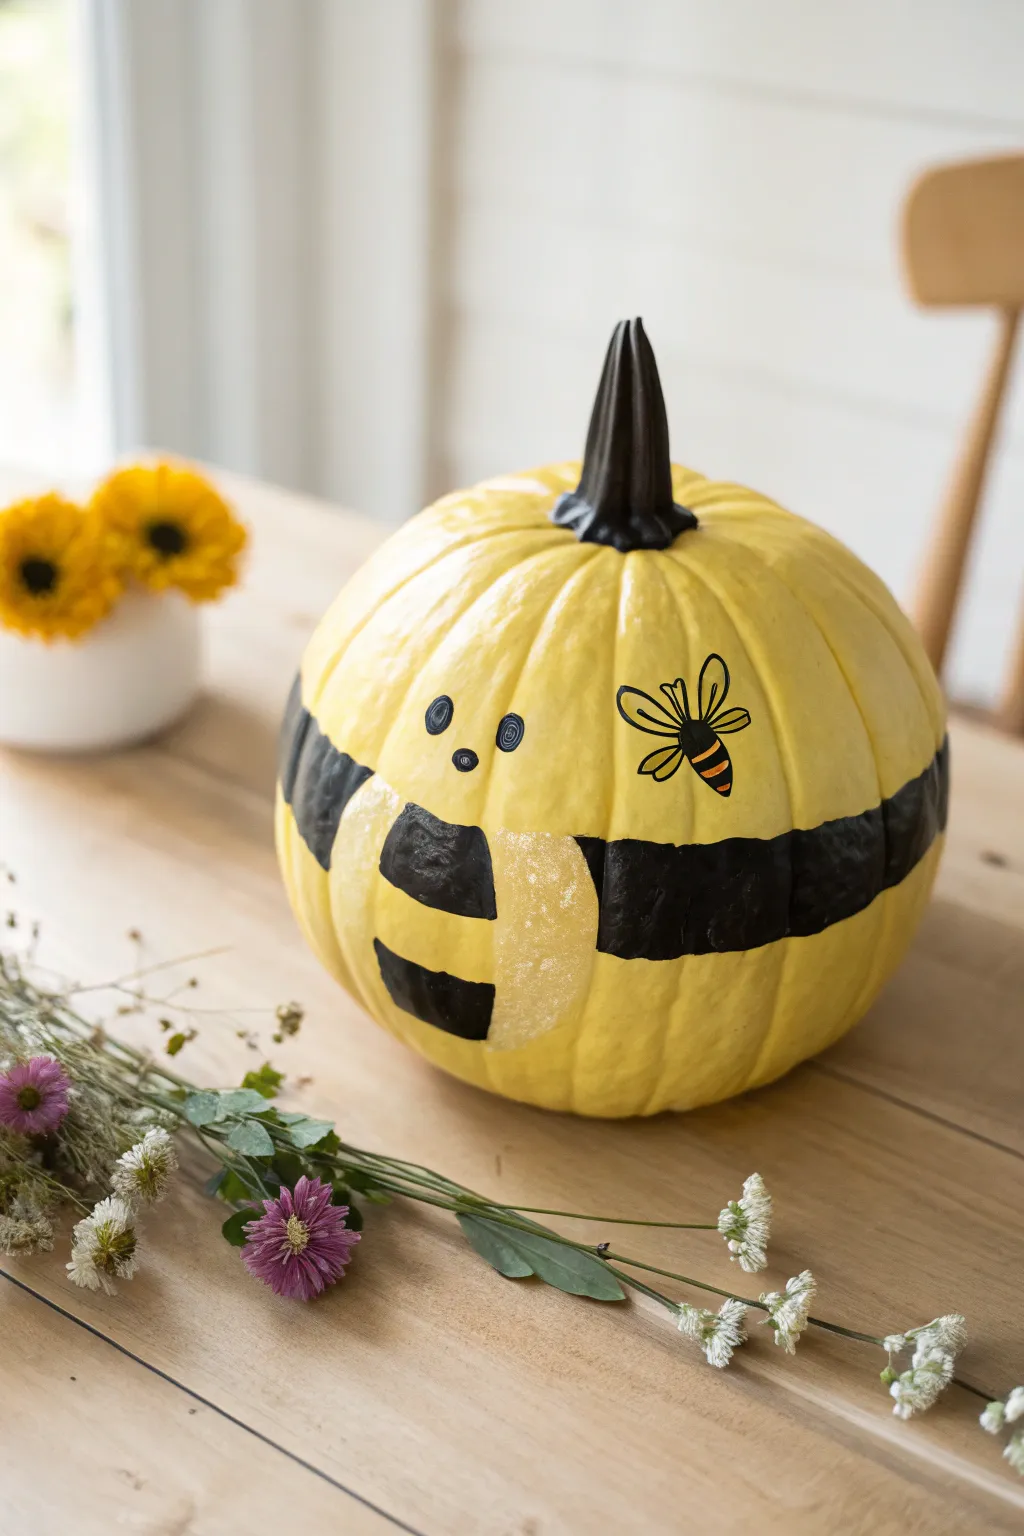
Transform a simple yellow pumpkin into a buzzing garden friend with this adorable, no-carve project. The bold black stripes and whimsical face create a striking contrast against the bright yellow rind, making it a cheerful addition to any autumn display.
How-To Guide
Materials
- Medium-sized pumpkin (naturally yellow or painted yellow)
- Black acrylic paint (matte or satin finish)
- Small round paintbrush (for details)
- Medium flat paintbrush (for stripes)
- Pencil
- Painter’s tape or masking tape (optional)
- Yellow acrylic paint (if your pumpkin isn’t naturally yellow)
- White or light yellow paint pen (optional, for highlights)
- Golden yellow paint (for the bee wing details)
Step 1: Base Preparation
-
Clean surface:
Begin by thoroughly washing your pumpkin with mild soap and water to remove any dirt or oils. Dry it completely with a clean cloth. -
Stem painting:
Using your black acrylic paint and a medium brush, carefully paint the entire stem black. I like to do this first so it can dry while I work on the body. -
Yellow base coat:
If your pumpkin isn’t already a vibrant yellow, apply two coats of yellow acrylic paint to the entire surface, allowing full drying time between layers.
Clean Lines Pro-Tip
If you make a mistake with the black paint, don’t panic. Let it dry completely, then paint over the error with your yellow base color to act as ‘white-out’ before trying again.
Step 2: Creating the Stripes
-
Plan the placement:
Look at the natural ribs of the pumpkin. You want two thick horizontal stripes to wrap around the pumpkin’s circumference. -
Mark lines:
Lightly sketch the top and bottom boundaries of your stripes with a pencil. Don’t worry about being perfectly straight; following the pumpkin’s natural curve looks organic and cute. -
Tape guide (optional):
If you struggle with steady lines, apply painter’s tape along your pencil marks to create a stencil for the stripes. -
Paint first stripe:
Fill in the top stripe using the medium flat brush and black paint. Use confident, smooth strokes to get solid coverage. -
Paint second stripe:
Repeat the process for the bottom stripe, leaving a wide band of yellow in the middle where the face will go. -
Touch-ups:
Check for any bald spots in your black paint and add a second coat if the yellow is showing through too much.
Step 3: Adding the Personality
-
Sketch the face:
In the open yellow space between your stripes, lightly pencil in two small circles for eyes and a tiny oval for the nose or mouth. -
Paint the eyes:
Using the small round brush, fill in the eye circles with black paint. Keep them relatively small to achieve that sweet, cartoonish look. -
Add the nose:
Paint the small central dot below the eyes. This triangular arrangement creates the classic bug face. -
Eye details:
Once the black eye paint is fully dry, you can add tiny spirals or dots of blue or white inside them for character, as seen in the inspiration photo.
Level Up: 3D Wings
Make your pumpkin fly by gluing wings made of wax paper or stiff wire mesh onto the sides, securing them firmly into the pumpkin rind with strong craft glue or pins.
Step 4: The Little Bee Detail
-
Outline the bee:
To the right of the face, sketch a small bee silhouette. Draw an oval body and four teardrop-shaped wings coming off the back. -
Paint the body:
Color the bee’s body with alternating stripes of black and golden yellow or orange. -
Wing outlines:
Use your finest brush or a black paint pen to outline the wings carefully. -
Wing veins:
Add a single line down the center of each wing to suggest transparency and detail. -
Final dry:
Let the entire pumpkin sit undisturbed for at least an hour to ensure the thick black paint is hard to the touch.
Place your buzzing creation on your porch or table to bring a sweet touch of nature to your seasonal decor


Sunny Yellow Pumpkin With White Polka Dots
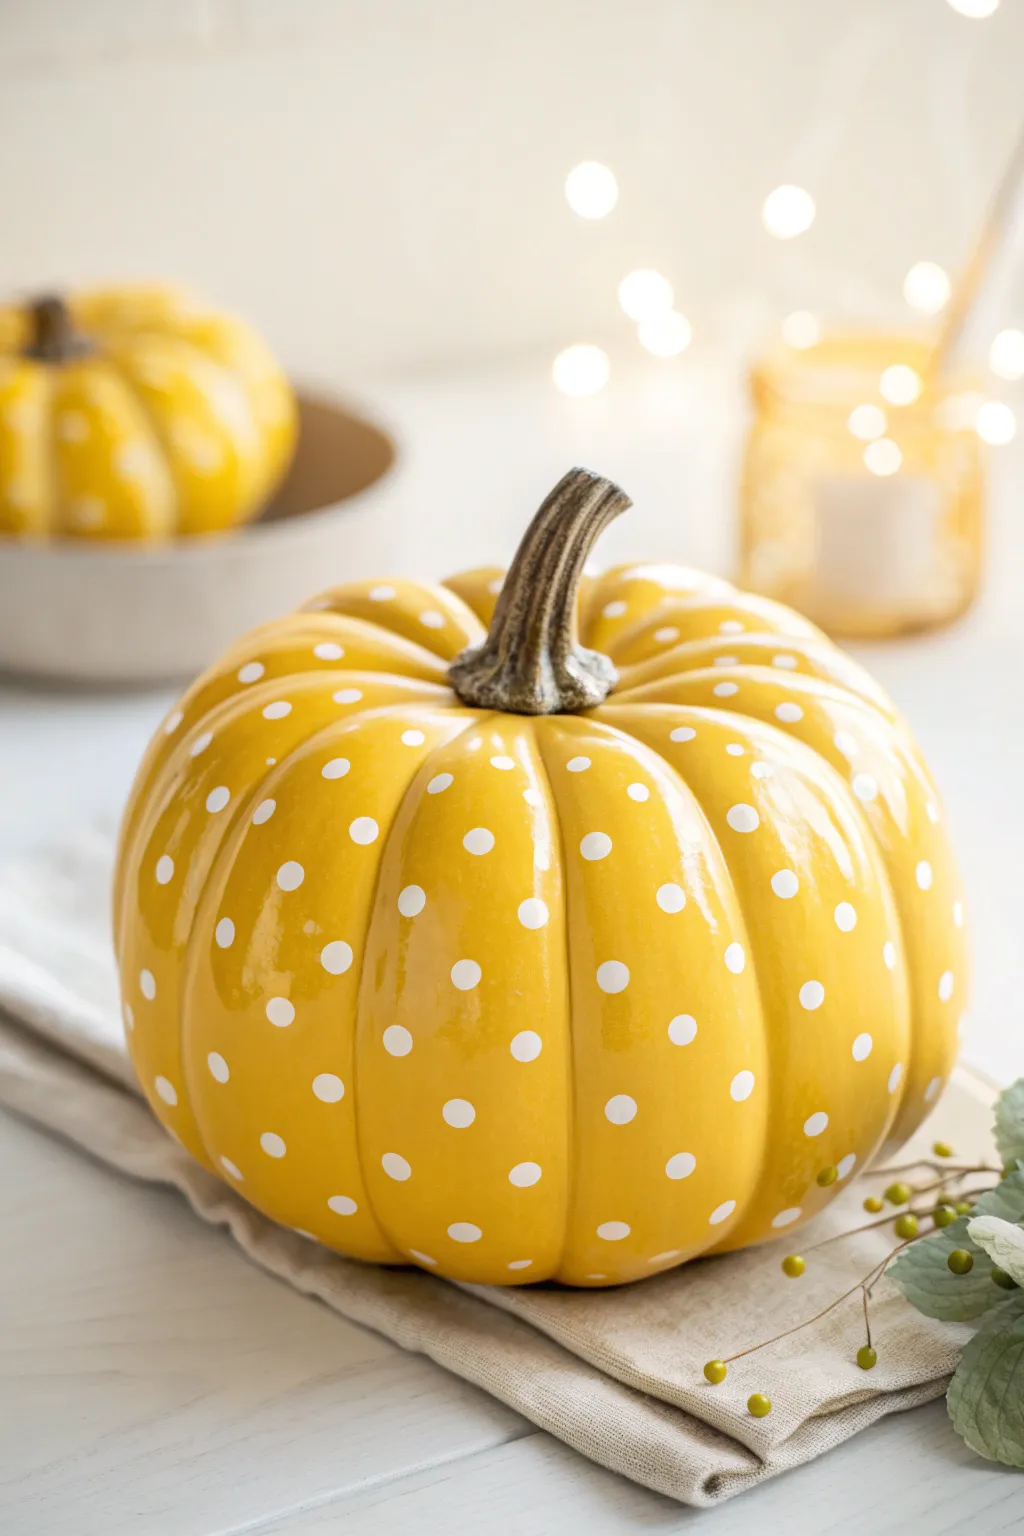
Brighten up your fall décor with a splash of sunshine using this cheerful, high-gloss yellow pumpkin project. The crisp white polka dots create a playful contrast against the warm golden hue, making it a perfect centerpiece for a modern autumn table.
Step-by-Step Guide
Materials
- Faux pumpkin (smooth white foam or ceramic base)
- High-gloss spray paint (sunny yellow or marigold)
- White acrylic paint (heavy body is best)
- Round sponge pouncers (small size, approx. 1/2 inch) OR circle stickers
- Small flat paintbrush (for touch-ups)
- Glossy clear sealant spray (optional)
- Painter’s tape
- Plastic drop cloth or newspaper
- Paper plate or palette
- Brown and olive green acrylic paint (for the stem)
Step 1: Preparation & Base Coat
-
Clean surface:
Begin by wiping down your faux pumpkin with a damp cloth to remove any dust or manufacturing oils. This ensures the paint adheres smoothly without bubbling. -
Protect the stem:
If you want to keep the original stem color or paint it separately later, carefully wrap the entire stem in painter’s tape. Press the edges down firmly where the stem meets the pumpkin body. -
Set up workspace:
Lay down your plastic drop cloth or newspaper in a well-ventilated area, preferably outdoors or in a garage. -
First coat:
Shake your yellow high-gloss spray paint can vigorously for at least a minute. Hold the can about 8-10 inches away from the pumpkin and apply a light, even coat. Don’t try to cover everything at once; thin coats prevent drips. -
Rotate and spray:
Once the first side is slightly tacky but not wet, rotate the pumpkin to reach all angles. Pay attention to the grooves and the bottom edge. -
Second coat:
Allow the first layer to dry for about 15-20 minutes. Apply a second coat of yellow spray paint to achieve a deep, opaque color. I usually find two coats are enough, but a third might be needed for lighter yellows. -
Dry completely:
Let the pumpkin dry completely, ideally overnight. The paint needs to be fully cured and hard before you start adding the dots to prevent smudging.
Step 2: Adding the Pattern
-
Prepare the white paint:
Squeeze a generous amount of white acrylic paint onto your paper plate. You want a creamy consistency—not too watery—so the dots stay opaque. -
Load the pouncer:
Dip your round sponge pouncer into the white paint. Dab it a few times on a clean part of the plate to offload excess paint and ensure an even coverage on the sponge face. -
Test placement:
Before committing to the pumpkin, practice creating a few dots on a piece of scrap paper to get a feel for the pressure needed. -
Start marking vertical lines:
Choose one of the vertical ribs (the grooves) of the pumpkin as a guide. Press the pouncer gently onto the surface to create your first dot near the top. -
Continue the line:
Work your way down that same rib, spacing the dots evenly. Aim for about 1 to 1.5 inches between each dot. -
Offset the next row:
Move to the next section or rib. For a classic polka dot look, place these dots in the spaces between the dots of the previous row (an offset or brick pattern), rather than aligning them directly side-by-side. -
Complete the pattern:
Continue working around the pumpkin, rotating it as you go. Keep checking your spacing to ensure the pattern stays relatively consistent. -
Touch up:
Once all dots are applied, inspect them closely. If any look transparent or streaky, use a small flat paintbrush to carefully dab a little extra white paint over the existing dot.
Perfect Circles
If you struggle with sponge pouncers, use white round adhesive vinyl stickers or reinforcement labels as stencils. Apply them, paint over, and peel while wet.
Step 3: Finishing Touches
-
Handle the stem:
Remove the painter’s tape from the stem. If the stem looks too plastic, paint it with a mix of brown and olive green acrylics to give it a realistic, organic look. -
Dry check:
Allow the white polka dots to dry for at least an hour. They should be dry to the touch before the final step. -
Final seal:
To get that super-shiny, ceramic look shown in the photo, finish by spraying the entire pumpkin with a coat of high-gloss clear sealant.
Gilded Glamour
For a more elegant twist, swap the white acrylic paint for metallic gold or copper leaf on the dots to make the pumpkin shimmer in candlelight.
Place your sunny creation near a window or soft light source to let that glossy finish truly shine
BRUSH GUIDE
The Right Brush for Every Stroke
From clean lines to bold texture — master brush choice, stroke control, and essential techniques.
Explore the Full Guide
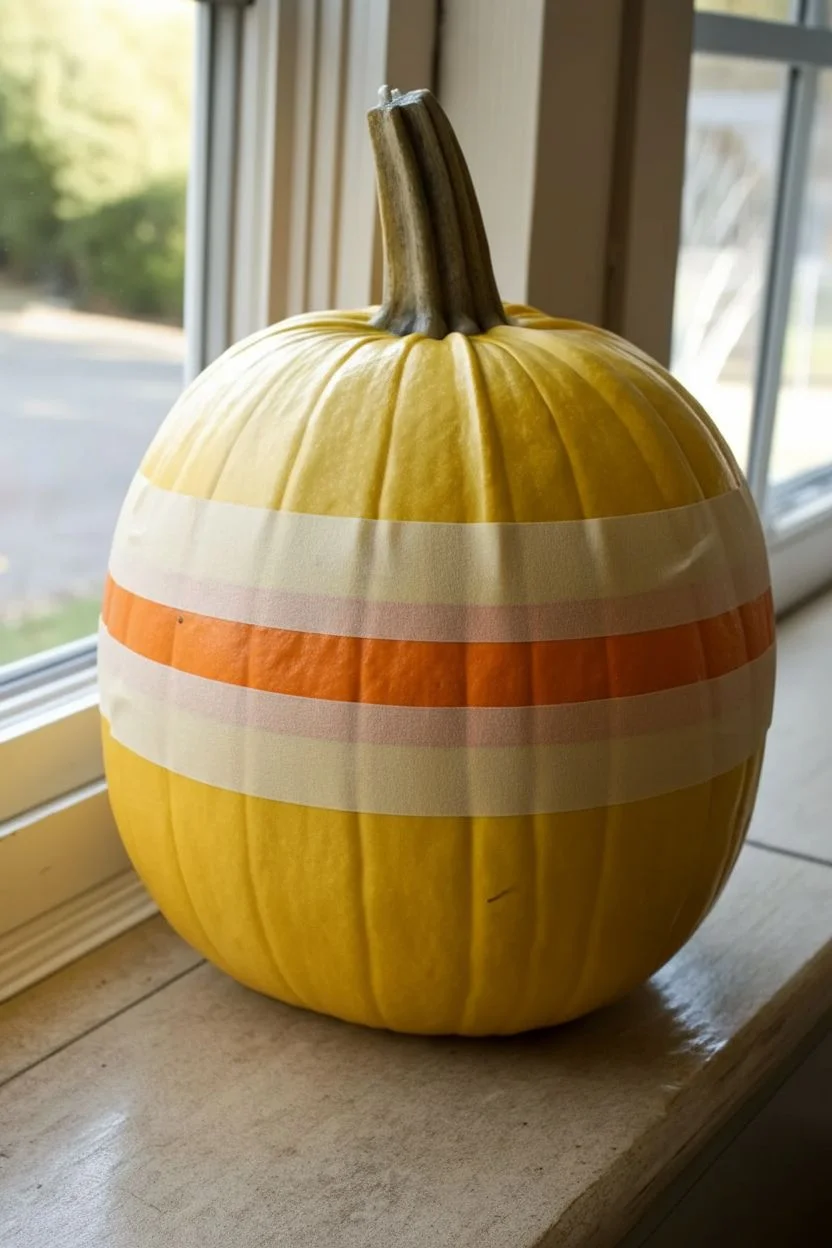
Buffalo Plaid Yellow Pumpkin Accent Pattern
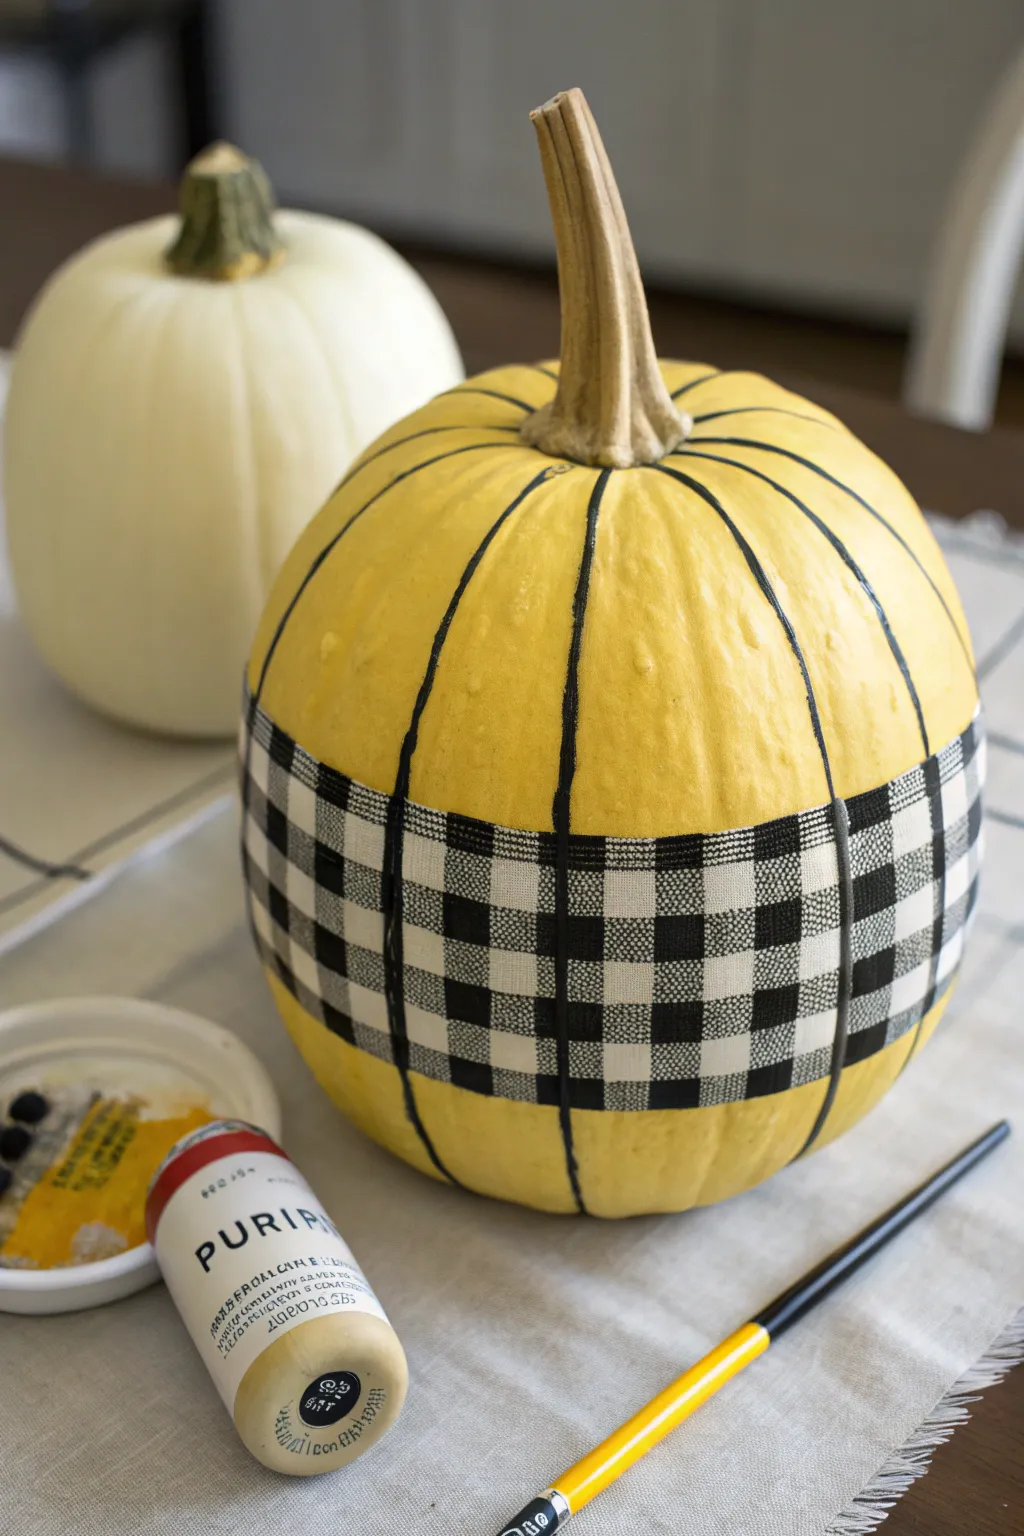
Transform a simple pumpkin into a cozy fall statement piece using a unique combination of pinstripes and rustic buffalo check patterns. The bright yellow base adds a cheerful pop of color, while the painted fabric-like band creates a sophisticated, layered look.
Step-by-Step
Materials
- Faux or real pumpkin (medium size)
- Yellow acrylic craft paint (mustard or sun yellow)
- Black acrylic craft paint
- White acrylic craft paint
- Foam brushes (for base coat)
- Fine liner brush (for pinstripes)
- Flat shader brush (small/medium width)
- Painter’s tape or masking tape
- Pencil
- Paint palette or paper plate
- Sealer spray (optional)
Step 1: Preparation & Base Coat
-
Clean the surface:
If using a real pumpkin, wash it with a mild bleach solution and dry completely. For a faux pumpkin, wipe it down with a damp cloth to remove any dust or manufacturing residue. -
Apply the yellow base:
Using a foam brush, paint the entire pumpkin with your chosen yellow acrylic paint. I find that dabbing the paint into the crevices first ensures full coverage. -
Let it dry and repeat:
Allow the first coat to dry completely. Apply a second or third coat until the original color of the pumpkin is completely hidden and the yellow is opaque and streak-free.
Step 2: Painting the Buffalo Plaid Band
-
Mark the band area:
Decide where you want your plaid belt to sit. Using a pencil, lightly mark a horizontal band around the center circumference of the pumpkin, about 2-3 inches wide. -
Paint the white background:
Fill in the marked band area with white acrylic paint. This is crucial because the buffalo plaid effect relies on a white base to make the colors pop. Let this dry thoroughly. -
Create the grid:
Using a pencil and a flexible ruler or tape measure, lightly draw a grid of squares inside the white band. Aim for squares that are roughly 1/2 inch to 3/4 inch in size. -
Mix a grey shade:
On your palette, mix a small amount of black paint with white to create a medium grey. This will represent the lighter intersecting lines of the plaid pattern. -
Paint the vertical grey stripes:
Using a flat shader brush that matches the width of your squares if possible, paint every other vertical column with the grey mixture. -
Paint the horizontal grey stripes:
Using the same grey paint, fill in every other horizontal row. Where the grey vertical and horizontal stripes intersect is where your darkest color will go. -
Add the black squares:
Identify the squares where the vertical and horizontal grey lines cross each other. Paint these specific squares with pure black paint to create the depth of the buffalo check pattern. -
Clean up edges:
Use a small brush with white paint to touch up any squares where the grey or black might have bled outside the lines.
Brush Maintenance Tip
Keep your shader brush slightly damp, not soaking, when painting the squares. This helps the acrylic flow smoother for sharper corners without bleeding.
Step 3: Adding Pinstripes & Finishing
-
Plan vertical pinstripes:
Follow the natural ribs or grooves of the pumpkin to guide where your vertical lines will go. The goal is to have thin black lines running from the stem down to the bottom. -
Paint the top stripes:
Using a fine liner brush and black paint, carefully draw a line from the base of the stem down to the top edge of your buffalo plaid band. -
Paint the bottom stripes:
Continue the line from the bottom edge of the plaid band down to the base of the pumpkin. Try to keep it aligned with the stripe you painted on the top half. -
Add definition to the band:
To make the plaid section look like a distinct ribbon, paint a thin black line along the very top and very bottom border of the white band. -
Paint the intersecting lines:
For a seamless look, carefully drag your black pinstripe paint over the plaid band as well, connecting the top and bottom sections. This makes it look like the pinstripes are an overlay or a cage. -
Seal the project:
Once all paint is fully dry—usually about 24 hours—you can spray the pumpkin with a clear acrylic sealer to protect the paint from chipping, especially if it will be displayed outdoors.
Wobbly Lines?
If your pinstripes look shaky, don’t stress. Gently wipe wet paint with a damp Q-tip, or wait for it to dry and touch up the edges with yellow paint.
Place your warm yellow pumpkin on a table runner or mantle to add a custom touch of farmhouse charm to your autumn decor
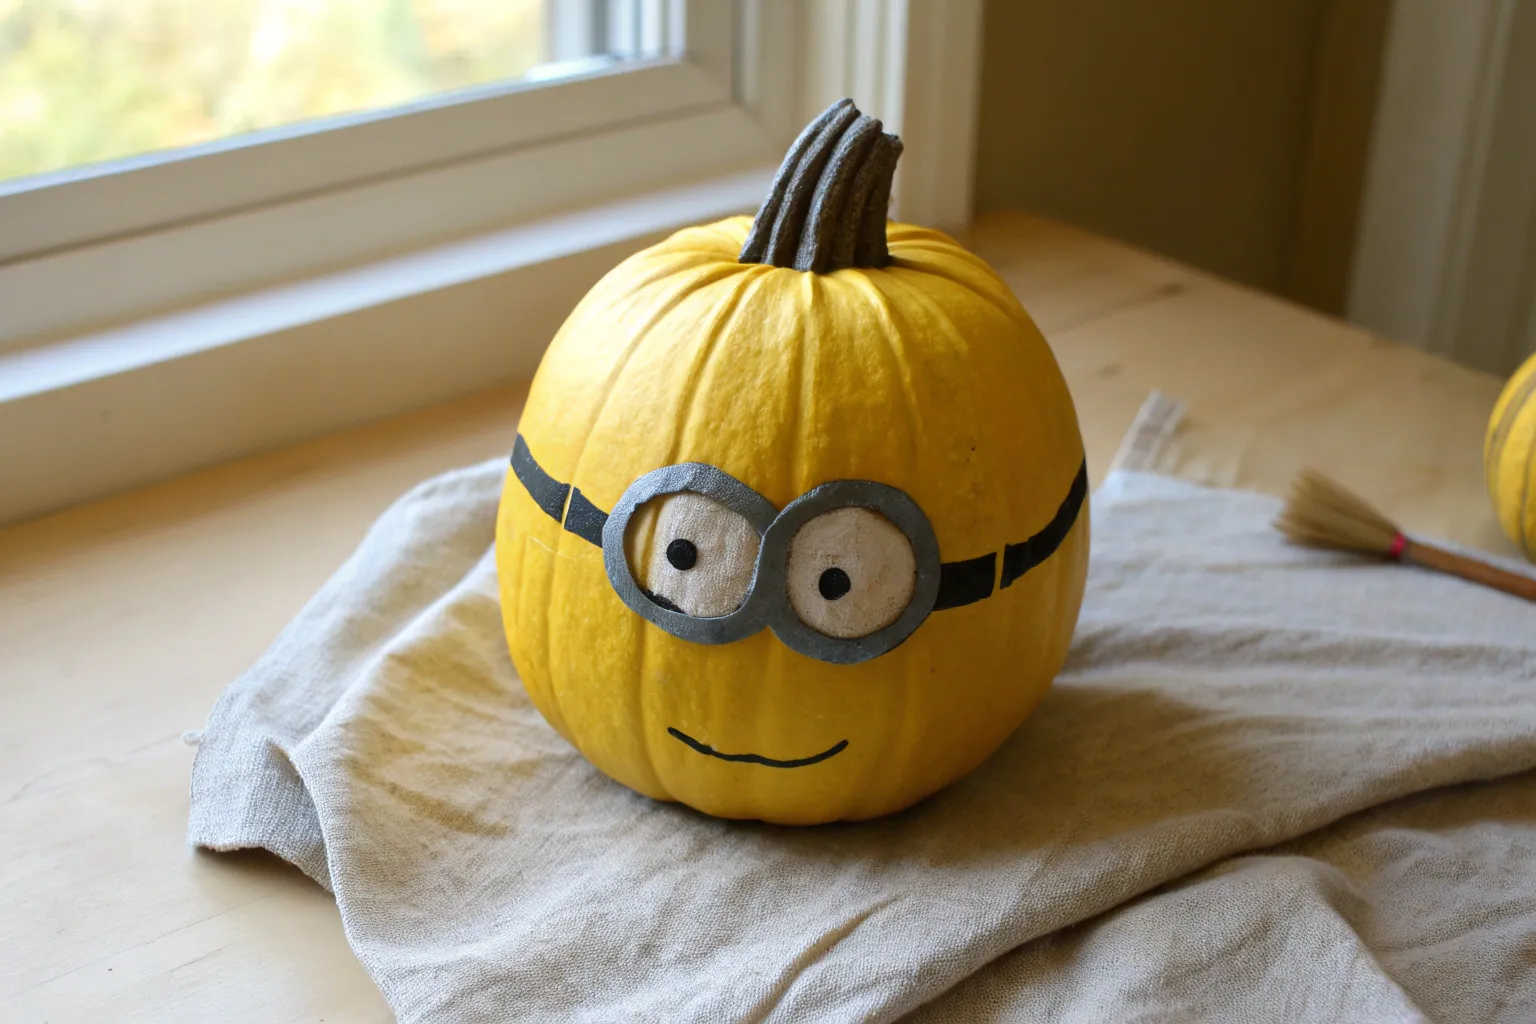
Yellow Pumpkin With Blue Overalls Character Look
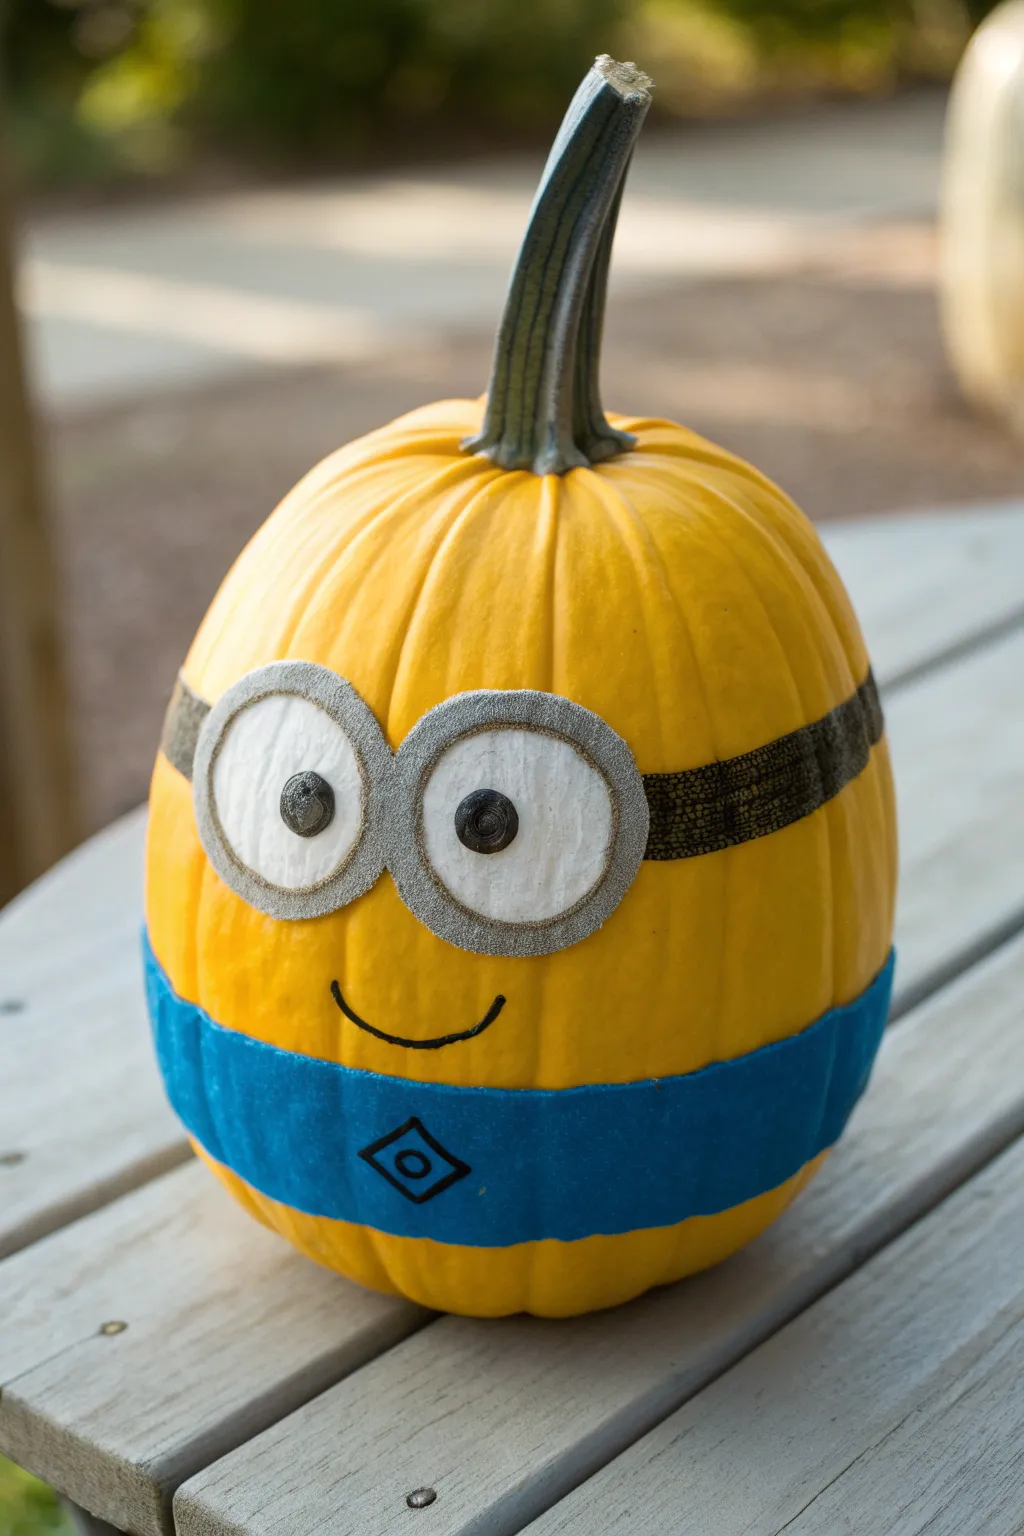
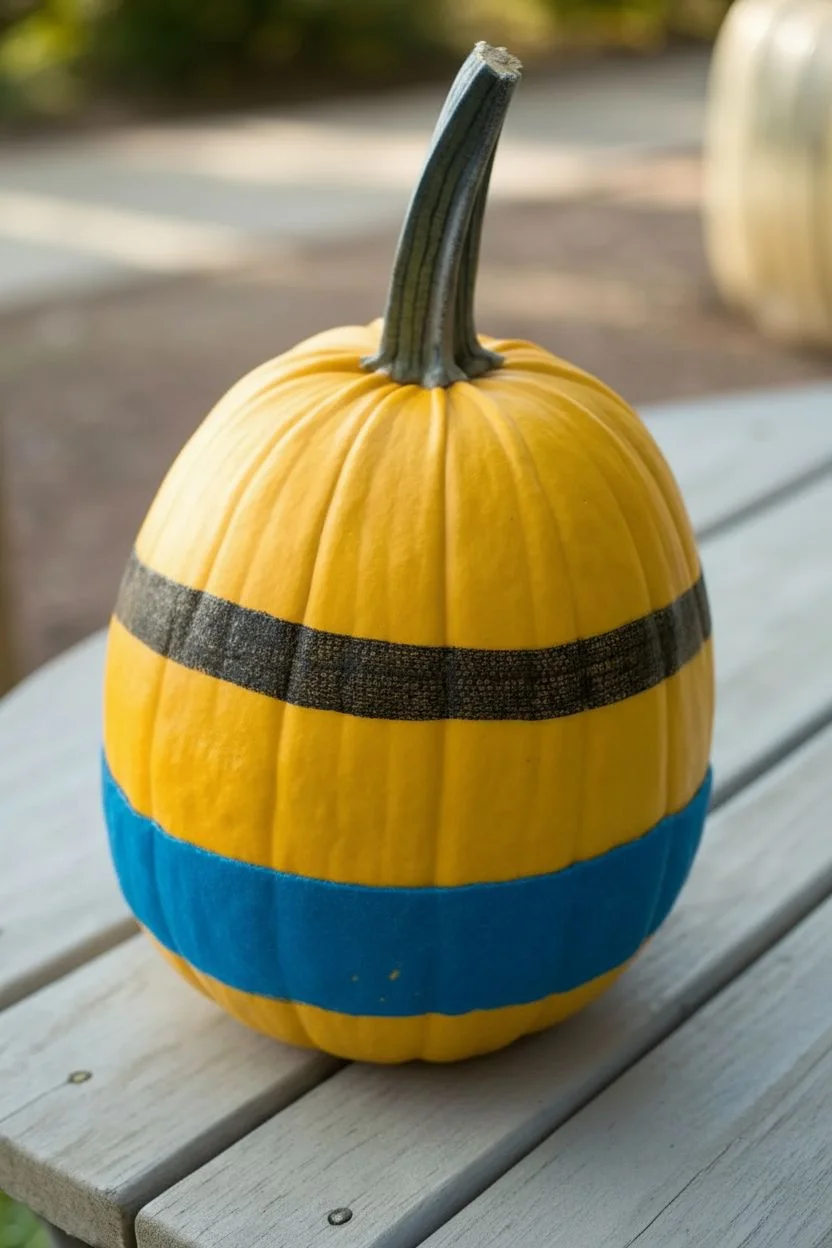
Transform a naturally yellow squash or pumpkin into a beloved animated character with just a few simple additions. This no-carve project relies on clever painting and felt accents to create the iconic goggles and blue overalls look.
Detailed Instructions
Materials
- Tall yellow pumpkin or winter squash
- Blue acrylic craft paint
- Black acrylic craft paint or permanent marker
- Silver Glitter paint or grey felt
- White felt or craft foam
- Black buttons (2)
- Wide paintbrush
- Fine detail paintbrush
- Hot glue gun and glue sticks
- Scissors
Step 1: Painting the Base Design
-
Clean surface:
Begin by wiping down your yellow pumpkin with a damp cloth to remove any dirt or oils, ensuring the paint will adhere properly. -
Mark the overalls:
Visualize where the blue overalls should sit on the bottom third of the pumpkin. You can lightly sketch a guide line around the circumference with a pencil if it helps keep things level. -
Paint the blue band:
Using a wide flat brush, paint a thick band of blue acrylic paint around the bottom section. You don’t need to paint the very bottom base, just a wide strip that mimics the top of the overalls. -
Apply second coat:
Let the first layer of blue paint dry completely. Apply a second coat to ensure the yellow pumpkin skin doesn’t show through, creating a solid, rich color. -
Paint the goggle strap:
While the blue dries, use black paint or a thick black marker to draw a horizontal line wrapping around the upper middle part of the pumpkin. -
texture the strap:
If using paint for the strap, I like to dab the brush slightly to give it a fabric-like texture, making it look like an elastic band.
Paint Peeling?
If acrylic paint peels off the pumpkin skin, lightly sand the area with fine-grit sandpaper first to give the surface ‘tooth’ for better adhesion.
Step 2: Creating the Eyes & Details
-
Cut the eye backing:
Cut two large circles out of white felt or craft foam. These will be the whites of the eyes and should be large enough to look comically oversized. -
Make the frames:
Cut two rings out of grey felt that are slightly larger than your white circles. Alternatively, you can paint a silver ring directly onto the pumpkin or around the white felt later. -
Sparkle the frames:
To match the image’s metallic look, paint the grey felt rings with silver glitter paint. Let them dry fully before handling. -
Assemble the eyes:
Glue the white circles onto the pumpkin, centered over the black strap line you painted earlier. They should touch in the middle. -
Add the goggles:
Hot glue the silver glitter rings directly over the edges of the white felt circles to create the goggle frames. -
Attach the pupils:
Glue a black button into the center of each white eye. Placing them slightly off-center or cross-eyed can add a funny expression. -
Draw the mouth:
Using a small brush with black paint or a marker, draw a simple, curved smile between the eyes and the blue overall line. -
Add the logo:
On the front center of the blue band, carefully draw a small black diamond shape with a circle inside it to represent the character’s logo. -
Final touches:
Clean up any stray glue strings or paint smudges to finish your character.
Make It 3D
Use actual denim fabric strips instead of blue paint for the overalls, and glue on real Overall buckles (or cardboard cutouts) for a mixed-media look.
Place your cheerful yellow character on the porch to greet visitors with a smile

PENCIL GUIDE
Understanding Pencil Grades from H to B
From first sketch to finished drawing — learn pencil grades, line control, and shading techniques.
Explore the Full Guide
Yellow Pumpkin Smiley Icons (Heart Eyes, Wink, Shades)
Bring the digital world into your autumn decor with these playful emoji-inspired pumpkins. Using small yellow gourds as your canvas, you can recreate popular facial expressions like heart eyes, blowing a kiss, and cool sunglasses for a modern, cheerful display.
Step-by-Step
Materials
- 3 small to medium yellow pumpkins (real or faux)
- Black acrylic paint or broad-tip black paint marker
- Red acrylic paint or red paint marker
- Small fine-tip paintbrush (if using liquid paint)
- Medium flat paintbrush
- Pencil for sketching
- Eraser
- Damp cloth
- Clear spray sealant (optional)
- Paper plate or palette
Step 1: Preparation & Planning
-
Clean the surface:
Begin by wiping down your yellow pumpkins with a damp cloth to remove any dirt or dust. If using real pumpkins, dry them thoroughly to ensure the paint adheres properly. -
Select your faces:
Decide which pumpkin will host which emoji personality. The smoother sides of the pumpkins work best for these designs, so rotate them to find the ideal ‘face’ area. -
Sketch the heart eyes:
On the first pumpkin, use a pencil to lightly sketch two large heart shapes where the eyes should be. Try to angle the points of the hearts slightly inward toward the nose area. -
Add the smile:
Below the heart eyes, draw a simple curved line for the mouth. Add small vertical tick marks across the line to create a stitched or toothy grin appearance. -
Sketch the kiss face:
For the second pumpkin, sketch two smaller hearts for eyes and a third heart lower down, centered where the mouth would be, to represent a kiss being blown. -
Outline the sunglasses:
On the third pumpkin, draw a classic wayfarer-style sunglasses shape. Include the bridge connecting the lenses and the side arms extending towards the pumpkin’s ‘ears’. -
Draw the cool smile:
Finish the sunglasses sketch with a simple, confident smirk underneath. Keep the line smooth and upward-curving.
Paint Fixes
If you smudge black paint on the yellow skin, don’t wipe it! Let it dry completely, then gently scratch it off with a fingernail or craft knife.
Step 2: Painting the Details
-
Paint the red hearts:
Using your red acrylic paint or marker, fill in the heart eyes on the first pumpkin. I find it helpful to outline the shape first and then fill the center for cleaner edges. -
Fill the kiss hearts:
Moving to the second pumpkin, paint all three sketched hearts—the two eyes and the mouth—with the same vibrant red. -
Let the red dry:
Allow the red paint to dry completely. This usually takes about 15-20 minutes depending on the thickness of your paint layers. -
Outline heart shapes:
Once the red needs no more touch-ups, carefully outline the red hearts on the first pumpkin with black paint or a marker to make them pop. -
Trace the stitched mouth:
Go over the pencil line of the mouth on the first pumpkin with black. Add the vertical stitch marks with short, deliberate strokes. -
Outline the kiss face:
On the second pumpkin, use your black tool to outline the three red hearts. The bold black border gives it that classic cartoon icon look. -
Fill the sunglasses:
Switching to the third pumpkin, fill in the lens area of the sunglasses with solid black paint. You may need two coats here to ensure the yellow doesn’t show through. -
Define the frames:
Carefully paint the bridge and the side arms of the sunglasses connecting to the lenses. -
Finish the cool smile:
Paint the curved smile line below the glasses with a steady hand to complete the cool expression. -
Refine edges:
Check all your designs for rough edges. Use a tiny brush with a bit of yellow paint (if matching) or carefully scrape away mistakes to clean up lines. -
Seal the work:
Once all paint is totally dry, give the pumpkins a light coat of clear spray sealant if you plan to display them outdoors.
Sharper Lines
For the crispest outlines, use a paint marker instead of a brush. It offers pen-like control ideal for the detailed heart borders and smiles.
Arranging these cheerful characters together on a windowsill creates an instantly happy atmosphere
Yellow Pumpkin With Sunflower Crown Details
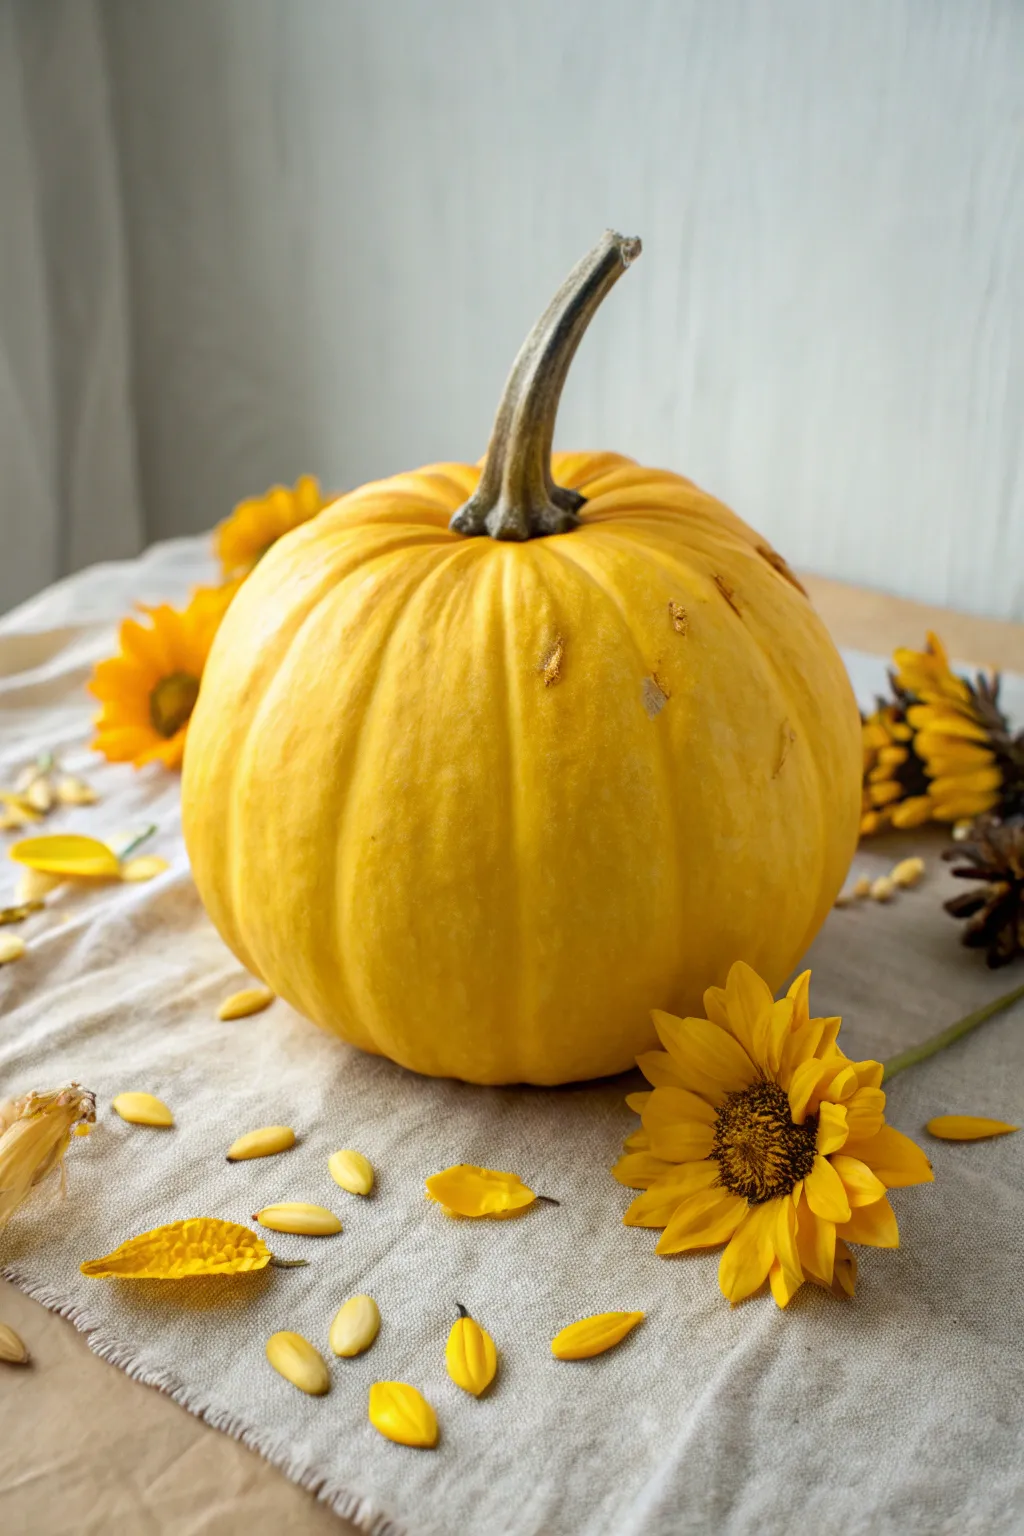
Brighten your autumn table with this radiant display featuring a vibrant yellow pumpkin nestled among sunny florals. This simple yet striking arrangement combines the warmth of harvest hues with the rustic charm of linen and seeds.
Step-by-Step Guide
Materials
- Medium-sized yellow pumpkin (fresh or realistic faux)
- Fresh or high-quality silk sunflowers
- Dried pumpkin seeds (pepitas)
- Loose yellow flower petals
- Beige linen or burlap table runner
- Soft cloth for polishing
- Small scissors or floral shears
- Optional: clear matte spray (if using a real pumpkin)
Step 1: Preparing the Base
-
Lay the Foundation:
Begin by spreading your beige linen fabric across your display surface. I like to bunch the fabric slightly rather than pulling it taut, creating gentle ripples and folds that add visual texture and a casual, welcoming feel. -
Clean the Pumpkin:
If using a real pumpkin, wash the surface gently with mild soapy water to remove any dirt or field debris. Dry it thoroughly with a soft towel. -
Polish for Shine:
Buff the pumpkin skin with a dry soft cloth. For an extra healthy glow on a real pumpkin, you can rub a tiny drop of vegetable oil over the surface, though keep it minimal to avoid attracting dust.
Preserve the Glow
To keep a real pumpkin looking fresh longer, wipe it with a mix of one part vinegar to ten parts water before displaying.
Step 2: Arranging the Centerpiece
-
Position the Pumpkin:
Place your yellow pumpkin in the center of the linen cloth. Angle it so the stem curves naturally towards one side, presenting the pumpkin’s most attractive face to the front. -
Inspect the Stem:
Ensure the stem is clean and dry. If it looks brittle or dusty, give it a quick brush with an old toothbrush to tidy it up without removing its rustic character. -
Select Your Sunflowers:
Choose 2-3 sunflowers with full, open heads. If they are fresh, trim the stems very short, leaving just about an inch attached. -
Place Key Blooms:
Tuck one large sunflower head near the base of the pumpkin on the right side. Position another partially visible towards the back left to create depth and balance. -
Add a Dried Element:
If you have a dried sunflower head or a darker, seed-heavy bloom, place it near the fresh yellow one. This contrast in texture adds an earthy, harvest-time element to the scene.
Step 3: Adding Scatter Details
-
Harvest the Petals:
Gently pull a few yellow petals from a spare sunflower. You don’t need many—just a small handful to scatter. -
Scatter Petals Artfully:
Drop the petals randomly around the base of the pumpkin. Let them fall where they may for a natural look, rather than placing them in a deliberate pattern. -
Incorporate Seeds:
Take a small handful of dried pumpkin seeds. Sprinkle these around the perimeter of the pumpkin, mixing them in with the petals. -
Group the Seeds:
Use your finger to gently nudge some seeds into small clusters of two or three, while leaving others singular. This variation mimics how seeds naturally fall. -
Check the Spacing:
Step back and look at the scattered elements. Ensure they aren’t too crowded; you want the beige linen to show through clearly to maintain a light, airy aesthetic. -
Final Adjustments:
Rotate the pumpkin slightly if needed to ensure the light catches its curves. Fluff any flattened linen folds near the edges of your arrangement.
Petal Curling?
If fresh petals curl too quickly, use high-quality silk petals for the scatter. They look realistic and last all season.
Now you have a cheerful, sunny centerpiece that brings a golden warmth to your home decor


Pale Butter Yellow Pumpkin With Glam Eyelashes
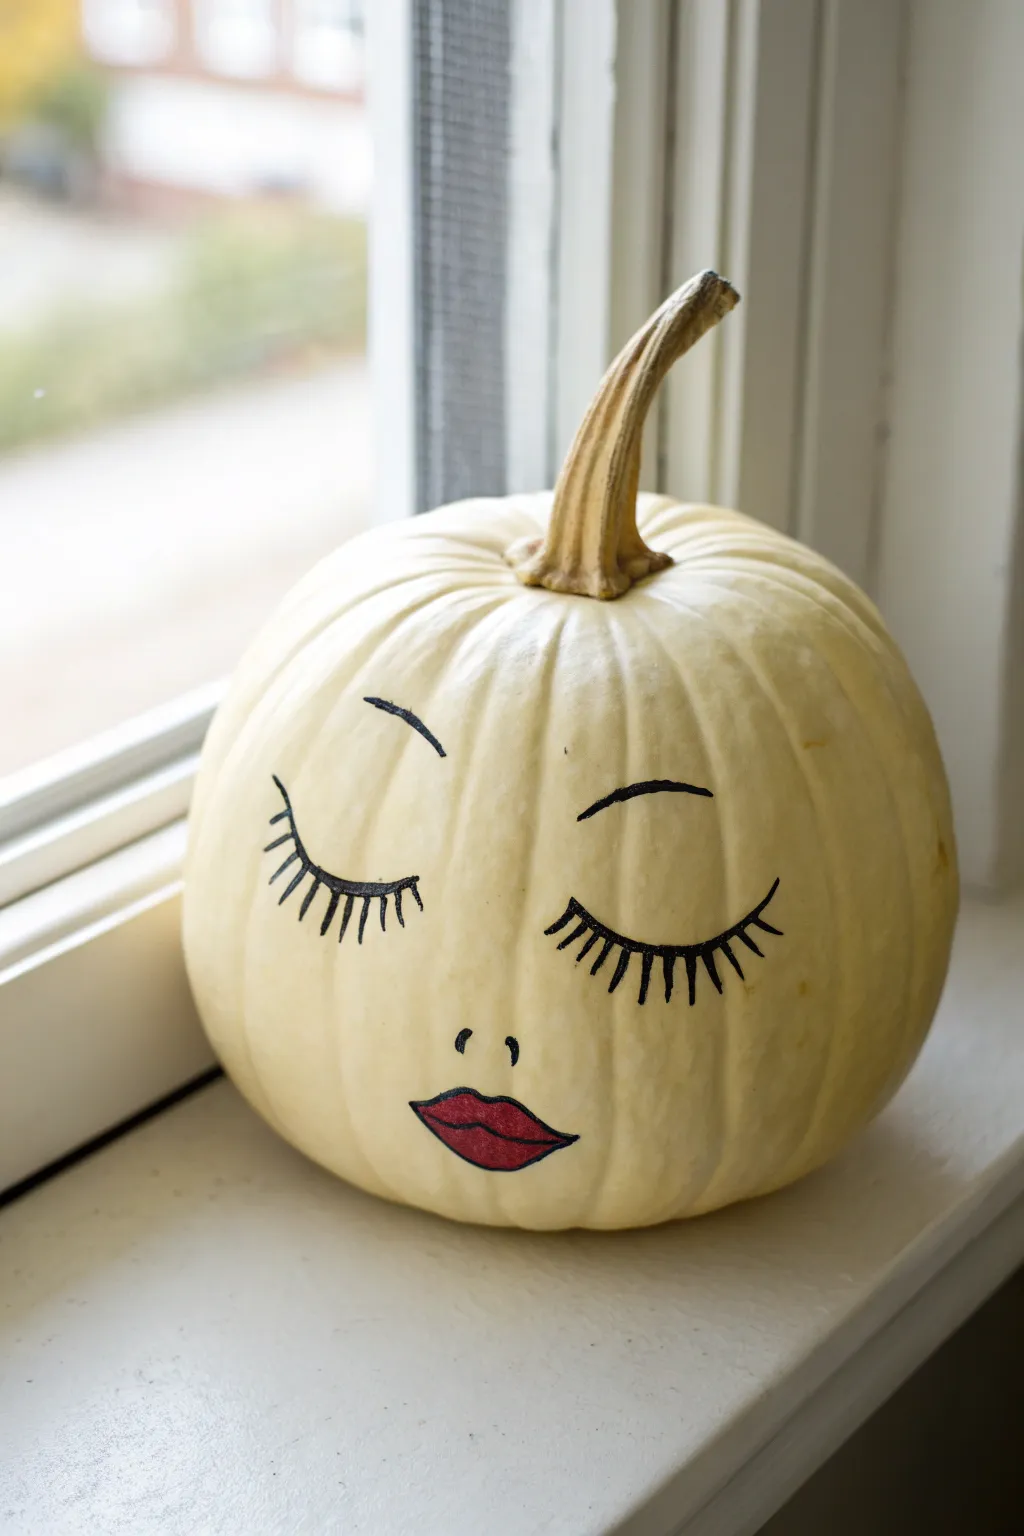
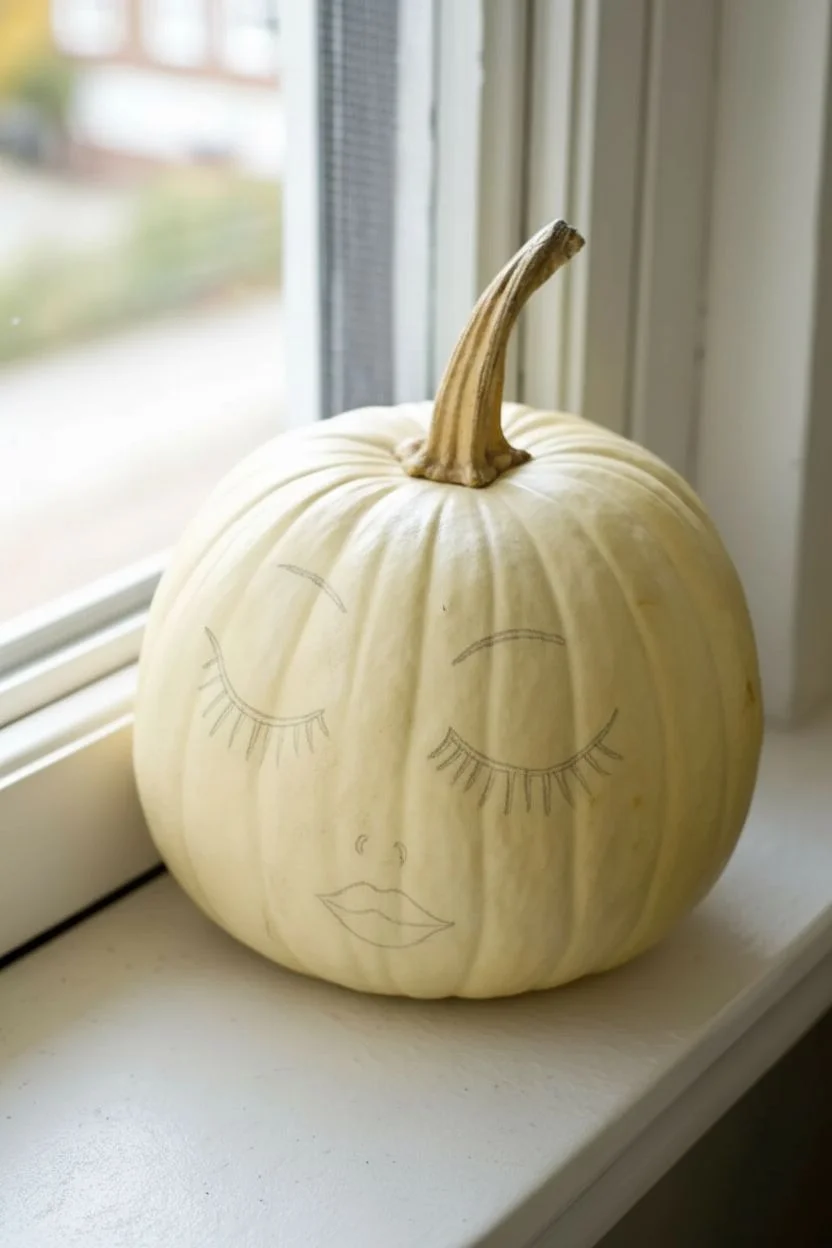
Give your autumn décor a touch of drowsy elegance with this simple yet chic no-carve pumpkin design. By using a pale butter-yellow pumpkin as your canvas, the bold black lashes and ruby red lips create a striking, modern contrast perfect for a windowsill display.
Step-by-Step Tutorial
Materials
- Real or faux pumpkin (pale butter yellow or white)
- Black acrylic paint or oil-based paint marker (medium tip)
- Red acrylic paint
- Small round paintbrush (size 0 or 1)
- Pencil with eraser
- Paper towel or rag
- Clear matte sealant spray (optional)
- Cup of water
Step 1: Preparation and Sketching
-
Clean surface:
Begin by wiping down your pumpkin with a damp paper towel to remove any dirt or dust. Let it dry completely so the paint adheres properly. -
Observe the ribs:
Look at the natural vertical ribs of the pumpkin. Identify a relatively smooth, wide section to serve as the ‘face’ area so your design isn’t distorted by deep grooves. -
Sketch the lash line:
Using a pencil, lightly sketch two large U-shaped curves for the closed eyelids. Place them about halfway down the pumpkin for a symmetrical look. -
Add the lashes:
Sketch long, sweeping straight lines extending downward and slightly outward from the U-curves. I like to make the outer lashes slightly longer for a cat-eye effect. -
Outline the brows:
Draw two shorter, curved lines above the eyelids for eyebrows. Keep them fairly high to give the face a relaxed, peaceful expression. -
Mark the nose:
Place two tiny vertical dashes or dots in the center, just below the level of the eyes, to suggest a dainty nose. -
Draft the lips:
Sketch a classic lip shape below the nose. Focus on a defined cupid’s bow on top and a fuller curve on the bottom.
Use a Paint Marker
For the crispest lines on the eyelashes, an oil-based paint pen offers much better control than a brush, especially over uneven pumpkin bumps.
Step 2: Painting the Details
-
Trace the eyes:
Take your black paint marker or a fine brush loaded with black acrylic paint. Carefully trace over the main eyelid curve first. -
Define the lashes:
Flick your marker or brush downward to create the eyelashes. Using quick, confident strokes helps keep the lines looking tapered and elegant rather than shaky. -
Fill the brows:
Go over your eyebrow pencil lines. Vary the thickness slightly—thicker towards the center of the face and tapering out towards the temples. -
Paint the nose:
Deftly dab on the two nostrils. Keep these very small and subtle; they shouldn’t distract from the eyes and lips. -
Allow black to dry:
Wait about 10–15 minutes for the black paint to set completely to avoid smudging nicely done lines while working on the mouth. -
Outline the lips:
Switch to your black marker/paint again to outline the lip shape you sketched. A crisp black outline gives it a cartoon-chic, pop-art vibe. -
Fill the lips:
Load your small brush with bright red acrylic paint. Carefully fill in the lips inside the black outline. -
Second coat:
If the orange or yellow of the pumpkin shows through the red, let the first coat dry and apply a second layer for true opacity. -
Clean up sketch lines:
Once all paint is 100% dry, gently erase any visible pencil marks with a soft eraser. -
Seal (Optional):
If this pumpkin will be outside, lightly mist it with a clear matte sealant to protect the painted face from moisture.
Add Real Makeup
Glue on a pair of actual false eyelashes for 3D drama, or add a dusting of red glitter to the wet red paint on the lips for extra sparkle.
Now you have a serene, glamorous pumpkin that adds a peaceful charm to any windowsill display
Yellow Pumpkin Candy-Corn Color Blocking
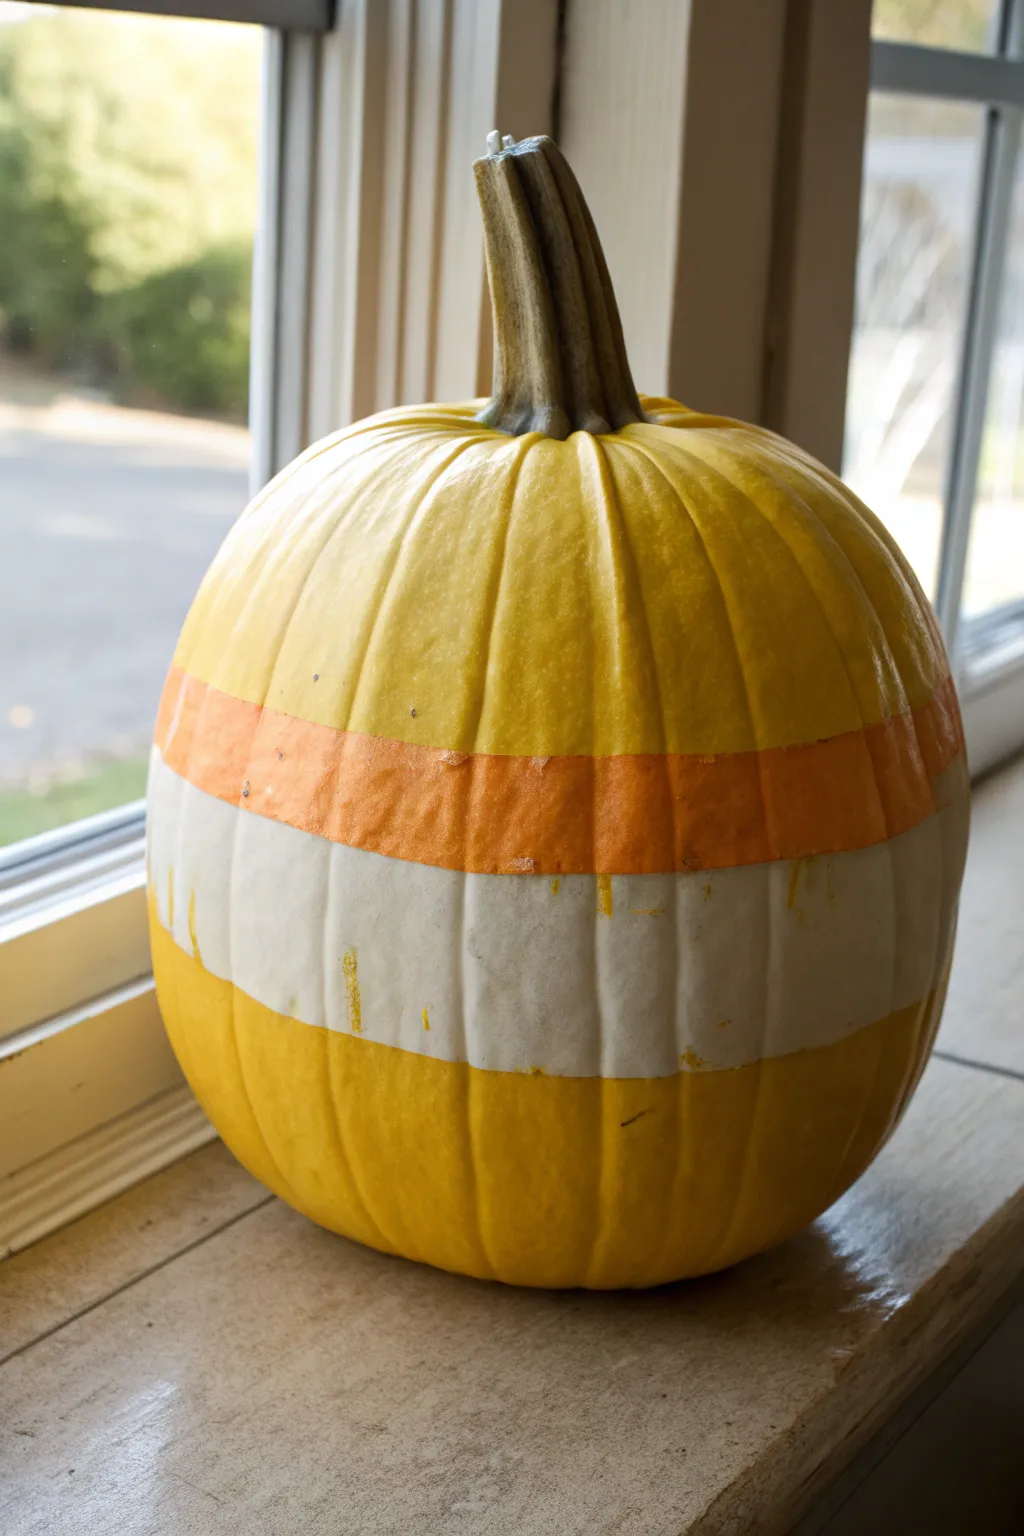
Transform a naturally yellow pumpkin into a sweet seasonal treat with some simple color blocking. By adding crisp horizontal bands of orange and white, you can mimic the iconic candy corn look without needing to paint the entire gourd.
How-To Guide
Materials
- A clean, dry yellow pumpkin (medium to large size)
- Painter’s tape or masking tape (1 inch width)
- White acrylic craft paint
- Orange acrylic craft paint
- Flat paintbrushes (approx. 1 inch width)
- Small detail brush (optional for touch-ups)
- Newspaper or drop cloth
Step 1: Preparation & First Stripe
-
Clean surface:
Begin by wiping down your pumpkin with a damp cloth to remove any dirt or dust from the field. Dry it thoroughly with a towel, as moisture will prevent the paint from adhering properly. -
Establish the top boundary:
Decide where you want your orange stripe to begin. Typically, this sits just below the widest part of the pumpkin’s shoulder. Apply a continuous ring of painter’s tape horizontally around the pumpkin at this level. -
Seal the tape edges:
Run your fingernail or a credit card edge firming along the bottom edge of the tape. This is crucial for preventing paint bleed on the pumpkin’s ribbed surface. -
Set the middle boundary:
Place a second ring of tape roughly 1.5 to 2 inches below your first piece of tape. This gap will become your orange stripe. -
Paint the orange band:
Using your flat brush, fill in the space between the two tape lines with orange acrylic paint. Apply the paint primarily in vertical strokes that follow the pumpkin’s ribs for better coverage. -
Add a second coat:
Let the orange paint dry for about 15-20 minutes. If the yellow skin is still showing through, apply a second coat and let it dry completely to the touch.
Step 2: Adding the White Band
-
Remove upper tape:
Carefully peel away the top ring of tape. You can leave the bottom ring of tape in place for now, or remove it—I find removing it helps visualize the spacing for the next section better. -
Define the white section:
You need a clear gap between the orange stripe and where the white stripe begins. However, unlike real candy corn where colors touch, this design leaves a sliver of natural yellow or has the white immediately adjacent. In the image, the white band is directly below the orange. -
Tape the bottom edge:
Determine how wide you want the white band to be. It usually looks best if it is slightly wider than the orange band. Place a ring of tape around the pumpkin to mark the bottom edge of this white section. -
Protect the orange paint:
If you are worried about your hand slipping, you can place a piece of tape gently over the dried orange paint, or just cut in carefully with your brush. -
Paint the white band:
Apply white acrylic paint to the designated area below the orange stripe. White paint often has less opacity than orange, so expect to do a few layers here. -
Layering the white:
Allow the first coat of white to dry for at least 20 minutes. Apply a second—and possibly a third—coat until the yellow pumpkin skin is completely hidden.
Uneven Lines?
Pumpkins are bumpy! If tape leaves gaps in the deep grooves, skip the tape in those spots and freehand the paint line with a small detail brush for a cleaner edge.
Step 3: Finishing Touches
-
Peel the final tape:
Once the white paint is tacky but not fully hardened, slowly peel off the bottom tape strip at a 45-degree angle to ensure a crisp line. -
Clean up edges:
Use a small damp brush or a cotton swab to gently wipe away any paint that might have seeped under the tape into the pumpkin’s deep crevices. -
Scratch check:
If any paint has dried in an unwanted area, you can often gently scratch it off with a fingernail or a craft knife, as acrylic doesn’t bond instantly to waxy pumpkin skin. -
Let it cure:
Allow the pumpkin to sit undisturbed for at least an hour so the paint can fully cure before moving it to your display location.
Make It Last
Since acrylic can peel off waxy skin, spray the finished dry pumpkin with a clear matte artist’s sealant. This protects the stripes from moisture and accidental scratches.
Place your candy-inspired creation near a window or on the porch for a sweet pop of seasonal color
Lemon-Inspired Yellow Pumpkin With Citrus Leaves
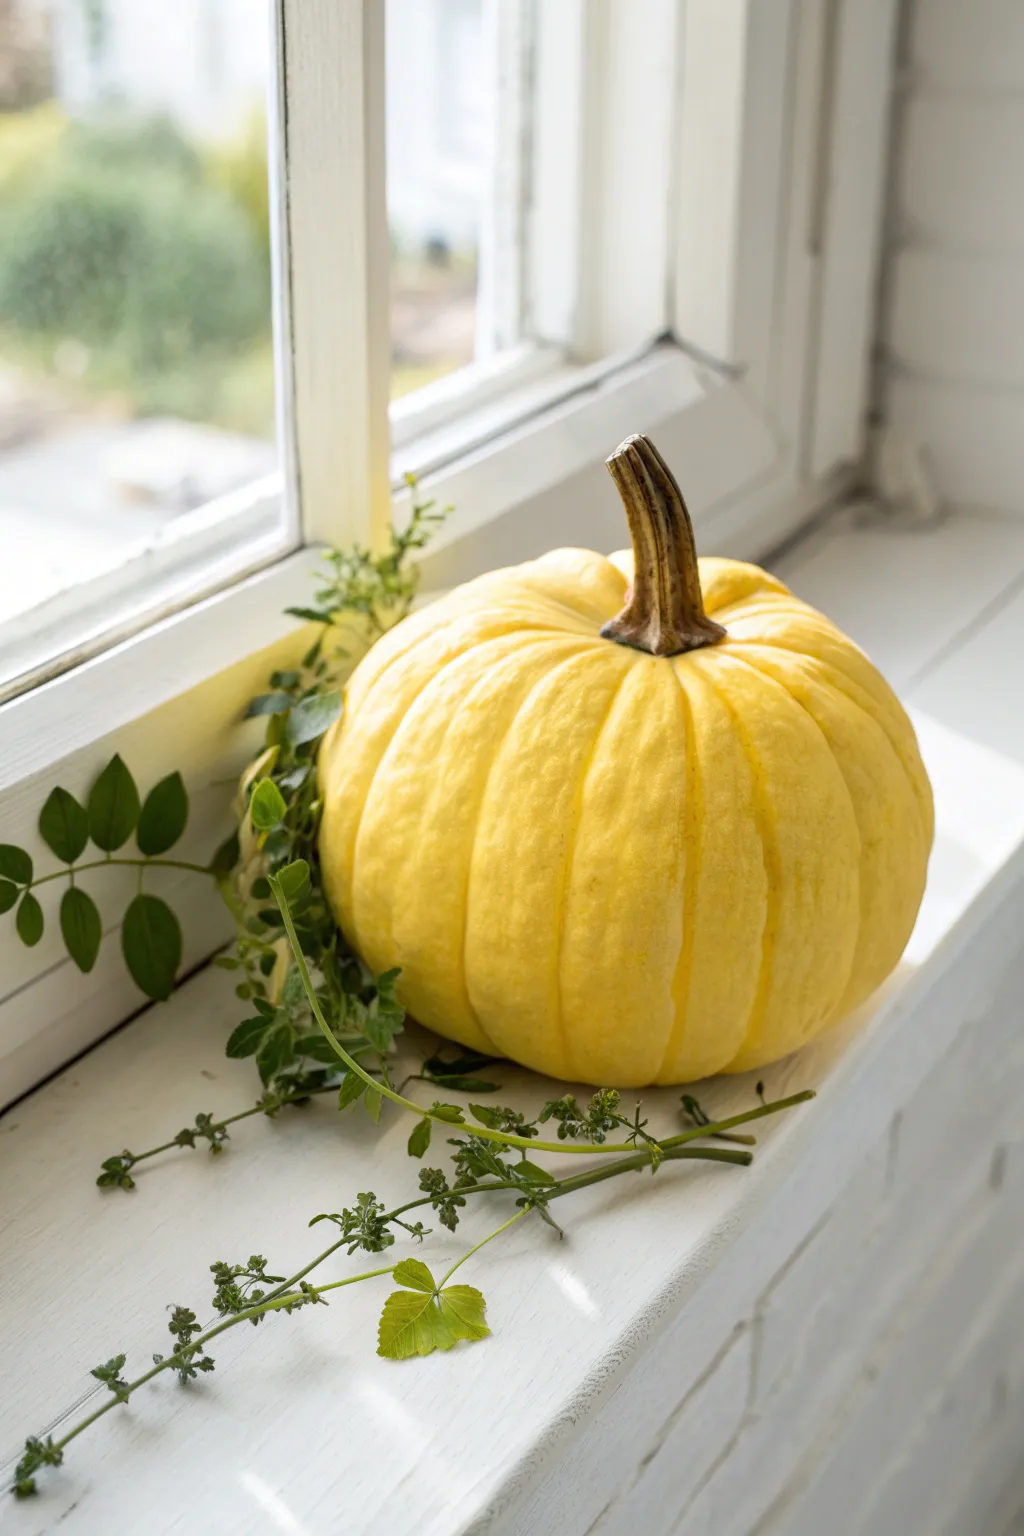
Bring a fresh, citrus-inspired twist to your autumn decor with this vibrant yellow pumpkin display. By combining a soft lemon hue with delicate greenery, you create a bright, airy centerpiece perfect for a windowsill or sunny nook.
Step-by-Step Guide
Materials
- Medium-sized pumpkin (white or pale orange base works best)
- Acrylic craft paint (Lemon Yellow, Cream, or Pale Yellow)
- Medium flat paintbrush
- Small round paintbrush
- Matte or satin sealer spray (optional)
- Fresh or faux citrus leaves (or similar triangular greenery like ivy)
- Green floral wire
- Wire cutters
- Paper towel or drop cloth
- Damp cloth for cleaning
Step 1: Preparation and Base Coat
-
Clean surface:
Begin by thoroughly wiping down your pumpkin with a damp cloth to remove any dirt or oils. Let it dry completely to ensure the paint adheres smoothly. -
Protect stem:
If you want to keep the natural brown stem unpainted, carefully wrap it with painter’s tape or simply be very mindful when painting near the top. -
Mix your color:
To achieve that soft, natural lemon look, mix a bright lemon yellow with a small dollop of cream or white paint. This prevents the color from looking too neon or artificial. -
Apply first coat:
Using your medium flat brush, apply a thin, even layer of your yellow mixture all over the pumpkin. Start from the top and brush downwards into the grooves. -
Dry time:
Allow this initial coat to dry for about 20-30 minutes. It might look streaky at this stage, but don’t worry, that’s normal.
Natural Texture
Use a dry brush technique with a tiny bit of white paint on the raised ribs to mimic the slightly waxy, textured skin of a real lemon or gourd.
Step 2: Building Color and Texture
-
Second coat:
Apply a second coat of the yellow paint. I like to use slightly thicker paint here to ensure full coverage over the original pumpkin skin. -
Highlighting ribs:
While the second coat is still slightly tacky, take a small amount of pure yellow on your brush and gently run it down the center of each pumpkin rib to create subtle dimension. -
Darkening grooves:
Conversely, you can mix a tiny drop of orange or brown into your yellow and use the small round brush to paint deep into the creases to emphasize the pumpkin’s shape. -
Stem maintenance:
If you got any yellow paint on the stem, now is the time to wipe it off with a damp paper towel or paint over it with a dark brown to restore the natural look. -
Sealing:
Once you are happy with the color opacity and the paint is fully dry, spray a light coat of matte or satin sealer to protect the finish and give it a slight sheen like a real fruit peel.
Scent Infusion
Rub a drop of lemon essential oil onto the unpainted bottom of the pumpkin to give your display a fresh citrus scent to match the look.
Step 3: Adding the Greenery
-
Select leaves:
Choose flexible vines with small, triangular leaves that mimic citrus foliage. Real cuttings work beautifully for short-term display, while faux vines last all season. -
Shape the vine:
Cut a length of vine that is about twice the circumference of your pumpkin. Gently bend it so it has a natural curve. -
Create a base loop:
Twist one end of the vine into a loose circle that can sit underneath or just to the side of the pumpkin base. -
Position the pumpkin:
Place your dry, painted pumpkin onto the windowsill or display surface. -
Arrange foliage:
tuck the vine underneath one side of the pumpkin, allowing the loose end to trail out naturally. I prefer to let a few leaves rest against the painted skin for contrast. -
Secure strays:
If your vine is unruly, use small bits of green floral wire to bind branches together underneath the pumpkin where they won’t be seen. -
Final touch:
Adjust the leaves so they look windswept and casual, rather than perfectly symmetrical, to enhance the organic feel.
Enjoy the bright and cheerful atmosphere this lemon-inspired pumpkin brings to your home
Yellow Pumpkin Ombre Fade Into Cream
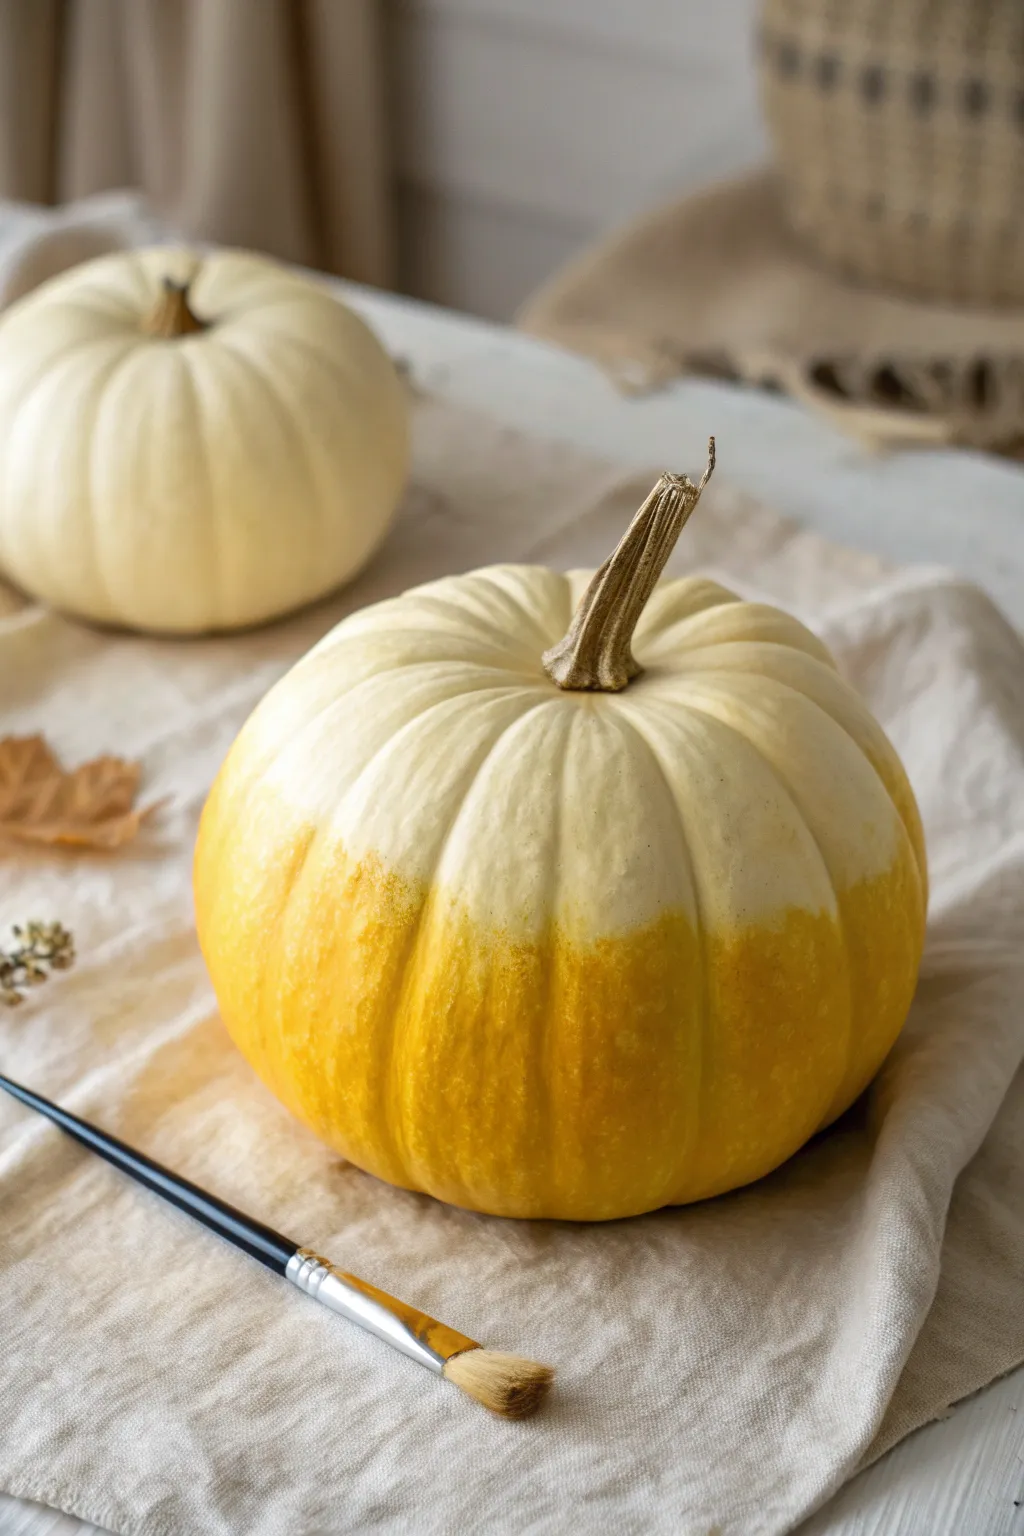
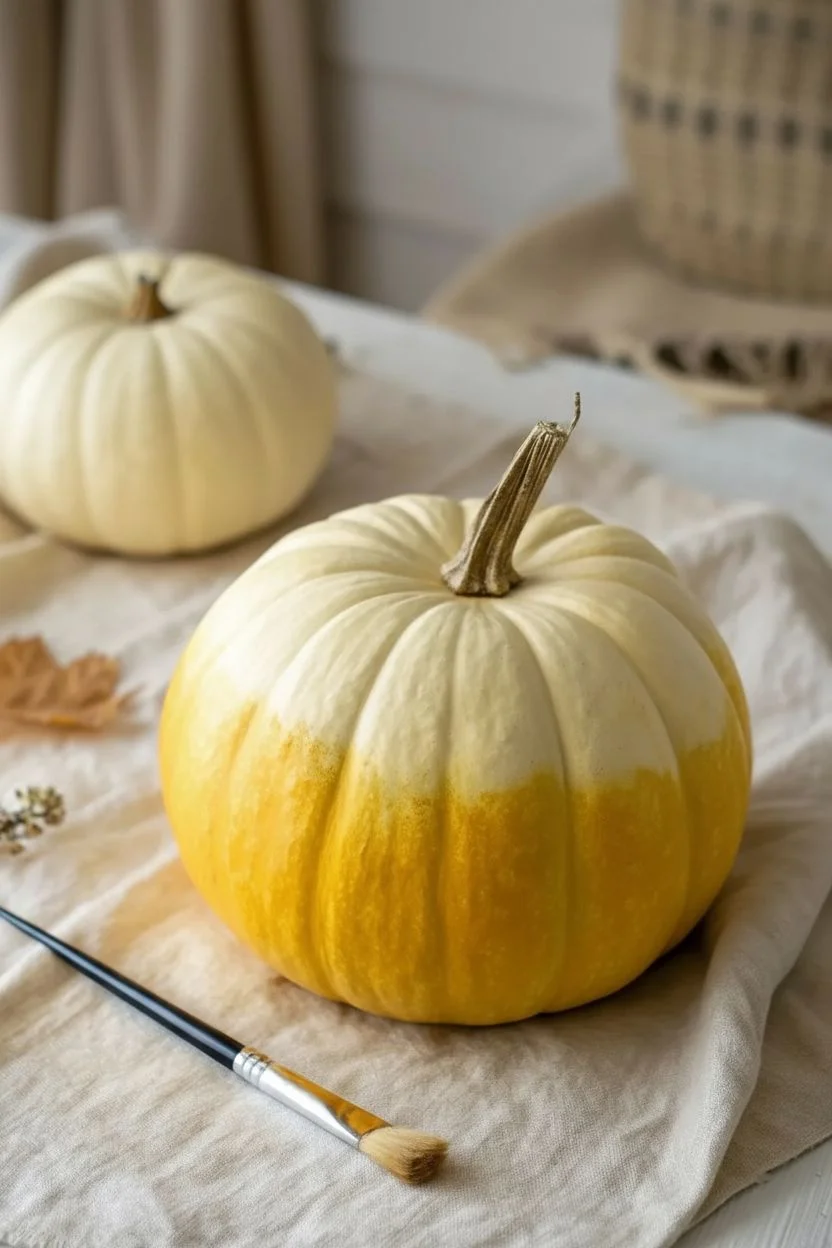
Recreate the warm glow of late autumn sunlight with this elegant ombre pumpkin modification. By blending a cheerful marigold yellow into the natural creaminess of a white pumpkin, you achieve a sophisticated two-tone look that bridges the gap between Halloween fun and chic Thanksgiving decor.
Step-by-Step Tutorial
Materials
- Medium-sized white pumpkin (real or faux)
- Acrylic craft paint (marigold or golden yellow)
- Wide flat paintbrush (approx. 1 inch)
- Dry blending brush (soft bristle)
- Paper plate or palette
- Water cup
- Paper towels
- Matte finish clear sealant spray (optional)
Step 1: Preparation & Base Coat
-
Clean surface:
Begin by thoroughly wiping down your pumpkin with a damp cloth to remove any dirt or oils. If you are using a real pumpkin, ensure it is completely dry before applying paint. -
Load palette:
Squeeze a generous dollop of your marigold yellow acrylic paint onto your paper plate. You want enough paint available to work quickly while it’s wet. -
Paint the base:
Flip the pumpkin upside down or hold it securely by the stem. Using the wide flat brush, paint the entire bottom surface of the pumpkin yellow. -
Establishing the horizon:
Continue painting upwards from the bottom, covering the lower third of the pumpkin completely. Don’t worry about a neat line at the top edge yet; just get solid, opaque coverage on the bottom section.
Step 2: Creating the Ombre Fade
-
Feathering technique:
Once the solid bottom third is painted, start using lighter brush strokes to pull the yellow paint upward towards the middle of the pumpkin. -
Working the grooves:
Pay special attention to the deep vertical ribs of the pumpkin. Use the corner of your brush to push paint up into these crevices slightly higher than the ridges for a natural, organic look. -
Dry brush transition:
Wipe most of the paint off your brush onto a paper towel until it is almost dry. Use this ‘dry brush’ to lightly drag over the top edge of your wet paint line. -
Blur distinct lines:
Use quick, upward sweeping motions to blur the boundary where the yellow paint meets the white pumpkin skin. The goal is to eliminate any hard stop lines. -
Stippling effect:
For a smoother gradient, I find that gently tapping (stippling) the transition area with a clean, dry blending brush helps diffuse the yellow pigment into a soft haze. -
Second layer application:
While the transition dries, go back to the very bottom of the pumpkin and apply a second coat of yellow to ensure the color is rich and saturated at the base. -
Checking the height:
Step back and look at the pumpkin from eye level. Ensure the fade effect starts roughly at the midline so the top remains bright white. -
Refining the fade:
If the transition looks too abrupt, dip your brush in a tiny bit of water (almost none), wipe it off, and gently rework the edge where the colors meet to soften it further.
Paint drying too fast?
If the acrylic sets before you can blend it, mix in a few drops of ‘acrylic retarder’ medium. This slows drying time, giving you longer to perfect that smooth fade.
Step 3: Finishing
-
Stem cleanup:
Check the stem area to ensure no accidental yellow smudges made their way to the top. Wipe them away immediately with a damp cloth if found. -
Drying time:
Allow the pumpkin to sit undisturbed for at least one hour until the paint is completely dry to the touch. -
Sealing the work:
If this pumpkin will sit on a porch, lightly mist the painted area with a matte clear sealant spray to protect your ombre effect from moisture.
Smoother Gradient
Use a damp makeup sponge instead of a brush for the transition area. Dab lightly at the paint line to create a soft, airbrushed look without visible bristles.
Place your warm, sun-dipped creation on a linen cloth to let its golden hues really shine
Yellow Pumpkin With White Floral Line Art
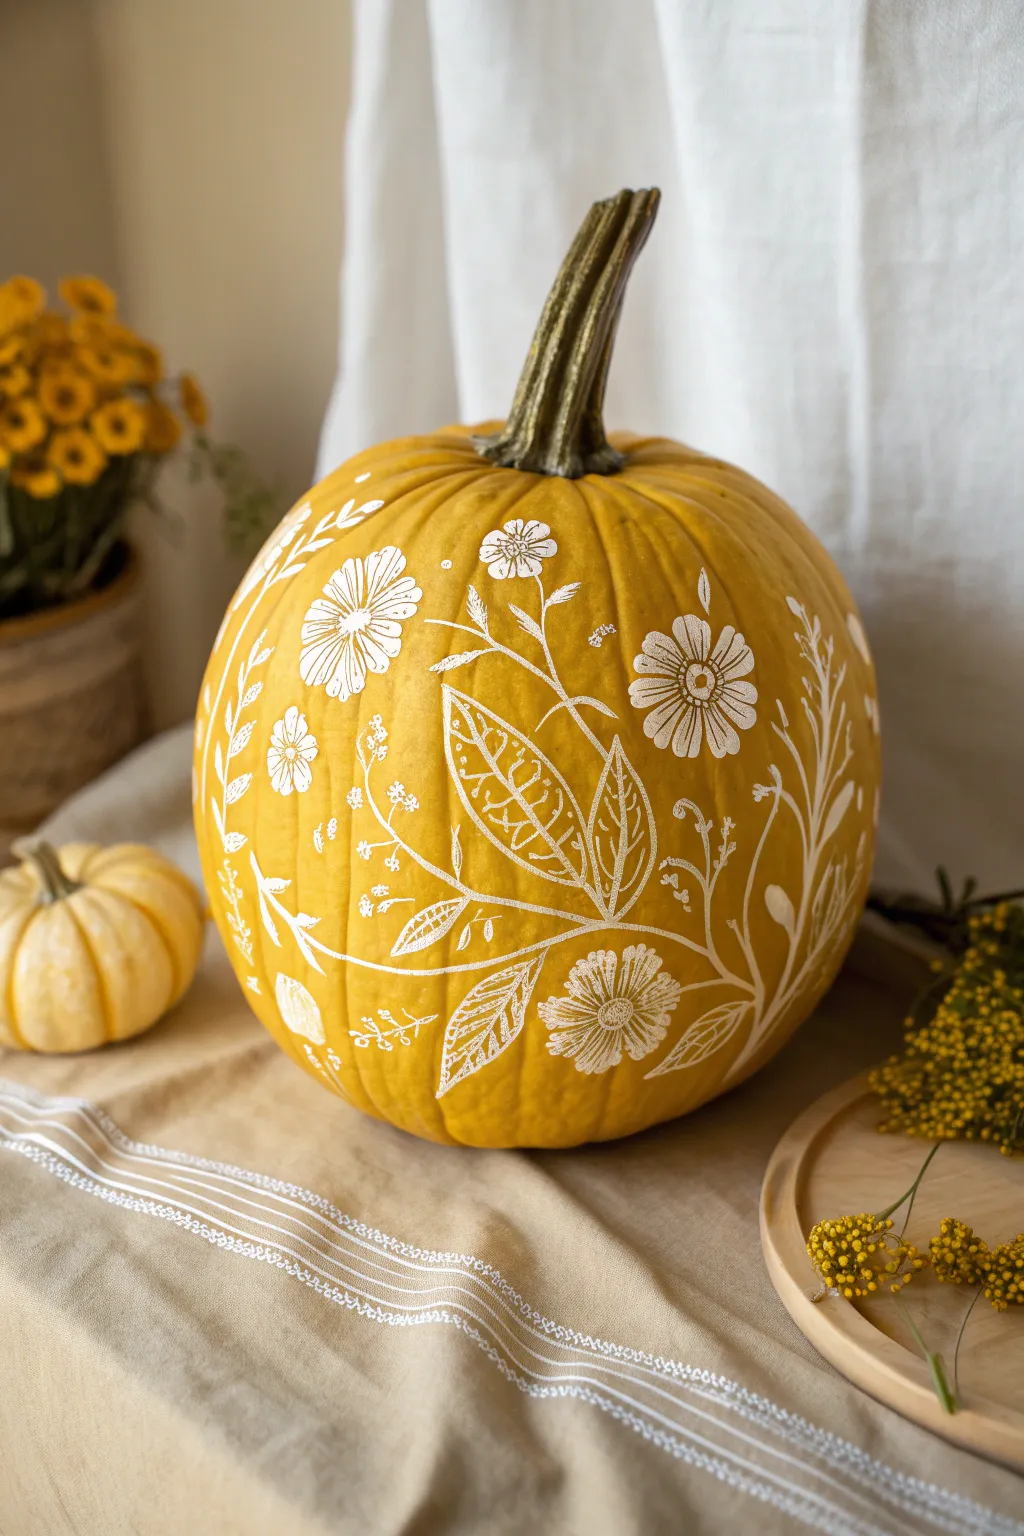

Transform a cheerful yellow pumpkin into a canvas for delicate botanical art with this simple white line drawing project. The high-contrast look creates a modern farmhouse vibe that feels both sophisticated and handmade.
Detailed Instructions
Materials
- Medium-sized yellow pumpkin (fresh or high-quality faux)
- White paint pen (oil-based works best)
- Fine-point white paint pen (for details)
- Pencil (soft lead like 4B)
- Damp cloth or paper towel
- Paper for practice sketching
- Clear matte sealer spray (optional)
Step 1: Preparation and Planning
-
Clean surface:
Thoroughly wipe down your pumpkin with a damp cloth to remove any dirt, dust, or oily residue that might prevent the paint markers from adhering properly. -
Dry completely:
Allow the pumpkin to air dry fully. If you rush this step, the moisture can cause your paint pens to run or dilute the white pigment. -
Sketch on paper:
Before touching the pumpkin, practice your floral motifs on a piece of paper. I like to sketch out a few variations of daisies, leaves, and vine tendrils to get a feel for the shapes. -
Plan placement:
Visualize where your main flower clusters will go. Aim for an organic flow that wraps around the curve rather than a stiff, centered pattern.
Step 2: Drafting the Design
-
Light pencil sketch:
Using a soft pencil, very lightly map out the main stems and large flower centers directly on the pumpkin skin. Keep the pressure minimal so you don’t indent the pumpkin. -
Draw main stems:
Mark the sweeping curves of the primary stems first. These act as the ‘spine’ of your design, anchoring the flowers and leaves. -
Outline major blooms:
Roughly circle where the largest flower heads will sit. Don’t worry about drawing every petal yet; just establish the size and position.
Paint Pen Won’t Flow?
If the ink skips on the waxy skin, wipe the tip on a damp cloth to unclog it. Shake well and re-prime on paper. Oil-based pens grab onto pumpkin skin much better than water-based ones.
Step 3: Inking the Botanicals
-
Prime the pen:
Shake your medium-tip white paint pen vigorously and depress the nib on a scrap piece of cardboard until the ink flows smoothly. -
Draw flower centers:
Start with the centers of your main flowers. Draw small circles or stippled dots to create texture in the middle of the blooms. -
Add petals:
Work outward from the centers, drawing simple, elongated oval petals. Leave small gaps between lines to maintain that sketchy, illustrated look. -
Connect stems:
Trace over your pencil stem lines with the paint pen. Vary the pressure slightly to give the stems a natural, tapered thickness. -
Add large leaves:
Draw the outline of the large leaves attached to the main stem. Fill the interior of the leaves with vein lines rather than solid color. -
Create leaf details:
For the leaf veins, use lighter strokes. You can create a ‘skeletal’ look by drawing a central line and branching smaller veins outward.
Mix Up The Botany
Don’t stick to just one flower type. Mix simplistic daisies with fern-like fronds and wheat-style stalks. The contrast between round petals and spiky leaves makes the design pop.
Step 4: Adding Fine Details
-
Switch to fine point:
Change to your fine-point paint pen for the delicate filler elements. This contrast in line weight adds professional depth to the artwork. -
Draw sprigs:
Fill empty spaces with smaller sprigs of tiny buds or baby’s breath style clusters. These should feel lighter and airier than the main flowers. -
Add wispy tendrils:
Extend a few curling lines off the main stems to mimic vines reaching out. These soften the edges of the design. -
Layer textures:
Go back over the flower centers with the fine tip to add tiny dots or cross-hatching for extra dimension. -
Clean up:
Once the paint is 100% dry (give it at least 30 minutes), gently erase any visible pencil marks with a clean eraser. -
Seal (Optional):
If you plan to keep the pumpkin outside, mist it lightly with a matte clear sealer to protect your gorgeous line work from moisture.
Now you have a stunning, hand-drawn centerpiece that captures the gentle beauty of autumn flora
Yellow Pumpkin With Metallic Gold Highlights
Transform a simple yellow pumpkin into a sophisticated centerpiece element by enhancing its natural texture. This project focuses on accentuating the pumpkin’s deep ribs with dark, contrasting tones while highlighting the ridges with metallic warmth for a cozy autumn glow.
Step-by-Step
Materials
- Small to medium yellow pumpkin (real or high-quality faux)
- Dark green acrylic paint (forest or olive shade)
- Brown acrylic paint (umber)
- Metallic gold paint or gold leaf pen
- Fine liner paintbrush
- Small flat shader brush
- Paper towels or soft cloth
- Mixing palette
- Matte spray sealer (optional)
- Damp sponge
Step 1: Preparation and Base Coat
-
Clean the surface:
Begin by thoroughly wiping down your pumpkin with a damp cloth to remove any dirt or waxy residue. If you are using a real pumpkin, ensure it is completely dry before proceeding. -
Inspect the color:
If your pumpkin isn’t naturally the bright, sunny yellow shown in the photo, give it a base coat of yellow acrylic paint mixed with a touch of cream. Let this base layer dry completely. -
Define the stem:
Paint the stem with a mix of brown and dull green to create a natural, woody look. I like to dry brush a little lighter beige on the high points of the stem for texture.
Step 2: Creating Depth in the Grooves
-
Mix the shadow color:
On your palette, mix a small amount of dark forest green with burnt umber. You want a color that looks almost black but retains an earthy mossy undertone. -
Apply the shadow:
Using your fine liner brush, paint a thin line of this dark mixture deep into the recessed grooves (ribs) of the pumpkin. Start from the stem and pull the brush downward toward the base. -
Feather the edges:
Before the dark paint dries fully, take a clean, slightly damp flat brush and gently feather the edges of the painted line outward. This prevents the shadow from looking like a harsh stripe. -
Add texture marks:
Dip your fine brush back into the dark mix and create tiny, irregular speckles or broken lines along the sides of the grooves to mimic organic imperfections. -
Repeat around the pumpkin:
Continue this process for every vertical groove on the pumpkin, ensuring the darkness is most concentrated deepest in the cracks. -
Deepen the contrast:
Once the first shadow layer is dry, go back over just the very deepest part of the groove with pure dark green to intensify the depth.
Paint Looking Streaky?
If your shadow lines look too harsh, instantly wipe them with a damp sponge to blur. Acrylic dries fast, so work one groove at a time.
Step 3: Adding the Gold Highlights
-
Select your gold:
Choose a metallic gold paint that has a warm, yellow undertone rather than a cool champagne tone to match the pumpkin’s warmth. -
Dry brush technique:
Load a small amount of gold paint onto a flat brush, then wipe most of it off onto a paper towel until almost no paint remains. -
Highlight the ridges:
Gently sweep the dry brush over the raised parts of the pumpkin skin (the hills between the grooves). Focus on the areas that would naturally catch the light. -
Accentuate the top:
Apply a slightly heavier touch of gold near the ‘shoulders’ of the pumpkin where it curves in toward the stem. -
Gild the stem base:
Take your fine liner brush with gold paint and carefully outline the very base of the stem where it meets the pumpkin skin for a subtle division. -
Detail the imperfections:
Find any natural bumps or warts on the pumpkin surface and tap them lightly with gold to turn flaws into features. -
Final assessment:
Step back and look at your pumpkin under good light. If the gold looks too subtle, add a second light layer of dry brushing to build up the shimmer. -
Seal the work:
To protect your paint job, especially if using a real pumpkin that might ‘sweat,’ mist the entire piece lightly with a matte sealer.
Level Up: Texture
Mix a pinch of baking soda into your base yellow paint before applying. This creates a gritty, realistic gourd texture that grabs the gold highlights better.
Place your gilded creation among fairy lights to watch the metallic accents truly shine
Abstract Yellow Pumpkin Drip-Paint Moment
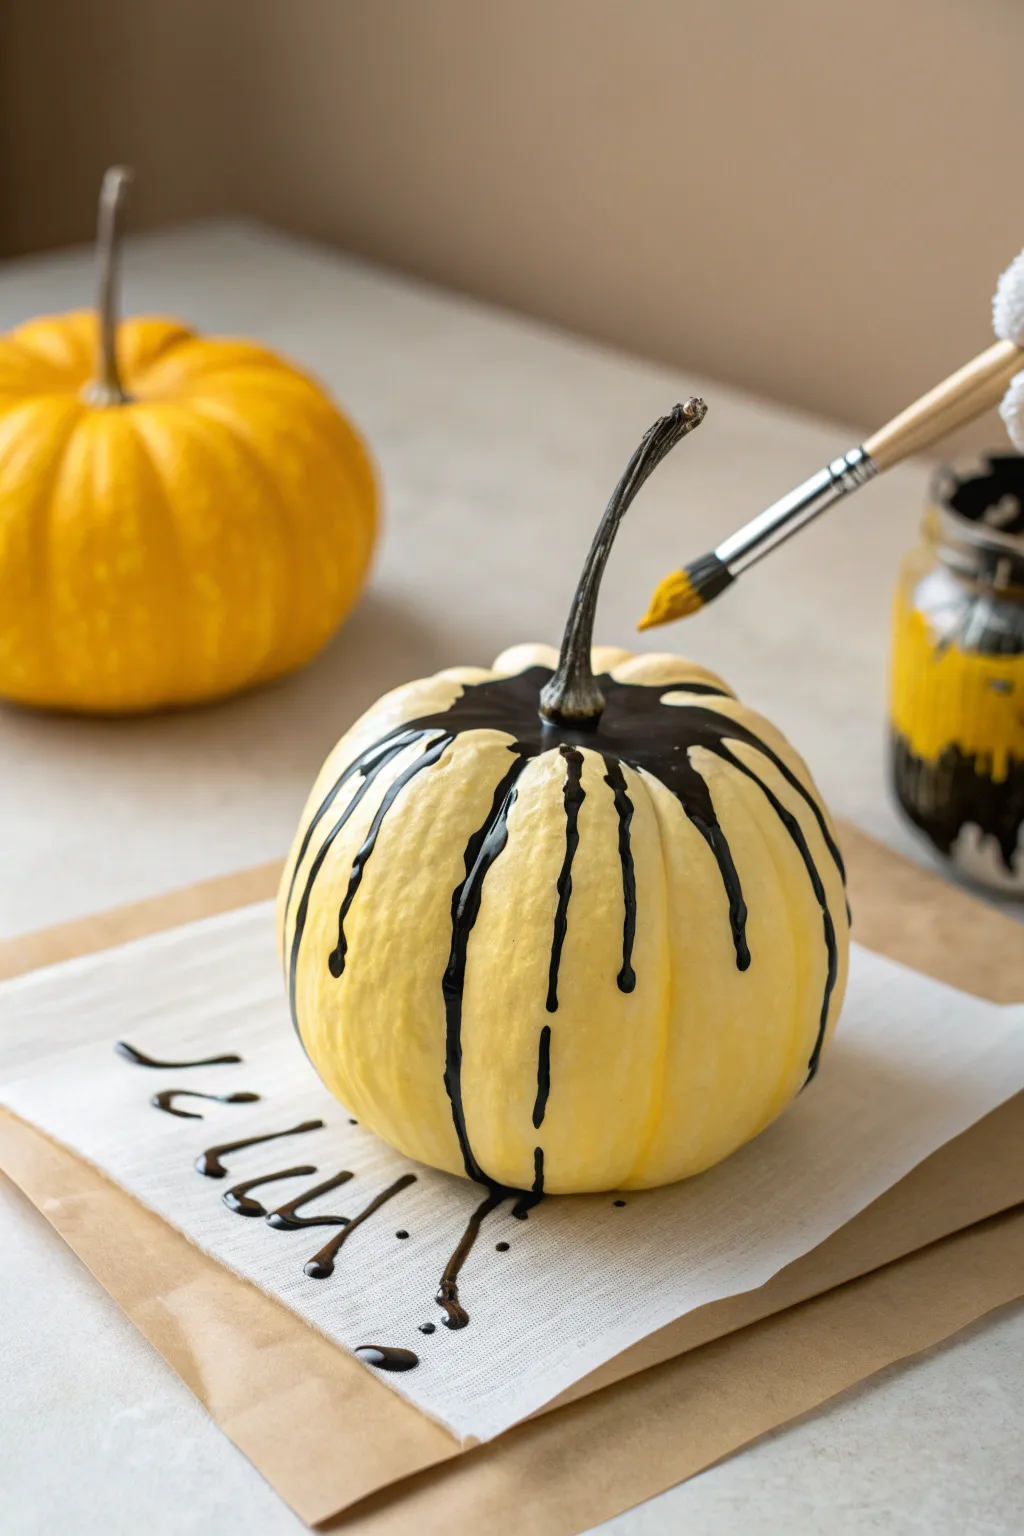
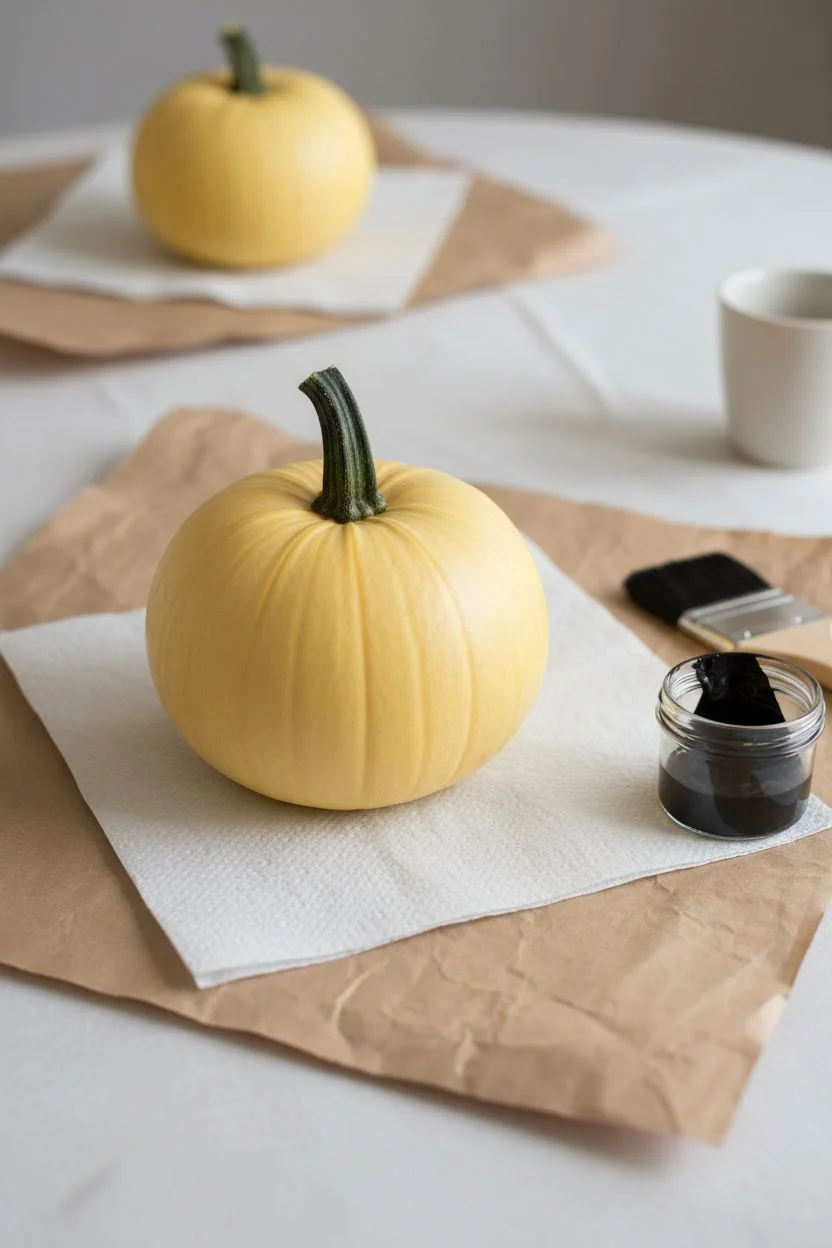
Transform a classic cream pumpkin into a piece of modern art with this bold and contrast-heavy project. By letting gravity do most of the work, you create striking, organic lines of black paint that flow down the sides, resulting in a spooky-chic centerpiece.
Detailed Instructions
Materials
- Small to medium cream or pale yellow pumpkin (real or faux)
- Black acrylic paint (high flow or fluid consistency works best)
- Medium round paintbrush
- Brown craft paper or newspaper (for table protection)
- White tissue paper or paper towel
- Small cup or jar for paint
- Water for thinning paint
- Spray sealant (optional)
Step 1: Preparation
-
Clean surface:
Begin by wiping down your pumpkin with a damp cloth to remove any dirt or waxy residue. If using a real pumpkin, ensure it is completely dry before applying any paint. -
Protect workspace:
This project gets messy by design, so lay down a generous sheet of brown craft paper to catch the inevitable drips. Place a square of white tissue paper or a paper towel directly under where the pumpkin will sit. -
Prepare paint:
Pour your black acrylic paint into a small container. If the paint is heavy body, mix in a few drops of water at a time until it reaches the consistency of heavy cream—it needs to be fluid enough to run but thick enough to stay opaque.
Step 2: Creating the Drips
-
Base application:
Load your brush heavily with the thinned black paint. Start right at the base of the stem, pressing the brush down to create a small pool of paint on the shoulder of the pumpkin. -
Guide the flow:
Gently push the pooled paint over the edge of the pumpkin’s shoulder. Let gravity take over as the stream travels down the natural grooves of the pumpkin skin. -
Add variety:
Repeat this process around the stem, but try to vary the amount of paint you load on the brush each time. Some drips should be long and reach the bottom, while others can stop halfway down. -
Control the path:
I actually prefer to gently tilt the pumpkin slightly while the paint is wet if I want a drip to curve around a specific bump or imperfection. -
Thicken the collar:
Once your main drips are established, go back to the top area around the stem. Paint a solid ring connecting all the drip starting points to create a cohesive black ‘collar’ that looks like it’s melting downward. -
Enhance opacity:
Check your drips for transparency. If the yellow shows through too much on the black lines, carefully retrace the path with a second layer of paint while the first layer is still tacky but not fully dry.
Paint Too Runny?
If drips are moving too fast and looking watery, let your paint mix sit for 5 minutes to thicken slightly, or add a tiny drop of un-thinned paint back into the mix.
Step 3: The Spilled Effect
-
Pool the bottom:
Allow some of the heavier drips to run all the way off the pumpkin and onto the white tissue paper below. This connects the object to its environment visually. -
Create faux writing:
Using the remaining paint on your brush, create abstract, calligraphy-like squiggles on the paper near the base. These don’t need to be real words; just mimic the flow of cursive writing. -
Add drop accents:
Dip just the tip of your brush and let tiny droplets fall onto the paper around the pumpkin to add dynamic energy to the composition. -
Dry time:
Let the pumpkin sit undisturbed for at least 2-3 hours. Thick drips take much longer to dry than standard brushstrokes, so be patient to avoid smudging. -
Clean the stem:
If you accidentally got black paint on the stem itself, you can wipe it off now with a slightly damp paper towel, or leave it for a grungier look. -
Optional Sealant:
Once fully dry, you can mist the pumpkin with a clear sealer to make the black paint look glossy and wet permanently.
Pro Tip: Stem Contrast
Keep the stem natural! Covering the stem in paint flattens the look, but leaving it twisted and brown adds a crucial organic texture that contrasts with the glossy paint.
Place your striking drip-art pumpkin on a mantle or tablescape for an effortlessly cool seasonal accent
Textured Yellow Pumpkin Using Stippled Brushwork
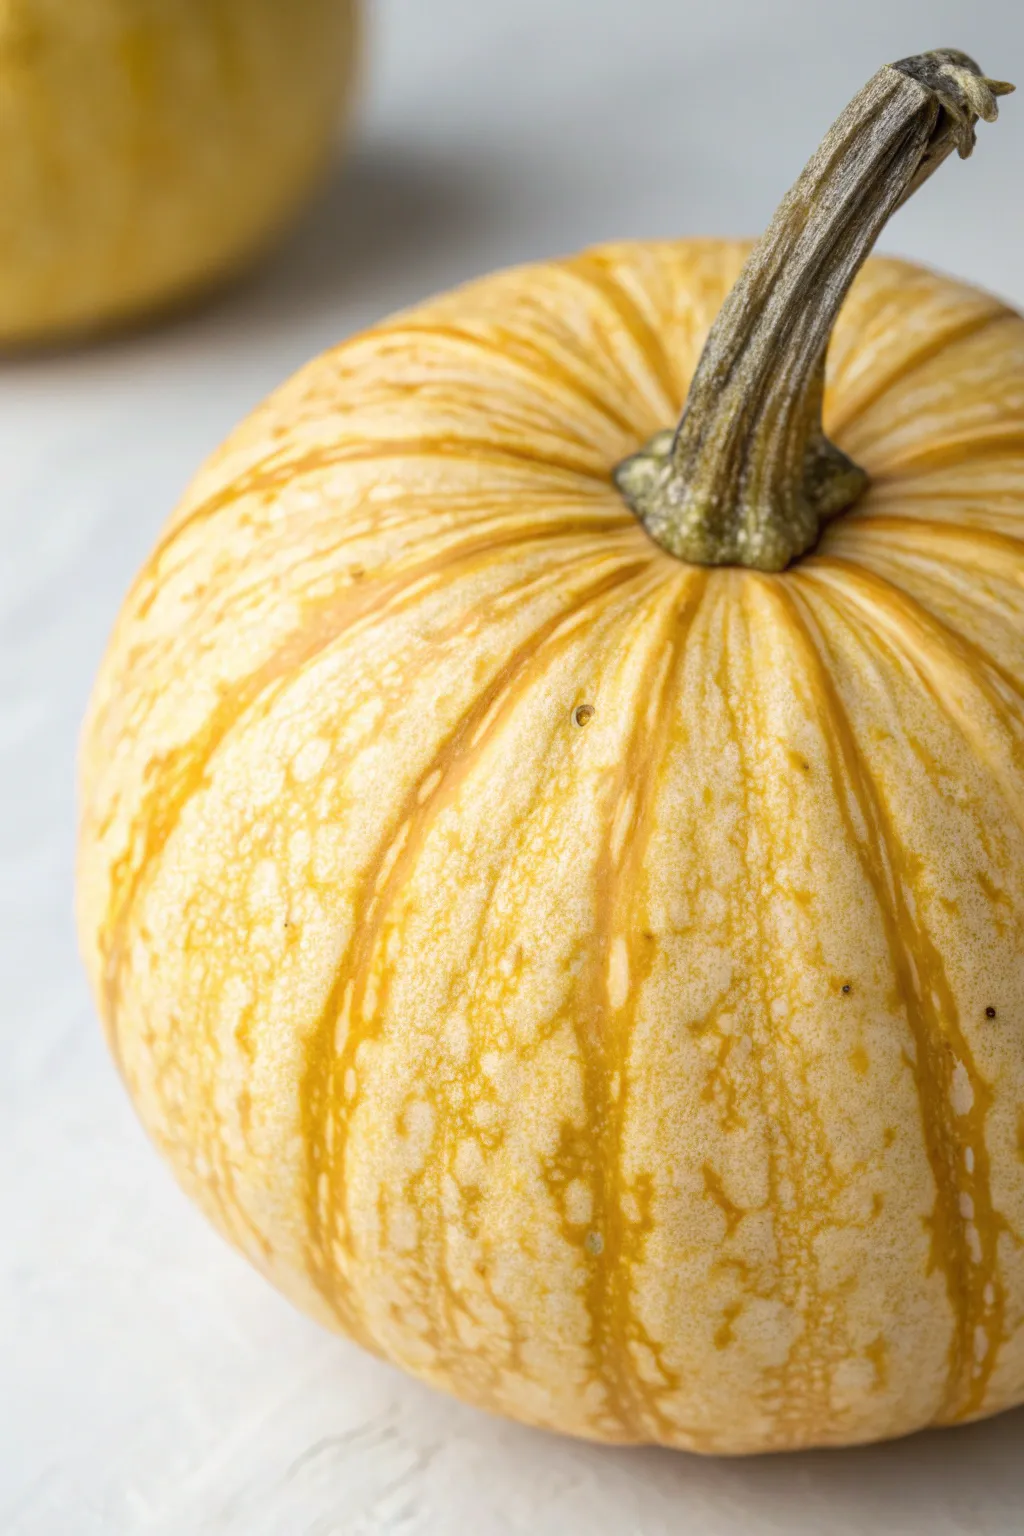
Capture the organic beauty of autumn with this detailed acrylic painting study that focuses on texture and pattern. You’ll layer washes and precise stippling to recreate the mottled skin and deep ribs of a small yellow pumpkin.
Step-by-Step
Materials
- Heavyweight watercolor paper or primed canvas board (8×10 inch)
- Acrylic paints: Titanium White, Yellow Ochre, Cadmium Yellow Medium, Burnt Sienna, Raw Umber, Sap Green
- Soft synthetic round brushes (sizes 2, 6)
- Small stipple brush or old, frayed round brush
- Palette and water container
- Paper towels
- Pencil (HB) and eraser
Step 1: Base Structure & Underpainting
-
Outline the form:
Begin by lightly sketching a slightly flattened oval shape for the pumpkin’s body. Add the stem at the top, slightly off-center to the right, leaning diagonally. -
Map the ribs:
Draw curved lines radiating from the base of the stem down to the bottom of the pumpkin to define the ribs. These lines should curve with the form, wider in the middle and converging at the top. -
Background wash:
Mix a very watery wash of Titanium White with the tiniest touch of Raw Umber to create an off-white background. Paint loosely around your sketch, avoiding the pumpkin itself. -
Base tone application:
Mix a pale, creamy yellow using Titanium White and a small amount of Yellow Ochre. Apply this as a flat base coat over the entire pumpkin body. -
Stem base coat:
While the pumpkin dries, mix Sap Green with Raw Umber and a touch of White to get a desaturated, brownish-green. Paint the entire stem shape with this flat color.
Too Polka-Dotted?
If your stippling looks too uniform, glaze over the area with a thin wash of your base yellow color. This pushes the dots back, making them look like subsurface texture.
Step 2: Defining Volume & Texture
-
Shadowing the ribs:
Create a wash of Yellow Ochre. Using your size 6 round brush, glaze along the pencil lines you drew for the ribs. This deepens the valleys where the ribs meet. -
Deepening the crevices:
Mix Yellow Ochre with a tiny bit of Burnt Sienna. With a smaller brush, paint thinner lines inside the shadows you just created, focusing on the upper section near the stem. -
Initial mottling:
Using a very dry brush or a sponge, lightly dab a mix of Cadmium Yellow and White onto the high points of the ribs (the ‘hills’) to create a varied, non-uniform surface. -
Stem texture – darks:
Switch to your smallest brush. Mix Raw Umber with a little Sap Green (no white this time). distinct, vertical striations up the length of the stem to mimic the woody texture. -
Stem texture – lights:
Mix a pale grey-green. Paint thin highlight lines between the dark striations on the stem, reinforcing the fibrous look.
Step 3: The Stippled Skin Effect
-
Mixing the speckle color:
Create a warm, golden-orange mix using Yellow Ochre and a hint of Burnt Sienna. Dilute it slightly so it flows but remains opaque. -
Stippling technique:
Load your stipple brush or an old, frayed brush with the golden-orange mix. Dab off excess paint on a paper towel until the brush is almost dry. -
Applying the pattern:
Gently tap the brush onto the pumpkin surface. Focus the density of these stipples along the depressed lines of the ribs, letting them fade out as you move toward the highlighted centers of the ribs. -
Creating the variegated look:
I find it helpful to go back with a clean, damp brush and gently soften some of the stippled edges while the paint is still tacky, so the spots look like they are ‘in’ the skin, not just sitting on top. -
Adding dark accents:
Take a fine detail brush with pure Burnt Sienna. Add tiny, individual dots or ‘freckles’ randomly across the skin, clustering a few near the base of the stem for realism. -
Defining the stem connection:
Mix a dark brownish-green. Paint the crevice where the stem meets the pumpkin skin, darkening under the rim of the stem to make it look securely attached. -
Final highlights:
Mix a bright, almost pure Titanium White. Dry brush a subtle highlight on the absolute highest curve of the pumpkin on the left side to simulate soft lighting.
Pro Tip: Organic Imperfection
Don’t make your rib lines perfectly smooth arcs. Add slight wobbles and breaks in the line work to mimic the natural, bumpy growth of a real pumpkin.
Step back and admire the wonderfully tactile surface you’ve created on your autumnal study


Have a question or want to share your own experience? I'd love to hear from you in the comments below!