Clay crafts may seem simple at first glance, but the right painting approach transforms a plain surface into a personal work of art. The beauty lies in exploring color, texture, and finish to give each piece its own quiet personality.
Preparing the Clay Surface

Before any paint touches the surface, proper preparation determines both durability and finish quality. Once your clay piece is fully dry or kiln-fired (depending on the medium), lightly sand any uneven areas with fine-grit sandpaper to achieve a smooth foundation. Remove dust using a damp, lint-free cloth and allow it to dry completely.
For unglazed air-dry clay or polymer clay, a thin layer of acrylic gesso or a diluted white-base paint acts as a primer. This seals the surface, increases paint adhesion, and prevents blotching. Fired ceramic pieces can usually be cleaned directly with alcohol before painting.
Choosing the Right Paint

Paint interacts differently with each clay type, and understanding those distinctions helps you achieve predictable, lasting results.
| Clay Type | Compatible Paints | Finish Notes |
|---|---|---|
| Air-dry clay | Acrylic, gouache | Matte to satin; seal afterward |
| Polymer clay | Alcohol ink, acrylic | Sheen depends on sealing choice |
| Ceramic (fired) | Underglazes, acrylics for craft use | Always seal for water resistance |
When I work with air-dry clay, I prefer acrylics because they strike a good balance between pigmentation and flexibility. They dry quickly yet remain workable long enough to blend gradients or soften edges with a damp brush.
Simple Painting Concepts to Explore

1. Layered Washes
Creating translucent washes allows the clay’s natural surface texture to remain visible. For this method, dilute acrylic paint with 40–50% water. Apply broad strokes, allowing each layer to dry before adding another. The result resembles mineral patina or aged plaster—a look that complements rustic home decor.
2. Stipple and Texture Accents
For a stone-like or weathered appearance, use a stiff, dry brush or sponge to dab contrasting shades over a dried base color. The irregular patterns mimic real geological textures. A touch of metallic pigment brushed on raised edges catches natural light beautifully on sculptural items or candle holders.
3. Minimal Line Art
A single steady brush stroke can make stronger visual impact than multiple layers. Once your base coat is dry, outline geometric motifs, small botanicals, or organic curves using a fine liner brush and matte black or white paint. This approach works nicely for coasters, pendant trays, or wall tiles.
4. Soft Gradient Techniques
Ombre transitions—moving gently from one hue to another—create depth and calmness. Blend wet acrylics directly on the clay surface, keeping edges slightly blurred with a damp sponge. Controlled mixing produces a smooth visual flow ideal for vases and planters.
Protective Finishes

A sealer not only enhances color but also protects paint from handling and moisture. Choose a matte varnish for a natural, stone-like texture or a gloss coat to emphasize color depth. Water-based polyurethane or clear acrylic sealer sprays work well for most indoor pieces. Always apply several light layers instead of one heavy coat to avoid clouding or drips.
For outdoor pieces, use UV-resistant sealants rated for ceramics. Avoid wax finishes unless the piece will stay indoors and dry—they can soften under heat or sunlight.
Combining Function and Aesthetics

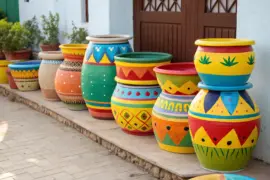
Painted clay doesn’t have to be purely ornamental. Simple bowls, name plaques, utensil holders, and jewelry trays all benefit from thoughtful color pairing. Muted earth tones convey calmness in a kitchen or workspace, while bright glazed accents create playfulness on garden decorations. Each project becomes a chance to connect creativity with day-to-day function.
When I paint small planters or pendant charms, I often work in series—using variations of one theme. This repetition encourages refinement in technique while producing cohesive sets that look intentional in any setting.
Encouragement for Experimentation
Clay painting rewards steady hands, curiosity, and patience rather than expensive tools. Mix handmade pigments with natural clays for earthy textures, or layer metallic foils for a touch of refinement. Expect small imperfections—they’re what make the piece unmistakably yours.