Painting on wood can turn a plain board into something striking and personal. With a modest toolkit and attention to surface preparation, almost anyone can achieve results that look polished, dimensional, and durable.
Understanding the Wood Surface

Wood behaves differently from canvas or paper because it’s fibrous, porous, and temperature-sensitive. Each wood type—pine, birch, maple—absorbs paint at different rates.
– Softwoods (like pine or cedar) tend to soak up more paint due to wider cell structure, producing a rustic or weathered look.
– Hardwoods (like oak, maple, or walnut) hold sharper details and give a smoother surface suitable for intricate designs.
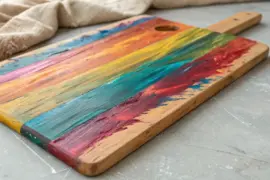
Wood’s natural grain is part of its appeal. The key is deciding whether to emphasize or conceal it. I often keep some grain visible, especially when creating botanical or geometric motifs, since it adds warmth that no synthetic surface can reproduce.
Preparation: Setting the Foundation

Preparation determines both durability and aesthetic precision. Even small shortcuts show later as uneven coverage, flaking, or warped surfaces.
Basic preparation checklist:
- Sand progressively. Begin with 120-grit sandpaper to remove rough fibers, then move to 220-grit for a fine finish. Always follow the grain.
- Clean carefully. Wipe dust off with a damp, lint-free cloth. Avoid soap residues—they can repel paint.
- Seal knots (especially in pine). Natural resins can bleed through lighter paints. A thin coat of shellac or sanding sealer prevents discoloration.
- Prime according to the final finish.
- For opaque designs: use a water-based primer that levels the surface and reduces absorption.
- For translucent washes or rustic looks: apply a thinned coat of acrylic medium instead, allowing partial visibility of the grain.
Choosing Paints and Tools

Different paint types produce distinct tactile and visual qualities.
| Paint Type | Surface Effect | Durability | Best For |
|---|---|---|---|
| Acrylic | Smooth, fast-drying, matte to satin | Moderate | Sign art, layered color fields |
| Chalk paint | Soft, velvety, vintage texture | Moderate | Rustic or distressed looks |
| Milk paint | Matte, slightly granular | High | Traditional finishes, aging effects |
| Oil paint | Rich color depth, longer open time | Excellent | Fine art detail, glazing |
For most beginners, acrylics offer the best balance of control and versatility. They adhere well when properly primed and can be sealed for outdoor projects. Use nylon brushes for smooth application or natural bristles for texture.
Beginner-Friendly Painting Techniques

The simplest techniques often make the strongest visual impact. These methods work well for beginners while offering room for subtlety and experimentation.
1. Dry Brushing
Use a minimal amount of slightly thick paint on a flat brush, sweeping it lightly across the grain. This highlights raised fibers and creates a weathered, layered appearance—ideal for decorative panels or furniture accents.
2. Layered Washes
Thin your paint with water (roughly 1:4 ratio) and build tone gradually. Light washes absorb into the higher fiber layers, producing soft gradients. I often use this for backgrounds in floral compositions or mood pieces where transparency adds depth.
3. Stenciling and Masking
Secure a stencil with low-tack tape. Apply pigment using a stippling brush or sponge in upward motions to avoid seepage. For modern designs, combine clean geometric lines with raw wood edges for contrast.
4. Glazing for Depth
Mix a glazing medium with small amounts of paint. Brush it over a fully dried base layer to tint or shadow specific areas. This technique plays with translucency and helps unify color tones.
5. Burnt Edges and Wood-Toning Effects
After painting, gently darken corners or lines with diluted umber or soft graphite. It subtly frames the composition and gives an aged, handcrafted aesthetic without heavy distressing.
Sealing and Finishing Touches
The finishing stage protects your work from moisture and UV light while enhancing color vibrancy. Choose the finish according to intended use:
- Matte sealant creates a contemporary, understated texture and hides minor surface flaws.
- Satin or semi-gloss emphasizes pigments and is easier to clean on tabletops or signage.
- Wax polish adds a tactile quality but should be reserved for indoor pieces.
Apply two or three thin layers, sanding very lightly between coats with 400-grit paper for a smooth, tactile surface.
Inspiration and Adaptable Project Ideas
- Personalized wall art: Combine masking tape lines with freehand organic forms for modern rustic appeal.
- Wooden trays or cutting boards: Use milk paint in muted colors, then seal with food-safe oil if used for dry items.
- Seasonal ornaments or signs: Experiment with layered washes and hand-lettering using round-tip brushes.
- Upcycled furniture: Revive a small side table or stool with dry-brushed chalk paint and sealed details.
What makes these techniques reliable is how naturally they evolve with practice. Even when the brush slips or a layer dries unevenly, those imperfections often become part of the piece’s story—proof of a human hand at work.
Final Thoughts
Painting on wood invites both control and spontaneity. Once the essentials of surface prep and layering are understood, you can explore style freely: from airy Scandinavian washes to bold mid-century abstractions. The tactile rhythms of grain and pigment always reward patience, precision, and curiosity.