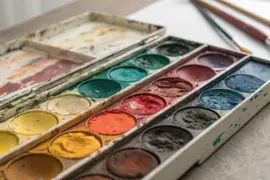
The difference between an amateur paint job and a professional one rarely comes down to luck. It’s about understanding how layers work together to create depth, richness, and durability that transforms a space.
Why Layering Changes Everything
When you apply a single coat of paint, you’re working against the physics of how paint performs. Paint is engineered to achieve its full color depth, durability, and protective qualities only when applied at a specific film thickness. One coat simply doesn’t deliver that—it leaves you with flatter colors, weaker stain resistance, and a finish that may look beautiful today but wears unevenly within months. Two coats reach nearly double the protective film thickness, which means colors stay vibrant, surfaces resist wear, and the overall appearance remains polished years down the line.
I’ve learned through countless hours of painting that layering is less about adding more and more paint, and more about understanding what each layer contributes to the final result. The first coat acts as a stabilizer, evening out how the surface absorbs paint. The second coat then builds uniform color and locks in durability. This deliberate approach transforms painting from a guessing game into a controlled process where the outcome is predictable.
Understanding Your Foundation: Preparation and Priming

Before your first decorative layer goes on, the foundation matters enormously. A clean, properly primed surface is where professional results begin. Over the years, I’ve watched rushed preparation sabotage otherwise perfect painting jobs.
Surface Cleaning
Start by removing everything that prevents paint from bonding: dust, grease, oils, and chalky residue. For interior walls, a mild detergent and water typically suffice. In kitchens or high-traffic areas where grease accumulates, trisodium phosphate (TSP) cuts through buildup more effectively. Don’t rush this step—paint adheres to clean surfaces through both chemical and mechanical bonding. Contamination compromises both.
The Primer Layer
Primer isn’t optional decoration. It seals the substrate, blocks stains, and creates uniform porosity so that topcoats adhere evenly. Think of primer as insurance. It creates a chemically compatible surface for your paint, allowing the colored layers above to perform at their intended level.
For most interior walls, a standard latex primer works well. For glossy surfaces you’re painting over, bonding primers grip much more effectively than standard options. In high-moisture areas like bathrooms, moisture-resistant primers prevent the problems that typically emerge months later.
Layering Finishes for Visual Depth
One of the most underutilized techniques in DIY painting is strategically layering different sheen levels. This creates the dimensional quality you see in professionally designed spaces.
Consider this approach: apply base coats in matte or eggshell finish—these sheens absorb light and provide a solid, forgiving foundation. Then finish with a glossier topcoat. This isn’t about making walls shiny. Instead, the subtle contrast means light reflects differently across the surface. A satin or semi-gloss topcoat over a flat base creates visual interest that a single matte finish simply can’t achieve.
| Sheen Layering Strategy | Effect | Best For |
|---|---|---|
| Matte base + Satin topcoat | Subtle depth, soft sheen | Walls in natural light |
| Eggshell base + Gloss accents | Focused visual interest | Trim, doors, architectural details |
| Matte throughout | Consistent, non-reflective surface | Ceilings, formal spaces |
| Satin or eggshell for all coats | Durable, practical versatility | High-traffic areas, kitchens |
Combining finishes in the same color deserves special mention here. Paint the same hue in flat finish on walls and glossy finish on trim. The eye perceives dimension even though it’s technically the same color. This technique adds sophistication without complexity.
The Two-Coat System: Where Professional Results Live

Most interior painting projects succeed with two coats. This isn’t arbitrary—it’s rooted in how paint performs.
A first coat establishes the base, evening out any variations in how the wall absorbs paint. You might notice the color looks somewhat flat or uneven at this stage. That’s normal. The surface is drinking in the paint inconsistently, and visually it shows.
Once this first coat dries completely, the second coat becomes transformative. It covers unevenness, enriches the color to its true depth, and locks in the durability the paint was formulated to provide. Colors that seemed washed out after one coat suddenly reveal their intended richness.
For the first coat, maintain steady pressure with your roller and use a W-shaped or up-and-down stroke pattern. Don’t worry about perfection—think in terms of even coverage rather than flawless appearance. Allow the specified drying time before applying the second coat. For latex paint at normal humidity and temperature (around 70°F and 50% relative humidity), this typically means 2 to 4 hours.
After the first coat has dried, lightly inspect the surface. Use fine-grit sandpaper—320-grit is ideal—to gently address any dust particles, small bumps, or rough spots. Use very light pressure and make long strokes in one direction. The goal isn’t to sand aggressively, but to create a smooth base for the second coat. Wipe away all dust thoroughly before proceeding.
Apply your second coat using the same methodical technique. This time, roll perpendicular to your first coat direction—if you went up-and-down initially, roll left-and-right now. This crosshatch approach ensures the paint levels properly and fills any slight variations from the first pass.
The Wet Edge: The Technique That Separates Good From Great

Maintaining a wet edge while painting prevents lap marks—those darker lines where wet and dry paint overlap. It’s one of the most important techniques to master, and it’s entirely about timing and planning.
Work in sections of manageable size. Cut in along the ceiling and trim with a brush while the wall paint is still wet, then roll the wall area. Plan your breaks at natural stopping points—windows, doors, or corners are ideal. By the time you finish rolling a section, you want the cut-in work still slightly wet. This allows the roller to blend seamlessly into the brushwork.
Apply paint about a short distance away from the edge of your previous work, then roll back toward the wet paint. This rolling-back motion draws the wet edge outward and prevents overlaps. If you’re working on an expansive wall, break it into vertical sections rather than trying to complete the entire wall in one pass.
You’re moving at a steady, deliberate pace. Not rushed, not leisurely. The paint should flow into adjacent wet areas, creating seamless transitions. If you notice your paint drying too quickly, it likely means the room temperature is too warm or humidity too low. Both slow evaporation—good news for wet-edge work.
The Feathering Technique: Smooth as Silk
Feathering is how professional painters eliminate visible brush strokes and create transitions so smooth they seem intentional rather than accidental. It’s simpler than you might think.
Load your brush with a small amount of paint—resist the urge to load heavily. Using very light pressure, apply paint with barely more than the tip of the brush making contact. Angle your strokes in multiple directions, almost crisscrossing lightly over the area. You’re not painting in neat lines; you’re feathering thin paint across the surface in varied directions.
The technique works because thinned paint self-levels. Rather than sitting in visible brush strokes, it flows and settles into a uniform finish as it dries. Each light pass adds just enough paint to build coverage without visible texture.
Use this technique along edges, at transitions between cut-in work and rolled areas, and anywhere you want to blend away lines. On trim work or architectural details, feathering alone can elevate the finished appearance from ordinary to refined.
Color Intensity Through Strategic Layering

Darker colors and highly saturated shades benefit substantially from understanding layering. Paint isn’t opaque in a single application the way we sometimes expect. Colors build with each coat, becoming progressively richer and more true to their intended hue.
If you’re painting a rich navy blue over white walls, expect the first coat to look more like a washed-out periwinkle. This isn’t failure—it’s simply how opacity builds. The second coat transforms it into the deep, saturated color you selected. For very deep or vibrant colors, a third coat occasionally necessary. Rather than assuming you need three coats from the start, apply two and assess. If the color lacks depth, one more coat completes the richness.
When painting a light color over previously dark walls, similar logic applies. You might need three coats to fully obscure the underlying color. This doesn’t mean painting thickly; it means applying thin, even layers and allowing each to dry before proceeding.
Sanding Between Coats: The Refinement Step
Light sanding between coats removes dust nibs, small bumps, and bristles that may have been caught during application. This step separates adequate finishes from exceptional ones, particularly if you’re using quality paint formulated to self-level.
Wait until the paint has completely dried—usually 24 hours for latex—before sanding. If you sand too soon, the paint is still too soft and will gunk up on the sandpaper rather than creating fine dust. Use 320-grit sandpaper or finer, using light pressure with long, straight strokes. You’re not removing paint; you’re smoothing the microscopic texture that accumulated on the surface.
After sanding, vacuum or wipe the surface thoroughly to remove dust. Any remaining particles will create bumps in your next coat. This discipline between layers is where patient painters achieve those flawless-looking walls.
Managing Environmental Factors
Paint doesn’t behave the same in all conditions. Temperature and humidity directly affect drying times and how well paint flows and levels.
The ideal painting window is 50°F to 85°F with humidity between 40% and 70%. In these conditions, paint dries at a predictable pace and has time to level properly. High humidity—typical in summer or in bathrooms—slows evaporation dramatically. This can actually be beneficial for wet-edge work, as paint stays workable longer. Conversely, low humidity in heated winter homes causes paint to dry so quickly that lap marks become nearly impossible to avoid.
If you’re painting during humidity extremes, modify your approach. In very humid conditions, take longer to complete a section—wet-edge painting is actually easier because the paint stays wet longer. In very dry conditions, work faster and perhaps reduce the area you tackle in one session. Ventilation helps, but open windows during painting can sometimes increase drying speed to problematic levels. Strike a balance.
Troubleshooting Common Layering Issues
Uneven coverage after two coats: Usually indicates insufficient surface preparation or incompatible primer for your chosen topcoat. The remedy is starting fresh with proper primer.
Visible brush strokes: This happens when brush pressure is too heavy or paint is applied too thickly. Solution: use the feathering technique with lighter pressure, or thin your paint slightly for better flow.
Lap marks persisting: These form when paint dries before you can blend it in. Prevent them by working in smaller sections, maintaining true wet-edge technique, and ensuring adequate ventilation without extreme drying conditions.
Patchy appearance: Often caused by uneven priming or primer not appropriate for your substrate. Each section of wall should prime and paint identically for uniform results.
Finishing Touches That Lock In Your Work
Once your layered paint has cured (typically 7-21 days for complete hardening, depending on humidity), consider your project complete but not finished. Avoid abrasive cleaning for a few weeks and use gentle products until the paint fully hardens.
For high-traffic areas or rooms prone to moisture, the layering foundation you’ve built provides lasting protection. The two-coat system protects against UV fade, moisture penetration, and daily wear far more effectively than single-coat applications. This durability justifies the extra time—because painting twice, done correctly, actually outlasts painting once, done carelessly.
The magic isn’t in complexity. It’s in understanding that professional results come from respecting how paint is formulated to perform, preparing properly, and applying layers strategically. Each coat serves a purpose. Each technique has a reason. When you layer thoughtfully, any paint looks professional.
(