There’s something instantly cozy about turning a humble fungus into a tiny dream home—part nature study, part storybook architecture. Here are my favorite mushroom house drawing ideas to help you build a whole little world, one sketch at a time.
Classic Spotted Toadstool Cottage
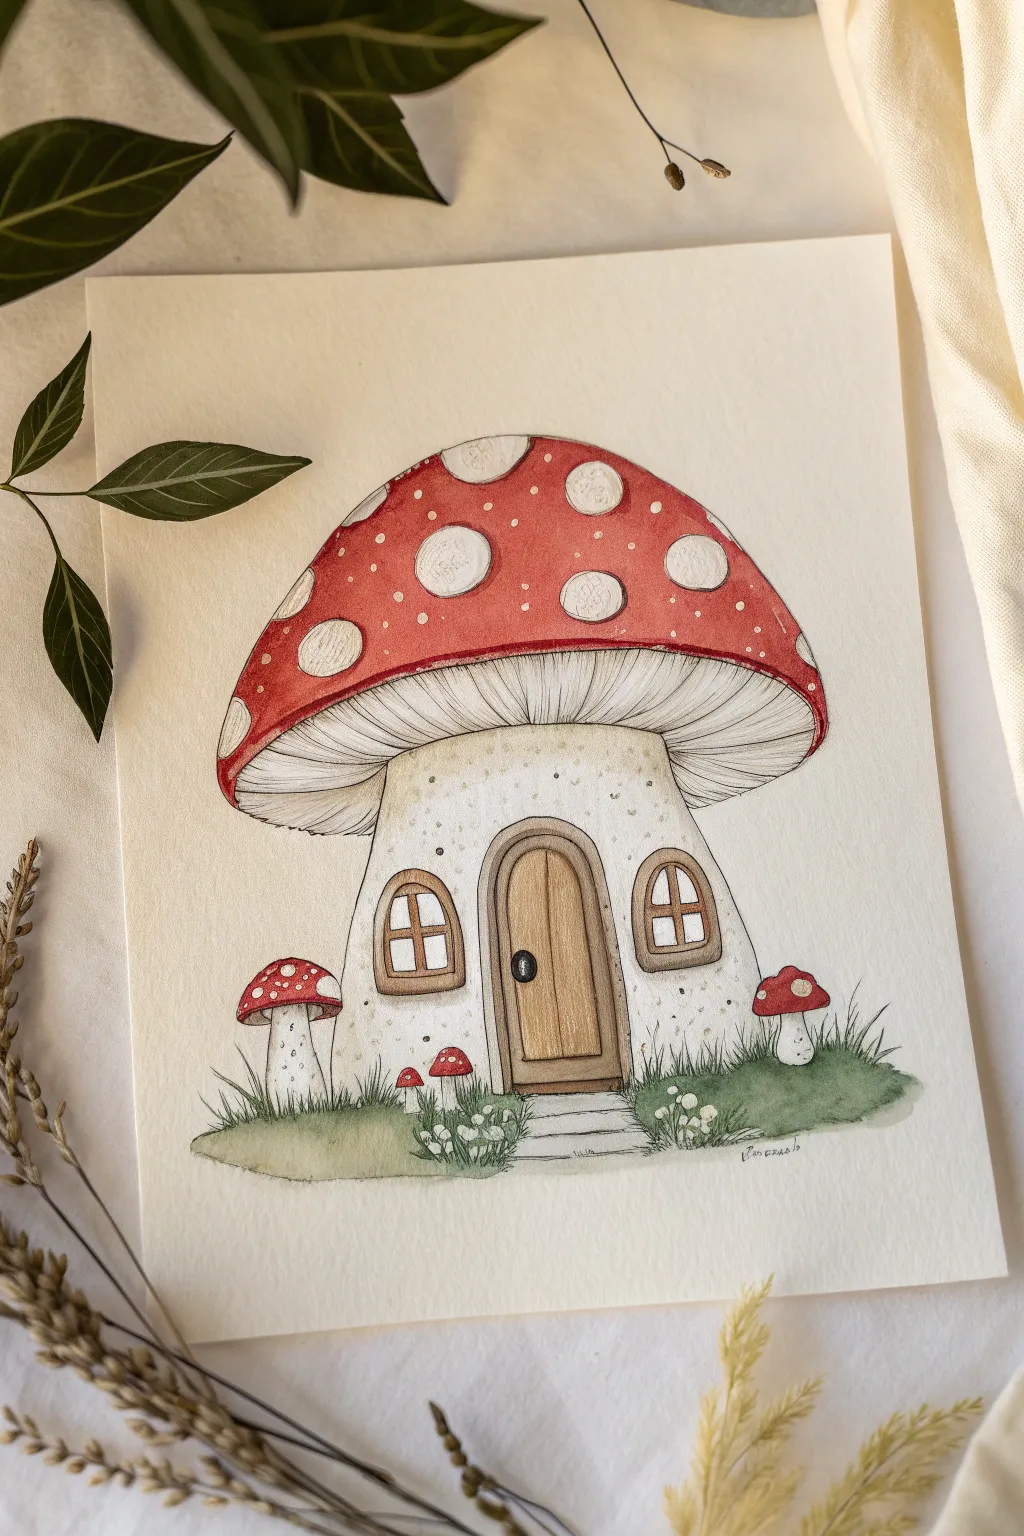
This charming illustration captures the cozy magic of a classic fly agaric mushroom turned into a forest dwelling. With its vibrant red cap, delicate ink lines, and earthy textures, this piece brings a touch of fairytale warmth to your paper.
Step-by-Step Tutorial
Materials
- Cold press watercolor paper (300 gsm)
- HB or H pencil
- Kneaded eraser
- Waterproof fine liner pens (0.1, 0.3, and 0.5mm, sepia or brown preferred)
- Watercolor paints (Alizarin Crimson, Vermilion, Yellow Ochre, Burnt Umber, Sap Green)
- White gel pen or white gouache
- Soft round watercolor brushes (sizes 2, 4, and 6)
- Small cup of water and paper towels
Step 1: Sketching the Foundation
-
Basic Shapes:
Start by lightly sketching a large semi-circle for the mushroom cap in the center of your page. Below it, draw a stout, slightly curving stalk that bells out at the bottom to form the house’s base. -
Adding Details:
Sketch a smaller, arched doorway in the center of the stalk and flank it with two arched windows. Add irregular circles of various sizes all over the cap for the classic toadstool spots. -
Surrounding Elements:
To ground your house, lightly draw a grassy mound at the base. Add a few smaller mushrooms—one medium on the left, a tiny one nearby, and a small one on the right—along with a stone path leading to the door. -
Refining Lines:
Go over your sketch to define the gills under the cap, curving them slightly to follow the mushroom’s form. Draw the wooden planks on the door and the window panes. Gently erase any heavy graphite lines until they are just faint guides.
Step 2: Inking the Outline
-
Main Outlines:
Using a 0.5mm brown or sepia fine liner, trace the main silhouette of the mushroom cap and stalk. A slightly shaky or broken line here adds organic character. -
Detailed Features:
Switch to a 0.3mm pen for the door frame, windows, and the smaller mushrooms. Use a 0.1mm pen for the delicate gills under the cap, drawing fine lines radiating from the stalk to the rim. -
Texture Work:
Add tiny stippling dots on the stalk to simulate texture, concentrating them near the top where the shadow of the cap would fall. Ink the grass blades using quick, upward flicks.
Bleeding Red Paint?
If your red paint bleeds into the white spots, don’t panic. Let it dry completely, then use opaque white gouache to paint over the mistake and reclaim the crisp circle shape.
Step 3: Painting the Cap
-
First Red Wash:
Mix a vibrant red using Vermilion and a touch of Crimson. carefully paint around the circular spots on the cap, leaving them the white of the paper. Keep the wash wet to avoid hard edges within the red areas. -
Deepening Shadows:
While the red is still slightly damp, drop in a deeper mixture of Alizarin Crimson along the bottom edge of the cap and near the darker sides to create volume. -
Gill Shading:
Dilute a tiny bit of grey or watered-down brown. lightly glaze over the gill area under the cap, keeping it very pale to let the ink lines show through.
Make It Magical
Add a chimney with a tiny wisp of smoke, or draw a tiny lantern hanging near the door to make the cottage look inhabited and extra cozy.
Step 4: Painting the House
-
The Stalk Walls:
Use a very watery wash of Yellow Ochre and a dot of brown to tint the house walls. Keep the center lighter to make the stalk look rounded. -
Woodwork:
Paint the door and window frames with Burnt Umber. Use a lighter tan mix for the door planks, adding a second layer of brown on the plank edges once dry to create separation. -
Grass and Ground:
Paint the grassy mound with Sap Green. Drop in darker green near the base of the house and under the small mushrooms for shadow. Paint the path stones with a light cool grey.
Step 5: Final Touches
-
Spot Detailing:
If the white spots on the cap look too stark, add a tiny bit of texture with a pale grey pencil or wash. I like to add a shadow on the lower right of each spot to make them look slightly raised. -
Highlights:
Once everything is completely dry, use a white gel pen or gouache to add tiny highlights to the red cap (small dots), the doorknob, and the tops of the grass blades. -
Shadows:
Use a diluted purple-grey mix to paint cast shadows under the window ledges and directly under the cap on the stalk to firmly ground the structure.
Your whimsical toadstool cottage is now ready to welcome tiny forest inhabitants


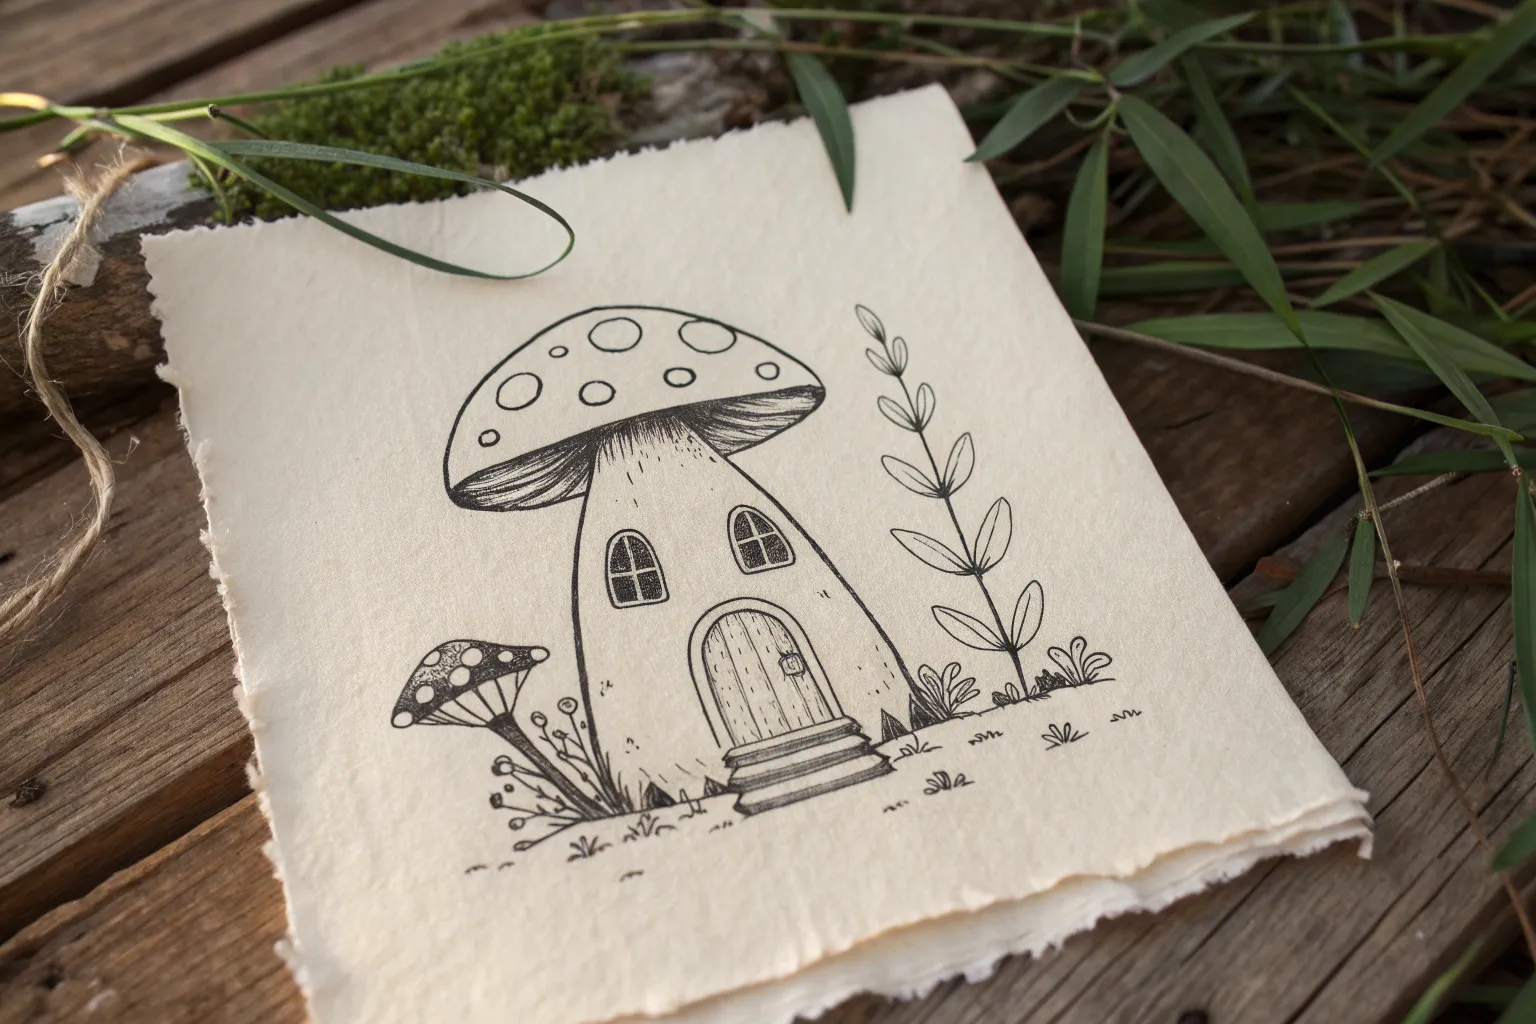
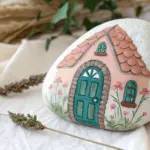
Arched Door Carved Into the Stem
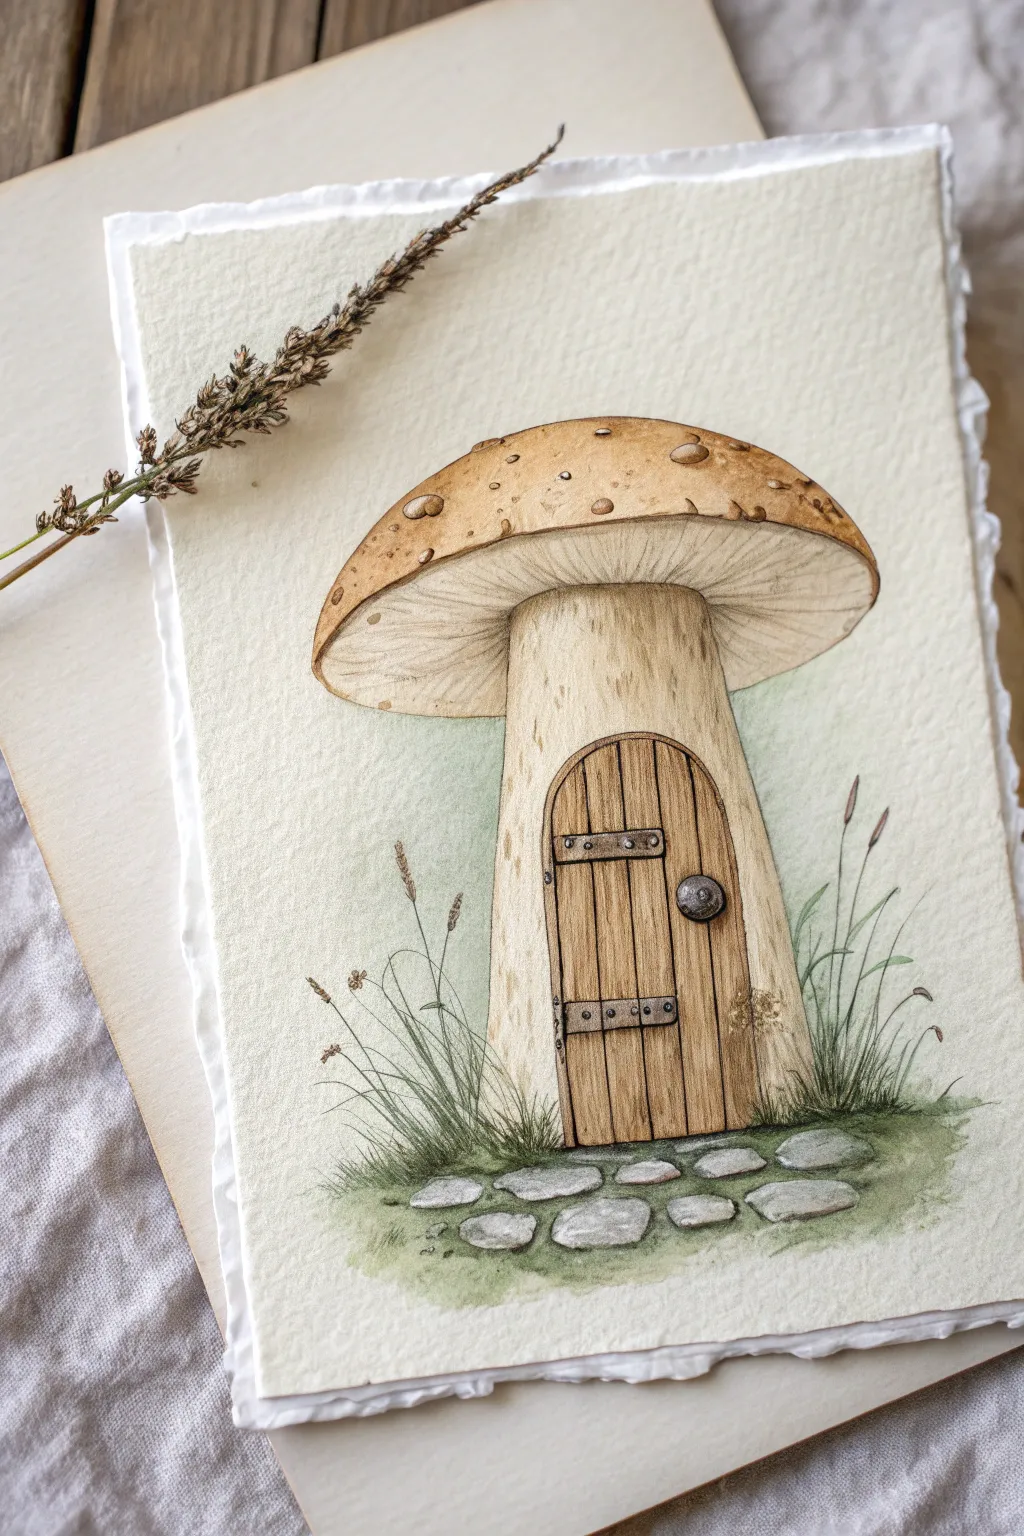
Capture the magic of the forest floor with this charming illustration of a mushroom cottage. This project combines the soft, organic textures of watercolor with crisp ink detailing to create a cozy home fit for a fairy.
Detailed Instructions
Materials
- Cold-press watercolor paper (300 gsm or heavier)
- Watercolor paints (Yellow Ochre, Burnt Sienna, Burnt Umber, Sap Green, Sepia)
- Fine liner pens (sizes 0.1, 0.3, and 0.5, waterproof)
- Round watercolor brushes (size 4 and size 0 or 00 for details)
- HB Pencil
- Kneaded eraser
- Clean water and paper towels
Step 1: Sketching the Structure
-
Outline the cap:
Begin by lightly sketching a large, rounded dome shape for the mushroom cap. Keep the top curve gentle and slightly flatten the bottom edge where the gills will be. -
Draw the stem:
From the center of the cap’s underside, draw a thick, sturdy stem that widens slightly as it reaches the ground. This provides a solid foundation for the door. -
Add the door:
Sketch a tall, arched doorway directly into the center of the stem. Draw a vertical line down the middle for the double doors and add horizontal bands for hinges. -
Detail the environment:
Lightly pencil in irregular oval shapes at the base to form the stone path. Add faint lines shooting up around the sides for grass blades and tall reeds.
Step 2: Watercolor Washes
-
Base layer for the cap:
Mix a diluted wash of Yellow Ochre and a touch of Burnt Sienna. Apply this loosely over the mushroom cap, leaving small, random white spots dry to represent natural highlights or textures. -
Paint the stem:
Using a very pale wash of Yellow Ochre mixed with plenty of water, fill in the stem area. Let the paint pool slightly at the edges to create natural shadowing. -
Color the door:
Switch to a richer Burnt Sienna for the wooden door. Paint vertical strokes to mimicking wood grain, leaving the iron hinges unpainted for now. -
Ground the scene:
Mix Sap Green with a little Sepia to de-saturate it. Paint a soft, grassy wash at the base of the stem, letting it fade out into the white paper at the bottom. -
Stone path wash:
Use a very watery grey or dilute Sepia to fill in the stepping stones. Keep these extremely pale, as we want the ink work to define them later.
Deckled Edge Secret
To get that torn paper look, dip a ruler in water, press it firm on the paper edge, and tear the paper against the ruler. It softens the fibers for a fuzzy edge.
Step 3: Adding Depth and Texture
-
Deepening the cap:
Once the first layer is dry, dab stronger Burnt Sienna onto the darker spots on the cap to create warts or raised textures. Add a shadow under the rim of the cap. -
Underside shading:
Paint a pale, cool grey-brown shadow on the underside of the cap (the gills area) and just under the rim where it overhangs the stem. -
Wood grain details:
Use a liner brush with concentrated Brown to add thin vertical lines on the door, reinforcing the plank look. Paint the hinges a dark slate grey.
Magical Glow
Mix a tiny amount of gold gouache or metallic watercolor into the door hinges or the spots on the mushroom cap for a subtle, magical shimmer.
Step 4: Inking the Details
-
Outline the main shapes:
Using a 0.3 pen, carefully trace the main contours of the mushroom cap and stem. Use broken or jittery lines for the cap’s surface to suggest an organic texture. -
Detailing the gills:
Switch to the 0.1 pen. Draw very fine, closely spaced lines radiating from the stem outward to the edge of the cap to create the delicate gill structure. -
Inking the door:
Use the 0.3 pen for the door planks. Add small circles for nail heads on the hinges and draw the round doorknob. Add tiny wood knots for realism. -
Texturing the stem:
I like to use very short, vertical hatching lines with the 0.1 pen on the stem to suggest roughness and roundness, focusing on the sides. -
Grass and reeds:
Draw swift, upward strokes for the grass blades using the 0.1 pen. Add the tall reeds with small brown heads at the tips. -
Defining the stones:
Outline the stepping stones with rough lines. Add stippling (dots) on one side of each stone to indicate shadow and texture.
Step 5: Final Touches
-
Reinforce shadows:
Glaze a tiny bit of dark green or brown over the base of the grass clumps to ground them. -
Clean up:
Once you are absolutely certain the ink and paint are dry, gently erase any visible pencil sketch marks.
Now you have a charming little woodland abode ready to frame or gift

Round Windows With Crossbars
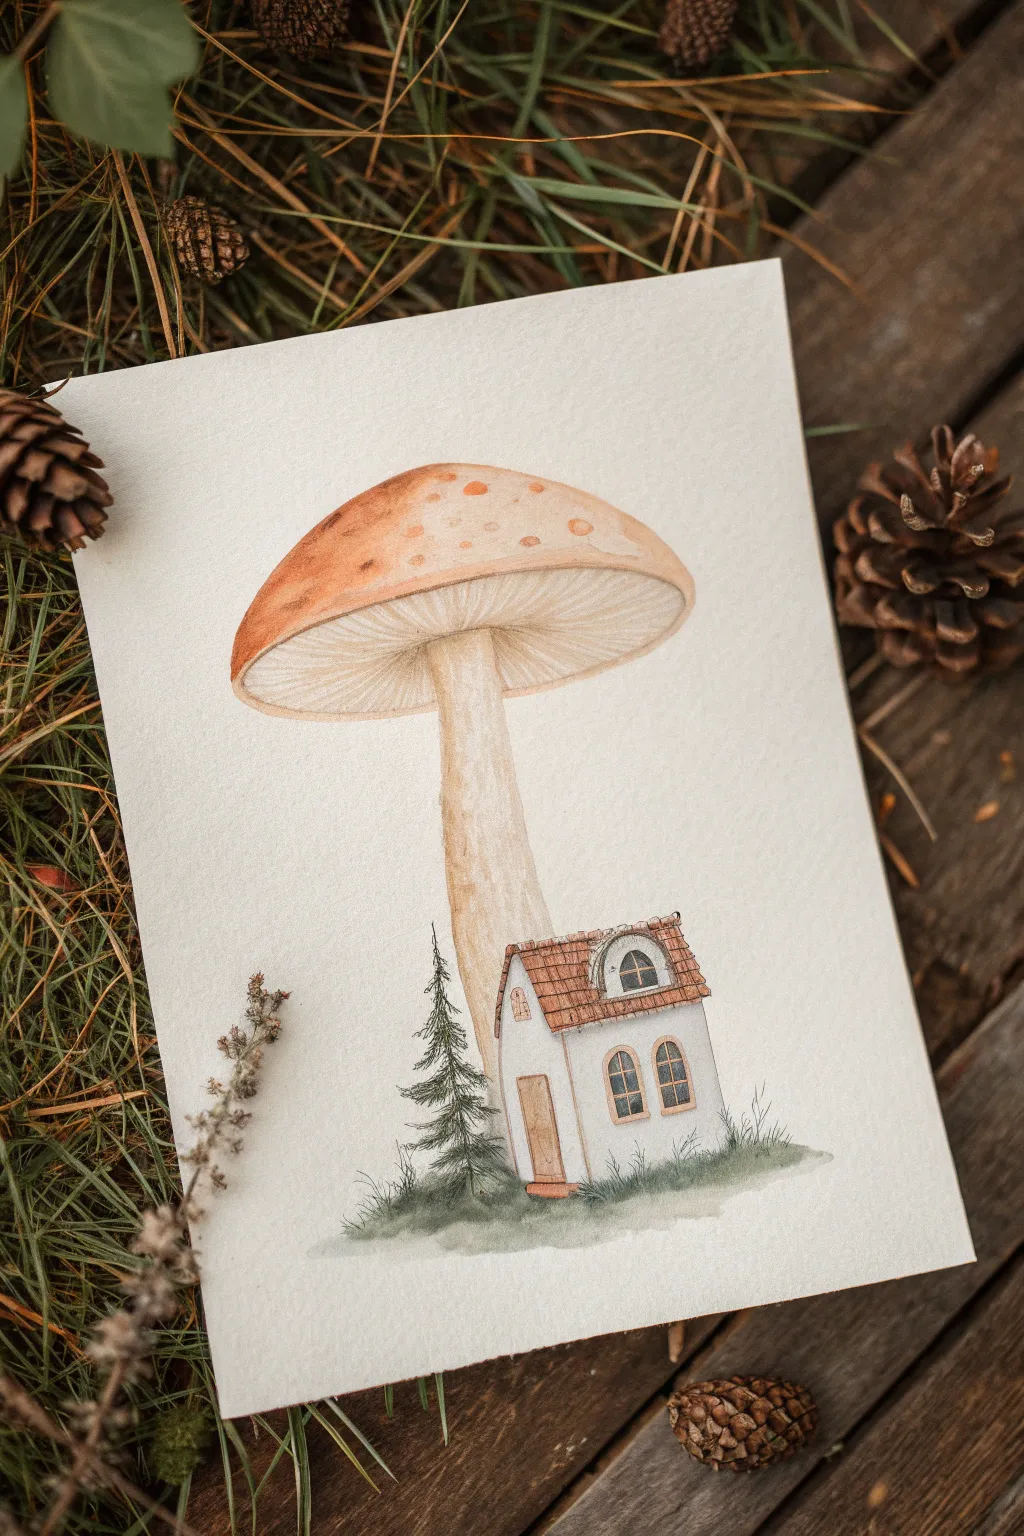
Capture the charm of forest life with this whimsical watercolor illustration featuring a tiny cottage nestled beneath a towering toadstool. The soft, earthy palette and delicate details create a peaceful scene perfect for a greeting card or wall art.
Step-by-Step Tutorial
Materials
- Cold press watercolor paper (300 gsm)
- HB pencil for sketching
- Kneaded eraser
- Watercolors (Burnt Sienna, Yellow Ochre, Sap Green, Payne’s Grey, Sepia)
- Small round brushes (size 0, 2, and 4)
- White gouache or gel pen (optional for highlights)
- Two jars of water
- Paper towels
Step 1: Sketching the Foundations
-
Outline the mushroom:
Begin by lightly sketching a large, broad mushroom cap near the top center of your page. Draw a sturdy, slightly curved stem descending from the center, widening just a bit at the base. -
Draft the cottage structure:
Tuck a small, simple house shape right against the base of the mushroom stem. Draw a pitched roof that slightly overlaps the stem, ensuring the perspective looks like the house is nestled under the cap. -
Draw the windows and door:
Sketch two arched windows on the front wall and a small wooden door. Add a dormer window (a window projecting from the roof) with a curved top to emphasize the cozy cottage feel. -
Add nature elements:
Lightly pencil in a small pine tree to the left of the house and some grassy tufts along the bottom to ground the structure.
Muddy colors?
If your mushroom cap colors are bleeding into the gills, ensure each section is bone dry before painting adjacent areas. A hair dryer on low heat speeds this up.
Step 2: Painting the Mushroom
-
Wash the cap:
Mix a diluted wash of Burnt Sienna and Yellow Ochre. Apply this to the top of the mushroom cap, keeping the top center lighter for a highlight and deepening the color towards the edges. -
Texturize the cap:
While the paint is still slightly damp, drop in small spots of pure unpainted paper or lift color away with a thirsty brush to create the speckled white spots typical of toadstools. -
Paint the gills:
Using a very pale mix of Sepia and water, paint fine lines radiating from the stem to the edge of the cap underneath. Use a size 0 brush for these delicate gills. -
Color the stem:
Wash the stem with a creamy mix of Yellow Ochre and a touch of Burnt Sienna. Let the paint pool slightly at the edges to create roundness.
Step 3: Building the Cottage
-
Paint the roof tiles:
Using a size 2 brush and a concentrated Burnt Sienna, paint the roof tiles. Start with a light wash, then use the tip of the brush to draw the individual overlapping tile shapes once the base is dry. -
Shadow the walls:
Keep the house walls mostly white (the paper color). Add very subtle shadows under the roof eaves using a watery Payne’s Grey to give the building dimension. -
Detail the windows:
Paint the window frames with a light wood tone. For the glass panes, use a dark grey-blue, leaving tiny white spots unpainted to represent reflecting light. -
Define the door:
Fill in the door with a warm brown. Allow it to dry, then use a darker brown to outline the frame and simple wood grain texture.
Level Up
Add a tiny trail of stepping stones leading to the door or paint tiny puffs of smoke coming from a chimney to make it look lived-in.
Step 4: Refining the Scene
-
Paint the pine tree:
Mix Sap Green with a little Payne’s Grey for a deep forest color. Use short, jagged strokes with your smallest brush to create the needles of the pine tree next to the house. -
Ground the image:
Add a soft wash of green and grey at the base of the house and tree. While wet, flick the brush upward to create wispy grass blades blending into the white background. -
Add texture to the stem:
Once the stem is fully dry, dry-brush a little Sepia along the sides to enhance the texture and vertical growth lines. -
Final outlines:
Use a very fine brush or a brown fine-liner pen to gently reinforce the edges of the roof, windows, and mushroom gills for crisp definition.
Now you have a charming little hideaway ready to frame or share with a friend


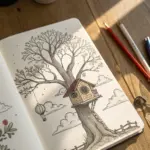
Chimney and Curling Smoke Puffs
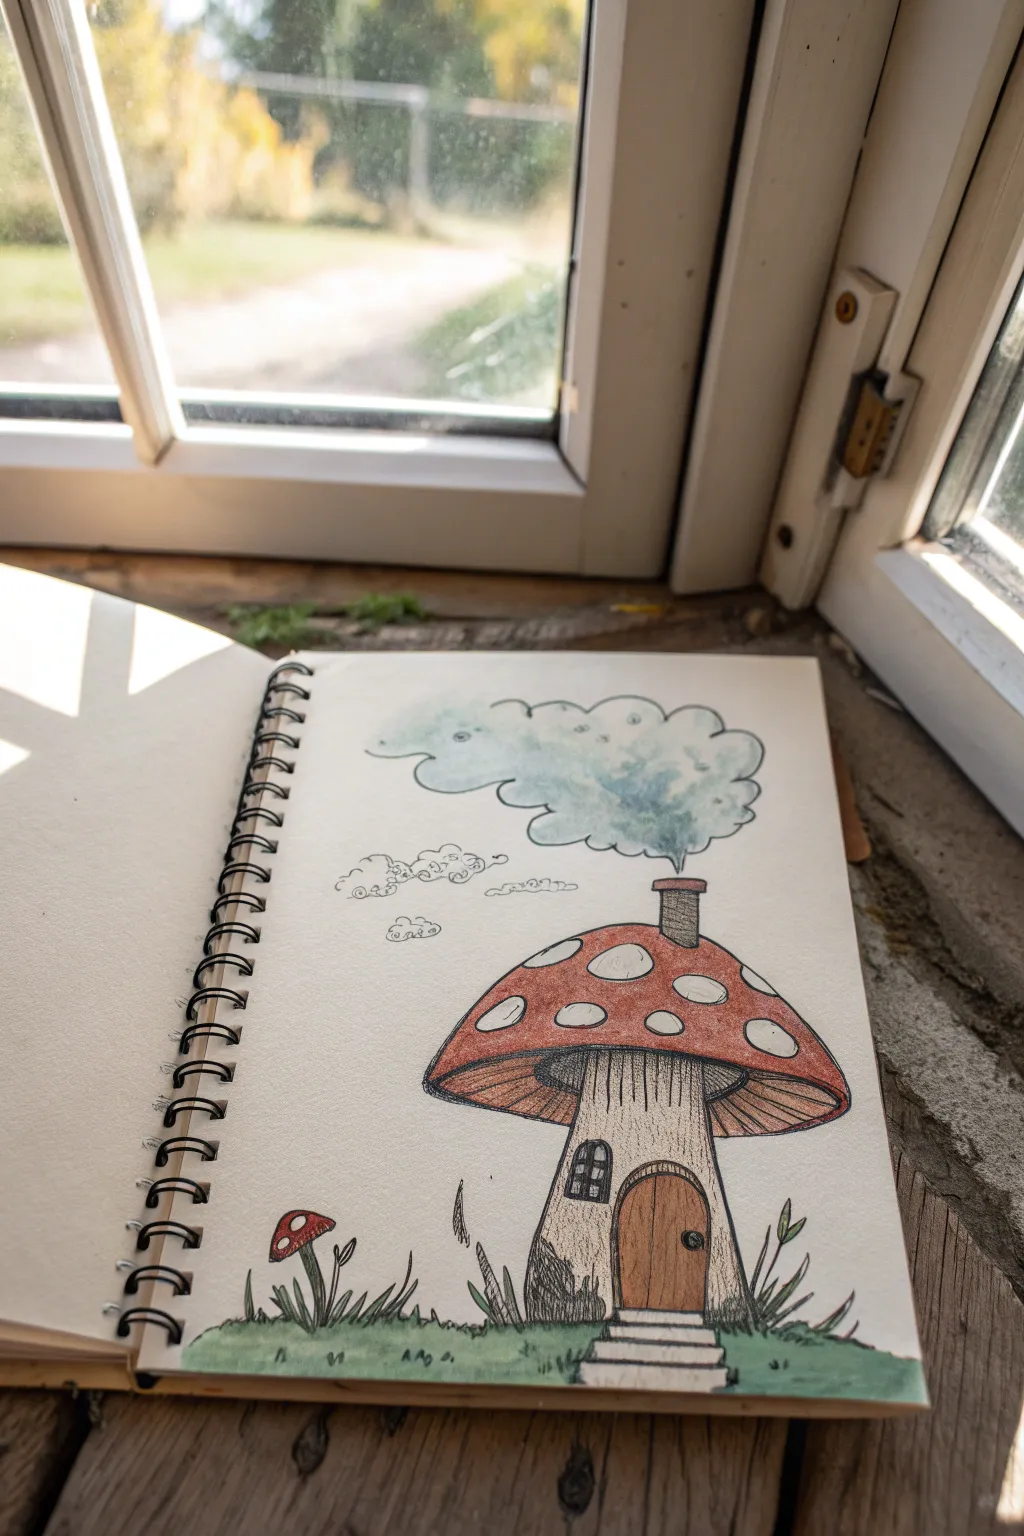
Create a cozy fairytale abode right in your sketchbook with this charming mushroom house tutorial. This project combines precise ink lines with soft coloring techniques to capture the texture of wood, stone, and billowing smoke.
Detailed Instructions
Materials
- Spiral-bound sketchbook (heavyweight paper)
- Fine liner pen (01 or 03 black)
- Pencil and eraser
- Colored pencils (red, brown, beige, green, gray)
- Light blue watercolor or pastel (optional for smoke)
Step 1: Sketching the Foundations
-
Outline the mushroom cap:
Start by drawing a large, rounded semi-circle for the mushroom’s cap. Let the sides curve downward deeply, creating an overhang, but leave the bottom edge slightly open or jagged where the gills will be. -
Draw the stalk:
Add the stem (the house’s body) widening slightly at the base as it meets the ground. This shape should feel sturdy enough to support the large red roof above. -
Add architectural details:
Sketch a small rectangular chimney poking out of the right side of the roof. Then, center a rounded wooden door on the stalk and add a small, arched window to the left of the door. -
Detail the gills and spots:
Lightly pencil in large, irregular ovals on the roof for the classic mushroom spots. Underneath the cap rim, draw curved lines that radiate from the stalk outward to represent the mushroom gills.
Smoke Texture Tip
For the softest looking smoke, don’t use ink for the cloud contours. Draw them only with light blue pencil for a wispy, ethereal effect.
Step 2: Inking the Structure
-
Define the main lines:
Using your fine liner pen, carefully trace over your pencil lines. For the stalk, use slightly broken or vertical shaky lines to imply a bark-like texture rather than a perfectly smooth wall. -
Texture the door and steps:
Draw vertical planks on the door and add a small circular handle. Sketch uneven, stacked rectangles at the base for stone steps leading up to the entrance. -
Ink the chimney and smoke:
Outline the brick chimney. Draw a puffy, cloud-like shape billowing out from it, using scalloped lines that drift upward towards the top of the page. -
Add surrounding nature:
Draw tufts of grass along the horizon line. Add a secondary, smaller mushroom to the left and some taller, spear-like leaves on the right to frame the house. -
Erase guidelines:
Wait a moment for the ink to set, then gently erase all visible pencil marks to clean up your drawing surface.
Step 3: Adding Color and Depth
-
Color the roof:
Fill the main area of the mushroom cap with a vibrant red colored pencil. Press harder near the bottom edge for shading, but leave the oval spots purely white. -
Shade the gills:
Use a light brown or peach pencil to color the gills under the cap. Add darker brown strokes strictly along the ink lines to create deep shadows and dimension. -
Warm up the wood:
Color the door with a rich medium brown. I like to use a beige or cream color for the mushroom stalk, adding vertical streaks of gray to enhance the aged, organic look. -
Ground the scene:
Use a mix of light and dark greens for the grass. Apply the color in short, upward flicking motions to mimic blades of grass rather than coloring a solid block. -
Detail the smoke:
Lightly shade the smoke cloud with a soft blue hue. If you want that dreamy, diffused look shown in the example, smudge the blue slightly with your finger or a tissue. -
Final touches:
Add dark scribbles near the base of the stalk for mossy texture and darken the window panes to show depth.
Make it Magical
Add tiny fireflies around the grass using a white gel pen or yellow dots to give the scene a glowing, evening atmosphere.
Now you have a cozy little retreat drawn directly onto your page to spark your imagination
BRUSH GUIDE
The Right Brush for Every Stroke
From clean lines to bold texture — master brush choice, stroke control, and essential techniques.
Explore the Full Guide
Gills as a Textured Roof Underside
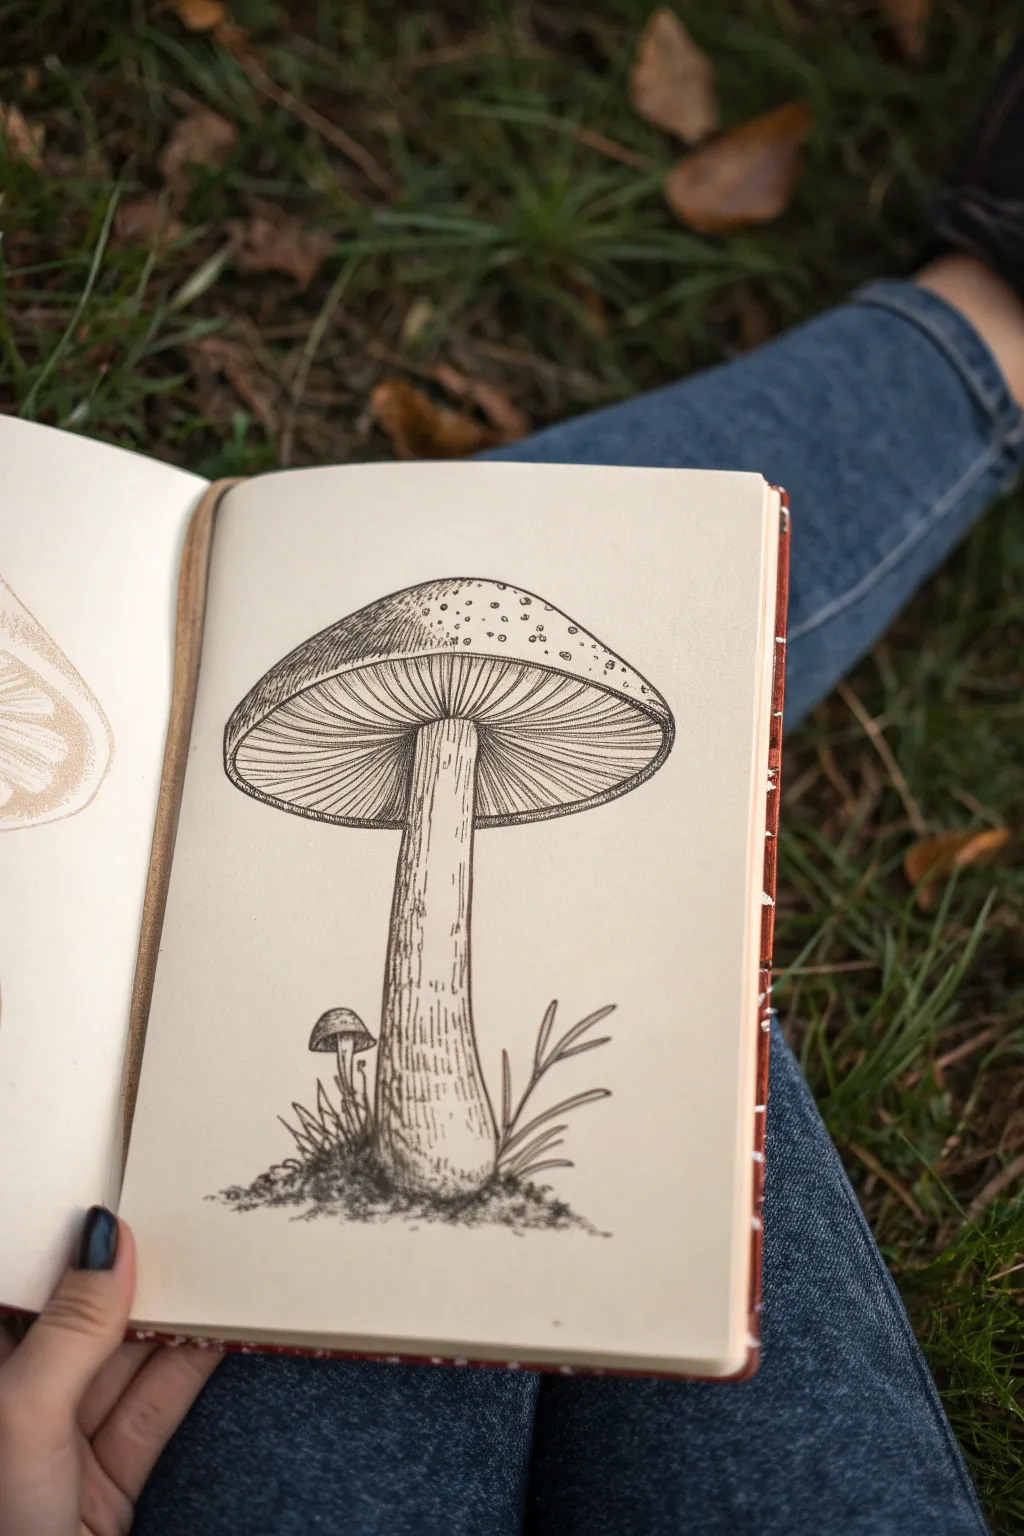
Learn to capture the intricate beauty of mushroom gills using fine liner pens in this detailed sketchbook study. This project focuses on building texture through hatching and line weight to create a realistic, three-dimensional roof for your fungal structure.
Step-by-Step Tutorial
Materials
- Sketchbook with smooth, heavy paper
- H pencil (for light sketching)
- Clean eraser
- Fine liner pen (0.05mm)
- Fine liner pen (0.1mm)
- Fine liner pen (0.3mm)
Step 1: Structural Sketching
-
Establish the Stalk:
Begin with your H pencil, drawing a tall, slightly thick vertical column for the stalk. Curve the bottom gently where it meets the ground to suggest weight. -
Create the Cap Outline:
Draw a wide, flattened oval sitting atop the stalk. Extend the top curve higher to form a subtle dome shape, ensuring the rim extends well past the stalk on both sides. -
Define the Gill Connection:
Sketch a smaller, inner oval where the stalk meets the underside of the cap. This defines the ring where the gills will radiate from. -
Add Ground Elements:
Lightly sketch a small, secondary mushroom sprouting to the left and a few blades of grass to the right to ground the composition.
Step 2: Inking the Form
-
Outline the Cap:
Switch to your 0.3mm pen. Ink the outer perimeter of the large mushroom cap with a confident, continuous line. -
Texture the Stalk:
Using the 0.1mm pen, draw the vertical sides of the stalk. Instead of straight lines, use broken, slightly wavy strokes to simulate fibrous texture. -
Add Stalk Details:
Fill the interior of the stalk with varied vertical striations using the 0.05mm pen. Keep drawing these lines loose and organic, avoiding rigid straightness. -
Ink the Base:
Use short, scribbled strokes at the bottom of the stalk to create a dirt-like texture where the mushroom emerges from the soil.
Wobbly Lines?
If your gill lines look shaky, try drawing them faster. Quick, confident strokes are usually smoother than slow, careful ones.
Step 3: Creating the Gills
-
Establish Primary Gills:
Using the 0.05mm pen, draw a series of curved lines radiating from the stalk to the outer rim of the cap. Space these evenly but fairly wide apart initially. -
Fill Secondary Gills:
Between your primary lines, draw shorter lines starting from the outer rim and fading inward. This creates the dense, packed look of real gills. -
Deepen the Shadows:
I prefer to go back near the stalk connection point and add very short, dense hatching lines between the gills. This creates a shadow effect that adds depth. -
Refine the Rim:
Thicken the line on the underside of the cap rim slightly with the 0.3mm pen to visually separate the gills from the top of the cap.
Add Depth
Use a light grey marker or watered-down ink wash on the shadowed side of the stalk to make the drawing pop off the page.
Step 4: Stippling and Final Details
-
Top Cap Texture:
On the top dome of the mushroom, use the 0.1mm pen to add stippling (dots). Concentrate the dots near the left side and rim to suggest shading and form. -
Add Speckles:
Intersperse small, open circles among the dots on the cap to represent the characteristic warts or flakes found on many mushroom species. -
Detail the Mini Mushroom:
Ink the small companion mushroom with the 0.1mm pen, using simple vertical lines for its gills and a solid outline for its cap. -
Draw the Grass:
Use quick, upward flicks with the 0.1mm pen to create the grass blades. Vary the pressure so the lines taper off thinly at the tips. -
Erase and Assess:
Wait at least five minutes for the ink to fully cure. Gently erase all underlying pencil marks to reveal the crisp black and white contrast.
With the texture complete, your mushroom house now has a sturdy and realistic foundation
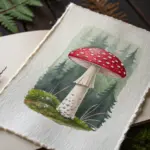
Mossy Forest Floor Setting
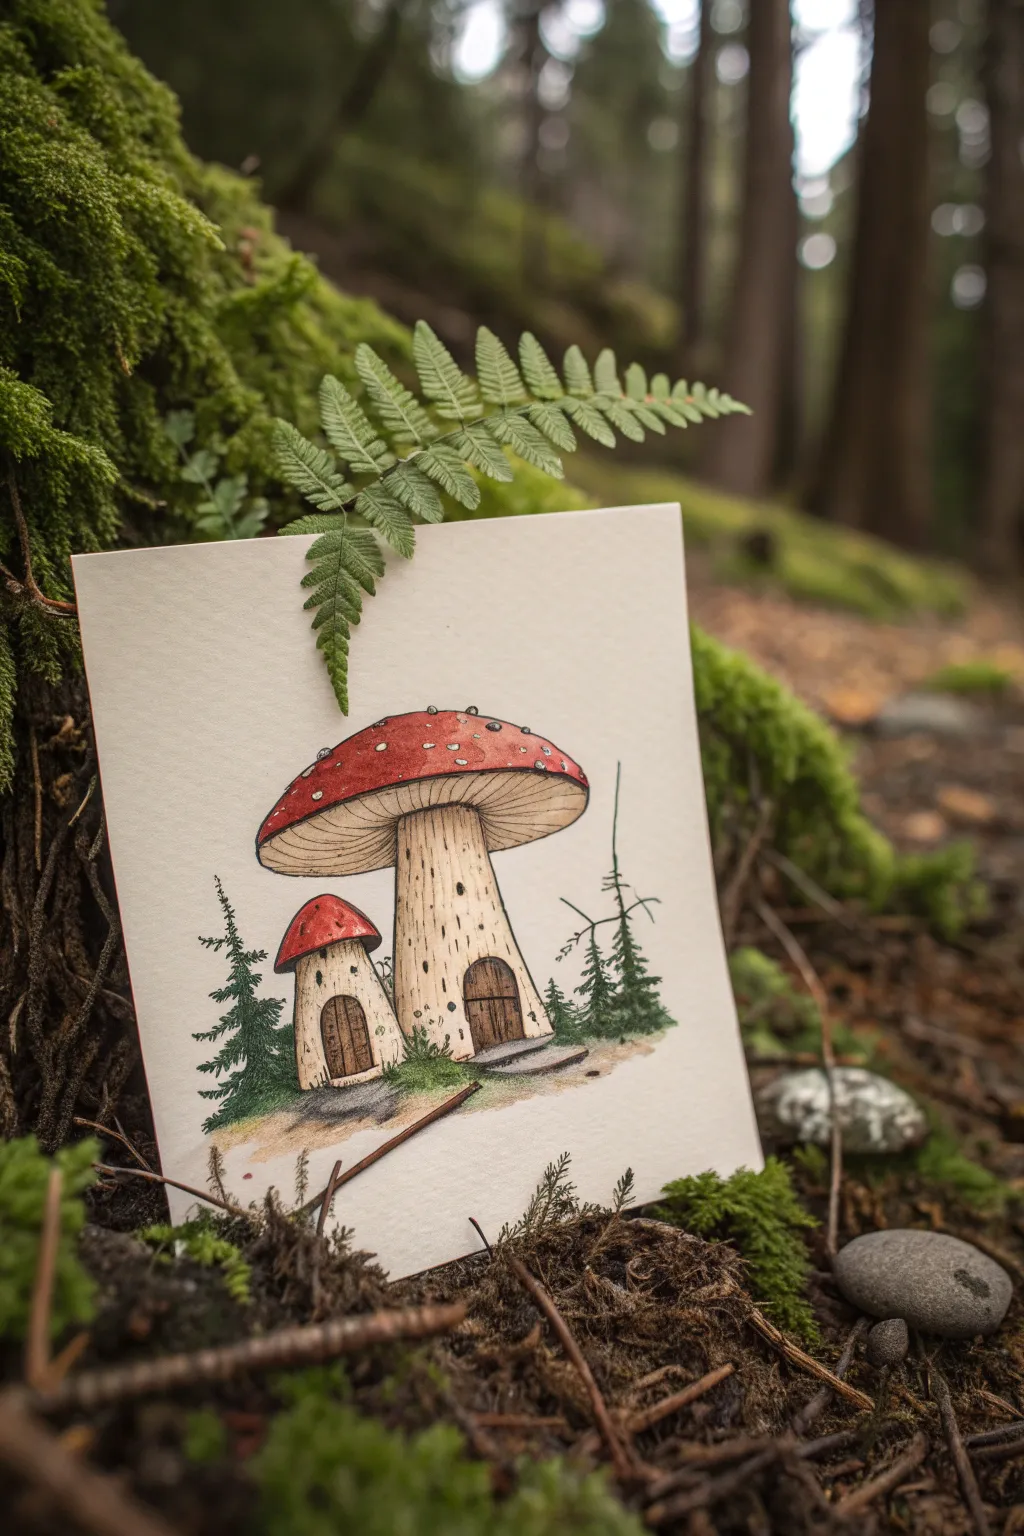
Capture the magic of the forest floor with this charming illustration of red-capped mushroom homes nestled among pine trees. Using fine liners and soft washes of color, you’ll create a storybook-style artwork that feels right at home in nature.
Step-by-Step
Materials
- Thick watercolor paper or mixed media cardstock (cream or off-white)
- Pencil (HB or H)
- Soft eraser
- Fine liner pens (sizes 0.1, 0.3, and 0.5, black waterproof ink)
- Watercolor paints or alcohol markers (Red, Warm Grey, Brown, Forest Green)
- Small round brushes (size 2 and 4)
- White gel pen
Step 1: Sketching the Foundation
-
Place the horizon:
Begin by lightly drawing a gentle, uneven horizon line near the bottom third of your paper to serve as the ground. -
Map out the large mushroom:
Draw the central mushroom first. Sketch a tall, slightly thick stalk that widens at the bottom, topped with a large, flattened domed cap. -
Add the smaller companion:
To the left of the main stalk, sketch a smaller, shorter mushroom. Make this one chubbier with a rounder, more bell-shaped cap. -
Sketch the gills:
Underneath the large cap, draw a curved line connecting the stalk to the rim, indicating where the gills will be. -
Define the doors:
Draw arched doorways at the base of both stalks. The larger door should look inviting and sturdy, while the small one can be narrower. -
Outline the surrounding flora:
Lightly pencil in jagged, triangular shapes on either side to represent the silhouette of pine trees.
Natural Imperfections
Don’t make your lines perfectly straight. Wobbly lines on the mushroom stalks make them look more organic and aged.
Step 2: Inking the Details
-
Ink the main outlines:
Using a 0.5 fine liner, trace over the main shapes of the mushroom caps and stalks. Keep your hand relaxed to give the lines a slightly organic feel. -
Draw the gills:
Switch to a 0.3 pen. Draw fine, closely spaced lines radiating from the top of the stalk out to the edge of the large cap’s rim. -
Detail the doors:
Add vertical wood grain textures to the doors. Use the 0.5 pen to outline the door frames heavily to make them pop. -
Texture the stalks:
With your thinnest 0.1 pen, add small vertical dashes and dots up and down the mushroom stalks to simulate rough texture and bark. -
Ink the pine trees:
Use quick, scribbly horizontal strokes with the 0.3 pen to create the pine needles. Start wide at the bottom and taper to a point at the top. -
Erase pencil marks:
Once the ink is completely dry, gently erase all underlying pencil sketch lines.
Step 3: Adding Color & Highlights
-
Paint the caps:
Apply a vibrant red wash to the tops of both mushrooms. Let the pigment pool slightly at the edges for natural shading. -
Shade the stalks and gills:
Use a diluted warm grey or light brown wash for the stalks. Add a slightly darker tone under the large cap to shadow the gills. -
Color the doors:
Fill in the wooden doors with a rich brown. I like to let this dry briefly and add a second layer to the edges for depth. -
Paint the greenery:
Use a deep forest green for the pine trees. Allow the strokes to be loose and textured, not a solid block of color. -
Ground the scene:
Add a wash of brown and green at the base of the mushrooms to create the mossy earth they sit on. -
Add cap spots:
Once the red paint is fully dry, use a white gel pen or opaque white paint to add small circles and dots to the mushroom caps. -
Final highlights:
Add tiny touches of white gel pen to the door handles and the tips of the pine trees for a bit of sparkle.
Photo Op
Take your drawing outside! Propping it against a mossy tree root for a photo instantly enhances the artwork’s fairy-tale vibe.
Now your little forest dwelling is ready to be discovered by a wandering sprite

PENCIL GUIDE
Understanding Pencil Grades from H to B
From first sketch to finished drawing — learn pencil grades, line control, and shading techniques.
Explore the Full Guide
Tiny Stone Path to the Front Door
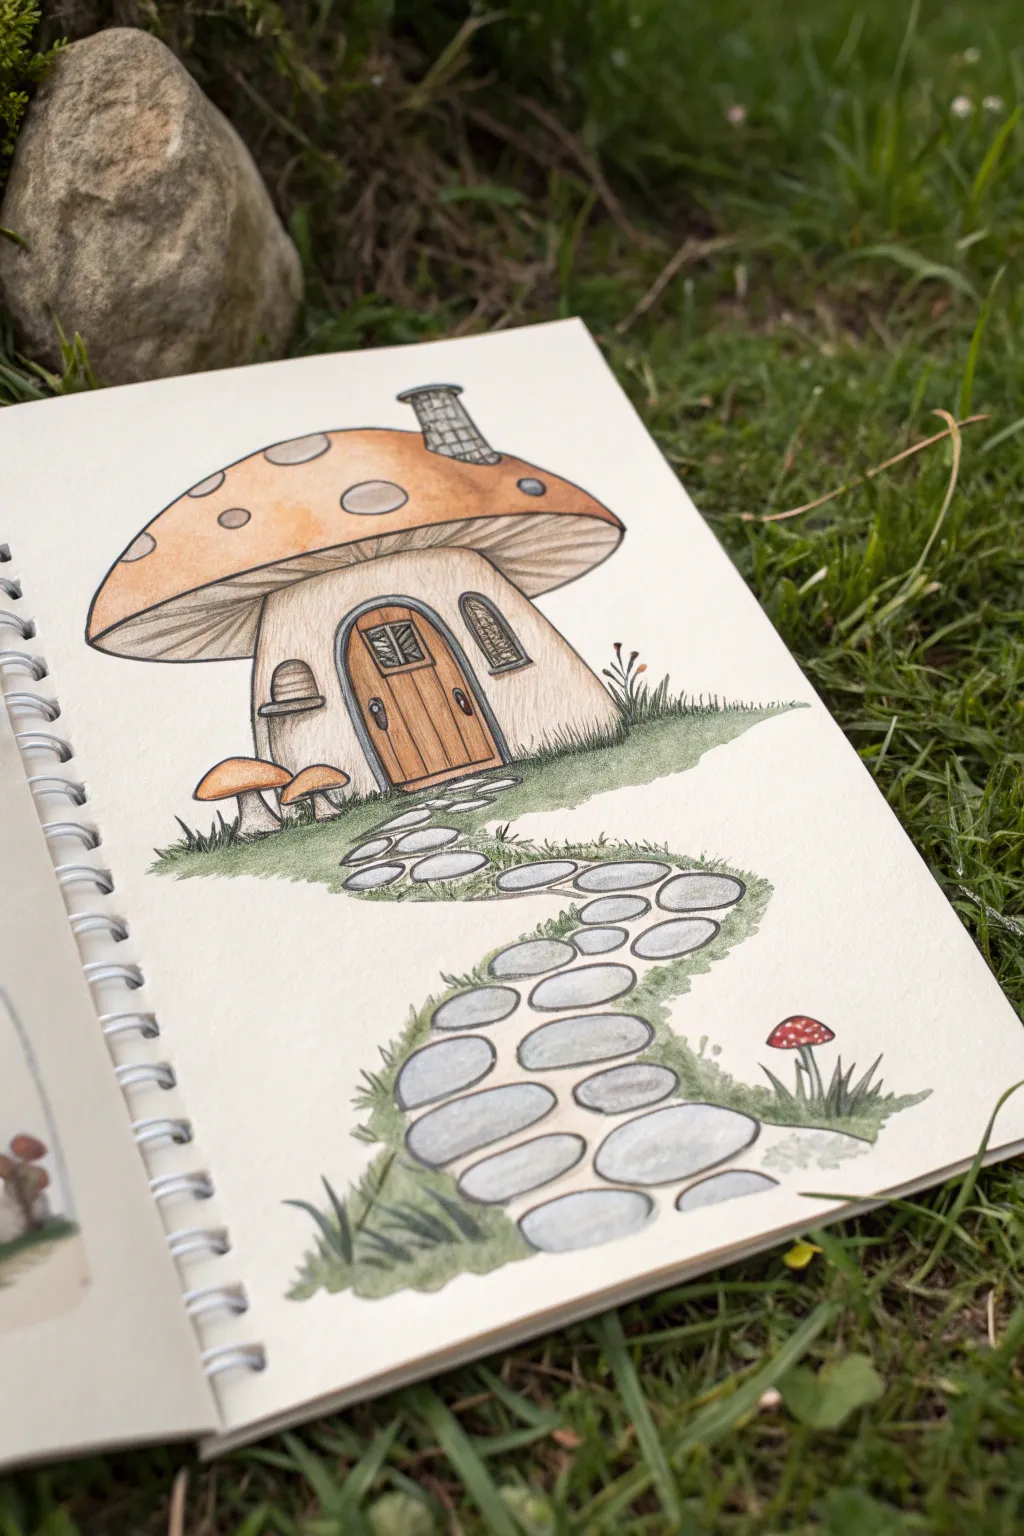
Capture the magic of a tiny woodland dwelling with this charming watercolor and ink illustration. The winding stone path adds perspective and depth, inviting the viewer right up to the cozy wooden door.
Detailed Instructions
Materials
- Spiral-bound sketchbook (mixed media paper recommended)
- Graphite pencil (HB or similar)
- Fine liner pens (black, waterproof, sizes 0.1mm and 0.3mm)
- Watercolor paints (pan or tube set)
- Small round brushes (size 2 and 4)
- White gel pen (optional for highlights)
- Eraser
Step 1: Sketching the Foundations
-
Outline the mushroom cap:
Start by drawing a large, rounded dome shape near the top center of your page. Curve the bottom edges downward slightly to give it volume, making sure it overhangs the stalk significantly. -
Draw the stalk and door:
Sketch a sturdy, wide stalk emerging from beneath the cap. In the center, outline a classic arched doorway with a wooden frame. -
Add windows and details:
Place a small, rectangular window with a curved top on the right side of the door. Add a small chimney poking out of the right side of the mushroom cap and another tiny window on the left. -
Map out the path:
This is crucial for the composition. Lightly sketch a winding path starting wide at the bottom of the page and getting narrower as it reaches the door to create perspective. Draw oval shapes for the stepping stones. -
Include extra elements:
Draw two tiny mushrooms to the left of the house and a single red toadstool on the right side of the path near the bottom.
Step 2: Inking the design
-
Inking the main structure:
Using a 0.3mm waterproof pen, carefully trace over your pencil lines for the mushroom house. Use confident strokes for the outline of the cap and stalk. -
Detailing the wood and stone:
Switch to a finer 0.1mm pen to add wood grain texture to the door by drawing vertical wavy lines. Add brick details to the chimney and cross-hatching to the window panes. -
Refining the path:
Ink the stepping stones, keeping the lines slightly organic rather than perfect ovals. Add small tufts of grass between slightly larger stones at the foreground. -
Adding texture lines:
Draw fine, vertical lines underneath the mushroom cap to represent gills. Add small spots to the roof of the main house and the tiny toadstool. -
Clean up:
Wait for the ink to dry completely to avoid smudging, then gently erase all visible pencil marks.
Uneven Ink Lines?
If your hand shakes while inking, don’t worry! Vary the line weight intentionally—thicker on shadow sides, thinner on light sides—to make wobbles look stylistic.
Step 3: Bringing it to life with color
-
Painting the mushroom cap:
Mix a warm orange-tan watercolor wash. Paint the cap, leaving the circular spots unpainted (white paper). Add a slightly darker concentration of pigment near the bottom edge for shadow. -
Coloring the stalk and door:
Use a heavy dilution of brown or ochre for the stalk to keep it light beige. Paint the door a richer, warmer brown to make it look like treated wood. -
Shading the gills:
I find a very diluted gray-brown works best here. Paint the underside of the cap, letting the ink lines provide most of the texture definition. -
Painting the stones:
Mix a cool gray. Paint each stepping stone individually. Let the color pool slightly on one side of each stone to suggest dimension and shadow. -
Adding the grass:
Using a mossy green, paint the grass areas around the base of the house and along the edges of the path. Use short, upward brush strokes to mimic blades of grass. -
Final accents:
Paint the small side mushrooms orange and the foreground toadstool a vibrant red. Paint the chimney gray. -
Adding shadows:
Once the first layers are dry, use a darker green or gray mix to add cast shadows under the mushroom cap and beneath the stepping stones on the grass.
Make It Magical
Add tiny clusters of dots with a white gel pen floating around the mushroom cap to look like fireflies or magical spores drifting in the air.
Now you have a cozy little fantasy getaway preserved right in your sketchbook
Flower Box Under the Window
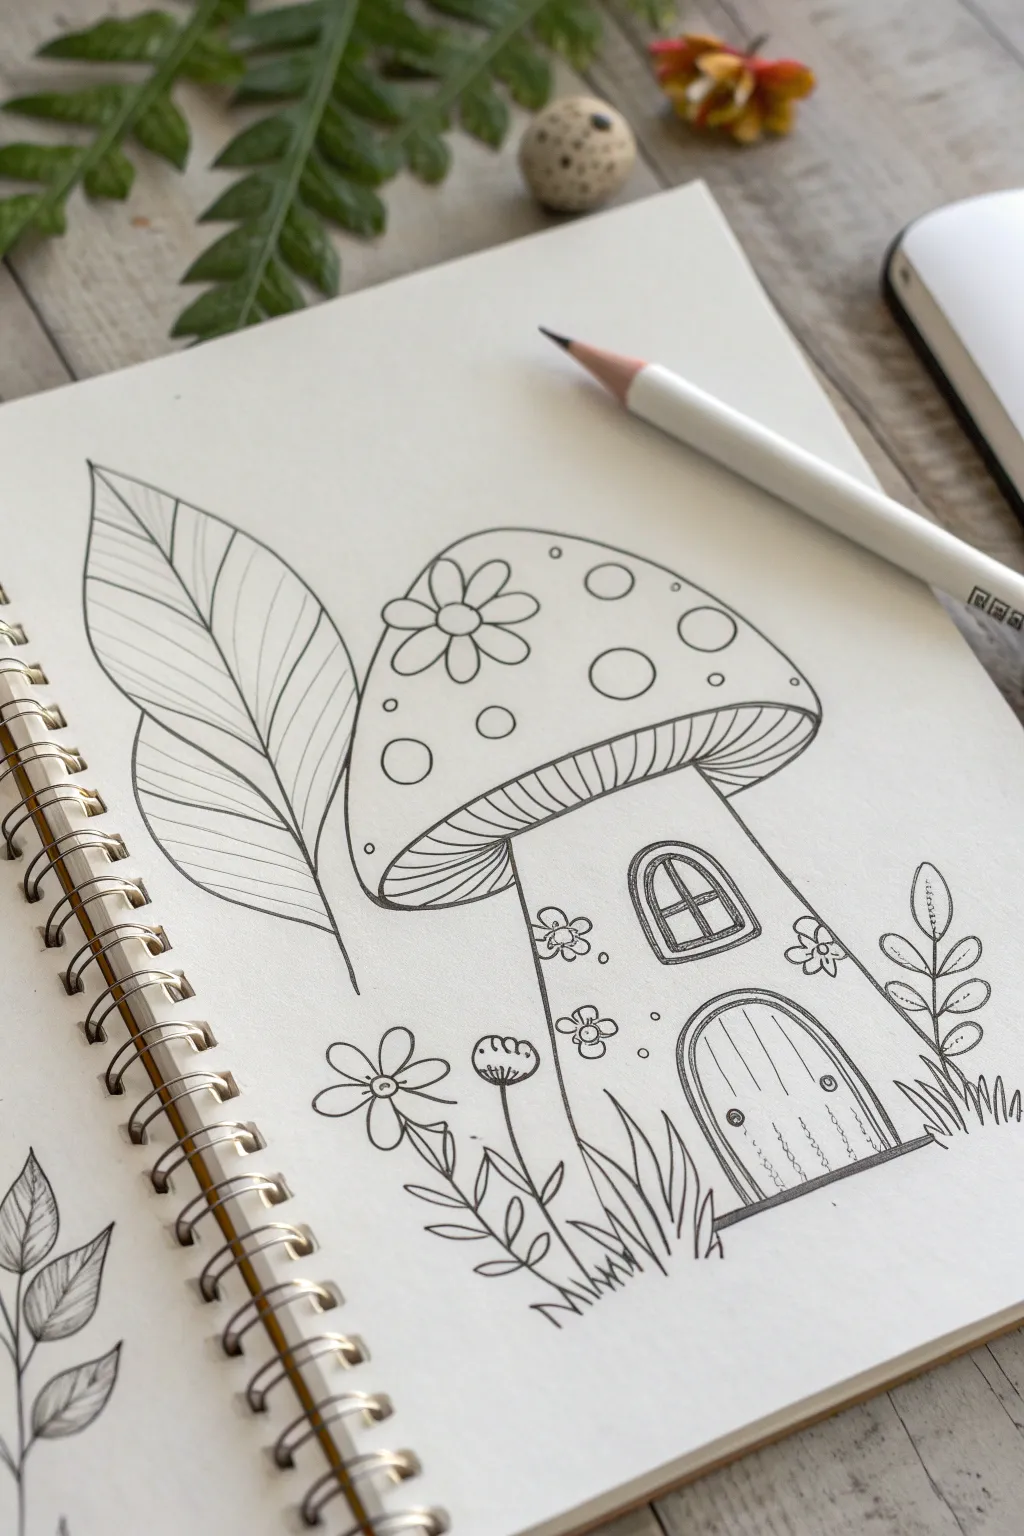
Capture the charm of fairytales with this delightful line drawing of a mushroom house nestled among garden foliage. This project focuses on clean lines, balanced composition, and simple botanical details to bring a cozy woodland scene to life on your sketchbook page.
Step-by-Step
Materials
- Sketchbook or drawing paper (heavyweight preferred)
- Graphite pencil (HB or 2B)
- Fine liner pen (black, 0.3mm or 0.5mm)
- Eraser
- Pencil sharpener
Step 1: Drafting the Main Shapes
-
Outline the mushroom cap:
Start by drawing a large, rounded semi-circle in the center of your page. This will be the roof of your house. Keep the bottom edge slightly curved upward to give it volume. -
Add the stem structure:
Draw two vertical lines descending from the width of the cap’s bottom edge, tapering them slightly outward at the base to create a sturdy stalk for the house. -
Position the large leaf:
To the left of the mushroom, sketch a sweeping, diagonal line for the central vein of a large leaf. Draw the leaf’s outer edges, making it tall enough to reach the mushroom cap’s height. -
Sketch the door and window:
Lightly draw a rounded arch shape at the bottom right of the stalk for the door. Above it, place a smaller arched window frame.
Uneven Circles?
If your roof spots look wonky, try drawing them lightly as faint squares first, then round off the corners. This helps you gauge size and spacing before committing to the curve.
Step 2: Adding Architectural Details
-
Detail the underside of the cap:
Connect the stalk to the cap’s outer edge with a curved line. Fill this narrow section with evenly spaced radial lines to represent the mushroom gills. -
Refine the door:
Draw a double frame around the door arch. Inside, add vertical wood grain lines and a small circle for the doorknob. Draw tiny circles along the bottom for decoration. -
Complete the window:
Add a frame around your window arch. Draw a cross in the center to create four window panes. -
Decorate the roof:
Draw several circles of varying sizes on the mushroom cap. Near the top left, draw a five-petaled flower resting directly on the curve of the roof.
Add Magic
Transform this house into a night scene by drawing a crescent moon in the background and adding tiny stars or fireflies around the lantern-like window.
Step 3: Drawing the Botanical Surroundings
-
Texture the large leaf:
Go back to your large leaf on the left. Draw curved veins extending from the center line to the outer edges, following the leaf’s natural contour. -
Add side flora:
On the right side of the house, sketch a vertical stem with pairs of small overlapping leaves growing upward. -
Create the grassy base:
Draw clusters of sharp, triangular grass blades at the base of the mushroom stalk and under the door to ground the structure. -
Sketch ground flowers:
Add a few simple flowers near the base. Try a daisy-like flower on the left and a small bud on a stem nearby. -
Decorate the walls:
Draw tiny flowers climbing up the left side of the house stalk for a dash of whimsy.
Step 4: Inking and Finalizing
-
Trace with fine liner:
Take your black fine liner and carefully trace over your pencil lines. I find it helpful to start with the main mushroom shape before moving to the smaller details. -
Vary line weight:
If you have a thicker pen, or by pressing slightly harder, darken the bottom edges of the mushroom cap and the ground line to add visual weight. -
Erase pencil marks:
Once the ink is completely dry, gently erase all underlying graphite sketches to leave a crisp, clean illustration. -
Add final textures:
Use your pen to add tiny dots or extra hatching lines on the wood door and under the mushroom cap for depth.
Now you have a charming woodland abode ready for coloring or keeping as a beautiful minimalist sketch


Fairy Lights and Glowing Spores
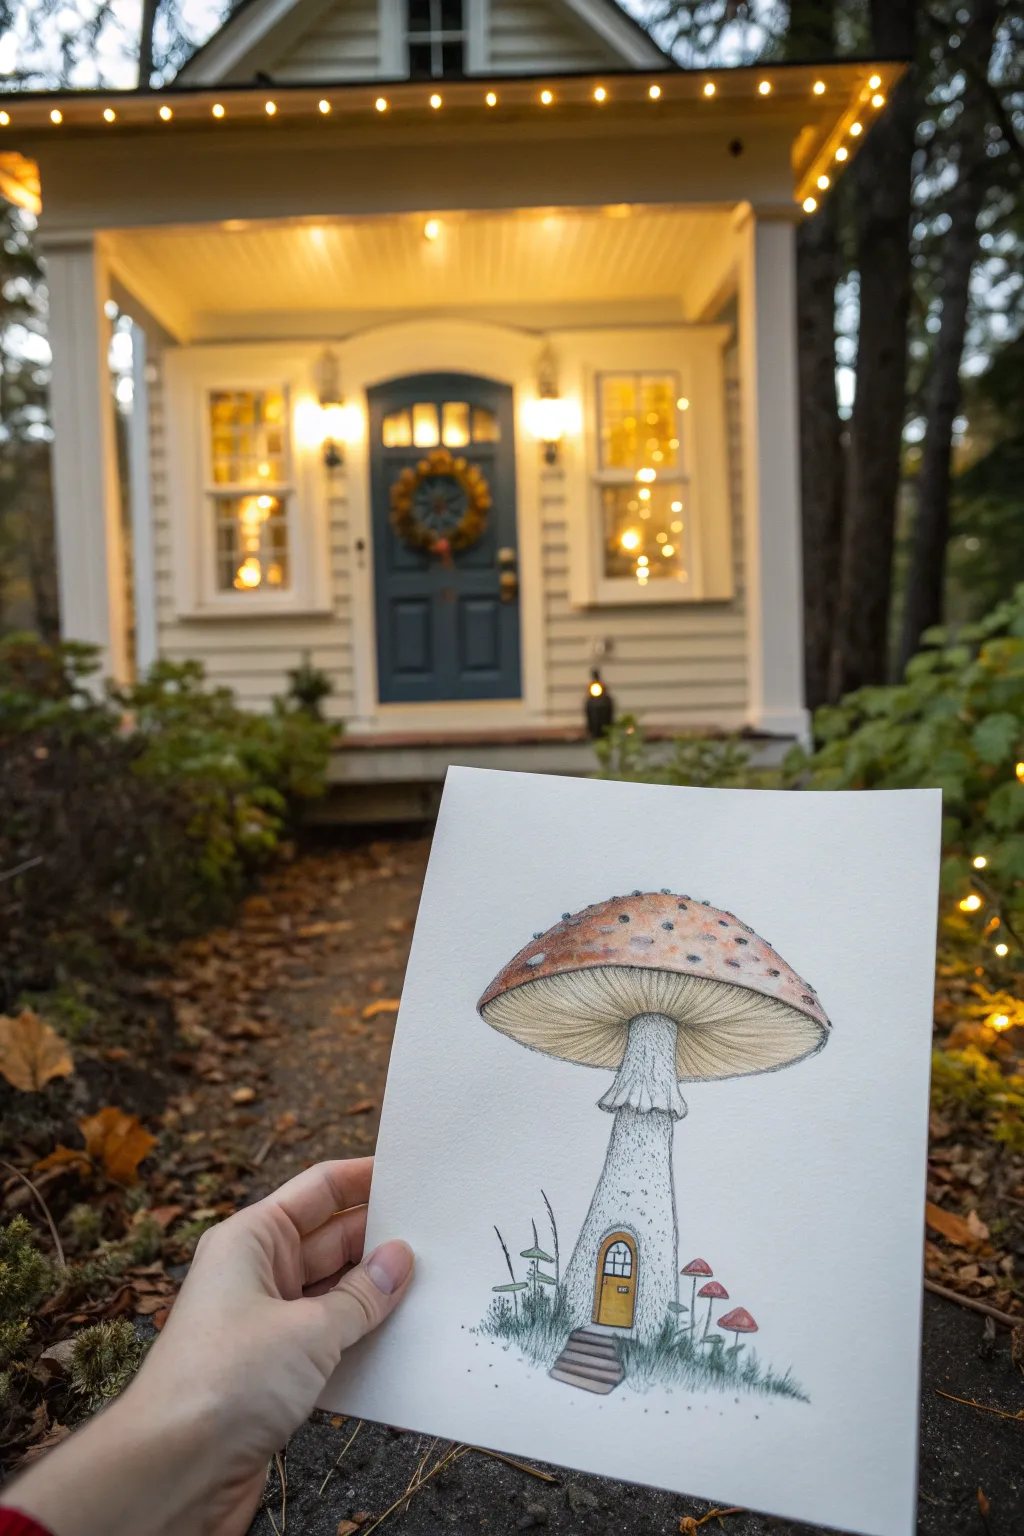
Capture the warmth of a woodland escape with this charming illustration of a fly agaric mushroom house. This project combines precise pen work with soft color washes to create a whimsical abode that feels right at home in a fairy forest.
Detailed Instructions
Materials
- Hot press watercolor paper (fine grain)
- Waterproof fine liner pens (0.1, 0.3, and 0.5 sizes)
- Graphite pencil (HB) and kneadable eraser
- Watercolor paints (Vermilion, Burnt Sienna, Yellow Ochre, Sap Green, Payne’s Grey)
- Small round brushes (size 2 and 4)
- Optional: White gouache or gel pen for highlights
Step 1: Drafting the Foundations
-
Establish the central stem:
Lightly sketch a tall, slightly tapered column for the main mushroom stem. Give it a gentle curve near the base to suggest organic growth, rather than a perfectly straight line. -
Cap construction:
Draw a wide, flattened dome shape resting on top of the stem. The perspective should be slightly from below, so curve the bottom edge of the cap upward to reveal the gill area underneath. -
Adding architectural details:
Sketch a small, arched doorway near the base of the stem. Add a tiny window grid within the door and outline three or four small wooden steps leading up to the entrance. -
Surrounding vegetation:
Pencil in grassy tufts around the base and sketch a few tiny companion mushrooms on either side to ground the composition.
Spot Check
For the crispest white spots on the red cap, use masking fluid before painting the red wash, or go back over the dry red paint with opaque white gouache.
Step 2: Inking the Outline
-
Main contour lines:
Using your 0.3 fine liner, carefully trace the outline of the mushroom cap and stem. Use a slightly wavy line for the skirt (the frilly part on the stem) to give it a delicate, textured look. -
Developing the gills:
Switch to your finest 0.1 pen. Draw fine, closely spaced lines radiating from the stem outward to the edge of the cap underneath. These lines should curve slightly to match the dome’s form. -
Detailing the stem texture:
Create texture on the stem using stippling (tiny dots) and short, broken dashes. concentrate these marks near the edges and under the cap to create shadow and roundness. -
Inking the door and stairs:
Define the door frame and steps with the 0.3 pen. Add wood grain details to the door and the steps using very light, scratchy lines. -
Refining the grass:
Ink the grass blades using quick, upward flicking motions to keep the tips sharp. Let the ink dry completely before erasing your pencil marks.
Muddy Waters?
If your gill lines are bleeding into the yellow wash, ensure your fine liner is totally waterproof. If not, do the wash first, let it dry, then ink the lines.
Step 3: Bringing it to Life with Color
-
Base wash for the stem:
Dilute a very small amount of Payne’s Grey or a cool shadow tone with plenty of water. Apply a pale wash to the shadowed side of the stem, keeping the center white for a highlight. -
Painting the cap:
Mix a warm Vermilion with a touch of Burnt Sienna. Paint the top of the cap, careful to leave small circles unpainted for the iconic white spots of the fly agaric. -
Shading the gills:
Use a diluted Yellow Ochre or light brown to wash over the gill area. Once dry, deepen the shadows near the stem connection with a darker brown mix. -
The welcoming door:
Paint the door with a rich Yellow Ochre or Gold tone. I like to let this dry briefly before adding a tiny touch of dark brown to the hinges and doorknob for contrast. -
Grounding the scene:
Paint the grass with varied strokes of Sap Green and touches of blue-green for depth. Paint the tiny side mushrooms in Red or Brown to complement the main house. -
Final shadow touches:
Mix a dark grey-blue used for cast shadows. Apply this strictly under the mushroom cap, under the skirt, and beneath the steps to firmly plant the structure on the ground.
Now your little mushroom home is ready for its fairy inhabitants to move in
Snail Mailbox and Garden Companions
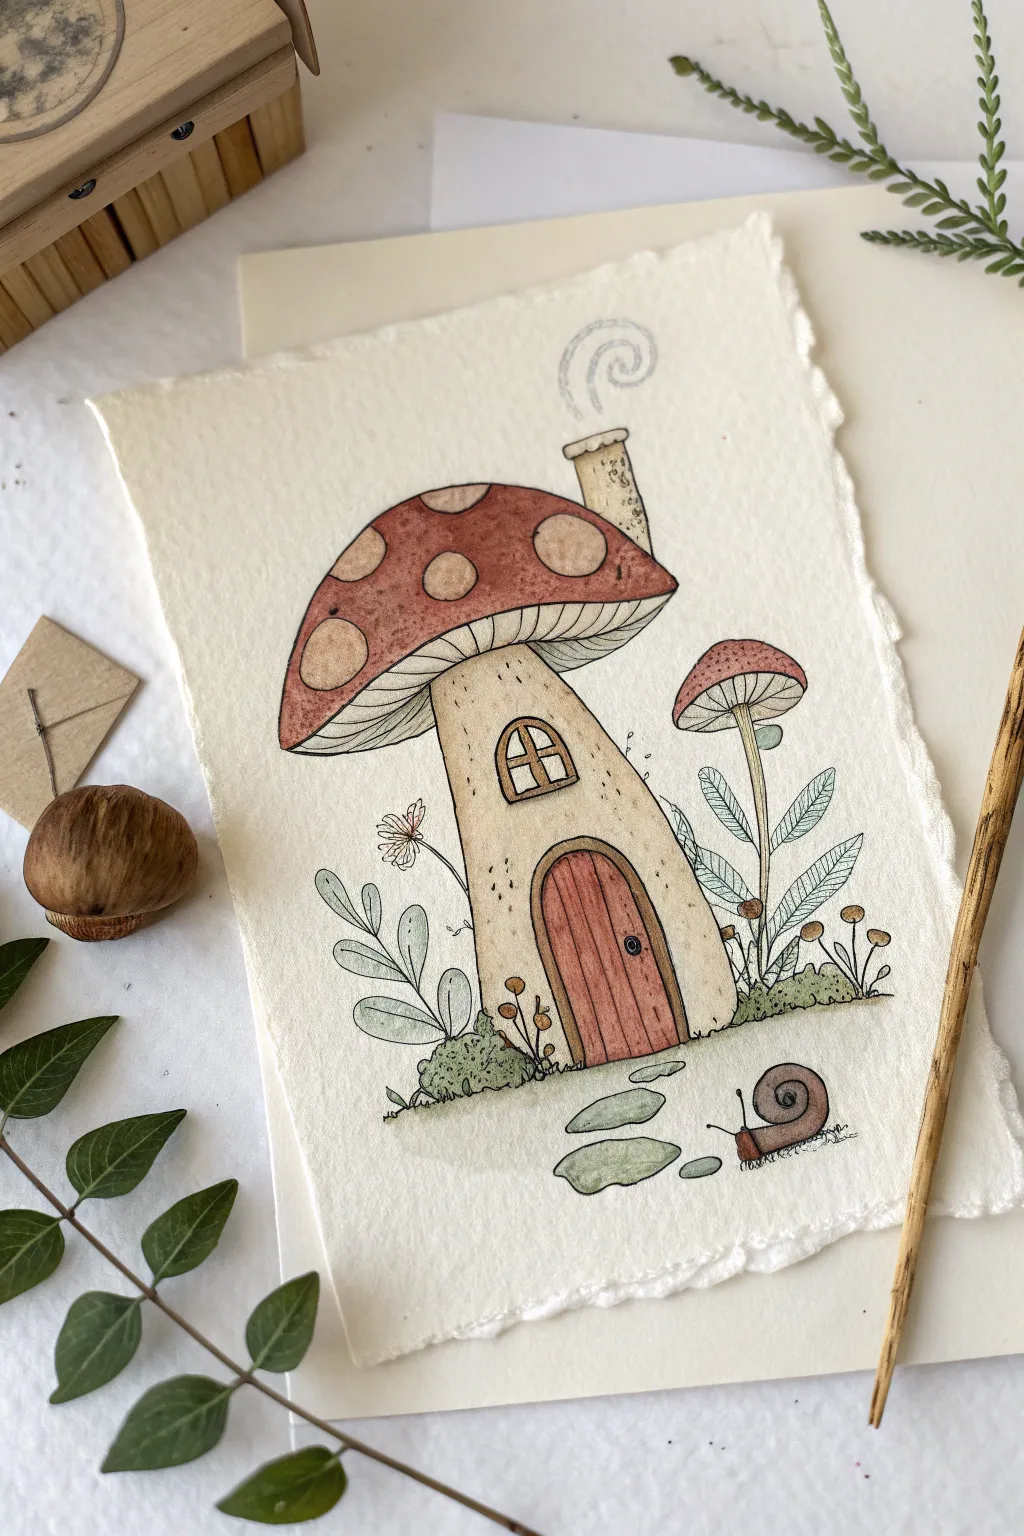
Step into a tiny world by painting this charming mushroom house illustration, complete with a curling chimney and a friendly snail visitor. This project uses soft watercolor washes and delicate ink linework on textured paper to create a cozy, vintage storybook feel.
Step-by-Step Tutorial
Materials
- Cold press watercolor paper (deckle edge optional)
- Pencil and kneaded eraser
- Waterproof fine liner pens (sizes 0.1 and 0.3)
- Watercolor paints (Red Ochre, Burnt Sienna, Sap Green, Yellow Ochre, Paynes Gray)
- Small round brushes (size 2 and 4)
- Jar of water to rinse
Step 1: Sketching the Foundations
-
Outline the main mushroom cap:
Begin by lightly sketching a large, rounded triangle shape for the roof. Curve the bottom edges downward slightly to give it volume and weight. -
Draw the stalk and details:
Sketch a sturdy, slightly curved stalk underneath the cap, widening it at the base. Add a smaller, secondary mushroom off to the right side for balance. -
Add architectural features:
Create an arched door at the base and a small arched window halfway up the stalk. Don’t forget the crooked chimney peeking out from the right side of the main roof. -
Sketch the garden elements:
Lightly draw leafy fronds on either side of the house, a few small stones leading to the door, and a cute snail with a spiral shell on the bottom right.
Step 2: Inking the Lines
-
Trace main outlines:
Using a 0.3 waterproof pen, carefully trace over your pencil lines for the main structures like the mushroom cap, stalk, and door frame. Keep your hand steady but allow for slight natural wobbles to enhance the organic feel. -
Ink the delicate details:
Switch to a thinner 0.1 pen for finer details like the gills under the mushroom cap, the wood grain on the door, and the leaf veins. -
Texturize the chimney and roof:
Add tiny stippling dots to the chimney to mimic soot or stone texture. Draw loose circles on the mushroom cap for the spots, keeping the lines broken and light for a natural look. -
Erase pencil marks:
Wait until the ink is completely dry—usually about 5-10 minutes—then gently erase all underlying pencil sketches with a kneaded eraser to keep the paper surface intact.
Natural Edges Pro Tip
To get that rustic, torn look on the paper edges, fold your watercolor paper back and forth several times along a ruler, then wet the fold with a brush before carefully tearing it.
Step 3: Adding Watercolor Washes
-
Paint the mushroom cap:
Mix a muted red or Red Ochre with plenty of water. Paint around the circular spots on the roof, letting the color pool slightly at the bottom edges for a shadowed effect. -
Color the stalk and chimney:
Use a very dilute wash of Yellow Ochre or cream to tint the mushroom stalk and chimney. This should be barely there, just warming up the white paper. -
Paint the door and details:
Fill in the door with a Burnt Sienna or warm brown. While you have this color, paint the snail’s shell and the undersides of the small mushroom on the right. -
Add greenery:
Mix a soft, desaturated Sap Green. Paint the leaves and the small grassy clumps at the base of the house, varying the intensity to create depth. -
Shadows and finishing touches:
Once the initial layers are dry, use a watery Paynes Gray to add subtle shadows under the roof cap and beneath the snail. Paint the stepping stones a cool grey-green. -
Smoke swirls:
Finally, with a very dry brush or a grey colored pencil, add the faint spiral of smoke rising from the chimney.
Level Up: Highlights
Use a white gel pen to add tiny highlights to the snail’s shell, the door handle, and the top of the mushroom spots to make the illustration pop.
Step back and admire your cozy little dwelling, letting it dry completely before framing or sending it to a friend
Clustered Mushrooms as Extra Rooms
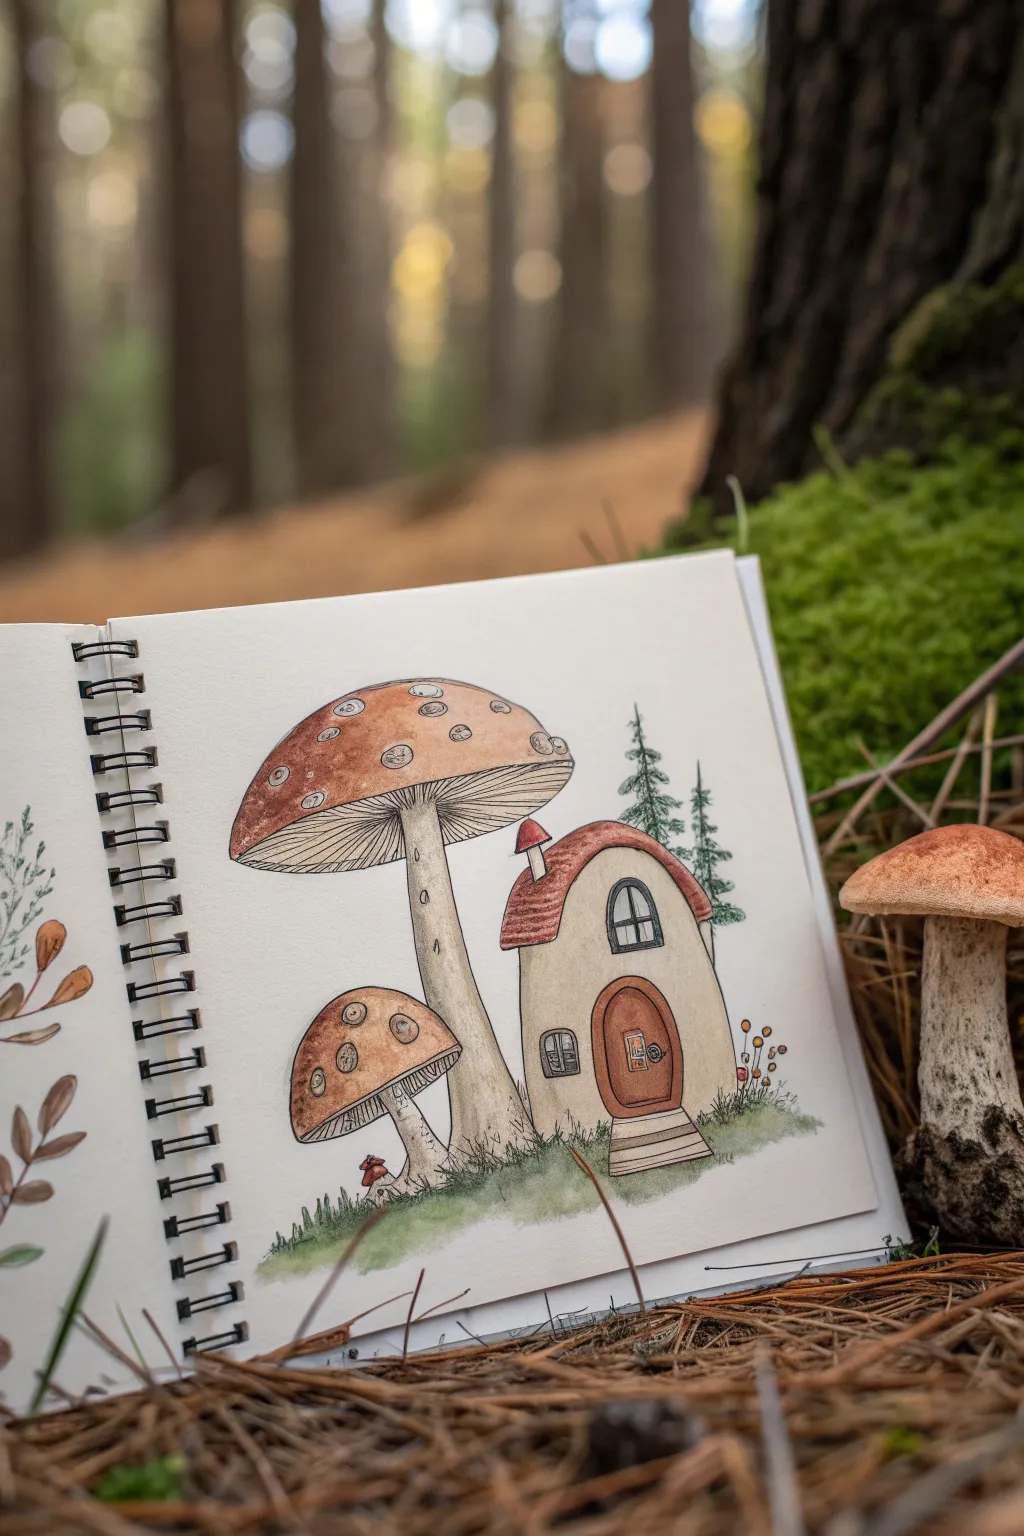
This charming illustration brings a fantasy forest to life by combining a cozy, lived-in cottage structure with towering toadstools. Using a mix of delicate ink lines and soft watercolor washes, you’ll create a seamless blend between nature and architecture.
How-To Guide
Materials
- Sketchbook with mixed media or watercolor paper (approx. 160gsm+)
- HB pencil and good quality eraser
- Waterproof fine liner pens (0.1mm and 0.3mm, black)
- Watercolor paint set (pans or tubes)
- Round watercolor brushes (size 2 and size 6)
- Jar of clean water
- Paper towel
Step 1: Pencil Framework
-
Sketch the Large Mushroom:
Start near the center-left of your page. Lightly sketch a large, wide cap shape, slightly tilted. Below it, draw a thick, tapering stem that curves gently as it hits the ground. This will be the main canopy. -
Add the Cottage Connection:
To the right of the main stem, sketch the cottage body. It should look like an organic, rounded mound that tucks slightly under the large mushroom cap. Add a curved, leafy roof that drapes over the top of the house. -
Place the Secondary Mushroom:
On the left side, nestled near the base of the large stem, draw a smaller, younger mushroom. Give it a rounder cap and a shorter, stubbier stem to create variety in scale. -
Draft the Details:
Sketch the architectural elements on the cottage: an arched wooden door with two steps leading up to it, an arched window above the door, and a small square window on the side. Add a tiny chimney poking out of the roof. -
Background Elements:
Lightly indicate two or three pine trees in the background behind the house. Keep these simple and vertical. Also, sketch a rough, uneven line for the grassy ground.
Step 2: Inking the Lines
-
Outline the Main Shapes:
Using your 0.3mm waterproof pen, carefully trace the main outlines of the mushrooms and the house. Use a slightly broken or wobbly line for the mushroom caps to give them an organic texture. -
Refine the Gills:
Switch to a finer 0.1mm pen. Underneath the large mushroom cap, draw fine lines radiating from the stem to the edge of the cap to represent the gills. Keep these lines delicate and close together. -
Detail the House:
Ink the door frame, window panes, and the chimney. I like to add small wood grain lines on the door to make it look rustic. Don’t forget the tiny stone steps at the entrance. -
Texture the Caps:
Draw small, uneven circles and ovals on top of both mushroom caps to represent the classic toadstool spots/warts. Ink the background pine trees with jagged, scribbly lines to suggest needles. -
Clean Up:
Once the ink is completely dry—give it a few minutes to be safe—gently erase all the underlying pencil marks to reveal a crisp line drawing.
Smudged Ink?
If your ink bleeds when painting, your pen might not be waterproof or the ink wasn’t dry. Test your pen on a scrap paper with water before starting your main piece.
Step 3: Applying Color
-
Paint the Caps:
Mix a diluted terracotta or rusted orange watercolor. Carefully paint the mushroom caps and the cottage roof. Leave the small circular spots unpainted (white paper) for high contrast. -
Shadowing the Caps:
While the orange is still slightly damp, drop a tiny bit of darker brown along the bottom edge of the caps and the roof curve to create volume and roundness. -
Coloring the Stems and House:
Use a very watery wash of pale beige or cream for the mushroom stems and the walls of the house. This should be extremely light to differentiate it from the white paper but not overpower the drawing. -
Wood and Windows:
Use a medium brown for the door and window frames. Paint the window glass a very pale, cool grey-blue. Paint the chimney red to match the roof. -
Grounding the Scene:
Mix a sap green with a touch of olive. Paint the grass at the base in loose, patchy strokes. Paint the background pine trees in a muted, darker green to push them into the distance.
Pro Tip: Texturing
Don’t color the mushroom stems completely flat. Leave small vertical streaks of white paper showing through the beige wash to mimic the fibrous texture of a stalk.
Step 4: Final Touches
-
Deepen Shadows:
Once the first layers are dry, mix a diluted grey-brown. Add subtle glazing shadows underneath the mushroom caps (over the gills) and under the eaves of the house to ground the structures. -
Add Life:
Use your fine pen or a tiny brush to add little tufts of grass over the green wash. You can also add tiny colored dots near the house to suggest wildflowers.
Now you have a cozy little forest dwelling ready for its fairy inhabitants to move in.
Balcony Grown From a Side Mushroom
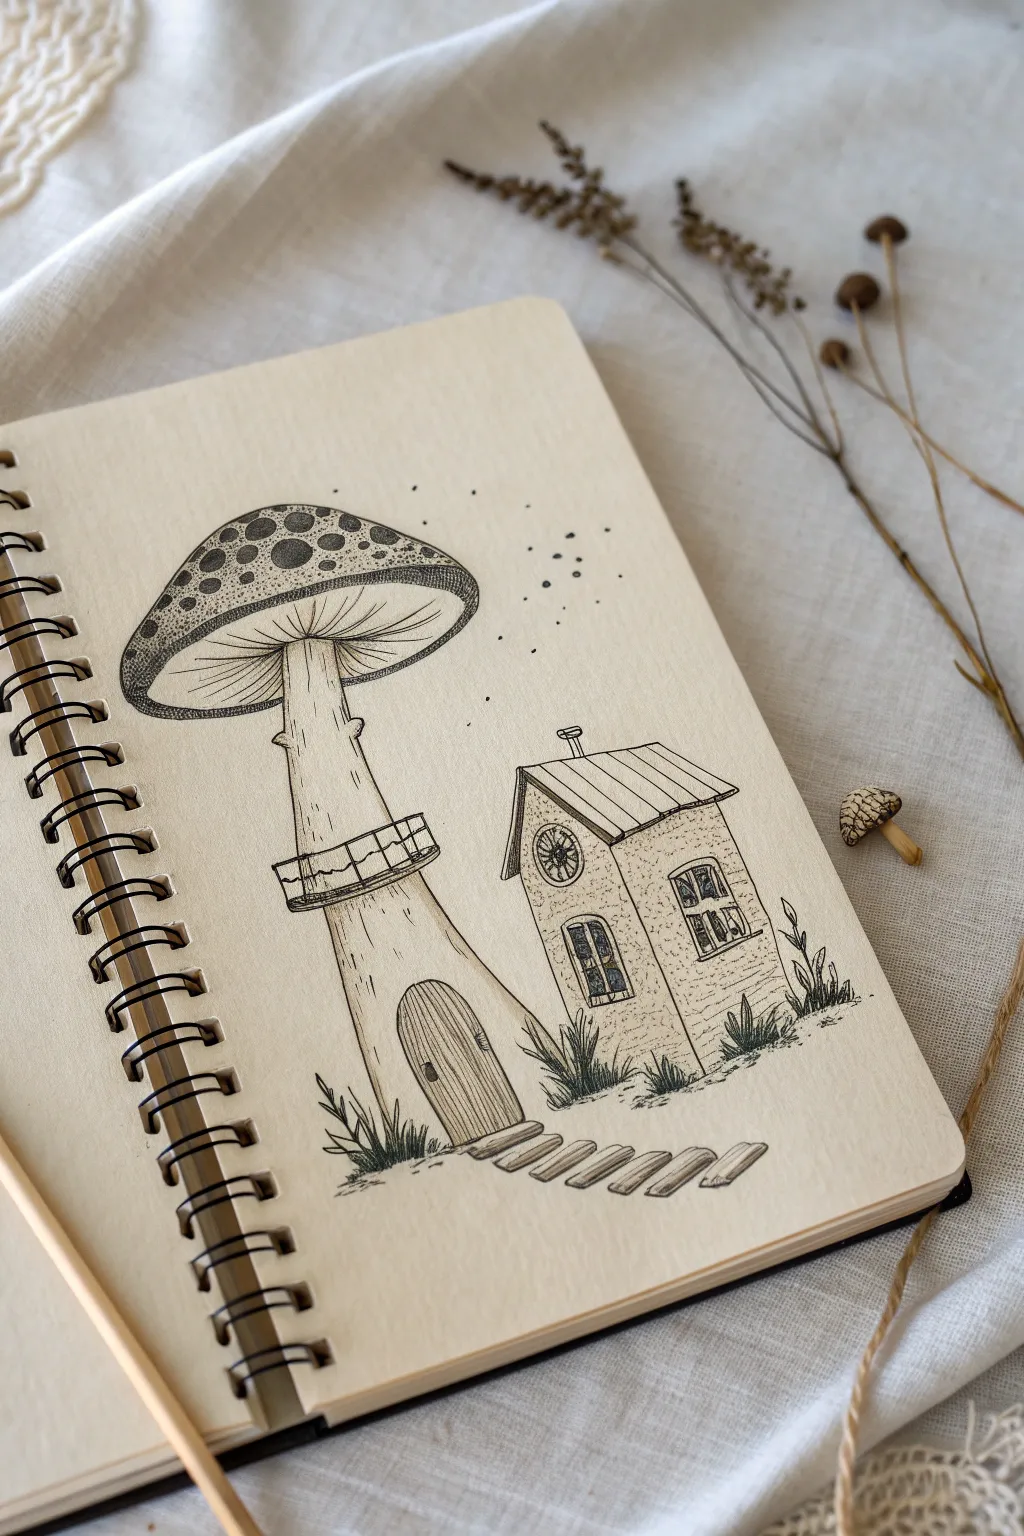
Capture the charm of fantasy architecture with this delicate pen and ink illustration of a tall mushroom dwelling attached to a cozy cottage. Using fine liners and stippling techniques, you’ll create texture and depth that make this tiny world feel lived-in and magical.
Step-by-Step
Materials
- Spiral-bound sketchbook (smooth or mixed media paper, cream/off-white recommended)
- HB or H graphite pencil
- Kneaded eraser
- Fine liner pens (sizes 0.05, 0.1, 0.3, and 0.5)
- Ruler (optional, strict straight lines aren’t necessary)
Step 1: Pencil Structure
-
Establish the mushroom shape:
Begin lightly with your pencil. Draw a large, slightly flattened oval for the mushroom cap. Below it, sketch a tall, curving stalk that mimics the shape of a lighthouse, wider at the base and tapering gently as it rises. -
Add the cottage extension:
To the right of the mushroom stalk, lightly sketch a boxy shape for the house attachment. Add a slanted roofline that connects snugly against the mushroom stem. -
Define the balcony guidelines:
About halfway up the mushroom stalk, sketch a narrow ellipse wrapping around the stem to mark where the balcony platform will sit. Draw vertical lines for the railing posts. -
Place windows and doors:
Sketch an arched doorway at the base of the mushroom. On the house extension, outline a round attic window and two rectangular windows below it. Add a winding path of uneven rectangles leading to the door.
Stippling Patience
Don’t rush the dots! Fast, hard tapping ruins pen tips. Hold the pen vertically and press gently. Group dots closer for shadows and spread them out for highlights.
Step 2: Inking the Mushroom
-
Outline the cap:
Switch to a 0.3 pen. Trace the outer edge of the mushroom cap. Draw the spots on the cap using various sizes of circles and ovals, leaving them uneven for a natural look. -
Detail the gills:
Using a fine 0.05 or 0.1 pen, draw lines radiating from the top of the stalk to the outer rim underneath the cap. These are the gills; keep your lines close together and delicate. -
Stipple the cap texture:
This is where patience pays off. Use a 0.1 pen to fill the space between the spots on top of the cap with tiny dots (stippling). Make the dots denser near the edges to create a 3D curved effect. -
Ink the stalk and balcony:
Outline the stalk with loose, sketch-like vertical lines to suggest wood or bark texture. Carefully ink the balcony railing, giving the wood planks a slightly shaky, organic line quality.
Glow Effect
Want a nighttime vibe? Use a white gel pen to add tiny stars or highlights on the windows and mushroom spots after the black ink is fully dry.
Step 3: Inking the Cottage
-
Structure the house:
Outline the roof and walls of the small cottage. Draw vertical lines on the roof to simulate standing seam metal or wood panels. Add a small chimney on top. -
Refine the windows:
Draw the window frames. For the glass, use tiny, hatched lines to suggest reflection and depth rather than coloring them in completely solid black. -
Add wall texture:
I find that less is more here. Use very sparse, light stippling (dots) on the cottage walls to give them a stucco or stone texture without overwhelming the drawing.
Step 4: Finishing Details
-
Draw the door and path:
Add vertical wood grain lines to the arched door. Ink the stepping stones leading up to it, giving them faint 3D edges to show thickness. -
Ground the scene:
Add tufts of grass around the foundation of the house and mushroom base. Use quick, upward flicking motions with your pen to make the grass look spiky. -
Add atmosphere:
Sprinkle a few tiny dots in the air around the mushroom cap to represent spores, fireflies, or magical dust. -
Erase and assess:
Once the ink is completely dry, gently erase all underlying pencil marks with your kneaded eraser. Check if any shadows need deepening with extra stippling.
Now you have a charming fantasy abode ready to inhabit your sketchbook pages
Cutaway Interior Cozy Room View
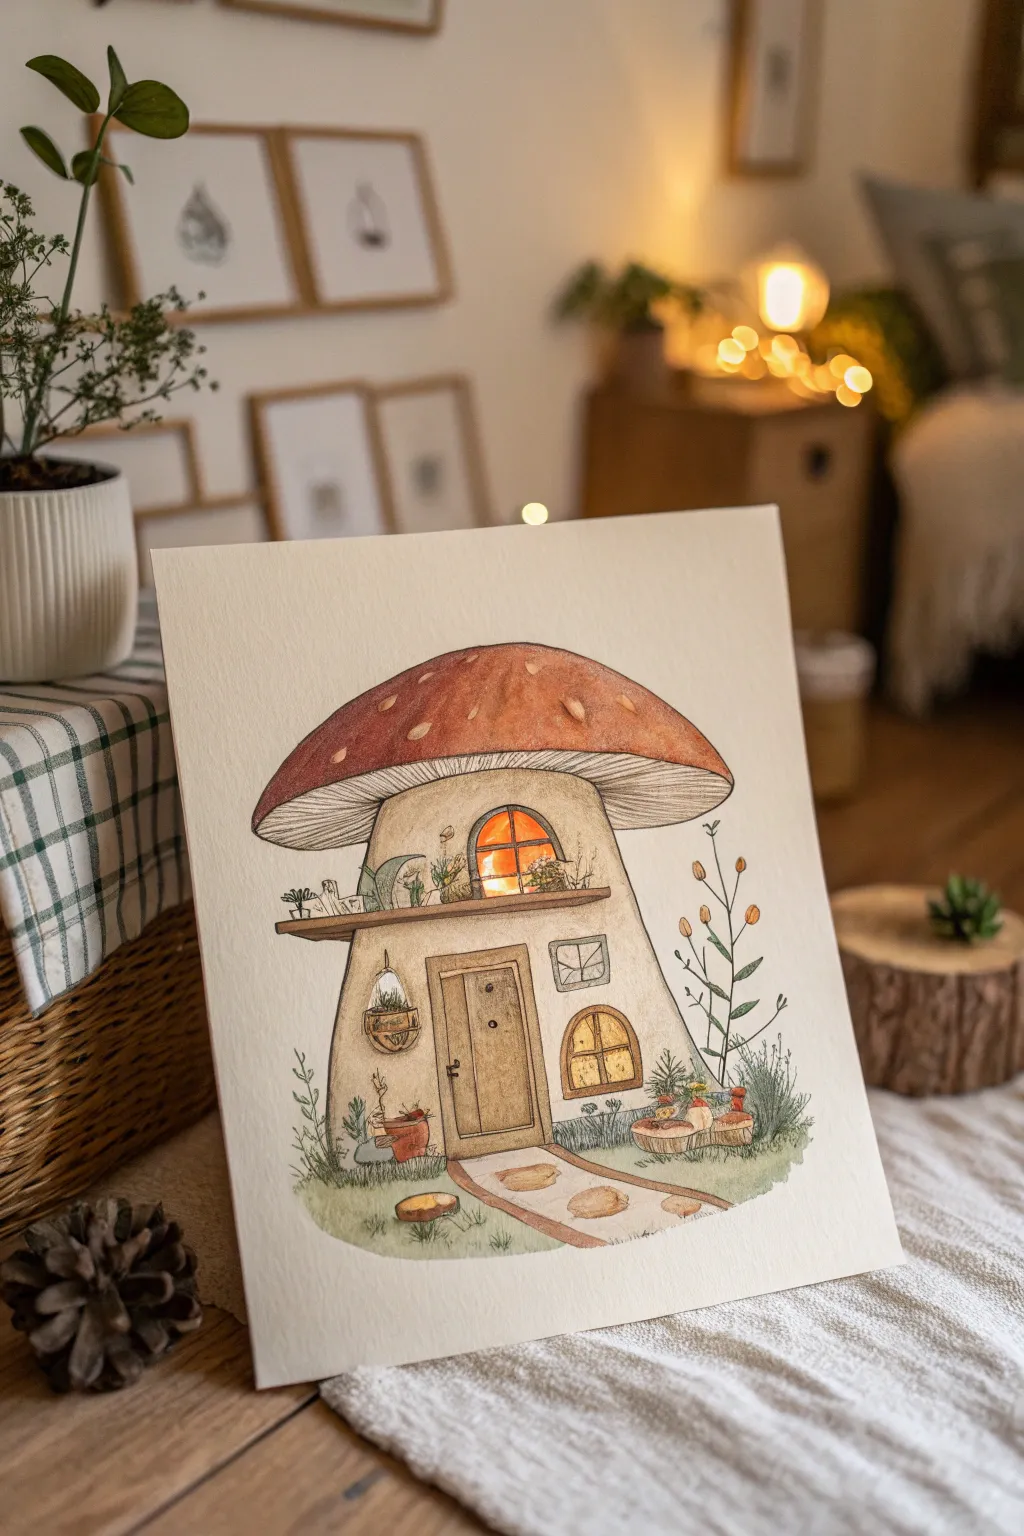
Bring a touch of cottagecore magic to your sketchbook with this whimsical mushroom house tutorial. By combining fine liner details with soft watercolor washes, you’ll create a charming dwelling that glows with warmth.
Step-by-Step
Materials
- Cold press watercolor paper (300 gsm)
- Pencil (HB or 2H)
- Kneaded eraser
- Waterproof fine liner pens (0.1, 0.3, and 0.5 sizes, brown or Sepia)
- Watercolor paints (Vermilion, Ochre/Sienna, Sap Green, Burnt Umber)
- White gel pen or gouache
- Round watercolor brushes (sizes 2 and 6)
- Masking tape
Step 1: Drafting the Foundations
-
Establish the Cap:
Begin by lightly sketching a large, rounded semi-circle for the mushroom cap. Keep the top curve smooth, but allow the bottom rim to dip slightly unevenly to mimic organic growth. -
Draw the Stalk:
Sketch the stalk widening slightly at the base. It shouldn’t be a perfect cylinder; give it a gentle curve on the right side to suggest a ‘lived-in’ slump. -
Add Structural Features:
Lightly pencil in the main rectangular door at the base and a rounded window halfway up the stalk. Add a small balcony protruding just under the cap’s rim. -
Sketch the Surroundings:
Define a winding stone path leading to the door. Add loose shapes for shrubbery on either side of the house and a few potted plants on the balcony.
Muddy Colors?
Ensure each layer is bone dry before glazing a new color over it. If your greens are bleeding into the beige stalk, use a hairdryer
Step 2: Inking the Details
-
Outline the Main Forms:
Switch to a waterproof 0.3mm fine liner (brown ink works beautifully here for a softer look). Trace over your pencil lines for the cap and stalk, using broken or slightly jittery lines to create texture. -
Texture the Gills:
Use a 0.1mm pen to draw fine, tightly packed lines underneath the cap, curving them slightly to follow the volume of the mushroom. -
Detail the Woodwork:
Ink the door frame and planks. Add tiny vertical grain lines on the door and small circles for nails or knots. Don’t forget the railing on the upper balcony. -
Add Botanical Elements:
Draw the leaves of the side plants and balcony pots using quick, looped strokes. Ink the stone path with irregular, rounded shapes. -
Erase Guidelines:
Once the ink is completely dry, gently remove all pencil marks with a kneaded eraser to prepare for painting.
Step 3: Watercolor Washes
-
Paint the Cap:
Mix a diluted Vermilion or rust red. Apply a wash over the mushroom cap, leaving small irregular spots unpainted (white) for the classic toadstool look. -
Color the Stalk:
Use a very watery Yellow Ochre or diluted Buff Titanium for the house walls. Keep this layer pale to suggest a creamy mushroom texture. -
Warm the Wood:
Paint the door, balcony, and window frames with Burnt Sienna. I like to drop in a tiny bit of darker brown while it’s wet to create shadows. -
Greenery Glazes:
Apply Sap Green to the surrounding grass and plants. Vary the intensity by adding more water for distant grass and more pigment for the potted plants.
Fairy Lights Idea
Paint tiny yellow dots connected by a thin line wrapped around the stalk or balcony. Add a touch of white gouache in the center for a glowing effect.
Step 4: Adding Glow and Final Touches
-
Create Window Glow:
Paint the window panes with a bright pure yellow or orange. While still slightly damp, dab the center with a tissue to make it look prominent and bright. -
deepen Shadows:
Mix a transparent grey-brown and glaze it under the cap’s overhang and beneath the balcony to ground the structure. -
Texture the Path:
Paint the path stones with a light brown wash, letting the watercolor pool slightly at the edges for definition. -
Reinforce Lines:
Go back with your 0.5mm pen to darken the deepest crevices, like the bottom of the door frame or the underside of the plants. -
Highlights:
Use a white gel pen to add tiny sparkle dots to the window panes and highlights on the red mushroom cap spots.
Now step back and admire the warm, inviting little home you have built on paper
Rainy-Day Cap With Dripping Eaves
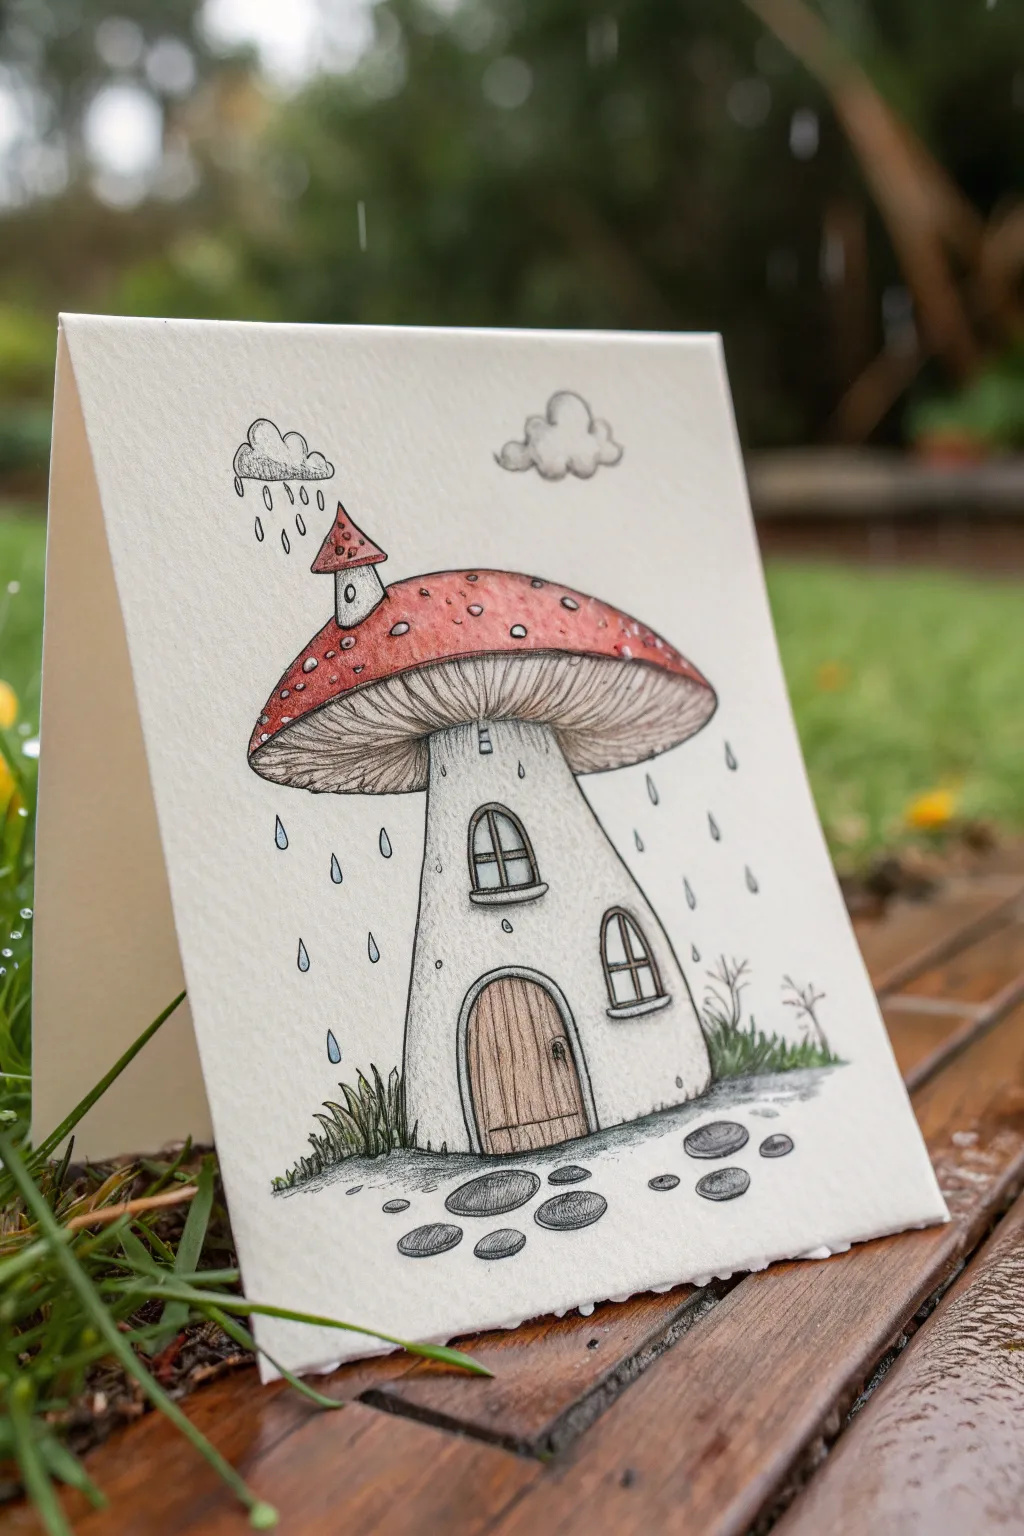
Capture the cozy feeling of a rainy afternoon with this charming illustration of a mushroom house weathering a storm. Using a blend of fine ink lines and soft colored pencils or watercolor, you’ll create a storybook scene complete with dripping eaves and puddle-jumping stones.
Step-by-Step Guide
Materials
- Heavyweight textured drawing paper (watercolor paper or mixed media)
- Fine liner pens (sizes 0.1, 0.3, and 0.5, waterproof)
- Graphite pencil (HB or 2B) and eraser
- Watercolor paints or watercolor pencils (Red, Earth tones, Blue, Grey)
- Small round paintbrush (size 2 or 4)
- White gel pen (optional for highlights)
Step 1: Sketching the Structure
-
Outline the mushroom shape:
Begin lightly with your pencil. Sketch a tall, slightly curved stalk that widens at the bottom for stability. Top it with a wide, elliptical cap that droops slightly over the edges, like an umbrella. -
Add the architectural details:
Draw an arched doorway at the base of the stalk. Add two arched windows—one higher up near the cap and a smaller one lower down to the right. Don’t worry about perfect symmetry; quirky lines add character. -
Sketch the chimney and surroundings:
Pop a tiny, crooked chimney onto the left side of the red cap, giving it its own miniature conical roof. Lightly sketch a few stepping stones leading to the door and tufts of grass at the base. -
Plan the weather elements:
floating above the chimney, sketch a small, fluffy rain cloud. Add a second cloud to the right. Draw teardrop shapes falling from the clouds and sliding off the mushroom cap’s rim.
Step 2: Inking the Details
-
Outline the main forms:
Switch to your 0.3 or 0.5 fine liner. Carefully go over your pencil lines for the mushroom cap and stalk. Use a slightly broken or shaky line for the stalk to suggest an organic, textured surface. -
Detail the underside:
Use a thinner 0.1 pen to draw the gills under the mushroom cap. These should be fine lines radiating from the top of the stalk out to the edge of the cap, curving slightly to follow the form. -
Texture the door and windows:
Draw vertical wood grain lines on the door. Add panes to the windows and give them thick sills. Ink the stepping stones with rough, imperfect ovals. -
Inking the rain:
Ink the clouds with bumpy, scalloped lines. For the rain, I like to keep the lines very crisp. Draw the droplets falling from the cloud and the eaves, and add tiny ripple rings on the ground where drops might be hitting. -
Erase pencil marks:
Wait a moment for the ink to dry completely, then gently erase all your graphite guidelines to leave a clean black-and-white drawing.
Wet-on-Dry Texture
Apply paint to dry paper rather than wetting it first. This keeps the color controlled and prevents it from bleeding into the delicate ink lines of the gills.
Step 3: Adding Color and Atmosphere
-
Paint the mushroom cap:
Using watercolor or watercolor pencils, fill in the top of the cap with a muted red. Leave small irregular circles distinctively white for the classic toadstool spots. -
Shade the underside:
Wash a very diluted grey or brown over the gills area. Add a slightly darker stripe of this shadow color right where the stalk meets the gills to create depth. -
Color the stalk and stones:
Keep the stalk mostly white or cream. Use a pale grey to lightly shade the sides of the stalk, giving it volume. Paint the stepping stones a darker slate grey. -
Warm up the wood:
Use a warm brown for the door. Vary the pressure or paint saturation to make some wood planks look darker than others. -
Tint the rain and glass:
Use a very pale, watery blue for the raindrops and the window panes. Paint the little cloud with a soft grey shadow on its underside. -
Ground the house:
Paint the grass tufts green and add a light wash of grey-green around the base and stones to ground the structure, so it doesn’t look like it’s floating.
Smudged Ink?
If your fineliner smears when you paint over it, it isn’t fully waterproof. Test your pen on scrap paper first, or do the painting first and ink last once dry.
Step 4: Final Touches
-
Enhance the shadows:
Once the first layer of color is dry, go back with a slightly darker variation of your colors. Add shadows under the window sills, under the cap’s rim, and beneath the stepping stones. -
Add white highlights:
If you have a white gel pen, add tiny reflection dots to the window panes and the most prominent raindrops to make them look wet and glossy. -
Stipple for texture:
Finally, use your finest pen to add tiny stipple dots on the stalk and the ground. This adds a gritty, earthy texture that brings the whole illustration together.
Now you have a cozy little fungi fortress ready to weather any storm
Snowy Winter Mushroom Roof

Capture the magic of the season with this cozy illustration of a mushroom cottage dusted with fresh snow. Using colored pencils and fine liners on textured paper, you’ll create a charming winter scene complete with glowing windows and icy details.
Step-by-Step Tutorial
Materials
- Heavyweight textured paper (watercolor or mixed media)
- HB graphite pencil
- Kneaded eraser
- Fine liner pens (black or dark brown, 0.1mm and 0.3mm)
- Colored pencils (Red, white, beige, browns, warm yellow, cool blue)
- White gel pen or gouache for highlights
- Paper blending stump or cotton swab
Step 1: Sketching the Foundation
-
Outline the Cap:
Begin lightly with your HB pencil. Draw a large, wide dome shape for the mushroom cap. Keep the bottom edge slightly curved downward to give it volume. -
Define the Stalk:
Sketch a thick, sturdy stalk emerging from the center of the cap. Widen it slightly at the base where it meets the ground to make the house look stable. -
Add Architectural Details:
Draw an arched door at the base of the stalk and a small, rounded window higher up on the left side. Frame both with thick borders to resemble wood or stone trim. -
Suggest the Terrain:
Lightly sketch uneven mounds around the base of the stalk to represent snowdrifts. Add a few vertical strokes on either side for tufts of winter grass pushing through the snow.
Step 2: Inking and Outline
-
Refine the Lines:
Use your 0.1mm fine liner to trace over your pencil sketch. Use broken, shaky lines for the mushroom stalk to mimic organic texture, but keep the door and window frames more solid. -
Detail the Gills:
Underneath the cap rim, draw fine lines radiating from the stalk toward the edge. These represent the mushroom gills; keep them delicate and close together. -
Add Structural Textures:
Draw vertical wood grain lines on the door and cross-hatching on the window pane. Erase all pencil marks once the ink is completely dry.
Frosty Texture Tip
To make the snow look fluffy, use small circular motions with your white pencil, layering heavily until the paper tooth is completely covered and waxy.
Step 3: Coloring the Mushroom
-
Base Layer for the Cap:
Take a deep red colored pencil and fill in the mushroom cap. Leave irregular white shapes empty scattered across the surface—these will become the snow clumps later. -
Deepen the Red:
Layer a darker red or burgundy near the bottom edge of the cap and under the white snow spots to create shadows and dimension. This makes the cap look rounded rather than flat. -
Shade the Stalk:
Use a beige or light warm grey pencil to shade the sides of the stalk, leaving the center lighter to suggest a cylindrical form. I find distinct vertical strokes help emphasize the fibrous texture here. -
Color the Woodwork:
Fill the door and window frame with warm browns. Press harder on the edges for depth, and use a yellow pencil to fill the window panes, creating a warm, inviting glow.
Fixing Smudges
If red pencil dust accidentally smudges onto your white snow areas, lift it gently with a kneaded eraser before applying the white layer to keep it crisp.
Step 4: Winter Details
-
Create Snow Clumps:
Using a white pencil (or white gouache if your paper is dark), fill in the empty spots on the cap. Add blue shading to the bottom of each white clump to make them look like three-dimensional snow pilings. -
Ground Snow and Grass:
Color the snow mounds at the base with very light blue, keeping the top edges white. Use a dull green or grey-blue for the grass tufts, making them look frosted and cold. -
Icicles:
Draw thin vertical lines hanging from the rim of the mushroom cap using a light blue pencil or fine blue pen. Add tiny circles at the tips to represent dripping water or frozen droplets. -
Final Highlights:
Use a white gel pen to add sharp highlights to the window panes, the top of the door frame, and the brightest points of the snow on the cap for a wet, icy finish.
Your charming winter retreat is ready to be admired
Autumn Leaves and Harvest Details
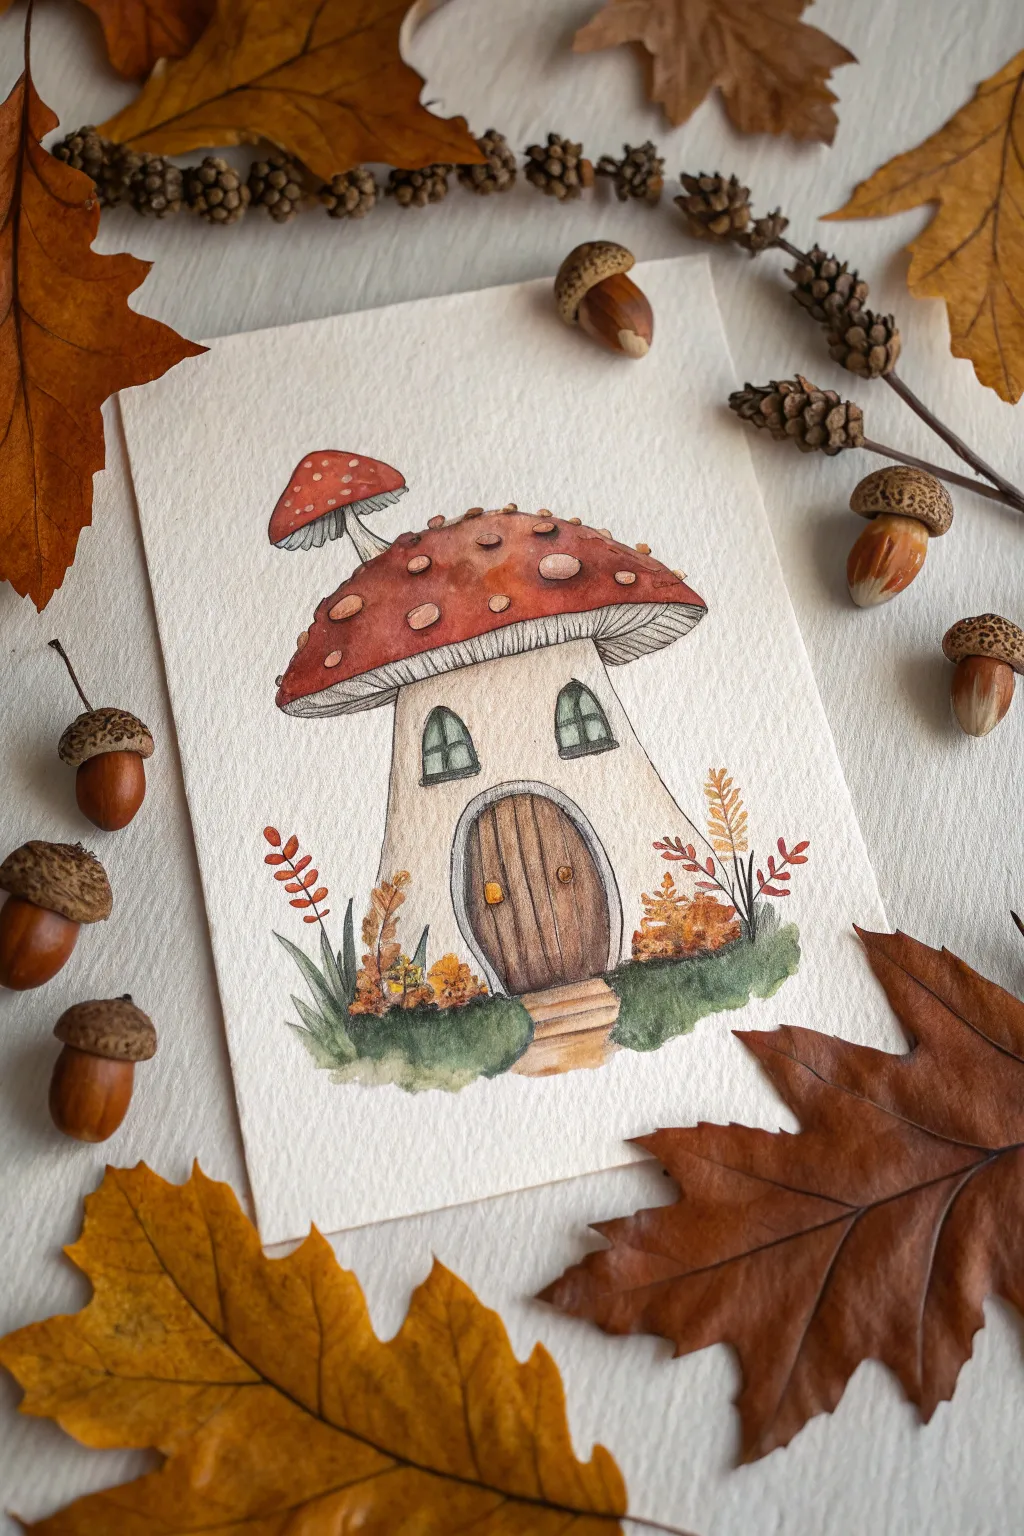
Capture the magic of an autumn forest with this charming illustration of a mushroom cottage. Featuring warm earthy tones and delicate details, this project combines simple line work with soft watercolor washes to create a cozy seasonal greeting.
Step-by-Step Guide
Materials
- Cold press watercolor paper (300 gsm)
- Waterproof fine liner pens (0.1 and 0.3 sizes, black or sepia)
- Watercolor paint set (focus on Burnt Sienna, Yellow Ochre, Alizarin Crimson, Sap Green, and Sepia)
- Round watercolor brushes (size 2 and 6)
- Pencil (HB) and eraser
- White gel pen or gouache for highlights
- Paper towels and water jars
Step 1: Sketching the Bones
-
Establish the main shapes:
Begin by lightly sketching a large, slightly squat triangle with rounded corners for the stalk base. Top this with a wide, curved dome shape for the main mushroom cap. -
Add the chimney mushroom:
Draw a smaller mushroom sprouting from the upper left side of the main cap, giving it a curved stem so it looks like it’s growing naturally out of the roof. -
Define architectural details:
Sketch a rounded arched door at the base of the stalk. Be sure to add a small stone step leading up to it. Above the door, draw two arched windows with simple mullions. -
Sketch the foliage:
Ground your house by sketching loose, grassy mounds at the bottom. Add tall blades of grass on the left and fern-like sprigs on the right to frame the structure.
Muddy colors?
Wait for each layer to dry completely before glazing a shadow over it. If the paper is damp, the new color will churn up the old one, creating a muddy look.
Step 2: Inking the outlines
-
Outline the structure:
Using your 0.3 fine liner, carefully trace the main outlines of the mushroom cap and stalk. Keep your hand relaxed to give the lines a natural, organic feel rather than a rigid geometric look. -
Detail the gills and wood:
Switch to a finer 0.1 pen to draw the gills under the mushroom cap using distinct, fine lines radiating from the stem. Ink the vertical wood grain planks on the door. -
Finalize ink details:
Ink the windows, the small chimney mushroom, and the surrounding foliage. Once the ink is completely dry—wait at least five minutes to prevent smudging—gently erase your pencil guidelines.
Make it a card
Paint this design on the right half of a landscape sheet of paper, then fold it in half to create a beautiful, hand-painted greeting card for fall.
Step 3: Watercolor Application
-
Paint the stalk base:
Dilute a mix of Yellow Ochre and a touch of brown to create a creamy beige wash. Apply this to the house walls (the stalk), keeping the center slightly lighter to suggest roundness. -
Color the caps:
Mix a rich muted red using Alizarin Crimson and a tiny bit of Burnt Sienna. Paint the main roof and the chimney cap, carefully painting around circular spots to leave them white. -
Shade the gills:
Use a very watery grey or diluted Sepia to add a transparent shadow under the cap where the gills are. This adds instant dimension to the roof overhang. -
Warm up the wood:
Paint the front door with a rich brown. I find that varying the saturation between individual planks makes the wood look more aged and realistic.
Step 4: Bringing it to Life
-
Add glass reflections:
Paint the window panes a pale, watery blue-grey. Keep the color transparent so it doesn’t look too heavy against the light walls. -
Greenery and ground:
Block in the grass at the base with Sap Green. drop in touches of brown or orange while the green is still wet to create an autumnal, muddy ground effect. -
Decorative foliage:
Paint the fern fronds and tall grass using burnt orange and rust tones to emphasize the fall season theme. -
Deepen the shadows:
Once your base layers are dry, glaze a slightly darker version of your wall color under the rim of the cap and along the bottom edge of the stalk to anchor the building. -
Final white highlights:
If you accidentally painted over any spots on the mushroom cap, or if they just need to pop more, use a white gel pen or a dot of gouache to brighten them up.
Place your finished painting among some gathered acorns and leaves for the perfect seasonal display
Isometric Mushroom House Blueprint Style
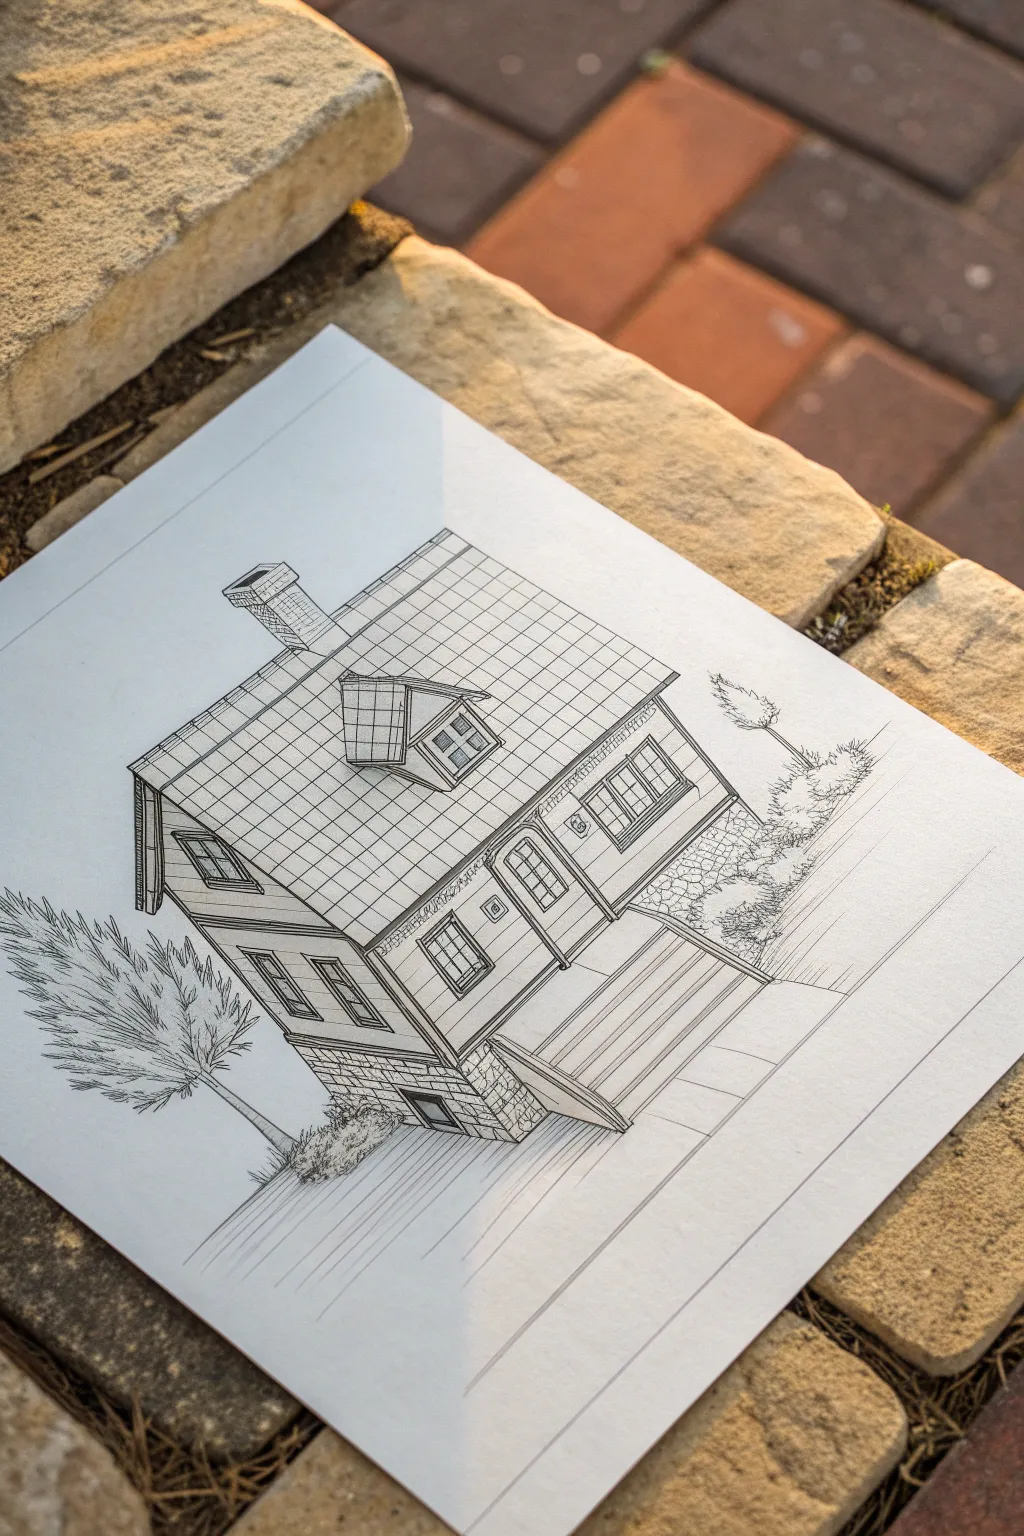
This project captures the charm of architectural planning with a crisp, technical style drawing of a cozy cottage. By using precise lines and isometric perspective, you’ll create an illustration that feels like a professional blueprint brought to life.
Step-by-Step Tutorial
Materials
- High-quality white drawing paper or cardstock
- Pencil (HB or 2H for sketching)
- Fine liner pens (0.1mm, 0.3mm, and 0.5mm sizes)
- Ruler (preferably clear plastic)
- Eraser (kneaded or white vinyl)
- Compass or protractor (optional, for angles)
Step 1: Laying the Geometric Foundation
-
Establish the isometric axis:
Start by lightly drawing a vertical line near the center of your page to represent the nearest corner of the house. From the bottom of this line, use your ruler to draw two receding lines angling upwards at approximately 30 degrees to the left and right. -
Block out the main volume:
Complete the basic box shape of the house’s main body. Draw parallel vertical lines for the other corners, ensuring they are equidistant if the house is square, or elongated for a rectangular footprint. Connect the tops with lines parallel to your base lines. -
Define the roofline:
Locate the center point of the shorter sides walls at the top. Draw a vertical line upward from this center to determine the roof’s peak height. Connect this peak to the corners to form the gable ends. -
Extend the roof structure:
Draw the ridge line of the roof parallel to the long side of the house. Connect the far end of the ridge to the far corners to complete the prism shape of the roof. -
Add structural extrusions:
Sketch a small box popping out of the roof slope for the dormer window. Similarly, block out a rectangular shape attached to the front or side for the entryway staircase.
Step 2: Detailed Pencil Drafting
-
Divide the surfaces:
Using your ruler, lightly sketch a grid pattern on the roof to represent tiles. Keep the lines strictly parallel to the roof edges to maintain the isometric illusion. -
Position the features:
Map out rectangles for the windows and doors. Ensure the vertical sides of the windows remain perfectly vertical, while the tops and bottoms align with the angled perspective lines of the wall they sit on. -
Sketch the surroundings:
Loose, organic shapes work best here. Lightly outline a tree to the left and some shrubbery along the foundation line to ground the structure. -
Draft the chimney:
Draw a rectangular column rising from the roof ridge. I find it helpful to draw through the roof form lightly to ensure the chimney aligns correctly with the house’s vertical axis.
Ruling Logic
Keep your ruler clean! Graphite buildup on the ruler’s edge can smudge your paper. Wipe the edge with a tissue frequently while sliding it across your drawing.
Step 3: Inking and Definition
-
Outline the main structure:
Switch to a 0.5mm fine liner. Carefully trace over the main structural lines of the house—the corners, the roof edge, and the foundation base. Use the ruler for steady, straight strokes. -
Detail the roof grid:
Using a thinner 0.3mm pen, ink the grid lines on the roof. Be consistent; steady pressure creates that clean, blueprint aesthetic. -
Ink windows and doors:
Use the 0.3mm pen for the window frames and door outlines. For the inner window panes (muntins), switch to your finest 0.1mm pen to keep the details from looking clunky. -
Texture the siding:
Add horizontal cladding lines to the upper walls using the 0.1mm pen. Don’t draw every single board if you want a cleaner look; suggesting them with broken lines or widely spaced lines works well. -
Render the stone foundation:
Draw irregular, interlocking shapes at the base of the house to simulate stone. Use a slightly shaky hand here to differentiate the organic stone texture from the rigid wood siding above. -
Add organic elements:
Ink the tree and bushes using quick, scribbly strokes to create foliage texture. This contrast softens the hard geometry of the architecture.
Slanted Lines?
If the house looks ‘twisted,’ check your verticals. In isometric styles, all vertical lines must be perfectly straight up and down, never angled.
Step 4: Final Touches
-
Clean up the sketch:
Wait for the ink to be completely dry—give it a few minutes to be safe. Gently erase all the underlying pencil guidelines and construction marks. -
Add depth with shadows:
Use hatching (closely spaced parallel lines) to create shadows under the roof eaves and inside the door frame. This adds instant three-dimensionality. -
Draw the ground lines:
Extend a few long, straight lines from the corners of the house outward to suggest the ground plane or a path, anchoring the building in space.
Now you have a precise architectural illustration that looks ready for a builder to review
Steampunk Mushroom House With Pipes and Gears
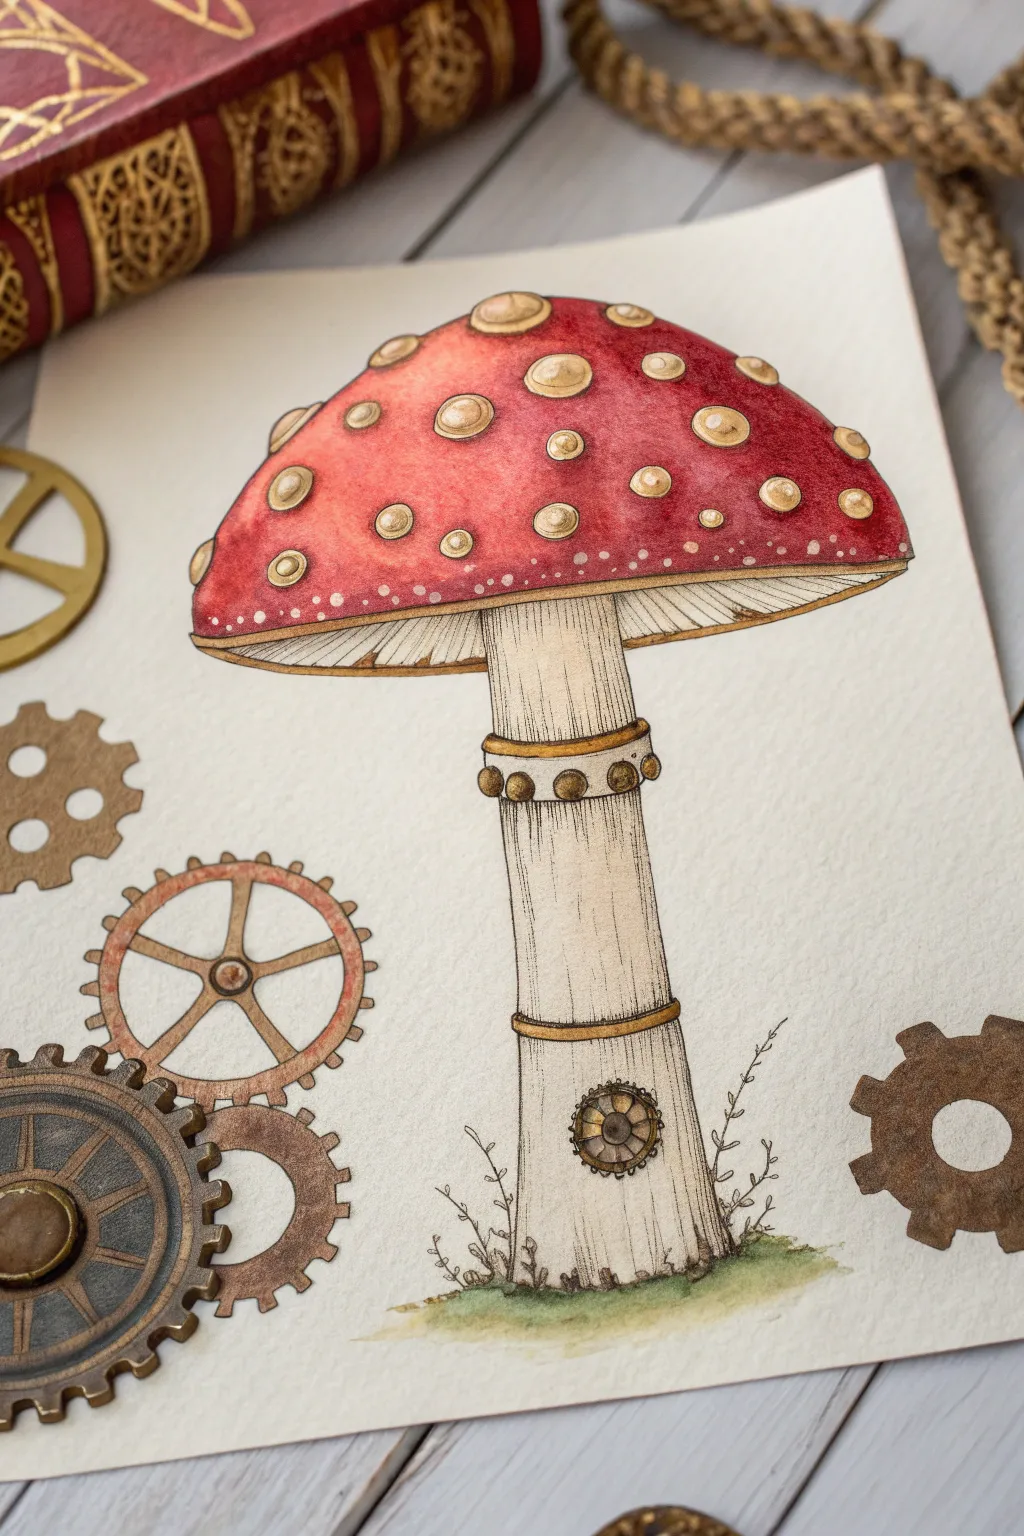
Blend organic whimsy with industrial grit in this detailed watercolor and ink illustration. This project juxtaposes the soft texture of a classic fly agaric mushroom with rigid, metallic steampunk bands and gears for a truly unique piece of art.
How-To Guide
Materials
- Hot press watercolor paper (smooth finish)
- Pencil (HB or H)
- Waterproof fine liner pens (sizes 0.1, 0.3, and 0.5)
- Watercolor paints (Alizarin Crimson, Burnt Sienna, Yellow Ochre, Sepia, Lamp Black)
- Round watercolor brushes (size 4 and size 0 for details)
- White gel pen or gouache
- Paper towel
Step 1: Sketching the Structure
-
Outline the Cap:
Begin lightly with your pencil, drawing a large, slightly flattened semi-circle for the mushroom cap. Ensure the curves are symmetrical but organic. -
Draw the Stem:
Extend a sturdy stem downwards from the center of the cap. Make it slightly thicker at the base and taper gently as it reaches the gills. -
Add Steampunk Elements:
Sketch two distinct bands around the stem—one near the gills and one near the base. Add a circular portal or gear window near the bottom right of the stem. -
Detailing the Spots:
Draw scattered circles and ovals across the cap for the classic mushroom spots. Give them a bit of dimension by thinking of them as raised warts rather than flat spots.
Bleeding Lines?
If your ink smudges when painting, ensure your pen is labeled ‘archival’ or ‘waterproof.’ If not, do the ink work *after* the paint has fully dried.
Step 2: Inking the Foundation
-
Refine the Lines:
Using a 0.3 fine liner, methodically trace over your pencil lines. Use a steady hand for the mechanical bands to make them look manufactured. -
Texture the Stem:
With the 0.1 pen, draw vertical, slightly wavering lines down the length of the stem to mimic fibrous plant texture. Leave the metallic bands clear of these lines. -
Add Mechanical Details:
Draw rivets or small circles along the bands and the gear window. Ink the gills under the cap with fine, radiating lines. -
Clean Up:
Once the ink is completely dry, erase all underlying pencil marks to keep your watercolor wash clean.
Step 3: Watercolor Application
-
Wash the Cap:
Mix a vibrant red using Alizarin Crimson and a touch of Burnt Sienna. Paint the cap, carefully painting around the spots to leave them white for now. -
Deepen the Shadows:
While the red is still damp, drop in slightly darker crimson near the bottom edge of the cap to create volume and roundness. -
Paint the Spots:
Dilute Yellow Ochre heavily with water. Wash over the ‘white’ spots and the gills to give them an aged, parchment-like tone. -
Brass Tones:
For the metal bands and gear window, mix Yellow Ochre with a tiny bit of Sepia. Paint these areas solid, aiming for a brass or gold look. -
Shadowing the Stem:
Use a very watered-down Sepia to add shading to the sides of the stem, reinforcing cylindrical form. I like to let this dry briefly before adding a second layer for deeper contrast.
Add Real Gears
For a mixed media twist, glue tiny real watch gears or metallic sequins over the drawn gear window for a 3D textural effect.
Step 4: Finishing Details
-
Enhance the Metal:
Mix a darker brown-black and paint small shadows under the rivets and along the edges of the metal bands to make them pop. -
Grounding the Image:
Paint a subtle wash of green and brown at the base of the mushroom to suggest moss or earth, grounding the figure. -
Highlights:
Use a white gel pen or opaque white gouache to add tiny reflections on the top of the rivets and the wettest part of the cap for a glossy finish. -
Final Ink Touches:
Go back in with your 0.5 pen to darken the deepest shadows, particularly under the cap rim and around the gear window, to finalize the contrast.
Now you have a whimsical botanical study that fits perfectly into any fantasy portfolio
Floating Mushroom House in the Sky
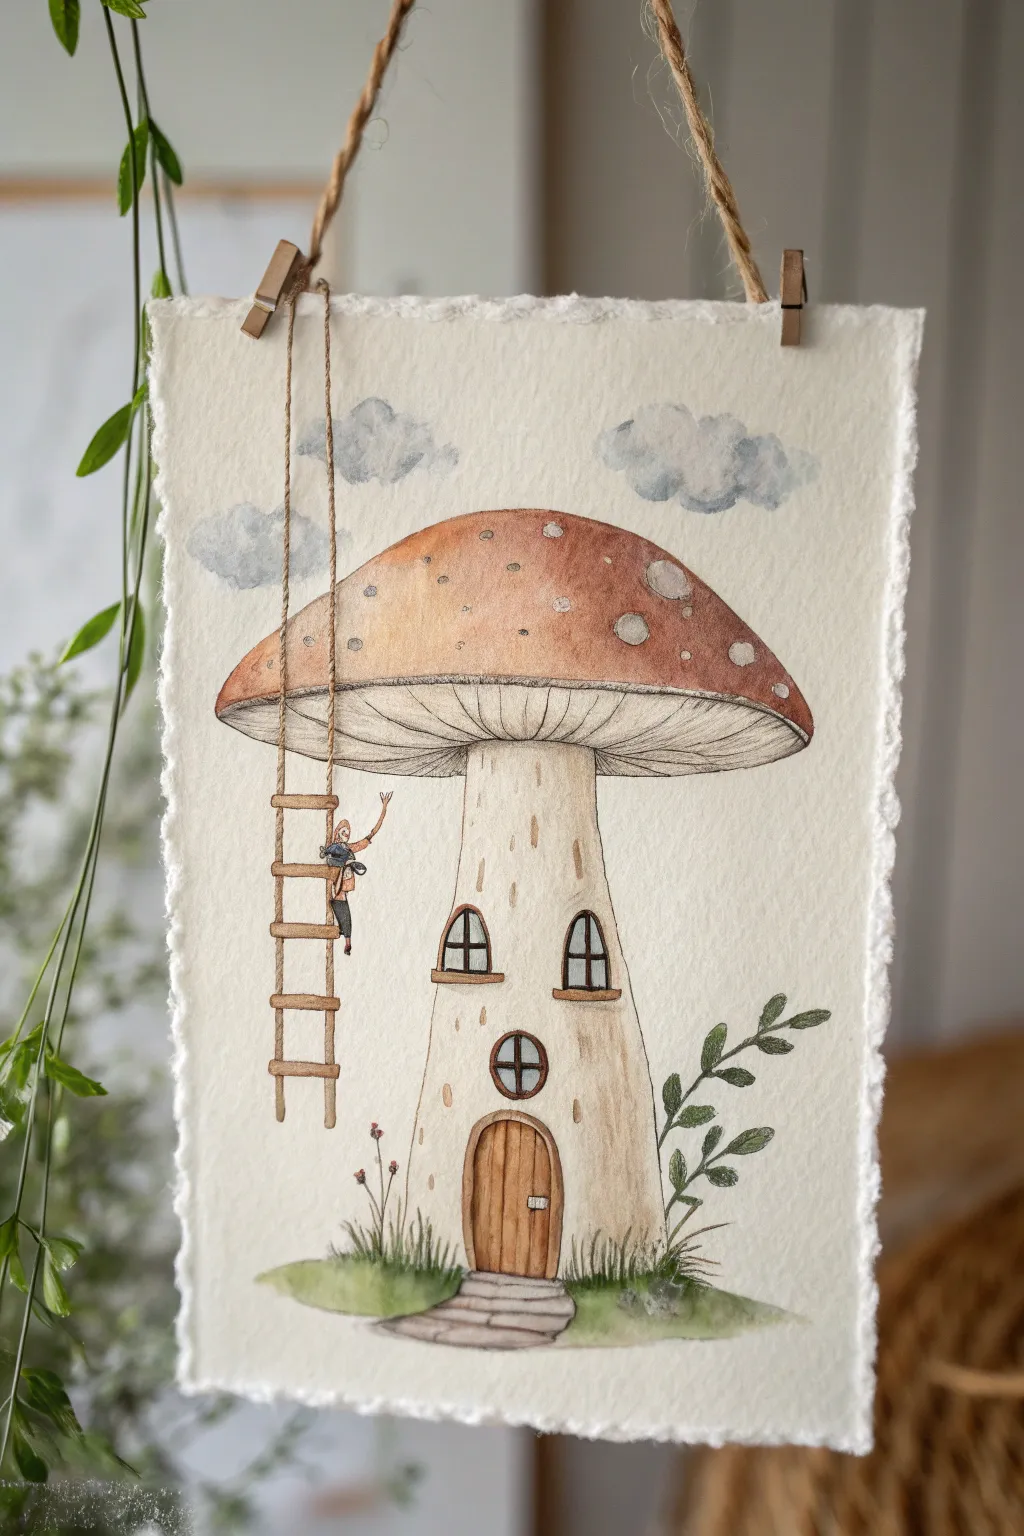
Capture the charm of a fairytale dwelling with this delicate watercolor and ink illustration featuring a mushroom house floating among the clouds. The project combines soft washes with precise ink details on deckle-edged paper for a rustic, hand-torn look.
Step-by-Step Tutorial
Materials
- Cold press watercolor paper (300 gsm)
- Watercolor paints (burnt sienna, yellow ochre, sap green, payne’s gray, cerulean blue)
- Waterproof fineliner pens (sizes 01 and 03, black or sepia)
- Round watercolor brushes (size 2, 6, and 8)
- Pencil (HB or 2H)
- Kneaded eraser
- Ruler
- Jute twine
- Mini wooden clothespins
Step 1: Paper Prep & Sketching
-
Creating the deckled edge:
If your paper doesn’t have a natural deckled edge, you can create one. Place a ruler along the edge of your paper, wet the crease line with water, and carefully tear the paper strip away to reveal a soft, fibrous edge. -
Outlining the main form:
Lightly sketch the large mushroom cap using a pencil. Aim for a wide, slightly flattened dome shape that overhangs the stem significantly. -
Drafting the stem and house features:
Draw the thick stalk centered under the cap, widening slightly at the base. Mark out positions for the arched door, circular window, and two upper arched windows. -
Adding the ladder and figure:
Sketch a rope ladder hanging from the sky on the left side. Add a tiny figure climbing the ladder, reaching toward the mushroom cap, keeping the details simple.
Bleeding Lines?
If your ink smudges when creating washes, ensure your pen is truly waterproof or archival. Alternatively, do all painting first, let it dry fully, and ink last.
Step 2: Watercolor Washes
-
Painting the mushroom cap:
Mix burnt sienna with a touch of red. Wet the cap area first with clean water (wet-on-wet technique) and drop in the color, leaving several small circular spots unpainted for the white dots. -
Coloring the stem:
Use a very diluted wash of yellow ochre and faint brown for the stem. Keep the center lighter to suggest a rounded volume, darkening the edges slightly. -
Adding the gills:
Paint the underside of the mushroom cap with a very pale, warm gray wash. While it’s still damp, you can drop a slightly darker shadow right where the stem meets the gills. -
Ground and greenery:
Paint a small patch of ground at the base using sap green and a touch of earth tones. Add a simple stone path leading to the door with a gray wash. -
Painting the sky:
Dilute cerulean blue and payne’s gray heavily. Paint soft, fluffy cloud shapes in the upper background, keeping the edges loose and undefined.
Step 3: Inking & Details
-
Outlining the structure:
Once the paint is completely dry, use an 01 fineliner to trace over your pencil lines. Use broken, sketchy lines for the mushroom texture rather than solid, rigid strokes. -
Detailing the gills:
Draw fine, radiating lines on the underside of the cap, moving from the stem outward to the rim. Keep these lines delicate and close together. -
Features and texture:
Outline the windows and door. Add vertical wood grain lines to the door and faint vertical dashes on the stem to simulate texture. I find that skipping lines here and there makes it look more organic. -
Inking the ladder:
Draw the vertical ropes and horizontal rungs of the ladder. Ink the tiny figure, adding small details like hair or clothing folds with the finest pen tip. -
Adding foliage:
Draw a vine or leafy branch growing up the right side of the mushroom stem. Paint the leaves with a deeper green once the ink is dry to make them pop.
Make it Sparkle
Add tiny dots of white gouache or a white gel pen to the mushroom cap spots and the window highlights to make the illustration look magical and bright.
Step 4: Final Assembly
-
Puncturing hanging holes:
If you wish to hang the piece like the example, use a needle or pushpin to poke two tiny holes near the top corners of your paper, or prepare your clips. -
Attaching the suspension:
For the specific look in the photo, clip two mini wooden clothespins to the top edge of the paper. -
Stringing it up:
Tie a length of jute twine to the metal springs of the clothespins, creating a loop for hanging the artwork on a wall or window.
Now you have a charming floating sanctuary ready to hang in a cozy corner


Have a question or want to share your own experience? I'd love to hear from you in the comments below!