When I’m craving something magical, I always come back to fairy house painting ideas—they’re the perfect mix of cozy, quirky, and totally imaginative. Here are some of my favorite ways to paint a fairy house, from classic woodland cottages to wild, dreamy fantasy twists.
Classic Woodland Cottage Fairy House
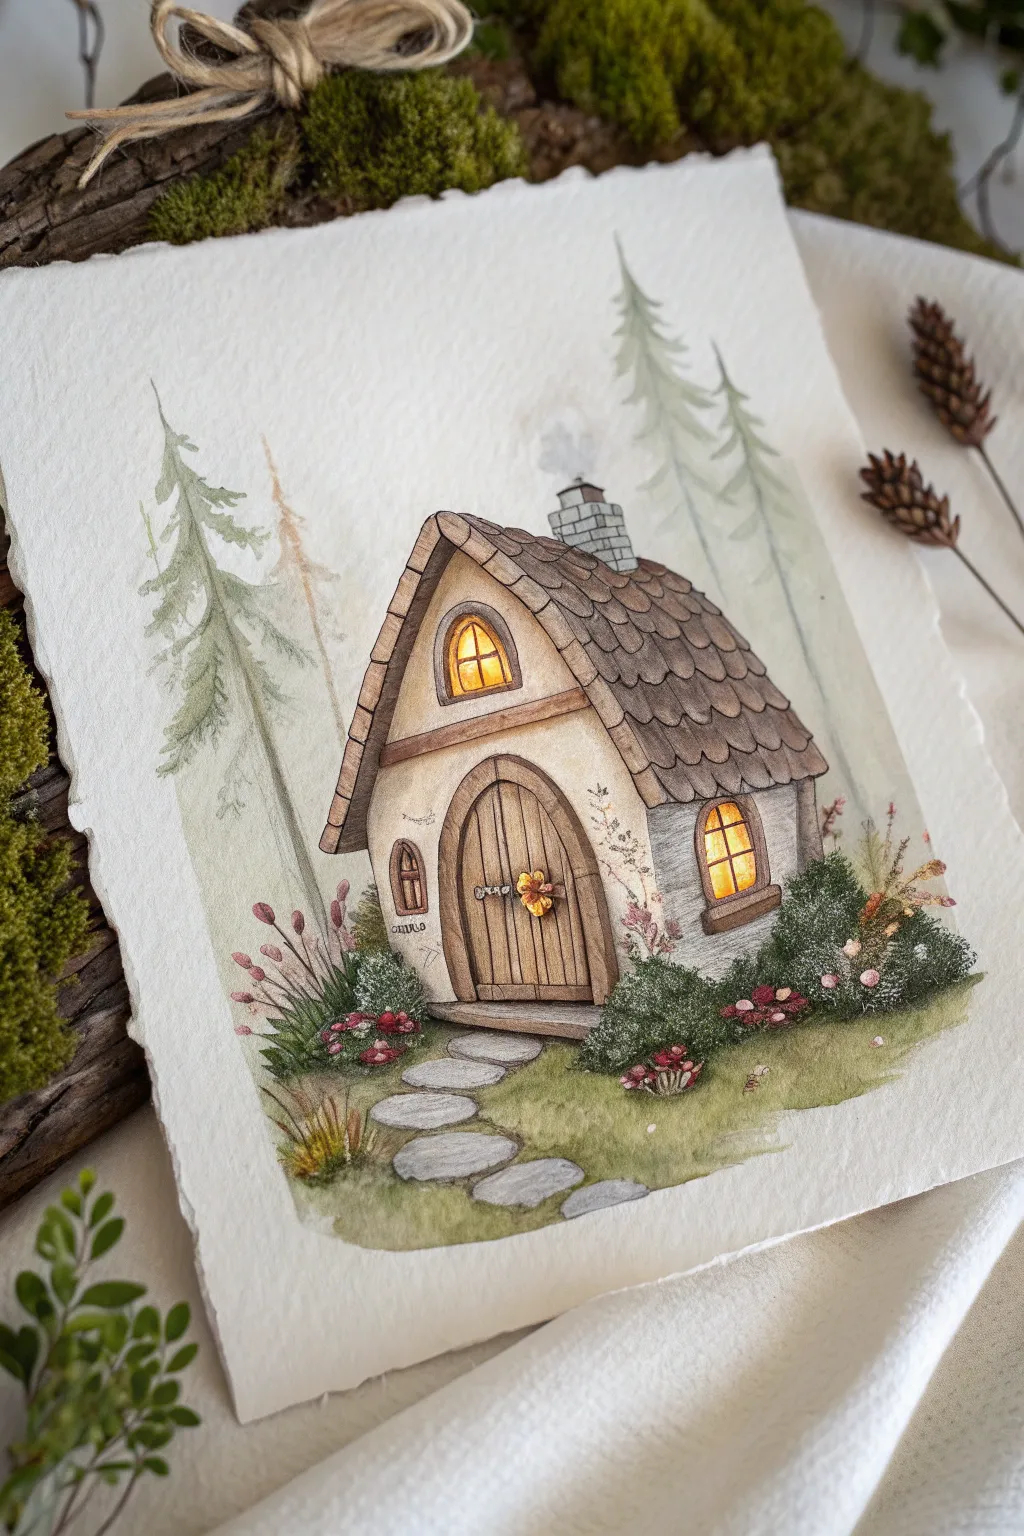
Capture the magic of a hidden forest dwelling with this charming watercolor and ink illustration. This project combines soft, layered washes with precise ink detailing to create a cozy fairy cottage nestled among tall pines.
Detailed Instructions
Materials
- Cold press watercolor paper (300 gsm or heavier)
- Watercolor paints (Earth tones: Ochre, Burnt Sienna, Sepia; Greens: Sap Green, Olive; plus Payne’s Grey and a warm Yellow)
- Set of round watercolor brushes (sizes 2, 6, and 8)
- Fine liner pens (waterproof ink, sizes 0.1 and 0.3, brown or black)
- White gouache or gel pen for highlights
- HB pencil and kneaded eraser
- Masking fluid (optional)
- Two jars of water and paper towels
Step 1: Sketching the Foundation
-
Rough Layout:
Begin with a light HB pencil sketch. Draw a central, slightly wonky triangle for the roof to give it that charming storybook feel. Place a rounded rectangle beneath it for the main house structure. -
Architectural Details:
Sketch a large, arched wooden door in the center and a small arched window in the upper gable. Add a chimney stack on the right roof slope and a smaller side window on the right wall. -
Environment Setup:
Lightly indicate the vertical lines for the background pine trees—keep them faint as they will be very subtle. Sketch the winding stone path leading to the door and rough shapes for the bushes flanking the cottage.
Keep it Loose
Don’t outline every single background tree with ink. Leaving the background trees as soft, paint-only shapes creates depth and keeps the focus on the cottage.
Step 2: First Wash & Background
-
Background Trees:
Mix a very watery, pale olive green. Using your size 8 brush, paint the background pine trees with loose, feathery strokes. Keep the edges soft and the color transparent to push them into the distance. -
Base Cottage Color:
Apply a dilute wash of Yellow Ochre mixed with a touch of Burnt Sienna to the house walls. While wet, drop a tiny bit of darker brown near the roofline to create a shadow gradient. -
Ground Layer:
Paint the grassy area around the house with a mix of Sap Green and Ochre. Use a wet-on-wet technique, allowing the colors to bleed slightly into the bottom of the house walls for a grounded look.
Muddy Greens?
If your greens look too artificial, mix in a tiny bit of red paint. This neutralizes the green and makes the foliage look more earthly and natural.
Step 3: Painting the Structure
-
Roof Texture:
Mix a warm grey-brown using Sepia and a touch of Payne’s Grey. Paint the roof shingles individually, leaving tiny slivers of white paper between some of them to suggest separation and light. -
Wooden Door:
Use a richer Burnt Sienna for the front door, painting in vertical strips to mimic wood planks. I usually lift out a little color in the center of each plank with a damp brush to create a rounded, dimensional effect. -
Stone Path:
Paint the stepping stones with a cool grey mixture. Vary the tone of each stone slightly—some lighter, some darker—to keep the path interesting. -
Window Glow:
Drop a saturated, warm yellow into the window panes to create that inviting, lit-from-within glow. Let this dry completely before touching the window frames.
Step 4: Adding Depth and Vegetation
-
Deepening Shadows:
Once the initial layers are bone dry, glaze a transparent purple-grey shadow under the eaves of the roof and along the left side of the house to establish a light source coming from the right. -
Foreground Bushes:
Stipple a darker, thicker green mixture (Sap Green + Sepia) for the bushes on either side of the door. Build up the texture by dabbing the brush rather than stroking. -
Berry Accents:
Add small pops of muted red or pink within the greenery to represent wild berries or small woodland flowers.
Step 5: Inking and Final Details
-
Outlining the Roof:
Using a 0.3 waterproof pen, outline the roof shingles. Don’t make the lines perfect; broken, jittery lines add to the aged, organic texture. -
Wood Grain Detail:
Switch to a finer 0.1 pen to draw wood grain texture on the door and the timbre beams framing the house. Add tiny knots and cracks for character. -
Stone Texture:
Outline the chimney stones and the stepping stones. Add tiny dots or stippling on the stones to simulate a rough surface. -
Magical Highlights:
Use white gouache or a white gel pen to add tiny reflections to the window panes and highlight the edges of the door handle. You can also add a wisp of white smoke rising from the chimney.
Now your little cottage is ready to welcome its tiny inhabitants


Mushroom Roof Fairy House
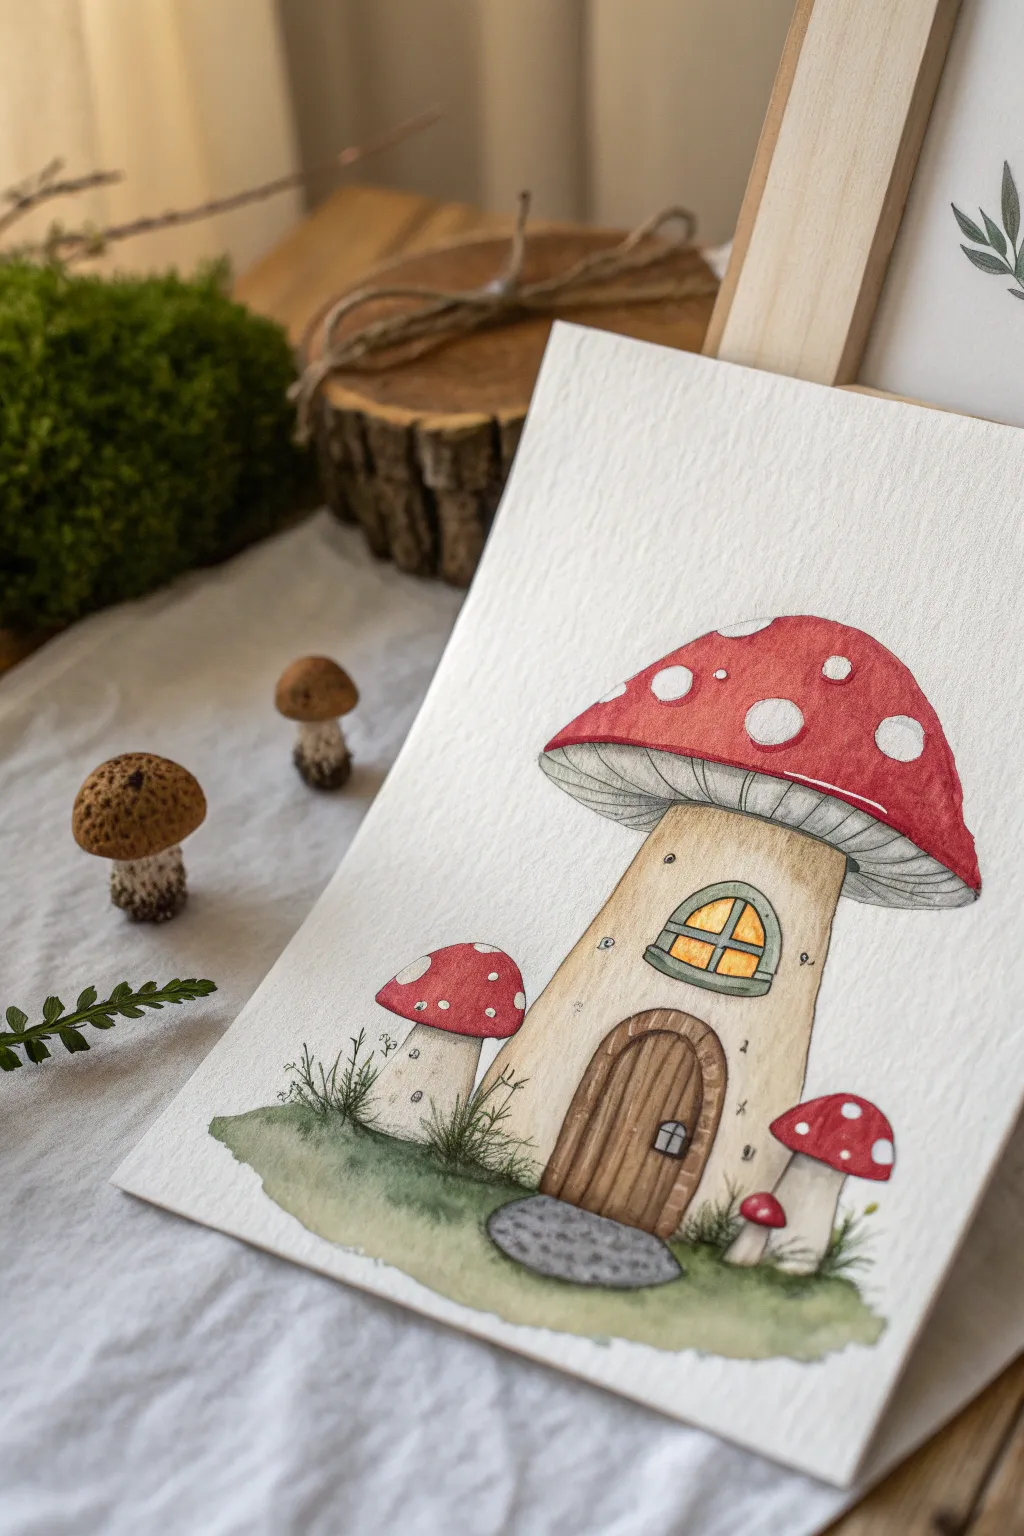
Capture the magic of the forest floor with this charming watercolor illustration of a toadstool home. Featuring a classic red-and-white spotted roof and a cozy wooden door, this piece uses gentle washes and ink outlines to create a storybook feel.
Step-by-Step Tutorial
Materials
- Cold press watercolor paper (300 gsm)
- Watercolor paints (Cadmium Red, Yellow Ochre, Burnt Sienna, Payne’s Grey, Sap Green)
- Fine liner pen (0.1mm and 0.3mm, waterproof)
- Round brushes (sizes 2, 4, and 6)
- Pencil (HB) and kneaded eraser
- jar of clean water
- Paper towels
Step 1: Sketching the Structure
-
Outline the main mushroom:
Begin by lightly sketching a large, gentle curve for the cap of the main mushroom house in the center of your paper. Beneath it, draw a thick, sturdy stalk that widens slightly at the base to ground the structure. -
Add architectural details:
Sketch a rounded wooden door at the base of the stalk and place a small, arched window midway up the stem. Don’t forget to outline the gills under the mushroom cap with faint, curved lines. -
Include smaller companions:
To the left, sketch a shorter, stout mushroom, and place two tiny mushrooms on the right side to balance the composition. Add a wavy, uneven line at the bottom to represent the grassy patch they all sit on. -
Refine the sketch:
Go back and add the characteristic circular spots on all the red caps. Keep your pencil lines very light so they won’t show through the transparent watercolor later.
Keep it bright
To keep the red cap vibrant, ensure your water is perfectly clean before mixing that color, and avoid overworking the paint once it’s on the paper.
Step 2: Applying the Washes
-
Paint the red caps:
Using your size 6 brush, load it with bright red watercolor. Carefully paint around the white circular spots on the main roof and the smaller mushrooms. If the red touches the white spots, lift it quickly with a damp brush. -
Wash the mushroom stems:
Dilute Yellow Ochre with plenty of water to create a creamy, beige wash. Paint the stalks of all the mushrooms, letting the color be slightly uneven to mimic natural mushroom textures. -
Color the door and window:
Mix Burnt Sienna with a touch of brown for the wooden door. Paint the window pane a warm yellow to suggest a light is on inside, leaving the frame unpainted for now. -
Base layer for the grass:
Use a light wash of Sap Green for the ground. Let the paint pool slightly in some areas to create natural variations in the terrain. -
Shade the gills:
Mix a very dilute grey wash. Carefully paint the underside of the main mushroom cap, allowing the white paper to show through as highlights on the gills.
Bleeding colors?
If the red paint bleeds into the white spots, wait for it to dry completely, then use a tiny bit of white gouache or a white gel pen to reclaim the crisp circles.
Step 3: Adding Details and Shadows
-
Deepen the shadows:
Once the first layers are dry, mix a slightly darker beige (Yellow Ochre plus a tiny dot of brown). Glaze this under the rim of the Main mushroom cap where it casts a shadow on the stem. -
Detail the door:
Use a finer brush to add vertical stripes of darker brown on the door to suggest wooden planks. Paint the stepping stone in front of the door with a neutral grey. -
Enhance the greenery:
Using a size 2 brush and a more concentrated green, add small tufts of grass around the base of the stems. I especially like using short, upward flicking motions here to mimic blades of grass. -
Refine the spots:
If your white paper spots serve as the highlights, you can leave them. Alternatively, if they look too stark, add a very pale grey shadow to the bottom curve of each white spot to give them dimension.
Step 4: Inking and Final Touches
-
Outline the main shapes:
Wait until the painting is bone dry. Using a 0.3mm waterproof pen, trace the main outlines of the mushrooms, the door, and the grassy mound. Use a broken line technique—lifting the pen occasionally—for a more organic look. -
Texture the gills:
Switch to your 0.1mm pen to draw fine, curved lines spaced closely together under the mushroom cap, defining the delicate gills. -
Add wood grain and grass:
Draw vertical wood grain lines on the door and window frame. Add tiny scribbles and loose lines in the grass area to suggest weeds and wild growth. -
Final whimsical details:
Add a few tiny dots or ‘pebbles’ near the base of the house and perhaps a few stray pen marks on the mushroom stem to suggest imperfections or moss.
Frame your little fairy dwelling or gift it to someone who loves woodland magic


Glowing Window Fairy House at Dusk
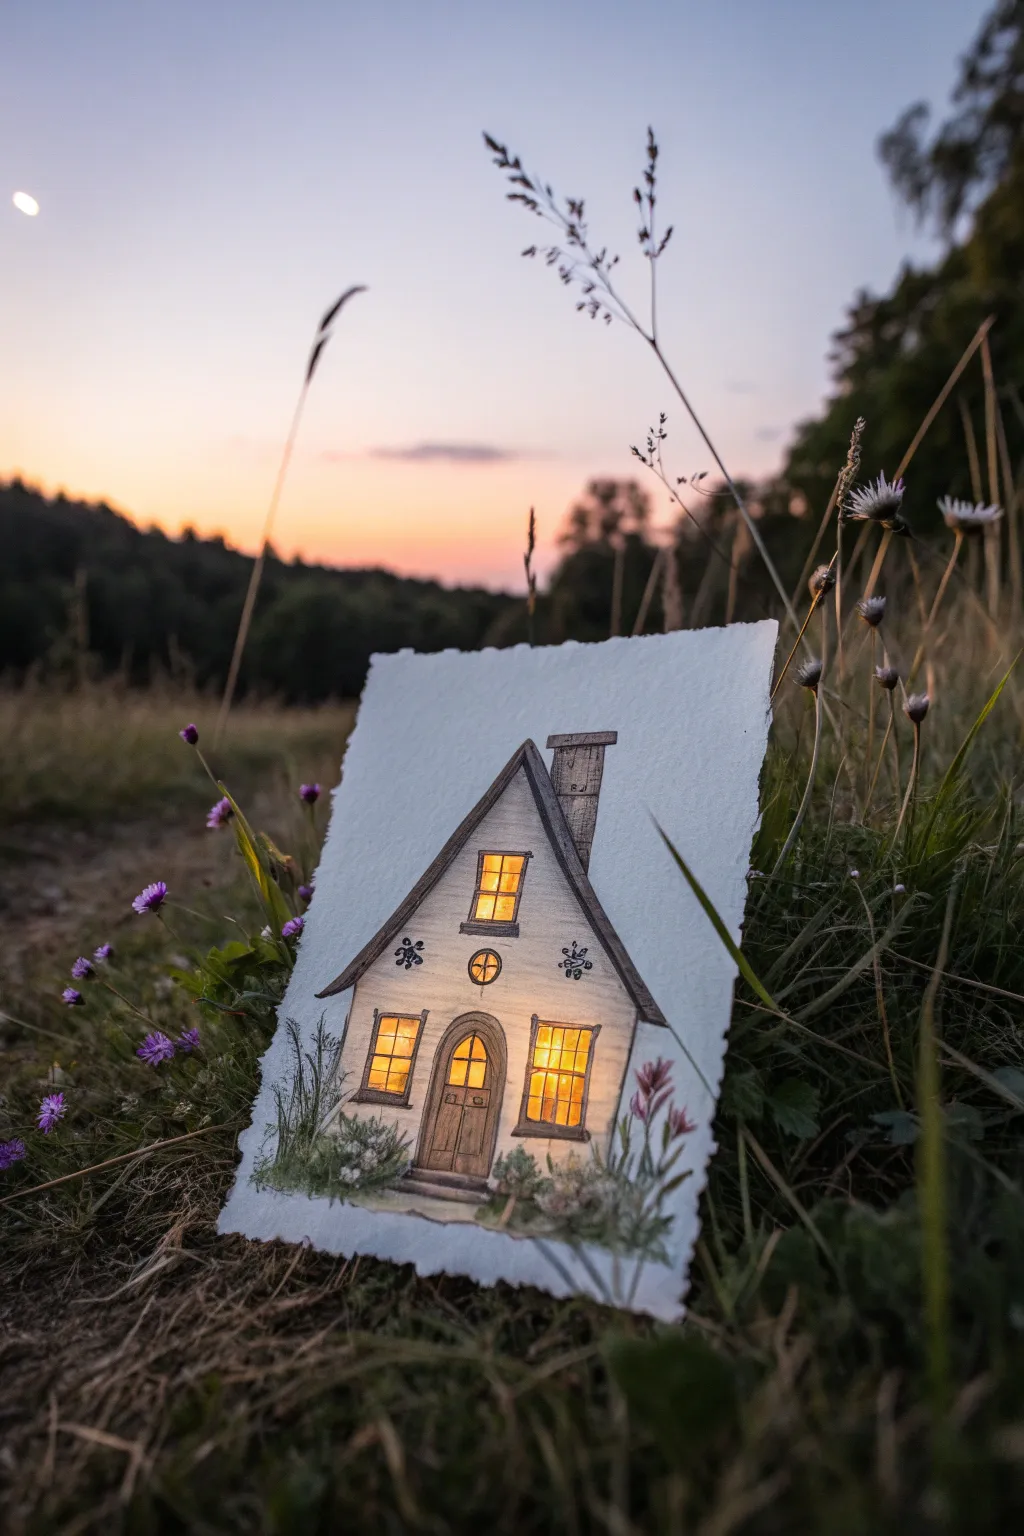
Capture the magic of twilight with this charming watercolor and ink painting of a rustic fairy cottage featuring warmly lit windows. The combination of precise pen lines and loose washes creates a cozy atmosphere perfect for a handmade card or miniature art display.
Step-by-Step Guide
Materials
- Cold press watercolor paper (deckled edge preferred for vintage look)
- Waterproof fine liner pens (0.1mm, 0.3mm, 0.5mm, black or sepia)
- Watercolor paints (Yellow Ochre, Burnt Sienna, Payne’s Grey, Green, Sap Green)
- Small round watercolor brushes (Size 0 and Size 2)
- Pencil and eraser
- Jars for water
- Paper towel
Step 1: Sketching the Structure
-
Draft the outline:
Begin with a light pencil sketch in the center of your paper. Draw a steep, triangular roof shape first, then add the rectangular base of the house below it. -
Add architectural details:
Sketch a rectangular chimney on the right side of the roof. Draw a central arched door and place two square windows on the ground floor, one on either side of the door. -
Place the attic details:
Add a smaller, square window in the upper triangle of the roof gable and a tiny round accent window just below it. -
Sketch the surroundings:
Lightly indicate where wild grasses and flowers will grow up along the base of the cottage to ground the structure.
Make it Shine
Add tiny dots of white gouache or a white gel pen to the center of the yellow windows to make the light look intensely bright.
Step 2: Inking the Lines
-
Outline the main structure:
Using a 0.3mm waterproof pen, carefully trace your pencil lines for the roof, walls, and chimney. Add a double line to the roof edge to give it thickness. -
Detail the wood and stone:
Switch to a finer 0.1mm pen to draw wood grain texture on the door and bricks on the chimney. Add small, decorative flower motifs on the upper white walls for a folkloric touch. -
Define the windows:
Draw the window panes carefully. For the main windows, create a grid pattern; for the door window, create an arched grid. -
Erase pencil marks:
Wait until the ink is completely dry to avoid smudging, then gently erase all visible pencil guidelines.
Deckle Those Edges
To mimic the photo’s paper texture, carefully tear the edges of your paper against a metal ruler instead of cutting with scissors.
Step 3: Creating the Glow
-
Paint the first light layer:
Dilute Yellow Ochre with plenty of water. Paint the inside of all window panes and the small window in the door with a pale yellow wash. -
Deepen the glow:
While the first layer is still slightly damp, drop a more concentrated yellow or light orange into the corners of the window panes to suggest warmth and depth. -
Paint the woodwork:
Use a mix of Burnt Sienna and a touch of Payne’s Grey to paint the door frames, window sills, and the chimney. Keep the application semi-transparent to let the ink work show through.
Step 4: Shadows and Surroundings
-
Shadow the walls:
Mix a very watery pale grey wash. Apply this gently under the roof eaves and along the left side of the house to create a subtle shadow, leaving most of the wall white. -
Color the roof:
Paint the roof with a wash of dark grey or brown. I like to let the color be uneven here, suggesting weathered shingles. -
Paint the base foliage:
Using Sap Green and your Size 2 brush, paint loose, upward flicking strokes at the bottom of the house to create grass blades. -
Add floral accents:
Dab small dots of purple or pink amongst the green grass strokes to represent wildflowers growing against the cottage walls. -
Final drybrush details:
Once everything is bone dry, use a nearly dry brush with dark brown paint to add extra texture to the roof and door for a weathered, rustic finish.
Now you have a cozy, illuminated miniature home ready to brighten any corner


Stone Pathway to a Fairy House
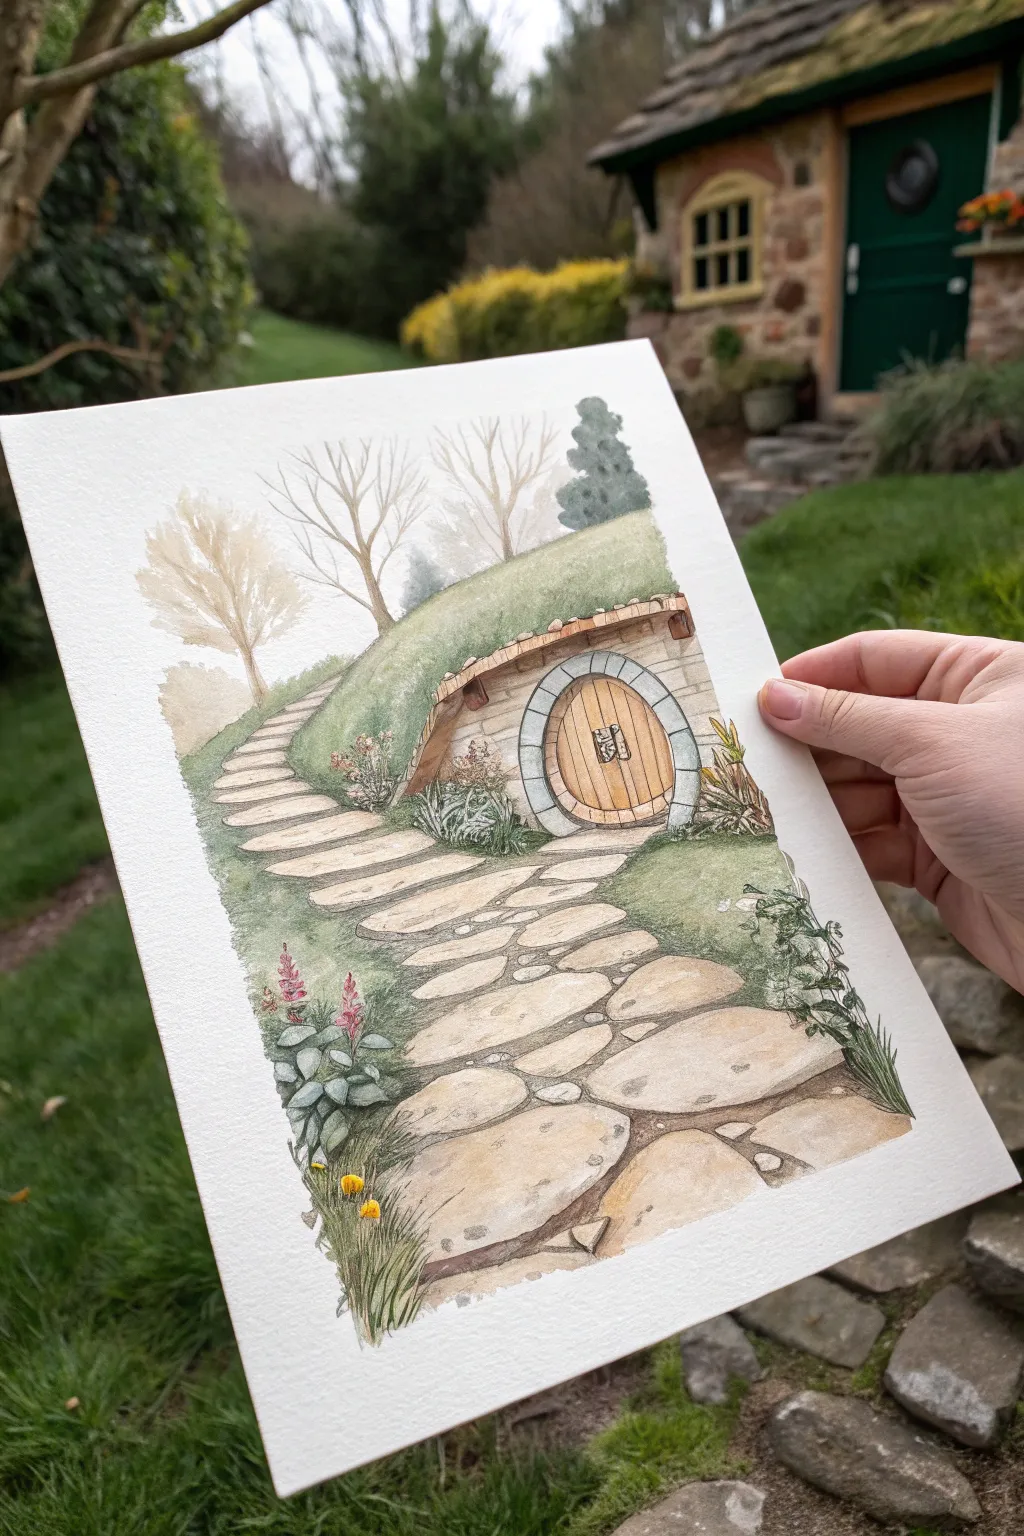
Transport yourself to a storybook world by painting this charming hillside dwelling, complete with a winding stone path and a signature round door. Using watercolor techniques, you’ll capture the soft textures of the grassy roof and the weathered details of the cobblestones.
Step-by-Step Guide
Materials
- Cold press watercolor paper (300 gsm)
- Pencil (HB or H) and kneaded eraser
- Watercolor paints (Sap Green, Yellow Ochre, Burnt Sienna, Payne’s Grey, Ultramarine Blue, Alizarin Crimson)
- White gouache or white gel pen
- Fine liner pen (brown or sepia, waterproof)
- Round watercolor brushes (Size 2, 6, and 10)
- Masking fluid (optional)
- Cup of water and paper towels
Step 1: Sketching and Masking
-
Map out the composition:
Begin by lightly sketching the large hill shape dominating the center. Draw the curved lines for the stone pathway, making them wider at the bottom to create perspective, leading the eye up to the house. -
Draft architectural details:
Sketch the facade of the house within the hill. Draw the round door frame, the wooden planks of the door, and the overhanging eaves. Add rough outlines for the bare trees in the background. -
Add nature elements:
Lightly pencil in the foreground foliage on the left and right sides of the path. Don’t worry about individual leaves yet; just mark the general shapes. -
Preserve highlights (Optional):
If you want crisp white highlights on the flower petals or stone edges, apply a tiny amount of masking fluid with an old brush and let it dry completely.
Step 2: Painting the Backdrop and Ground
-
Soft background trees:
Mix a very watery wash of pale brown and grey. Using your size 6 brush, paint the distant trees with delicate, branching strokes. Keep this layer pale to push it into the background. -
Base layer for the hill:
Prepare a mix of Sap Green and a touch of Yellow Ochre. Apply a wash over the grassy mound, careful to paint around the stone facade of the house. While wet, drop in a slightly darker green near the bottom edge for shading. -
Pathway base tones:
Dilute Yellow Ochre with plenty of water to create a creamy beige. Wash this over the pathway stones. While this is damp, dab a little watery grey onto random stones to create variety.
Pro Tip: Perspective Trick
Make the stones at the bottom of the paper larger and more detailed than the stones near the door. This change in scale instantly creates a strong sense of depth.
Step 3: Houses and Details
-
The wooden door:
Paint the round door with a warm Burnt Sienna. Once dry, use a smaller brush to add vertical lines for the wood grain using a more concentrated brown mix. -
Stone facade texture:
For the wall surrounding the door, use a very pale grey wash. Once dry, use the size 2 brush to paint thin, staggered horizontal lines to suggest brickwork. -
Defining the path:
Mix a shadow color using Payne’s Grey and Burnt Sienna. With a fine brush, carefully paint the gaps between the pathway stones. Keep the lines closest to the viewer slightly thicker and darker. -
Adding stone texture:
Add subtle texture to the pathway stones by splattering a tiny bit of brown paint or stippling with a nearly dry brush.
Level Up: Seasonal Shift
Change the greens to oranges and reds for an autumn vibe, or leave the hill white and add blue shadows for a snowy winter version of this cozy home.
Step 4: Foliage and Finishing Touches
-
Grass blades:
Using your smallest brush and a mix of green and blue, paint individual grass blades along the edges of the path. Flick the brush upward for a natural, tapered look. -
Foreground plants:
Paint the leafy plants in the bottom corners. Use a darker blue-green for the leaves in shadow and a brighter yellow-green for the tips hitting the light. -
Floral accents:
Add small dabs of pink or red (Alizarin Crimson) for the foxgloves or flowers peeking out of the grass. Keep these loose and organic. -
Deepening shadows:
I like to go back in now and deepen the shadows under the eaves of the roof and right inside the door frame to give the house dimension. -
Ink outlines:
Once the painting is 100% bone dry, use a waterproof fine liner to selectively outline the door hinges, the edges of the stones, and the main tree branches for a crisp illustrative style. -
Final highlights:
Use white gouache or a white gel pen to add tiny highlights on the door handle, the tops of the stones, and the centers of the flowers.
Now frame your piece or gift it to a fantasy-loving friend to enjoy
BRUSH GUIDE
The Right Brush for Every Stroke
From clean lines to bold texture — master brush choice, stroke control, and essential techniques.
Explore the Full Guide
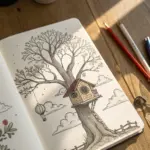
Tree Stump Fairy House Illusion
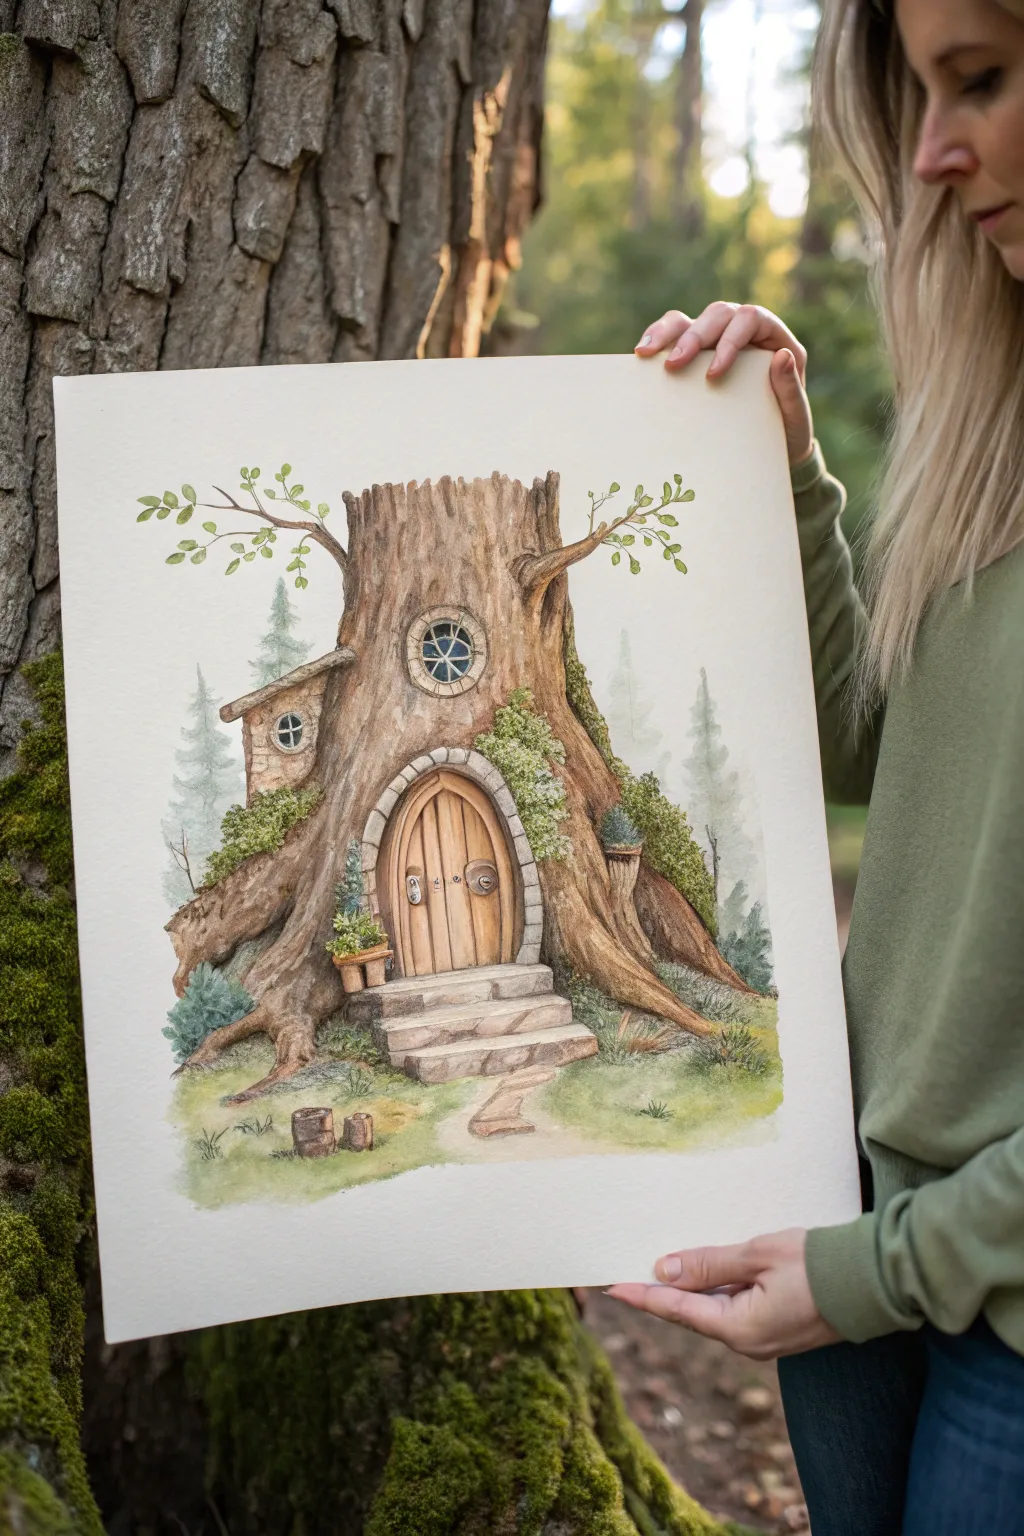
Capture the magic of the deep woods with this whimsical watercolor illustration, featuring a cozy home carved directly into an ancient tree stump. This project uses soft washes and fine ink details to create a texture that feels organic and inviting.
Detailed Instructions
Materials
- Cold press watercolor paper (140lb/300gsm)
- Watercolor paints (Burnt Sienna, Yellow Ochre, Sepia, Sap Green, Payne’s Grey, Indigo)
- Pencil (HB or H) and kneaded eraser
- Fine liner pens (0.1mm and 0.3mm, brown or sepia ink preferable)
- Round watercolor brushes (sizes 2, 6, and 8)
- White gouache or white gel pen
- Masking fluid (optional)
- Washi tape or painter’s tape
Step 1: Sketching the Foundation
-
Outline the trunk:
Begin by lightly sketching the large, central tree stump shape in the middle of your paper. Flare the base out wide to show the roots gripping the earth, and create an jagged, uneven top edge to imply where the tree was snapped or cut long ago. -
Add architectural details:
Draw the central arched doorway slightly off-center near the base. Add the stone steps leading up to it, ensuring they get wider at the bottom for perspective. Sketch a small, circular window above the door and a small lean-to roof extension on the left side of the trunk. -
Sketch environmental elements:
Lightly pencil in background pine trees to set the scene. Add tufts of grass and moss clumps around the roots and on the bark itself to integrate the house with nature.
Step 2: Layering the Base Colors
-
Background wash:
Mix a very dilute wash of Sap Green and Indigo. Apply this loosely to the background area behind the stump, letting it fade out towards the edges of the paper to create a misty, atmospheric forest effect. -
Initial bark layer:
Using a size 8 brush, apply a wash of Yellow Ochre and dilute Burnt Sienna to the entire tree stump. Keep this layer wet and drop in touches of darker brown near the edges and shadows to start building roundness. -
Painting the door:
Paint the wooden door with a warm mix of Burnt Sienna. While it’s still damp, lift out vertical strips of color with a thirsty (clean, damp) brush to suggest individual wooden planks. -
Stone details:
Use a watery mix of Payne’s Grey and a touch of brown for the stone steps and the doorframe. vary the shades slightly between stones so they don’t look like a solid block of concrete.
Pro Tip: Bark Texture
When painting bark, drag a fairly dry brush vertically down the paper. The bristles will skip over the paper’s texture, creating instant, rugged wood grain effects.
Step 3: Building Texture and Depth
-
Deepening the bark shadows:
Once the first layer is dry, mix Sepia and Indigo. Use a size 6 brush to paint the deep creases of the bark, particularly under the roof extension, around the door frame, and under the root flares. -
Creating moss:
Mix a vibrant Sap Green. Stipple this color onto the areas where you sketched moss—along the roots and on the ‘shoulders’ of the stump. I like to drop in a tiny bit of yellow while this is wet to make the moss look sun-dappled. -
Defining the planks:
With a size 2 brush and a darker brown mix, carefully paint fine lines between the door planks and add wood grain details to the door surface. -
Window details:
Paint the window pane with a dark grey-blue to suggest glass reflecting the forest. Keep it darker at the top and lighter at the bottom. -
Adding background trees:
Using a pale, watery green-grey mix, paint the silhouette of pine trees in the background. Keep edges soft; these should look distant and foggy compared to the sharp foreground.
Troubleshooting: Muddy Colors
If your greens and browns look muddy where they touch, let the bark layer dry completely before painting the adjacent moss. Patience prevents the colors from bleeding.
Step 4: Fine Details and Ink
-
Inking the outlines:
Using your fine liner pen (0.1mm), gently outline the main features. Don’t use a continuous solid line; use broken, scratchy lines for the bark to mimic rough texture, and smoother lines for the man-made elements like the door. -
Hatching for shadow:
Add cross-hatching or stippling with the pen in the darkest areas—under the eaves of the roof, inside the keyhole, and in the deepest crevices of the roots. -
Adding the hardware:
Draw the door handle, hinges, and the small lantern next to the door with the pen. Fill them in, leaving small white spots for metallic highlights. -
Foreground grass:
Use the size 2 brush with various greens to flick upwards at the base of the painting, creating blades of grass that overlap the bottom of the stone steps. -
Final highlights:
Use white gouache or a gel pen to add tiny highlights to the window panes, the metal door handle, and the tops of the moss clumps to make them pop.
Frame your whimsical stump house or gift it to a friend who loves fairy tales
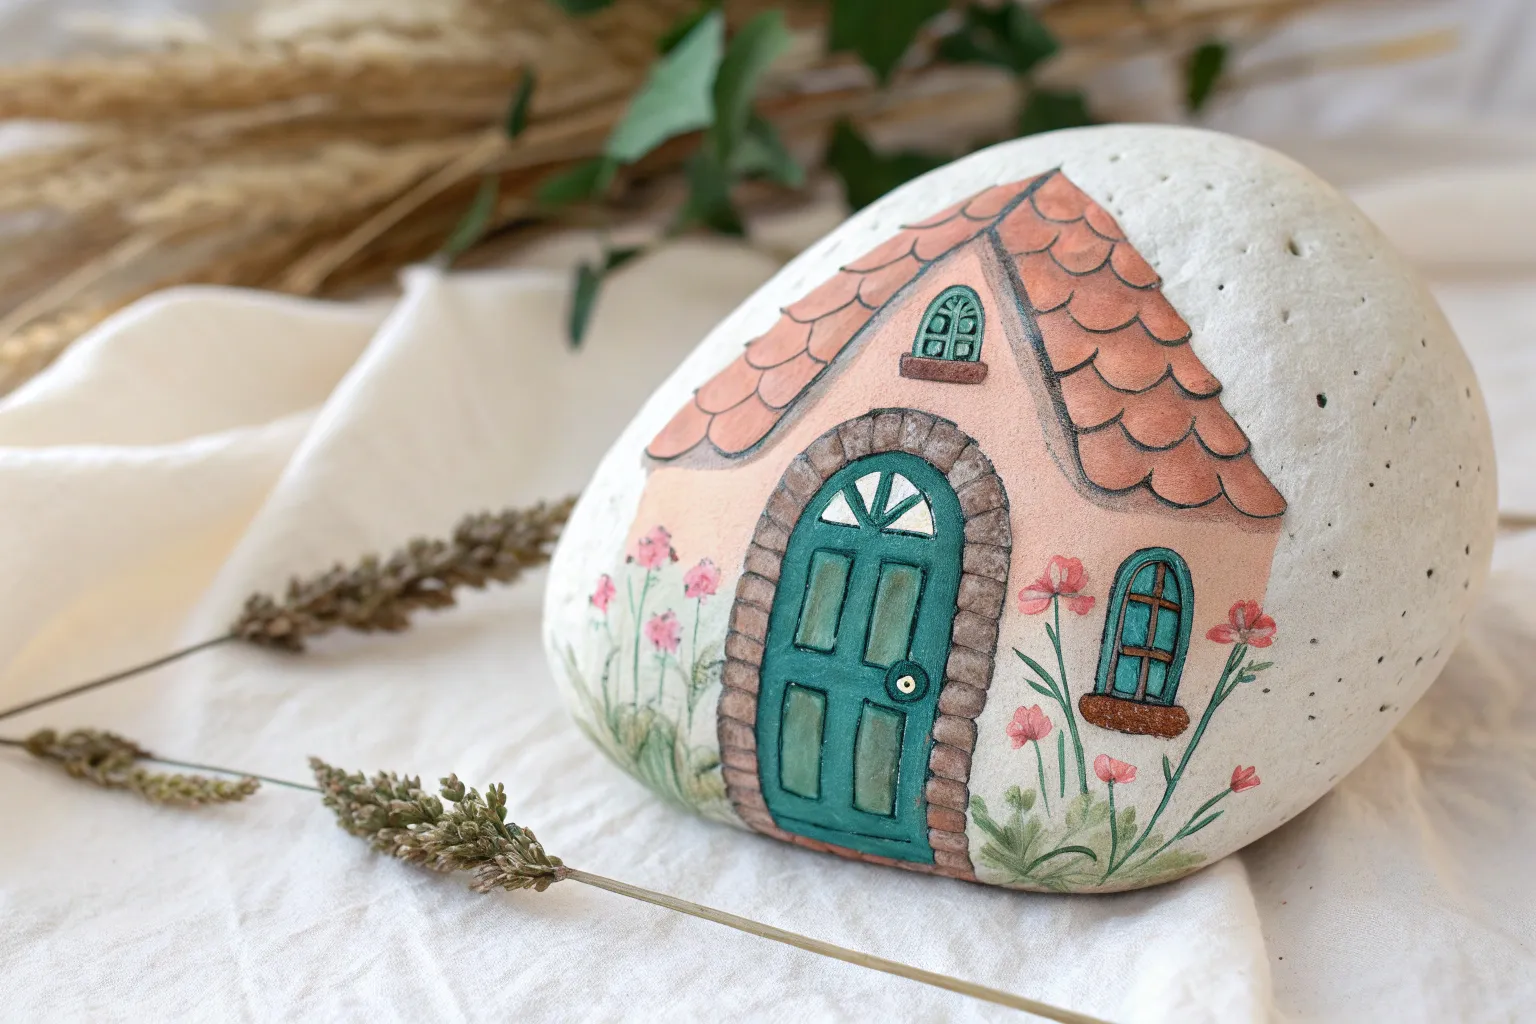
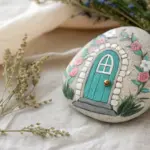
Painted Rock Fairy House Miniature
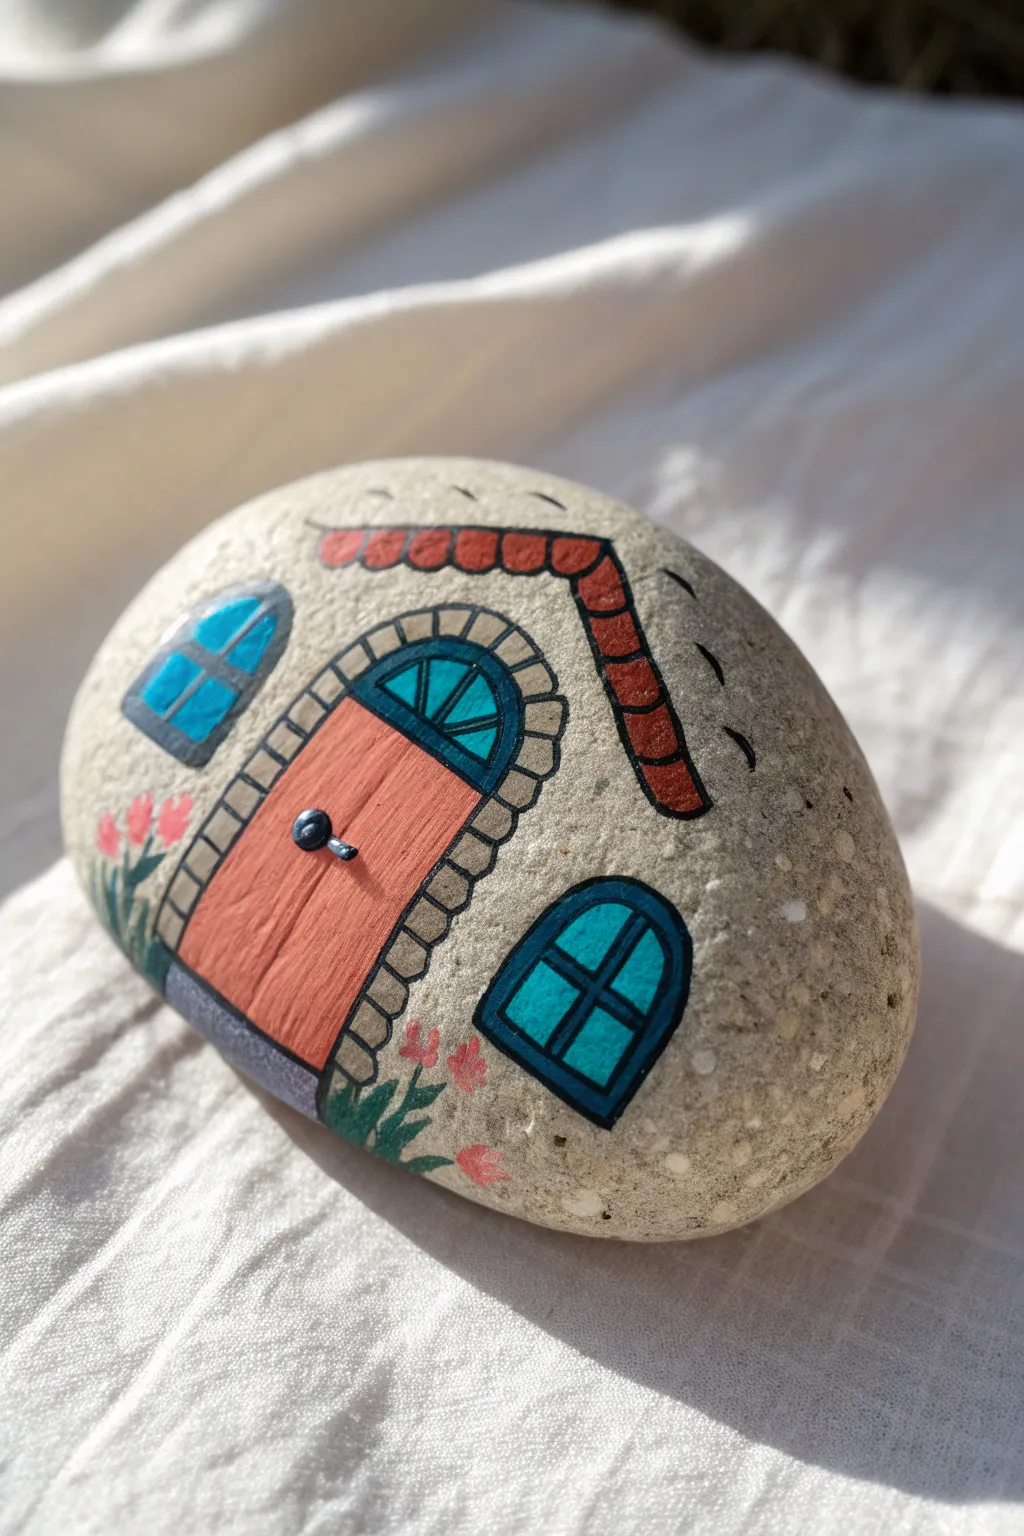
Transform a simple garden stone into an enchanting abode with this charming rock painting project. The natural grey of the stone serves as the perfect stucco-like backdrop for a warm coral door and inviting teal windows.
Step-by-Step
Materials
- Smooth, oval-shaped river rock (cleaned and dried)
- Acrylic paints (coral pink, teal/turquoise, dark grey/black, terracotta red, white, green, grey)
- Fine detail brushes (sizes 00 and 1)
- Flat shader brush (small)
- Pencil or chalk
- Paint palette or mixing plate
- Cup of water and paper towels
- Matte or satin clear sealant (optional)
Step 1: Planning and Base Layers
-
Selecting and prepping:
Choose a rock that stands up well on its own or lays flat nicely. Ensure it is scrubbed clean of any dirt or oils and fully dry before beginning. -
Sketch the layout:
Using a pencil or a piece of white chalk, lightly outline the main features. Draw a large central arch for the door, a sloped inverted ‘V’ for the roofline above it, and two rounded windows on either side. -
Blocking in the door:
Load a flat brush with a warm coral or salmon pink paint. Fill in the rectangular shape of the door inside your arched sketch, leaving space around the edges for the stone trim. -
Painting the windows:
Switch to a teal or turquoise shade. Paint the two window shapes completely solid. You may need a second coat of both the pink and teal to ensure opacity against the grey stone. -
Adding the roof tiles:
Using terracotta or brick red paint, follow the roofline you sketched. Instead of a solid line, dab small, rectangular block shapes to mimic individual clay tiles along the ‘V’ shape.
Step 2: Structural Details
-
Creating the stone arch:
Mix a light grey or beige color. Using a small brush, paint individual blocky stones surrounding the door frame and the fanlight window above the door. -
Framing the windows:
With a fine liner brush and dark grey or black paint, carefully outline the teal windows. Add a line across the bottom of each to create a sill. -
Detailing the panes:
Continue with the dark liner color to draw the window panes. For the side windows, draw a simple cross. For the fanlight above the door, draw a semi-circle with radiating lines like a sunburst. -
Adding the door frame:
Outline the coral door with your dark liner color to separate it from the stone archway. -
Defining the roof:
Outline the individual red roof tiles with black ink or thin black paint to make them pop against the natural rock background.
Choosing the Stone
Look for a rock with a flat face but a rounded top edge. This natural curve acts as a pre-made roof shape, giving your house instant dimension.
Step 3: Bringing it to Life
-
Adding wood grain:
Mix a slightly darker shade of your coral door color (or use thinned brown). Paint very faint, thin vertical lines on the door to suggest wood planks. -
Installing hardware:
Dip the handle end of a paintbrush into black paint and dot it onto the left side of the door for a knob. Add a tiny highlight of white to make it look spherical. -
Grounding with greenery:
At the base of the house, paint small wisps of green grass and simple leaf shapes climbing up the sides slightly. -
Blooming flowers:
Dab tiny spots of pink or red onto the tips of your green stems to create little garden flowers flanking the entrance. -
Adding whimsical strokes:
Using your finest brush and black paint, add a few floating curved lines near the roof to suggest wind or movement in the air. -
Highlighting:
Add tiny white reflection lines to the teal window panes to make them look like glass. I like to keep these subtle, just a dash in the corner. -
Sealing the magic:
Once fully dry, apply a coat of matte or satin varnish to protect your miniature home from the elements if you plan to keep it outside.
Shaky Lines?
If your hand shakes while outlining the stones or windows, use a fine-tip black paint pen or permanent marker instead of a brush for better control.
Place your finished cottage in a potted plant or garden to delight anyone who spots it

PENCIL GUIDE
Understanding Pencil Grades from H to B
From first sketch to finished drawing — learn pencil grades, line control, and shading techniques.
Explore the Full Guide
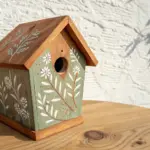
Textured Stone Fairy House With Cracks
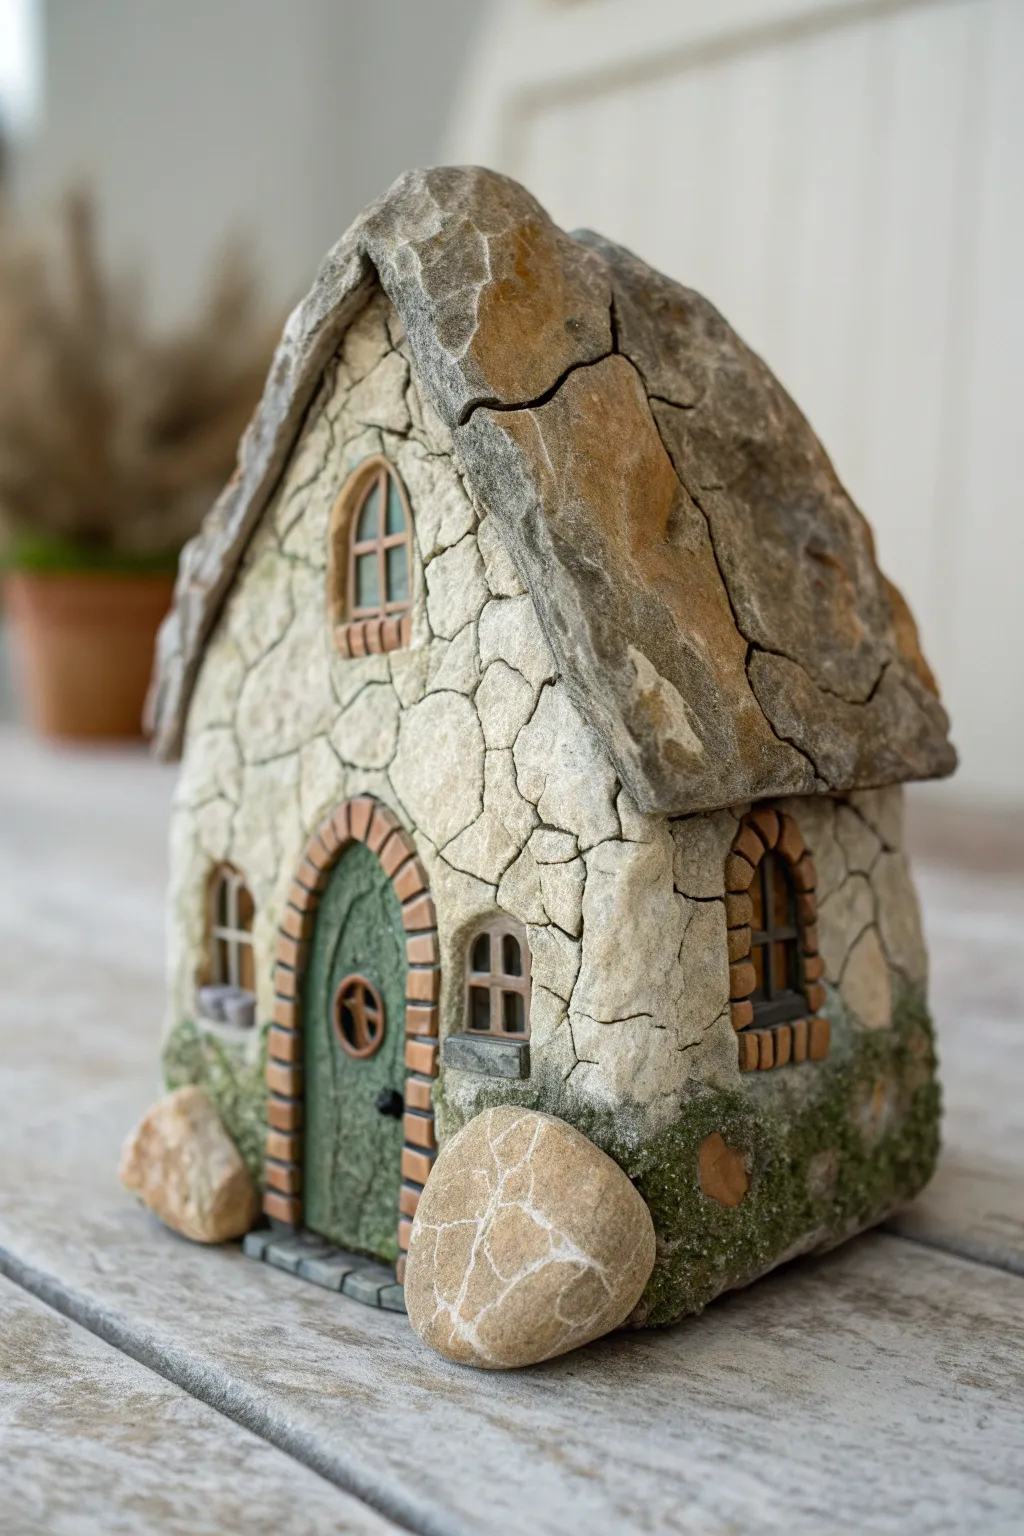
Achieve the look of ancient, weathered masonry with this detailed project that focuses on realistic stone textures and aging techniques. You’ll transform a simple form into a charming cottage that looks like it was carved directly from a boulder.
Step-by-Step Guide
Materials
- Air-dry clay or polymer clay (stone gray or white)
- Fairy house base form (jar, cardboard structure, or thick foil armature)
- Texture tools: stiff wire brush, crumpled foil, toothpick, needle tool
- Acrylic paints: slate gray, raw umber, burnt sienna, moss green, black, white
- Matte mod podge or varnish
- Dried tea leaves or fine green flocking (for moss)
- Small flat brushes and a detail liner brush
- Two smooth rounded stones (for the front foundation)
Step 1: Sculpting the Stone Structure
-
Prepare the base form:
Begin by covering your armature (a glass jar works beautifully) with a uniform layer of clay about 1/4 inch thick. Smooth the clay down so it adheres well to the surface beneath. -
Define the roof edges:
Add extra thick slabs of clay to the top to form the steeply pitched roof. Shape the edges to look rugged and uneven, overlapping the wall slightly to create eaves. -
Carve the stonework:
Using a needle tool, carve deep, irregular shapes into the wall clay to simulate fitted stones. Vary the sizes—some large, some small filler stones—to create a natural, organic masonry pattern. -
Add deep cracks:
For that aged look, slice deep fissures into the roof slab and occasionally through the wall stones. Gently pull the clay apart slightly at these cuts so they remain distinct after drying. -
Texturizing surfaces:
Press a crumpled ball of aluminum foil firmly against the roof and wall stones. This simple trick adds instantaneous realistic pitting and roughness to the smooth clay. -
Form windows and door:
Roll thin snakes of clay and flatten them slightly to create brick arches around where you want your windows and door. Use a craft knife to mark individual brick segments. -
Install the foundation stones:
Press two large, smooth real stones into the wet clay at the front corners of the house to serve as a sturdy-looking foundation. -
Sculpt the door:
Fill the door arch with a flat piece of clay. Use a tool to score vertical wood grain lines and add a small round window frame in the center.
Fixing Clay Cracks
If unwanted cracks appear while the clay dries, create a ‘slurry’ by mixing a small bit of clay with water and fill the gaps like spackle.
Step 2: Painting and Weathering
-
Base coat application:
Once the clay is fully dry, paint the entire structure (except the real stones) with a mix of white and a touch of slate gray. Let this dry completely. -
Black wash technique:
Mix black paint with water until it’s very thin. Brush this deeply into all the cracks, crevices, and stone lines, then immediately wipe the surface with a damp rag, leaving shadows only in the recesses. -
Dry brushing the walls:
Dip a dry brush into white paint, offload most of it on a paper towel, and lightly graze the tops of the wall stones to highlight the texture. -
Painting the roof:
Paint the roof with a wash of raw umber and grey. I like to blot it while wet to create variegated earthy tones that mimic stained limestone. -
Detailing the bricks:
Carefully paint the window and door trim bricks with burnt sienna. Once dry, give them a tiny dark wash to dull the brightness. -
Coloring the door:
Paint the door a muted forest green. Use a fine liner brush to paint the door handle and hinges black. -
Adding mossy effects:
Mix a little sand or dried tea leaves into green paint. Stipple this textured mixture along the bottom edge of the house and up the corners where moisture would naturally gather. -
Sealing the work:
Coat the finished house with a matte varnish to protect the paint and eliminate any unnatural shine from the acrylics.
Realistic Windows
Paint the glass panes black first, then add high-gloss varnish or UV resin over just the panes to make them look like real glass.
Place your weathered stone cottage in the garden enjoy the ancient charm it adds to your setting
Underwater Bubble Fairy House
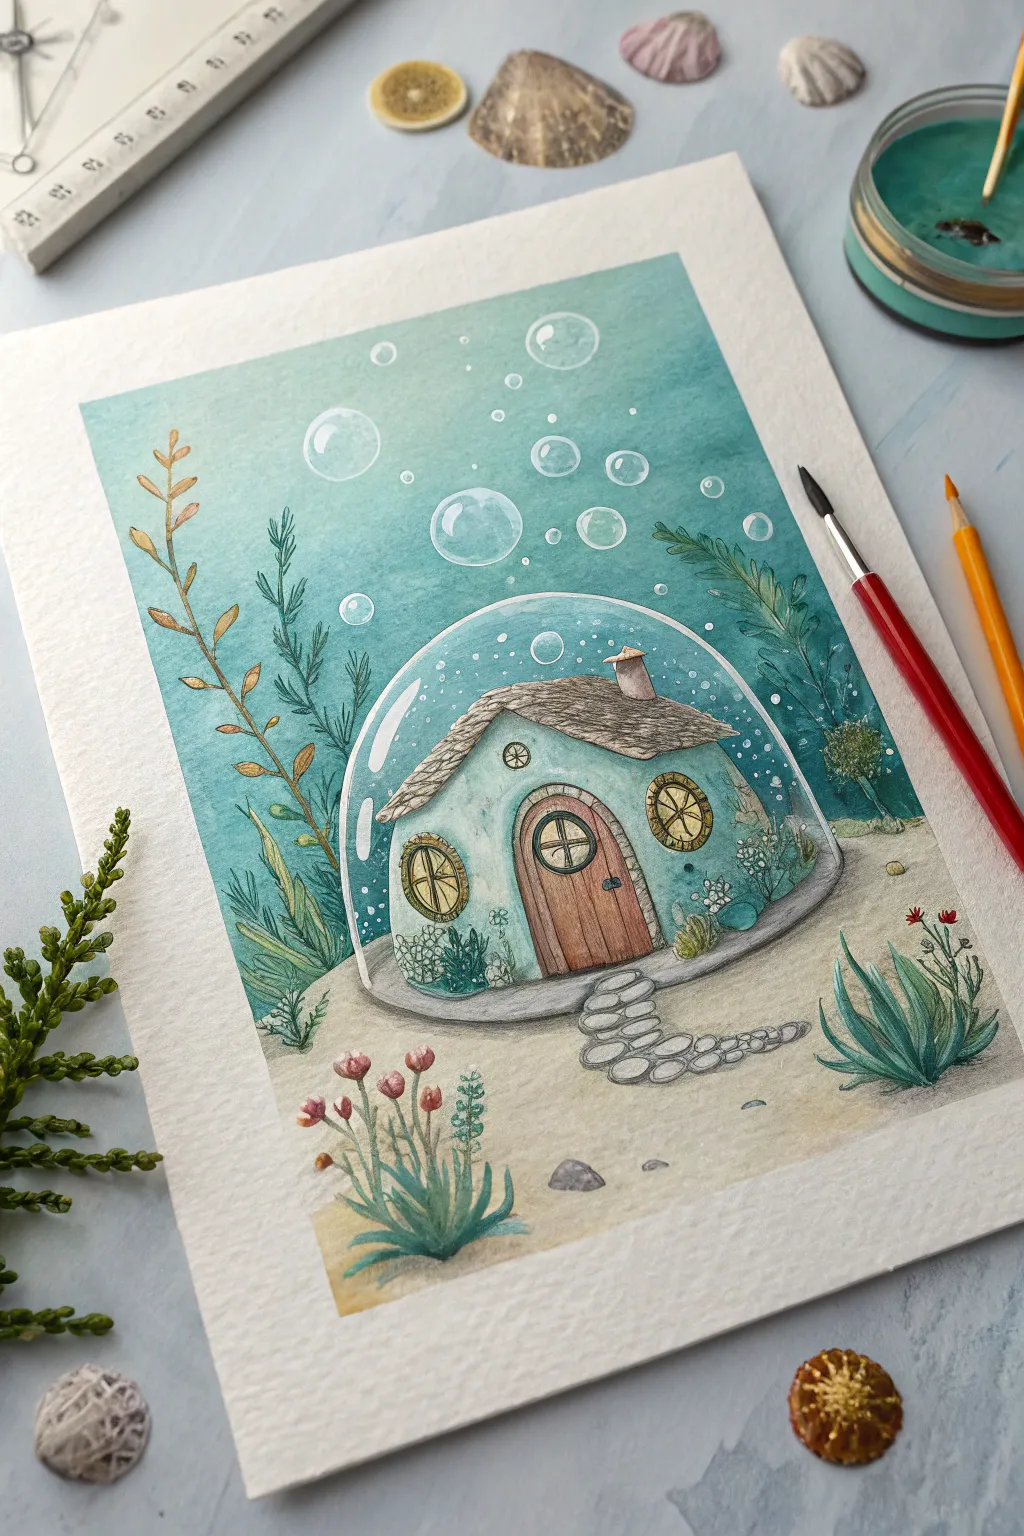
Transport your imagination beneath the waves with this whimsical painting of a cozy cottage protected by a magical air bubble on the ocean floor. Using soft watercolor washes and fine details, you’ll create a serene underwater scene where fantasy meets aquatic life.
Step-by-Step Guide
Materials
- Cold press watercolor paper (A4 or similar)
- Watercolor paints (phthalo blue, turquoise, earthy browns, ochre, sap green)
- White gouache or white gel pen
- Round brushes (sizes 2, 6, and 10)
- Fine liner brush or 00 round brush
- Pencil (HB) and eraser
- Masking fluid (optional)
- Ruler
- Compass or circular object to trace
Step 1: Sketching the Foundations
-
Establish the horizon:
Begin by lightly drawing a wavy horizon line about one-third of the way up from the bottom of your paper to separate the sandy floor from the water. -
Form the bubble:
In the center of the page, resting on the sandy bottom, use a compass or a bowl to trace a light, large circle. Flatten the bottom slightly where it touches the sand to give it weight. -
Draft the cottage:
Inside the bubble, sketch a charmingly lopsided cottage. Give it a curved roof (like a mushroom cap) and a sturdy chimney. Ensure the house fits comfortably within the bubble boundaries. -
Add architectural details:
Draw an arched wooden door in the center and two round windows on either side. Sketch a stone path leading out of the bubble and winding toward the right foreground. -
Place the flora:
Sketch tall, wavy seaweed strands rising on the left and right sides of the bubble. Add small succulent-like plants in the foreground corners and some tiny bushes inside the bubble near the house walls.
Uneven Wash?
If your blue water background dries with hard edges or ‘cauliflowers,’ re-wet the area gently with a clean damp brush and smooth it out, or dab on a little fresh pigment to blend.
Step 2: Painting the Ocean Depths
-
Wet-on-wet background:
Use clean water to wet the entire sky area above the sandy bottom, carefully painting *around* the bubble, the house, and the main seaweed stalks. This creates a barrier. -
Apply the turquoise wash:
While the paper is wet, drop in a gradient of turquoise and phthalo blue. Make the top of the painting darker and let it fade into a lighter, watery blue as you approach the sand line. -
Create background bubbles:
While the wash is still damp but not soaking, lift out circles of pigment using a clean, thirsty brush or paper towel to create soft, ghostly bubbles in the distance. Let this layer dry completely. -
Paint the sandy floor:
Mix yellow ochre with a touch of light brown. Apply a pale wash to the sandy bottom area, dappling in slightly darker brown spots while wet to mimic texture.
Step 3: Coloring the Cottage & Bubble
-
Tint the cottage walls:
Paint the house walls a very pale, diluted turquoise—lighter than the ocean water—to show it’s separate but related to its environment. Leave small gaps for the windows and door. -
Thatch the roof:
Use a mix of sepia and raw umber for the roof. Start with a light brown wash, then use the tip of a smaller brush to add short, directional strokes that mimic straw or shingles. -
Detail the wood and stone:
Paint the door a warm, reddish-brown. Fill the window frames with yellow ochre to suggest warm light inside. Use grey washes for the stone path, darkening the edges of each stone for dimension. -
Glassy bubble effect:
Outline the main bubble with a very thin line of white gouache or pale blue. Add curved white highlights along the top arc to simulate a reflective glass surface.
Pro Tip: Masking Magic
Apply masking fluid to the bubble outlines and the floating bubbles before you start the blue background wash. This keeps the paper perfectly white for sharp, bright highlights later.
Step 4: Foliage and Final Details
-
Seaweed base layers:
Paint the tall seaweed strands using sap green mixed with a little blue. Vary the pressure on your brush to create thick-and-thin undulating leaves. -
Foreground plants:
Detail the aloe-like plant in the bottom right with deeper teal greens, and add pinkish-red tips to the flowers on the bottom left for a pop of contrasting color. -
Define the outlines:
Once everything is bone dry, take a fine liner brush with sepia or dark grey paint (or a waterproof ink pen) to gently outline the house, the door planks, and the window panes. -
Enhance the bubbles:
Using opaque white gouache, paint distinct white circles for the bubbles floating above the house. Add a tiny ‘reflection’ dot on the top right of each bubble for realism. -
Final highlights:
Add tiny white dots inside the main bubble to represent magical dust or small air pockets, and crisp up the highlights on the seaweed leaves.
Step back and admire your serene underwater sanctuary, perfectly sealed against the deep blue sea.


Have a question or want to share your own experience? I'd love to hear from you in the comments below!