If you’re craving art ideas for beginners with pencil, you’re in the perfect place to start making drawings that look impressive without feeling overwhelming. I’m going to nudge you toward simple shapes, comfy subjects, and a little shading practice that instantly levels up your sketches.
Easy Cube in Two-Point Perspective
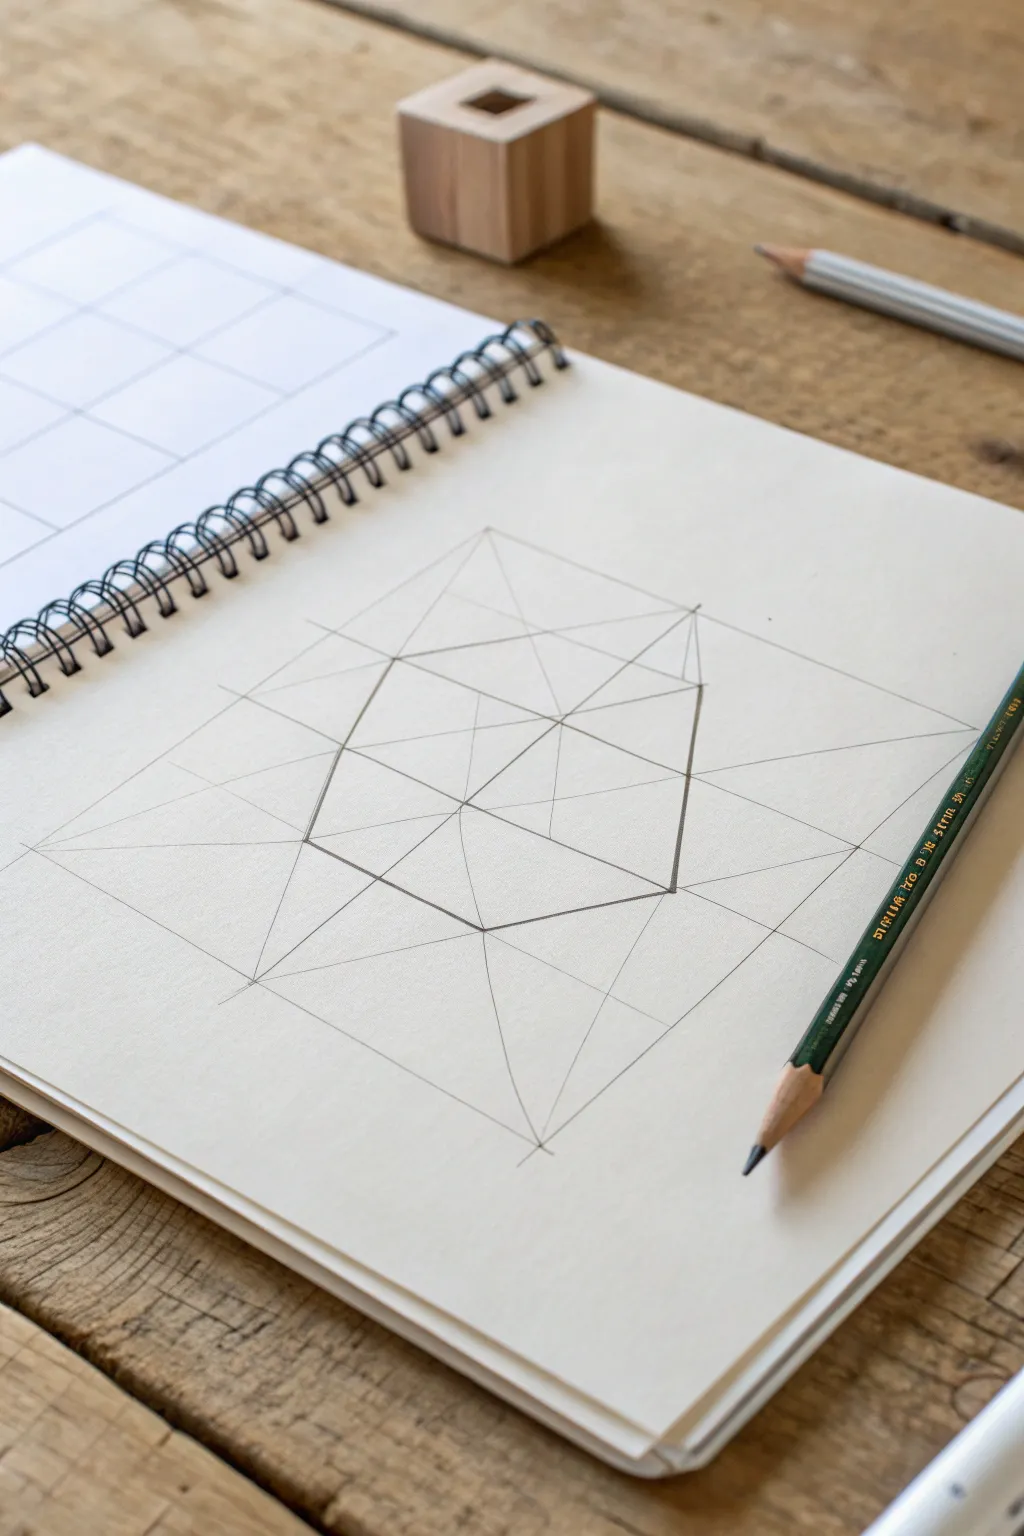
Learn the fundamental skill of two-point perspective by constructing a crisp, floating cube. This exercise creates a satisfying geometric illusion where simple lines transform into a three-dimensional form jumping off the page.
How-To Guide
Materials
- Sketchbook or drawing paper (medium weight)
- Graphite pencil (HB or 2B)
- Straightedge or ruler
- Eraser
Step 1: Setting the Guidelines
-
Establish the horizon line:
Begin by drawing a straight, horizontal line across the center of your page. This represents your horizon line, or eye level. -
Mark vanishing points:
Place two small dots on the far left and far right ends of your horizon line. These are your Vanishing Points (VP1 and VP2). -
Draw the central vertical:
In the middle of the page, below the horizon line (if you want looking down) or crossing it, draw a purely vertical line. This will become the front corner of your cube nearest to you. -
Connect to the left:
From the top end of your central vertical line, draw a light guideline connecting straight to the left vanishing point. Do the same from the bottom end of the vertical line to the left VP. -
Connect to the right:
Repeat the previous process on the right side: draw light guidelines connecting both the top and bottom of your central vertical line to the right vanishing point. -
Complete the ‘kite’ shape:
You should now have a diamond or kite-like shape formed by these converging lines attached to the central vertical. Keep these initial construction lines very faint, as many will be erased or drawn over.
Wonky Cube?
If the cube looks distorted, check your vertical lines. They must be perfectly parallel to the side of your paper, not tilted, or calculation fails.
Step 2: Defining the Cube
-
Determine the sides:
Decide how wide your cube is. Draw two vertical lines on either side of the center line, sandwiched between the receding guidelines you just drew. These define the left and right back corners. -
Cross the top:
To create the top plane of the cube, draw a line from the top of the *left* vertical line to the *right* vanishing point. -
Complete the top plane:
Now draw a line from the top of the *right* vertical line to the *left* vanishing point. Where these two new lines intersect forms the back corner of your cube. -
Cross the bottom (internal structure):
Although it might be hidden, it’s helpful to construct the bottom. Draw lines from the bottom of the left vertical to the right VP, and the bottom of the right vertical to the left VP. -
Verify verticals:
Check that the intersection point of those bottom lines aligns vertically with the back corner of the top plane. If they line up perfectly, your perspective is accurate.
Precision Tip
Keep your pencil extremely sharp for construction lines. A dull point creates thick lines that make finding exact intersection points difficult.
Step 3: Finalizing the Form
-
Darken the visible lines:
Switch to a slightly heavier hand or a softer lead. Trace over the lines that represent the actual edges of the cube—the central vertical, the two side verticals, and the outer diamond shape. -
Define the internal Y:
Darken the three lines meeting at the front corner (the ‘Y’ shape inside the hexagon outline) to firmly establish the front-facing volume. -
Add subtle diagonal cross-hairs:
For extra geometric flair as seen in the reference, leave the faint ‘X’ crossing the faces of the cube. These help locate the exact center of each face in perspective. -
Clean up:
Gently erase the excess lengths of the guidelines that extend past the cube toward the vanishing points, leaving just the clean geometric solid.
Now you have a mathematically perfect cube ready for shading or further elaboration


Coffee Mug With Clean Ellipses
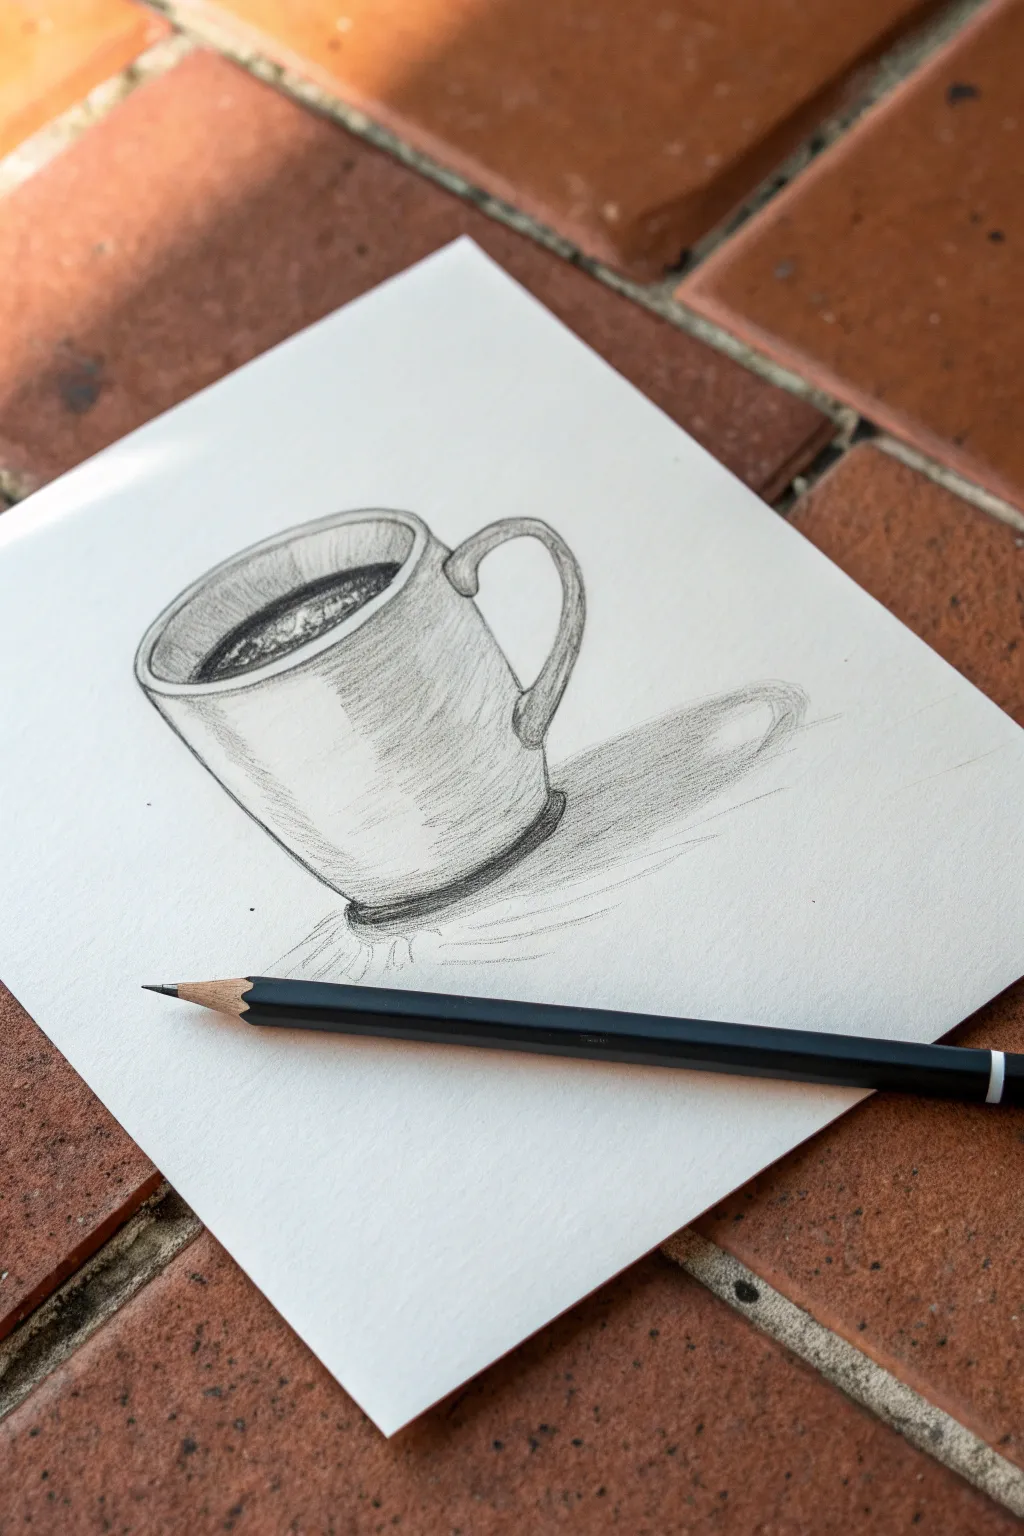
Master the art of ellipses and cylindrical forms with this charming pencil sketch of a classic coffee mug. This project focuses on clean linework, subtle hatching for volume, and casting a convincing shadow to ground your object.
How-To Guide
Materials
- White drawing paper (medium tooth)
- HB or 2B graphite pencil
- Pencil sharpener
- Block eraser or kneaded eraser
- Ruler (optional, for checking symmetry)
Step 1: Constructing the Basic Shape
-
Establish center alignment:
Begin by lightly sketching a vertical centerline on your paper. This invisible axis will help ensure your mug stands straight and doesn’t lean to one side. -
Determine the width:
Mark the top and bottom width of the mug equal distances from your center line. Since this is a standard mug, the top width should be slightly wider than the bottom to account for perspective. -
Draw the top ellipse:
Sketch the oval opening of the mug. Keep the curves smooth and rounded at the outer edges—avoid sharp points that look like almonds or footballs. -
Define the bottom curve:
Draw the bottom curve of the mug. This curve should mirror the front curve of your top ellipse but be slightly deeper and more rounded due to the viewing angle. -
Connect the sides:
Draw straight lines connecting the top ellipse to the bottom curve. These should angle inward very slightly as they go down, creating a tapered cylinder form.
Uneven Ellipses?
Turn your paper upside down. Viewing the drawing inverted tricks your brain and makes lopsided curves instantly obvious, allowing you to correct the symmetry easily.
Step 2: Adding the Handle and Rim
-
Sketch the handle shape:
On the right side, lightly sketch a simplified ‘ear’ shape or question mark curve that starts just below the rim and ends near the bottom third of the cup. -
Thicken the handle:
Add a second inner line to give the handle thickness. Pay attention to how the handle attaches to the body; curves should flare out slightly where they meet the ceramic surface. -
Create the rim thickness:
Go back to your top ellipse and draw a second, slightly smaller oval inside the first one. This indicates the thickness of the ceramic wall. -
Indicate the liquid:
Draw a curved line inside the mug, parallel to the front rim, to show where the coffee surface sits. Leave a small gap between the liquid line and the inner rim.
Morning Steam
Use a kneaded eraser to gently lift subtle, vertical squiggles above the hot coffee. Smudge slightly with a finger for a soft, transparent steam effect.
Step 3: Shading and Definition
-
Fill the coffee:
Shade the liquid area dark, pressing firmly with your pencil. Leave a few small white shapes or streaks near the left side to represent light reflecting off the wet surface. -
Start the body shading:
Using diagonal hatching lines, begin shading the exterior of the mug. Focus the darkest values on the left side and the very bottom, assuming the light source is coming from the top right. -
Develop form with mid-tones:
Extend your hatching toward the center of the mug but lighten your pressure. The right side and the area near the handle should remain the lightest to show the highlight. -
Shade the handle:
Add shadow to the underside and inner curve of the handle. I like to keep the top edge of the handle bright white to make it look three-dimensional. -
Deepen the base contact:
Darken the line at the very bottom of the mug where it sits on the table. This ‘occlusion shadow’ should be the darkest graphite mark on your paper.
Step 4: Cast Shadow and Finishing Touches
-
Map the cast shadow:
Lightly outline the shape of the shadow falling to the right. It should stretch out from the base, roughly mimicking the shape of the mug but elongated like a stretched oval. -
Fill the shadow:
Fill the shadow shape with uniform, closely spaced hatching lines. Make the shadow darker near the mug and slightly lighter as it fades outward to the right. -
Refine the outline:
Go over your main construction lines with a deliberate, darker stroke to finalize the silhouette. You don’t need a single hard line everywhere; broken lines can add artistic character. -
Final clean up:
Use your eraser to lift out any smudges on the white background and brighten the highlight on the rim and the liquid reflection.
Now you have a solid grasp of perspective basics and a lovely sketch to show for it


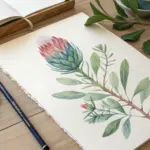
Simple Rose From Spiral Petals

Capturing the delicate fold of rose petals is a classic artistic challenge that yields beautiful results. This project focuses on building a realistic bloom from a simple central spiral, using careful shading to create depth and volume.
Step-by-Step Tutorial
Materials
- Spiral-bound sketchbook or drawing paper (medium tooth)
- Graphite pencils (HB for sketching, 2B and 4B for shading)
- Black colored pencil or charcoal pencil (for deepest contrasts)
- Kneaded eraser
- Pencil sharpener
Step 1: Laying the Foundation
-
Establish the center:
Begin by lightly sketching a tight, small spiral in the upper-middle section of your page. This will serve as the tightly packed center of the rose bud. -
Expand the spiral:
Draw larger, looser C-curves wrapping around that initial center point. Let these curves overlap slightly, mimicking how petals hug the center. -
Define outer petals:
Sketch wider, more open shapes for the outer petals. Give the edges a slightly wavy, organic line rather than a perfect curve to make them look like soft organic matter. -
Add the stem and leaves:
Draw a slightly curved line extending downward for the stem. Add two leaf shapes branching off—one higher on the left, one lower on the right. Keeping the stem imperfect makes it look more natural. -
Refine the outline:
Go over your sketch with an HB pencil to firm up the lines you want to keep. Pay attention to the ‘turnover’ of the petals—the visible edge where the petal curls outward.
Smudge Control
Place a scrap piece of paper under your drawing hand to prevent smearing your graphite work as you move across the page.
Step 2: Developing Form through Shading
-
Start shading the center:
Switch to your 2B pencil. Begin shading the deepest crevices of the central spiral. The areas where petals overlap should be the darkest. -
Create gradients:
Work outward from the dark crevices, lightening your pressure as you move toward the highlighted edges of the petals. This gradient creates the illusion of curve. -
Shade the petal turnovers:
Leave the very edges of the rolled-back petals white or extremely light. Shade underneath these rolls to make them pop forward visually. -
Deepen the contrast:
I like to use a 4B pencil or a black charcoal pencil here to punch up the darkest shadows. Focus on the very bottom of the bloom and the deepest recesses of the spiral. -
Texture the petals:
Instead of smooth blending, use tiny, directional hatch marks or stippling (dots) that follow the curve of the petal. This mimics the velvety texture of a rose.
Step 3: Stem and Leaf Details
-
Outline the stem textures:
Darken one side of the stem to give it cylindrical form. Add a tiny thorn or two if you wish to add character. -
Detail the leaves:
Draw a central vein line down the middle of each leaf. Then, lightly sketch smaller veins branching out diagonally. -
Shade leaf segments:
Shade the leaf sections between the veins, keeping the veins themselves lighter. Darken the edge of the leaf closest to the stem. -
Serrated edges:
Go back along the outline of your leaves and create tiny, saw-tooth jagged edges. This is a signature characteristic of rose foliage.
Dew Drop Detail
Erase a tiny circle on a petal and add a sharp crescent shadow underneath it to create a realistic water droplet.
Step 4: Final Touches
-
Assess values:
Step back and look at your drawing. Are the darks dark enough? If the drawing looks flat, add more shadow under the large lower petals. -
Clean up highlights:
Use your kneaded eraser to lift off any graphite smudge from the paper background and to tap highlights back into the brightest parts of the petals. -
Final outline check:
If any outer lines got lost during shading, re-define them with a sharp pencil point for a crisp finish.
Now you have a timeless floral study ready to be framed or kept as a sketchbook milestone
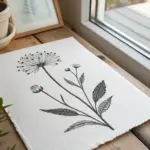


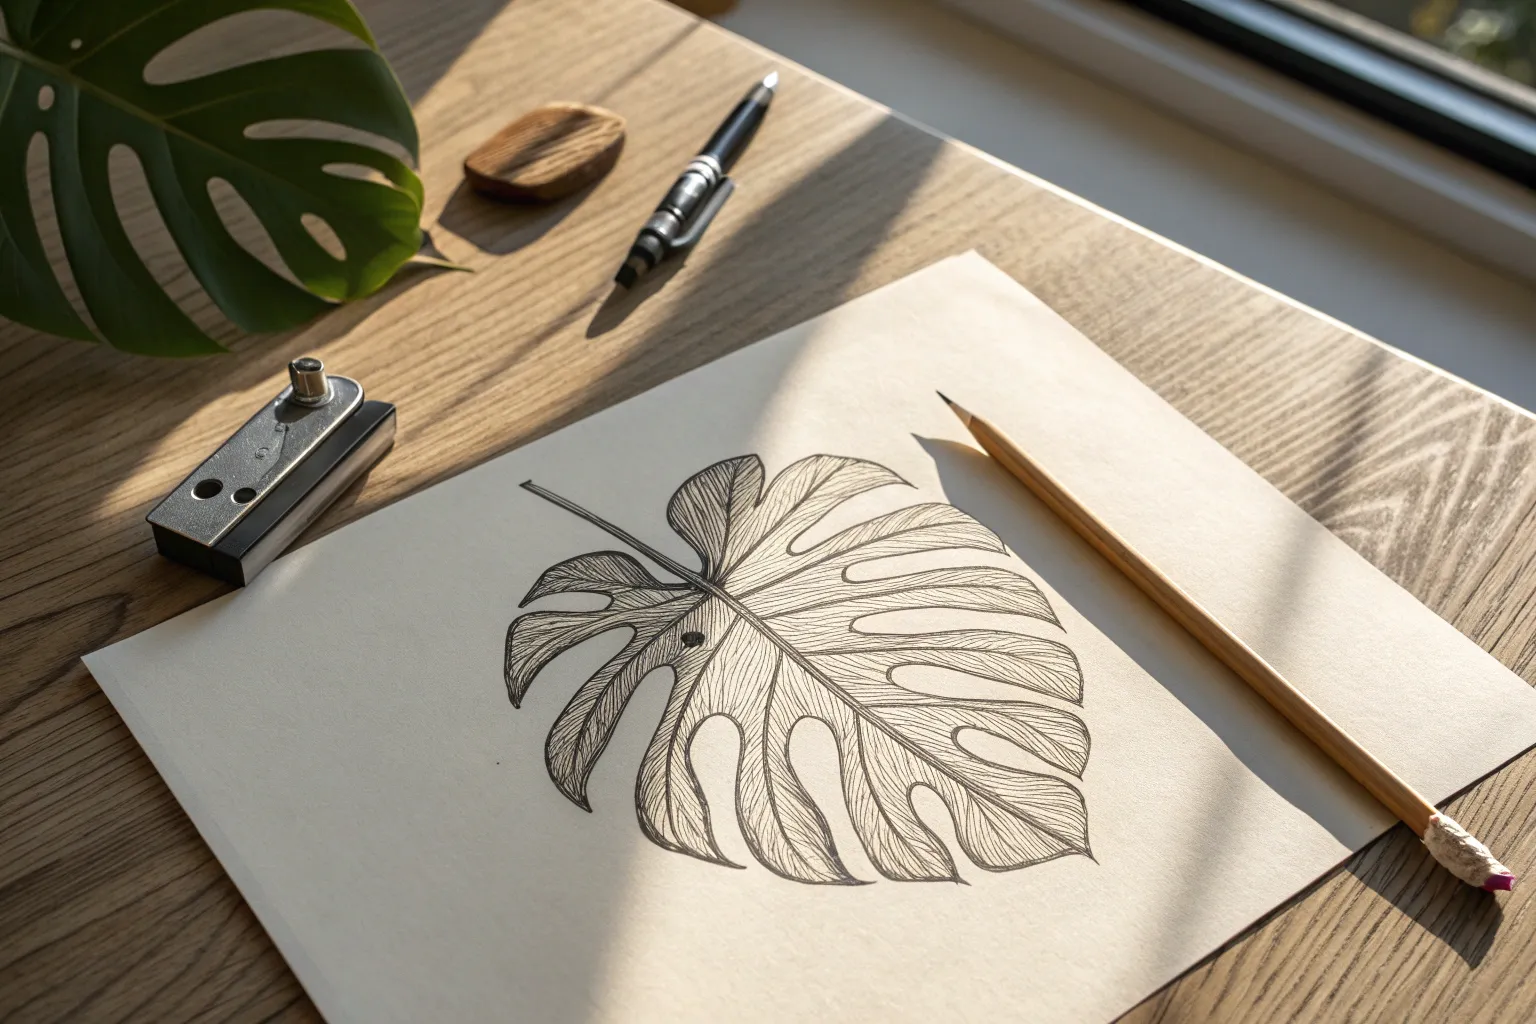
Leaf Study With Veins and Texture
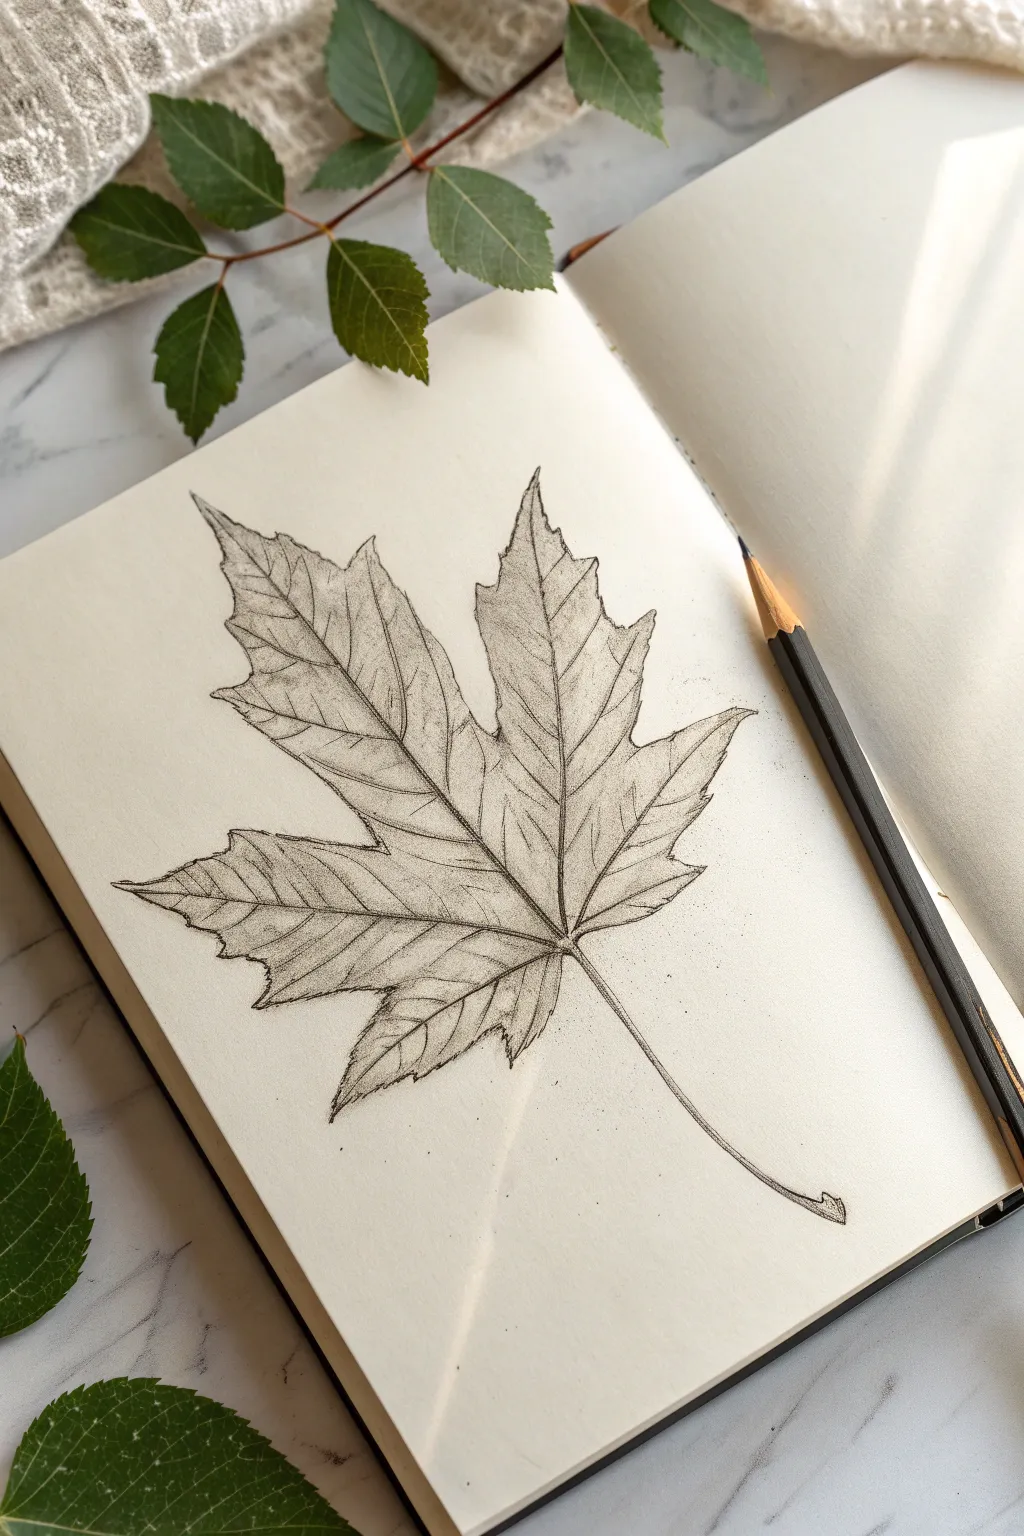
Master the delicate art of botanical illustration by capturing the intricate veins and texture of a maple leaf. This project focuses on building up layers of graphite to create a realistic, dimensional look on simple sketchbook paper.
Step-by-Step
Materials
- Sketchbook with smooth or medium-tooth paper (Canson or Strathmore recommended)
- Set of graphite pencils (HB, 2B, and 4B)
- Fine point mechanical pencil (0.5mm, HB lead)
- Kneaded eraser
- Pencil sharpener
- A real maple leaf (optional, for reference)
Step 1: Drafting the Structure
-
Mark the center line:
Begin by lightly drawing a curved diagonal line across the page with your HB pencil. This will serve as the central vein and stem of the leaf. -
Establish the main veins:
From a central point near the bottom third of your main line, draw four radiating lines outward—two stretching up towards the top corners and two extending lower towards the bottom. -
Outline the lobes:
Around each of these five main structural lines (the center and four radiating lines), sketch a rough, jagged V-shape to define the general size of the leaf’s five lobes. Keep your pressure extremely light so these marks can be erased later. -
Detail the serrated edges:
Switch to your mechanical pencil for precision. Go over your rough outline and carefully draw the characteristic ‘toothed’ edge of the maple leaf. Make the points sharp and vary the sizes of the indentations for a natural look. -
Define the stem:
Thicken the bottom part of the central line to create the stem. Add a tiny, slightly widened shape at the very bottom where the stem would attach to a branch.
Smudge Alert
If your hand smears the drawing while you work, place a clean scrap of paper under your drawing hand. It acts as a shield to protect your shading and keeps the background crisp.
Step 2: Adding Veins and Texture
-
Draw secondary veins:
Inside each lobe, draw smaller veins branching off from the main central vein. These should angle upward and outward towards the tips of the leaf’s serrated edges. -
Refine the vein connections:
Soften the points where veins meet. In nature, veins naturally taper into one another rather than meeting at harsh angles, so use a gentle touch to blend these junctions. -
Apply base shading:
Using the side of a 2B pencil, lightly shade the entire inside of the leaf. I find it helpful to stroke in the direction of the veins to begin building texture immediately. -
Darken the main veins:
Go back over your primary skeletal lines with a freshly sharpened 2B pencil. Press slightly harder to make them stand out against the base shading. -
Create depth with contrast:
Identify which areas of the leaf should be darker. Usually, the spaces between the veins (the lamina) are slightly recessed. Shade these areas a bit more heavily to make the veins appear raised.
Pro Tip: Lift for Light
Don’t just draw shadows; draw light too. Use a kneaded eraser to ‘tap’ areas of possible insect damage or spots where the leaf is thinner, creating realistic translucent patches.
Step 3: Refining and Polishing
-
Enhance the texture:
With a sharp HB or mechanical pencil, add very fine, faint scribbles or cross-hatching between the secondary veins. This mimics the microscopic texture of a dried leaf surface. -
Deepen shadows:
Switch to your 4B pencil. Add darker values near the center of the leaf where all the veins converge, and along the ‘valleys’ where the lobes meet. This adds dimension. -
Add directional strokes:
Use short, flicking strokes moving from the central veins outward. This reinforces the flow of the leaf’s structure. -
Clean up the edges:
Use your kneaded eraser to tap along the outer perimeter of the leaf. This cleans up any smudges and keeps the outline crisp. -
Highlight the veins:
Mold your kneaded eraser into a very fine point. Gently lift away graphite directly on top of the thickest veins to create a highlight, making them look round and cylindrical. -
Final stem details:
Add a dark shadow on one side of the stem with the 4B pencil to give it a round form, leaving the other side lighter.
Now you have a permanently preserved botanical specimen in your sketchbook to admire regardless of the season

PENCIL GUIDE
Understanding Pencil Grades from H to B
From first sketch to finished drawing — learn pencil grades, line control, and shading techniques.
Explore the Full Guide
Feather With Soft Blending
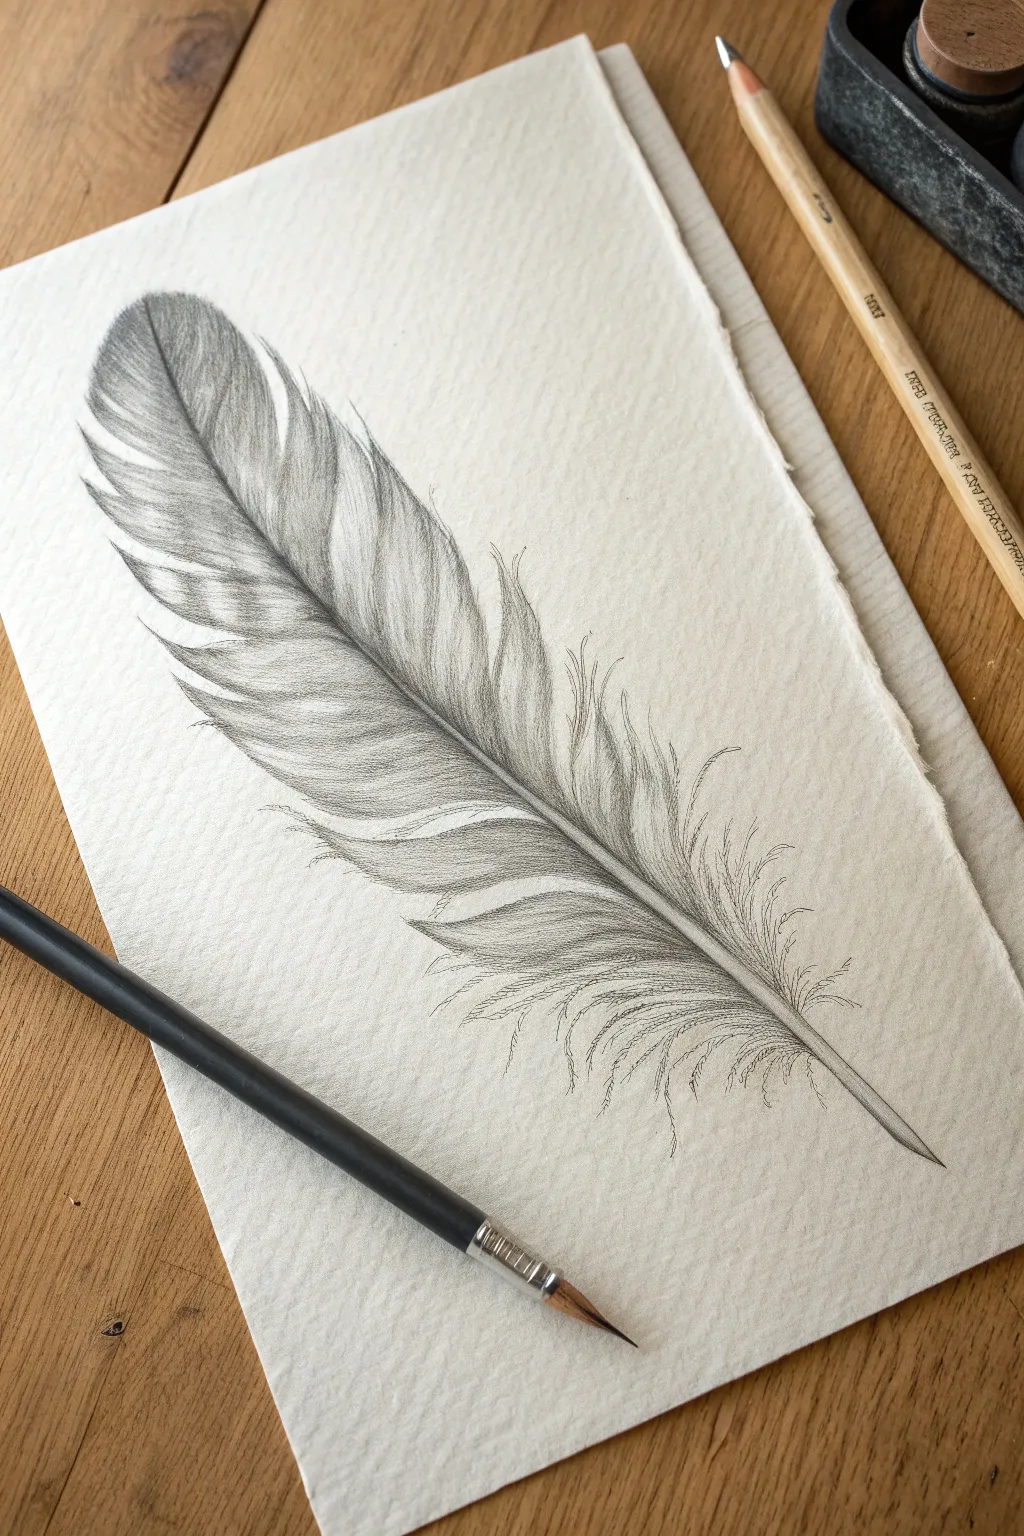
Capture the delicate beauty of a single feather with this approachable pencil study, perfect for refining your shading skills. You will learn to create realistic textures using soft gradients and fine, wispy strokes to mimic nature’s effortless design.
Step-by-Step Tutorial
Materials
- Textured sketch paper or cold-press watercolor paper
- HB graphite pencil (for outlining)
- 2B and 4B graphite pencils (for shading)
- F graphite pencil (for fine details)
- Small blending stump (tortillon) or cotton swab
- Kneaded eraser
Step 1: Sketching the Structure
-
Draw the Spine:
Start with your HB pencil and draw a long, gentle S-curve across the page. This line, known as the rachis, establishes the feather’s gesture and flow. Make the line slightly thicker at the bottom (the quill) and taper it to a very fine point at the top tip. -
Map the Vane Shape:
Lightly sketch the outer silhouette of the feather around the spine. The shape should be imperfect—narrow at the base, widening in the middle, and rounded at the top. Think of it like a stretched-out leaf that flows with the curve of your center line. -
Add Splits and Breaks:
Nature is rarely uniform, so add character to your feather by marking a few V-shaped notches or splits along the edges of the vane. This mimics how feather barbs naturally separate over time.
Keep it Sharp
For realistic feather texture, sharpness is key. Rotate your pencil every few strokes to maintain a point, ensuring your barb lines remain crisp and hair-like.
Step 2: Establishing Tone
-
Base Shading:
Switch to your 2B pencil. Begin shading the vane sections on either side of the spine. Use long, sweeping strokes that follow the direction of the barbs—growing outward and upward from the center spine. -
Define the Spine:
Sharpen your 2B pencil and carefully darken the areas immediately adjacent to the spine. Leave the spine itself white or very light grey to make it look raised and cylindrical. -
Initial Blending:
Take your blending stump or a cotton swab and gently smudge the graphite you just laid down. Rub in the direction of the barbs to maintain the texture, smoothing out the rough paper grain just enough to create a soft, velvety base tone.
Muddy Shading?
If your blending looks like a grey blob, you’ve over-smudged. Use a fine eraser to lift out thin ‘negative’ lines to re-establish the direction of the barbs.
Step 3: Refining Texture
-
Deepen the Shadows:
Using the 4B pencil, revisit the darkest areas, usually found near the spine and underneath the splits you sketched earlier. This contrast is what gives the feather volume. -
Create Patterns:
Many feathers have subtle banding. Use the 2B pencil to create soft, horizontal bands or spots across the vane. I like to keep these markings slightly irregular so they look organic rather than manufactured. -
Lift Highlights:
Mold your kneaded eraser into a fine wedge shape. Press and lift graphite away from the spine and certain parts of the vane to create bright highlights, enhancing the 3D effect. -
Detail the Barbs:
Switch to the harder F pencil for crisp lines. Draw individual barbs within the shaded areas, ensuring they curve outward. These lines should lay on top of your blended base to suggest detailed texture without overcrowding the drawing.
Step 4: The Wispy Edges
-
Loosen the Base:
At the very bottom of the feather (the afterfeather), near the quill, the structure changes from solid to fluffy. Use loose, erratic, and curly strokes with the HB pencil to draw these soft, downy filaments. -
Fray the Edges:
Go along the entire outer contour of the feather. Instead of a solid outline, draw tiny, individual hair-like strokes that flick outward. This destroys the solid line and makes the feather look soft to the touch. -
Refine the Splits:
Where the feather vane splits, draw fine, overlapping hairs crossing the gap. Real feathers rarely break cleanly; usually, a few stray barbs bridge the separated sections. -
Final Shadow Check:
Add a final pass of 4B shading right at the junction where the barbs meet the spine to maximize depth. -
Clean Up:
Use the clean edge of your eraser to tidy up the background paper, removing any accidental smudges, ensuring the feather stands out clearly against the white space.
Step back and admire the gentle flow and texture of your finished graphite feather study
Realistic Eye With a Shine Spot
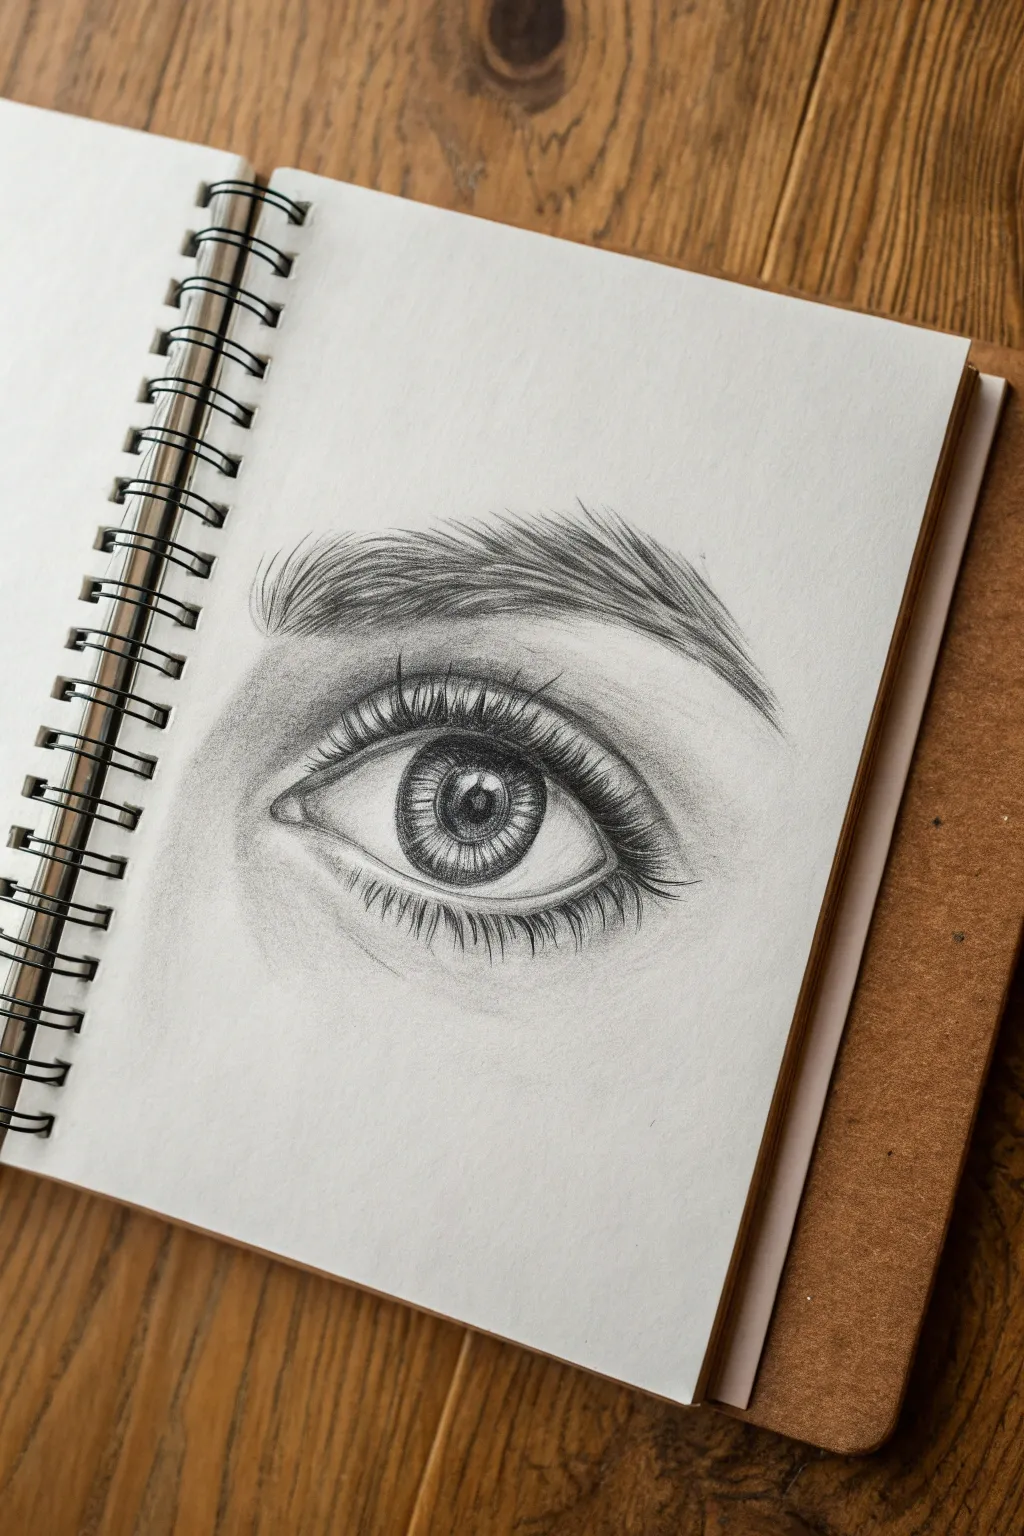
Learn to draw a captivatingly realistic human eye that seems to sparkle on the page. This project focuses on graphite shading techniques and building layers to create depth, intricate iris textures, and a lifelike eyebrow.
How-To Guide
Materials
- Sketchbook with smooth, heavy drawing paper
- HB pencil (for initial sketching)
- 2B and 4B pencils (for shading and details)
- Kneaded eraser
- Blending stump or cotton swab
- Fine-point mechanical pencil (optional, for lashes)
Step 1: Shaping the Outline
-
Establish the curve:
Begin with your HB pencil using very light pressure. Draw an almond shape for the eye opening. Notice how the upper lid curve is usually steeper than the lower lid curve. -
Add the iris and pupil:
Place a perfect circle in the center of the eye opening for the iris. The top and bottom of this circle should be slightly hidden by the eyelids. Draw a smaller, concentric circle directly in the center for the pupil. -
Mark the highlight:
Before doing any shading, draw a small, rectangular or oval shape overlapping the pupil and iris. This is your ‘shine spot’ or catchlight—it must remain paper-white. -
Define the tear duct:
Extend the inner corner of the eye slightly downwards to create the small, triangular tear duct area. -
Outline the crease:
Sketch a curved line above the upper eyelid to indicate the eyelid crease. This line should follow the shape of the eye but taper closer at the ends.
Keep it Sharp
For the crispest eyelashes and iris details, I always sharpen my pencil every few minutes. A dull tip creates blurry lines that ruin the realistic effect.
Step 2: Shading the Iris
-
Darken the pupil:
Switch to a 4B pencil and fill in the pupil completely black, being extremely careful to preserve the white highlight shape you marked earlier. -
Radiate iris lines:
Using a sharp 2B pencil, draw fine lines radiating outward from the pupil like bicycle spokes. Vary their length—some short, some reaching the outer edge. -
Darken the rim:
Shade the outer ring of the iris (the limbal ring) darker than the interior. Blend this slightly inward so it doesn’t look like a harsh cartoon outline. -
Add depth to the highlight:
Pencil in a tiny reflection of eyelashes within the top part of your highlight if you want extra realism, or keep it crisp white for high contrast.
Add a Reflection
Instead of a simple white box highlight, try drawing a tiny window silhouette (four squares) in the eye for an eerie ‘reflection’ look.
Step 3: Skin and Shadows
-
Shade the eyeball:
The ‘white’ of the eye isn’t flat white. Lightly shade the corners of the eyeball where it curves back into the specific socket, leaving the center bright. -
Cast a shadow:
Add a horizontal shadow across the top of the eyeball, right underneath the upper eyelid. This adds immediate dimension. -
Define the skin:
Using the side of your pencil or a blending stump, create soft graphite shading around the eye socket, darkening the crease area and the inner corner near the nose.
Step 4: Lashes and Brows
-
Map the lashes:
For the upper lashes, start your stroke at the eyelid rim and flick outward and upward in a curved motion. Don’t make them straight lines; give them a ‘J’ curve. -
Create lash clusters:
Group hairs together slightly at the tips to form triangles. Make the lashes thickest at the outer corner and sparse toward the tear duct. -
Reflect in lower lashes:
Draw shorter, thinner lashes on the lower lid. Be sure to leave a small gap of skin (the waterline) between the eyeball and where these lashes start. -
Stroke the eyebrow:
Using a 2B or 4B pencil, draw the eyebrow hairs. Start at the bottom of the brow and flick upward. As you move toward the tail of the brow, angle your strokes more horizontally. -
Final blend:
Use your blending stump to soften the shading on the skin one last time, ensuring the pupil and lashes stay crisp and sharp against the softer skin tones.
Now you have a striking, soulful eye staring back at you from your sketchbook
BRUSH GUIDE
The Right Brush for Every Stroke
From clean lines to bold texture — master brush choice, stroke control, and essential techniques.
Explore the Full Guide
Butterfly Wings Using Symmetry
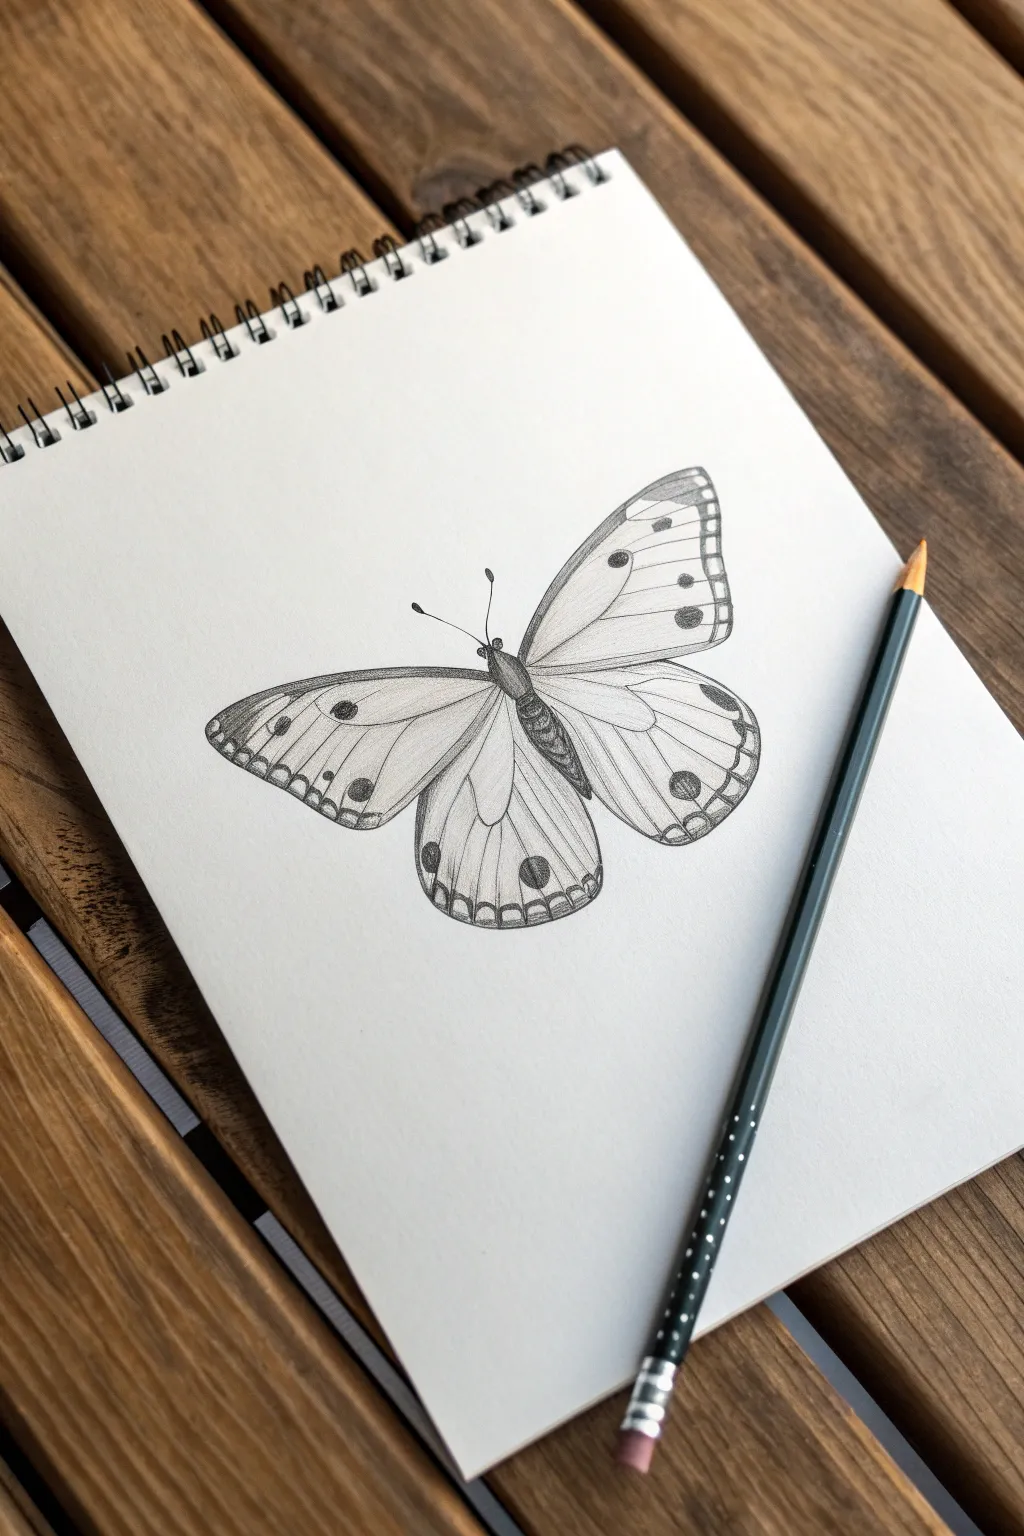
Master the art of biological symmetry with this elegant pencil study of a butterfly. You will focus on building clean outlines, realistic wing structures, and varied shading techniques to give the insect a lifelike yet illustrative quality.
Step-by-Step Tutorial
Materials
- Sketchbook paper (smooth or medium grain)
- HB graphite pencil (for initial outlines)
- 2B or 4B graphite pencil (for darker shading)
- Fine-tip mechanical pencil (optional, for details)
- Kneaded eraser
- Ruler (optional)
Step 1: Drafting the Skeleton
-
Establish the axis:
Begin by drawing a very faint vertical line down the center of your page. This axis line is crucial for ensuring both wings mirror each other perfectly. -
Map the body:
On the central line, sketch three elongated oval shapes to form the head, thorax (middle), and abdomen (tail). The thorax should be the widest part where the wings attach. -
Draft the upper wings:
Sketch a large triangular shape extending from the thorax on the right side. Round off the outer corners. Repeat this exact shape on the left side, checking your symmetry against the center line. -
Draft the lower wings:
Draw rounded, teardrop-like shapes extending from the lower thorax and abdomen. These should slightly tuck underneath the upper wings at the connection point. -
Refine the wing edges:
Using your HB pencil, go over the wing outlines to create the specific scalloped edges seen in the reference. Add small indentations along the bottom edges for a natural look.
Step 2: Mapping the Pattern
-
Add the veins:
Lightly draw lines radiating from the butterfly’s body outward to the wing edges. These veins act as the framework for the pattern cells. -
Sketch the spots:
Place circular spot outlines within the cells you just created. Look closely at the reference: note the larger spots on the lower wings and the smaller trail of spots along the upper wing edges. -
Outline the borders:
Draw a secondary line just inside the outer edge of the wings. This creates the ‘border zone’ where many butterfly patterns contain repeating decorative elements. -
Clean up the sketch:
Take your kneaded eraser and gently list away the initial construction lines and the central axis, leaving only your clean butterfly outline.
Uneven Wings?
If symmetry is hard, draw one side perfectly first. Trace it onto baking paper, flip the paper over, and rub the back to transfer the exact shape to the other side.
Step 3: Shading and Definition
-
Darken the body:
Switch to a darker pencil (2B or 4B). Shade the thorax and abdomen firmly, using short, textured strokes to simulate a fuzzy texture. Leave a tiny sliver of white for a highlight. -
Fill the spots:
Fill in the circular spots with solid dark graphite. I like to press firmly here to create high contrast against the lighter wing sections. -
Define the veins:
Go over your vein lines with firm pressure. Near the body, make the lines slightly thicker, tapering them as they reach the wing tips. -
Shade the wing roots:
Apply soft, gradient shading where the wings meet the body. Use the side of your pencil lead to fade this darkness out toward the middle of the wing. -
Detail the borders:
In the border sections along the wing edges, add small, curved hatch marks. This gives the edges a distinct, banded appearance. -
Add texture:
Very lightly shade the interior wing panels. Use faint, sweeping strokes that follow the direction of the veins to suggest the delicate texture of wing scales. -
Final touches:
Draw the antennae extending from the head, adding small knobs at the ends. Check your contrast levels and darken any areas that need more pop.
Level Up: Color Contrast
Use a white charcoal pencil or white gel pen to add tiny highlights on the darkest spots and the body. This makes the drawing look glossy and three-dimensional.
Now you have a beautifully symmetrical study that captures the delicate nature of a butterfly
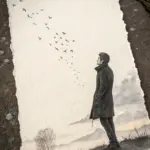
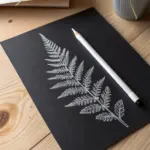
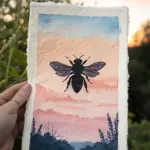
Tree Silhouette Against a Full Moon
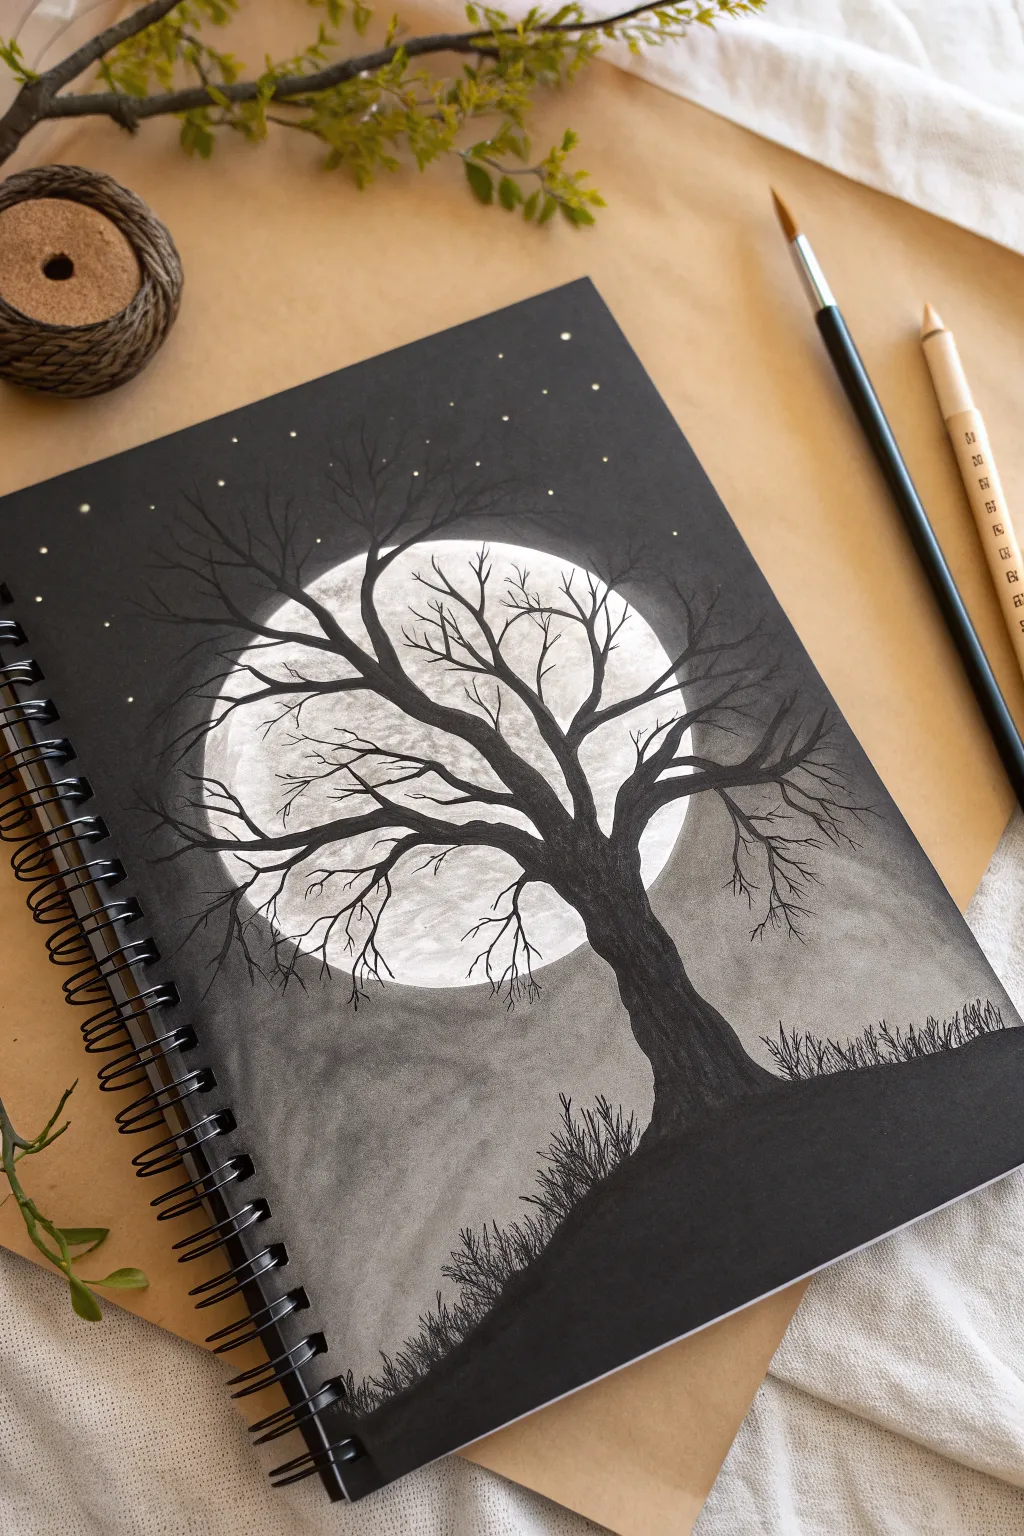
Create a moody and dramatic night scene using the high contrast of white charcoal on black paper. This project captures the stark beauty of a leafless tree reachng across a luminous full moon, perfect for practicing silhouette techniques and spherical shading.
Detailed Instructions
Materials
- Black sketchbook paper or black cardstock
- White charcoal pencil (or white pastel pencil)
- Black charcoal pencil (medium or soft)
- Blending stump (tortillon) or cotton swab
- Compass or a circular object to trace (e.g., a lid or roll of tape)
- Kneaded eraser
- White gel pen (optional for stars)
Step 1: Setting the Celestial Scene
-
Establish the Moon:
Begin by placing your circular object slightly off-center on the upper portion of the black paper. Trace around it lightly with your white charcoal pencil to create the outline of the moon. -
Initial Fill:
Gently fill in the moon’s circle with the white charcoal pencil. Don’t press too hard yet; create a soft, even layer of white across the entire shape as a base. -
Creating Craters and Texture:
To make the moon look realistic, we need shadows. Lightly rub your finger or a blending stump over the white charcoal to smooth it out, leaving some areas slightly patchy to suggest terrain. -
Adding Lunar Detail:
Use a clean blending stump or a kneaded eraser to lift away small patches of white pigment. This negative drawing technique creates the darker ‘seas’ or craters on the moon’s surface. -
Brightening the Highlights:
Go back in with the white pencil and press harder on the brightest areas, usually the rim or the spaces between the craters, to make the orb truly glow. -
Atmospheric Glow:
Scribble a very faint ring of white just outside the moon’s edge. Smudge this outward with your finger to create a hazy, atmospheric halo that fades into the black sky.
Step 2: Rooting the Landscape
-
Drafting the Slope:
Switch to your black charcoal pencil. Draw a sloping line starting from the bottom right corner, rising gently up towards the left side of the page to form the hill. -
Filling the Ground:
Fill in the area below your slope line completely with black charcoal. Press firmly to ensure it is opaque and solid, distinguishing it from the black paper itself. -
Adding Texture to the Hill:
Use short, flicking upward strokes along the top ridge of the hill to create the impression of wild grass blades breaking the horizon line.
Smudge Alert
Charcoal moves easily. Place a clean sheet of scrap paper under your drawing hand to prevent smearing your moon or black silhouette while you work.
Step 3: Structuring the Silhouette
-
Trunk Placement:
Draw the main trunk of the tree starting from the hill on the right side. Curve it diagonally so it leans aggressively toward the left, reaching over the moon. -
Thickening the Base:
Widen the base of the trunk where it meets the ground, giving the tree a sense of weight and age. I find adding a few bumps here suggests gnarly roots or bark texture. -
Primary Branches:
Extend two or three thick main branches from the top of the trunk. Make sure at least one large branch crosses directly in front of the moon to create strong contrast. -
Filling the Silhouette:
Color in the trunk and main branches with heavy pressure using the black charcoal. The goal is a solid, void-like black that stands out against the glowing moon.
Make it Mystical
Add a small silhouette of an owl perched on a branch or a hanging swing to add narrative and life to your moody scene.
Step 4: Extending the Reach
-
Branching Out:
From your main branches, draw smaller, thinner branches splitting off in different directions. Remember that branches generally get thinner the further they grow from the trunk. -
Crossing the Light:
Pay special attention to the thin twigs overlapping the bright white moon. These need to be sharp and crisp. Keep your pencil point very sharp for these fine details. -
Adding Complexity:
Add tiny, jagged twigs at the ends of the branches. A little zigzag motion with your wrist helps create that crooked, spooky winter tree aesthetic. -
Foreground Grasses:
Return to the hill and add taller clumps of weeds or dry bushes near the base of the tree using quick, upward strokes to integrate the trunk into the landscape. -
Starry Night:
Finally, use the white charcoal or a white gel pen to dot a few stars in the black sky above the tree. cluster a few together and leave open spaces for a natural look. -
Final Clean Up:
Use your black pencil to touch up any areas where white dust might have fallen onto the dark silhouette, ensuring the tree remains stark black.
This high-contrast technique creates a striking piece of art that looks impressive regardless of your skill level


Circle-Bound Mini Mountain Landscape
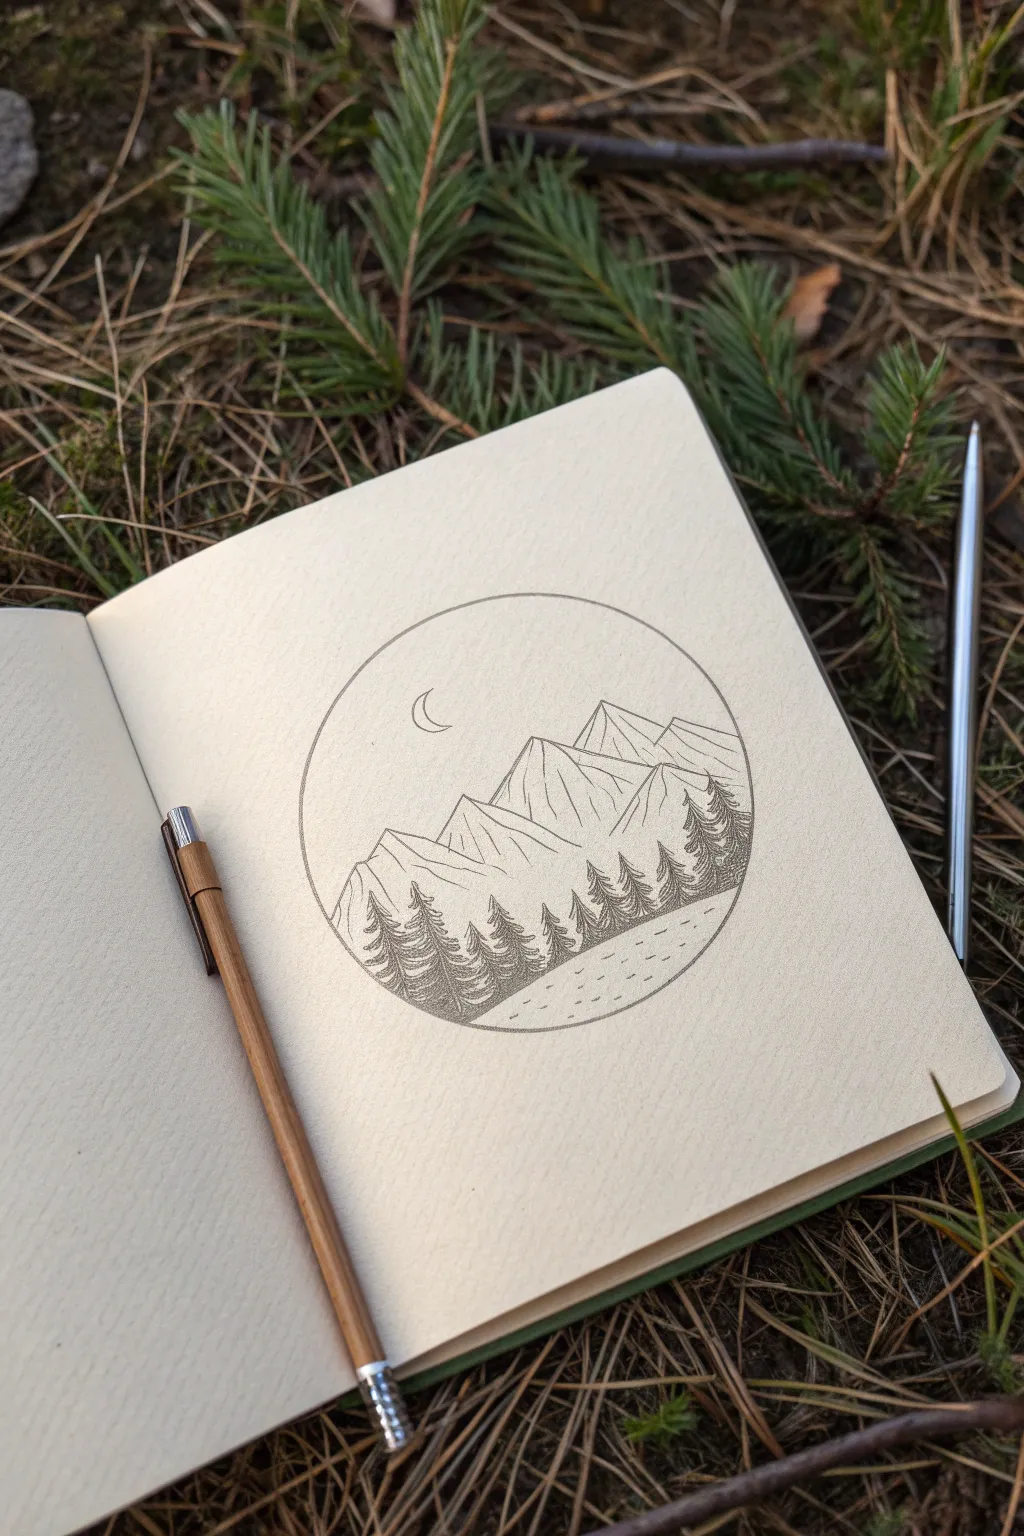
Capture the serenity of the outdoors with this geometric landscape sketch, focusing on clean lines and simple textures. This project is perfect for beginners wanting to practice shading and composition within a defined circular boundary.
Step-by-Step Tutorial
Materials
- Sketchbook with cream or off-white paper
- Compass or a circular object to trace (e.g., a cup rim)
- HB or 2B pencil (mechanical or freshly sharpened)
- Fine-point eraser
- Ruler (optional)
Step 1: Setting the Frame
-
Draw the boundary:
Begin by placing your compass or circular object in the center of your page. Lightly draw a perfect circle about 3-4 inches in diameter to serve as the frame for your landscape. -
Establish the horizon line:
Visualize a line cutting across the lower third of the circle. This won’t be a straight line, but rather the diagonal slope of a shoreline where the water meets the trees.
Fixing Flat Mountains
If mountains look flat, increase the contrast. Darken the shadowed side of the ridges significantly while leaving the sunlit side almost paper-white.
Step 2: Drafting the Mountains
-
Outline the first peak:
Starting from the left side, draw a jagged, triangular shape reaching up towards the center of the circle. Keep the lines angular to mimic rock formations. -
Add secondary peaks:
Behind and to the right of your first mountain, sketch a taller, central peak. Add a third, smaller peak on the far right to balance the composition. -
Define the ridgelines:
Draw vertical, slightly wavy lines down from the mountain tips to the base. These lines define the different faces of the mountains and will guide your shading later. -
Add mountain texture:
Using light, rapid strokes, add diagonal hatching to the shadowed sides of the mountains—typically the right-facing slopes—to create dimension and form.
Starry Night Upgrade
Use a white gel pen to add tiny dots in the sky for stars, or stipple faint dots with your pencil for a subtle, grainy texture in the night sky.
Step 3: Adding the Forest
-
Position the tree line:
Draw a faint guideline slightly below the base of your mountains. This is where the tops of your pine trees will sit. -
Sketch the first tree:
Start on the far left. Draw a vertical line for the trunk, then add short, downward-sloping scribbles on either side to create the pine branches. Keep the top pointy and the base wider. -
Fill the forest layer:
Continue drawing trees across the width of the circle. Vary their heights slightly—some taller, some shorter—to make the forest look natural. -
Overlap the trees:
Ensure the trees overlap each other. I like to draw the foreground trees first and then tuck partial tree shapes behind them to create density. -
Darken the foliage:
Go back over your trees with darker, tighter scribbles. The trees should be significantly darker than the mountains to bring them forward visually.
Step 4: Sky and Water details
-
Draw the moon:
In the upper left quadrant of the sky, carefully draw a small, thin crescent moon. Keep it delicate and unshaded. -
clean up mountain lines:
Re-trace the outer edges of your mountains with a firmer hand to separate them clearly from the sky. -
Sketch the shoreline:
Draw a solid line at the base of your trees. Angle it slightly downward from left to right to create the bank of the lake or river. -
Add water ripples:
Below the shoreline, draw several short, horizontal dashes. Space them out largely near the bottom of the circle and closer together near the shore to mimic perspective.
Step 5: Final Polish
-
Reinforce the circle:
Go over your original circle perimeter one last time with a confident, dark stroke to neatly contain the entire drawing. -
Erase guidelines:
Use your fine-point eraser to gently remove any stray sketch marks outside the circle or within the open sky area, keeping the cream paper clean.
Now you have a serene little world perfectly captured in your sketchbook.
Umbrella Figure in Gentle Rain
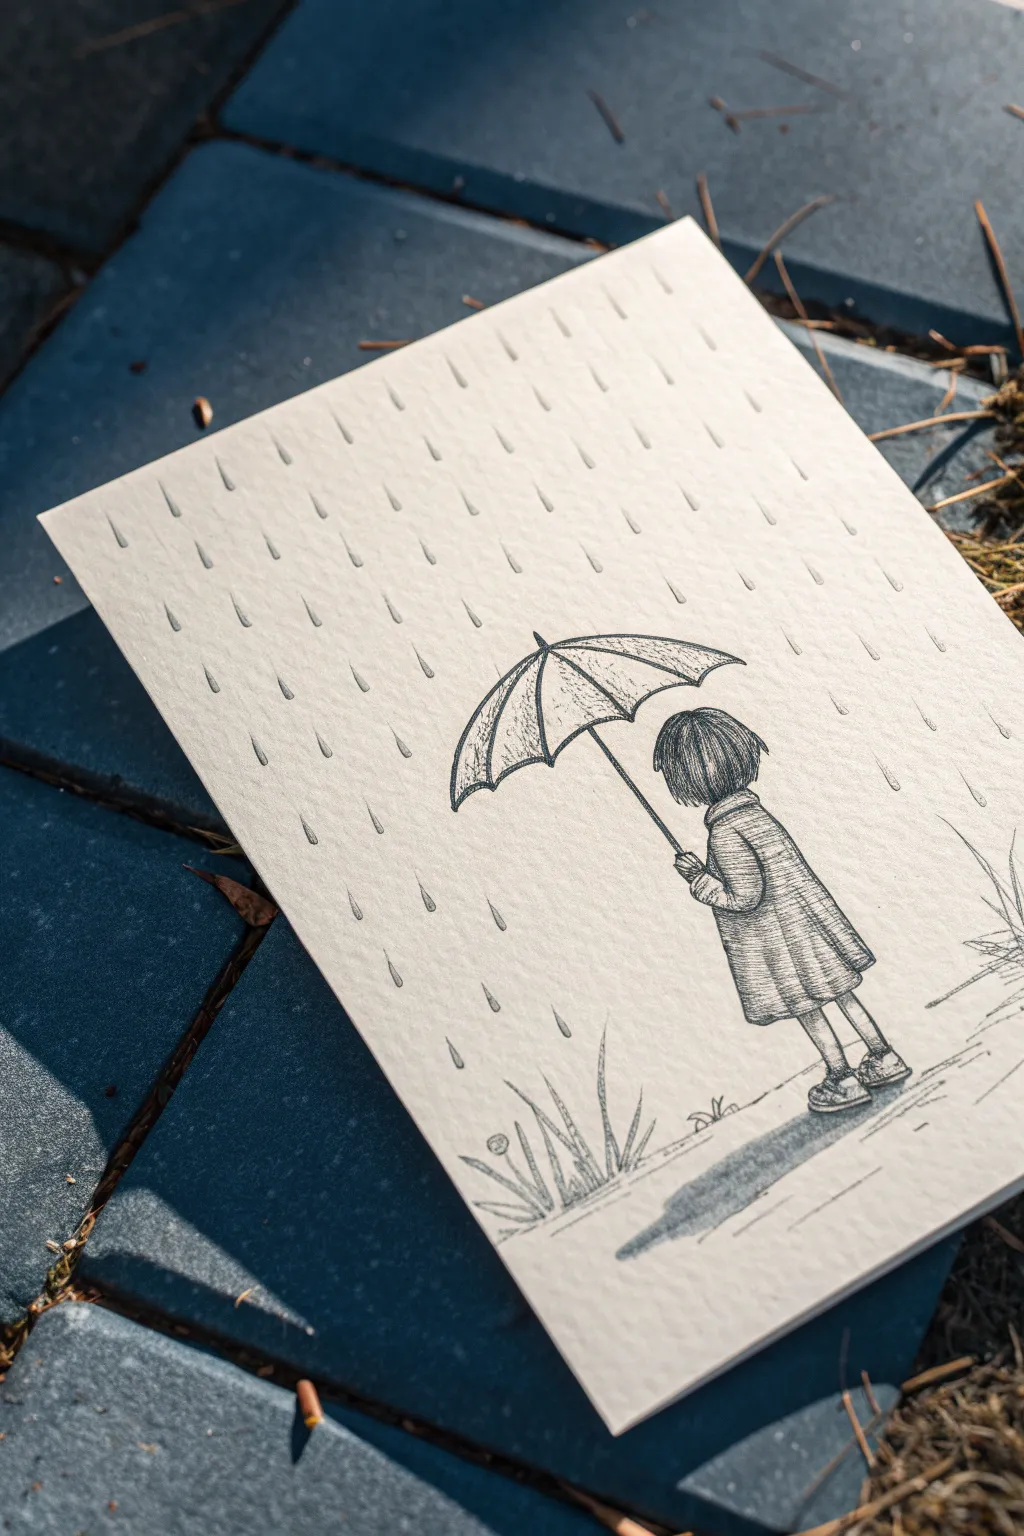
This charming, minimalist sketch captures a quiet moment of childhood with gentle rain and a trusty umbrella. Using simple fine-liner techniques and careful shading, you will create an evocative scene that feels both nostalgic and sweet.
How-To Guide
Materials
- High-quality textured paper (cold press watercolor paper or mixed media paper)
- HB pencil for initial sketching
- Fine liner pens (sizes 0.1, 0.3, and 0.5)
- Kneaded eraser
- Ruler (optional)
Step 1: Laying the Foundations
-
Map the composition:
Begin with your HB pencil, pressing very lightly. Draw a faint vertical line slightly to the right of the center of your page to represent the girl’s body posture, and sketch a loose circle for the umbrella canopy above where her head will be. -
Outline the figure:
Sketch a simple rounded shape for the head (hair) under the umbrella. Then, draw a trapezoid shape for the coat, widening slightly at the bottom. Add two simple stick legs and oval shapes for shoes. -
Shape the umbrella:
Refine the umbrella’s curve. Draw the scalloped bottom edge using soft ‘C’ curves connecting the ribs. Add the central stick handle extending down to the girl’s hand. -
Define the clothing:
Add details to the coat. Sketch the collar, the cuff of the sleeve holding the umbrella, and the hemline. Keep your lines loose; we will refining them with ink later.
Ink Smearing?
If you are left-handed, place a scrap piece of paper under your hand as you draw. This prevents oils and friction from dragging wet ink across your clean paper.
Step 2: Inking the Scene
-
Inking the umbrella:
Switch to your 0.3 fine liner. Trace the umbrella’s outer curve and the scalloped edge. Draw the ribs radiating from the center top to the points of the scallops. -
Adding umbrella texture:
Use the 0.1 pen to add hatching inside the umbrella panels. Make quick, short strokes that follow the curve of the fabric to suggest volume and shadow. -
Detailing the hair:
With the 0.1 pen, draw the hair using vertical strokes. Start from the top of the head and flick downwards to create the texture of a bob cut. Leave a tiny white gap near the top to suggest a highlight. -
Inking the coat:
Outline the coat with the 0.3 pen. For the texture, use horizontal hatching lines across the body of the coat. Vary the spacing slightly to make it look like woven fabric. -
Creating fabric folds:
Add density to your hatching on the right side of the coat and under the sleeve to create shadows. This gives the figure three-dimensionality. -
Lower body details:
Ink the legs and shoes with the 0.3 pen. Add tiny socks by drawing a line just above the ankles. Shade the shoes darker to weigh the figure down.
Step 3: Atmosphere and Environment
-
Grounding shadow:
Beneath the girl’s feet, sketch a horizontal, elongated shadow using the side of your 0.1 pen or very tight cross-hatching. This anchors her to the ground so she isn’t floating. -
Drawing the rain:
Using the 0.1 pen, draw short, vertical teardrop shapes all over the background. Keep them uniform in direction (slightly angled) but randomized in spacing to look natural. -
Adding grass tufts:
In the bottom right and left corners, sketch a few simple blades of grass using quick upward flicks. This suggests a park or garden setting without overcrowding the scene. -
Creating puddles:
Draw faint, flat elliptical shapes near the grass or feet to suggest shallow puddles reflecting the rain. -
Final clean up:
Wait at least 15 minutes for the ink to fully cure. Here I prefer to check for any wet spots before carefully erasing all original pencil guidelines with your kneaded eraser. -
Enhancing contrast:
Step back and assess your drawing. Use the 0.5 pen to re-line the outermost edges of the girl and umbrella if the image needs more ‘pop’ against the background paper.
Creative Twist
Use a white gel pen to add tiny highlights on the raindrops and the wettest parts of the umbrella. This mimics the light catching the water.
Now you have a serene rainy day sketch that brings a cozy mood to any sketchbook page
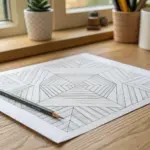
Folded Ribbon Banner With Gradients

This classic folded banner design is brought to life not with smooth shading, but with thousands of tiny dots. The gradient stippling technique creates a wonderfully textured, vintage aesthetic perfect for journals or card making.
Detailed Instructions
Materials
- Smooth drawing paper or cardstock
- HB graphite pencil (for initial sketching)
- Fine liner pen (0.1mm or 0.3mm) or a sharpened 2B pencil
- Eraser
- Ruler (optional, for guidelines)
Step 1: Drafting the Outline
-
Draw the main curve:
Start by lightly sketching two parallel curved lines in the center of your page to form the main body of the banner. Give them a gentle arch, like a shallow rainbow. -
Close the ends:
Connect the ends of your two parallel lines with shorter, slightly concave vertical lines. This creates the front-facing panel of your ribbon. -
Add the folding points:
From the bottom corners of your main panel, draw a short diagonal line moving inward and downward. This establishes where the ribbon creates a visual fold. -
Sketch the back tails:
Draw the tails of the ribbon extending out from behind the folds. Use flowing lines that mimic the curve of the main body, flaring slightly at the ends, and finish them with a V-notch for that classic fishtail look. -
Define the borders:
Inside the main body of the banner, sketch a thin inner border parallel to the top and bottom edges. This creates a decorative frame where we’ll add details later. -
Refine the lines:
Go over your sketch with confident strokes. Identify which lines represent the ‘front’ and which are tucking ‘behind’ to ensure the overlap looks physically possible.
Patience Is Key
Don’t rush the dots! Fast tapping creates hooked dashes instead of round points. Hold the pen vertical to the paper for perfect circles.
Step 2: Applying Texture and Details
-
Start the stippling:
This implies shading using only dots. Begin on the darker, folded sections of the ribbon. Tap your pencil tip repeatedly near the fold lines, clustering the dots tightly together. -
Create a gradient:
As you move away from the folds and shadowed corners, space your dots further apart. This transition from dense to sparse dots creates a smooth gradient effect without smudging. -
Shade the tails:
Apply the same stippling technique to the fishtail ends. Concentrate the dots heavily where the tail disappears behind the front panel, and fade them out toward the tips. -
Detail the main panel:
For the front of the banner, keep the center mostly white to suggest a highlight. Add very light, sparse stippling only near the extreme edges to give the surface a cylindrical rounded form. -
Add border texture:
Return to the thin inner border you drew earlier. Fill this narrow strip with a medium density of dots, making it distinct from the whiter center panel. -
Erase guidelines:
Once your ink or dark pencil work is established and you’re happy with the structure, gently erase any initial light sketch lines that are still visible. -
Enhance the contrast:
I find it helpful to look at the drawing from a distance to spot weak areas. Go back into total shadow areas—like right under the fold—and add more dots to make them nearly solid black. -
Decorative elements:
Draw tiny vertical tick marks or small repeating shapes inside the border strips for extra ornamentation. -
Finishing touches:
Inspect your gradients. If a transition looks too abrupt, add a few widely spaced dots in the lighter area to bridge the gap softly.
Make It Yours
Instead of dots, try using tiny parallel hatch lines for the shadows to give the banner an engraved currency look.
With your banner complete, you now have a sophisticated frame ready for hand-lettering a name or quote
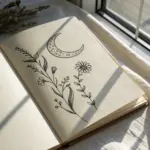
Lightbulb With a Tiny Garden Inside
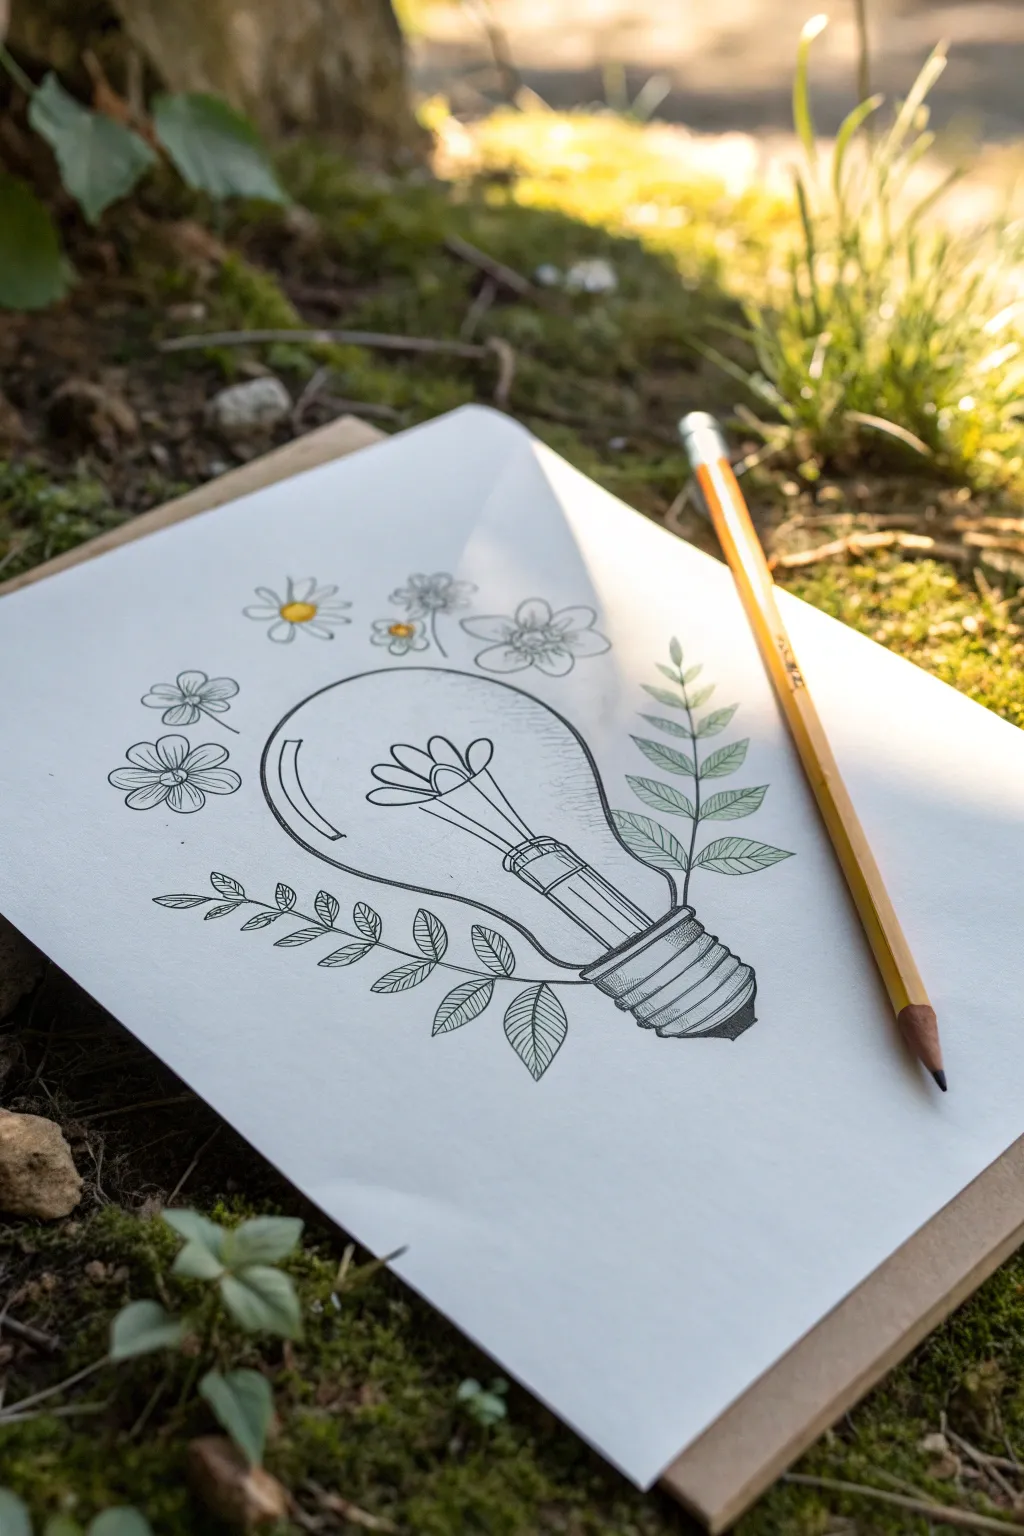
This charming sketch transforms an everyday object into a vessel for nature, replacing the industrial filament with delicate petals. It’s a perfect beginner project that combines simple geometric shapes with organic botanical lines.
Step-by-Step
Materials
- Sketchbook or drawing paper (heavyweight preferred)
- HB or 2B pencil for sketching
- Fine liner pens (0.3mm and 0.5mm)
- Yellow colored pencil or marker
- Eraser
- Ruler (optional)
Step 1: The Bulb Structure
-
Outline the globe:
Begin by drawing a large circle in the center of your page. It doesn’t need to be perfect; a slightly loose hand adds character. Leave the bottom of the circle open where it will connect to the base. -
Draft the neck:
From the open bottom of your circle, draw two lines curving slightly inward towards each other to form the neck of the bulb. -
Sketch the screw base:
At the bottom of the neck, draw a series of stacked, flattened ovals or rounded rectangles. These should get progressively smaller towards the bottom, mimicking the screw threads of a real lightbulb. -
Add the contact point:
Finish the very bottom of the base with a small, dark semi-circle or button shape for the electrical contact point.
Step 2: Botanical Elements
-
Draw the ‘filament’ flower:
Instead of a wire, draw a stem rising from the base into the center of the bulb. Top it with a simple daisy-like flower, keeping the petals open and facing upward. -
Add floating blooms:
Sketch three small daisies hovering near the top left outside the bulb. Keep these simple with circular centers and rounded petals. -
Create the left branch:
Starting near the bottom left of the bulb, draw a long, curved line extending outwards. Add pairs of small, pointed leaves along the stem. -
Create the right branch:
Repeat this process on the right side, drawing a similar leafy branch that curves upward, mirroring the bulb’s shape.
Wobbly Lines?
Don’t stress if your bulb isn’t a perfect circle. Keep your wrist loose and draw multiple light circles until you find the right shape, then darken the best line.
Step 3: Inking and Details
-
Ink the main outline:
Using your 0.5mm fine liner, carefully trace over your pencil lines for the lightbulb globe and the threaded base. I find that breaking the line slightly near the top gives it a nice glass-like reflection effect. -
Refine the flowers:
Switch to a finer 0.3mm pen for the delicate petals inside and outside the bulb. Add tiny dots in the centers of the floating flowers for texture. -
Detail the leaves:
Ink the leafy branches. Add a central vein line to each leaf to give them more dimension and realism. -
Add glass reflections:
Draw two curved lines on the left side of the bulb’s interior—one long, one short—to suggest the curve of the glass. -
Texture the base:
Use parallel hatching lines (closely spaced straight lines) to shade the threaded base, making it look metallic and rounded. -
Erase guidelines:
Once the ink is completely dry, gently erase all underlying pencil sketches.
Make it Glow
Use a soft yellow watercolor wash or pastel chalk around the central flower inside the bulb to create a soft, glowing light effect.
Step 4: Final Touches
-
Add subtle color:
Take your yellow pencil or marker and color just the centers of the floating daisies. This small pop of color brings the drawing to life without overwhelming the line work. -
Review and refine:
Look over your drawing. If line weights feel too thin in places, like the outer edge of the bulb, go over them once more to bold them up.
Now you have a lovely piece of surreal art that lights up the page with nature

Have a question or want to share your own experience? I'd love to hear from you in the comments below!