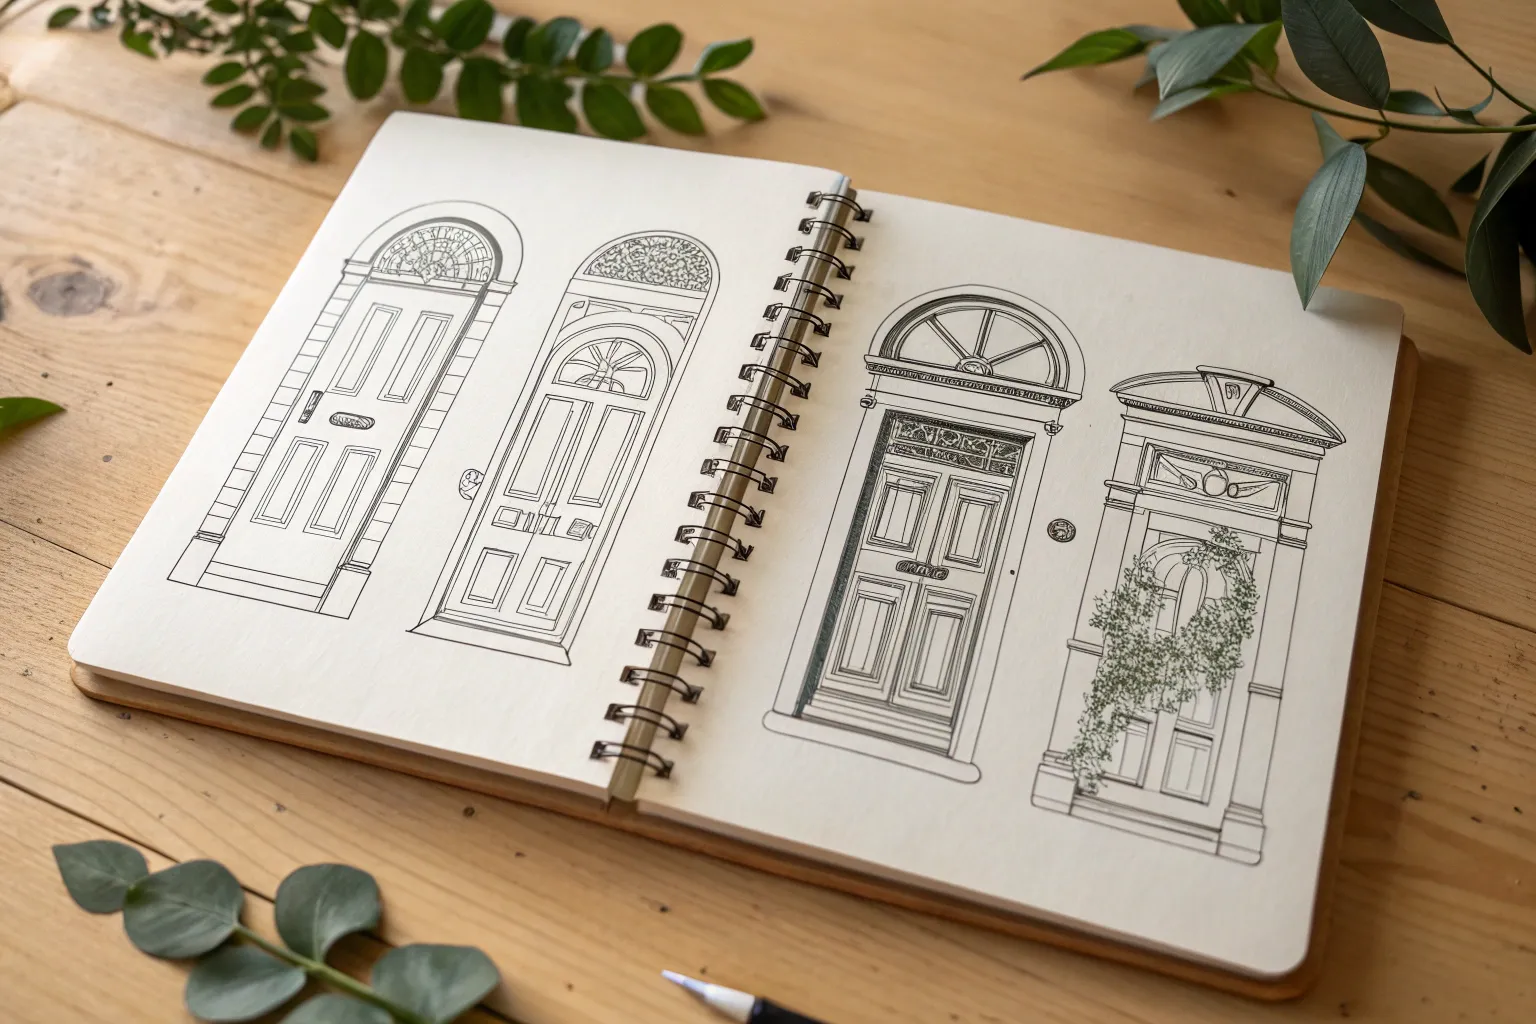
Doors are such a satisfying thing to draw because they’re basically a bunch of friendly shapes with endless personality on top. Here are my favorite door drawing ideas—from classic architectural studies to playful, storybook twists you can try right in your sketchbook.
Townhouse Door With Fanlight
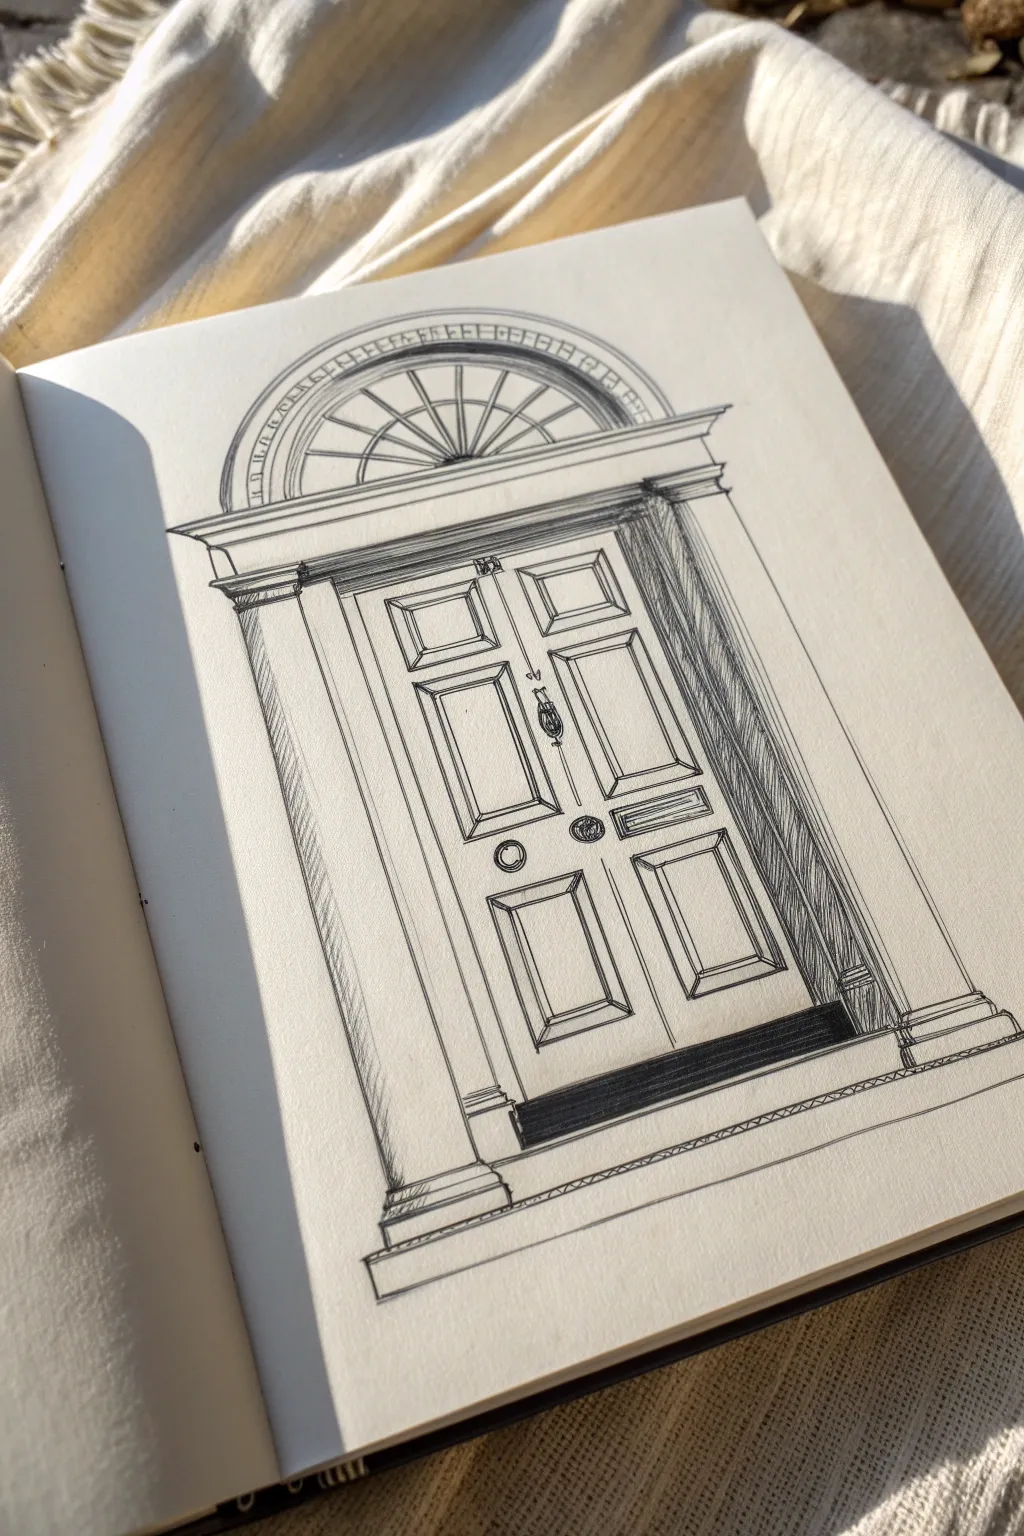
Capture the elegance of classic architecture with this detailed pen-and-ink study of a Georgian townhouse door. This project focuses on mastering perspective and architectural details like fanlights and paneling using simple line work.
Step-by-Step Guide
Materials
- Sketchbook with smooth, heavy paper
- HB graphite pencil
- Eraser (kneaded preferred)
- Fine liner pen (0.1mm) for details
- Fine liner pen (0.3mm or 0.5mm) for main lines
- Ruler or straight edge
Step 1: Laying the Architectural Foundation
-
Establish the main frame:
Start by drawing a tall rectangle centered on your page using your pencil and ruler. This will be the outer boundary of the door frame. Leave plenty of room at the top for the arch. -
Add the arch:
Draw a semi-circle sitting directly on top of your rectangle. To keep it symmetrical, you might want to lightly draw a vertical centerline through the entire door first. -
Create the fanlight structure:
Inside the arch, draw a smaller semi-circle closer to the center. Connect the two semi-circles with evenly spaced radial lines (like spokes on a wheel) to create the window panes of the fanlight. -
Define the door panels:
Divide the main rectangle into two vertical doors. Within each door, sketch the layout of the rectangular panels—typically two smaller ones at the top, two tall ones in the middle, and two medium ones at the bottom. -
Sketch the surrounding columns:
On either side of the door frame, lightly sketch vertical pillars or pilasters. Add horizontal bands at the top and bottom of these pillars to represent the capitals and bases.
Straight Line Struggles?
If your ruler slips, don’t restart! Thicken the line slightly to hide the wobble, or add parallel hatching nearby to make it look like intentional shading texture.
Step 2: Inking the Structure
-
Outline the fanlight:
Switch to your 0.3mm pen. Carefully trace the arches of the fanlight. For the ‘spokes,’ use a ruler to keep them crisp, but don’t worry if the lines have a slight wobble—it adds character. -
Ink the door frame:
Go over the main rectangular frame and the central division line of the door. Use the ruler for long straight lines, but try to stop just short of intersecting corners for a more artistic look. -
Detail the panels:
Trace your penciled panel shapes. To give them depth, draw a second, slightly smaller rectangle inside each panel shape to represent the beveled molding. -
Draw the columns and steps:
Ink the vertical lines of the side columns. At the very bottom, draw two horizontal steps leading up to the door, making the bottom step slightly wider than the top one.
Pro Tip: Variance is Key
Vary your line weight. Use thicker lines for the main structural outline and very thin, broken lines for the interior wood grain or molding details to create visual hierarchy.
Step 3: Adding Depth and Texture
-
Shade the columns:
Use your 0.1mm pen to add vertical hatching lines down the length of the columns. Keep the lines close together but loose; this suggests a round or fluted surface. -
Darken the deep shadows:
Identify the deepest recessed areas, like the strip at the bottom of the door (the kick plate or gap) and the corners of the fanlight. Fill these in completely with black ink to ground the drawing. -
Add hardware details:
Draw small circles for the doorknobs and a small rectangular shape for the letterbox. Don’t forget the door knocker centered on the upper middle panel. -
Enhance the molding:
Add extra thin lines to the corners of the door panels. These diagonal lines suggest the mitered joints of the wood molding. -
Apply shadow to the entryway:
Add diagonal hatching on the left side of the door jamb (the thick wall part). This creates the illusion that the door is set back deep into the wall. -
Clean up the sketch:
Wait at least five minutes to ensure the ink is completely dry. Gently erase all your underlying pencil guidelines to reveal the clean ink drawing.
Now you have a charming architectural sketch ready to be the entrance to your next artistic journey.


Double Doors With Symmetry
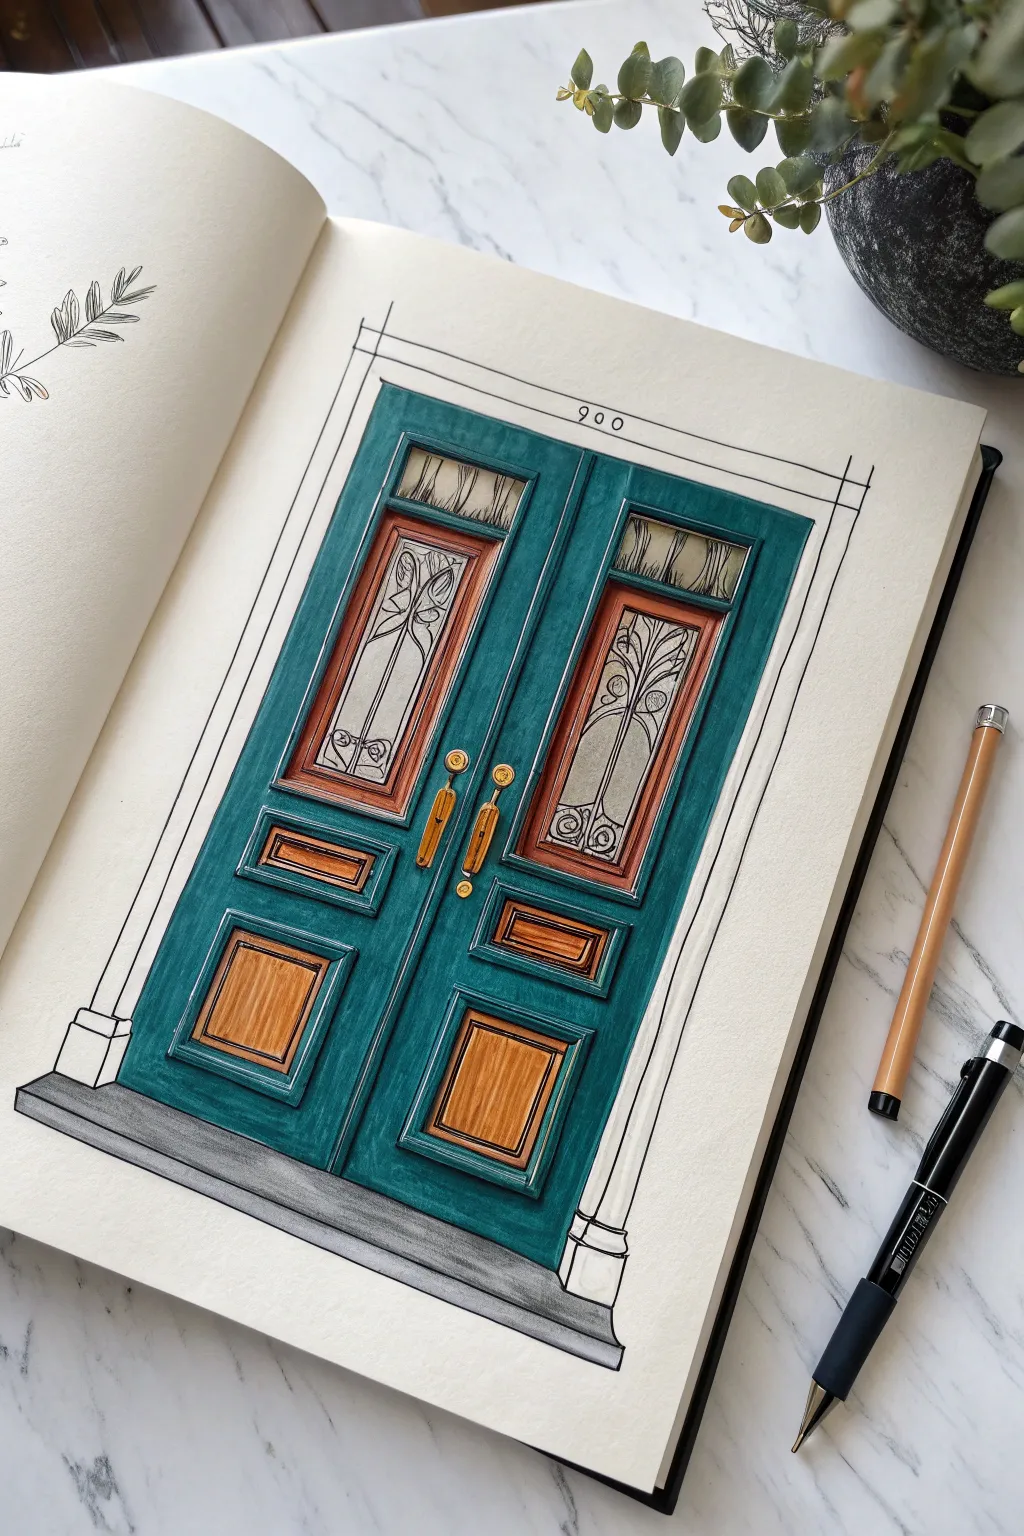
Capture the elegance of classic architecture with this illustration of grand double doors featuring Art Nouveau glasswork. The rich teal tones contrast beautifully with warm wood accents, creating a striking focal point for your sketchbook.
Step-by-Step
Materials
- High-quality sketchbook paper (heavyweight, marker-friendly)
- Pencil (HB or 2H for sketching)
- Fine liner pens (black, sizes 0.1, 0.3, and 0.5)
- Alcohol-based markers (Deep Teal, Warm Brown, Amber, Light Grey, Warm Grey)
- Ruler or straight edge
- Eraser
- White gel pen
Step 1: The Architectural Framework
-
Establish boundaries:
Begin by using your ruler to draw a large vertical rectangle in the center of your page. Leave ample white space around the edges. Divide this main rectangle perfectly in half with a vertical line to separate the two doors. -
Add the frame:
Draw the outer door casing. Sketch a parallel line slightly outside your main rectangle, extending slightly past the top corners to hint at architectural detail. At the bottom, sketch a wide, rectangular step using horizontal lines to ground the structure. -
Define the panels:
Inside each door half, sketch out the panel placements. Start with the large upper window panels, leaving space for the wooden frames. Below that, mark out two smaller rectangular panels on each door: a thin horizontal one in the middle and a squareish one at the bottom. -
Detail the insets:
Refine the sketches for the recessed panels. Draw concentric rectangles inside the wooden sections to give them depth, simulating molding. For the top windows, lightly sketch the curved, organic lead lines typical of Art Nouveau designs.
Step 2: Inking the Structure
-
Outline the main lines:
Switch to your 0.5 fine liner. Carefully trace over your main structural lines—the outer frame and the separation between the doors. Keep your hand steady and use the ruler for clean, crisp edges. -
Ink the detailed molding:
Use a thinner 0.3 pen for the interior molding lines on the panels. This hierarchy of line weight helps push the details back slightly while keeping the main shape bold. -
Trace decorative elements:
With your finest 0.1 pen, trace the delicate swirls inside the glass windows and the small ‘900’ house number above the door. Ink the door handles now as well. -
Erase guidelines:
Once the ink is completely dry, gently erase all pencil marks. Brush away the eraser crumbs so they don’t interfere with the markers.
Bleeding edges?
If your markers bleed outside the lines, thicken the black outline slightly to hide the mistake. You can also use a white gel pen to touch up small errors on the white paper.
Step 3: Applying Color
-
Base teal layer:
Start with your Deep Teal marker. Fill in the main body of the doors, carefully working around the brown wood panels and glass sections. Use long, vertical strokes to minimize streaking. -
Deepen the shadows:
Go over the teal areas again, specifically targeting the edges where panels are recessed. This second layer adds necessary contrast and visual weight to the door frame. -
Wood paneling:
Use a Warm Brown marker to fill the frames around the glass and the small rectangular moldings. I like to leave the very center of these panels slightly lighter or go over the edges twice to suggest a beveled shape. -
Warm amber accents:
Fill the lowest square panels with an Amber or lighter wood tone marker. Add vertical streaks to mimic wood grain texture. -
Tint the glass:
Lightly color the window panes with a very pale Light Grey marker. Don’t fill it solidly; leave some white patches to represent transparency and reflection.
Add some age
To make the doors look weathered, stipple some grey or brown dots near the bottom kickplates and corners using a fine tip marker for a grungy, vintage texture.
Step 4: Finishing Touches
-
Hardware details:
Color the door handles with a golden yellow or ochre marker. Add a tiny dot of brown on the underside of the handle to create a shadow. -
Concrete step shading:
Use a Warm Grey marker for the step at the bottom. Apply the color heavily on the vertical face of the step and lighter on the top tread to show dimension. -
Highlighting:
Take your white gel pen and add small, crisp lines to the top edges of the molding and the shiniest part of the door handles. This simulates light hitting the glossy paint and metal. -
Final crisping:
If any marker bled over the lines, use your thickest black pen to re-outline the major outer edges, cleaning up the silhouette.
Step back and admire how the simple combination of straight lines and color creates such a welcoming entrance


Cottage Door With Round Top
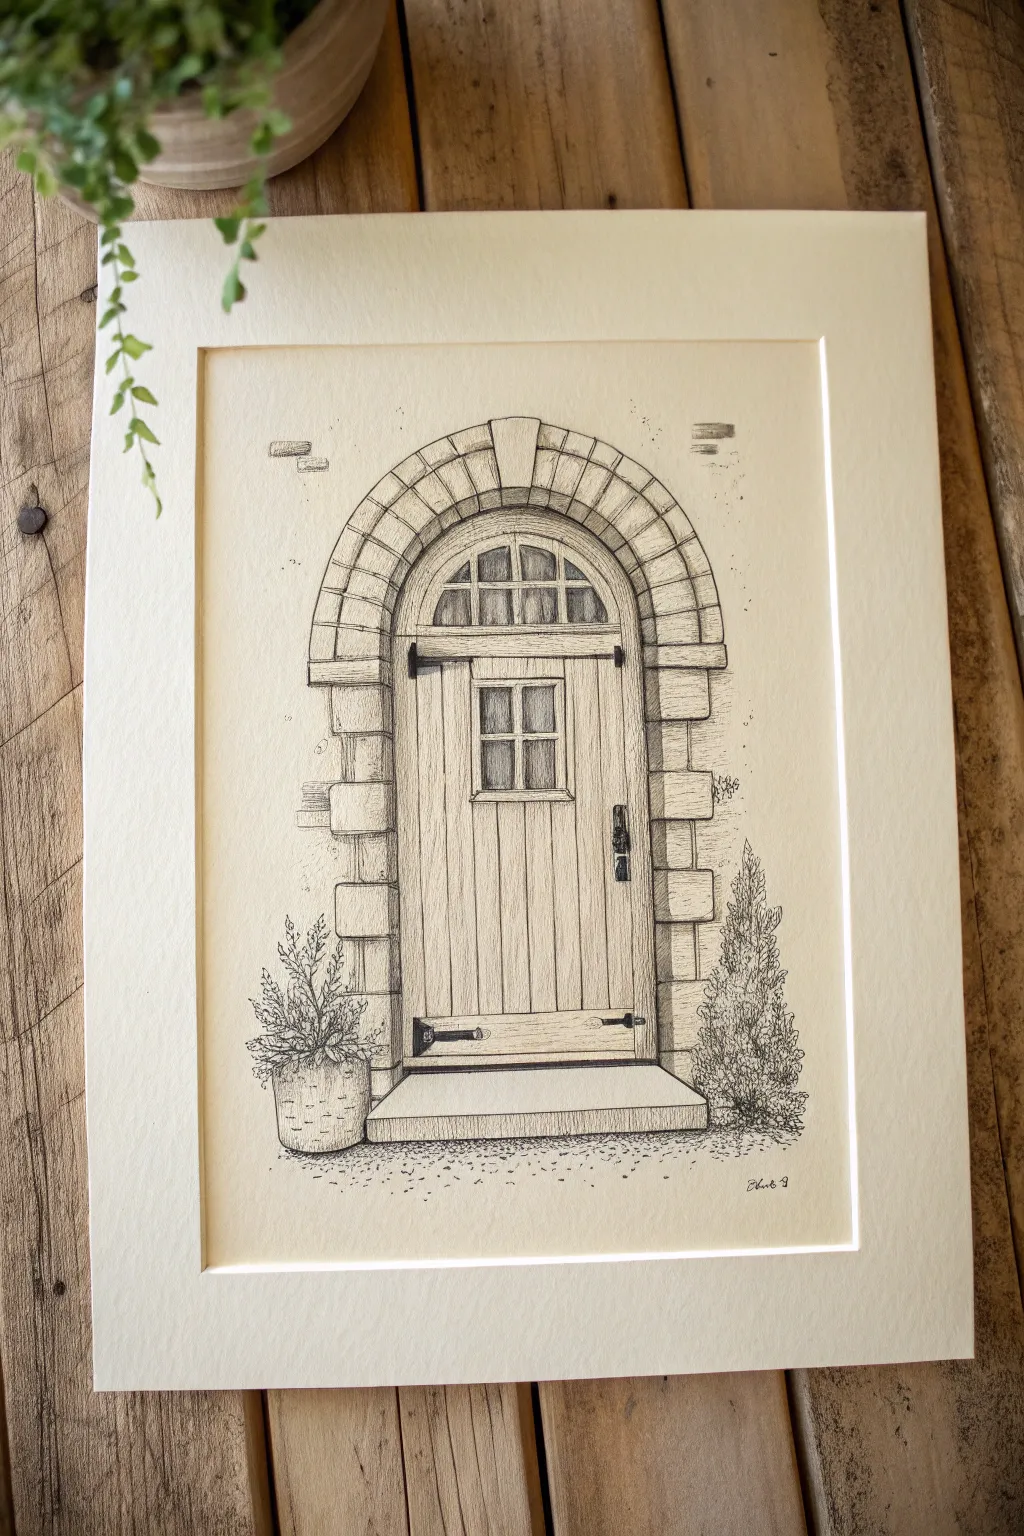
This charming pen and ink illustration captures the rustic beauty of a cottage entrance with intricate stonework and a welcoming wooden door. The fine lines and textured shading create a timeless, architectural study perfect for practicing precision and patience.
Step-by-Step Tutorial
Materials
- High-quality drawing paper (smooth or vellum finish)
- Pencil (HB or H for light sketching)
- Kneaded eraser
- Ruler
- Fine liner pens (sizes 005, 01, 03, and 05)
- Compass or circular object (optional for the arch)
Step 1: Drafting the Foundations
-
Establish the frame:
Begin by lightly sketching a tall vertical rectangle in the center of your page to serve as the main door. Use your ruler to ensure the sides are perfectly straight and parallel. -
Create the arch:
Draw a semi-circle connecting the top two corners of your rectangle. If you struggle with free-handing curves, a compass or tracing a small bowl works wonders here to get that perfect round top. -
Outline the stonework:
Sketch a second, larger arch around the first one to create the doorframe’s width. Then, draw vertical lines down the sides for the stone jambs, making them slightly staggered to suggest individual blocks. -
Add structural details:
Lightly pencil in the internal details of the door, including the small square window in the upper third, the fanlight window inside the arch, and the horizontal step at the bottom. -
Sketch the greenery:
Loosely block in the shapes for the potted plant on the left and the small shrub on the right. Keep these lines organic and jagged to differentiate them from the rigid architecture.
Stone Age Trick
To make stones look old, don’t close every shape completely. Leave small gaps in the outlines and add tiny ‘chips’ or cracks to the corners of the blocks.
Step 2: Inking the Structure
-
Outline the stones:
Switch to an 03 or 05 fine liner to ink the main outlines of the stone arch and side jambs. Give the lines a slightly wavering quality rather than using a ruler here; this mimics the look of aged, hand-cut stone. -
Define the door panels:
Use a finer pen (01) to draw the vertical planks of wood on the door. Don’t make them perfectly straight—a little wobble adds character. Leave space for the window frame and hardware. -
Ink the windows:
Carefully outline the window panes. For the top fanlight, draw the radiating muntins (the dividers) that curve with the arch. Ensure the small central window has a thick, sturdy frame. -
Add heavy hardware:
Use your thickest pen or fill in shapes with an 05 to create the black iron hinges and handle. The stark black contrast against the light wood is essential for this style.
Make It Yours
Change the season by altering the plants. Add pumpkins to the step for autumn, or draw a holly wreath on the door for a winter holiday vibe.
Step 3: Texturing and Shading
-
Wood grain texture:
With your 005 pen, draw very fine, broken vertical lines along the door planks. I find that lifting the pen quickly at the end of each stroke creates a natural, tapered wood grain effect. -
Stippling the stone:
Add texture to the stone blocks using stippling (dots) and short, erratic dashes. Concentrate these marks on the underside of the arch and the left side of the vertical stones to suggest a light source coming from the right. -
Shadowing the jambs:
Deepen the shadows between the individual stone blocks particularly where they meet the wall. Use cross-hatching (overlapping diagonal lines) to create depth in the recessed areas. -
Inking the foliage:
For the pine-like shrub on the right, use short, upward directional strokes to create a needle texture. Build up layers of ink at the bottom of the plant for density. -
Drawing the potted plant:
On the left, draw the leaves with small, leafy loops. For the basket or pot, use cross-hatching to create a woven or textured surface, ensuring the base is darker to ground it. -
Grounding the scene:
Add stippling dots along the ground in front of the step to simulate gravel or dirt. Make the dots denser directly under the step and plants to serve as a cast shadow. -
Final touches:
Erase all remaining pencil lines gently. Step back and look for areas that need more contrast; usually, deepening the shadows inside the small window panes makes the whole drawing pop.
Once matted and framed, your cottage door illustration invites the viewer into a cozy, imagined world


Door With Brick Surround
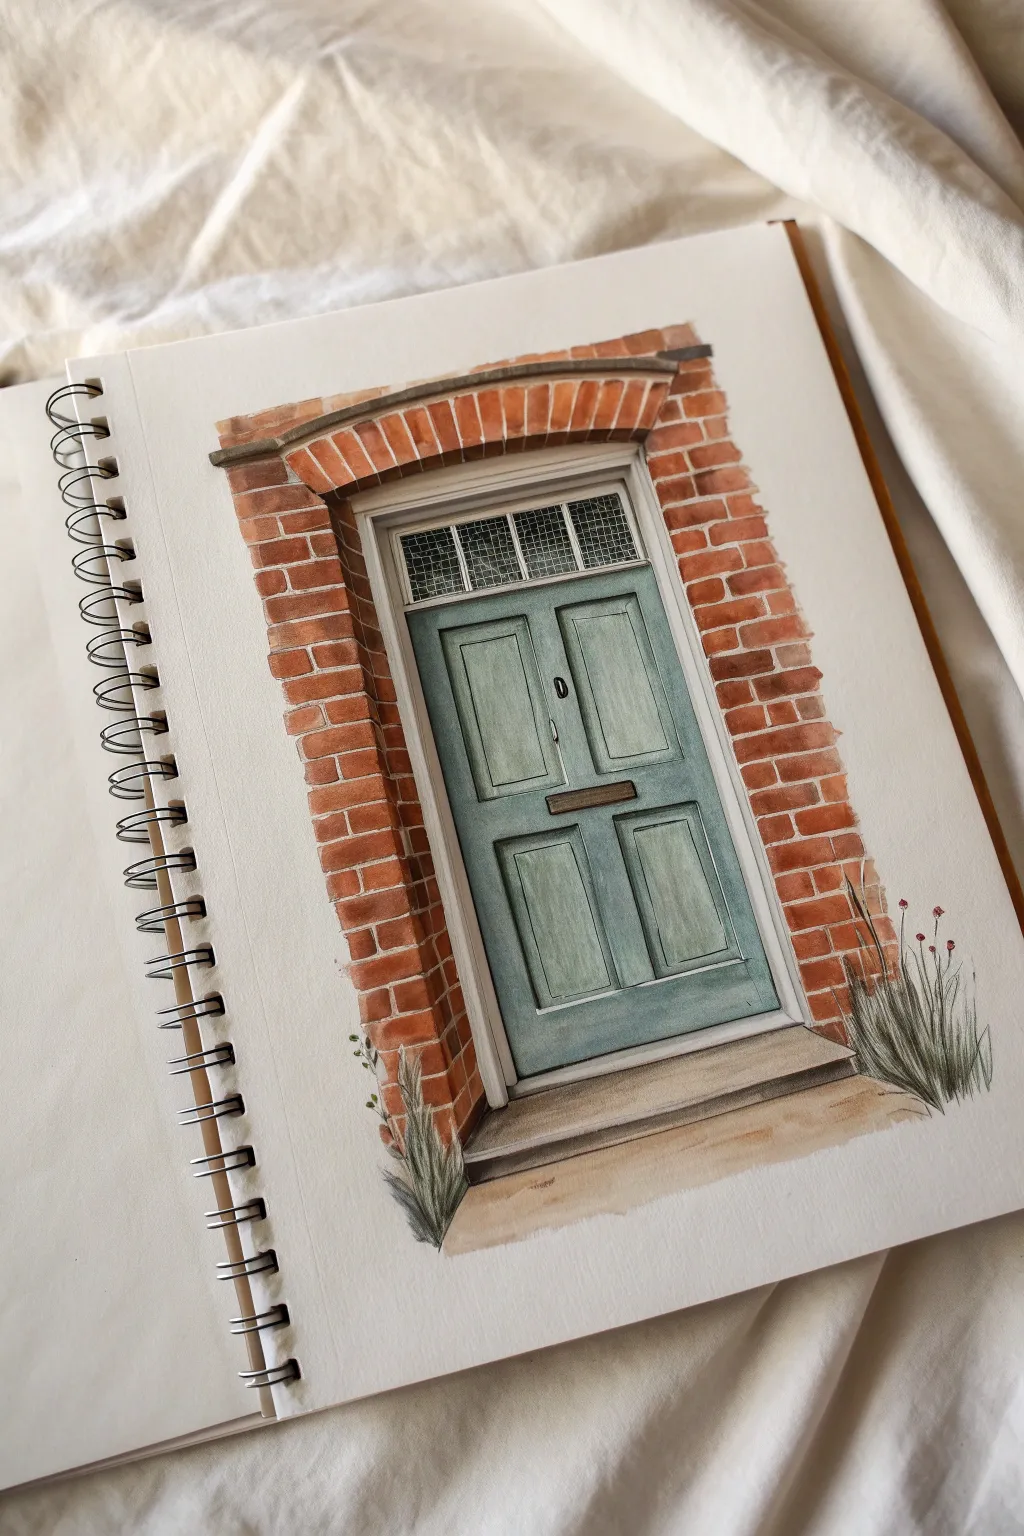
Capture the cozy allure of a traditional entrance with this watercolor and ink illustration featuring a weathered teal door framed by warm, textured brickwork. This project balances precise architectural lines with the loose, organic nature of watercolor washes.
Step-by-Step
Materials
- High-quality watercolor paper or sketchbook (cold press recommended)
- HB or 2B pencil
- Ruler
- Fine liner pens (0.1, 0.3, and 0.5mm, waterproof black ink)
- Watercolor paints (burnt sienna, yellow ochre, warm red, teal/phthalo green, payne’s grey, burnt umber)
- Round watercolor brushes (size 2 and 6)
- White gel pen or gouache (optional)
Step 1: Drafting the Structure
-
Establish the frame:
Begin by lightly pencilling a large rectangle in the center of your page to define the overall door shape. Use your ruler to ensure the vertical lines are parallel. -
Add the brick outline:
Draw the outer boundary for the brickwork. Instead of a perfect rectangle, give the edges a staggered, stepped look to mimic unfinished masonry. -
Defining the panels:
Inside the main door rectangle, sketch the four main panels: two shorter ones at the top and two longer ones at the bottom. Leave space for the central rail and stiles. -
The fanlight window:
Above the door panels, sketch a rectangular window section. Lightly grid this area to represent the small glass panes. -
Arch and steps:
Draw the slightly curved brick lintel above the door frame and a simple, flat stone step at the base.
Step 2: Inking the Details
-
Outline the door:
Switch to a 0.5mm waterproof fine liner. Carefully go over the main lines of the door frame and the four interior panels. Keep your hand steady but allow for slight imperfections to suggest age. -
Brickwork texture:
Using a thinner 0.1mm or 0.3mm pen, draw the individual bricks. Don’t simply draw a grid; draw each brick as its own shape with slightly rounded corners. Vary their sizes slightly for a natural look. -
Window details:
Ink the grid within the fanlight window using the 0.1mm pen. Add cross-hatching inside the glass panes to suggest depth and shadow behind the glass. -
Hardware and plants:
Draw the small keyhole, the letterbox slot, and the mail flap. Sketch sketchy, upward strokes at the bottom corners for the tufts of grass. -
Erase guidelines:
Once the ink is completely dry, gently erase all pencil marks to leave a clean black-and-white framework.
Keep it Imperfect
Don’t stress straight lines! A slightly wobbly line on the bricks makes the building look older and more charming than using a ruler for everything.
Step 3: Watercolor Washes
-
Base coat for the door:
Mix a watery wash of teal or muted turquoise. Apply this over the wooden parts of the door. Keep the wash uneven—lighter in the center of panels and darker near the edges—to create dimension. -
Brick foundation:
Mix Burnt Sienna with a touch of Yellow Ochre. Paint the individual bricks, leaving tiny slivers of white paper between them to represent the mortar. Vary the water ratio so some bricks appear darker than others. -
Shadowing panels:
Once the first teal layer is dry, mix a slightly darker version of that color (add a touch of Payne’s Grey). Paint inside the recessed bevels of the door panels to make them look 3D. -
Deepening the bricks:
Glaze over select bricks with a translucent layer of Burnt Umber or Warm Red. Focus on the edges of the brickwork to give the wall ‘weight’. -
The Stone Step:
Use a very diluted wash of Payne’s Grey and Yellow Ochre for the bottom step. Keep it warm and neutral, adding a darker strip of shadow underneath the door itself.
Add Weathering
Once dry, use a dry brush with faint brown paint to scuff the bottom of the door, simulating dirt splashes and age near the step.
Step 4: Finishing Touches
-
Glass and metal:
Paint the window panes with a very dark grey, almost black, leaving tiny white spots for reflections. Color the letterbox with a metallic bronze or dark brown tone. -
Grass accents:
Use a mix of sap green and olive green to paint the grass tufts. Use quick, upward flicking motions with the tip of your brush. -
Final shadows:
I like to add a final, crisp shadow line under the brick lintel and along the right side of the door frame using a dark grey mix to really pop the structure.
Your charming entryway is complete, ready to welcome anyone into your sketchbook world

PENCIL GUIDE
Understanding Pencil Grades from H to B
From first sketch to finished drawing — learn pencil grades, line control, and shading techniques.
Explore the Full Guide
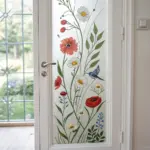
Garden Door With Climbing Vines
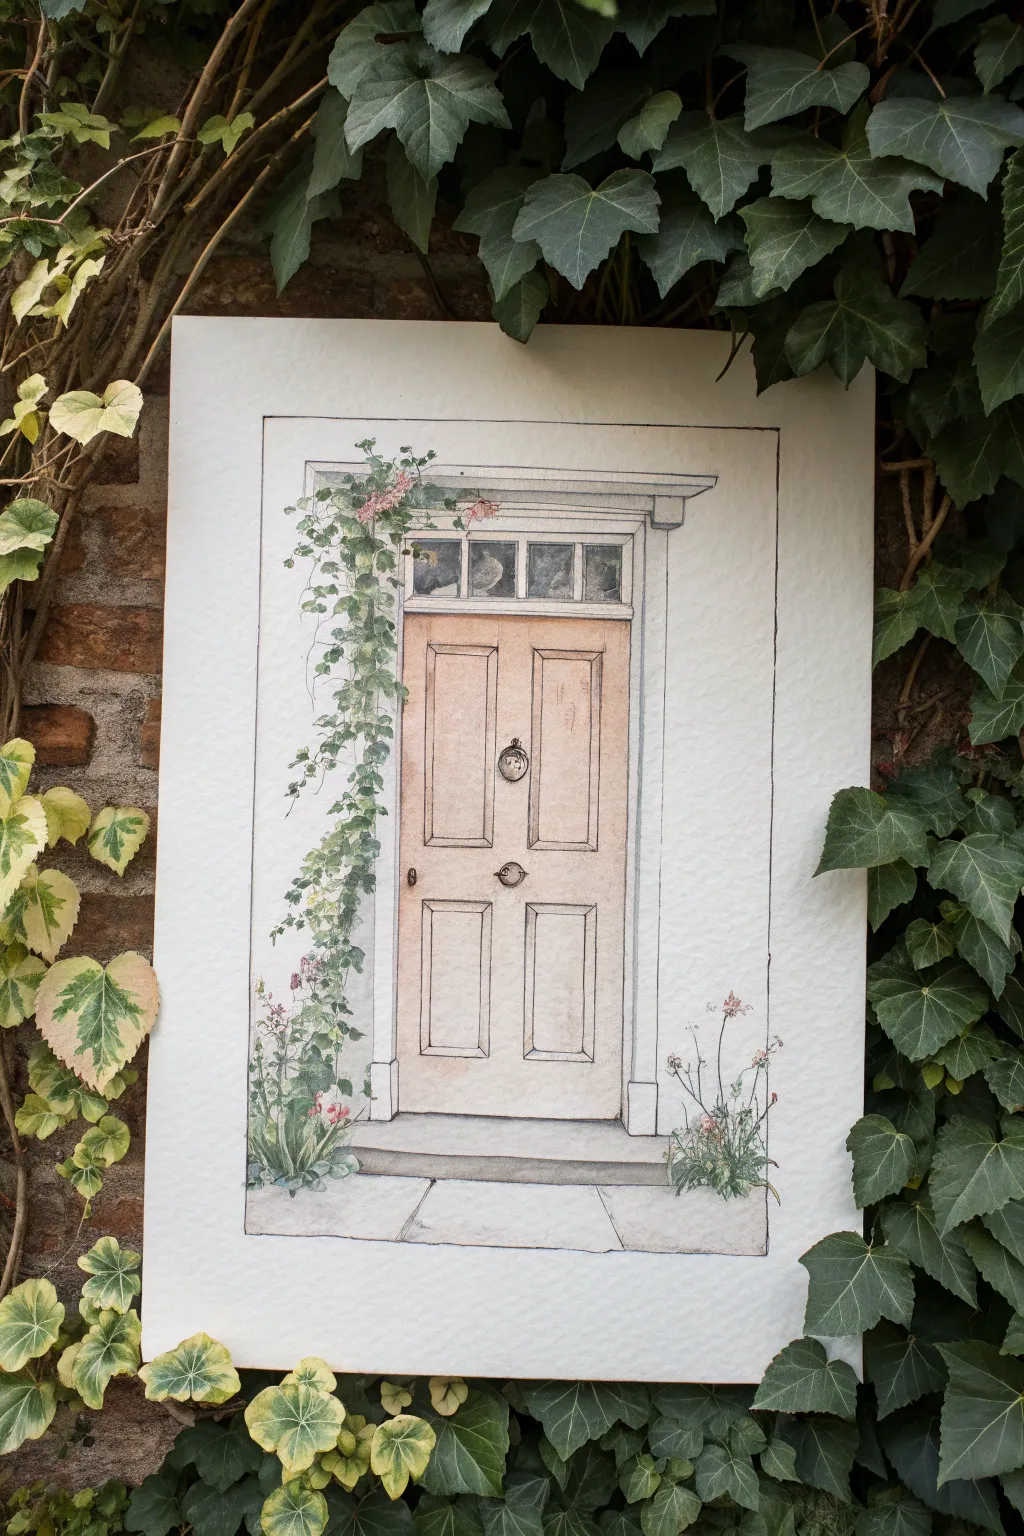
Capture the charm of an English cottage entrance with this delicate watercolor and ink illustration. The soft wash of the peach door contrasts beautifully with the climbing ivy, creating an inviting scene full of organic texture.
Step-by-Step Tutorial
Materials
- Cold press watercolor paper (A4 or similar)
- HB pencil and eraser
- Fine liner waterproof pens (0.1mm and 0.3mm)
- Watercolor paints (Peach, Burnt Sienna, Payne’s Grey, Sap Green, Olive Green, Yellow Ochre)
- Small round paintbrush (size 2 or 4)
- Ruler
- Jar of clean water
- Paper towels
Step 1: Drafting the Structure
-
Establish the frame:
Begin by using your ruler to draw a large rectangle in the center of your paper. This will serve as the outer boundary for your door and its surrounding wall section, giving the drawing a contained, vignette feel. -
Outline the door frame:
Inside your main rectangle, lightly sketch the vertical posts and the horizontal header of the door frame. Add a simple cornice detail at the top to give it some architectural weight. -
Sketch the door panels:
Draw the door itself within the frame. Divide it into four main panels—two longer ones on top and two shorter ones on the bottom. Keep your pencil pressure light so these lines can be erased or painted over later. -
Add the transom window:
Above the door, sketch a rectangular transom window divided into four small panes. This adds vertical height and elegance to the entrance. -
Define the hardware:
Place a small circle in the center of the vertical divider for the doorknob and a larger circle near the top center for a knocker. Don’t worry about perfect details yet; just get the placement right.
Step 2: Inking the Lines
-
Ink the structural lines:
Switch to your 0.3mm waterproof pen. Carefully trace over your pencil lines for the door, the frame, and the outer boundary box. Use the ruler for long straight lines to keep them crisp. -
Detail the climbing vines:
Using a thinner 0.1mm pen, freehand the winding stems of the climbing plant on the left side. Let the lines be wiggly and organic as they travel up the door frame and spill over the top cornice. -
Draw the leaves:
Add clusters of small, heart-shaped or lobed leaves along the vine stems. Vary their sizes and angles to make the growth look natural rather than patterned. -
Ground the scene:
Sketch a few tufts of grass and taller wildflowers at the base of the door on both the left and right sides. Add the horizontal lines for the steps and pavement below the door. -
Erase pencil marks:
Wait a few moments to ensure the ink is totally dry, then gently erase all visible graphite lines to leave a clean black-and-white skeleton.
Uneven Watercolors?
If your large washes look streaky, mix more paint than you think you need beforehand. Ensure your brush is fully loaded and work quickly wet-on-wet to let the pigment settle smoothly.
Step 3: Applying Watercolor Washes
-
Paint the door panels:
Mix a very diluted wash of Peach and a touch of Burnt Sienna. Apply this soft terracotta color to the wooden door panels. I like to keep the center of panels slightly lighter to suggest dimensionality. -
Shadow the windows:
Use a watery Payne’s Grey to fill in the transom window panes. While wet, lift a little pigment out with a paper towel to create reflections or a sense of dusty glass. -
Color the greenery:
Load your brush with Sap Green and dab color onto the climbing leaves. Don’t try to fill every leaf perfectly; letting the white paper show through adds sparkle and liveliness. -
Deepen the foliage contrast:
While the first green layer is damp, drop in tiny touches of Olive Green or a darker mix into the dense areas of leaves to create depth and shadow. -
Add floral accents:
If you drew flowers, touch them with tiny dots of pink or red. Keep these extremely subtle so they don’t overpower the gentle mood of the piece. -
Wash the stone step:
Mix a very pale grey wash (water down your Payne’s Grey significantly) and sweep it across the step and the pavement area. Keep the strokes horizontal to suggest the flat surface.
Pro Tip: Organic Vines
When drawing the climbing ivy, deliberately break the lines of the door frame where the leaves overlap. This makes the plant look like it is physically sitting in front of the architecture.
Step 4: Finishing Touches
-
Enhance shading:
Once the door paint is dry, use a slightly darker mix of your door color to paint thin lines along the inner edges of the panels. This ‘drop shadow’ effect makes the woodwork pop. -
Darken the hardware:
Paint the doorknob and knocker with a concentrated mix of black or dark grey. Leave a tiny speck of white unpainted on the metal to act as a highlight. -
Final vine details:
If the vines feel too disconnected, take your fine pen and add delicate tendrils connecting stray leaves back to the main stem. -
Review and refine:
Step back and look at the whole piece. If any areas look too flat, add a subtle second glaze of color to deepen the tone, particularly under the door header.
Frame this charming little doorway in a simple mat board to showcase your architectural sketching skills.
Open Door With Interior Shadow
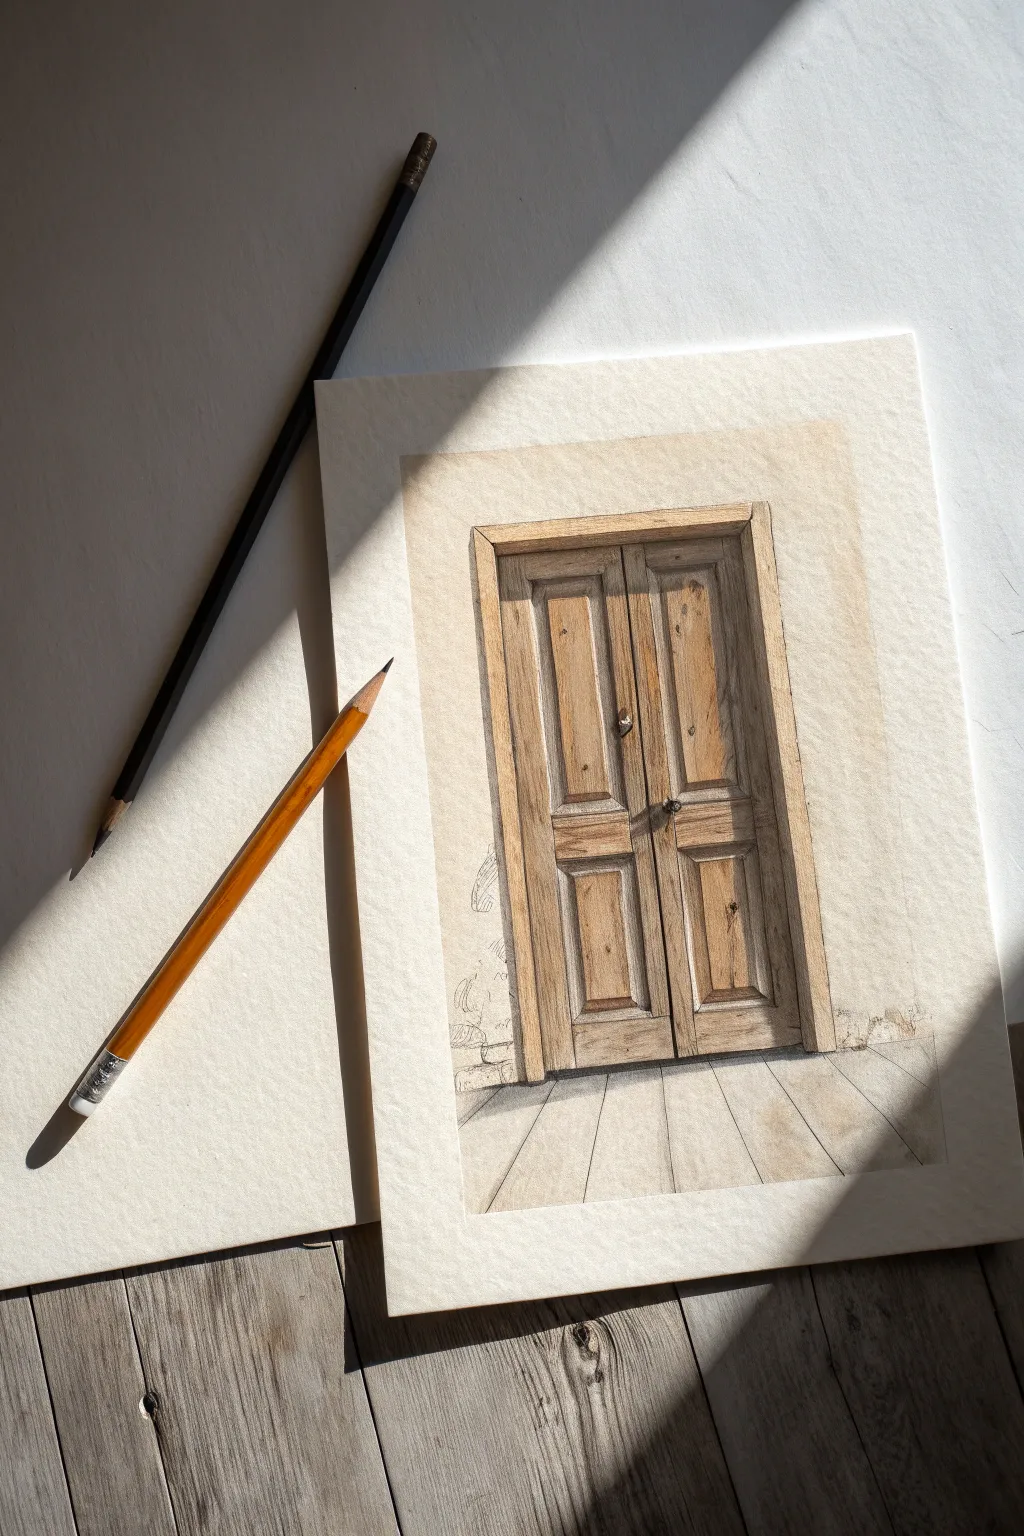
This elegant artwork captures the texture of weathered wood through a combination of precise pencil lines and warm watercolor washes. The subtle play of light and shadow gives this closed door an inviting, dimensional feel that sits beautifully on textured paper.
Step-by-Step Guide
Materials
- Textured watercolor paper (cold press, heavy grain)
- H or HB graphite pencil (for initial sketch)
- 2B or 4B graphite pencil (for detailing)
- Watercolor paints (Yellow Ochre, Burnt Sienna, Raw Umber, Sepia)
- Fine liner brush (size 0 or 1)
- Medium round brush (size 4 or 6)
- Ruler
- Kneaded eraser
Step 1: Structural Framework
-
Paper Preparation:
Begin with a sheet of high-quality watercolor paper. The texture is crucial for this look, so choose a cold-press paper with a visible grain. -
Define the Frame:
Using your ruler and H pencil, draw the outer rectangular frame of the door doorway. Draw a second, slightly smaller rectangle inside it to create the door jamb width. Keep your lines very light so they don’t show through the paint later. -
Divide the Doors:
Find the precise center of your inner rectangle and draw a vertical line to separate the two door leaves. -
Panel Layout:
Sketch the recessed panels on each door. Draw two rectangles on the left door and mirror them exactly on the right door. Leave a horizontal band in the middle for the handle area. -
Floor Perspective:
Draw the floorboards below the door. Start your lines at the bottom of the door frame and fan them out slightly as they move toward the bottom edge of the paper to create a subtle perspective effect.
Grain Got Too Dark?
If your pencil wood grain overpowers the paint, gently roll a kneaded eraser over the area. It lifts the graphite without damaging the watercolor wash underneath.
Step 2: Base Watercolor Washes
-
First Wood Tone:
Mix a very watery wash of Yellow Ochre with a touch of Burnt Sienna. Apply this loosely over the entire wooden door area. Don’t worry about being perfectly even; slight variations mimic natural wood grain. -
Wall Wash:
While the door dries, mix a very pale, diluted wash of Raw Umber or a creamy beige. Paint the wall area surrounding the door frame, keeping the edges soft and uneven for an aged vignette look. -
Floor Tone:
Apply a pale gray-brown wash to the floorboards. I like to stroke the brush in the direction of the boards to enhance the perspective.
Step 3: Deepening Values
-
Shadowing the Panels:
Once the base layer is completely dry, mix a slightly darker brown using Burnt Sienna and Sepia. Paint inside the recessed panel rectangles, focusing the pigment along the inner edges to show depth. -
Vertical Grain Texture:
Using a fine liner brush and the darker brown mix, paint very thin, broken vertical lines down the length of the door planks. These shouldn’t be solid stripes, just hints of grain pattern. -
Defining the Jamb:
Paint the shadow inside the door frame (the jamb) with a darker Sepia tone to make the door itself pop forward.
Add Weathered Moss
To make the door look like an exterior entrance, dab tiny spots of diluted Sap Green into the bottom corners and crevices to simulate moss growth.
Step 4: Pencil Detailing
-
Reinforcing Edges:
Switch to your clearer 2B pencil. Go over the main structural lines of the door panels and frame. Use a ruler if you want crispness, or freehand it for a rustier look. -
Drawing Knots and Cracks:
Add character marks with the pencil. Draw small knotholes, tiny cracks, and imperfections in the wood, especially on the main vertical planks. -
The Hardware:
Draw the door handle and the keyhole escutcheon in the center band. Shade these heavily with a 4B pencil to make them look like dark, wrought iron.
Step 5: Final Atmosphere
-
Floorboard Definition:
Use the pencil to trace the gaps between the floorboards. Press harder near the door and lighter as the lines move away to enhance depth. -
Adding the Wall Shadow:
To ground the structure, paint a faint, cool gray shadow along the very bottom edge where the wall meets the floor. -
Masonry Hints:
Lightly sketch some irregular brick or stone shapes near the bottom corners of the door frame, barely suggesting the wall’s material without overworking it. -
Final Contrast Check:
Step back and look at your drawing. Use the 4B pencil to darken the deepest crevices—specifically the center line between the doors and under the panels.
Once the final pencil marks are set, you have a charming architectural study ready for display
BRUSH GUIDE
The Right Brush for Every Stroke
From clean lines to bold texture — master brush choice, stroke control, and essential techniques.
Explore the Full Guide
Screen Door Layered Over A Main Door
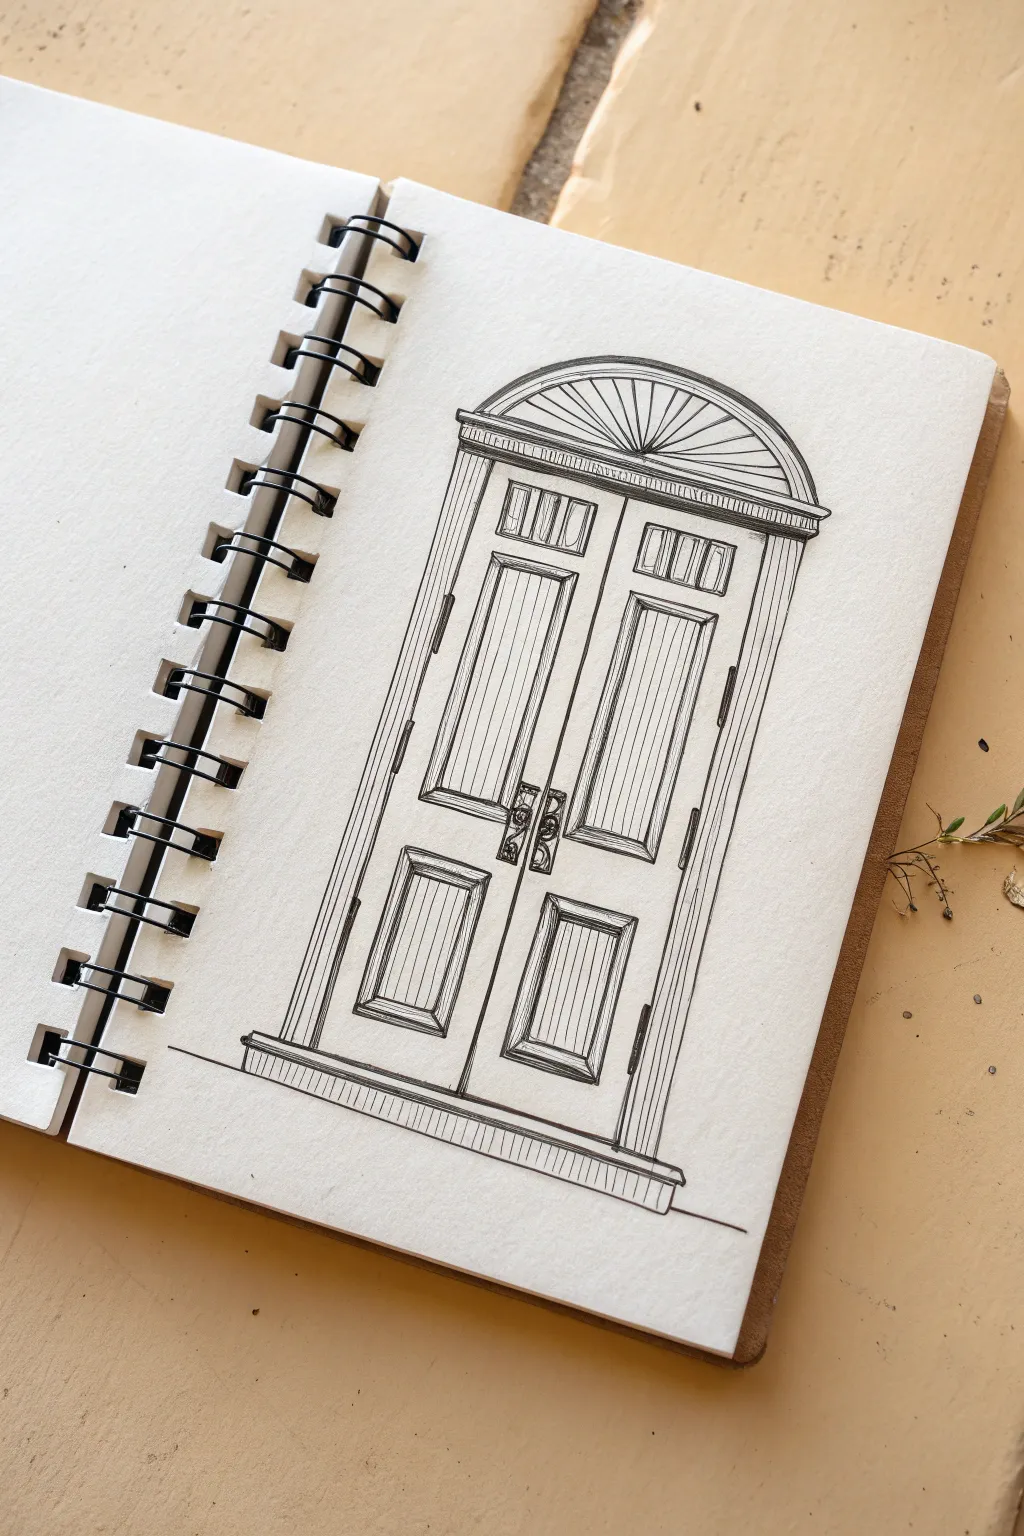
Capture the elegance of traditional architecture with this crisp, linear ink drawing of a stately double door. The project focuses on clean linework and vertical hatching to create texture and depth without needing color.
Step-by-Step
Materials
- Spiral-bound sketchbook (medium tooth paper)
- H or HB graphite pencil for initial sketching
- Fine liner pens (0.1mm, 0.3mm, and 0.5mm)
- Ruler or straight edge
- Kneaded eraser
Step 1: Laying the Foundation
-
Establish the outer frame:
Begin with a light pencil sketch. Draw a tall, vertical rectangle to define the overall space the doors will occupy. -
Divide the doors:
Draw a central vertical line splitting your rectangle perfectly in half to separate the two door panels. -
Add the archway:
Sketch a semi-circle sitting directly on top of your rectangle. This will become the fanlight window. Add a second, slightly larger arch above it to create the frame. -
Mark the panels:
Lightly block in three rectangular distinct sections on each door: a small horizontal one at the top, a tall vertical one in the middle, and a shorter square-ish one at the bottom. -
Draft the threshold:
Draw a horizontal rectangular shape at the very bottom, extending slightly wider than the door frame, to creating the step or threshold.
Step 2: Inking the Structure
-
Outline the main frame:
Switch to your 0.5mm pen. Carefully trace over the main outer lines of the door frame and the threshold, using your ruler to keep the lines crisp and straight. -
Define the door gap:
Ink the central vertical line where the doors meet. I find it helpful to make this line slightly thicker or draw two very close parallel lines to show the physical gap. -
Ink the fanlight:
Trace the arches at the top. Use a ruler to draw the radiating lines inside the semi-circle, fanning out like sun rays from the center point of the arch’s base. -
Detail the cornices:
Draw the detailed molding that separates the door from the fanlight. This usually involves several thin, horizontal parallel lines stacked closely together. -
Draw the panel molding:
Switch to a 0.3mm pen. Inside each of your six penciled panel blocks, draw a smaller rectangle. Connect the corners of the inner and outer rectangles with tiny diagonal lines to create the beveled look of recessed wood.
Steady Hand Trick
If you struggle with long straight lines, engage your whole arm rather than just your wrist. Lock your wrist and pull the pen down with your elbow movement.
Step 3: Texture and Details
-
Add vertical wood grain:
Using your finest 0.1mm pen, draw vertical hatching lines inside the recessed panels. Keep these lines straight and closely spaced to simulate wood texture. -
Add frame texture:
Continue these vertical hatched lines on the main vertical beams of the door frame, ensuring they follow the direction of the wood. -
Detail the upper windows:
For the small top rectangular panels, draw vertical lines to represent small glass panes, or stick to the wood texture if you prefer solid panels. -
Install the hardware:
With the 0.3mm pen, draw the central handle unit. This is often an ornately shaped vertical rectangle spanning the gap between the doors. Add scrollwork or small circles for knobs. -
Add the hinges:
Draw small, slender rectangles on the far outer edges of the door frame to represent the hinges. -
Shade the threshold:
Use vertical hatching on the front face of the bottom step to give it dimension and shadow. -
Grounding line:
Draw a horizontal line extending outward from the base of the step to ground the drawing, so the door doesn’t look like it’s floating. -
Final clean up:
Wait at least five minutes for the ink to dry completely, then gently erase all your initial pencil guidelines with a kneaded eraser.
Level Up: Depth
Add a second layer of hatching (cross-hatching) in the deepest corners of the recessed panels to make the molding pop.
Now you have a beautifully classic architectural sketch ready to anchor your sketchbook page
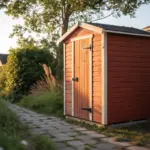
Sliding Barn Door Track
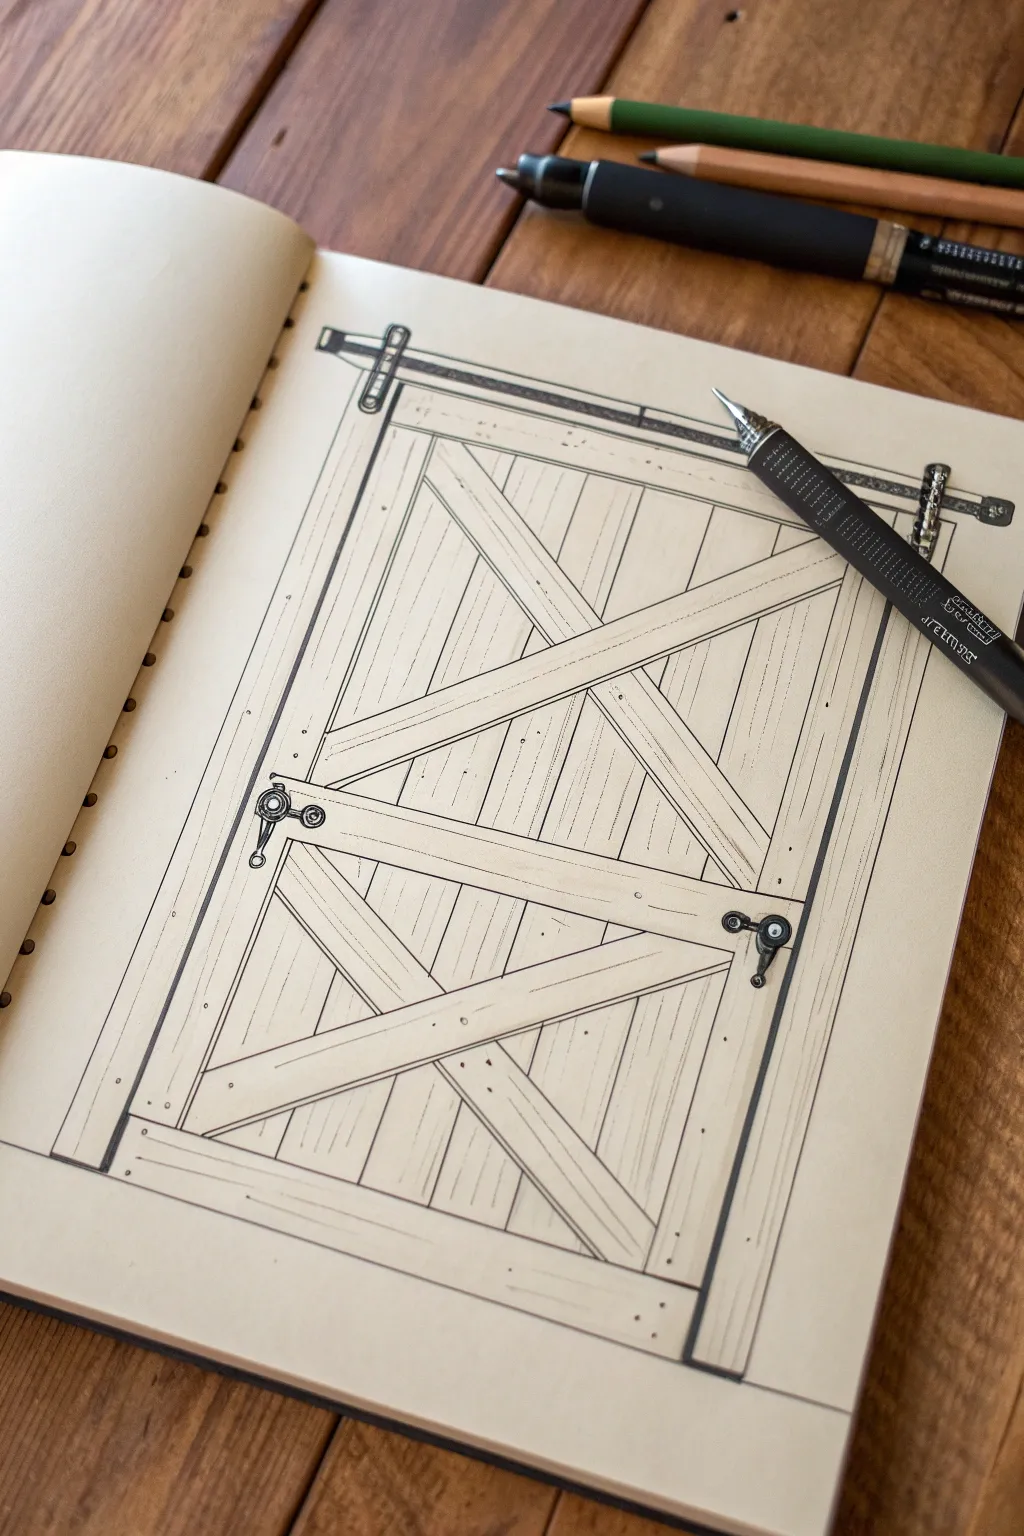
This project captures the sturdy elegance of a sliding barn door using precise linework and subtle texturing. You will create a detailed architectural-style sketch that emphasizes wood grain patterns and industrial hardware contrasting against clean panels.
How-To Guide
Materials
- Sketchbook with cream or off-white paper
- Mechanical pencil (HB or 2H)
- Ruler or straightedge
- Fine liner pens (0.1mm, 0.3mm, and 0.5mm)
- Eraser (kneaded preferred)
Step 1: Structural Layout
-
Establish the Outer Frame:
Begin by lightly penciling a large rectangle to define the overall door shape. Leave a small margin at the top of your page for the track hardware later. Use your ruler to ensure the vertical lines are perfectly parallel. -
Define the Stile and Rail:
Inside your main rectangle, draw a smaller rectangle about 1/2 inch inward to create the door’s outer frame. Add a horizontal line across the center to create the middle rail, splitting the door into upper and lower sections. -
Draft the Cross Braces:
Sketch the prominent ‘X’ braces in both the top and bottom panels. Draw these as double lines to give the wood beams thickness, ensuring they intersect cleanly at the center of each panel. -
Add the Track Guide:
Above the door frame, lightly sketch a horizontal rail extending past the door’s width. Mark the positions for the two hanging rollers that connect the door top to this rail.
Line Weight Mastery
Always keep the outer perimeter lines thickest (0.5mm) and texture lines thinnest (0.1mm). This hierarchy makes the drawing readable.
Step 2: Inking the Outline
-
Ink the Hardware First:
Switch to a 0.3mm pen to define the metal track and roller hangers. I find it easiest to ink these precise shapes first so the wood lines don’t accidentally run through them. -
Outline the Main Structure:
Use a straightedge and a 0.5mm pen to ink the heavy outer frame of the door. This thicker line weight helps ground the drawing and separates the main structure from the internal details. -
Define the Cross Bracing:
Carefully ink the ‘X’ patterns with the 0.5mm pen. Pay close attention to the joinery where the diagonal pieces meet the horizontal rails—stop your lines just short of intersecting to suggest separate pieces of wood. -
Add the Handles:
Draw the industrial handles or latch mechanisms using a 0.3mm pen. Incorporate small circles for the rivets or bolts that hold them in place. -
Add Dimension Lines:
Draw a thin secondary line inside the frame and brace edges using a 0.1mm pen. This slight offset creates a beveled look, adding depth to the woodwork.
Step 3: Texture and Details
-
Draw Vertical Planking:
Behind the ‘X’ braces, fill the negative space with vertical lines to represent the tongue-and-groove backing boards. Use a ruler but vary your pressure slightly so the lines feel organic. -
Indicate Wood Grain:
Switch to your finest 0.1mm pen. Add sparse, elongated squiggles and broken lines on the frame and cross braces to simulate wood grain. Follow the direction of the wood—vertical on stiles, horizontal on rails. -
Detail the Track Hardware:
Add tiny vertical hatching or stippling (dots) to the metal rollers and track bar. This shading gives the hardware a metallic, rounded appearance compared to the flat wood. -
Incorporate Nail Holes:
Place tiny, random dots or small circles at the ends of the planks and braces. These represent nail heads or knots and add character to the rustic aesthetic. -
Strengthen Shadows:
Use the 0.5mm pen to thicken the lines on the bottom and right side of the cross braces. This simple line-weight variation implies a light source coming from the top left. -
Clean Up:
Once the ink is completely dry, thoroughly erase all underlying pencil guidelines. Check for any lighter areas that might need a second pass of ink to match the contrast of the rest of the drawing.
Draftsman Aesthetic
Extend your structural lines slightly past corners (called ‘run-out’). It gives the sketch a professional, architectural blueprint vibe.
Your finished sketch now has the charm of a custom carpentry plan ready for the workshop


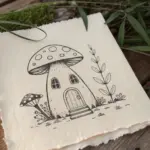
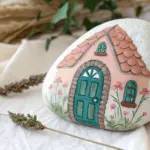
Tiny Door In A Tree Trunk

This charming illustration captures the magic of a hidden fairy door nestled within an ancient tree trunk. Using a combination of fine linework and soft watercolor washes, you’ll create a cozy, textured scene that feels like a portal to another world.
Detailed Instructions
Materials
- Hot press watercolor paper (smooth texture)
- Fine liner pens (sizes 005, 01, and 03, waterproof ink)
- Watercolor paints (pans or tubes)
- Round watercolor brushes (sizes 2, 4, and a small detail brush)
- Pencil (HB) and kneaded eraser
- Ruler
- Masking tape
- White gel pen (optional for highlights)
Step 1: Drafting the Foundations
-
Establish the Trunk:
Begin by lightly sketching the vertical boundaries of the tree trunk with your pencil. Make the lines slightly wary and uneven to mimic natural bark, allowing the base to flare out into thick roots on either side. -
Outline the Doorway:
In the center of the trunk, draw a Gothic-style arch. Use a ruler to ensure the bottom is straight, but keep the curve at the top smooth and pointed. Around this arch, sketch a second, slightly larger line to create the stone frame. -
Detail the Stonework:
Divide the frame into individual stone blocks. Sketch roughly rectangular shapes that follow the curve of the arch, varying their sizes slightly for a rustic feel. -
Add the Steps:
Below the door, draw two curved steps. Visualize them as semi-circles flattening out towards the ground. Add thickness to each step so they look solid and heavy. -
Wood Grain and Hardware:
Draw vertical planks inside the door shape. Across these planks, sketch two horizontal strap hinges with bolted ends and a small oval keyhole plate on the right side.
Ink Confidence
Don’t try to draw straight lines for the bark. Shaky, broken lines look much more realistic than perfect straight ones when drawing nature textures.
Step 2: Inking the Details
-
Outline the Main Forms:
Switch to your 03 pen to ink the main outlines of the tree, the steps, and the stone arch. Keep your hand relaxed; wobbles here actually help the texture look organic. -
Texturing the Bark:
Using a 01 pen, draw long, vertical lines running down the tree trunk. I like to break these lines up, adding knots and swirls occasionally to represent roughly hewn bark. Leave space around the door frame. -
Refining the Wood Planks:
Ink the vertical lines of the door planks with the 01 pen. Add very fine, broken vertical dashes between the main lines to suggest wood grain. -
Adding Finishes:
Use your finest 005 pen for delicate details like the bolts on the hinges, the cracks in the stone steps, and tiny blades of grass near the roots. -
Erase Guidelines:
Once the ink is completely dry—give it a few minutes to be safe—gently erase all pencil marks with your kneaded eraser.
Magical Glow
Paint the center of the door a lighter yellow-orange than the edges. It creates a subtle, inviting ‘glow’ effect, as if someone is home inside.
Step 3: Bringing it to Life with Color
-
Base Wash for the Tree:
Mix a watery wash of Burnt Umber and Yellow Ochre. Paint the entire tree trunk, avoiding the door and stones. While wet, drop in slightly darker brown near the edges to create roundness. -
Painting the Door:
Use a warm, golden brown tone for the door itself. Apply the paint in vertical strokes to reinforce the plank direction. Let some areas be lighter to show wear. -
Stonework Shadows:
Mix a light gray with a touch of brown. Paint the stone arch and steps. While these are drying, add a tiny bit of darker gray to the bottom of each stone to suggest shadows. -
Deepening Values:
Once the first layer is dry, mix a dark Sepia or Van Dyke Brown. Use your size 2 brush to paint focused shadows deep in the bark crevices and directly under the stone arch to make the door pop. -
Hardware and Mushrooms:
Paint the hinges and keyhole a dark, slate gray. If you sketched mushrooms at the base, paint their caps a muted red or terracotta and stems cream. -
Grounding the Scene:
Add a wash of pale green and brown at the bottom for the ground. Stipple darker green paint around the roots to suggest moss and small plants.
Frame your miniature masterpiece with a wide mat to give it a professional gallery look
Door Thumbnail Grid Challenge
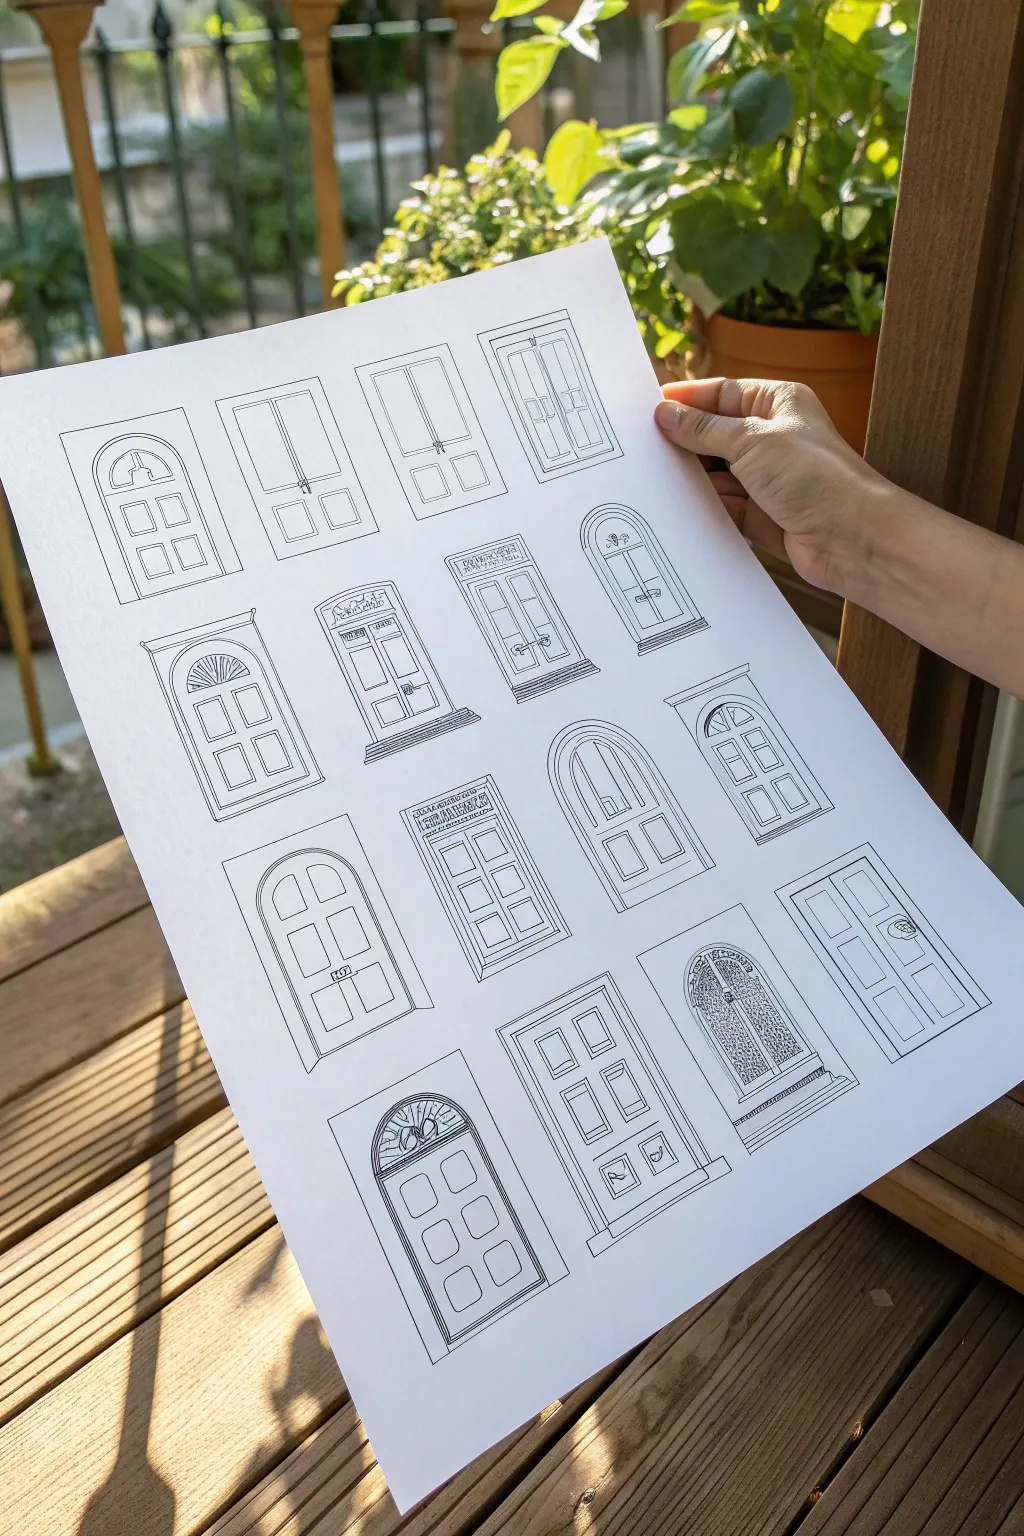
This sketching exercise invites you to fill a page with an array of unique door designs, exploring various architectural styles from arched entryways to modern panels. The clean, black-line aesthetic against crisp white paper makes for a satisfying study in line weight and detail.
Detailed Instructions
Materials
- Large sheet of smooth bristol or drawing paper (A3 or 11×17 inch recommended)
- Pencil (HB or H for light sketching)
- Eraser (kneaded)
- Ruler (long clear ruler is best)
- Fine liner pens (sizes 005, 01, 03, and 05)
- Drawing board or clipboard (optional)
Step 1: Setting the Foundation
-
Prepare your grid:
Begin by lightly measuring out a 4×4 grid on your paper using your H pencil and ruler. Leave generous margins around the edges and even spacing between each box to ensure the layout breathes. -
Define the boundaries:
Draw faint rectangular guides for where each door will sit. These don’t need to be the final outline of the door, but rather the ‘plot of land’ each door will occupy. Vary the proportions slightly—make some tall and narrow, others wider or squatter. -
Sketch basic silhouettes:
Still using your pencil, lightly sketch the primary shape of the sixteen doors. Mix up the top shapes; try rounded arches, flat lintels, triangular pediments, and simple rectangles.
Straight Lines Only?
If your hand is shaky, don’t worry. Slight wobbles add organic character to architectural sketches. For long lines, lock your wrist and move your whole arm.
Step 2: Drafting the Details
-
Add structural elements:
Go back to the first door and sketch in the frame, the door itself, and any immediate surrounding trim. Repeat this for all positions, ensuring variety in each design. -
Design the panels:
Pencil in the inner details. For some doors, draw classic six-panel layouts; for others, try vertical slats, glass window panes, or ornate carvings. I find it helpful to look at reference photos of real doors during this stage to keep the designs feeling authentic. -
Include hardware:
Don’t forget the knobs, handles, letter slots, and hinges. Place knobs carefully—usually halfway up or slightly lower—to maintain a sense of scale. -
Refine architectural features:
Add extra embellishments like fanlights (semicircular windows) above the doors, stone steps at the base, or decorative molding around the frames.
Step 3: Inking the Designs
-
Ink the main outlines:
Switch to your 03 or 05 fine liner. Carefully trace the outermost perimeter of each door frame. Using a slightly thicker line here separates the object from the background. -
Define secondary lines:
Use a 01 pen for the internal structural lines, such as the separation between the door and its frame, or the edges of major panels. -
Add fine details:
Switch to your 005 pen for the most delicate work. Trace the wood grain suggestions, the intricate patterns in stained glass, or the fine details of a doorknob. -
Creating depth with line weight:
Revisit the bottoms of ledges, frames, and deep recesses with your thicker pen. Adding a slightly heavier line on the shadow side (usually the bottom and right) gives the flat drawing instant dimension. -
Texture work:
For doors that look solid or rustic, use hatching or stippling (small dots) with your finest pen to suggest material texture or shadows in the corners of panels.
Add a Pop of Color
Use watercolor or markers to color just one element on each door, like the stained glass or the door itself, leaving the frames black and white.
Step 4: Final Polish
-
Erase pencil guides:
Wait at least 10-15 minutes for the ink to fully cure. This is crucial to avoid smudges. Once dry, gently erase all underlying pencil grids and sketch lines with a kneaded eraser. -
clean up intersections:
Inspect your corners. If any lines didn’t quite meet, touch them up carefully with your finest pen to crisp up the geometry. -
Review and balance:
Step back and look at the sheet as a whole. If one door looks too ‘light’ compared to others, add a few more hatching lines or thicken the frame to balance the visual weight across the page.
Now you have a charming collection of architectural miniatures ready to be framed or scanned for future projects


Have a question or want to share your own experience? I'd love to hear from you in the comments below!