Whenever I’m stuck on what to paint, I come back to strawberries because they’re basically a mini masterclass in color blending, shine, and texture. Here are my favorite strawberry painting ideas—from classic and realistic to playful and a little unexpected.
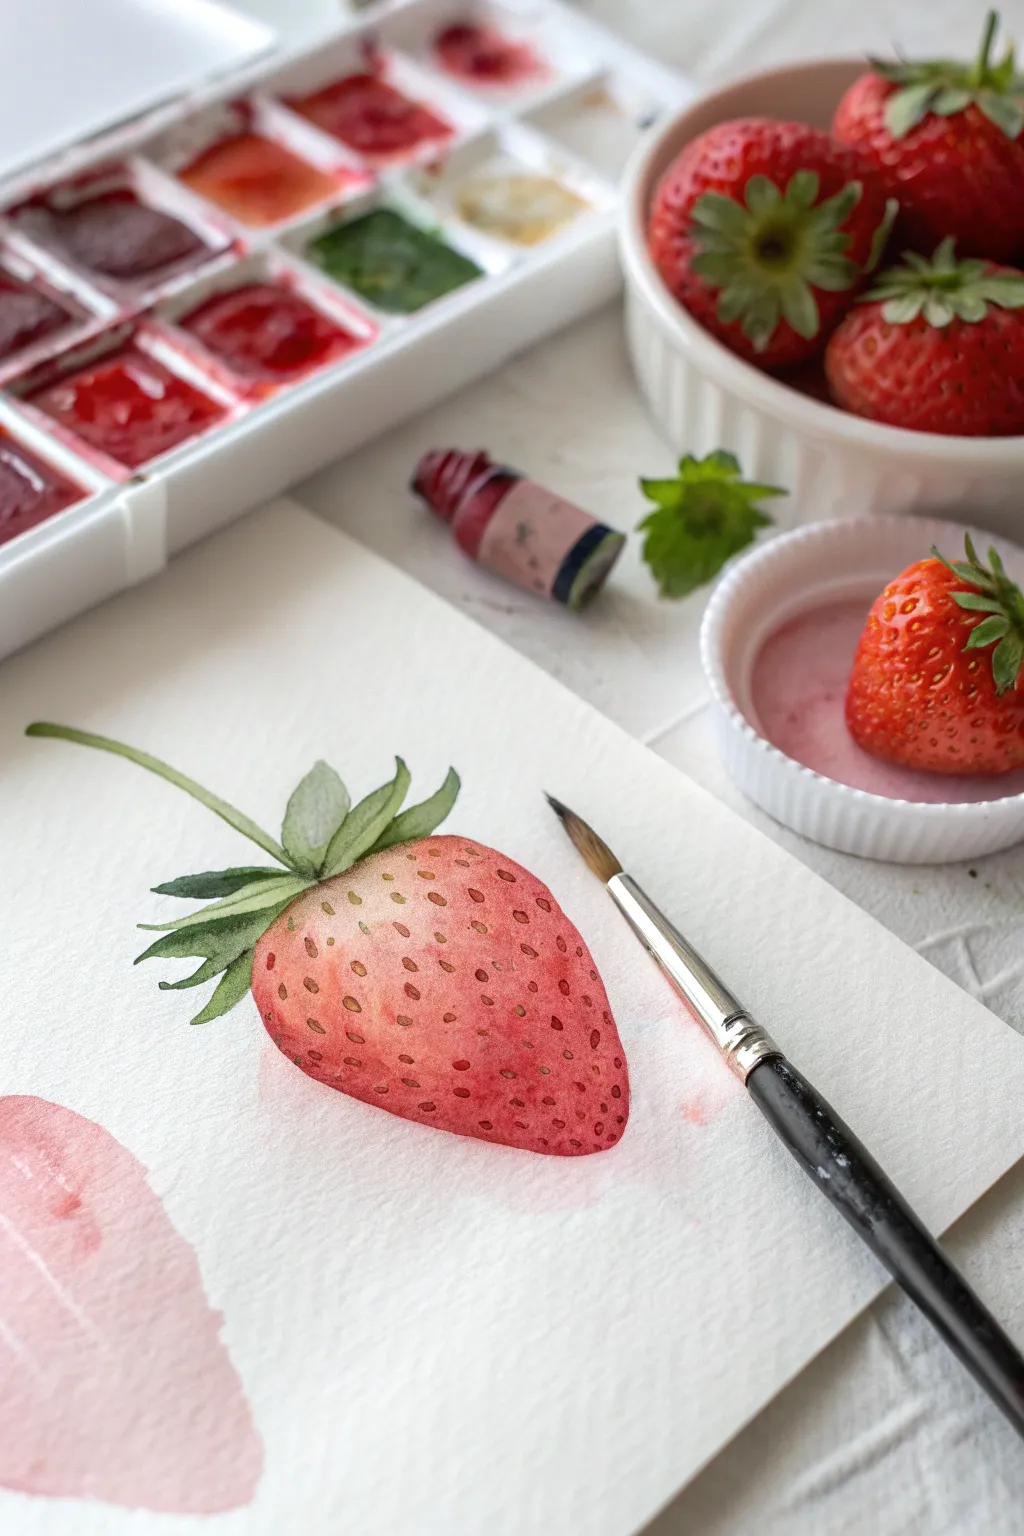
Classic Watercolor Single Strawberry
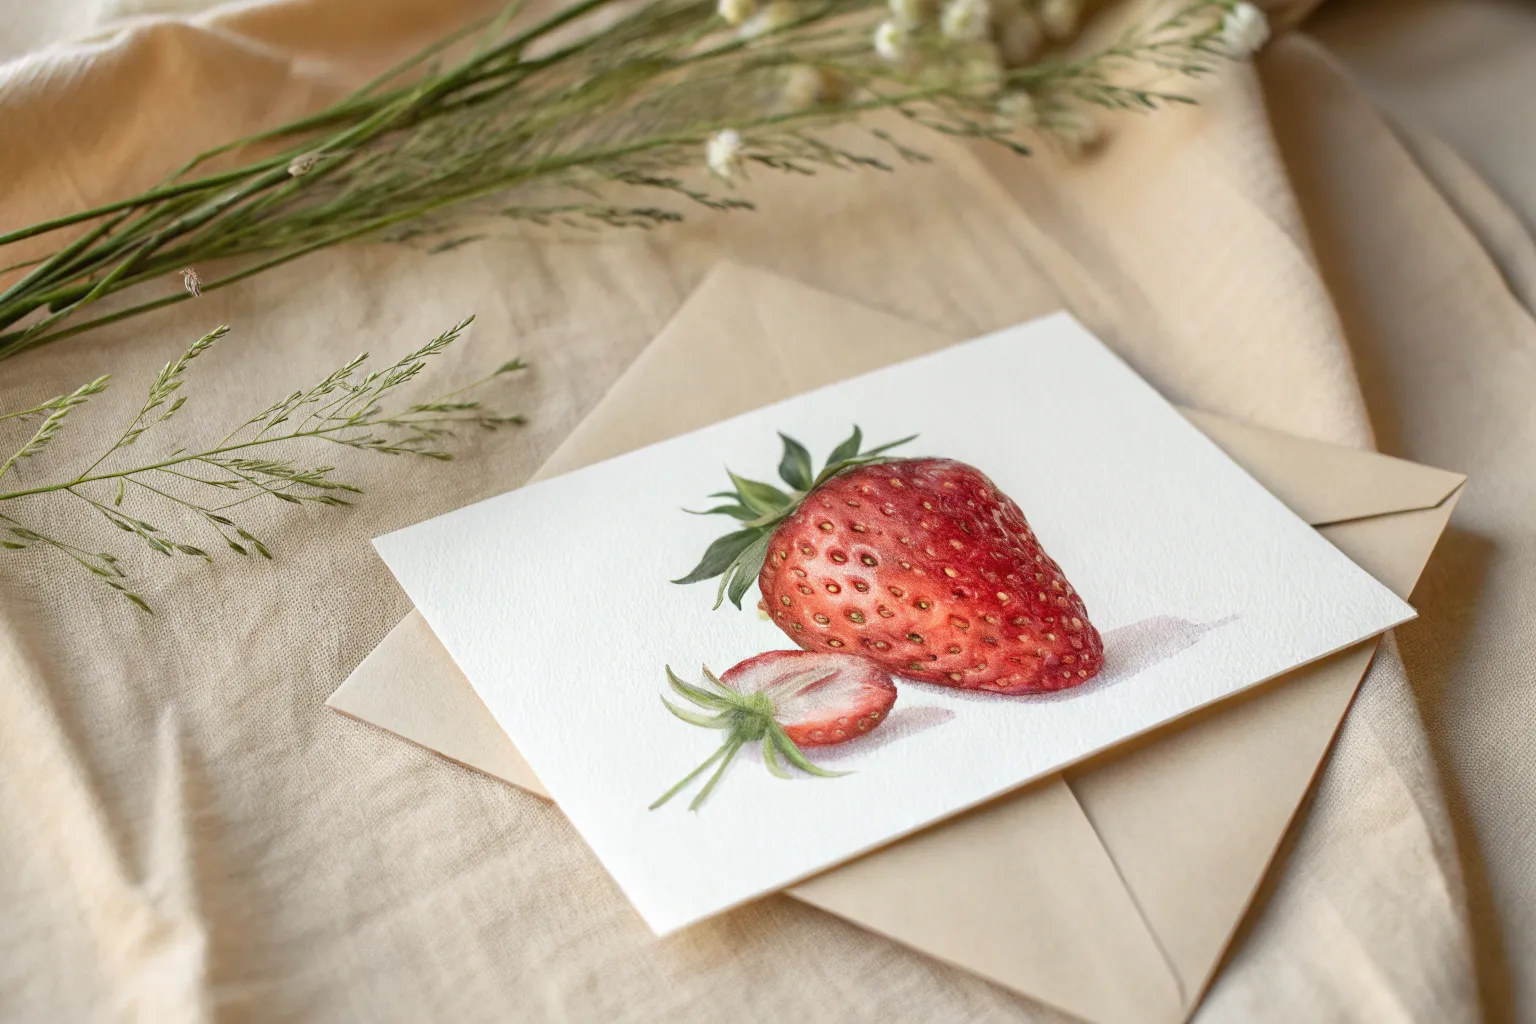
Capture the delicate beauty of a single strawberry with this traditional botanical watercolor study. By carefully layering translucent washes and building texture with fine details, you’ll create a piece that feels both vintage and fresh.
How-To Guide
Materials
- Cold press watercolor paper (medium texture)
- Watercolor paints (Alizarin Crimson, Sap Green, Yellow Ochre, Burnt Umber)
- Round watercolor brush (size 6)
- Fine liner or detail brush (size 0 or 00)
- Pencil (HB or H)
- Kneaded eraser
- Clean water
- Palette
- Paper towels
Step 1: Drawing and Base Layers
-
Construct the shape:
Begin by lightly sketching the outline of the strawberry in the center of your paper. Aim for a slightly rounded, heart-like shape that tapers gently at the bottom, avoiding perfect symmetry to keep it natural. -
Add the crown:
Sketch the leafy cap (calyx) at the top. Draw five to seven leaves radiating outward, some curling up and some drooping down over the berry’s shoulder. Keep the pencil lines very faint so they won’t show through the paint. -
First wash:
Mix a very watery, pale wash of Alizarin Crimson with a touch of Yellow Ochre. Using your size 6 brush, fill in the berry body. This initial layer should be extremely light, almost pink-white, establishing a glowing base. -
Lift the highlight:
While the paint is still damp, use a clean, thirsty brush to lift a small area of pigment on the upper left shoulder of the berry. This creates the primary highlight where the light hits the fruit. -
Paint the leaves:
Mix a light wash of Sap Green. Fill in the leaf shapes carefully. Don’t worry about detailing the veins yet; just establish a flat, green base color for the foliage.
Fixing Muddy Colors
If your red starts looking brown or dull, let the paper dry completely. Then, glaze a pure, clean layer of crimson or rose over top to bring back the vibrancy.
Step 2: Developing Form and Color
-
Deepen the reds:
Once the first layer is bone dry, mix a slightly stronger crimson. Glaze this over the berry, leaving the highlighted area pale. Focus the saturation towards the bottom tip and the right side to start building roundness. -
Shadow the leaves:
Add a touch of Burnt Umber or a darker green to your Sap Green mix. Apply this shadow color to the base of the leaves where they meet the berry and underneath where leaves overlap. -
Define the texture:
With the red layer dry, mix a warm, yellowish-red. Using the tip of your brush, dab small, soft marks vertically down the berry to suggest the bumpy texture of the surface, avoiding the highlight area.
Step 3: Seeds and Fine Details
-
Map the seeds:
Switch to your fine detail brush. Mix a dark, concentrated red or reddish-brown. Paint tiny, teardrop-shaped indentations scattered across the surface. Notice how the seeds curve with the form of the berry. -
Add seed depth:
Mix a dark Yellow Ochre or light brown. Carefully paint a tiny dot inside each dark red indentation. This represents the achene (the actual seed) sitting inside the pit. -
Cast shadows:
Using a very dilute dark red or purple mix, paint a tiny crescent shadow inside each seed pit, usually on the side opposite your light source, to make them look recessed. -
Layering for volume:
Return to your larger brush and a watery red glaze. Wash over the shadowed side of the berry (not the highlight) to unify the seeds with the skin and deepen the overall contrast. -
Leaf details:
With the fine brush and a dark green mix, paint thin central veins on the leaves. Add crisp edges to the tips of the leaves to give them a dried, realistic appearance. -
Stem connection:
Paint the short stem stub at the very top using a mix of Green and Yellow Ochre. Add a tiny shadow where it connects to the leaves to anchor it. -
Final assessment:
Step back and look at the contrast. If the berry looks too flat, add one final glaze of cool red (like Alizarin) to the very bottom right edge to enhance the shadow.
Make It Pop
Use a white gel pen to add tiny, singular highlights to the glossy shoulder of the berry or the tips of the seeds for a wet, freshly-washed look.
Now you have a timeless botanical illustration ready to be framed or gifted to a garden lover


Realistic Strawberry With Colored Pencils
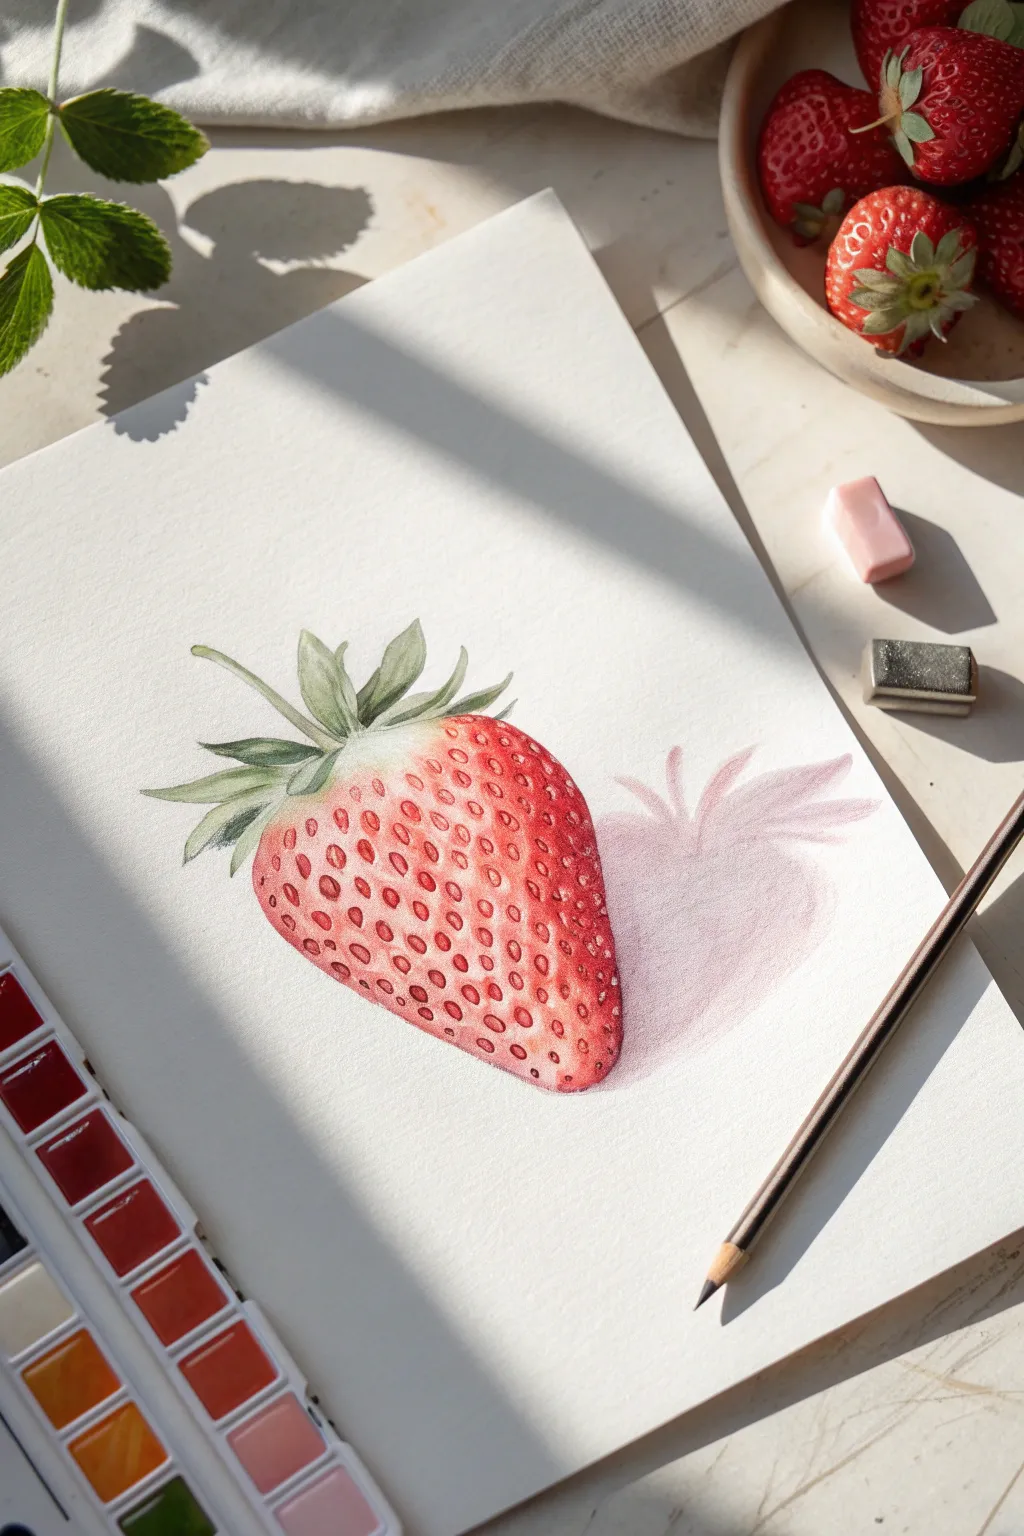
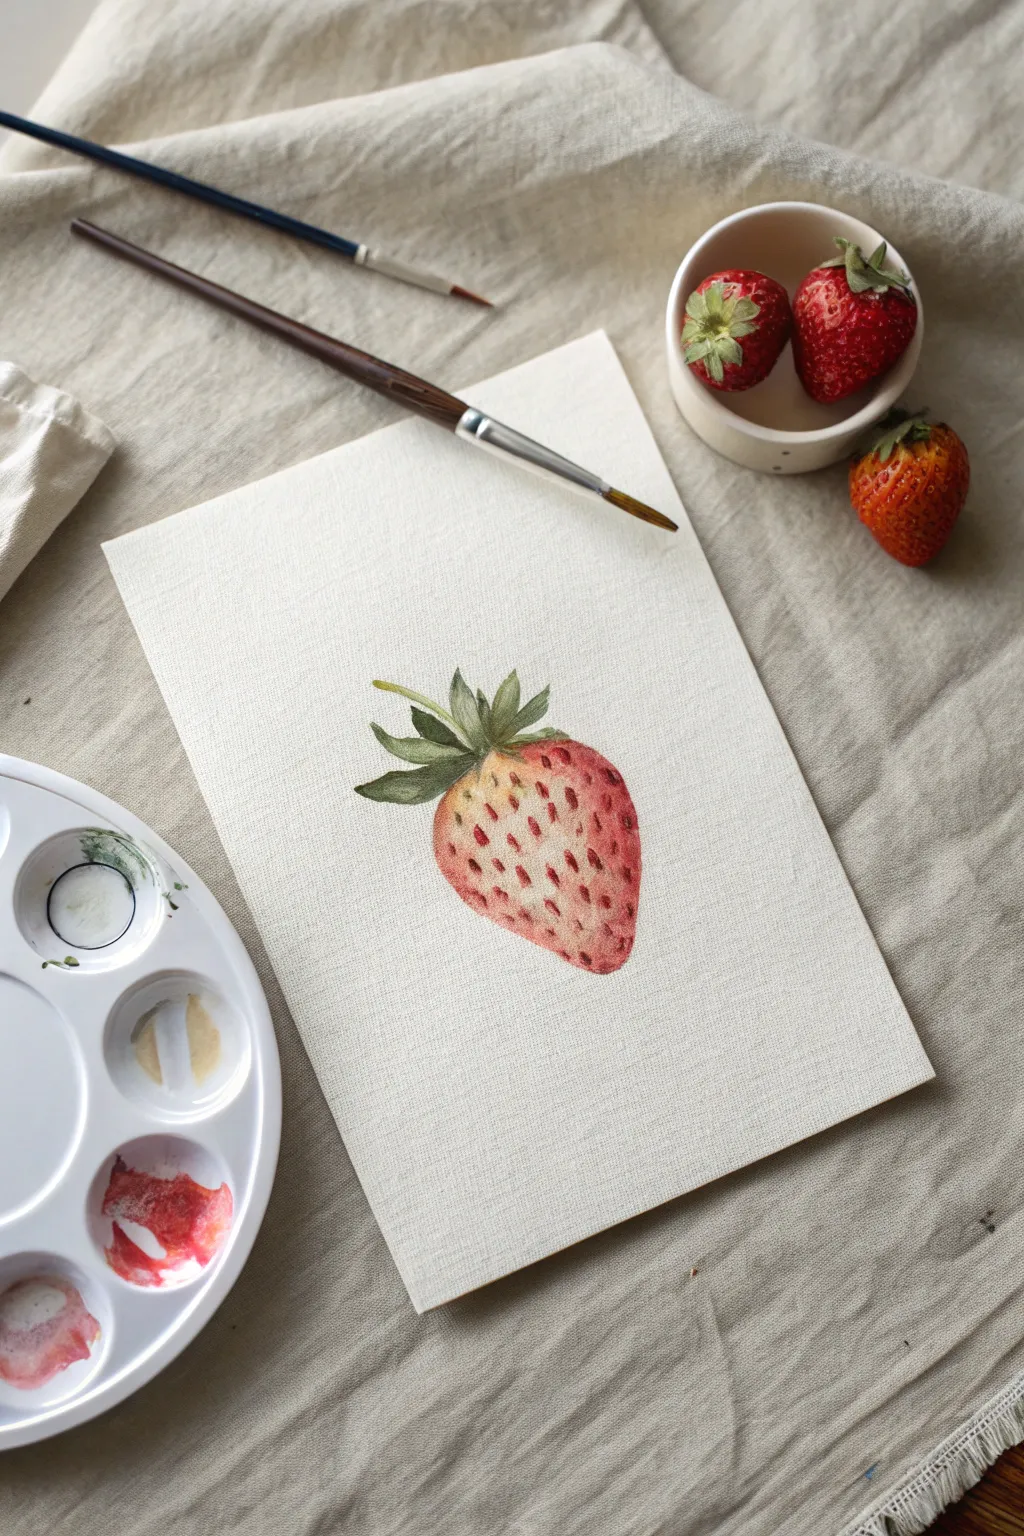
Capture the luscious texture of a ripe strawberry with this mixed-media study that combines the fluidity of watercolor with the precision of colored pencils. The result is a hyper-realistic fruit with delicate light and shadow play, sitting vividly on crisp white paper.
Step-by-Step Guide
Materials
- Hot press watercolor paper (smooth texture)
- HB graphite pencil
- Kneaded eraser
- Watercolor paint set (reds, greens, yellow ochre)
- Round watercolor brush (size 4 or 6)
- Colored pencils (Scarlet red, deep crimson, sap green, olive green, cream/white, dark brown)
- Pencil sharpener
- Paper towel
Step 1: Sketch and Base Wash
-
Contour Drawing:
Begin with a very light sketch of the strawberry’s signature heart-like shape using your HB pencil. Add the star-shaped leafy cap at the top, drawing the leaves turning slightly upwards and twisting. Keep your lines faint so they disappear later. -
Mapping Seeds:
Lightly indicate the positions of the seeds. Notice how they follow the curvature of the fruit—they aren’t just random dots. They should curve around the form, becoming closer together near the edges to create volume. -
First Wash:
Mix a watery, pale red watercolor wash. Apply this over the body of the strawberry, but leave the area near the top shoulder and the very center almost white for the highlight. This reserved white paper is crucial for the glossy look. -
Green Base:
While the red dries, mix a light sap green wash. Paint the leafy hull, letting the color be uneven to suggest natural variation. Leave the very tips of the leaves slightly lighter. -
Cast Shadow:
Mix a very diluted, purplish-grey wash. Paint the cast shadow to the right of the fruit. Soften the edges of this shadow with a clean, damp brush so it fades out gently rather than having a hard outline.
Fixing Flatness
If the berry looks flat, darken the bottom right edge with cool red or purple to push the form back.
Step 2: Building Volume with Pencil
-
Defining Seeds:
Once the paint is bone dry, take a yellow ochre or cream colored pencil. Draw the small, teardrop-shaped seeds inside the indentations you mapped earlier. Press lightly; seeds are rarely pure white or bright yellow. -
Deepening Red Tones:
Using a scarlet red colored pencil, begin shading around the seeds. Don’t color over them; work around each seed to create the little pit it sits in. This repetitive step creates the signature pitted texture. -
Shadows and Depth:
Switch to a deep crimson or dark red pencil. Focus on the bottom curve of the strawberry and the right side (away from the light source). Darken the area behind the seeds here to make them look deeper. -
Blending Layers:
Go back over your pencil work with the lighter red pencil, using circular motions to burnish and blend the pencil strokes into the watercolor base. This removes the graininess of the paper. -
Refining the Leaves:
Sharpen your olive green and sap green pencils. Add veins and crispy edges to the leaves on top. Use the darker green to shade where the leaves overlap each other or cast small shadows on the fruit’s shoulder.
Step 3: Final Details
-
Highlight Control:
Check your main highlight area. If you’ve encroached too much with red, use a white colored pencil to glaze over the top left shoulder, smoothing the transition from red to white. -
Darkest Accents:
Take a dark brown or very dark red pencil. Add tiny, sharp accents to the deepest shadow side of each seed pit. This high contrast makes the surface look wet and bumpy. -
Stem Texture:
Add fine lines to the stem with your green pencil to suggest fibrous texture. If the stem needs to look woody, a touch of brown near the cut end helps. -
Shadow Softness:
I like to enhance the cast shadow with a light touch of mauve or cool grey colored pencil, just right next to the fruit’s edge, to anchor it firmly to the surface.
Water Droplets
Add a realistic water drop by leaving a tiny white circle and adding a sharp, dark shadow underneath it.
Enjoy the vibrancy of your fresh fruit illustration as you sign your name near the shadow


Gouache Strawberry Pattern Study
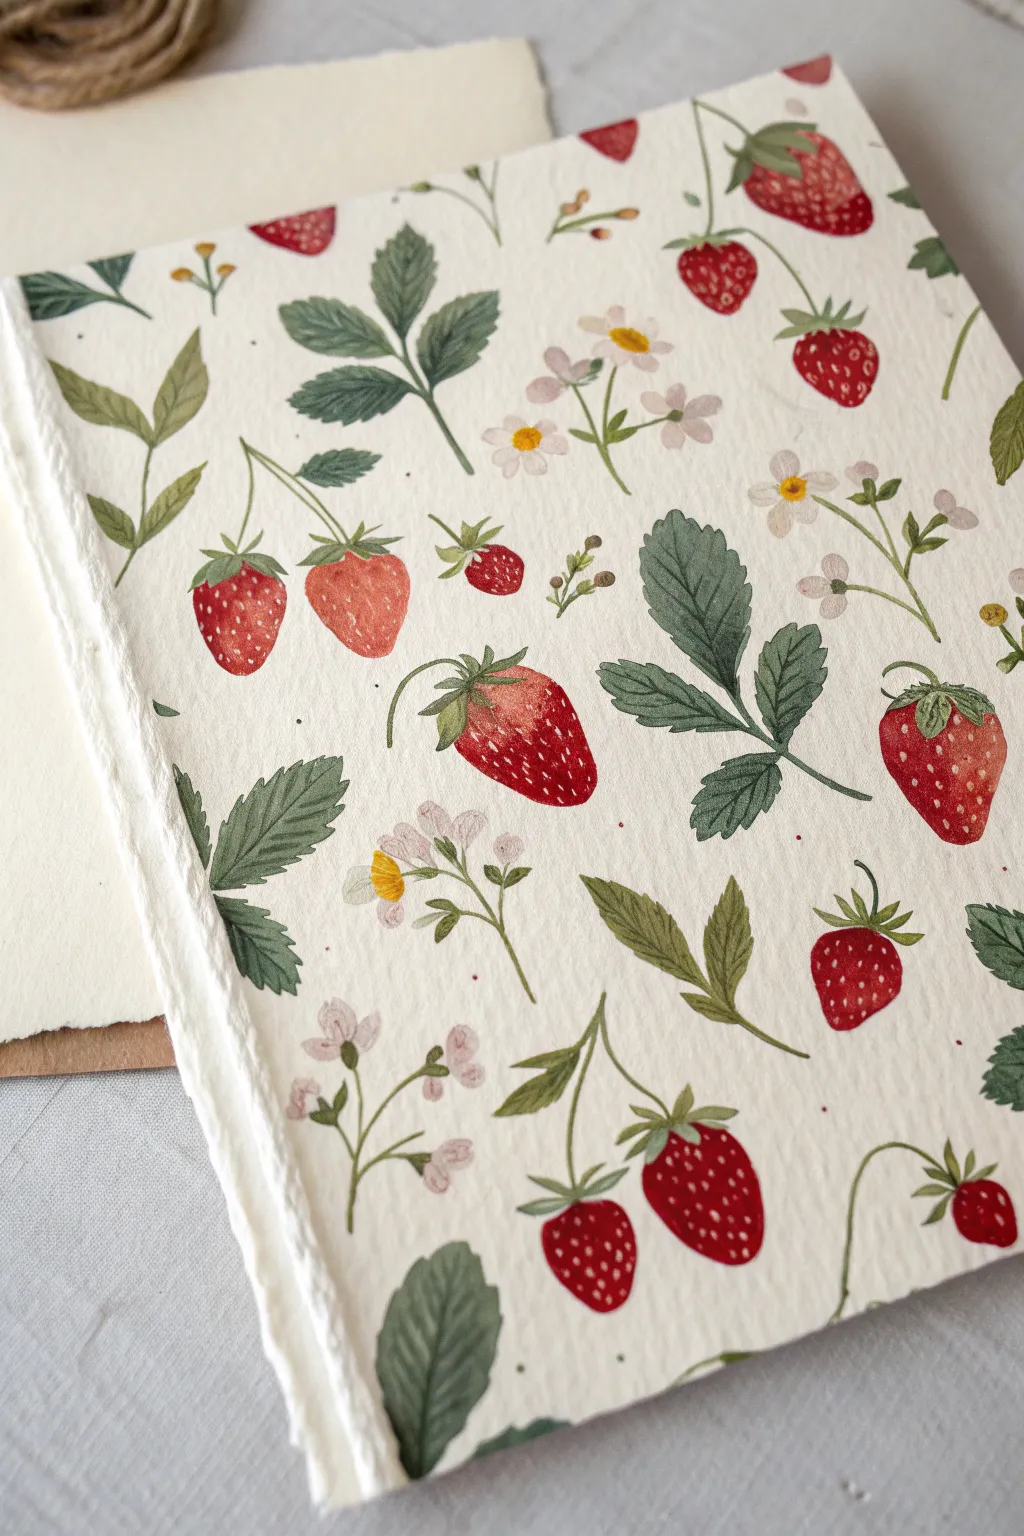
Capture the charm of a summer garden with this delicate gouache pattern study featuring ripe berries, foliage, and tiny blossoms. The matte finish of gouache on textured paper creates a lovely, vintage botanical feel perfect for greeting cards or sketchbook practice.
Step-by-Step
Materials
- Heavyweight textured watercolor paper (cold press or handmade cotton)
- Gouache paints (Red, Alizarin Crimson, Sap Green, Olive Green, White, Yellow Ochre, Burnt Sienna)
- Round synthetic brushes (sizes 0, 2, and 4)
- Pencil (HB or H)
- Kneaded eraser
- Mixing palette
- Water cups
- Paper towels
Step 1: Planning the Pattern
-
Sketch the layout:
Begin by lightly penciling the main elements of your pattern. Instead of a grid, aim for an organic scatter. Place the largest strawberry shapes first, rotating them in different directions to create movement. -
Add foliage framework:
Fill the gaps between berries with sets of leaves. Sketch classic three-leaf clusters (trifoliate) and single leaves, varying their sizes. Draw thin, curving stems connecting some berries to imagined vines. -
Intersperse floral elements:
Scatter small, five-petaled flowers throughout the empty spaces. Group some in pairs on a stem and leave others floating singly. Keep these sketches faint as gouache is opaque, but heavy graphite can smudge into the paint.
Bleeding Red?
If the red paint bleeds into the white seeds, your base layer wasn’t dry enough. Wait for the red to be fully matte and dry before adding details.
Step 2: Painting the Berries
-
Base coat for strawberries:
Mix a vibrant primary Red with a touch of Yellow Ochre for a warm, ripe strawberry color. Using your size 4 brush, fill in the berry shapes. -
Create variety:
For some berries, mix in a little Alizarin Crimson to make them darker and cooler. This variation makes the pattern look more natural and less stamped. -
Add shadows:
While the base layer is still slightly damp, drop a tiny amount of darker red (Red mixed with a speck of Burnt Sienna) along one side of the berry to suggest roundness. -
Paint the seeds:
Once the red base is completely bone dry, switch to your size 0 brush. Mix a creamy, pale yellow or white-yellow.paint tiny seeds in a teardrop pattern across the surface of the berries.
Add Texture
Use a rougher, handmade paper for this project. The paint will settle into the grooves, giving the berries an organic, vintage textile appearance.
Step 3: Painting the Foliage
-
Leaf base color:
Mix a natural green using Sap Green and a touch of Olive. Paint the trifoliate leaf clusters. I like to lift the brush at the tip of the leaf to create a sharp point. -
Varying greens:
Add a bit of white or yellow to your green mix for the younger, smaller leaves. Paint the single leaves and the leafy caps (calyxes) sitting atop each strawberry. -
Detailing the leaves:
If you want extra detail, wait for the green leaves to dry. Then, mix a darker, cool green (add a touch of blue or violet to your green) and paint a thin central vein and delicate side veins using the size 0 brush. -
Connecting stems:
Use a thinned-down version of your green mix to paint the fine, curving stems that connect the flowers and berries. Keep your hand light to ensure the lines remain elegant and thin.
Step 4: Floral Details & Finishing
-
Painting blossoms:
Using pure White (or White with the tiniest touch of pink), paint the small flower petals. Since the paper is white, ensure your paint is thick enough to stand out against the texture. -
Flower centers:
Once the white petals are dry, add a bright dab of Yellow Ochre or Primary Yellow to the center of each flower. -
Adding depth:
If any berries look too flat, you can dry-brush a tiny bit of deep crimson on the shadowed side, being careful not to disturbing the painted seeds too much. -
Final assessment:
Step back and look at the overall balance. If there are large empty white spaces, add tiny green buds, single petals, or small dots of red/pink to balance the composition without overcrowding it.
Enjoy the rhythmic process of filling your page with this sweet, summery pattern.


Ink Outline and Wash Strawberry
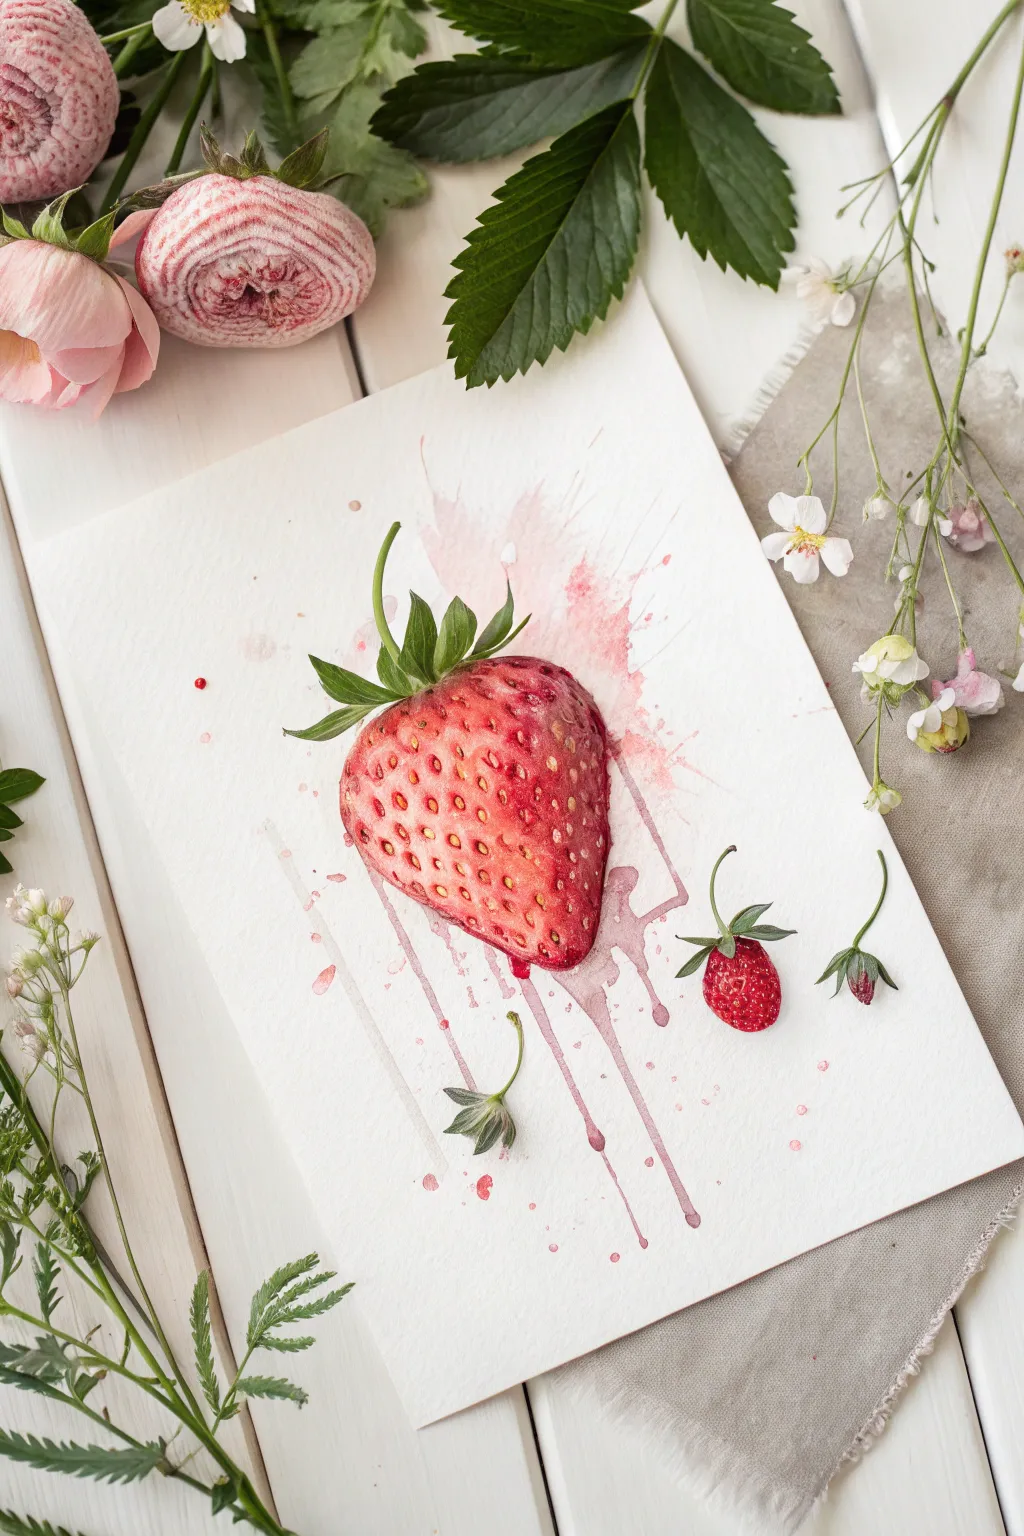
Capture the juicy essence of a ripe strawberry with this dynamic watercolor project that balances realistic textures with loose, expressive splashes. By combining careful seed detailing with free-flowing pigment runs, you’ll create a piece that feels both botanical and wonderfully modern.
Step-by-Step Guide
Materials
- Cold press watercolor paper (300 gsm)
- Round watercolor brushes (sizes 2, 6, and 10)
- Watercolor paints: Alizarin Crimson, Cadmium Red, Sap Green, and a warm Yellow
- Liquid watercolor or red ink (optional for intense drips)
- Pencil (HB or H)
- Kneaded eraser
- Paper towels
- Clean water
- Pipette or eyedropper (optional)
Step 1: Sketching and Initial Washes
-
Outline the form:
Begin by lightly sketching a large, heart-shaped strawberry in the center of your paper. Keep your pencil lines faint so they don’t show through the final paint. -
Add the stem:
Sketch the cap of leaves (sepals) at the top. Draw them curving slightly upward and outward to give the berry a sense of volume. -
Map the light:
Identify where the light naturally hits the fruit—usually on the upper left shoulder—and lightly circle this area to remind yourself to leave it unpainted or very pale. -
First wet glaze:
With your size 10 brush, apply clean water to the strawberry body, avoiding the highlight area. -
Drop in color:
Load your brush with a watery mix of Cadmium Red and Yellow. Touch it to the wet paper and let the pigment bloom naturally, keeping the color strongest at the bottom and right edges. -
Paint the leaves:
While the berry dries, use your size 6 brush to paint the leaves with Sap Green. Vary your pressure to create tapered points at the end of each leaf.
Step 2: Building Texture and Depth
-
Deepen the reds:
Once the first layer is touch-dry, mix a stronger, less watery Alizarin Crimson. Apply this to the shadowed sides of the berry to build three-dimensional form. -
Create the seed pockets:
This is where patience pays off. With a damp, clean brush (size 2), gently lift distinct little dots of pigment out of the red areas to create the look of recessed seeds. -
Shadow the seeds:
Mix a tiny amount of green with your red to create a dark maroon. Using the tip of your smallest brush, paint a tiny crescent shadow inside the top of each lifted seed spot. -
Add yellow seeds:
If the lifted areas are too white, glaze over them with a very sheer wash of yellow ochre to make the seeds look embedded in the flesh. -
Darken the cap:
Return to the green leaves and add a second layer of darker green near the base of the stem to separate the individual leaves visually.
Juicy Highlights
Don’t overwork the white highlight area. If you accidentally paint over it, use a tiny amount of white gouache at the very end to bring back the shine.
Step 3: Abstract Splatters and Drips
-
Prepare the wash:
Mix a very loose, puddle-like amount of your red paint, or use liquid watercolor/ink for vibrancy. -
Initiate the drip:
Load your largest brush heavily with the watery red mix. Press it against the bottom edge of the painted strawberry and let gravity pull the bead of water down. -
Guide the flow:
If the paint doesn’t run on its own, tilt your paper vertically or use a clean wet brush to drag a line of pigment downward to simulate juice running. -
Create background splash:
Wet the area behind the strawberry slightly and drop in faint red washes. I like to flick the brush bristles slightly to create tiny, energetic speckles around the fruit. -
Add floating elements:
Paint a few small, detached strawberry shapes or loose green stems floating near the main subject to enhance the artistic composition. -
Final drying:
Let the piece dry completely flat to ensure the drips set with hard, crisp edges.
Add a Frame
Use a ruler and pencil to draw a faint geometric box around or behind the strawberry before painting, letting the drips break the boundary for a graphic design look.
Step back and admire how the controlled details of the seeds contrast beautifully with the wild freedom of the paint drips
BRUSH GUIDE
The Right Brush for Every Stroke
From clean lines to bold texture — master brush choice, stroke control, and essential techniques.
Explore the Full Guide
Botanical Strawberry Plant Study
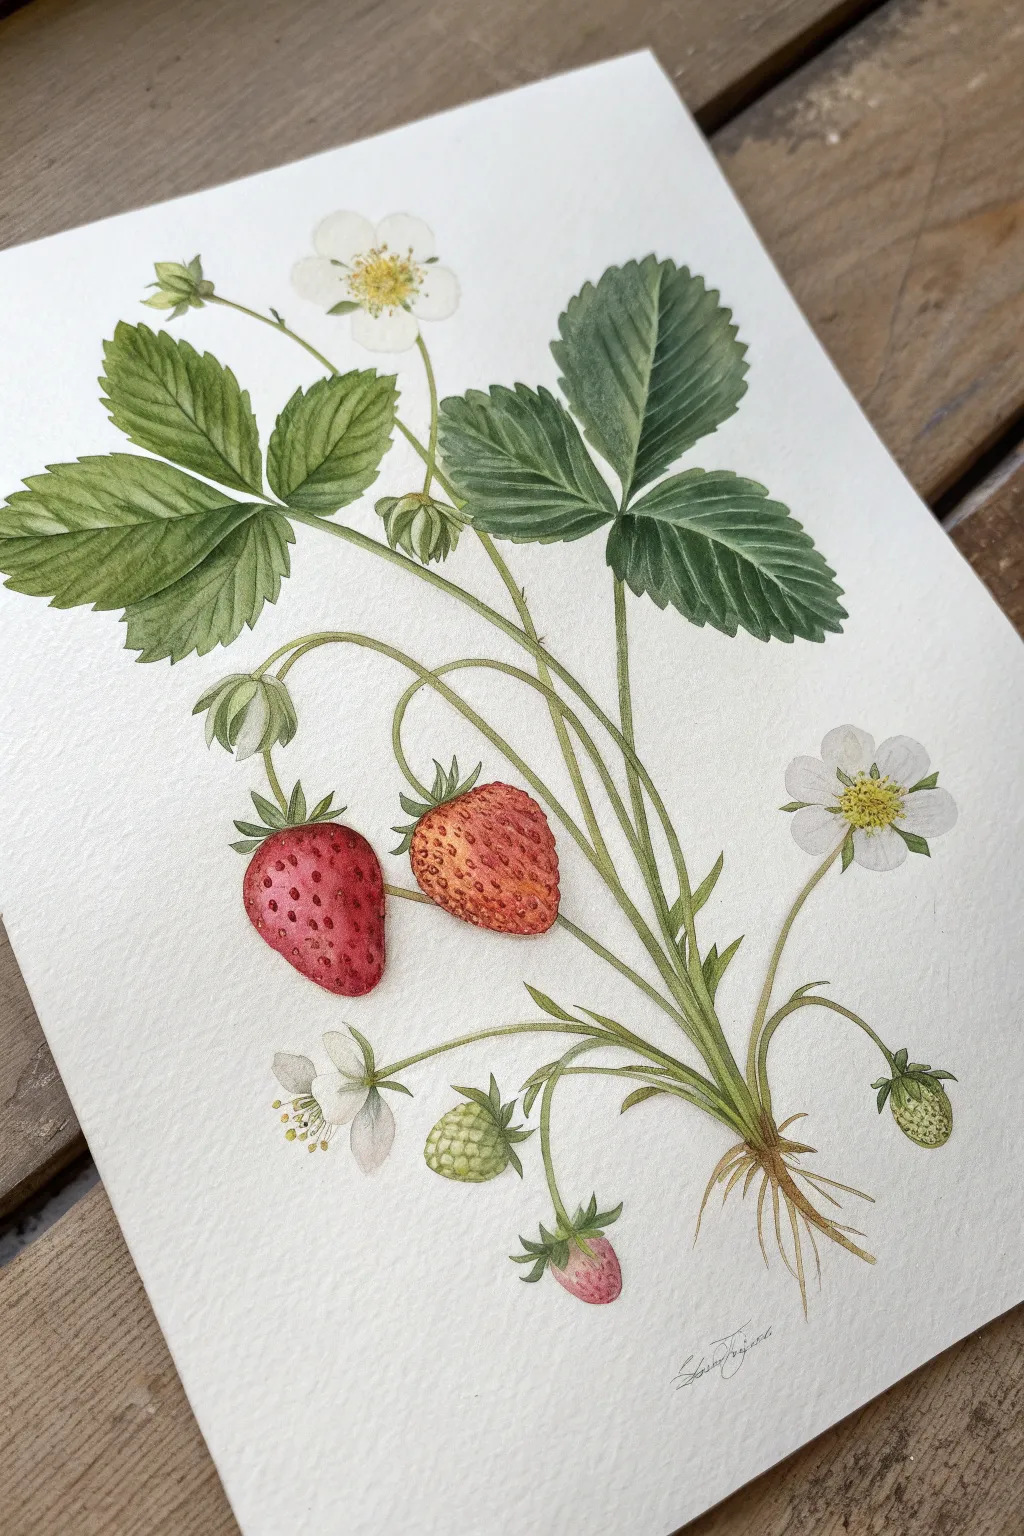
Capture the delicate details of nature with this scientific-style botanical illustration of a strawberry plant, from flower to fruit. Using watercolor, you’ll build up layers of transparent color to achieve realistic textures on the serrated leaves and ripening berries.
Step-by-Step Tutorial
Materials
- Hot press watercolor paper (smooth finish)
- H or HB pencil for initial sketching
- Kneaded eraser
- Watercolors (Sap Green, Hooker’s Green, Alizarin Crimson, Cadmium Red, Lemon Yellow, Yellow Ochre, Burnt Umber)
- Round brushes (sizes 2, 4, and 00 for details)
- White gouache or white gel pen (optional for highlights)
- Two jars of water
- Paper towels
Step 1: Drawing the Structure
-
Map the composition:
Begin by lightly sketching the central stem structure. Draw a main cluster of stems emerging from a central root point at the bottom right, flowing diagonally upward toward the left. Keep your lines incredibly faint. -
Outline the leaves:
Sketch the trifoliate (three-part) leaves. Place a larger, more mature cluster near the top right and a slightly younger set on the left. Pay attention to the jagged, serrated edges on each leaflet. -
Position flowers and fruit:
Draw the strawberry shapes dangling from arched stems in the center. Sketch one fully red berry, one ripening orange-red berry, and several small green unripened fruits. Add the five-petaled white flowers at different heights. -
Detail the roots:
At the very base where the stems converge, sketch a fine network of fibrous roots spreading downward. -
Refine the pencil work:
Go over your sketch to ensure the stem connections are accurate. Use a kneaded eraser to lift off almost all the graphite, leaving only the faintest ghost of an outline to guide your paint.
Muddy colors?
Wait for each layer to dry completely before glazing the next. If you paint wet-into-wet too often with these complementary colors (red berries vs. green caps), they will turn brown.
Step 2: Painting the Foliage
-
Base wash for leaves:
Mix a light, watery Sap Green. Paint the entire surface of the leaves, excluding the veins if you can leave tiny thin white lines, or plan to lift them later. -
Deepen leaf shadows:
While the first layer is dry, mix a darker Hooker’s Green. Paint the sections between the veins, leaving the vein lines lighter. This negative painting technique creates the ribbed texture characteristic of strawberry leaves. -
Vary the greens:
For the upper right leaves, glaze a slightly cooler, bluish-green tone to suggest they are turning away or in shadow. Keep the younger leaves on the left a fresher, warmer yellow-green. -
Stem gradients:
Paint the long, arching stems with a mix of Sap Green and Yellow Ochre. As you reach the base of the plant, blend in a touch of reddish-brown to show where the stems toughen near the roots.
Go Microscoptic
Use a magnifying glass to study real strawberry leaves. Adding tiny, precise ‘hairs’ along the stems and leaf edges with your finest brush makes the botanical study look professional.
Step 3: Fruit and Flowers
-
Berry base layers:
For the ripe berry, lay down a pale wash of Cadmium Red. For the ripening berry next to it, start with a wash of Yellow Ochre transitioning into a soft orange. -
Building fruit dimension:
Once dry, deepen the red on the main berry, focusing color on the shadowed side (right/bottom) to create roundness. I like to leave a tiny sliver of white paper or pale wash on the upper left for a natural highlight. -
Adding seeds:
Using your smallest 00 brush and a mix of Alizarin Crimson and Burnt Umber, paint tiny, tear-drop shaped setbacks for the seeds. Don’t paint the seeds black; paint the deep red shadow indentations *around* where the tiny yellow seeds sit. -
Unripe fruit texture:
Paint the small green berries with pale yellow-green. Use a stippling motion with the tip of your brush to suggest the bumpy texture of the seeds before they swell. -
Flower centers:
Paint the centers of the white flowers with Lemon Yellow. Add tiny dots of brownish-yellow around the center to represent the stamens and pollen. -
Flower shadows:
The petals are white, so simply use a very diluted grey-blue to paint delicate shadows where petals overlap or curve, defining their form without adding actual color.
Step 4: Final Details
-
Root system:
Paint the roots using washes of Burnt Umber and Yellow Ochre. Make the main root thickest and let the brush trail off into very fine, hair-like lines at the tips. -
Sepals and caps:
Paint the leafy caps (calyx) on top of the strawberries with a fresh green. Add tiny spikes or hairs to the stems using a dry-brush technique with a fine brush. -
High contrast tune-up:
Assess the whole image. Darken the deepest shadows where leaves overlap or under the fruit to make the image pop off the white page. -
Final highlights:
If you lost your white highlights on the berries during the painting process, use a tiny dot of white gouache or a gel pen to bring back that moist shine on the fruit skin.
Step back and admire your precise, scientific study of this beautiful summer fruit.
Wet-on-Wet Watercolor Strawberry Glow
Capture the delicate transparency of a ripe strawberry using the wet-on-wet watercolor technique. This project focuses on building layers just like nature does, resulting in a berry that looks juicy enough to pick right off the paper.
How-To Guide
Materials
- Cold press watercolor paper (300 gsm)
- Round pointed watercolor brush (size 4 or 6)
- Small detail brush (size 0 or 1)
- Watercolor paints (Alizarin Crimson, Sap Green, Lemon Yellow, Burnt Umber)
- Clean water jar
- Paper towel
- Pencil (HB or lighter)
Step 1: Preparation and Base Layer
-
Sketch the outline:
Begin by lightly sketching the strawberry shape. It’s roughly heart-shaped but slightly irregular at the top where the stem connects. Keep your pencil lines extremely faint so they disappear under the paint later. -
Add the leaves:
Draw the calyx (the green leaves) at the top. Notice how some leaves curl upward while others lay flat against the fruit. Add a slender stem curving off to the left. -
Mask the highlights:
Look at the reference image; notice the pale, almost white area on the upper left shoulder of the berry. You can either leave this white paper bare or apply a very faint wash of Lemon Yellow here. -
Prepare the wet-on-wet base:
With clean water, wet the entire body of the strawberry, carefully avoiding the green leaves. The paper should glisten but not have puddles. -
Drop in the first blush:
Pick up a watery mix of Alizarin Crimson. Touch the brush to the wet paper, starting at the bottom tip and the right side where the shadows are deepest. Let the pigment bloom upward naturally.
Seed Depth Trick
Don’t paint seeds in the bright highlight area dark brown. Instead, use a golden yellow or orange tone there so they don’t look like harsh dark spots on the light skin.
Step 2: Building Form and Color
-
Layering the reds:
While the paper is still damp but not soaking, drop in a more concentrated crimson mix along the bottom edge and right side to create roundness. Keep the top left area very pale to maintain that ‘glow’ effect. -
Creating the highlight transition:
Use a clean, damp brush to soften the edges where the red paint meets the white highlight area. This gradient is crucial for the 3D effect of the fruit. -
Dry completely:
This is a critical pause. Let the red body of the strawberry dry completely before touching the green leaves, or the colors will bleed together muddying your artwork. -
Paint the leaves:
Mix a watery Sap Green. Paint the leaves using the tip of your round brush. Paint broadly at first to fill the shapes. -
Leaf shadows:
While the green is still damp, mix a tiny bit of red into your green to darken it. Drop this darker shade at the very base of the leaves where they tuck into the berry. -
Stem definition:
Paint the stem with a single confident stroke. Add a thin line of darker green on the underside of the stem to give it cylindrical volume.
Add a Juice Drop
Paint a small, separate splatter of red wash nearby on the paper as if a drop of strawberry juice fell, adding a candid, artistic vibe to the composition.
Step 3: Seeds and Details
-
Mapping the seeds:
Once the red layer is bone dry, mix Burnt Umber with a touch of red. Using the very tip of your detail brush, paint small, teardrop-shaped seeds. -
Seed placement:
Pay attention to perspective—the seeds near the edges should look thinner and closer together effectively wrapping around the form, while the seeds in the center are fuller teardrops. -
Seed shadows:
To make the seeds look embedded rather than floating, paint a tiny crescent of dark red shadow immediately to the right and bottom of each seed. -
Refining the leaves:
I like to go back to the leaves once dry and add fine veins using a darker, drier green mix and the detail brush. -
Final glaze:
If the berry looks too pale, apply a very watery glaze of red over the shadow areas (bottom right), careful not to disturb the painted seeds too much. -
Check transparency:
Assess the highlight. If you lost the brightness, you can gently lift a little pigment with a damp stiff brush or white gouache, though preserving the paper white is always best.
Now step back and admire how a few simple layers of water and pigment have transformed into a sweet, summer treat suitable for framing

PENCIL GUIDE
Understanding Pencil Grades from H to B
From first sketch to finished drawing — learn pencil grades, line control, and shading techniques.
Explore the Full Guide
Glazed Strawberry for Deep Red Depth
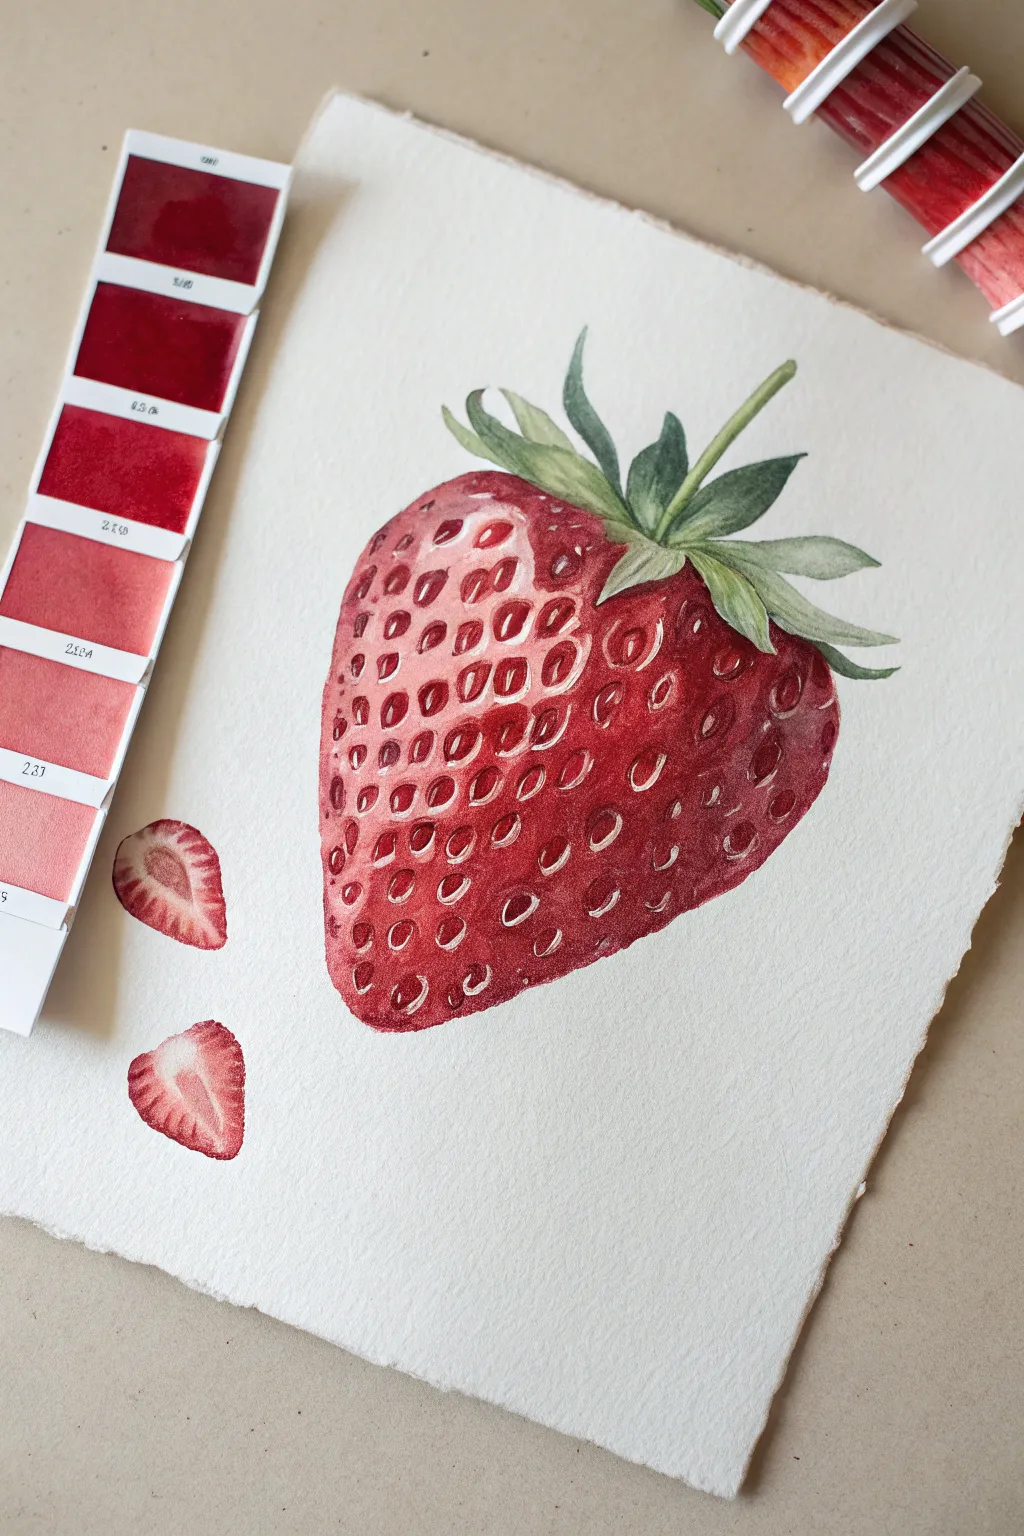
Capture the luscious depth of a ripe strawberry with this detailed watercolor study, emphasizing rich reds and sparkling highlights. This project focuses on building layers of glaze to create a three-dimensional, almost edible appearance on textured paper.
Step-by-Step Guide
Materials
- Cold press watercolor paper (300 gsm)
- Watercolor paints (Alizarin Crimson, Cadmium Red, Sap Green, Burnt Umber)
- Small round brushes (sizes 2 and 4)
- Fine detail brush (size 0 or 00)
- White gouache or white gel pen
- Pencil (HB) and kneaded eraser
- Mixing palette
- Two jars of water
- Paper towels
Step 1: Sketching and Initial Wash
-
Outline the shape:
Begin by lightly sketching the large heart-shaped form of the strawberry. Add the jagged, leafy crown at the top, slightly off-center to suggest perspective. To the left, sketch two small strawberry slices. -
Map the seeds:
Instead of drawing every single seed perfectly, indicate their positions with small, rhythmic oval marks that curve around the form of the berry to emphasize volume. Don’t press too hard with the pencil. -
First red wash:
Mix a watery, pale wash of Cadmium Red. Paint the entire body of the berry, but carefully paint *around* each tiny seed oval you sketched, leaving the white paper showing. This reserves the brightest highlights early on. -
Leaf base layer:
While the berry dries, use a diluted Sap Green to wash in the leaves. Keep the edges soft and vary the intensity, letting some areas remain very pale.
Muddy Reds?
If your shadows look dull or brown, stop adding earth tones. Instead, deepen your red with a cool blue (like Ultramarine) or violet to keep the vibrancy alive while darkening values.
Step 2: Building Deep Color
-
Deepen the reds:
Once the first layer is bone dry, mix a stronger, more saturated red using Alizarin Crimson. Apply this over the berry, again avoiding the seed pockets and the very brightest highlights near the top left shoulder. -
Shadow glazing:
To create the roundness, mix a touch of Burnt Umber or a cool violet into your crimson. Apply this darker mix along the bottom right curve and under the leaves to create a shadow side. -
Define the leaves:
Switch to your size 2 brush. Mix a darker Sap Green, perhaps with a touch of blue for depth, and paint the veins and shadows of the leaves. Leave the center veins lighter to show structure. -
The slices:
Paint the outer skin of the small slices with your bright red mix. For the fleshy interior, use a very watery wash of pink deeply diluted with water, keeping the center core white.
Step 3: seeds and Details
-
Painting the seed pockets:
Now for the patience game. With a size 2 brush and a rich crimson mix, carefully paint the shadow *inside* each little seed crater. Paint the upper left side of the crater wall dark, leaving the bottom right rim lighter to simulate a recessed pit. -
Coloring the seeds:
Using a mix of Yellow Ochre or light brown on a detail brush, dot the actual seeds sitting inside those pits. They shouldn’t be black; a golden-brown looks more natural. -
Seed shadows:
Add a tiny speck of dark brown shadow just underneath each individual seed to make them pop out from the surface. -
Refining the glaze:
I find that doing a final, very translucent glaze of pure red over the mid-tones helps unify the patchy look of the seed work, bringing the whole fruit together.
Pro Tip: Lost Edges
Don’t outline the entire strawberry. Let thehighlight side fade almost into the white paper. This ‘lost edge’ technique makes the object feel rounder and less like a cartoon cutout.
Step 4: Highlights and Final Touches
-
crisp white edges:
Using white gouache or a gel pen, add tiny, sharp highlights to the rim of the seed pockets where the light catches most intensely. This ‘wet’ look is crucial for realism. -
Leaf texture:
Add fine lines of texture to the green leaves with your smallest brush to mimic fibrous plant material. -
Slice details:
Add fine red radiating lines (vascular bundles) to the pink interior of the strawberry slices. -
Final assessment:
Step back and darken the deepest shadow area on the bottom right of the main berry if it looks too flat. Contrast is key.
Enjoy the process of watching your flat sketch transform into a juicy, dimension-filled fruit.
Stippled Seeds for Strawberry Texture
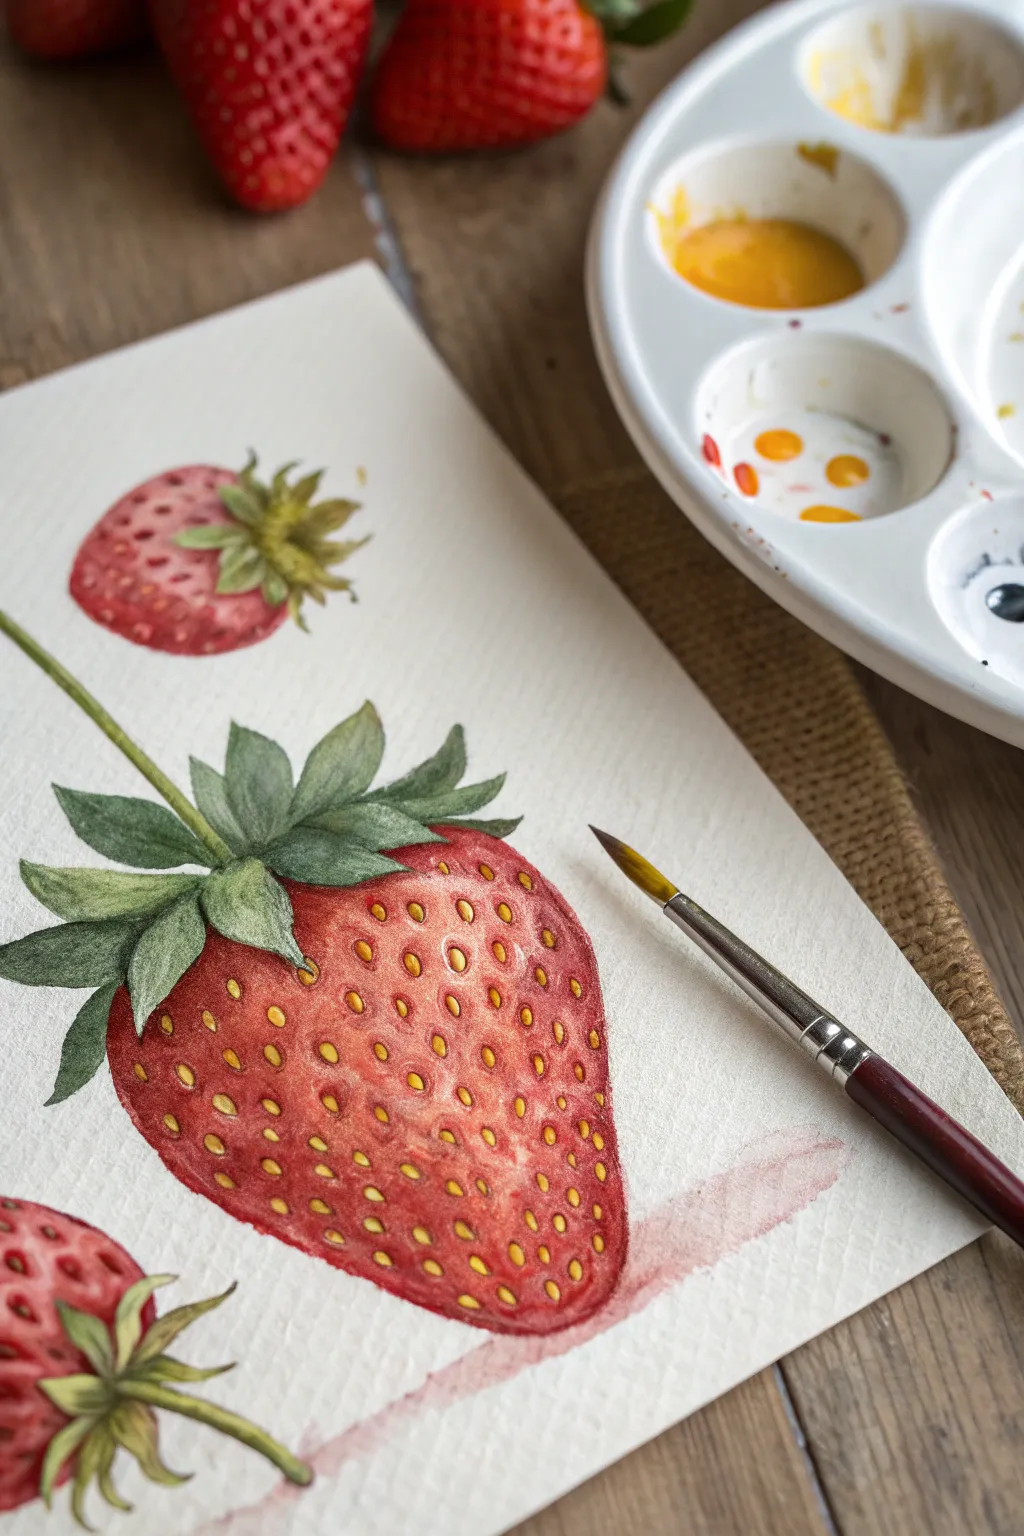
Master the art of botanical illustration by capturing the lush, juicy texture of a strawberry through careful layering and stippling. This project focuses on building depth with watercolor washes and using precise brushwork to create realistic, sunken seeds.
Detailed Instructions
Materials
- Cold press watercolor paper (300 gsm)
- Watercolor paints (Alizarin Crimson, Sap Green, Cadmium Yellow, Burnt Umber)
- Round watercolor brushes (sizes 2, 4, and 0 for details)
- HB pencil
- Kneadable eraser
- Clean water and palette
- Paper towel
Step 1: Sketching and Base Layers
-
Lightly sketch the outline:
Begin by drawing the basic heart-like shape of three strawberries on your paper in different orientations. Keep your pencil pressure very light so the graphite doesn’t show through the transparent paint later. -
Add the leaves:
Sketch the leafy calyx at the top of each berry. Pay attention to how the leaves curve and overlap; some should point upward, while others drape down over the fruit’s shoulder. -
Mark seed placement:
Instead of drawing every seed, lightly mark small, rhythmic dashes or tiny ovals where the seeds will go. Follow the curve of the berry to give it a 3D form. -
Apply the first wash:
Mix a diluted wash of Alizarin Crimson with plenty of water. Paint the entire body of the strawberry, carefully working around the leaves and the highlights. I like to leave small patches of white paper near the top left to represent the shine. -
Soften the edges:
While the paint is still damp, rinse your brush and run clean water along the edge of your highlighted areas to create a soft, gradual transition rather than a hard line.
Preserve the Highlight
For the brightest highlights, apply masking fluid before you start painting. This keeps the paper pristine white without you having to paint carefully around it.
Step 2: Building Form and Color
-
Deepen the reds:
Once the first layer is completely dry, mix a more concentrated red. Apply this to the shadowed areas—usually the bottom right and the ‘shoulders’ under the leaves—to start building volume. -
Paint the leaves base:
Mix Sap Green with a touch of Cadmium Yellow for a fresh, leafy color. Fill in the calyx leaves, varying the intensity to show where light hits them. -
Paint the stem:
Use a size 2 brush to paint the thin stems attached to the main strawberry. Keep the line steady but organic. -
Add leaf shadows:
Mix a small amount of Burnt Umber or a darker green into your Sap Green. Apply this darker mix to the underside of the leaves and where they overlap to create separation.
Colors Look Muddy?
Wait for each layer to dry fully before adding the next. Painting wet-on-wet with too many layers mixes the pigments on the paper and causes dullness.
Step 3: Detailed Texture and Seeds
-
Create seed indentations:
Using a size 2 brush and a rich crimson mix, paint small C-shaped shadows around the bottom and right side of each seed location. This creates the illusion of the seed sitting inside a small pit. -
Paint the seeds:
Mix Cadmium Yellow with a tiny bit of Burnt Umber for a golden-ochre color. With your size 0 brush, carefully fill in the seed ovals yourself. -
Refine the seed shadows:
Go back with a darker red (Alizarin Crimson mixed with touch of green or brown) and deepen the shadow inside the seed pit just behind the seed itself. This contrast makes them pop. -
Boost the overall saturation:
If the berry looks too pale after drying, apply a thin, translucent glaze of red over the shadowed areas, being careful not to disturb the seed details you just painted. -
Highlight the seeds:
For extra realism, leave a tiny speck of white paper on the seeds if possible, or use a tiny dot of white gouache or gel pen later to add a highlight to individual seeds. -
Cast shadow:
Mix a very watery, purplish-grey wash. Paint a loose, horizontal shadow underneath the main strawberry to ground it on the page.
Step back and admire how those tiny details have transformed simple red shapes into mouth-watering fruit


Negative Painting Around Strawberry Shapes
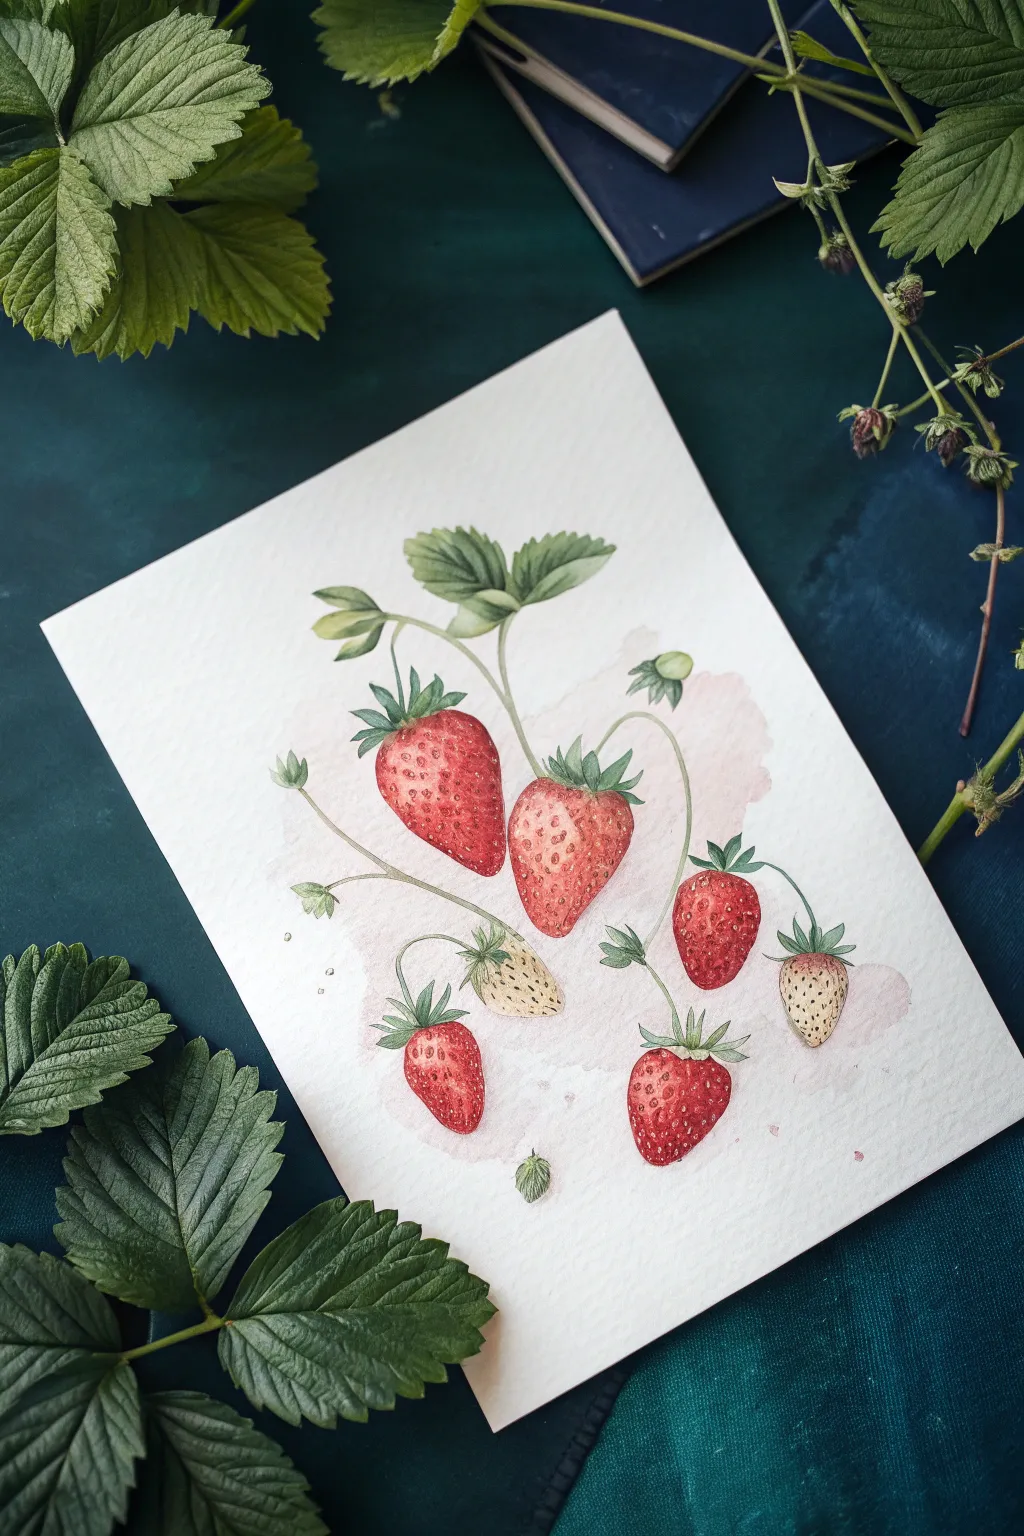
This project captures the delicate beauty of wild strawberries using fine watercolor techniques and soft washes. The composition features a graceful, drooping vine arrangement with a mix of ripe red berries, unripe pale ones, and intricate green foliage.
Step-by-Step
Materials
- Cold press watercolor paper (300 gsm)
- Watercolor paints (Alizarin Crimson, Sap Green, Yellow Ochre, Burnt Umber)
- Round brushes (sizes 2, 4, and 0 for details)
- Hard pencil (2H or H) for light sketching
- Kneaded eraser
- Two jars of water
- Paper towels
Step 1: Sketching the Composition
-
Plan the vine structure:
Begin by lightly sketching the central, curved stem that anchors the composition. Let it loop gently downwards, creating the framework for where the berries will hang. -
Outline the strawberries:
Sketch five main strawberry shapes of varying sizes. Place the largest, ripest ones near the center and smaller, unripe berries towards the outer edges or lower down. -
Add leaves and sepals:
Draw the jagged, characteristic strawberry leaves at the top of the stem. Don’t forget the leafy caps (sepals) sitting on top of each berry, making them look slightly upturned or flared. -
Refine and lighten:
Once you are happy with the placement, roll a kneaded eraser over the entire sketch. You want the graphite lines to be barely visible so they don’t muddy the transparent watercolor later.
Seed Placement Trick
Don’t arrange seeds in perfect rows. Stagger them slightly in a diamond pattern to mimic natural growth and wrap them around the form.
Step 2: Painting the Berries
-
Base wash for ripe berries:
Mix a watery Alizarin Crimson. Paint the base layer of the three main red strawberries, leaving tiny specks of white paper showing through for highlights, especially near the top shoulders. -
Base wash for unripe berries:
For the pale, unripe berries, mix a very dilute wash of Yellow Ochre with a touch of Sap Green. Apply this gently, keeping the color faint. -
Deepening the reds:
While the red berries are still slightly damp, drop in more concentrated crimson near the bottom tips and shadow sides to create volume and roundness. -
Lifting highlights:
If your paint got too dark, use a clean, damp brush to lift a little pigment from the center of the berries to enhance the curvature. -
Texture preparation:
Allow the berry shapes to dry completely. This is crucial before adding the seeds, or they will blur into the base color.
Step 3: Foliage and Stems
-
Painting the main leaves:
Mix Sap Green with a tiny bit of Burnt Umber to dull the brightness. innovative Paint the large leaves at the top, using varying ratios of water to create natural tonal shifts between sections of the leaf. -
Connect the stems:
Using a size 2 brush and a pale green mix, carefully trace over your stem lines. Keep the pressure light to maintain thin, delicate connectors between the main vine and the berries. -
Detailing the sepals:
Paint the leafy caps on each strawberry with a slightly darker green mix. Use the tip of your brush to make the points sharp and crisp. -
Veining the leaves:
Once the large leaves are dry, mix a darker, more concentrated green. Use a size 0 brush to paint thin veins, following the natural curve of the leaf structure.
Paper Choice Matters
Try hot press watercolor paper instead of cold press. The smoother surface makes painting tiny seeds and fine details much easier.
Step 4: Seeds and Background Wash
-
Adding seeds to red berries:
Mix a dark reddish-brown. Using your finest brush, paint tiny, elongated tear-drop shapes for seeds on the red strawberries. Follow the curve of the berry—seeds on the edges should look more compressed. -
Seeds on unripe berries:
For the pale berries, use a dark green or brownish-yellow for the seeds. Keep these dots very small and precise. -
Shadowing the seeds:
To make the seeds look recessed, paint a tiny crescent of dark red shadow on the upper side of each seed on the ripe berries. -
Applying the background tint:
Mix a very dilute, watery wash of crimson or a soft pinkish-brown. Carefully paint a loose, organic shape behind the berries, essentially ‘negative painting’ around the stems and fruit. -
Softening edges:
Before the background wash dries, use a clean wet brush to soften the outer edges so the color fades gently into the white paper rather than leaving a hard line. -
Final touches:
Add a few tiny splatters of the background color or red paint around the main cluster to give the piece a loose, artistic feel.
Step back and admire your beautifully detailed botanical study
Limited Palette Strawberry Color Challenge
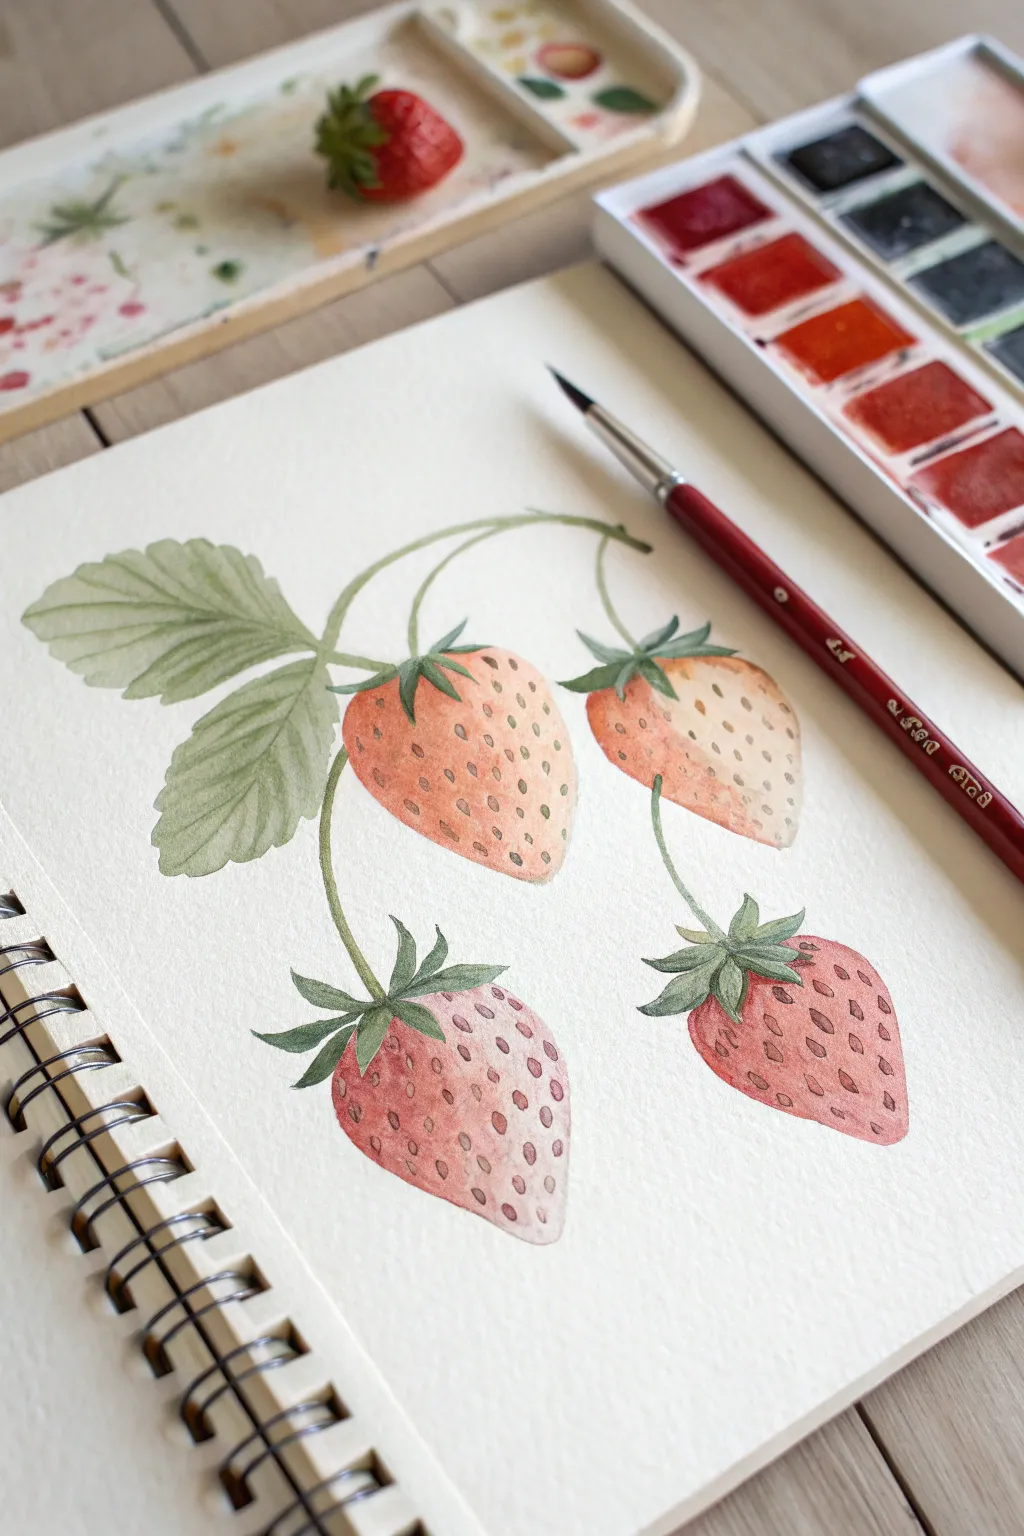
Embrace simplicity with this lovely watercolor study featuring four strawberries hanging from delicate vines. This project focuses on capturing soft gradients and fine details using just a few carefully chosen pigments to create a harmonious, vintage feel.
Detailed Instructions
Materials
- Cold press watercolor paper (sketchbook format shown)
- Round watercolor brushes (size 4 for washes, size 0 or 1 for details)
- Watercolor paints (Alizarin Crimson, Sap Green, Burnt Sienna, Yellow Ochre)
- Pencil (HB or H)
- Eraser
- Clean water jar
- Paper towel
Step 1: Sketching the Composition
-
Outline the vines:
Begin by lightly sketching the main vine structure. Start from the top left and curve a gentle arch downwards, branching out to hold four distinct strawberries at varying heights. -
Sketch the berries:
Draw the basic cone shapes for the four strawberries. Keep the shapes slightly irregular and organic rather than perfectly geometric triangles. -
Add the leaves:
In the upper left corner, sketch a cluster of three serrated strawberry leaves attached to the main stem. Ensure the jagged edges are distinct but soft. -
Detail the sepals:
Draw the star-shaped leafy caps (sepals) where the stem meets each berry. These should look like little crowns sitting atop the fruit.
Step 2: First Wash: Leaves and Stems
-
Mix your greens:
Create a muted green mix using Sap Green and a tiny touch of Alizarin Crimson to desaturate it. You want a natural, earthy green rather than a bright artificial one. -
Paint the leaves:
Using your size 4 brush, apply a light, even wash of the green mix to the three large leaves. Let the paint pool slightly to create natural texture. -
Define the veins:
While the leaves are still slightly damp but not soaking, lift out pigment with a clean, thirsty brush to suggest the central veins, or wait until dry and paint negative space around them. -
Connect the stems:
Carefully trace over your pencil lines for the vines using the tip of your brush. Keep the pressure light to maintain thin, delicate lines.
Fix Color Bleeds
If red bleeds into the green stem, quickly dab the area with a clean paper towel to lift the paint. Wait for it to dry completely before re-painting the edge.
Step 3: Building the Berries
-
Base wash for berries:
Mix a watery wash of Alizarin Crimson with a hint of Yellow Ochre for a warm, ripening look. Paint the entire body of each strawberry with this pale wash. -
First gradient:
While the base wash is wet, drop in more concentrated Alizarin Crimson at the bottom tips and shadow sides of the berries to create volume. -
Adding warmth:
For the berries that look less ripe (like the top right one), add a little more Yellow Ochre or Burnt Sienna near the top to suggest they are still turning red. -
Paint the sepals:
Using a slightly darker version of your green mix, carefully paint in the leafy caps on each berry. I like to let the tips of these leaves be the darkest point.
Add Vintage Speckles
f you want the paper to look aged, flick a stiff toothbrush with diluted brown paint lightly over the dry painting for a speckled, retro botanical effect.
Step 4: Refining Details
-
Enhance leaf texture:
Once the large leaves are fully dry, mix a darker green and paint thin, delicate lines to emphasize the veins and serrated edges. -
Deepen the shadows:
Look at where the stems overlap or go behind the main vine. Add tiny touches of dark green or brown here to create depth and separation. -
Seed placement:
Using the size 0 brush and a mix of Burnt Sienna and Alizarin Crimson, paint small, teardrop-shaped seeds on each berry. -
Seed shading:
Ensure the seeds follow the curve of the berry. Near the highlights, the seeds can be lighter; in the shadowed areas, make them darker. -
Final touches:
Add a tiny, dark shadow directly underneath each seed on the right side to make them look recessed into the flesh of the fruit.
Allow your beautiful botanical study to dry completely before erasing any remaining visible pencil lines
Strawberry Slice Cross-Section Study
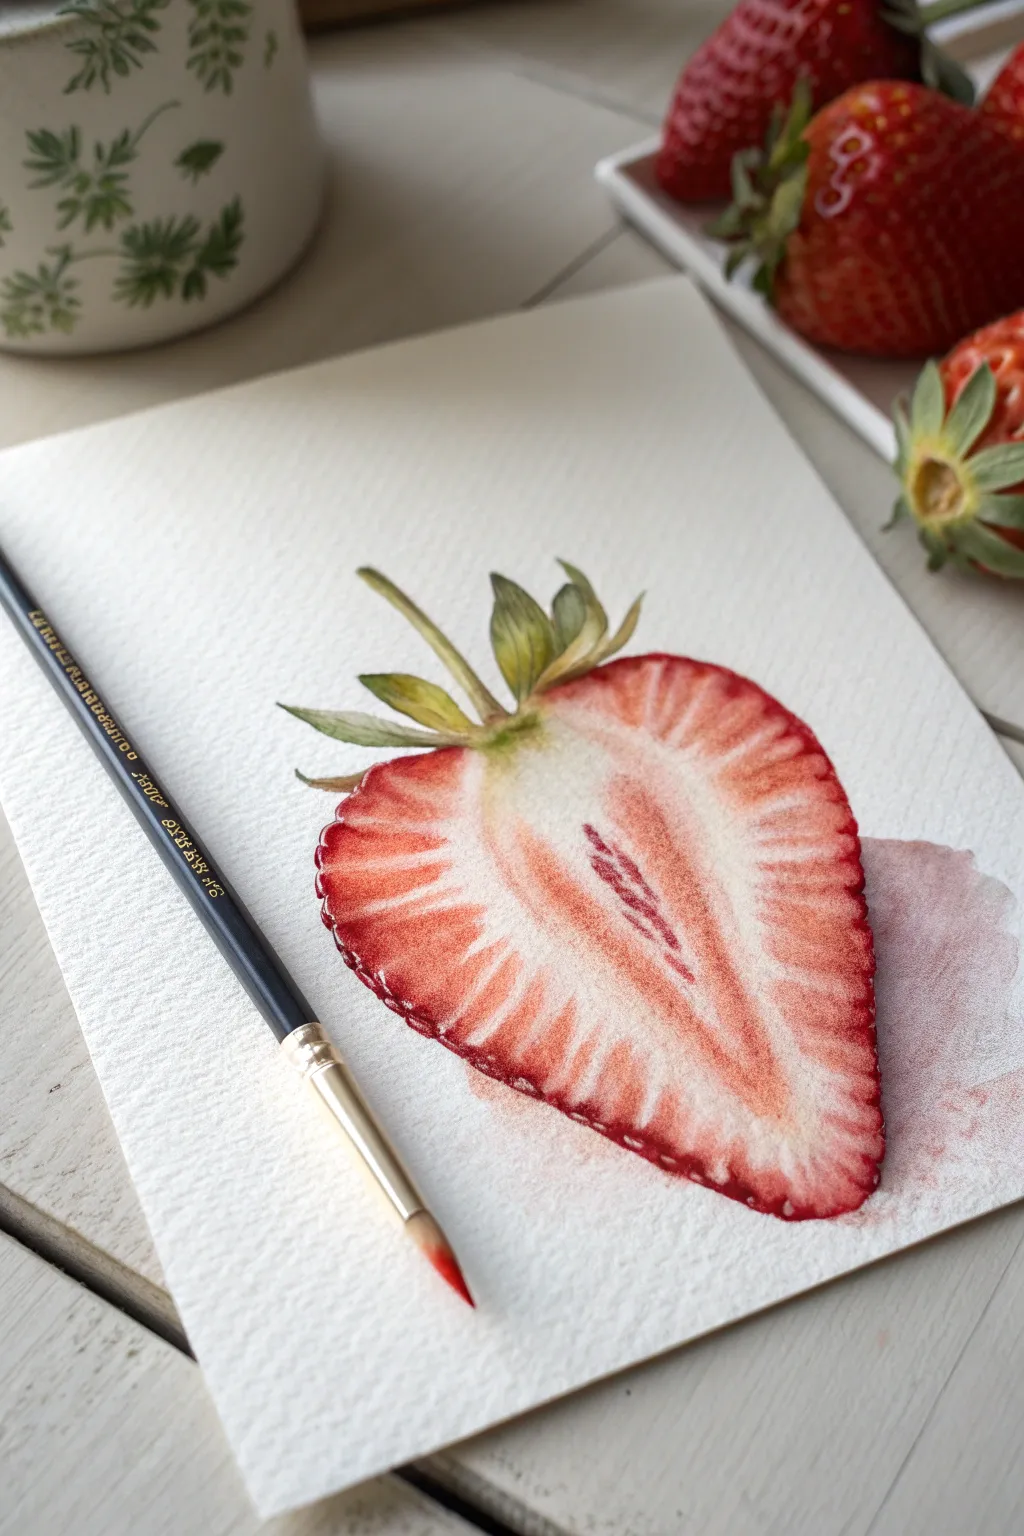
Capture the delicate inner details of a summer favorite with this realistic watercolor study. You’ll layer translucent reds and pinks to create the juicy texture and radiating fibers of a sliced strawberry.
Step-by-Step Guide
Materials
- Cold-pressed watercolor paper (300gsm/140lb)
- Round watercolor brushes (sizes 2, 4, and 6)
- Small liner brush (size 0 or 00)
- Watercolor paints (Alizarin Crimson, Cadmium Red, Sap Green, Yellow Ochre)
- Pencil (HB or H)
- Kneaded eraser
- Clean water jar
- Paper towels of cloth
Step 1: Sketching the Form
-
Outline the shape:
Begin with a light pencil sketch of a heart-like strawberry shape. Keep the lines faint so they don’t show through the final wash. -
Mark the core:
Sketch the central white core (the pith) running from the stem down towards the tip. It should look a bit like a narrow flame or elongated triangle. -
Detail the veins:
Lightly draw radiating lines extending from the core to the outer edges. These will guide your painting of the fibrous texture later. -
Add the leafy cap:
Sketch the sepals (the green leaves) at the top, making them look jagged and somewhat dried at the tips.
Step 2: Initial Washes
-
Paint the first red layer:
Mix a watery wash of Cadmium Red. Apply this to the outer edges of the berry, pulling the color inward but stopping before you reach the white core. -
Soften the edges:
While the paint is wet, use a clean, damp brush to soften the inner edge of the red, letting it fade gently into the white paper of the core. -
Tint the core:
With a very dilute mix of Yellow Ochre and a touch of red, add a faint, warm whisper of color to the central white area so it isn’t stark white. -
Base layer for leaves:
Mix a light Sap Green with a hint of Yellow Ochre. Paint the base layer of the green leaves at the top.
Wet-on-Wet Trick
For the softest transition between the red flesh and white core, pre-wet the paper with clean water before dropping in your first red wash.
Step 3: Building Texture and Depth
-
Deepen the outer rim:
Once the first layer is dry, use Alizarin Crimson to darken the very outer edge of the strawberry skin. This creates the illusion of a glimmering, uncut skin. -
Paint the fibers:
Switch to a size 2 brush. Using a mix of Cadmium Red and Alizarin Crimson, paint thin, radiating strokes from the core outward, following your pencil guides. -
Feather the strokes:
Keep these fiber lines broken and organic, not straight rulers. I like to lift my brush at the end of the stroke to taper the line naturally. -
Define the central hollow:
Paint the small, darker red crevices often found in the very center of the white core using a concentrated red mix. -
Refine the greens:
Add shadows to the leaves using a darker green mix (Sap Green plus a tiny touch of red to muddy it). Paint the undersides and overlapping areas.
Make it Pop
Mix a tiny amount of blue into your red for the darkest shadows near the skin. This cool tone makes the warm reds look even more vibrant by comparison.
Step 4: Final Details
-
Enhance the crimson edge:
Use your smallest brush to dab tiny dots or dashes of pure Alizarin Crimson along the bottom red curve to mimic the texture of the outer seeds and skin. -
Gloss and highlight:
If you lost too much white, use a small amount of white gouache or a white gel pen to add tiny specular highlights on the skin edge or wet center. -
Cast shadow:
Mix a watery purple-grey (green mixed with red). Paint a soft, diffuse shadow under the right side of the strawberry to ground it on the paper. -
Final leaf details:
Add tiny brown tips to the green leaves using Burnt Umber to show the slightly dried ends characteristic of a picked strawberry.
Step back and admire the fresh, organic textures you’ve captured in your fruit study
Mini Canvas Strawberry Series
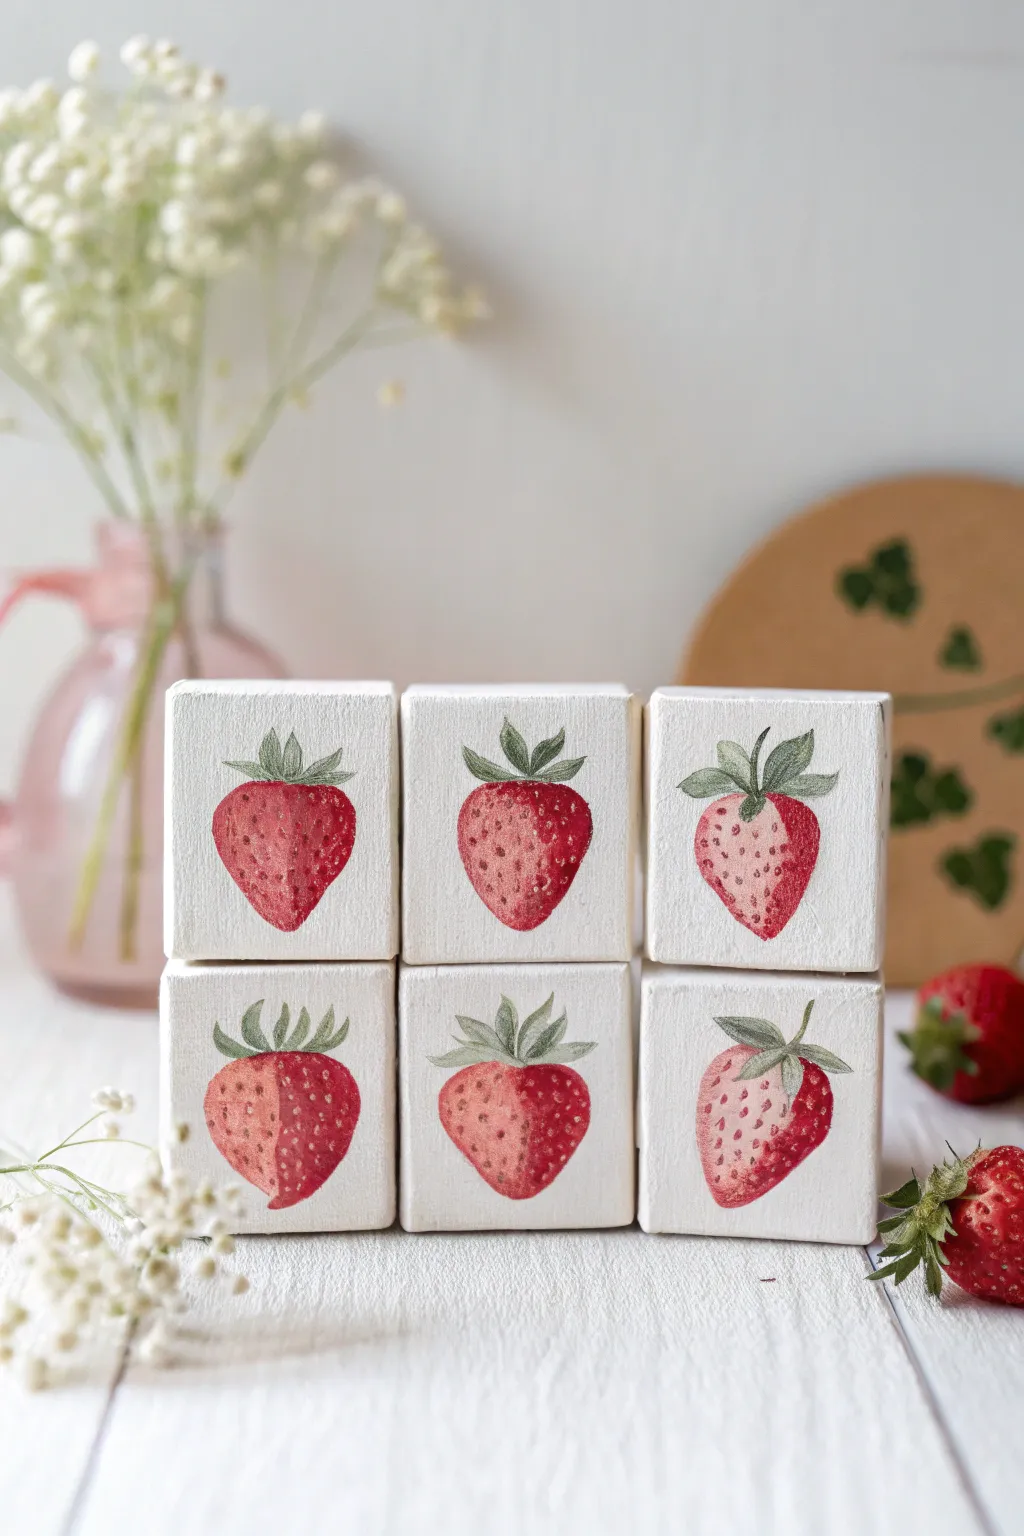
Transform simple wooden blocks into a charming gallery of fruit with this segmented painting project. The unfinished wood grain combined with delicate washes of red and green creates a rustic, farmhouse-style aesthetic perfect for shelf decor.
How-To Guide
Materials
- 6 small wooden craft blocks (approx. 2×2 inches)
- Fine-grit sandpaper (220 grit)
- White acrylic gesso or matte white acrylic paint
- Watercolor paints or fluid acrylics (Crimson Red, Scarlet, Sap Green, Burnt Umber)
- Small round paintbrushes (sizes 2 and 0)
- Pencil for sketching
- Palette for mixing
- Water cup and paper towels
- Matte spray varnish (optional)
Step 1: Preparation and Priming
-
Sand the blocks:
Begin by lightly sanding all faces of your six wooden blocks to ensure they display a smooth, professional finish. Wipe away any dust with a slightly damp cloth. -
Whitewash the background:
Instead of a solid white coat, dilute your white acrylic paint or gesso with a little water. Paint the front face of each block, allowing some of the natural wood texture to subtly show through. -
Let it cure:
Allow the white base coat to dry completely. If the wood grain raised up during painting, give it another very light sanding to smooth it back down.
Step 2: Sketching
-
Outline the shapes:
Using a light hand and a sharp pencil, sketch a single strawberry shape in the center of each block. Vary the shapes slightly—make some plump and round, others slightly more tapered. -
Add leave details:
Sketch the calyx (the green leafy top) on each berry. Try different arrangements for variety: some leaves perked up, some drooping down over the fruit’s shoulder.
Pro Tip: Seed Placement
Don’t evenly space the seeds. Clustering them tighter near the edges of the berry helps sell the illusion that the surface is curving away from the viewer.
Step 3: Painting the Fruit
-
Base wash:
Mix a watery wash of Scarlet red. Apply this to the entire body of the strawberry on the first block. Keep the edges soft but distinct. -
Build the gradient:
While the first layer is still slightly damp, drop in concentrated Crimson Red along the right side and bottom curve to create a sense of shadow and volume. -
Create highlights:
Lift a little pigment from the upper left side using a clean, damp brush, or simply leave that area lighter to suggest a light source hitting the glossy skin. -
Repeat the process:
Continue this coloring process for all six blocks. I find it helpful to vary the redness slightly—leave one or two looking a bit paler and under-ripe for realistic variation.
Level Up: Puzzle Block
Paint different fruits on the other sides of the blocks (like blueberries or lemons) so you can rotate them to change your seasonal display instantly.
Step 4: Adding Details
-
Paint the leaves:
Using your size 2 brush and Sap Green, paint the leaves. Start with a lighter green wash, then add a darker mix (Sap Green plus a touch of Red or Brown) to the base of the leaves where they meet the berry. -
Define the veins:
Once the green is dry, use your smallest brush (size 0) to add a tiny central vein line to the larger leaves for definition. -
Add seed indentations:
Mix a dark reddish-brown using Crimson and Burnt Umber. Using the very tip of your smallest brush, paint small, teardrop-shaped seeds across the surface of the berries. -
Detail the seeds:
Ensure the seeds follow the curve of the berry’s form, rather than painting them in flat horizontal rows, to enhancing the 3D effect. -
Final highlights:
If your contrast feels low, use a tiny dot of opaque white paint or white gel pen right next to a few seeds on the highlighted side to make the texture pop.
Step 5: Finishing Touches
-
Dry completely:
Let the blocks sit for several hours to ensure all moisture has evaporated from the wood. -
Seal the work:
To protect your painting without adding unwanted shine, lightly mist the blocks with a matte spray varnish. This keeps that raw, vintage look intact.
Stack your finished blocks on a kitchen shelf or windowsill for a sweet, handcrafted display that celebrates the season
Strawberry Bookmark With Repeating Motifs
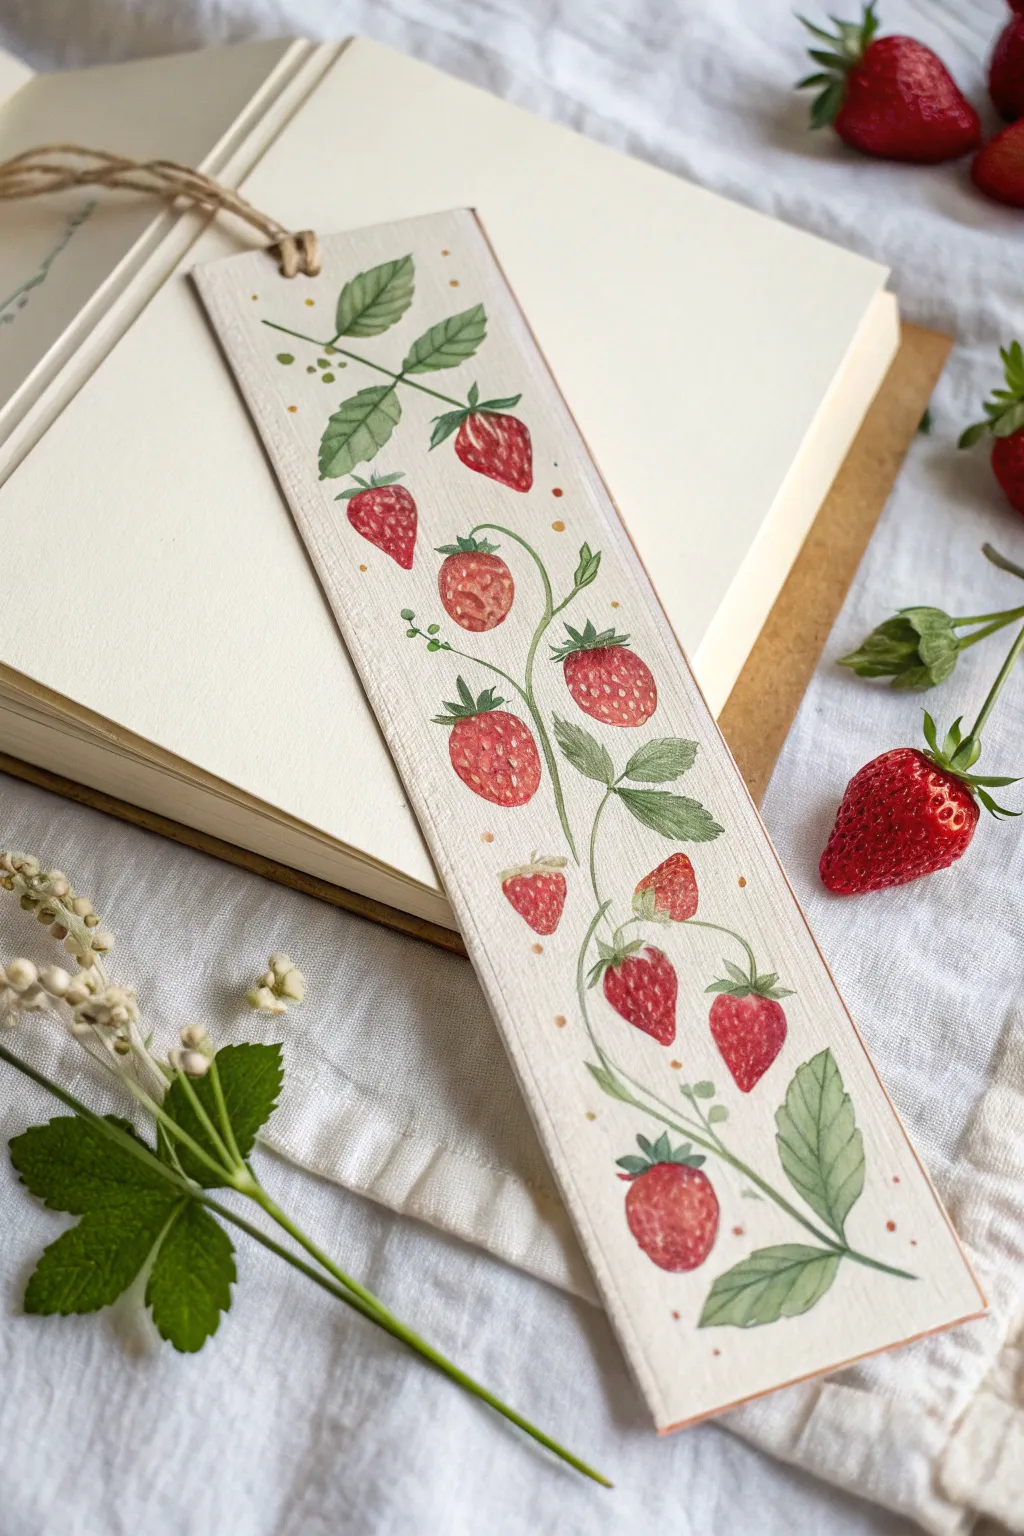
Capture the sweetness of summer with this delicate bookmark featuring a trailing vine of watercolor strawberries. The repeating motif creates a lovely vertical rhythm, perfect for holding your place in a favorite novel.
Step-by-Step Guide
Materials
- Cold-press watercolor paper (300 gsm)
- Watercolor paints (Alizarin Crimson, Sap Green, Yellow Ochre, Burnt Sienna)
- Round watercolor brushes (size 2 and 00 for details)
- Pencil (HB or H)
- Kneaded eraser
- Paper cutter or ruler and craft knife
- Hole punch
- Natural jute twine
- White gouache or white gel pen (for highlights)
Step 1: Preparation and Sketching
-
Cut the Paper:
Begin by cutting a strip of watercolor paper to your desired bookmark size, approximately 2 inches wide by 6-7 inches long. -
Plan the Vine:
Lightly sketch a winding, S-curved line running from the bottom to the top of the strip to serve as the main stem. -
Sketch the Fruits:
Draw small strawberry shapes along the vine, alternating sides. Vary their orientation—some pointing up, some down—to keep the composition dynamic. -
Add Leaf Details:
Clustered near the top and bottom, sketch groups of three serrated strawberry leaves. Add smaller single leaves along the vine to fill empty spaces. -
Refine and Erase:
Once happy with the placement, gently roll a kneaded eraser over the sketch to lift most of the graphite, leaving only faint guidelines.
Step 2: Painting the Motifs
-
Base Layer of Berries:
Mix a watery wash of Alizarin Crimson. Paint the berry shapes, leaving small specks of white paper dry near the top left of each fruit for natural highlights. -
Touching in Unripe Areas:
While the red is still damp on a few berries, touch in a tiny drop of yellow or pale green at the tips or tops to suggest varying ripeness. -
Painting the Leaves:
Using a mix of Sap Green and a touch of Burnt Sienna to dull it, paint the leaves. I like to drop a slightly darker green into the damp wash near the veins for depth. -
Connecting the Vine:
With a thin liner or size 0 brush, connect the elements with a fine green line, following your initial S-curve. -
Adding Sepals:
Paint the small, leafy caps (sepals) on top of each strawberry using a vibrant green mixture. -
Let it Dry:
Allow the entire piece to dry completely before adding texture. This prevents the colors from bleeding.
Natural Texture
Use cold-press paper! The bumpy texture catches the pigment beautifully, giving the strawberries a natural, organic feel that smooth paper often misses.
Step 3: Details and Finishing
-
Adding Seeds:
With your smallest brush (size 00) and a thick mixture of Yellow Ochre or White Gouache, paint tiny seed dots on the dry red berries. -
Leaf Veins:
Using a slightly darker green than the base leaf color, carefully paint thin veins onto the dried leaves. -
Shadows and Depth:
Glaze a very translucent layer of dark red on the shadowed side of the berries (opposite your highlight) to give them roundness. -
Decorative Dots:
To fill negative space and add whimsy, paint tiny stray dots of green, yellow, and red around the main vine. -
Create the Tassel Connection:
Once fully dry, punch a single hole at the top center of the bookmark. -
Attach the Twine:
Cut three strands of jute twine, fold them in half, push the loop through the hole, and pull the tails through the loop to secure.
Vintage Edges
For an antique botanical look, lightly distress the edges of the bookmark with brown ink or tea-staining before adding the tassel.
Now you have a charming, hand-painted accessory to mark your place in your next reading adventure
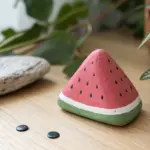
Strawberry Rock Painting
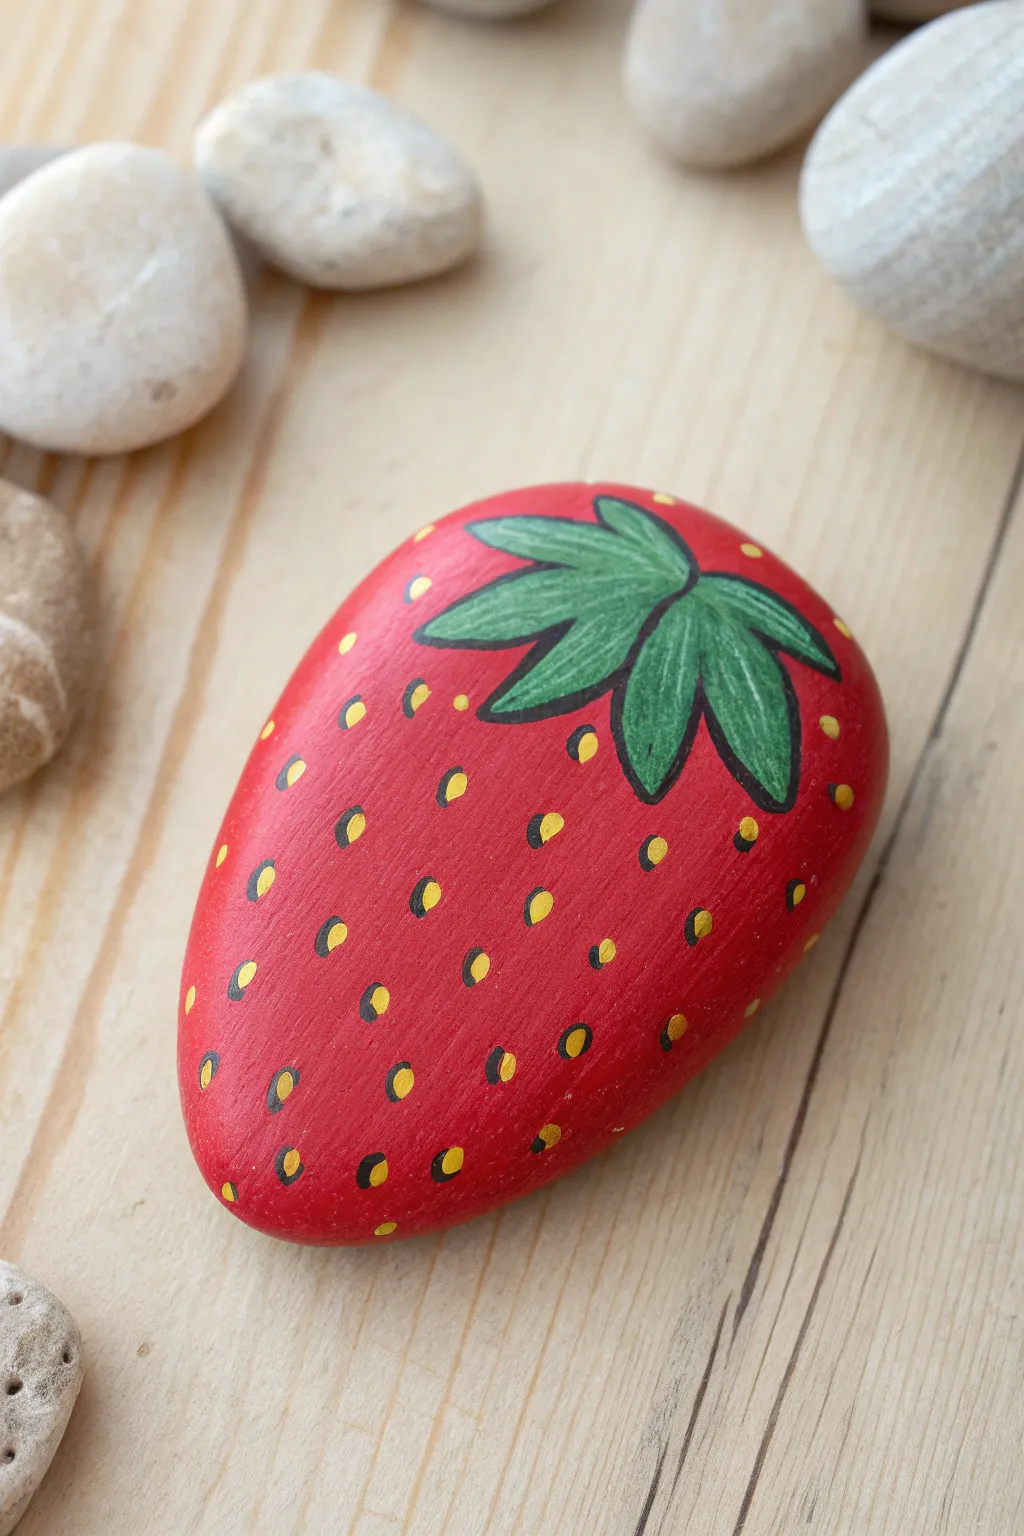
Transform a simple stone into some sweet, permanent produce with this vibrant painted rock project. The smooth surface of a river rock is the perfect canvas for creating this glossy, stylized strawberry that looks good enough to eat—almost.
Step-by-Step Tutorial
Materials
- Smooth, oval-shaped river rock
- Red acrylic paint (bright scarlet or cardinal)
- Green acrylic paint (medium leaf green)
- Yellow or goldenrod acrylic paint
- Black fine-point paint pen or thin detail brush
- Flat paintbrush
- Small round detail paintbrush
- Clear acrylic sealer (spray or brush-on)
Step 1: Base Coat Application
-
Clean the canvas:
Begin by washing your rock thoroughly with warm, soapy water to remove any dirt or oils. Let it dry completely before starting, as moisture trapped inside can ruin the paint later. -
Prime the surface:
If your rock is very dark, apply a layer of white acrylic paint first. This primer coat ensures your red will pop and won’t look muddy against the grey stone background. -
Apply the red base:
Using a flat paintbrush, cover the entire top surface of the rock with bright red acrylic paint. Smooth out your brushstrokes as you go for a clean finish. -
Check opacity:
Let the first coat dry fully. If the color looks streaky or translucent, apply a second coat of red. I find that two thin coats usually look better than one thick, gloopy layer. -
Complete coverage:
Don’t forget to paint the sides and extend the red slightly underneath the rock so no bare stone shows when it is sitting flat.
Smooth Surface Trick
Work with the rock’s natural texture. If your rock has a chipped area, position it as the strawberry top where the leaves will cover imperfections.
Step 2: Painting the Foliage
-
Outline the leaves:
Once the red base is bone dry, switch to your green paint and a small round brush. At the wider end of the rock (the ‘top’ of the strawberry), paint the outline of a leafy crown. -
Create the shapes:
Draw three to five jagged leaf shapes radiating from a central point. Make them slightly irregular and overlapping to look organic. -
Fill in the green:
Fill in the leaf outlines with your green paint. You may need two coats here as well, especially since you are painting over a strong red background. -
Add leaf details:
If you want extra dimension, mix a tiny bit of darker green or yellow into your wet paint to create subtle highlights on the leaves, though solid green works perfectly fine for this stylized look. -
Dry completely:
Allow the green paint to dry completely. It is crucial the paint is hard to the touch before moving on to outlining.
Step 3: Seeds and Outlining
-
Plan seed placement:
Visualize where your seeds will go. They should be scattered evenly across the red area, all pointing generally downward or toward the center. -
Paint the seeds:
Using your smallest detail brush and yellow or goldenrod paint, create small teardrop shapes. Use a light touch—press down slightly to make the round bottom, then lift up to make the point. -
Vary direction:
As you move toward the edges of the rock, angle the seeds slightly outward to mimic the curvature of a real berry. -
Outline the leaves:
Take your black fine-point paint pen (or a liner brush with black paint) and carefully trace the outer edge of the green leaves. -
Add leaf veins:
Draw a central line down the middle of each leaf section with the black pen to create the main vein structure. -
Outline the seeds:
This step makes the design pop. Use the black pen to draw a partial outline around the bottom curve of each yellow seed. You don’t need to circle the whole seed; just a ‘U’ shape creates a shadow effect. -
Seal the deal:
Once all paint and ink are fully cured (give it at least an hour), apply a coat of clear acrylic sealer. A glossy finish makes the strawberry look juicy and fresh.
Make It a Basket
Paint several different sized rocks to create a whole basket of berries. Vary the visible ripeness by mixing a little pink or white into the red on a few.
Place your finished strawberry rock in a garden pot or on a sunny windowsill for a touch of summer cheer that lasts all year
Mixed Media Strawberry Collage
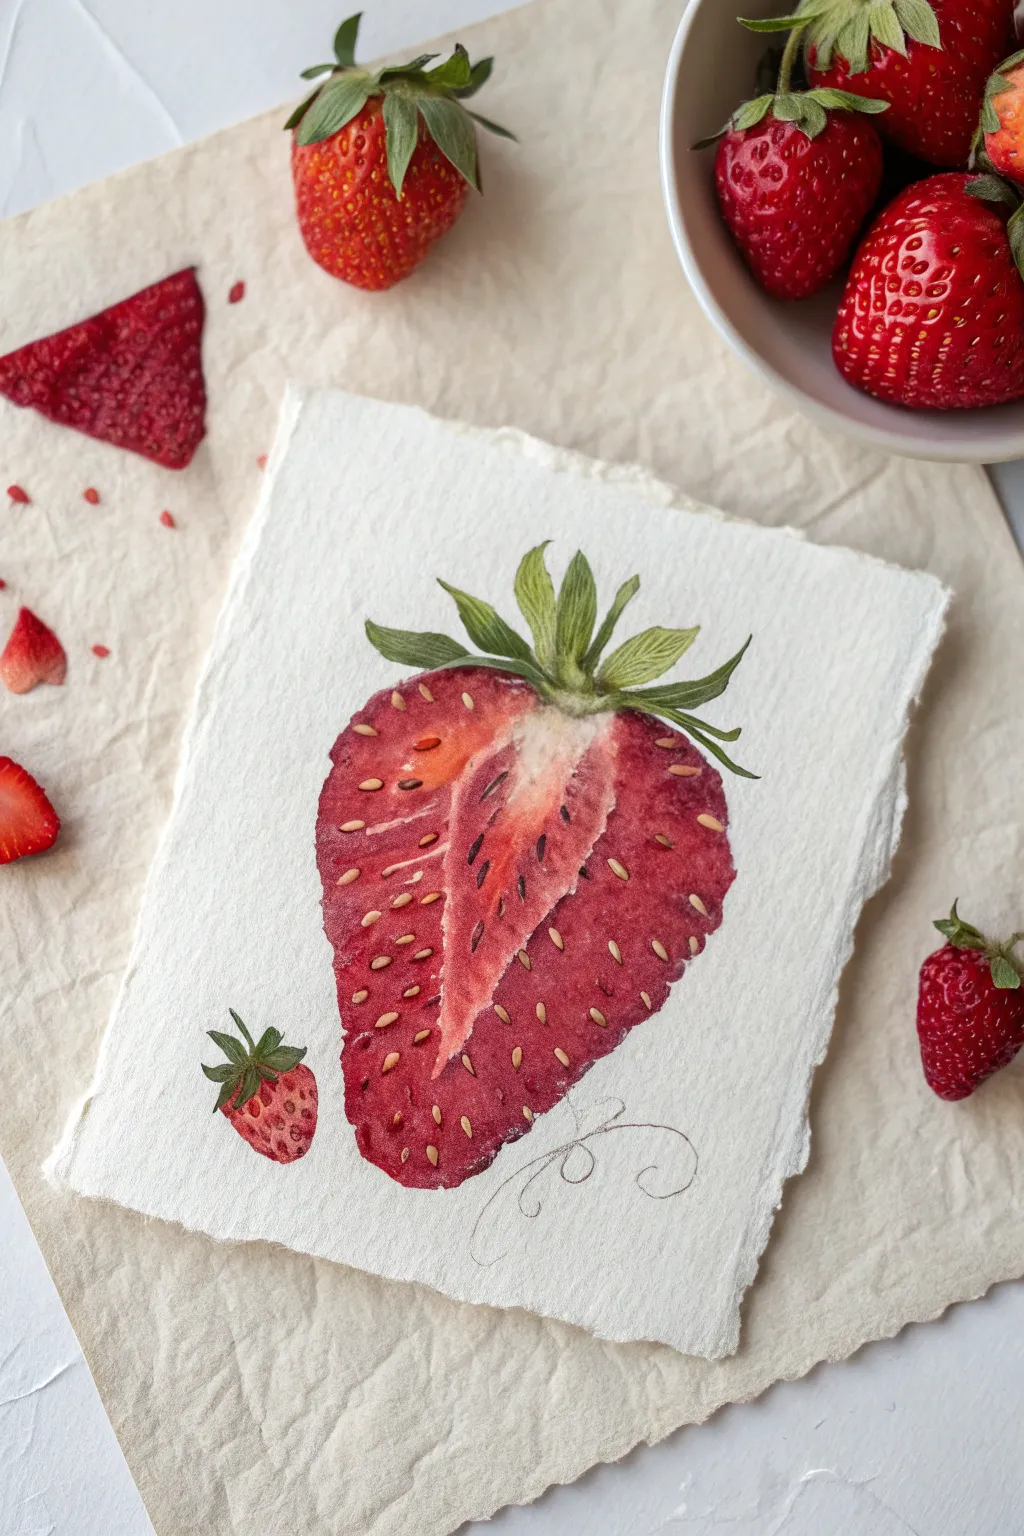
Capture the delicate textures of nature with this mixed media study that combines vibrant watercolor washes with precise colored pencil detailing. The result is a botanical illustration that feels both scientific and artistically loose, resting beautifully on deckled-edge handmade paper.
Step-by-Step Guide
Materials
- Heavyweight cold-press watercolor paper with deckled edges (approx. 300gsm)
- Watercolor paints (Alizarin Crimson, Sap Green, Yellow Ochre, Burnt Umber)
- Colored pencils (wax or oil-based in deep red, white, yellow, and dark green)
- Round watercolor brushes (size 4 and 8)
- Fine liner brush (size 0 or 00)
- HB or 2B graphite pencil
- Kneaded eraser
- Clean water and paper towels
Step 1: Planning and Sketching
-
Prepare the Paper:
Select a piece of thick, handmade paper with a rough, deckled edge to mimic the rustic look of the example. If you only have a large sheet, you can tear the edges against a ruler to create that soft, fibrous border. -
Outline the Main Subject:
Lightly sketch the large, heart-shaped contour of the sliced strawberry in the center of the page. Mark the distinct ‘V’ shape of the messy white core section in the middle. -
Add the Greenery:
Draw the leafy hull (calyx) at the top. Notice how the leaves flare out; keep your pencil lines light and whimsical rather than rigid. -
Sketch the Companion Berry:
To the bottom left of the main slice, lightly draw a tiny, whole strawberry. Keep it simple and much smaller than the main subject to create scale. -
The Flourish:
Using a very loose hand, add a few swirling, calligraphy-style loops near the bottom right of the main strawberry with your graphite pencil. Leave this raw and unpainted for that sketchbook aesthetic.
Muddy Centers?
If the red paint bleeds too much into the white core, blotting is key. Quickly dab the wet area with a clean corner of a paper towel to lift the pigment back to white.
Step 2: Watercolor Application
-
The First Red Wash:
Mix a watery Alizarin Crimson. Paint the flesh of the large strawberry, avoiding the central white core and the seeds. Keep the wash uneven to suggest texture. -
Defining the Core:
For the whitish-pink core, dilute your red mix heavily with water until it’s barely tinted. Paint the ‘V’ shape, letting it bleed slightly into the darker red flesh for a soft transition, but keep the very center almost pure paper white. -
Painting the Leaves:
Using the size 4 brush and Sap Green, fill in the top leaves. Add a touch of Yellow Ochre to the tips while wet to create a sun-kissed, drying leaf look. -
The Tiny Berry:
Paint the small companion strawberry with a solid coat of your crimson mix. It needs less detailed grading than the large slice since it is a secondary element. -
Deepening the Shadows:
Once the first layer is dry, mix a little Burnt Umber into your crimson. Apply this darker tone to the outer edges of the slice and right under the green leaves to create volume.
Scented Art
For a fun sensory twist, mix a tiny drop of strawberry essential oil into your red watercolor wash. The painting will carry a faint, sweet scent when dry.
Step 3: Detailing and Texture
-
Adding Seeds:
With a fine liner brush and a mix of Yellow Ochre and a tiny dot of brown, paint small tear-drop shapes for the seeds. On the sliced section, remember that some seeds are cut in half or embedded in the core. -
Core Textures:
Use a very dry brush with faint red pigment to create the fibrous, vein-like lines running through the white core. These should be subtle and directional, pointing toward the tip. -
Colored Pencil Definition:
Once the paint is bone dry, use a dark red colored pencil to sharpen the outer edges of the strawberry skin. I like to use small, circular scribbles here to mimic the bumpy surface. -
Highlighting:
Take a white colored pencil or a white gel pen and add tiny highlights to the upper left side of the seeds and on the glossy skin of the small berry. -
Leaf Veins:
Use a dark green sharpened pencil to draw fine veins on the leaves, starting from the center and flicking outward. -
Final Pencil Touches:
Re-emphasize the graphite swirl at the bottom if it got lost, and lightly roughen the pencil outline of the small berry to make it look like a quick field study.
Step back and admire your fresh, juicy botanical illustration.
Geometric Abstract Strawberry Blocks
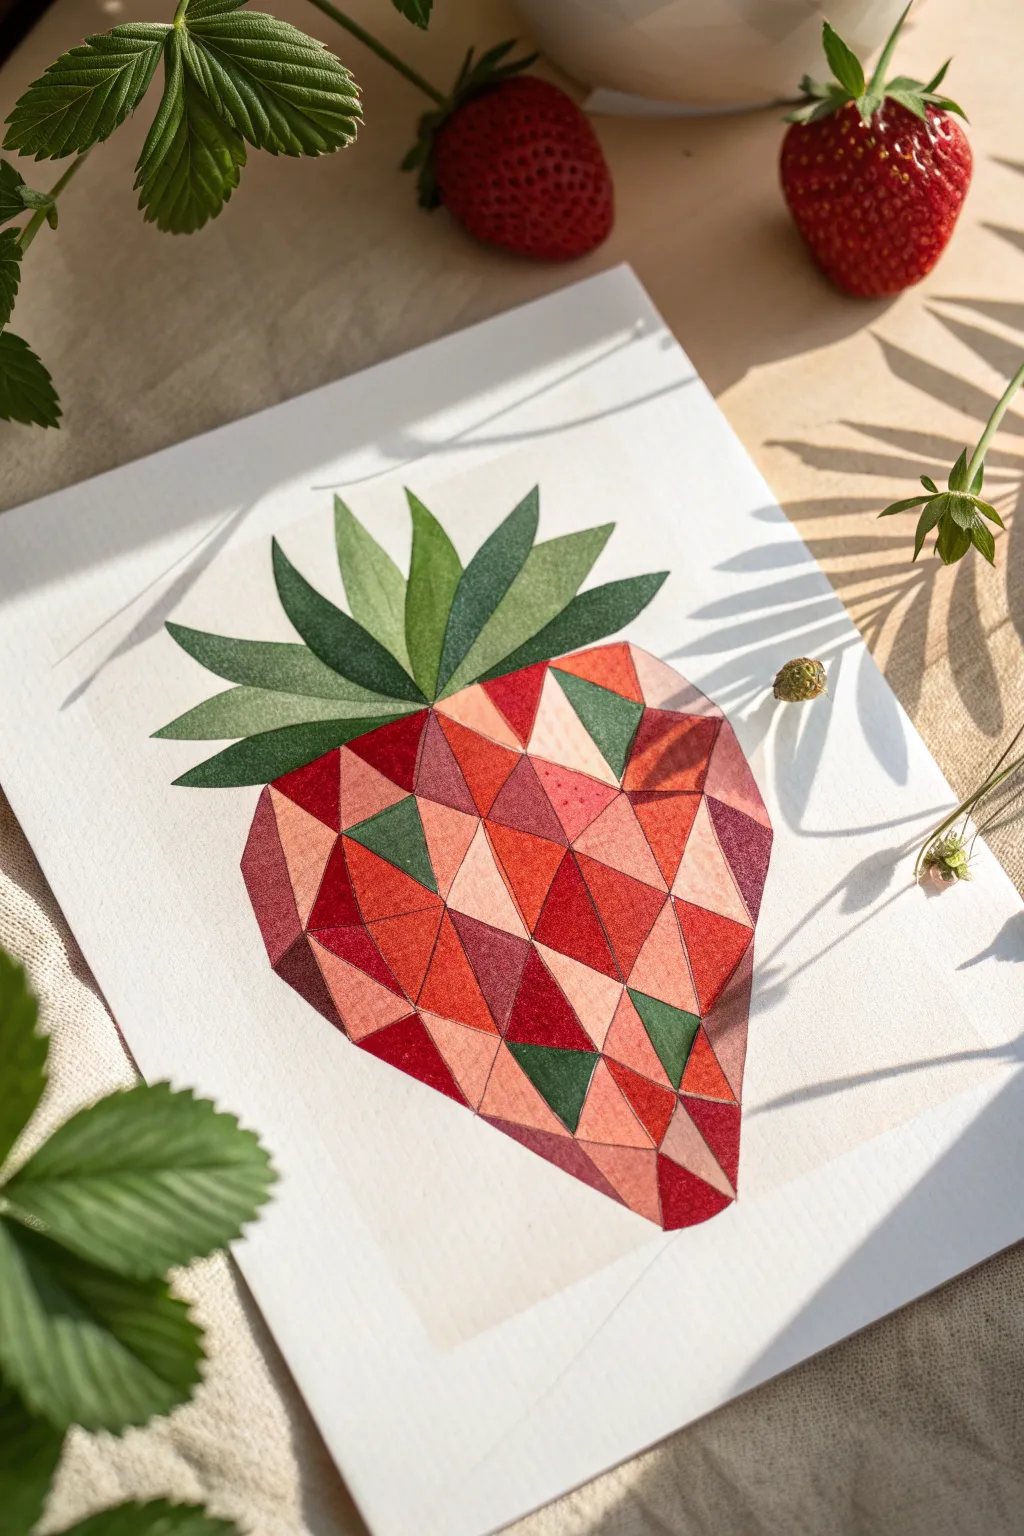
Transform a classic summer fruit into a modern art piece with this geometric mosaic design. Using a palette of warm reds, soft pinks, and earthy greens, you’ll build a structure of interlocking triangles that creates a stunning faceted effect like a gemstone.
Step-by-Step
Materials
- Cold press watercolor paper (140lb/300gsm)
- Pencil (HB or H)
- Ruler
- Eraser (kneaded preferred)
- Watercolor paints (Alizarin Crimson, Cadmium Red, Sap Green, Burnt Sienna, Yellow Ochre)
- Small round brushes (size 2 and 4)
- Painter’s tape or masking tape
- Jar of water
- Palette for mixing
- Paper towels
Step 1: Planning the Geometry
-
Lightly sketch the outline:
Begin by lightly sketching the general silhouette of a large strawberry in the center of your paper. Draw a soft, rounded triangle shape for the body and extend a few sweeping lines upward for the leaves. -
Create the grid lines:
Using your ruler, draw intersecting lines across the body of the strawberry. These don’t need to be perfectly symmetrical; in fact, varying angles add interest. Create a network of triangles of different sizes. -
Refine the leaf shapes:
For the leaves, draw distinct, pointed segments radiating from the top center. Divide each leaf into two or three long, angular sections to match the geometric style of the fruit body. -
Lighten your graph:
Take your kneaded eraser and gently roll it over the entire sketch. You want the graphite lines to be barely visible—just enough to guide your painting but faint enough to disappear under the watercolor.
Step 2: Painting the Fruit Mosaic
-
Mix your red palette:
Prepare three or four distinct red mixtures. Create a deep, saturated crimson, a bright standard red, a warm orange-red, and a very pale, watery pink. Having these ready pre-painting ensures a cohesive look. -
Start with the darkest triangles:
Identify a few scattered triangles throughout the berry shape to be your ‘shadow’ points. Fill these in carefully with your deepest crimson mix using the size 2 brush. Stay strictly within the pencil lines. -
Add mid-tone variation:
While the dark sections dry, select a non-adjacent set of triangles to fill with your standard red and orange-red mixtures. Painting non-touching shapes prevents wet colors from bleeding into each other. -
Incorporate the highlights:
Fill the remaining empty triangles in the berry body with your palest pink wash. Leave a few triangles almost white or extremely pale to simulate light hitting the facets of the fruit. -
Introduce contrast greens:
To make the design pop, choose 3-5 random triangles within the red body to paint green. This unexpected abstract touch adds depth and complexity to the mosaic pattern. -
Connect the edges:
Once your first pass is completely dry, look for any white gaps between the triangles. Carefully fill these hair-thin lines with a neutral, diluted red or simply expand the adjacent colors until they touch perfectly.
Bleeding Colors?
If adjacent triangles bleed into each other, you are painting too fast. The paper must be bone-dry before you paint a shape that touches an already-painted one. Use a hairdryer to speed this up.
Step 3: Detailing the Crown
-
Mix leaf colors:
Prepare a dark, cool green (mix Sap Green with a touch of red or blue) and a lighter, yellowish green. You need distinct values to separate the leaf segments. -
Paint the first leaf segments:
Paint one side of each leaf shape with your lighter green mix. I like to alternate left and right sides on different leaves to create a sense of movement and light direction. -
Add the shadowed segments:
Once the light green is dry, fill the remaining leaf segments with the darker green mixture. This sharp contrast between the two halves gives the leaves a folded, 3D appearance. -
Sharpen the points:
Use the very tip of your smallest brush to ensure the tips of the leaves and the bottom point of the strawberry are crisp and sharp. -
Final assessment:
Step back and look at the overall balance. If any pale triangles look too washed out, you can glaze a second layer of translucent color over them to increase saturation without losing transparency.
Add Metallic Flair
Once the painting is totally dry, trace the grid lines between the colored triangles with a thin gold gel pen or metallic watercolor for a stained-glass or cloisonné effect.
Now you have a vibrant, faceted strawberry illustration that balances geometric precision with watercolor fluidity
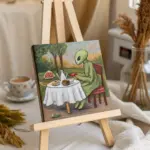
Surreal Floating Strawberries in a Dreamy Sky
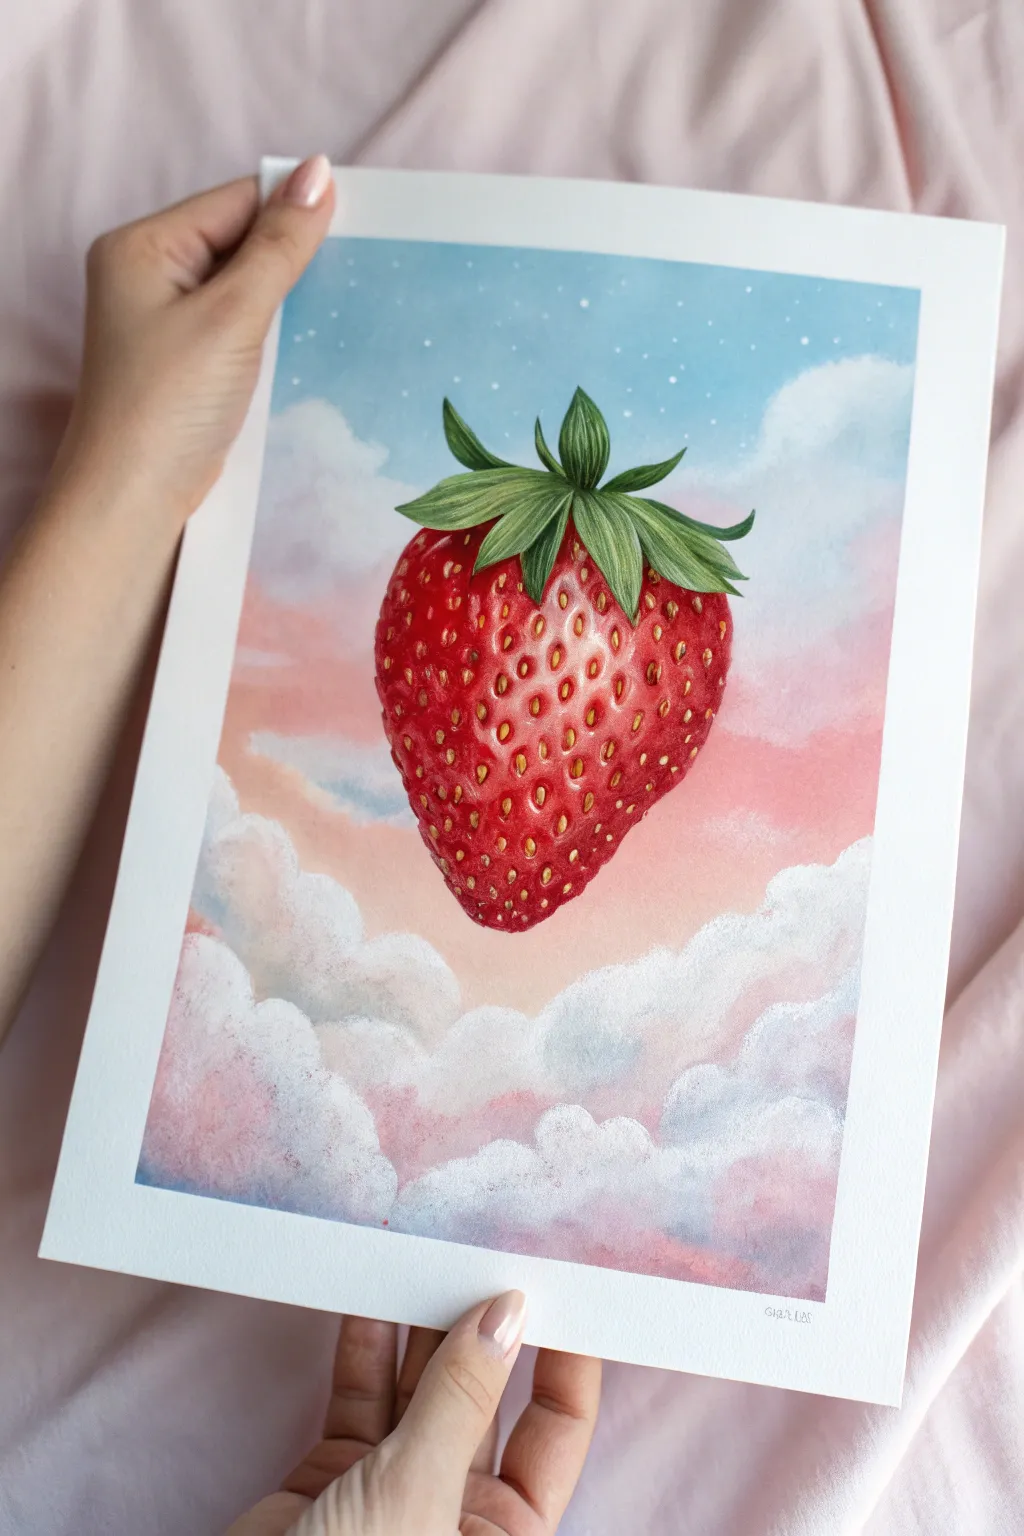
This surreal painting captures the magic of a giant, glossy strawberry suspended amongst fluffy, cotton-candy clouds. Using a blend of soft gradients and crisp details, you’ll create a dreamy atmosphere that makes the fruit pop right off the page.
Detailed Instructions
Materials
- Heavyweight mixed media or watercolor paper (hot press for smoothness)
- Gouache or acrylic paints (Cyan, Magenta, Yellow, White, Hooker’s Green)
- Colored pencils (wax or oil-based for details)
- Flat shader brushes (sizes 6 and 10)
- Fine liner brushes (sizes 00 and 1)
- Pencil and eraser for sketching
- Palette for mixing
- Paper towels and water cup
Step 1: Setting the Scene
-
Sketch the composition:
Begin by lightly sketching the outline of a large, plump strawberry in the center of your paper. Keep the lines faint so they don’t show through later. Add the leafy calyx on top, making the leaves curl naturally. -
Outline the clouds:
Around the strawberry, sketch bubbly, cumulus cloud shapes. Leave generous space at the top and bottom, but let some clouds overlap slightly with the bottom tip of the strawberry to ground it in the scene. -
Paint the sky gradient:
Mix a pale cyan blue fading into a soft pastel pink. Start at the top with the blue, and as you move down, blend in the pink to create a sunset-like transition behind the strawberry. Avoid the cloud shapes for now. -
Base coat the clouds:
Fill in the cloud shapes with pure white paint. Use a slightly dry brush technique near the edges to keep them looking fluffy and soft rather than hard-edged. -
Add cloud shadows:
Mix a very pale lavender using white, a tiny touch of magenta, and blue. Gently paint the bottoms and crevices of the clouds to give them volume and dimension.
Seed Spacing Help
Follow the curve! Imagine grid lines wrapping around the strawberry sphere. Seeds shouldn’t be random; align them on these curved imaginary lines to maintain perspective.
Step 2: The Strawberry Base
-
Apply the red base:
Paint the entire body of the strawberry with a bright, solid red. You may need two coats to ensure opacity. Leave the leafy top unpainted for now. -
Create the rounded form:
While the red is still slightly workable or by glazing over it dry, darken the edges with a deeper crimson to simulate roundness. Add a lighter, slightly orange-red highlight area near the upper center where the light hits. -
Paint the leaves:
Fill in the calyx leaves with a mid-tone green. Use smooth, confident strokes that follow the curve of each leaf. Let this base layer dry completely before moving on.
Make it Shine
Mix a glazing medium with a tiny drop of iridescent or pearl white paint. Apply this very thinly over the ‘highlight’ area of the strawberry for a dewy, fresh gloss.
Step 3: Realistic Details
-
Define the leaf veins:
Using a fine liner brush or a dark green colored pencil, draw thin lines for the veins in the leaves. Add lighter yellow-green strokes in between to create texture and highlights. -
Map the seeds:
With a fine brush or a yellow ochre pencil, mark small tear-drop indentations across the strawberry surface. Notice how the perspective changes; seeds near the edges should look thinner and closer together. -
Shadow the seed pockets:
Paint a tiny crescent of dark red or maroon inside the top or side of each seed indentation. This small shadow creates the illusion that the seed is sunken into the flesh. -
Highlight the seed pockets:
Add a tiny speck of white or pale pink on the fleshy rim directly below each seed. This contrast against the shadow is crucial for the 3D ‘pitted’ texture. -
Paint the actual seeds:
Fill the center of your indentations with a golden-yellow color. I like to add a microscopic dot of white on each individual seed to make them look glossy.
Step 4: Final Atmosphere
-
Refine the sky:
If the sky looks too flat, use colored pencils to gently shade more depth into the blue and pink areas, smoothing out any brushstrokes. -
Add stars:
Dilute some white gouache or acrylic until it is milky. Use a small brush to dot tiny stars into the upper blue section of the sky for a magical touch. -
Enhance cloud highlights:
Go back over the tops of the clouds with thick, pure white paint to make them pop against the pink background.
Step back and admire your surreal, sky-high fruit masterpiece


Have a question or want to share your own experience? I'd love to hear from you in the comments below!