When I sketch love tattoo ideas, I’m always chasing that sweet spot between timeless symbols and the tiny details that make your story feel like yours. Here are 20 designs I’d doodle for you across my studio table—starting super classic and getting more artsy and unexpected as we go.
Tiny Heart Outline
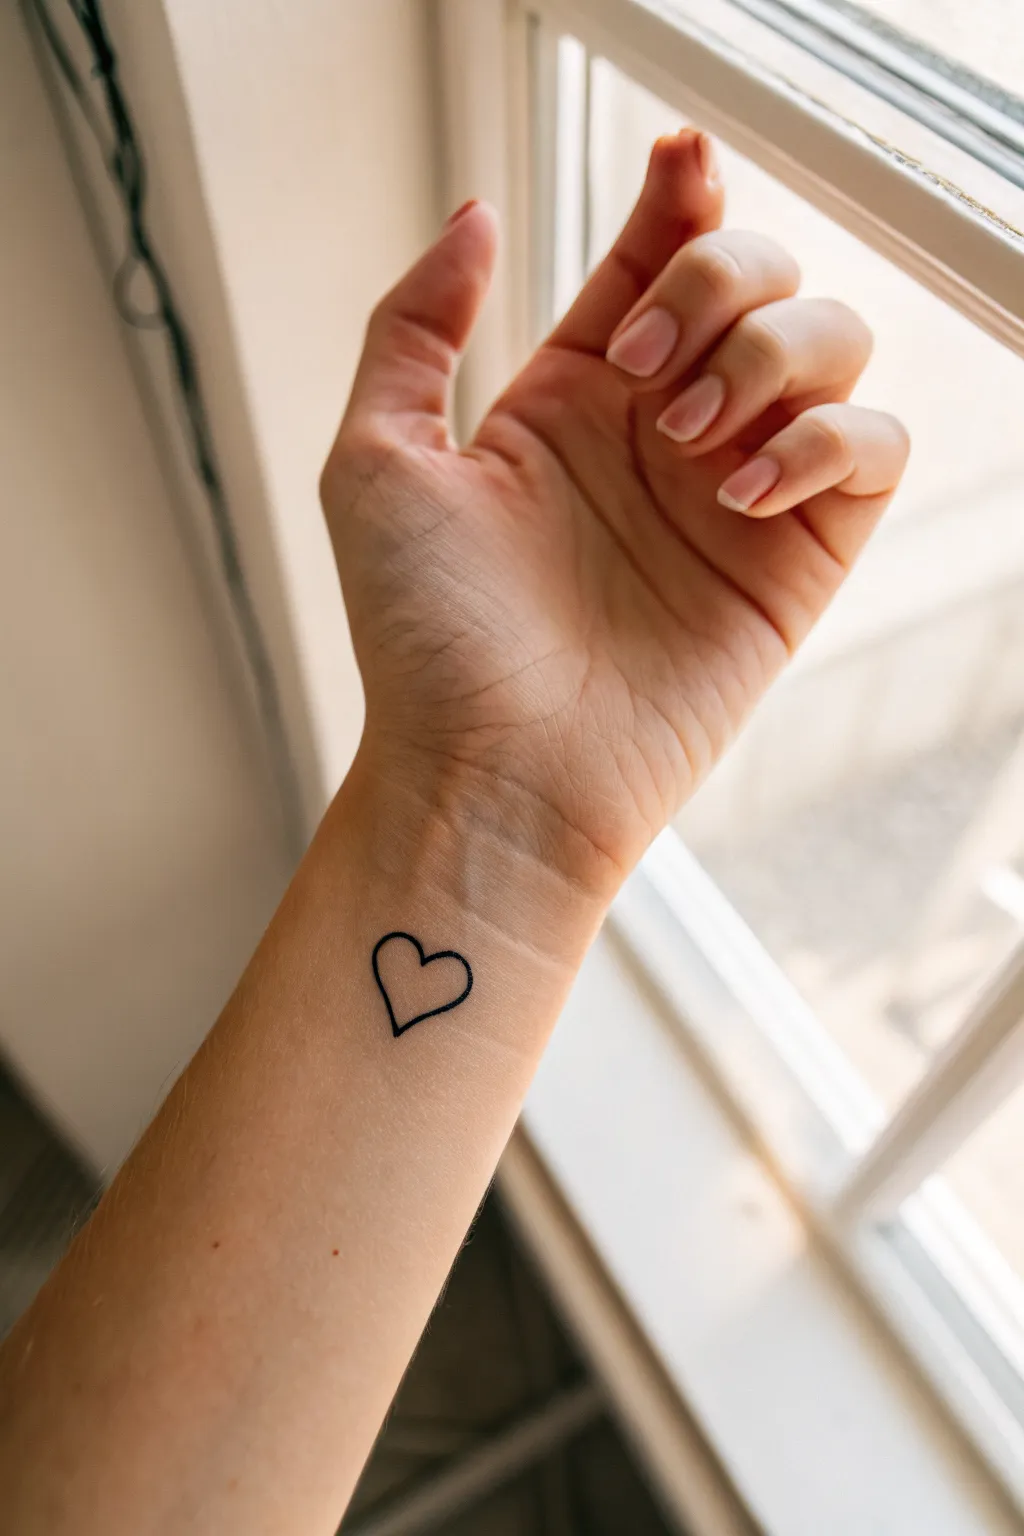
For a subtle yet meaningful expression of love, this tiny heart outline tattoo is perfect in its simplicity. Placed delicately on the inner wrist, the fine lines create an elegant, timeless symbol that feels personal and intimate.
Step-by-Step Guide
Materials
- Tattoo stencil paper
- Stencil transfer gel (e.g., Stencil Stuff)
- Black tattoo ink (lining black)
- Tattoo machine (pen or coil)
- 3RL or 5RL tattoo needle cartridge (Round Liner)
- Disposable ink caps
- Green soap and squeeze bottle
- Paper towels
- Disposable razors
- Skin marker (surgical pen)
- Vaseline or tattoo glide
- Gloves (latex or nitrile)
Step 1: Preparation & Stencil
-
Design the heart:
Sketch a small, classic heart shape on a piece of paper first to perfect the symmetry. Aim for a size about 1 to 1.5 cm wide. -
Transfer to stencil paper:
Place your drawing over the carbon sheet of the stencil paper. Trace the heart firmly using a ballpoint pen to create the purple transfer copy on the back. -
Prep the skin:
Clean the inner wrist area thoroughly with green soap and water. Dry it with a clean paper towel. -
Shave the area:
Even if the hair isn’t visible, gently shave the wrist area with a disposable razor to remove peach fuzz that could clog the needle. -
Disinfect:
Wipe the area down with an alcohol pad or skin disinfectant and let it air dry completely. -
Apply transfer gel:
Put a small, pea-sized drop of stencil transfer gel on your gloved finger and rub it into the skin until it’s tacky, not wet. -
Place the stencil:
Press the stencil cutout firmly onto the wrist. Ensure the heart is upright when the arm is held naturally. Hold it for 5-10 seconds before peeling it off gently. -
Dry time:
Allow the stencil to dry on the skin for at least 10–15 minutes. This prevents the purple line from wiping away during the tattooing process.
Step 2: Tattooing the Outline
-
Setup the station:
While the stencil dries, set up your machine. Insert your 3RL or 5RL needle cartridge. I usually prefer a 5RL for a solid line that isn’t too scratchy. -
Pour the ink:
Shake your black lining ink bottle well and fill a small ink cap. -
Apply glide:
Spread a very thin layer of Vaseline or tattoo glide over the stencil. This lubricates the skin and prevents ink pools from obscuring your view. -
First pass – Left side:
Dip your needle. Stretch the skin taut with your non-tattooing hand. Start at the top center dip of the heart and pull a steady line down the left curve to the bottom point. -
Check your depth:
Wipe away excess ink gently to check your line. You want a consistent black line that isn’t blown out (too deep) or faint (too shallow). -
First pass – Right side:
Start again at the top center dip. Pull the line along the right curve to meet the bottom point perfectly. Exhale as you pull the line to keep your hand steady. -
Clean and assess:
Wipe the entire area with green soap and a paper towel. Inspect the lines for any light spots or holidays (gaps). -
Touch up:
If any section looks faint, carefully go over just that segment again. Be extremely precise to avoid double lines.
Blowout Patrol
If the line looks blurry or spreads under the skin immediately, you are pressing too deep or running the machine too fast. Lighten your hand pressure.
Step 3: Aftercare
-
Final clean:
Give the tattoo a final thorough clean with green soap to remove all blood, plasma, and extra ink. -
Protect:
Apply a thin layer of aftercare ointment or a second skin bandage to protect the fresh work.
Make it Pop
Use a subtle dot-work technique for one half of the heart instead of a solid line for a modern, textured aesthetic.
Enjoy your new, permanent symbol of love


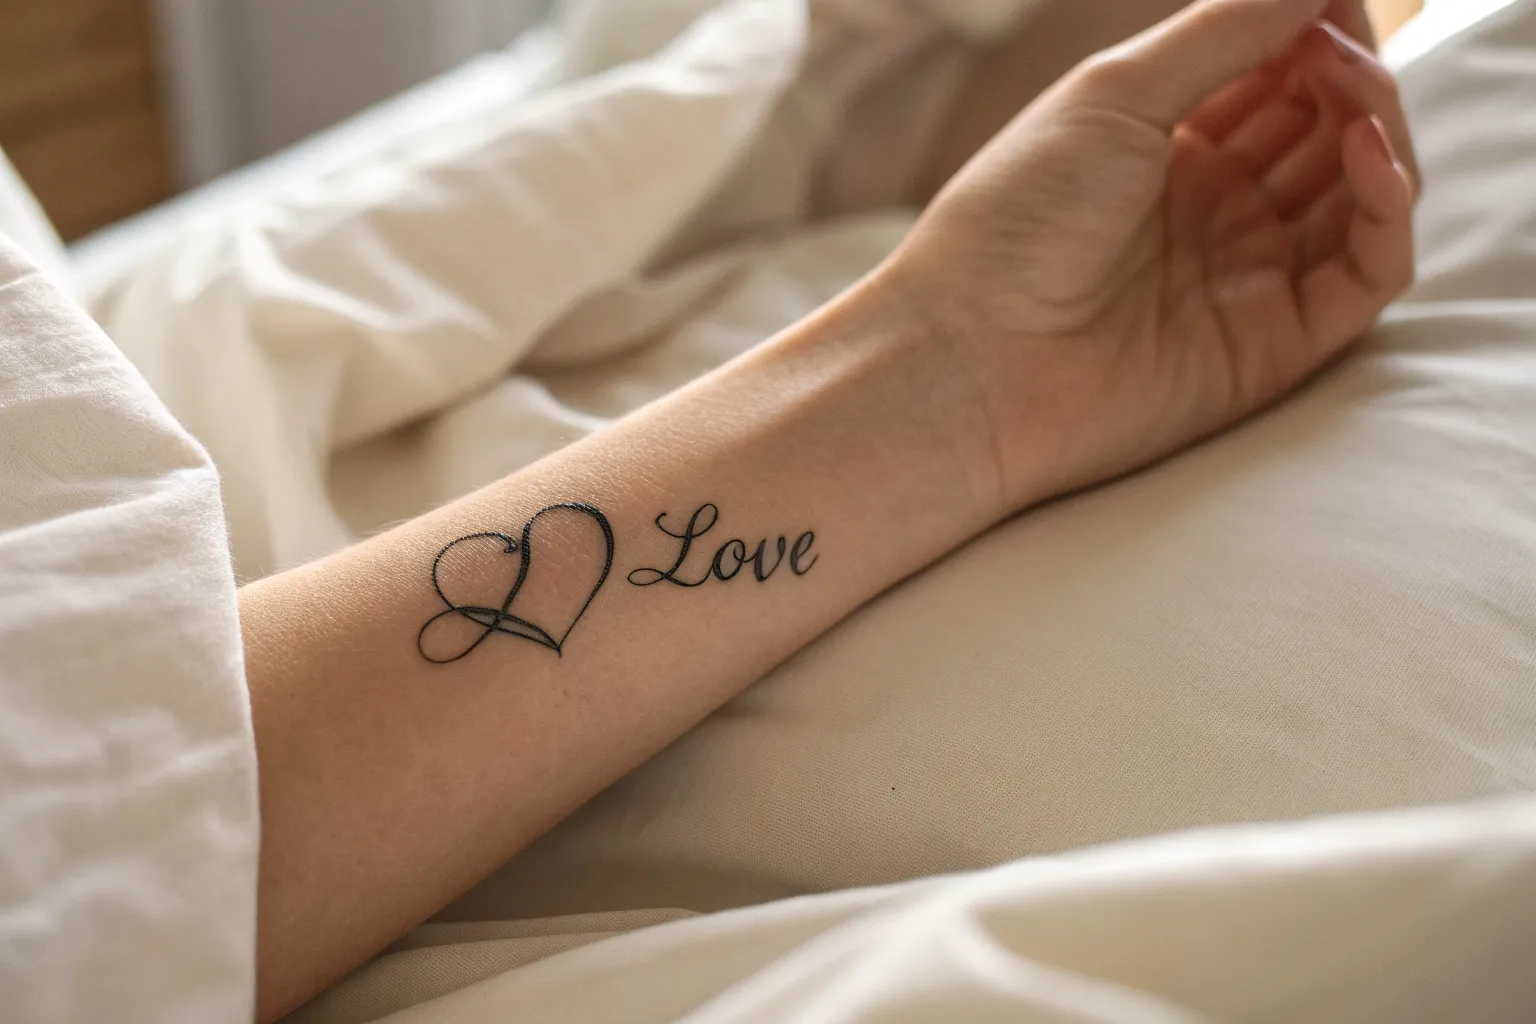
Infinity Loop With Love

This elegant line art tattoo design couples a classic infinity loop with smooth, cursive lettering for a timeless symbol of devotion. The minimalist blackwork style really lets the clean lines of the script and geometric loop shine on the forearm.
Step-by-Step
Materials
- Tracing paper
- Pencil (HB or 2B)
- Fine liner pen (0.3mm or 0.5mm, black)
- Tattoo transfer paper (hectograph paper)
- Tattoo machine (liner setup)
- 3RL or 5RL tattoo needle cartridge
- Black tattoo ink
- Stencil stuff or transfer gel
- Green soap & paper towels
- Skin marker (surgical)
- Vaseline or tattoo glide
- Disposable gloves
Step 1: Design Preparation
-
Drafting the loop:
Begin by sketching a simple infinity symbol (a sideways figure-eight) on plain paper. Aim for a balanced shape where both loops are approximately the same size, with a slightly flattened top and bottom for a sleek look. -
Adding the script:
Just above the center crossing point of the infinity loop, lightly sketch the word ‘Love’ in cursive. The ‘L’ should be capitalized with a nice loop at the top, and the ‘ove’ should flow together smoothly. -
Refining the placement:
Adjust the spacing so the word ‘Love’ hovers centered above the loop, leaving a small, airy gap between the text and the symbol so they don’t touch. -
Finalizing the line weight:
Go over your pencil sketch with a fine liner pen to finalize the design. Keep the line weight consistent for the loop, but allow for slight variation in the calligraphy of ‘Love’ to mimic pen pressure—thicker on downstrokes, thinner on upstrokes. -
Creating the stencil:
Place your final drawing over a sheet of hectograph transfer paper. Firmly trace over every line with a ballpoint pen to create the purple stencil on the back of your tracing sheet.
Step 2: Stencil Application
-
Preparing the skin:
Clean the forearm area thoroughly with green soap and water. Shave the area if necessary to ensure a smooth canvas. -
Applying transfer gel:
Apply a thin, even layer of Stencil Stuff or transfer gel to the skin. It should be tacky to the touch, not wet or dripping. -
Placing the design:
Carefully press the stencil onto the center of the forearm. Hold it in place for a few seconds without shifting, then peel it back gently to reveal the purple outline. -
Drying time:
Allow the stencil to dry completely for about 10-15 minutes. This prevents the lines from wiping away when you start tattooing.
Wobbly Lines?
If your hand shakes, stretch the skin tighter with your non-tattooing hand. Proper stretching creates a flatter surface and stabilizes the needle.
Step 3: Tattooing Process
-
Setting up:
Load a 3RL or 5RL needle into your machine. I prefer a 3RL for delicate script like this to keep it looking crisp. Pour your black ink into a small cap. -
Lining the ‘Love’:
Start with the text to avoid smudging the stencil below it. Begin at the top of the ‘L’, moving slowly and keeping your needle depth consistent (around 1.5mm). -
Connecting the letters:
Move smoothly into the lowercase letters. Focus on the transitions between ‘o’, ‘v’, and ‘e’, ensuring the cursive connections are seamless. -
Enhancing the script:
If you drafted variable line weights, carefully build up the downstrokes of the letters by making a second precise pass right next to the first one to thicken them slightly. -
Starting the loop:
Dip for fresh ink and apply a thin layer of glide over the stencil. Start lining the infinity symbol from the center crossing point, moving outward to the left loop. -
Completing the curve:
Maintain a steady hand speed to keep the loop line very thin and uniform. Complete the left loop, cross the center, and flow into the right loop in one continuous motion if possible. -
Closing the shape:
Connect the final curve back to the center point. Check for any lighter spots in the line work and carefully touch them up without widening the line. -
Final clean:
Gently wipe away excess ink and plasma with green soap and a paper towel. Check the design one last time for clarity.
Customize It
Incorporate a tiny heart into the script’s tail or add a significant date in small block font inside one of the infinity loops.
Now you have a delicate, permanent reminder of everlasting affection right on your arm


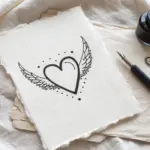
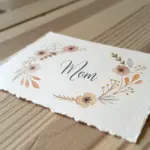
Heart and Banner Name
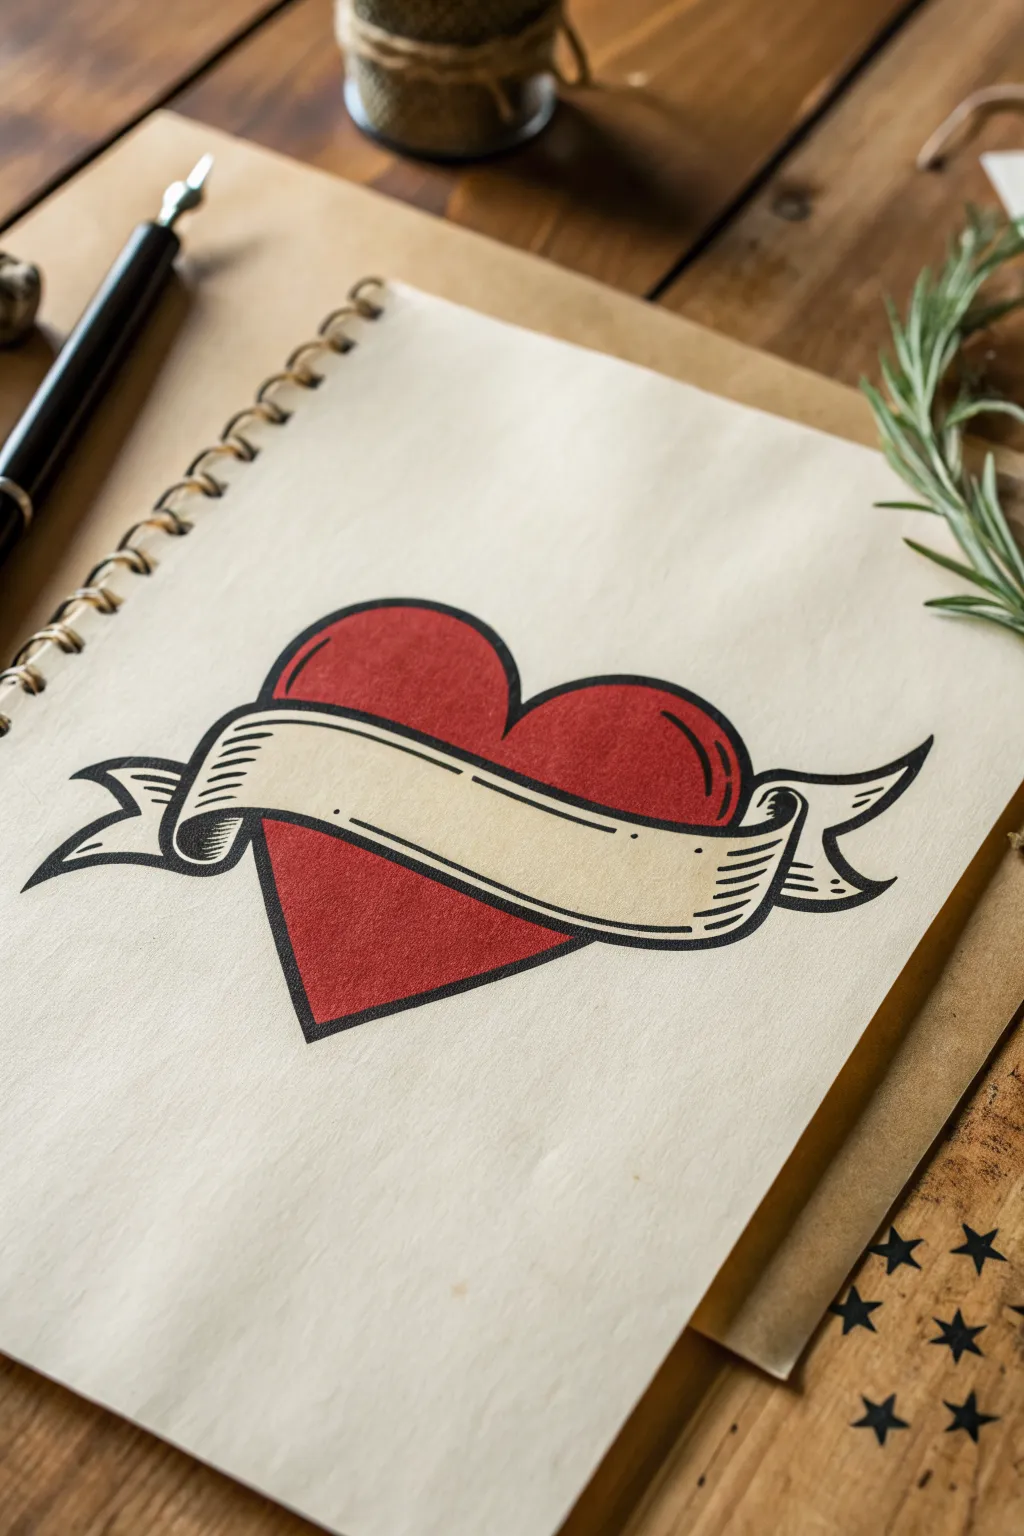
Learn to draw this timeless tattoo motif featuring a bold red heart wrapped in a flowing, blank banner ready for personalization. The style mimics traditional ink illustrations with clean linework and subtle texture shading.
Detailed Instructions
Materials
- Sketchbook with cream or off-white paper
- Pencil (HB or 2H)
- Kneaded eraser
- Black ink fineliners (0.1mm, 0.3mm, 0.5mm)
- Black brush pen or broad marker
- Red alcohol-based marker (vintage or brick red)
- Beige or light warm grey marker (optional for banner)
- White gel pen (optional)
Step 1: Penciling the Framework
-
Establish the heart shape:
Start by lightly sketching a symmetrical heart in the center of your page. Keep the drawn line faint as this is just a guide. Focus on making the curves at the top roughly equal in size. -
Draft the central banner:
Draw a long, curving rectangular strip that cuts horizontally across the heart. It should sit slightly below the middle point, obscuring part of the heart’s shape. -
Add the banner folds:
I like to sketch the ribbon ends folding behind the main strip. Draw the tails curving backward and ending in a ‘V’ or fishtail shape on both the left and right sides. -
Refine the overlap:
Erase the parts of the heart that are now ‘hidden’ behind the banner to clear up your view. Define the connection points where the ribbon folds over itself.
Uneven Heart Curves?
Draw an upside-down triangle first, then add two semi-circles on top of the flat base. This geometric trick helps keep both lobes of the heart symmetrical before you refine the outline.
Step 2: Inking the Outline
-
Commit to the banner lines:
Using a 0.5mm fineliner, trace the outline of the banner first. Since it sits in the foreground, these lines should remain unbroken and confident. -
Ink the heart outline:
Trace the visible parts of the heart with the same 0.5mm pen. Remember to stop your line exactly where it meets the banner. -
Add line weight variation:
Go back over the outer perimeter of the entire design (the outside of the heart and the outside edges of the banner) with a slightly thicker line or a brush pen to make the sticker-like silhouette pop. -
Erase pencil guides:
Wait at least five minutes for the ink to fully cure, then gently erase all remaining pencil marks with your kneaded eraser.
Level Up: Lettering
Sketch a name or word like ‘MOM’ or ‘LOVE’ lightly in pencil first. Use a serif font and curve the baseline of the letters to match the curve of the banner for a professional look.
Step 3: Color & Shading
-
Fill the heart:
Use your brick red marker to fill the heart shape. Apply the ink efficiently to keep the color solid and uniform, but avoid coloring inside the banner. -
Base tone for the banner:
If you want an aged look, color the banner with a very pale beige or warm light grey marker. Leaving it paper-white works too, but a tint adds dimension. -
Initial shading with lines:
Switch to a 0.1mm fineliner. Add small, parallel hatch marks inside the folds of the ribbon where shadows would naturally fall. -
Deepen the fold shadows:
Use your black brush pen or a thick marker to fill in the tiny triangular gaps where the ribbon folds tightly against itself, creating deep contrast. -
Add shine lines:
On the top curves of the heart, add two small, curved highlight lines using a 0.3mm pen. This mimics the classic ‘flash tattoo’ relfection style. -
Detail the banner edges:
Add faint, short lines running parallel to the top and bottom edges of the banner strip to suggest a rolling, fabric texture. -
Final clean up:
Check your heavy black outlines. If the red marker bled slightly, crisp up the edges again with your thickest black pen.
Now you have a classic piece of flash art ready to be filled with a name or kept as a sleek graphic design


Single-Word Love Script
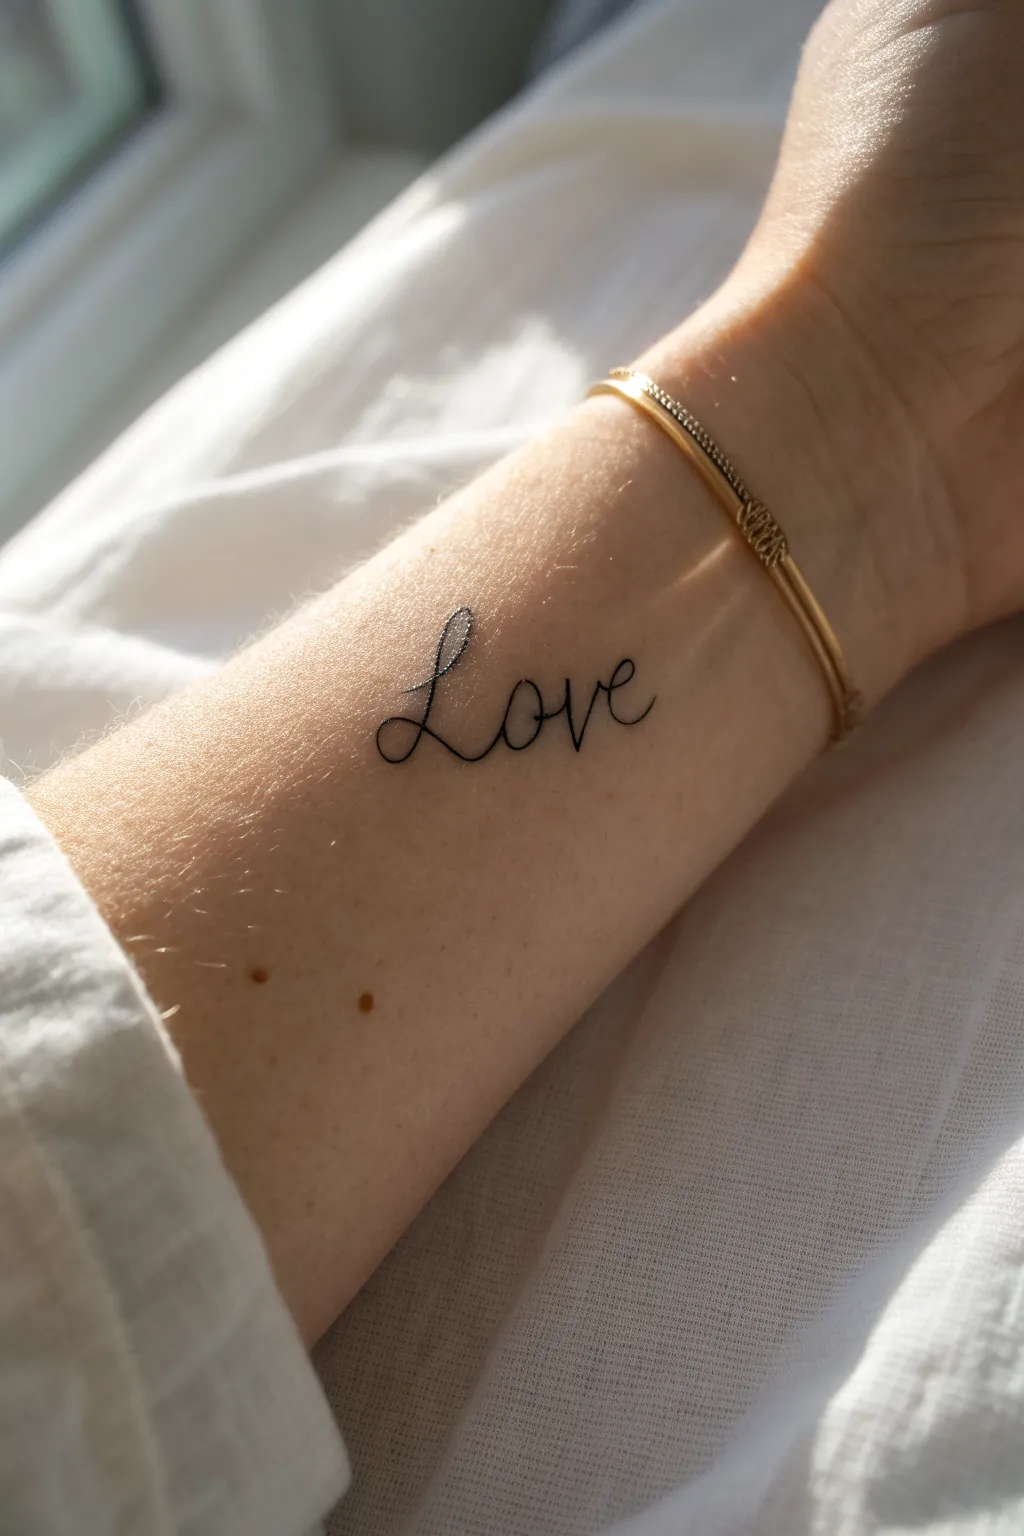
Follow this guide to create a fine-line script tattoo that embodies simplicity and affection. The result is a crisp, airy design on the inner wrist that looks elegant and timeless.
Step-by-Step Tutorial
Materials
- Professional tattoo machine (pen style or rotary preferred composed for lining)
- 3RL or 5RL tattoo needle cartridge (Round Liner)
- Black tattoo ink
- Ink caps
- Stencil paper
- Stencil transfer solution
- Green soap and squeeze bottle
- Medical-grade gloves
- Paper towels
- Petroleum jelly or tattoo process butter
- Skin marker (surgical pen)
- Razor
Step 1: Preparation and Stencil
-
Design the script:
Sketch the word ‘Love’ on paper first to perfect the flow. Aim for a looped, continuous cursive style where the ‘L’ is large and open, and the ‘e’ curls gently upward at the end. -
Create the stencil:
Place your design over the carbon sheet of your stencil paper. Trace over your sketch firmly with a ballpoint pen to create the transfer. -
Prepare the skin:
Put on fresh gloves. Clean the inner wrist area thoroughly with green soap and water to remove oils. -
Shave the area:
Gently shave the placement area, even if hair isn’t visibly thick, to ensure the stencil adheres perfectly and the needle moves smoothly. -
Apply transfer solution:
Apply a small drop of stencil transfer solution to the skin. Rub it in until the skin is tacky but not soaking wet. -
Place the stencil:
Carefully press the stencil onto the wrist. Ask the client to relax their hand so the skin sits naturally. Hold firmly for a few seconds. -
Peel and dry:
Peel the paper back carefully to reveal the purple outline. Allow this to dry completely for at least 10 minutes so it won’t wipe away during tattooing.
Steady Hands
For smooth script, lock your wrist and move using your whole arm or elbow. This prevents the ‘jittery’ look that comes from just moving your fingers.
Step 2: Tattooing the Outline
-
Setup the machine:
Load your tattoo machine with a clean 3RL or 5RL needle. A 3RL is best for that ultra-thin look seen in the photo, while a 5RL offers slightly more stability. -
Dip ink:
Pour fresh black ink into a cap. Dip the needle tip briefly while the machine is running to pick up the pigment. -
Lubricate the skin:
Apply a very thin layer of tattoo butter explicitly over the stencil area. This prevents the ink from pooling and obscuring your lines. -
Anchor your hand:
Stretch the skin taut with your non-tattooing hand. Place the side of your tattooing palm against the arm for stability. -
Begin the ‘L’:
Start at the top loop of the ‘L’. Exhale steadily as you pull the line. Keep your voltage moderate so you can move your hand at a comfortable, consistent speed. -
Maintain constant depth:
Ensure the needle depth remains consistent—just beneath the surface layer. Going too deep will cause a ‘blowout’ making the delicate script look blurry. -
Connect the letters:
Move fluidly from the bottom of the ‘L’ into the ‘o’. I like to lift the needle slightly at transition points to breathe, but try to keep the line continuous if possible. -
Execute the ‘v’ and ‘e’:
Focus on the spacing between the ‘v’ and the ‘e’. Keep the loops open and airy. Finish with a clean, confident flick upward on the tail of the ‘e’. -
Clean and check:
Gently wipe away excess ink with a paper towel dampened with green soap. Do not scrub, just dab. -
Final touches:
Inspect the lines for any faint spots. If needed, carefully re-line only the gaps to ensure a solid black saturation without thickening the line weight.
Placement Magic
Place the stencil slightly higher on the wrist than you think necessary. This avoids the crease lines where the skin folds, which can cause ink to fade quickly.
Once healed, this dainty script will serve as a permanent, elegant reminder of love
BRUSH GUIDE
The Right Brush for Every Stroke
From clean lines to bold texture — master brush choice, stroke control, and essential techniques.
Explore the Full Guide
Lock and Key Pair
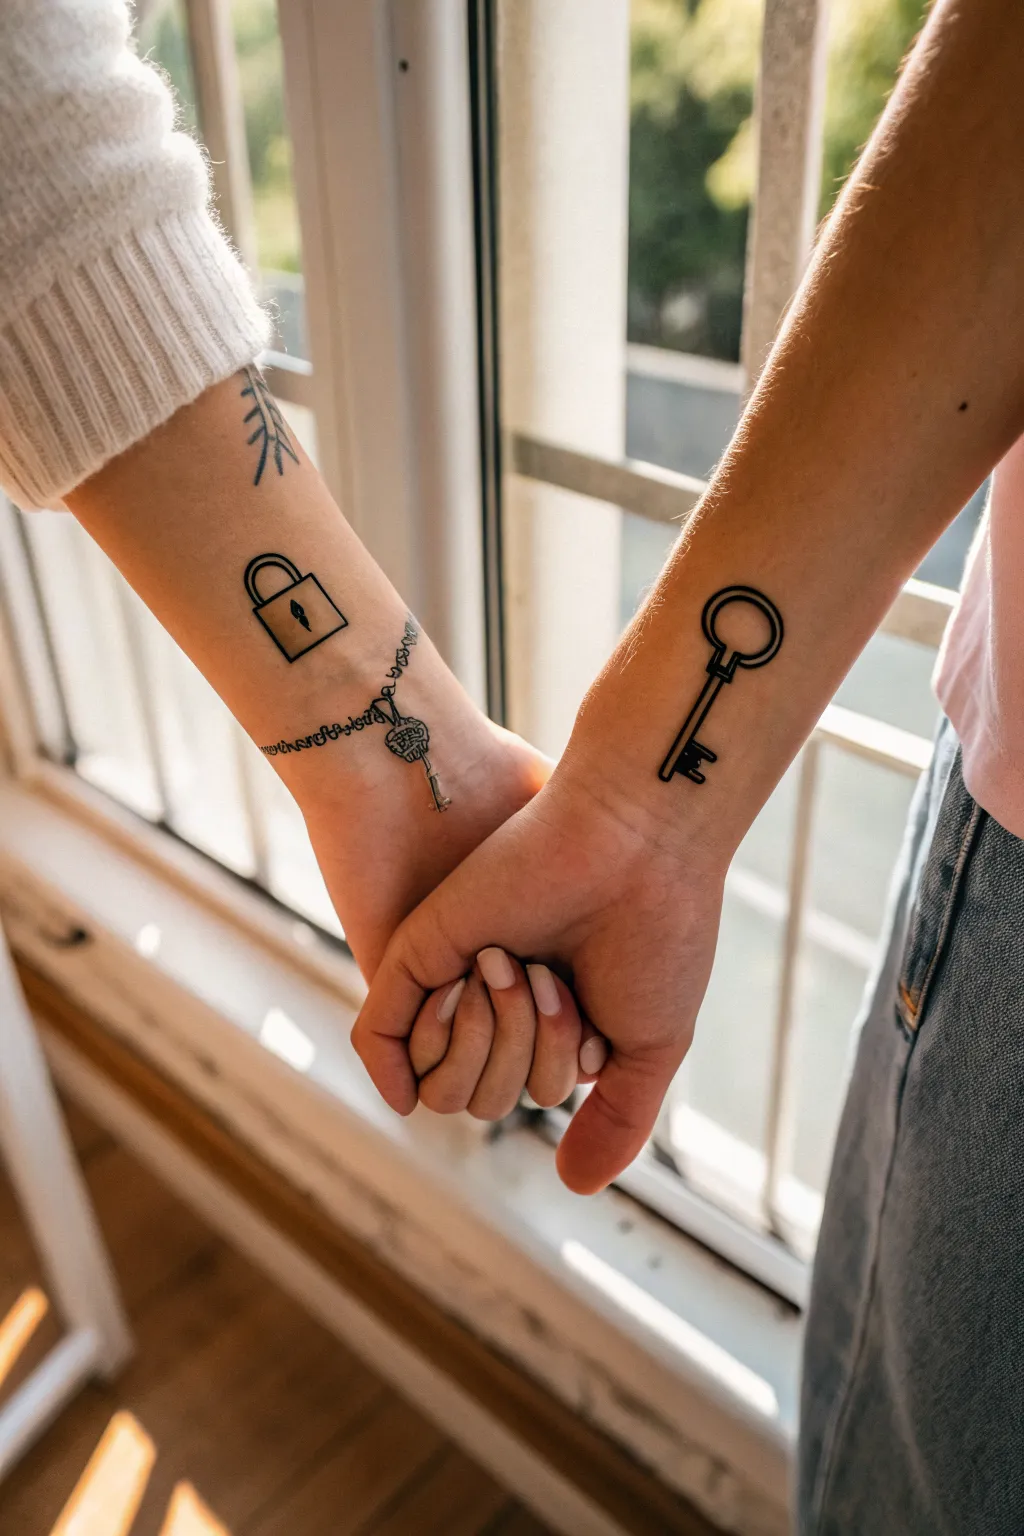
This minimalist couple’s tattoo design features a bold line-art padlock on one arm and a classic skeleton key on the other, symbolizing a perfect fit. The look relies on clean, consistent linework and precise placement to ensure the duality of the connection is clear when holding hands.
Detailed Instructions
Materials
- Tattoo machine (pen style suggested for lining)
- Round Liner (RL) cartridges (specifically 7RL and 5RL)
- Black tattoo ink
- Stencil paper and transfer gel
- Green soap and squeeze bottle
- Disposable gloves
- Paper towels
- Vaseline or tattoo balm
- Alcohol wipes
- Sterile ink caps
- Skin marker (surgical pen)
Step 1: Preparation & Stencil
-
Design the pair:
Begin by sketching the lock and key designs on paper or a tablet. For the lock, draw a simple square body with a semi-circle shackle on top and a small keyhole in the center. For the key, draft a classic skeleton key shape with a circular handle, a long shaft, and a rectangular bit at the end. -
Match the scale:
Ensure the visual weight of both objects is balanced; the key shouldn’t look significantly larger or smaller than the lock. Print both designs at the desired size, roughly 2-3 inches in height -
Transfer to stencil:
Trace your final designs onto the carbon sheet of your stencil paper. Press firmly to ensure a solid, unbroken purple line on the transfer sheet. -
Prep the skin:
Clean the inner forearm area on both clients with green soap, then shave the area. Wipe down with an alcohol pad to remove oils and let it air dry completely. -
Apply the stencil:
Apply a thin, even layer of stencil transfer gel. Place the ‘lock’ stencil on the first person’s inner wrist and the ‘key’ on the second person’s corresponding wrist. I always ask the couple to hold hands at this stage to check the visual alignment before the stencil dries. -
Dry time:
Allow the stencils to dry on the skin for at least 10-15 minutes. This prevents the purple lines from wiping away during the tattooing process.
Pro Tip: Line Weight
Use a thicker needle (7RL or 9RL) for the outer perimeter and a thinner one (3RL or 5RL) for interior details. This contrast makes the simple design pop.
Step 2: Lining the Key
-
Set up machine:
Load a 7RL (7 Round Liner) cartridge for the main outline. Set your voltage appropriate for lining (usually between 7-9V depending on your machine). -
Outline the handle:
Dip into black ink and start with the circular handle of the key. Pull a steady, continuous curve. If you can’t do the full circle in one pass, break where lines naturally intersect. -
Draw the shaft:
Draw the two parallel lines for the shaft of the key, connecting the handle to the bit. Keep your hand speed consistent to avoid blowouts. -
Detail the bit:
Carefully line the teeth of the key. These are small right angles, so slow down your hand movement to keep corners sharp rather than rounded. -
The collar detail:
Add the small horizontal ring (the collar) just below the handle using a single crisp line.
Step 3: Lining the Lock
-
Outline the body:
Move to the second arm. Using the same 7RL, tattoo the square body of the padlock. Ensure the corners are crisp 90-degree angles. -
Add the shackle:
Create the double-lined arch on top of the square body. Ensure the spacing between the inner and outer arch lines remains parallel throughout the curve. -
Switch needles:
Switch to a finer 5RL cartridge for the internal detail. This creates a subtle hierarchy in line weight. -
Add the keyhole:
In the center of the lock body, tattoo the small keyhole design. This requires precision, so anchor your hand firmly.
Level Up: Chain Link
Add a delicate fine-line chain bracelet connecting to the lock, wrapping around the wrist for a jewelry effect that integrates the tattoo.
Step 4: Cleaning & Aftercare
-
Final wipe:
Gently wipe away excess ink and plasma using green soap and a paper towel. Inspect the lines for any gaps or light spots. -
Refine lines:
If any lines look faint, do a quick second pass explicitly strictly over the existing line to bolden it without creating a ‘double line’ effect. -
Protect:
Apply a thin layer of soothing tattoo balm or a second-skin bandage to protect the fresh work.
Once healed, these complementary tattoos serve as a permanent reminder of your connection every time you reach for each other’s hand
Split Heart That Connects
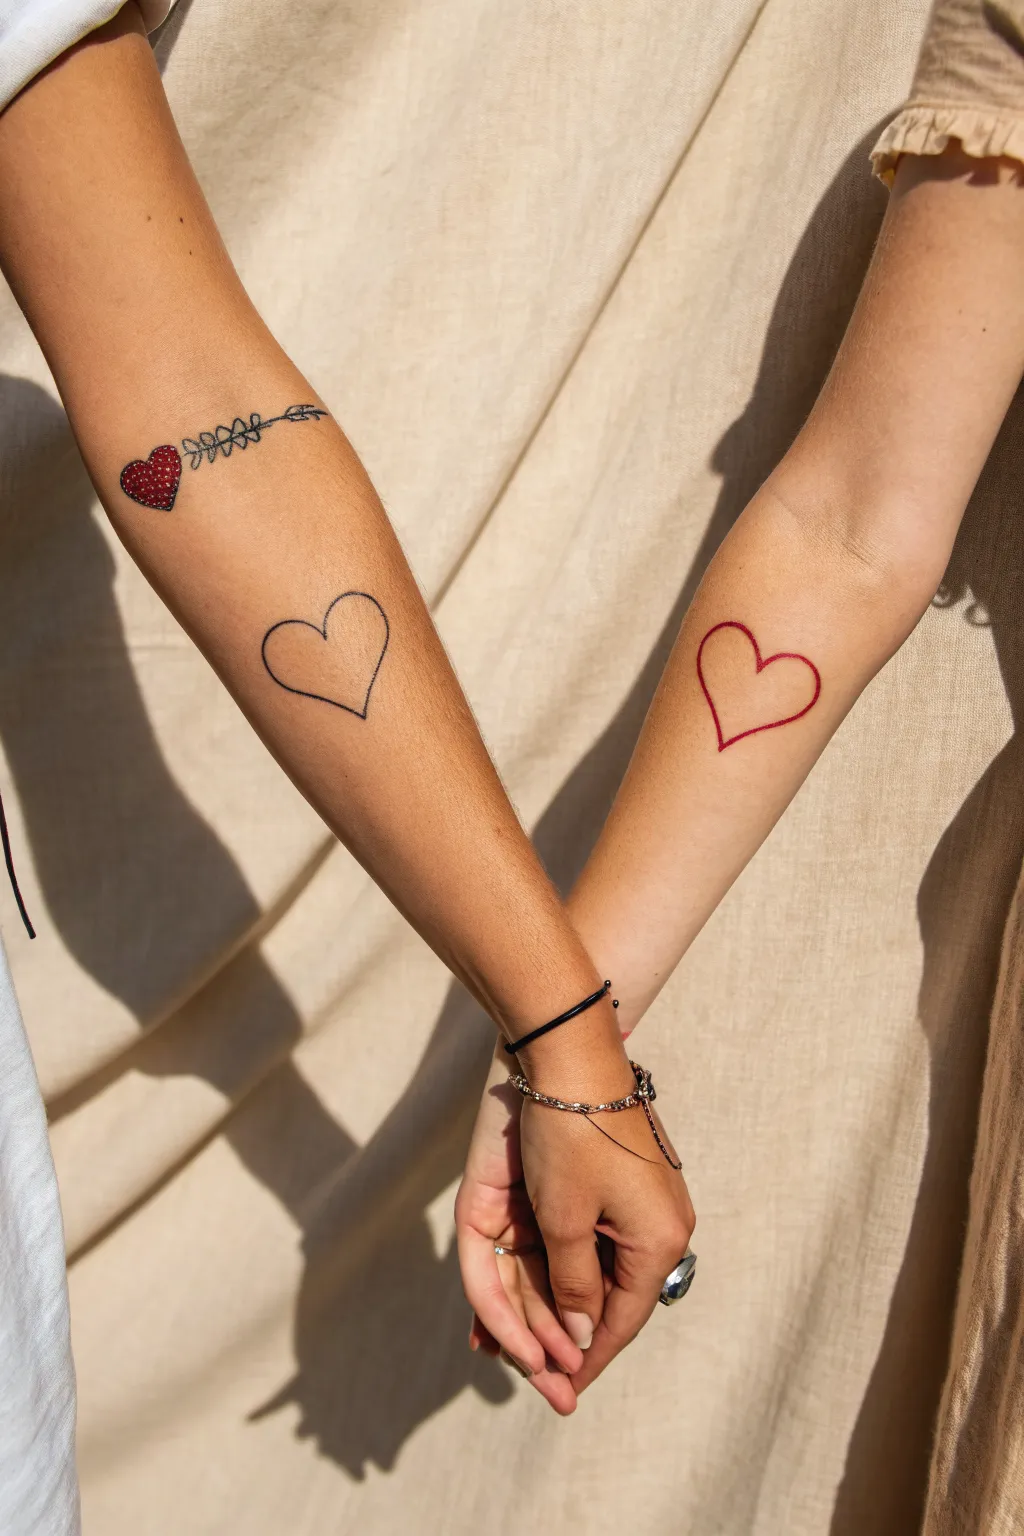
This minimalist project creates a pair of complementary heart tattoos designed to stand alone yet connect visually when arms are brought together. One design features a crisp black outline while its partner mirrors the shape in vibrant red ink.
Step-by-Step Guide
Materials
- Tattoo stencil paper
- Stencil transfer gel or deodorant stick
- Fine-point black tattoo marker (or gentian violet pen)
- Black tattoo ink (lining formula)
- Red tattoo ink (lining formula or high pigment)
- Round liner cartridge needles (3RL and 5RL)
- Tattoo machine
- Green soap and squeeze bottle
- Paper towels
- Petroleum jelly or tattoo ointment
- Disposable gloves and ink caps
Step 1: Design and Placement
-
Prepare the stencil design:
Begin by drawing a simple, symmetrical heart shape on your transfer paper. Since these hearts need to look like a pair, I prefer tracing the first one to create the second so they are identical in size and curvature. -
Clean the skin:
Cleanse the inner forearm area of both subjects thoroughly with green soap and water. Shave the areas if necessary to ensure a smooth canvas. -
Apply transfer gel:
Apply a thin, even layer of stencil transfer gel to the first arm. Wait a few seconds until it feels tacky but not wet. -
Place the first stencil:
Position the first heart stencil on the inner forearm, ensuring it aligns straight with the wrist. Press firmly and peel back carefully. -
Match the placement:
Have the two subjects hold hands or place their arms side-by-side to visually align the second stencil. The goal is for the hearts to sit at the same height on the arm. -
Dry the stencils:
Allow the purple stencil transfer to dry completely for at least 10 minutes. This prevents the drawing from wiping away during the tattooing process.
Uneven Lines?
If your lines look shaky, stretch the skin tighter with your non-tattooing hand. A tight canvas is crucial for smooth, continuous straight lines.
Step 2: Tattooing the Black Outline
-
Setup the black ink:
Pour your black lining ink into a cap. Load your machine with a 5RL (Round Liner) needle for a bold, clean line. -
Apply ointment:
Smear a very thin layer of tattoo ointment over the stencil area. This lubricates the skin and keeps excess ink from pooling. -
Line the heart:
Starting at the bottom point of the heart, pull a steady line up towards the center dip. Maintain a consistent hand speed and voltage to keep the line weight uniform. -
Complete the shape:
Continue the line down the other side, meeting perfectly at the bottom point. Wipe away excess ink gently to check for any gaps or holidays in the line.
Step 3: Tattooing the Red Outline
-
Switch setup:
Change your cartridge to a fresh 5RL or 7RL needle. Red ink can sometimes be harder to see or saturate, so a slightly thicker needle grouping can help punch it in solidly. -
Load red ink:
Dip into your red ink cap. Ensure the needle reservoir is full but not dripping. -
Execute the red line:
Just as with the black heart, start from the bottom point. Move slowly and deliberately. Red ink is thinner than black, so watch closely to ensure the skin is accepting the pigment fully. -
Check saturation:
Wipe the area clean with green soap. If the red looks patchy or pinkish rather than solid red, go over the line one more time very carefully to build opacity.
Make It Unique
Instead of classic red and black, try using each person’s favorite color, or use UV reactive ink for a design that glows under blacklight.
Step 4: Arrow Detail (Optional)
-
Switch to fine liner:
For the detailed heart-and-arrow design higher on the arm, switch to a finer 3RL needle. -
Outline the small heart:
Tattoo the outline of the small heart shape first. -
Stipple the filling:
Instead of coloring it solid, use a stippling technique (dots) to fill the small heart, giving it a textured, ruby-like appearance. -
Draw the arrow:
Carefully line the arrow shaft and the leaf-like fletching details. I find using a very light touch here helps keep these delicate lines crisp.
Step 5: Aftercare
-
Final clean:
Give both tattoos a final thorough wash with green soap to remove surface blood and plasma. -
Protect:
Apply a thin layer of aftercare balm and cover with a protective film or bandage.
Enjoy your matching art that symbolizes a connection whenever you are together

PENCIL GUIDE
Understanding Pencil Grades from H to B
From first sketch to finished drawing — learn pencil grades, line control, and shading techniques.
Explore the Full Guide
Matching Finger Band Tattoos
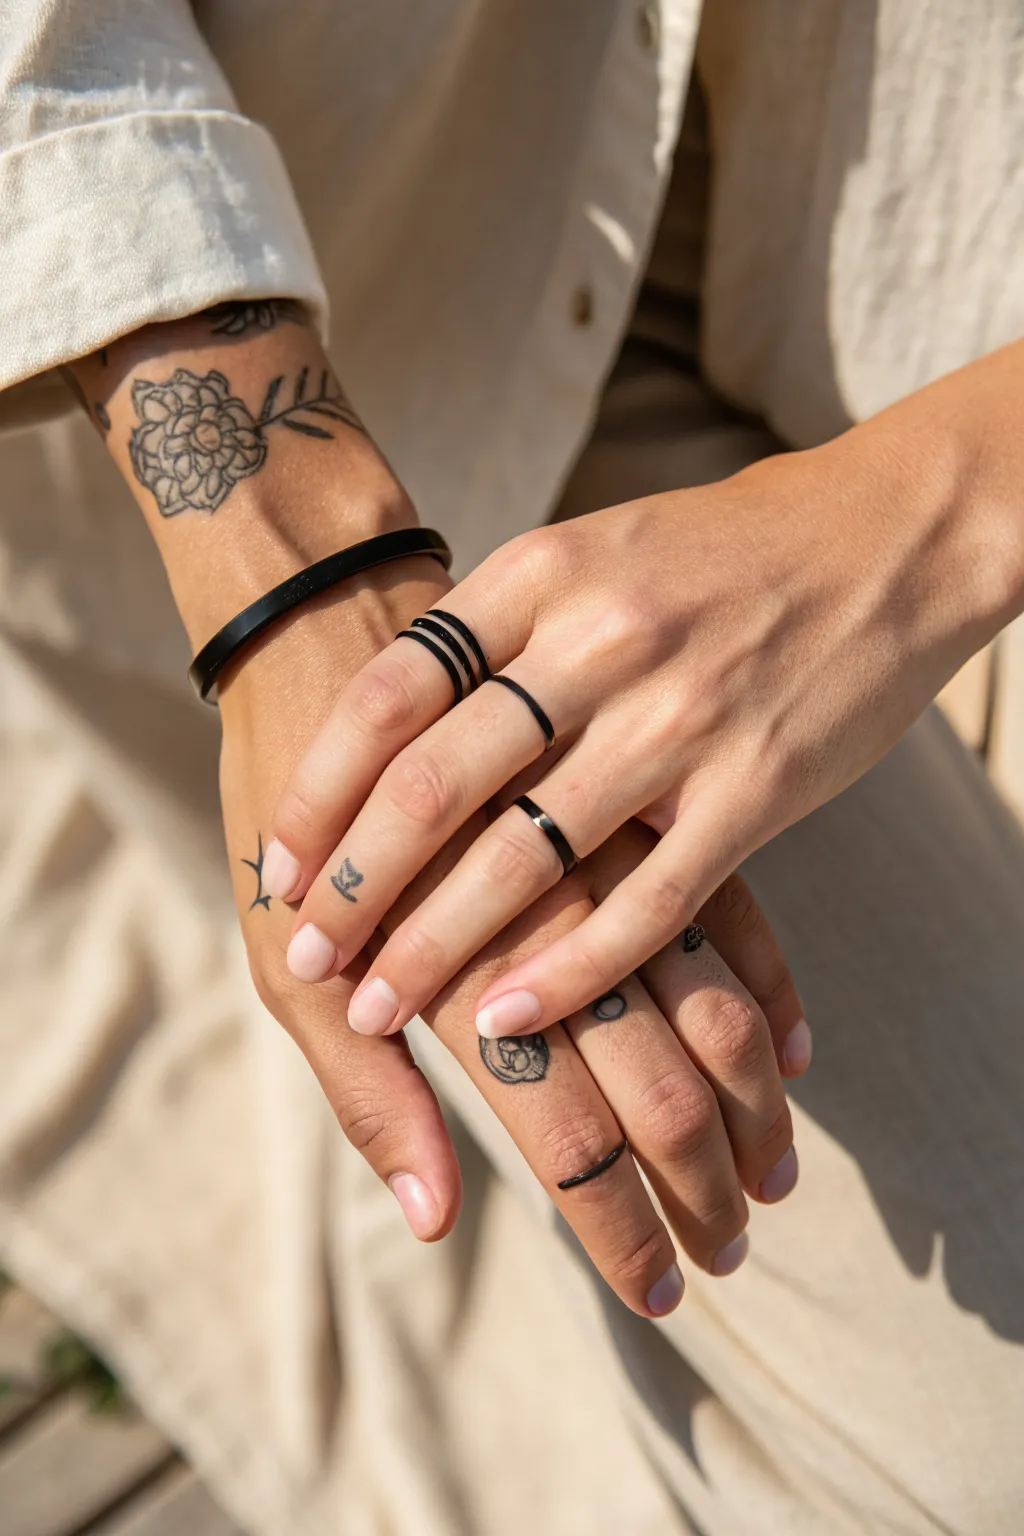
These sleek, permanent accessories offer a subtle and modern way to symbolize a connection, replacing traditional jewelry with ink. The design features bold black bands wrapped around various fingers, complemented by delicate, fine-line symbols for a personalized touch.
Step-by-Step
Materials
- Tattoo machine (pen style or coil)
- 3RL (Round Liner) tattoo needle cartridge
- 5RL (Round Liner) tattoo needle cartridge
- Dynamic Black tattoo ink (or high-quality lining black)
- Stencil paper and transfer gel
- Green soap and squeeze bottle
- Ink cups
- Petroleum jelly or tattoo glide
- Distilled water
- Disposable gloves
- Tattoo bed or armrest
- Clip cord sleeve and machine bags
- Skin marker (surgical marker)
Step 1: Preparation & Stenciling
-
Sanitize the area:
Begin by thoroughly cleaning the fingers and hands with green soap and water. Shave any fine hairs on the fingers if necessary, then sanitize with alcohol to ensure the skin is pristine. -
Measure the bands:
Using a flexible measuring tape or a strip of paper, measure the circumference of the specific phalanges where the rings will sit. This ensures the bands will close perfectly around the finger. -
Create the stencil:
Draw the straight lines for the bands on your stencil paper. Use a ruler to ensure they are perfectly straight. For the small decorative elements like the crescent moon or flower, sketch these separately on the sheet. -
Apply the transfer:
Apply a thin layer of stencil transfer gel to the finger. Position the long stencil strip around the finger carefully. It can be tricky to make the ends meet perfectly, so rework it if the alignment is off. -
Marking freehand guides:
Sometimes stencils warp on knuckles. I find it helpful to use a surgical skin marker to correct any gaps where the stencil wraps around the side of the finger to ensure a continuous loop. -
Dry time:
Allow the stencil to dry completely for at least 10-15 minutes. This is crucial on hands because the skin moves a lot, and a wet stencil will wipe away immediately.
Step 2: Tattooing the Bands
-
Setup the machine:
Load a 5RL needle for the thicker bands. Dip into your black ink. Set your voltage appropriate for lining (usually between 7-9V depending on your hand speed). -
Stretch the skin:
Finger skin is thin and tough. Stretch the skin tight across the phalanx with your non-tattooing hand. This prevents the needle from snagging or blowing out the line. -
Line the top edge:
Start by tattooing the top perimeter of the ring band. Move slowly and maintain a consistent needle depth. Hands fade easily, but going too deep causes blowouts, so aim for the upper dermis. -
Line the bottom edge:
Execute the bottom line of the ring band parallel to the first. Keep your breathing steady to ensure the gap between lines remains consistent. -
Fill the band:
If the band is intended to be solid black like the index finger ring, carefully pack black ink between the two lines using tight circular motions or a saturation pass. -
Connect the sides:
Roll the client’s finger gently to access the sides. Connect your lines so the ring appears seamless. This is the hardest part, so take your time matching up the ends.
Placement Pro Tip
Avoid the very creases of the knuckles. Ink falls out of these high-movement areas quickly. Place bands squarely on the phalanx bone for longevity.
Step 3: Adding Detail & Finishing
-
Switch needles:
Swap to a 3RL needle for the thinner, delicate bands (like on the ring finger) and the small symbols. This allows for finer detail without heavy visual weight. -
Tattoo the fine bands:
Execute the thinner, single-line rings using the 3RL. Use a light hand here; these lines should look wispy and elegant compared to the solid bands. -
Add the symbols:
Tattoo the small flower petal or moon symbol on the adjacent fingers. Use just the tip of the needle for stippling or very fine lines to keep them distinct. -
Clean and inspect:
Wipe the hand gently with distilled water and a bit of green soap. Inspect the lines for any dropouts or light spots. -
Touch up:
Finger tattoos often need immediate refinement. If a line looks shaky or faint, go over it one last time while the skin is open. -
Seal:
Apply a thin layer of tattoo aftercare balm or a specialized second-skin bandage if the placement allows for it.
Level Up: Negative Space
For the thick bands, leave a tiny sliver of skin un-tattooed in the center or create a geometric gap for a more stylized, modern jewelry look.
Enjoy the timeless elegance of your new, permanent matching accessories
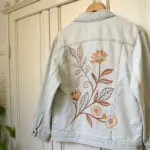
Rose Wrapped Around a Heart
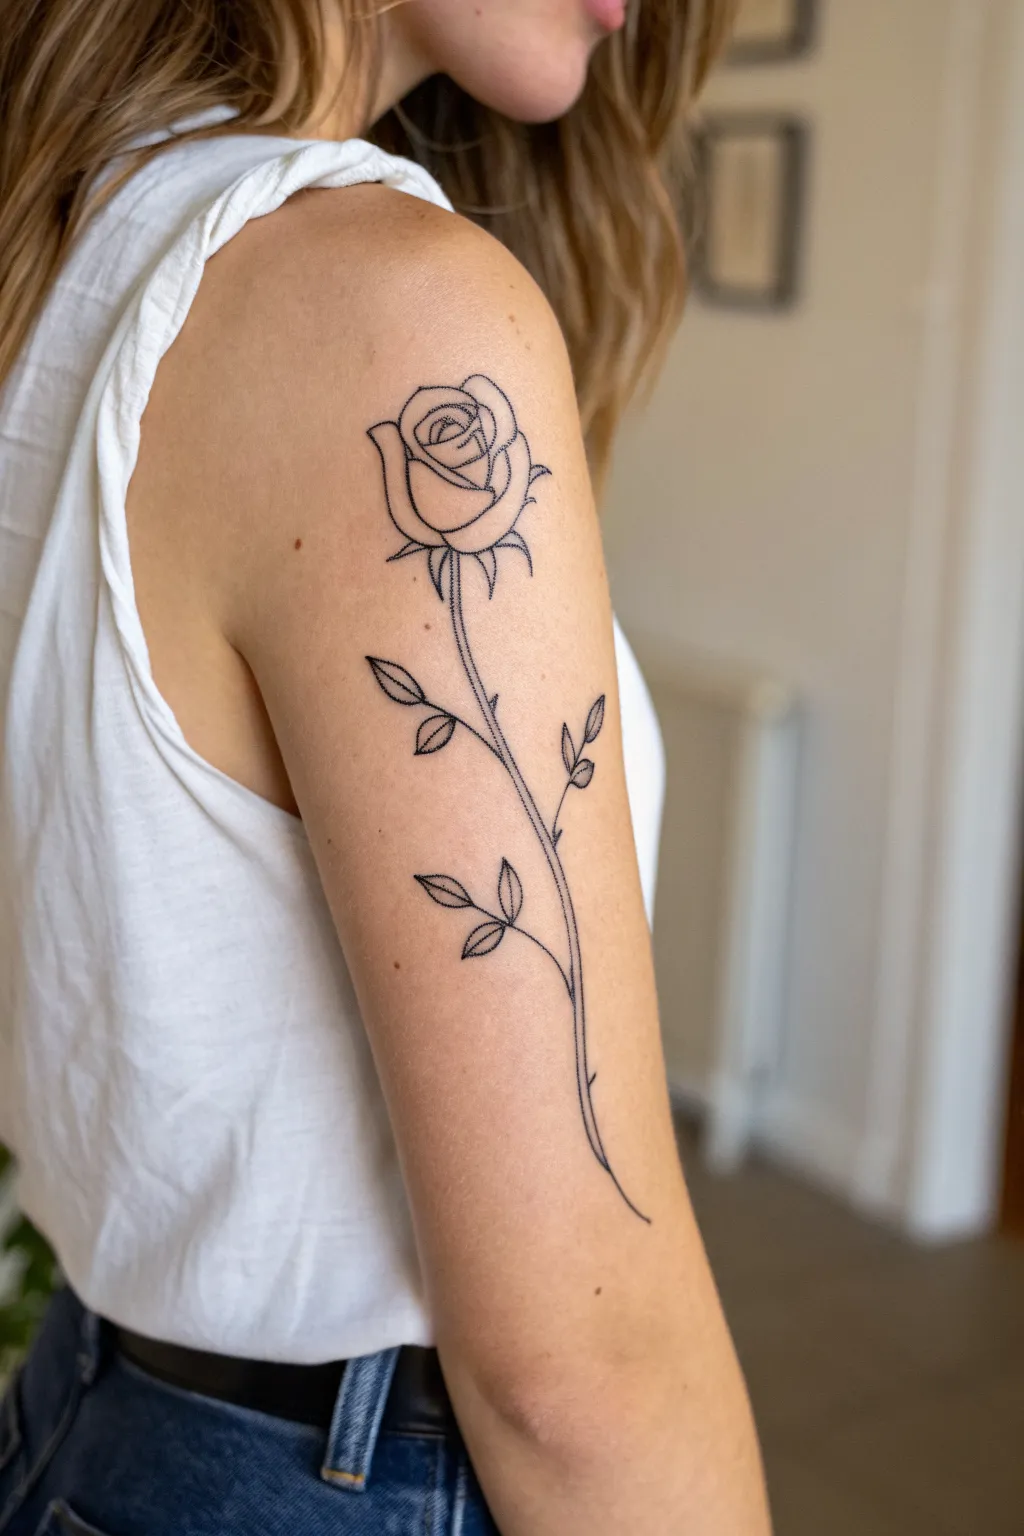
This elegant and minimalist tattoo features a delicate, fine-line rose that rests gracefully along the upper arm. The design focuses on clean contours and subtle shading, creating a timeless piece that flows naturally with the body’s curves.
Step-by-Step Guide
Materials
- Stencil paper and transfer solution
- Tattoo machine (pen style rotary preferred for fine lines)
- Round Liner needle cartridges (3RL and 5RL)
- Black tattoo ink
- Distilled water (for wash)
- Ink caps
- Green soap and squeeze bottle
- Paper towels
- Medical gloves
- Vaseline or A&D ointment
- Razor and alcohol wipes
Step 1: Preparation and Stencil Application
-
Prepare the station:
Begin by sanitizing your entire workspace. Set up your ink caps—one with solid black and one with a 50/50 grey wash (diluted black ink). Wrap your machine and cord with barrier film to ensure sterility. -
Clean the skin:
Clean the client’s upper arm area thoroughly with green soap. Use a razor to shave the area, removing all fine hairs to ensure the stencil transfers clearly and the needle doesn’t snag. -
Disinfect and dry:
Wipe the shaved area with an alcohol pad to remove oils. Let it air dry completely for a moment before applying the stencil stuff. A little goes a long way here; you want the skin tacky, not wet. -
Position the stencil:
Apply your rose stencil so the bloom sits on the upper deltoid and the stem follows the natural vertical line of the tricep. Ask the client to stand naturally with their arm down to check the flow. -
Let it set:
Once the placement is perfect, peel the paper back and press the design gently. Allow the stencil to dry for at least 10–15 minutes. If you start too soon, you risk wiping away your guide.
Clean Lines
If you notice your stencil rubbing off while working, stop immediately. Apply a tiny dot of stencil fix or Vaseline to preserve the remaining lines before continuing.
Step 2: Linework
-
Load the liner:
Insert a 5RL (5 Round Liner) cartridge into your machine. Dip into solid black ink. I find starting with the main stem gives a good anchor for the rest of the piece. -
Outline the stem:
Begin at the bottom of the stem, pulling a long, steady line upwards. Keep your hand speed consistent to avoid shaky lines. The stem shouldn’t be perfectly straight; add subtle curves to mimic organic growth. -
Draw the leaves:
Work up the stem, outlining the leaves. For the pointed tips, taper your stroke by lifting the needle slightly as you exit the line, creating a sharp, crisp finish. -
Outline the rose petals:
Move to the flower head. Start from the center spiral and work outward. The petals should interact, overlapping gracefully. Keep your needle depth shallow but consistent to prevent blowouts on this delicate skin. -
Add the sepals:
Outline the small, leafy sepals at the base of the rose head where it meets the stem. These should have slightly sharper angles than the soft petals.
Soft Shade
Use a grey wash for stippling instead of solid black. This creates a much softer, more realistic gradient that heals into a gentle shadow rather than harsh dots.
Step 3: Shading and Details
-
Switch needles:
Swap your 5RL for a finer 3RL cartridge. This will be used for the delicate stippling and internal details that give the rose dimension without heavy shading. -
Add leaf veins:
Inside the leaves, draw the central vein using a very light touch. It doesn’t need to connect all the way to the tip; a broken line often looks more artistic here. -
Stipple shading basics:
Lower your machine voltage slightly. Using a whipping motion or pointillism technique, add tiny dots at the base of the petals and leaves where shadows would naturally fall. -
Shade the petals:
Concentrate your stippling near the center of the rose spiral and under the overlapping folds of the outer petals. This creates depth while keeping the piece feeling light and airy. -
Detail the thorns:
If you are including the small thorns along the stem, use the 3RL to add just a tiny bit of weight to their underside, making them look sharp. -
Clean and reveal:
Gently wipe away excess ink and plasma with green soap and a paper towel. wiping away from the stencil if any remains. This is the moment you see the clean, crisp lines clearly. -
Final check:
Inspect the lines for any gaps or light spots. Touch up with the 3RL if necessary. Apply a thin layer of ointment to soothe the skin and protect the fresh tattoo.
Enjoy the timeless beauty of this floral piece as it heals into a stunning work of art


Sun and Moon Love Pair
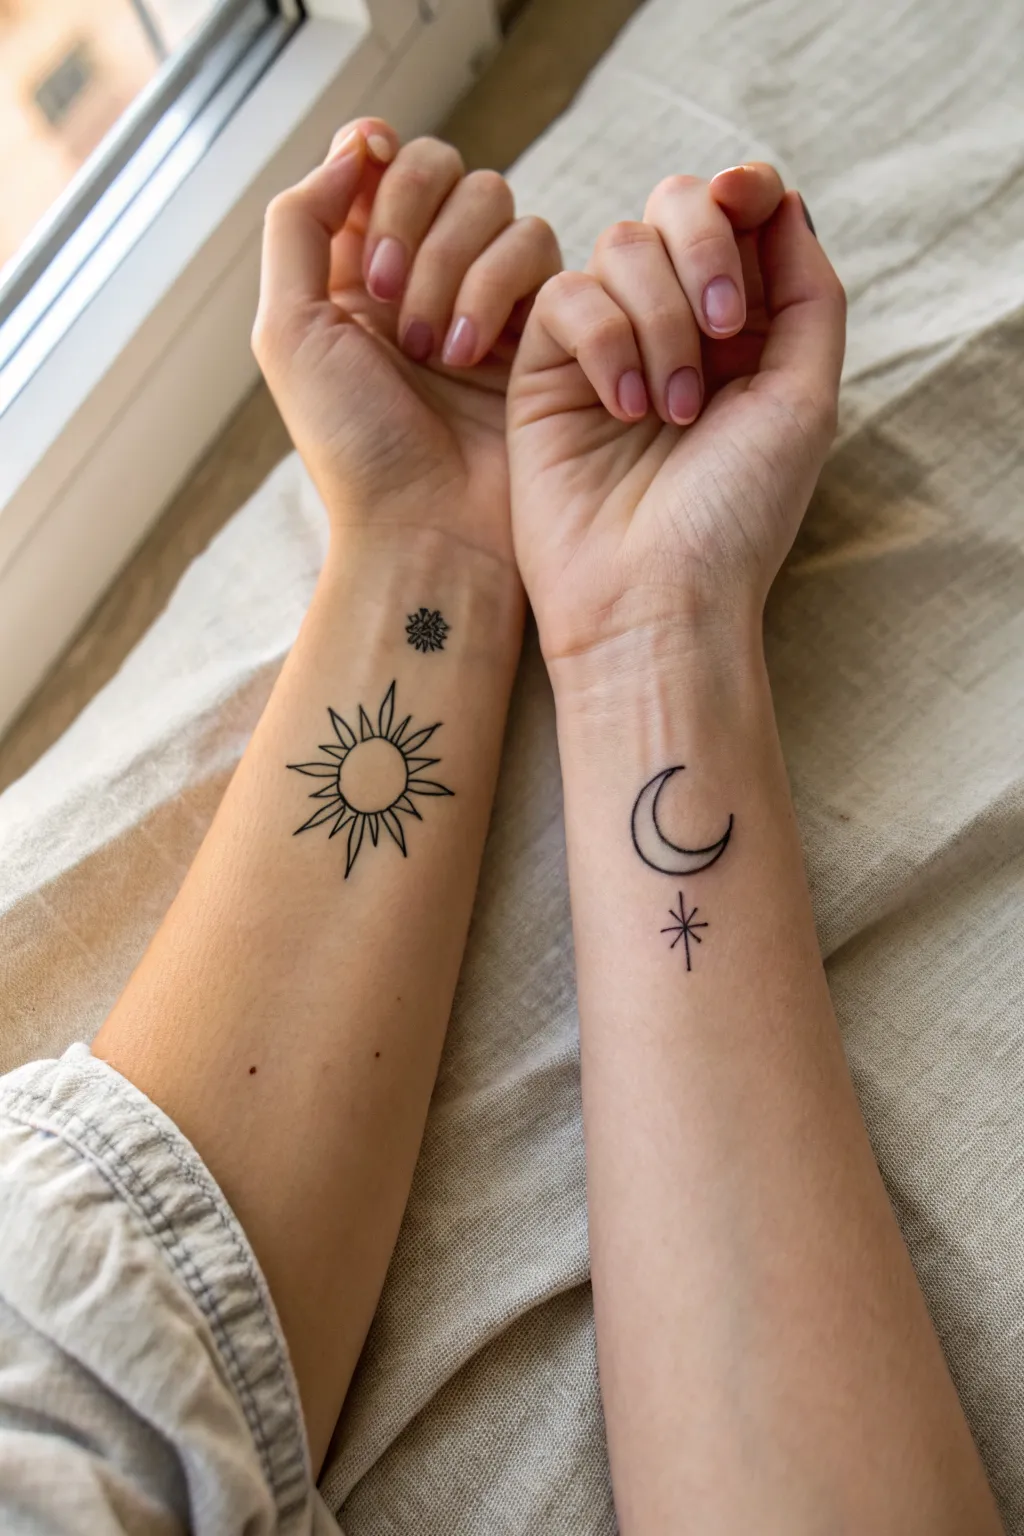
Capture the eternal dance of day and night with these complementary fineline designs featuring a stylized sun and crescent moon. This pair relies on clean, minimalist linework to create a balanced aesthetic perfect for wrists or forearms.
Step-by-Step Tutorial
Materials
- Tattoo machine (pen style preferred for stability)
- Round Liner (RL) cartridges: 3RL and 5RL
- High-quality black tattoo ink
- Stencil paper and thermal printer (or hand tracing tools)
- Stencil transfer gel
- Green soap and squeeze bottle
- Vaseline or ink glide
- Disposable gloves and sterile setup
- Razor and rubbing alcohol
Step 1: Preparation & Stenciling
-
Design the Solar Element:
Begin by drawing a perfect circle for the sun’s core. Surround it with a ring of triangular rays; alternate between slightly longer, sharper triangles and slightly shorter ones to give it a dynamic, radiating look. Add a tiny, messy starburst floating just above the rays. -
Design the Lunar Element:
Sketch a clean crescent moon shape. Ensure the curve is smooth and the points taper to sharp ends. Directly below the moon, draw a simple star composed of a vertical line intersected by a horizontal line, with two smaller diagonal lines crossing the center. -
Create the Transfer:
Transfer your finalized designs onto thermal stencil paper. Being precise here is crucial because fineline tattoos leave no room for hiding shaky stencils. -
Skin Prep:
Clean the inner wrist area thoroughly with green soap, then shave the area gently even if no hair is visible. Finish by sanitizing with rubbing alcohol and letting it air dry completely. -
Apply the Stencil:
Apply a thin, even layer of stencil transfer gel. Place the sun stencil on the left wrist and the moon on the right wrist, ensuring they align symmetrically when the arms are held side-by-side. Peel back the paper carefully and let the purple stencil dry for at least 10 minutes.
Stay Steady
For long curves like the moon, exhale slowly while pulling the line. This prevents micro-shakes that occur when holding your breath.
Step 2: Linework – The Sun
-
Load the Machine:
Set up your machine with a 5RL cartridge for the main structural lines. Dip into your black ink cap, ensuring the needle reservoir is full but not dripping. -
Outline the Core:
Start with the central circle of the sun. Stretch the skin taut with your non-drawing hand to ensure a crisp line. Execute the circle in one or two steady passes, maintaining consistent needle depth. -
Execute the Rays:
Move outward to the triangular rays. Connect the base of each triangle to the central circle cleanly. I find it helpful to pull the needle away from the circle toward the tip of the triangle to keep the points sharp. -
Detail the Starburst:
Switch to a 3RL cartridge for finer detail. Tattoo the small, scratchy starburst above the sun using a light hand to differentiate its texture from the main sun icon.
Dotwork Detail
Add subtle stippling shading inside the sun or moon tips using a 3RL at low voltage for a textured, mystical finish without solid fill.
Step 3: Linework – The Moon
-
Outline the Crescent:
Switch back to the 5RL if you changed needles. Begin at one tip of the crescent moon and pull a long, smooth curve down to the bottom tip. Do not rush this curve; breathing steadily helps keep your hand stable. -
Complete the Shape:
Draw the inner curve of the moon, connecting both tips. Watch your junction points carefully so lines don’t blow out or cross over messily at the sharp ends. -
Tattoo the Lower Star:
Move to the star below the moon. Use the 5RL or switch to a 3RL for a more delicate look. Create the vertical and horizontal main axis first to establish the cross shape. -
Final Accents:
Add the smaller diagonal lines to the star. These should be shorter than the main axis lines to create a twinkling effect essentially creating a burst shape.
Step 4: Cleaning & Aftercare
-
Wipe Down:
Gently wipe away excess ink and plasma using green soap and a wet paper towel. Dab, don’t scrub, as the skin is now traumatized. -
Inspect and Refine:
Check your lines for any holidays (gaps in the ink) or faint spots. If needed, do a quick second pass on any weak areas, but be careful not to overwork the skin. -
Protect the Art:
Apply a very thin layer of soothing ointment or a second-skin bandage to protect the fresh tattoos from bacteria and friction.
Enjoy your new synchronized celestial ink that celebrates balance and connection
Minimal Love Birds
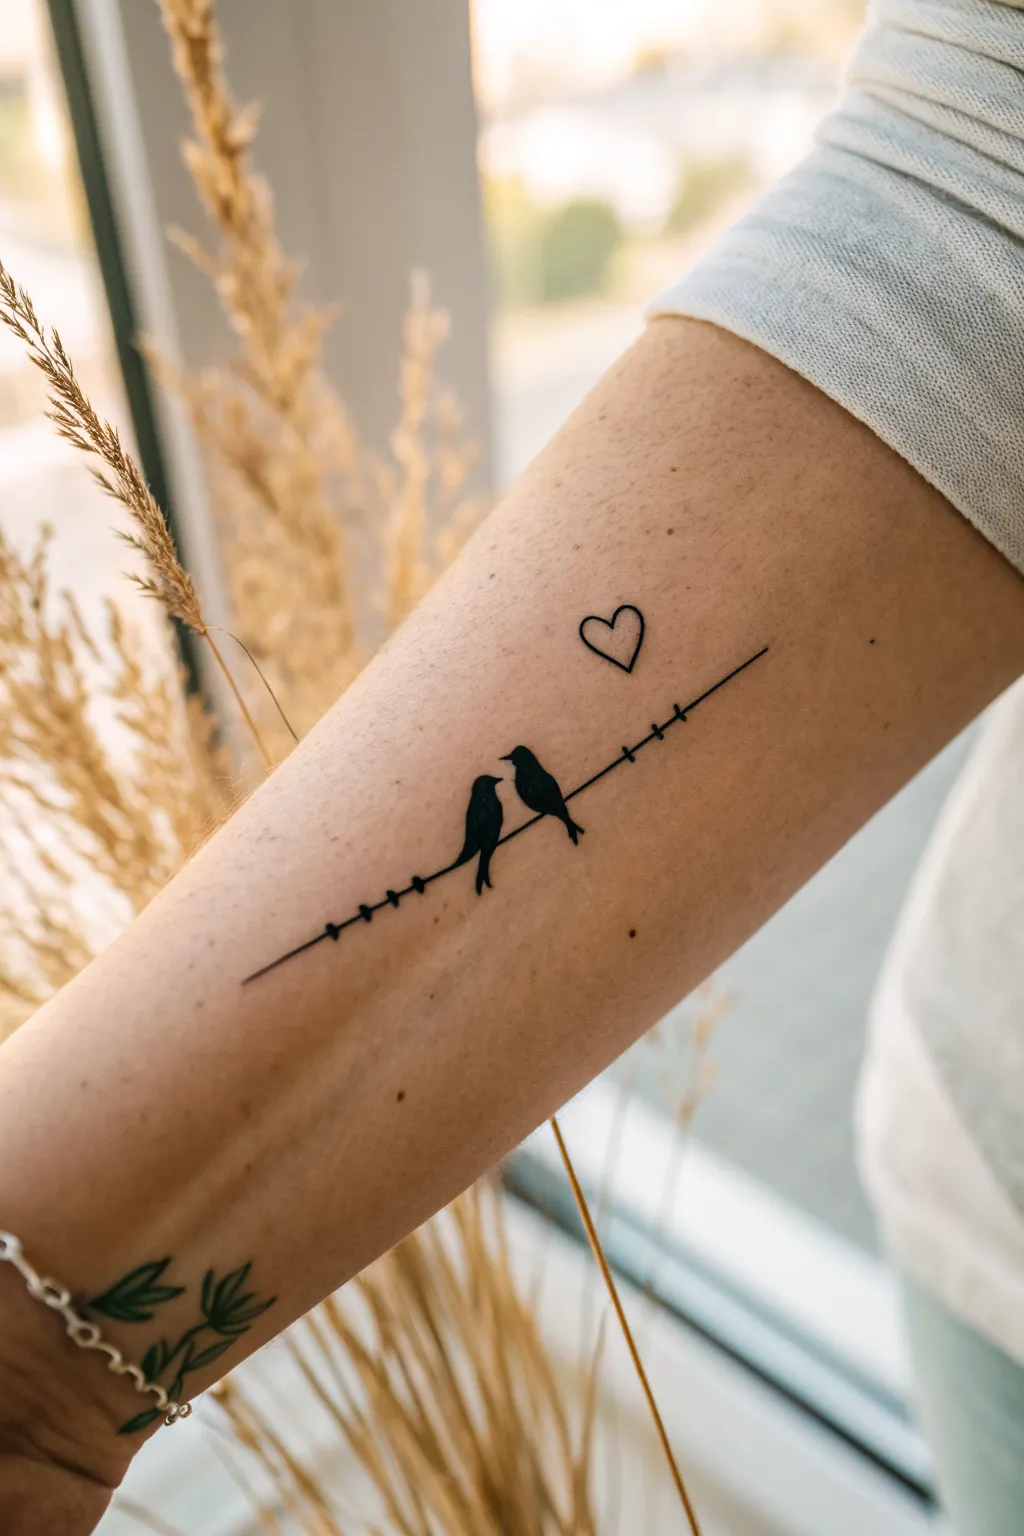
This minimalist design captures a sweet moment between two birds perched on a wire, accompanied by a floating heart. The stark black silhouettes create a timeless, romantic look that translates beautifully to the forearm.
Detailed Instructions
Materials
- Process sketch paper
- Pencil (HB or 2B)
- Fine-point black ink pen (0.3mm or 0.5mm)
- Ruler
- Eraser
- Tracing paper
- Tattoo transfer paper
- Stencil transfer solution (Stencil Stuff)
- Tattoo machine (pen or rotary style preferable)
- 3RL (3 Round Liner) cartridge needle
- 5RS (5 Round Shader) or 7RL cartridge needle (for filling)
- Dynamic Black tattoo ink (or similar high-quality black)
- Ink caps
- Green soap and squeeze bottle
- Paper towels
- Disposable gloves
- Vaseline or tattoo glide
- Clip cord sleeve and machine barrier film
Step 1: Design Preparation
-
Sketch the baseline:
Begin on your paper by using a ruler to draw a straight line at a slight diagonal angle. This will serve as the wire the birds rest on. I like to keep this line around 3-4 inches long for a proportionate forearm placement. -
Draft the bird outlines:
Lightly sketch two small bird shapes sitting on the center of the line. The left bird should be facing right, and the right bird facing left, as if they are looking at each other. Keep their forms simple—rounded heads and tapered tails. -
Add wire details:
along the main wire line, mark small, equidistant perpendicular dashes. Add about three or four to the left of the bird pair and three or four to the right to create that textured, barbed-wire aesthetic. -
Place the heart:
Draw a small, simple heart outline floating above the wire, slightly to the right of the birds. It should be balanced with the empty space on that side. -
Finalize the drawing:
Go over your pencil sketch with a fine-point ink pen to solidify the lines. Fill in the bird bodies completely to ensure they read as solid silhouettes. Erase any stray pencil marks once the ink is dry. -
Create the stencil:
Place a sheet of carbon tattoo transfer paper under your tracing paper or directly beneath your drawing if using a thermal copier. If tracing manually, firmly trace every line of your design onto the transfer sheet to create a purple carbon copy.
Fixing Shaky Lines
If a line wobbles, don’t just go over it again. Instead, slightly thicken the line weight intentionally along its entire length to mask the tremor uniformly.
Step 2: Stencil Application
-
Prepare the skin:
Clean the forearm area thoroughly with green soap and a paper towel. Shave the area to remove any hair, then clean again with an alcohol wipe to remove natural oils. -
Apply transfer solution:
Rub a small amount of stencil transfer solution onto the skin until it is damp and tacky, but not soaking wet. -
Place the stencil:
Carefully position your carbon stencil onto the arm. Press it down firmly and hold for a few seconds to let the chemical transfer bond. Peel it off gently reveal the purple guide lines. -
Dry time:
Allow the stencil to dry completely on the skin for at least 10–15 minutes. This prevents the lines from wiping away easily during the tattooing process.
Step 3: Tattooing Process
-
Setup your station:
While the stencil dries, set up your tattoo machine, wrap it in barrier film, pour your black ink into a cap, and put on fresh gloves. -
Line the wire:
Dip your 3RL needle into the black ink. Starting from one end of the main wire line, pull a steady, single pass line. Move your hand at a consistent speed to ensure straightness. -
Detail the barbs:
Using the same 3RL needle, carefully tap in the small vertical dashes along the wire. These are tiny strokes, so use a light hand. -
Outline the heart:
Move up to the heart. Use the 3RL to create a crisp, continuous outline. Keep your voltage steady and breathe through the curve to avoid shaken lines. -
Outline the birds:
Still using your liner needle, trace the exterior outline of the two bird shapes. Do not fill them in yet; just establish the boundary. -
Switch to fill:
Swap your cartridge to a slightly thicker one, like a 5RS or a 7RL, which works well for packing small areas with solid black. This is optional; you can stick with the 3RL if you have patience, but a shader is faster. -
Fill the silhouettes:
Using small circular motions, pack the black ink solidly into the bird shapes. Don’t overwork the skin—just ensure saturation is even and dense so no skin tone shows through. -
Clean and inspect:
Gently wipe away excess ink and plasma with a damp paper towel and green soap. Inspect the lines for any dropouts or unevenness. Touch up any faint areas immediately. -
Final wipe:
Give the tattoo a final clean with green soap, followed by a thin layer of soothing ointment or a second skin bandage to protect the fresh work.
Pro Tip: Solid Blacks
To get pitch black silhouettes without trauma, stretch the skin tightly and use slow, tight ovals. If it looks grey, you’re moving too fast for your hand speed.
Now you have a permanent piece of art that perfectly balances minimalism with affection.
Coordinates of Where You Met

Capture a significant moment in time with these elegant, minimalist Roman numeral tattoos perfect for couples or best friends. The clean, serif font creates a timeless look that memorializes a special date or shared coordinate.
How-To Guide
Materials
- Tracing paper
- Pencil (soft lead, like 2B or 4B)
- Fine-point black tattoo marker or skin-safe pen
- Rubbing alcohol
- Cotton pads
- Temporary tattoo transfer paper (optional, for testing content)
- Reference image of Roman numerals
- Scissors
Step 1: Planning and Design
-
Choose your dates:
Select the specific dates or numbers you want to immortalize. In the example, notice how the format is split with a specific separator (• XVII / – X). Convert your numbers to Roman numerals carefully. -
Select a font style:
Search for a classic serif font, like Times New Roman, which gives that traditional chiseled look. The serif ‘feet’ on the letters are crucial for this specific aesthetic. -
Draft on paper:
Using a pencil and plain paper, sketch out your numerals to determine the ideal spacing. Ensure the slashes and hyphens are balanced between the number groups. -
Create the stencil:
Once happy with the design, trace it firmly onto tracing paper or tattoo transfer paper. If using transfer paper, remember to draw the design in reverse so it applies correctly. -
Cut out the design:
Trim the excess paper around your drawn stencil, leaving just enough edge to hold onto. This makes placement much easier to visualize on the arm.
Step 2: Skin Preparation
-
Clean the area:
Soak a cotton pad with rubbing alcohol and thoroughly wipe down the inner forearm area. This removes oils and dirt, ensuring the ink or stencil adheres cleanly. -
Dry completely:
Allow the skin to air dry for a moment. Applying a stencil to damp skin can cause the ink to bleed or blur immediately. -
Shave if necessary:
If the forearm has visible hair that might interfere with the fine lines, gently shave the area to create a smooth canvas.
Pro Tip: Liquid Bandage
To make a marker tattoo last days instead of hours, brush a thin layer of liquid bandage over the dried design. It seals the ink against water.
Step 3: Application and Inking
-
Apply the stencil:
Press your tracing paper or transfer sheet against the skin. If using the pencil rub method, place the graphite side down and rub the back firmly with a damp cloth or stick deodorant to transfer the outline. -
Check the alignment:
Before removing the paper entirely, peel back one corner to ensure the transfer is dark enough. Adjust the arm position to check that the text runs straight along the bone structure. -
Outline main strokes:
Using your fine-point body art marker, begin tracing the main vertical strokes of the numerals (the I, V, and X shapes). Keep your hand steady and pull the pen toward you for better control. -
Add the serifs:
Carefully draw the small horizontal lines (serifs) at the top and bottom of each vertical stroke. These should be thin and precise to mimic the printed font style. -
Thicken slightly:
I like to go over the vertical downstrokes almost imperceptibly to give them slightly more weight than the horizontal serifs, adding dimension to the lettering. -
Draw the separators:
Add the dots, slashes, or hyphens between your number groups. Keep these crisp; the slash should be at a consistent angle matching any italics if used. -
Allow to set:
Let the ink dry completely without touching it or bending your arm excessively. If you want it to last longer (as a temporary look), dust it lightly with baby powder.
Troubleshooting: Smudged Ink
If a line blurs while drawing, quickly dip a Q-tip in rubbing alcohol and erase the mistake. Dry the spot completely before re-drawing the line.
Enjoy your matching sophisticated ink that carries a secret meaning just for the two of you
Soundwave Love Message
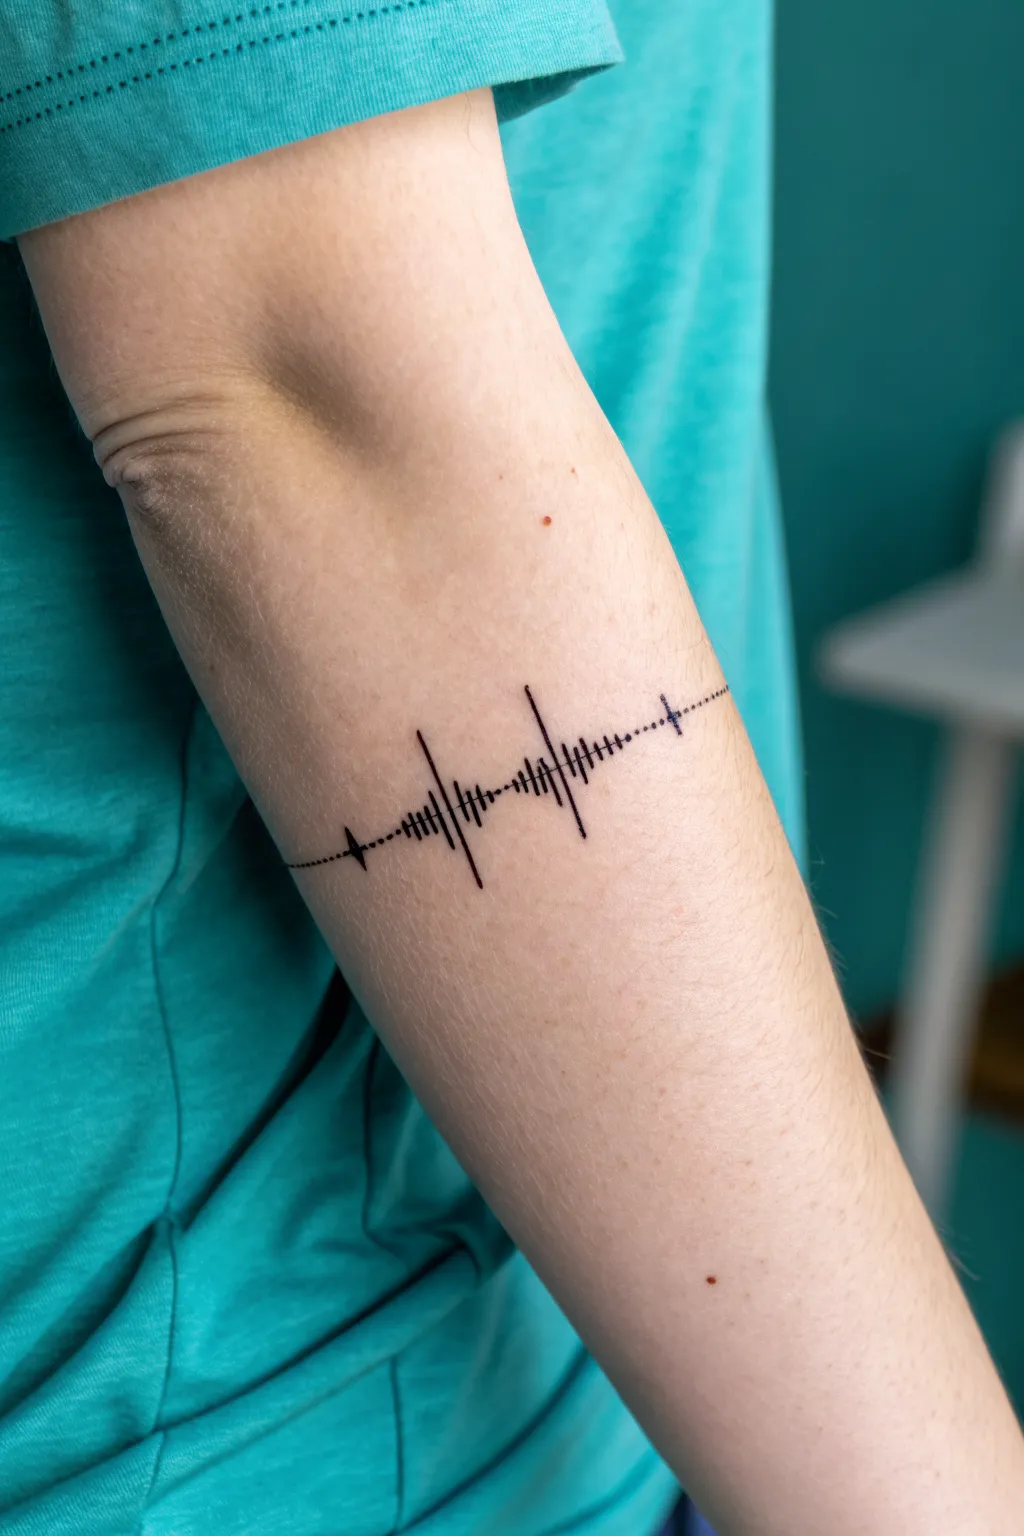
Capture a fleeting moment forever by turning a voice recording or favorite song snippet into a minimalist piece of body art. This tutorial guides you through designing and tattooing a clean, linear soundwave that wraps elegantly around the forearm.
Detailed Instructions
Materials
- Audio recording (voice memo or song clip)
- Audio editing software (Audacity or similar)
- Tablet or computer with design software
- Stencil paper (thermal or freehand)
- Stencil transfer solution (Stencils Stuff)
- Tattoo machine (pen style or rotary)
- 3RL (3 Round Liner) tattoo needle cartridge
- Dynamic Black tattoo ink (or high-quality lining black)
- Green soap and squeeze bottle
- Distilled water
- Ink caps
- Vaseline or tattoo glide
- Paper towels
- Razors
- Gloves (nitrile)
Step 1: Design & Preparation
-
Capture the audio:
Begin by recording the specific phrase, laugh, or song segment you want to immortalize. Keep the recording short—about 2-3 seconds works best for a visual representation that isn’t too crowded. -
Generate the waveform:
Import your file into an audio editor or a waveform generator app. Take a screenshot of the resulting wave pattern. You want a distinct visual spike where the sound is loudest. -
Stylize the design:
Import the waveform image into your design software. Trace the peaks and valleys using straight, vertical lines of varying lengths. To match the reference, keep the lines sharp and non-curved. -
Add the connection line:
Draw a horizontal guide through the center of the vertical bars. Instead of a solid line, create a dotted or dashed line that extends outwards from the main waveform, acting as a ‘lead-in’ and ‘lead-out’ for the design. -
Print the stencil:
Once satisfied with the vectors, print the design onto suitable transfer paper. If using a thermal printer, run it through now. If tracing by hand, use hectograph paper and a ballpoint pen to trace your design firmly.
Needle Steadying Trick
For perfectly straight vertical lines, exhale slowly as you pull the line. Resting your pinky finger on the client’s arm creates a solid anchor point for stability.
Step 2: Placement & Stenciling
-
Prepare the skin:
Clean the inner forearm thoroughly with green soap and water. Shave the area with a brand-new razor, even if the hair isn’t very visible, to ensure a smooth canvas. -
Sanitize and dry:
Wipe the area with alcohol to remove surface oils, then let it dry completely. Apply a small amount of stencil transfer solution, rubbing it in until the skin is tacky but not wet. -
Apply the stencil:
Carefully place the stencil onto the center of the forearm. Press down firmly for several seconds without sliding the paper. Peel it back gently to reveal the purple guide. -
Dry time:
I always insist on waiting at least 10 to 15 minutes here. Let the stencil dry completely on the skin so it doesn’t wipe away during the tattooing process.
Stencil Wiping Off?
If the stencil starts fading while you work, stop wiping. Instead, dab gently with a dry paper towel. Always work from the bottom up or right to left (if right-handed) to avoid smearing.
Step 3: Tattooing the Line Work
-
Setup the station:
Wrap your machine, pour your black ink into a small cap, and put on fresh gloves. Load a 3RL (3 Round Liner) needle cartridge; this fine grouping is crucial for delicate lines. -
Start with the center bars:
Dip your needle and begin with the tallest vertical bars in the center of the waveform. Pull the lines straight from top to bottom, using a steady hand to keep them crisp. -
Work outward:
Continue tattooing the vertical lines, moving outward from the center. Ensure the spacing between each bar is consistent, matching your stencil exactly. -
Tattoo the dotted line:
For the horizontal connector, switch to a stippling motion or very short dragging motions to create the dots. Be careful not to merge them; they need breathing room to look like a dotted line. -
Check depth and consistency:
Wipe the area gently with a damp paper towel to check your saturation. If any lines look faint or ‘scratchy,’ go over them one more time, but be careful not to overwork the skin. -
Final clean:
Once the linework is solid, clean the entire forearm with green soap solution to remove excess ink and plasma. Apply a thin layer of aftercare ointment or a second-skin bandage.
Now you have a deeply personal, permanent visualization of a sound that means the world to you
Thumbprint Heart Merge
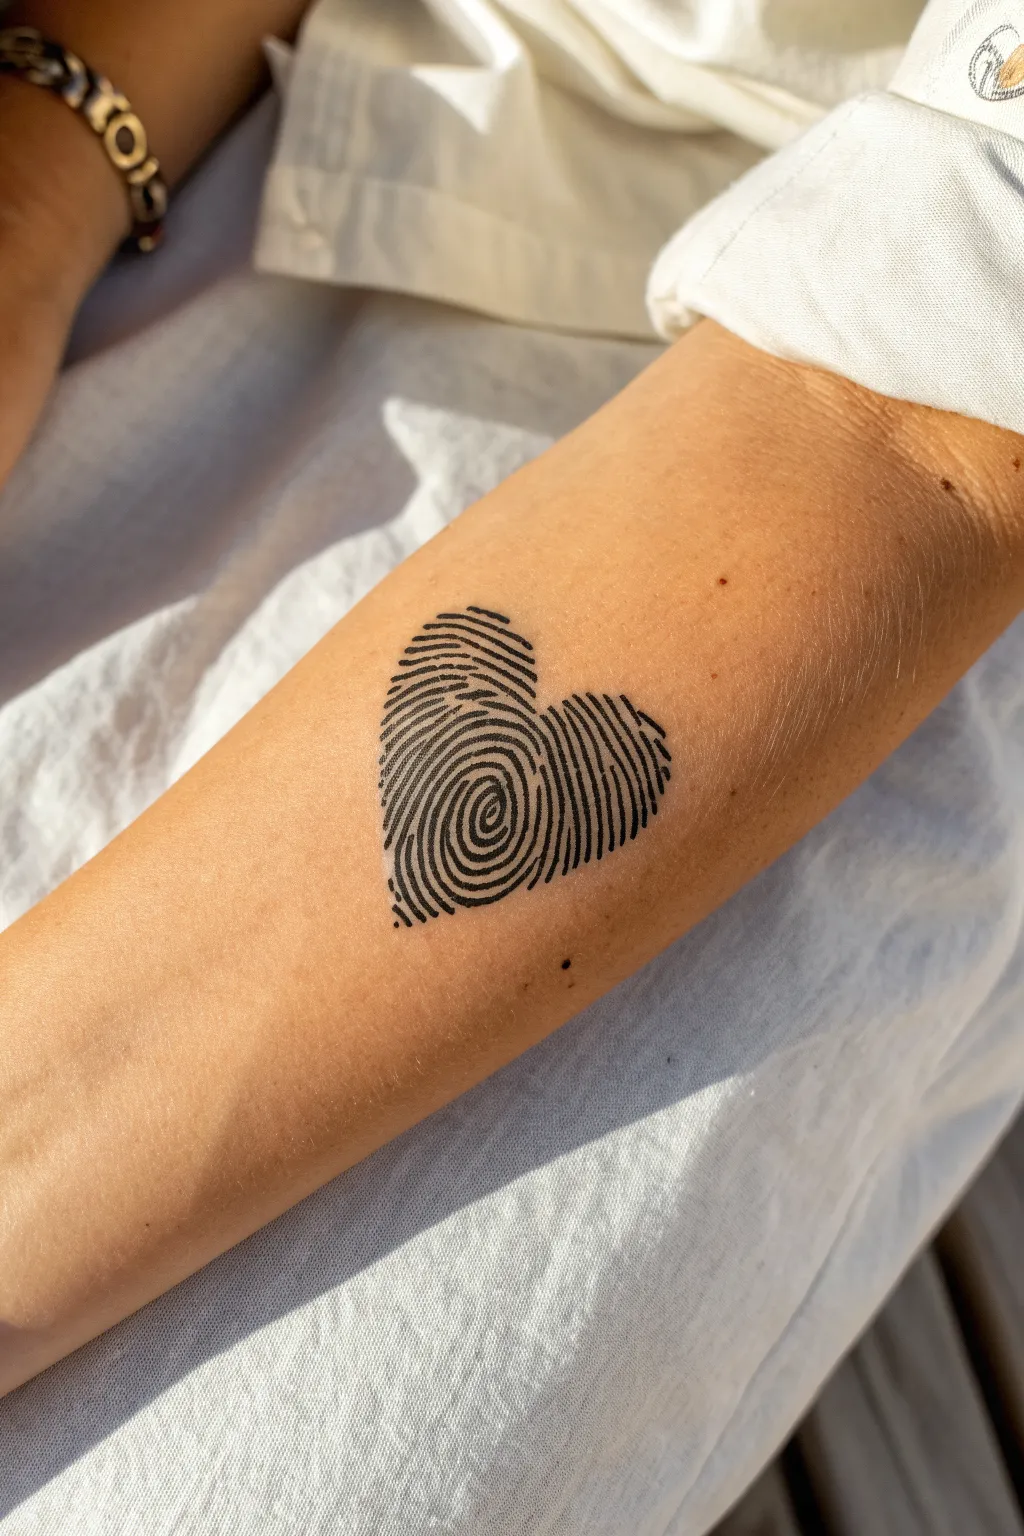
This project captures the unique identity of a loved one by transforming two distinct fingerprints into a unified heart shape. The design relies on clean, high-contrast black lines to replicate the organic flow of dermal ridges, creating a deeply personal and minimalist piece of body art.
Step-by-Step Guide
Materials
- Ink pad (black)
- White cardstock or heavy paper
- High-resolution scanner or smartphone camera
- Digital drawing tablet (iPad with Procreate or similar) or tracing paper/fine liner pens
- Stencil paper (thermal or freehand)
- Stencil transfer gel
- Create your own tattoo machine (for scratch art style) or Professional tattoo equipment (for permanent application)
- Tattoo ink (Dynamic Black or similar)
- Needle cartridges (3RL or 5RL for fine lines)
- Skin safe marker
- Green soap and paper towels
- Protective gloves
Step 1: Designing the Heart
-
Capture the prints:
Begin by pressing your thumb (or your partner’s) onto a black ink pad. Ensure the coverage is even but not dripping wet. Press firmly onto white cardstock so the ridges are clearly defined. -
Create multiple samples:
Don’t rely on just one attempt. Take several prints at slightly different angles and pressures. You want to find one with a clear ‘whorl’ or center pattern, as this will act as the focal point of the design. -
Digitize the prints:
Scan your best prints at a high resolution (at least 300 dpi) or take a macro photo in bright, natural light. Import these images into your design software. -
Arrange the composition:
Rotate the two chosen fingerprints so they angle toward each other at the bottom, mimicking the bottom point of a heart. Overlap them slightly to see where the natural curves might merge best. -
Clean up the lines:
Using a digital inking brush or a fine liner over tracing paper, trace the strongest ridge lines. You don’t need to trace every single pore; focus on the continuous flow. I find that simplifying the chaotic edges helps the final tattoo look cleaner. -
Form the heart silhouette:
Erase or ignore the stray ridges that fall outside a classic heart shape. You are essentially cropping the fingerprint texture into a heart clip-path. -
Connect the gap:
Where the two prints meet in the center, artistically merge the lines so they don’t look like two separate stamps, but one wider texture. Ensure the central whorl of the main print remains the dominant visual anchor.
Step 2: Stencil Preparation
-
Finalize the line weight:
Ensure your design is pure black and white with no grayscale. The spaces between the lines (negative space) should be roughly equal to the thickness of the ink lines to prevent the tattoo from healing into a blurry blob. -
Print the stencil:
Print your finalized design onto thermal stencil paper using a thermal printer, or trace it manually onto hectograph paper using a firm hand and a ballpoint pen. -
Prepare the skin:
Clean the area on the forearm thoroughly with green soap and shave it dry to remove any fine hairs. Wipe down with alcohol to remove oils.
Smudged Stencil?
If the stencil looks blurry or misplaced, wipe it off immediately with alcohol sanitizer before it dries. Do not try to guess the lines; reapply a fresh stencil for precision.
Step 3: Tattoo Application
-
Apply the stencil:
Apply a thin, even layer of stencil transfer gel. Press the stencil firmly onto the skin, hold for a few seconds to let the purple dye transfer, and peel it off gently. Let it dry for at least 10 minutes so it doesn’t wipe away while working. -
Setup your station:
While the stencil dries, set up your machine. A 3RL (Round Liner) needle is excellent for this level of detail. Pour your black ink into a small cap. -
Outline the perimeter:
Start by tattooing the outermost edges of the heart shape to establish the boundary. Use a steady hand and consistent depth. -
Fill the texture:
Work your way from the bottom up or outside in. Follow the curves of the fingerprint ridges carefully. It helps to break the complex lines down into smaller segments mentally. -
Mind the gap:
Pay close attention to the negative space. If you place lines too close together, ink migration can close the gaps over time. Keep the ‘white’ skin visible between the black lines crisp. -
Detail the whorl:
When tattooing the central spiral, slow down your hand speed. This is the tightest part of the design and requires precision to avoid a muddy look. -
Final wipe and clean:
Gently wipe away excess ink with green soap and a paper towel. Check for any faint lines that need a second pass to ensure solid saturation.
Scale Matters
Don’t go too small. Fingerprint lines need breathing room. If you scale this down under 2 inches, the lines will eventually bleed together as the skin ages.
Now you have a permanent, deeply personal symbol of connection that carries the unique mark of someone special
Red String of Fate Linework
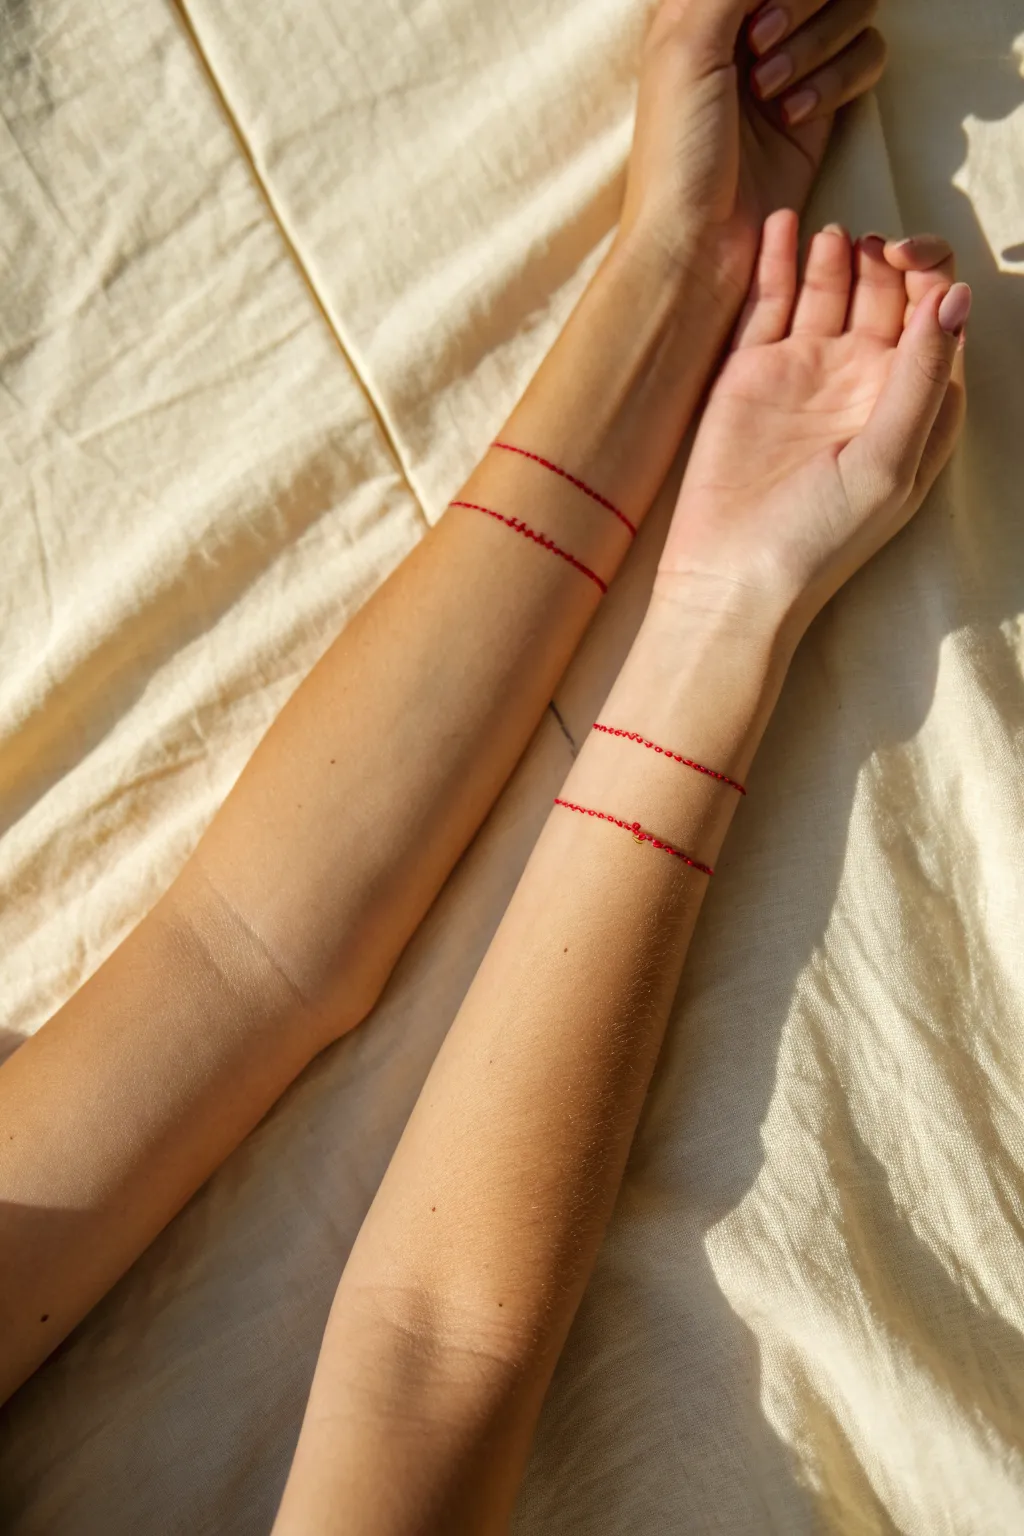
Embrace the ancient legend connecting soulmates with this delicate, minimalist red ink design. These fine-line tattoos mimic the look of a simple thread or subtle chain wrapped gently around the wrist, creating an eternal bond directly on the skin.
How-To Guide
Materials
- Red tattoo ink (high-quality, body-safe)
- Fine liner tattoo needles (3RL or 5RL)
- Tattoo machine
- Stencil paper
- Stencil transfer solution
- Green soap/cleansing solution
- Paper towels
- Disposable gloves
- Petroleum jelly or tattoo process butter
- Razor for shaving
- Alcohol wipes
- Sterile ink caps
Step 1: Design & Stencil Preparation
-
Measure the circumference:
Using a soft measuring tape or a strip of paper, measure the exact circumference of the wrist where the bands will sit. Note this measurement to ensure your stencil wraps perfectly without overlapping or falling short. -
Draw the linear design:
On a piece of plain paper, draw two parallel straight lines using a ruler. Keep the distance between them consistent—about 3 to 5 millimeters works well for this delicate look. -
Create the chain variation:
For the second design style shown, draw two parallel lines but manipulate the stroke to look like a small chain. Instead of a solid line, create tiny, connected loops or small dashes. I find drawing small ‘figure-eights’ helps mimic a jeweled chain. -
Transfer to stencil paper:
Create your master stencil by tracing your final designs onto the pressure-sensitive side of the hectic paper. Press firmly to ensure a dark, crisp purple line.
Step 2: Skin Preparation & Stenciling
-
Clean and shave:
Thoroughly clean the wrist area with green soap and water. Shave the area carefully, even if no hair is visible, to remove dead skin cells and vellus hair that could clog the needle. -
Sanitize the area:
Wipe the skin down with an alcohol pad to remove any oils. Let it air dry completely before proceeding. -
Apply transfer solution:
Apply a thin, even layer of stencil transfer solution. The skin should be tacky/damp, not wet or dripping. -
Place the stencil:
Carefully wrap the stencil around the wrist. This can be tricky on a curved surface; align the ends carefully so the lines meet seamlessly. Press down firmly for a few seconds. -
Peel and dry:
Peel the paper back gently. Allow the stencil to dry on the skin for at least 10–15 minutes. This prevents the purple guide from wiping away during the tattooing process.
Uneven Connection?
If the stencil ends do not meet perfectly around the wrist, don’t guess! Wipe it off completely with alcohol and re-apply. A misalignment is permanent once tattooed.
Step 3: Tattooing the Linework
-
Prepare the machine:
Load your machine with a fine liner needle, such as a 3RL (3 Round Liner) for the sharpest line, or a 5RL for slightly more boldness. Fill your ink cap with pure red ink. -
Lubricate the skin:
Apply a very thin amount of petroleum jelly or process butter over the stencil. This lubricates the needle and keeps the stencil intact. -
Execute the solid lines:
Start with the arm receiving the solid bands. Stretch the skin taut with your non-tattooing hand. Run the needle smoothly along the stencil line at a consistent depth and speed to avoid wobbles. -
Connect the wraparound:
As you wrap around the wrist, you will need to stop, adjust the client’s arm position, and re-stretch the skin. Ensure you pick up exactly where you left off to create a continuous hoop. -
Tattoo the chain texture:
Switch to the other arm/design. For the chain look, use a stippling motion or tiny circular motions rather than a long drag. This builds the texture of links or twisted thread. -
Double-check saturation:
Red ink can sometimes be deceptive on skin. Wipe the area gently with green soap and check for any ‘holidays’ (gaps) in the line. Touch up lightly if needed. -
Final cleanse:
Once finished, clean the entire area with green soap to remove excess ink and plasma. Dab dry with a clean paper towel. -
Aftercare application:
Apply a thin layer of aftercare ointment or a protective second-skin bandage to shield the fresh work.
Red Ink Visibility
Red ink heals lighter than it looks fresh. Pack the red solidly but don’t overwork the skin, as red pigments specifically can cause more immune reactions than black.
Now you carry a permanent symbol of connection that remains as vibrant as the bond it represents.

Have a question or want to share your own experience? I'd love to hear from you in the comments below!