If you’re craving that cozy, magical glow, Christmas window painting is one of my favorite ways to dress up plain glass fast. I pulled together these christmas window painting patterns ideas so you can pick a vibe—classic snowy, cute and playful, or unexpectedly artsy—and start painting tonight.
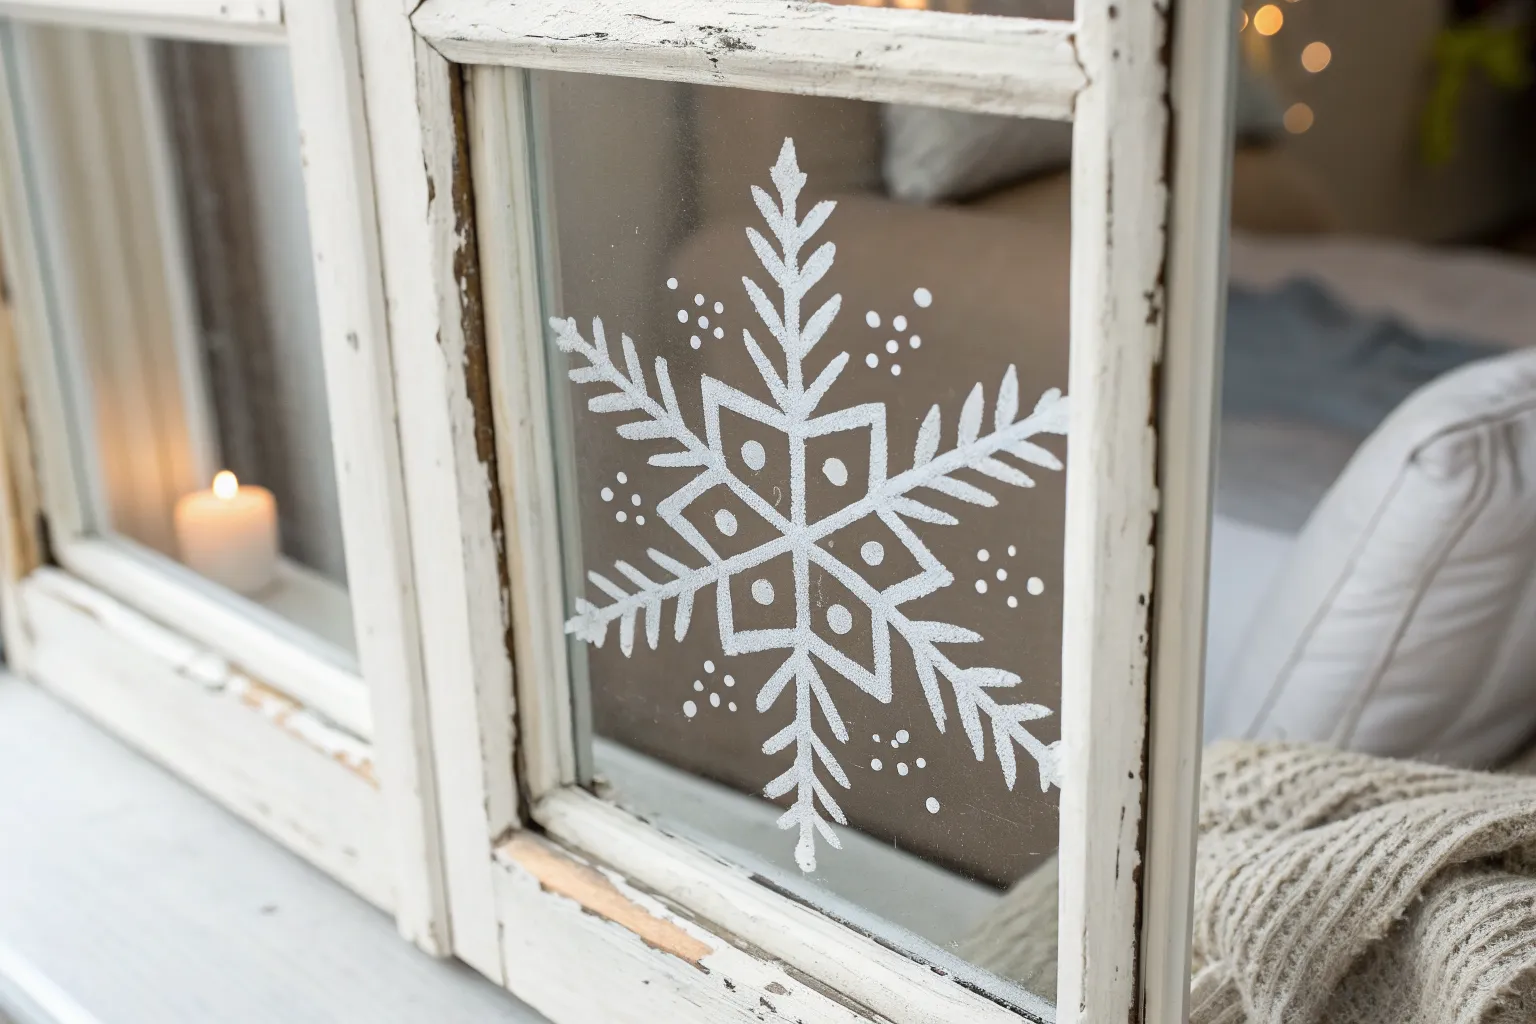
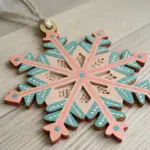
Classic Snowflake Scatter
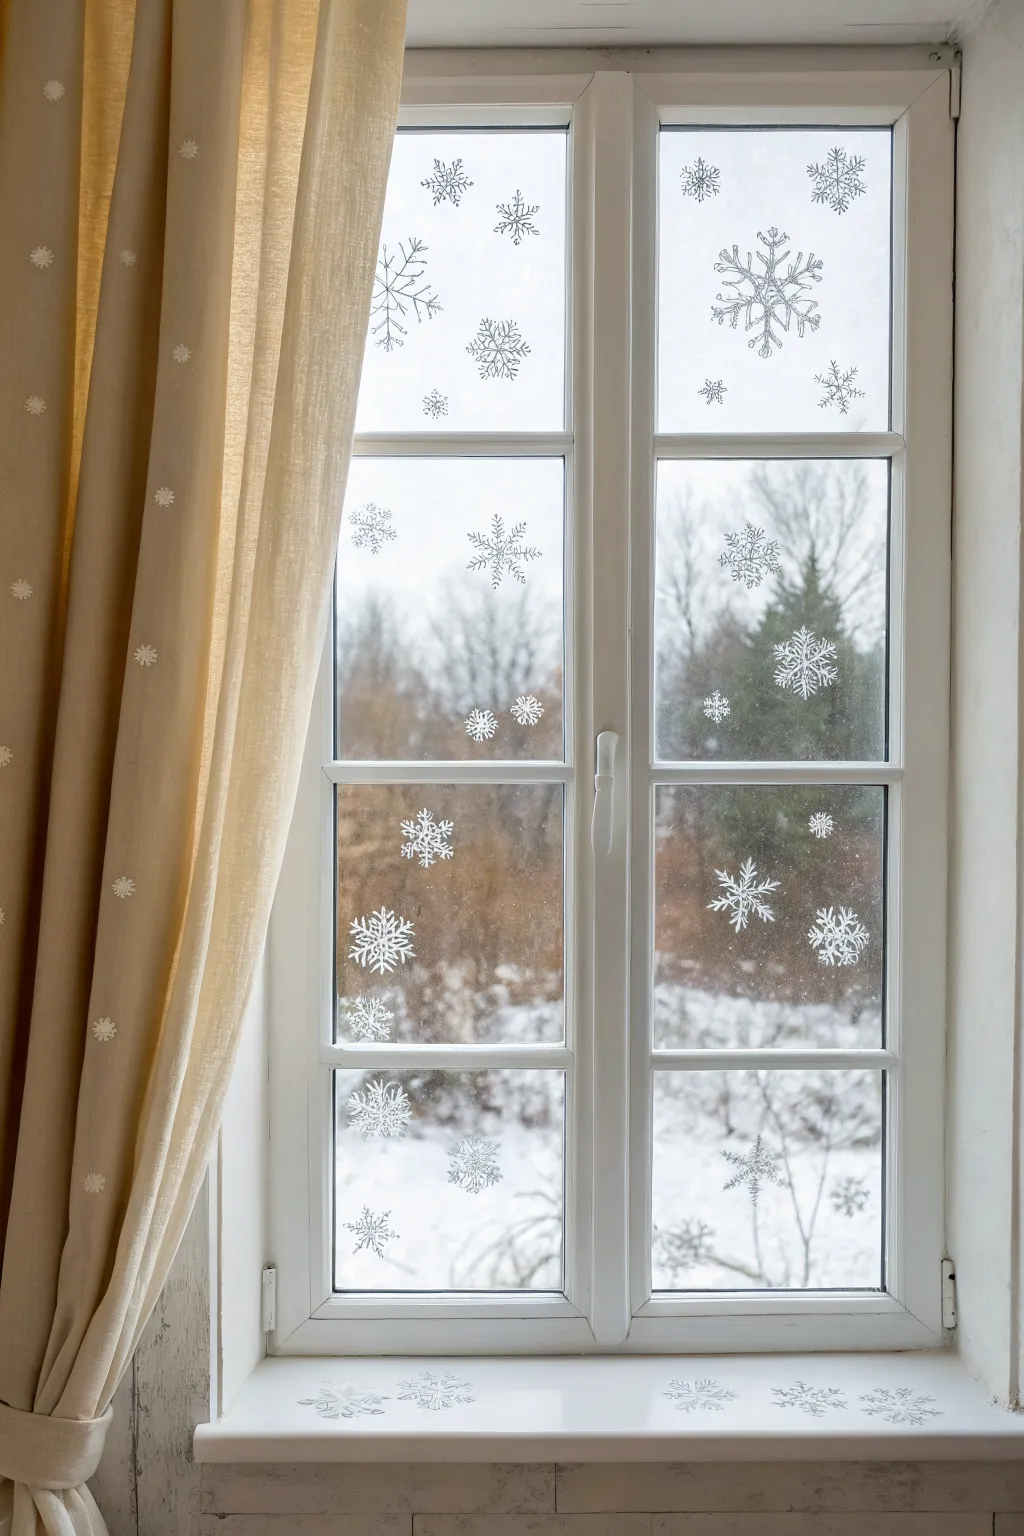
Transform an ordinary window into a frosty view straight from a storybook with this delicate white painting project. The scattered snowflakes move from the glass down onto the sill itself, creating a cozy and immersive snowy effect without the chill.
How-To Guide
Materials
- White liquid chalk marker (medium tip)
- White liquid chalk marker (fine tip)
- Glass cleaner
- Lint-free cloth or paper towels
- Paper scrap for testing
- Printable snowflake stencils or reference images (optional)
- Painter’s tape (optional, for holding stencils)
Step 1: Preparation & Planning
-
Clean surface:
Begin by thoroughly cleaning your window glass and the window sill with glass cleaner. Ensure the surface is completely dry and free of lint, as grease or dust will prevent the chalk marker form sticking properly. -
Prime markers:
Shake your white liquid chalk markers vigorously to mix the pigment. Press the tip repeatedly on a scrap piece of paper until the white ink flows smoothly and opaque. Do not do this directly on the glass to avoid puddling. -
Plan layout:
Mentally map out where your largest snowflakes will go. Aim for a random ‘scatter’ pattern rather than neat rows. I like to visualize triangles to keep the spacing dynamic and natural-looking.
Stencil Secret
Tape a snowflake printout on the *outside* of the glass facing in. Simply trace the lines from the inside for perfect symmetry every time.
Step 2: Painting the Glass
-
Anchor snowflakes:
Start with the medium tip marker. Draw your largest, most prominent snowflakes first. Begin with a simple cross (+) and add an X over it to create an eight-pointed star as your base structure. -
Add main details:
On these large flakes, add ‘V’ shapes along the arms pointing outward. Vary the designs—some can have diamonds at the tips, while others might have simple dots or loops. -
Medium flakes:
Switch to drawing medium-sized flakes in the open spaces. Use a six-pointed structure for variety (a vertical line crossed by an X). Keep these slightly simpler than your anchor flakes. -
Simple stars:
Fill smaller gaps with tiny, simple stars. These can just be crossing lines without elaborate details. This creates depth, making it look like some flakes are further away. -
Fine details:
Switch to the fine tip marker. Go back to your large snowflakes and add intricate interior details, like tiny lines connecting the arms or small circles in the center. -
Create movement:
Ensure you place some partial snowflakes at the very edges of the panes, cutting them off as if they are drifting out of frame. This makes the scene feel expansive.
Drippy Ink?
If the marker ink runs or drips, the tip is too saturated. Blot it on a paper towel and let the painted area dry fully before adding a second coat.
Step 3: The Window Sill Extension
-
Transition down:
This step is what makes this specific look so special. Begin drawing snowflakes on the horizontal window sill surface, just as you did on the glass. -
Perspective shift:
Because you are viewing the sill from above or an angle, you can afford to make these flakes slightly flatter or distorted if you want a 3D effect, but drawing them flat works perfectly fine for a decorative look. -
Cluster near glass:
Group a few flakes closer to the window frame on the sill, as if they have just landed and are accumulating there. -
Fade out:
Draw fewer flakes as you move away from the window glass toward the room, creating a fading effect. -
Final touches:
Stand back and review the overall composition. Look for any awkward empty spots and fill them with tiny dots or ‘snow dust’ using the fine tip marker. -
Clean up edges:
If any lines look smudge, wait for them to dry completely, then use a slightly damp Q-tip to erase and sharpen the edges.
Enjoy the cozy atmosphere your handcrafted snowfall brings to the room, regardless of the weather outside


Frosted Corner Swirls
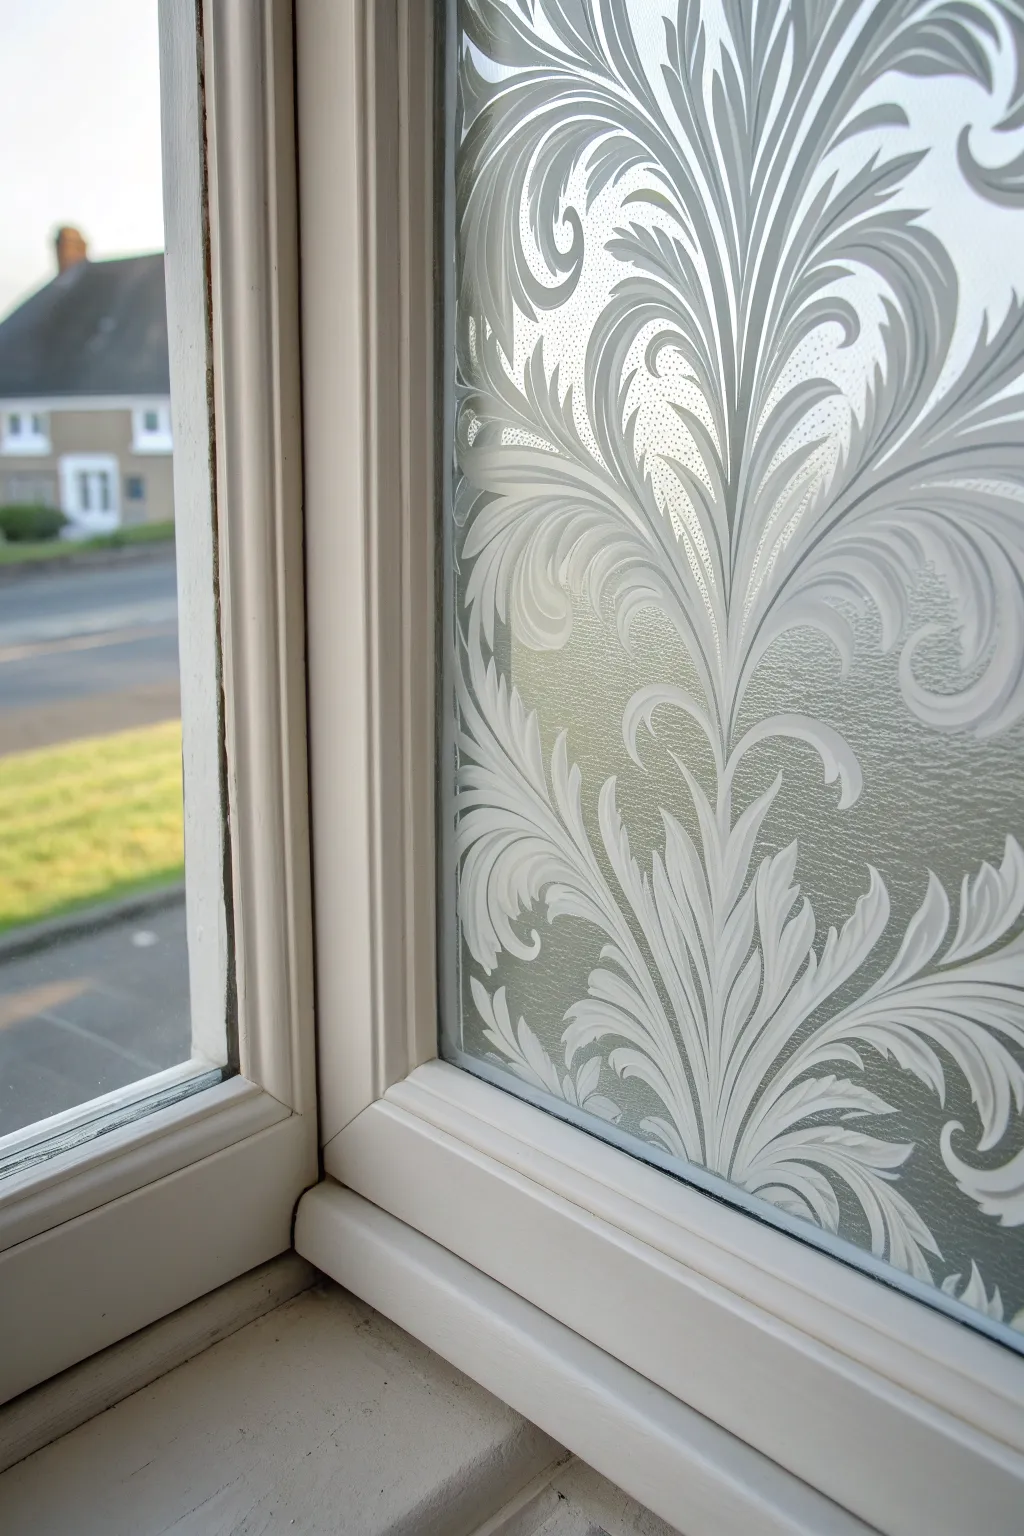
Transform a plain window pane into a masterpiece of Victorian-style elegance using this intricate faux-etching technique. This design features sweeping acanthus leaves and delicate swirls that create privacy while letting the winter light filter through beautifully.
Step-by-Step
Materials
- White window chalk marker (medium tip)
- White window chalk marker (fine tip)
- Frosted glass spray paint or Santa Snow spray (optional for texture)
- Paper towels and glass cleaner
- Printed floral scroll stencil or reference pattern
- Masking tape
- Sponges or cotton swabs (for blending)
Step 1: Preparation and Mapping
-
Clean surface:
Begin by thoroughly cleaning the inside of your window. Any dust or grease will prevent the chalk marker or spray from adhering smoothly, so ensure the glass is squeaky clean and dry. -
Tape the template:
If you aren’t comfortable freehanding, print out a large floral scroll pattern. Tape this paper to the *outside* of the window facing in. This gives you a perfect guide to trace without obstructing your painting hand. -
Establish the central spine:
Using your medium-tip marker, draw the main vertical stem first. This central line anchors the entire design, starting from the bottom corner and reaching upward like a growing vine.
Clean Lines Secret
Keep a crisp edge by wiping your marker tip on a paper towel every few minutes. Buildup on the nib can cause globs that ruin the delicate etched-glass illusion.
Step 2: Drafting the Swirls
-
Outline main leaves:
Trace the large, sweeping curves of the primary leaves branching off the center stem. Keep your hand steady and focus on creating fluid, continuous C-curves and S-curves. -
Add secondary flourishes:
Sketch in the smaller curls that nestle inside the larger curves. These should flow in the same direction as the main branches, filling the negative space. -
Connect the base:
Ensure the bottom of the design feels grounded by adding wider, heavier leaf shapes near the window sill. This visual weight balances the delicate tips at the top. -
Thicken the lines:
Go back over your initial skeleton lines. I like to thicken the outer edges of the curves to mimic the look of carved glass, tapering the line width as it curls inward.
Sparkle Upgrade
While the white ink is still wet, gently blow a tiny pinch of clear or iridescent glitter onto the thickest parts of the design for a magical morning frost shimmer.
Step 3: Creating the Frosted Effect
-
Fill solidly:
Using the medium marker, color in the main bodies of the leaves. Do this in sections so the ink doesn’t dry too quickly before you can work with it. -
Feather the edges:
Before the ink dries completely, take a cotton swab or a small, dry sponge and gently stroke the wet ink from the center line outward. This creates a striated, feathery texture that looks like etched crystal. -
Stipple specifically:
For the areas between the leaves, you can add a stippled effect. Rapidly tap the tip of your marker to create tiny dots, simulating the rough texture of frosted background glass. -
Detail with fine tip:
Switch to your fine-tip marker. Draw sharp, crisp veins running through the center of each leaf. These lines should remain solid white to contrast with the feathered shading you just created.
Step 4: Refining and Sealing
-
Sharpen points:
Check the tips of your leaves. Use the fine marker to extend them into sharp, elegant needle points. This crispness is key to achieve that high-end engraved look. -
Erase mistakes:
If a line went rogue, dampen a Q-tip with a little glass cleaner to precisely erase and tidy up the edges. A sharp edge makes the design pop against the clear glass. -
Add highlights:
Add a second coat of white to the very top edges of the curves where ‘light’ would hit the etching. This subtle layering adds dimension. -
Optional texture spray:
For a true frosted look, you can lightly mask off the clear areas and give the design a very faint mist of Santa Snow spray, though the marker method alone is often cleaner and longer-lasting. -
Remove template:
Go outside and remove the paper template. Step back inside to view your work against the real background. -
Final cure:
Let the artwork dry undisturbed for at least an hour. Once dry, the chalk marker is surprisingly durable but can be easily wiped away with water when the season changes.
Now you have a stunning, privacy-enhancing piece of art that looks like expensive etched glass but washes away easily come January


Snowy Village Along the Sill
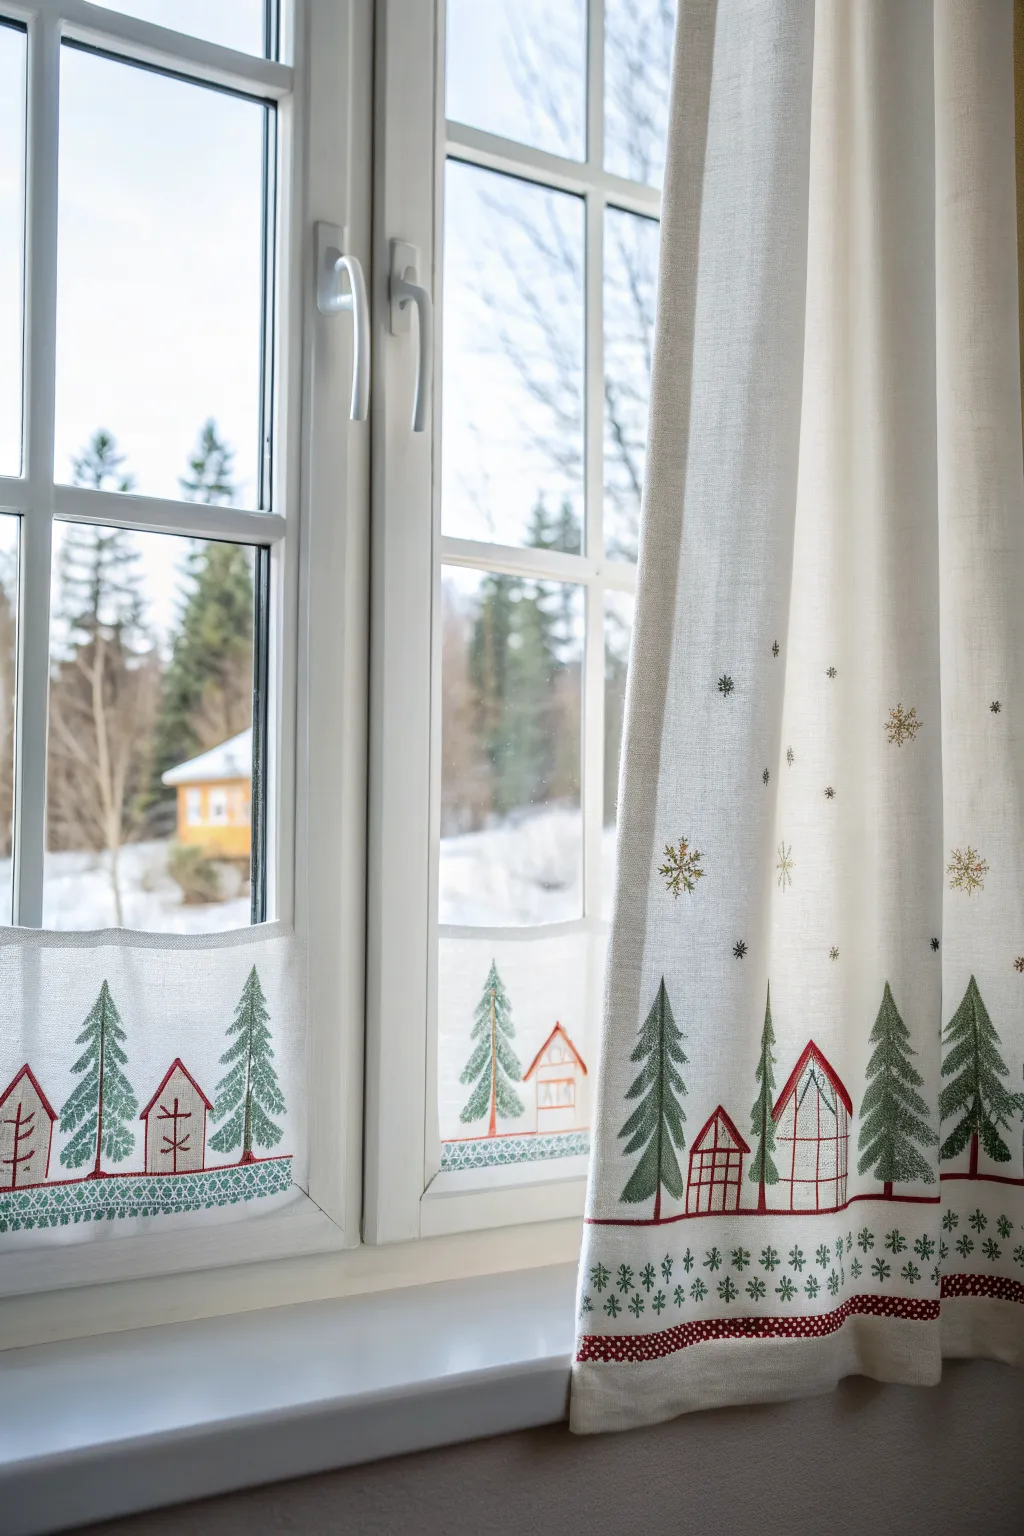
Transform plain linen curtains into a cozy winter scene by recreating the look of classic cross-stitching or embroidery with fabric paint. This charming village motif, complete with pine trees and little cottages, adds festive warmth to your window without a single actual stitch.
Step-by-Step
Materials
- White or cream linen/cotton fabric (for café curtain and side panel)
- Fabric paint (Forest Green, Barn Red, Charcoal Grey)
- Fine-point fabric markers (Red and Green)
- Flat shader brush (size 4 or 6)
- Fine liner brush (size 0 or 00)
- Ruler or straight edge
- Pencil or disappearing ink fabric pen
- Iron and ironing board
- Masking tape or painter’s tape
Step 1: Preparation and Layout
-
Measure and mask:
Begin by measuring about 2-3 inches up from the bottom hem of your fabric. Apply a strip of masking tape horizontally across the entire width to mark the baseline where your village will sit. -
Sketch the border:
Using a pencil and ruler, lightly draw two parallel lines just below your tape line, spaced about half an inch apart. This will become the decorative border later. -
Draft the village:
Lightly sketch your village scene above the tape line. Alternate between tall, triangular pine trees and simple, gabled houses. Keep the shapes geometric and slightly stylized to mimic folk embroidery.
Step 2: Painting the Trees
-
Establish the tree shape:
Load your flat shader brush with Forest Green paint. Start at the top point of a tree sketch and use short, downward strokes to create the branches. -
Create texture:
Instead of painting a solid green triangle, leave small gaps and use choppy strokes to imitate the texture of needlework or evergreen boughs. -
Add the trunks:
Switch to a fine liner brush and mix a touch of Charcoal Grey with Green. Paint a thin vertical line from the center base of the tree down to your masking tape baseline.
Faux-Stitch Trick
Use a stencil brush with very little paint and dab vertically. This creates a woven texture that looks more like thread than flat paint.
Step 3: Painting the Cottages
-
Outline the structures:
Using the fine fabric marker or a liner brush with Barn Red paint, carefully outline the walls and roofs of your house sketches. -
Fill the roofs:
For the roofs, make the red outline slightly thicker. I like to keep the interior of the walls unpainted (showing the fabric color) to keep the design light and airy. -
Add architectural details:
Paint simple grid patterns for windows and vertical lines for doors using the very tip of your fine brush. Use Charcoal Grey or a darkened Red for subtle contrast.
Sparkle Upgrade
Mix a tiny amount of fabric glitter medium into your snow paint, or sew small seed beads onto the centers of the painted snowflakes for real texture.
Step 4: Details and Border
-
Paint the decorative border:
Remove the masking tape. Between the two parallel lines you drew earlier at the bottom, paint small repeating motifs—either tiny crosses to look like stitches or small dots—using red and green alternately. -
Paint the snowflakes:
In the open sky area above the village, paint scattered snowflakes. Use the fine liner brush with gold or grey paint to create six-pointed stars and small asterisks. -
Vary the snowflake sizes:
Make some snowflakes larger and more complex, and fill the space between them with tiny single dots for a falling snow effect. -
Simulate embroidery stitches:
To truly sell the faux-embroidery look, go back over your solid painted areas (like tree branches) and add tiny, short hatch marks with a slightly darker shade of green.
Step 5: Finishing Touches
-
Heat set the paint:
Allow the paint to dry completely, preferably overnight. Once dry, heat set the design by ironing the reverse side of the fabric according to your paint manufacturer’s instructions. -
Install the curtain:
Hang your new café curtain on a tension rod inside the window frame, or attach rings for the side panel, letting the light filter through your winter village.
Now you have a charming winter window treatment that frames the outdoors beautifully while keeping things cozy inside


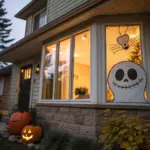
Christmas Tree Silhouette With Lights

Bring warmth to a cold winter evening with this illuminated paper cutout project that creates a stunning silhouette against the twilight sky. By combining simple cutting techniques with clever backlighting, you can transform a plain windowpane into a glowing festive focal point.
Step-by-Step Tutorial
Materials
- Large sheet of sturdy white cardstock or poster board (sized to your window pane)
- Pencil and eraser
- Ruler or straight edge
- Sharp craft knife (e.g., X-Acto)
- Self-healing cutting mat
- Star-shaped paper punch (optional but helpful)
- Hole punch (standard round size)
- Battery-operated LED fairy lights (warm white, battery pack)
- Clear double-sided tape or invisible tape strips
- Compass or circular template (optional for tree curves)
- Scissors
Step 1: Designing the Tree
-
Measure your space:
Start by measuring the specific pane of glass where you intend to hang the tree. You want the tree to fill about 70-80% of the vertical space for the best visual impact. -
Draft the centerline:
Lay your cardstock flat on a cutting mat. Use your ruler to draw a very light vertical line down the exact center of the paper; this will ensure your tree is perfectly symmetrical. -
Sketch the branches:
Lightly sketch the Christmas tree shape. Start with a five-point star at the very top. Then, draw swooping, curved branches extending downwards, getting wider as you go. Aim for 4-5 total tiers of branches. -
Refine the curves:
Go over your sketch to darken the final cut lines. I like to make the tips of the branches slightly upturned, which gives the tree a cheerful, classic look. -
Mark the light points:
Plan where your lights will shine through. Mark small dots randomly across the body of the tree. These will become the glowing ‘ornaments’ later.
Step 2: Cutting and Punching
-
Cut the perimeter:
Using your craft knife for precision (or scissors for the broader curves), carefully cut out the entire exterior shape of the tree and the star topper. -
Punch the holes:
Use your standard hole punch to punch out the circular dots you marked earlier. If the punch can’t reach the middle of the tree, place the paper on the cutting mat and carefully cut small circles or diamonds with your craft knife. -
Add starry details:
If you have a star punch, punch a few star shapes scattered among the round holes. Alternatively, manually cut small star shapes with a very sharp blade for added variety. -
Erase guidelines:
Gently erase any remaining pencil lines, especially the center vertical line, so the white surface looks pristine from inside the room.
Wire Management
Use white electrical tape instead of clear tape on the back. It blends with the cardstock and prevents ‘light leak’ from the wires showing through the paper where you don’t want it.
Step 3: Installation and Lighting
-
Prep the lights:
Unravel your battery-operated LED fairy lights. Ensure they are working and untangled before you attempt to attach them. -
Secure lights to the cutout:
Flip the tree cutout over so the back is facing you. Arrange the LED wire so that one bulb aligns with each hole or star cutout you made. -
Tape the lights:
Use clear tape to secure the wire against the back of the cardstock. Make sure the tape holds the bulb directly over the opening so the light shines through clearly without being obstructed by the paper edge. -
Manage the battery pack:
Run the excess wire and the battery pack down toward the bottom of the tree. You can tape the small flat battery pack to the back of the trunk if it’s lightweight, or plan to let it rest on the window sill. -
Apply mounting tape:
Place small strips of double-sided tape along the outer edges of the tree’s backside (the side with the wires). -
Mount to the window:
Press the tree firmly against the window pane. Ensure the ‘front’ (clean side) is facing into the room, while the wires are sandwiched between the paper and the glass. -
Frame with extra lights:
For the finishing touch seen in the photo, drape a separate strand of string lights along the top casing of your window frame to create a warm overhead glow.
Color Changing
Tape small squares of colored tissue paper over the holes on the back side before attaching lights. This turns the white lights into colorful glowing ornaments when lit.
Flip the switch as the sun goes down and enjoy the cozy, magical glow of your handcrafted holiday window
BRUSH GUIDE
The Right Brush for Every Stroke
From clean lines to bold texture — master brush choice, stroke control, and essential techniques.
Explore the Full Guide
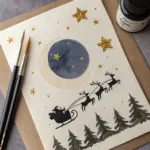
Sleigh and Reindeer Night Trail
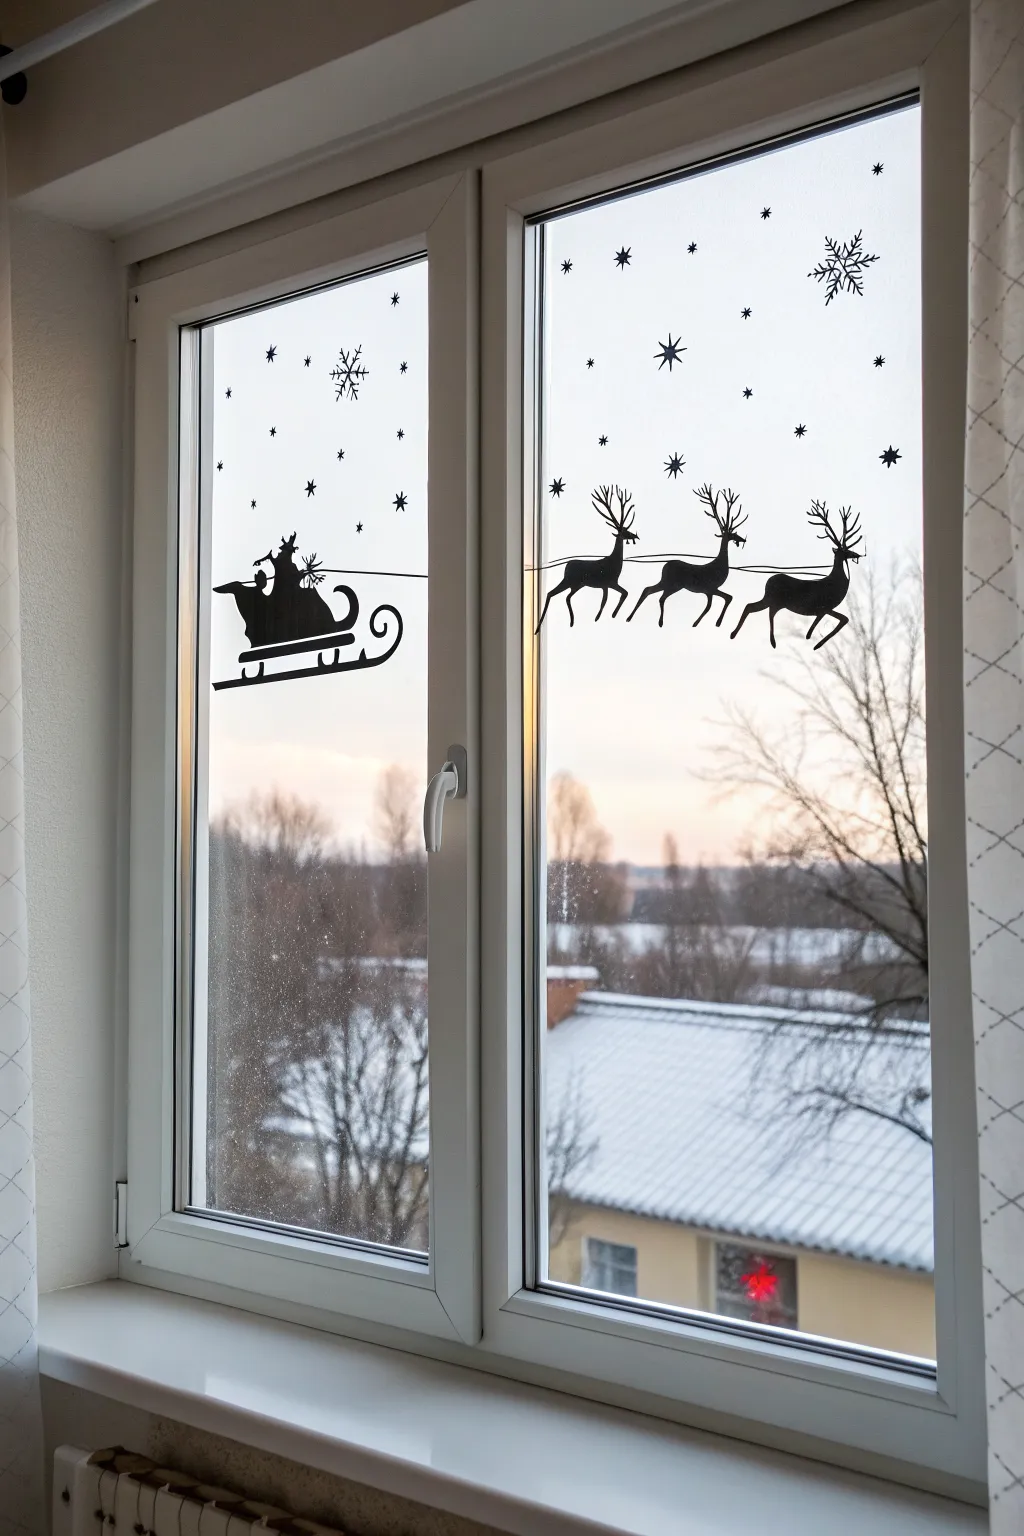
Transform your winter view into a magical night sky with this crisp, high-contrast silhouette design. Using self-adhesive vinyl or cut paper creates a professional, sharp-edged look that stands out beautifully against the snowy outdoors.
Step-by-Step Guide
Materials
- Black self-adhesive vinyl (matte finish preferred)
- Transfer tape (optional but helpful)
- Scissors and a craft knife (X-Acto)
- Cutting mat
- Pencil and eraser
- Paper for stencils/templates
- Window cleaner and lint-free cloth
- Squeegee or old credit card
- Measuring tape
Step 1: Planning and Template Creation
-
Measure the window panes:
Start by measuring the width of each window pane exactly. This design spans across two panes—Santa on the left and the reindeer on the right—so you need to know how much space you have for each grouping. -
Sketch or print your design:
Sketch out the silhouette shapes on plain paper first to get the scale right. You’ll need one Santa sleigh, three leaping reindeer, and an assortment of six-pointed stars and snowflakes. Alternatively, find free clip art online and print them to size. -
Check the alignment:
Hold your paper templates up to the window. Ensure the reins will visually connect across the window frame divider. The lead reindeer on the right pane should look like it’s pulling the sleigh on the left pane.
Clean Cuts Pro Tip
If you don’t have vinyl, use black construction paper and apply a very thin layer of dilute dish soap to the back. It sticks to glass when wet and peels off cleanly when dry.
Step 2: Cutting the Silhouettes
-
Transfer to vinyl:
Place your paper templates onto the backing paper of the black vinyl. Trace around them with a pencil. Since the vinyl is solid black on the front, cutting from the back is easier, but remember to flip your design horizontally if it’s directional. -
Cut the reindeer outlines:
Using sharp scissors, cut out the main bodies of the three reindeer. Focus on getting smooth curves for their legs and bellies. -
Detail the antlers:
Switch to a craft knife and cutting mat for the antlers. These delicate lines are too tricky for scissors. I like to carefully remove the negative space between the antler points first to avoid tearing. -
Cut the sleigh:
Cut out the Santa and sleigh shape. Don’t forget the negative space under the sleigh runners and the curve of the sack’s top. -
Create the celestial elements:
Cut out several sizes of small stars and a few intricate snowflakes. Varied sizes make the ‘sky’ look deeper and more realistic. -
Prepare the reins:
Cut very thin, long strips of black vinyl for the reins. These need to be long enough to connect the reindeer together and trail back toward the sleigh.
Step 3: Application
-
Clean the glass:
Thoroughly clean the inside of your window with glass cleaner and a lint-free cloth. Any dust or grease will prevent the vinyl from sticking smoothly or create bubbles. -
Position the sleigh:
Peel the backing off the Santa shape and apply it to the left window pane. Position it slightly lower than the center line to leave room for the sky above. -
Smooth the vinyl:
Use a squeegee or credit card to press the vinyl firmly against the glass, working from the center outward to push out any trapped air bubbles. -
Apply the reindeer:
Move to the right pane. Place the reindeer in an ascending line, making them look like they are taking flight. Keep the vertical spacing consistent so the movement looks natural. -
Attach the reins:
Carefully apply the thin strips of vinyl connecting the reindeer necks. For the gap between the windows, cut the rein strip right at the edge of the glass on both sides so it looks like a continuous line passing behind the frame. -
Scatter the stars:
Peel and stick the stars and snowflakes randomly in the upper half of both window panes. Place larger snowflakes near the top corners and smaller stars lower down to balance the composition. -
Final burnish:
Go over every piece one last time with your squeegee, paying special attention to the thin antler tips and rein lines to ensure they are fully adhered. -
Clean up:
Wipe away any fingerprints left on the glass around the decals with a dry cloth for a streak-free finish.
Level Up: Rudolph’s Nose
Add a tiny circle of red translucent cellophane or red vinyl to the nose of the lead reindeer. When the sun hits it, it will glow like a real light.
Enjoy your festive silhouette view every time you glance out the window this season
Hand-Lettered Holiday Greeting
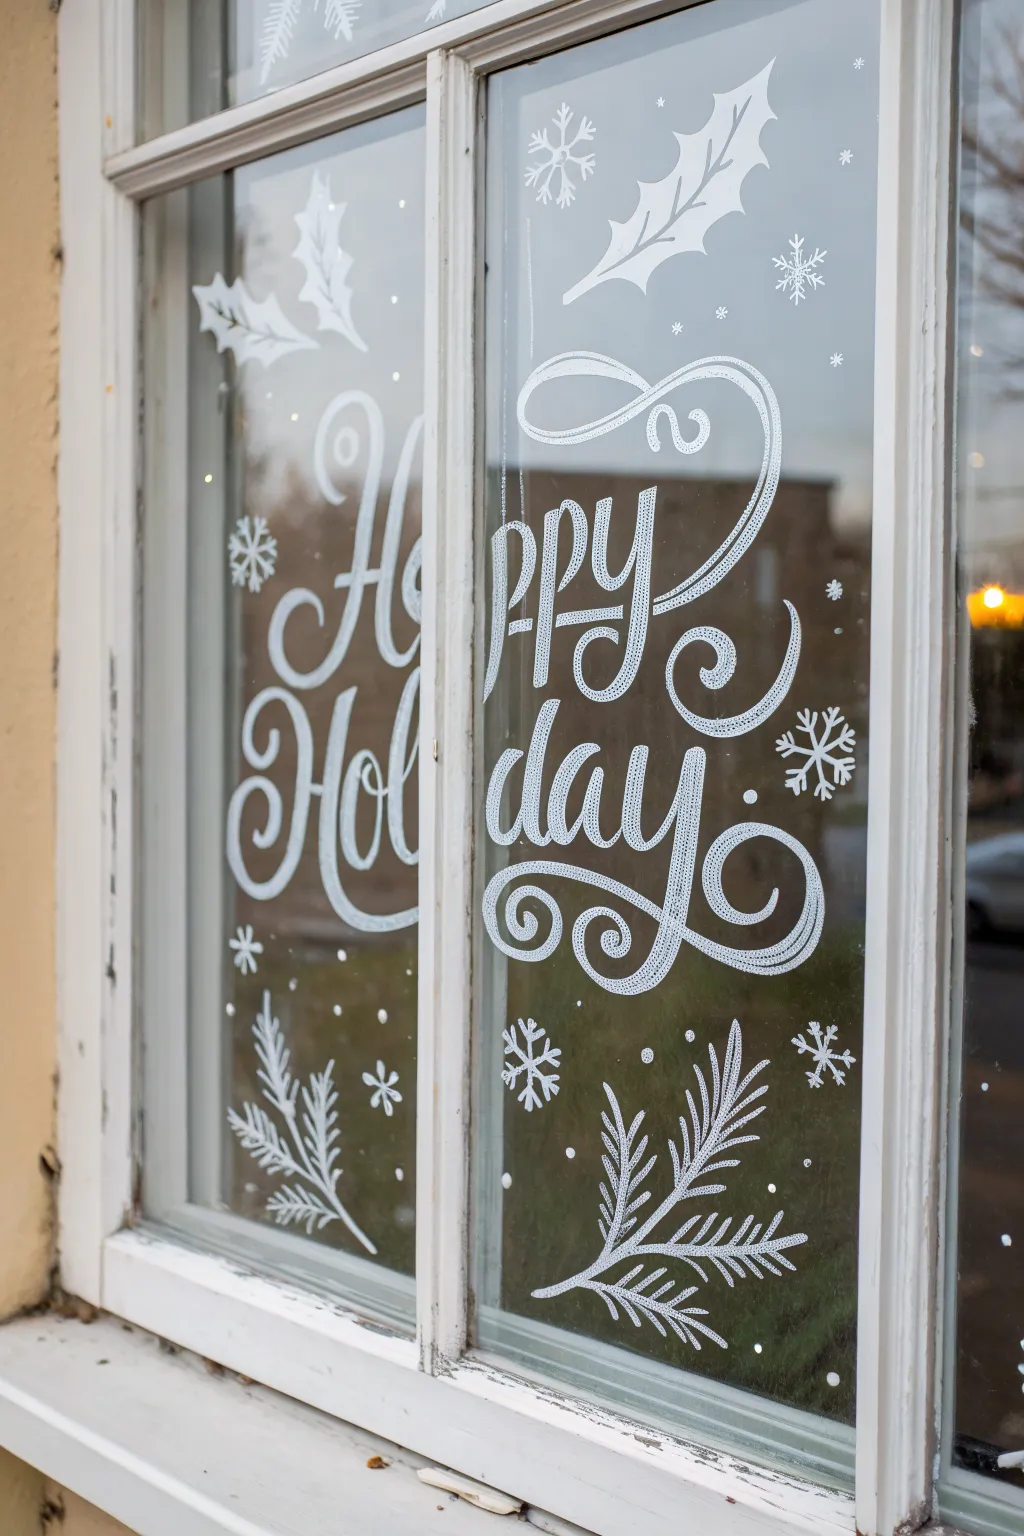
Transform a plain window pane into a festive focal point with this elegant hand-lettered design. Using white liquid chalk or paint markers, this project features intricate dotted lettering surrounded by delicate pine boughs and winter foliage.
Step-by-Step Tutorial
Materials
- Glass cleaner and lint-free cloth
- White liquid chalk marker (medium bullet tip)
- White acrylic paint marker (fine point) for details
- Paper, pencil, and tape (for sketching the template)
- Measuring tape
- Cotton swabs and water (for corrections)
Step 1: Preparation and Template
-
Clean surface:
Begin by thoroughly cleaning the window pane inside and out using glass cleaner and a lint-free cloth. Any dust or grease will prevent the marker from adhering cleanly. -
Measure space:
Measure the width and height of your window pane to determine the scale of your lettering. This design splits the word across the center mullion, so measure both sides if you have a divided window. -
Draft the layout:
On a large sheet of paper, sketch out ‘Happy Holiday’ in a cursive script. Aim for a bouncy calligraphy style where the letters ‘H’ and ‘y’ have large, swooping flourishes. -
Check alignment:
Hold your paper sketch up to the window to ensure the words flow naturally across the gap between panes. The loop of the ‘H’ should sit on the left, and the ‘y’ tail on the right. -
Tape the template:
Once satisfied, tape your paper template securely to the *outside* of the window facing in. This allows you to trace the design from the inside comfortably.
Oops! Runny Ink?
If liquid chalk drips, let it dry completely before flaking it off with a dry fingernail or scraper. Wiping it wet often creates a cloudy smear that is harder to fix.
Step 2: Lettering the Main Text
-
Prime the marker:
Shake your medium-tip liquid chalk marker well and press the tip onto a scrap piece of paper until the ink flows smoothly and opaque. -
Trace the outlines:
Carefully trace the outer edges of your sketched letters onto the glass. Do not fill them in yet; create a ‘hollow’ outline for each stroke. -
Thicken downstrokes:
Identify the downstrokes (parts of the letters where your pen moved downward). Double up the outline on these sections to make them look thicker, maintaining that hollow space inside. -
Add internal details:
This is where the magic happens: instead of coloring the letters solid, use the fine-point marker to fill the hollow spaces with tiny, repetitive dots or hatch marks. This creates the lacy texture seen in the ‘p’s and ‘d’. -
Refine the flourishes:
Extend the curly flourishes on the capital ‘H’ and the ‘y’. Add an extra inner line to these flourishes to give them ribbons-like dimension.
Step 3: Adding Holiday Motifs
-
Sketch foliage positions:
Looking at the open spaces around your text, lightly mark where the pine branches and holly leaves will go. The reference image places holly at the top and pine at the bottom. -
Draw the holly leaves:
Near the top right, draw the jagged outline of two or three holly leaves. Keep the lines crisp and angular. -
Draw the pine branches:
At the bottom, draw a long, curved central stem for a pine branch. Add short, wispy strokes coming off the stem in a V-shape pattern to mimic needles. -
Layer the needles:
I like to go back over the pine branch and add a second layer of needles in between the first set to make the branch look lush and full. -
Add snowflakes:
Scatter 3-4 simple snowflakes in the empty negative spaces. Use a simple asterisk (*) shape as a base and add small V-tips to the ends of the lines. -
Create snow texture:
Using the fine point marker, add tiny random dots all around the lettering and foliage to simulate falling snow.
Make It Sparkle
While the white ink is still wet on the thickest parts of the letters, gently blow a pinch of clear or iridescent glitter onto the paint for a shimmering, icy effect.
Step 4: Final Touches
-
Remove template:
Go outside and carefully peel off your paper template. Return inside to inspect your work against the natural background. -
Clean up edges:
Dampen a cotton swab slightly and use it like an eraser to sharpen any smudged lines or uneven edges on your lettering. -
Sharpen details:
If any white lines look translucent, carefully go over them one last time to ensure the white pops brightly against the glass.
Step back and enjoy the cozy, handmade charm your new window art brings to the view outside

PENCIL GUIDE
Understanding Pencil Grades from H to B
From first sketch to finished drawing — learn pencil grades, line control, and shading techniques.
Explore the Full Guide
Candy Cane Stripe Pattern
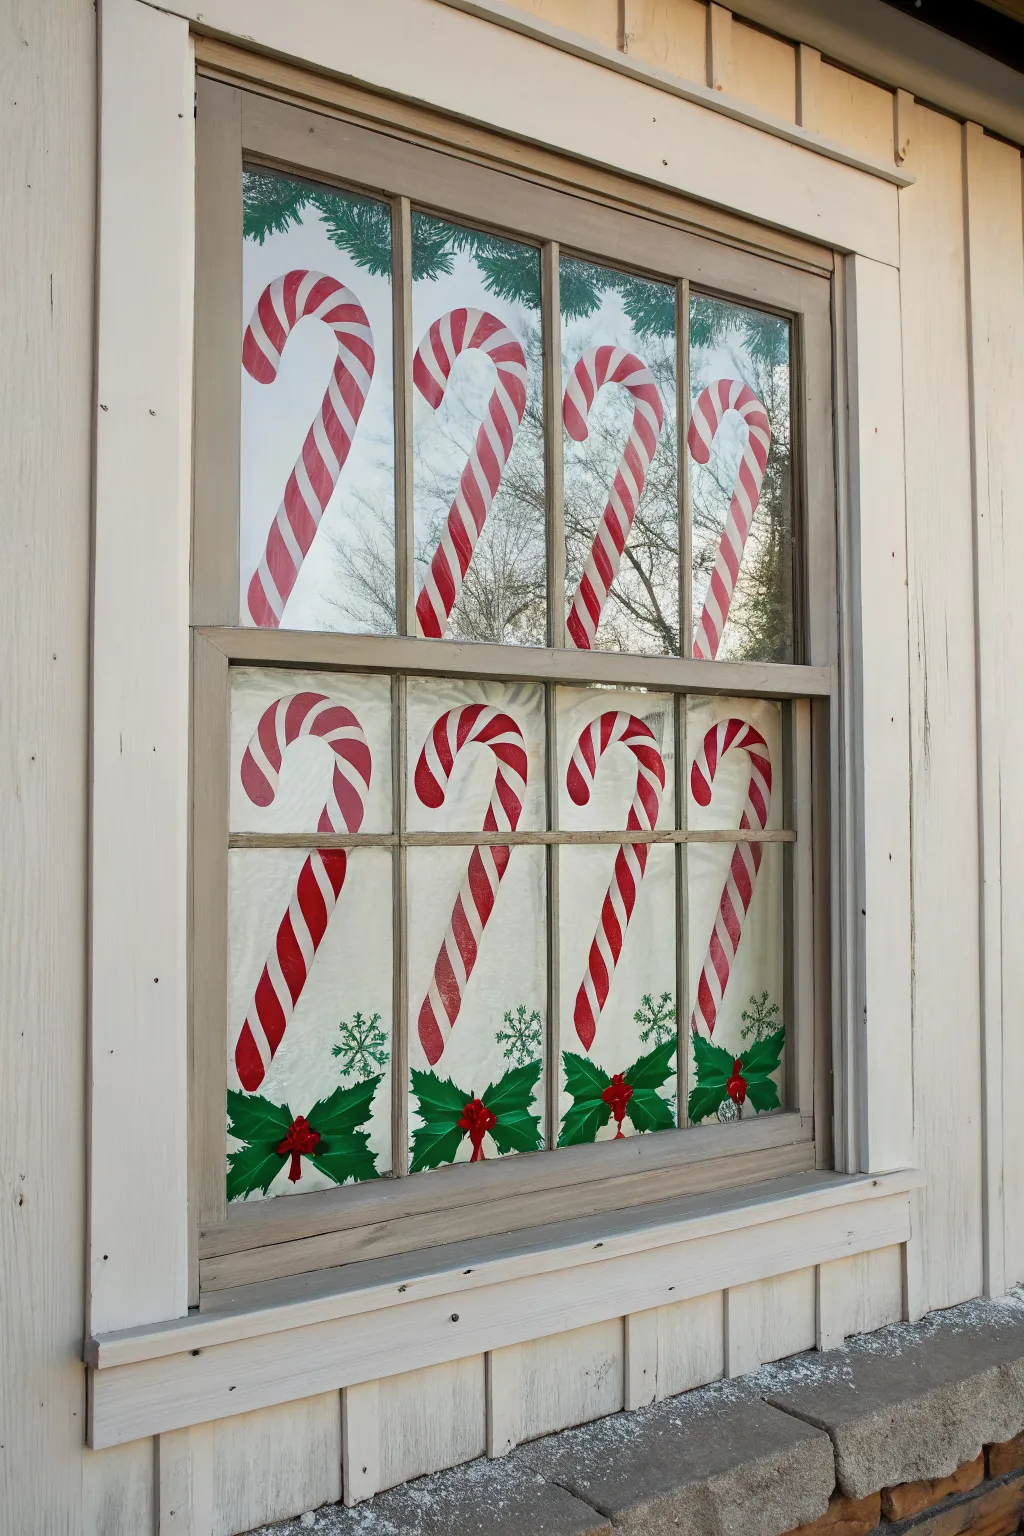
Transform your view into a sugary winter wonderland with this dual-pane candy cane design that spans the full height of your window. The artwork features four tall canes in both the upper and lower sashes, complete with snowy fir accents for a truly classic holiday look.
Step-by-Step Guide
Materials
- White liquid window chalk marker (broad tip)
- Red acrylic craft paint or tempera paint
- Green acrylic craft paint or tempera paint
- Flat paintbrush (medium width, about 1 inch)
- Small round paintbrush (for details)
- Painter’s tape or masking tape
- Paper plate or palette
- Glass cleaner and paper towels
- Ruler or level (optional)
Step 1: Preparation and Mapping
-
Clean surface:
Begin by thoroughly cleaning the window glass inside and out. Any dust or grease will prevent the paint from sticking properly, so ensure it is completely dry and streak-free before starting. -
Mark vertical guides:
Since you have four window panes across, visualize one candy cane per vertical pane section. If your window is a single sheet of glass, use painter’s tape to mark four equal vertical columns to keep your spacing consistent. -
Outline the hook:
Using your white chalk marker or a thin brush with white paint, sketch the curved ‘hook’ of the candy canes in the upper sash of the window. Start near the left side of each pane section, curving up and to the right. -
Extend the staff:
Draw the long, straight vertical lines for the cane bodies. These lines should extend from the hook in the top sash all the way down through the bottom sash, stopping a few inches above the window sill. -
Create the width:
Add the second parallel line to define the thickness of your candy canes. Aim for a width of about 2-3 inches so they are visible from the street.
Opacity Secret
Windows are backlit during the day. For bold colors that don’t look washed out, apply a second coat of paint once the first is fully dry.
Step 2: Painting the Base
-
Fill with white:
Using the broad white chalk marker or white paint on a flat brush, fill in the entire outline of the candy canes. Don’t worry about the stripes yet; you need a solid white base to make the colors pop. -
Allow to dry:
This step is crucial. Let the white base coat dry completely to the touch. If you paint the red stripes while the white is wet, you’ll end up with pink smears. -
Tape the stripes (optional):
For razor-sharp lines, I sometimes apply small strips of painter’s tape diagonally across the dried white painted canes. However, freehanding them gives the artwork a charming, hand-painted feel.
Step 3: Adding Color and Detail
-
Paint diagonal stripes:
Load your medium flat brush with red paint. Starting from the top hook, paint diagonal stripes downward. Try to keep the spacing consistent between the red and remaining white sections. -
Connect the sashes:
Pay special attention to where the top and bottom window sashes meet. Ensure the angle of the red stripe continues logically from the top pane to the bottom pane so the image looks cohesive. -
Add holly leaves:
At the very bottom of each candy cane on the lower sill, use green paint to add two large, jagged holly leaves pointing outward. These anchor the design visually. -
Paint the berries:
Once the green leaves are dry, use your small round brush to dab a cluster of bright red berries right where the leaves join at the base of the cane. -
Add evergreen garland:
In the very top corners of the upper window sash, use a dry-brush technique with green paint to create the texture of pine needles draping down, framing the top of the design. -
Frost the glass:
To mimic the frosted look in the background, lightly sponge a very thin, watered-down layer of white paint around the candy canes, or use a specific ‘frosting effect’ spray for glass. Keep this transparent. -
Draw snowflakes:
Use the white chalk marker to draw delicate snowflakes in the empty spaces between the candy canes on the lower window pane. Vary the sizes for visual interest. -
Final touches:
Step back and check your work from a distance. If any red stripes look too thin, thicken them up now. Clean up any accidental smudges with a damp cotton swab.
Make It Sparkle
While the red paint on the berries and stripes is still wet, sprinkle a pinch of red or iridescent glitter onto it. It will catch the streetlights at night.
Now you have a festive, custom window display that looks just as sweet from the inside as it does from the curb
Snowman Family Row
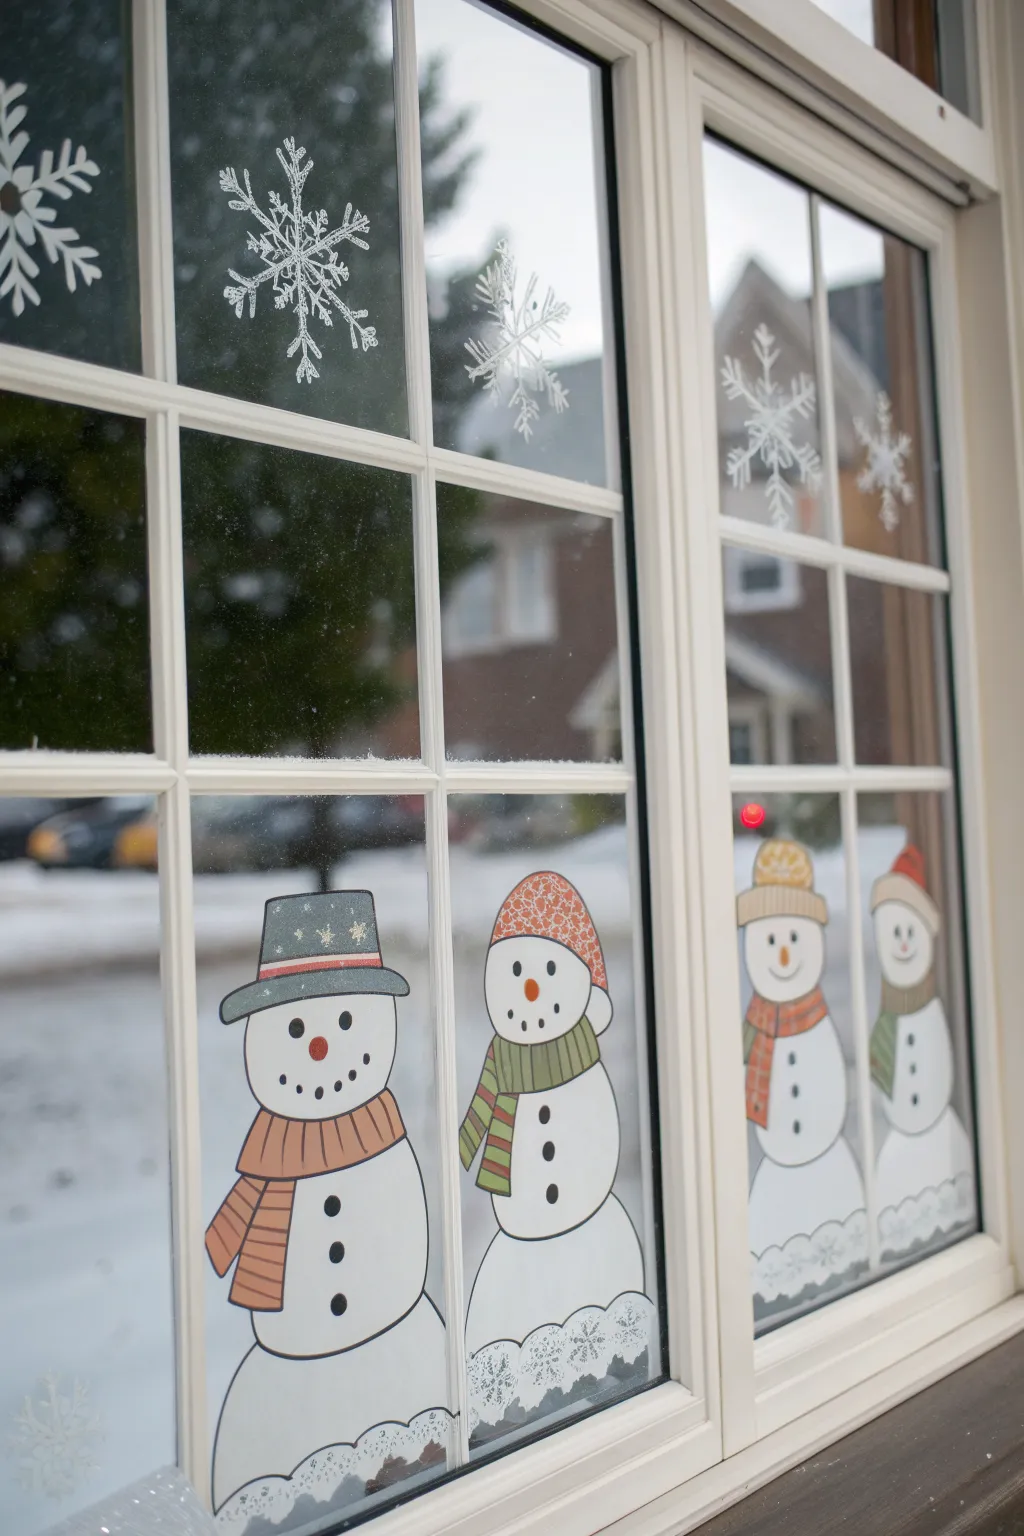
Create a cheerful winter scene without the mess of paint by crafting a row of paper snowmen to peek out your window. This project combines simple drawing and cutting skills to make a festive display that looks hand-painted from the street but removes easily when the season ends.
Detailed Instructions
Materials
- Heavy white cardstock or watercolor paper
- Pencil and eraser
- Black permanent marker (fine and ultra-fine tip)
- Colored markers or colored pencils (orange, red, green, grey)
- Scissors
- Clear double-sided tape or invisible tape
- White or silver paint pen (optional for snowflakes)
Step 1: Drafting the Snowmen
-
Measure your panes:
Before drawing, measure the width of your window panes. You want your snowmen to fit comfortably within the glass area without being covered by the window grid. -
Sketch the body shapes:
On your white cardstock, lightly sketch the stacked snowball shapes for the bodies. Make four distinct snowmen, varying their heights slightly to create a family effect. -
Add the hats:
Give each snowman a unique headpiece. Sketch a tall top hat for the first one, a cozy beanie for the second, a simple cap for the third, and a stocking cap for the fourth. -
Draw the faces:
Sketch simple dot eyes and a carrot nose for each figure. For the smiles, use a series of small dots to resemble coal pieces. -
Accessorize with scarves:
Drape scarves around their necks. I like to make the first snowman’s scarf hang down long, while the others can be wrapped closer to the neck or tucked in.
Step 2: Coloring and Outlining
-
Outline the main lines:
Go over your pencil sketches with a fine-tip black permanent marker. Keep your lines steady and bold to ensure they are visible from a distance. -
Color the tall hat:
Use a grey marker or pencil for the top hat on the first snowman, leaving a band of red for contrast. Add tiny star details on the grey felt if you wish. -
Fill in the knit caps:
Color the beanie of the second snowman with orange, adding a textured pattern like little ‘v’ shapes to mimic knitting. Use lighter earth tones or creams for the smaller snowmen’s hats. -
Color the scarves:
Fill in the scarves using red, green, and orange. Stripes work perfectly here to add visual interest without being too complicated. -
Add facial details:
Color the carrot noses a bright orange and fill in the coal buttons and eyes with solid black. -
Create the base detail:
At the very bottom of each snowman, just above where you’ll cut, draw a wavy line with delicate lace-like patterns or swirls to suggest they are sitting in a drift of snow.
Sticky Situation
If double-sided tape leaves residue on the cold glass, try using small dabs of clear glue stick on the paper corners. It holds well and washes off easily with warm water.
Step 3: Cutting and Installation
-
Cut out the figures:
Carefully cut out each snowman. Leave a very small, uniform border of white paper around the black outline to make the drawing pop against the background. -
Prepare the window:
Clean the inside of your window glass thoroughly with glass cleaner and a lint-free cloth to ensure the tape adheres well. -
Tape the snowmen:
Apply small pieces of double-sided tape to the front (colored side) of the snowmen if you want them facing outside, or the back if they face inward. For the look in the photo, tape the front to the glass. -
Position the family:
Stick each snowman to the bottom of its respective window pane, ensuring they sit flush against the bottom edge of the glass. -
Create paper snowflakes:
Draw simple six-pointed snowflakes on leftover white cardstock or use a white paint pen directly on the glass above the snowmen. -
Attach the snowflakes:
If you used paper for the flakes, cut them out and tape them to the upper panes, scattering them randomly to look like falling snow.
Let it Glow
Cut tiny holes for the snowman buttons and tape a small battery-operated LED or fairy light directly behind the paper to make their buttons glow at night.
Now your home greets passersby with a warm, friendly winter gathering that will last all season


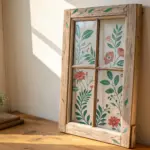
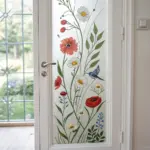
Poinsettia and Mistletoe Clusters
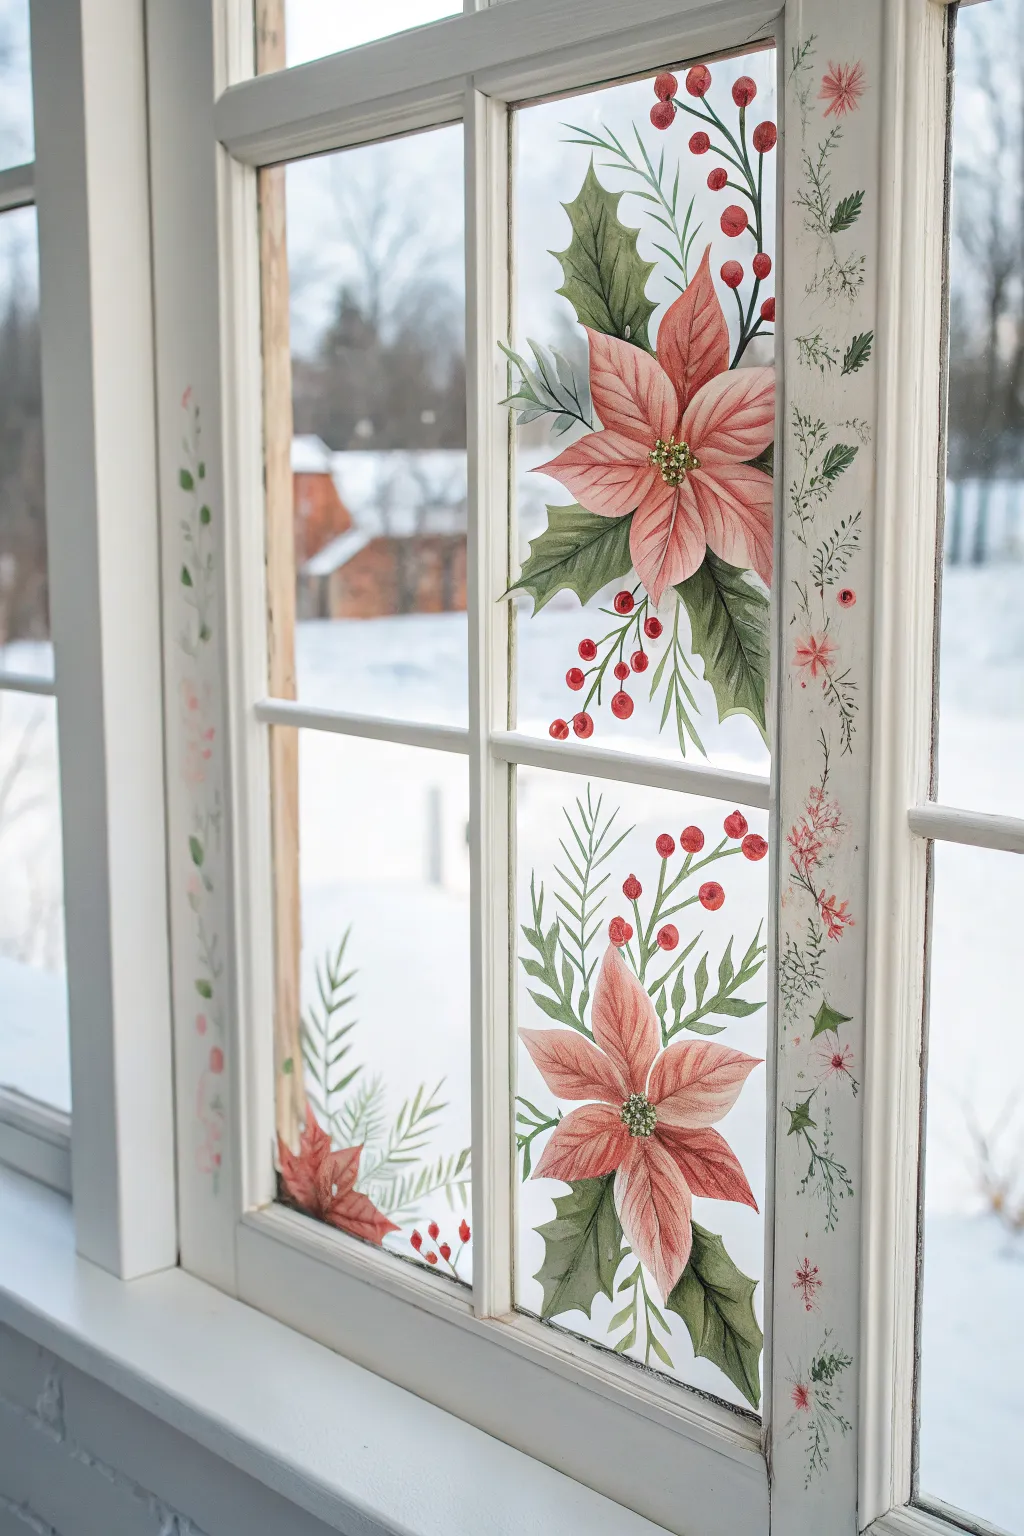
Transform your winter view with this delicate window painting project featuring soft pink poinsettias and classic holly. The translucent quality of the paint allows light to filter through, creating a stained-glass effect that brightens even the coldest days.
Step-by-Step Tutorial
Materials
- Acrylic craft paints (Titanium White, Alizarin Crimson, Sap Green, Phthalo Green, Burnt Umber, Yellow Ochre)
- Window glass cleaner and lint-free cloth
- Rubbing alcohol
- Assorted synthetic brushes (1/2″ flat shader, #4 round, #0 liner)
- Palette or paper plate
- Water cup and paper towels
- Chalk marker or dry-erase marker (white)
- Razor blade scraper (for cleanup)
Step 1: Preparation and Layout
-
Clean the Surface:
Start by thoroughly cleaning the window pane and the surrounding wooden frame. Remove any dust or grease with glass cleaner, then wipe the glass down with rubbing alcohol to ensure the paint adheres properly. -
Plan Composition:
Visualize three main clusters: a large focal poinsettia in the upper right pane, a medium one in the lower right, and a smaller bud cluster in the bottom left. Keep the center panes mostly clear to maintain your view. -
Sketch the Outline:
Using a white chalk marker or dry-erase marker, lightly sketch the five-pointed star shape of the poinsettia leaves directly onto the glass. Add swooping lines for the holly leaves and pine sprigs extending outward.
Opacity Secret
Mix a tiny drop of dish soap into your acrylic paint. It helps the paint stick to slick glass without beading up and makes removal easier later.
Step 2: Painting the Poinsettias
-
Mix Base Petal Color:
Create a soft salmon pink by mixing Titanium White with a small dot of Alizarin Crimson and a tiny touch of Yellow Ochre. You want a color that is opaque enough to show but translucent enough to glow. -
Block in Petals:
Using the #4 round brush, fill in the petal shapes. Apply the paint in thin, even strokes, pulling from the tip of the petal toward the center of the flower. -
Let First Layer Dry:
Allow this base layer to dry completely. Acrylic on glass can be slippery, so painting wet-on-wet might lift the previous layer. -
Add Petal Veins:
Mix a slightly darker version of your pink by adding a bit more crimson. Use the liner brush to paint delicate central veins and faint branching lines on each petal to add dimension. -
Create Center Details:
For the flower center, dab small dots of Yellow Ochre mixed with Sap Green. Once dry, add tiny highlights of pure white to these dots to make them look like textured cyathia.
Step 3: Foliage and Accents
-
Paint Holly Leaves:
Mix Sap Green with a touch of Burnt Umber for a deep, natural green. Use the flat shader brush to block in the spiky holly leaves, tucking them behind the pink petals. -
Add Leaf Veining:
Once the green is dry, mix Sap Green with White to create a lighter mint shade. Use your liner brush to draw the central vein and side ribs on the holly leaves for contrast. -
Paint Pine Sprigs:
Using the #0 liner brush and a fluid mixture of Phthalo Green and White, flick quick, wispy strokes outward to create delicate pine needles. I prefer to vary the length of these strokes for a natural look. -
Create Berries:
Dip the round handle end of a brush into Alizarin Crimson and dot it onto the glass to create perfectly round berries. Group them in clusters of three or hang them from thin vines. -
Add Berry Highlights:
When the red dots are dry, add a tiny speck of Titanium White to the top left of each berry to simulate a shiny, reflective surface.
Frosty Finish
Sponge a very thin layer of white paint focused around the corners of the panes to create a faux frost effect that frames your floral clusters.
Step 4: Frame Details
-
Prepare the Frame:
Move your attention to the wooden window sash. Ensure the white paint is clean and dry. -
Paint Vine Scrollwork:
With a very watery mix of Sap Green, paint a continuous, undulating vine running vertically up the frame. Keep the line extremely thin. -
Add Frame Florals:
Along this vine, add tiny leaves and miniature versions of the pink flowers using the tip of your smallest brush. This connects the painting on the glass to the architecture of the window.
Enjoy your beautiful winter garden view from the warmth of your home

Have a question or want to share your own experience? I'd love to hear from you in the comments below!