When I want quick festive inspiration, I always start with simple Christmas designs that look charming even as speedy sketches. Here are my favorite drawing ideas—from classic icons to more playful patterns you can remix for cards, journal pages, and little handmade tags.
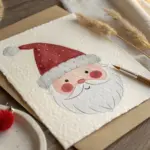
Simple Santa Face Sketch
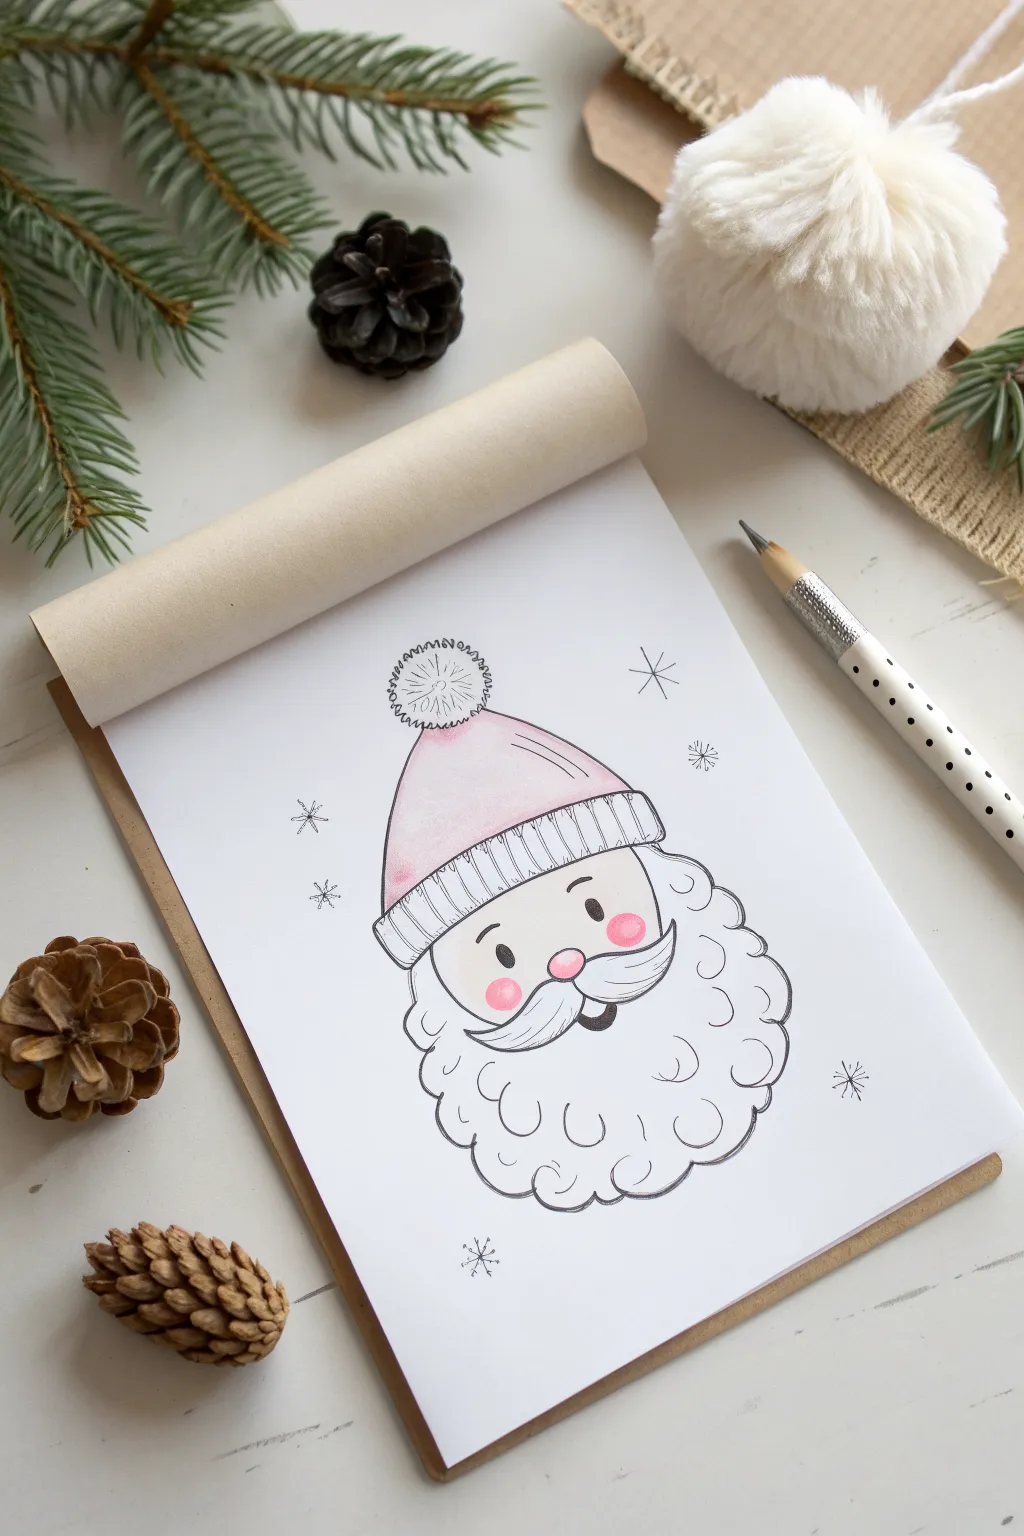
Capture the jolly spirit of the season with this sweet and simple Santa face sketch. Featuring soft pastel touches and loose, wiggly line work, this illustration is perfect for personalized holiday cards or festive gift tags.
How-To Guide
Materials
- White sketchbook paper or cardstock
- F graphite pencil (for initial sketching)
- Fine-liner pen (black, approx. 0.3mm to 0.5mm)
- Pink colored pencil or pastel pencil
- Eraser
- Pencil sharpener
Step 1: Setting the Structure
-
Outline the hat shape:
Begin by drawing a soft, rounded triangle near the top center of your page. This will be Santa’s hat. Instead of a sharp point at the top, round it off slightly where the pom-pom will sit. -
Add the hat brim:
Sketch a rectangular band across the bottom of the triangle. Curve the lines slightly downward to wrap around the forehead, giving the drawing dimension. -
Draw the face contour:
Just below the brim, draw a wide U-shape for the face. Keep it relatively shallow, as the beard will cover the lower chin area. -
Position the pom-pom:
Sketch a rough circle at the very tip of the hat. Don’t worry about making it perfect; the texture we add later will define its shape.
Step 2: Facial Features
-
Place the nose:
Identify the center of the face area and draw a small, smooth oval for the nose. It should sit slightly below the middle of the face. -
Add the mustache:
From the center of the nose, draw two teardrop shapes curving outwards and upwards. The tips should flick up slightly for a cheerful expression. -
Draw the eyes:
Place two short, thick vertical dashes for eyes above the mustache. Add tiny eyebrows just above them using small curved lines. -
Sketch the mouth:
Tuck a small, dark semi-circle centered directly beneath the mustache to create an open, smiling mouth.
Fixing Shaky Lines
If your ink lines wobble, don’t restart. Simply thicken the line slightly in that spot or add a second loose line next to it. Since the style is intentionally scribbly, imperfections blend right in.
Step 3: The Glossy Beard
-
Start the beard outline:
Beginning at one ear position (side of the face), draw a series of connected, loopy scallops. Work your way down and around the chin. -
Complete the beard shape:
Continue these varied C-curves up the other side until you reach the hat brim on the opposite side. Keep the loops irregular to make the beard look fluffy. -
Add interior texture:
Draw loose, random C-shaped curves inside the main beard outline. These floating lines suggest volume and curls without overcomplicating the sketch.
Pro Tip: Soft Blush
To get that super soft rosy cheek look, scribble your pink pencil on a scrap paper first, pick up the pigment with a cotton swab or your finger, and gently rub it onto the Santa’s face.
Step 4: Inking and Coloring
-
Define the hat texture:
With your fine-liner, ink the hat brim using vertical lines. Space them unevenly to mimic a knitted rib texture. -
Ink the pom-pom:
Use short, spiky strokes radiating outward from the center of your pom-pom circle to create a fuzzy, yarn-like appearance. -
Finalize the line art:
Go over your pencil lines with the nice black pen. When inking the beard, keep your hand loose to maintain that charming, wiggly quality seen in the reference. -
Erase guidelines:
Wait a moment for the ink to dry completely, then gently erase your initial pencil sketches to clean up the page. -
Color the cheeks:
Take your pink pencil and softly shade two round circles specifically on the cheeks. Press harder in the center and fade out toward the edges. -
Tint the hat and nose:
Lightly shade the main body of the hat with the same pink, leaving some white space for highlights. Add a tiny touch of pink to the top of the nose as well. -
Add snowflakes:
Surround your Santa with a few simple asterisk-style snowflakes. Draw a central cross and add a diagonal cross over it for a classic winter sparkle.
Now you have a charming winter character ready to brighten up your sketchbook


Classic Christmas Tree Layers
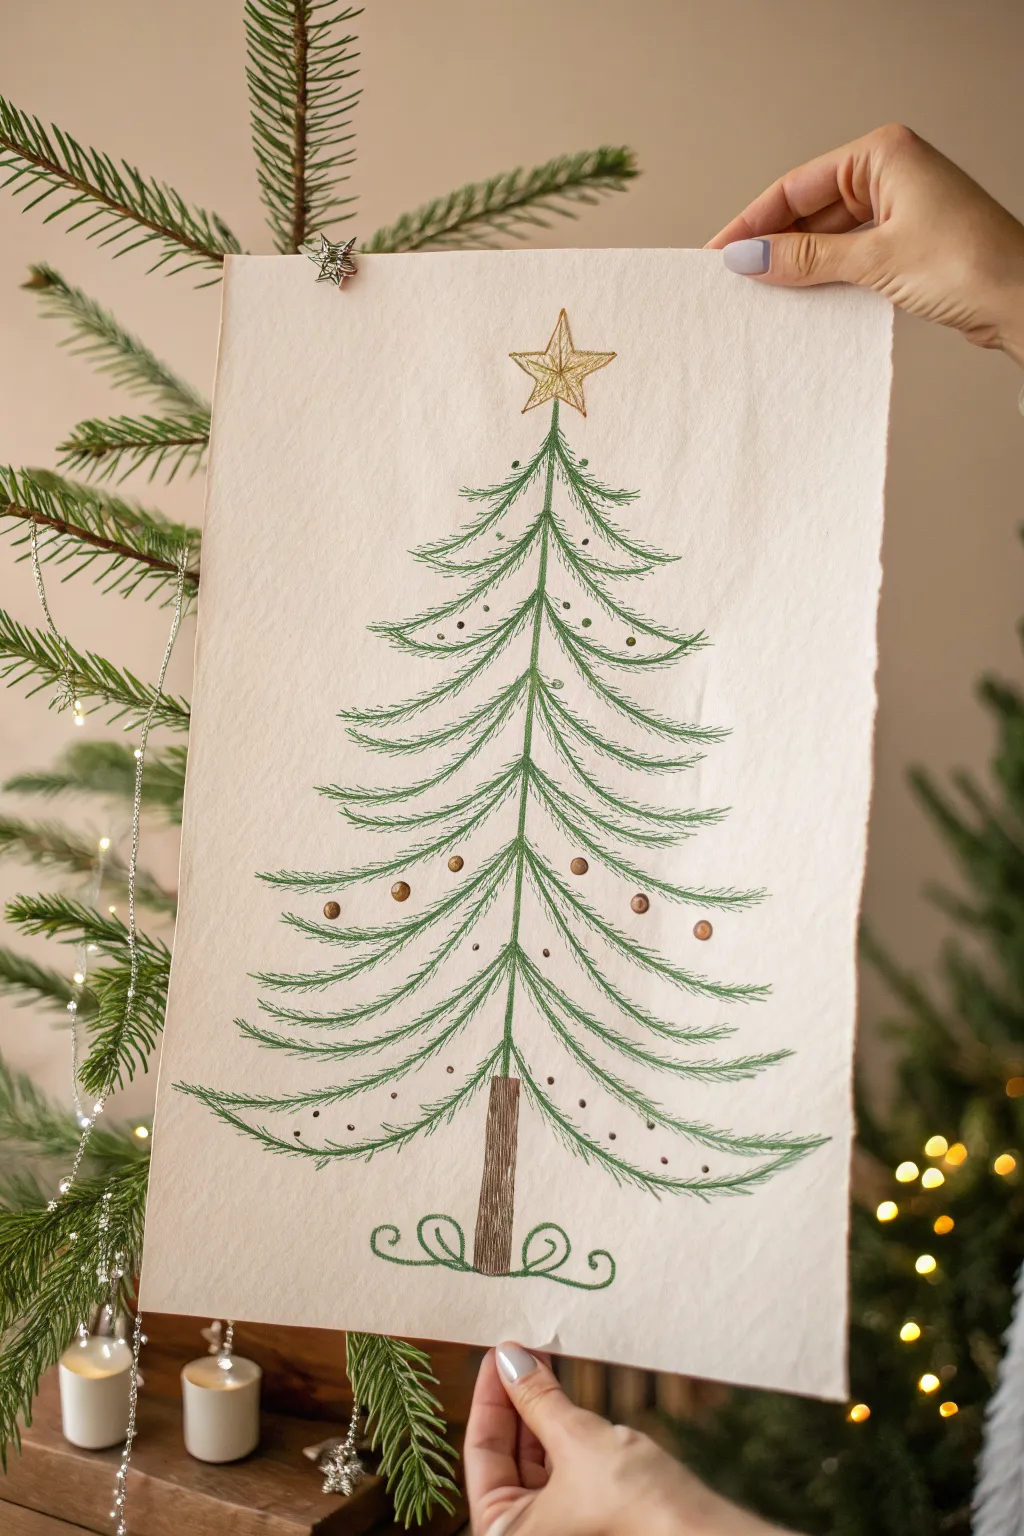
Capture the charm of a classic holiday evergreen with this delicate pen-and-ink style illustration. The design focuses on sweeping, rhythmic branches and minimalist ornaments for a sophisticated, hand-drawn look.
Step-by-Step Tutorial
Materials
- Cream or off-white textured art paper (heavyweight sketch or mixed media)
- Fine liner pens (Green, 0.3mm and 0.5mm)
- Brown marker or felt-tip pen
- Gold metallic gel pen or paint marker
- Bronze or copper metallic pen (for ornaments)
- Pencil (HB) and eraser
- Ruler
Step 1: Structural Sketching
-
Establish the centerline:
Begin by using your ruler and pencil to draw a faint vertical line down the center of your paper. This will act as the spine of your tree and ensure it stands straight. -
Mark the tiers:
Lightly mark horizontal dashes along the spine where each layer of branches will sit. Start narrower at the top and gradually widen the distance between layers as you move down, creating roughly 8-9 distinct tiers. -
Outline the trunk:
At the bottom of your centerline, sketch a simple rectangular shape for the trunk. It doesn’t need to be perfectly straight; a slight unevenness adds character.
Step 2: Drawing the Branches
-
Start the spine:
Switch to your green fine liner. Draw a solid line down your pencil guide, stopping just before you reach the trunk area. -
Draw the main branch curves:
Starting from the top tier, draw the main swooping lines for the branches. These should arc downwards and then slightly flick up at the tips. Keep the top branches short and extend the length as you move down the tree. -
Add secondary branches:
For the lower, wider tiers, draw a second, slightly smaller swooping line underneath the main branch line. This adds volume to the bottom of the tree. -
Texture with needles:
Using quick, flicking motions with your green pen, add the pine needles along the top edges of your branch curves. Keep the lines short and angled outward toward the branch tips. -
Fill the undersides:
Repeat the needle texture on the undersides of the branches. I find that making these bottom needles slightly longer helps create a fuller, heavier look for the boughs. -
Connect to the spine:
Ensure all your green branch lines connect cleanly back to the center spine so the tree looks structural and sturdy.
Wobbly Lines?
Don’t stress if your sweeping curves aren’t perfect arcs. Natural branches are irregular! A few bumps or waves in the line art actually make the tree look more organic and realistic.
Step 3: Ornaments and Details
-
Color the trunk:
Use your brown marker to fill in the trunk. Instead of solid coloring, use tight vertical lines to mimic the texture of bark. -
Add the base scrolls:
With the green fine liner, draw two decorative curlicues extending from the base of the trunk, grounding the design with a whimsical flourish. -
Draw the star:
At the very top, sketch a five-pointed star using the gold metallic pen. Add internal lines connecting the center to the inner corners to give it a faceted, 3D appearance. -
Place the baubles:
Switch to your bronze or copper pen. Draw small, solid circles resting on top of the branches. Scatter them randomly rather than placing them on every single branch tip. -
Add tiny filler dots:
Using a very fine tip pen (or the same bronze marker), add tiny speckles or micro-dots in the negative spaces between branches to suggest distant lights or falling snow. -
Clean up:
Once you are certain the ink is completely dry, gently erase your initial pencil guideline from the center of the tree.
Add Some Sparkle
Once the ink is dry, add tiny dots of liquid glitter glue to the center of the star or on top of the bronze ornaments for a design that catches the light.
Display your finished festive pine in a simple frame or use it as the front of a handmade holiday card to share the cheer


Cozy Snowman From Three Circles
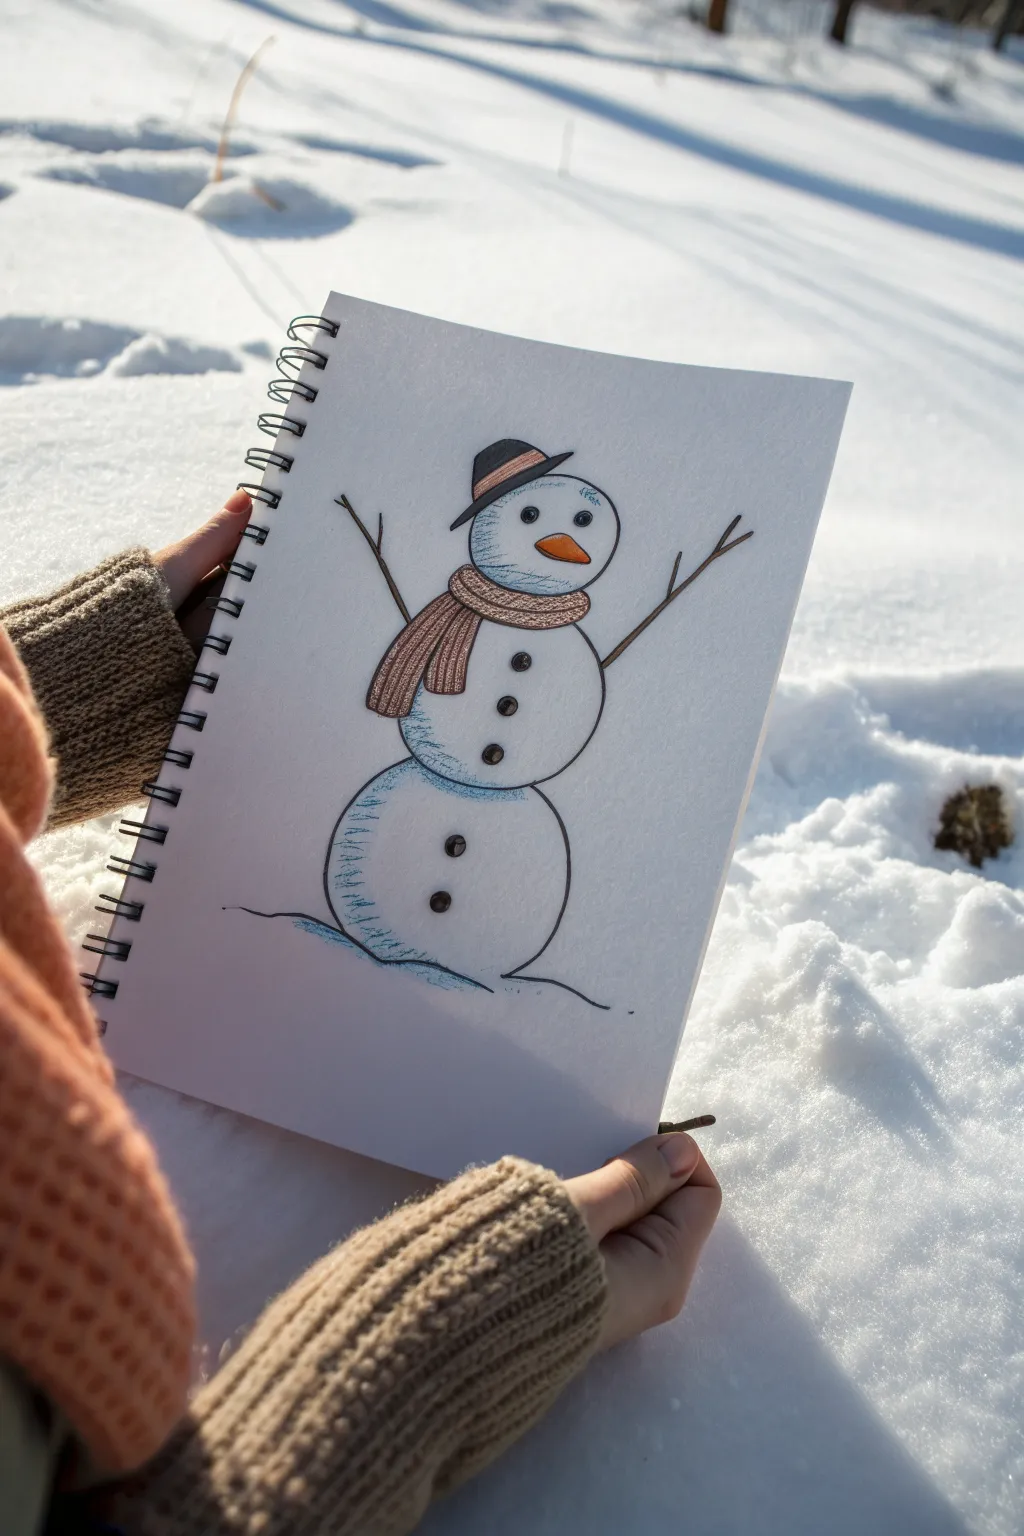
Capture the essence of winter with this charming, simply-styled snowman illustration. Using clean lines and gentle shading, you’ll create a character that looks like it popped straight out of a classic holiday storybook.
Detailed Instructions
Materials
- Spiral-bound sketch pad (white heavyweight paper)
- Black fine-liner pen (0.5mm or similar)
- Colored pencils (light blue, orange, brown, dark grey)
- Pencil for sketching
- Eraser
Step 1: Basic Structure
-
Sketch the base:
Begin lightly with your pencil. Near the bottom center of the page, draw a large, slightly flattened circle for the snowman’s base. -
Add the torso:
Stack a slightly smaller circle directly on top of the base. This one should be roughly two-thirds the size of the bottom snowball. -
Draw the head:
Place the smallest circle on top for the head. It’s helpful to tilt this one just a tiny bit to give the snowman some personality. -
Define the ground:
Sketch a gentle, wavy line underneath the bottom circle to suggest the snowbank he is resting on, extending it slightly to the left and right.
Step 2: Adding Details
-
Outline the hat:
Draw a brim slightly slanted across the top of the head. Add a rounded crown on top of that brim, resembling a bowler hat or a soft felt cap. -
Wrap the scarf:
Draw a curved band right where the head meets the torso. Extend two rectangular strips hanging down the left side of the torso to represent the scarf ends. -
Create the face:
Sketch two small circles for eyes and a long, carrot-shaped cone for the nose pointing to the right. -
Add stick arms:
Draw two thin, branching lines extending outward from the middle snowball. Angle them upwards as if the snowman is cheering. -
Place the buttons:
Mark out three small circles on the torso and two larger circles on the bottom snowball for his coal buttons.
Textured Lines
Don’t connect the circle outlines perfectly. Leave small gaps or overlap lines slightly to make the snow look fluffy rather than rigid.
Step 3: Inking & Coloring
-
Ink the outlines:
Using your black fine-liner, carefully trace over your pencil lines. I prefer to use a slightly broken, sketchy line rather than a perfect curve to mimic the texture of packed snow. -
Refine the details:
Ink the buttons, eyes, and stick arms. Add small lines within the scarf ends to look like fringe. -
Erase pencil marks:
Once the ink is completely dry, gently erase all visible graphite sketch lines. -
Shade the snow:
Take a light blue colored pencil and gently shade the left side of each snowball (bottom, torso, head). Use curved strokes that follow the round shape to create dimension. -
Color the scarf:
Fill in the scarf with a warm brown or copper pencil. Add darker stripes or texture lines to make it look knitted. -
Finish the accessories:
Color the nose bright orange. Use a dark grey or black pencil for the hat, leaving a lighter band if desired like in the reference. -
Darken the buttons:
Fill in the button circles and eyes with solid black ink or a very dark pencil. -
Ground shadow:
Add a touch of blue shading along the ground line beneath the snowman to anchor him to the page.
Uneven Shading?
If your blue shading looks too harsh, use a white colored pencil or a blending stump to smooth out the transition into the white paper.
Now you have a frosty friend ready to greet the season from the pages of your sketchbook
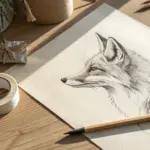

Friendly Reindeer With Big Antlers
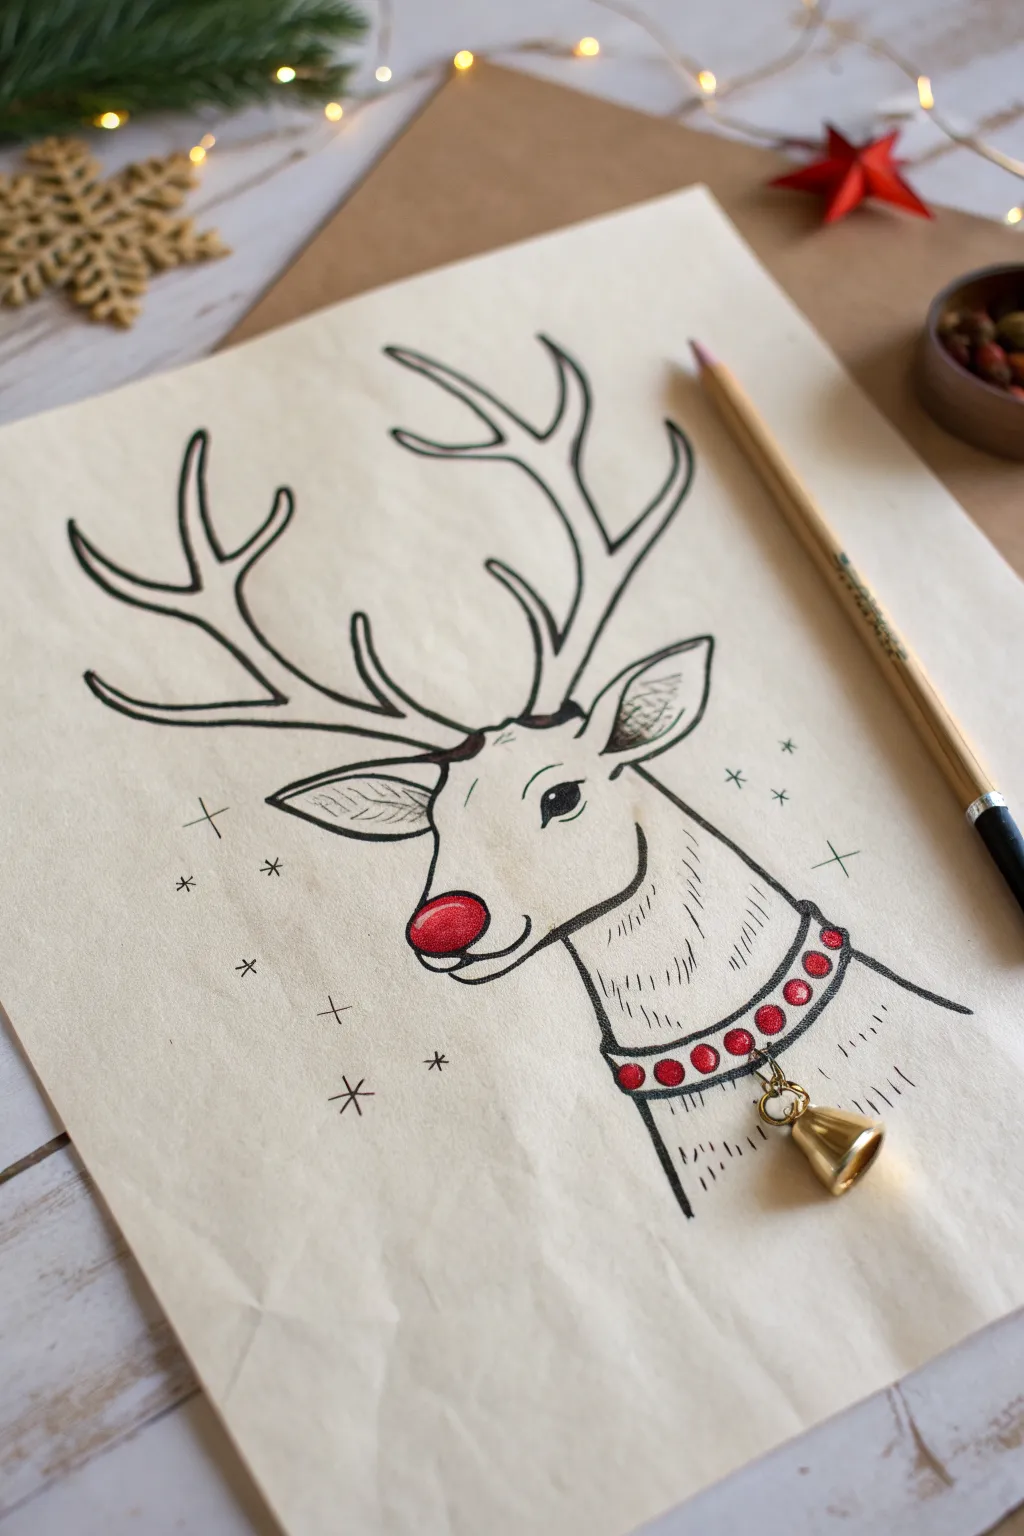
Capture the magic of Christmas with this charming mixed-media reindeer portrait. This sketch combines simple line work with bold pops of red and a whimsical 3D element that literally rings in the season.
Step-by-Step
Materials
- Cream or tan toned sketch paper
- Fine-liner pen (black, archival ink)
- Pencil (HB for sketching)
- Eraser
- Red colored pencil or marker
- Small brass craft bell
- Gold jump ring
- Clear craft glue or tape
- Needle or push pin (for making a hole)
Step 1: Sketching the Outline
-
Map the head shape:
Start lightly with your pencil. Draw a softly rounded snout that slopes up into the forehead. Add the definition for the jawline extending downwards towards where the neck will be. -
Place the features:
Position a round oval at the very tip of the snout for the nose. Draw an almond-shaped eye midway up the head, leaving a small white circle inside for a highlight. -
Add the ears:
Sketch two leaf-shaped ears just behind the eye line. The ear closest to the viewer should point slightly forward, while the further one tucks behind the antler base. -
Draw the antlers:
From the top of the head, extend two large, branching lines upward. Create the ‘Y’ shapes typical of antlers, making them curved and organic rather than stiff straight lines. -
Define the neck and collar:
Draw the neck extending down from the jaw and back of the head. Curve a band across the neck to represent the collar, giving it a slight bow shape to show the roundness of the neck.
Step 2: Inking and Details
-
Ink the main lines:
Using your black fine-liner, carefully trace over your pencil sketch. Use smooth, continuous strokes for the antlers and face outline. -
Add texture marks:
With quick, short flicks of your pen, add fur texture inside the ears and along the neck. I find that keeping these lines loose makes the fur look softer. -
Detail the eye:
Fill in the eye with solid black, being very careful to preserve that tiny white highlight circle you sketched earlier. This gives the reindeer life. -
Draw collar decorations:
Inside the collar band, draw a row of small circles. These will be the red baubles later. -
Erase guidelines:
Once the ink is completely dry—give it a minute effectively—erase all visible pencil marks to clean up the drawing.
Fixing Wobbly Lines
If your ink lines aren’t perfect, thicken the line slightly in that area. Varying line weight actually adds character and makes the drawing feel more organic.
Step 3: Color and Final Touches
-
Color the nose:
Use your red colored pencil or marker to fill in the nose. Leave a small sliver of white at the top of the oval to make it look shiny and round. -
Fill the collar gems:
Color in the small circles on the collar with the same bright red. Press firmly to get a saturated, jewel-like look. -
Add sparkle:
Around the reindeer’s face, draw simple four-point crosses and asterisks with your black pen to create a magical, twinkling effect. -
Attach the bell:
Carefully poke a tiny hole in the paper right at the center bottom of the collar. Open the gold jump ring, slide the brass bell onto it, feed the ring through the paper hole, and pinch it closed. -
Secure the hardware:
If the bell feels too heavy for the paper, add a small piece of clear tape on the back of the drawing over the jump ring to keep it stable.
Make it Sparkle
Use a metallic gold gel pen to trace over the collar outlines or to add extra starbursts in the background for a festive, shimmering finish.
Enjoy the gentle jingle of your new festive artwork whenever you move the page
BRUSH GUIDE
The Right Brush for Every Stroke
From clean lines to bold texture — master brush choice, stroke control, and essential techniques.
Explore the Full Guide
Mini Christmas Icon Doodle Grid
Fill a grid page with charming, minimalistic holiday sketches that capture the festive spirit in bite-sized form. This project focuses on clean lines and simple shapes to build a cohesive collection of winter imagery.
Step-by-Step Tutorial
Materials
- Grid paper notebook or bullet journal
- Fine-liner pen (0.3mm or 0.5mm, black)
- Pencil (HB)
- Eraser
- Ruler (optional, but helpful for spacing)
Step 1: Setting the Stage
-
Define the grid area:
Begin by deciding on the overall layout. While the notebook has a grid, you’ll need to envision a 3×6 or 4×6 invisible matrix so your doodles have breathing room. Mentally mark the center of each grid square where your icons will live. -
Draft the top row:
Using a pencil lightly, sketch the first row of icons. Start with a simple pine tree composed of three stacked triangles. Next to it, draw a five-point star with a smaller star inside. Finish the row with a simplified Christmas tree shape, perhaps just a triangle on a stick for variety.
Uneven Lines?
If your straight lines are wobbly, don’t worry. Embrace the ‘doodle’ aesthetic by deliberately making lines slightly loose or going over them twice for a sketchy look.
Step 2: Drawing the Icons
-
Sketch circular elements:
Moving down, sketch the round ornaments. For the baubles, draw a perfect circle first, then add the square cap and loop on top. Sketch one plain bauble and one later with an intricate interior pattern. -
Add seasonal symbols:
Draft a classic bell shape with a clapper at the bottom. Near it, lightly sketch some scattered snowflakes using simple crossing lines or asterisks to fill negative space. -
Outline the gift boxes:
Toward the bottom of the page, sketch several square or rectangular boxes. Vary their proportions—make some tall and some wide. Add crossing lines to represent ribbons, but keep the pencil pressure very light. -
Draft unique shapes:
Include a candy cane with a distinct hook, and sketched a more complex 3D star. For the 3D star, draw a standard star first, then add lines from the center to each inner point to create facets.
Level Up: Color Pop
Use a single colored pencil (like gold or red) to fill just one tiny section of each icon. This minimalist splash of color unifies the grid instantly.
Step 3: Inking and Details
-
Trace the linear trees:
Switch to your fine-liner pen. Carefully trace over your pencil lines for the trees. For the leftmost tree, use jagged, zigzag motions for the branches. For the rightmost tree, keep the lines straight and geometric. -
Ink the stars:
Go over the star shapes. For the faceted star, fill in alternating sections with black ink to create depth and shadow. -
Detail the ornaments:
Ink the circular baubles. inside the central ornament, draw a dense, scribbled texture or a web-like pattern to make it stand out against the simpler designs. -
Refine the bell:
Trace the bell, ensuring the bottom curve is smooth. Add a small horizontal stripe across the body of the bell for a touch of detail. -
Ink scattered snowflakes:
Go over the tiny snowflakes and asterisks. Keep these very delicate; just a quick flick of the wrist is often enough. -
Finalize the gifts:
Ink the gift boxes. When drawing the ribbons, add tiny loops at the top for bows. For one box, add diagonal hatching stripes to the wrapping paper surface for texture. -
Complete the candy cane:
Outline the candy cane, then add the diagonal stripes inside. I like to curve changes in the stripe direction slightly to match the bend of the hook.
Step 4: Cleanup
-
Let the ink set:
Wait at least 5-10 minutes to ensure the ink is completely dry. Grid paper can sometimes absorb ink slowly. -
Erase guidelines:
Gently erase all underlying pencil sketch lines. Hold the paper taut with one hand to prevent crinkling the page while rubbing.
This festive grid of icons is now ready to decorate your holiday cards or bullet journal layouts
Snowflake Symmetry Sampler
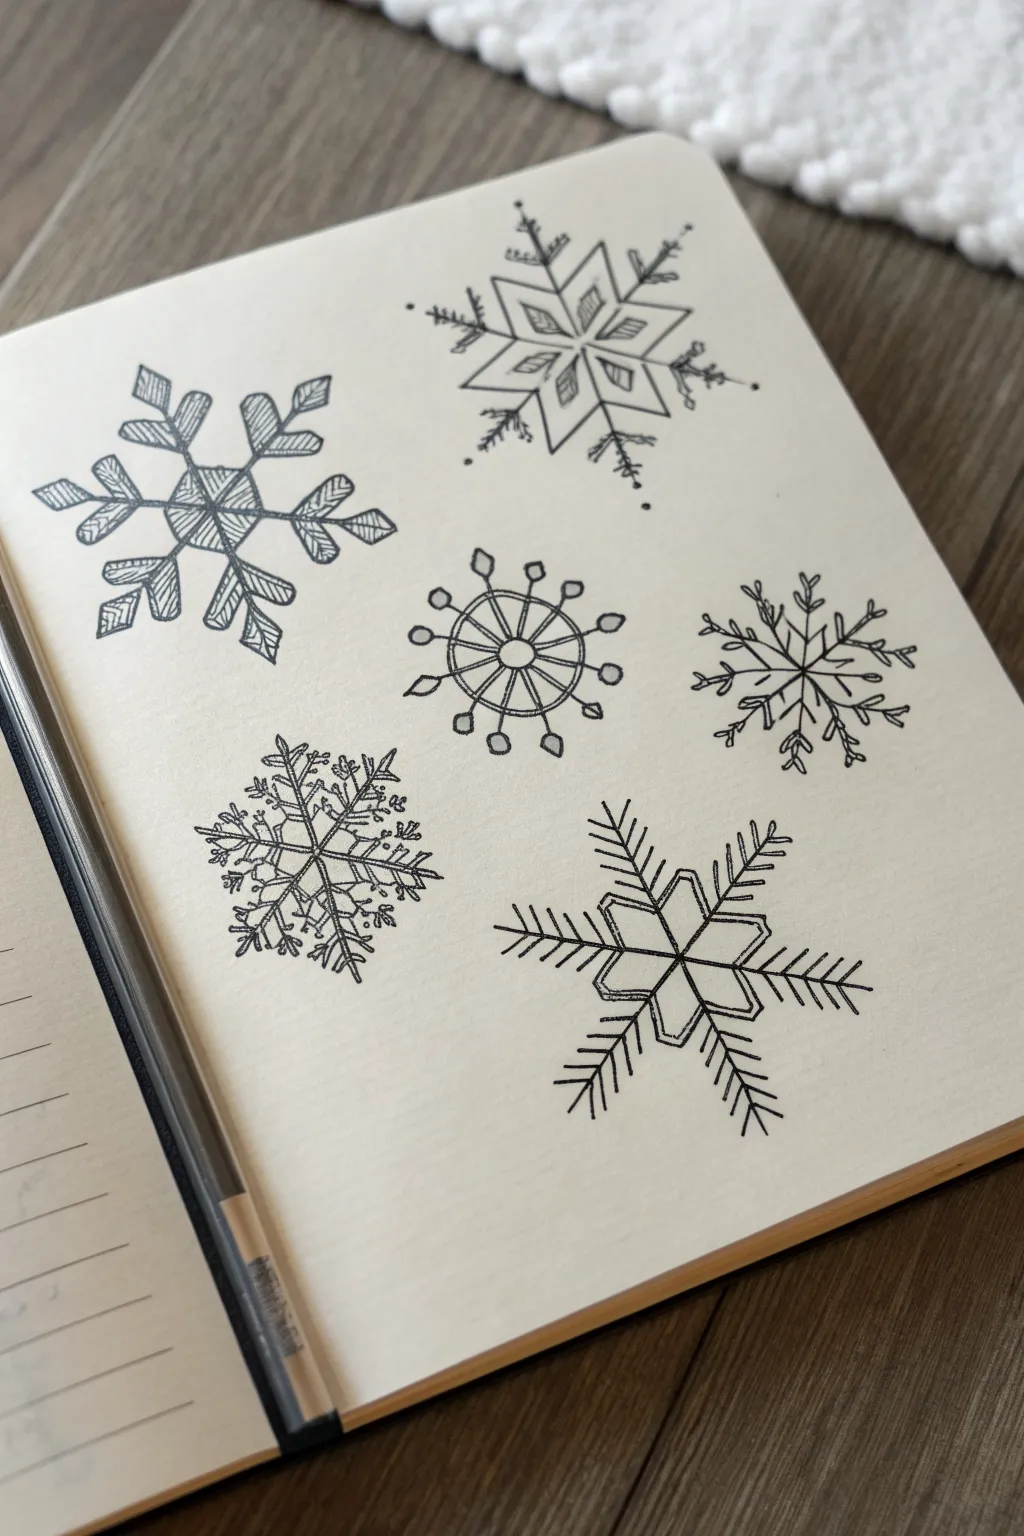
This sketchbook spread explores the beautiful geometry of winter with six distinct snowflake designs, ranging from geometric block styles to delicate botanical patterns. Using just a fine-tip pen, you will create a cohesive sampler that celebrates the endless variety of ice crystals.
How-To Guide
Materials
- Smooth sketchbook paper or cardstock
- Fine-liner pen (black, 0.3mm or 0.5mm)
- Pencil (HB or 2H for guidelines)
- Ruler
- Eraser
Step 1: Preparation & Layout
-
Visualizing the grid:
Imagine your page divided into two columns and three rows. Lightly mark six center points with your pencil where each snowflake will live, ensuring they are spaced evenly so they don’t crowd each other. -
Setting the skeletons:
For each of the six spots, use your ruler and pencil to draw a very faint six-pointed star asterisks (three lines intersecting at the center) to serve as your symmetry guide. Keep these lines light so they erase easily later.
Wonky symmetry?
If your six points feel uneven, draw a faint circle with a compass first. Mark the radius distance around the circle’s edge exactly six times to get perfect 60-degree spacing.
Step 2: Geometric Designs (Top Row)
-
Drafting the Block Flake (Top Left):
Start with the top-left design. Draw a small hexagon in the center. Extend thick, rectangular arms outward along your guide lines, capping each with a V-shape tip pointing inward. -
Adding diagonal texture:
Fill the interior of these blocky arms with diagonal hatching lines to give them a shaded, architectural look. -
Creating the Star Flake (Top Right):
Move to the top right. Draw a six-pointed star shape in the center. From each star point, extend a thin line outward. -
Detailing the Star arms:
Add smaller V-shapes along the extension lines to create little arrow-like branches, and place a tiny dot at the very tip of each arm.
Step 3: Ornamental Designs (Middle Row)
-
Drafting the Wheel Flake (Middle Left):
Draw three concentric circles in the center. The innermost circle is small, the next is medium, and the third is the largest. -
Connecting the spokes:
Draw your six main spoke lines cutting through the circles. At the end of each spoke (outside the largest circle), draw a small diamond or teardrop shape. -
Adding intermediate details:
Between the main spokes, add shorter lines extending from the middle circle, topped with small circles for a decorative, jewelry-like effect. -
Sketching the Botanical Flake (Middle Right):
Draw six simple straight lines radiating from a center point. Along each line, draw tiny paired leaves or branches curving upward, resembling a fern frond or wheat stalk.
Level-Up: Sparkle
Use a white gel pen or a silver metallic marker to add tiny highlight dots on top of the black ink lines once dry, giving the snow an icy shimmer.
Step 4: Complex & Linear Designs (Bottom Row)
-
Building the Crystal Flake (Bottom Left):
This one is the most intricate. Draw your six main axes, then connect them near the center with a jagged, hexagonal web pattern. -
Branching out:
Add multiple small, chaotic branches coming off the main stems. I suggest varying the lengths to make it look like frost growing naturally on a windowpane. -
Drafting the Arrow Flake (Bottom Right):
Draw a small hexagon in the center. Extend six long, straight lines from the hexagon’s corners. -
Fletching the intricate arms:
Add series of V-shapes (chevrons) pointing inward along each arm. Space them consistently—about four or five chevrons per arm—to create a feathery, arrow-like appearance.
Step 5: Finalizing
-
Inking the lines:
Go over your favorite pencil lines with the fine-liner pen. Commit to the shapes now, keeping your hand steady for the straight geometric sections. -
The clean up:
Wait until the ink is completely dry—give it a few minutes—then gently erase all the underlying pencil guides to reveal the crisp black-and-white contrast.
Fill the rest of the page with smaller doodles or leave the negative space to let the individual designs breathe

PENCIL GUIDE
Understanding Pencil Grades from H to B
From first sketch to finished drawing — learn pencil grades, line control, and shading techniques.
Explore the Full Guide
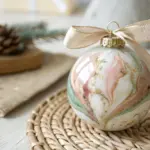
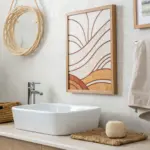
Patterned Ornaments in Line Art
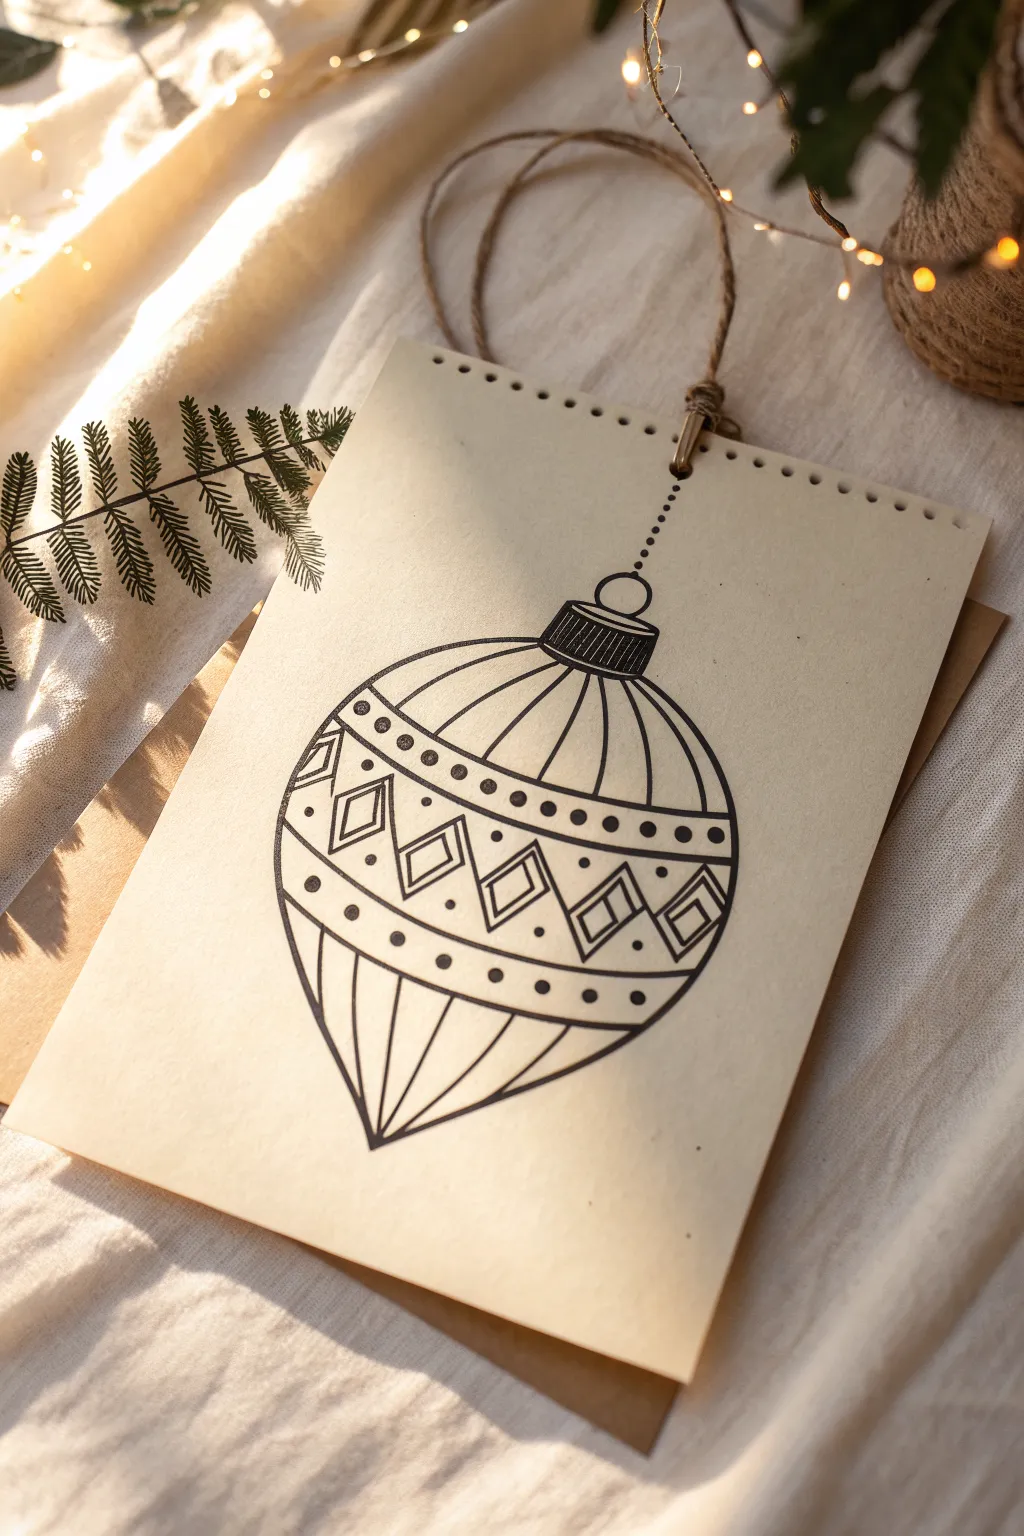
Create a sophisticated holiday greeting with this minimalist line art project featuring a stylized Christmas ornament. The warm cream cardstock paired with crisp black ink creates a cozy, modern-rustic aesthetic perfect for personalized seasonal cards or gift tags.
Step-by-Step Tutorial
Materials
- Cream or off-white cardstock (heavyweight)
- Black fine-liner pen (0.3mm or 0.5mm)
- Black brush pen or thicker marker
- Pencil (HB)
- Eraser
- Ruler
- Compass or circular object for tracing
- Hole punch
- Jute twine or rustic string
Step 1: Setting the Foundation
-
Prepare your canvas:
Cut your cream cardstock to your desired size. A standard A5 or 5×7 inch rectangle works well for this design. Ensure the edges are clean and sharp. -
Punch the binding holes:
Using a standard hole punch or a specialized crafting punch, create a row of evenly spaced small holes along the top edge of the card. This gives it the look of a tear-off calendar or notepad. -
Sketch the ornament shape:
Lightly trace a circle in the center of the paper using a compass or a round object like a jar lid. Then, modify the bottom of the circle to taper into a gentle point, creating a classic teardrop or onion-shaped bauble silhouette. -
Add the cap:
Draw a small rectangle at the very top of your ornament shape for the metal cap. Add a small circle or loop above that rectangle where the string would attach. -
Draft the guide lines:
Lightly sketch curved horizontal bands across the body of the ornament. These curves should follow the contour of the bauble to give it a 3D effect, appearing to wrap around the sphere rather than sitting flat.
Steady Hand Tip
To keep horizontal curves smooth and symmetrical, turn your paper as you draw. Pulling the pen toward your body is often easier than drawing side-to-side.
Step 2: Inking the Outlines
-
Outline the main shape:
Take your fine-liner pen and carefully trace the outer perimeter of the ornament. Keep your hand steady and confident for a smooth line. -
Define the cap:
Ink the rectangular cap at the top. Inside the rectangle, draw vertical lines close together to simulate the texture of a metal crimped cap. Leave a tiny sliver of white at the top edge for a highlight. -
Draw the hanging string:
Using a dotted line technique, draw a straight line going from the loop of the ornament cap up toward the punched holes at the top of the paper. -
Ink the dividing bands:
Go over your penciled horizontal curves with the pen. Create distinct sections: top dome, a decorative middle band, a lower decorative band, and the bottom tip.
Step 3: Adding Patterns and Details
-
Stripe the top section:
In the top dome section, draw curved vertical lines radiating from the cap down to the first dividing band. These lines should curve outward to emphasize the roundness. -
Create the dot border:
In the narrow band just below the top dome, add a row of small, solid black circles. Space them evenly for a clean look. -
Draw the diamond pattern:
In the wide central band, draw a zigzag line to create a row of triangles. Inside each resulting diamond shape, draw a smaller diamond. -
Fill the diamonds:
Carefully draw another smaller diamond inside the previous one, creating a nested effect. This geometric detail is the focal point of the pattern. -
Add lower dots:
In the band below the diamonds, add another series of dots. I like to make these slightly larger than the top row to add visual weight to the bottom. -
Stripe the bottom tip:
Similar to the top section, draw curved lines radiating from the bottom point of the ornament up to the nearest horizontal band. -
Enhance line weight:
Go back over the main horizontal dividing lines with your pen to make them slightly thicker than the pattern lines. This hierarchy helps separate the sections clearly.
Level Up: Metallic Pop
Trace over just the diamond patterns or the dots with a gold or silver gel pen. This adds a subtle festive shimmer that catches the light beautifully.
Step 4: Finishing Touches
-
Erase pencil marks:
Wait until the ink is completely dry—give it a few minutes to be safe—then gently erase all your initial pencil sketches. -
Add the twine:
Thread a piece of jute twine through the center hole at the top of the card. Tie it in a simple loop or knot to complete the rustic look. -
Final check:
Inspect your drawing for any faint lines that need strengthening. If you want more contrast, use the brush pen to darken the cap or the outer silhouette one last time.
Hang your beautiful artwork on the wall or attach it to a special gift to spread some handmade holiday cheer
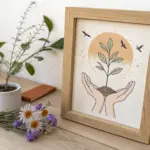
Full Wreath Circle Composition
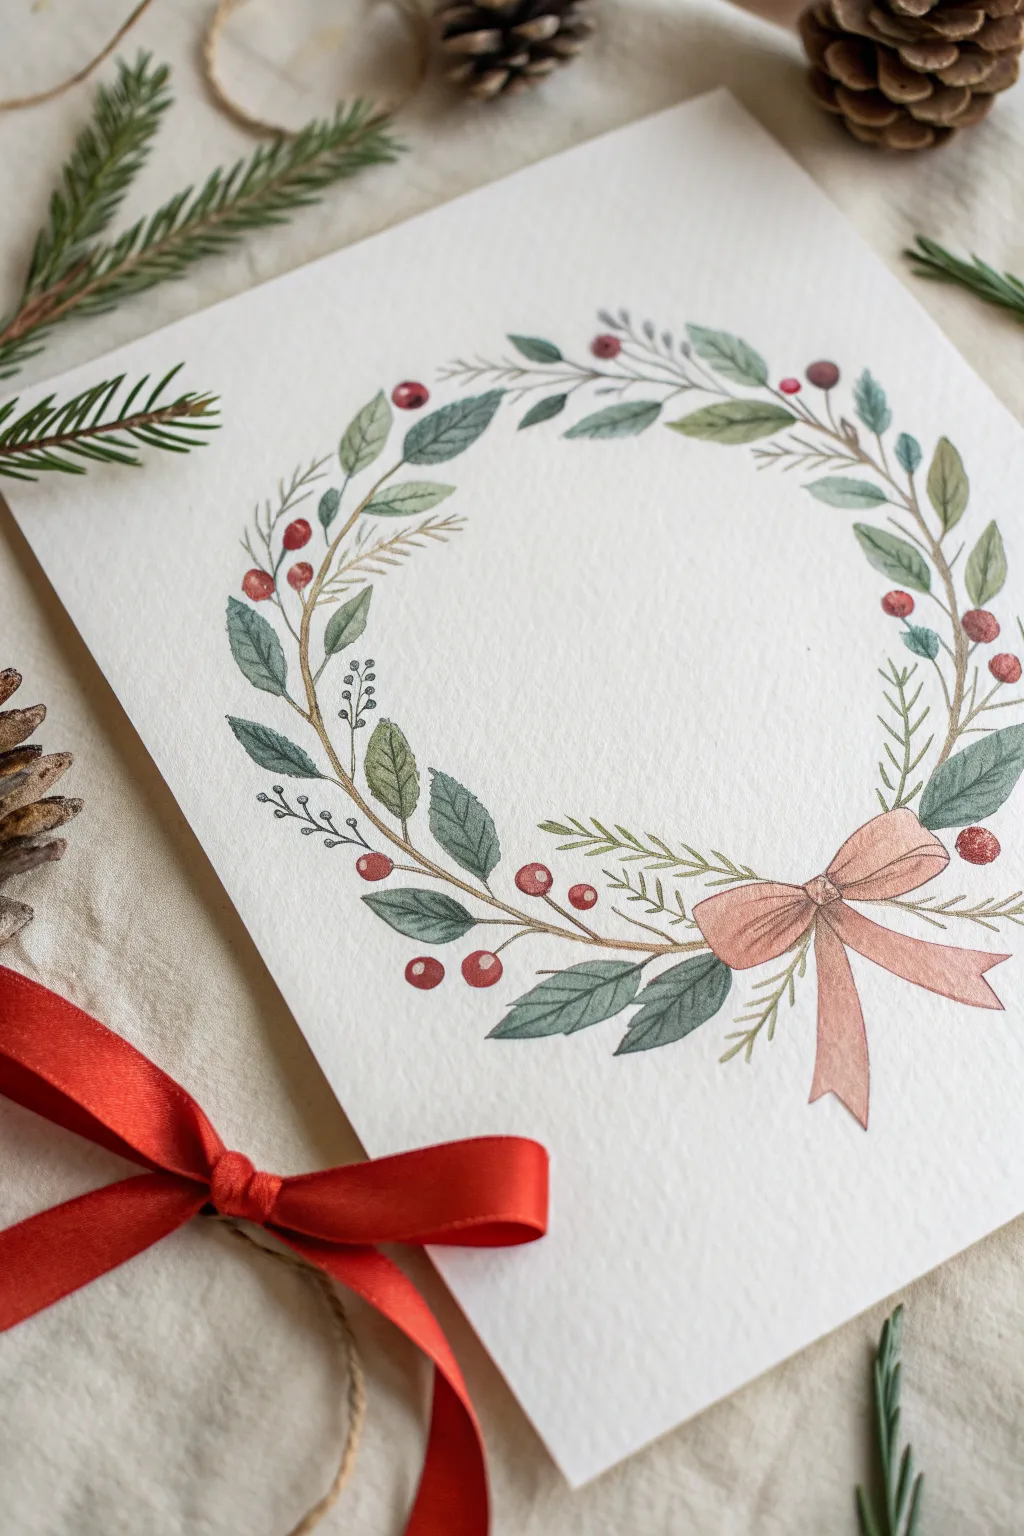
This delicate holiday wreath brings together soft sage greens, vibrant berries, and a dusty pink bow for an elegant Christmas card design. The fine details and varied leaf shapes make this composition feel organic and naturally gathered.
Step-by-Step
Materials
- Cold press watercolor paper (heavyweight, textured)
- Watercolor paints (Sap Green, Hooker’s Green, Indigo, Alizarin Crimson, Burnt Umber, Yellow Ochre, Peach/Rose)
- Round watercolor brushes (Size 2 for details, Size 6 for leaves)
- HB pencil
- Compass or circular object for tracing
- Kneaded eraser
- Palette for mixing
- Cup of water and paper towels
Step 1: Planning the Structure
-
Trace the guide:
Begin by lightly tracing a circle in the center of your paper using a compass or a small plate. This line will act as the spine for your wreath but should be barely visible. -
Sketch the bow placement:
On the lower right side of the circle (around the 4 or 5 o’clock position), lightly sketch the outline of the bow first. This ensures you don’t accidentally paint leaves underneath where the ribbon should be. -
Draw the main branches:
Sketch a thin, wandering line over your circle guide, letting it weave slightly in and out to look like real twigs. Add small offshoot stems radiating outward and inward from this main ring.
Water Control Tip
For crisp leaves, ensure each leaf is dry before painting a neighbor that touches it. If wet touches wet, the colors will bleed together.
Step 2: Painting the Foliage
-
Mix your greens:
Prepare three puddles of green: a bright spring green (Sap Green + Yellow Ochre), a deep blue-green (Hooker’s Green + Indigo), and a muted sage. -
Paint the foundation leaves:
Using your Size 6 brush, paint simple almond-shaped leaves scattered around the circle. Use the muted sage mix for these to create a soft base layer. -
Add darker contrast:
Switch to the deep blue-green mix. Paint slightly serrated or pointed leaves, particularly focusing on the bottom left and top right areas to create balance. I like to leave a tiny sliver of white paper down the center of some leaves to suggest a highlight. -
Incorporate pine sprigs:
With the Size 2 brush and the darkest green mix, add clusters of fine pine needles. Use quick, flicking stokes radiating from a central stem. -
Paint the filler stems:
Using a very dilute, watery green-grey, paint faint fern-like fronds or small sprigs in the background spaces. These should look almost transparent.
Step 3: Adding Details and Color
-
Paint the woody stems:
Mix Burnt Umber with a touch of purple for the branches. Use the very tip of your Size 2 brush to trace over your pencil stem lines, connecting all the floating leaves to the main circle. -
Add the berries:
Load your brush with concentrated Alizarin Crimson. Dot groups of 2-3 berries throughout the wreath. Vary the tone by adding more water to some berries so they aren’t all the same flat red. -
Connect the berries:
Once the berries are dry, use the thin brown mix to draw tiny, hair-thin stems connecting the berries to the main branch. -
Paint the decorative twigs:
Add small, bare twig details sticking out from the wreath using the brown mix. You can add tiny dots at the ends of these to mimic buds.
Add Some Sparkle
Once dry, use a gold gel pen or metallic watercolor to add tiny dots to the berry centers or highlights on the bow for a festive shimmer.
Step 4: The Bow and Final Touches
-
Base layer for the bow:
Mix a watery wash of Peach or Dusty Rose. Fill within your bow sketch lines, keeping the paint very wet. -
Shading the ribbon:
While the base wash is still slightly damp, drop concentrated pink/rose paint into the areas where the ribbon folds or knots to create soft, diffused shadows. -
Define the ribbon edges:
Once the bow is fully dry, use a slightly darker mix of the same pink to sharply outline the edges and the knot, giving it crisp definition. -
Add leaf veining:
Revisit your largest dry leaves. Using a darker version of the leaf’s color and your finest brush, paint thin central veins or delicate side veins. -
Erase guidelines:
Ensure the painting is completely bone dry. Gently use the kneaded eraser to lift any visible pencil marks, especially around the outer perimeter.
Now you have a timeless, hand-painted wreath perfect for scanning into custom holiday cards


Jingle Bells With a Big Bow
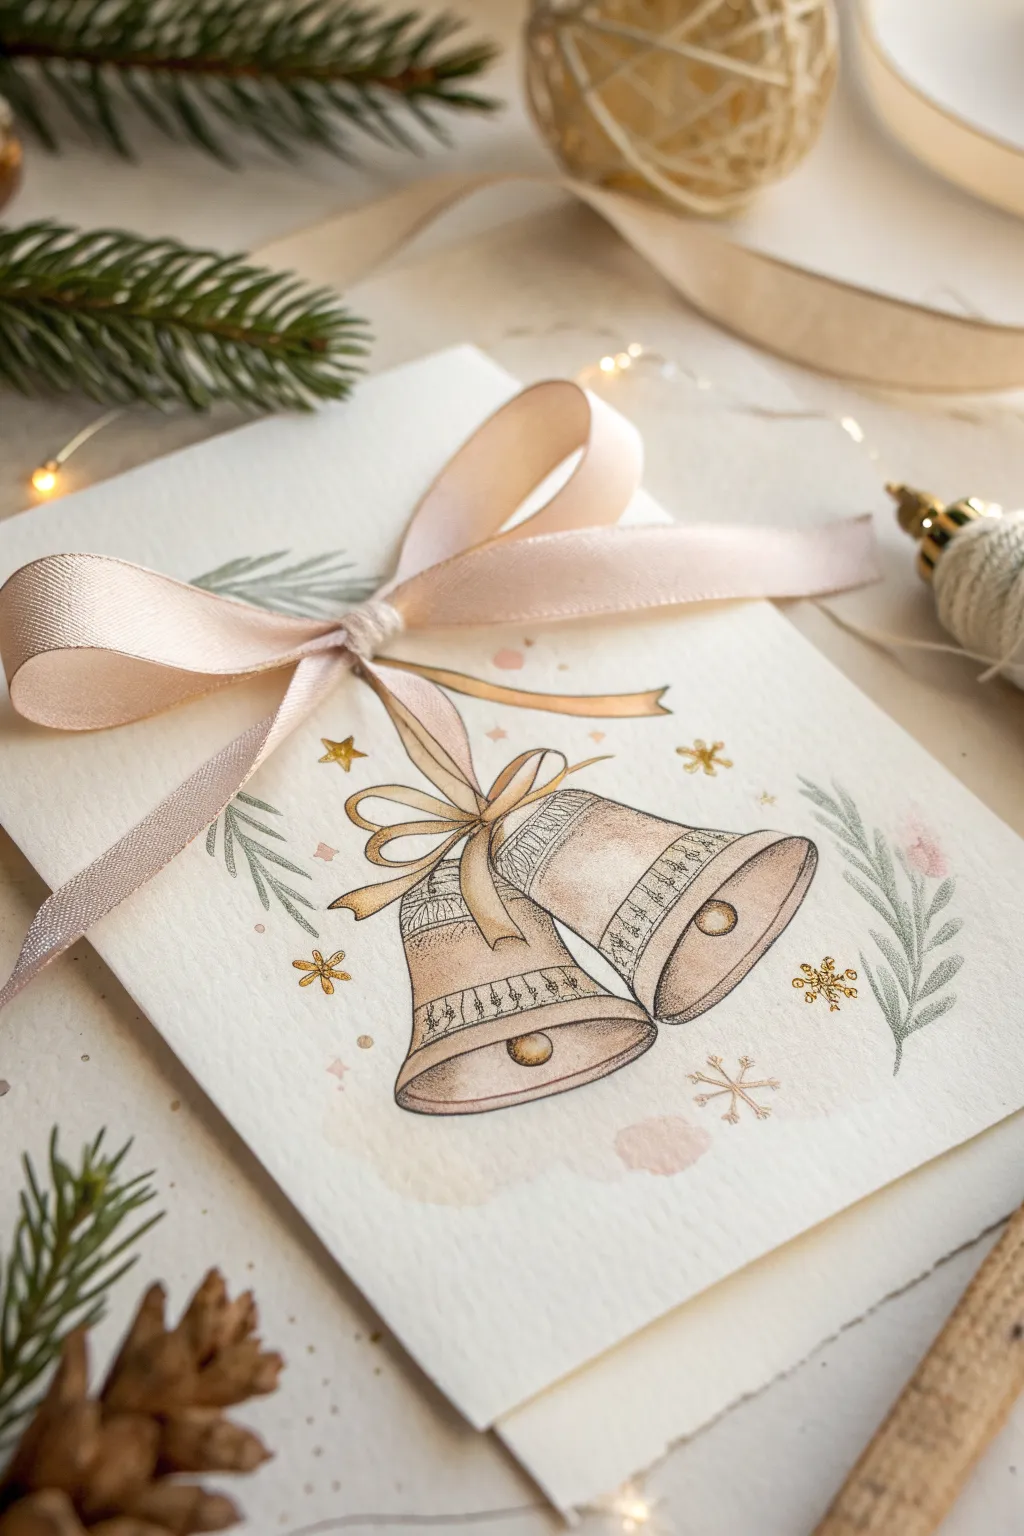
Capture the nostalgic charm of the holidays with this elegant greeting card, featuring hand-drawn jingle bells accented by a real satin bow. The mix of soft watercolor washes and precise ink stippling creates a vintage aesthetic that pairs perfectly with the tactile quality of the ribbon.
Step-by-Step Guide
Materials
- Cold press watercolor paper (A5 folded or 5×7 flat)
- Pencil (HB or similar) and kneaded eraser
- Waterproof fine liner pens (0.1mm and 0.3mm, sepia or black)
- Watercolor paints (Sepia, Yellow Ochre, Burnt Sienna, Sage Green)
- Small round brushes (Size 2 and 4)
- Pale pink satin ribbon (1/4 inch or 6mm width)
- Craft glue or double-sided tape
- Gold gel pen or metallic watercolor (optional)
Step 1: Sketching the Layout
-
Position the main elements:
Begin by lightly sketching the outline of two bells in the center of your paper. Position them so they are tilting slightly away from each other, connected at the top where the loops meet. -
Draw the bell details:
Sketch horizontal bands across the body of each bell. Add the clappers (the rounded ball inside) peeking out from the bottom rim of each bell. -
Sketch the painted bow:
Draw a loose, flowing bow connecting the bells’ handles. This drawn bow will sit underneath the real ribbon later, adding depth and shadow to the illustration. -
Add nature elements:
Lightly sketch sprigs of pine needles and vague foliage shapes flanking the bells. Keep these markings faint as they will be painted loosely.
Soft Edges Pro-Tip
For the background foliage, wet the paper with clean water first before touching it with your green paint. This ‘wet-on-wet’ technique creates soft, dreamy edges.
Step 2: Inking the Structure
-
Outline the bells:
Using your 0.3mm waterproof pen, carefully trace over your bell pencil lines. Use a slightly shaky or broken line to give it an antique, hand-drawn character rather than a perfect geometric look. -
Create texture with stippling:
Switch to the 0.1mm pen to add shading. Instead of hatching, use tiny dots (stippling) on the curved sides of the bells and under the rim to create volume and shadow. -
Detail the bands:
Draw tiny vertical lines or small geometric patterns inside the horizontal bands on the bells. This adds that intricate, engraved look found on sleigh bells. -
Erase pencil marks:
Wait for the ink to be completely dry, then genty erase your initial pencil sketches.
Step 3: Watercolor Washes
-
Base wash for the bells:
Mix a very watery wash of Yellow Ochre and a touch of Burnt Sienna. Paint the bells, leaving the center parts lighter or even white to mimic a metallic shine. -
Deepen the shadows:
While the paper is still slightly damp, drop a stronger mix of Sepia into the sides and bottom rims of the bells. Let the color bleed naturally into the paler wash for a soft gradient. -
Paint the foliage:
Using a diluted Sage Green, paint the pine sprigs with quick, feathery strokes. I like to keep this very loose so it doesn’t distract from the main subject. -
Add scattered accents:
Create small golden starbursts or snowflakes around the bells using Yellow Ochre or a metallic gold paint. Add a few faint pinkish spots in the background for a dreamy atmosphere.
Troubleshooting Ink Smears
If your fineliner smears when painting, the ink wasn’t fully waterproof or dry. Test your pen on scrap paper with water first, or do the painting first and ink later.
Step 4: Finishing Touches
-
Highlighting:
Once dry, you can use a gold gel pen to add tiny highlights to the clappers or the decorative bands on the bells for extra sparkle. -
Prepare the ribbon:
Cut a length of pale pink satin ribbon. Tie it into a neat bow, ensuring the loops are slightly larger than the width of your painted bells. -
Trim the ends:
Cut the tails of the ribbon at an angle or into a ‘V’ shape to prevent fraying and give it a professional finish. -
Attach the bow:
Apply a strong craft glue or a small piece of double-sided tape to the back of the knot on your satin bow. Press it firmly onto the paper exactly where the two bell handles meet. -
Secure the tails:
If you want the ribbon tails to drape specifically, use a tiny dot of glue behind the fabric to hold them in a curved position against the paper.
Now your beautiful, mixed-media card is ready to share warm holiday wishes with someone special
Glowing Christmas Lights String
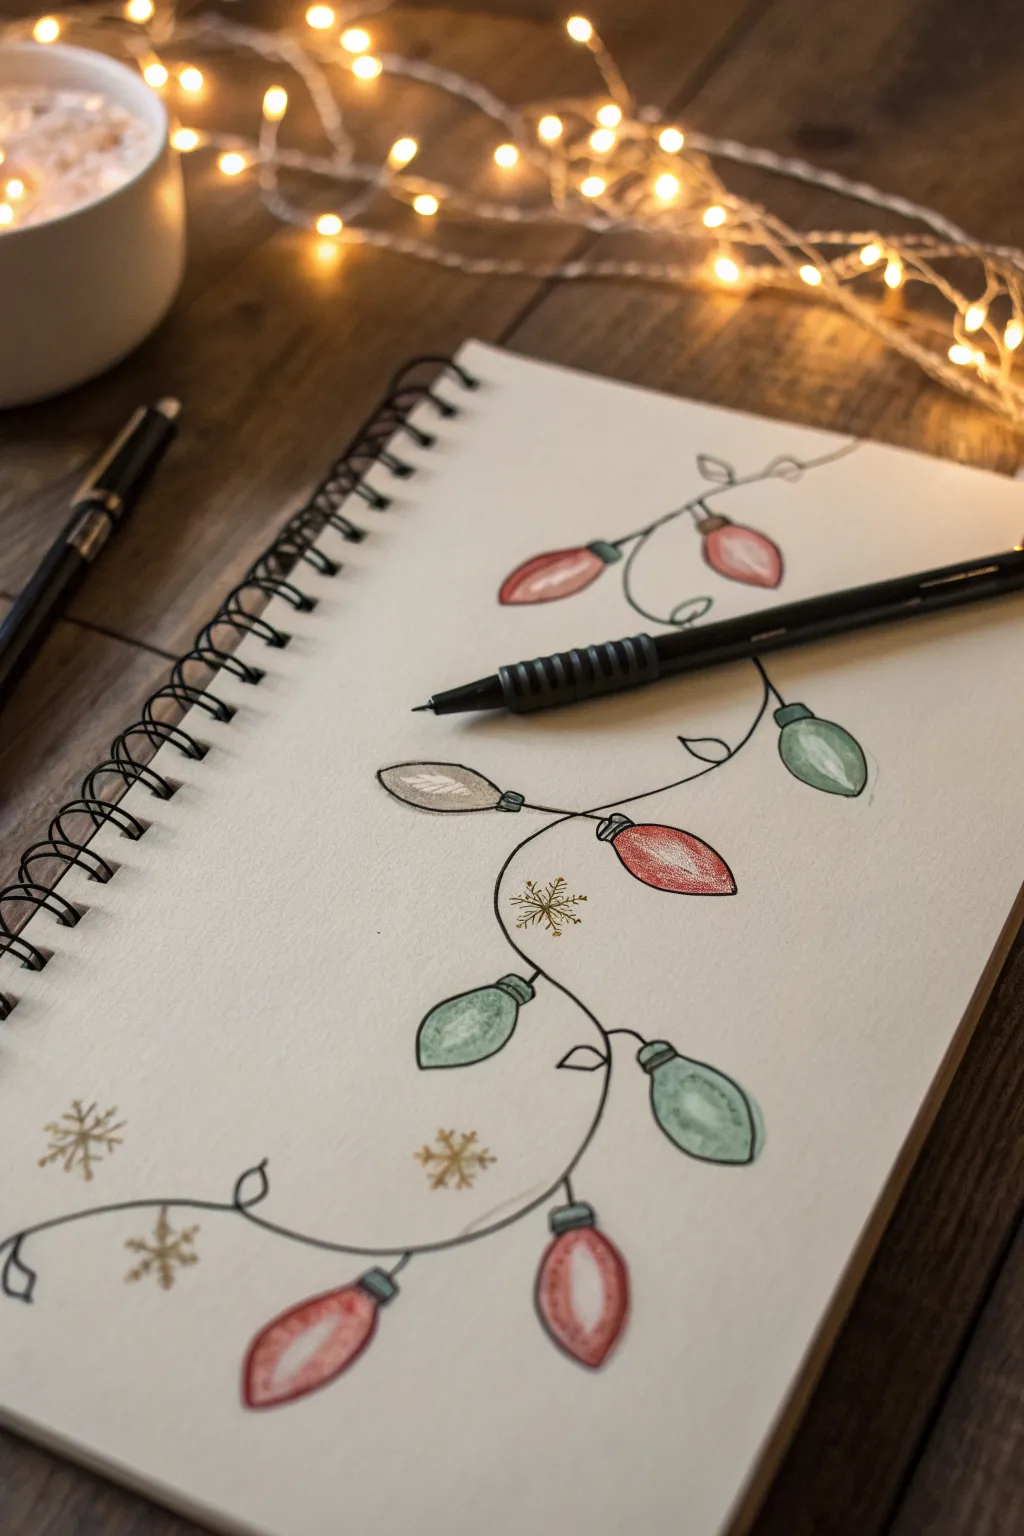
Capture the cozy glow of the holidays with this charming illustration of tangled Christmas lights. Using simple linework and gentle coloring, you’ll create a festive border that looks perfect on handmade cards or bullet journal spreads.
Detailed Instructions
Materials
- Spiral-bound sketchbook or heavy drawing paper
- Fine liner pen (black, 0.3mm or 0.5mm)
- Pencil (HB or similar)
- Eraser
- Colored pencils (red, forest green, light grey/silver, gold)
- White gel pen (optional for highlights)
Step 1: Planning the Flow
-
Draft the main wire:
Start by lightly sketching a single, meandering line with your pencil. Let it curve gently from the top right corner down toward the bottom left, creating gentle loops and waves rather than a straight line. This serves as the backbone for your light string. -
Position the bulbs:
Along your pencil curve, lightly mark small ‘T’ shapes where you want your bulbs to sit. Space them out somewhat evenly, but vary the angles so they point in different directions—some up, some down, some sideways—to mimic how real lights twist. -
Sketch the bulb shapes:
Draw the classic C7 or C9 Christmas light shape at each mark. Think of a pointed teardrop or almond shape. Don’t worry about perfection; a little variation adds character. -
Add the sockets:
At the base of each bulb, sketch a small rectangle or cylinder connecting the glass part to the main wire. This is the plastic socket that holds the light.
Step 2: Inking the Outline
-
Trace the wire:
Switch to your black fine liner pen. Carefully trace over your pencil wire line. I like to keep a loose wrist here so the line feels organic and not too stiff. Add tiny little loops occasionally where the wire might twist on itself. -
Outline the sockets:
Draw the rectangular sockets with the pen. Add two or three tiny horizontal lines across each socket to represent the screw ridges found on real light strands. -
Ink the bulbs:
Trace your bulb shapes. When you’re done, let the ink dry completely for a minute to avoid smudges, then gently erase all your underlying pencil sketches for a clean slate. -
Connect the details:
Check where the wire meets the sockets. If there are gaps, draw tiny little curved lines to show the wire threading into the base of the plug.
Stay Loose
Don’t try to make the wire perfectly straight or the loops symmetrical. The charm of this design comes from the messy, tangled look of real holiday decorations.
Step 3: Adding Color & Glow
-
Color the red bulbs:
Select a few bulbs to be red and fill them in with colored pencil. Use a light hand in the center and press harder near the edges to create a sense of roundness and dimension. -
Color the green bulbs:
Repeat the shading process with forest green on the remaining bulbs. Leave a very tiny area in the center of each bulb fainter or even white to simulate the glass catching the light. -
Add a silver touch:
Find a bulb you want to denote as ‘burnt out’ or just clear glass, and very lightly shade it with grey, leaving it mostly the color of the paper. Alternatively, use this grey to add a shadow to one side of the colored bulbs. -
Shadow the sockets:
Use a darker green or grey to color the plastic sockets. Applying a little extra pressure on one side helps them look cylindrical rather than flat.
Watercolor Wash
Swap pencils for watercolor paints. Paint the bulbs loosely, letting the color bleed slightly outside the lines for a dreamy, glowing effect.
Step 4: Magical Final Touches
-
Draw subtle snowflakes:
In the empty spaces around your light string, use a gold colored pencil or a gold gel pen to draw tiny asterisks or simple six-pointed snowflakes. Keep them small and delicate. -
Highlight the glass:
To really make the bulbs shine, add a small, white reflection line or dot on the upper curve of each bulb. If you have a white gel pen, use it here; otherwise, simply leaving the paper white works too. -
Add internal glow:
Inside each colored bulb, draw a very faint, thin V-shape near the base to suggest the filament inside glowing. -
Final whimsical details:
Add a few tiny stray lines or loops coming off the main wire to look like loose connections or extra bits of cord, giving the drawing a playful, unpolished feel.
Now you have a festive string of lights that brings warmth to the page without using any electricity
Snow Globe With a Tiny Scene
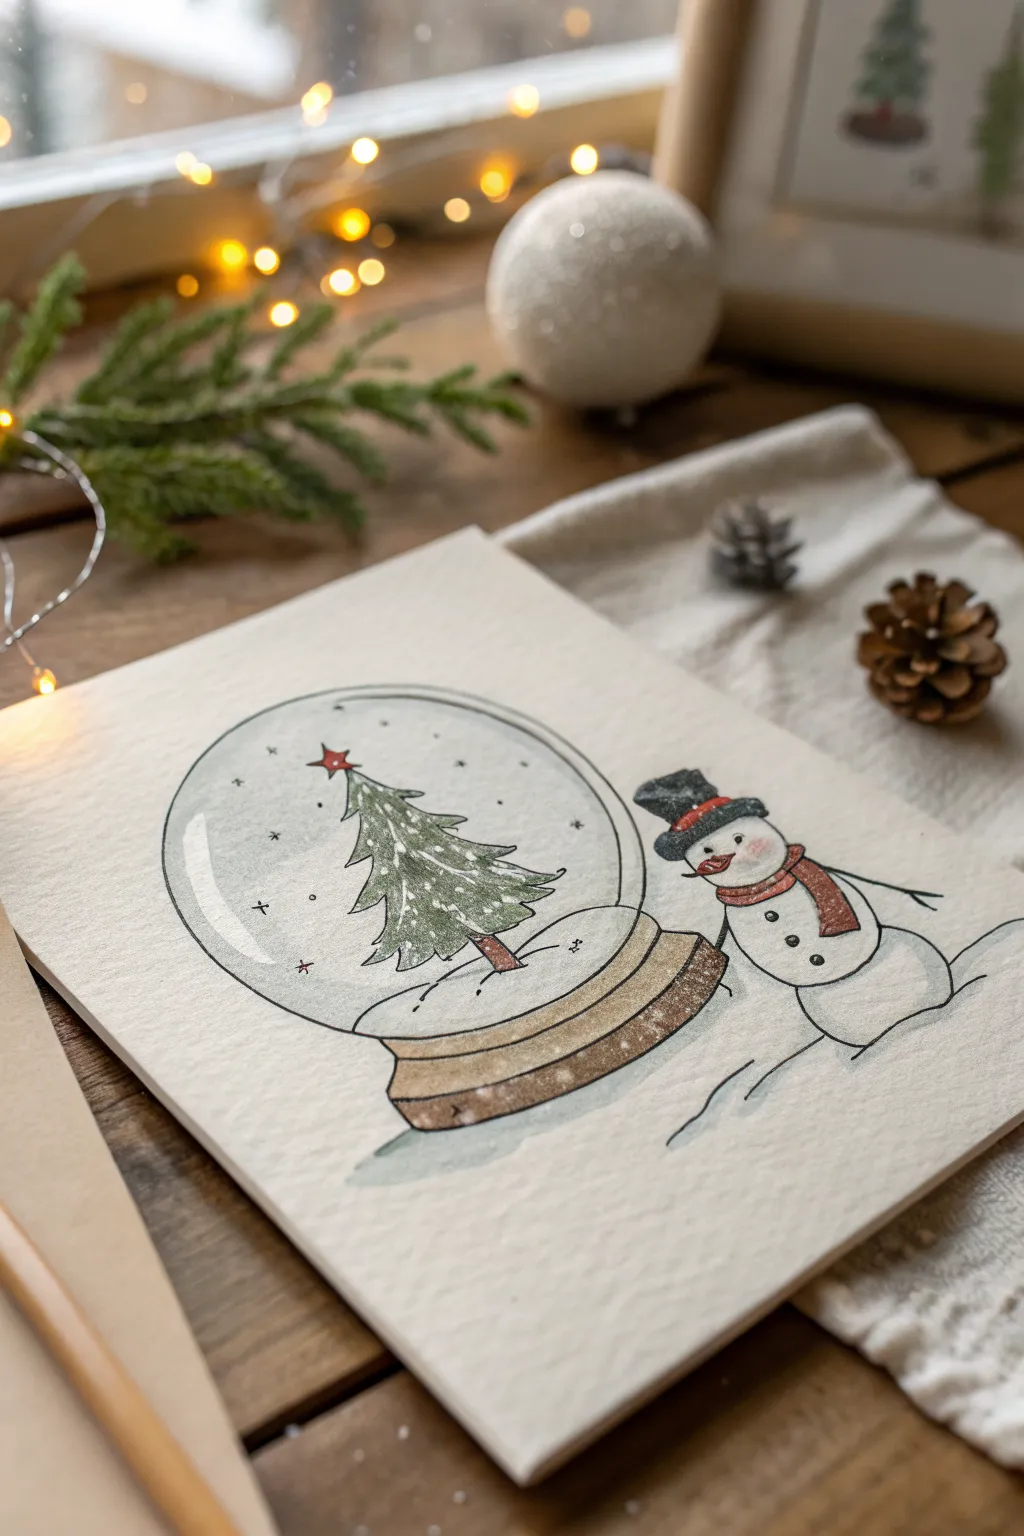
Capture the magic of the season with this charming illustration featuring a classic snow globe and a friendly snowman companion. Drawn with delicate ink lines and soft watercolor washes, this piece creates a cozy, nostalgic atmosphere perfect for holiday cards.
Step-by-Step
Materials
- Heavyweight textured watercolor paper (cold press)
- Pencil (HB or H)
- Kneaded eraser
- Waterproof fine liner pen (black, size 0.1 and 0.3)
- Watercolor paints (Forest Green, Burnt Sienna, Payne’s Grey, Alizarin Crimson, Cerulean Blue)
- Small round watercolor brush (size 2 or 4)
- White gel pen or opaque white gouache
- Compass or a circular object to trace
Step 1: Sketching the Composition
-
Draw the globe outline:
Begin by lightly tracing a circle in the center-left of your paper using a compass or a glass rim. Leave enough space on the right side for the snowman. -
Add the base:
Sketch a flattened oval shape directly beneath the circle for the top of the base. Add curved lines extending downward to create a thick, wooden-style stand, slightly wider at the bottom. -
Position the tree:
Inside the globe, lightly sketch a triangular guide for the Christmas tree. It should sit centrally on a small mound of ‘snow’ at the bottom of the globe. -
Sketch the snowman:
To the right of the globe, draw two stacked circles for the snowman’s body and head. Position him so he appears to be admiring the snow globe. -
Refine sketches:
Add details like the snowman’s top hat, scarf, and stick arms. Inside the globe, refine the tree branches with jagged, organic lines and add a tiny star on top.
Highlight Hack
Don’t stress if you paint over the ‘snow’ on the tree. Just go back in with opaque white gouache or a white paint pen at the very end to reclaim those snowy tips.
Step 2: Inking the Lines
-
Outline the main shapes:
Using the 0.3 waterproof pen, carefully go over your pencil lines. Keep the hand relaxed; slightly broken or wobbly lines add to the illustrative charm. -
Detail the tree:
Switch to a finer 0.1 pen for the tree needles. Use quick, short strokes to suggest texture rather than outlining every single branch. -
Add character details:
Ink the snowman’s smile, carrot nose, and buttons. Draw the scarf with simple stripes or a solid outline. -
Create the glass effect:
Draw the circle of the globe, but leave small gaps in the line work, particularly near the top left, to suggest a reflection on the glass. -
Erase guidelines:
Wait until the ink is completely dry to prevent smudging, then gently gently lift all underlying pencil marks with your kneaded eraser.
Make It Sparkle
Apply a thin layer of glitter glue or clear drying glue sprinkled with iridescent glitter over the snow inside the globe for a real shimmering effect.
Step 3: Watercolor Washes
-
Paint the tree:
Dilute Forest Green and apply it to the tree branches. Leave small patches of white paper showing through to represent snow resting on the boughs. -
Color the accessories:
Use Alizarin Crimson for the snowman’s scarf and the tiny star atop the tree. I like to keep the paint watery here for a soft, vintage look. -
Paint the base:
Mix Burnt Sienna with a touch of Payne’s Grey to get a wooden tone. Paint the base of the snow globe, layering a slightly darker mix on the right side for shadow. -
Shade the snowman:
Using a very watery wash of Payne’s Grey or pale blue, add subtle shadows to the bottom and right side of the snowman’s snowball body to give it dimension. -
Tint the glass:
Mix a very pale wash of Cerulean Blue or watery grey. Paint a curved swath inside the globe along the left side and bottom to suggest the curvature of the glass. -
Ground the scene:
Add a few horizontal washes of pale blue-grey beneath the globe and snowman to create a cast shadow on the ground.
Step 4: Finishing Touches
-
Add falling snow:
Once the paint is bonedry, use a fine-tip pen to add tiny asterisks or dots inside the globe for floating snowflakes. -
Highlight with white:
Use a white gel pen to add a bright highlight on the snowman’s nose and the curved reflection on the snow globe glass to make it shine. -
Texturize the base:
If the base looks too flat, add gentle stippling with the brown paint or pen to simulate wood grain or texture.
Now you have a cozy winter scene ready to warm up any holiday greeting card
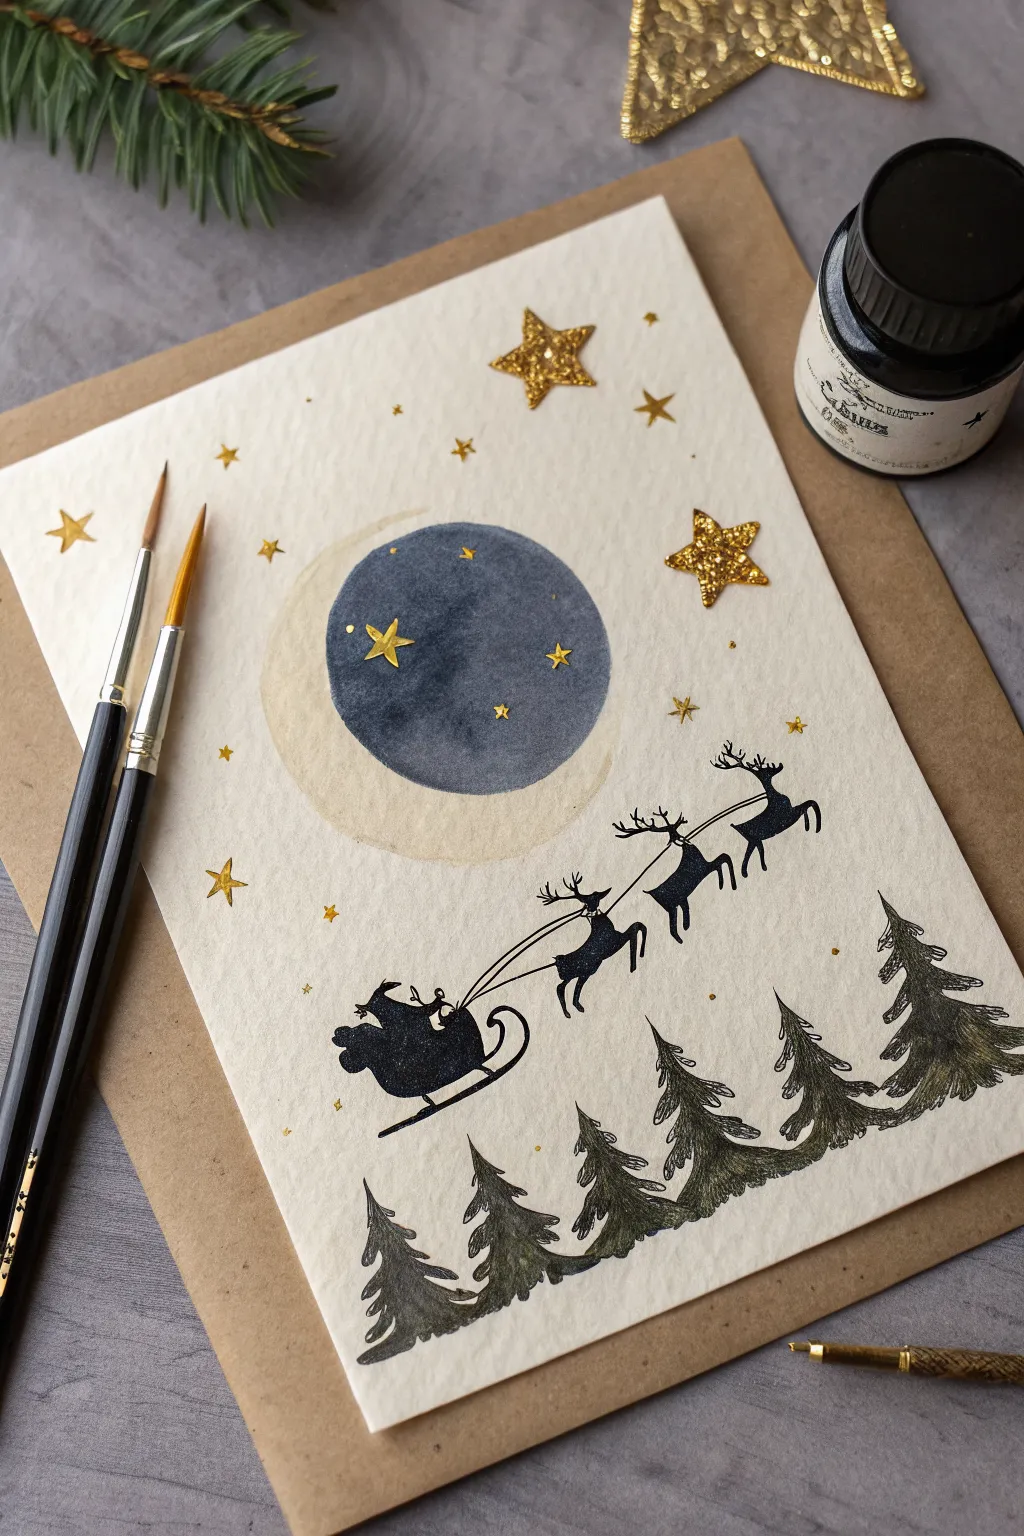
Santa’s Sleigh Night-Sky Silhouette

Capture the magic of Christmas Eve with this charming watercolor and ink illustration featuring a celestial night sky and Santa’s journey. The mix of muted indigo watercolor, crisp black ink silhouettes, and twinkling gold leaf stars creates a sophisticated, handcrafted holiday greeting.
Step-by-Step Guide
Materials
- Cold press watercolor paper (cut to 5×7 inches)
- Watercolor paints: Indigo or Payne’s Gray, Yellow Ochre
- Black waterproof fine liner pen (01 or 03 size) or dip pen with black ink
- Round watercolor brushes (size 4 and size 0 for details)
- Gold paint pen or metallic gold watercolor
- Glitter star stickers or gold glitter glue
- Pencil and eraser
- Compass or circle stencil
- Jar of water and paper towels
Step 1: Painting the Moon
-
Outline the moon:
Begin by lightly tracing a circle in the upper center of your paper using a compass or by tracing a round object like a jar lid. This will be the boundary for your night sky. -
Paint the crescent shape:
Mix a very watery wash of Yellow Ochre to create a pale buff color. Paint a large crescent shape on the left side of your circle, extending slightly outside the line to give the moon a soft glow. Let this dry completely. -
Fill the dark sky:
Load your size 4 brush with Indigo or Payne’s Gray. Carefully fill in the rest of the circle, overlapping the pale crescent slightly. Keep the paint wet to ensure an even, flat wash without harsh streaks. -
Add texture:
While the indigo paint is still damp, I like to drop in tiny touches of clean water or darker concentrated pigment to create subtle craters and texture on the moon’s surface.
Uneven Moon Color?
If the watercolor dries with ‘blooms’ or watermarks, simply wet the whole moon area again lightly and drop in more pigment to smooth it out.
Step 2: Creating the Forest Floor
-
Draft the trees:
Using a pencil, lightly sketch a row of pine trees along the bottom edge of the paper. Vary their heights to create a natural-looking forest line. -
Ink the tree outlines:
Switch to your black ink or fine liner. Outline the trees using jagged, downward strokes to mimic pine needles. Don’t worry about perfect lines; a rough texture looks more organic. -
Fill and shade:
Fill in the trees with scribbled, textured lines. Leave small gaps of white paper showing through the black ink to suggest snow resting on the branches. -
Add a watercolor wash:
Once the ink is waterproof and dry, glaze over the trees with highly diluted indigo or gray watercolor to unify the forest floor without obscuring your ink work.
Step 3: Santa’s Silhouette
-
Sketch the flight path:
lightly visualize a diagonal line ascending from left to right, situated between the moon and the trees. Sketch the basic shapes of the sleigh and three reindeer. -
Detail the sleigh:
Using your fine pen or ink, draw the sleigh’s silhouette. Include the curved runner at the bottom and a rounded shape for the sack of toys in the back.. -
Draw the reindeer:
Ink the reindeer silhouettes. Focus on the graceful curves of their leaping legs and the branching antlers. Render them solid black for a striking silhouette effect. -
Connect the team:
Draw very thin, delicate lines connecting the reindeer to each other and back to the sleigh to represent the harnesses and reins.
Level Up: Cosmic Splatter
Dip a toothbrush in white gouache or acrylic. Flick the bristles to spray a fine mist over the indigo moon for a realistic starry galaxy effect.
Step 4: Golden Details
-
Paint small stars:
Dip a small brush into gold paint or use a gold pen to draw tiny five-pointed stars directly onto the dark indigo moon. Add a few small dots for distant planets. -
Add larger stars:
Scatter larger gold stars around the moon and above the sleigh in the white space. Vary the sizes to create depth in your composition. -
Apply glitter accents:
For the largest, focal stars, stick on gold glitter star stickers or carefully paint shapes with glue and sprinkle loose gold glitter over them for extra sparkle. -
Final touches:
Erase any visible pencil lines once you are certain all ink and paint layers are bone dry. Your festive scene is now ready to be gifted.
Now you have a magical celestial card that perfectly captures the anticipation of Christmas Eve


Have a question or want to share your own experience? I'd love to hear from you in the comments below!