Whenever I’m craving that little hit of wonder, I reach for celestial art—all moon phases, sun rays, and dreamy starry skies. Here are my favorite ideas to help you turn a blank page into your own tiny universe.
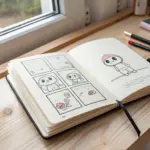
Moon Phase Mini Series
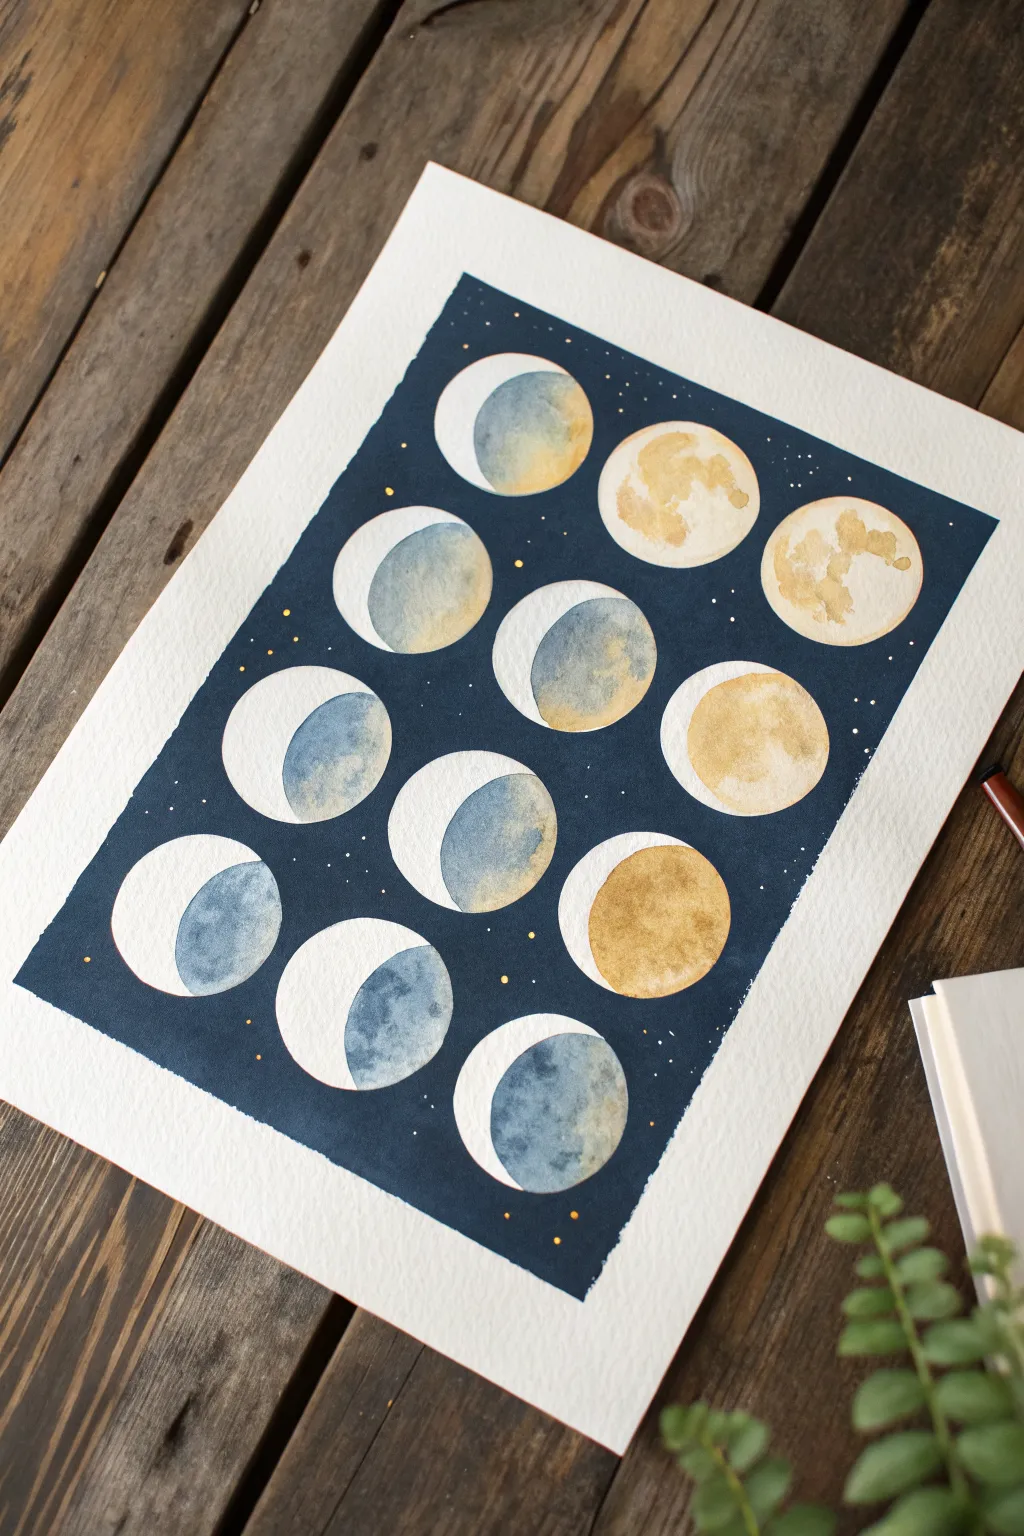
Capture the mystic progression of the lunar cycle with this indigo and gold watercolor study. This project combines deep, celestial blues with warm ochre and metallic accents to create a stunning piece of lunar art perfect for framing.
Step-by-Step
Materials
- Cold press watercolor paper (300 gsm)
- Watercolor paints (Indigo, Payne’s Gray, Yellow Ochre, Burnt Sienna)
- Gold watercolor paint or metallic gouache
- Round watercolor brushes (sizes 2, 6, and 10)
- Masking fluid (drawing gum)
- Old/cheap brush or silicone tool for masking fluid
- Compass or circle template
- Pencil and eraser
- Painter’s tape or washi tape
- White gel pen (optional)
- Clean water and paper towels
Step 1: Preparation & Sketching
-
Tape your paper:
Begin by securing your watercolor paper to a sturdy board or table using painter’s tape. This prevents the paper from buckling when wet and creates that crisp white border seen in the final piece. -
Grid the layout:
Lightly sketch a grid to guide your moon placement. You’ll need three columns and four rows to accommodate twelve moons, ensuring they are evenly spaced. -
Draw the circles:
Using a compass or a circle template, draw twelve identical circles within your grid. Keep your pencil lines very faint so they don’t show through later. -
Mark the crescents:
Inside each circle, lightly sketch the curve that defines the crescent shape. Vary the thickness of the crescents to represent different stages of the lunar cycle, from thin slivers to nearly full moons.
Pro Tip: Soap Shield
Before dipping your brush into masking fluid, coat the bristles in dish soap. This creates a barrier that prevents the fluid from ruining the brush and makes cleanup instantaneous.
Step 2: Masking & Background
-
Apply masking fluid:
Using an old brush or silicone tool, carefully fill in the *crescent shapes* of the moons with masking fluid. We want to protect these areas so they stay white while we paint the dark background. -
Protect the full moons:
For the moons that will be fully painted (like the full moon and gibbous phases), mask the entire circle to keep the shape perfectly round during the background wash. -
Let it dry completely:
Allow the masking fluid to dry entirely. It should feel rubbery and tack-free to the touch before you proceed with any paint. -
Mix the night sky color:
Prepare a rich, dark wash by mixing Indigo with a touch of Payne’s Gray. You want a deep, saturated color that is almost black but still retains that beautiful blue undertone. -
Paint the background:
Using your largest brush, apply the wash over the entire rectangular area, painting right over the masked moons. Work somewhat quickly to keep a ‘wet edge’ and avoid streaks. -
Add texture (optional):
While the background is still slightly damp, you can drop in tiny blooms of clean water or sprinkle a pinch of salt to create subtle starry textures. -
Remove the masking:
Once the dark background is bone dry, gently rub off the masking fluid with your finger or a rubber cement pickup tool to reveal the stark white paper underneath.
Troubleshooting: Tearing?
If the paper tears when removing masking fluid or tape, you likely pulled too fast or the paper wasn’t fully dry. Always wait longer than you think and pull clearly away from the paint.
Step 3: Painting the Moons
-
Base layer for shadow:
For the shadowed parts of the moon (the dark side of the crescent), mix a very watery, pale version of your Indigo. Paint this lightly into the unlit portion of the circle. -
Golden craters:
Mix Yellow Ochre with a bit of Burnt Sienna. On the illuminated parts of the moons, drop in this warm color wet-on-wet, letting the pigment bloom naturally to mimic craters. -
Cool shadows:
While the moons are damp, touch a dilute blue-grey mix to the edges to give them spherical dimension. I find blending the blue into the gold creates a lovely, moody transition. -
Define the textures:
Once the first layers are dry, use a smaller size 2 brush to dab in darker concentrated spots of Ochre or grey to create specific craters and lunar mare (seas).
Step 4: Final Details
-
Add metallic touches:
Load a small brush with gold watercolor or metallic gouache. Carefully paint small accent crescents or highlight crater edges on the full moons for a magical shimmer. -
Splatter stars:
Cover your painted moons with a scrap piece of paper to protect them. Load a toothbrush or stiff brush with white gouache or gold paint and flick tiny speckles onto the dark background to create distant stars. -
Refine the edges:
If any background blue bled into your moons, use a white gel pen or opaque white gouache to tidy up the edges of the circles. -
Reveal the border:
Slowly peel away the painter’s tape at a 45-degree angle to reveal your clean, white borders.
Hang this serene celestial study in a spot where it can catch the light and show off those subtle gold details.


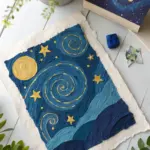
Watercolor Galaxy Wash
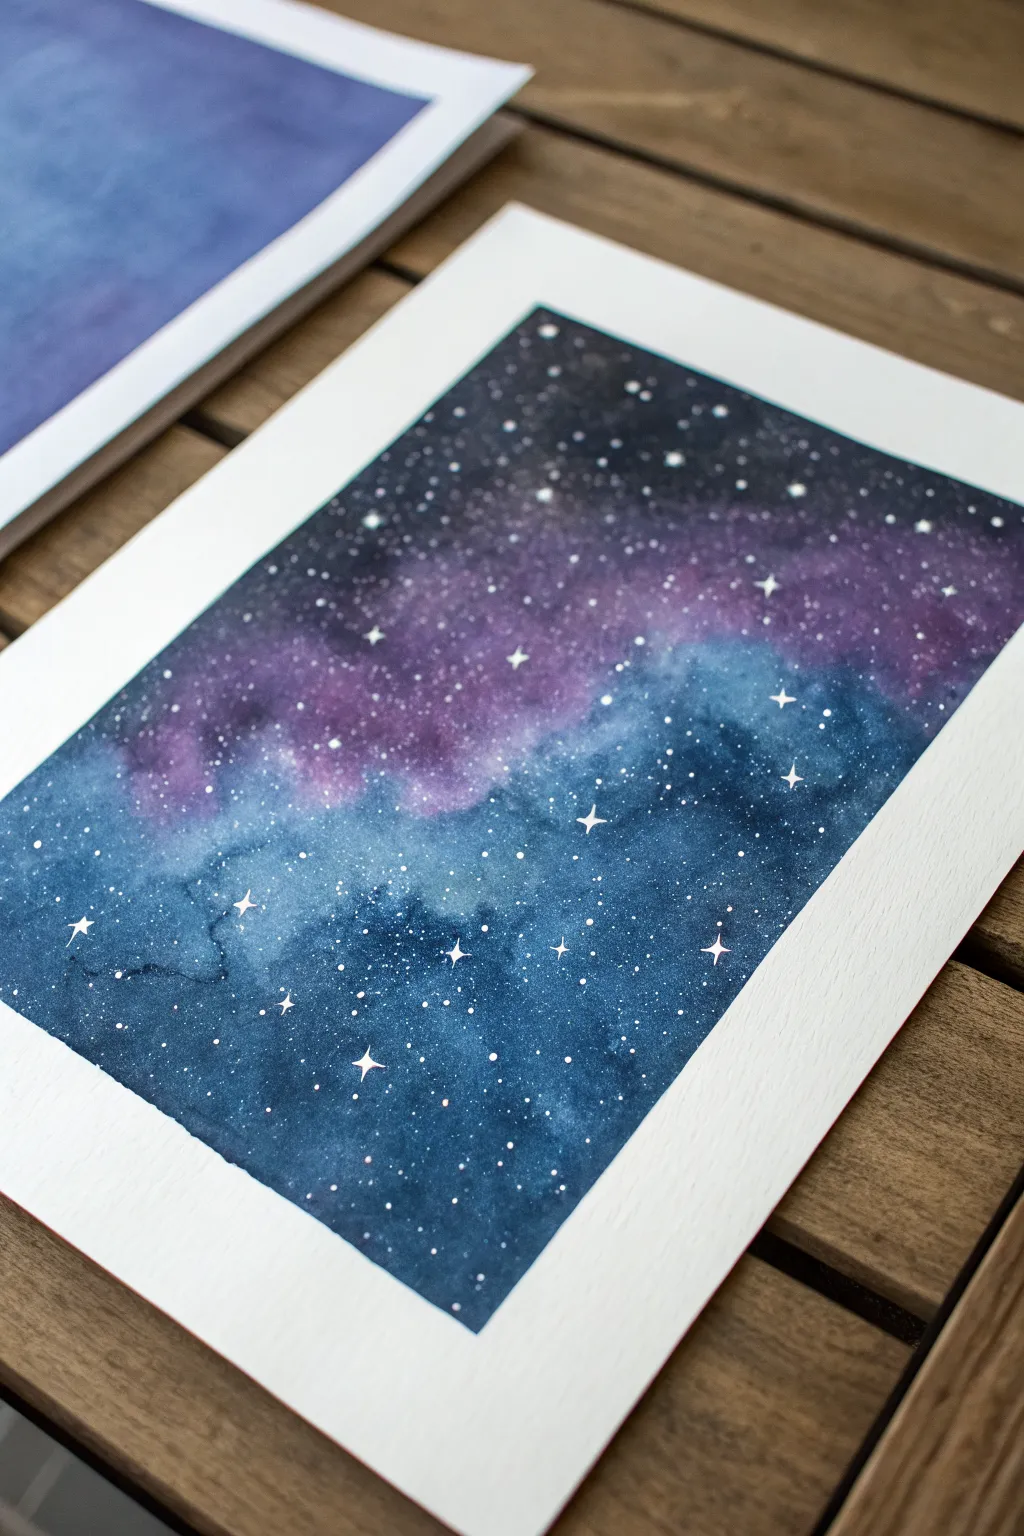
Capture the magic of the cosmos with this moody and ethereal watercolor painting. The blend of indigo, violet, and teal creates a deep atmospheric effect, highlighted by crisp, sparkling stars.
How-To Guide
Materials
- Cold press watercolor paper (300 gsm)
- Painter’s tape or washi tape
- Watercolor paints (Indigo, Prussian Blue, Dioxazine Purple, Black)
- White gouache or white ink
- Round watercolor brushes (Size 8 or 10 for wash, Size 0 or 1 for details)
- Jar of clean water
- Paper towels
- Palette or mixing tray
- Old toothbrush (optional)
Step 1: Preparation & First Wash
-
Tape the Edges:
Secure your watercolor paper to a board or table using painter’s tape. Press the edges down firmly to ensure paint doesn’t seep underneath, creating that crisp white border seen in the final piece. -
Wet the Paper:
Using your large round brush and clean water, apply an even coat of water to the entire paper surface inside the tape. The paper should be glistering but not swimming in puddles. -
Lay the Base Colors:
While the paper is wet, drop in patches of lighter blue and purple. Allow them to bleed naturally into one another, keeping this layer somewhat transparent to act as the glowing gas of the nebula. -
Leave Breathing Room:
Be careful not to cover every inch with heavy pigment yet. Leaving some areas slightly lighter helps create depth and luminosity later on.
Muddy Colors?
If your galaxy looks muddy, stop overworking the paper while it’s wet. Let the colors mix themselves. If you need to fix a section, wait for it to dry completely before glazing over it.
Step 2: Building Depth
-
Deepen the Darks:
While the first layer is still damp (but not soaking), start dropping in your darker colors—Indigo and Dioxazine Purple. Concentrate these darker hues around the edges and corners to vignette the image. -
Introduce Black:
Mix a small amount of black with your indigo. Apply this to the very darkest sections of the sky to maximize contrast against the lighter purple nebula cloud. -
Soft Blending:
Tilt your board slightly if needed to encourage the paint to move. If a hard edge forms where you don’t want it, use a clean, slightly damp brush to gently soften the transition between colors. -
Create Texture:
I sometimes like to tap a clean, wet brush over the wash while it’s drying; this pushes pigment away and creates those blooming ‘cauliflower’ textures that look like space clouds. -
Let it Dry Completely:
This is crucial. Before adding stars, the background wash must be bone dry. If the paper is cool to the touch, it’s likely still damp inside.
Step 3: Adding the Starlight
-
Prepare White Pigment:
Squeeze out a pea-sized amount of white gouache. Dilute it with just enough water so it has the consistency of heavy cream—opaque but flowy. -
Splatter the Background Stars:
Load a brush (or an old toothbrush) with the white mix. Tap the handle of the brush against your finger over the paper to create a spray of fine white dots. -
Control the Chaos:
Vary the distance of your tapping. Closer to the paper creates concentrated clusters; further away creates a dusting of distant stars. -
Paint Major Stars:
Switch to your smallest liner brush (size 0 or 1). Dip it into the thick white gouache and paint specific, larger dots where you want prominent stars. -
Add the Sparkles:
For the brightest stars, paint a small cross or four-pointed diamond shape. Extend the points gently outward to mimic the diffraction spikes seen in astrophotography. -
Final Highlights:
Look for areas in the nebula that need emphasis and add a few tiny clusters of white dots manually to guide the eye. -
The Reveal:
Wait until the white paint is completely dry. Then, slowly peel the tape away at a 45-degree angle to reveal your clean edges.
Bleed Prevention Trick
To get that perfect crisp edge, run a bone folder or the back of a spoon hard over the tape edge before you start painting and keep water away from the very brim.
Enjoy the deep, cosmic atmosphere you’ve created on the page
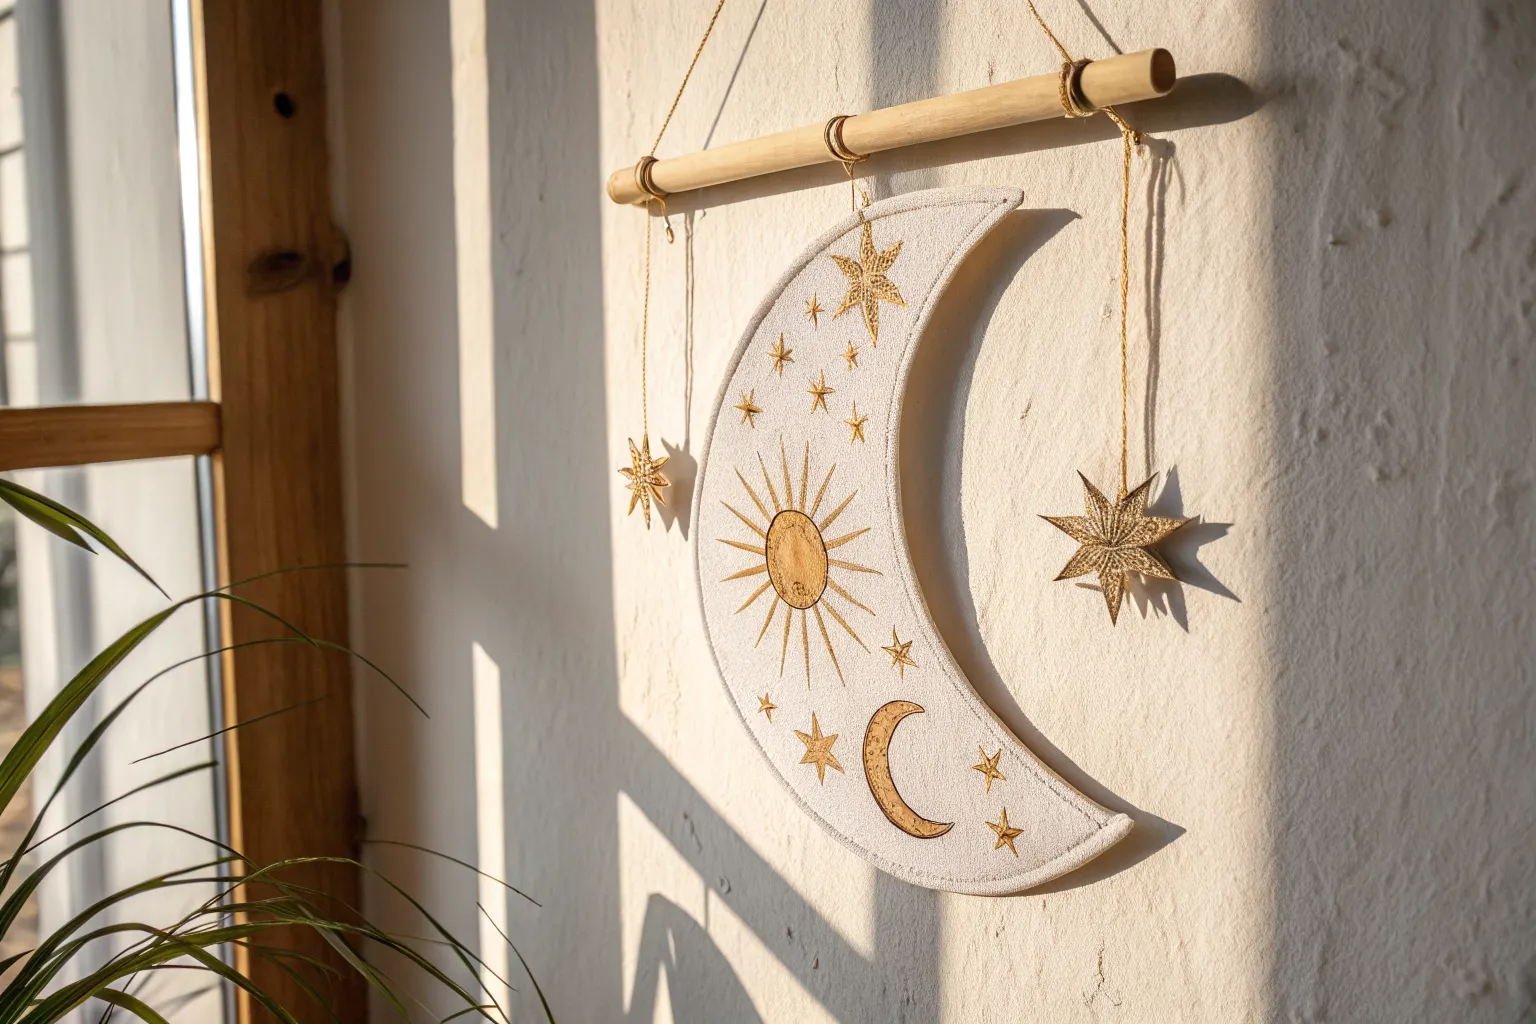
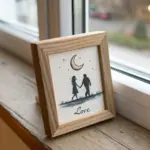
Sun and Moon Faces
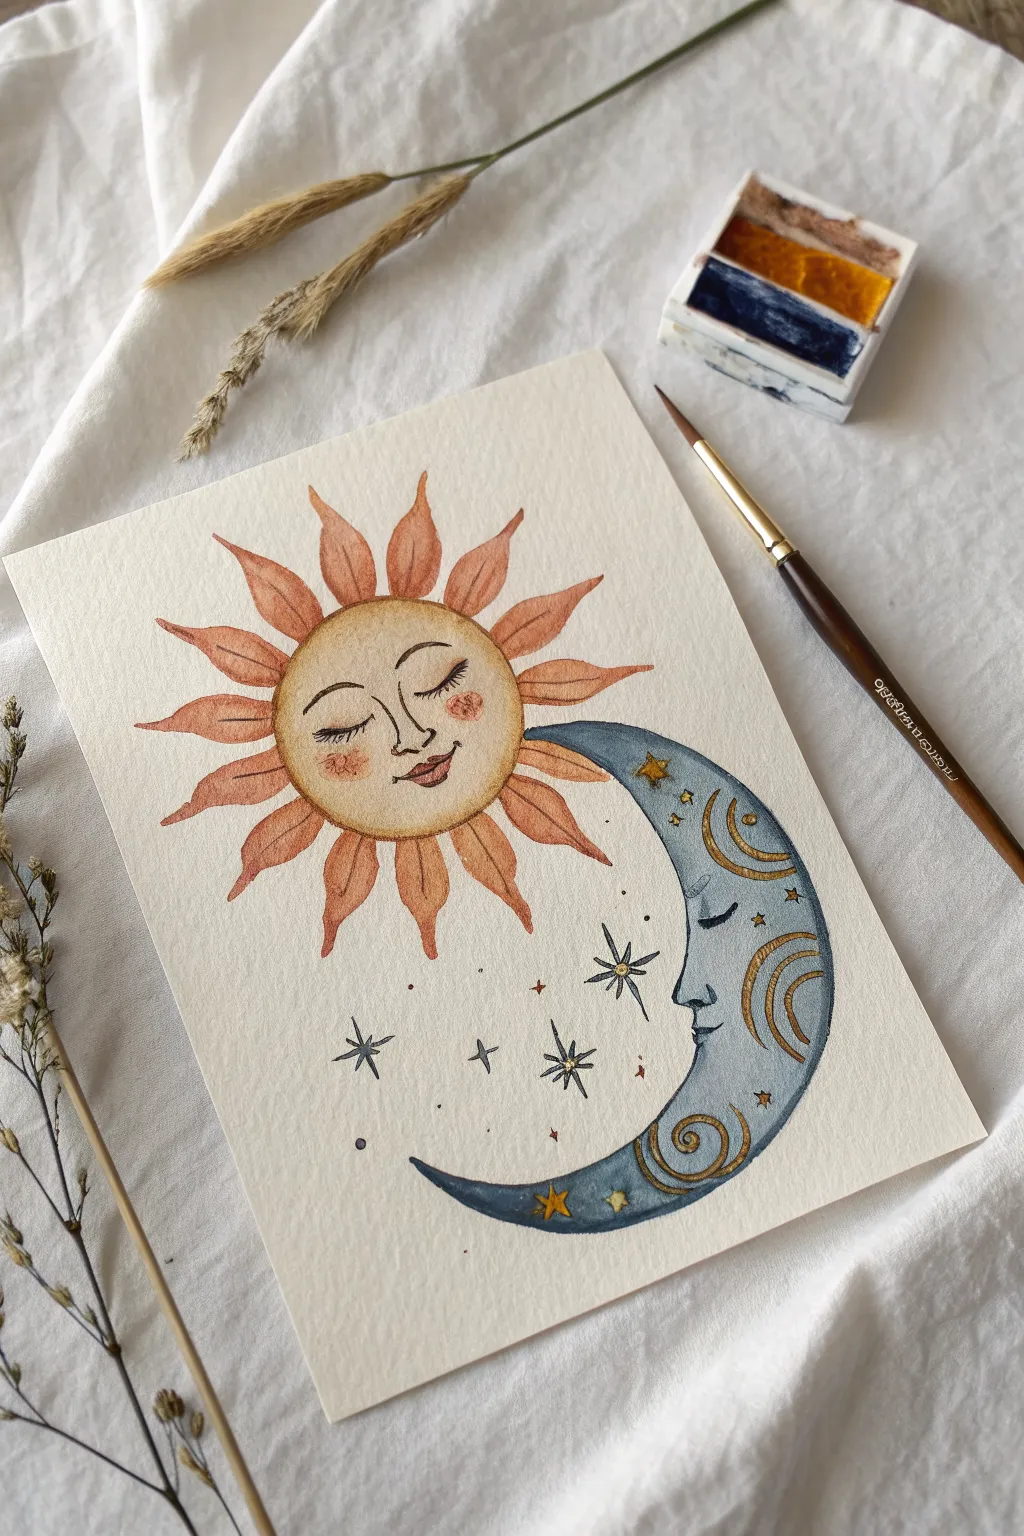
This whimsical watercolor piece captures the classic harmony between a warm, smiling sun and a serene crescent moon. With its soft washes, defined outlines, and delicate gold accents, it creates a cozy, mystical vibe perfect for art journals or wall decor.
Step-by-Step Guide
Materials
- Cold press watercolor paper (approx. 5×7 inches)
- Watercolor paint set (specifically yellow ochre, terra cotta, indanthrone blue or payne’s gray)
- Metallic gold watercolor paint or gold gouache
- Round watercolor brush (size 4 or 6)
- Fine detail brush (size 0 or 00)
- HB Pencil
- Kneaded eraser
- Micron pen (brown, size 01 or 03)
- Clean water and paper towels
Step 1: Sketching the Celestial Bodies
-
Review composition:
Visualize the layout first: the sun face sits in the upper left-center, while the crescent moon gently cups the lower right side, creating a nested effect. -
Draw the sun’s circle:
Use a compass or trace a small circular object to draw the sun’s face. Sketch faint guidelines vertically and horizontally across the face to help position the features later. -
Add the sun’s rays:
Sketch the wavy, flame-like rays extending outward. Notice how the rays on the right side tuck slightly behind where the moon will be. -
Outline the crescent moon:
Draw the large ‘C’ shape of the moon. The inner curve should follow the sun’s rays but not touch them directly, leaving a small gap of negative space. -
Sketch the features:
Lightly pencil in the closed eyes, noses, and lips for both faces. The sun looks contentedly forward, while the moon is seen in profile, looking toward the sun. -
Clean up sketch lines:
Gently roll a kneaded eraser over your drawing. You want the graphite lines to be faint enough to be covered by paint but visible enough to guide you.
Muddy colors?
If the orange sun bleeds into the blue moon, let it dry completely. Then, gently lift the mistake with a clean, damp brush and blot with a tissue.
Step 2: Painting the Sun
-
Base wash for the sun:
Mix a watery pale yellow ochre. Paint the entire circle of the sun’s face. While wet, drop a tiny bit of reddish-orange onto the cheeks to create a soft, natural blush. -
Painting the rays:
Use a terra cotta or burnt orange shade for the rays. Paint them individually, ensuring the paint remains somewhat transparent. Vary the saturation slightly so some rays look darker than others. -
Adding gradients:
Before the rays dry completely, touch the tips with a slightly more saturated orange to give them depth and a glowing effect. -
Let it dry:
Allow the sun to dry completely before starting the moon to prevent the warm and cool colors from bleeding into each other.
Level Up
Paint the background a deep, dark midnight blue (leaving a border around your figures) to make the celestial faces pop dramatically.
Step 3: Painting the Moon and Details
-
Moon base layer:
Mix a diluted Payne’s gray or a dusty blue. Apply an even wash over the crescent moon shape. -
Deepening the shadows:
While the moon is still damp, drop concentrated blue-grey pigment onto the bottom curve and the outer edge to create a rounded, 3D form. -
Fine lining the features:
Once all paint is bone dry, use a brown Micron pen (or a very steady hand with dark brown paint) to trace the eyelashes, noses, and lips. Add the freckles on the sun’s cheeks. -
Outlining the shapes:
Gently outline the sun, the rays, and the moon profile with the pen. Keep the line weight delicate; broken lines can add a nice organic feel. -
Painting the stars:
Using the tip of your detail brush and dark grey paint, create several four-pointed stars and small dots in the space between the sun and moon.
Step 4: Metallic Accents
-
Adding gold swirls:
Activate your metallic gold paint. Paint decorative swirls and curved lines onto the dry blue surface of the moon. -
Highlighting the stars:
Add tiny gold centers to the dark grey stars you painted earlier, and paint a few standalone gold stars for variety. -
Final touches:
Inspect the piece for any desired contrast. I sometimes add a final tiny pass of brown ink to the corners of the mouths to emphasize the smiles.
This serene celestial pair is now ready to frame or gift to a stargazer friend
Constellation Line Art
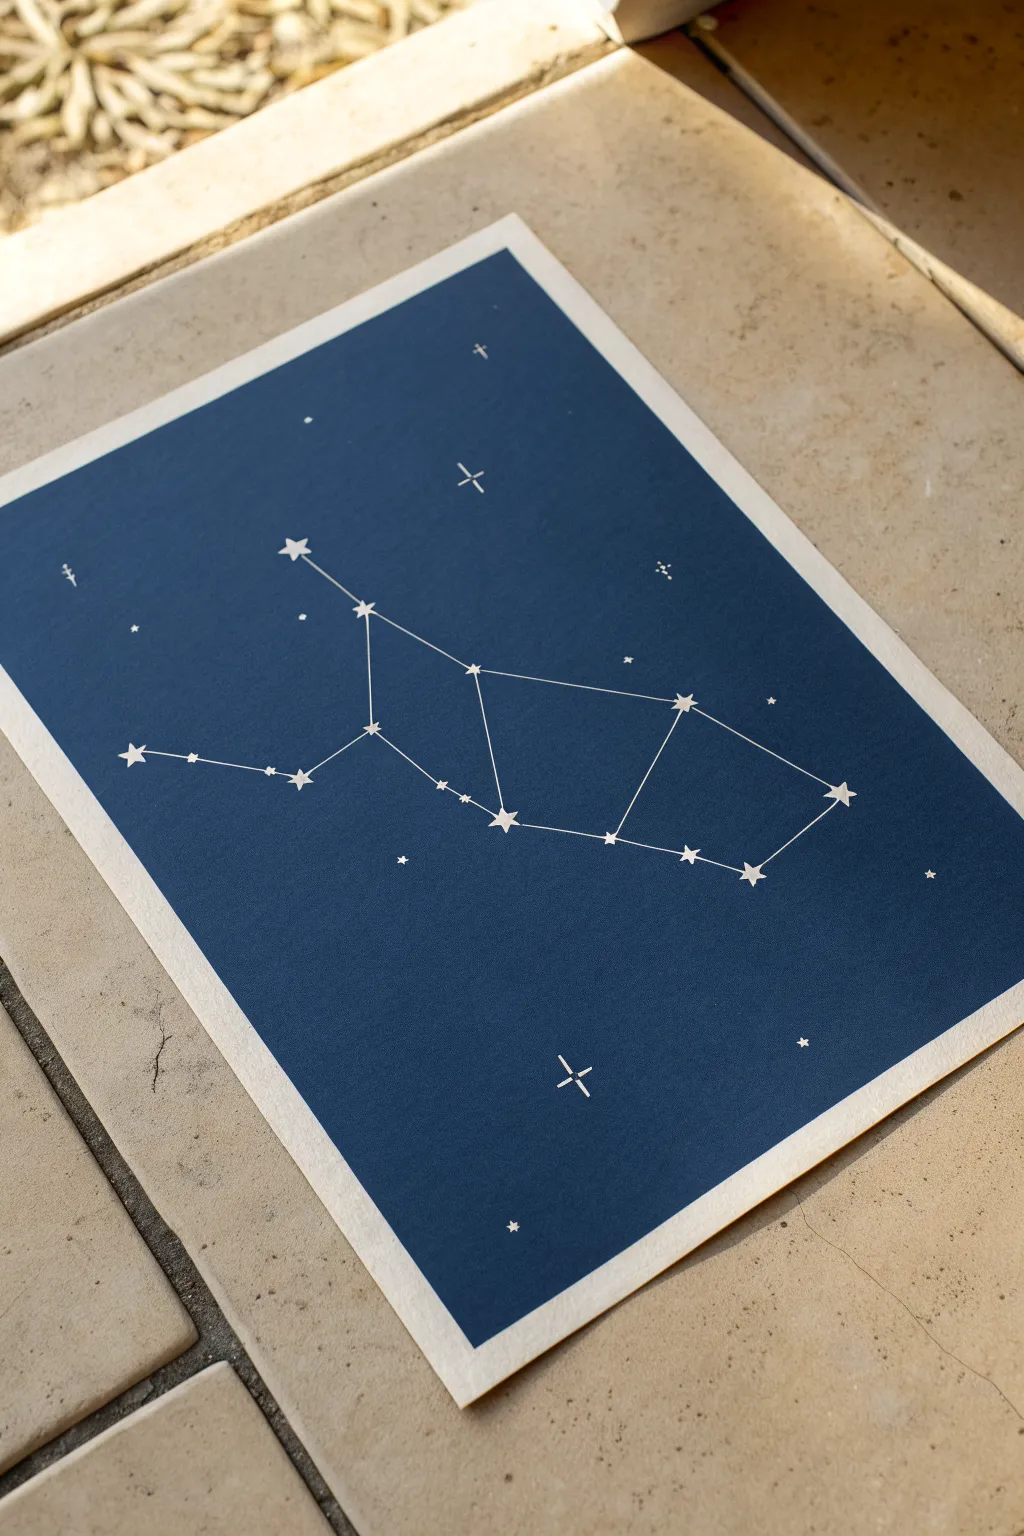
Capture the minimalist beauty of the night sky with this striking constellation art piece. Using deep indigo paint on textured paper creates a rich, velvety backdrop that makes the delicate white star lines pop.
Step-by-Step
Materials
- Heavyweight watercolor paper (cold press)
- Deep indigo or navy blue acrylic gouache
- White gel pen (size 08 or 10) or white gouache with a fine liner brush
- Ruler
- Pencil
- Washi tape or masking tape
- Flat wash brush (1 inch)
- Constellation reference image (Virgo shown here)
Step 1: Preparing the Night Sky
-
Mask the borders:
Begin by taping down your watercolor paper to a flat surface using washi tape. Create a border of about half an inch on all sides to ensure a clean, white edge when you’re finished. -
Mix the perfect blue:
Squeeze out a generous amount of indigo acrylic gouache. I like to add a tiny dot of black to deepen the tone slightly, aiming for a midnight sky look rather than a bright royal blue. -
Apply the base coat:
Using a wide flat brush, apply the paint in smooth, horizontal strokes across the paper. Ensure full coverage but keep the layer relatively thin to avoid cracking. -
Second coat for opacity:
Once the first layer is dry to the touch, apply a second coat if the paper texture is still showing through too much. You want a solid, matte field of color. -
Let it cure:
Allow the background to dry completely. This is crucial; if the paint is even slightly damp, your white lines will feather and bleed later.
Clean Lines Only
If your white gel pen skips over the textured paper, try warming the tip on your thumb first, or switch to a fine brush with thinned white gouache for smoother flow.
Step 2: Mapping the Stars
-
Reference check:
Pull up your reference image of the Virgo constellation (or your chosen zodiac sign). Identify the major ‘anchor’ stars that form the main shape. -
Mark anchor points:
Lightly mark the position of the main stars using a pencil. Don’t press hard; you just need faint guides on top of the dark paint. -
Draft the connections:
Use a ruler to lightly pencil in the connecting lines between your star points to ensure the geometry looks correct before committing to ink.
Step 3: Inking the Constellation
-
Draw the main stars:
Using your white gel pen or fine liner brush, draw the stars at your marked points. Create variety by making some stars 5-point shapes and others simple solid dots. -
Connect the dots:
Place your ruler against the pencil guides. draw straight, confident white lines connecting the stars to form the constellation’s skeleton. -
Add major flares:
For the brightest stars (like Spica in Virgo), extend the points of the star slightly to create a subtle lens flare effect. -
Scatter background stars:
Dot tiny white specks randomly in the empty negative space. Keep these very small to represent distant stars and add depth without cluttering the composition. -
Include distinct elements:
Add a few unique celestial shapes, like a small cross or a four-point sparkle, in the corners to balance the composition. -
Clean up:
Check for any pencil marks that might be visible and gently erase them, though the white ink usually covers them well.
Level Up: Metallic Touch
Swap the white ink for metallic silver or gold leaf pen for the main constellation lines. It catches the light beautifully against the matte blue background.
Step 4: Finishing Touches
-
Peel the tape:
Carefully peel away the masking tape at a 45-degree angle. Move slowly to ensure the crisp white border of the paper is revealed without tearing. -
Flatten the art:
If the paint has caused the paper to buckle slightly, place the finished (and dry) piece under a heavy book overnight to flatten it out.
Display your personal zodiac map in a simple float frame to appreciate the raw paper edges
BRUSH GUIDE
The Right Brush for Every Stroke
From clean lines to bold texture — master brush choice, stroke control, and essential techniques.
Explore the Full Guide
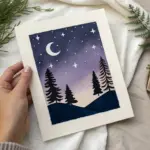
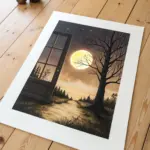
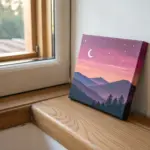
Starry Night Landscape Silhouette
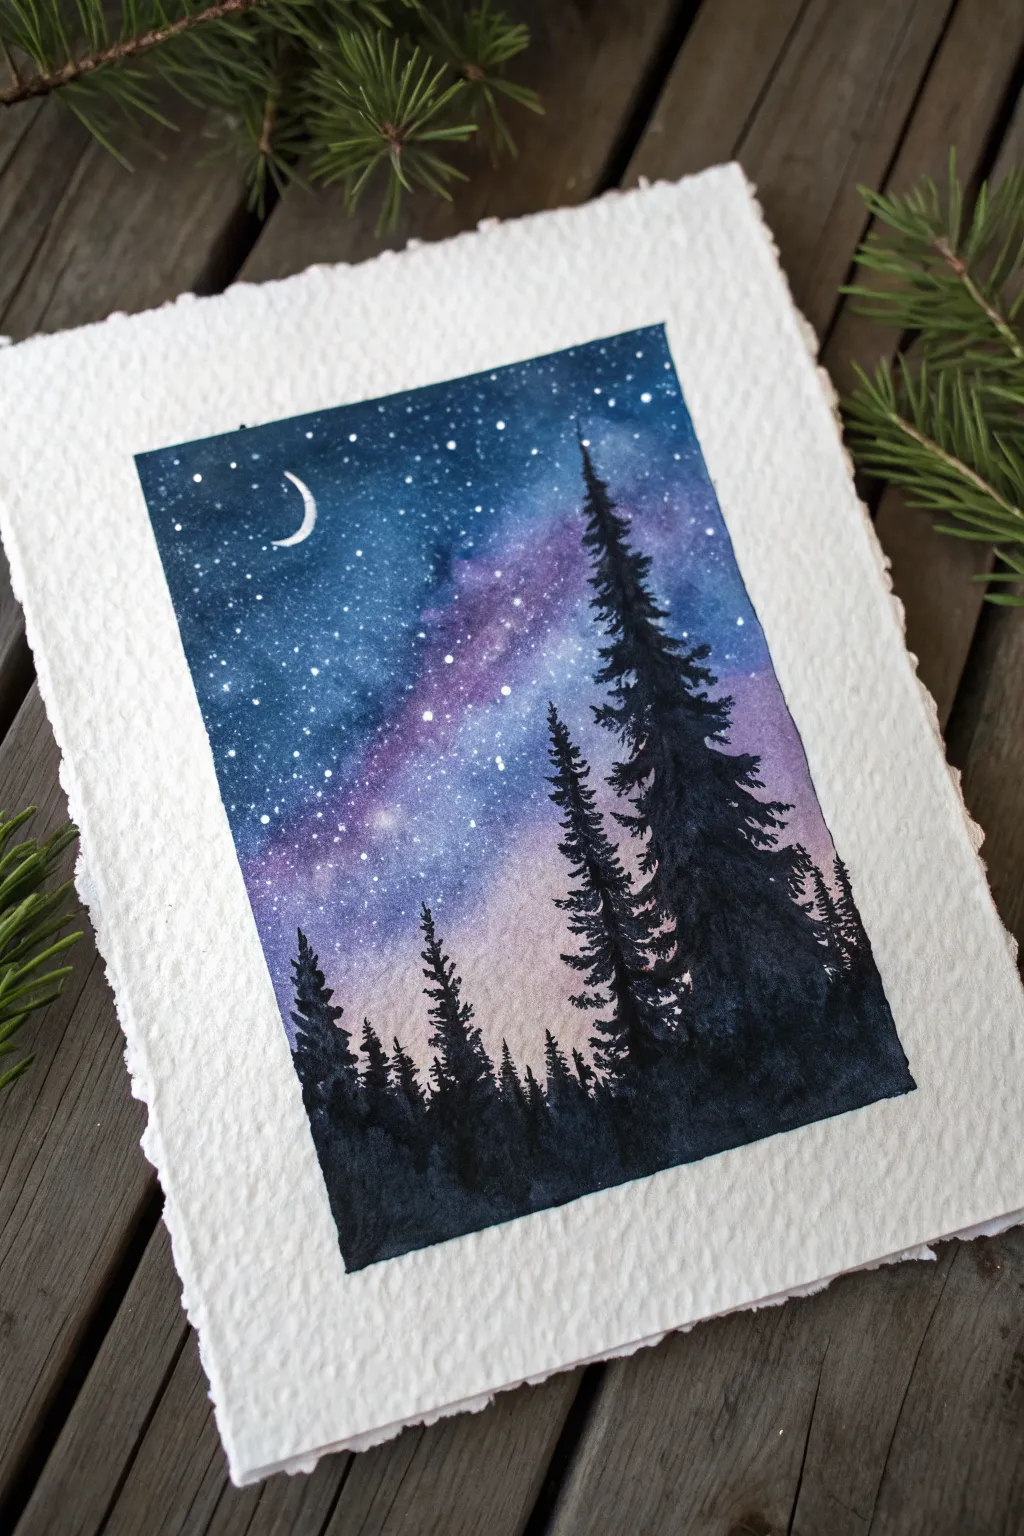
Capture the magic of a starry evening with this dreamy watercolor landscape. You’ll create a seamless blend of celestial blues and purples, accented by a delicate crescent moon and framed by striking pine silhouettes.
Step-by-Step Tutorial
Materials
- Cold press watercolor paper (deckle edge preferred)
- Painter’s tape or masking fluid (optional)
- Watercolor paints: Indigo, Prussian Blue, Violet, Magenta, Black
- White gouache or white gel pen
- Round brushes: size 8 or 10 for washes, size 0 or 1 for details
- Clean water jars
- Paper towels
- Salt (optional for texture)
Step 1: Setting the Scene
-
Prepare the paper:
Begin by taping down your cold press watercolor paper to a board if it isn’t a block. This prevents buckling. If you want a crisp border within the deckled edge like the example, tape off a rectangular area in the center, leaving a wide margin. -
Wet the surface:
Using your large round brush, apply a layer of clean water to the entire rectangular area you intend to paint. The paper should be glistening but not forming puddles.
Step 2: Painting the Galaxy
-
Lay the light colors:
While the paper is wet, drop in a diagonal swath of Magenta or light Violet across the middle-right section. This will be the glowing heart of your galaxy. -
Deepen the sky:
Working quickly while the paper is still damp, load your brush with Prussian Blue. Apply this to the upper left and right corners, blending it gently towards the pink/violet center. -
Add midnight tones:
Mix Indigo with a touch of Black to get a very deep, dark blue. Paint the very top edges and corners with this mixture to create depth and contrast. -
Create the horizon glow:
Towards the bottom third of the painting, dilute your brush with water and pull some of the pink/violet wash downwards, letting it fade into white or very pale pink near the imaginary horizon line. This simulates the last light of dusk. -
Blend the transitions:
Clean your brush, damp it slightly, and gently soften any harsh lines where the blue meets the purple. The transition should look smoky and soft. -
Dry completely:
It is crucial to let this first layer dry 100% before moving on. I prefer to let it air dry to maintain the softness, but a hair dryer on low heat works too.
Star Control
Cover the bottom ‘horizon’ area with a scrap piece of paper before splattering white paint. This keeps your stars in the sky and prevents them from looking like snow on the ground.
Step 3: Stars and Moon
-
Splatter the stars:
Mix white gouache with a tiny bit of water until it has a milky consistency. Dip a brush or toothbrush in it and tap it against another brush handle over the dark blue sections to inconsistent starry speckles. -
Add larger stars:
Use a fine detail brush (size 0) or a white gel pen to manually dot a few slightly larger, brighter stars in the darker areas. -
Paint the crescent moon:
Using your white gouache or gel pen, carefully draw a thin, crisp crescent moon in the upper left quadrant. Keep the lines sharp.
Make it Sparkle
For a magical touch, use iridescent or metallic watercolor for the purple galaxy band. When the light hits the finished piece, the Milky Way will shimmer subtly.
Step 4: Forest Silhouettes
-
Mix the silhouette color:
Create a concentrated mix of Black with a little Indigo. The paint needs to be thick and opaque, not watery. -
Paint the main tree line:
Start at the very bottom edge. Paint a jagged, uneven block that rises slightly higher on the right side. This is the forest floor. -
Start the hero tree:
On the right side, draw a thin vertical line extending almost to the top of the painting. This guide line will correspond to the trunk of the tallest pine. -
Foliage technique:
Starting at the top of your vertical line, use the tip of your brush to tap small, irregular horizontal dashes. As you move down the trunk, make the branches wider and slightly drooping. -
Add texture to the hero tree:
Don’t make the tree perfect triangles. Leave small gaps between branches so the sky peeks through, giving it a realistic, bristly look. -
Paint secondary trees:
Add a medium-sized tree to the left of the main one, and smaller trees on the far left. Vary their heights so the composition feels organic. -
Anchor the forest:
Ensure the bottom of all trees blend seamlessly into the black base you painted earlier. Add tiny vertical spikes along the horizon for distant treetops.
Step 5: Final Touches
-
Assess and Refine:
Once the black paint is dry, check if any stars were covered by trees. You can add a tiny speck of white on a dark branch to suggest a star shining through. -
Remove tape:
Carefully peel away your masking tape at a 45-degree angle to reveal the clean, sharp edges.
Frame your miniature masterpiece or use it as a stunning handmade greeting card
Solar Eclipse Spotlight

Capture the breathtaking celestial drama of a solar eclipse with this vibrant mixed-media art piece. The central void contrasts beautifully against radiant corona flares and a starry teal cosmos, creating a stunning focal point for any room.
Step-by-Step
Materials
- High-quality black cardstock or illustration board (A3 or similar size)
- Acrylic paints (Titanium White, Cadmium Yellow, Orange, Phthalo Green/Teal, Black)
- Soft pastel chalks or PanPastels (White, Yellow, Orange)
- Circle masking film or a precise circle stencil
- Sponge applicators or makeup sponges
- Fine detail brush (size 0 or 00)
- Stiff bristle brush (e.g., old toothbrush)
- Matte fixative spray
- Compass or round object for tracing
Step 1: Setting the scene
-
Prepare the Void:
Begin by determining the center of your black cardstock. Use a compass to lightly draw a perfect circle in the middle, roughly 4-5 inches in diameter depending on your paper size. -
Mask the Eclipse:
Carefully cut a circle from masking film that perfectly matches your drawn circle. Adhere this mask firmly to the center of the paper to protect the black void while you work on the glowing corona. -
Base Glow Application:
Load a sponge applicator with white acrylic paint. Dab off most of the paint until the sponge is almost dry. -
Creating the Rim:
Gently tap the sponge around the edge of your masking circle. Keep this first layer tight to the mask to establish the brightest part of the corona.
Cosmic Drift
When sponging the corona, rotate your paper frequently. This ensures the radial flares look natural and organic all the way around, rather than slanted in one direction.
Step 2: Building the Corona
-
Adding Warmth:
While the white is still slightly tacky, pick up a tiny amount of yellow paint on a clean sponge. Blend this outward from the white ring, softening the transition. -
Expanding the Flare:
Introduce a soft orange hue further out. Use radial strokes—pulling the sponge from the center outward—to mimic the directional flare of solar gases. -
Cosmic Transition:
Mix a teal shade using Phthalo Green and a touch of white. Sponge this color around the outer edges of the orange glow, fading it into the black background. -
Smoothing with Pastels:
Once the paint is fully dry, take white and pale yellow soft pastels. Rub them gently over the painted corona area to create a hazy, ethereal glow that paint alone can’t achieve. -
Blending the Haze:
Use your finger or a fresh sponge tool to smudge the pastel powder, smoothing out any harsh paint textures and enhancing the luminosity.
Diamond Ring Effect
Add a single, intense burst of white light at one point on the circle’s edge to mimic the famous ‘Diamond Ring’ effect seen just before totality.
Step 3: Starlight and Details
-
Prepare the Stars:
Thin down some white acrylic paint with water until it reaches an ink-like consistency suitable for splattering. -
Splatter Technique:
Dip a stiff bristle brush or old toothbrush into the thinned paint. Hold it over the teal and black outer areas and flick the bristles to create a field of tiny, distant stars. -
Hand-painted Stars:
Using your finest detail brush, manually paint larger, brighter stars. Focus these clusters near the transition between the teal nebula and the deep space background. -
Adding Starbursts:
Select a few major stars to highlight. Paint cross-shapes or eight-pointed flares on these to make them twinkle realistically. -
Protecting the Work:
Before removing the mask, take the artwork outside and give it a light coat of matte fixative to set the pastels and protect the surface.
Step 4: The Reveal
-
Removing the Mask:
Wait for the fixative to dry completely. Very slowly and carefully peel away the central circle mask to reveal the crisp, pitch-black moon against the blazing corona. -
Edge Refinement:
If any paint bled under the mask, use black paint and a steady hand to touch up the circle’s edge. -
Final Glow Touch-up:
If the contrast feels too harsh, you can lightly dust a minuscule amount of pastel right over the very edge of the black circle to simulate light diffraction, but keep it subtle.
Hang this striking piece where it can catch low light, letting the corona glow and draw the eye into the center

PENCIL GUIDE
Understanding Pencil Grades from H to B
From first sketch to finished drawing — learn pencil grades, line control, and shading techniques.
Explore the Full Guide
Shooting Star Trails
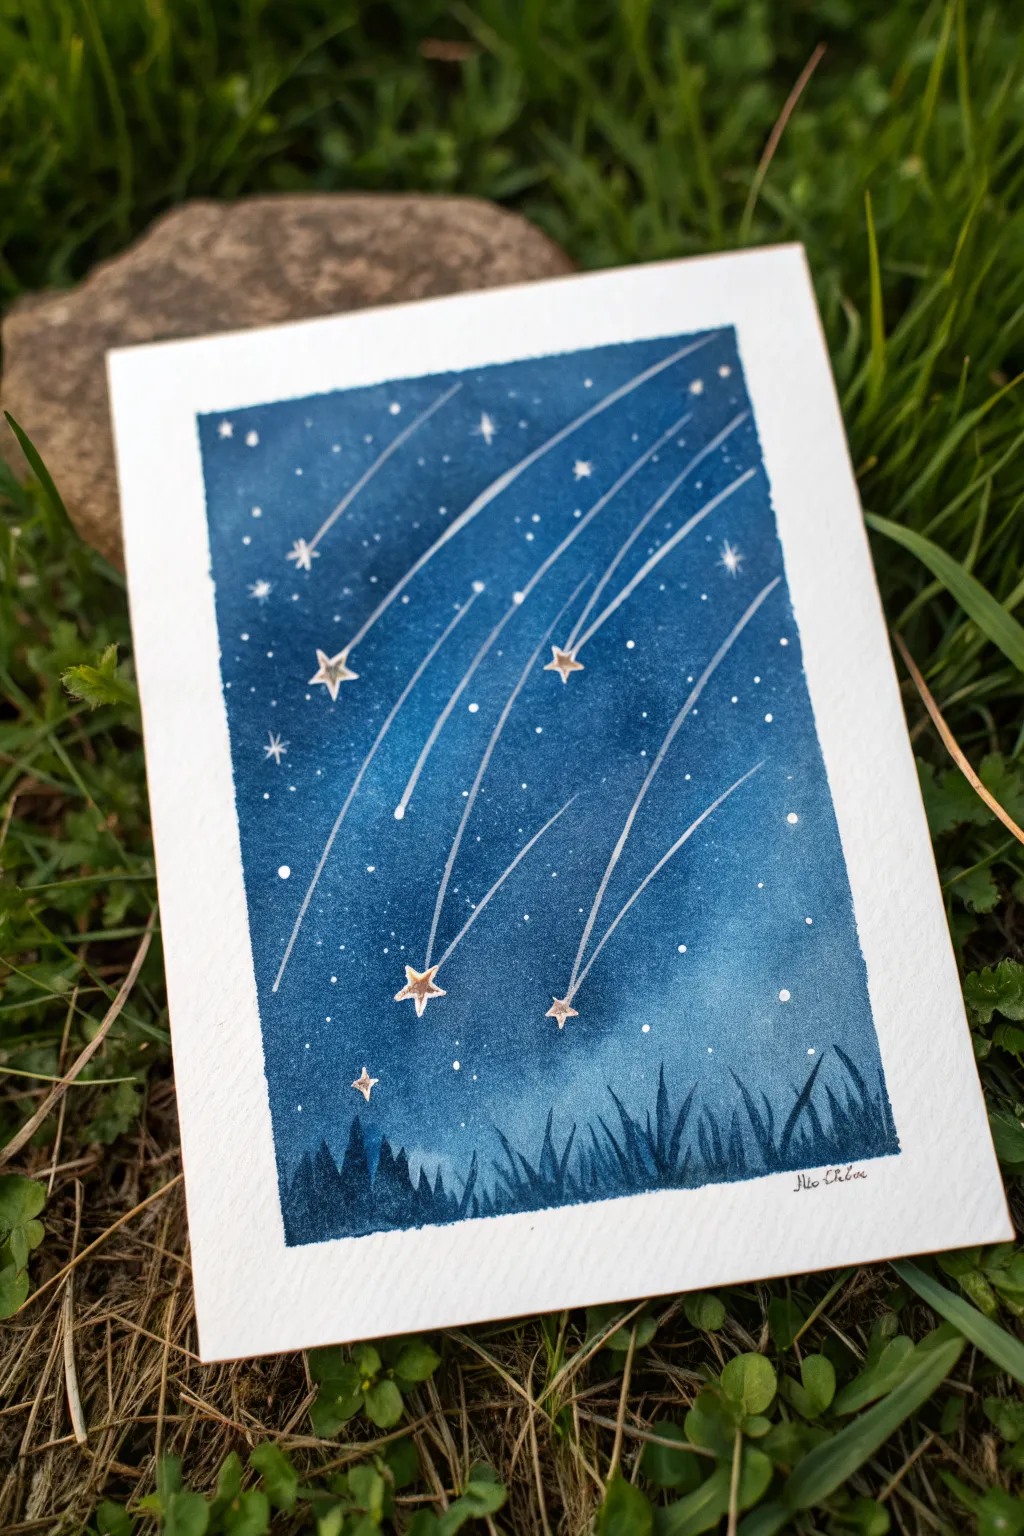
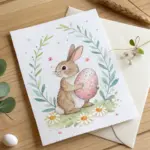
Capture the magic of a summer night with this charming watercolor card featuring trailing shooting stars. Using simple wet-on-wet techniques and metallic accents, you will build a deep blue galaxy that glows against a grassy silhouette.
Detailed Instructions
Materials
- Cold press watercolor paper (postcard size, approx. 4×6 inches)
- Masking tape or painter’s tape
- Watercolor paints (Indigo, Prussian Blue, Ultramarine, Black)
- White gouache or white gel pen
- Metallic gold or copper watercolor paint (or a metallic marker)
- Round brushes (size 6 or 8 for wash, size 0 or 1 for details)
- Cup of water and paper towels
- Ruler (optional)
Step 1: Preparation and Sky Base
-
Secure the paper:
Tape down all four edges of your watercolor paper to a sturdy board or table. This creates that crisp white border seen in the original and keeps the paper from buckling. -
Wet the surface:
Using your larger round brush and clean water, thoroughly wet the rectangular area inside the tape. You want the paper to look glossy but not have pooling puddles. -
Apply the first wash:
Load your brush with a light mix of Prussian Blue or Ultramarine. Drop color onto the wet paper, letting it spread naturally. -
Deepen the cosmos:
While the first layer is still damp, pick up a concentrated mix of Indigo and a touch of Black. Dab this darker pigment around the edges and top corners to create a vignette effect. -
Create the gradient:
Tilt your board slightly if needed to help the dark pigment flow downward, but keep the center area slightly lighter to suggest atmospheric depth. I like to leave the very bottom edge just a fraction lighter to contrast with the grass later. -
Dry completely:
Let the paper dry until it is room temperature to the touch. This is crucial—painting details on damp paper will cause them to blur.
Pro Tip: Clean Lines
To keep your shooting star trails perfectly straight and parallel, you can use a ruler as a guide, but keep the brush loose for a hand-painted feel.
Step 2: Adding the Stars
-
Splatter the background:
Dilute a tiny amount of white gouache with water. Load a brush, hold it over the paper, and tap the handle firmly to spray fine mist-like stars across the sky. -
Plot the shooting stars:
Visualize where your main meteors will fall. They should angle diagonally from the top right toward the bottom left. -
Draw the star heads:
Using a fine detail brush and your metallic gold or copper paint, carefully draw small, five-pointed star shapes at the desired end-points of your meteors. -
Paint secondary stars:
Add a few more standalone metallic stars scattered randomly in the open blue spaces to balance the composition. -
Add bright accents:
Once the metallic stars are dry, place a tiny dot of white gouache in the center of the largest ones to make them twinkle.
Level Up: 3D Sparkle
Add tiny rhinestones or sequins to the center of the shooting stars with a dot of craft glue for a card that truly catches the light.
Step 3: Trails and Landscape
-
Paint the trails:
Mix a semi-opaque white (gouache mixed with a lot of water) or use a milky gel pen. Draw long, sweeping lines extending from the top right down to your metallic stars. -
Vary the line weight:
Start the line very thin and faint at the top, and press slightly harder as you approach the star to make the trail look like it is gaining intensity. -
Suggest movement:
Add a few shorter, fainter white streaks parallel to the main trails to give the impression of speed and debris. -
Mix the landscape color:
Create a thick, creamy mixture of Indigo and Black. You want this to be very opaque. -
Paint the grass silhouette:
Using the tip of your detail brush, paint upward, flicking strokes along the bottom edge. Vary the lengths and angles to simulate wild grass. -
Add foreground depth:
Between the blades of grass, fill in the solid bottom strip with your dark black-blue mix to anchor the image. -
Refine and reveal:
Once absolutely everything is bone dry, carefully peel away the masking tape at a 45-degree angle to reveal your clean edges.
Sign your beautiful nocturnal landscape and send it to a friend who acts as a guiding light in your life
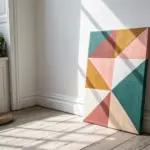
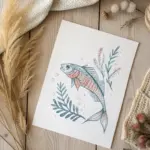
Sunburst Rays in Warm Hues
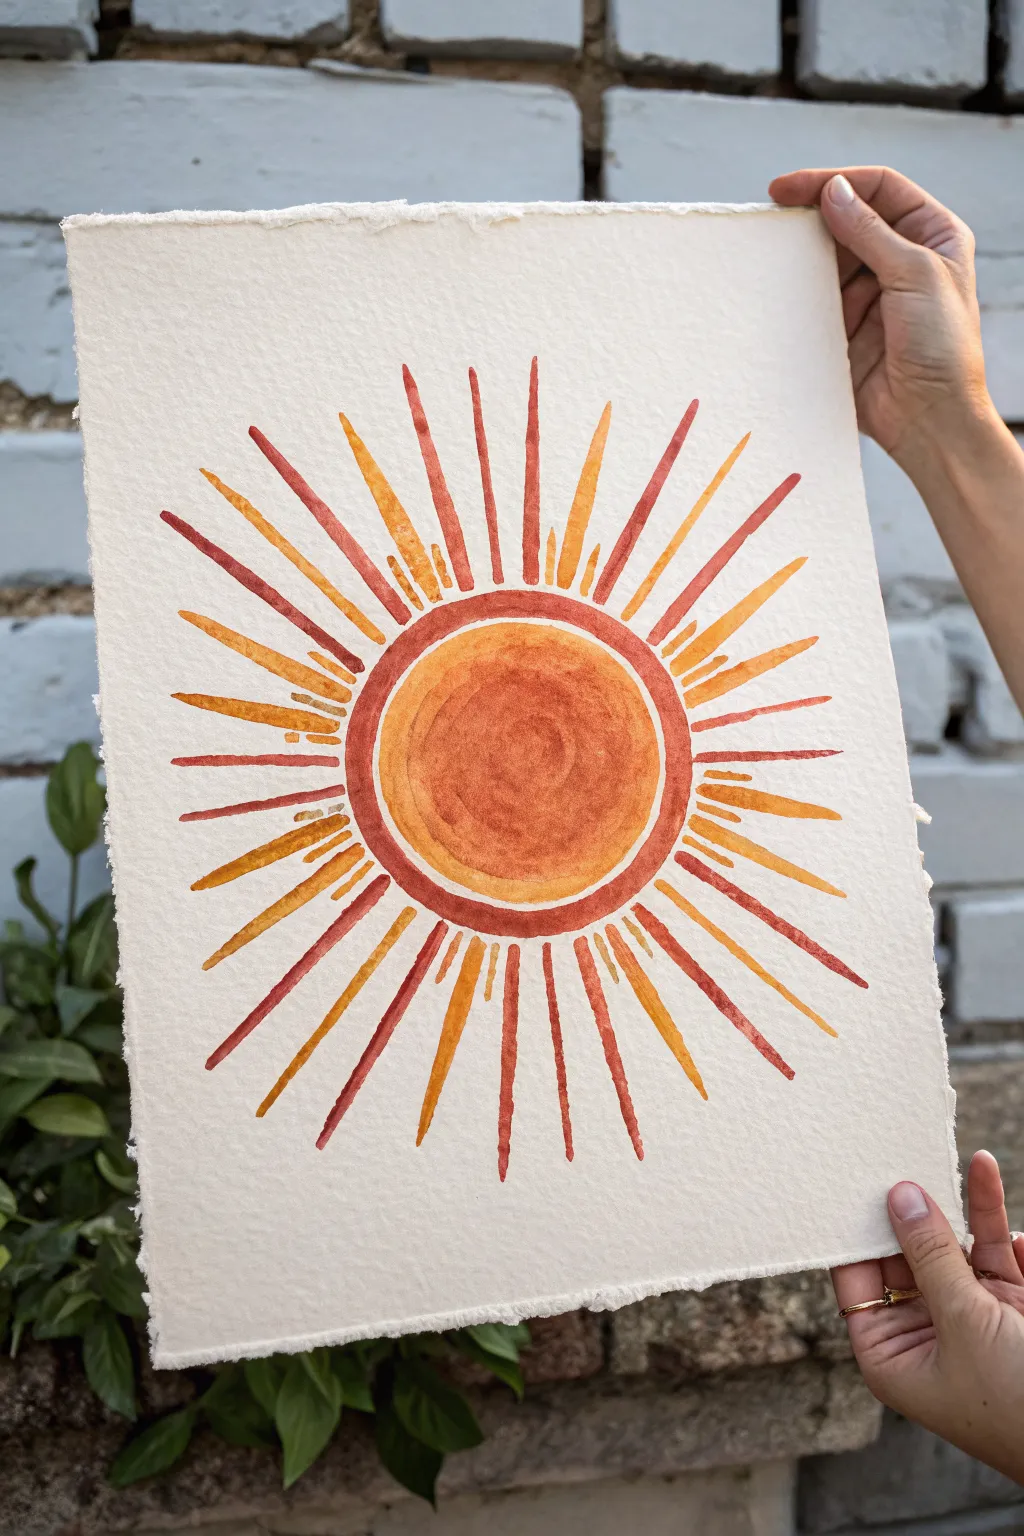
Bring the warmth of the sun into your space with this radiant watercolor project. Using rich, earthy tones on textured handmade paper creates an organic, celestial piece that feels both modern and timeless.
Detailed Instructions
Materials
- Handmade deckle-edge watercolor paper (medium texture, 300gsm)
- Watercolor paints (burnt orange, golden yellow, terracotta/red)
- Round watercolor brushes (size 6 and size 2 for details)
- Pencil (HB or lighter)
- Compass or two round objects of different sizes
- Jar of clean water
- Paper towels
- Mixing palette
Step 1: Planning the Layout
-
Find the center:
Place your sheet of handmade paper on a flat surface. Lightly mark the approximate center point with your pencil; it doesn’t need to be mathematically perfect, as the charm lies in its hand-drawn feel. -
Draw the central sun:
Using a compass or a small round object (like a jar lid), lightly trace a circle in the center. This will be the main body of the sun. -
Define the outer ring:
Trace a second, slightly larger circle around the first one to create a defined ring. Leave a small gap between the two circles to separate the core from its border.
Uneven Paint Drying?
Handmade paper drinks water fast. If paint dries patchy, add a second layer of diluted pigment once the first is dry to smooth out the tone.
Step 2: Painting the Core
-
Mix your base orange:
On your palette, mix a warm golden-orange hue. Add enough water to make the paint fluid but keep the pigment strong. -
Fill the inner circle:
Load your size 6 brush and paint the innermost circle. Use circular strokes, starting from the center and working outward, allowing the water to pool slightly for texture. -
Add depth to the core:
While the paint is still wet, drop a slightly darker reddish-orange into the center of the wet circle. I like to tilt the paper gently to let the colors blend naturally without overworking them. -
Paint the outer ring:
Switch to a terracotta or deep red-orange color. Carefully paint the thin ring you sketched earlier, framing the central sun. Keep your hand steady to maintain an even width. -
Let it dry:
Allow the center section to dry completely before moving on to the rays. This prevents the wet paint from bleeding outward into your ray design.
Ornate Gold Finish
For a magical touch, re-trace the thin ring around the sun or highlight specific rays with metallic gold watercolor paint after drying.
Step 3: Creating the Rays
-
Pre-mix three warm shades:
Prepare three distinct puddles of paint on your palette: a deep red-orange, a bright tangerine, and a golden yellow. -
Draft the major rays:
Using your pencil very faintly, mark the positions for the longest rays first. Think of them like the main hour marks on a clock face (12, 3, 6, 9) to keep the spacing balanced. -
Paint the long red rays:
Using the deep red-orange mixture and your size 6 brush, paint long, tapering rays at the main anchor points. Start near the sun’s ring (without touching it) and pull the brush outward, lifting pressure at the end to create a point. -
Add intermediate orange rays:
Switch to the bright tangerine color. Paint slightly shorter rays in the spaces between the red ones. Varying the lengths adds a dynamic, shimmering effect. -
Fill with golden rays:
Use the golden yellow paint for the shortest rays. Tuck these into the remaining gaps, or add them as small accents near the base of the larger rays to make the sun look dense and glowing. -
Detail with small accents:
With the smaller size 2 brush, add tiny, dash-like rays in between the larger ones where the design feels empty. These act as little sparks of light. -
Refine the edges:
Check the tips of your rays. If any look too blunt, use a slightly damp, clean brush to gently pull the pigment outward into a sharper point. -
Final drying stage:
Let the entire painting sit undisturbed until bone dry. The textured paper holds water longer than smooth paper, so give it extra time. -
Erase pencil marks:
Once you are absolutely sure the paint is dry, gently erase any visible pencil lines around the central circles or ray paths.
Hang your finished sunburst where it can catch the morning light and brighten your room


Planet Parade Color Study
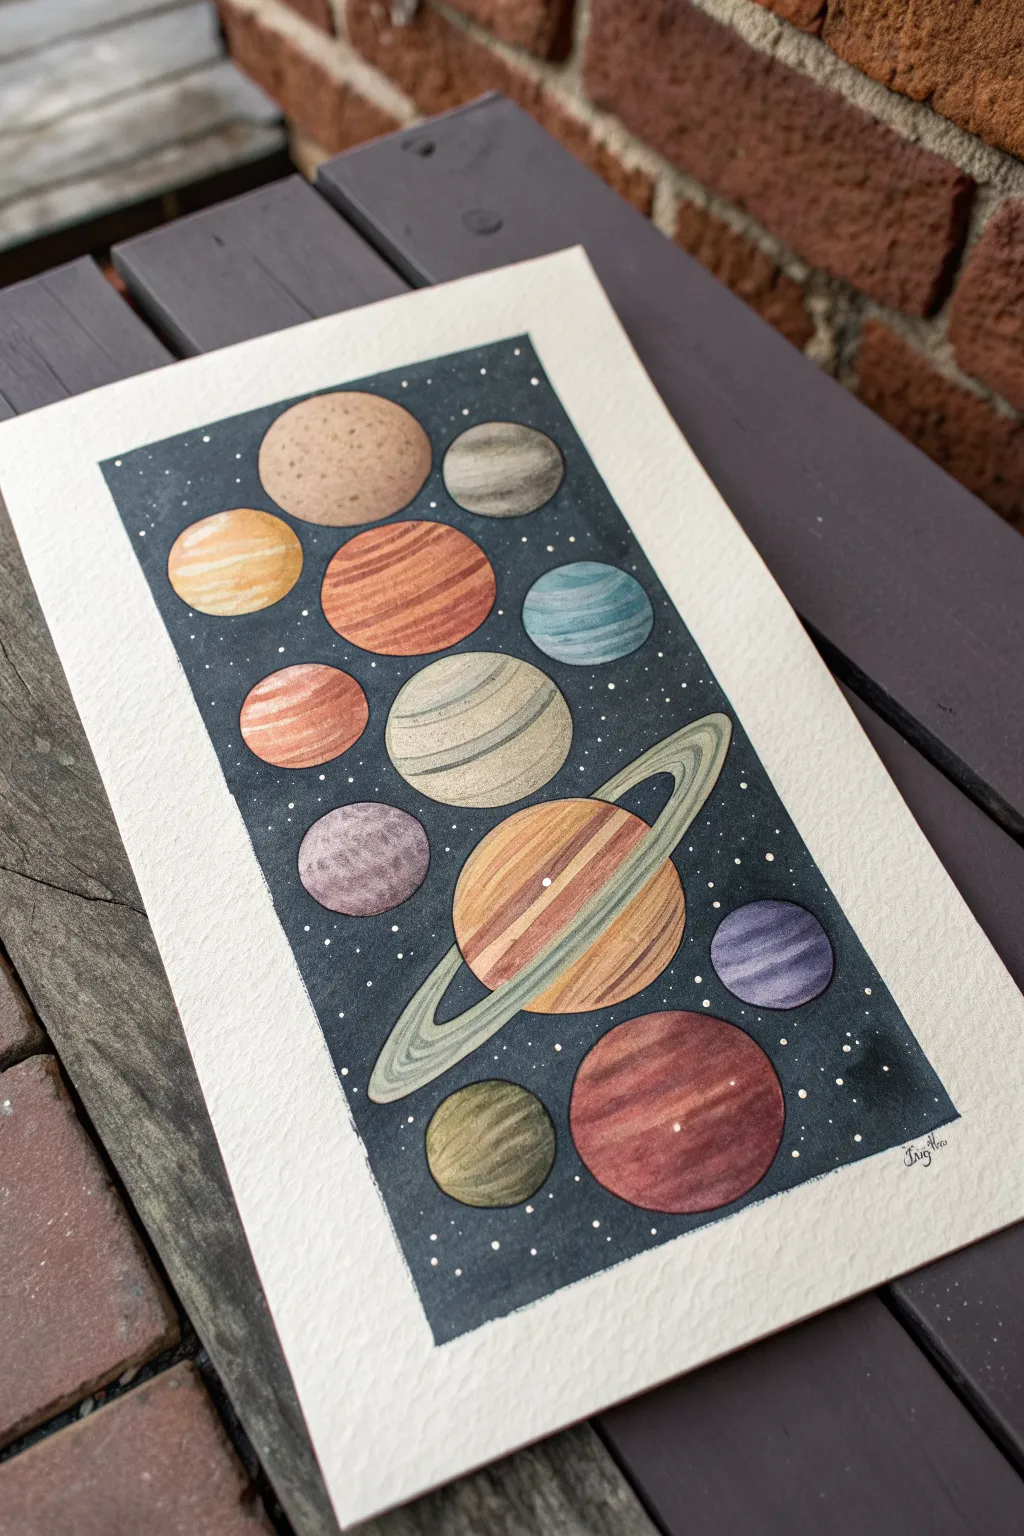
This detailed watercolor study captures a whimsical vertical alignment of imagined planets against a deep space background. The piece focuses on varied textures and a rich, earthy color palette, perfect for practicing wet-on-wet techniques and precision control.
Step-by-Step
Materials
- Cold press watercolor paper (300 gsm)
- Watercolor paints (pan or tube)
- White gouache or white gel pen
- Pencil (HB or lighter)
- Compass or circle stencils
- Round brushes (sizes 2, 4, and 6)
- Masking tape
- Water jars and paper towels
- Palette for mixing
Step 1: Preparation and Sketching
-
Secure the paper:
Begin by taping down all four edges of your watercolor paper to a board or table. This prevents buckling and creates that crisp white border seen in the final piece. -
Outline the composition:
Using a ruler, lightly draw a rectangular border inside your taped area to define the painting field. This rectangle will contain all your planets. -
Draft the planets:
With a compass or circle stencil, lightly sketch twelve circles of varying sizes within the rectangle. Arrange them somewhat randomly but keep them balanced vertically. Don’t press too hard; you want the graphite to disappear later. -
Add the ring:
Choose one large planet in the lower half to feature a ring system. Sketch a long, thin ellipse that cuts across the planet, erasing the line of the planet where it passes ‘behind’ the ring.
Step 2: Painting the Planets
-
Base layer for striped planets:
Select a planet intended for stripes (like the orange one near the top). Wet the circle with clean water first, then drop in diluted orange and yellow ochre, letting them bleed softly together. -
Creating crater textures:
For the beige cratered planet at the top, paint a flat wash of heavily diluted brown. While still damp, drop in tiny dots of clean water or darker brown pigment to create ‘blooms’ that mimic crater surfaces. -
Painting the ringed giant:
Paint the main body of the ringed planet with diagonal strokes of ochre, burnt sienna, and muted purple. Follow the curvature of the sphere with your brushstrokes to suggest roundness. -
Detailing the rings:
Carefully paint the rings using a pale, greenish-grey wash. Use the tip of your smallest brush to leave narrow hairline gaps between the rings if possible, or paint thin darker lines over the dried wash later. -
Layering the remaining planets:
Continue filling in the remaining circles. Use a mix of techniques: solid flat washes for some, and wet-on-wet blending for the blue and teal planets to create swirling atmospheric effects. -
Adding texture and depth:
Once the initial layers are bone dry, go back in with a size 2 brush. Add specific details like darker stripes on the red planets or distinct crater shadows on the grey ones.
Clean Edges Top Tip
For perfectly crisp planet edges, consider using liquid masking fluid on the circles before painting the background. Rub it off only after the dark paint is 100% dry.
Step 3: The Background and Stars
-
Prepare the background mix:
Mix a large puddle of very dark color. I prefer combining Indigo, Payne’s Grey, and a touch of Burnt Umber to get a deep, complex black that isn’t too flat. -
Fill the negative space:
Carefully paint around the finished planets. Use a larger brush for open areas and switch to your smallest brush to cut in close to the planet edges. Work relatively quickly to avoid harsh drying lines. -
Refine the edges:
If you accidentally paint over a planet edge, lift the wet paint immediately with a clean, damp brush. The goal is a sharp contrast between the bright planets and the dark void. -
Let it dry completely:
Allow the dark background to dry thoroughly. The paper should feel cool to the touch if it is still damp; wait until it is room temperature. -
Add the stars:
Using white gouache or a white gel pen, dot tiny stars into the dark background. Vary the sizes slightly, and cluster a few together for a natural galaxy look. -
The final reveal:
Slowly peel away the masking tape at a 45-degree angle to reveal your clean white borders.
Level Up: Metallic Pop
Swap standard yellow or grey for metallic gold or silver watercolor paint on the rings or specific planet stripes to verify a shimmering, cosmic effect.
Enjoy the satisfaction of your personal galaxy as the colors settle and dry
Aurora Over a Star Field
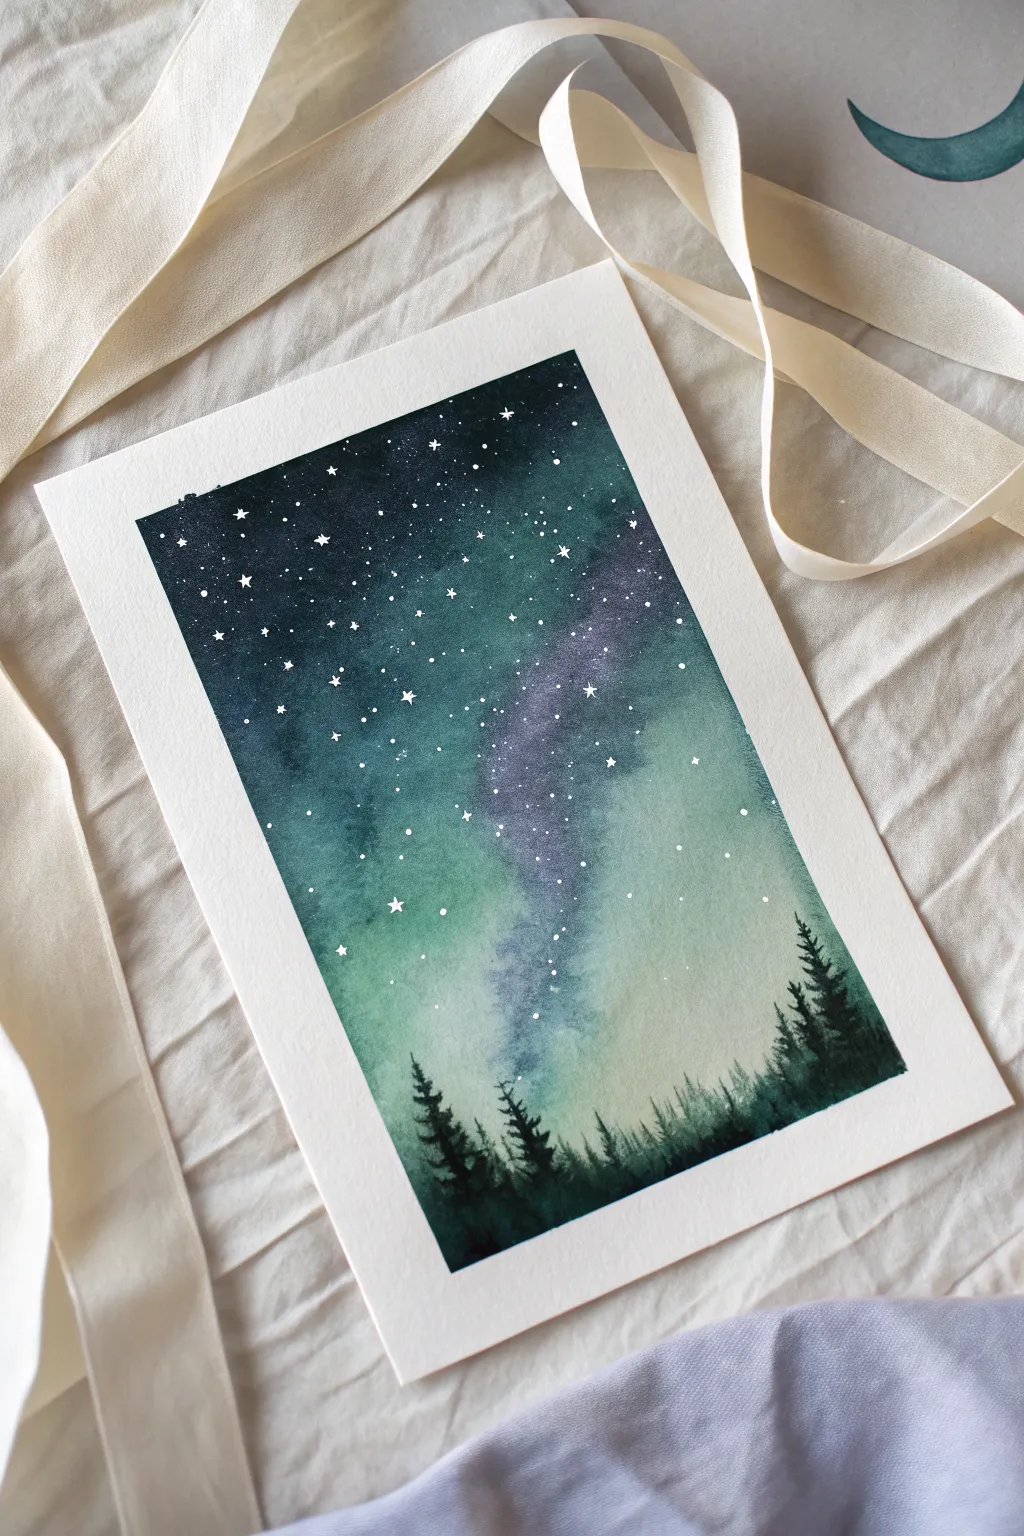
Capture the ethereal beauty of the northern lights with this dreamy watercolor landscape. This project teaches you how to blend deep teals, purples, and blacks to create a glowing night sky over a serene, silhouetted forest.
Step-by-Step Guide
Materials
- Cold Press Watercolor Paper (140lb/300gsm, cellulose or cotton)
- Watercolor Paints (Indigo, Phthalo Green, Prussian Blue, Deep Purple/Dioxazine Violet, Black)
- White Gouache or White Gel Pen
- Masking Tape or Washi Tape
- Round Brushes (Size 8 or 10 for washes, Size 2 or 4 for trees)
- Two jars of water (clean and dirty)
- Paper towels
- Mixing palette
Step 1: Preparation & Sky Base
-
Tape details:
Begin by taping down all four edges of your watercolor paper to a hard board or table. Press the edges firmly to ensure a crisp white border later. -
Wet the paper:
Using your largest clean brush, apply a coat of clean water over the entire paper surface. The paper should be glisten with a sheen but not have puddles. -
First color wash:
While the paper is wet, drop in a light wash of Phthalo Green focused on the lower-middle section. This lighter area will act as the glowing heart of your aurora. -
Adding the purple:
While the green is still damp, introduce a streak of Deep Purple diagonally through the sky. Let it bleed naturally into the green edges to create soft transitions.
Step 2: Deepening the Night
-
Darkening the corners:
Mix a strong concentration of Indigo and Prussian Blue. Apply this to the top corners and the very top edge of the paper, pulling the color down towards the center but stopping before you cover the bright green and purple. -
Building contrast:
Reinforce the darkest parts of the sky by adding a touch of black to your blue mix. Dab this into the upper corners while the paint is still wet to create depth. -
Softening edges:
If hard lines form between the dark blue and the light green aurora, clean your brush, dampen it slightly, and gently tickle the edges where colors meet to smooth the gradient. -
The milky way texture:
To create varied texture in the purple band, I like to drop in tiny dots of clean water or a slightly stronger purple pigment. This creates blooms that look like distant gas clouds. -
Dry completely:
Let this layer dry completely. The paper must be bone dry before the next step, or your stars will blur into blobs.
Muddy colors?
If your green and purple mix into a brown mess, let the green layer dry slightly before adding purple, or leave a tiny gap of wet paper between them so they merge slowly.
Step 3: Stars & Trees
-
Splatter stars:
Dilute a small amount of white gouache with water until it’s the consistency of heavy cream. Load a brush and tap it against another brush handle over the paper to create a spray of fine stars. -
Detail stars:
Using a very fine brush or a white gel pen, add larger, deliberate stars. Draw a few tiny cross shapes to represent twinkling stars for extra sparkle. -
Base tree line:
Prepare a thick mixture of black and pine green watercolor. Draw a jagged, uneven line across the bottom third of the paper to establish the ground. -
Painting the pines:
Switch to your small detail brush. Paint vertical lines rising from the ground wash to act as tree trunks. -
Adding branches:
Use a erratic, dabbing motion to add branches to the trunks. Start narrow at the top and widen the branches as you move down the tree. -
Varying heights:
Ensure your trees are different heights. Place a few tall, distinct trees on the left and right sides to frame the composition, keeping the center slightly more open. -
Final touches:
Darken the bottom of the forest with pure black paint to ground the image and add weight to the silhouette. -
The reveal:
Wait until everything is 100% dry. Carefully peel away the tape at a 45-degree angle to reveal your crisp white borders.
Add Magic
For a magical touch, use metallic silver watercolor for the larger stars instead of plain white. They will catch the light beautifully when the painting is moved.
Enjoy the calm satisfaction of seeing your personal galaxy emerge from the colors
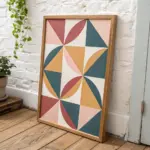
Circular Star Map Composition
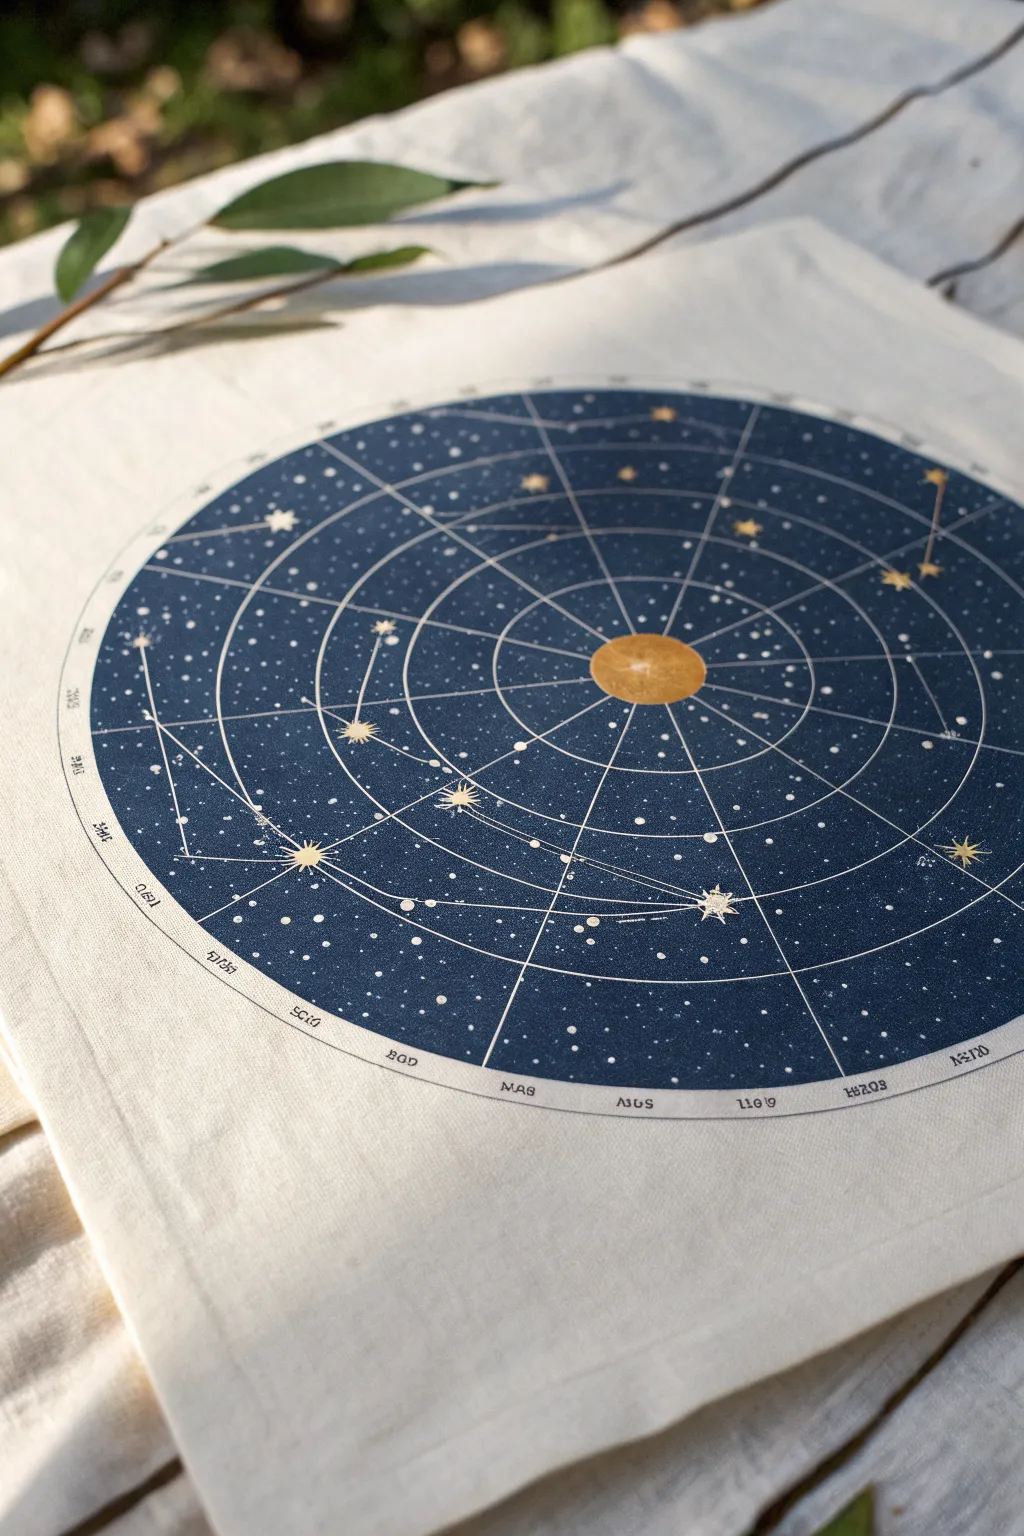
Transform plain fabric into a navigational masterpiece with this crisp, gold-accented star map design. Using screen printing techniques paired with fabric ink creates a durable, professional finish that stands out beautifully against natural off-white textiles.
Step-by-Step
Materials
- Light colored cotton or linen fabric (tote bag, pillowcase, or square)
- Screen printing frame (approx. 10×14 inch or larger)
- Photo emulsion and sensitizer kit
- Transparency film for inkjet/laser printer
- Screen printing squeegee
- Fabric screen printing ink (Navy Blue)
- Metallic Gold fabric paint
- Fine detail paintbrush (size 0 or 00)
- High-wattage light bulb (for exposure) or strong sunlight
- Glass pane or clear acrylic sheet
- Masking tape
- Iron and ironing board
Step 1: Designing and exposing the screen
-
Digital Preparation:
Create or download a high-contrast circular star map design. Ensure the background circle is solid black and the star lines, text rings, and orbital paths are transparent (white in the digital file). Invert this for printing: you want the ink to go where the dark blue is. -
Print Transparency:
Print your design onto a transparency sheet using the highest quality setting on your printer. You want the black areas to be completely opaque to block light effectively. -
Coat the Screen:
Mix your photo emulsion according to the package instructions. Using the squeegee, apply a thin, even coat of emulsion to both sides of the screen. Let it dry completely in a pitch-black room or closet. -
Expose the Image:
Place your dried screen flat, mesh side up. Place the transparency on top, ensuring it’s centered, and cover it with the glass sheet to keep it flush. Expose it to your light source for the time specified by your emulsion brand. -
Wash Out:
Immediately rinse the screen with lukewarm water. The unexposed emulsion (where your transparency was black) will wash away, revealing your stencil. Scrub gently if needed, then let the screen dry completely.
Step 2: Printing the Blue Background
-
Secure the Fabric:
Iron your fabric piece until it is perfectly smooth. Place a piece of cardboard inside the bag or under the fabric layer to prevent ink from bleeding through to the other side. -
Position the Screen:
Align the screen over the fabric where you want the design to sit. Use masking tape to tape off the outer edges of the screen inside to ensure ink doesn’t accidentally wander past the stencil frame. -
Apply Navy Ink:
Spoon a generous bead of Navy Blue fabric ink across the top of the screen, above the design area. Avoid touching the design itself with the ink just yet. -
Flood the Screen:
Lift the screen slightly off the fabric. Using the squeegee, pull the ink down over the design with very light pressure just to fill the mesh. This is called the flood stroke. -
Print Stroke:
Lower the screen onto the fabric. Holding the squeegee at a 45-degree angle, pull it down firmly and consistently across the entire design in one smooth motion. -
Reveal the Base:
Carefully lift the screen from one corner to reveal the print. The navigational lines and stars should remain the color of the natural fabric, while the background is filled with deep blue. Let this layer dry to the touch.
Fuzzy Lines?
If your print looks blurry, your screen might not have been flush with the fabric. Use spray adhesive on the cardboard insert to hold the fabric perfectly flat and still during printing.
Step 3: Adding Gold Accents and Finishing
-
Paint the Central Sun:
Once the blue ink is dry, take your fine paintbrush and the metallic gold paint. Carefully fill in the central circle of the map to create the sun, keeping the edges crisp. -
Highlight Major Stars:
Identify the larger stars or major constellation points on your map. Dab small amounts of gold paint onto these specific points to make them shimmer against the matte blue background. -
Add Celestial Dust:
For a subtle effect, I like to dilute a tiny drop of gold paint with water and flick it very sparingly over the blue areas to mimic distant galaxies, though this is optional. -
Text Touch-ups:
If any of the small text on the outer ring didn’t print clearly, use the very tip of your brush or a gold fabric marker to gently define the letters. -
Heat Setting:
Allow the entire project to cure for 24 hours. To make it washable, cover the design with a thin cloth or parchment paper and iron it on a hot, dry setting for 3-5 minutes to set the ink permanently.
Level Up: Embroidered Details
Instead of painting the gold stars, use metallic gold embroidery floss to stitch French knots or star stitches over the printed constellations for tactile texture.
Now you have a stunning piece of usable art that captures the mystery of the cosmos on simple fabric
Metallic Stars and Foil Highlights
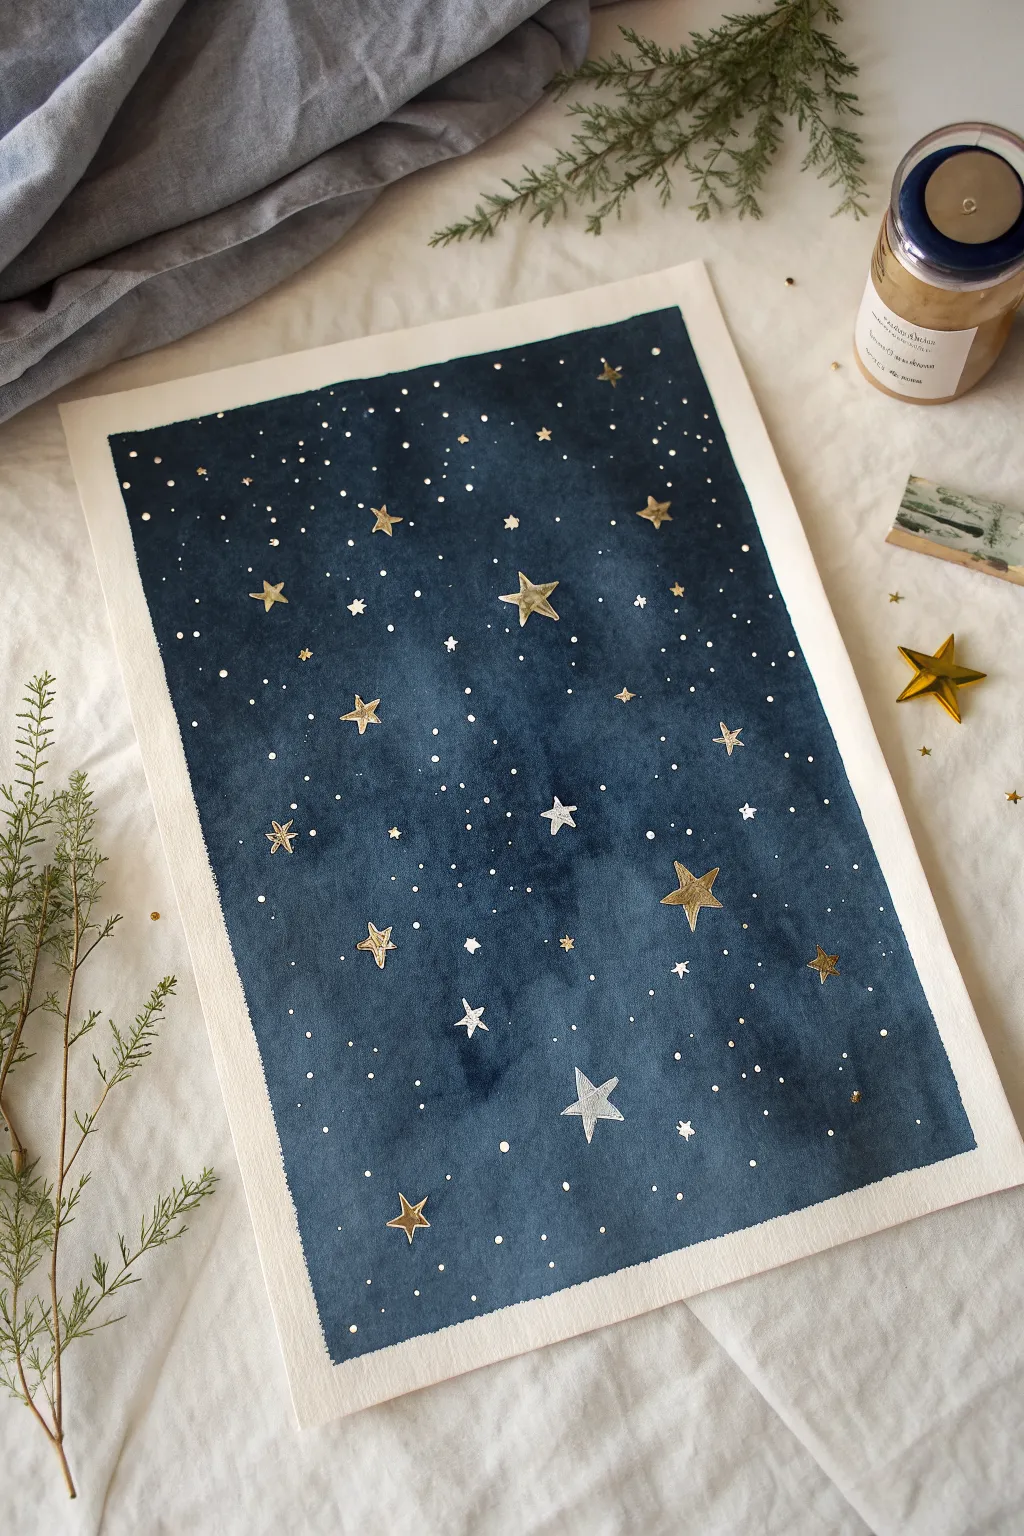
Capture the magic of a midnight sky with this deep, moody watercolor piece. By combining rich indigo washes with shimmering metallic accents, you’ll create a celestial scene that catches the light beautifully.
Step-by-Step Guide
Materials
- Cold press watercolor paper (heavier weight, 300gsm recommended)
- Painter’s tape or masking tape
- Indigo watercolor paint
- Payne’s Grey watercolor paint (optional for depth)
- Metallic gold watercolor paint or gold gouache
- Metallic silver watercolor paint or silver gouache
- White gouache or white ink
- Large flat wash brush
- Small round detail brush (size 0 or 1)
- Old toothbrush (for splattering)
- Drawing board or hard surface
- Paper towels
- Two jars of water
Step 1: Preparing the Night Sky
-
Secure the paper:
Begin by taping your watercolor paper down to a board on all four sides. Press the tape edges firmly to ensure clean borders later. -
Mix the base color:
Create a generous puddle of your dark blue paint. I like to mix Indigo with a touch of Payne’s Grey to get a really deep, almost black-blue hue. -
Wet the paper:
Using your large flat brush, apply a layer of clean water across the entire area inside the tape. The paper should be glisten, but not hold puddles. -
Apply the first wash:
Load your large brush with the dark blue mix and sweep it across the wet paper. Allow the paint to bloom and flow naturally. -
Build saturation:
While the paper is still wet, drop in more pigment in random areas to create cloud-like variations in density. This unevenness mimics the depth of space. -
Dry completely:
Let this background layer dry 100%. If the paper is cold to the touch, it’s still damp. Using a hairdryer on a low setting can speed this up.
Keep it Clean
Cover the areas you want to keep paint-free with scrap paper before splattering with the toothbrush to control where the ‘galaxy dust’ lands.
Step 2: Adding the Stars
-
Create distant stars:
Dilute a small amount of white gouache with water until it has a milky consistency. Dip an old toothbrush into it. -
Splatter technique:
Hold the toothbrush over the paper and run your thumb across the bristles to flick tiny white specks onto the dark background. Vary the density in different areas. -
Paint larger white stars:
Switch to your small detail brush. Use white gouache to dot in specific, slightly larger stars amongst the splatter mist. -
Add silver accents:
Load your detail brush with silver metallic paint. Paint medium-sized 5-point stars scattered randomly across the composition. -
Incorporate gold highlights:
Clean your brush thoroughly, then switch to the gold metallic paint. Paint a few larger 5-point stars as focal points. -
Layering stars:
For visual interest, paint some tiny gold and silver dots near the painted stars to suggest clusters or constellations. -
Define the shapes:
Go back over your largest metallic stars with a second coat if needed to ensure they are opaque and shiny against the dark background. -
Final drying:
Allow all the detailed stars to dry completely to avoid smudging the metallic pigments. -
Reveal the border:
Carefully peel away the painter’s tape at a 45-degree angle, pulling away from the artwork to reveal the crisp white edge.
Add Zodiac Flair
Before painting random stars, lightly sketch out your favorite constellation or zodiac sign with a pencil and paint those specific stars in bright gold.
Frame your new celestial masterpiece to catch the light and enjoy the shimmer
Textured Cratered Moon Surface
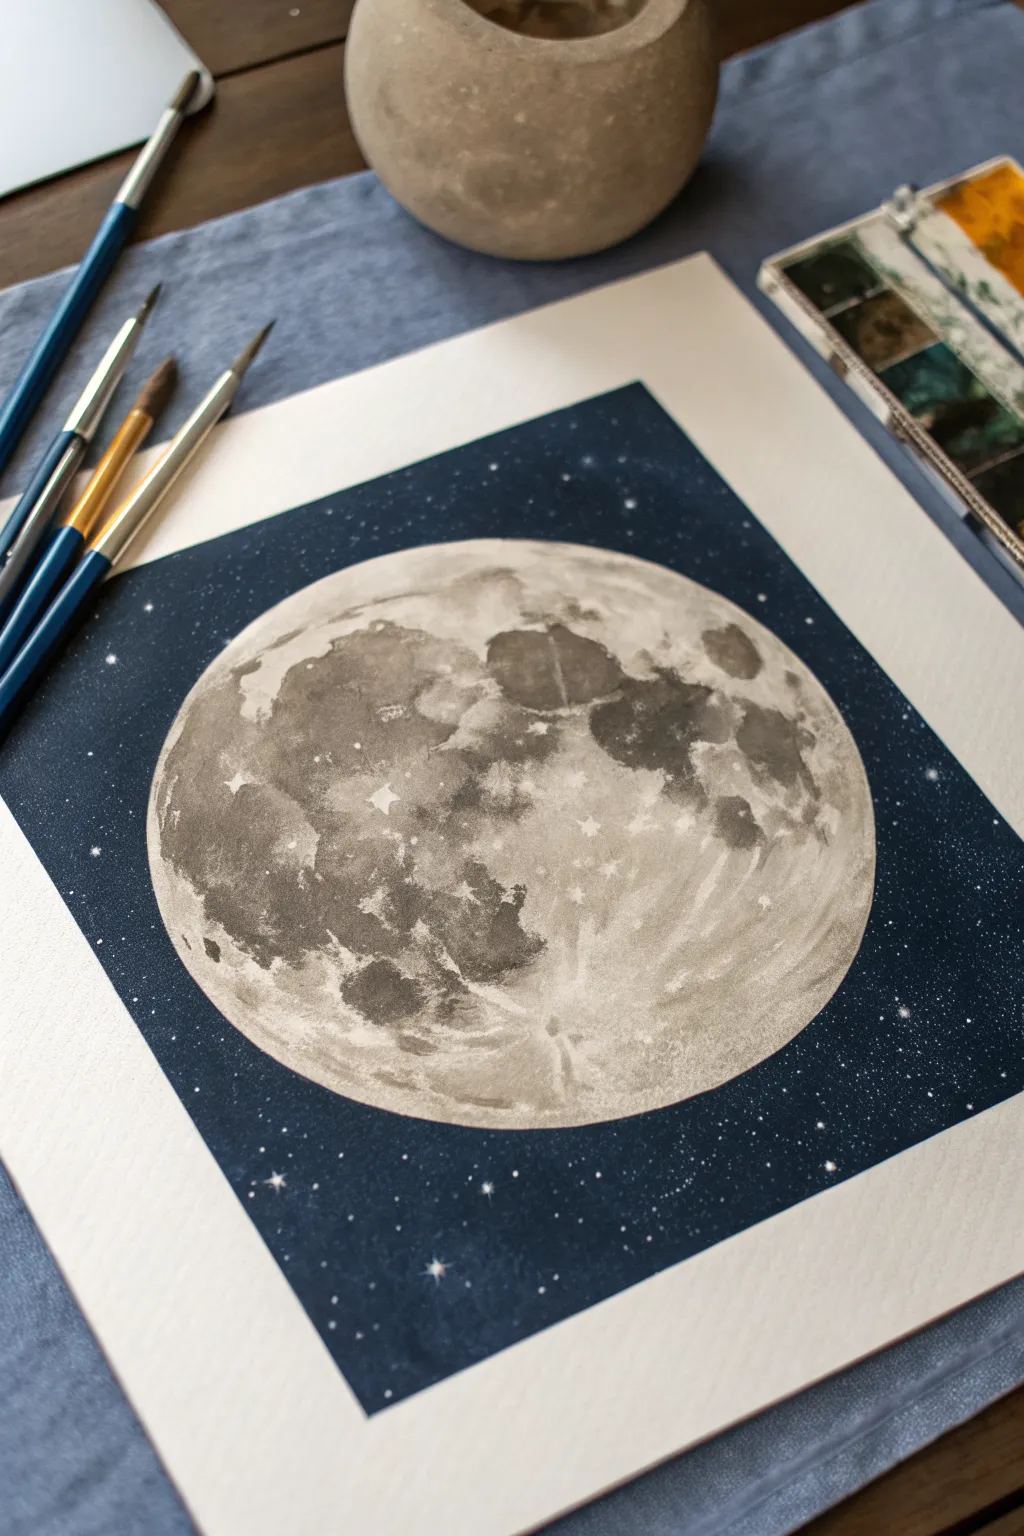
Capture the mysterious beauty of the night sky with this textured watercolor moon painting. Using simple salt resist techniques and careful layering, you’ll create realistic craters and a deep, starry indigo background that makes your celestial subject pop.
Detailed Instructions
Materials
- Cold press watercolor paper (square format)
- Watercolor paints (Indigo, Payne’s Gray, Burnt Umber, Sepia, Titanium White)
- Masking fluid
- Old paintbrush or rubber styling tool (for masking fluid)
- Round watercolor brushes (sizes 2, 6, and 10)
- Table salt or sea salt
- Compass or circular object for tracing
- Graphite pencil (HB or lighter)
- Paper towels
- Clean water
- White gouache or white gel pen
Step 1: Preparation & Mapping
-
Trace the circle:
Begin by lightly tracing a perfect circle in the center of your watercolor paper using a compass or a bowl. Keep your pencil lines faint so they don’t show through the lighter areas of the moon later. -
Mask the moon:
Using an old brush or a silicone tool, carefully apply masking fluid to the entire circular area of the moon. This protects the white paper while you paint the dark background. Let it dry completely until it feels tacky but hard to the touch. -
Prepare your dark wash:
Mix a large puddle of your background color. I like to combine Indigo with a touch of Payne’s Gray to get a deep, rich midnight blue. Ensure you have enough paint mixed to cover the entire background in one go.
Bleeding Edges?
If paint seeps under your masking fluid, wait for everything to dry. Then, use a stiff brush with clean water to gently scrub and lift the unwanted paint, blotting with a tissue.
Step 2: The Starry Abyss
-
Apply the background:
Using your largest round brush (size 10), apply the dark blue wash evenly across the paper, surrounding the masked moon. Work wet-on-wet if you want meaningful texture, or wet-on-dry for a solid, flat look. -
Create faint stars:
While the background paint is still damp but not soaking wet, flick a tiny amount of clean water or diluted white gouache onto the dark areas. This pushes the pigment away to create soft, distant-looking stars. -
Dry and remove mask:
Allow the background to dry completely. Once the paper is flat and bone-dry, gently rub off the masking fluid with your finger or a clean eraser to reveal the crisp white circle.
Step 3: Texturing the Moon
-
Base tonal wash:
Mix a very watery, pale gray using a tiny bit of Sepia and Payne’s Gray. Wash this over the entire moon, leaving a few bright white highlights untouched for contrast. -
Adding texture with salt:
While the base wash is still wet, drop in slightly darker gray pigments in random patches and sprinkle a pinch of salt over these wet areas. As it dries, the salt will absorb paint, creating a unique crater-like texture. -
Defining the maria:
Once the first layer is dry, brush off the salt. Mix a darker, thicker grey-brown (the ‘maria’ or dark plains of the moon). Paint these organic, blotchy shapes, primarily focusing on the left side and top center of the moon. -
Softening edges:
Immediately after painting a dark patch, use a clean, damp brush to soften some of the edges, allowing the dark gray to fade gently into the lighter background text. -
Building crater depth:
Switch to your smallest brush (size 2). Use a concentrated dark grey to paint small C-shapes or uneven circles to represent individual deep craters, particularly along the terminator line where shadow meets light.
Bloom for Craters
Drop clear water into a drying wash of grey paint. The water pushes pigment to the edges of the drop, creating a perfect, natural-looking crater rim without drawing a circle.
Step 4: Finishing Details
-
Refining the surface:
Add faint washes of Burnt Umber in specific areas to give the moon a subtle warmth, preventing it from looking too monochromatic. -
Brightest stars:
Using opaque white gouache or a white gel pen, dot larger, crisp stars onto the dark blue background. Group a few together for a natural constellation effect. -
Clean up borders:
If any background blue bled into your moon, gently lift it with a stiff, damp brush, or cover it with a touch of white gouache to maintain a sharp edge. -
Final highlights:
Add tiny dots of pure white gouache to the moon’s surface to represent crater peaks catching the sunlight. -
Dry and assess:
Let the piece settle and dry fully. Step back to check if the contrast between the glowing moon and the dark sky is strong enough; darken the background with a second glaze if necessary.
Now you have a stunning lunar portrait ready to frame or gift to a fellow stargazer
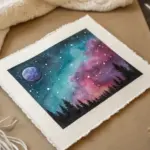
Nebula Ink Bloom Experiment
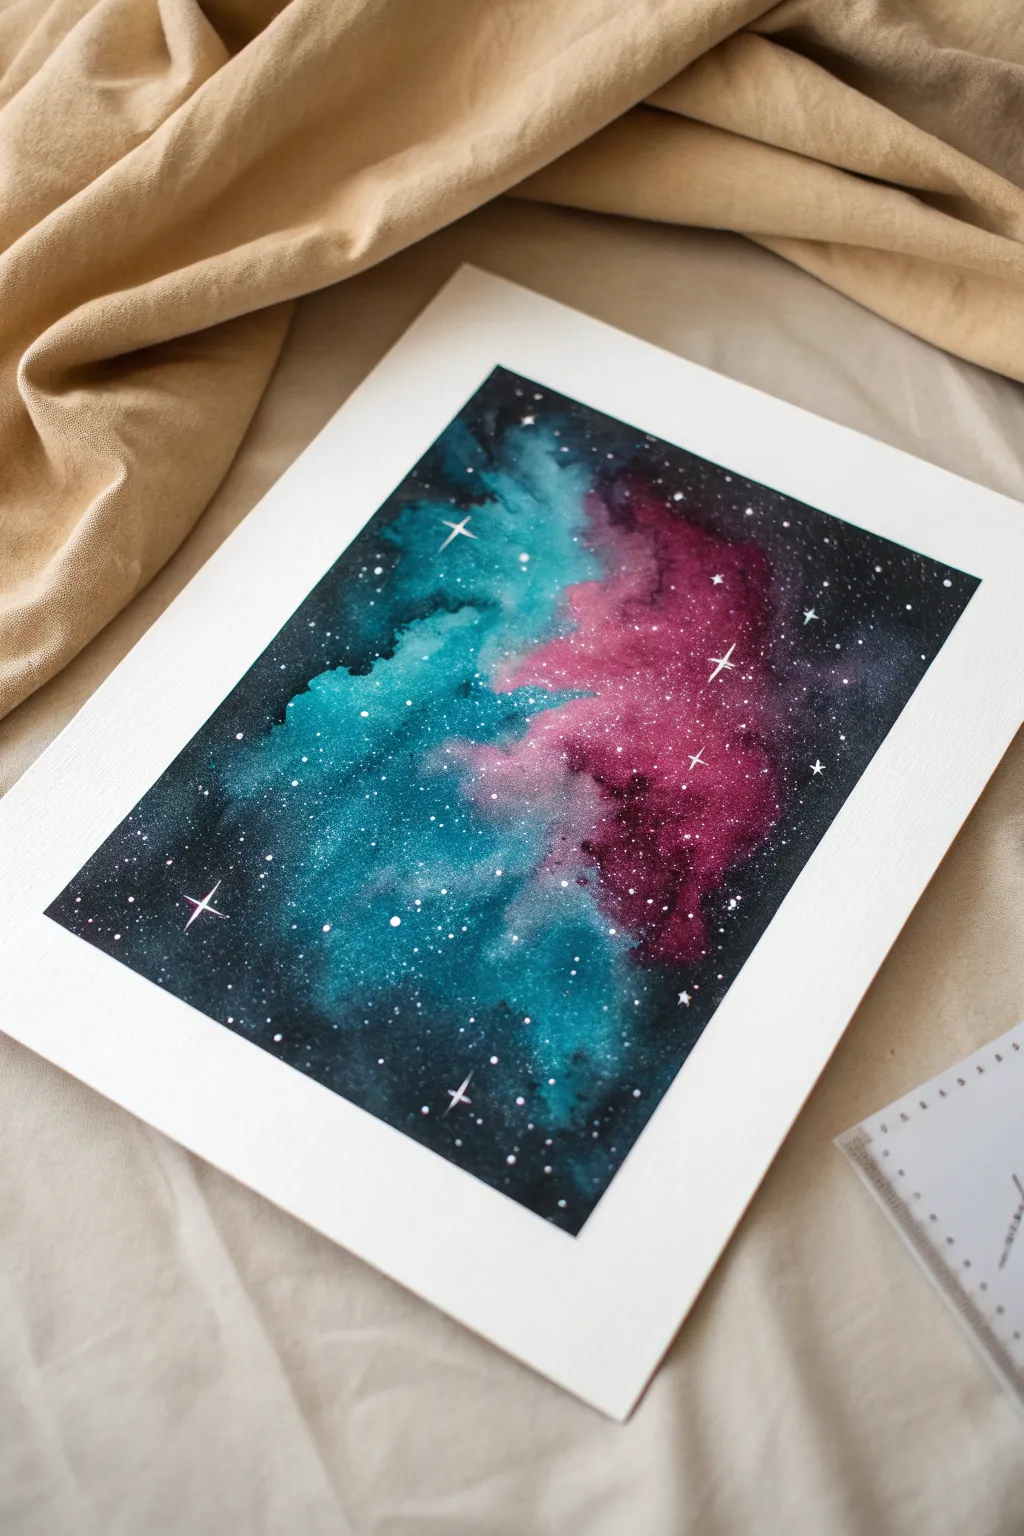
Capture the ethereal beauty of deep space with this vibrant nebula painting, featuring swirling clouds of teal and magenta against a dark, starry abyss. The ‘ink bloom’ technique creates soft, organic transitions that perfectly mimic the mysterious gas clouds of the cosmos.
Step-by-Step
Materials
- High-quality watercolor paper (cold press, 300gsm)
- Masking tape (low tack)
- Watercolor paints (Turquoise/Teal, Magenta/Crimson, Indigo/Payne’s Grey, Black)
- White gouache or white acrylic ink
- Round brushes (sizes 8 and 4)
- Detail brush (size 0 or 00)
- Two jars of water
- Paper towels
- Old toothbrush (optional for spatter)
Step 1: Preparation & First Wash
-
Secure the paper:
Tape your watercolor paper down firmly to a board or table on all four sides. This creates that crisp, clean white border shown in the image and prevents the paper from buckling under heavy water usage. -
Wet the center:
Using a clean, large brush, wet the central area of the paper where the nebula will live. Don’t soak the whole page, just an irregular, organic shape in the middle, leaving the edges dry for now. -
Drop in the teal:
Load your brush with a watery teal or turquoise. Gently touch it to the wet paper on the left side of your shape, letting the pigment bloom naturally outward. Don’t overwork it; let the water do the moving. -
Add the magenta:
Clean your brush and pick up the magenta paint. Drop this onto the wet paper on the right side, allowing it to meet the teal. Where they touch, they will blend into a lovely deep purple—avoid mixing them manually or you might get mud.
Bleeding Check
If your stars are spreading into soft burrs, the background layer wasn’t 100% dry. Wait 10 more minutes, or use a hair dryer on a low, cool setting before trying again.
Step 2: Deepening the Darkness
-
Define the edges:
While the center is still damp but not swimming, mix a concentrated dark blue or indigo. Start painting around the colored nebula clouds, working from the outside in. -
Create the void:
Switch to black or Payne’s Grey for the furthest corners and edges. Blend this harsh dark tone into the indigo as you move closer to the colorful center. -
Soft transitions:
Here I like to use a damp, clean brush to soften the boundary where the dark background meets the bright nebula. You want a smoky, wispy edge, not a hard line. -
Layering color:
If your center colors have dried too pale (watercolors always dry lighter), add a second layer of turquoise and magenta to intensify the saturation. Dab the paint on to keep hold of that cloud-like texture. -
Let it dry completely:
This is crucial. Walk away and let the paper become bone dry. If you add stars now, they will just bleed into gray blobs.
Step 3: Stardust & Details
-
Mix the stars:
Dilute a small amount of white gouache or acrylic ink with a drop of water. It should be the consistency of heavy cream—opaque but fluid. -
Create the starfield:
Dip an old toothbrush or a stiff brush into the white mix. Run your thumb across the bristles to flick tiny specks across the painting. Focus heavier sprays on the colored nebula parts to make them glow. -
Paint larger stars:
Using your smallest detail brush (size 0), paint distinct dots of varying sizes randomly throughout the dark background. Grouping a few together creates natural-looking constellations. -
Add the flares:
Select 3 or 4 of your largest white dots to turn into ‘lens flare’ stars. Paint a thin vertical line through the dot, followed by a thin horizontal line crossing it. -
Refine the flares:
Use the very tip of your brush to taper the ends of these cross shapes so they look sharp and twinkling, not blocky. -
Reveal the border:
Once the white paint is totally dry, slowly peel off the masking tape. Pull away from the painting at a 45-degree angle to ensure a perfect, crisp edge.
Metallic Magic
Once the painting is dry, re-trace the crossing lines of the largest stars with a fine tip silver or metallic gel pen for a dimension that catches the light.
Frame your new slice of the universe to add a sense of infinite wonder to any room.
Have a question or want to share your own experience? I'd love to hear from you in the comments below!