
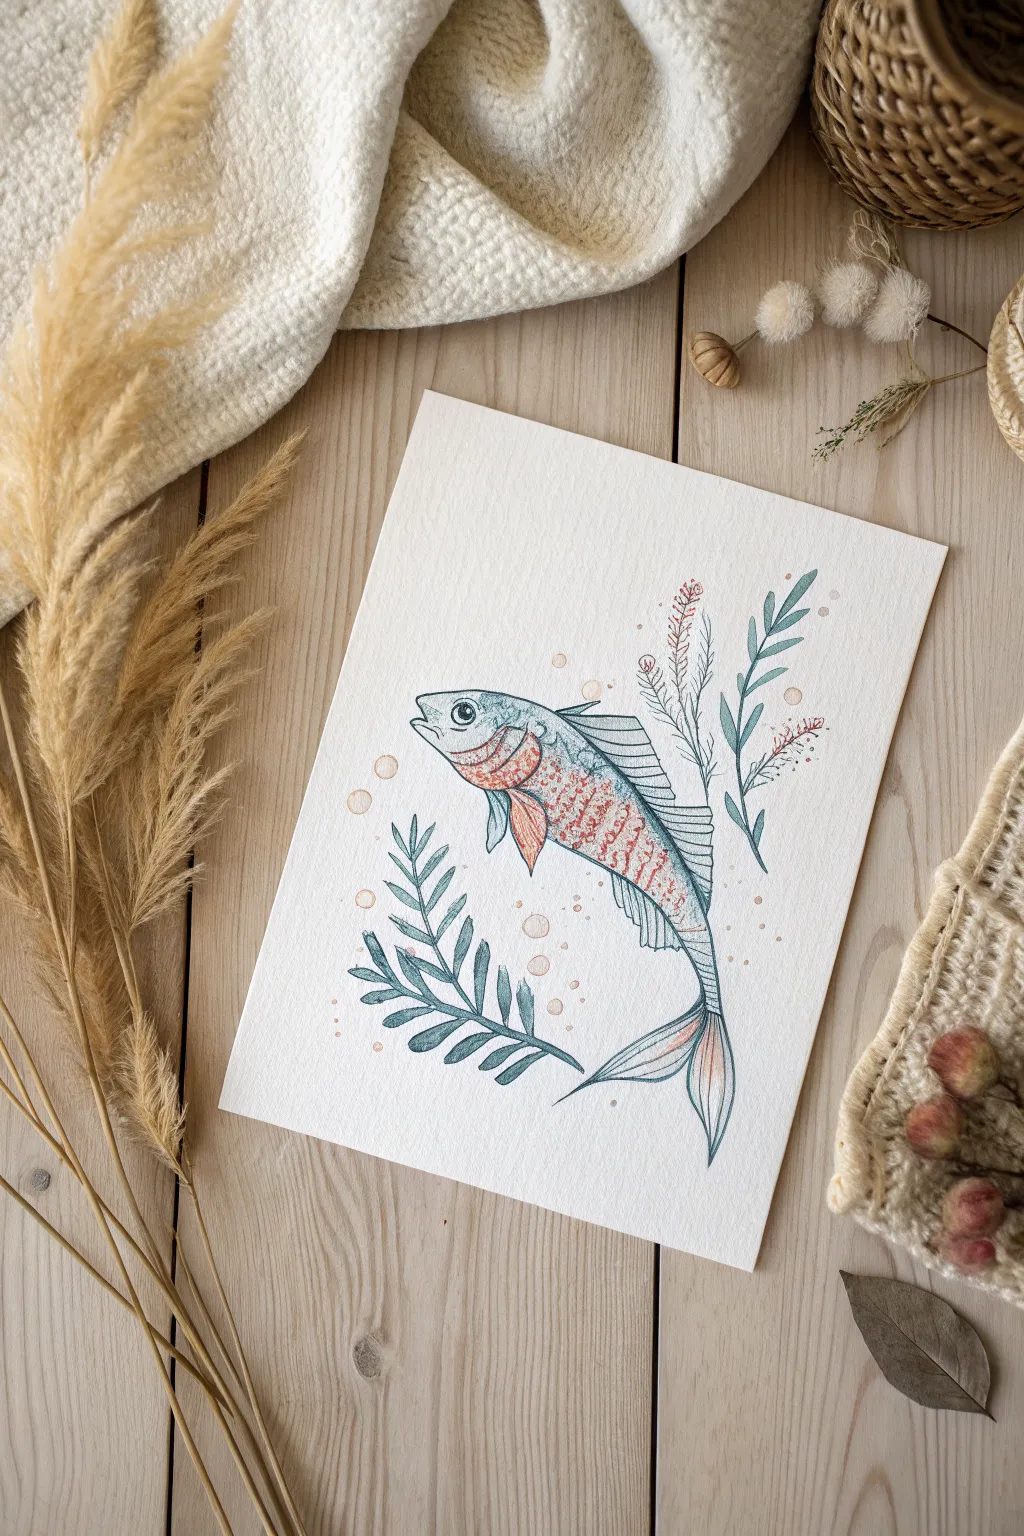
Whenever I’m stuck, I draw fish—there’s something about sleek shapes, wild fins, and patterned scales that instantly sparks ideas. Here are my favorite cool fish drawing ideas, starting with classic crowd-pleasers and drifting into weirder, more imaginative waters.
Classic Koi in an S-Curve
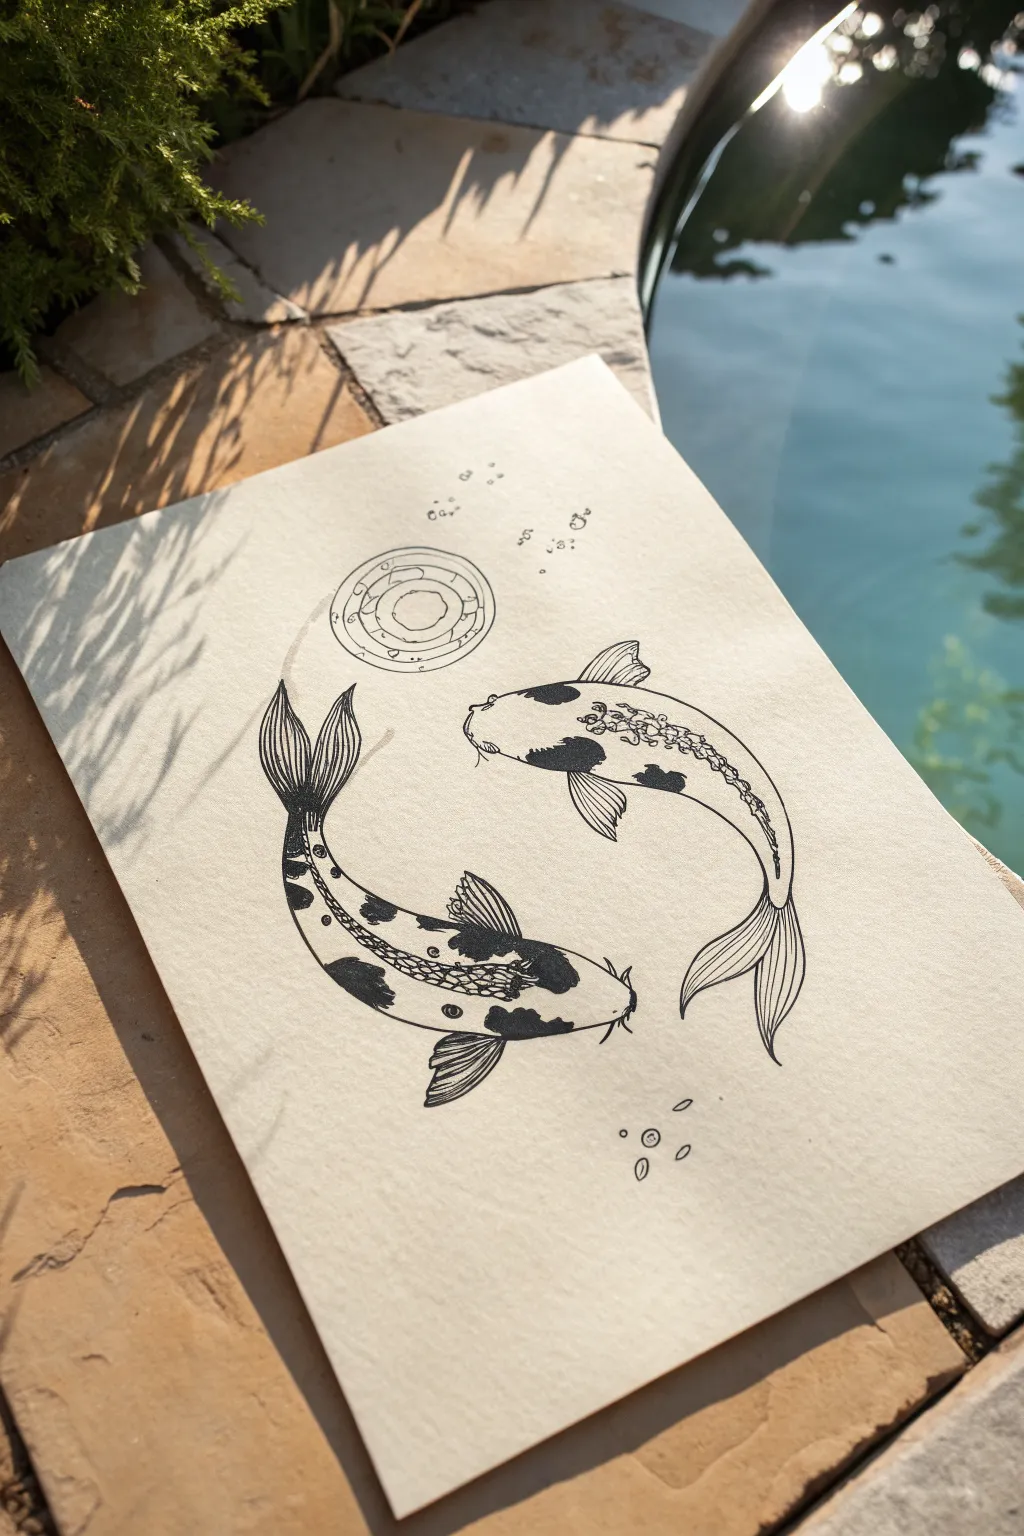
This classic design features two koi fish swimming in a harmonious circle, mimicking the balance of a yin-yang symbol. Using fine liner pens on textured paper, you’ll create a striking black-and-white illustration that emphasizes flow and movement.
Step-by-Step Guide
Materials
- Textured fine art paper (off-white or cream)
- HB pencil
- Soft eraser
- Fine liner pens (sizes 0.1, 0.3, and 0.5)
- Circle template or compass (optional)
Step 1: Planning composition
-
Map out the curve:
Begin by sketching a large, faint S-curve in the center of your paper with your HB pencil. This line will serve as the invisible spine for both fish to swim around. -
Draft the fish bodies:
Draw two teardrop shapes along that S-curve, one swimming upward and one swimming downward. Ensure the heads are rounded and the bodies taper smoothly toward the tail area. -
Add the circle element:
Above the upper fish’s head, sketch a small circle for the sun or moon motif. You can use a template here if you want perfect symmetry, or freehand it for a more organic look.
Step 2: Refining the sketch
-
Define the fins:
Add the pectoral fins on the sides of each fish. Since the fish are turning, make the outer fin slightly larger to suggest perspective. Sketch flowing, fan-like tail fins at the end of the tapered bodies. -
Place the details:
Lightly sketch the dorsal fin along the back. Draw the eyes near the sides of the head and add the barbels (whiskers) near the mouth area. -
Map the patterns:
Lightly outline the distinct patches of color on the koi’s backs. These irregular blotches are key to the koi look, so vary their shapes and sizes. -
Sketch the background elements:
Draw concentric circles inside your moon/sun motif and add a few scattered bubbles around the fish to enhance the underwater feel.
Keep it Fluid
When drawing the long tail fins, move your whole arm, not just your wrist. This creates smoother long lines that mimic water movement better than short, sketchy strokes.
Step 3: Inking the outlines
-
Start the main lines:
Switch to your 0.3 fine liner. Carefully trace the outer contours of the fish bodies. Keep your hand steady but allow the line weight to vary slightly for a natural feel. -
Detail the fins:
Use the finer 0.1 pen for the delicate lines inside the fins. Draw these lines radiating from the base of the fin outward, following the curve of the fin shape. -
Ink the facial features:
carefully outline the eyes and the barbels. I find using the 0.1 pen here prevents the small details from looking too heavy or blobby.
Smudge Alert
Textured paper ‘grabs’ ink and can stay wet longer than smooth paper. To avoid smearing your work, place a scrap piece of paper under your drawing hand as a guard.
Step 4: Adding texture and shading
-
Scales and spine:
Draw a decorative line of scales running down the spine of each fish. You don’t need to draw every single scale on the body; suggesting them along the spine and near the color patches is often enough. -
Fill the dark patches:
Use your 0.5 pen to fill in the dark markings you sketched earlier. Instead of a solid black block, try using tiny, dense stippling (dots) or tight cross-hatching to add texture while filling them in. -
Detail the decorative circle:
Ink the sun/moon motif using the 0.3 pen. Add small dots or dashes between the concentric rings to create visual interest without overwhelming the main subject. -
Add bubbles:
Ink the small bubbles, keeping the lines very thin. Leave a tiny gap in the circle of each bubble to represent a highlight.
Step 5: Final touches
-
Erase pencil lines:
Wait until the ink is completely dry—give it a few extra minutes just to be safe. Gently run your soft eraser over the entire drawing to remove the graphite guide lines. -
Check contrast:
Step back and look at the drawing. If the fish look too flat, use the 0.1 pen to add a little stippling shading on the underbellies to give them volume.
Now you have a serene piece of art that captures the graceful movement of koi fish

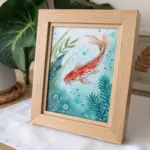

Betta Fish With Flowing Fins
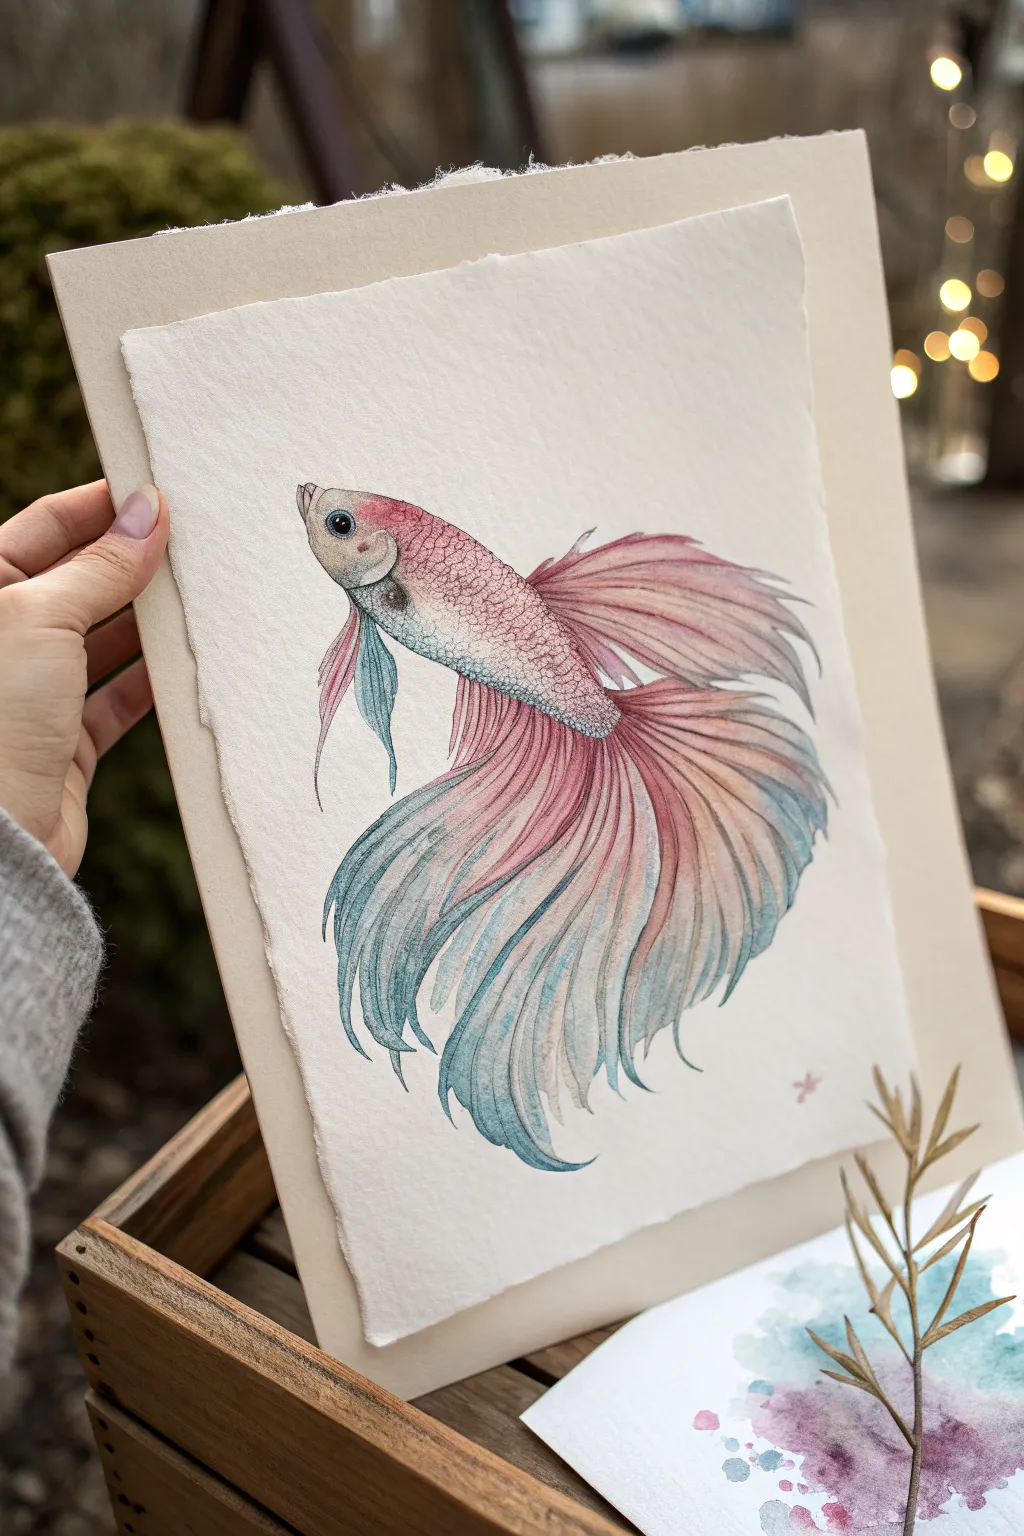
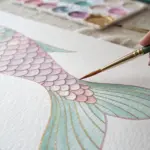
Capture the fluid elegance of a Betta fish with this delicate mixed-media project. By combining soft watercolor washes with precise ink detailing, you’ll create a vibrant, flowing fin effect that practically swims off the textured paper.
How-To Guide
Materials
- Heavyweight watercolor paper (300gsm cold press recommended)
- Watercolor paints (Pink, Rose Madder, Teal, Cerulean Blue, Burnt Umber)
- Small round brushes (Size 0, 2, and 4)
- Fine liner pen (0.05mm or 0.1mm, waterproof black or dark sepia)
- Pencil (HB for sketching)
- Kneadable eraser
- Paper towels and water jars
- Backing board or cardboard for mounting
Step 1: Sketching the Form
-
Outline the body:
Begin with a light pencil sketch of the fish’s main body. Draw a teardrop shape that tapers slightly at the tail end to establish the core form. -
Map the fins:
Lightly sketch the large, flowing fins. Don’t worry about the intricate folds yet; just focus on the sweeping, fan-like gesture of the top fin (dorsal), the tail (caudal), and the long bottom fin (anal). -
Refine the features:
Mark the position of the eye, the gill cover, and the mouth. Keep your lines faint so they won’t show through the transparent paint later. -
Prepare the edges:
For that charming artisanal look shown in the photo, you can manually tear the edges of your watercolor paper against a ruler before you start painting.
Natural gradients
Work ‘wet-on-wet’ for the fins. Pre-wetting the paper allows the pink and blue pigments to bleed into each other organically, creating that soft, dreamy transition.
Step 2: Watercolor Washes
-
First wet layer:
Using a clean, damp brush, wet the body area slightly. Drop in a pale wash of pink near the head and upper back, transitioning into a very light teal towards the belly. -
Base color for fins:
While the body dries, wet the fin areas. Apply a diluted Rose Madder near the base where the fins meet the body, letting it bleed outward. -
Gradient blending:
Before the pink wash dries completely, introduce Cerulean Blue or Teal at the tips of the fins. Tilt your paper gently to encourage the colors to meet and blend softly in the middle. -
Deepening contrast:
Once the first layer is dry, go back in with a size 2 brush. Add a saturated mix of Pink and Burnt Umber to the scales on the upper body to start building dimension. -
Shadows in the folds:
Paint thin, watery strokes of purple (mix pink and blue) along the natural folds of the fins. This creates the illusion of overlapping fabric-like texture.
Add metallic shimmer
Once dry, use a metallic watercolor pan or a gold gel pen to add tiny highlights to the scales. It mimics the iridescent flash of a real Betta fish.
Step 3: Scales and Texture
-
Painting scales:
Switch to your smallest brush (size 0). Using a mix of Rose Madder and a touch of brown, paint small C-shaped curves primarily along the upper back of the fish. -
Dot detailing:
Add tiny stippling dots of darker pigment inside individual scales to give them a shimmering, textured appearance without outlining every single one. -
Defining the eye:
Paint the eye using dark brown or black, leaving a tiny spot of white paper reserved for the highlight. This sparkle brings the fish to life.
Step 4: Ink Detailing
-
Outline the body:
Once the paint is bone dry, use your fine liner pen to trace the gills and mouth with extremely delicate, broken lines. -
Fin rays:
Draw long, flowing lines following the curve of the fins. I like to start from the body and flick the pen outward to keep the ends tapering naturally. -
Cross-contouring:
Add very subtle cross-hatching near the base of the fins where they connect to the body, deepening the shadows. -
Scale definition:
Go over your painted scales with the pen, adding partial outlines to emphasize the overlapping pattern. -
Edge refinement:
Darken the very edges of the fins with the pen, adding slight raggedness to mimic the fragile, translucent nature of fin tissue.
Step 5: Final Touches
-
Enhancing colors:
If certain areas look washed out, glaze a very thin layer of vibrant pink or teal over the dried ink to boost saturation. -
Mounting:
Use double-sided tape or photo corners to mount your torn-edge artwork onto a larger, neutral-colored backing board to frame it beautifully.
Step back and admire the gentle movement and vibrant color gradients in your finished piece
Goldfish With Soft Round Forms
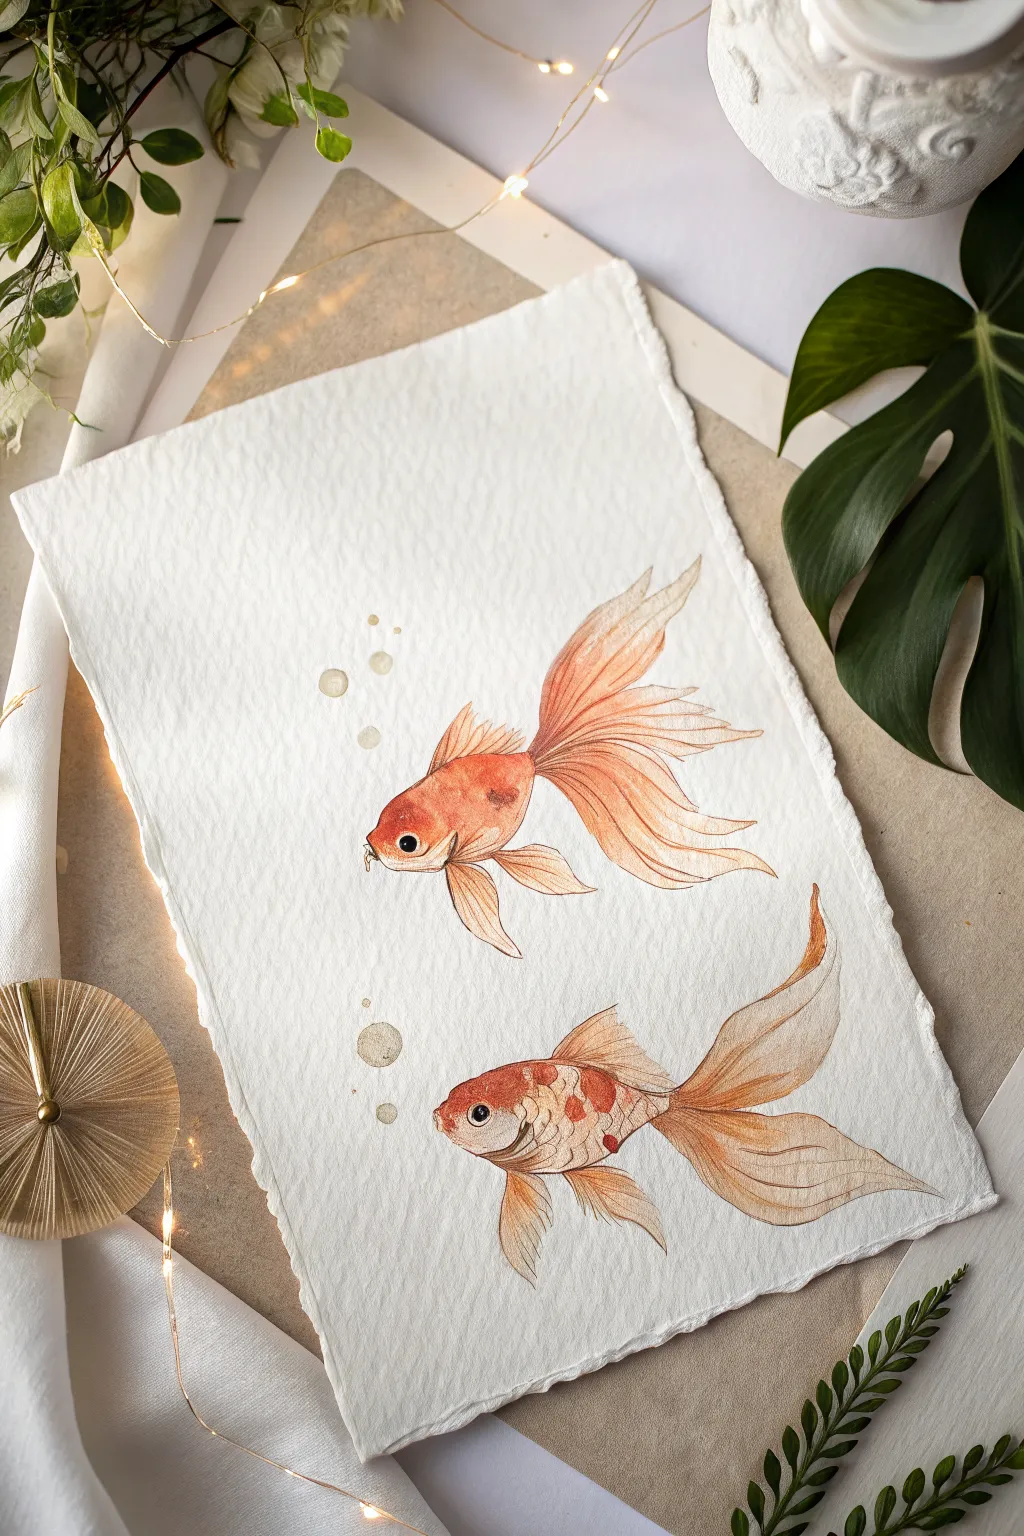
Capture the graceful movement of two goldfish in this delicate watercolor study. Using soft washes and precise layering, you will create translucent fins and shimmering scales on textured paper that gives the piece an organic, vintage feel.
Step-by-Step Tutorial
Materials
- Cold-press watercolor paper with deckle edges (300 gsm)
- Watercolor paints: Burnt Sienna, Cadmium Orange, Yellow Ochre, Alizarin Crimson, Sepia
- Round watercolor brushes: Size 6 (for washes) and Size 2 (for details)
- HB or 2H pencil
- Kneaded eraser
- Clean water jar
- Paper towels
- White gouache or white gel pen (optional for highlights)
Step 1: Sketching the Forms
-
Plan the composition:
Orient your paper vertically. Lightly visualize two fish: one placed slightly higher and swimming diagonally upward to the right, and the second one lower, swimming horizontally to the right. -
Draw the basic shapes:
Using your HB pencil, sketch elongated oval shapes for the bodies. Keep the pressure extremely light so the graphite won’t show through the transparent watercolor layers later. -
Add the flowing tails:
Sketch the large, fan-like tail fins. For the top fish, sweep the tail upwards; for the bottom fish, let the tail trail behind horizontally with a slight downward curve. -
Refine the details:
Draw the smaller pectoral and dorsal fins. Add the curved gill lines and place the eyes low on the head. Mark a few small circles near the mouths to represent bubbles. -
Lighten the sketch:
Roll your kneaded eraser gently over the entire drawing to lift excess graphite, leaving only faint ghost lines to guide your painting.
Muddy Colors?
If your transparent overlapping fins look muddy, ensure the bottom layer is 100% dry before glazing the next fin over it. Patience prevents the pigments from churning together.
Step 2: First Wash & Base Colors
-
Mix your base orange:
Create a dilute mix of Cadmium Orange and a touch of Burnt Sienna. You want a warm, golden-orange hue that isn’t too saturated. -
Paint the top fish body:
With a damp size 6 brush, apply clean water to the body of the top fish (wet-on-wet). Drop in your orange mix, concentrating the pigment on the top ridge and letting it fade to near-white at the belly. -
Paint the bottom fish body:
Repeat the process for the bottom fish. I like to add a tiny drop of Alizarin Crimson to the mix here for the blotchy red patches characteristic of calico goldfish. -
Wash the fins:
Using a very watery, pale version of your orange mix, paint the large tail fins. Use long, sweeping strokes that follow the curve of the tail, leaving small gaps of white paper to suggest separate distinct fin rays. -
Add depth to the fins:
While the tail wash is still slightly damp, drop a stronger concentration of Orange near the base where the fin connects to the body, letting it bleed outward naturally.
Step 3: Layering & Texture
-
Define the face:
Once dry, use the size 2 brush and a mix of Sienna and Sepia to carefully paint the eye. Leave a tiny white spec of paper unpainted for the highlight. -
Detail the scales:
Mix a semi-transparent orange-brown. Using only the very tip of your small brush, paint small ‘C’ shaped scallops along the top and middle of the fish bodies to suggest scales. -
Enhance the calico spots:
On the bottom fish, glaze over the darker patches with a slightly more saturated reddish-orange to deepen the contrast against the pale belly. -
Strengthen fin lines:
Using a fine liner brush or the tip of your size 2, paint thin, delicate lines running through the tails and fins. These should be darker near the body and fade out toward the tips. -
Add shadows:
Mix a light wash of Sepia or gray. Glaze a tiny shadow under the gill plate and along the bottom edge of the belly to give the fish three-dimensional roundness.
Pro Tip: Soft edges
To keep the fins looking ethereal, soften the outer edges with a clean, damp brush immediately after painting them. This eliminates harsh outlines and creates movement.
Step 4: Finishing Touches
-
Paint the bubbles:
Use a very pale wash of Yellow Ochre or dirty water to paint the bubbles. Outline one side slightly darker to give them volume. -
Sharpen edges:
Check the perimeter of your fish. If any edges look too fuzzy where they should be crisp (like the dorsal fin), redefine them with a confident stroke of pigmented paint. -
Final highlights:
If you lost your eye highlight or want extra sparkle on the scales, use a tiny dot of white gouache or a white gel pen to bring back the shine.
Let your artwork dry completely before framing to showcase the beautiful texture of the watercolor paper.

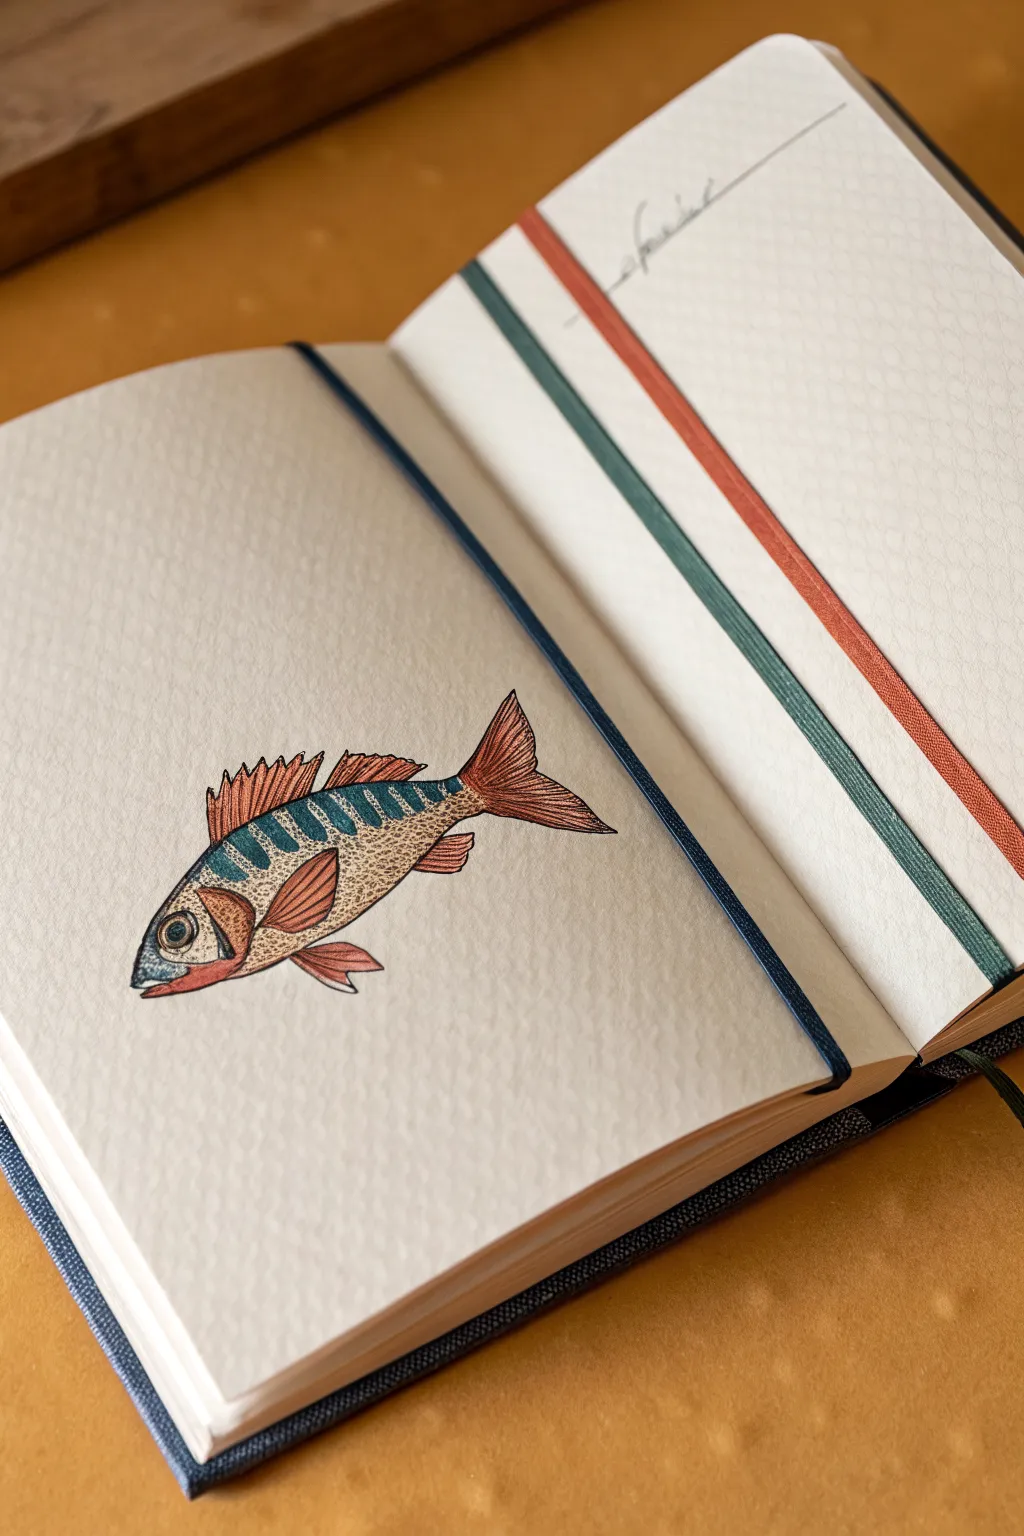
Simple Fish Side-Profile Study
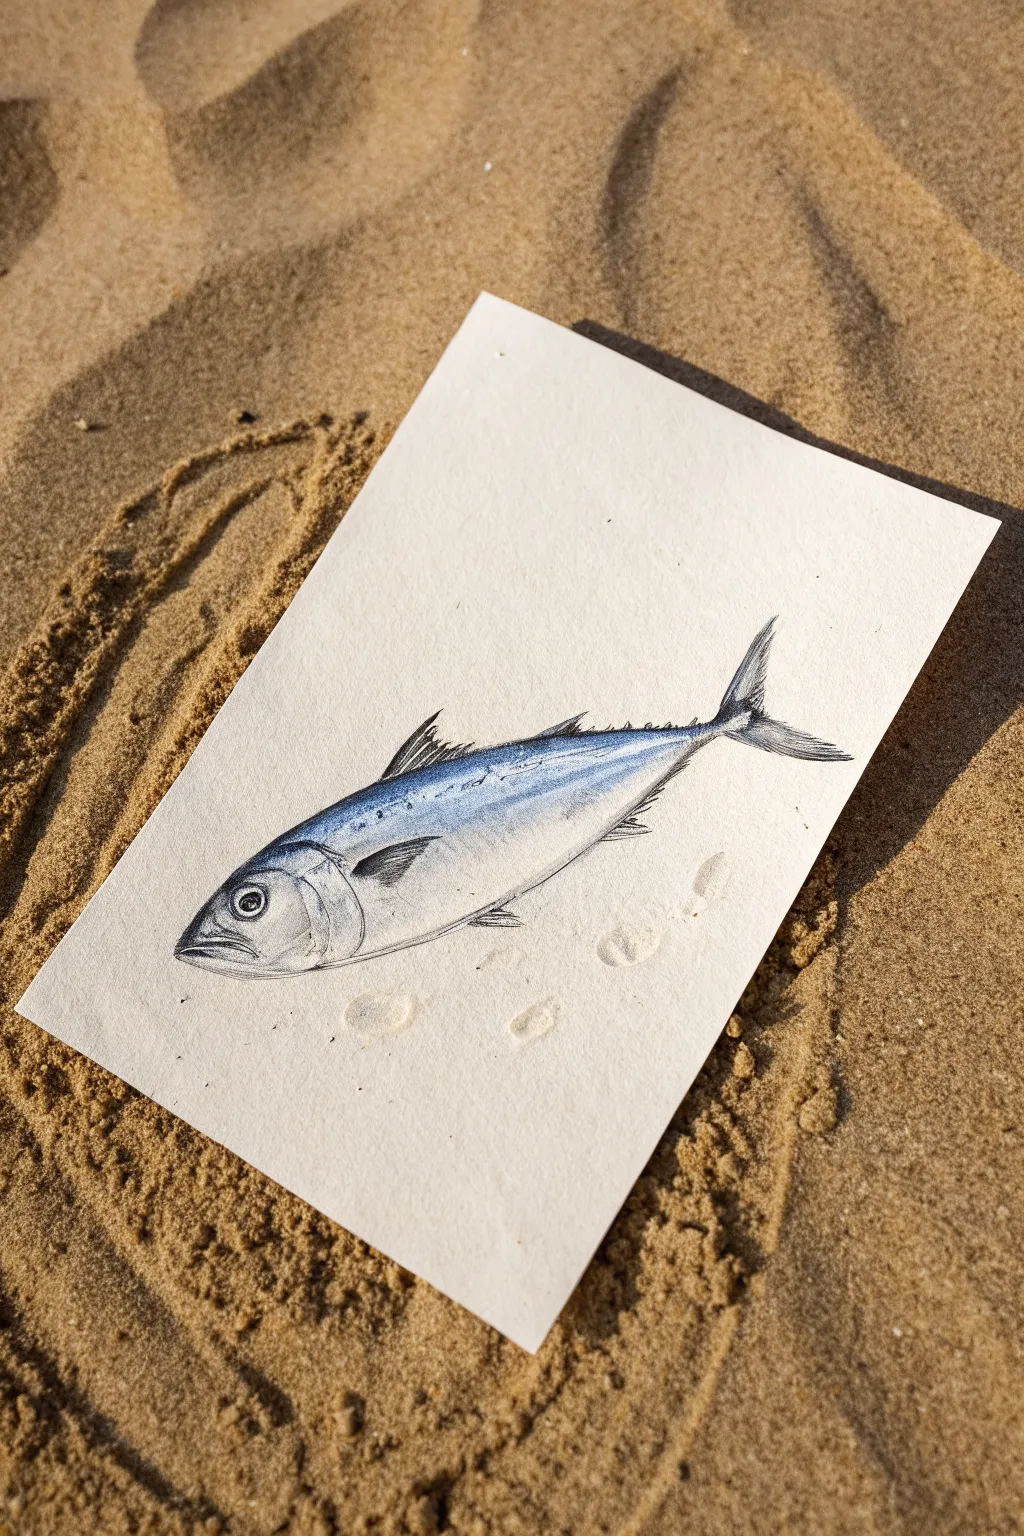
Capture the essence of the sea with this refined side-profile study of a mackerel, blending precise linework with soft washes of blue. The result is a clean, scientific illustration style that looks beautiful displayed against natural textures like sand or driftwood.
Detailed Instructions
Materials
- Heavyweight watercolor paper or mixed media paper (off-white or cream)
- Fine liner pens (0.1mm and 0.3mm, black water-resistant ink)
- Blue watercolor paint (Prussian Blue or Indigo) or watercolor pencils
- Small round paintbrush (size 2 or 4)
- Graphite pencil (HB) and eraser
- Clean water and paper towel
Step 1: Drafting the Form
-
Establish the curve:
Begin by lightly sketching a long, gentle arc with your HB pencil to denote the spine of the fish. This ensures the body has a natural, swimming posture rather than appearing stiff. -
Outline the silhouette:
Sketch the torpedo-shaped body around your central arc. Taper the shape significantly towards the tail (the caudal peduncle). Mark the position of the head, making it about one-fifth of the total length. -
Place the fins:
Locate the triangular dorsal fin on the top back and the pectoral fin just behind the gill cover. Don’t forget the distinctive tail fin (caudal fin) with its deep fork, and the tiny finlets running along the top and bottom ridges near the tail. -
Define facial features:
Draw the circular eye slightly forward from the center of the head. Sketch the curve of the gill cover (operculum) and the mouth line, ensuring the lower jaw protrudes slightly.
Step 2: Inking the Details
-
Refine the outline:
Switch to your 0.3mm fine liner. Trace over your pencil sketch with confident, smooth strokes. Use a slightly broken line for the belly to suggest softness. -
Add texture to fins:
Using the 0.1mm pen, draw fine, closely spaced lines within the fins to represent the rays. These lines should fan out from the base of the fin toward the edges. -
Detail the head:
darken the pupil, leaving a tiny white highlight for liveliness. Use faint stippling (dots) around the nose and gill cover to create subtle texture without heavy lines. -
Erase guidelines:
Once the ink is completely dry, gently erase all underlying pencil marks to leave a clean, crisp illustration.
Smudge Alert
If your ink smears when adding watercolor, your pen isn’t truly waterproof. Test your pen on a scrap piece of paper first, or let the ink dry for at least 30 minutes before painting.
Step 3: Adding Color and Depth
-
Mix a light wash:
Prepare a very dilute wash of Prussian Blue or Indigo watercolor. If using pencils, lightly shade the top half of the fish and use a wet brush to activate the pigment. -
Apply the first layer:
Paint a strip along the upper back of the fish. Use a clean, damp brush to pull this color downwards, fading it into the white of the paper before reaching the belly. -
Deepen the contrast:
While the first layer is still slightly damp, add a more concentrated distinctive blue stripe right along the spine. This creates that characteristic dark-to-light gradient seen in pelagic fish. -
Add subtle spotting:
Mackerel often have mottled patterns. With the very tip of your brush and a darker mix, add tiny, irregular dashes along the upper back area. -
Enhance shading:
Add a tiny touch of grey or diluted black ink to the underside of the belly and beneath the pectoral fin to give the fish three-dimensional volume.
Silver Shimmy
For a realistic fish scale effect, wait until the blue paint is bone dry, then use a silver gel pen or metallic watercolor to add tiny highlights along the lateral line.
Step 4: Finishing Touches
-
Create water spots:
To mimic the aesthetic in the photo, dip your clean brush in water and let a few droplets fall intentionally onto the white space below the fish. -
Blot the droplets:
Let the water sit for ten seconds, then gently press a paper towel over them. This disturbs the paper grain slightly, creating ghost-like ‘water stains’ for atmosphere.
Now you have a serene aquatic study ready to be framed or gifted to an ocean lover
BRUSH GUIDE
The Right Brush for Every Stroke
From clean lines to bold texture — master brush choice, stroke control, and essential techniques.
Explore the Full Guide
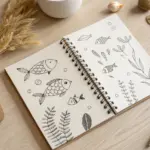
School of Tiny Fish Doodles
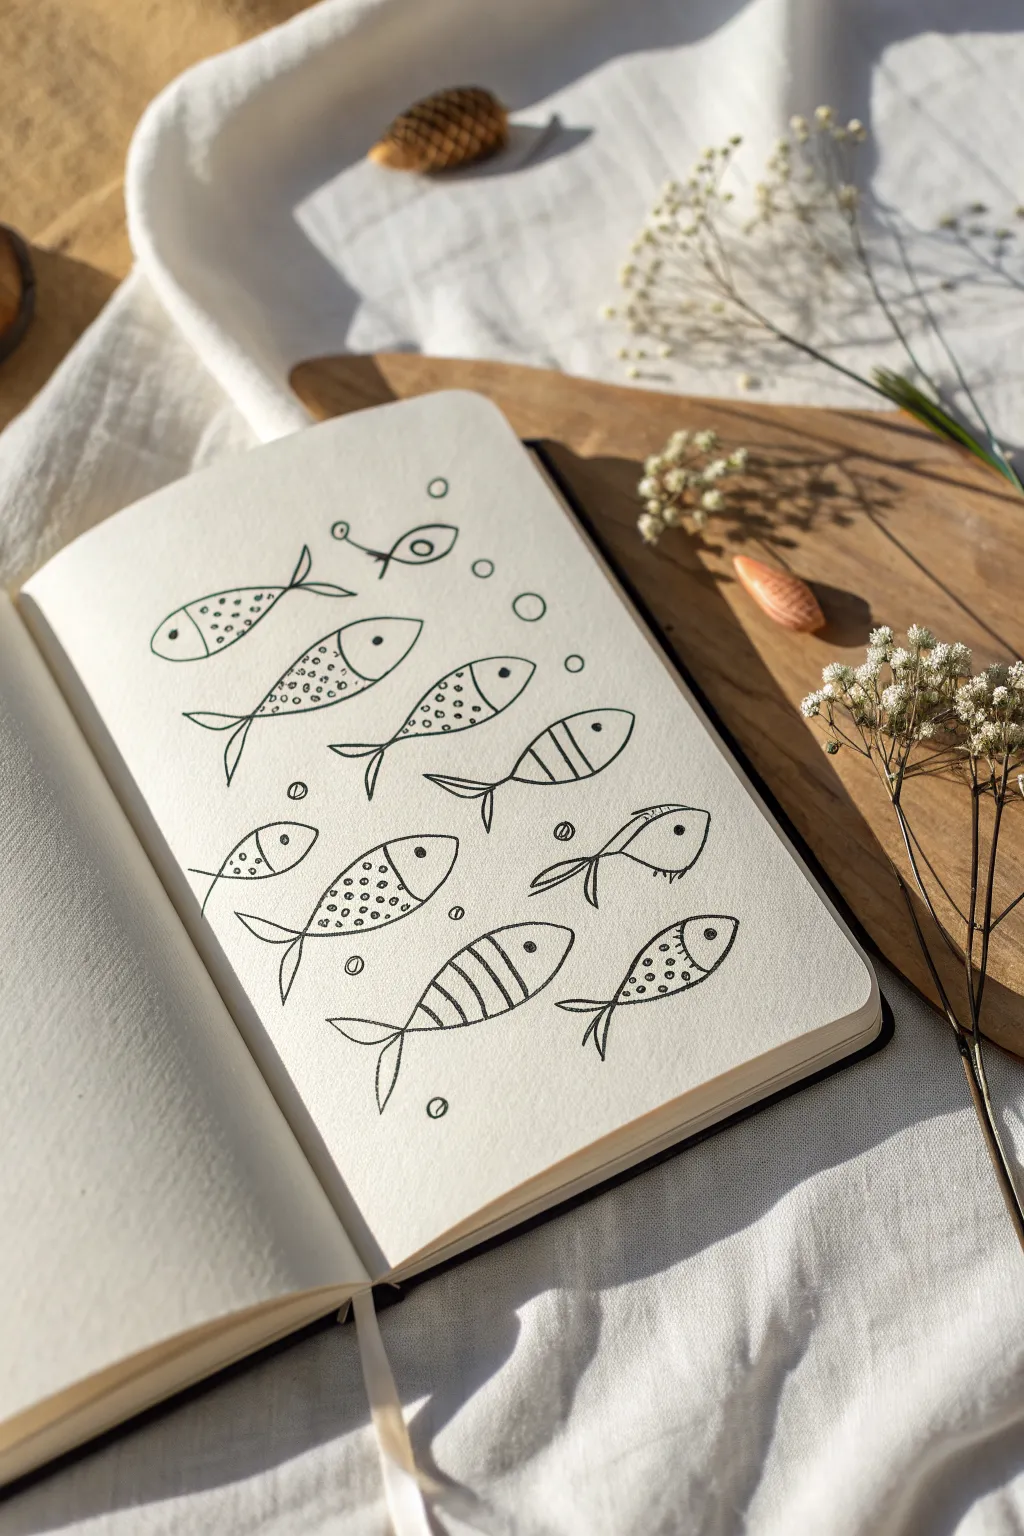
Create a charming school of stylized fish swimming across your sketchbook page using simple lines and patterns. This project relies on minimalist shapes and repetitive textures to build a cohesive and relaxing aquatic scene.
Step-by-Step Guide
Materials
- Sketchbook or drawing paper (cream or white)
- Black fine liner pen (0.3mm to 0.5mm)
- Pencil (optional for sketching)
- Eraser
Step 1: Drafting the Shapes
-
Map out the placements:
Visualize where your fish will swim on the page. You want a scattered, natural look rather than perfect rows. Imagine invisible currents they are following, some swimming left and others right. -
Draw the basic body ovals:
Start by drawing simple, elongated almond or oval shapes for the fish bodies. Keep them roughly the same size but vary the angles slightly to create movement. -
Add the tails:
At the tapered end of each oval, sketch a triangular or forked tail shape. Some tails can be simple triangles, while others can have a graceful curve like a crescent moon attached to the body.
Uneven Ink Flow?
If your pen skips over the textured paper, slow down your stroke speed. Pressing harder can damage the nib, so let the ink flow naturally by easing off the pressure.
Step 2: Inking the Outlines
-
Trace over your pencil lines:
Using your black fine liner, go over the body and tail outlines. I prefer a monoline pen here for a clean, graphic look. Do not worry if the lines aren’t perfectly smooth; a little wobble adds character. -
Define the heads:
Draw a curved vertical line inside the oval body, near the front, to separate the head from the rest of the fish. -
Add the eyes:
Place a small black dot inside the head section for the eye. Position it slightly differently on each fish—some higher, some centered—to give them individual personalities. -
Erase guidelines:
Once the ink is completely dry, gently erase any visible pencil marks underneath your ink lines to clean up the page.
Step 3: Adding Patterns & Details
-
Create striped fish:
Select a few fish to fill with stripes. draw vertical or slightly curved lines across the body section, spacing them evenly. -
Create polkadot fish:
For the next set of fish, fill the body section with small, open circles. Keep the circles loose and organic rather than perfect geometric dots. -
Create speckled fish:
Choose another group of fish to texture with solid black dots. Vary the density, perhaps clustering them near the top or bottom of the fish body for shading. -
Create solid scale fish:
For variety, leave some fish plain or draw a simple horizontal line through the middle of their body. -
Detail the tails:
Add a single line down the center of some tails to suggest fins, or leave them as simple outlines. -
Check the balance:
Look at the composition. If a fish feels too empty compared to its neighbors, add a few more textural marks to balance the visual weight.
Make It Splash
Use watercolor or colored pencils to fill in just the patterned sections of the fish, leaving the background white for a vibrant pop of color.
Step 4: Finishing Touches
-
Add bubbles:
Draw small, open circles of varying sizes floating between the fish. These bubbles help fill empty negative space and tie the composition together. -
Insert mini details:
Place tiny dots or even smaller bubbles near the larger ones to create little clusters of effervescence. -
Thicken select lines:
Go back and slightly thicken the curve of a belly or the top of a fin on a few fish to add subtle dimension. -
Final ink check:
Scan the page for any broken lines that need connecting or pattern work that looks too faint, and touch them up with your pen.
Enjoy flipping through your sketchbook and finding this peaceful underwater scene waiting for you
Fish Blowing Bubbles in Line Art
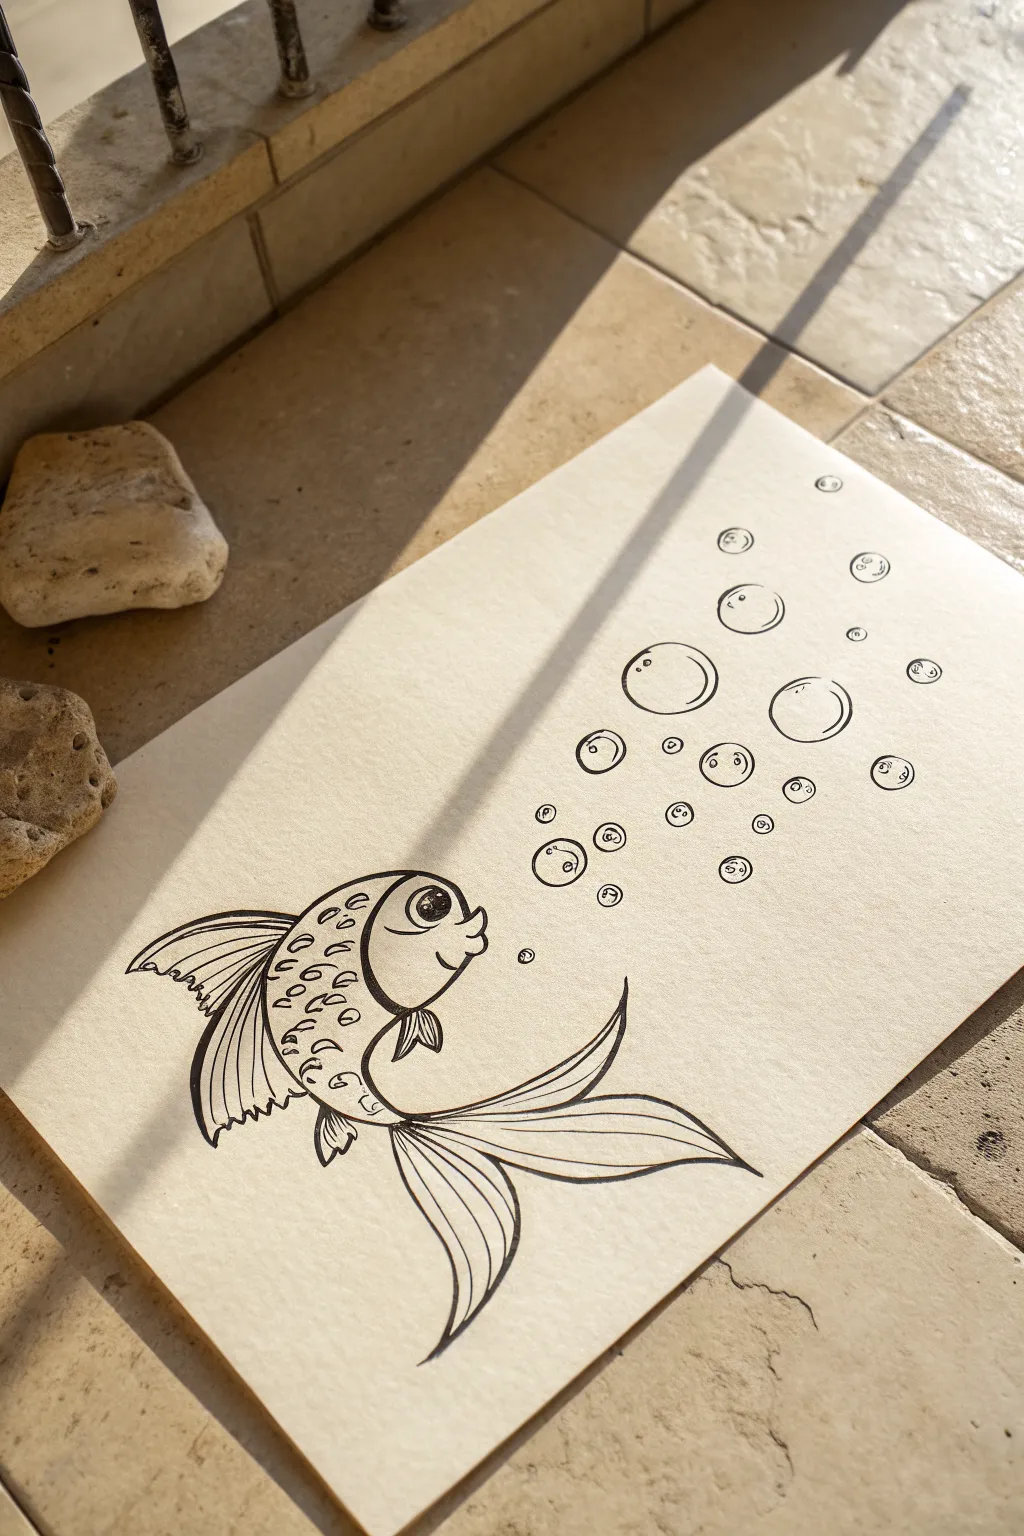
Capture the playful movement of a cartoon-style fish sending bubbles to the surface in this elegant line art project. Using simple black ink on toned paper creates a classic, clean illustration that looks charmingly timeless.
Step-by-Step
Materials
- Light beige or cream-toned drawing paper (smooth texture)
- Black fine liner pen (size 0.5 or 0.8)
- Pencil (HB or 2B)
- Soft eraser
- Ruler (optional for spacing)
- Reference image of fish anatomy (optional)
Step 1: Sketching the Foundations
-
Establish the curve:
Begin by lightly sketching a gentle ‘S’ curve with your pencil in the lower left quadrant of your paper. This line will serve as the spine of the fish, determining its flow and movement. -
Outline the body shape:
Draw an oval shape around the front part of your ‘S’ curve to form the fish’s head and main body. Taper this shape as it moves toward the tail, creating a teardrop effect. -
Map out fins and tail:
Sketch large, sweeping triangles for the tail fins at the back. Add a dorsal fin on top and a smaller pectoral fin on the side. Keep these lines loose and gestural for now; we just need placement. -
Draft the bubbles:
Lightly draw a series of circles rising from the fish’s mouth toward the top right corner. Vary the sizes, mixing large bubbles with tiny accent dots to create a natural, floating path.
Ink Flow Secret
Pull the pen toward you rather than pushing it away when drawing the long tail curves. It gives you more control and usually results in smoother lines.
Step 2: Inking the Fish
-
Define the head and eye:
Switch to your black fine liner. Start at the front, drawing a prominent, rounded curve to separate the head from the body. Draw a large circle for the eye, filling in a large black pupil but leaving a small white highlight for shine. -
Detail the mouth:
Draw the lips with two small, curved bumps protruding slightly. Add a small smile line at the corner of the mouth to give the fish a happy expression. -
Ink the dorsal fin:
Outline the top fin with a scalloped edge on the back side. Inside the fin, draw curved lines that follow the shape of the fin, stopping just short of the body line. -
Create the flowing tail:
Trace your tail sketches with long, confident strokes. The tail is split into two main sections; make the tips pointed and elegant. Draw internal lines that swoop along the length of the tail to suggest texture and flexibility. -
Add the pectoral fin:
Ink the small side fin located just behind the head line. Give it similar internal striping to the other fins to maintain consistency. -
Draw the scales:
Fill the body area with small `C` shapes or `U` shapes to represent scales. I prefer to space them irregularly rather than in perfect rows to give it a more organic look. Leave the belly area mostly clear for contrast.
Wobbly Circles?
Instead of moving your fingers or wrist to draw the bubbles, try locking your wrist and moving your entire arm from the shoulder. This creates rounder shapes.
Step 3: Bubbles and Final Touches
-
Outline the main bubbles:
Carefully ink the larger circles you sketched earlier. Try to keep your hand steady to close the circles neatly, but don’t worry if they aren’t geometric perfection. -
Add bubble highlights:
inside each large bubble, draw a small crescent moon shape or a tiny oval near the upper left inner edge. This is crucial for making them look transparent and wet. -
Ink the tiny bubbles:
Go over the smallest circles. For the tiniest filler dots, simply press the tip of your pen down; for slightly larger ones, create a small open circle. -
Thicken the outer lines:
Go back over the main outline of the fish (the belly, back, and major tail curves) to slightly thicken the line weight. This helps the subject pop off the page. -
Erase pencil marks:
Wait at least 5-10 minutes to ensure the ink is completely dry. Gently erase all underlying pencil sketches, being careful not to crumple the paper.
Now you have a charming piece of aquatic art ready to be framed or gifted

PENCIL GUIDE
Understanding Pencil Grades from H to B
From first sketch to finished drawing — learn pencil grades, line control, and shading techniques.
Explore the Full Guide
Jumping Fish Splash Pose
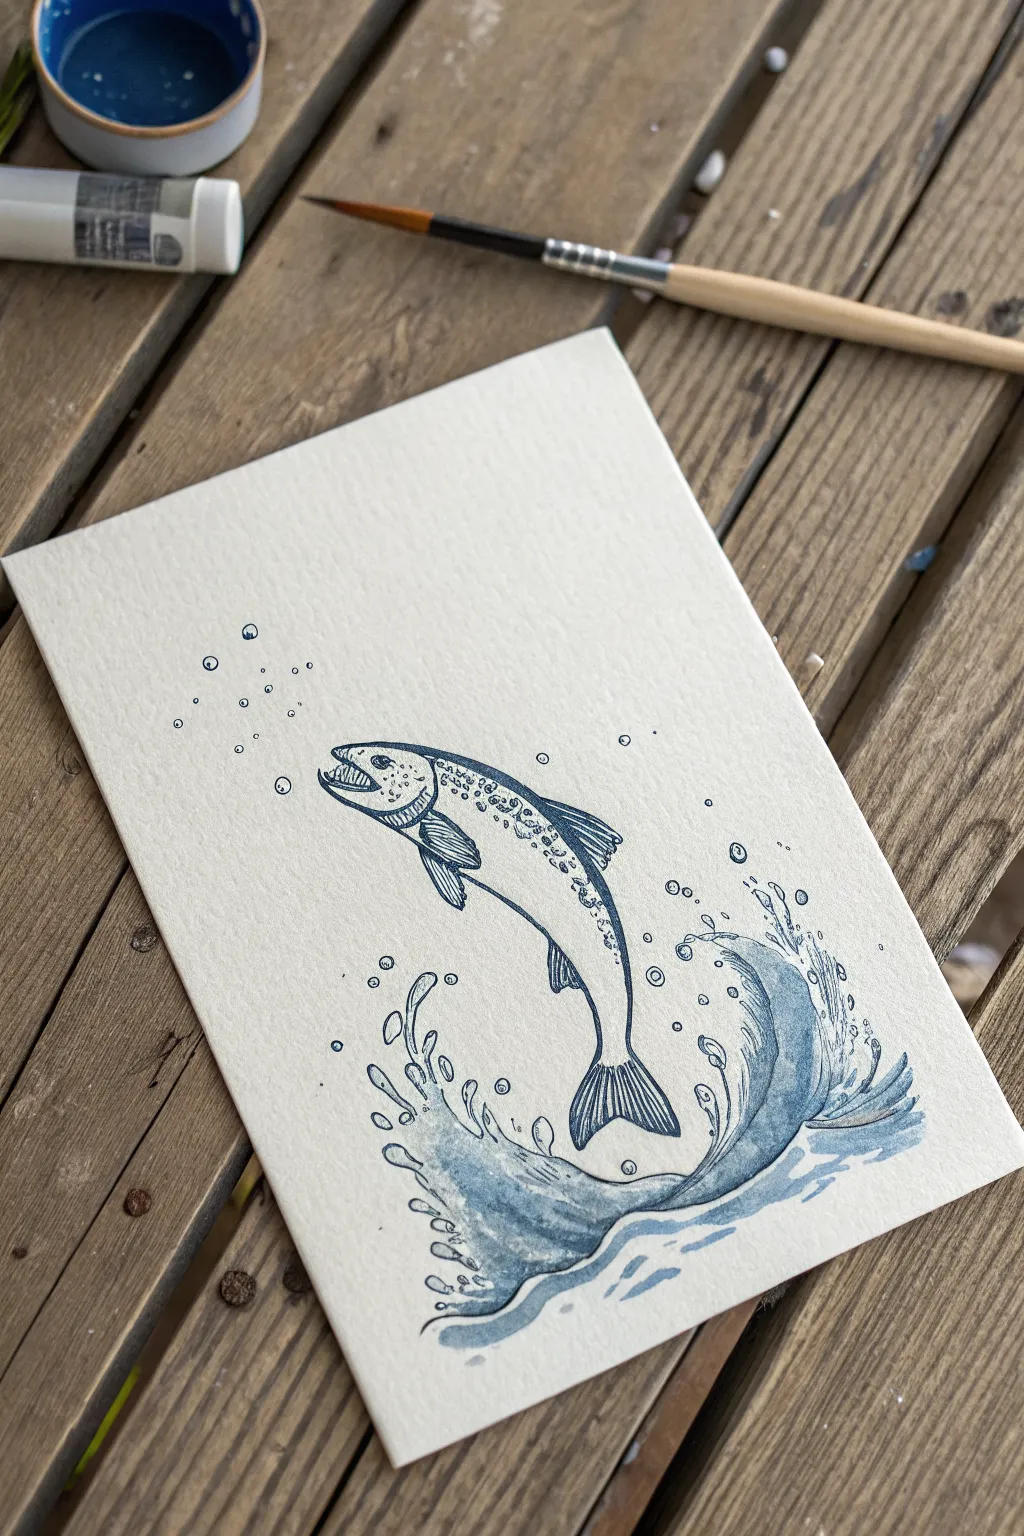
Capture the dynamic energy of a river catch using just a single color of watercolor paint and fine liner ink. This project combines loose, watery splashes with precise linework to create a striking illustration of a leaping fish.
How-To Guide
Materials
- Cold press watercolor paper (textured)
- Small round watercolor brush (size 2 or 4)
- Payne’s Grey or Indigo watercolor paint
- Fine liner pen (black or dark blue, waterproof)
- Pencil (HB)
- Eraser
- Clean water jar
- Paper towel
Step 1: Sketching the Composition
-
Outline the fish body:
Begin lightly with your pencil. Draw a curved, crescent-like shape for the fish’s body, positioning it diagonally across the paper to simulate upward movement. Keep the tail narrower and the chest area slightly broader. -
Add fins and head details:
Sketch the open mouth with a slightly hooked jaw. Add the dorsal fin on the back, the pectoral fin on the side, and the forked tail fin at the bottom. Keep these lines faint so they can be erased later. -
Map the splash:
Draw loose, swirling shapes at the base of the tail to represent the water launching the fish upward. Don’t worry about perfect realism here; think of it as a stylized wave curling underneath.
Step 2: Inking the Details
-
Trace the main contours:
Using your waterproof fine liner, go over your pencil lines for the fish’s body. Use a steady hand but allow the line weight to vary slightly for a more organic look. -
Detail the face:
Draw the eye as a small circle with a dot in the center. Carefully ink the teeth inside the open mouth and the lines of the gill cover. -
Texture the body:
Instead of drawing every scale, suggest texture. Use small, erratic circles or speckles along the fish’s back (the dorsal area) to mimic the spotted pattern of a trout. Leave the belly clear. -
Line the fins:
Add striated lines to the fins and tail. These lines should fan out from the base of the fin toward the edges, indicating the ribbing structure. -
Ink the splash:
Outline the water shapes. Add small floating circles above the splash and near the fish’s head to represent scattered droplets and bubbles.
Ink Confidence
Make sure your fine liner is completely waterproof before painting! Test it on a scrap piece of paper with water first to ensure it won’t bleed.
Step 3: Adding Watercolor
-
Prepare your paint:
Dilute your Payne’s Grey or Indigo paint on a palette. You want a medium transparency—not too thick, but distinct enough to see the blue tone. -
Initial wash on the wave:
Load your brush and fill in the main body of the wave splash. Use the belly of the brush to sweep the color into the curve, letting the water texture settle into the paper. -
Create gradients:
While the wave paint is still wet, dip your brush in clean water and soften the edges where the wave meets the white paper. This creates a beautifully faded, splashing effect. -
Paint the fish accents:
Apply very light washes to the fins and the back of the fish. I find it effective to leave the belly of the fish completely unpainted to make it look shiny and dimensional. -
Darken the details:
Wait for the first layer to dry slightly, then add a second, more concentrated layer of paint to the darkest areas: the tips of the tail, the shadows under the wave, and the pupil of the eye. -
Fill the bubbles:
Use the very tip of your brush to drop a tiny amount of diluted paint into the bottom half of the bubble circles, leaving the tops white for a highlight. -
Final touches:
Look for any disconnects in your splash. You can add a few extra loose brushstrokes of plain water or very pale paint around the splash zone to create a sense of movement and spray.
Metallic sheen
Once the blue watercolor is totally dry, mix a tiny bit of silver iridescent medium or metallic watercolor over the fish’s scales for a realistic shimmer.
Now stepping back, you can admire the fluid motion captured in your stylish monochromatic jumping fish
Striped Fish Pattern Practice
Capture the delicate beauty of aquatic life with this detailed perch illustration, characterized by its striking vertical stripes and warm, textured fins. This project focuses on layering fine liners and colored pencils to build realistic depth and scale patterns directly in your favorite journal.
Step-by-Step
Materials
- Sketchbook with heavy-weight or mixed media paper
- HB or 2H graphite pencil
- Kneaded eraser
- Fine liner pens (Black, sizes 0.05, 0.1, and 0.3)
- Colored pencils (Mustard Yellow, Burnt Sienna, Teal/Blue-Green, Orange, Cream)
- White gel pen (optional for highlights)
Step 1: Drafting the Form
-
Basic Shapes:
Begin by lightly sketching an elongated oval near the center of your page. This will act as the main body. Tack on a triangle at the rear for the tail and a smaller, rounded shape at the front for the head. -
Refining the Outline:
Connect your shapes to create a smooth, continuous fish silhouette. Define the curve of the back and the belly. Lightly mark the position of the gill plate just behind the head area. -
Locating Features:
Place the eye high on the head, sketching a simple circle. Then, map out the fins: the spiny dorsal fin on top, the pectoral fin on the side, and the ventral and anal fins along the bottom. -
Mapping pattern:
Lightly sketch five to seven vertical stripes running down the upper half of the body. These should taper as they go down, resembling elongated triangles or irregular bands.
Step 2: Inking and Texture
-
Clean Lines:
Using a 0.1 fine liner, trace over your final pencil outline. Use a confident, single stroke for the belly and back, but use broken or slightly jagged lines for the fins to suggest their ribbed texture. -
Detailing the Fins:
Switch to your thinnest 0.05 pen. Draw fine lines radiating from the base of each fin to the tip. These rays give the fins their structure and transparency. -
Scale Work:
This step requires patience. Stipple tiny dots or very small ‘u’ shapes across the body, concentrating them darker near the top spine and lightening them as you move toward the belly. This creates the ‘sandpaper’ texture. -
The Eye:
Ink the pupil solid black, leaving a tiny speck of white paper for a reflection. Draw a ring around the pupil for the iris. -
Cleanup:
Once the ink is completely dry, gently erase all underlying graphite marks with your kneaded eraser to prepare for color.
Scale Texture Tip
Don’t draw every single scale! Use stippling (dots) densely on the back and sparsely on the belly to suggest texture without cluttering the drawing.
Step 3: Layering Color
-
Base Tone:
Lightly shade the entire body (except the belly) with a cream or very pale yellow pencil to establish a warm undertone. -
The Stripes:
Fill in the vertical stripe markings with a teal or blue-green pencil. Press firmly in the center of the stripe and fade out slightly at the edges to blend into the body. -
Body Shading:
Using a mustard yellow or light brown, shade the areas between the stripes. I like to layer this color slightly over the edges of the blue stripes to mimic natural skin blending. -
Fin Gradients:
Color the fins using a bright orange at the tips, fading into a burnt sienna or reddish-brown near the body connection points. -
Adding Depth:
Take the burnt sienna pencil and lightly shade the top ridge of the fish’s back and the shadowed area under the gill plate to give the drawing volume. -
Final Touches:
Go back in with your 0.3 pen to re-darken the outer contour if it got lost under the wax. Add a tiny dot of white gel pen to the eye if the paper highlight was covered.
Make It Pop
Add a very subtle drop shadow beneath the fish using a light cool grey marker. It lifts the illustration off the page and makes it look 3D.
Enjoy the satisfaction of seeing your realistic aquatic study swimming across the page


Pufferfish With Texture Dots
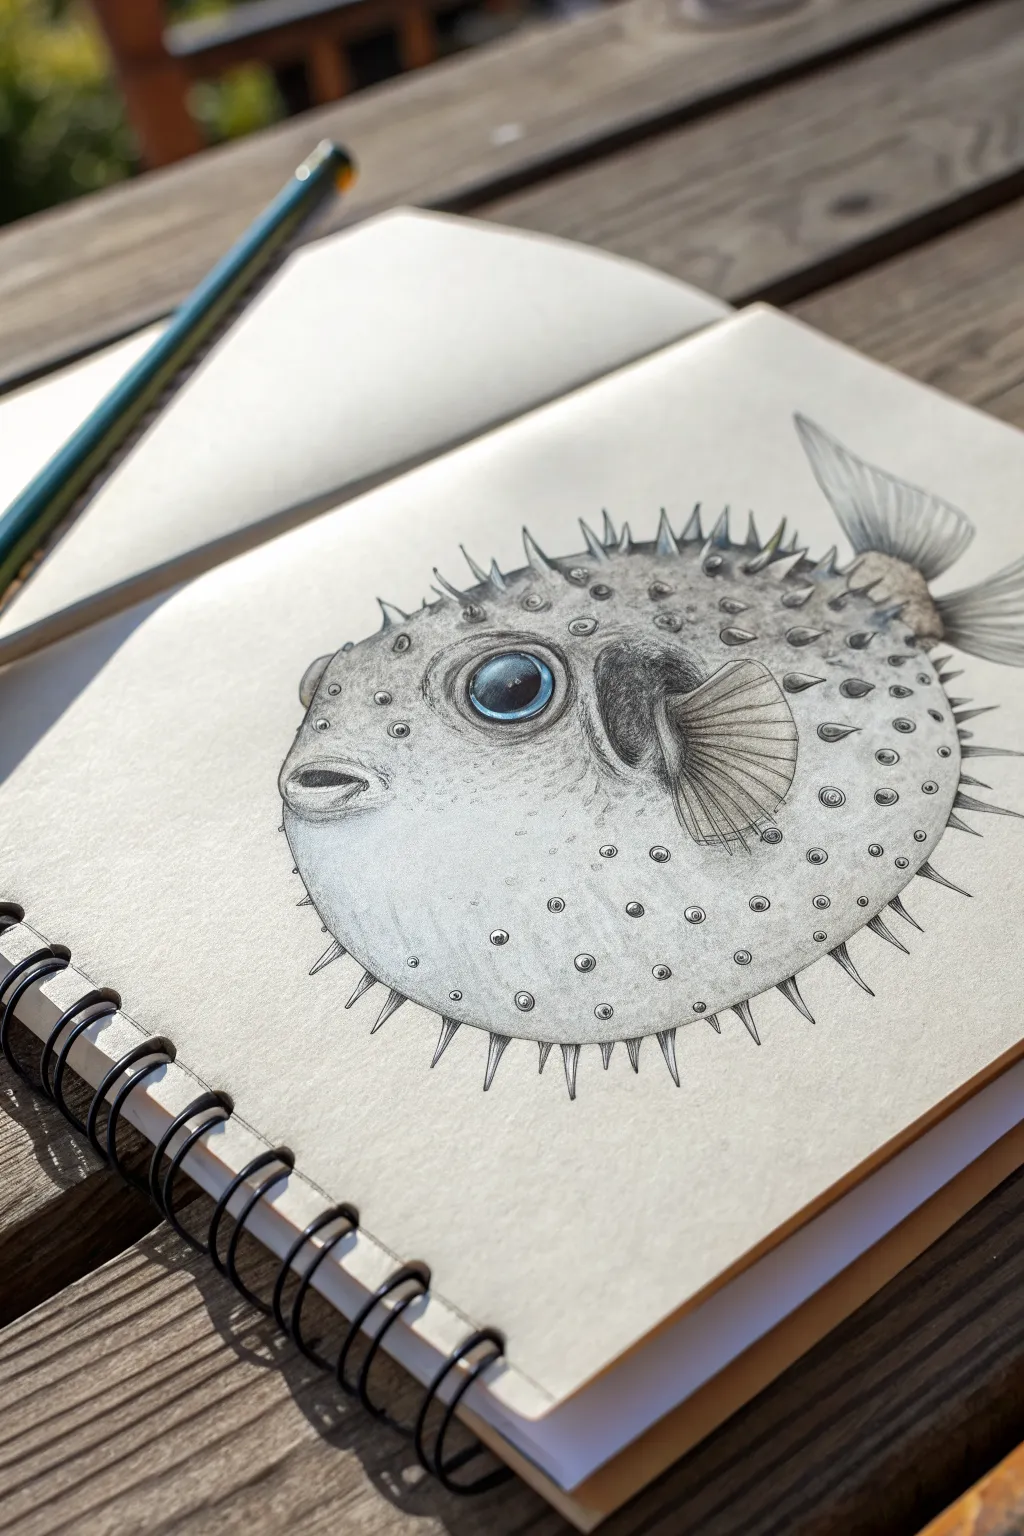
Capture the whimsical charm of a porcupinefish with this detailed pencil study that focuses on texture and form. The drawing contrasts the smooth, spherical body with sharp spines and distinct, dark tubers for a striking 3D effect.
Detailed Instructions
Materials
- Sketchbook with smooth, heavy paper
- Graphite pencils (HB, 2B, 4B)
- Blue colored pencil or watercolor paint
- Fine liner or dark charcoal pencil (optional for deepest blacks)
- Blending stump or tortilla
- Kneaded eraser
Step 1: Basic Structure
-
Outline the orb:
Begin with a light HB pencil to draw a large, perfect circle for the main body. Keep your lines faint so they can be easily erased or blended later. -
Add the tail and fins:
Sketch a small, fan-shaped tail fin protruding from the upper right side of the circle. Add a pectoral fin on the side of the body, positioning it slightly right of center to suggest the fish is turned three-quarters toward you. -
Place the features:
Draw a large circle for the eye in the upper-left quadrant. It should be oversized and expressive. Below and to the left of the eye, sketch a small, protruding mouth with slightly parted lips.
Sphere Logic
To make the fish look round, curve your spine rows. Don’t draw straight lines of spikes; arc them around the form like lines of longitude on a globe.
Step 2: Defining Texture
-
Map the spines:
Lightly mark the positions of the spines. Instead of drawing them all at once, place small dots or circles in concentric rings around the eye and body to ensure even spacing. -
Draw the thorns:
Turn those guide marks into sharp, triangular spikes. The spines on the outer edges should point outward, while the ones in the center should appear foreshortened, looking more like small mounds or points. -
Create the heavy tubers:
Using a 2B pencil, draw the distinct circular bases for the spines. These look like small donuts or dark rings. Vary the pressure to make the ones on the top and right side darker, indicating shadow. -
Detail the eye:
Draw a smaller pupil inside the eye circle, leaving a distinct white highlight spot near the top. This reflection is crucial for making the fish look alive.
Wet Look
Add a tiny touch of white gel pen or gouache on the highest point of the eye and the moist lip to give that realistic, wet gleam.
Step 3: Shading and Depth
-
Establish the light source:
Imagine the light coming from the upper left. Gently shade the bottom right curve of the spherical body using the side of your HB pencil to create volume. -
Darken the gill area:
Behind the pectoral fin, shade a deep, dark crescent shape to represent the gill opening. I prefer using a 4B pencil here to get a rich, velvety black depth. -
Shade the fins:
Draw fine lines radiating from the base of the fins to their tips. Darken the base of the fins more heavily to suggest they are attached to the body. -
Texture the skin:
Between the spines, use light stippling (dots) and tiny circular motions with a blending stump to give the skin a rough, leathery appearance. -
Add color to the iris:
Carefully fill in the iris around the pupil with a blue colored pencil. Start light near the bottom and press harder near the top for a gradient effect.
Step 4: Refining Details
-
Enhance the spines:
Go back over your spines. Sharpen the tips and add a tiny cast shadow underneath each one to make them pop off the surface of the skin. -
Deepen the contrast:
Use a 4B pencil to darken the pupil (avoiding the highlight) and the dark rings around the spines on the shadowed side of the fish. -
Blend the body:
Use a blending stump to smooth out your main shading on the belly, ensuring a seamless transition from the light upper area to the shadowed underside. -
Lift highlights:
Take your kneaded eraser and dab the upper left area of the body and the tops of the fins to lift off graphite, creating brighter highlights. -
Final touches:
Clean up the outer edges. If any spines got smudged, redefine their sharp points for a crisp finish.
Now you have a wonderfully prickly pufferfish ready to float off the page
Cute Chibi Fish Character Sheet
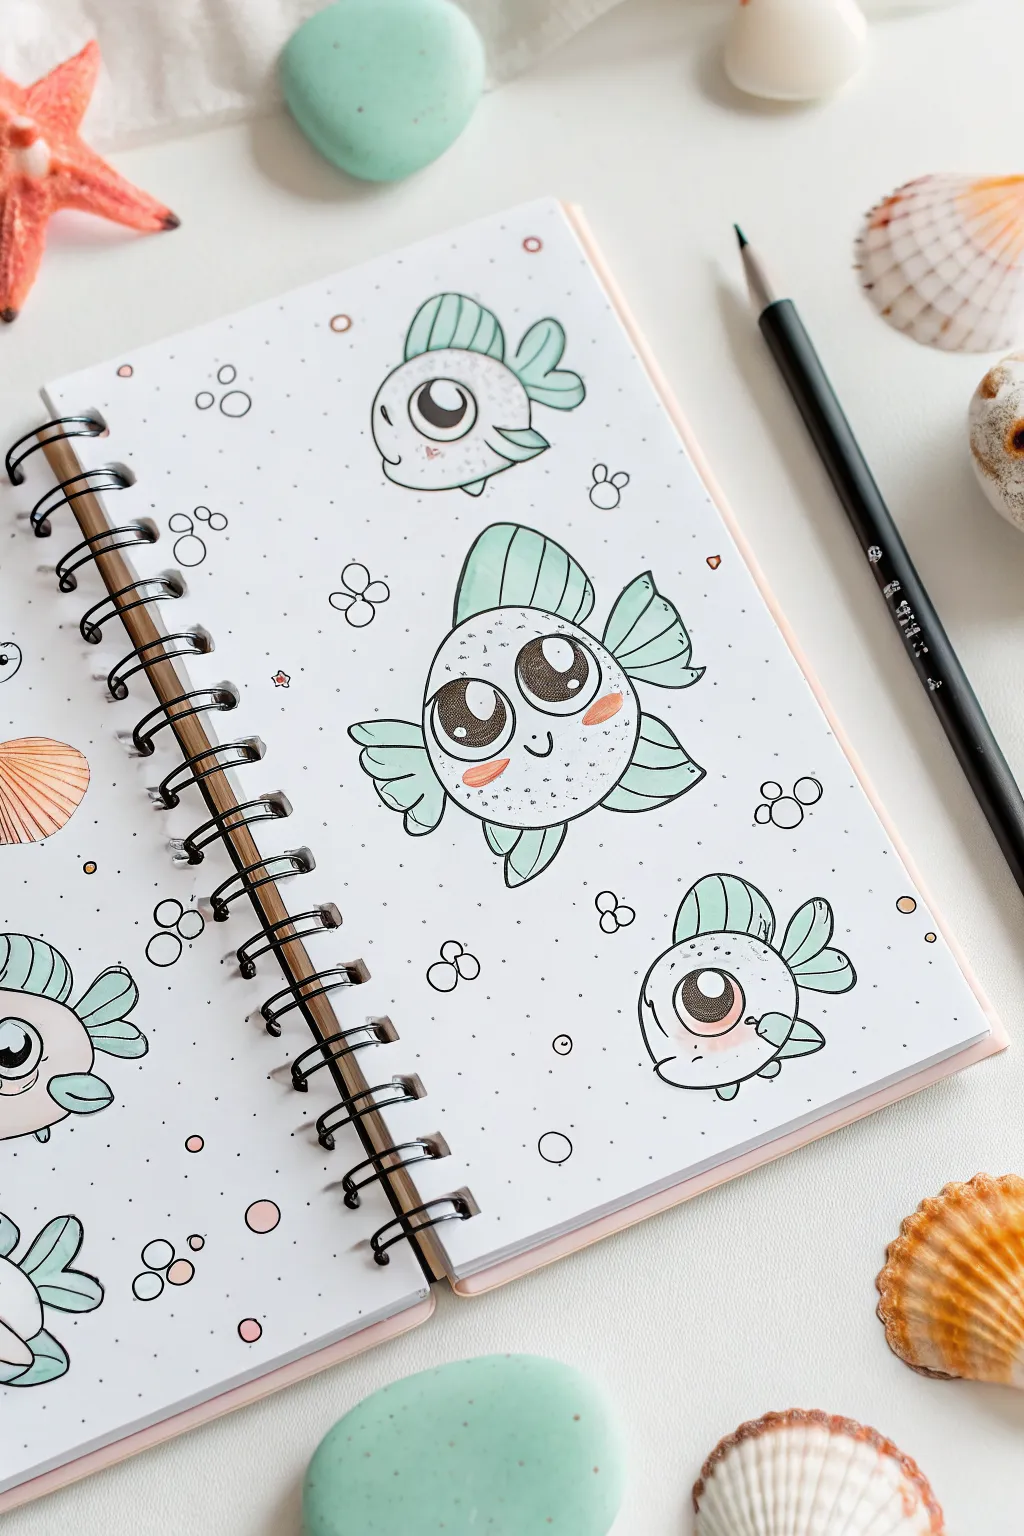
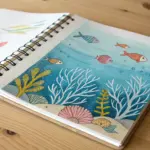
Create your own adorable school of fish with this delightful doodle spread featuring simple shapes and sweet expressions. This project focuses on clean linework and soft pastel accents to bring a playful, bubbly energy to your sketchbook pages.
Step-by-Step Tutorial
Materials
- Spiral-bound sketchbook or bullet journal
- Fine liner pen (black, waterproof, approx. 0.5mm)
- Thicker marker pen (black, approx. 0.8mm or 1.0mm)
- Pastel mint green marker or colored pencil
- Pastel peach or light pink marker
- Pencil and eraser for sketching
Step 1: Drafting the Shapes
-
Lay out the composition:
Start by lightly sketching the placement of your fish across the page. Aim for a main central character and two or three smaller floating companions around it to create a balanced, dynamic layout. -
Draw the main body circles:
For each fish, sketch a near-perfect circle or slight oval. Don’t worry about being precise; a little unevenness adds to the organic, doodle charm. -
Add fin foundations:
Attach simple geometric shapes for the fins. Sketch a small rounded trapezoid on top for the dorsal fin, and two wing-like shapes on the sides for pectoral fins. Add a fan shape at the back for the tail.
Keep it Clean
Wait at least 2 minutes for your ink outlines to dry before using the eraser. Smudged ink can ruin the crisp, clean aesthetic of this style instantly.
Step 2: Inking the Characters
-
Outline the bodies:
Using your thicker black marker, trace over your pencil lines for the main circular bodies and the outer edges of the fins. Keep your hand relaxed to get that smooth, confident cartoon line. -
Draw the large eyes:
Inside the central fish’s body, draw two very large touching ovals for eyes. For the smaller fish, draw a single large circle to represent a side profile view. -
Fill in the pupils:
Inside the eye ovals, draw smaller circles for highlights, then fill the rest of the eye with black ink. Leave plenty of white space for that sparkling, kawaii look. -
Add facial details:
Switch to your finer pen. Draw a tiny, U-shaped smile right between the eyes. For the side-profile fish, place the mouth near the bottom edge of the circle. -
Details on the fins:
Use the fine liner to draw vertical stripes or segments inside the dorsal and side fins. This adds texture without cluttering the design.
Theme Variations
Try changing the fin color to coral pink or baby blue for a different mood, or turn them into goldfish by adding long, flowing tails instead of short fans.
Step 3: Adding Color and Texture
-
Color the fins:
Take your pastel mint green marker and gently fill in the fins and tails. I prefer to leave a tiny sliver of white space near the black outlines to keep the drawing feeling airy and light. -
Blush those cheeks:
using the peach or pink marker, add small ovals underneath the eyes of the main fish for blush. On the side-profile fish, verify the cheek placement is below the eye. -
Texturize the skin:
With your fine liner, dot the body of the fish with tiny stippling marks. Concentrate the dots slightly more at the bottom of the fish to suggest subtle shading.
Step 4: Background Elements
-
Draw bubbles:
Scatter groups of small circles around the fish to create bubbles. Group them in clusters of two or three, varying the sizes. -
Add tiny fillers:
Fill the empty negative space with tiny dots and small hollow circles. This makes the page feel like filled water without needing to color the whole background. -
Erase guidelines:
Once the ink is completely dry, gently erase any visible pencil sketch lines to clean up your artwork.
Now you have a lively page of fish characters swimming through your notebook
Grumpy Fish Expression Swap
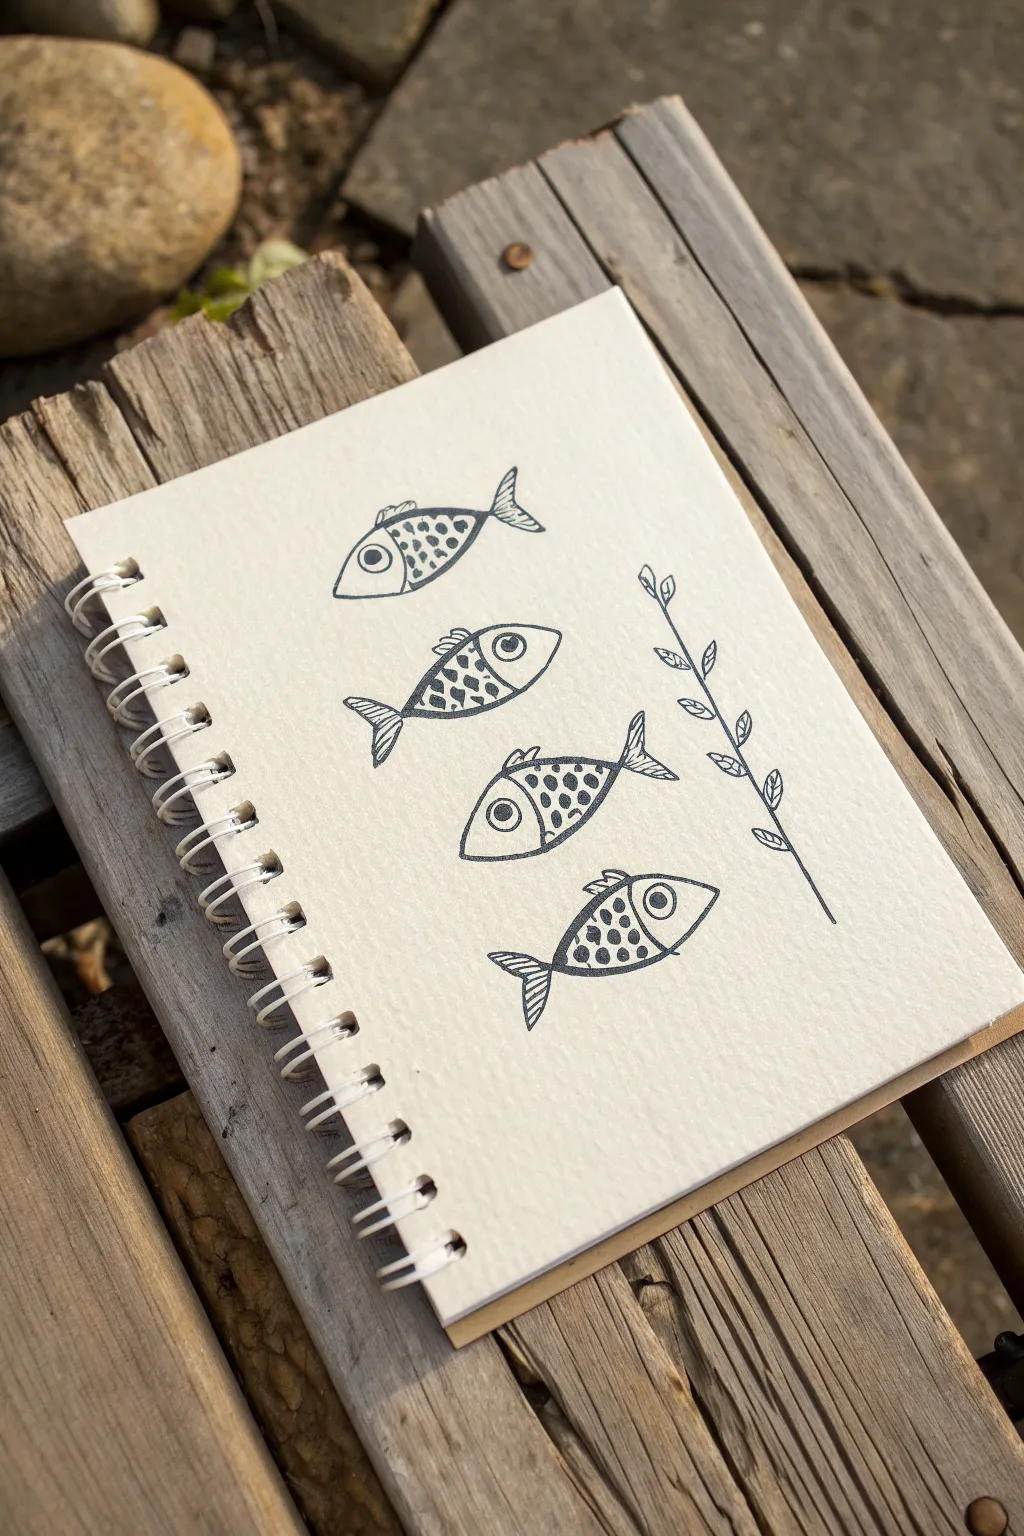
Capture the charm of simple line art with this sketchbook page featuring a school of four distinctively patterned fish and a delicate aquatic plant. Using bold outlines and playful geometric fills, you’ll create characters that feel both cohesive and uniquely expressive.
Detailed Instructions
Materials
- Spiral-bound sketchbook (heavyweight paper preferred)
- Fine-liner pen (0.5mm or 0.8mm black)
- Pencil (HB or 2B)
- Eraser
- Ruler (optional)
Step 1: Planning and Outlining
-
Space planning:
Begin by visualizing the placement of your four fish. They should be stacked vertically in the center-left of the page, leaving enough room on the right side for the plant stem. You can lightly mark the center point for each fish with a pencil so they are evenly spaced. -
Drafting the basic shapes:
Using your pencil, lightly sketch four oval or almond shapes for the fish bodies. Vary the orientation slightly—tilt some noses up and some down to give the school a sense of movement. -
Adding tails:
Sketch triangular tail fins on the back of each oval. Keep the shapes loose and simple; triangles can be slightly curved or sharp depending on the personality you want for each fish. -
Refining the plant stem:
Draw a long, slender, slightly curved line on the right side of the page, extending from the bottom quarter up toward the top right corner. Mark small dashes along the stem where the leaves will attach.
Ink Confidence
Don’t rush the lines. Pull the pen toward you rather than pushing it away for smoother curves, and rotate the sketchbook if your hand feels awkward.
Step 2: Inking the Characters
-
Inking the body outlines:
Switch to your black fine-liner pen. Carefully trace over your pencil lines for the main bodies and tails. I prefer using a slightly thicker nib here if available, but a standard 0.5mm works beautifully too. -
Defining the heads:
Draw a curved vertical line inside each oval to separate the head from the body. You can make these curves face forward or backward to change the perspective. -
Drawing the eyes:
Place a circle inside each head section. For the pupils, draw a smaller solid black dot. Experiment with placement—a pupil looking up, down, or sideways instantly changes the fish’s mood. -
Adding dorsal fins:
Ink a small, spiky or rounded fin on the top of each fish. This is a great spot to add variation; try some triangle spikes on one fish and a curved, ribbed fin on another.
Splash of Color
Use a light watercolor wash or colored pencil in just one shape per fish (like the fins or a specific pattern row) to make the black ink pop.
Step 3: Pattern and Detail
-
Patterning the top fish:
For the first fish, fill the body section with small triangles to resemble scales. Keep them loosely packed but not touching for a graphic look. -
Patterning the second fish:
On the second fish down, draw curved vertical lines across the body, then add small dashes between them to create a brick-like texture. -
Patterning the third fish:
Fill the third fish’s body with bold polka dots. Vary the sizes slightly to make it feel organic rather than perfectly uniform. -
Patterning the bottom fish:
For the final fish, use a mix of techniques or repeat the triangle scale pattern, perhaps making the triangles larger this time. Simplicity is key. -
Adding tail details:
Draw three or four straight lines inside each tail fin, fanning out from the body connection point to the tail’s edge. Cross-hatch one or two tails for extra texture.
Step 4: Botanical Elements and Finish
-
Inking the stem:
Trace the long main stem line with a steady hand. It doesn’t need to be perfectly straight; a wobble adds natural character. -
Drawing the leaves:
Add small, pairs of oval leaves along the stem. Keep the leaves simple with just an outline and a single center visual vein line if desired. -
Final clean up:
Wait at least five minutes to ensure the ink is completely dry. Gently erase all visible pencil sketches from underneath your ink work.
Now you have a charming page of aquatic doodles ready to be expanded into a full underwater scene
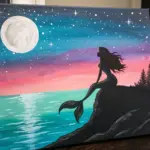
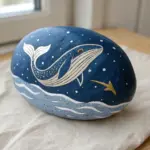
Fish and Moon Night Scene
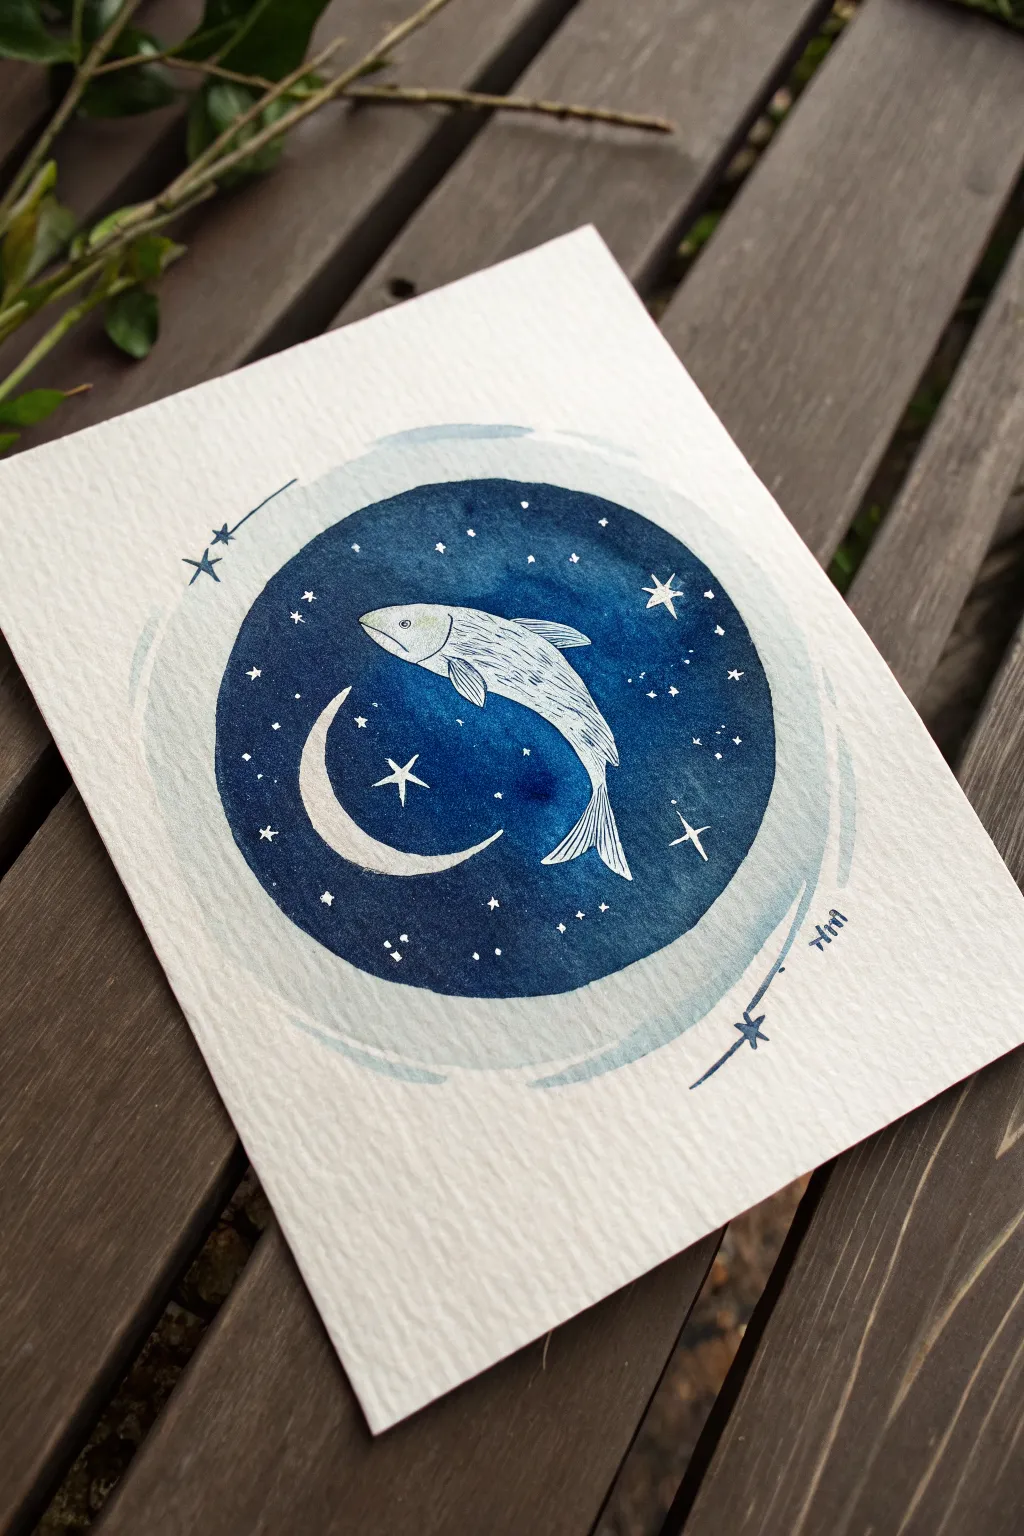
This whimsical watercolor project captures a magical moment where ocean meets sky, featuring a stylized fish leaping through a starry portal. The stark contrast between the deep indigo background and the crisp white line work creates a striking, dreamlike illustration.
How-To Guide
Materials
- Cold press watercolor paper (300 gsm recommended)
- Pencil and eraser
- Compass or a round object (like a masking tape roll)
- Watercolor paints (Indigo, Prussian Blue, or Payne’s Gray)
- White gouache or white gel pen
- Fine liner pen (optional, for fish details if not using gouache)
- Round watercolor brushes (sizes 2 and 6)
- Palette for mixing
- Clean water and paper towels
Step 1: Sketching the Layout
-
Establish the circle:
Begin by lightly tracing a perfect circle in the center of your paper using a compass or a round template. Keep your pencil pressure very light so the graphite won’t show through the paint later. -
Draft the fish:
Sketch the outline of a salmon or trout-shaped fish leaping diagonally upwards through the center of the circle. Position it so the head is higher than the tail, creating a sense of movement. -
Add celestial elements:
Draw a thin crescent moon shape below the fish, curving upwards. Mark the positions of a few larger stars, especially the one nestled near the moon’s curve.
Step 2: Painting the Night Sky
-
Mix your deep blue:
Create a concentrated puddle of dark blue paint on your palette. Indigo or Phthalo Blue mixed with a touch of black works well to achieve that deep, midnight tone. -
Outline the preserve zone:
Using your smaller size 2 brush, carefully paint around the outline of the fish and the crescent moon with the dark blue mix. You want the paper inside these shapes to remain perfectly white. -
Fill the cosmos:
Switch to your larger brush and fill in the rest of the circle with the dark blue wash. While the paint is wet, you can drop in slightly more concentrated pigment in some areas to create subtle texture. -
Create the outer glow:
Dilute your remaining blue paint with plenty of water until it is very pale. Paint a loose, sweeping ring around the outside of the main circle, leaving a small gap of white space between the dark circle and this pale wash. -
Let it dry completely:
This is crucial; wait until the background is bone-dry before adding any details to prevent smudging or bleeding.
Use masking fluid
Apply masking fluid to the fish and moon before painting the blue background. This lets you paint freely without worrying about preserving the white paper.
Step 3: Adding Details and Magic
-
Detail the fish:
With a very fine brush dipped in diluted blue paint, or a fine liner pen, draw the scales, gills, and eye of the fish. Use short, curved strokes for the scales to mimic texture. -
Define the fins:
Add fine lines to the pectoral, dorsal, and tail fins. Keep these lines delicate to suggest the transparency of the fins. -
Shade the moon:
If you wish, add a tiny bit of texture to the crescent moon with faint grey dots or lines, though usually, leaving it stark white is most effective. -
Paint the stars:
Using your white gouache or a white gel pen, add the stars. Draw traditional four or five-point stars for the larger ones, and dot tiny specks for distant stars. -
Connect the constellations:
Draw the stylized star shapes and connecting lines outside the circle on the left and bottom right corners using a fine dark blue line, as seen in the reference. -
Add outer sparklies:
If you used a pale wash outside the circle, you can add a tiny star or two over that wash to integrate the elements. -
Final assessment:
Check for any uneven edges on your main circle. If needed, carefully touch up the perimeter with your dark blue paint to ensure it looks crisp. -
Sign your work:
Add your initials or signature near the bottom right constellation graphic to finish the piece.
Uneven background?
If your dark blue dries with unwanted ‘blooms’ or watermarks, wait for it to dry fully, then apply a second, smooth layer of paint over the entire circle.
Once the final star is placed, you’ll have a serene piece of art that perfectly balances deep color with delicate line work
Yin-Yang Twin Fish Design
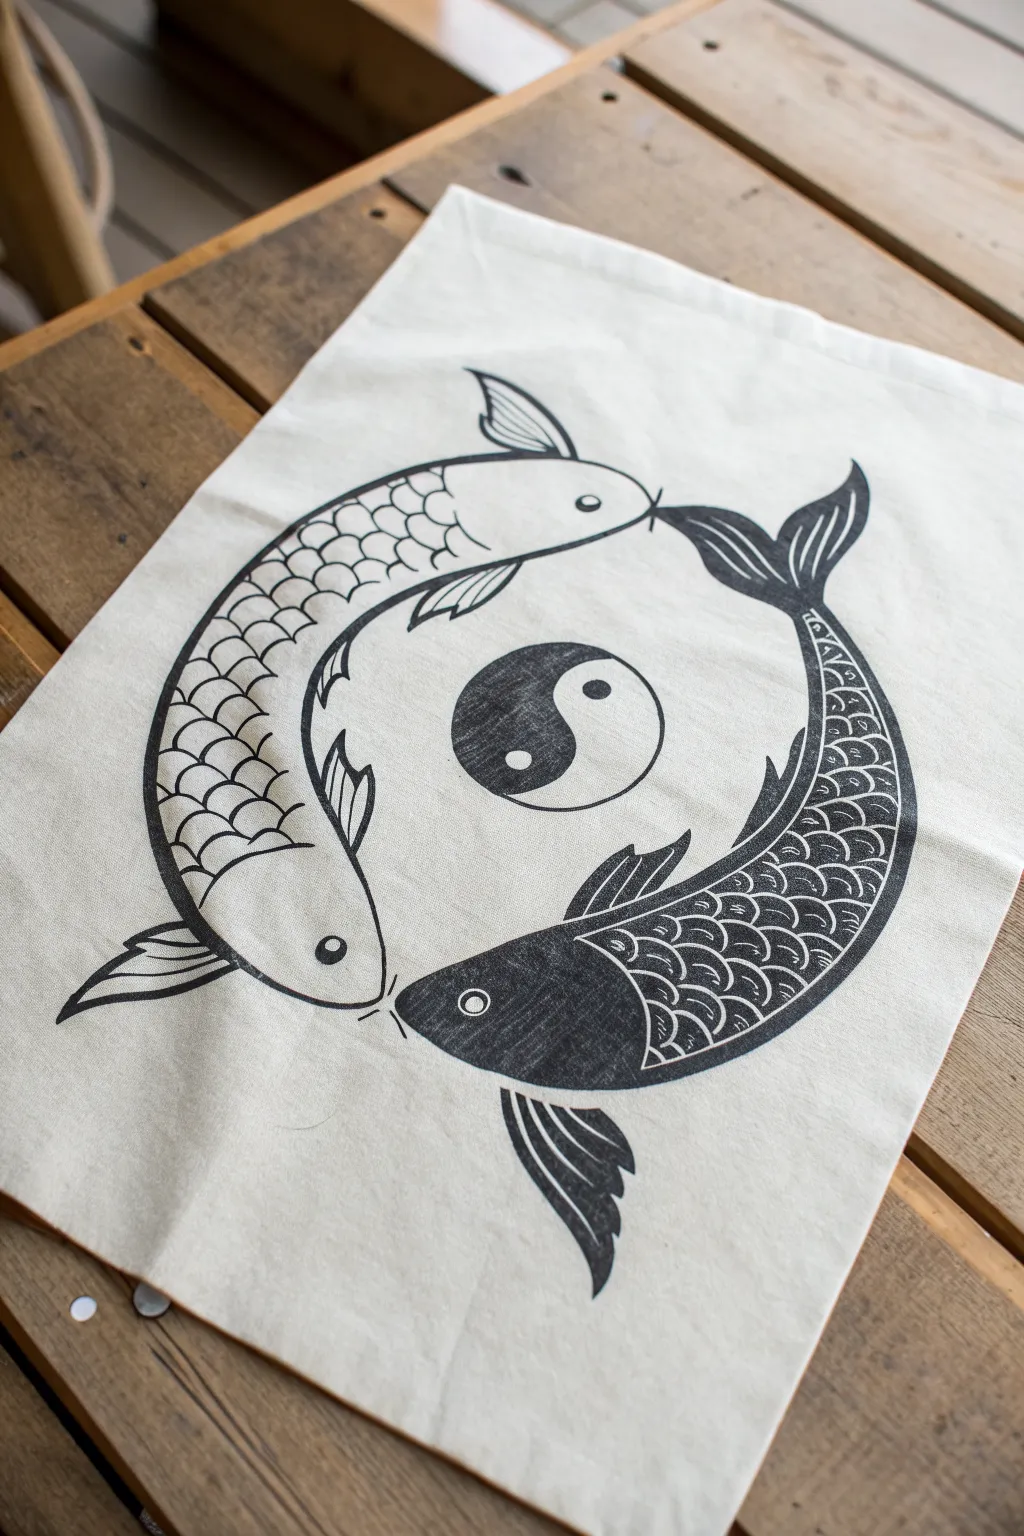
Transform a plain canvas tote into a striking piece of wearable art with this balanced koi fish design. This project uses fabric markers or ink to create a harmonious composition where two fish circle a central Yin-Yang symbol.
Step-by-Step Tutorial
Materials
- Plain canvas tote bag (natural or white)
- Black fabric marker (fine tip for details)
- Black fabric marker (broad tip for filling)
- Pencil (HB or lighter)
- Eraser
- Circular object for tracing (bowl or plate)
- Ruler
- Cardboard insert (to fit inside the bag)
- Iron (for setting the ink)
Step 1: Preparation and Sketching
-
Prepare your surface:
Before starting, iron your tote bag flat to remove any creases that could distort your drawing. Slide a piece of cardboard inside the bag; this is crucial to prevent ink from bleeding through to the other side. -
Establish the circle:
Place your circular object in the center of the bag where you want the design to sit. Lightly trace around it with a pencil to create the boundary for your fish. -
Draft the central Yin-Yang:
Find the center of your large circle and draw a smaller circle for the traditional Yin-Yang symbol. Sketch the S-curve dividing the two halves, ensuring it flows smoothly. -
Sketch the fish bodies:
Lightly sketch the two koi fish within the larger circle boundary. Position them so they curve around the center, with the nose of one fish chasing the tail of the other. Their bodies should taper gracefully toward the tails. -
Add fin details:
Draw the dorsal fins on the outer curve of each fish and the pectoral fins near the heads. Keep the lines fluid to suggest movement. -
Draft the scales:
Lightly pencil in the grid of scales on both fish. For the ‘white’ fish, you’ll be outlining these later. For the ‘black’ fish, these pencil lines will serve as guides for negative space.
Bleeding Lines?
If ink spreads into fabric grain, your marker might be too juicy. Move the pen faster or switch to a finer tip for outlines to minimize bleeding.
Step 2: Inking the Outline
-
Outline the light fish:
Using your fine-tip fabric marker, carefully go over the pencil lines for the ‘light’ fish (the top one). Ink the outer body shape, the fins, and the head. -
Define the light scales:
Continue with the fine tip to draw the individual scallop-shaped scales on the light fish’s body. Be deliberate here, as these lines create the texture. -
Outline the dark fish:
Ink the outer boundary of the bottom fish. Do not draw the scales in the same way; instead, just endure the outline is clean. -
Ink the central symbol:
Outline the small central Yin-Yang circle and the dividing S-curve. Fill in the dark half and add the two contrasting dots.
Add a Splash
Make the design pop by painting just the eye of each fish with a drop of red textile paint or adding gold ink accents to the scales.
Step 3: Filling and Detailing
-
Fill the dark fish body:
Switch to your broad-tip marker. Carefully fill in the body of the bottom fish with solid black ink. I prefer to work slowly around the scale lines I sketched, leaving thin slivers of un-inked canvas to define the scales. -
Detail the dark fins:
For the fins on the dark fish, color them black but leave thin white stripes or lines to represent the fin rays/texture. This negative space technique makes the details pop. -
Add facial features:
Using the fine tip, draw the eye on the light fish (a simple circle with a dot). For the dark fish, leave a small white circle uncolored for the eye, adding a tiny black dot in the center. -
Refine the tails:
Double-check the tail fins on both fish. Add striations or lines to the light fish’s tail with black ink, and clarify the white lines on the dark fish’s tail. -
Clean up sketch lines:
Once the ink is completely dry (give it a good 15-20 minutes), gently erase any visible pencil marks. Be careful not to smudge the fabric. -
Heat set the design:
To make your bag washable, place a clean cloth over the design and iron it on a high setting (no steam) for a few minutes to set the ink permanently into the fibers.
Now you have a custom, Zen-inspired tote perfect for carrying your daily essentials
Fishbowl Leap With Curved Water

Capture the whimsical moment of a goldfish taking a leap of faith with this charming watercolor tutorial. The scene features a beautifully detailed orange fish suspended in mid-air above a classic round bowl with splashing water effects.
Detailed Instructions
Materials
- Cold press watercolor paper (300 gsm)
- Watercolor paint set (essential colors: orange, red, yellow, phthalo blue, sap green, burnt umber)
- Round watercolor brushes (sizes 2, 4, and 0 for details)
- HB pencil for sketching
- Kneaded eraser
- Two jars of water
- Paper towels
- White gel pen or gouache (optional for highlights)
Step 1: Sketching the Scene
-
Outline the bowl:
Begin by lightly sketching the fishbowl in the lower center of your paper. Draw an ellipse for the rim, then two curved lines coming down to form the rounded body, leaving the bottom slightly flattened. Keep your pencil pressure very light so the graphite doesn’t smudge later. -
Add the water line:
Sketch the water level inside the bowl. Instead of a straight horizontal line, draw an ellipse that mirrors the curve of the rim but sits lower. Break the right side of this ellipse with jagged, uneven lines to indicate where the splash will be. -
Position the fish:
Draw the goldfish floating well above the bowl. Start with a simple teardrop shape for the body, slightly curved to show motion. Add the fan-like tail flowing downward and the dorsal fin on top. -
Sketch the habitat details:
Add small leafy plants anchored at the bottom of the page, some overlapping the front of the bowl and some behind it to create depth. Sketch a small orange shape inside the water—perhaps a friend left behind or a piece of coral.
Unwanted Bloems?
If you get ‘cauliflower’ blooms in your water wash, it means you added wet paint to damp paper too late. Dry it completely, then gently glaze over it to smooth it out.
Step 2: Painting the Goldfish
-
Base wash:
Mix a vibrant orange using yellow and red. Apply a light wash over the entire fish body, leaving the eye area white. I like to drop in a touch of pure yellow on the belly while it’s still wet to make it glow. -
Define the scales:
Once the base layer is dry, mix a slightly darker, reddish-orange. Using your size 2 brush, paint small ‘C’ shapes or u-shapes across the upper body to suggest scales. Let these fade out as you move toward the belly. -
Paint the fins:
Use a diluted mixture of the reddish-orange for the tail and fins. Paint delicate strokes that follow the curve of the tail, leaving tiny slivers of white paper between some strokes to simulate the translucent fin rays. -
Face details:
With your smallest brush (size 0) and a mix of burnt umber and black (or very dark blue), paint the pupil of the eye. Add a tiny outline around the gill cover and the mouth.
Step 3: Creating Glass and Water
-
Outline the glass rim:
Mix a very watery, pale blue-grey (phthalo blue with a touch of grey or brown). Carefully trace the rim of the bowl. The line should be thin and broken in places—don’t draw a continuous heavy outline, as glass is reflective and disappears in spots. -
Paint the water volume:
Apply a very light wash of the blue-grey to the water area inside the bowl. Keep it lighter near the center and slightly darker near the edges to show the volume of the water. -
Create the splash:
Where you sketched the splash earlier, use short, upward strokes with a slightly darker blue mix. Paint small droplets hovering above the splash zone to emphasize the action. -
Add the bottom thickness:
Paint the thick glass bottom of the bowl using a darker concentration of your blue-grey mix. Follow the curve of the bowl’s base, making the glass look substantial and heavy. -
Inner details:
Paint the small orange object inside the bowl with the same colors used for the leaping fish. Keep it simpler and slightly less detailed since it is viewed through water and glass.
Level Up: Metallic Pop
Mix a tiny bit of gold watercolor or metallic ink into your orange paint for the fish scales. It will make the goldfish shimmer realistically when the light hits the paper.
Step 4: Finishing Touches
-
Paint the greenery:
Mix a sap green with a little blue for a cool-toned plant color. detailed the leaves with your size 4 brush. Use a simple pressure stroke—press down to widen the leaf and lift up to taper the point. -
Add shadow grounds:
Mix a neutral grey-brown wash. Apply a quick, horizontal swathe of color underneath the bowl and plants to ground the composition so the bowl isn’t floating in white space. -
Enhance the bubbles:
Using a dark blue/grey and your size 0 brush, outline tiny circles trailing from the splash up toward the fish. Keep the lines very thin. -
Final highlights:
If you lost any sparkling highlights, use a white gel pen or a tiny dot of white gouache to add a glint to the fish’s eye, the top of the water rim, and the wettest part of the splash.
Now you have a dynamic moment frozen in time, ready to frame or give as a gift
Tattoo-Style Fish With Decorative Waves
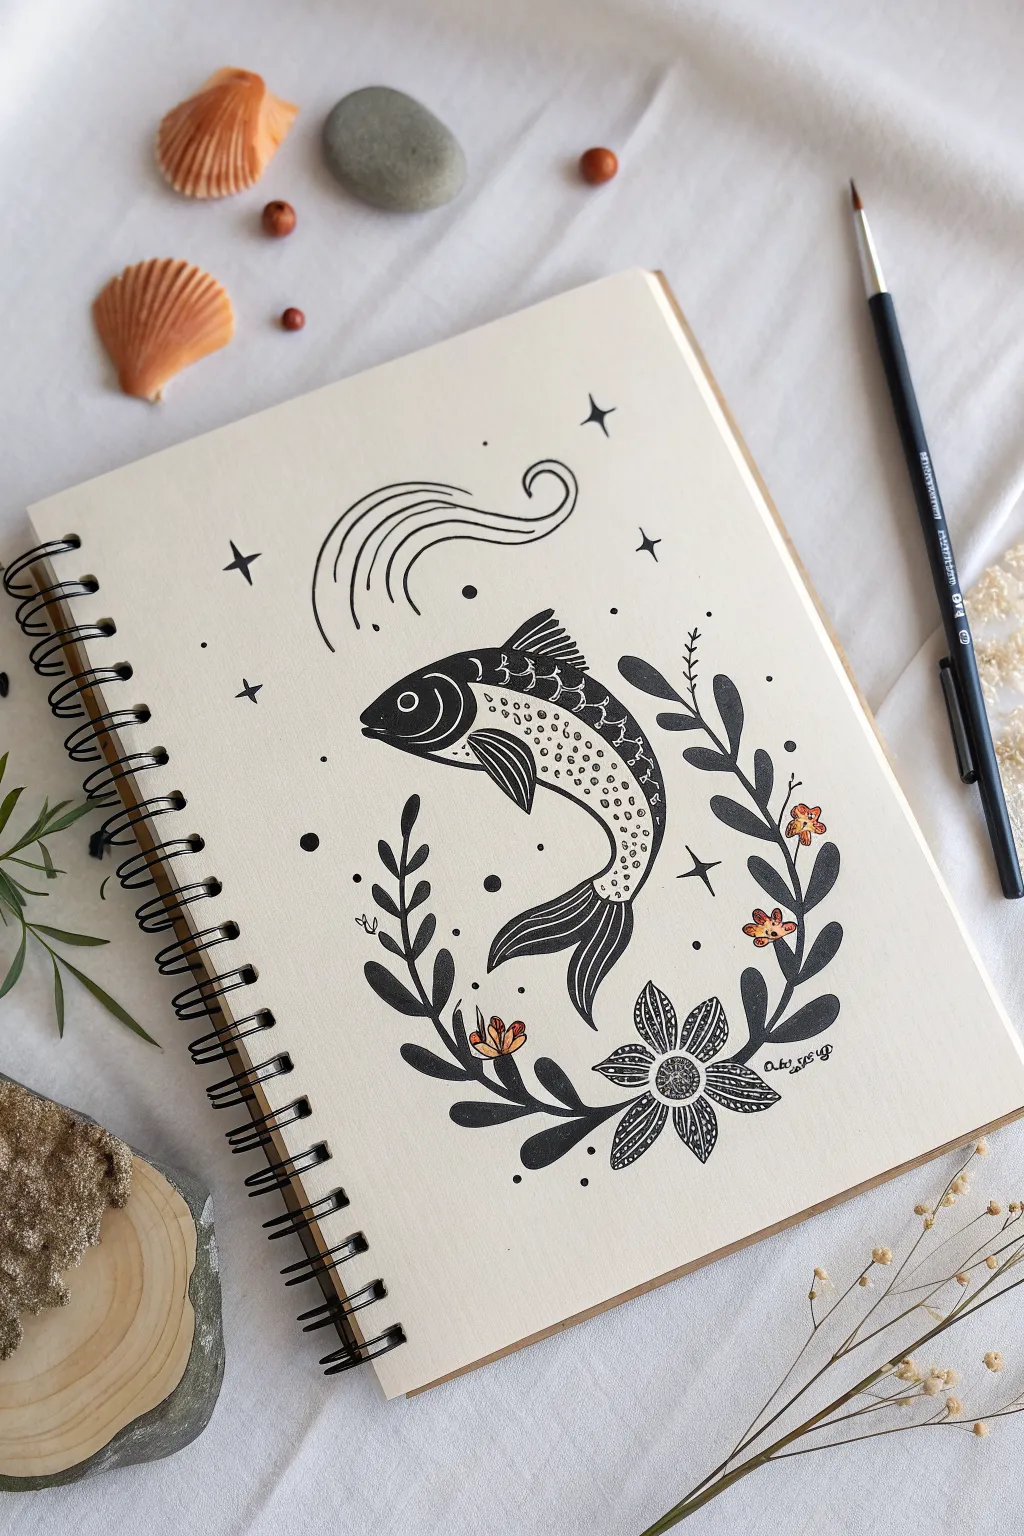
This striking illustration blends boldness with delicacy, featuring a spotted fish leaping amidst floral elements and celestial stars. The high-contrast black ink style mimics the clean lines of a traditional tattoo, making it a perfect exercise for practicing linework and stippling techniques.
Step-by-Step Tutorial
Materials
- Spiral-bound sketchbook or mixed media paper (light cream or off-white)
- Black fineliner pens (sizes 0.1, 0.3, and 0.5mm)
- Black brush pen or broad marker
- Pencil (HB or 2B) for sketching
- Soft eraser
- Orange or amber-colored pencil or marker
Step 1: Sketching the Layout
-
Define the central curve:
Start by lightly sketching a large ‘C’ curve in the center of your page with your pencil. This will serve as the spine of the fish, capturing its jumping motion. -
Outline the fish body:
Flesh out the fish’s shape around that spine line. Taper it towards the tail and round it off at the head. Add a triangle shape for the dorsal fin on top and sketches for the pectoral and tail fins. -
Map the botanical frame:
Sketch two main curved lines stemming from the bottom, reaching up the sides like brackets. These will become the leafy branches that cup the fish. -
Place focal elements:
Draw circles to mark where the flowers will go—one large one at the bottom center and a couple of smaller ones tucked into the leaves on the right. Add a few small crosses to plan your stars.
Step 2: Inking the Fish
-
Outline the silhouette:
Using a 0.5mm fineliner, go over your pencil lines to create a smooth, continuous outline for the fish’s body. Break the line slightly where fins attach to keep the look organic. -
Detail the head:
Draw the gill curve and the eye. Use a thicker pen or brush pen to fill in the dark space around the eye and at the front of the snout, leaving a thin white rim for definition. -
Fill the fins:
For the fins, switch to a brush pen or broad marker. Fill them in solid black, leaving very thin white stripes to suggest the fin rays. -
Create the scale pattern:
Along the top back of the fish, draw a series of small, interlocking scallops for scales. As you move down towards the belly, switch to stippling—dots that are dense near the top and sparse near the bottom. -
Add the dorsal details:
Ink the top dorsal fin. Instead of solid black, use varying line weights to draw stripes, keeping it lighter than the lower fins to create visual balance.
Ink Smudge Rescue
If you accidentally smudge wet ink, turn it into a ‘bubble’ or extra dot depending on the size. In this stippled style, imperfections can easily become part of the background texture.
Step 3: Drawing the Botanicals
-
Ink the main stems:
Trace over your pencil guides for the stems with the 0.5mm pen, making them slightly thicker at the base and tapering them toward the tips. -
Draw solid leaves:
Using your brush pen or broad marker, draw the simple, almond-shaped leaves attached to the stem. Fill them in completely solid black for that tattoo-flash aesthetic. -
Outline the main flower:
For the large bottom flower, draw six distinct petals. Inside each petal, draw a smaller petal outline. Draw a circle for the center. -
Texture the flower:
Fill the space between the inner and outer petal lines with dense stippling or cross-hatching to make it dark. Leave the inner petal shape white, adding just a few dots for texture. -
Add tiny blooms:
Ink the small three-petaled flowers nestled in the leaves on the right side. Keep these outlines simple and delicate.
Level Up: Gold Leaf
Instead of orange marker, apply a tiny amount of gold leaf or metallic gold paint to the flower centers and the fish’s eye for a luxurious, illuminated manuscript feel.
Step 4: Atmosphere and Color
-
Draw the waves:
Above the fish, draw three or four fluid, wavy lines that curl at the end, mimicking stylized ocean currents or wind. -
Add celestial details:
Using a fine 0.1mm pen, draw four-pointed stars (diamonds with curved sides) scattered around the composition. Fill some in solid black and leave larger ones as outlines. -
Scatter the stardust:
Place random dots of varying sizes around the fish and leaves to tie the composition together and fill empty negative space. -
Erase pencil marks:
Wait until the ink is completely dry—I usually give it a full five minutes just to be safe—and then gently erase all remaining pencil sketches. -
Apply the pop of color:
Take your orange pencil or marker and lightly color the small three-petaled flowers and just two petals of the main bottom flower. This subtle accent warms up the heavy black ink.
Step back and admire the contrast between the bold black shapes and the delicate stippling you have achieved
Geometric Low-Poly Fish
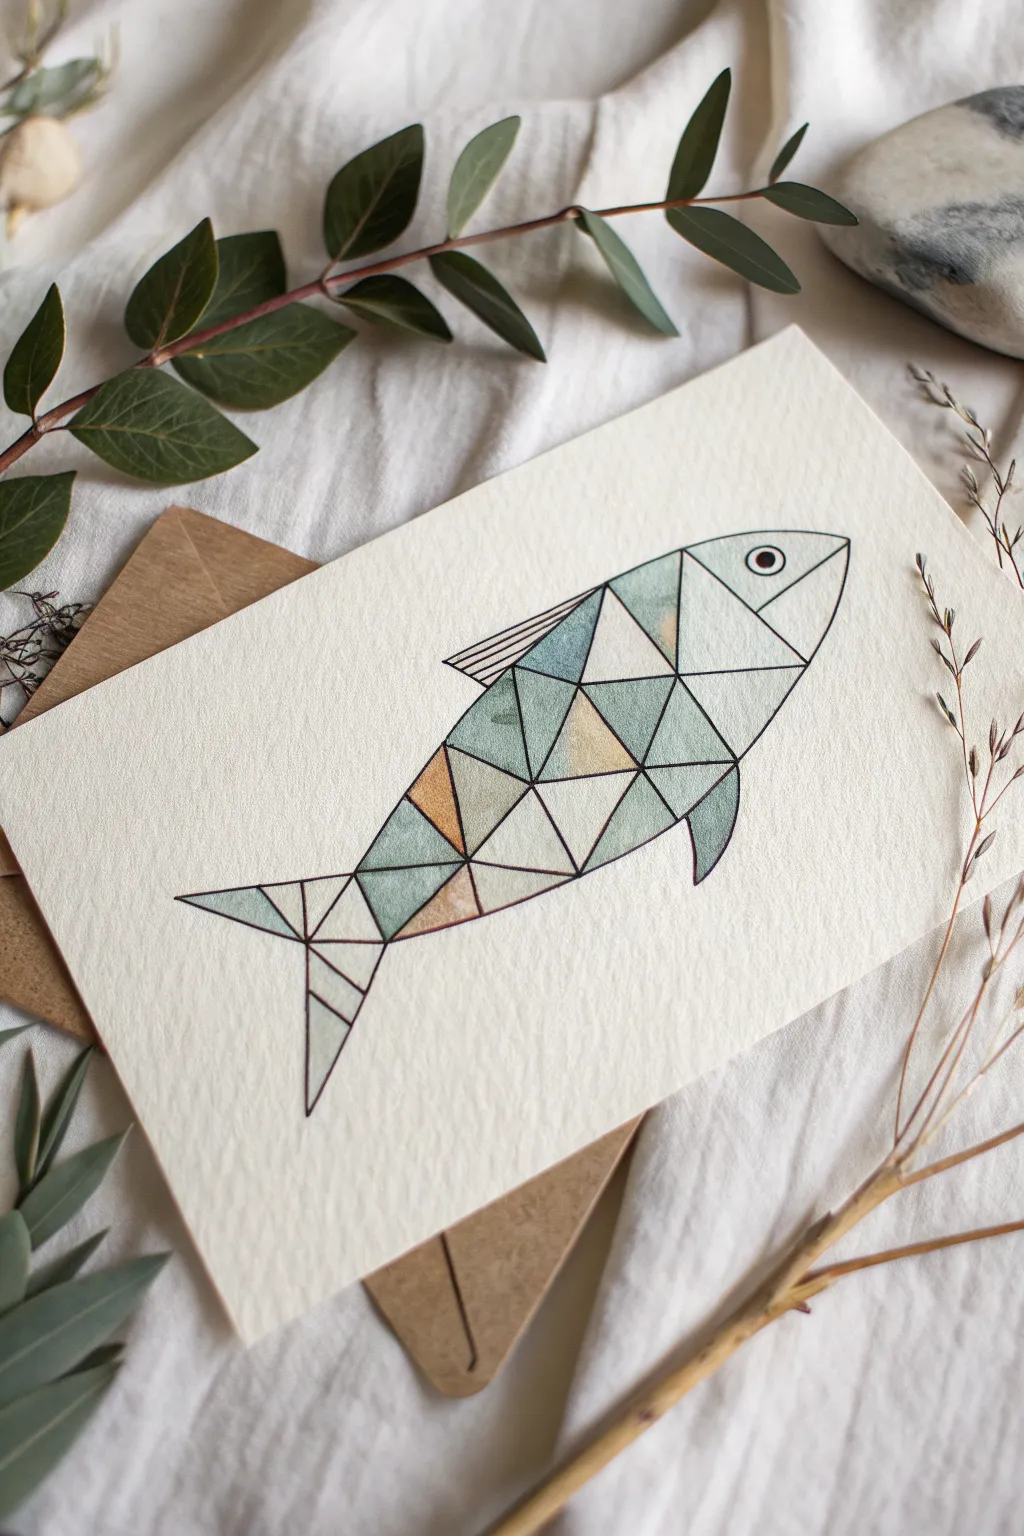
This elegant project combines the precision of geometric design with the soft, organic flow of watercolors. By breaking a simple fish shape into angular facets, you’ll create a modern low-poly illustration perfect for framing or greeting cards.
Step-by-Step Guide
Materials
- Cold press watercolor paper (300 gsm)
- Pencil (HB or 2H)
- Ruler or straight edge
- Fine liner pen (black, waterproof, 0.3mm or 0.5mm)
- Watercolor paints (Indigo, Teal, Yellow Ochre, Burnt Sienna)
- Small round paintbrush (size 2 or 4)
- Eraser
- Jar of water
- Paper towel
Step 1: Planning the Structure
-
Outline the body:
Start by lightly sketching the main silhouette of the fish using your pencil. Draw an elongated oval shape that tapers towards the tail end. -
Add defining features:
Sketch a simple triangle for the tail fin and a small curved shape for the pectoral fin on the lower body. Add a small dorsal fin on the top edge. -
Define the head:
Draw a curved vertical line to separate the head from the body. Inside the head area, sketch a small circle for the eye. -
Create the grid:
Using a ruler, begin drawing diagonal lines across the body of the fish. These don’t need to be perfectly symmetrical; random angles often look better. -
Form the triangles:
Intersect your first set of diagonal lines with lines going the opposite direction. Your goal is to break the entire interior of the fish into various sized triangles and quadrilateral shards. -
Refine the geometry:
Check your pencil sketch. Ensure every shape is closed and that the ‘low-poly’ faceted look is consistent across the body, tail, and fins.
Bleeding Lines?
If paint bleeds between triangles, you’re working too fast. Let each shape dry before painting its neighbor, or use a hair dryer on low heat to speed up the process between sections.
Step 2: Inking the Design
-
Trace the silhouette:
Take your waterproof fine liner and carefully trace the outer boundary of the fish. Use a ruler if your hand isn’t steady, but a slightly organic line works well too. -
Ink the internal lattice:
Go over all your internal geometric pencil lines with the pen. Be precise where lines meet; you want clean vertices without overshooting the corners. -
Detail the eye and fins:
Ink the eye circle, filling in the pupil but leaving a tiny highlight. For the dorsal fin, add a few straight lines to suggest spines. -
Erase guidelines:
Wait at least five minutes for the ink to dry completely to avoid smudging. Then, gently erase all pencil marks to leave a clean black-and-white framework.
Metallic Pop
Once the watercolors are fully dry, paint a few random triangles with metallic gold or silver watercolor paint. It adds a sophisticated shimmer that catches the light.
Step 3: Adding Color
-
Prepare your palette:
Mix watery puddles of your colors. You want very transparent washes of teal, muted blue-grey, and a soft sandy ochre. -
Paint the first triangles:
Dip your brush in the teal mix and paint a few non-adjacent triangles. I usually adhere to a rule of never painting two touching shapes wet-on-wet to prevent bleeding. -
Introduce variation:
Switch to your blue-grey mix (indigo with lots of water). Fill in scattered triangles, leaving some white space or filling others later. -
Add warmth:
Use the yellow ochre or burnt sienna mix to paint a few select triangles, particularly towards the belly or tail. This warmth balances the cool sea tones. -
Create gradients:
For a dynamic look, try dropping a tiny bit of darker pigment into the corner of a wet triangle and letting it bloom outward. -
Fill remaining gaps:
Once the initial shapes are dry, go back and paint the remaining empty triangles. Vary the saturation so some are pale and others are deeper in tone. -
Final touches:
Let the paint dry completely. If the paper has buckled slightly, you can place it under a heavy book overnight to flatten it out.
Enjoy your sleek, geometric artwork as a minimalistic addition to your wall decor
Fantasy Hybrid Fish Creature
Capture the delicate beauty of marine life with this mixed-media illustration that combines fine liner work with soft color washes. The result is a charming, vintage-inspired fish swimming amongst stylized aquatic foliage.
How-To Guide
Materials
- Heavyweight watercolor paper (hot press or cold press)
- Pencil (HB or H for light sketching)
- Kneadable eraser
- Fine liner pens (sizes 0.1 and 0.3, black or dark grey)
- Colored pencils (teal, rust orange, muted red)
- Watercolor paints (optional, for soft background washes)
- Small round brush
Step 1: Sketching the Composition
-
Outline the body shape:
Begin by lightly sketching a long, streamlined oval shape in the center of your paper. This will serve as the main body of the fish. Keep your pencil pressure very light so these lines can be erased later. -
Add fins and tail:
Sketch a forked tail at the back end. Add a dorsal fin along the top back and pectoral fins near the gill area. The fins in this style are slightly exaggerated and stylized, almost like leaves. -
Draw the facial features:
Place a large, round eye near the front of the head. Sketch a mouth line that gives the fish a slight, peaceful expression, and mark out the curve of the gill cover behind the eye. -
Placement of foliage:
Lightly draw sweeping, curved lines around the fish to indicate where the seaweed and aquatic plants will go. One stem should curve under the belly, and another should rise vertically behind the dorsal fin.
Scale Simulation
Don’t draw every scale! Suggest them by grouping small, scalloped marks in shadow areas (like under the belly or fins) while leaving highlighted areas smooth.
Step 2: Inking the Details
-
Ink the main outline:
Using your 0.3 fine liner, carefully trace over your pencil sketch of the fish’s body. Use smooth, confident strokes to create clean lines. -
Add texture to the scales:
Switch to a finer 0.1 pen. Instead of drawing every single scale, use stippling (small dots) and small broken lines along the belly and back to suggest texture. Focus the density of dots near the top of the fish for shading. -
Define the fins:
Draw the spines of the fins with the 0.1 pen. Add fine lines between the spines to show the delicate membrane, keeping the lines parallel and close together. -
Ink the plant life:
Trace your seaweed sketches. For the leafy plant at the bottom, use solid lines for the stems and leaves. For the feathery plant at the top, use short, quick dashes to mimic small bristles or flowers. -
Clean up:
Once the ink is completely dry—give it a few minutes—gently erase all underlying pencil marks with your kneadable eraser.
Smudged Ink?
If your fine liner smears when erasing pencil marks, you likely erased too soon. Wait at least 5-10 minutes for ink to cure fully before using an eraser.
Step 3: Applying Color
-
Base layer of teal:
Take a teal or blue-green colored pencil. Lightly shade the upper back of the fish and the fins. Use a very soft touch to keep the paper texture visible. -
Adding warmth:
Use a rust orange or muted red pencil to shade the middle section of the fish’s body. Layer this color lightly over the teal in the transition areas to blend them naturally. -
Deepening the foliage:
Color the bottom seaweed with a solid teal, pressing slightly harder to make it darker than the fish. For the top feathery plant, use the rust color to create contrast. -
Detailing the eye:
Color the iris of the eye with teal, leaving a tiny white highlight uncolored to bring life to the creature. Darken the pupil with your black pen. -
Creating texture with pattern:
Using the rust pencil, draw small scallops or ‘C’ shapes on the reddish part of the fish’s body to simulate specific scale patterns without overpowering the drawing.
Step 4: Final Touches
-
Adding bubbles:
Draw several small circles of varying sizes floating around the fish using the rust-colored pencil. Keep lines very faint. -
Watercolor modification (optional):
If you want a softer look, you can lightly brush water over the colored pencil areas (if they are watercolor pencils) or add very dilute washes of paint inside the bubbles. -
Review contrast:
Step back and look at your drawing. If the fish looks too pale against the white paper, darken the teal outline on the back just a little more to ground the image.
Now you have a serene aquatic friend ready to frame or gift


Have a question or want to share your own experience? I'd love to hear from you in the comments below!