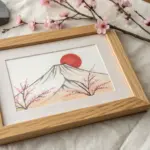
If you love the look of Ancient Egyptian art but want it to feel totally doable, you’re in the right headspace. I’m sharing my favorite easy Egyptian drawing ideas that start with simple shapes and end with that instantly recognizable tomb-painting vibe.
Simple Pyramid Trio
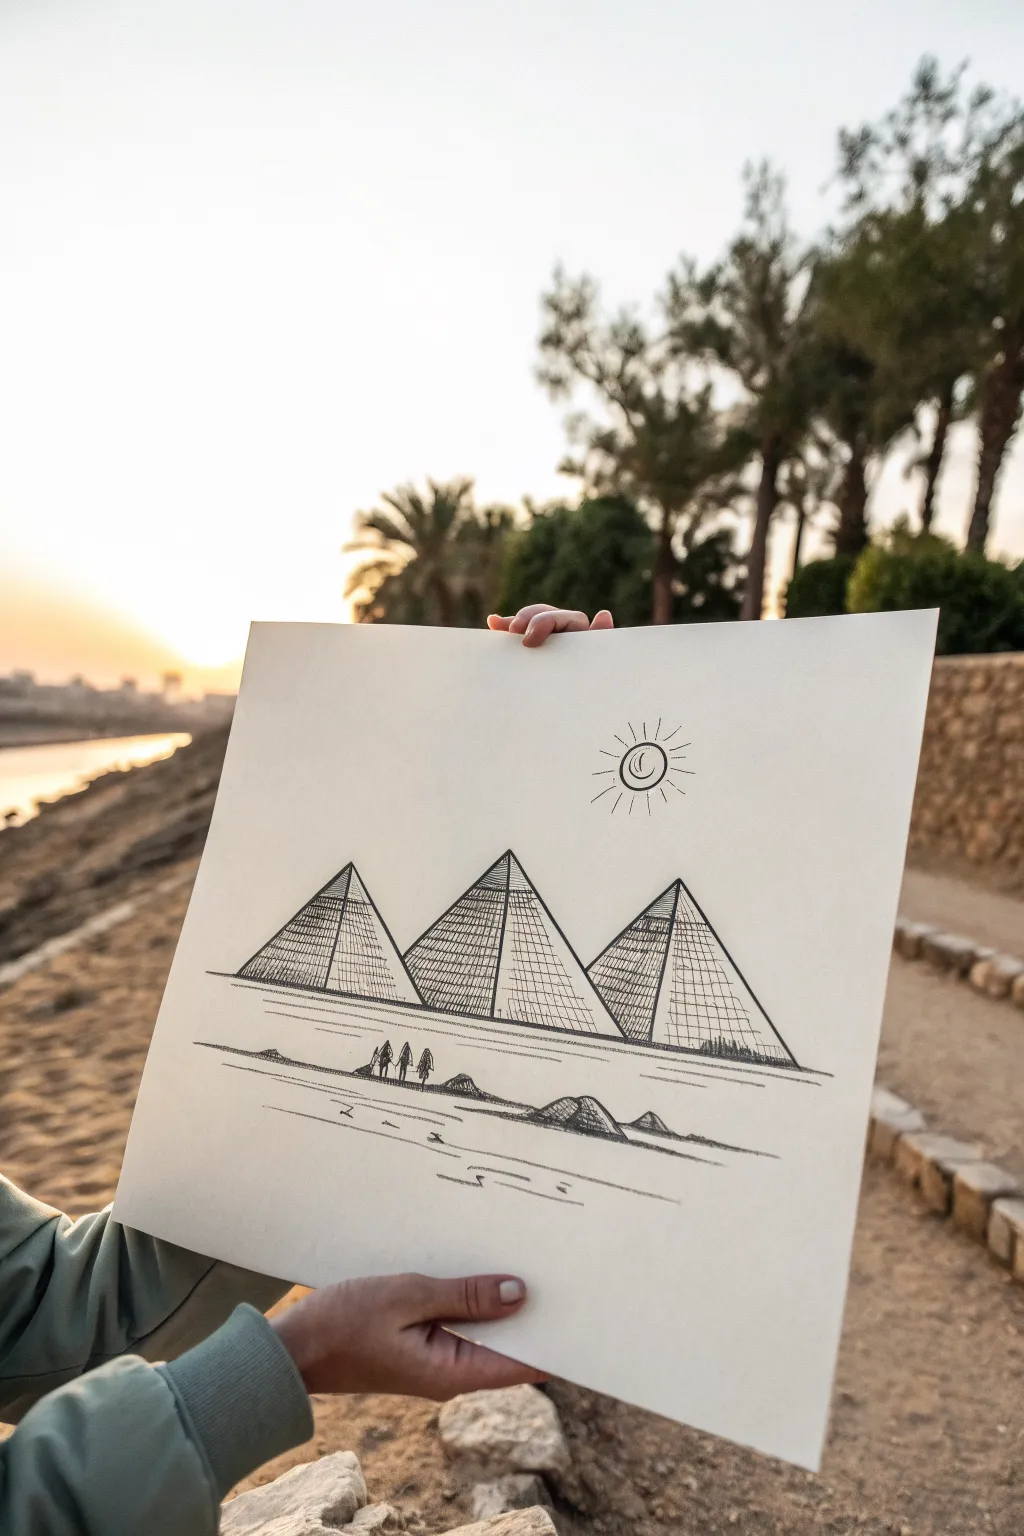
Capture the timeless mystery of the Giza plateau with this clean, line-art style drawing. This project focuses on geometric precision and hatching techniques to create depth and texture using simple black ink.
Step-by-Step Guide
Materials
- Large sheet of thick drawing paper or Bristol board (A3 or similar)
- Pencil (HB or 2H for sketching)
- Ruler
- Fine liner pens (sizes 0.1, 0.3, and 0.5)
- Eraser
Step 1: Planning the Layout
-
Establish the horizon:
Begin by lightly sketching a horizontal line about one-third of the way up from the bottom of your page. This doesn’t need to be perfectly straight; a slight, natural waver gives it an organic desert feel. -
Outline the central pyramid:
Using your ruler and pencil found the center of the page. Draw a large triangle for the middle pyramid first. The base should rest on your horizon line, and the peak should reach towards the upper third of the paper. -
Add flanking pyramids:
Draw the left and right pyramids. Make the left one slightly smaller and overlapping behind the central one. The right pyramid stands slightly apart. Ensure their perspectives match by drawing a vertical line down the center of each triangle to define the two visible faces.
Step 2: Inking the Structures
-
Inking the main outlines:
Switch to your 0.5 fine liner. Carefully trace over the outer edges of your three pyramids. I find that holding the pen more upright helps keep the line width consistent against the ruler. -
Define the faces:
Draw the vertical divider line down the center of each pyramid. This edge separates the light side from the shadowed side. -
Erase pencil guides:
Wait a moment for the ink to dry completely, then gently erase the pencil marks within the pyramids so you have a clean slate for texturing.
Uneven Ink Lines?
If your ruled lines smudge or bleed, lift the ruler straight up rather than sliding it. Consider wiping the ruler’s edge with a tissue between strokes.
Step 3: Creating Texture and Depth
-
Horizontal brickwork (Left Faces):
On the left face of each pyramid, use the 0.3 pen to draw tightly spaced horizontal lines. These represent the layers of stone blocks. They don’t need to be ruled; freehand lines add character. -
Cross-hatching (Right Faces):
On the right face of every pyramid (the shadow side), draw the same horizontal lines, but then cross them with vertical or diagonal lines. This cross-hatching makes these sides appear darker. -
Deepen the shadows:
Go back over the bottom corners of the shadowed sides with your 0.1 pen, adding extra hatch marks to create a gradient of darkness near the base.
Add a Sunset Glow
Use a diluted wash of watercolor or tea to stain the paper before drawing. This gives an ‘antique parchment’ look that suits the ancient subject perfectly.
Step 4: Atmospheric Details
-
Draw the sun:
In the upper right sky, draw a simple circle. Inside it, draw a crescent moon shape offset to the side. Radiate simple, straight lines outward for sunbeams, varying their lengths slightly. -
Sketch the figures:
Just below the pyramids on the horizon line, draw three tiny figures using simple shapes—triangles for bodies and dots for heads. Their small scale emphasizes the massive size of the monuments. -
Foreground dunes:
In the immediate foreground, closer to the bottom edge, sketch a few low, rolling mounds to suggest smaller dunes or rocks. -
Ground texture:
Use horizontal, broken lines to fill the space between the foreground dunes and the pyramids. These striations suggest the vast, flat desert floor. -
Final clean up:
Check for any remaining pencil marks and erase them. Strengthen the horizon line with a few broken, thicker strokes to ground the entire scene.
Now you have a striking geometric landscape ready to be framed or gifted to a travel lover
Easy Sphinx Side View
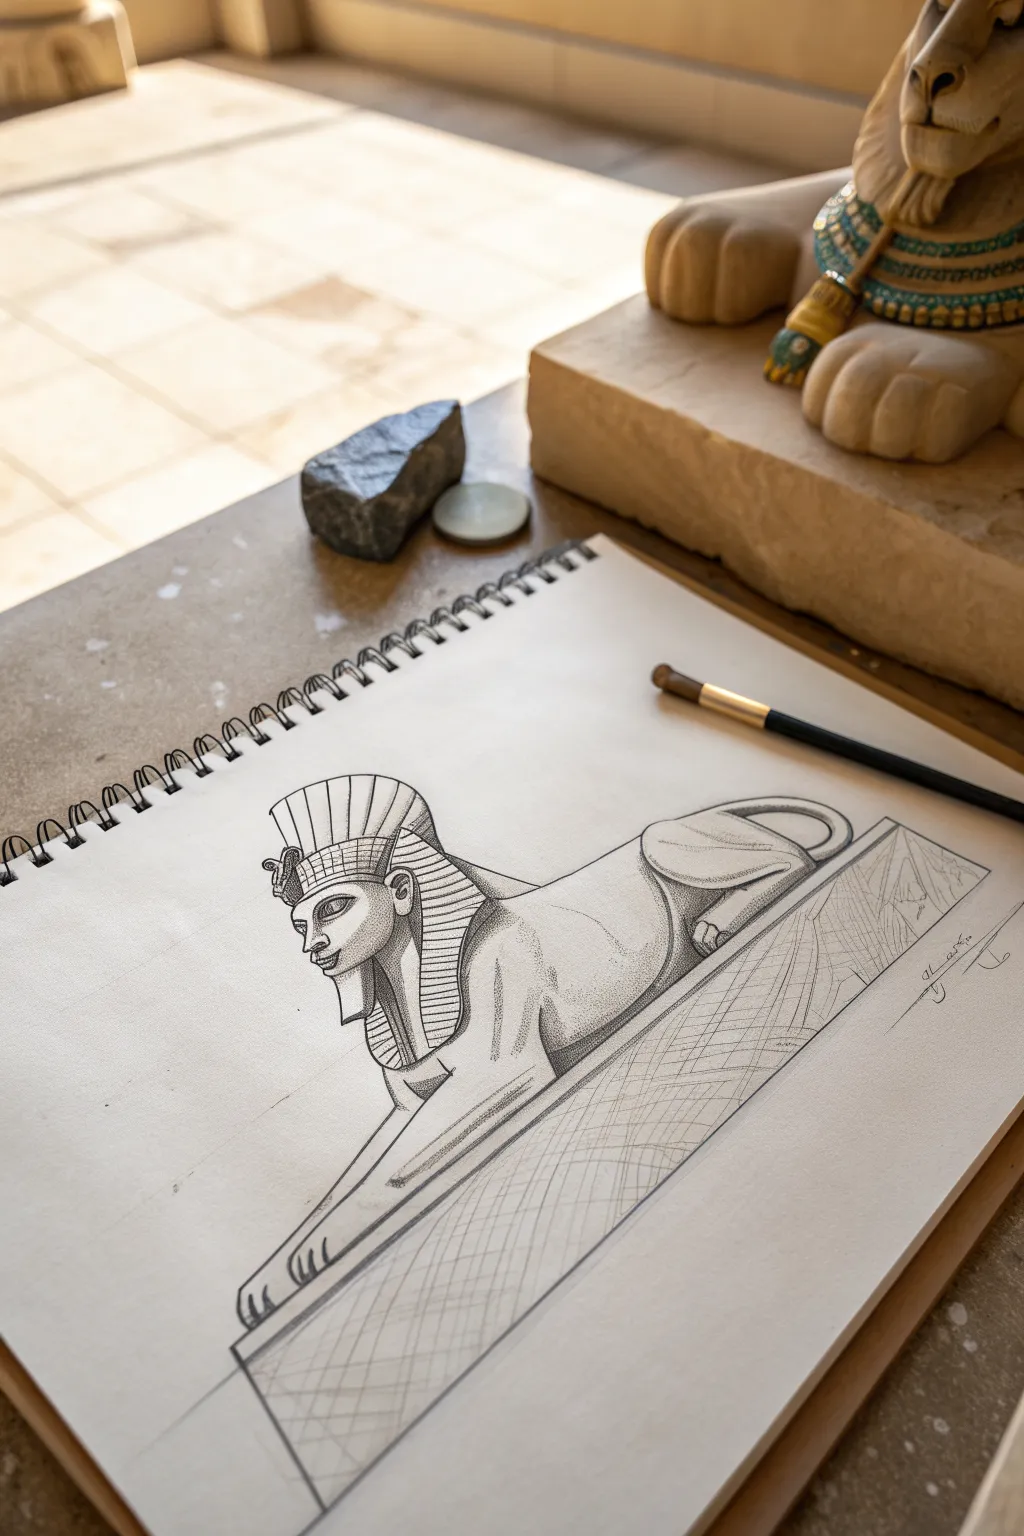
Capture the timeless mystique of Ancient Egypt with this detailed profile sketch of the Great Sphinx. This project focuses on clean linework and subtle shading to bring out the iconic headdress and resting lion body.
Detailed Instructions
Materials
- Sketchbook with smooth drawing paper (approx. A4 size)
- H pencil (for initial guidelines)
- HB or 2B pencil (for main outlines)
- Fine-point black pen or dark charcoal pencil (for final definition)
- Eraser (kneaded preferred)
- Ruler
Step 1: Laying the Foundations
-
Establish the Base Line:
Begin by drawing a long, diagonal line across the bottom third of your page using your ruler. This will act as the ground line for the Sphinx’s pedestal. -
Rough in the Body Shape:
Lightly sketch a large, elongated oval shape resting on your diagonal line to represent the lion body. Add a vertical rectangle rising from the front (left side) of the oval for the neck and head area. -
Define the Head Profile:
At the top of the vertical rectangle, sketch a simple circle for the head cranium. Add a smaller, protruding shape to the left for the face profile, marking the nose and chin placement.
Uneven Proportions?
Check the head size against the body length. The body should be roughly 3 to 3.5 times the length of the head. Lightly sketch adjustment ovals before committing to dark lines.
Step 2: Constructing the Sphinx
-
Outline the Nemes Headdress:
Draw the iconic headdress shape. Start from the top of the forehead, curving up and back, then draping down behind the neck onto the shoulders. It should flare out slightly at the bottom. -
Detailing the Face:
Refine the facial profile. Draw a straight, prominent nose, closed lips with a slight smile, and a defined chin. Sketch the almond-shaped eye high on the cheek. -
Shaping the Chest and Paws:
Connect the head to the body with a sturdy neck. Extend the front legs forward from the chest, ending in large, rounded paws resting flat on the pedestal. -
Refining the Hindquarters:
Curve the back of the oval downwards to form the haunches. Draw the back leg folded under the body, with the tail curling up and around the rear hip.
Make it Weathered
To age your Sphinx like the real monument, add small cracks, chips in the nose, or eroded edges on the headdress using jagged, broken lines instead of smooth ones.
Step 3: Adding Details and Texture
-
Striping the Headdress:
Use your HB pencil to draw curved, parallel lines across the entire headdress and the ‘lappets’ (the parts hanging over the chest). Keep the spacing consistent. -
Drawing the Pedestal:
Use your ruler to create a 3D box effect for the base. Draw a second diagonal line parallel to your first one, and connect them with short vertical lines at the corners to show depth. -
Cross-Hatching the Base:
Fill the side panel of the pedestal with a crisscross grid pattern to simulate stone blocks or texture. Keep these lines lighter than the main subject. -
Inking the Outline:
Switch to your fine-point pen or sharpen your dark pencil. Go over the main outer contours of the Sphinx with a confident, continuous line to lock in the shape. -
Adding Stippled Shading:
Instead of smudging, use stippling (tiny dots) to shade. Concentrate dots under the chin, beneath the chest, and along the lower belly to create volume.
Step 4: Final Touches
-
Defining the Paws:
Draw clear, curved lines on the paws to separate the toes (claws). This adds realism to the lion features. -
Erasing Guides:
Once your ink or dark pencil work is completely set, carefully erase all your underlying construction lines and the initial diagonal guide. -
Reinforcing Contrast:
Go back over the darkest areas—like the eye pupil and the deepest shadows under the body—to make the drawing pop against the white paper.
Your finished drawing now stands as a noble tribute to ancient artistry, ready to guard your sketchbook pages

Pharaoh Profile Bust
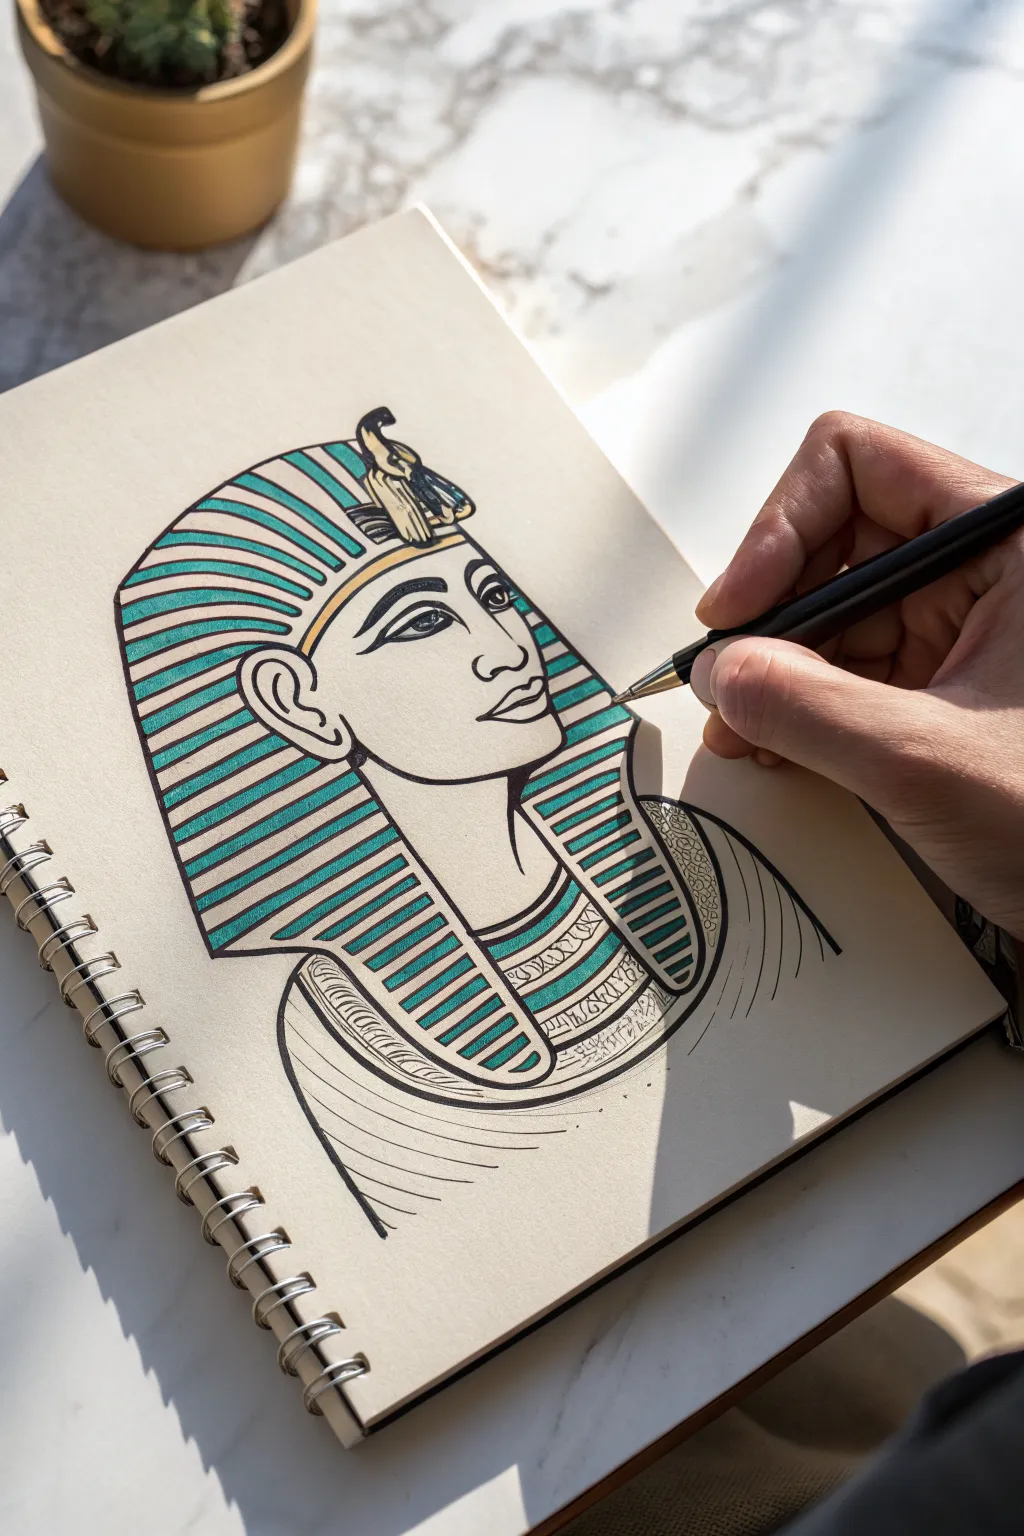
Capture the timeless elegance of ancient history with this striking profile drawing of an Egyptian Pharaoh. Using bold ink lines combined with teal and gold accents, this project creates a professional-looking illustration that pops off the sketchbook page.
Step-by-Step Tutorial
Materials
- Spiral-bound sketchbook (smooth, heavyweight paper)
- Pencil (HB or 2B)
- Eraser
- Fine liner pens (Black, 0.3mm and 0.8mm)
- Teal or turquoise brush marker
- Gold metallic paint pen or gel pen
Step 1: Sketching the Guidelines
-
Outline the head shape:
Begin lightly with your pencil. Sketch a circle for the cranial area and extend a jawline downwards to form the profile view of a face. -
Draft the nemes headdress:
Around the head shape, draw the large, triangular outline of the nemes headdress. It should arch over the forehead and sweep down behind the ear, wider at the bottom than the top. -
Position facial features:
Draw faint horizontal lines to mark where the eye, nose, and mouth will sit. Profile views rely on accurate spacing, so take a moment to check your proportions here. -
Detail the profile:
Refine the pencil sketch of the face. Draw the sloping forehead, the bridge of the nose, the lips, and the chin. Add an almond-shaped eye and the distinct eyebrow line.
Steady Hands
For the cleanest stripes on the headdress, turn your sketchbook so your hand pulls the pen naturally toward you rather than pushing it away.
Step 2: Inking the Structure
-
Ink the main outlines:
Switch to your thicker fine liner (0.8mm). Carefully trace over your pencil lines for the profile of the face, the neck, and the outer shape of the headdress. -
Define the ear:
Using a slightly thinner pen (0.3mm), ink the intricate curves of the ear. The ear should sit just in front of the headdress fabric. -
Draw the Uraeus:
At the center of the forehead band, ink the small cobra shape (the Uraeus). Keep the details simple but distinct. -
Add headdress stripes:
Draw the horizontal stripes across the headdress. These should curve slightly to follow the volume of the head. I find starting from the top and working down helps keep the spacing consistent. -
Add the collar:
Ink the semi-circular collar piece (the usekh) at the base of the neck, adding concentric curved lines inside it.
Step 3: Coloring and Detailing
-
Erase pencil marks:
Wait until the ink is completely dry to touch, then gently erase all visible graphite lines to clean up your workspace. -
Fill the teal stripes:
Take your teal brush marker. Color in alternating stripes on the headdress. Leave every other stripe white for now. -
Color the collar:
Apply the teal marker to select bands within the collar necklace, maintaining a pattern of colored and uncolored sections. -
Add gold accents:
Use the gold metallic pen to color the forehead band, the Uraeus cobra, and the thin stripes that were left white on the headdress. -
Enhance the eyes:
With the 0.3mm black pen, darken the pupil and add the traditional heavy eyeliner look (kohl) extending from the corner of the eye.
Ink Smearing?
If your markers smear the black fineliner, switch the order: apply the color blocks first, let them dry, and then draw the black outlines on top.
Step 4: Final Touches
-
Texture the fabric:
Add very fine, subtle lines or small hatched marks on the white garment below the collar to suggest fabric folds. -
Thicken outer lines:
Go back over the outermost silhouette lines with your thickest pen. This bolder outline helps separate the subject from the background. -
Review contrast:
Check your teal stripes; if they look streaky, apply a second layer of marker for a solid, opaque look. -
Sign your work:
Find a discreet spot near the shoulder or bottom corner to add your signature or initials.
Now you have a regal piece of ancient craftsmanship right in your modern sketchbook

Queen With Tall Crown
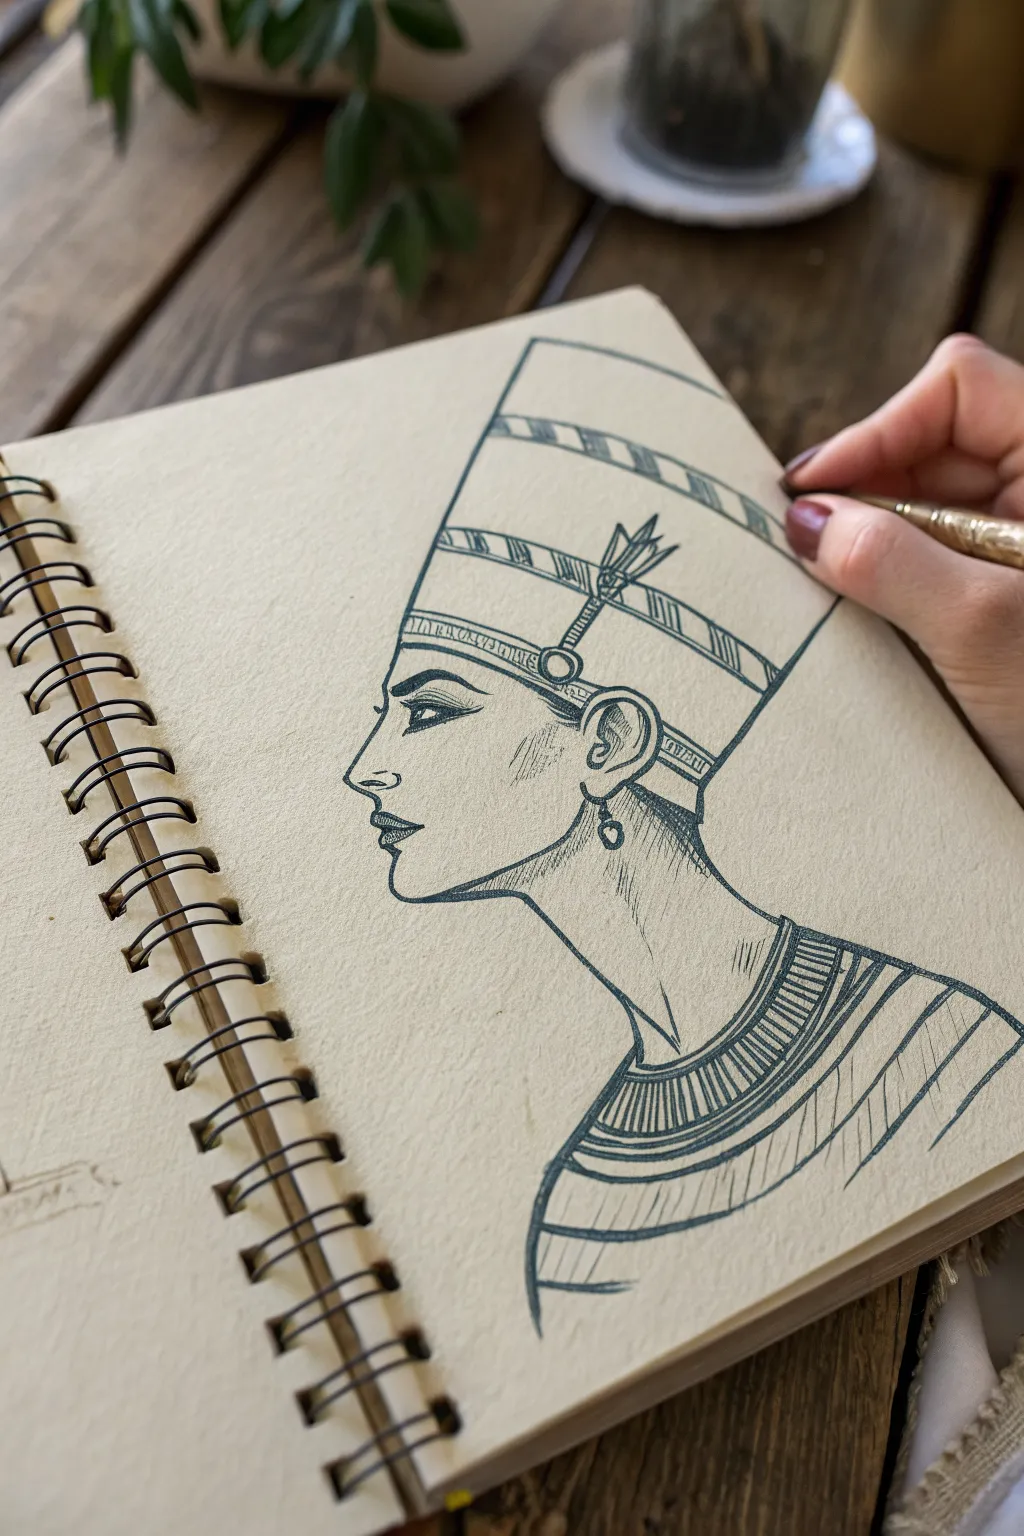
Capture the elegance of ancient Egypt with this striking profile drawing of Queen Nefertiti on tan toned paper. The stark contrast of dark ink against the warm background creates a classic, timeless look that emphasizes line work and form.
Step-by-Step Guide
Materials
- Spiral-bound sketchbook with tan/toned paper
- HB or 2B pencil (for initial sketch)
- Kneadable eraser
- Fine liner pen (0.3mm or 0.5mm, black or dark sepia)
- Thicker marker or brush pen (optional, for filling large dark areas)
Step 1: Laying the Foundations
-
Establish the Head Shape:
Begin with your pencil by drawing a simple circle for the skull and a descending curve for the jawline to map out the basic profile shape. -
Block in the Crown:
Sketch a tall, rectangular shape extending upward and slightly backward from the forehead. Nefertiti’s crown is iconic—it widens slightly as it goes up before flattening at the top. -
Define facial Proportions:
Mark horizontal guidelines for the eyes, nose, and mouth. The nose should be straight and prominent, while the lips are full and slightly upturned at the corners. -
Outline the Neck and Shoulders:
Draw a long, slender neck extending gracefully from the jawline. Curve the line outward at the base to suggest the beginning of the shoulder and the collar necklace.
Clean Lines
Turn your sketchbook as you draw the long curves of the crown or neck. Pulling the pen toward your body often creates steadier lines than pushing away.
Step 2: Defining the Features
-
Draft the Profile:
Refine the pencil lines of the face. Pay special attention to the nose’s bridge and the distinct shape of the lips. The chin should be firm but rounded. -
Sketch the Eye:
Draw the eye in a stylized, almond shape, typical of Egyptian art. Add the heavy eyelid line and the extended cosmetic line (kohl) stretching toward the ear. -
Detail the Ear:
Place the ear fairly high on the side of the head, aligning roughly with the eye and nose. Sketch the inner cartilage details and add a small loop for an earring. -
Add Crown Details:
Draw the horizontal bands across the crown. Add the uraeus (the royal cobra symbol) at the front, rising from the brow band.
Step 3: Inking the Drawing
-
Trace the Main Lines:
Switch to your fine liner pen. Carefully trace over your refined pencil sketch with confident, clean strokes. I prefer starting with the profile to anchor the drawing. -
Define the Eye and Eyebrow:
Ink the eye fully black, leaving a tiny speck of white paper for a highlight if you wish. Thicken the eyebrow line to match the heavy kohl style. -
Ink the Crown Bands:
Draw the parallel lines for the decorative bands on the crown. Use steady hand movements to keep the curves consistent with the head’s roundness. -
Detail the Collar:
Ink the broad collar necklace (usekh) with curved concentric lines at the base of the neck. Add vertical dashes between the lines to represent beads.
Historical Color
Use watercolor or colored pencils to tint the crown blue and the necklace gold and red, mimicking the famous painted bust of Nefertiti found in Berlin.
Step 4: Shading and Texture
-
Erase Pencil Guidelines:
Once the ink is completely dry, gently run your kneadable eraser over the page to remove all graphite marks, leaving a clean inked image. -
Add Crown Texture:
Use vertical hatching lines to shade the main body of the crown. Keep these lines relatively loose to suggest the texture of the material without making it solid black. -
Shade the Face:
Apply light hatching under the cheekbone and jawline. Keep the strokes short and follow the contour of the face to give it a three-dimensional feel. -
Darken the Neck Shadow:
Add denser cross-hatching under the chin and along the front of the neck. This heavy shadow helps push the chin forward and defines the anatomy. -
Accentuate the Lips:
Fill in the upper lip slightly darker than the lower lip. Use tiny, curved strokes to show the roundness of the mouth. -
Final Contrast Check:
Look over the drawing for areas that need more depth. Deepen the shadows in the ear and underneath the collar necklace to make the portrait pop off the page.
Now you have a regal piece of history captured right in your notebook
BRUSH GUIDE
The Right Brush for Every Stroke
From clean lines to bold texture — master brush choice, stroke control, and essential techniques.
Explore the Full Guide
Eye of Horus Doodle
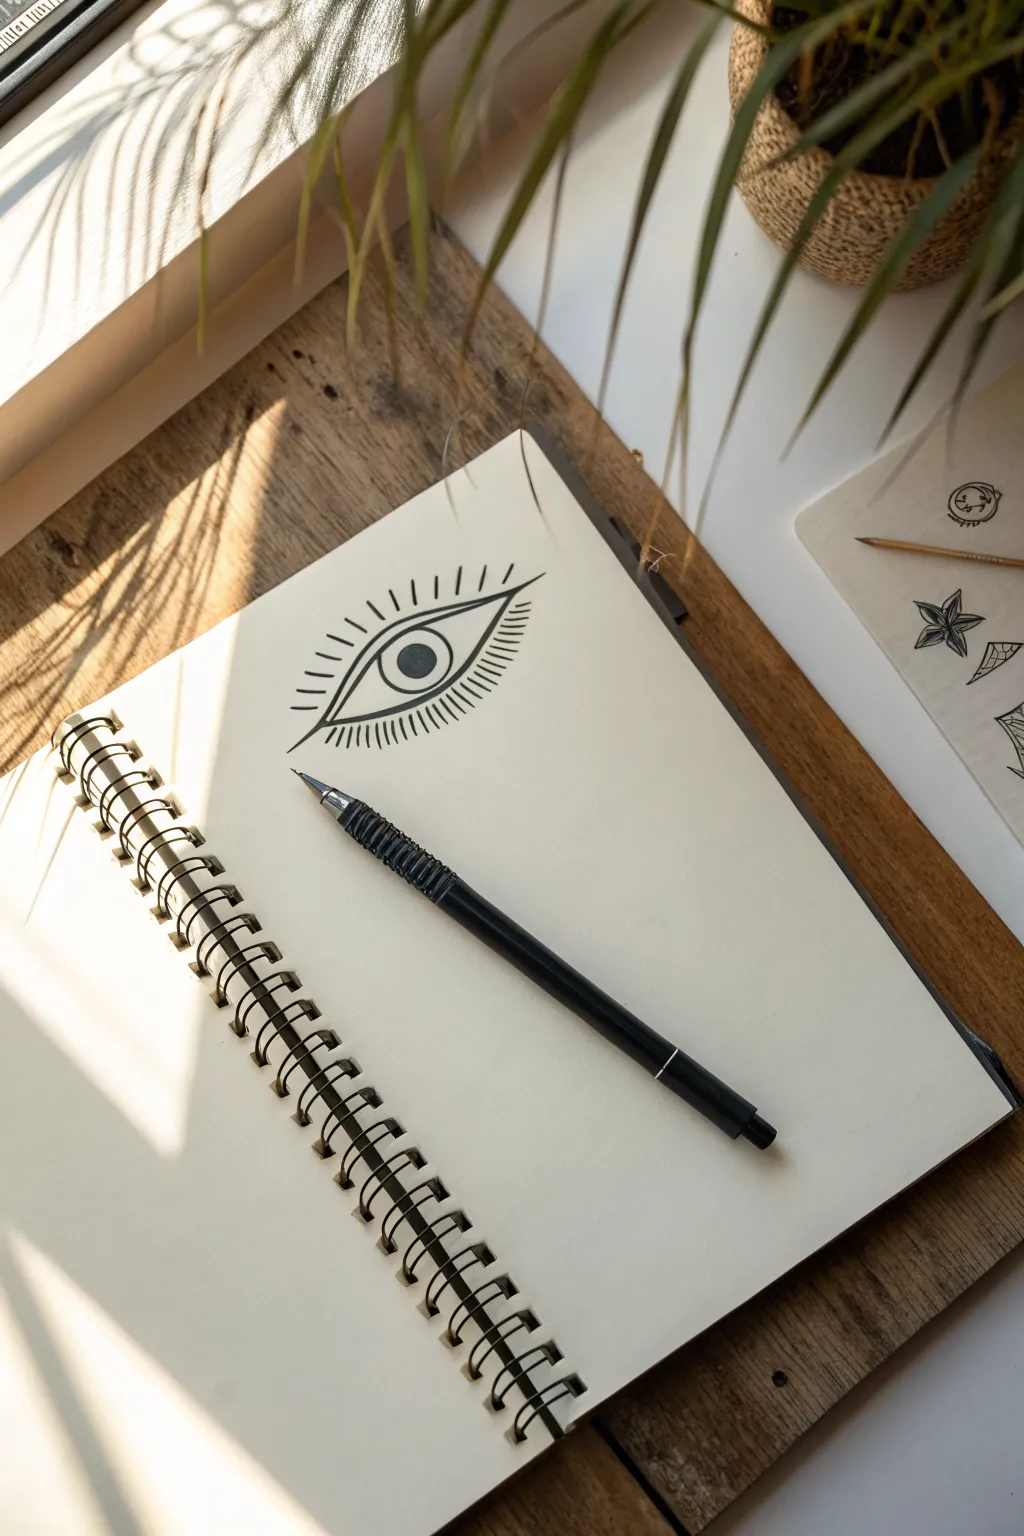
Capture the mystic allure of an ancient symbol with this minimalist black-ink eye doodle. This project focuses on clean lines and bold contrast, creating a striking graphic element that looks great in any sketchbook journal.
Step-by-Step
Materials
- Spiral-bound sketchbook (smooth paper preferred)
- Black drawing pen (fine tip, 0.5mm or 0.7mm)
- Pencil (HB for sketching)
- Eraser
Step 1: Drafting the Basic Shape
-
Position your starting point:
Find a clean, empty page in your sketchbook. Visualize the center of the upper half of the page to ensure you have enough room for the radiating lashes later. -
Sketch the upper curve:
Using your pencil very lightly, draw a wide, gentle arch. This will be the top lid of the eye. It should look like a flattened rainbow. -
Sketch the lower curve:
Connect the two ends of your arch with a mirrored curve underneath. The shape should be pointed at the corners, forming a classic almond or lemon shape. -
Center the iris:
In the middle of your almond shape, lightly sketch a perfect circle. It should be large enough that the top and bottom edges are just barely touching (or slightly obscured by) the eyelids. -
Add the pupil:
Draw a smaller circle directly in the center of the iris. Keep this concentric and centered for a focused gaze.
Steady Hands
Rest the side of your palm on a separate scrap of paper while drawing. This prevents smearing the fresh ink and stabilizes your hand for smoother curves.
Step 2: Inking the Outline
-
Trace the upper lid:
Switch to your black ink pen. Confidently trace over your pencil line for the upper lid. I like to make the line slightly thicker in the middle and tapered at the corners for an elegant look. -
Trace the lower lid:
Ink the bottom curve, ensuring the corners meet sharply with the upper line. Try to keep your hand steady for a smooth flow. -
Ink the iris:
Carefully trace the outer circle of the iris. If your hand shakes, you can purposefully make the line a bit thicker to hide small wobbles. -
Fill the pupil:
Fill in the smallest center circle completely with black ink. Leave a tiny white dot if you want a highlight, or fill it solid black like the reference image for a flat, graphic style. -
Create the heavy iris outline:
Go back over the iris circle (the larger one) and thicken the line weight significantly. This creates a bold ring that separates the pupil from the white space. -
Erase guide lines:
Wait a moment for the ink to fully dry to avoid smudging, then gently erase your underlying pencil sketches.
Step 3: Adding the Radiating Lashes
-
Mark the center lash:
Starting at the very top center of the eye, draw a short, straight line radiating upward. This acts as your anchor for the rest of the pattern. -
Add the corner lashes:
Move to the far left and right corners. Draw a line extending outward from each corner. -
Fill the upper section:
Fill the space between the center and corners with evenly spaced lines. Angle them slightly as you move outward, so they fan out like sun rays. -
Repeat for the bottom:
Do the same for the bottom lid. Start with a center line pointing down, then fill in the sides with radiating strokes. Try to keep the length of these lines consistent with the top ones. -
Thicken the lash bases:
To give the drawing more weight, go back to where each lash meets the eyelid and slightly thicken the base of the line, tapering it to a point at the end. -
Final clean up:
Check for any uneven gaps. You can add smaller, shorter lines between the main lashes if you want a fuller look, or leave it sparse for a cleaner aesthetic.
Golden Accents
For a magical touch, fill the space between the pupil and the heavy iris ring with metallic gold paint or gel pen.
Now you have a striking, mystic eye illustration ready to watch over your daily notes
Ankh in One Stroke
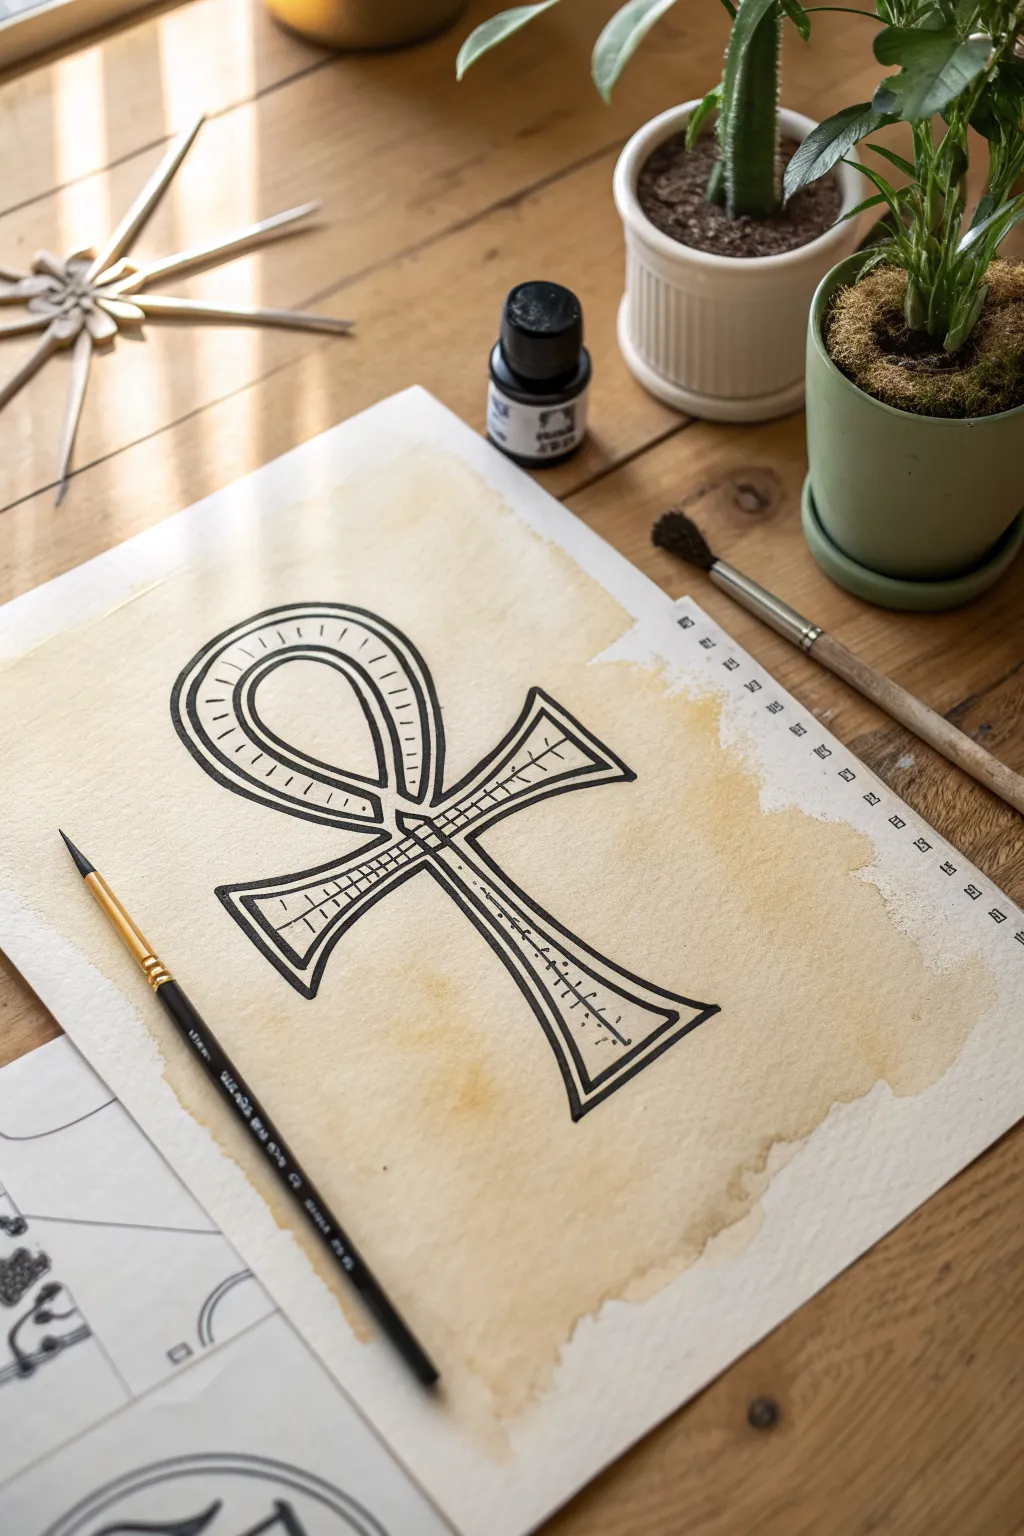
Transport yourself to ancient Egypt by creating this striking Ankh symbol on beautifully weathered paper. The contrast of the bold black ink against the organic coffee-stained background gives this drawing a truly timeless and historical feel.
Step-by-Step Tutorial
Materials
- Heavyweight watercolor or mixed media paper
- Strong black coffee or black tea (brewed and cooled)
- Wide flat brush (for staining)
- Black drawing ink or a thick black permanent marker
- Fine liner pen (0.5mm or similar)
- Pencil and eraser
- Ruler
- Round watercolor brush (size 4 or 6)
- Paper towels
Step 1: Preparing the Ancient Parchment
-
Brew the ‘ink’:
Start by brewing a very strong cup of black coffee or tea. The darker the liquid, the deeper the antique effect will be. Allow it to cool completely before using. -
Initial wash:
Lay your paper on a flat, protected surface. Using a wide flat brush, apply the coffee or tea across the center of the page. -
Create the edges:
Don’t paint all the way to the edges of the paper. Instead, let the liquid pool naturally in a rough rectangular shape in the middle, creating that ragged, organic border seen in the example. -
Add texture:
While the paper is still wet, you can drop a few extra droplets of coffee in random spots to create darker blooms and variation. -
Dry completely:
Let the paper dry fully. This is crucial; drawing on damp paper will cause your ink to bleed uncontrollably. You can use a hairdryer to speed this up if you’re impatient.
Step 2: Drafting the Ankh
-
Construct the centerline:
Using a pencil and ruler, lightly draw a vertical line down the center of your stained area to help keep the symbol symmetrical. -
Mark the crossbar:
Draw a horizontal line across the upper third of your vertical line. This will form the arms of the Ankh. -
Sketch the loop:
Draw an oval or teardrop shape resting on top of the crossbar. It should look like a handle. -
Thicken the shape:
Outline around your skeleton lines to give the Ankh width. The loop, arms, and stem should all be roughly the same thickness. -
Flare the ends:
Slightly widen the ends of the horizontal arms and the bottom of the vertical stem to give it that classic architectural look.
Uneven Stain?
If the paper curls while drying, tape the edges down. If the stain is too light, simply wait for it to dry and apply a second layer of coffee.
Step 3: Inking and Detailing
-
Outline with ink:
Using your black ink and a round brush (or a thick marker), carefully trace over your outer pencil lines. I prefer a brush here because it naturally creates a slightly variable, organic line weight. -
Create the inner border:
Draw a second, thinner line inside the main outline, maintaining a small, consistent gap from the outer edge. -
Connect the lines:
At the ends of the arms and the bottom stem, close the gap between your two outlines with small straight lines. -
Add horizontal hatching:
In the center of the cross (where the arms meet the stem), draw a series of small horizontal hatch marks inside the inner border to create a darker, focal point. -
Draw the ticking:
Along the stem and the loop, add tiny, evenly spaced tick marks perpendicular to the inner line. These mimic decorative carvings. -
Erase pencil guides:
Wait until the black ink is absolutely bone dry to avoid smearing. Gently erase your initial pencil sketches. -
Final touches:
If the ink looks a bit light in areas, go over the main outline one more time to ensure it is a deep, solid black.
Golden Touch
Once the black ink is dry, paint a thin line of gold watercolor or metallic ink inside the double borders for a royal Egyptian finish.
Display your finished artifact proudly or use it as a striking cover for a handmade journal

PENCIL GUIDE
Understanding Pencil Grades from H to B
From first sketch to finished drawing — learn pencil grades, line control, and shading techniques.
Explore the Full Guide
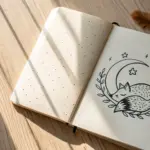
Scarab Beetle Icon
Capture the mystic symbol of rebirth with this elegant mixed-media illustration featuring a detailed scarab beetle beneath a golden celestial orb. The combination of crisp ink lines and soft watercolor washes on textured paper creates a timeless, artifact-like quality.
How-To Guide
Materials
- Cold press watercolor paper (deckle edge preferred)
- Fine liner pens (0.1, 0.3, and 0.5 sizes, archival black ink)
- Pencil and eraser
- Watercolor paints (Yellow Ochre, Burnt Sienna, Olive Green)
- Small round watercolor brush (size 2 or 4)
- Ruler
- Circular object for tracing (like a bottle cap)
Step 1: Setting the Composition
-
Prepare the paper:
If your paper doesn’t have a deckle edge, you can tear the edges carefully against a ruler to create that rough, handmade look. -
Sketch the celestial orb:
Position your small circular object in the upper center of the paper and lightly trace around it with a pencil to define the sun or moon. -
Outline the beetle’s body:
Below the circle, sketch a vertical oval for the beetle’s abdomen and a smaller, slightly flattened semi-circle on top for the thorax and head. -
Add the botanical frame:
Draw two long, curved lines starting from the sides of the beetle, swooping down and crossing each other at the bottom center. These will be the stems for your laurel wreath.
Make it Shine
For the celestial orb, mix a tiny amount of metallic gold watercolor or gold gouache into your yellow paint. It adds a subtle shimmer that mimics ancient Egyptian jewelry.
Step 2: Applying Watercolor
-
Paint the orb:
Mix a wash of Yellow Ochre with a touch of Burnt Sienna. Paint the circular area, letting the colors bleed slightly to create a mottled, moon-like texture. Let this dry completely. -
Paint the leaves:
Using a very dilute Olive Green, paint small, simple leaf shapes along the curved pencil stems. Keep the paint transparent and subtle so it doesn’t overpower the black ink later. -
Dry the artwork:
Wait for all paint to be bone dry. If the paper feels cool to the touch, it still holds moisture which can cause ink to bleed.
Botanical Variation
Instead of olive green, use a sepia or diluted brown ink for the leaves to create a monochromatic, vintage diagram aesthetic.
Step 3: Inking the Beetle
-
Define the head:
Using a 0.3 pen, outline the head shape, adding the small pincers and the distinctive antennae that fan out at the ends. -
Draw the thorax:
Outline the middle section (thorax). Fill in the center of this section with stippling (small dots) to create a textured, shaded appearance, leaving the edges slightly lighter. -
Outline the wings:
Draw the large oval abdomen, splitting it down the middle with a double line to represent the folded wing casing (elytra). -
Add leg structure:
Sketch the six legs. The front pair reaches forward near the head, while the middle and back pairs extend outward and backward. Give the legs jagged, saw-like edges to mimic the insect’s texture. -
Detail the shell:
Switch to your finest 0.1 pen. Draw vertical, slightly curved lines running down the length of the wing cases to create striations. -
Deepen the contrast:
Use a 0.5 pen to thicken the outer contour lines of the beetle. Add solid black fill to the very edges of the shell to make the Beetle look rounded and three-dimensional.
Step 4: Final Touches
-
Ink the wreath:
Gently outline the painted leaves with your 0.1 pen. Use broken, organic lines rather than perfect outlines to keep the botanical element looking delicate. -
Add stem details:
Draw the central stem lines, crossing them at the bottom as planned in your sketch. -
Erase pencil marks:
Once you are certain the ink is fully dry, gently erase any visible pencil guidelines to clean up the illustration.
Now you have a stunning piece of historically inspired art ready to be framed or gifted
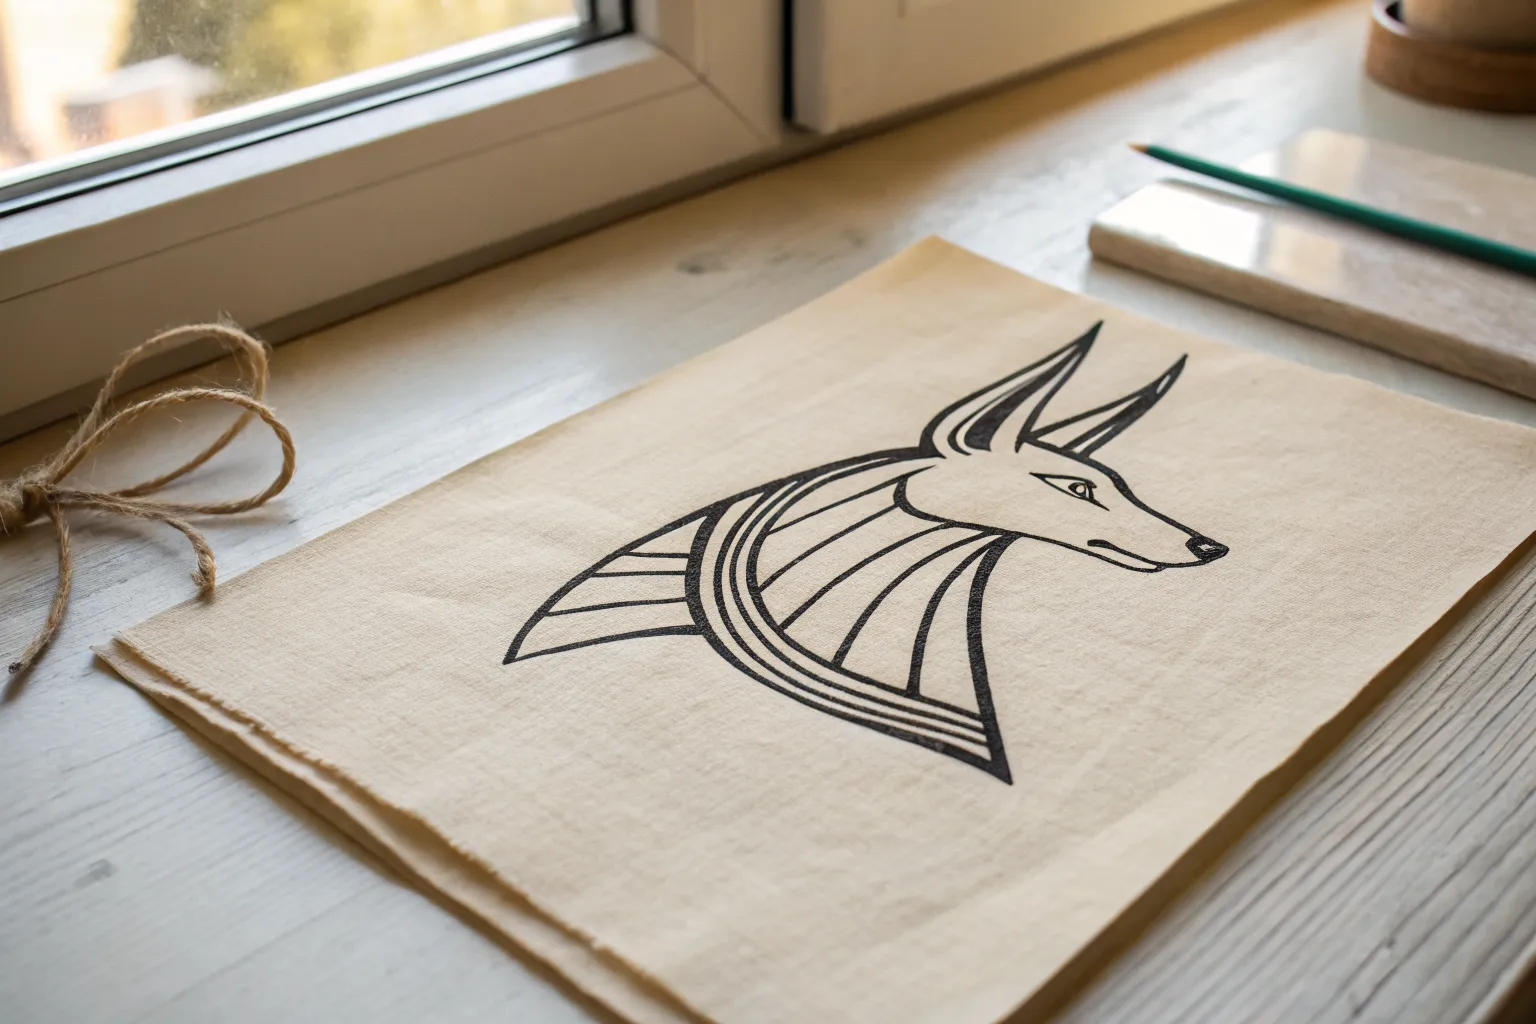
Anubis Head Outline
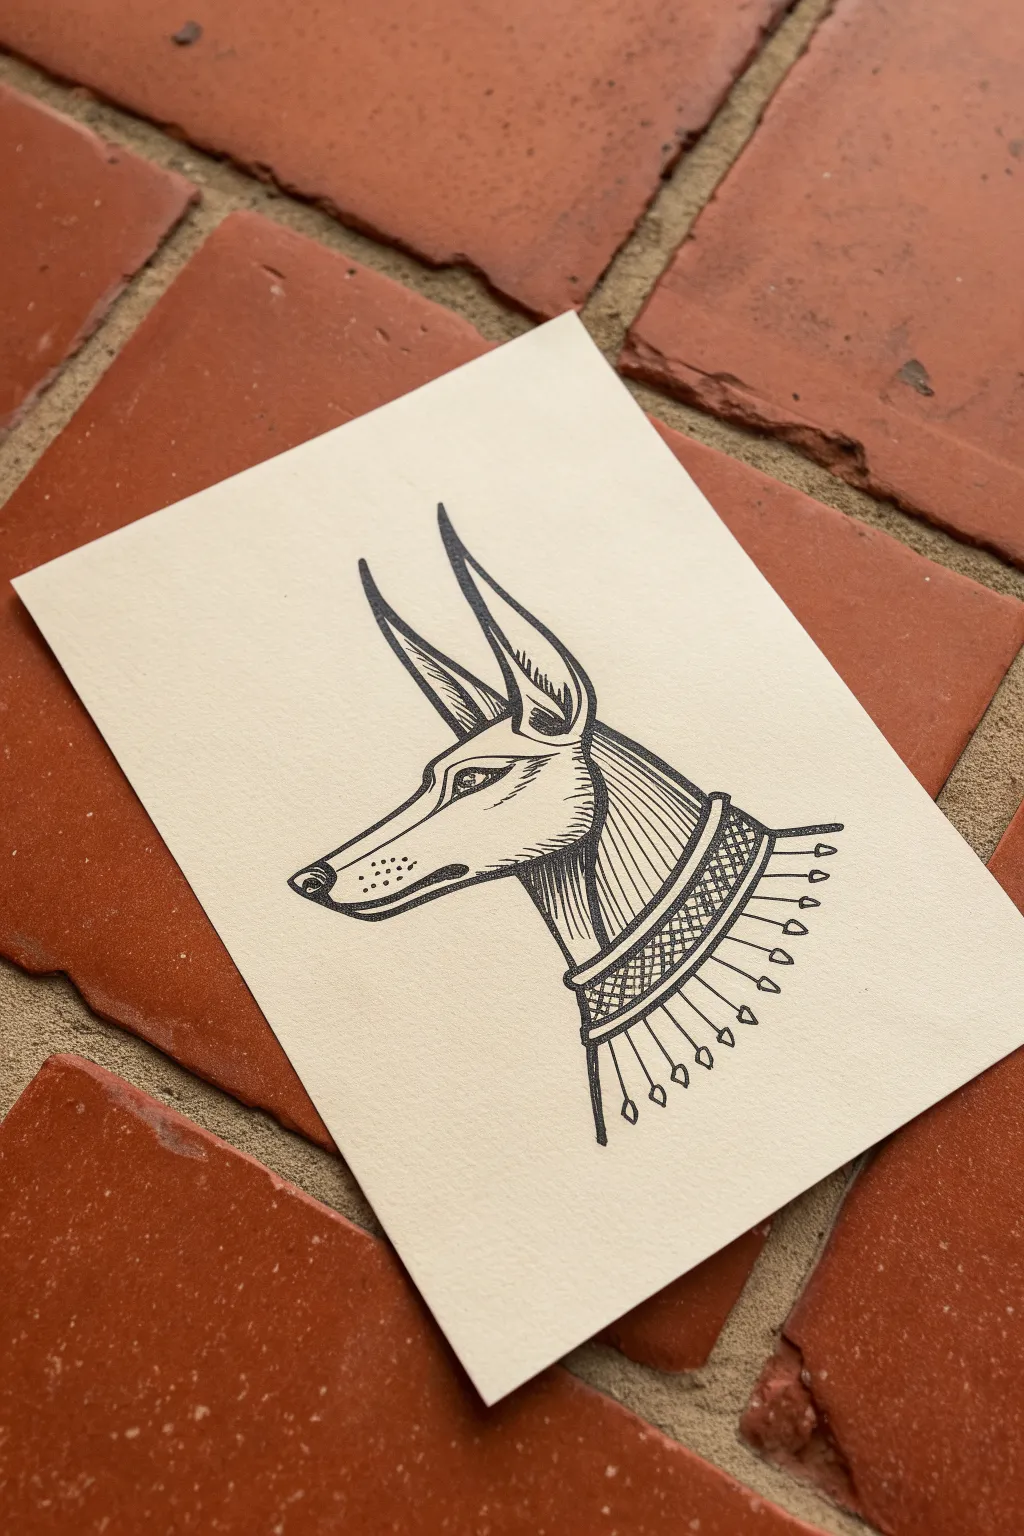
This elegant ink drawing captures the regal profile of Anubis, the jackal-headed deity, with crisp lines and stylized detailing. The project focuses on clean outline work and precise shading to give dimension to the classic Egyptian motif.
Step-by-Step
Materials
- Cream-colored drawing paper or cardstock
- HB or 2H graphite pencil (for sketching)
- Kneaded eraser
- Fine liner pens (sizes 0.1mm, 0.3mm, and 0.5mm)
- Ruler (optional)
Step 1: Sketching the Structural Outline
-
Establish the head shape:
Begin with a light pencil sketch. Draw a long, tapering triangle pointing to the left to form the snout, and connect it to a rounded shape for the back of the head. -
Add the ears:
Draw two tall, pointed ears extending upward and slightly backward from the top of the head. The front ear should be slightly larger and overlap the base of the rear ear. -
Define the neck:
Extend a curved line down from the back of the head and another from the jawline to create a thick, sturdy neck. -
Refine the features:
Carve out the details of the face. Draw a small, almond-shaped eye with an elongated tail (typical of Egyptian art), define the nose tip, and sketch the mouth line extending back from the snout. -
Sketch the collar:
At the base of the neck, draw a wide, curved band representing the Wesekh collar. Divide this band into two parallel sections and add small hanging ornaments along the bottom edge.
Steady Hands
For long, sweeping lines like the ears or neck, pivot your movement from your elbow rather than your wrist. This creates smoother, less shaky strokes.
Step 2: Inking the Main Lines
-
Outline the profile:
Using a 0.5mm fine liner, go over your pencil lines for the main profile. Keep your hand steady to create a smooth, continuous line from the nose tip up to the ears. -
Detail the ears:
Switch to a 0.3mm pen. Ink the inner curves of the ears, adding a few short strokes inside the base to suggest depth. -
Ink the facial features:
Carefully ink the eye, leaving a tiny white highlight if desired, and darken the pupil. Ink the nose and the mouth line, making the line slightly thicker near the corner of the mouth. -
Draw the collar structure:
Outline the bands of the collar with the 0.5mm pen. While ink is wet, be careful not to smudge it with your hand.
Ink Smudges?
If you accidentally smudge wet ink, turn it into a shadow with extra hatching, or use a white gel pen to cover the mistake once it’s fully dry.
Step 3: Shading and Texture
-
Erase pencil marks:
Once you are certain the main ink lines are completely dry, gently erase the underlying graphite sketch with a kneaded eraser. -
Hatch the neck:
Using a 0.1mm or 0.3mm pen, draw straight, parallel vertical lines down the neck area. Keep the spacing consistent, but stop them before hitting the collar. -
Texture the snout:
Add dots near the nose to represent whisker spots. Draw a few thin lines under the eye to suggest the cheekbone structure. -
Detail the collar pattern:
Fill the top band of the collar with vertical hatching. For the lower band, draw a cross-hatch pattern (diagonal lines in both directions) to create a net-like texture. -
Add the hanging ornaments:
Drop thin lines from the bottom of the collar, ending each with a small diamond or teardrop shape. Ensure they are evenly spaced. -
Deepen the shadows:
Return to the ears and neck. Add extra hatching lines in the deepest shadowed areas, like inside the ear curve and under the jaw, to increase contrast. -
Final touches:
Inspect your lines. If any main outlines look too thin compared to the intricate shading, carefully thicken them with the 0.5mm pen to separate the subject from the background.
Display your artwork on a simple stand or frame it to highlight the stark contrast of the ink


Bastet Cat Goddess Sketch
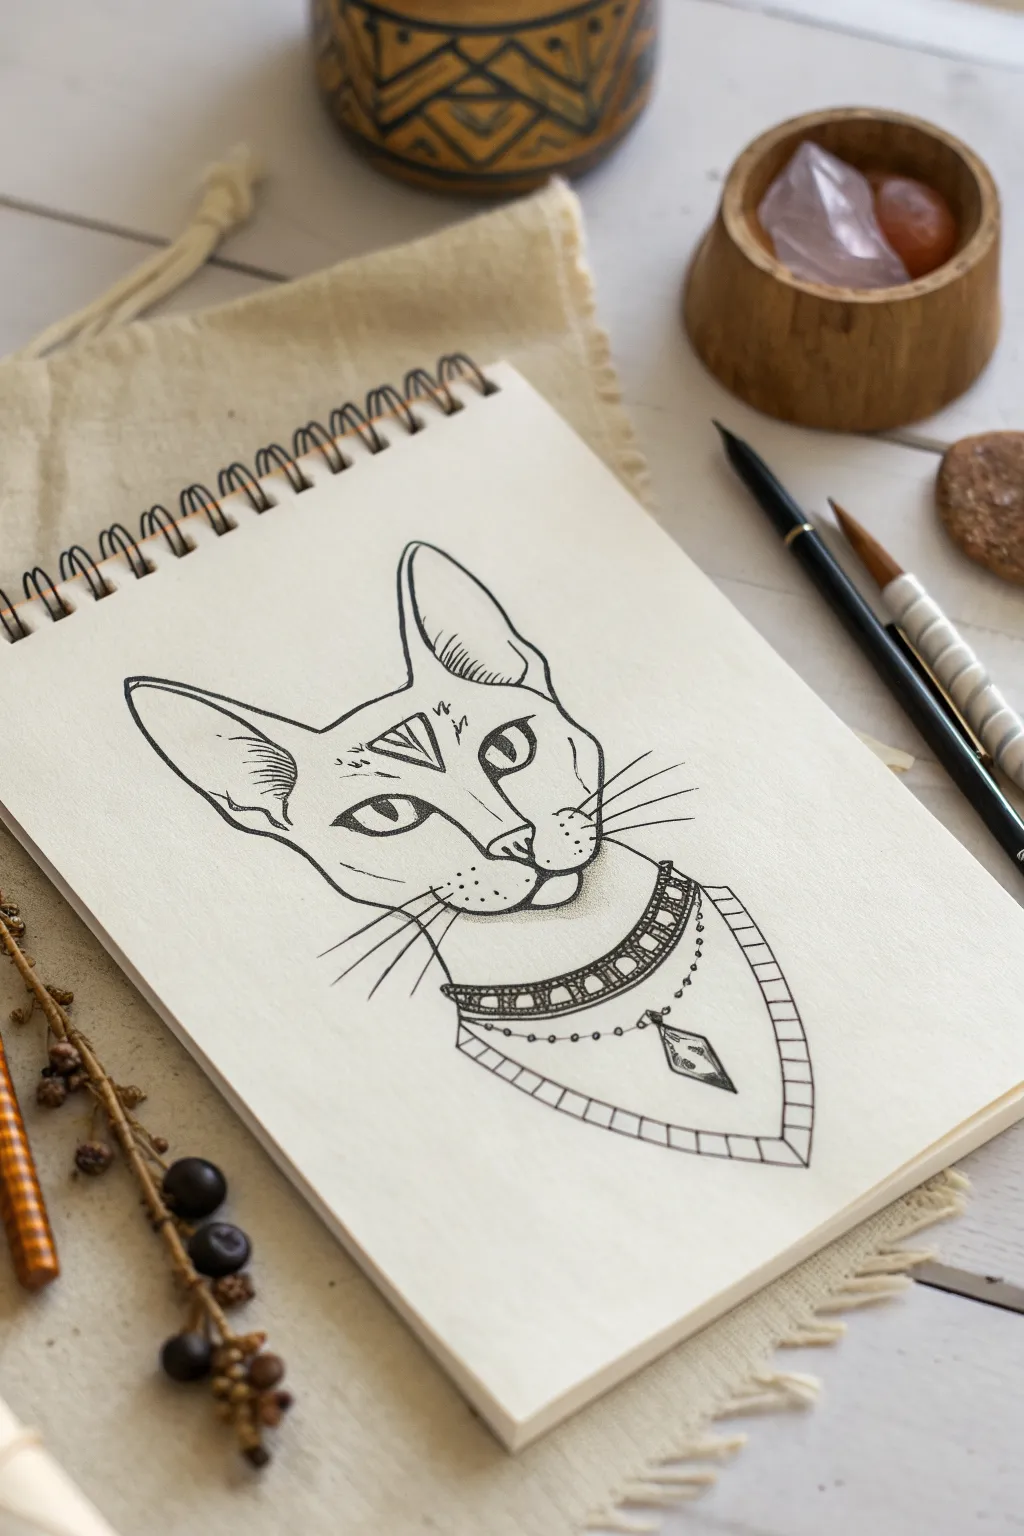
Channel the ancient elegance of Egyptian mythology with this stylized ink portrait of Bastet. This project focuses on capturing the sharp, regal geometry of the feline goddess using clean linework and delicate pen shading.
How-To Guide
Materials
- Sketchbook or drawing paper (heavyweight works best)
- HB graphite pencil
- Kneaded eraser
- Fine liner pen (0.1mm or 0.3mm)
- Medium liner pen (0.8mm or 1.0mm)
- Ruler (optional)
Step 1: Constructing the Base
-
Map out the head shape:
Begin lightly with your pencil. Draw a wide V-shape for the chin and jawline, curving outwards at the top to form the cheekbones. Connect the top with a slightly curved horizontal line to create a broad, inverted triangular shape. -
Place the ears:
Draw two large, tall triangles on top of the head. These should be quite prominent and pointed, characteristic of Bastet imagery. Curve the outer lines slightly to make them feel organic rather than purely geometric. -
Add guidelines:
Roughly sketch a vertical line down the center of the face to help with symmetry. Add a horizontal line about halfway down the head to mark where the eyes will sit.
Pro Tip: Line Weight
Use a thicker pen for the outermost silhouette and the heavy eyeliner, but switch to your finest tip for the whiskers and necklace chain. This contrast makes the drawing pop.
Step 2: Defining the Features
-
Sketch the eyes:
Draw almond-shaped eyes along your horizontal guideline. Angle the outer corners upwards sharply. Draw the pupils as vertical slits or narrow ellipses to emphasize the feline nature. -
Draw the nose and muzzle:
Place a small inverted triangle for the nose nose just below the eyes. Extend two curved lines down from the nose to form the mouth, creating a distinct ‘W’ shape for the muzzle. -
Draft the forehead markings:
In the center of the forehead, sketch a small inverted triangle containing vertical lines. This mimics the scarab or sun disc motifs often seen in Egyptian art. -
Outline the collar structure:
Draw a curved neckline below the chin. Add a second, wider curve below that to form the base of the collar. From the bottom of the collar, draw a V-shape extending downward to represent the chest ornament.
Trouble with Symmetry?
If the eyes look uneven, turn your paper upside down. This tricks your brain into seeing shapes instead of a face, making it much easier to spot and fix alignment errors.
Step 3: Inking the Outline
-
Ink the main contours:
Switch to your medium liner pen (around 0.8mm). Carefully trace the outer shape of the ears, the jawline, and the main shape of the collar. Use confident, smooth strokes. -
Refine the facial features:
Using a slightly thinner pen (0.3mm or 0.5mm), ink the eyes, nose, and mouth. Make the upper eyeliner thick and bold to mimic the kohl makeup style of ancient Egypt. -
Add ear details:
Inside the ears, draw the inner folds using the thinner pen. Add short, curved hatching lines near the base of the inner ear to suggest depth and shadow. -
Detail the collar design:
Ink the horizontal bands of the collar. Inside the main band, draw small, evenly spaced circles or semi-circles. Add the vertical lines on the lower V-shaped ornament.
Step 4: Decoration and Shading
-
Add the whiskers:
With your finest pen (0.1mm), draw long, sweeping whiskers extending from the muzzle. Keep your wrist loose to ensure the lines taper naturally at the ends. -
Draw the jewelry details:
Below the main collar, add a delicate hanging chain using tiny dots or small circles. Draw a diamond-shaped pendant at the center point, adding geometric details inside it. -
Apply shading to the finish:
Use stippling (tiny dots) on the muzzle where whiskers emerge. Add light hatching lines under the chin and around the eyes to give the face dimension without darkening it too much. -
Erase pencil lines:
Wait until the ink is completely dry—I usually give it at least five minutes to be safe. Gently run your kneaded eraser over the entire drawing to lift the graphing lines.
Now you have a timeless piece of art worthy of a pharaoh’s collection
Cute Wrapped Mummy
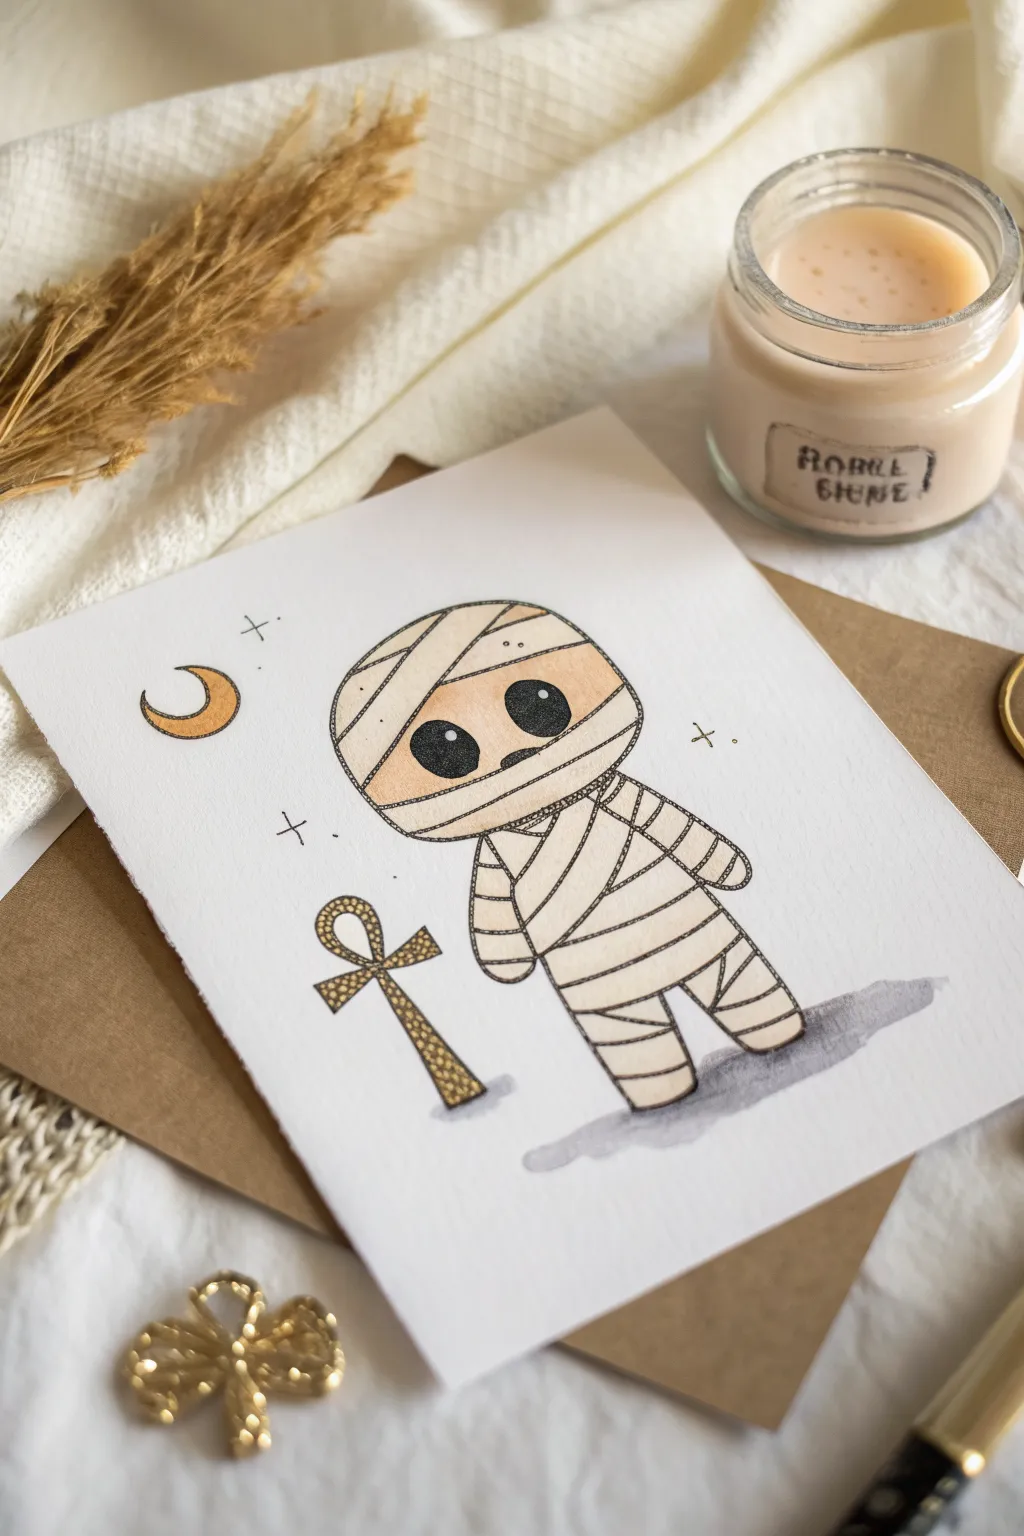
This adorable mummy illustration combines simple line work with gentle watercolor washes for a charming, not-so-spooky result. With its big eyes and golden ankh accessory, it’s a perfect beginner-friendly project for exploring Egyptian themes.
Detailed Instructions
Materials
- Cold press watercolor paper (A5 size)
- Pencil and eraser
- Waterproof fine liner pen (01 or 03 size, black)
- Finer detail pen (005 size, black)
- Watercolor paints (Yellow Ochre, Burnt Sienna, Payne’s Grey, Gold)
- Small round watercolor brush (size 2 or 4)
- Cup of water and paper towel
Step 1: Sketching the Bones
-
Head shape:
Start by drawing a large, slightly flattened oval for the head. It should be bigger than the body to give that cute ‘chibi’ proportion. -
Body outline:
Draw a smaller, rounded rectangular shape beneath the head for the torso, followed by two stumpy legs. Add simple, rounded tubes for the arms hanging at the sides. -
Wrapping lines:
Lightly sketch diagonal and horizontal lines across the head and body to represent the bandages. Don’t make them perfectly straight—a little curve helps show volume. -
Feature placement:
Mark out a clear horizontal band on the face where the eyes will go. Inside this band, sketch two large ovals for eyes and a tiny triangle nose between them. -
Accessories:
To the left of the mummy, sketch a simple Ankh symbol (a cross with a loop at the top) and a crescent moon shape above it.
Smudge Alert
Wait longer than you think before erasing pencil lines over the ink. If the paper feels cool to the touch, the ink might still be damp.
Step 2: Inking the Lines
-
Main outlines:
Using your 03 waterproof pen, trace over your pencil lines for the mummy’s outer silhouette. Keep the line steady but don’t worry about perfection. -
Bandage details:
Ink the bandage lines. I like to occasionally break the line or add a tiny ‘step’ where one bandage overlaps another to add dimension. -
Filling the eyes:
Use the pen to color in the large pupils completely black for a bold look. Leave a tiny white spec for a highlight if you wish, or keep them solid like the original. -
Decorative elements:
Ink the crescent moon, the star crosses, and the outline of the Ankh symbol carefully. -
Clean up:
Wait at least 5-10 minutes for the ink to fully set, then gently erase all visible pencil marks.
Step 3: Adding Color
-
Skin tone:
Dilute a mix of Yellow Ochre and a tiny touch of Burnt Sienna with plenty of water. Paint the strip of face visible between the bandages. -
Bandage shading:
Mix a very watery grey using Payne’s Grey. Paint extremely light washes on the edges of the mummy’s bandages to create shadow and form, leaving the center of the body mostly white paper. -
Ground shadow:
While you have the grey mix, paint a loose, jagged puddle shape beneath the mummy’s feet to ground the character. -
Golden accents:
Using a gold watercolor paint or a mix of yellow ochre and concentrated orange, fill in the crescent moon and the Ankh symbol. -
Texture details:
Once the gold paint on the Ankh is dry, use your finest 005 pen to add tiny stippling dots over it for a textured, ancient metal look. -
Final twinkle:
Add a few tiny dots around the background stars with your pen to simulate magical dust or sand.
Level Up
Use a metallic gold gel pen for the ankh and moon instead of paint to make the illustration really shimmer in the light.
Once dry, you can mount your little mummy on kraft cardstock for a handmade greeting card
Canopic Jar Faces Made Easy
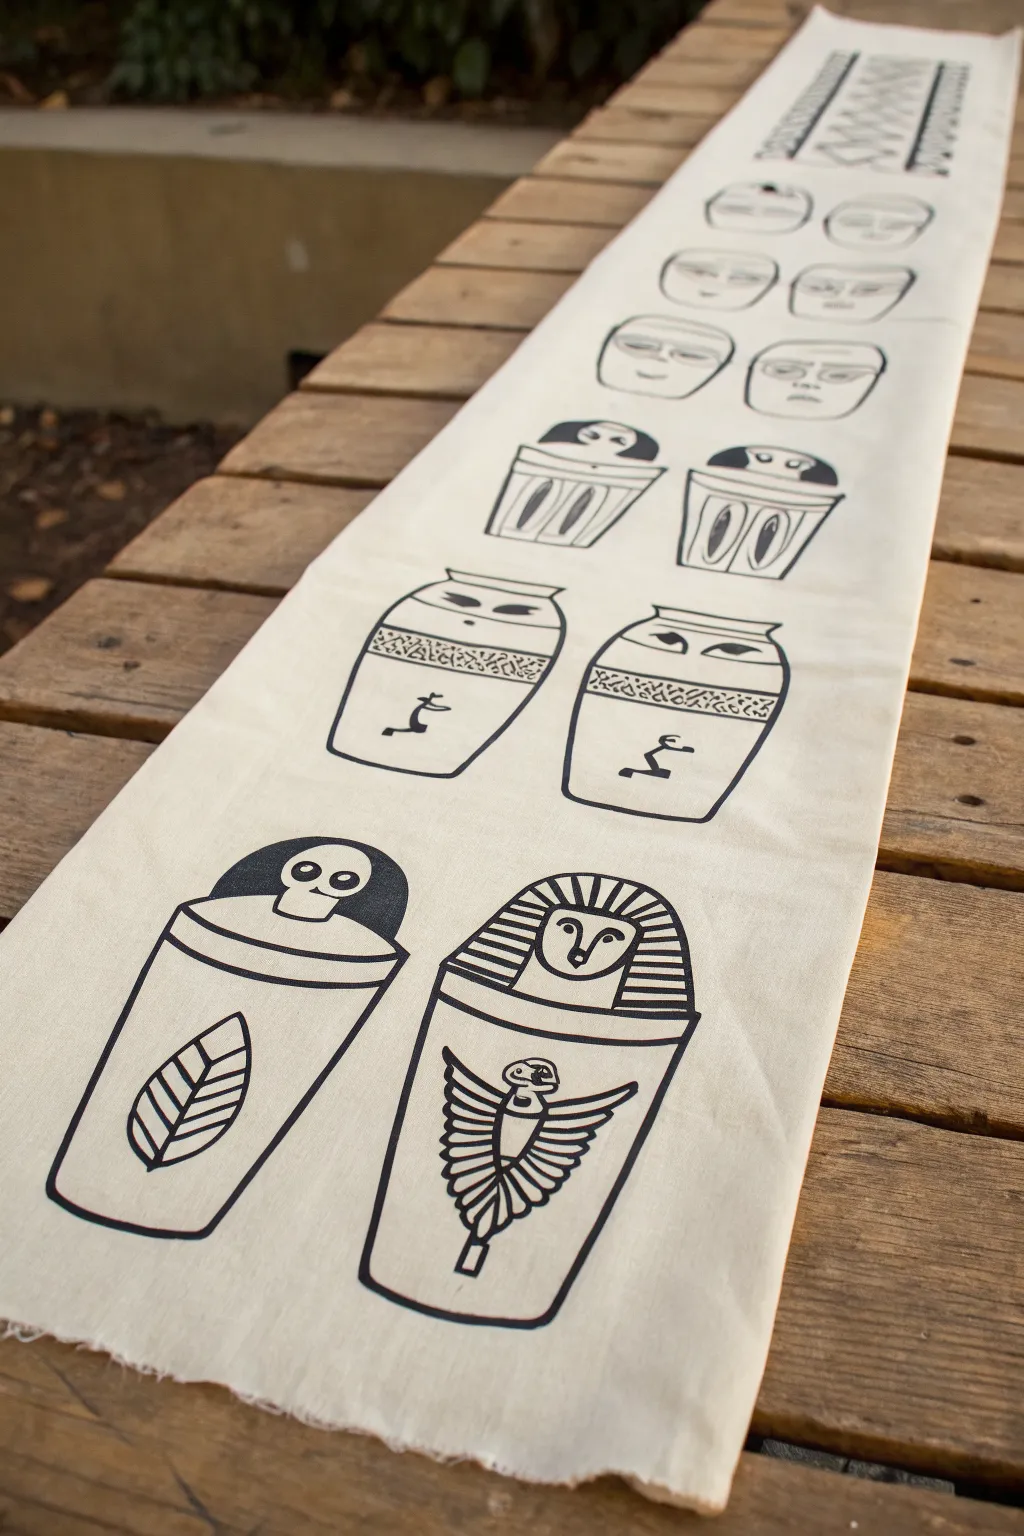
This striking table runner captures the mystery of ancient Egypt with a series of bold, graphic canopic jars. Using simple black lines on neutral fabric, you’ll create a modern, minimalist tribute to historical artifacts that looks impressive on any dining table.
Step-by-Step Tutorial
Materials
- Long strip of natural canvas or cotton fabric (approx. 12″ x 60″)
- Pencil
- Eraser
- Fine-tip black fabric marker or permanent marker
- Medium-tip black fabric marker
- Ruler or straight edge
- Iron and ironing board
- Scrap paper or cardboard
Step 1: Preparation and Layout
-
Prepare the fabric:
Begin by washing and drying your canvas strip to remove any sizing. Iron it completely flat so you have a smooth surface for drawing. -
Protect your surface:
Since ink can bleed through fabric, I always place a long strip of scrap paper or cardboard underneath the entire length of the runner before starting. -
Plan the spacing:
Using your ruler, lightly mark the center line of the runner. You will need space for about five or six pairs of designs. Lightly mark horizontal lines every 6-8 inches to ensure your pairs stay evenly spaced.
Ink Bleeding?
If your marker bleeds into the fabric grain, switch to a tighter weave canvas or treat the fabric with a clear acrylic medium/gesso wash before drawing.
Step 2: Sketching the Bottom Jars
-
Outline the jar shapes:
Starting at the bottom of the runner, lightly sketch two jar outlines using a pencil. These should be slightly tapered cylinders—wider at the top rim and narrower at the base. -
Add the lids:
Draw the lids sitting on top of the jar rims. For the left jar, draw a simple rounded dome shape. For the right jar, sketch a headcloth shape (nemes) often seen on pharaohs. -
Sketch the faces:
Inside the lid shapes, add the faces. The left one is a simple skull-like face with round eyes; the right is a human face with an elongated chin and headdress stripes. -
Draw the main symbols:
On the body of the left jar, sketch a large leaf shape with veins. On the right jar, draw a winged scarab or bird symbol with spread wings.
Make It Look Aged
Before drawing, tea-dye the entire fabric strip. Steep it in strong black tea for 20 minutes, rinse, and dry for a beautiful antique parchment color.
Step 3: Sketching the Middle Variations
-
Draft the middle section:
Move up to the next section. Draw two more jar outlines, similar in size to the first pair. -
Add decorative bands:
Instead of full symbols, draw a horizontal band across the upper third of these jars. Fill the band with a tight, scribbled texture to mimic hieroglyphs or stone texture. -
Draw stylistic figures:
Below the bands, sketch simple, stick-figure-style hieroglyphs—like a seated figure with arms raised—in the center of each jar. -
Create distinct lids:
For this pair, alter the lids. Give them flatter tops with simple, stylized eyes looking forward.
Step 4: Designing the Upper Elements
-
Sketch the top faces:
As you move toward the top, transition from full jars to just the jar heads or masks. Draw four to six floating heads in pairs, varying their expressions from serene to stern. -
Add the geometric border:
At the very top edge of the runner, use your ruler to sketch a geometric border. Create a zigzag or diamond pattern flanked by vertical stripes to frame the end of the piece.
Step 5: Inking and Finishing
-
Trace main lines:
Once you are happy with your pencil sketch, take your medium-tip fabric marker. carefully trace over the main outlines of the jars and heads. -
Fill clear shapes:
Use the medium marker to fill in larger dark areas, such as the dark semi-circle background behind the skull-faced jar lid. -
Detail with fine tip:
Switch to the fine-tip marker for delicate areas. Trace the veins in the leaf, the feathers on the winged scarab, and the facial features. -
Add texture:
Use the fine tip to create the scribbled texture in the decorative bands on the middle jars. Quick, irregular strokes work best here creates an ancient, weathered look. -
Line weight variation:
Go back over the outer edges of the jars with the medium marker to thicken the lines slightly, making the objects pop against the unbleached fabric. -
Erase and set:
Wait at least an hour for the ink to fully dry. Gently erase any visible pencil marks. Finally, heat-set the ink by ironing the reverse side of the runner on a high (cotton) setting.
Place your finished runner on a wooden table to let the stark black and white contrast really shine.
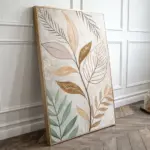
Lotus and Papyrus Plant Motifs
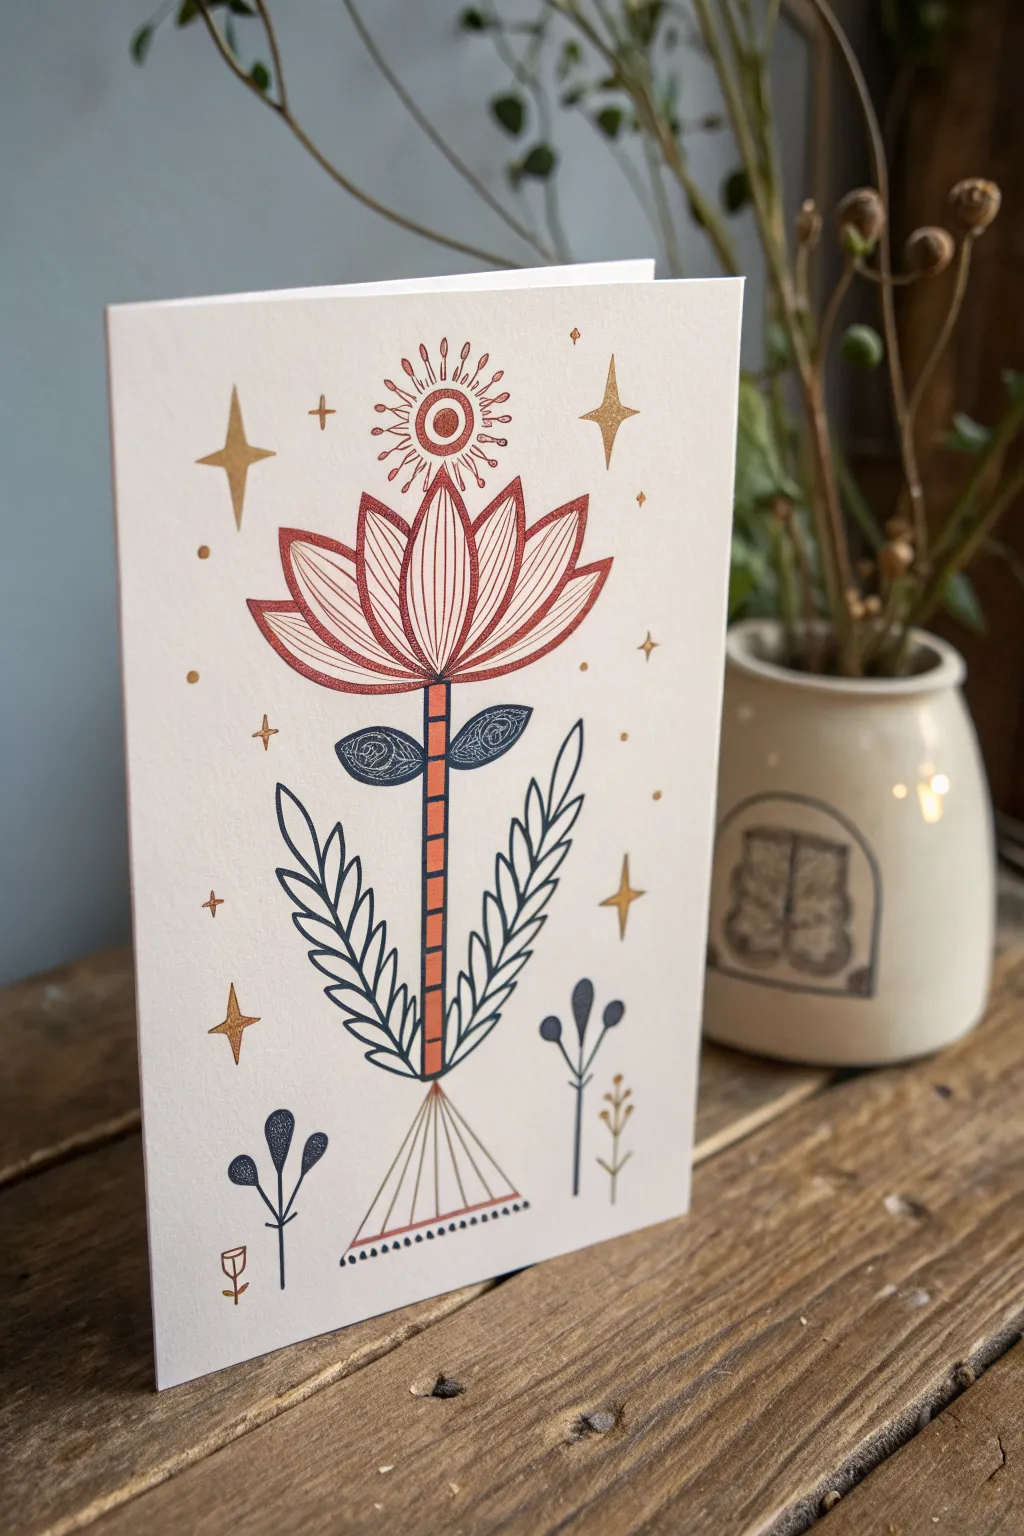
Capture the timeless elegance of Egyptian motifs with this stylized lotus flower card, featuring clean lines and a harmonious palette of terracotta, navy, and gold. This project combines simple geometric shapes with delicate detailing to create a piece that feels both ancient and modern.
Step-by-Step Guide
Materials
- Heavyweight cream or off-white cardstock (A5 folded to A6)
- Fine liner pens (0.3mm and 0.5mm) in terracotta/rust and navy blue
- Gold gel pen or metallic marker
- Pencil (HB or 2H)
- Eraser
- Ruler
- Protractor or circle template (optional)
Step 1: Planning and Sketching
-
Map out the center line:
Begin by using your ruler to draw a very faint vertical line right down the center of your cardstock. This will be the anchor for the stem and the symmetrical flower. -
Sketch the flower base:
About two-thirds of the way up the card, sketch a wide, shallow U-shape or bowl shape. This will become the base of your lotus blossom. -
Draft the petals:
Sketch a central, pointed oval petal rising from the middle of your bowl shape. Then, add three flanking petals on each side that fan out slightly, creating a classic lotus silhouette. -
Outline the stem and leaves:
Draw the stem as a thin column descending from the flower to the bottom quarter of the page. Add two horizontal, almond-shaped leaves just below the flower head, and long, curved fronds branching out lower down. -
Add the sun motif:
Above the central petal, lightly sketch a small circle for the sun element. Leave some space around it for the rays you’ll add later. -
Sketch the base triangle:
At the very bottom of the stem, draw a triangle shape resting on its base, which will serve as the decorative pot or root system.
Step 2: Inking the Lotus
-
Ink the main petals:
Switch to your terracotta fine liner. Carefully trace over your pencil lines for the flower petals. Keep your hand steady to ensure the lines are crisp. -
Add petal details:
Inside each petal, draw fine vertical lines following the curve of the outer shape. I like to leave a little breathing room near the edges so it doesn’t look too cluttered. -
Create the sun eye:
Ink the circle above the flower with the terracotta pen. Draw a smaller circle inside it and fill it in, creating an eye-like pupil. Add short, radiating lines around the outer circle for sun rays. -
Detail the stem:
Outline the stem with the same terracotta pen. Instead of leaving it solid, draw small horizontal lines to create a segmented, bamboo-like effect, coloring every other segment solid.
Steady Hands
Rest your wrist on a clean sheet of scrap paper while drawing. This prevents hand oils from smudging the ink or transferring to the cardstock.
Step 3: Adding Contrasting Elements
-
Ink the upper leaves:
Take your navy blue pen and outline the two horizontal, almond-shaped leaves. Fill them with an intricate pattern—like a small spiral or veins—to contrast with the lighter petals. -
Draw the lower fronds:
Use the navy pen for the long, fern-like leaves extending from the lower stem. Draw a central spine and add small, curved leaflets on either side, keeping the shapes pointed and sleek. -
Base details:
Outline the triangular base. Instead of filling it solid, draw vertical lines radiating from the top point to the bottom edge. Using the navy pen, add a row of tiny dots along the very bottom line. -
Add side flora:
Draw small, simple plant motifs on the bottom left and right using the navy pen. These can be simple stems with oval berries or leaves to fill empty negative space.
Ancient Vibes
Try using metallic copper instead of gold for the stars to give the piece a warmer, more aged papyrus aesthetic.
Step 4: Golden Touches
-
Draw the stars:
Using your gold gel pen, add four-pointed stars (diamond shapes with elongated vertical points) scattered around the flower. Place a large one on the upper left and right, and smaller ones for balance. -
Scatter small details:
Add tiny gold dots and small ‘plus’ signs (+) in empty areas of the background to create a magical, starry sky effect. -
Erase guidelines:
Wait at least 15 minutes for all ink to dry completely. Gently erase your pencil line down the center and any sketch marks. -
Final assessment:
Check your lines. If the terracotta looks too faint in places, go over the main outlines one more time to make the flower really pop against the cream card.
Now you have a stunning, hand-drawn greeting card ready to gift or frame
Mini Hieroglyph Alphabet Sheet
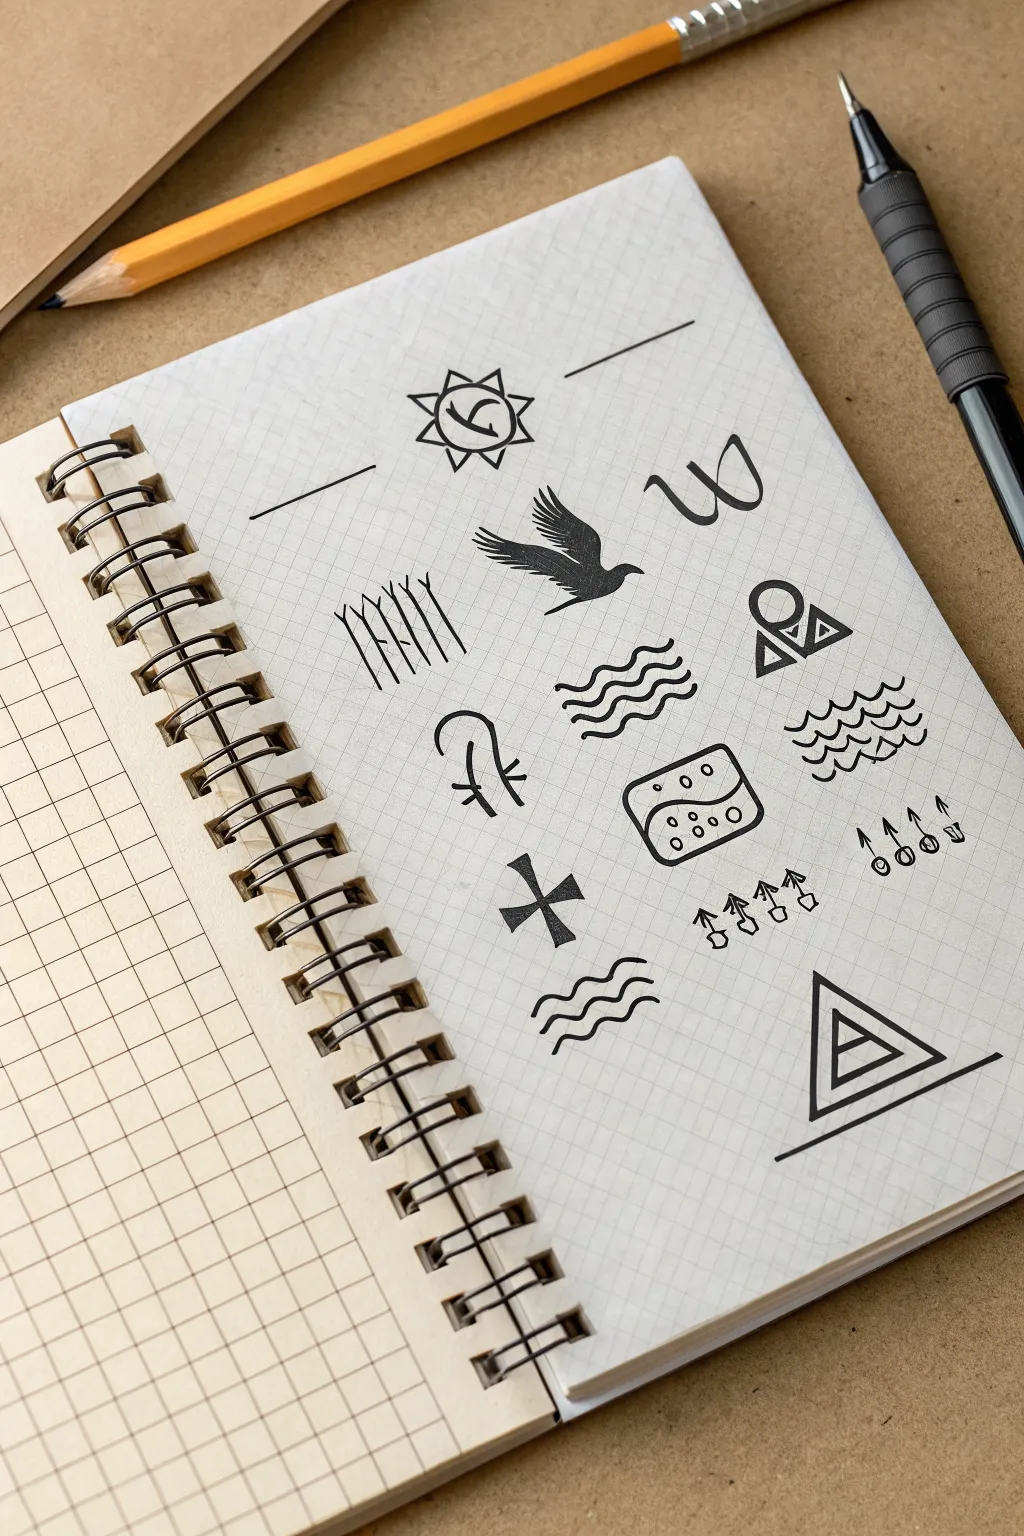
Capture the essence of ancient script with this clean, minimalist hieroglyph practice sheet. Using bold black ink against grid paper creates a striking, modern interpretation of timeless symbols that sits perfectly in any sketchbook.
How-To Guide
Materials
- Spiral-bound grid paper sketchbook
- Fine liner pen (0.5mm or 0.8mm)
- Brush pen or thick marker (black)
- Pencil (HB or 2B)
- Eraser
- Ruler (optional)
Step 1: Setting the Layout
-
Open your sketchbook:
Start with a fresh page in your spiral-bound grid notebook. The grid lines will serve as your invisible guide for keeping proportions consistent without needing perfectly straight freehand skills. -
Plan the center:
Visualize the center of the page. This is where your focal symbols, like the bird and the waves, will live. You can lightly mark the center point with a pencil if it helps orient you. -
Sketch the sun header:
Near the top center, sketch a small circle with a triangle inside. Surround it with eight small triangles pointing outward to form a sun. Draw two horizontal lines flanking the sun to create a header effect.
Ink Smearing?
If your ruler smudges the fresh ink while drawing straight lines, tape a penny to the underside of the ruler. This lifts the edge off the paper just enough to prevent dragging.
Step 2: Drawing the Core Symbols
-
Outline the bird:
Just below the sun, slightly to the right of the center, pencil in a soaring bird silhouette. Focus on the curve of the wings; the left wing sweeps upward and the right creates a gentle curve downward. -
Add the wave stack:
Below the bird, draw three stacked wavy lines. Keep the peaks and troughs aligned vertically with the grid lines to maintain a uniform look. -
Create the geometric mountain:
To the right of the waves, draw a small triangle. Add a circle hovering just above its tip, and bisect the triangle with a small line or shape to mimic an eye or moon symbol. -
Sketch the ‘reeds’:
On the left side, opposite the bird, draw a cluster of seven vertical lines. Tilt the outer ones slightly inward, resembling tall grass or reeds bundled together. -
Draw the Ankh-inspired shape:
Under the reeds, creating a vertical line with a curved loop on top. Cross it with a short horizontal bar. This mimics the classic Ankh form but keeps it stylized.
Step 3: Adding Details and Lower Elements
-
Form the cartouche box:
In the lower middle right, draw a rounded rectangle. Divide it with a wavy diagonal line. In the top half, draw a few circle outlines; in the bottom half, draw circles filled with dots. -
Draw the lower waves:
Near the bottom left, add another set of three simple wavy lines, similar to the ones you drew earlier but slightly smaller. -
Construct the bottom pyramid:
At the very bottom right, draw a large triangle. Draw a smaller triangle inside it, and a line underneath as a base. Add a horizontal bar inside the inner triangle. -
Add the directional arrows:
Above the bottom pyramid, sketch a row of small arrow-like shapes growing out of circles or bases. Vary their height slightly for visual interest.
Age the Page
Before drawing, lightly brush the paper with cooled coffee or tea and let it dry flat. This creates a parchment-like, ancient texture that makes the black ink stand out even more.
Step 4: Inking and Finalizing
-
Trace with fine liner:
Take your fine liner pen and carefully go over your pencil lines. For the geometric shapes like the triangles and sun rays, keep your hand steady and use the grid to check your straightness. -
Fill the solids:
Switch to your brush pen or thick marker. Completely fill in the silhouette of the bird to make it pop. Do the same for the cross shape on the lower left if you want it bold. -
Thicken selected lines:
I prefer to go back over the waves and the outer edges of the bottom pyramid with the thicker pen to add weight and contrast to the page. -
Erase and clean:
Wait at least five minutes for the ink to dry completely. Once safe, gently erase all visible pencil marks to reveal the crisp black designs.
Your finished page now serves as a beautiful reference sheet for future artistic archeology
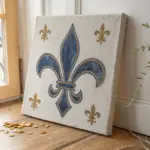
Your Name in a Cartouche
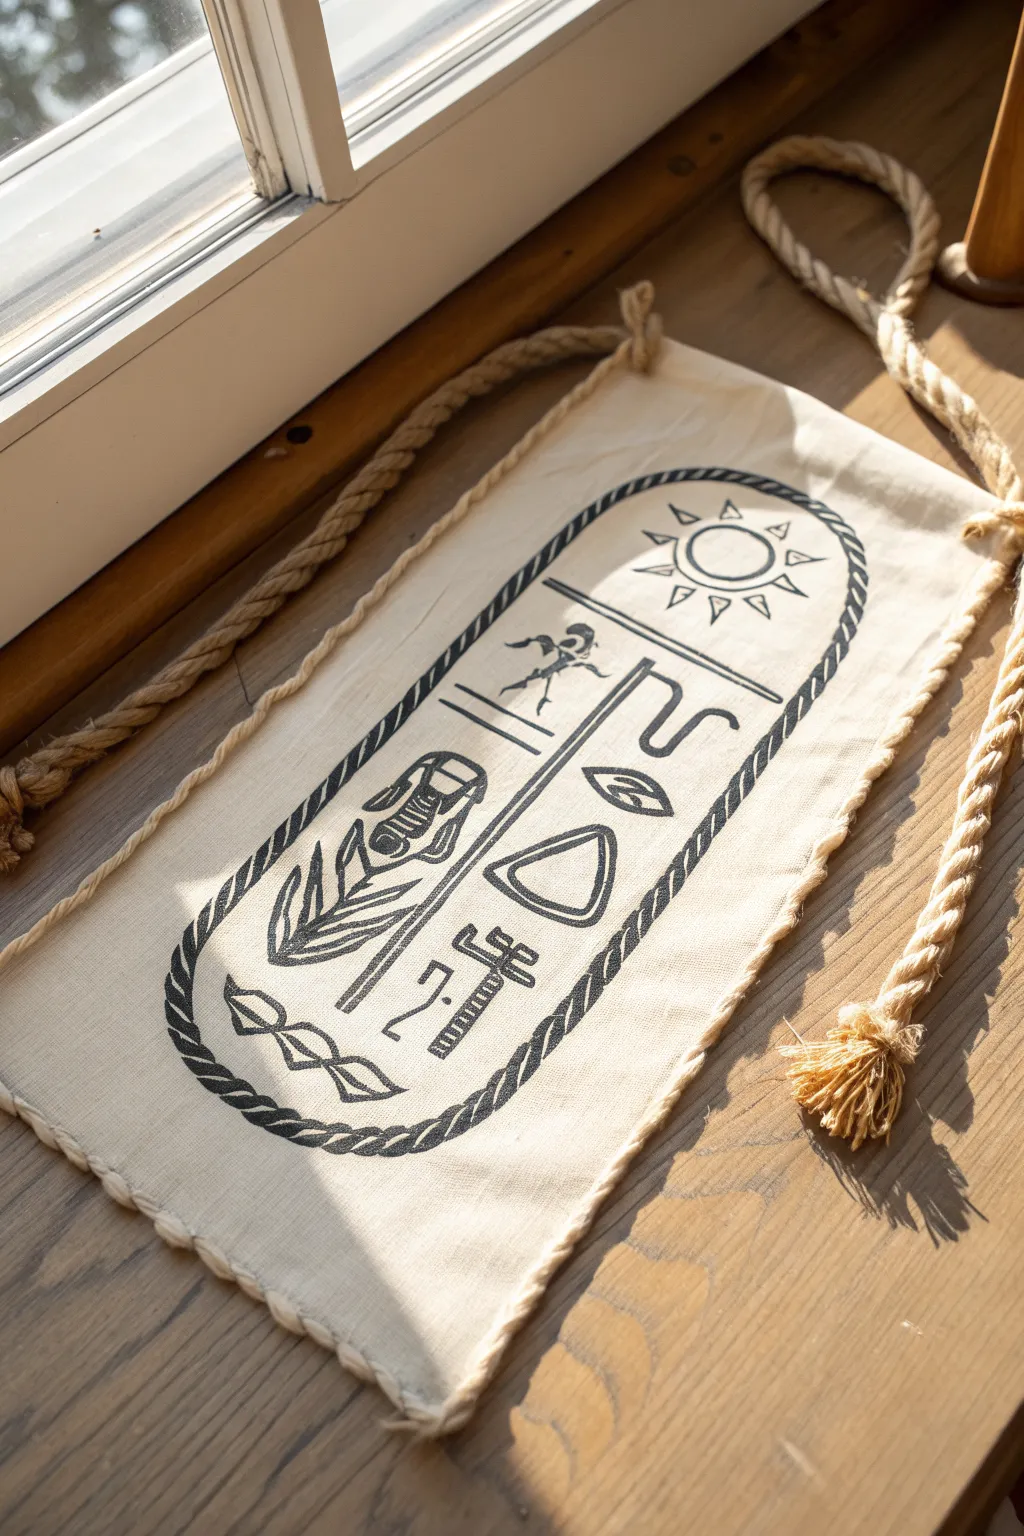
Transform a simple strip of canvas into a personalized piece of ancient history with this fabric cartouche banner. The bold black linework pops beautifully against the natural beige textile, creating a rustic yet striking decoration that feels like an archaeological find.
Step-by-Step
Materials
- Natural cotton canvas or unbleached linen fabric (approx. 10×20 inches)
- Black fabric paint or a permanent fabric market (fine tip)
- Twisted jute or cotton rope (approx. 1/4 inch thick)
- Fabric glue or strong craft adhesive (clear drying)
- Pencil and eraser
- Ruler
- Scissors
- Cardstock or paper for sketching
- Sewing needle and beige thread (optional, for extra durability)
Step 1: Preparation and Design
-
Cut the canvas base:
Begin by cutting your canvas fabric into a rectangle. A good starting size is about 6 inches wide by 14 inches long, leaving room for seams if you choose to hem, though a raw edge works for a rustic look. -
Draft the cartouche shape:
On a separate piece of paper, sketch the iconic cartouche outline—an elongated oval with a flat bar at the bottom. The sides should be straight, capped by semi-circles at the top and bottom. -
Research your hieroglyphs:
Decide on the name or word you want to feature. Look up the corresponding phonetic hieroglyphs online; usually, animals, birds, and geometric shapes are stacked vertically inside the oval. -
Transfer the design:
Lightly trace your oval cartouche shape directly onto the center of the fabric using a pencil. Use a ruler to ensure the sides are perfectly parallel. -
Sketch the symbols:
Pencil in your chosen hieroglyphs inside the oval. Since cartoons and symbols can be tricky, keep the shapes simplified—focus on clear outlines rather than shading.
Bleeding Lines?
If ink spreads into fabric fibers, spray the canvas lightly with hairspray or a clear matte sealer before drawing. This seals the fibers and keeps lines crisp.
Step 2: Inking the Artwork
-
Test your marker:
Before touching the final fabric, test your fabric marker or paint on a scrap piece of canvas to check for bleeding. If it bleeds, you may need a finer tip. -
Outline the cartouche border:
Carefully go over the pencil border of the cartouche with your black marker. To mimic the rope look often seen in carvings, draw small diagonal harsh marks inside the border or make the line thick and braided. -
Ink the upper symbols:
Start inking from the top down to avoid smudging your work with your hand. Outline the sun disk or upper decorative elements first. -
Fill in the central glyphs:
Draw the main symbols carefully. I find it helpful to draw the outline first and then go back to thicken specific lines for visual weight. -
Add the bottom bar:
Complete the drawing by inking the horizontal bar at the base of the cartouche, adding any final details or texture lines to the glyphs. -
Erase guidelines:
Allow the ink to dry completely—refer to the manufacturer’s instructions—then gently erase any visible pencil marks.
Aged Look
For an ancient papyrus feel, soak your canvas in strong black tea or coffee and let it dry completely before starting. This adds a warm, historic tint.
Step 3: Finishing and Assembly
-
Prepare the rope trim:
Measure the circumference of your fabric rectangle. Cut a length of twisted rope slightly longer than this measurement to account for corners. -
Glue the first edge:
Apply a bead of fabric glue along the raw edge of the canvas on the back side. Press the rope firmly into the glue, creating a border that frames the fabric. -
Continue the border:
Work your way around the entire perimeter, gluing the rope down bit by bit. Hold the rope in place for a few seconds at each section to ensure it grabs the fabric. -
Create hanging loops:
Cut two shorter pieces of rope, about 4 inches each. Fold them into loops and glue or sew them securely to the top corners of the banner on the backside. -
Seal the rope ends:
Where your border rope ends meet, apply a dab of glue to prevent fraying and tuck the raw ends behind the fabric if possible for a cleaner look. -
Add a hanging cord:
Thread a long piece of rope through the two top loops. Knot the ends securely so the banner can hang from a hook or rod. -
Final dry:
Lay the banner flat on a clean surface and let all glue cure overnight before hanging it upright.
Hang your personalized hieroglyph banner where it can catch the light and spark conversation about ancient writing systems
Walk-Like-an-Egyptian Figure Strip
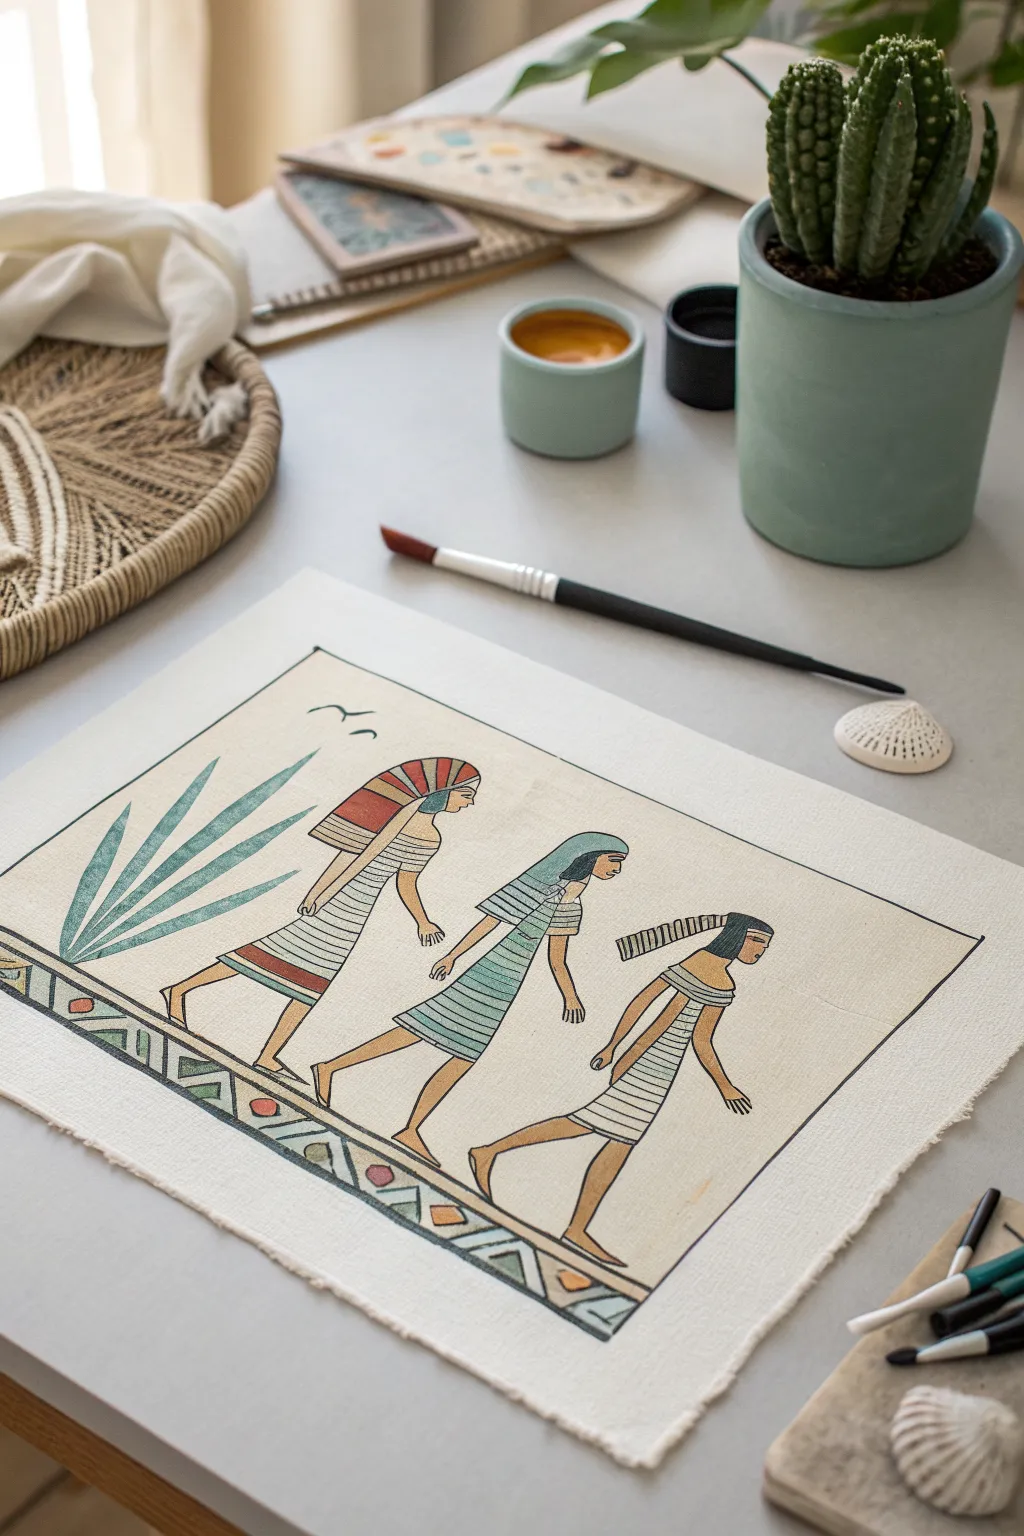
Transport your art space to antiquity with this charming trio of figures painted on textured fabric. The project features clean lines, classic profile poses, and a soothing palette of turquoise and terracotta for a historically inspired yet modern look.
Step-by-Step Tutorial
Materials
- Heavyweight cotton canvas or linen fabric (cut to approx. 8×10 inches)
- Acrylic paints (black, terracotta/burnt sienna, turquoise/teal, off-white, sand/beige)
- Fine liner brush (size 0 or 00)
- Small flat brush (size 4 or 6)
- Pencil (HB or H)
- Ruler
- Palette or mixing plate
- Cup of water and paper towels
Step 1: Preparing the Foundation
-
Shape the canvas:
Begin by cutting your canvas or heavy linen to your desired rectangular size. To achieve the rustic look shown in the image, gently fray the edges by pulling away loose threads on all four sides until you have a slight fringe. -
Prime the surface:
Mix a small amount of sand or beige paint with plenty of water to create a wash. Use your flat brush to coat the entire fabric surface lightly, giving it an aged, parchment-like tone. Let this dry completely before drawing. -
Outline the border:
Using a ruler and a light pencil touch, draw a rectangular border about an inch inward from the fabric edge. Add a second parallel line at the bottom to create the decorative floor strip.
Step 2: Sketching the Figures
-
Block in figure placement:
Mark the positions for three figures evenly spaced across the canvas. Remember the Egyptian art rule: heads and legs in profile, but shoulders often turned slightly forward. -
Sketch the first figure:
On the left, draw the first figure. Give them a tall, rounded headdress and a long, A-line skirt. Keep the lines simple and geometric. -
Sketch the center figure:
Draw the middle figure slightly smaller or in a simpler tunic. Their headdress should be shorter, perhaps a simple headcloth style. -
Sketch the right figure:
Add the final figure on the right. Give this one a distinct hairstyle—a long, braided ponytail extending backward—and a similar walking pose with arms swinging naturally. -
Add environmental details:
In the bottom border, sketch a repeating geometric pattern of triangles. Finally, add a large, stylized agave or reed plant on the far left side, rising behind the first figure.
Pro Tip: Steady Hand
For the cleanest black outlines, rest your pinky finger on a dry part of the canvas while you paint. This stabilizes your hand significantly for those long, straight lines.
Step 3: Painting the Scene
-
Paint the skin tones:
Mix a warm tan color using white, orange, and a touch of brown. carefully fill in the arms, legs, and distinct profile faces of all three figures using a small round brush. -
Color the garments (Base):
Using off-white or very pale grey, fill in the main shapes of the dresses and skirts. Don’t worry about the stripes yet; just get the solid base color down. -
Paint the decorative border:
While the figures dry, move to the bottom strip. Paint the triangles in alternating shades of turquoise, sage green, and muted terracotta. I like to keep the paint slightly translucent here to show the fabric texture. -
Add color to headdresses:
Paint the first figure’s headdress with alternating bands of red and blue-grey. Paint the center figure’s headcloth in solid turquoise, and the third figure’s hair black. -
Paint the plant life:
Fill in the large plant on the left with a teal or turquoise shade. Use long, confident strokes starting from the base and flicking upward to create the sharp leaf tips.
Level Up: Gold Leaf
Add a touch of royal luxury by applying real gold leaf or metallic gold paint to the jewelry collars and parts of the headdresses for a shimmer that catches the light.
Step 4: Inking and Details
-
Outline the main shapes:
Switch to your finest liner brush and black paint (slightly thinned with water for flow). Carefully outline the rectangular border, the plant leaves, and the main silhouette of each figure. -
Detail the clothing:
Paint thin horizontal stripes across the dresses of all three figures. Use a steady hand and try to curve the lines slightly to suggest the volume of the body underneath. -
Add facial features:
Very delicately paint the eyes. Egyptian style requires a distinct almond-shaped eye with a long eyeliner extension, even on a profile face. Add a tiny line for the mouth. -
Finalize bottom pattern:
Outline the geometric shapes in the floor border with black to make the colors pop. -
Add subtle birds:
Using the very tip of your brush, add two simple ‘m’ shaped birds flying in the upper left sky area to balance the composition.
Once dry, your ancient narrative strip is ready to be framed or mounted as a unique piece of history on your wall
Modern Geometric Egyptian Icons
Reimagine ancient iconography with a clean, contemporary twist using this geometric drawing guide. The stark contrast of navy blue and terracotta orange against cream paper creates a sophisticated piece that feels both historical and modern.
Step-by-Step Guide
Materials
- High-quality cream or off-white cardstock (A3 or 11×17)
- Ruler
- Compass
- Fine liner pens (Navy Blue, 0.5mm and 0.8mm)
- Fine liner pen (Terracotta or Burnt Orange, 0.5mm)
- Pencil (HB or 2H for light lines)
- Eraser
- Wooden poster hanger or clip frame
Step 1: Layout and Grid
-
Define the border:
Start by measuring a large rectangle about 2 inches from the edge of your paper. Use your ruler to ensure the lines are perfectly straight and the corners are 90 degrees. -
Establish the grid:
Lightly pencil a 3×4 grid inside your main border rectangle. This will give you twelve invisible boxes to center your symbols in. I like to find the exact center of each box and mark it with a tiny dot to help with alignment later.
Ink Smudge Fix
If you smudge a line, don’t panic. Use a white gel pen to essentially ‘white out’ the mistake on cream paper, or thicken the line slightly to hide the error.
Step 2: Column One: Line Work
-
Draft the diamond:
In the top left box, use your ruler to draw a tall diamond shape. Inside it, draw a vertical line and a horizontal line crossing at the center. -
Add orange accents:
Switch to your orange pen or pencil draft. Draw a small, stylized ‘bowtie’ shape at the center intersection of the diamond. -
Create the sun wheel:
In the second box down, use your compass to draw a circle. Use a ruler to divide it into eight even pie slices, extending the lines slightly past the circle’s edge. Add tiny dots at the end of each extended line. -
Draw the stylized beads:
For the third box, draw a central cross. Then, draw four circles arranged around the center point. Inside each circle, add a smaller concentric circle or dot. -
Form the star tile:
In the bottom left box, outline a diamond shape. Inside, draw four concave kite shapes pointing inward to create a negative-space four-pointed star in the middle.
Step 3: Column Two: Central Icons
-
Sketch the eye:
In the top center box, draw a wide, almond-shaped eye. Add a circle for the iris and a curved line above for the heavy eyelid. -
Construct the pyramid:
For the second box, draw a large distinct triangle. Draw a vertical line down the center. Fill the triangle with horizontal stripes using your orange pen. -
Complex triangle glyphs:
In the third box, draw a large triangle. Divide it internally with smaller triangles and lines as shown in the reference. This symbol relies on symmetry, so measure carefully. -
Draft the sun ray:
In the bottom center, draw a small circle. Use your ruler to draw long, radiating lines outward. Alternate the lengths—one long, one short—for a dynamic sunburst effect.
Add Metallic Flair
Swap the terracotta ink for a metallic copper or gold paint pen. The shimmer adds a luxurious, royal Egyptian feel to the geometric layout.
Step 4: Column Three: Sacred Shapes
-
The geometric orb:
In the top right, use your compass to draw a thick circle. Inside, draw an inverted triangle intersecting with a standard triangle to create a stylized geometric composition. -
Stylized plant form:
Below that, draw a vertical line with a teardrop shape at the top. Add horizontal bars and curved leaves branching off the sides to resemble a stylized lotus or papyrus. -
The organic drop:
For the third box in this column, draw a large teardrop shape. Unlike the others, fill this entire shape with the terracotta orange color, leaving small circles or lines as negative space inside. -
The final cross:
In the bottom right corner, draw a solid navy circle. Inside, leave a cross shape uncolored (negative space) to create a bold, high-contrast symbol.
Step 5: Inking and Finishing
-
Inking the navy lines:
Take your 0.8mm navy pen and carefully trace over all your pencil lines. Use the ruler for straight edges to keep that crisp, architectural look. For finer details inside the symbols, switch to the 0.5mm pen. -
Apply final color:
Go over any orange elements with your terracotta pen to ensure the color is saturated and opaque. -
Clean up:
Wait at least 15 minutes for the ink to fully cure. Gently erase the underlying grid lines and any stray pencil marks. -
Border line:
Finally, ink the large rectangle border that frames the entire collection. This ties everything together visually.
Hang your finished print using a simple wooden hanger to complete the minimalist aesthetic

Have a question or want to share your own experience? I'd love to hear from you in the comments below!