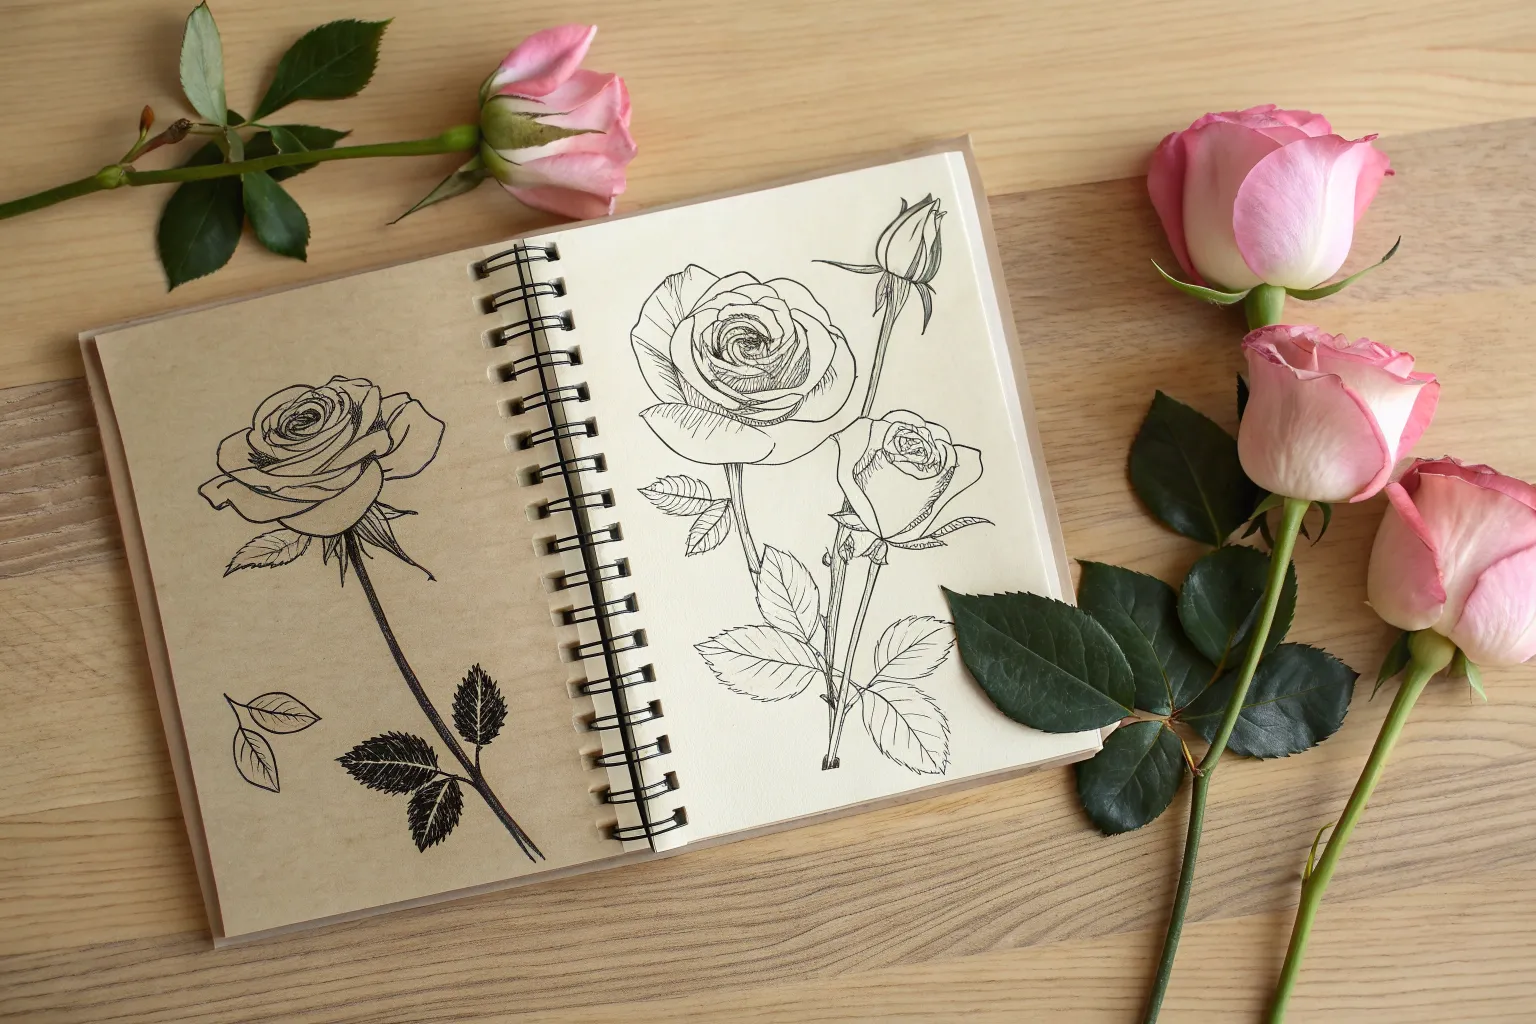
If you’ve ever stared at a rose and thought, “How do I even start?” you’re not alone—I’ve been there so many times. Here are my favorite rose sketch ideas to take you from simple, confidence-boosting lines to more detailed, artsy experiments.
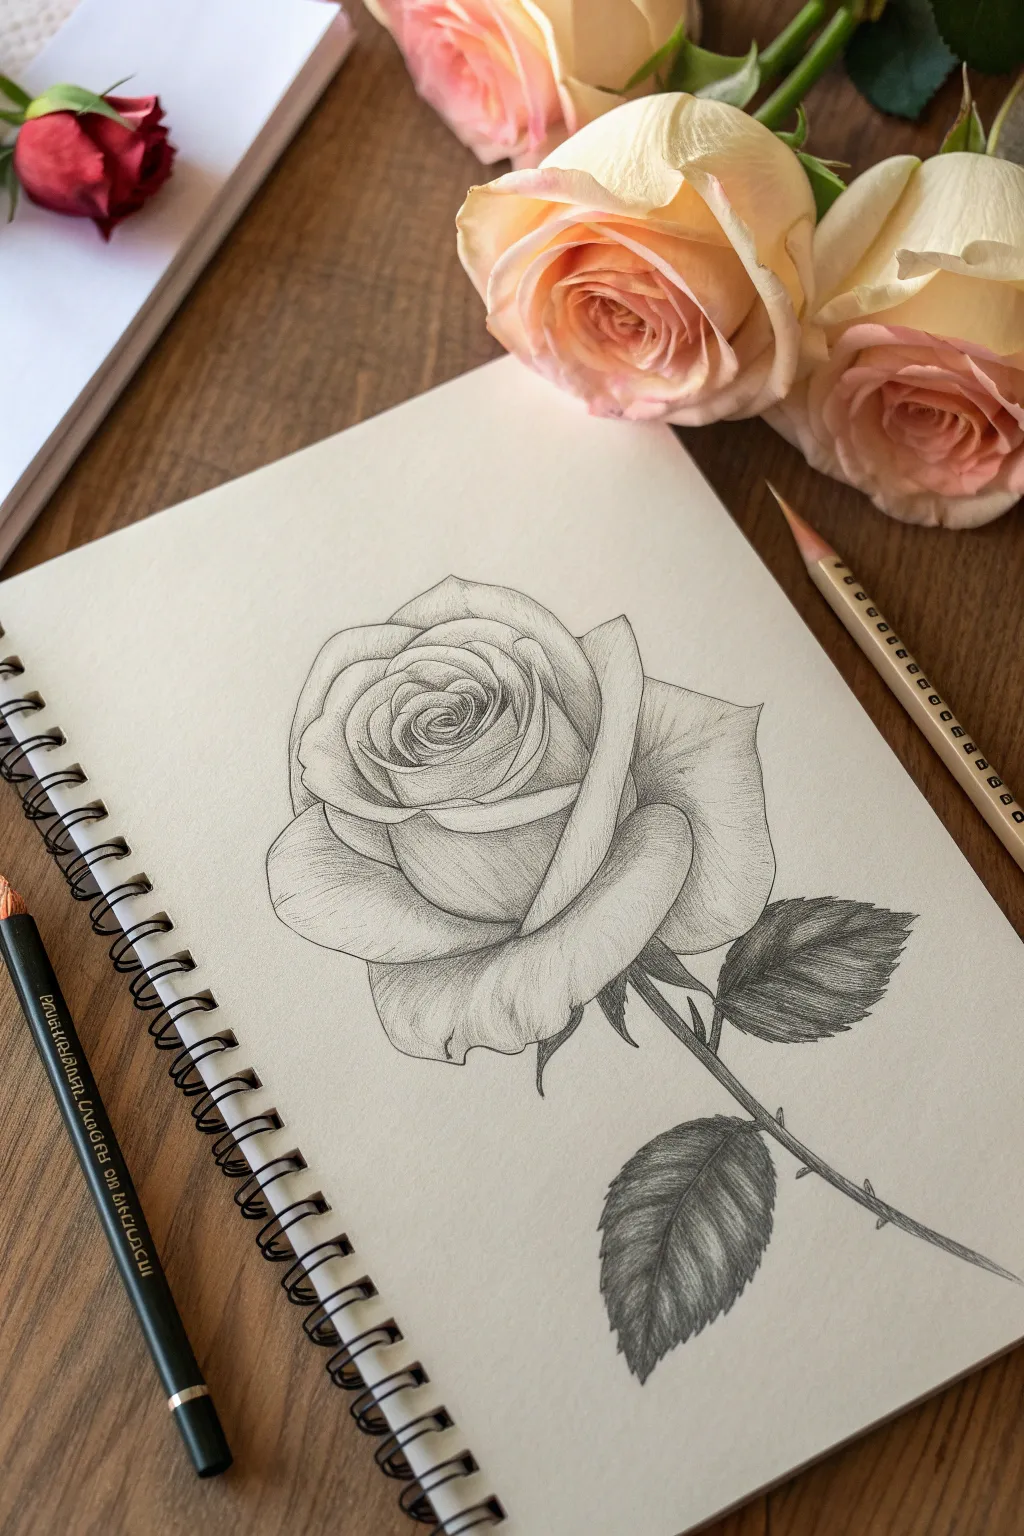
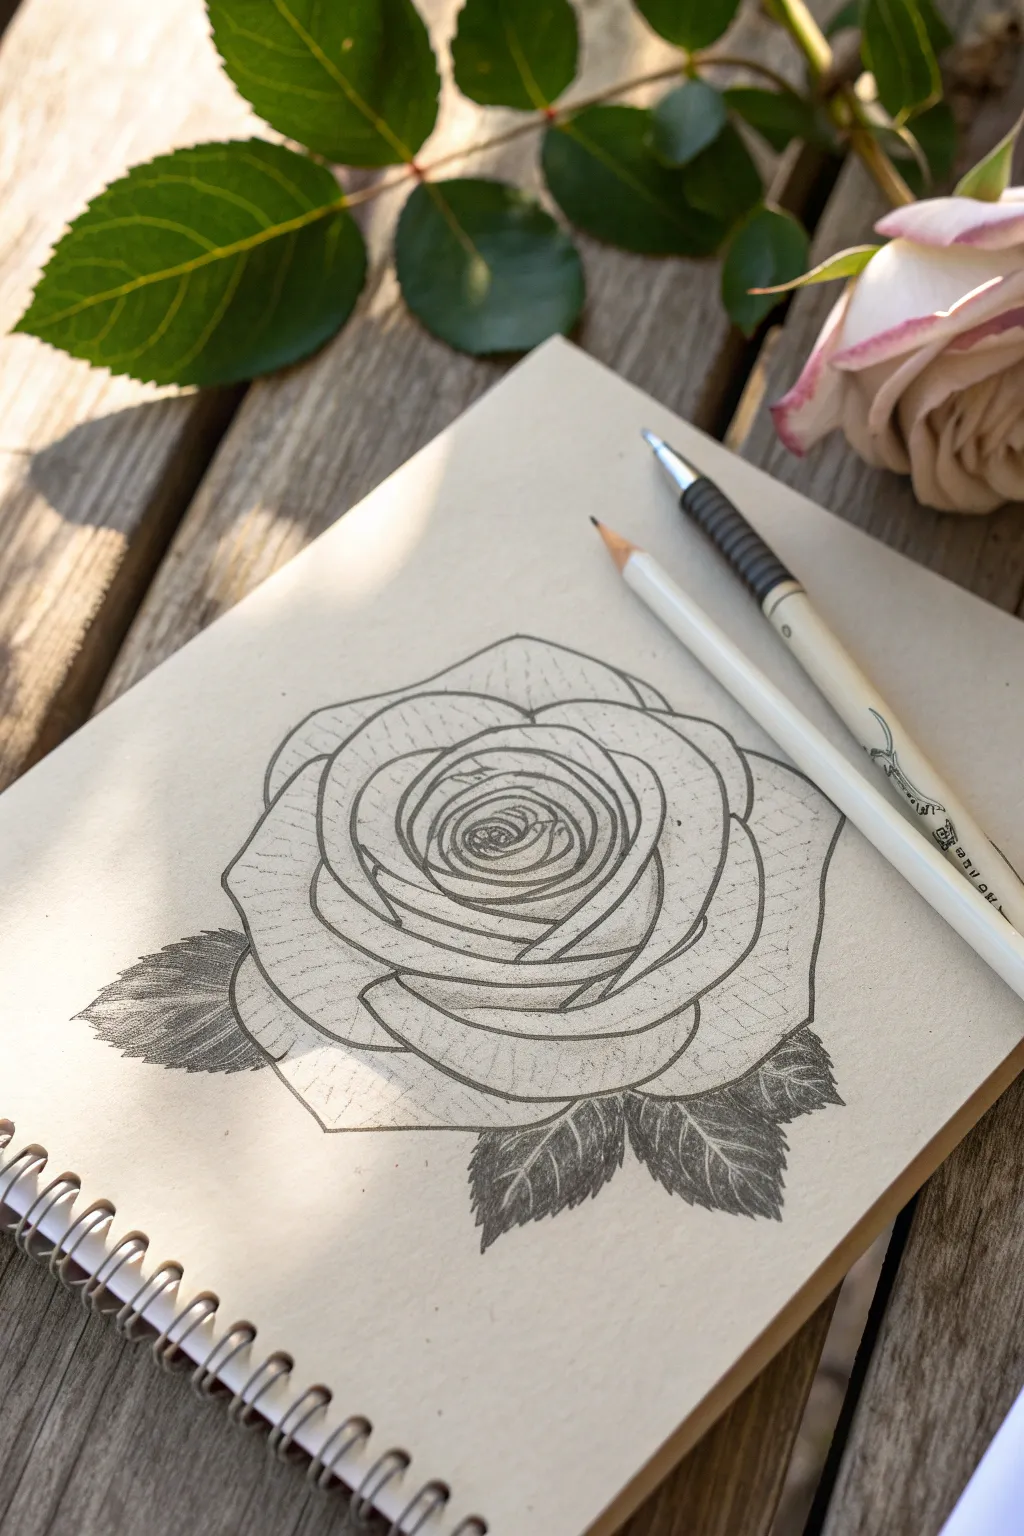
Classic Spiral Rose Doodle
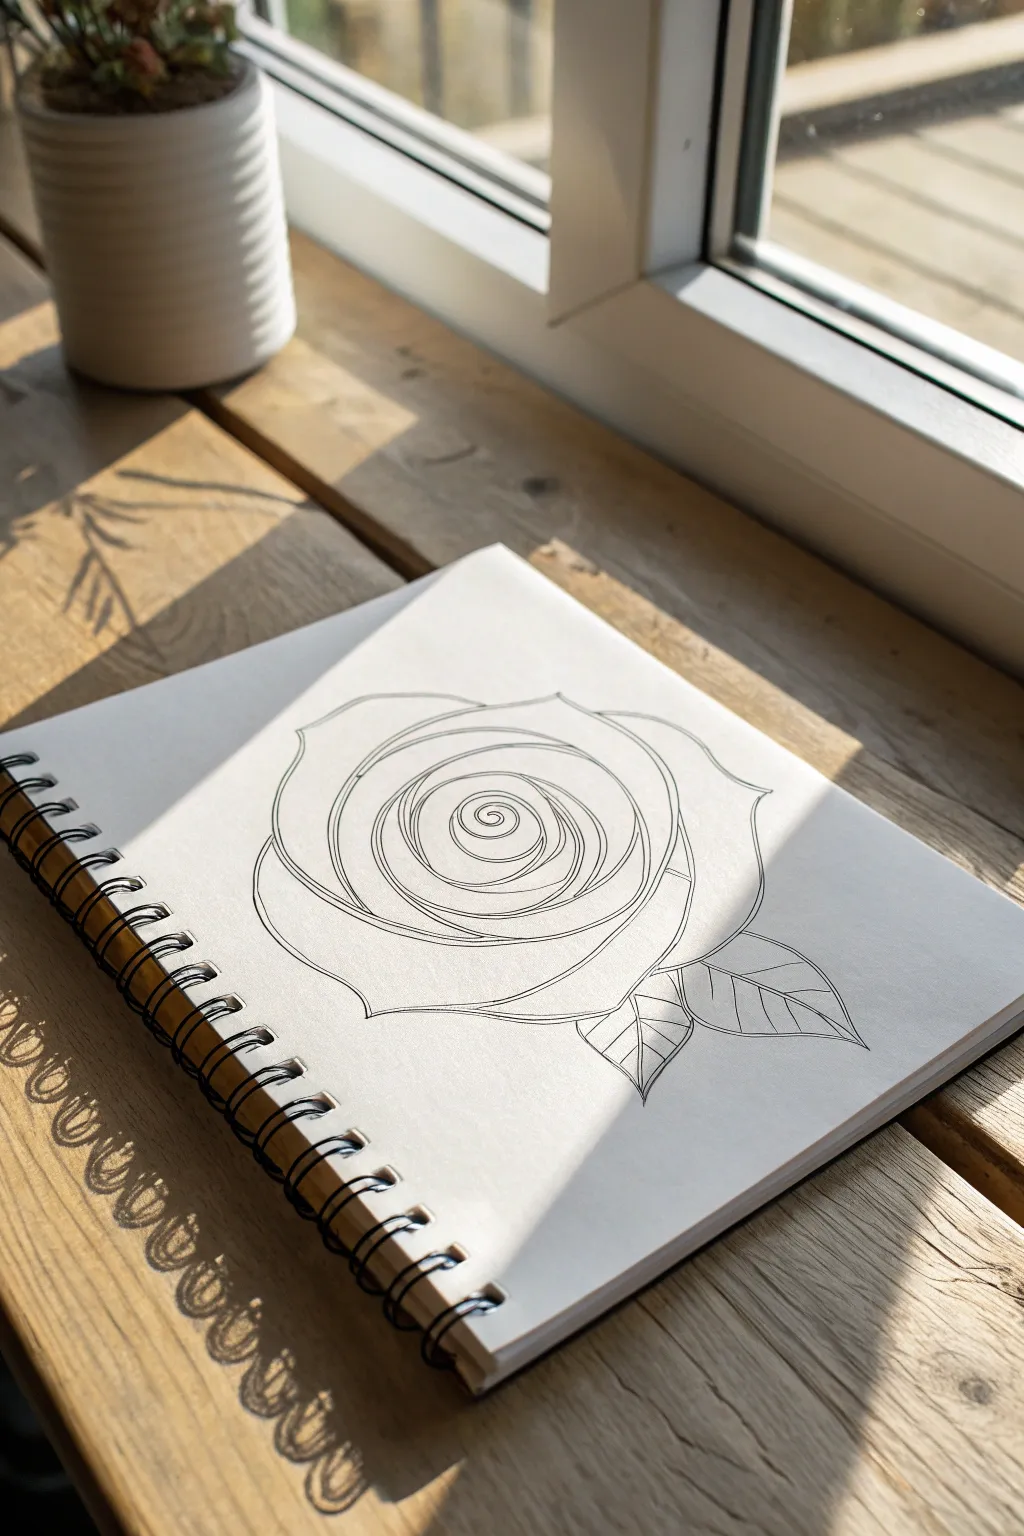
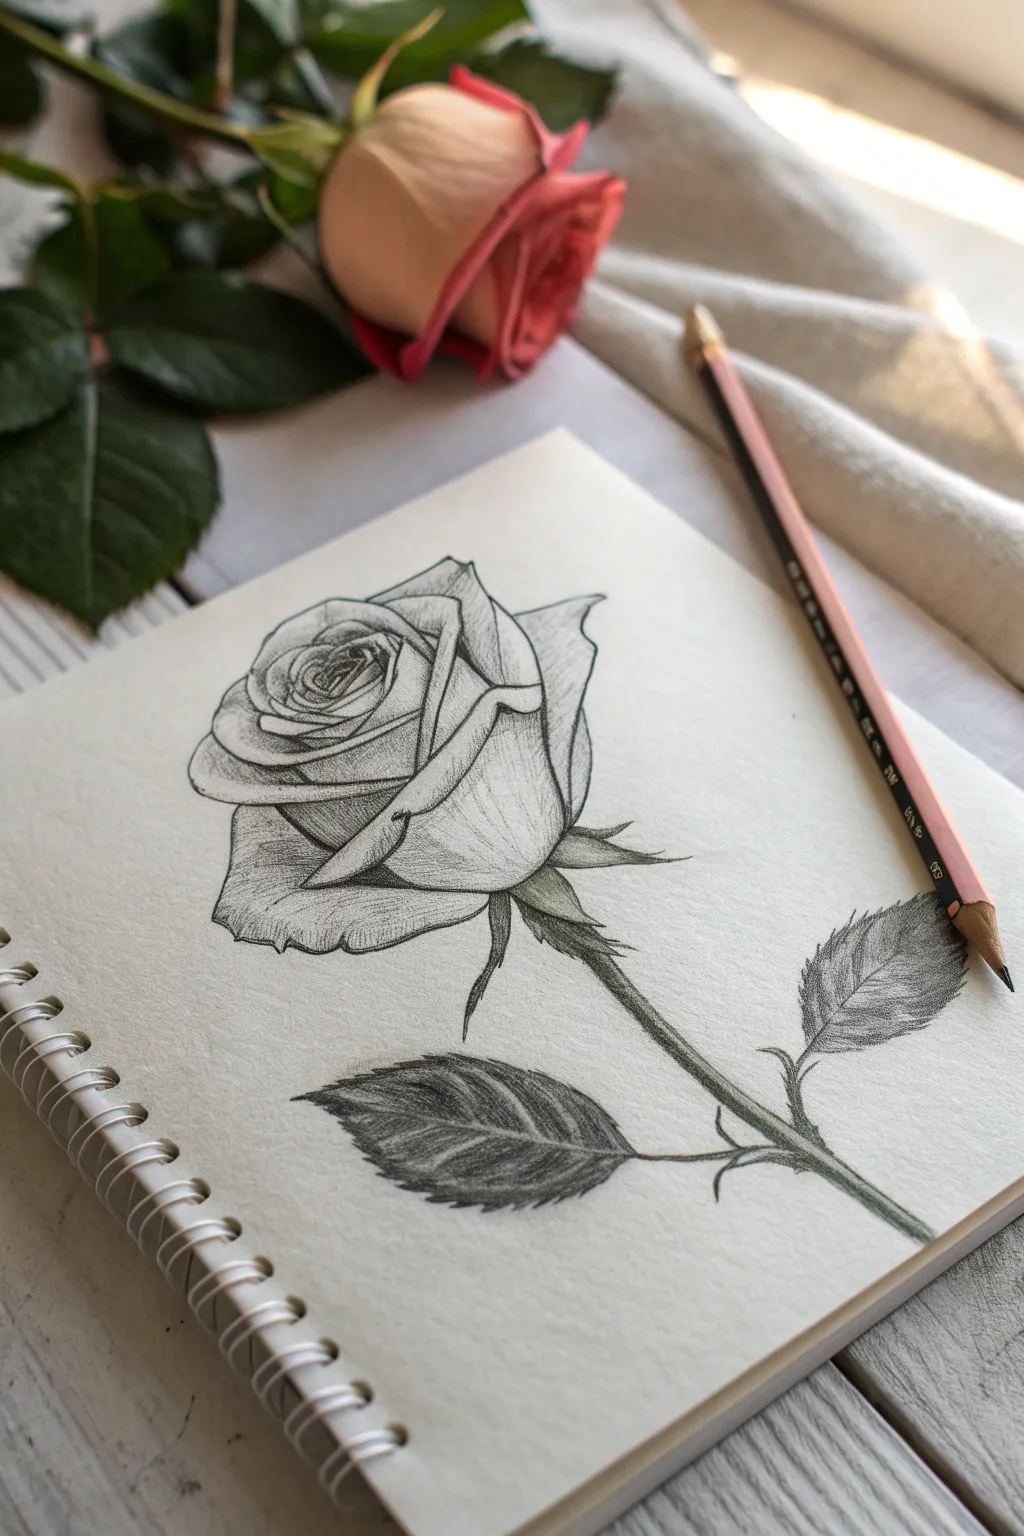
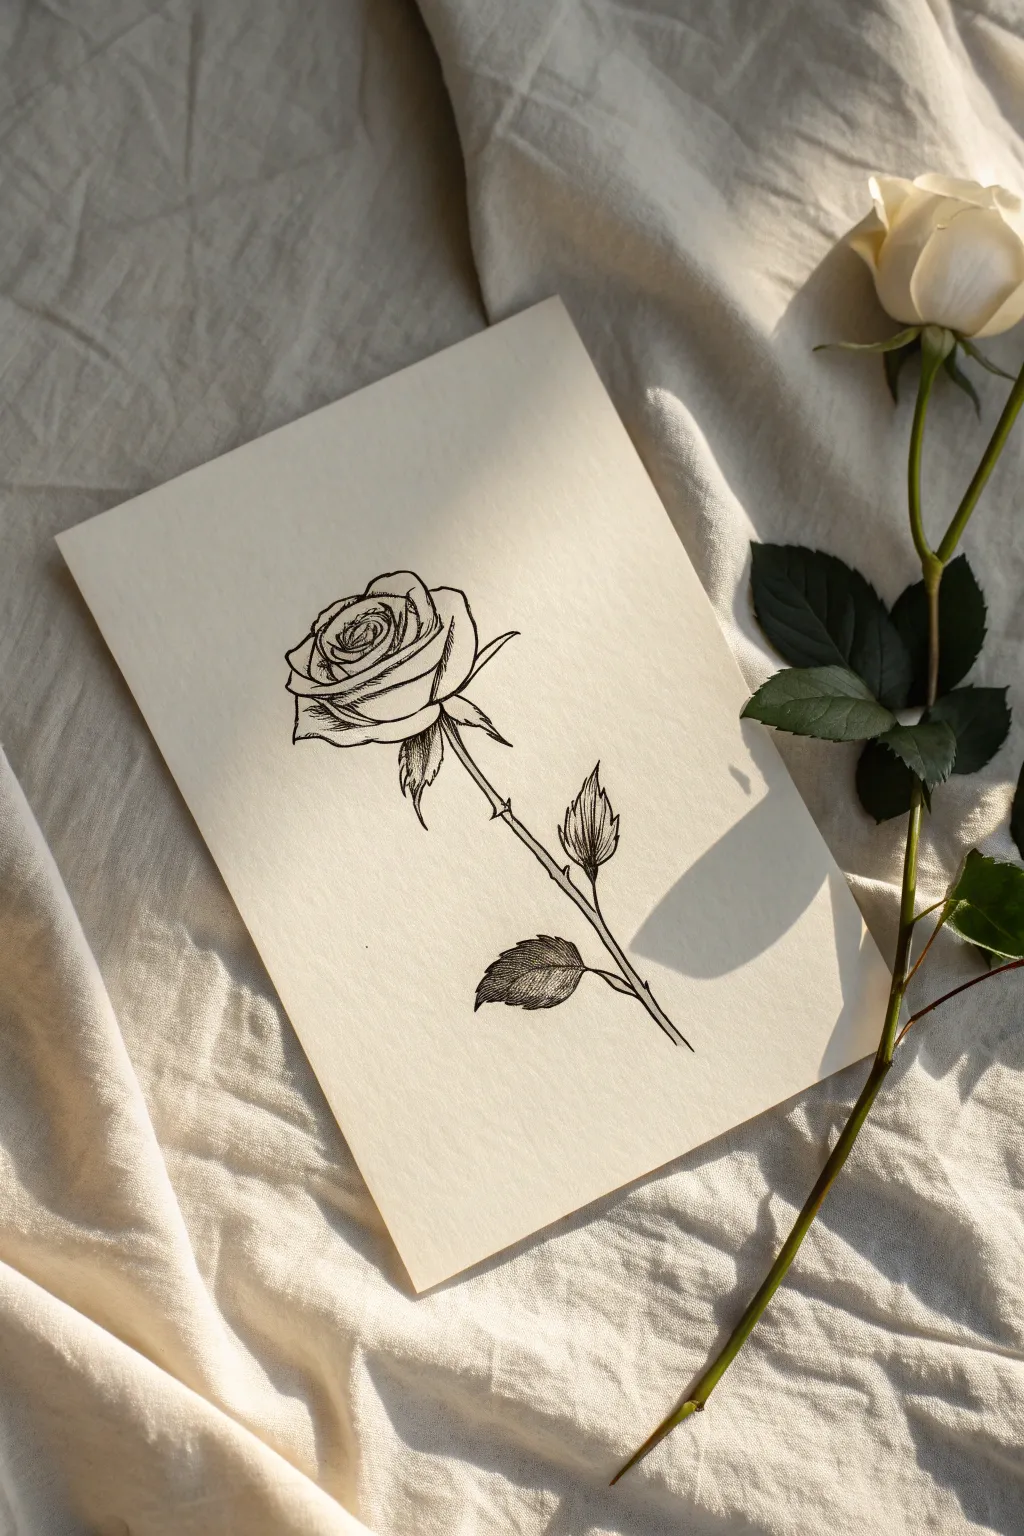
Capture the simple elegance of a blooming rose with this clean line-art study. This project focuses on confident ink lines and creating a satisfying, balanced composition that looks beautiful in stark black and white.
Detailed Instructions
Materials
- Spiral bound sketchbook (smooth cartridge paper)
- HB or 2H graphite pencil for sketching
- Fine liner pen (0.5mm or 0.8mm, black)
- Quality eraser (kneadable or white vinyl)
- Ruler (optional, not strictly needed)
Step 1: Laying the Foundation
-
Mark the center:
Begin by lightly marking the center point of your page with your pencil. This ensures your rose blooms right in the middle of the composition rather than drifting off the edge. -
Sketch the central spiral:
Draw a small, loose spiral at your center mark. This doesn’t need to be perfect; it simply acts as the tight bud at the very heart of the flower. -
Define the inner petals:
Around the initial spiral, lightly sketch two or three tightly curved lines that cup around each other. Think of these as parentheses enclosed around the center point. -
Expand the bloom:
Continue adding curved lines that radiate outward. Each new layer should be slightly larger and flatter than the last, mimicking how real rose petals unfold. -
Establish the outer shape:
Sketch the largest, outermost petals. These should have a slight point in the middle of their curve, giving them that classic rose petal ‘dip’ at the apex. -
Add flanking leaves:
Draw two pointed oval shapes emerging from the bottom right side of the rose. Position one slightly behind the other to create depth and interest.
Wobbly Lines?
If your hand shakes, try drawing the curves from your shoulder, not your wrist. Move the pen faster; speed often smooths out the wobble.
Step 2: Inking the Design
-
Start the ink work:
Switch to your fine liner pen. Beginning at the very center spiral, trace over your pencil lines with a steady, confident hand. -
Refine the spiral:
As you ink the center, try to keep the gap between the spiral lines consistent. This creates a hypnotic, pleasing rhythm to the drawing. -
Clean up petal intersections:
When inking the overlapping petals, be careful not to cross lines where one petal sits in front of another. Stop your pen line right where it meets the edge of the foreground petal. -
Add weight to the outer petals:
I prefer to exert just a tiny bit more pressure on the outermost petal lines. This subtle line weight variation helps ground the flower on the page. -
Define the leaves:
Ink the outlines of the leaves. For the leaf veins, use a lighter touch or a thinner pen if you have one available, drawing a central line and smaller v-shaped veins branching off. -
Leaf detailing:
Ensure the leaf tips are sharp and crisp to contrast with the softer curves of the flower petals. -
Erase guidelines:
Wait at least five to ten minutes for the ink to dry completely. Once safe, gently erase all underlying pencil marks to reveal the clean black and white illustration. -
Final assessment:
Look for any gaps in your line work. If a line didn’t quite connect to another, carefully bridge the gap to make sure the shape feels solid and complete.
Add Dimension
Use stippling (tiny dots) at the base of the petals where they overlap to create shadow and depth without needing gray markers.
Enjoy the clean simplicity of your finished botanical sketch


Easy Step-by-Step Petal Layers
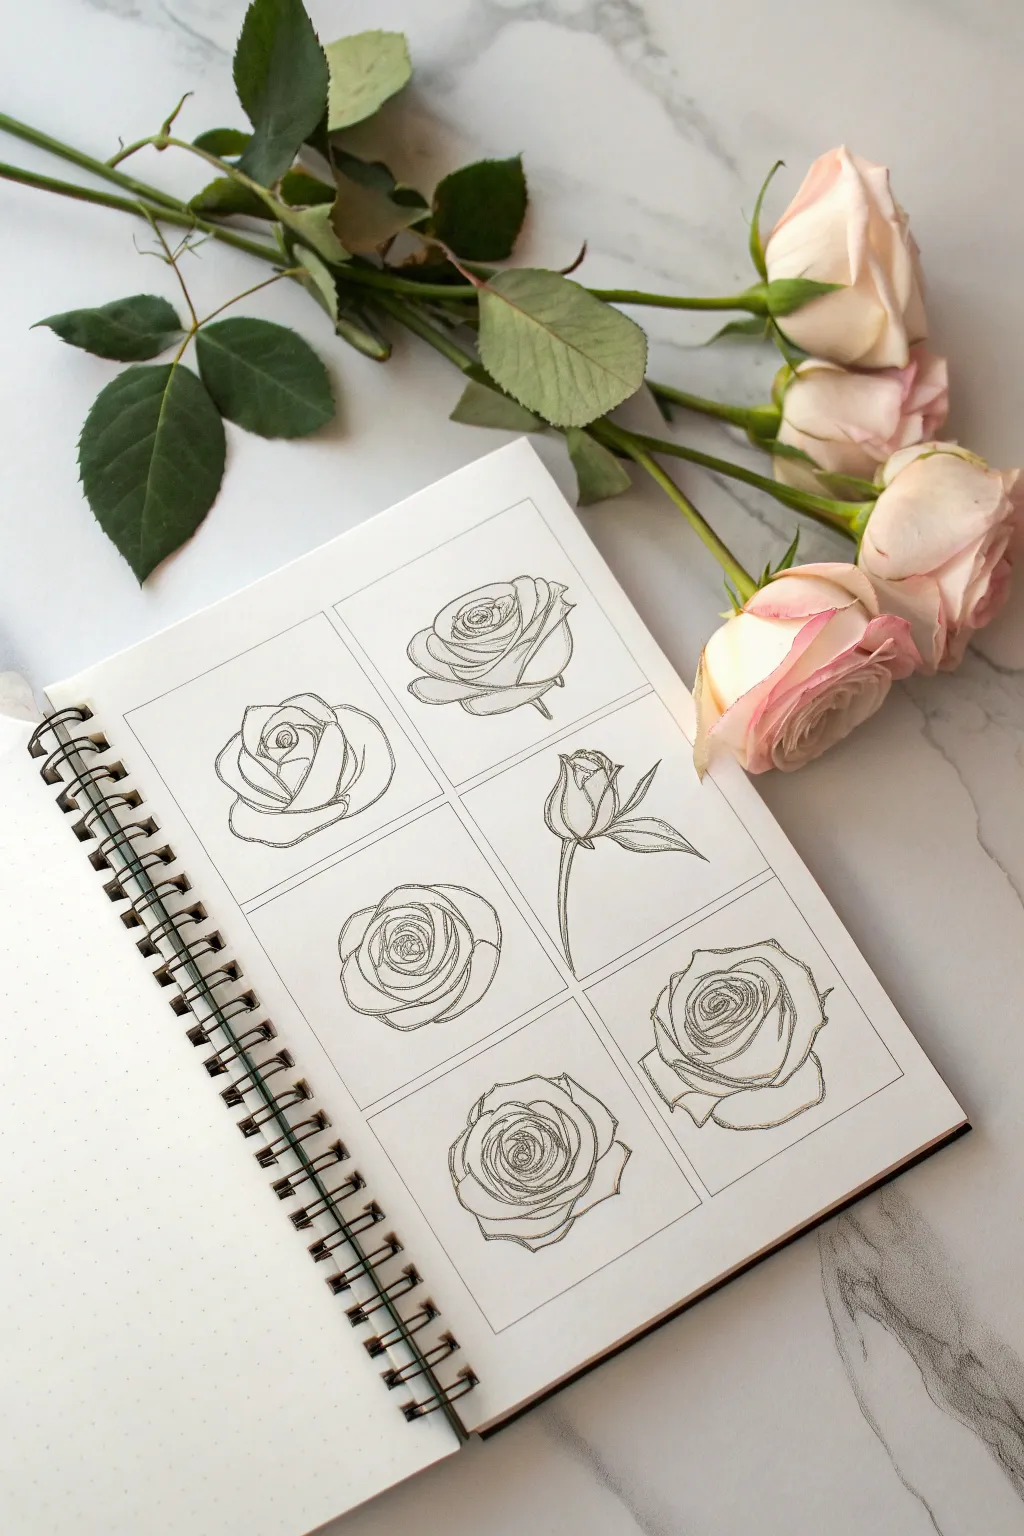
This project explores six distinct ways to capture a rose’s beauty using clean, confident line work. By practicing different angles and bloom stages in a grid format, you’ll build your understanding of petal structures without the pressure of shading.
Step-by-Step Guide
Materials
- Dotted or grid notebook (A5 size recommended)
- Fine liner pen (0.3mm or 0.5mm, black)
- Pencil (HB or 2B for sketching)
- Good quality eraser
- Ruler
Step 1: Setting Up the Grid
-
Create the framework:
Using your ruler and pencil, lightly draw a large rectangle on your page. Divide this large rectangle into six equal smaller boxes—two wide and three tall. This grid will keep your sketches organized and uniform. -
Outline the boxes in ink:
Once you are happy with the spacing, trace over your grid lines with your fine liner pen. Keep your hand steady for crisp, straight edges.
Step 2: Sketching the Blooms
-
Establish the rose centers:
In the top-left box, start a standard bloom by lightly sketching a tight spiral in the center. Repeat this process for the middle-left and bottom-left boxes, varying the tightness of the spiral slightly for each. -
Draft the outer petals (Left Column):
Around those spirals, sketch curved, overlapping shapes that mimic petals unfolding. Keep the lines loose and organic. The top-left rose should look slightly cup-shaped, while the bottom-left one can be more open and symmetrical. -
Sketch the angled perspective (Top Right):
For the top-right box, draw an oval shape first to represent the top opening of the rose. Add a U-shaped curve underneath for the body of the flower, suggesting we are looking at it from a side angle. -
Draft the bud (Middle Right):
In the middle-right box, draw a teardrop shape pointing upward. This will be a closed bud. Add two small leaf shapes curving out from the base for the sepals. -
Create the full bloom (Bottom Right):
For the final box, start with a very tight center spiral and expand outward with wide, rippling circles. This sketch represents a fully opened rose seen directly from above.
Natural Imperfections
Don’t make your petals perfect circles. Wobbly lines and uneven edges actually make the rose look more organic and realistic.
Step 3: Inking and Refining
-
Ink the centers first:
Switch to your fine liner. Starting with the center spirals of each rose, carefully define the innermost petals. Use broken lines occasionally to suggest softness rather than rigid edges. -
Define the petal edges:
Work outward from the center. Instead of tracing your pencil lines exactly, look for opportunities to add small dips or folds to the petal rims. This adds realism to the line art. -
Detail the side view (Top Right):
When inking the side-view rose, emphasize the curve of the outer petals wrapping around the base. Add a tiny stem stub at the bottom. -
Ink the bud and sepals (Middle Right):
For the bud, use smooth, confident curves. Make sure the sepals (the green leaves at the base) have sharp, tapered tips to contrast with the soft flower petals. Extend a long, slender stem downward. -
Complex layers (Bottom Row):
For the bottom two roses, focus on the overlapping effect. Ensure that a petal line stops when it hits another petal appearing in front of it. This creates depth purely through line weight and placement. -
Add texture marks:
I find that adding tiny, delicate hatching lines near the base of the petals helps suggest curve and shadow without fully shading the piece. Keep these minimal.
Smudged Ink?
If you smudge ink while erasing, turn it into a shadow with cross-hatching, or use white gel pen to cover minor mistakes once dry.
Step 4: Final Touches
-
Erase pencil marks:
Wait several minutes to ensure the ink is completely dry. Gently erase all the underlying pencil sketches and guidelines, leaving only the crisp black ink. -
Check line weight:
Look over your grid. If any outer edges feel too thin or weak, go over them once more to thicken the line slightly, grounding the flowers in their boxes.
You now have a clean reference sheet of roses in various stages of bloom to refer back to for future drawings


Realistic Rose With Soft Pencil Shading
This tutorial guides you through creating a classically beautiful, realistic rose drawing that emphasizes soft tonal transitions and delicate petal folds. You’ll learn how to build up layers of graphite to capture the velvety texture of flower petals.
Step-by-Step
Materials
- Spiral-bound sketchbook with smooth drawing paper (heavyweight prevents buckling)
- H or HB pencil (for initial outlining)
- 2B pencil (for mid-tone shading)
- 4B or 6B pencil (for darkest shadows)
- Kneaded eraser
- Precision pencil sharpener
- Blending stump or tissue (optional)
Step 1: Constructing the Framework
-
Establish the center:
Begin by lightly sketching a tight, small spiral in the upper-middle area of your page. This will serve as the innermost bud of the rose where the petals are tightly packed together. -
Draft the inner petals:
Using your Harder grade pencil (H or HB), draw small, overlapping C-shaped curves hugging the central spiral. Keep these strokes faint, as lines in nature are rarely hard or dark. -
Expand the bloom:
Working outward, sketch larger, wider petals that unfurl from the center. Make the edges slightly uneven and organic rather than perfect arcs to mimic real rose anatomy. -
Add outer guard petals:
Draw the largest, low-hanging petals at the bottom. Let some of these curl downwards or fold over at the edges, giving the flower 3D volume. -
Sketch the stem and leaves:
Draw a straight line extending diagonally from the flower base for the stem. Add two leaves on the right side and one lower down, giving them serrated (jagged) edges.
Keep it Clean
Place a scrap piece of paper under your drawing hand. This prevents your palm from smudging your work or transferring oils to the paper while you shade the rose.
Step 2: Developing Form with Shading
-
Define the core shadows:
Switch to your 2B pencil. Identify the deepest crevices between the inner petals and lightly fill them in. The darkest points should be right where the petals tuck under one another. -
Shade the petal surfaces:
Using the side of your pencil lead, apply soft graphite to the curved surfaces of the petals. Leave the top ridges and folded-over edges white to represent caught light. -
Refine the center:
Darken the tight spiral in the middle. I like to sharpen my pencil to a fine point here to create crisp distinct lines separates those tiny, packed petals. -
Create depth in outer petals:
For the large bottom petals, shade heavily near the base where they attach to the flower, fading out to white as you reach the outer rim. This gradient creates a curved look. -
Add cast shadows:
Look for where one petal creates a shadow on the petal beneath it. Darken these specific areas firmly to separate the layers visually.
Step 3: Detailing and Texture
-
Texture the leaves:
The leaves need a different texture than the petals. Fill them in with closer, sharper parallel strokes that follow the direction of the veins. -
Enhance leaf contrast:
Darken the veins themselves or shade the spaces *between* the veins to make them pop. Use a 4B pencil here to make the leaves feel distinct from the softer flower. -
Shadow the stem:
Shade one side of the stem (the right side in this example) to make it look cylindrical. Add tiny triangular thorns along the stem length. -
Soften the transitions:
If your pencil strokes look too scratchy on the rose petals, use a kneaded eraser to dab at them gently, or smudge slightly with a clean finger or blending stump. -
Finalize contrast:
Take your darkest pencil (4B or 6B) and revisit the deepest crevices in the rose center and under the heavy outer petals. High contrast makes the drawing look realistic. -
Clean up highlights:
Use the clean edge of your eraser to lift out any graphite smudge from the very tips of the petals and the highlighted ridges, ensuring the brightest whites are crisp.
Graphite look too shiny?
Heavy pencil layering can cause ‘graphite shine.’ To fix this, spray the finished drawing with a matte fixative spray, which dulls the reflection and locks the drawing.
With practice, you’ll master the delicate balance of light and shadow that brings a simple flower sketch to life


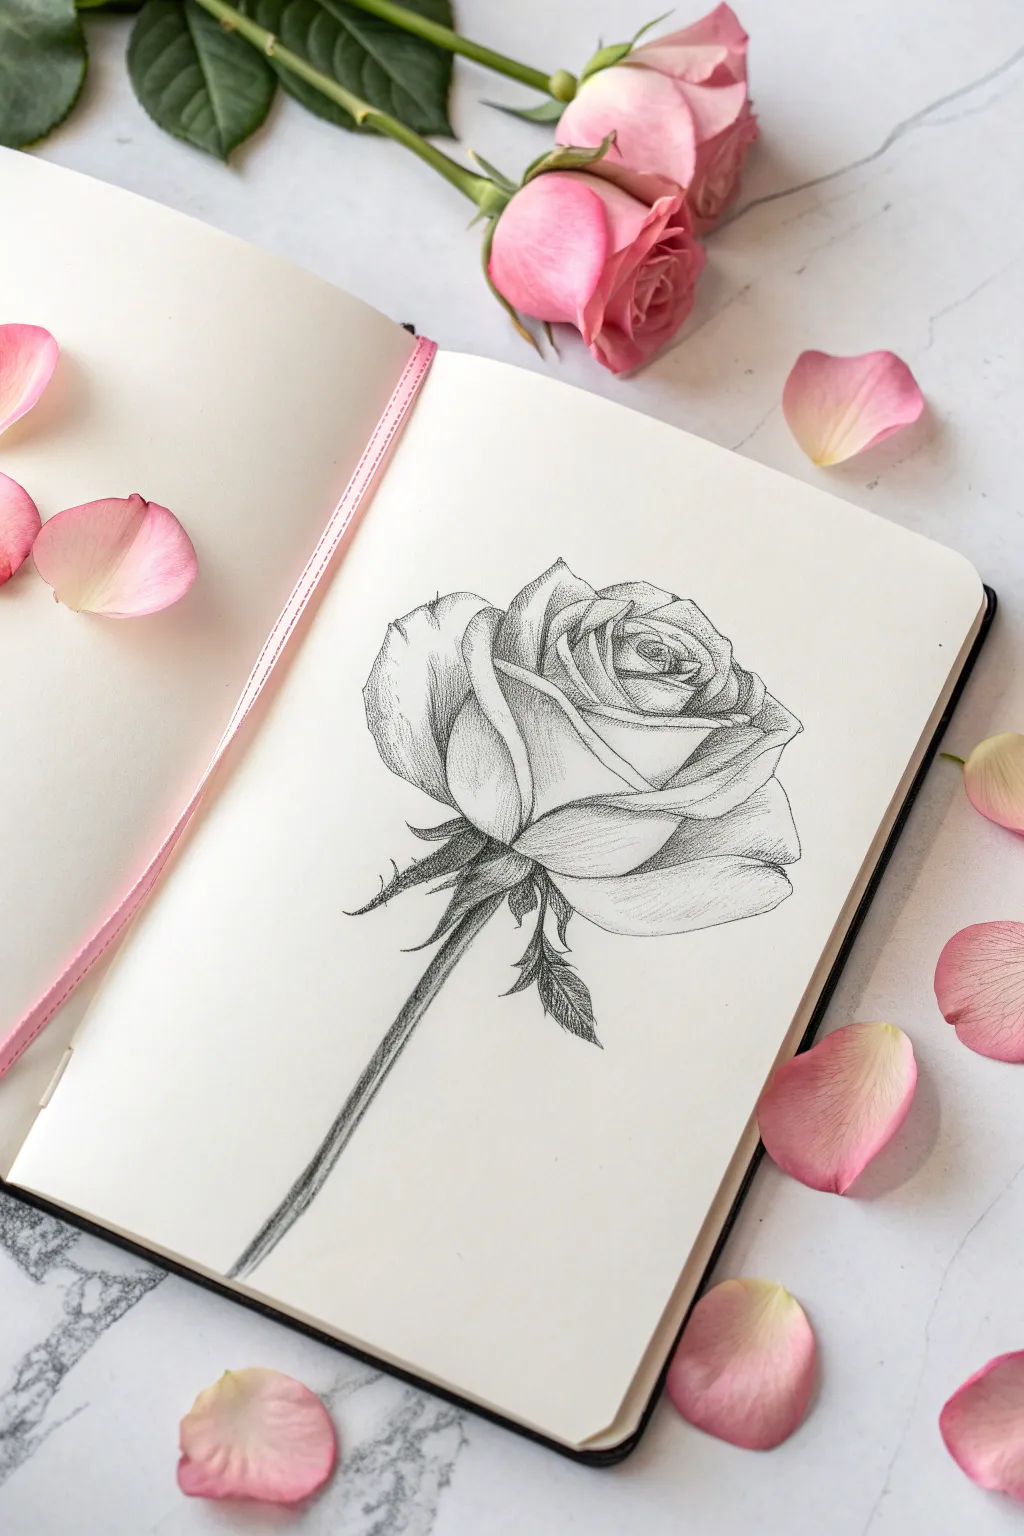
Rosebud Study (Closed and Simple)
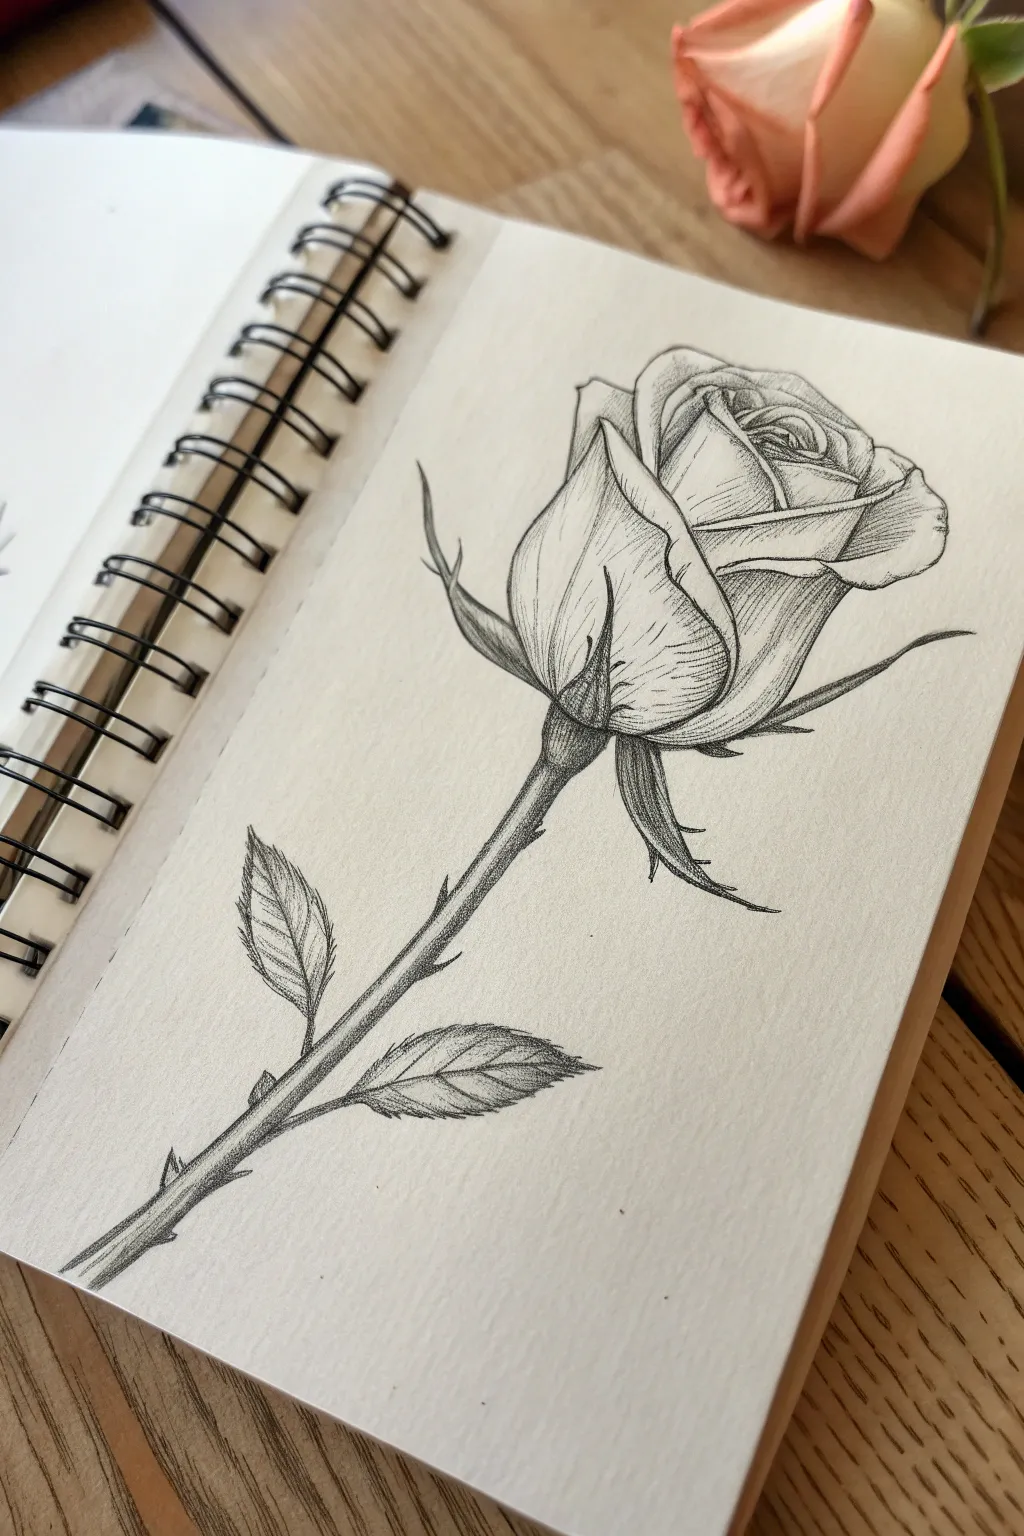
This elegant pencil sketch captures the delicate unfolding of a rose with clean lines and careful shading. The study focuses on structure and value, using hatching techniques to create realistic depth on textured sketchbook paper.
Step-by-Step Tutorial
Materials
- Sketchbook with slightly textured paper (off-white or cream)
- HB or 2B graphite pencil (for initial structural lines)
- 4B or 6B graphite pencil (for shading and dark accents)
- Fine-point mechanical pencil (optional, for crisp details)
- Kneaded eraser
Step 1: Structural Foundation
-
Establish the Head:
Begin by lightly sketching a loose oval shape near the top center of your page. This will represent the main body of the rose bloom. -
Define the Center:
Inside the oval, draw a tighter, spiral-like swirl. This indicates the tightly packed petals at the very heart of the rose. -
Map the Main Petals:
Draw angled U-shapes wrapping around the central spiral. Focus on the large front petal that cups the bottom of the bloom, making sure its edges curve softly outward. -
Add the Stem Line:
Draw a slightly curved line extending downward from the base of the bloom. This doesn’t need to be thick yet, just a gesture line for direction. -
The Sepals:
Sketch the sepals (the green leaf-like structures) at the base of the flower head. Draw them curling away from the bud—some pointing down along the stem, others curving out to the sides.
Step 2: Refining the Shape
-
Petal Edges:
Go back over your petal shapes with a little more confidence. Add subtle unevenness to the rims of the petals where they curl over; real rose petals are rarely perfect geometric arcs. -
Thicken the Stem:
Add a second line parallel to your stem guide to give it thickness. I like to add a tiny thorn or two jutting out, keeping them sharp and triangular. -
Leaf Placement:
Draw two main leaves branching from the lower section of the stem. Make them teardrop-shaped with serrated (jagged) edges to mimic real rose foliage. -
Clean Up:
Use your kneaded eraser to gently lift away any heavy construction lines or smudges, leaving a clean outline ready for shading.
Pro Tip: Line Weight
Make the outline of objects closer to the viewer slightly thicker and darker. Keep lines on receding petals thinner to create depth.
Step 3: Shading and Texture
-
Core Shadows:
Switch to a slightly softer pencil (like a 4B). Identify the deepest shadows—usually inside the spiral center and underneath the overlapping petal folds. -
Hatching the Petals:
Use directional hatching (closely spaced parallel lines) to shade the petals. Follow the curve of the form; if the petal curves down, your stroke should curve down. -
Defining the Sepals:
Darken the underside of the sepals where they meet the stem. Use short, dense strokes to make them look thicker and darker than the delicate petals. -
Stem Texture:
Shade one side of the stem more heavily to create a cylindrical look. Add tiny, vertical lines to suggest the fibrous texture of the plant stalk. -
Leaf Veins:
Draw a central vein down each leaf. Shade the leaf halves with hatched lines that angle away from the center vein toward the jagged edges. -
Deepen Contrast:
Look for areas where shapes overlap, such as where a petal casts a shadow on the one below it. Press harder here to create crisp, dark separation lines. -
Final Highlights:
Use the clean edge of your eraser to lift out small highlights on the curves of the petals and the tops of the leaves, enhancing the 3D effect.
Level Up: Vintage Tone
Sketch on tan-toned paper and use a white charcoal pencil to add bright highlights for a stunning, classical botanical illustration look.
Now you have a timeless floral study captured in your sketchbook
BRUSH GUIDE
The Right Brush for Every Stroke
From clean lines to bold texture — master brush choice, stroke control, and essential techniques.
Explore the Full Guide
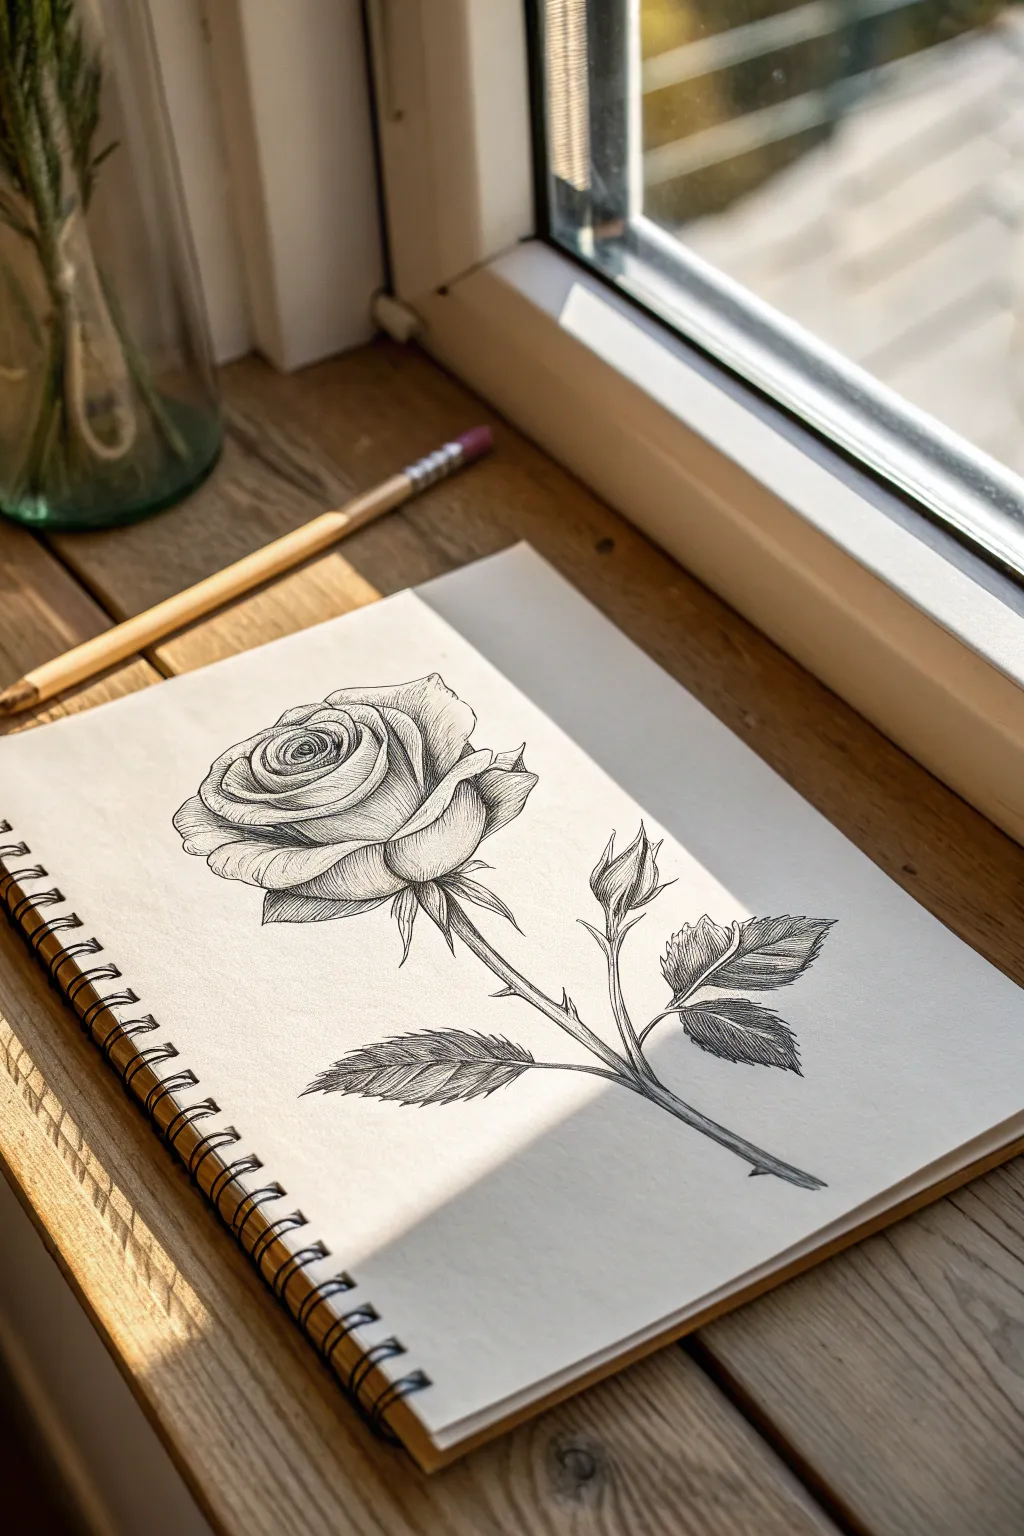
Side-View Rose Profile
This classic sketching project captures the delicate unfolding of a rose from a side profile perspective. By focusing on the structural layers of the petals and the texture of the leaves, you’ll create a drawing that feels both realistic and softly artistic.
Detailed Instructions
Materials
- Spiral-bound sketchbook (medium textured paper)
- HB pencil (for initial outlines)
- 2B or 4B pencil (for shading and depth)
- Fine-point mechanical pencil (optional, for details)
- Kneaded eraser
- Pencil sharpener
Step 1: Constructing the Core Shape
-
Establish the central axis:
Begin by drawing a faint, slanted line to act as the stem and guide for the flower’s angle. This ensures your rose doesn’t look like it’s falling over. -
Outline the cup:
At the top of your stem line, sketch a U-shape or a rounded cup. This represents the main body of the rose before the petals flare out. -
Define the center spiral:
Inside the cup, draw a tight, swirling oval shape. This is the tightly packed center of the rose where the petals haven’t yet unfurled. -
Draft the outer petals:
Lightly sketch large, triangular-shaped petals peeling away from the central cup. Focus on the one large petal on the left and the sharper petal tip on the right. -
Add the stem and leaves guide:
Extend the stem line downwards. Mark two positions for leaves: one lower down on the left, and one slightly higher on the right.
Flat Looking Flower?
If the rose looks flat, check your contrast. Deepening shadows where petals overlap instantly pushes background petals back and pulls foreground ones forward.
Step 2: Defining the Petals
-
Detail the center tight petals:
Refine the central spiral by overlapping small C-shaped curves. These should look like layers of fabric hugged tightly together. -
Draw the rim of the outer petals:
Go over the large outer petals, adding slightly ragged or wavy edges to mimic the natural texture of a real rose petal. Don’t make the lines too perfect. -
Add the petal folds:
For the petals facing us, draw the ‘turn-over’ edge where the petal curls outward. This creates dimension and shows that the petal has thickness. -
Sketch the sepals:
At the base of the flower head, draw the sepals—those little leafy spikes pointing downwards against the stem. Make them sharp and distinct.
Pro Tip: Directional Lines
Never shade randomly. Always curve your pencil strokes to match the curvature of the petal. This ‘contours’ the object, making it look round and 3D.
Step 3: Shading and Texture
-
Start shading the darks:
Using your softer pencil (2B or 4B), fill in current deepest shadows. These are usually deep inside the spiral center and underneath the large outer petals. -
Hatch natural curves:
Apply shading using contoured hatching lines that follow the shape of the petal. If the petal curves up, your lines should curve up. -
Soften the petal surfaces:
Use lighter pencil pressure to shade the middle of the petals, leaving the edges nearly white to act as highlights. I find that lifting pigment with a kneaded eraser helps create soft transitions here. -
Refine the stem:
Darken the stem, particularly on the right side to suggest a cylindrical shadow. Add a few small thorns with sharp, flicking motions.
Step 4: Developing the Leaves
-
Outline the serrated edges:
Draw the final shape of the leaves, ensuring the edges are jagged or ‘toothed’ rather than smooth curves. -
Draw the leaf veins:
Draw a central vein line down each leaf, then branch out with smaller veins toward the edges. -
Fill the leaves with tone:
Shade the leaves fairly darkly compared to the rose petals. Use short, dense strokes that follow the direction of the veins. -
Deepen contrast:
Go back in with your darkest pencil and reinforce the serrated edges and the central vein shadows to make the leaf texture pop. -
Final clean-up:
Erase any stray construction lines or smudges around the drawing to leave a crisp presentation on the page.
Step back and admire the gentle gradients and sharp details of your botanical study
Top-Down Bloom (Radial Petal Map)
This classic top-down perspective captures the spiraling beauty of a rose bloom using clean, slightly geometric lines and carefully shaded foliage. It’s a perfect exercise in understanding radial symmetry and building depth through structured petal layers.
Step-by-Step
Materials
- Sketchbook with smooth, off-white paper
- HB graphite pencil (for initial outlines)
- 2B or 4B graphite pencil (for darker definitions)
- Mechanical pencil (optional, for precision)
- White charcoal or pastel pencil (for highlights)
- Kneaded eraser
Step 1: Constructing the Framework
-
Establish the Center:
Begin by lightly drawing a small oval in the very center of your page. This will act as the tight, innermost bud of the rose. -
Spiral Outward:
Around that central oval, sketch a tight spiral line. Imagine a coiled spring loosen gently as it moves away from the center to guide your petal placement. -
Map the Inner Petals:
Draw small, overlapping C-shaped curves hugging the central spiral. Keep these shapes compact and tightly fitted together, representing the unfurled center. -
Expand the Middle Layers:
As you move outward, make the C-shapes larger and wider. Allow the top edges of these petals to curve slightly, creating a soft point or dip in the middle to mimic the natural fold of a rose petal. -
Define the Outer Bloom:
Sketch the largest, outermost petals. These should be broad and slightly angular, giving the rose a grounded, somewhat geometric feel rather than perfect circles. -
Refine the Edges:
Go back over your light sketch lines with a firmer hand. Sharpen the corners where petals overlap to give the drawing that crisp, ‘mapped’ look shown in the reference.
Keep it Sharp
A sharp pencil point is crucial for the ‘etching’ style shading on the petals. Rotate your pencil every few strokes to maintain a fine point.
Step 2: Shading and Texture
-
Apply Base Shading:
Using the side of your HB pencil, lightly shade the lower sections of each petal where it tucks under the one above it. This separates the layers. -
Deepen the Core:
Switch to a softer pencil (like a 2B). Darken the very center of the spiral significantly to create a sense of depth and a focal point for the eye. -
Add Line Texture:
Instead of smooth blending, use directional hatching marks on the petals. Draw faint lines that follow the contour of the petal, curving from the base toward the outer edge. -
Highlight the Rims:
I find that using a white charcoal pencil or a clean eraser to brighten the very top rim of each petal makes the layers pop against the shaded interiors.
Uneven Petals?
If the rose looks too symmetrical or fake, intentionally flatten or square off the edges of a few outer petals to break the perfect circular pattern.
Step 3: Adding Contrast with Foliage
-
Position the Leaves:
Sketch three jagged leaf shapes tucked underneath the outer petals—two on the bottom, one on the left. Make the tips point outward. -
Darken the Leaves:
Use your darkest pencil (4B) to fill in the leaves. Apply heavy pressure to create a rich, dark grey or black that contrasts sharply with the lighter rose. -
Create Veins:
You can either draw around the veins leaving them the color of the paper, or lift the pigment out afterward with the sharp edge of an eraser to create fine, white vein lines. -
Final Cleanup:
Erase any stray construction lines or smudges outside the main drawing. Sharpen the outermost contour of the entire flower one last time for a clean finish.
Now you have a structured, architectural rose bloom that jumps right off the page

PENCIL GUIDE
Understanding Pencil Grades from H to B
From first sketch to finished drawing — learn pencil grades, line control, and shading techniques.
Explore the Full Guide
Rose Stem With Leaves and Thorns
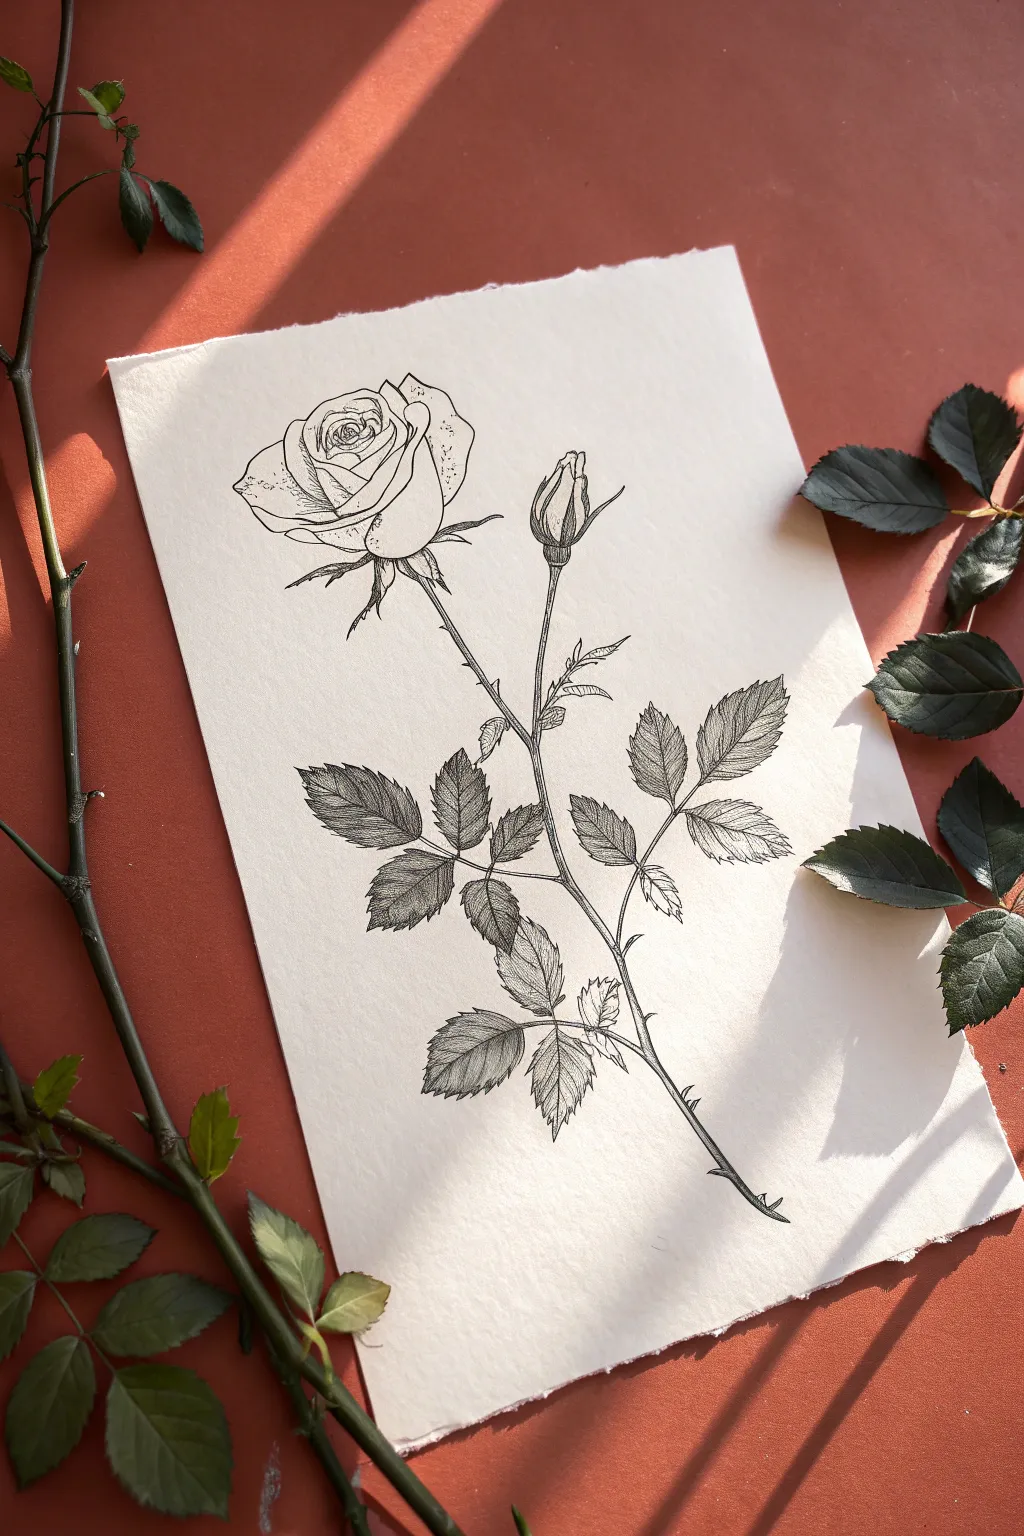
This project captures the delicate elegance of a single rose stem using fine liner pens on textured, deckle-edged paper. You’ll work from a light pencil sketch to crisp, detailed ink lines, mastering the art of botanical illustration through shading and texture.
Step-by-Step Guide
Materials
- Heavyweight textured paper (deckle edge optional)
- Hard pencil (2H or H) for sketching
- Fine liner pens (sizes 005, 01, and 03)
- Kneadable eraser
- Ruler (optional for stem alignment)
Step 1: Structural Sketching
-
Establish the curve:
Begin with your 2H pencil. Draw a gentle, sweeping ‘S’ curve down the center of your page to represent the main stem. This line should feel fluid, not stiff. -
Place the bloom:
At the top of your stem, lightly sketch a simplified circle or oval where the main rose head will sit. Angle it slightly to the left for a natural look. -
Add the bud stem:
About a third of the way down the main bloom, draw a thinner secondary stem branching off to the right. Cap this with a small teardrop shape for the rosebud. -
Map leaf clusters:
Along the lower two-thirds of the main stem, sketch thin lines extending outward for the leaf stems. Add rough diamond or oval shapes at the ends of these lines to indicate where leaf clusters will go. -
Refine the petals:
Inside your main circle, start defining the rose petals. Draw a tight spiral in the center, then layer larger, unfolding petals around it. Keep the edges slightly uneven to mimic organic matter.
Step 2: Inking the Outlines
-
Initial outline:
Switch to your 01 fine liner. Starting at the center of the rose, carefully trace your pencil lines. Don’t make the lines perfectly smooth; trembling slightly can actually help replicate the texture of petals. -
Define the sepals:
Draw the star-like sepals beneath the main bloom and the bud. These should be long and leafy, curling slightly downwards or hugging the bud. -
Stem and thorns:
Ink the long stem lines. As you work your way down, add small, sharp triangles for thorns. Ensure the thorns curve slightly downward, pointing towards the ground. -
Leaf serration:
When outlining the leaves, use short, jagged strokes to create the serrated edges typical of rose foliage. This texture is distinct from the smoother petal lines. -
Erase guidelines:
Once the ink is completely dry (wait at least 5 minutes to avoid smearing), gently lift all the pencil marks with your kneadable eraser.
Clean Lines?
If your hand shakes or a line goes rogue, turn it into a leaf overlap or an extra thorn. Nature is rarely perfect, and organic imperfections add realism.
Step 3: Shading and Details
-
Center depth:
Using your finest pen (005), add hatching lines deep inside the central spiral of the rose. These lines should follow the curve of the petals to enhance the 3D form. -
Petal stippling:
Add tiny dots (stippling) at the base of the outer petals where shadows would naturally fall. This creates a softer gradient than line shading. -
Veining the leaves:
Draw a central vein down each leaf. Branching off from the center, add delicate side veins. Keep these lines very thin and broken rather than solid. -
Hatching for shadows:
Use parallel diagonal lines (hatching) on one half of individual leaves to suggest light direction and folding. I find that focusing shadow on the lower leaves gives the drawing visual weight. -
Stem texture:
Add tiny, vertical dashes along the stem, particularly under the thorns and leaf junctions, to give it a woody, cylindrical appearance. -
Darkening key areas:
Switch back to the 03 pen to selectively re-line the darkest shadowed areas, such as the underside of the main bloom, to make the drawing pop.
Add Vintage Flair
Before drawing, lightly stain your paper with cold tea or coffee and let it dry flat. This creates an aged, parchment look that suits botanical art perfectly.
Now you have a timeless botanical illustration ready to frame or gift.
Rose With Sepals and Base Details
This elegant floral study captures the delicate beauty of a blooming rose using precise line work and careful shading techniques. By combining cross-hatching with soft gradients, the sketch creates a realistic sense of depth on the petals and leaves.
Detailed Instructions
Materials
- Spiral-bound sketchbook (heavyweight paper preferred)
- H pencil (for initial layout)
- HB or 2B pencil (for shading)
- Fine liner pens (0.1mm, 0.3mm, 0.5mm)
- Kneadable eraser
- Blending stump (optional)
Step 1: Structural Layout
-
Establish the rose core:
Start by drawing a loose, angled spiral in the upper-left quadrant of your page to represent the tightly packed center petals of the rose. -
Map the outer petals:
Using your H pencil, sketch overlapping C-shaped curves radiating outward from the spiral core. Keep these lines very faint, as you’ll adjust them significantly. Angle the bloom slightly towards the left. -
Draft the sepals and base:
Draw the cupped base of the flower (the calyx) just below the petals. Extend five long, pointy triangular shapes downwards from the base to form the sepals that cradle the bloom. -
Sketch the stem and bud:
Draw a long, slightly curved line for the main stem extending diagonally downward to the right. Add a smaller off-shoot stem branching upward to the right, topped with a small, teardrop-shaped closed bud. -
Position the leaves:
Add three main leaf clusters: one large leaf on the lower left of the stem, and a pair of leaves on the right side. Ensure the leaves have serrated (jagged) edges.
Step 2: Refining Petal Shapes
-
Defined outlines:
Switch to your 0.3mm fine liner. Carefully go over your pencil lines, giving the petals organic, slightly wavy edges rather than perfect circles. The petals should fold over at the top edges. -
Detailing the center:
Tighten the spiral in the center, ensuring the lines overlap to look like tightly wrapped fabric. Leave the very center slightly darker to suggest depth. -
Drawing the sepals:
Outline the sepals with sharp, crisp lines. Allow them to curve naturally; some might point straight down, while others fan out.
Uneven Shading?
If hatching looks messy, don’t cross-hatch. Stick to single-direction parallel lines that follow the object’s curve. This ‘contour hatching’ defines shape even with imperfect spacing.
Step 3: Shading and Texture
-
Leaf venation:
Draw a central vein through each leaf. Branch smaller veins outward towards the serrated edges, keeping these lines thin and delicate. -
Initial hatching on petals:
Using the 0.1mm pen, start adding texture to the rose petals. Use fine, parallel lines (hatching) that follow the curve of each petal. Focus this shading where the petals overlap or tuck underneath one another. -
Deepening petal shadows:
Add cross-hatching (lines going in the opposite direction) in the deepest crevices of the rose center and under the large outer petals to create high contrast. -
Shading the sepals:
Use vertical hatching lines on the sepals, concentrating the ink near the base of the flower to make the tips look lighter and more delicate. -
Texturing the stem:
Shade one side of the main stem (the bottom or right side) heavily to give it a cylindrical form. Add small, sharp triangles for thorns along the stem. -
Shading the bud:
Treat the bud similarly to the main bloom, with tight hatching at the base where the sepals meet the petals, fading out toward the tip. -
Leaf texture:
Fill in the leaves with uniform diagonal hatching. Only darken one half of the leaf relative to the central vein to suggest light hitting the surface. -
Final contrast check:
Use your 0.5mm pen to darken the very darkest shadow areas—specifically under the main bloom and the junction of the leaves and stem. This makes the drawing pop off the page. -
Cleanup:
Once the ink is completely dry, gently erase the underlying pencil structure lines with your kneadable eraser.
Use Line Weights
Use a thicker pen (0.5mm or 0.8mm) for the outermost outline of the entire flower, and very thin pens (0.05mm) for internal shading. This ‘thick outer, thin inner’ rule adds instant clarity.
Now you have a timeless botanical illustration ready to be framed or kept as a study in your sketchbook


Single Rose in a Vase Sketch
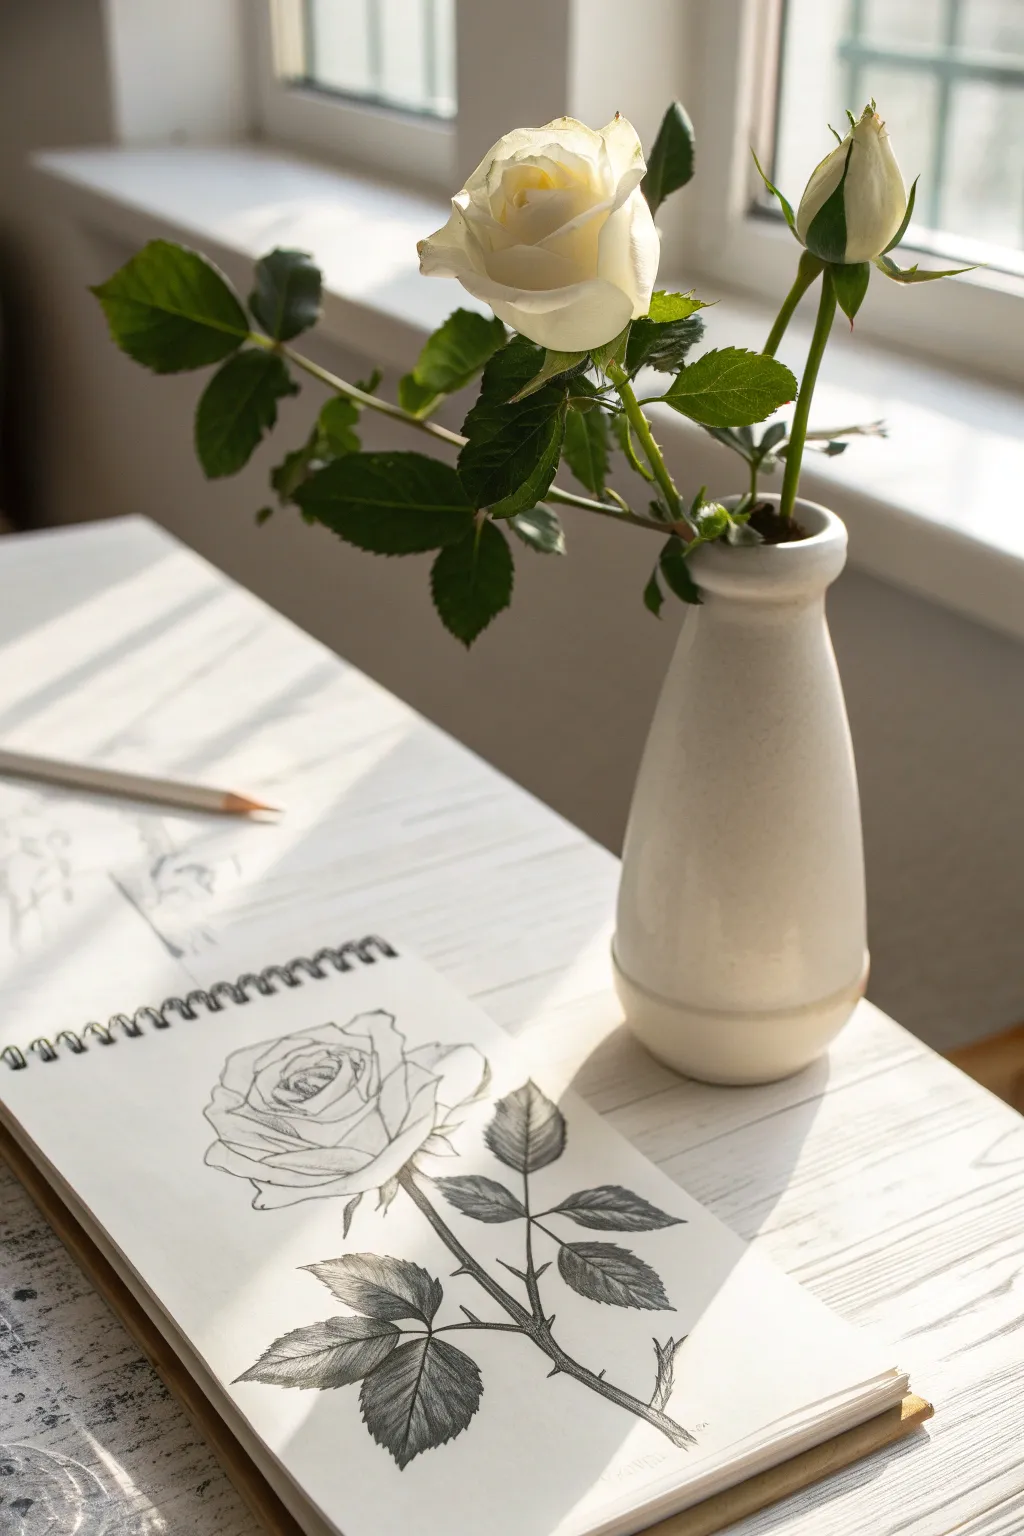
Capture the delicate beauty of a white rose with this realistic pencil study. This tutorial guides you through sketching a single bloom with its stem and leaves, focusing on shadow and texture to create a lifelike botanical illustration.
Step-by-Step Guide
Materials
- Spiral-bound sketchbook (medium tooth paper)
- HB graphite pencil (for initial outlines)
- 2B and 4B graphite pencils (for shading)
- Kneaded eraser
- Fine-point mechanical pencil (optional for details)
- Live rose reference or photo
Step 1: Structural Foundation
-
Mark placement:
Begin by lightly marking the top and bottom boundaries of your drawing on the paper to ensure the full stem fits. Draw a faint vertical line to act as the central axis for the stem. -
Block in the bloom:
At the top of your axis, lightly sketch a loose circle or oval to represent the overall mass of the rose head. Don’t worry about petals yet; just establish the size. -
Map the stem and leaves:
Draw the main stem following your axis line, adding a slight natural curve. Sketch basic diamond or tear-drop shapes branching off the stem to indicate where the leaf clusters will go. -
Define the center:
Inside your head circle, draw a tight, spiraling swirl to mark the tightly packed center petals of the rose. This will serve as the focal point for the petals radiating outward.
Step 2: Petal and Leaf Definition
-
Sketch inner petals:
Working outward from the center spiral, draw the edges of the inner petals. Use overlapping, curved lines that wrap around the center, keeping your pencil pressure light. -
Expand the bloom:
Draw the larger, outer petals. Notice how these petals dip and curl at the edges. Give these lines a bit of wobble to mimic the organic texture of real petals. -
Refine the stem:
Thicken the stem line slightly. Add small, sharp triangle shapes along the stem to represent the thorns, ensuring they point slightly downward. -
Detail the drawing:
Go back to your leaf shapes and refine their edges with serrated (saw-tooth) lines. Draw a central vein line down the middle of each leaf. -
Clean up guidelines:
Take your kneaded eraser and gently lift away your initial axis lines and the construction circle, leaving only the clean outline of the flower.
Smudgy paper?
Place a scrap sheet of paper under your drawing hand. This prevents skin oils from transferring to the paper and stops your hand from smearing the graphite you’ve already laid down.
Step 3: Shading and Texture
-
Start shading leaves:
Switch to your 2B pencil. Begin shading the leaves, using short, directional strokes that follow the veins from the center outward toward the leaf edge. -
Deepen leaf contrast:
Use a 4B pencil to darken the areas where leaves overlap or curl under. I find that making the leaves significantly darker than the flower helps the white rose pop off the page. -
Shadow the stem:
Add shading to one side of the stem (the side away from your light source) to give it a cylindrical form. Darken the base of the thorns where they attach to the stem. -
Shade the petal depths:
Return to the flower head with a sharp HB or 2B pencil. Very lightly shade the deepest crevices between the petals, keeping the tops of the petals paper-white. -
Soften the bloom:
Use a blending stump or a light touch with your finger to often the shadows on the petals, creating a smooth, velvety gradient. -
Final leaf details:
Go back over the leaf veins with a sharp pencil to ensure they remain visible against the darker shading. Add subtle cast shadows where the leaves rest over the stem.
Level Up: Dramatic Lighting
Increase the contrast by ignoring the mid-tones on the flower head. Use only deep blacks for crevices and pure white paper for petals to create a high-contrast, graphic look.
Now you have a permanent botanical study that captures the fleeting elegance of a fresh rose
Loose Rose Bouquet Cluster
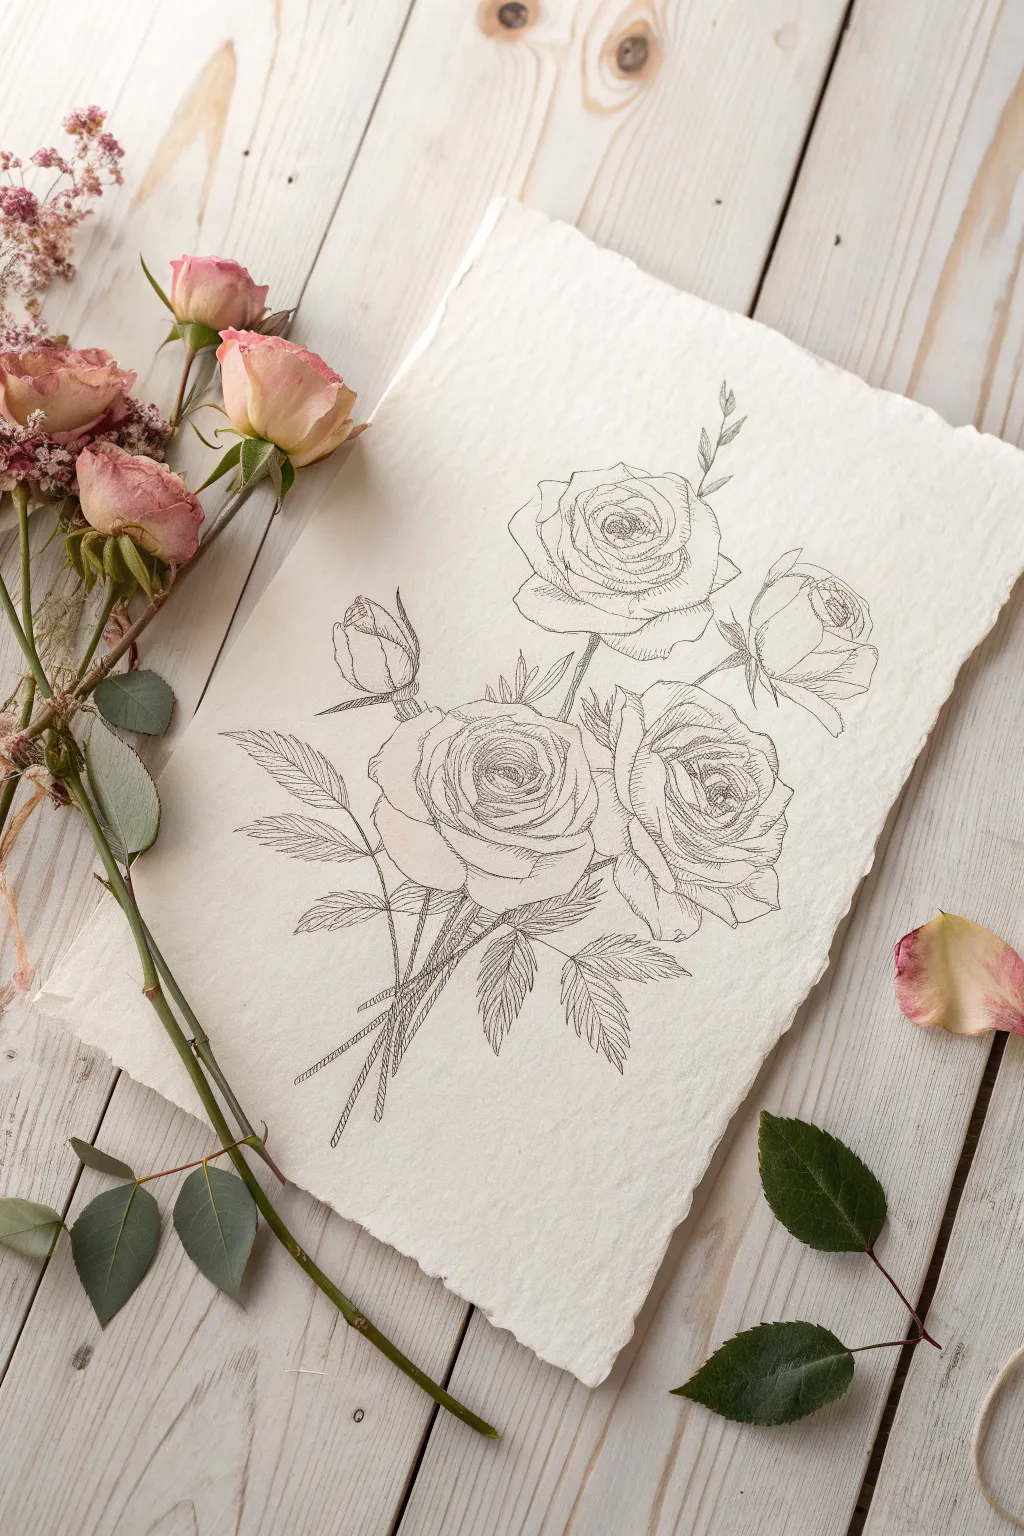
Capture the romantic simplicity of a botanical illustration with this fine-line rose bouquet sketch. By focusing on contour lines and delicate hatching, you will create a timeless piece of art on beautiful deckle-edge paper.
Step-by-Step Tutorial
Materials
- Heavyweight, handmade cotton paper with deckle edges (off-white or cream)
- HB or 2H graphite pencil for sketching
- Kneaded eraser
- Fine liner pens (sizes 0.05, 0.1, and 0.3mm in black or sepia)
- Ruler (optional for stem alignment)
Step 1: Structural Layout
-
Map the composition:
Begin by lightly marking the general placement of your five main elements on the paper using your H-grade pencil. Think of a triangle shape: place one large circle for a rose at the top, two large circles below it for the base roses, and small ovals for the buds on the left and right sides. -
Define stem direction:
Draw faint lines extending downward from each circle to create a gathering point. The stems should converge near the bottom center, crossing over each other as if held in a hand. -
Rough in the petals:
Inside your large circles, lightly sketch the spiral center of each rose. Draw loose, overlapping C-curves radiating outward to suggest the unfolding petals. Keep these lines very faint and fluid. -
Add foliage placeholders:
Sketch simple leaf shapes extending from the stems and between the flower heads. Don’t worry about serrated edges yet; just focus on the leaf direction and size balance.
Step 2: Inking the Blooms
-
Outline the top rose:
Switch to your 0.1mm fine liner. Start with the tightest spiral in the center of the top rose. Use broken, slightly shaky lines rather than perfect curves to mimic organic petal textures. -
Expand the petals:
Work your way outward, drawing the larger, cup-shaped petals. Allow the petal edges to curl slightly at the tips. Ensure the lines don’t meet perfectly at every corner; small gaps keep the sketch looking airy. -
Ink the lower roses:
Repeat the process for the two lower roses. I find it helpful to vary the angle slightly so they aren’t carbon copies of the top one—perhaps tilt the right one slightly outward. -
Detail the buds:
Ink the two side buds. For these, focus on the sepals (the green leaves hugging the bud) at the base, drawing them with sharp, tapered points that curl away from the petals.
Fixing Smudges
If you smudge ink, don’t panic. Turn the smudge into a deliberate shadow by extending your hatching in that area, or add a fallen petal shape over the mark to hide it creatively.
Step 3: Details and Shading
-
Ink the stems:
Draw the final stem lines using a slightly thicker 0.3mm pen if available, or double up your 0.1mm lines. Include the thorns as small, sharp triangles along the stems. -
Serrate the leaves:
Go over your pencil leaf guides. Instead of smooth lines, use short, jagged zig-zag motions to create the characteristic serrated edge of rose leaves. -
Add leaf veins:
Draw a central vein down each leaf, then add fine branching veins. Keep these lines very light, perhaps switching to your 0.05mm pen. -
Begin shading petals:
Using the 0.05mm pen, start hatching inside the rose petals. Use short, parallel lines that follow the curve of the petal. Place shadows where petals overlap or dip inward. -
Darken the centers:
Add denser hatching (cross-hatching) to the very center of the roses. This contrast draws the eye in and gives the flower depth. -
Shade the leaves:
Add hatching to one side of the leaf veins to suggest depth. Leave the other side relatively open to represent light hitting the surface. -
Texture the stems:
Add vertical hatching lines along the stems, particularly where they cross over each other, to visually separate them and add roundness.
Vintage Wash
For an antique botanical look, lightly brush highly diluted tea or coffee over the paper before drawing. Let it dry completely flat to create a warm, aged background tint.
Step 4: Final Touches
-
Erase pencil marks:
Wait at least 10-15 minutes to ensure the ink is completely dry. Gently dab and roll the kneaded eraser over the sketch to lift all graphite guidelines without damaging the paper surface. -
Assess and refine:
Step back and look at the overall balance. If a particular area looks too flat, add a few more delicate hatch marks to deepen the shadow. -
Create the connection:
Add a few loose, sketchy lines around the point where the stems gather to suggest a tie or binding without drawing a specific ribbon, keeping the aesthetic loose.
Display your botanical sketch in a floating frame to show off the beautiful deckle edges
Ink-Outline Rose Over Light Pencil
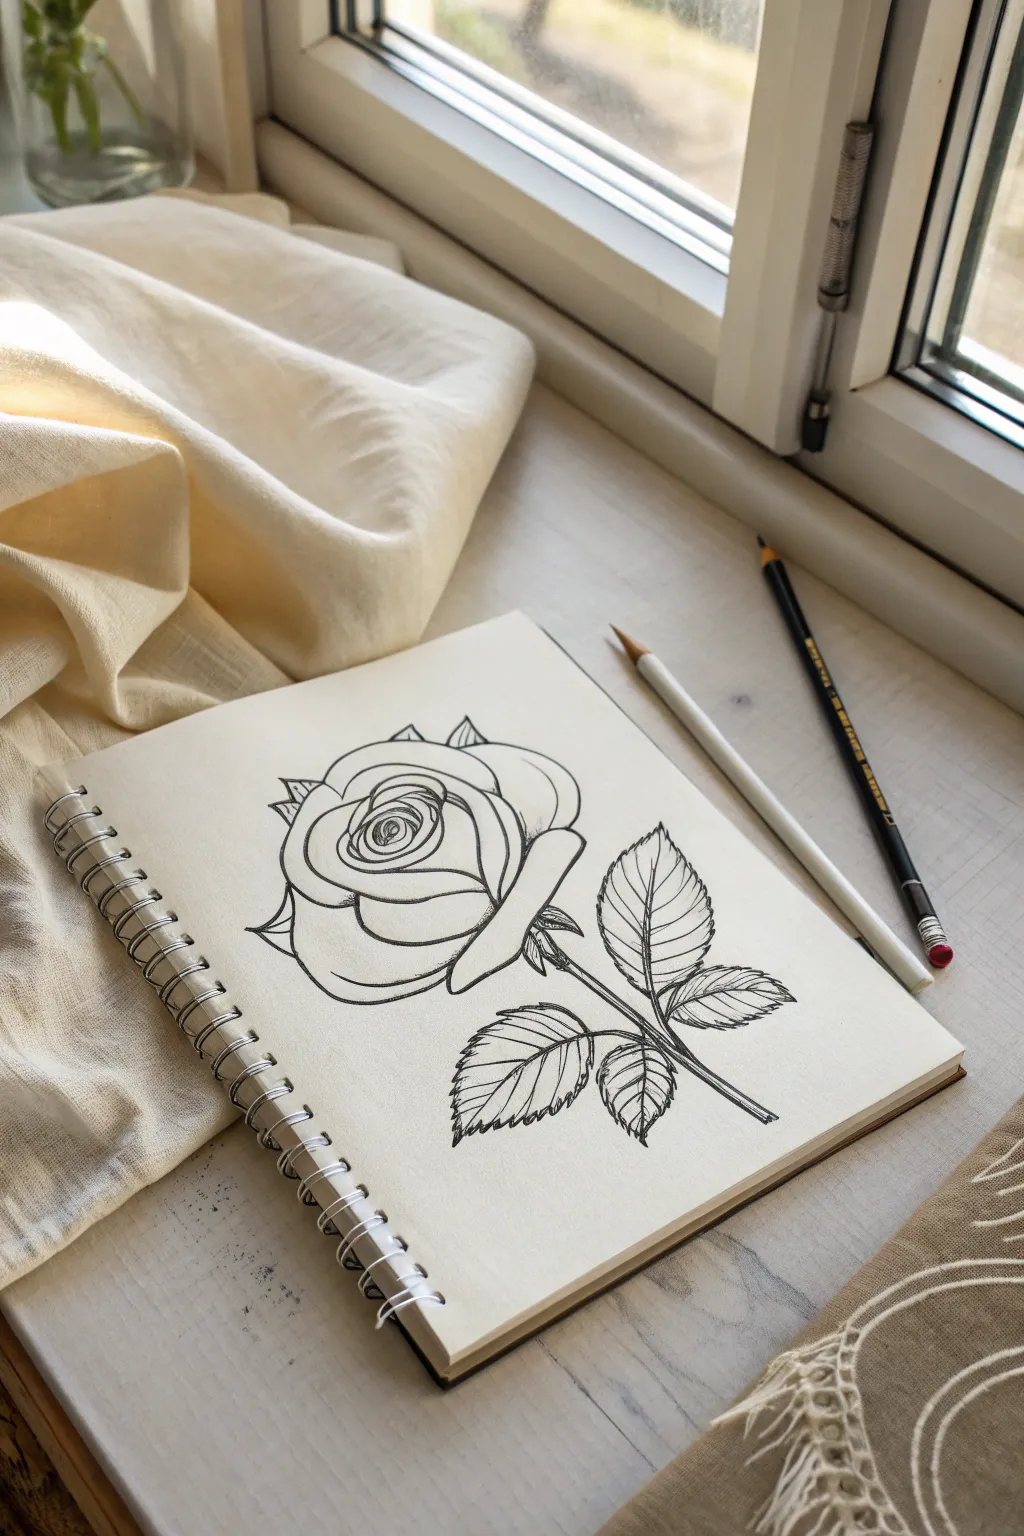
Capture the delicate beauty of a blooming rose using a classic two-step method that builds confidence. This project features crisp, clean ink lines over a soft pencil foundation, perfect for creating botanical art with depth and precision.
Step-by-Step
Materials
- Wirebound sketchbook (medium weight paper)
- HB or 2H graphite pencil
- Fine liner pen (black, 0.3mm or 0.5mm)
- Kneaded eraser
- Soft white vinyl eraser
Step 1: Pencil Foundation
-
Draw the center spiral:
Begin lightly in the upper third of your page with your pencil. Sketch a small, tight oval to represent the very center of the rose bud, drawing a spiraling line inside it to suggest tightly packed petals. -
Add first petal layers:
Around that central spiral, draw two or three cup-shaped curves that hug the center. Keep your pencil pressure very light so these lines can be easily erased later. -
Expand the bloom:
Sketch larger, wider U-shaped petals wrapping around the core. I find it helpful to overlap them slightly, making each outer petal a bit larger than the ones before it to simulate the flower opening up. -
Define outer petals:
Draw the largest, outermost petals. Give these lines a bit more character with slight waves or dips in the edges, rather than perfect curves, to make the flower look organic. -
Sketch the sepals:
Add the sepals (the small leafy green parts) hanging down from the base of the flower head. Draw them as jagged, triangular shapes pointing downward. -
Draw the stem:
Extend a confident, slightly curved line downward from the base of the flower to create the stem. Add a second parallel line close to it to give the stem thickness. -
Position the leaves:
Sketch the central veins for three leaves branching off the stem—one on the left, two on the right. Draw the outline of the leaves in a teardrop shape with serrated, saw-tooth edges.
Fix Shaky Lines
If a line goes wobbly, don’t restart! Thicken the line slightly in that area to disguise the shake, or add local hatching to turn the mistake into a shadow.
Step 2: Inking the Outline
-
Ink the rose center:
Switch to your fine liner pen. Carefully trace your pencil lines starting from the innermost spiral. Use a steady hand, but don’t worry if lines aren’t perfectly smooth; nature is rarely perfect. -
Trace the petals:
Work your way outward, inking the petal edges. Where petals overlap, ensure the lines stop cleanly at the intersection so the front petals clearly sit atop the back ones. -
Refine the petal edges:
As you ink the outer petals, emphasize those little dips and folds you sketched earlier. You can make the line weight slightly thicker on the bottom curves of the petals to suggest shadow weight. -
Ink the stem and sepals:
Trace the sepals and the stem. When inking the stem, add a few tiny, sharp triangles along the sides to represent thorns. -
Detail the leaves:
Ink the serrated outlines of the leaves. Draw the central vein clearly, then add secondary veins branching out towards the edges of each leaf. -
Let the ink dry:
Pause for at least 5-10 minutes to ensure the ink is completely dry. Smudging wet ink with an eraser is heartbreaking, so patience is key here. -
Erase pencil guides:
Gently rub your kneaded eraser or vinyl eraser over the entire drawing to lift away the graphite, leaving only the crisp black ink work.
Add Watercolor
Once the ink is fully waterproof-dry, lightly glaze specialized watercolor paint over the petals for a soft, vintage botanical illustration look.
Step 3: Adding Texture and Depth
-
Shade the leaves:
Using the same pen, add very fine hatch marks (closely spaced parallel lines) to one half of each leaf section. This creates a two-tone effect that adds dimension to the foliage. -
Hatch the sepals:
Add tiny vertical hatch lines to the base of the sepals where they meet the stem, darkening the area slightly to show depth. -
Contour the petals:
Add very sparse, short curved lines near the base of the petals and inside the folds. These lines should follow the curve of the petal to suggest roundness. -
Final touches:
Review your drawing. If line connections look weak, darken the corners where lines meet to add a little ‘occlusion shadow’ for a finished, professional look.
Now you have a timeless botanical sketch ready to be framed or kept as a practice study.
Cross-Hatching Shadow Rose
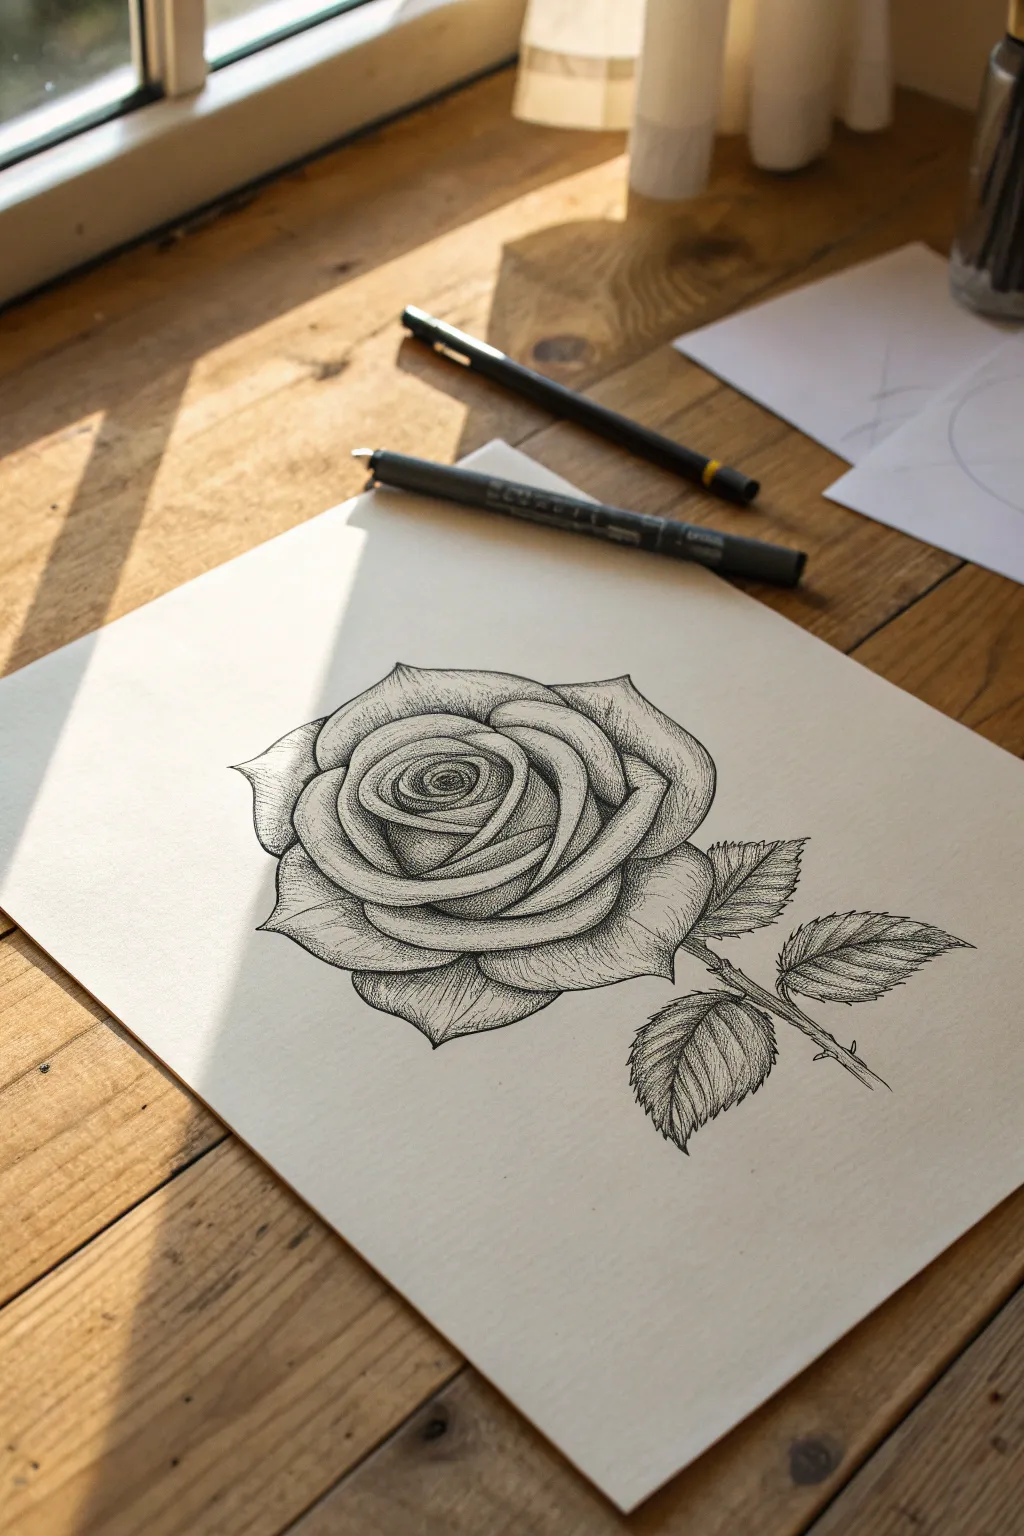
Capture the delicate beauty of nature with this sophisticated pen and ink rose drawing. By utilizing precise cross-hatching techniques, you’ll create rich volume and dramatic shadows that make the petals lift right off the page.
Step-by-Step Tutorial
Materials
- Smooth bristol board or heavyweight sketch paper
- HB graphite pencil
- Kneaded eraser
- Fine liner pens (sizes 0.1, 0.3, and 0.5)
- Ruler (optional, for planning)
Step 1: Pencil Foundation
-
Establish the Center:
Begin lightly with your HB pencil by drawing a tight, spiraling oval in the center of your page. This will act as the budding heart of the rose where the petals are most tightly packed. -
Bloom Outward:
Sketch overlapping C-shaped curves radiating outward from the center spiral. Ensure each new petal serves as a ‘cup’ for the one before it, gradually increasing their size as you move away from the center. -
Define Outer Petals:
Draw the largest, outermost petals with slightly jagged, organic edges. Let some edges fold over naturally, creating small triangular flaps at the tips to suggest depth and realistic curvature. -
Add Stem and Leaves:
Extend a sturdy stem diagonally downwards to the right. Attach three serrated leaves to the stem—two smaller ones near the bloom and a larger one extending outward—ensuring you sketch the central vein for each leaf.
Step 2: Inking the Outline
-
Initial Trace:
Using a 0.3 fineliner, carefully go over your pencil lines. Focus on the organic quality of the petals; a slightly shaky or imperfect line often looks more natural than a rigid one for floral subjects. -
Refine Leaf Edges:
When inking the leaves, pay special attention to the serrated (saw-toothed) edges. Use quick, short strokes to keep points sharp and distinct. -
Clean Up:
Once the ink is completely dry—I usually give it a full five minutes to be safe—gently erase all underlying graphite marks with your kneaded eraser to reveal a clean framework.
Direction is Key
Always stroke your pen in the direction the petal is growing. These contour lines act like a wireframe, telling the viewer’s eye exactly how the surface curves.
Step 3: Building Shadow and Texture
-
Inner Depth:
Switch to your finest 0.1 pen. Start shading the deepest crevices of the central spiral using tight stippling or very dense hatching to create near-black areas where light cannot reach. -
Petal Contours:
Begin adding texture to the petals using long, curved contour lines that follow the shape of the flower. These lines should start from the base of the petal and fade out as they reach the highlight area in the center. -
Cross-Hatching Shadows:
Identify where petals overlap. Beneath each overlapping petal, lay down a set of diagonal hatch lines. Then, cross over them with lines in the opposite direction to darken the shadow cast on the petal below. -
Mid-Tone Transition:
To blend the dark shadows into the white paper, use dots or broken lines at the edge of your cross-hatching. This creates a soft gradient rather than a harsh line of shadow. -
Leaf Veins:
Draw the secondary veins branching off the center line of each leaf. Keep these lines thin and delicate. -
Leaf Shading:
Shade one half of each leaf section darker than the other to imply a V-shape groove. Use dense diagonal lines that run parallel to the veins. -
Stem Texture:
Add cylindrical volume to the stem by hatching heavily on one side (the shadowed side) and leaving a thin strip of white on the opposite side for a highlight. -
Deepening Contrast:
Take the 0.5 pen, which is your thickest tool, and selectively re-line the darkest shadow areas where petals meet. This emphasizes the separation between layers. -
Final Thorns:
Add small, sharp thorns to the stem using the 0.3 pen, shading the underside of each thorn to ground it to the stem.
Vintage Patina
After drawing, lightly wash over the paper with diluted tea or coffee. This stains the background and gives the crisp ink drawing an antique, botanical illustration look.
Step back and admire how simple lines have transformed into a bloom full of volume and life
One-Line Continuous Rose Sketch
This elegant project captures the timeless beauty of a rose using precise ink lines and delicate hatching techniques. The result is a crisp, illustration-style botanical that looks stunning on a clean, off-white card stock.
Step-by-Step
Materials
- Heavyweight cream or off-white cardstock (hot press finish preferred)
- Pencil (HB or 2H for light drafting)
- Kneaded eraser
- Fine liner pens (sizes 005, 01, and 03)
- Ruler (optional for centering)
Step 1: Drafting the Composition
-
Establish the stem line:
Start by drawing a very faint, slightly diagonal line with your pencil to act as the central axis for the stem. This ensures your flower stands tall without leaning too heavily. -
Map out the bloom:
At the top of your axis, sketch a rough oval shape. Inside this oval, lightly mark a spiral. This will serve as the guide for the tightly packed inner petals. -
Add petal guides:
Sketch rough, curved shapes expanding outward from the central oval to represent the unfolding outer petals. Keep these lines loose and light. -
Locate leaves and thorns:
Mark the position of the sepals directly under the bloom, then lightly sketch the shapes of the leaves along the stem. Add small triangles where thorns will be placed.
Clean Lines Only
If your ink smudges when erasing pencil marks, wait at least 30 minutes before erasing. Oil from your skin can slow drying time significantly.
Step 2: Inking the Outlines
-
Outline the center:
Switch to your 03 pen. Begin in the very center of the spiral, drawing the innermost petals with confident, curved strokes that overlap slightly like a tightly furled scroll. -
Define the middle petals:
Move outward, drawing the surrounding petals. Focus on the sharp, slightly curled edges where the petal folds back—this is key to the dimensional look. -
Draw the outer bloom:
Complete the flower head by inking the largest, lowest petals. Allow for some natural jaggedness or irregularity in the line work to depict the organic texture of the rose. -
Ink the sepals:
Draw the leafy sepals hanging down from the base of the flower head. I like to give these slightly jagged edges rather than perfect curves to make them look realistic. -
Structure the stem:
Ink the long stem using the 03 pen. Instead of one perfectly straight line, break it up slightly where the leaves attach or thorns protrude to add character. -
Add thorns and leaves:
Outline the sharp thorns and the leaves. For the leaves, use a slightly jagged or serrated line to mimic the natural edge of rose foliage.
Add a Vintage Wash
Once the ink is totally waterproof/dry, gently brush a weak wash of diluted coffee or tea over the paper for an aged, antique parchment look.
Step 3: Detailing and Shading
-
Erase pencil guides:
Wait until the main ink lines are completely dry, then gently use the kneaded eraser to lift away all your initial pencil sketches. -
Start shadowing with hatching:
Switch to a finer 01 or 005 pen. Begin adding shading to the inner petals using close, parallel hatch marks. Place these shadows where petals overlap to create depth. -
Contour the outer petals:
On the larger petals, use curved hatching lines that follow the shape of the petal. This directional shading helps ‘sculpt’ the roundness of the flower. -
Darken the deepest crevices:
Go back into the very center of the rose and the deepest folds underneath the petals. Add a second layer of cross-hatching here to create high-contrast dark zones. -
Texture the sepals:
Add vertical lines running down the length of the green sepals under the bloom. This gives them a fibrous, leafy texture distinct from the soft petals. -
Shade the leaves:
Draw a central vein line for each leaf. Add shading on one side of the vein or at the base of the leaf using fine, diagonal strokes to suggest curvature. -
Final stem details:
Add tiny marks or touches of shading along the side of the stem, particularly under the thorns, to give it a cylindrical form rather than a flat look.
Now you have a timeless floral illustration ready to be framed or gifted on a card
Geometric Rose (Faceted Petals)
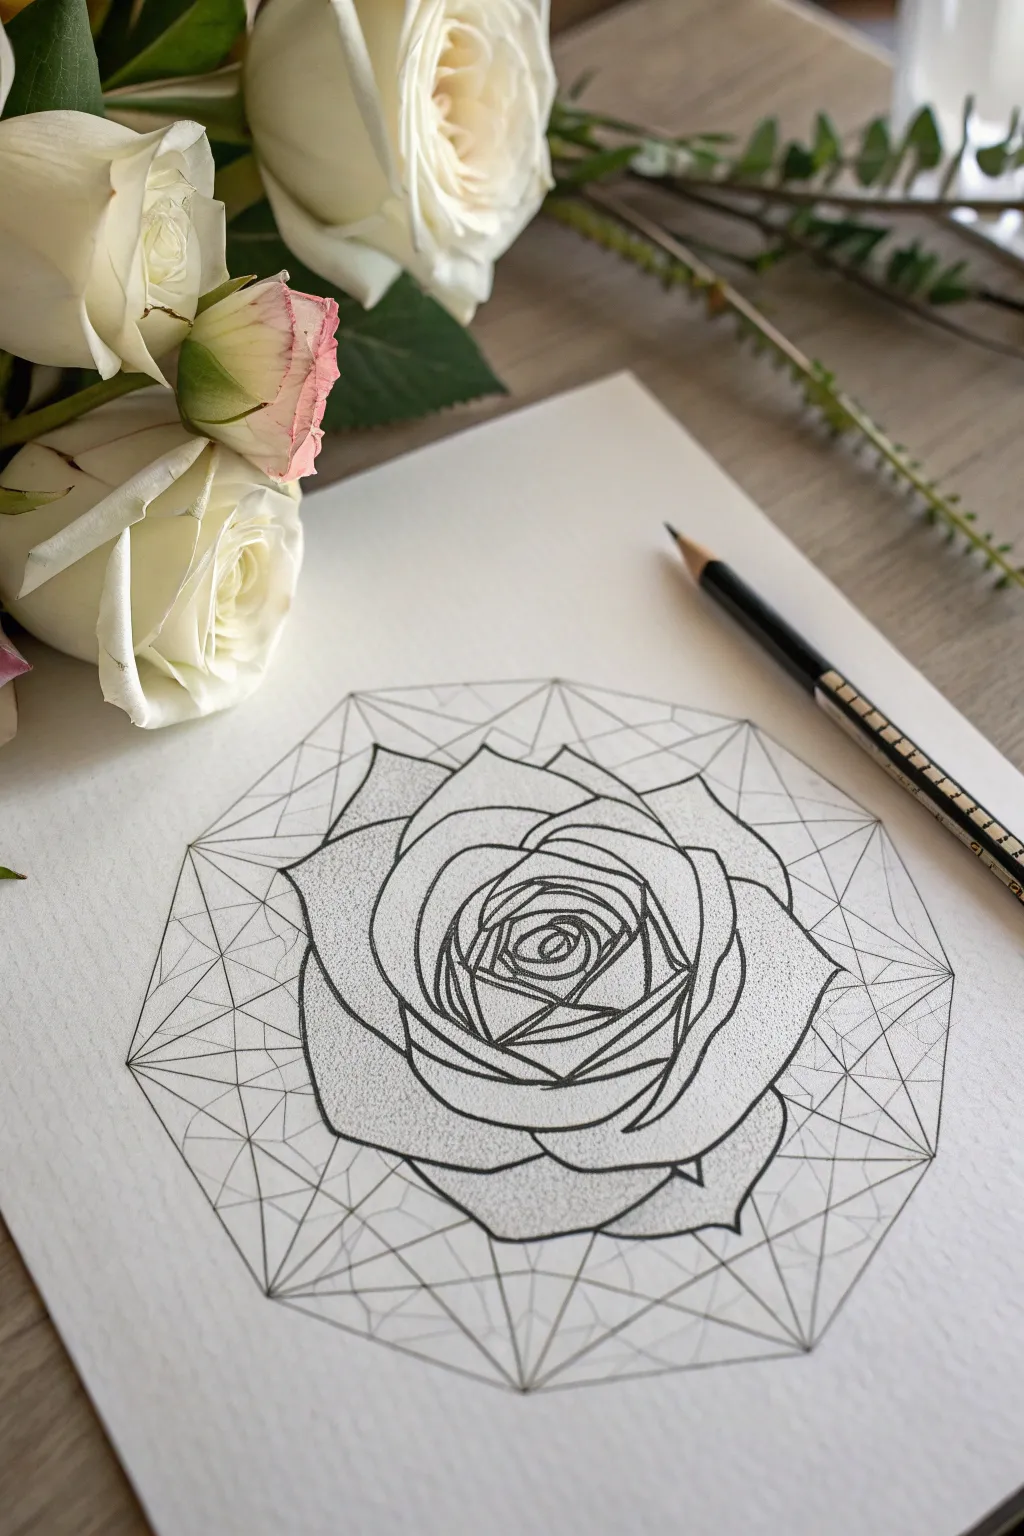
This striking drawing combines the natural, organic flow of a rose with the crisp precision of geometric linework. The result is a harmonious design where faceted, crystal-like structures seem to cradle the soft layers of the flower.
Step-by-Step Tutorial
Materials
- High-quality drawing paper (smooth or light texture)
- H or 2H pencil (for construction lines)
- HB or B pencil (for initial sketching)
- Fine liner pens (0.1mm, 0.3mm, 0.5mm)
- Compass
- Ruler
- Protractor (optional)
- Eraser
Step 1: Constructing the Geometric Grid
-
Establish the center:
Mark a small dot in the very center of your paper. This will be the anchor for both your geometric frame and the rose itself. -
Draw the main circle:
Using your compass, draw a light circle around the center point. A radius of about 3-4 inches works well for a standard page. -
Create the outer polygon:
Keep your compass at the same radius. Place the needle on the circle’s edge and make a mark on the circumference. Move the needle to that mark and repeat until you have six points. Connect these points with a ruler to form a hexagon. -
Subdivide the shape:
Draw straight lines connecting opposite corners of the hexagon, passing through the center. Then, connect every other point to create an overlapping triangle effect (a Star of David) or simply connect midpoints to create smaller internal polygons. -
Add radial facets:
From the corners of your internal shapes, draw lines radiating inward or connecting to adjacent sections. You want to create a web of triangles and diamonds that will serve as the ‘crystal’ background.
Step 2: Sketching the Rose
-
Outline the center bud:
Switch to your HB pencil. In the very center of the grid, sketch a tight spiral. This represents the unraveled heart of the rose. -
Draft the inner petals:
Draw small, overlapping petal shapes surrounding the spiral. Keep these fairly angular rather than perfectly round to match the geometric theme. -
Expand the bloom:
Continue adding layers of petals moving outward. As you move away from the center, make the petals larger and slightly more open. -
Align with the grid:
I like to deliberately let the tips of the petals touch or align with the intersection points of the geometric grid beneath. This helps integrate the organic flower with the rigid background. -
Refine the outer petals:
For the outermost layer, draw broad, sweeping curves that extend almost to the edge of your internal geometric shapes. Give them slightly pointed tips to echo the facets.
Clean Lines
Keep your ruler slightly elevated or wipe it often. Ink can smudge if dragged across the paper by the ruler’s edge.
Step 3: Inking and Detailing
-
Ink the rose outlines:
Using a 0.3mm or 0.5mm fine liner, carefully trace your rose sketch. Use confident, smooth strokes. Vary the line weight slightly—thicker on the shadowed undersides of petals—to add depth. -
Ink the geometric frame:
Switch to a finer pen (0.1mm) for the background grid. Use a ruler to trace the geometric construction lines. The contrast between the freehand rose and ruled background lines is key. -
Add stippling for texture:
Use the 0.1mm pen to add stippling (tiny dots) to the petals. Concentrate the dots at the base of the petals and where they overlap to create shading without solid black lines. -
Connect the elements:
Look for areas where the rose overlaps the geometric lines. You can choose to stop the geometric lines at the petal edge (making the rose look solid) or draw them through (making it look transparent). -
Erase pencil marks:
Wait at least 15 minutes for the ink to dry completely. Gently erase all your pencil construction lines to reveal the crisp ink drawing. -
Final touches:
Assess the contrast. If the rose needs more pop, thicken the outermost outline slightly to separate it from the geometric web.
Watercolor Wash
Apply a very light, diluted watercolor wash to just the geometric shards in cool blues or greys to make the rose pop.
Enjoy the meditative process of balancing structure and nature in your drawing
Rose With a Pop of Color Accent
Capture the delicate beauty of a blooming rose with this detailed graphite study. Using simple shading techniques and careful observation, you’ll create a lifelike flower that seems to lift right off the sketchbook page.
Detailed Instructions
Materials
- High-quality sketchbook paper (smooth or vellum finish)
- Graphite pencils (HB, 2B, 4B)
- Kneaded eraser
- Fine-point mechanical pencil (optional for details)
- Blending stump or tortillon
Step 1: Laying the Foundations
-
Sketch the envelope:
Begin with an HB pencil using very light pressure. Draw a rough oval shape near the top of the page to represent the overall bloom, and a straight line extending downward for the stem. -
Establish the center:
Inside the oval, draw a tight spiral shape. This will act as the tightly packed inner petals of the rose bud. -
Map the outer petals:
Around the spiral, sketch loose, overlapping ‘U’ and ‘V’ shapes that gradually get larger as they move away from the center. Ensure these lines curve naturally to mimic organic petal edges. -
Add the sepals:
At the base of the flower head, draw small, leaf-like triangular shapes pointing downwards. These refer to the sepals that cradle the bloom. -
Define the stem:
Thicken the initial stem line by adding a second parallel line. Add a few small, sharp thorns pointing slightly downward along the stem.
Step 2: Developing Form and Texture
-
Refine the center:
Switch to a 2B pencil. Go back to the central spiral and carefully define the edges of the innermost petals, making the lines slightly darker where petals overlap. -
Sculpt the petals:
Work outward, defining the contours of the larger petals. Pay attention to how the petals curl over at the top edges—draw a double line at the rim to show the thickness of the petal turnover. -
Erase guidelines:
Use your kneaded eraser to gently lift away any initial construction lines that don’t match your final petal shapes. -
Start shading the core:
Using the 2B pencil, shade the deepest crevices in the rose center. The areas between the tight petals should be darkest to create depth. -
Shade the mid-tones:
Add light shading to the underside of the outer petals. Use directional strokes that follow the curve of the petal to suggest its rounded form.
Smudge Control
Place a scrap piece of paper under your drawing hand. This prevents your palm from smearing your work or transferring oils to the paper while you shade the details.
Step 3: Refining Details
-
Deepen contrast:
bring in a 4B pencil for the darkest shadows. Focus on the area directly under the bloom where the sepals meet the stem, and the deep pockets between the large outer petals. -
Texture the sepals:
Add short, hatched lines to the sepals (the green leaves under the rose) to give them a slightly rougher texture compared to the smooth petals. -
Define the stem texture:
Shade one side of the stem more heavily to make it look cylindrical. Add vertical striations to mimic the woody texture of a rose stem. -
Blend for softness:
Use a blending stump to gently smudge the graphite on the petals. This creates that characteristic velvety soft look of a rose. I prefer to leave some paper white for highlights. -
Final leaf details:
Draw the small leaves attached to the stem just below the bloom. Use sharp, jagged edges to represent their serrated margins. -
Clean up highlights:
Take the kneaded eraser and tap it against the top curves of the petals to lift off graphite, creating crisp, bright highlights where the light hits. -
Final assessment:
Step back and check the contrast balance. If the sketch looks flat, darken the shadows under the ‘rolled over’ edges of the petals to make them pop.
Watercolor Splash
For the ‘pop of color’ look mentioned in the title, lightly paint the petals with a sheer wash of pink watercolor, letting the pencil lines show through.
Your sketchbook page now holds a timeless floral study ready to be admired


Have a question or want to share your own experience? I'd love to hear from you in the comments below!