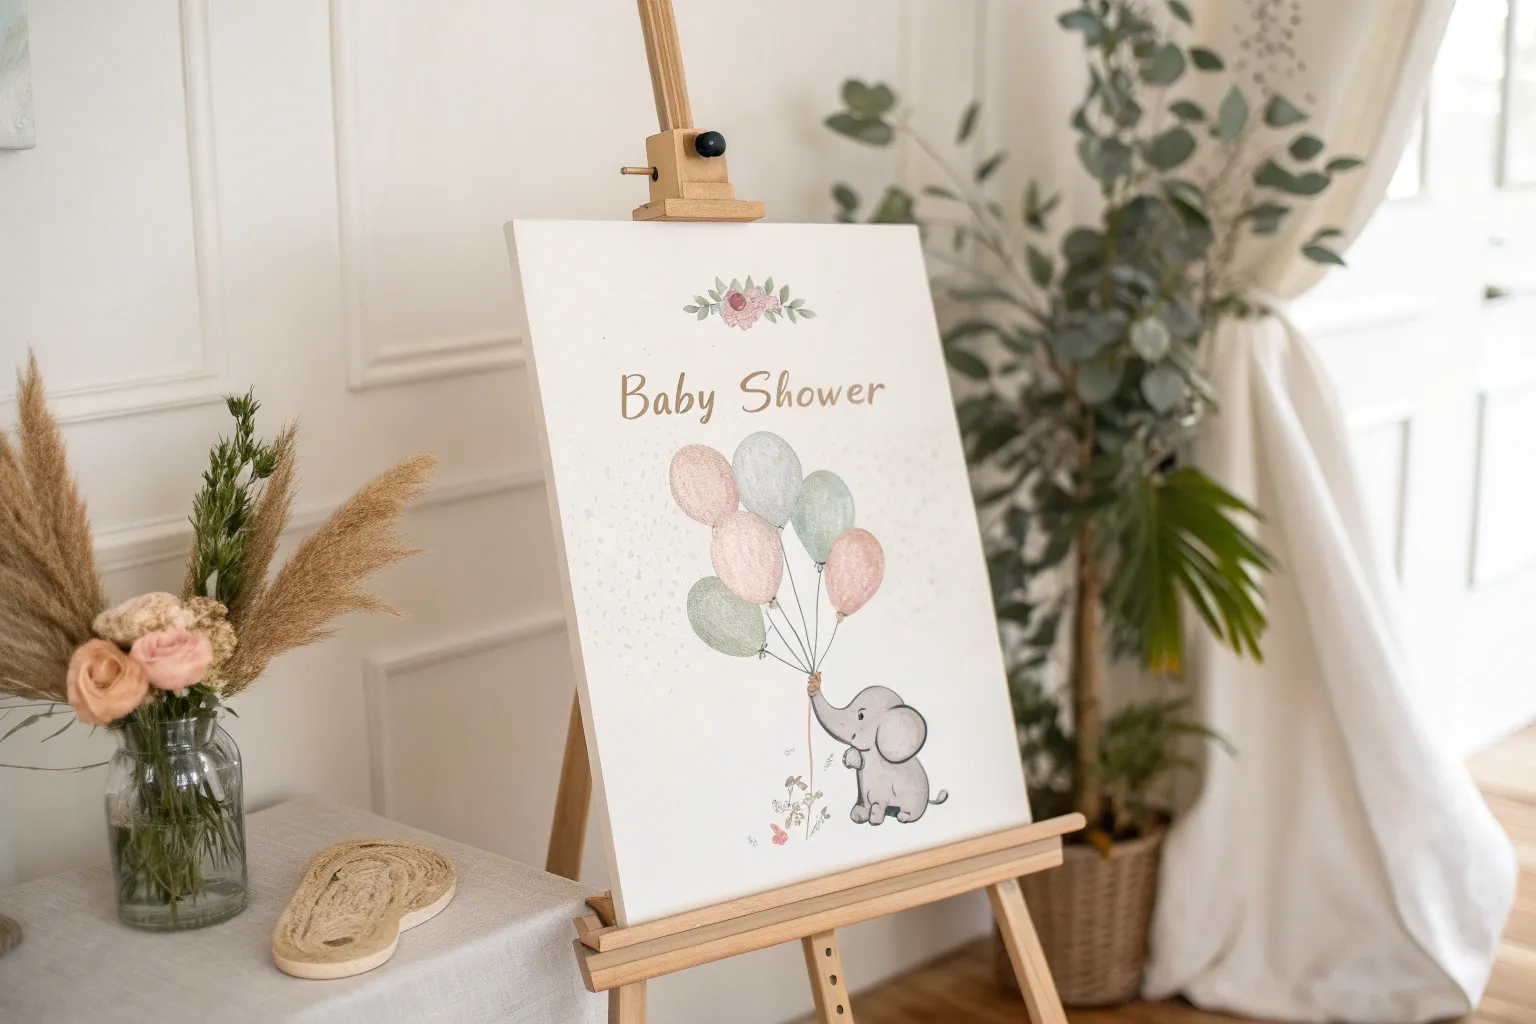
If you want a baby shower activity that doubles as a keepsake, a canvas painting is such a sweet way to capture everyone’s love in one place. Here are my favorite baby shower canvas painting ideas—from classic guestbook canvases to more unexpected nursery-worthy designs.
Fingerprint Balloon Bouquet Guestbook
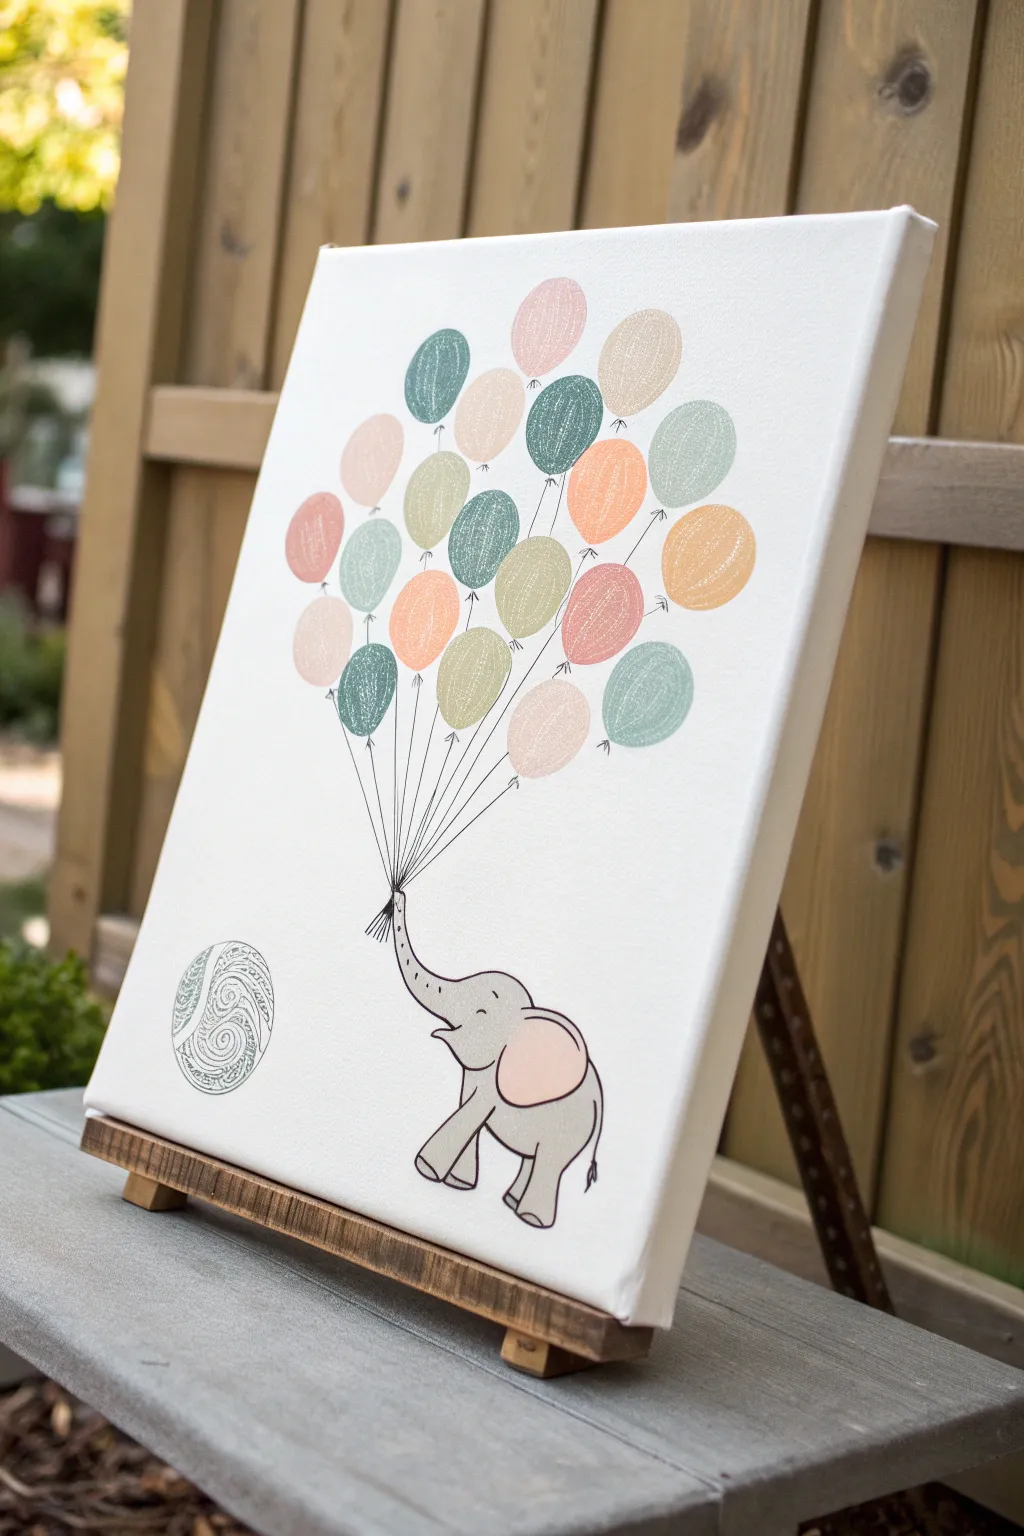
This adorable guestbook alternative doubles as a custom piece of nursery art, featuring a sweet grey elephant holding a bouquet of balloons made by your guests. Using simple illustration techniques and ink pads, you can create a cherished keepsake that captures the presence of loved ones.
Step-by-Step Guide
Materials
- White stretched canvas (16×20 inches or similar)
- Black archival ink fine-liner pen (0.5mm or 0.8mm)
- Grey acrylic paint (light and medium shades)
- Pink acrylic paint (soft pastel)
- Small flat paintbrush
- Small round paintbrush for details
- Various ink pads (muted greens, pinks, peaches, greys)
- Pencil and eraser
- Ruler
Step 1: Drafting the Design
-
Sketch the elephant:
Begin near the bottom center of the canvas. Lightly sketch a small, seated elephant using a pencil. Start with a rounded shape for the body and a smaller oval for the head, extending a trunk upwards. -
Refine the shapes:
Define the elephant’s legs, making them chunky and rounded at the bottom. Add a large, curved ear on the side of the head and a small tail behind. -
Plan the balloons:
Lightly draw a large oval area above the elephant’s trunk where the balloons will eventually go. This guides where the strings will lead, but don’t draw individual balloons yet since those will be fingerprints. -
Mark the decorative ball:
In the bottom left corner, lightly sketch a circle for the decorative ball design shown in the reference image.
Step 2: Painting the Base Elements
-
Paint the elephant gray:
Using your grey acrylic paint and a small flat brush, fill in the elephant’s body. I suggest keeping the paint application fairly flat and smooth for an illustrative look. -
Add the ear detail:
Mix a little white into your pink paint to create a soft pastel shade. Paint the inside of the elephant’s ear with this color. -
Outline the elephant:
Once the paint is completely dry, use your black archival fine-liner to trace over your pencil lines. Give the elephant a solid outline, add creases on the trunk, and draw toes on the feet. -
Draw the face:
Using the same pen, draw a simple curved line for a smiling eye and a small smile near the trunk. Don’t forget a few small dots on the trunk for texture. -
Create the decorative ball:
Go back to the circle in the bottom left. Use the fine-liner to draw intricate swirl patterns inside the circle. You can mimic the reference image by creating concentric, wavy spirals that look like a yarn ball or abstract toy.
Smudge Prevention
Have baby wipes nearby for guests to clean their fingers immediately. Keep a scrap paper handy for testing ink density before they commit to the canvas.
Step 3: Creating the Balloon Strings
-
Draw the focal point:
Mark a single point right at the tip of the elephant’s trunk. All balloon strings will converge here. -
Draw radiating lines:
Using a ruler and your fine-liner, draw straight lines extending upward and outward from the trunk tip. These lines should fan out to fill the oval area you planned earlier. -
Add variety to lengths:
Make sure your lines vary in length so the balloons will be staggered, some lower and some higher, creating a full bouquet shape. -
Detail the grip:
Draw small loops or a tiny knot right at the trunk tip to show where the elephant is holding the bunch of strings.
Guest Participation
Leave space on the side for a sign instructing guests to pick a color, add their print, and sign their name inside their balloon with a thin pen.
Step 4: Adding the Fingerprints
-
Prepare the ink pads:
Set out your selection of ink pads. The reference uses a cohesive palette of sage greens, dusty pinks, peaches, and greys. -
Test prints:
Before touching the canvas, practice making fingerprints on scrap paper to get the pressure right. You want the unique texture of the print to show. -
Place the balloons:
Press a finger onto an ink pad and then firmly onto the end of a string line on the canvas. Repeat this process, changing colors randomly to distribute the hues evenly. -
Add connectors:
Once the ink is dry, use your fine-liner to draw a tiny triangle or knot at the base of each fingerprint, connecting it securely to its string. -
Protect the art:
Let the ink dry fully (this can take longer on canvas than paper) before moving or framing to prevent smudges.
Now you have a charming, collaborative piece of art ready to hang in the nursery

Fingerprint Tree With Signed Leaves
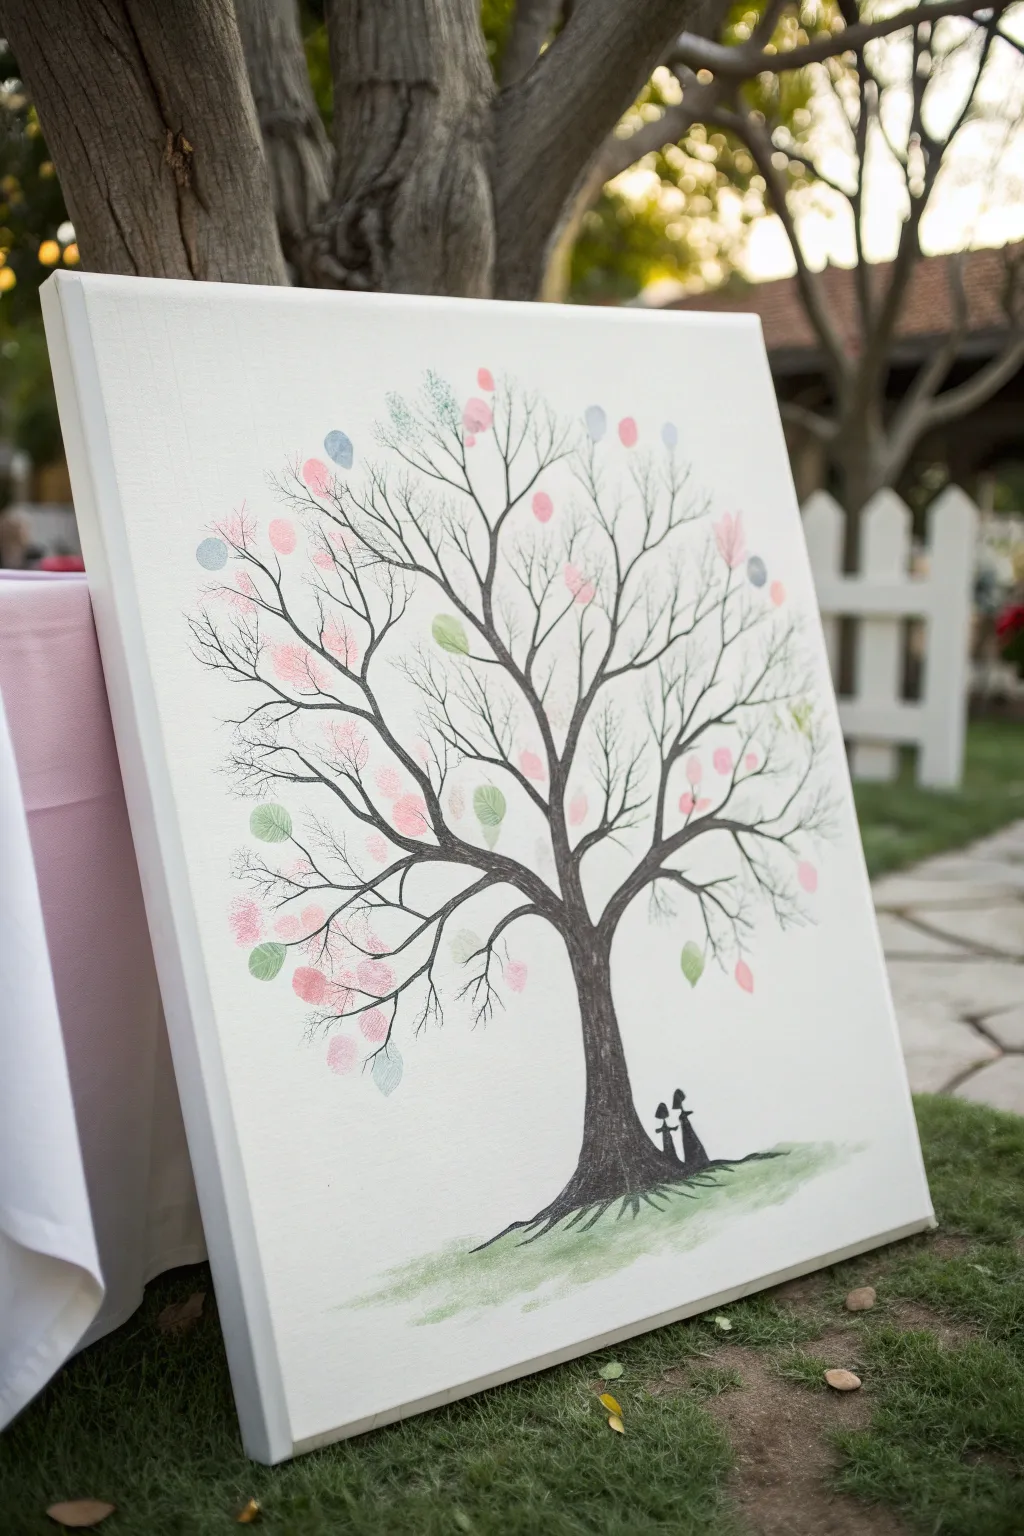
This interactive guest book alternative transforms simple thumbprints into a sentimental canopy of leaves, creating a lasting memory of your baby shower. With a gracefully sketched tree and delicate silhouette details, it becomes a piece of collaborative art ready to hang in the nursery.
How-To Guide
Materials
- Stretched white canvas (16×20 or 18×24 inches recommended)
- Graphite pencil (HB or 2B)
- Black fine-point permanent marker or archival ink pen
- Charcoal pencil or soft black colored pencil
- Green colored pencil or pastel chalk (for grass)
- Set of non-toxic ink pads (pink, baby blue, mint green, lavender)
- Fine liner brush
- Paper towels and wet wipes (for guests)
Step 1: Drafting the Tree Structure
-
Sketch the Trunk:
Begin lightly with your pencil about three inches from the bottom of the canvas. Draw a sturdy trunk base that tapers slightly as it moves upward, anchoring it with a few root lines spreading out to the sides. -
Branch Outward:
From the top of the trunk, split your line into two or three main primary branches. Let these curve gently outward rather than shooting straight up, creating a wide ‘V’ or ‘U’ shape to fill the canvas width. -
Add Secondary Limbs:
From each main branch, draw smaller limbs extending outward. Keep your wrist loose to create natural, organic curves rather than stiff lines. -
Create Fine Twigs:
Fill in the empty spaces by sketching very fine, delicate twigs at the ends of the branches. Simply flick your pencil tip to make these lines taper off into nothing. -
Finalize the Skeleton:
Step back and look at the symmetry. Add a few more tiny twigs in any sparse areas to ensure the tree looks balanced before you commit to ink.
Smudge Prevention
If a guest smudges an ink print, turn it into a falling leaf! Draw a tiny dotted line trailing down from a branch to the smudge to make it look intentional.
Step 2: Inking and Detailing
-
Outline with Ink:
Using your black fine-point marker or archival pen, carefully trace over your pencil lines. Start from the top delicate twigs and work your way down to the trunk to avoid smudging your work. -
Thicken the Trunk:
Go back over the main trunk and primary branches, adding extra strokes to thicken them. The trunk should be the darkest and heaviest part of the composition. -
Add Texture:
Use short, vertical hatching lines along the trunk to simulate rough bark texture. I find that varying the length of these strokes adds a nice realistic depth. -
Draw the Silhouettes:
At the base of the trunk on the right side, lightly sketch two small seated figures—a larger one and a smaller one—representing a parent and child. Fill these in completely with solid black ink. -
Erase Guide Lines:
Once the ink is completely dry (give it at least 15 minutes), gently erase any visible pencil marks to clean up the canvas.
Add Hidden Details
Hide a small heart or the baby’s initials within the bark texture of the tree trunk for a secret detail that only the family will know is there.
Step 3: Adding Ground and Color
-
Sketch the Grass:
Using a charcoal pencil or soft green colored pencil, lightly sketch a horizontal mound under the tree roots. Keep the strokes loose and feathery. -
Blend the Ground:
If using pastel or soft pencil, gently smudge the green pigment with your finger or a paper towel to create a soft, dreamy wash of color for the hill. -
Test the Ink Pads:
Before adding prints to the canvas, test your ink colors on a scrap piece of paper. This ensures the pads aren’t dry and lets you see how the colors look next to each other. -
Place Example Leaves:
To show guests what to do, place 5-10 fingerprints yourself. Scatter them randomly at the ends of the twigs, using different colors (pink, blue, green) to create a balanced starting point. -
Draw Leaf Details:
Once the ink on your example prints is dry, use a very fine pen to draw tiny veins or stems connecting the fingerprint ‘leaves’ to the branches. -
Set Up the Station:
Place the canvas on an easel at the shower alongside the ink pads and pens. Include a small instruction card asking guests to ‘leaf’ their print and sign their name near it.
Now you have a beautiful, collaborative piece of art that freezes a moment in time with everyone you love


Baby Name And Date Keepsake Canvas
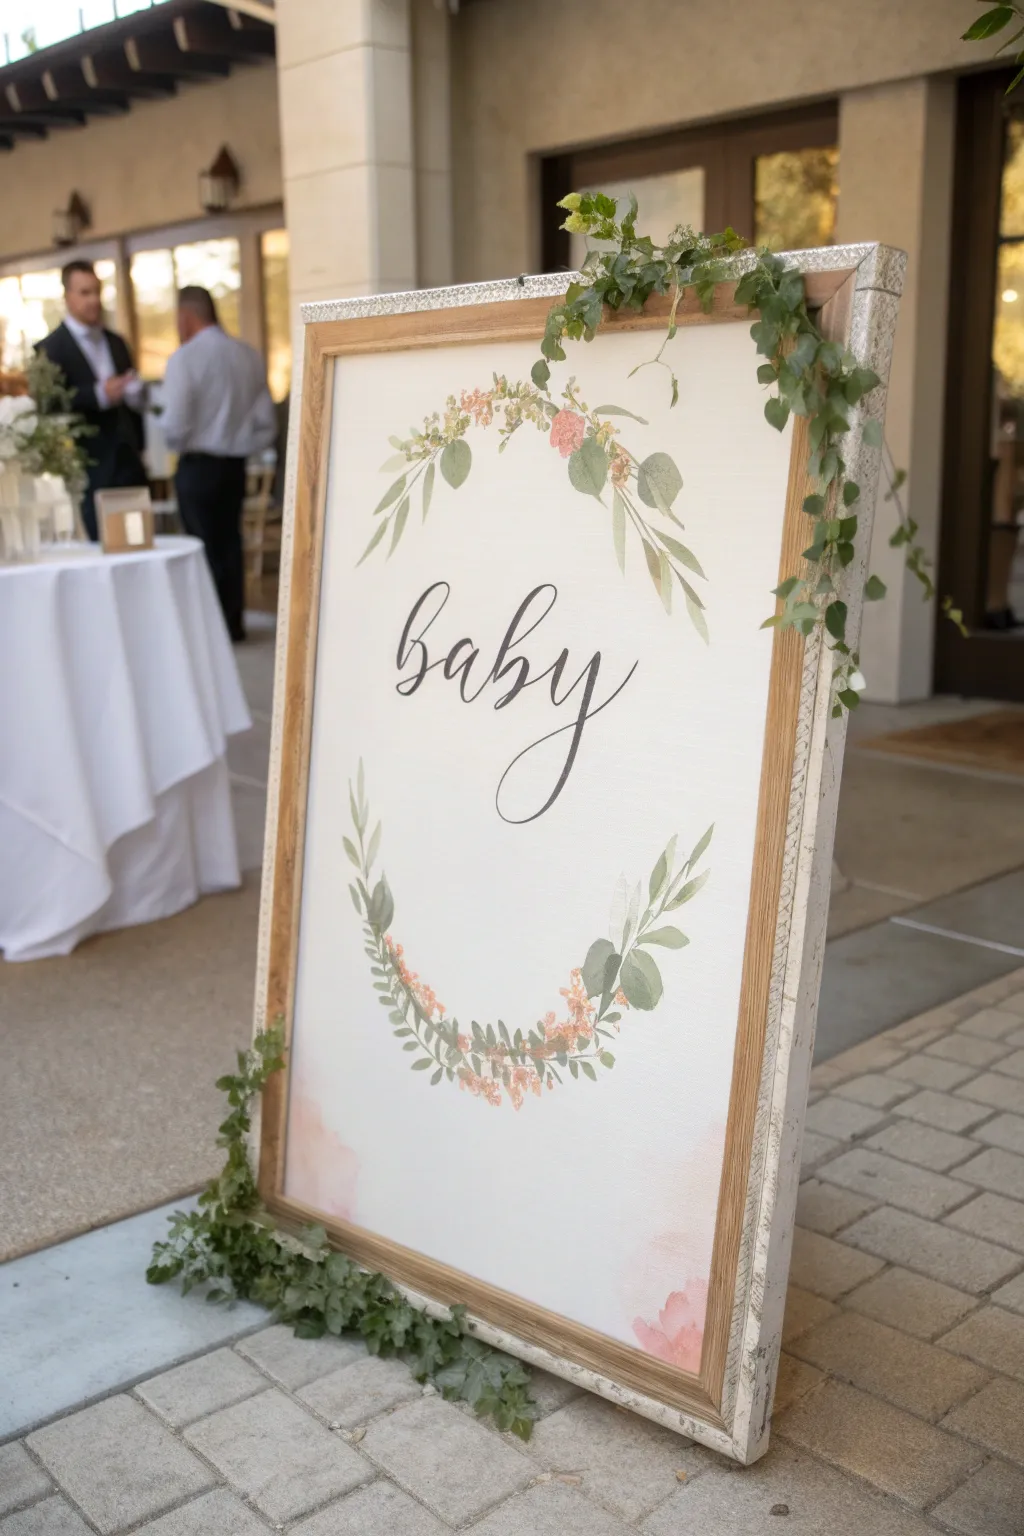
Welcome guests with this sophisticated, large-scale canvas sign featuring a delicate watercolor-style wreath and flowing calligraphy. The mix of painted botanical elements and draped fresh greenery creates a stunning 3D effect perfect for a modern baby shower.
Detailed Instructions
Materials
- Large rectangular canvas (24×36 inches or similar)
- Wooden frame (optional, to fit canvas size)
- Acrylic paints (sage green, forest green, peach, blush pink, white)
- Calligraphy marker or black acrylic paint with a liner brush
- Pencil and eraser
- Large round plate or string compass (for tracing)
- Round brushes (sizes 4, 8, and a small liner)
- Fresh ivy vines or high-quality faux greenery
- Floral wire or heavy-duty tape
- Water cup and palette
Step 1: Drafting the Design
-
Establish the focal point:
Begin by deciding where your text will go. Lightly measure and mark the exact center of the canvas with a pencil to ensure your wreath is balanced. -
Create the wreath guide:
Use a large circular object or create a simple string compass (string tied to a pencil) to lightly sketch a large circle in the middle of the canvas. This will be the backbone for your floral wreath. -
Sketch the text:
Inside the circle, lightly pencil in the word ‘Baby’ or your chosen name. Practice the script on scratch paper first to get the spacing right before transferring it to the canvas.
Fixing Wobbly Text
If your painted letters look shaky, wait for them to dry, then use a fine-tip black paint pen to outline and smooth the edges precisely.
Step 2: Painting the Botanicals
-
Mix your greens:
On your palette, mix a few shades of green. Create a soft sage by adding white to green, and keep a darker forest green pure for contrast. This variation adds depth to the leaves. -
Base layer of leaves:
Using a size 8 round brush, start painting simple leaf shapes along the top and bottom curves of your penciled circle. Leave the sides mostly open for a delicate, airy look. -
Vary leaf opacity:
To mimic the watercolor look seen in the photo, dilute your acrylics slightly with water. Paint some leaves quite sheer and others more opaque. -
Add floral touches:
Mix a soft peach and blush pink. Dab small, clustered spots among the greenery to represent tiny flower buds, keeping them loose and impressionistic. -
Connect the elements:
Use a thinner liner brush with brown or dark green paint to draw thin stems connecting your leaves and flowers to the main circular guide. -
Add watercolor washes:
While the paint is dry, I sometimes like to add very watered-down washes of pink near the bottom corners of the canvas for a soft, dreamy background effect.
Add Dimension
Hot glue small, high-quality silk flowers directly onto the painted wreath sections to create a mixed-media 3D masterpiece.
Step 3: Lettering and Assembly
-
Fill in the lettering:
Once you are happy with the pencil spacing, go over your text with a black calligraphy marker or black paint and a liner brush. Press harder on downstrokes for thicker lines and lift up for thin upstrokes. -
Refine the script:
Go back over the lettering to smooth out any shaky edges, ensuring the curves are graceful and the ink is fully opaque. -
Erase guidelines:
Wait until the paint and ink are completely bone-dry, then gently erase any visible pencil marks from your initial sketch. -
Frame the canvas:
If using a raw canvas board, mount it into a rustic or distressed white wooden frame to give it structure and stability. -
Prep the greenery:
Take your fresh ivy or faux vines and trim them to size. You want pieces that will drape naturally over the top right and pile slightly at the bottom left. -
Attach the vines:
Secure the vines to the frame using floral wire (wrapped around the frame edge) or strong tape on the back. Let the leaves naturally curl over the front of the painting.
Step back and admire how the fresh greenery brings your painted artwork to life


Sweet Baby Onesie Clothesline Painting
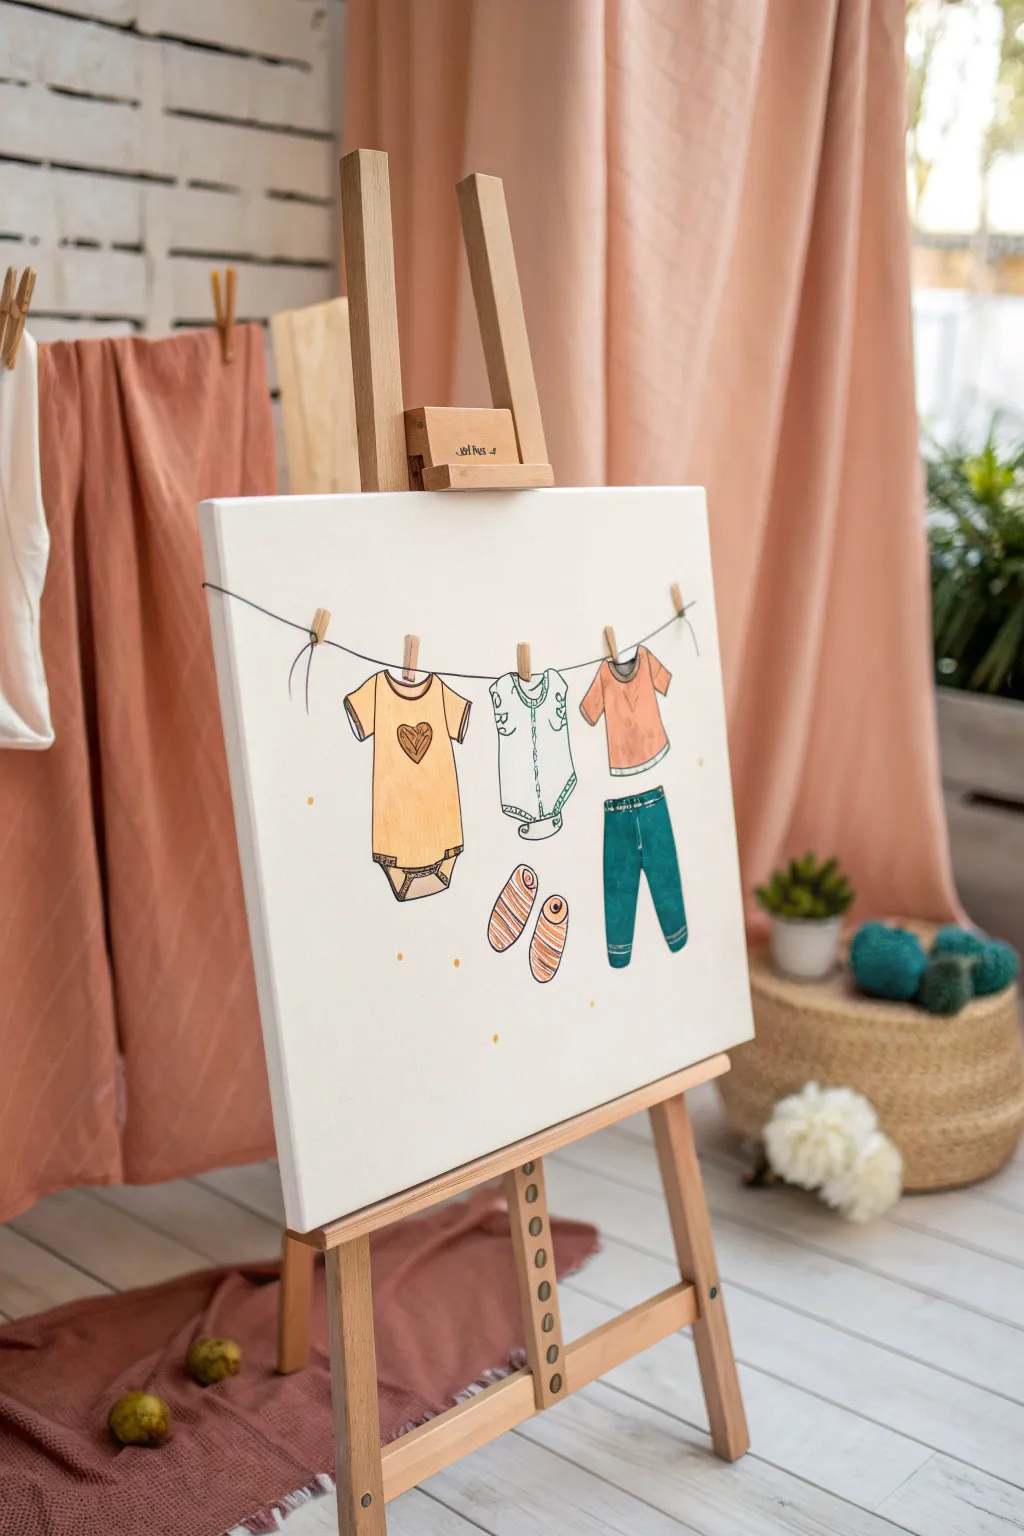
Capture the sweetness of a new arrival with this charming painting featuring tiny baby clothes drying on a line. With its soft color palette and illustrative style, it makes for a delightful nursery decoration or a thoughtful baby shower gift.
How-To Guide
Materials
- Square artist canvas (approx. 16×16 or 20×20 inches)
- Acrylic paints (Titanium White, Yellow Ochre, Mint Green, Burnt Sienna, Teal/Dark Green, Black)
- Paintbrushes: Flat brush (for washes), Round brush (size 4 or 6), Detail liner brush (size 0 or 00)
- Pencil and eraser
- Ruler
- Palette for mixing
- Jar of water
- Paper towels
Step 1: Sketching the Layout
-
Establish the clothesline:
Begin by lightly sketching a curved line horizontally across the upper third of your canvas. Let it dip slightly in the center to mimic the weight of hanging clothes. -
Outline the yellow onesie:
Sketch the first item on the left: a classic onesie shape with short sleeves. Draw the bottom snaps and add a heart shape in the center of the chest. -
Draw the mint bodysuit:
Next to the yellow onesie, sketch a sleeveless bodysuit. Give it a slightly gathered look at the bottom and indicate a vertical line down the center for buttons. -
Add the t-shirt:
To the right, draw a simple baby t-shirt with short sleeves. Make sure the neckline dips a bit to show the back collar. -
Sketch the pants:
Below the t-shirt, sketch a pair of little pants or leggings. Angle the legs slightly outward as if they are swinging gently. -
Place the booties:
In the space between the yellow onesie and the pants, draw two small, oval-shaped booties. Orient them so the soles are facing somewhat forward. -
Detail the clothespins:
Finally, sketch small rectangular clothespins attaching the shoulder straps of the onesies and the shirt to your main clothesline.
Clean Lines
If your hand shakes while outlining, try resting your pinky finger on a dry part of the canvas for stability. Diluting the paint slightly helps the brush glide smoother.
Step 2: Blocking in Color
-
Paint the yellow onesie:
Mix a soft, warm yellow using Yellow Ochre and plenty of Titanic White. Fill in the first onesie, keeping the paint application fairly flat and even. Leave the heart unpainted for now. -
Fill the mint bodysuit:
Create a pale mint shade by mixing a tiny dot of Mint Green (or a mix of green and blue) with white. Paint the middle bodysuit carefully. -
Color the t-shirt:
Mix Burnt Sienna with white to get a soft terracotta or salmon color. Apply this to the t-shirt on the right. -
Paint the pants:
Use a Teal or Dark Green mixed with a touch of white to fill in the pants. This darker color adds a nice visual anchor to the composition. -
Base coat the booties:
Paint the booties with the same terracotta mix used for the t-shirt, or perhaps a slightly lighter version. -
Add the heart detail:
Go back to the yellow onesie and paint the heart in the center using a darker shade of yellow or light brown.
Personalize It
Add the baby’s name or birth date in a playful script font underneath the clothes, or paint the onesies in colors matching the actual nursery theme.
Step 3: Outlining and Refining
-
Mix your outline color:
Instead of pure black, mix a very dark grey or charcoal using Black and a tiny bit of Burnt Sienna to warm it up. Dilute this slightly with water for better flow. -
Outline the clothes:
Using your fine liner brush, carefully trace over your pencil lines. I prefer to keep a loose hand here so the lines have a sketchy, illustrative feel rather than looking mechanically perfect. -
Add clothing details:
Paint the specific details: the ribbing on the onesie neckline, the snaps at the bottom, the button placket on the mint suit, and the cuffs on the pants. -
Create the clothesline:
Paint the main clothesline across the canvas using the liner brush. Extend the line off the edges of the canvas to create continuity. -
Paint the clothespins:
Fill in the clothespins with a light tan color (Burnt Sienna + lots of white). Once dry, outline them with your dark liner color. -
Detail the booties:
Add stripe patterns to the booties using white or a light cream paint over the terracotta base. -
Final touches:
Add tiny decorative dots of yellow around the clothes to fill the negative space and add a whimsical touch. Erase any remaining visible pencil marks once the paint is fully dry.
Hang this sweet masterpiece in the nursery to welcome the little one home
BRUSH GUIDE
The Right Brush for Every Stroke
From clean lines to bold texture — master brush choice, stroke control, and essential techniques.
Explore the Full Guide
Mama And Baby Bump Silhouette
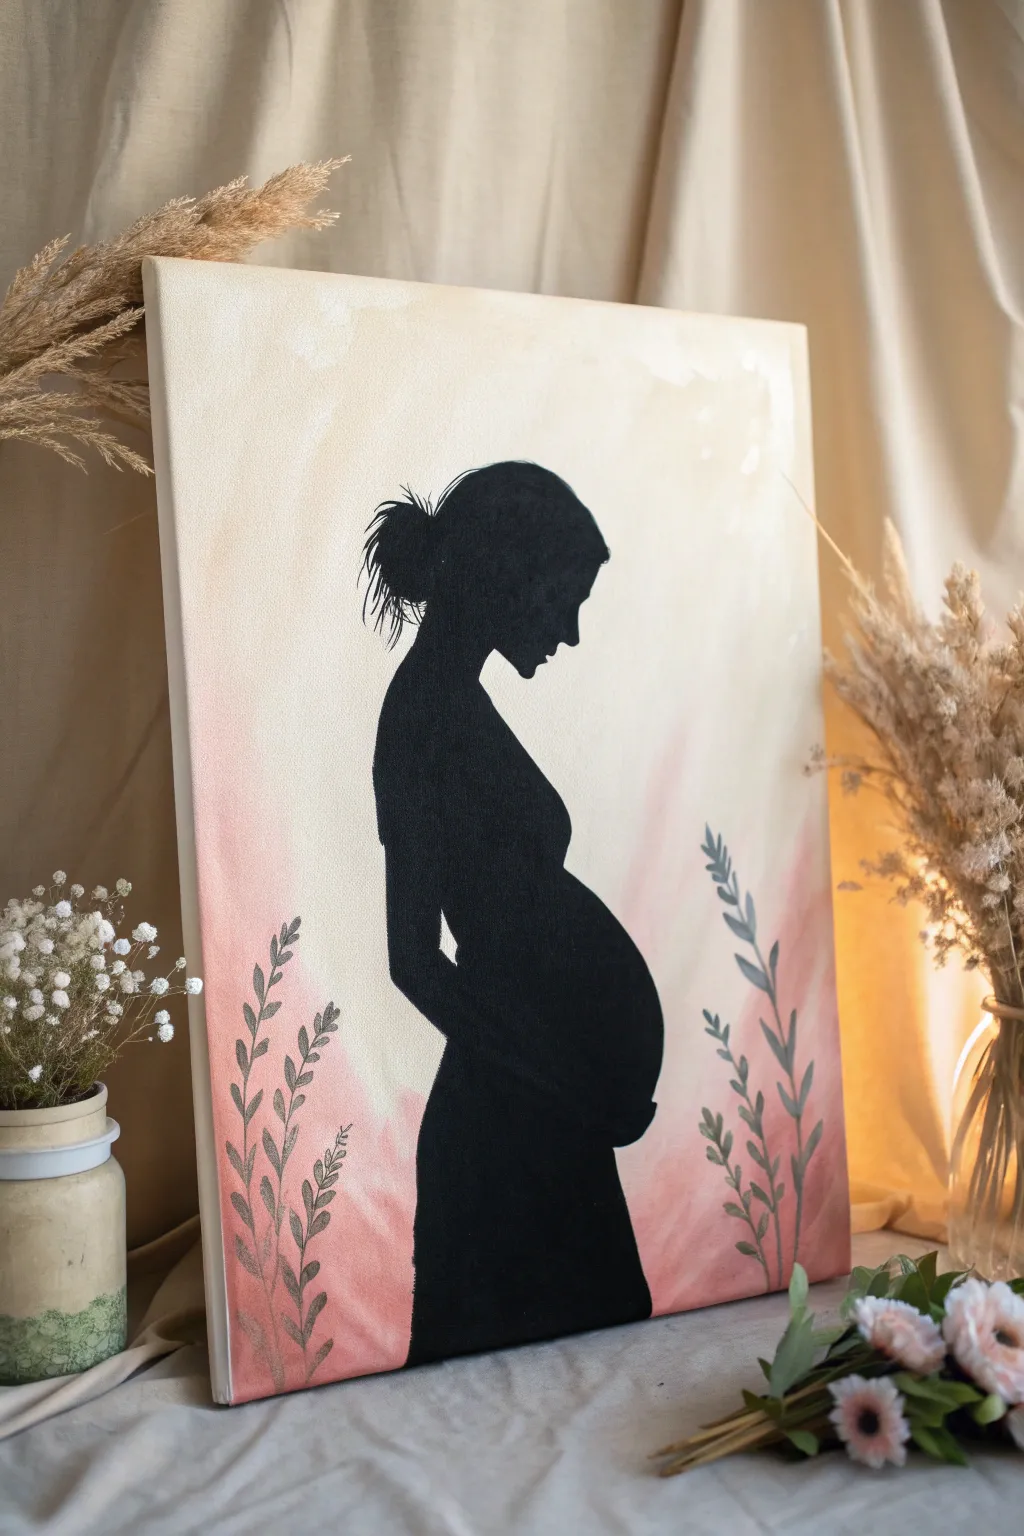
Celebrate the beauty of motherhood with this elegant silhouette painting that pairs a bold black figure against a soft, dreamy background. The gentle watercolor effect creates a warm, loving atmosphere perfect for nursery decor or a thoughtful baby shower gift.
Step-by-Step Guide
Materials
- Rectangular stretched canvas (e.g., 16×20 inches)
- Acrylic paints: Titanium White, Light Pink, Peach, Black, Grey-Green or Sage
- Large flat brush (1-2 inch)
- Medium round brush
- Small fine liner brush (size 0 or 00)
- Pencil and eraser
- Water cup and paper towels
- Mixing palette
- Optional: Printed silhouette template and transfer paper
Step 1: Creating the Soft Background
-
Prepare the wash:
Start by mixing a very fluid, watery version of your Light Pink and Peach paints on your palette. We want a transparency similar to watercolor, so use plenty of water. -
Establish the base:
Using your large flat brush, apply a very thin, watery layer of Titanium White across the entire canvas to prime the surface and help the colors blend smoothly. -
Apply the first color wash:
While the white is still damp, pick up your watery Light Pink mix. Sweep it diagonally across the canvas, concentrating the color on the bottom left and top right corners. -
Blend in the warmth:
Immediately introduce the watery Peach tone into the center areas and near the pink edges. Use broad, loose strokes to blend the two colors where they meet, creating a soft, cloud-like gradient. -
Soften the edges:
If any brushstrokes look too harsh, dip your brush in clean water and gentled feather the edges of the paint. The goal is an airy, abstract background without distinct lines. -
Let it dry completely:
This step is crucial. Allow the background to dry fully—for at least 30-45 minutes or use a hairdryer on a low setting—before attempting to draw or paint over it.
Fixing Smudges
Did black paint stray outside the line? Don’t panic. Let it dry completely, then paint over the mistake with your background pink/peach mix. Build it up in layers to hide the dark mark.
Step 2: Painting the Silhouette
-
Outline the figure:
Lightly sketch the pregnant woman’s silhouette in pencil. Focus on the curve of the back, the messy bun hairstyle, and the prominent baby bump. Alternatively, print a template, place transfer paper underneath, and trace the outline onto the canvas. -
Define the edges:
Using a medium round brush loaded with opaque Black acrylic paint, carefully paint along the inside of your pencil lines. Keep your hand steady to create a crisp, sharp edge. -
Detail the hair:
Switch to your small fine liner brush for the hair. Flick the brush outward quickly and lightly at the bun area to create wispy, realistic strands escaping the hair tie. -
Refine the profile:
Use the fine liner brush again to carefully shape the nose, chin, and neck. These small details define the emotion of the piece, so take your time here. -
Fill the silhouette:
Once the outline is secure, switch back to a larger brush to fill in the body of the silhouette with solid black. Ensure the coverage is even and opaque. -
Second coat check:
If the background color shows through the black paint, wait for the first layer to dry and apply a second coat of black for a true, deep silhouette.
Step 3: Adding the Floral Accents
-
Sketch the stems:
With a very light pencil touch, mark where your leaf sprigs will go. Place one sprig climbing up the bottom left corner and another on the bottom right, framing the bump. -
Paint the main stems:
Mix a muted Grey-Green or Sage color. Using your fine liner brush, paint the central stems following your pencil guides with a steady, flowing motion. -
Add the leaves:
Using the small round brush, press down and lift up to create simple teardrop-shaped leaves along the stems. Vary the angle slightly for a natural look. -
Layering leaf colors:
Once the green leaves are dry, I like to mix a tiny bit of white into the green and add delicate highlights to the tips of a few leaves for dimension. -
Final inspection:
Step back and look at your composition. If needed, touch up the background with a tiny bit of watered-down pink around the leaves, or sharpen any black edges on the silhouette.
Metallic Touch
For a glamorous twist, paint the floral sprigs using gold or metallic rose gold acrylic paint instead of green. It adds a beautiful shimmer that catches the light.
Hang your completed artwork in a bright spot where the gentle colors can truly shine
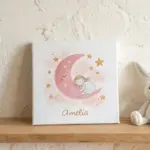
Baby Elephant Nursery Canvas
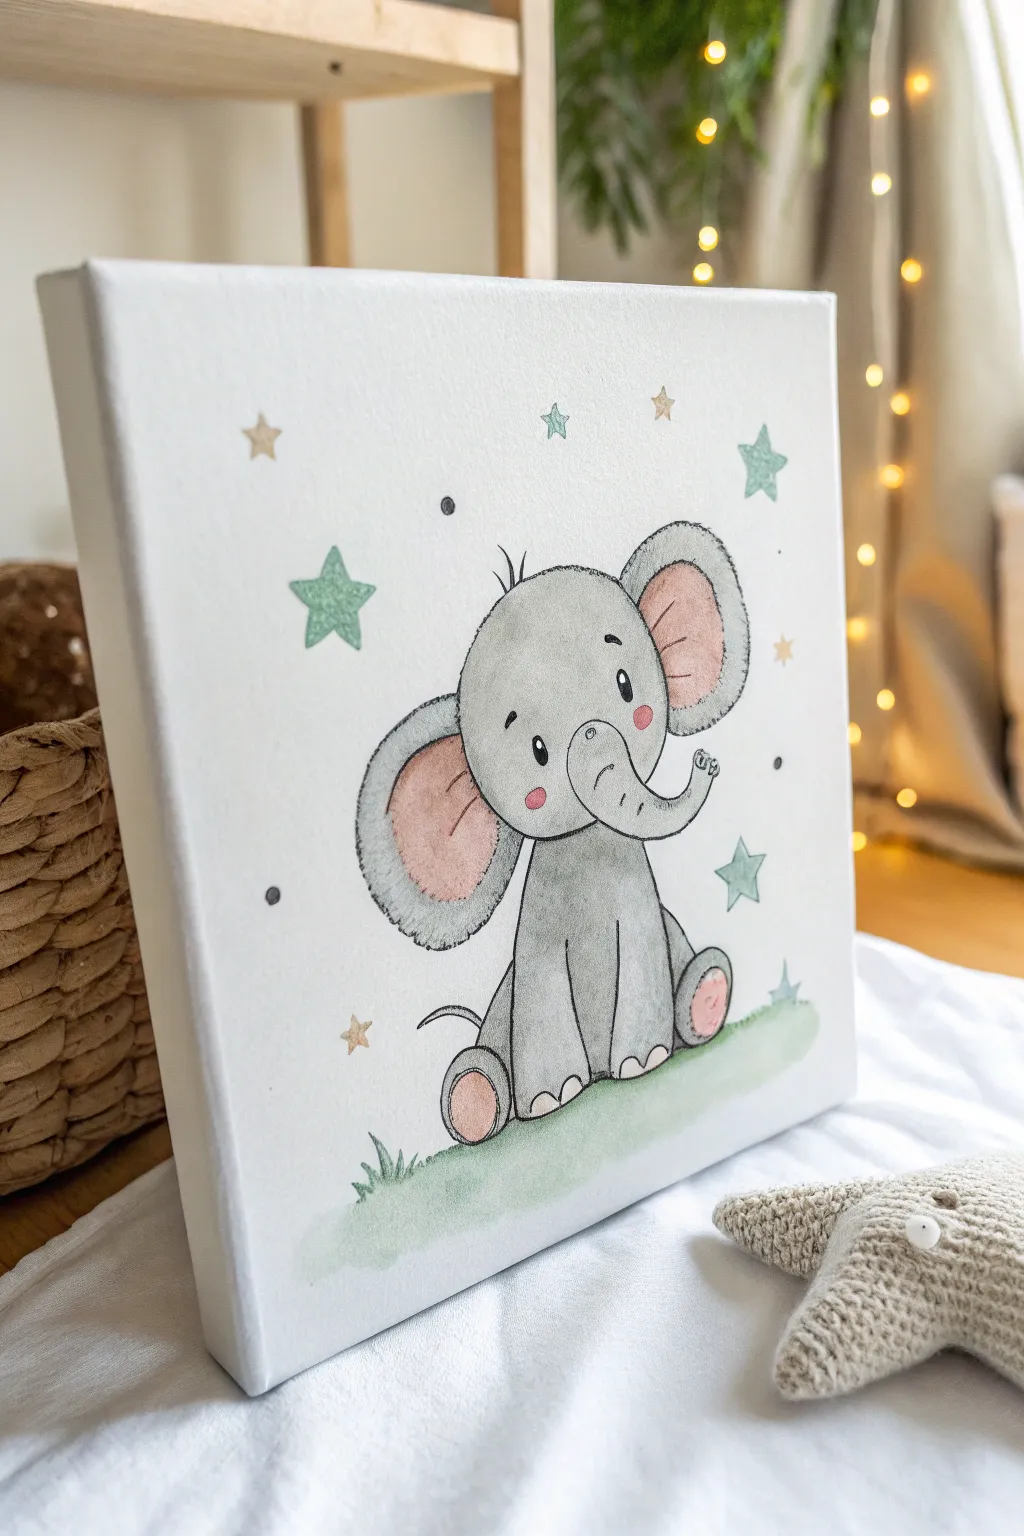
This adorable baby elephant painting features a soft watercolor style on a sturdy canvas, perfect for adding a gentle touch to any nursery. The project combines easy-to-draw shapes with subtle shading to create a sweet, professional-looking piece of wall art.
Step-by-Step Tutorial
Materials
- Square stretched canvas (approx. 10×10 or 12×12 inches)
- Acrylic paints (Greys, Soft Pink, Sage Green, Black, White, Gold)
- Textile medium or glazing liquid (to thin acrylics for a watercolor look)
- Pencil and eraser
- Fine liner brush (size 00 or 0)
- Round brushes (flats and rounds, sizes 2-6)
- Palette
- Water cup and paper towels
Step 1: Planning and Sketching
-
Prepare the canvas:
Start with a clean, stretched canvas. If your canvas is very rough, you might want to apply a layer of gesso and sand it smooth once dry, as this helps with the delicate line work later. -
Block out the head shapes:
Lightly sketch a large oval shape for the elephant’s head in the center-right of the canvas. It should be slightly tilted. Add two large, rounded ear shapes on either side—make them big and floppy for maximum cuteness. -
Sketch the body:
Below the head, draw a pear-shaped body. It should look like the elephant is sitting, so keep the bottom wide and stable. Add two rounded stumps for the front legs right in the middle of the body. -
Add details:
Draw the back legs peeking out from the sides near the bottom, with oval pads on the soles. Sketch a curved trunk lifting upwards—a sign of good luck! Add two small oval eyes, eyebrows, and a tiny tail. -
Draw the environment:
Sketch a gentle, wavy hill line beneath the elephant for it to sit on. Finally, draw scattered star shapes of varying sizes floating in the sky above the elephant’s head.
Fixing Wobbly Lines
If your black outlines get too thick or messy, wait for them to dry completely. Then, mix your base grey color and carefully paint over the mistake to tidy up the edge.
Step 2: Painting the Base Colors
-
Mix your grey wash:
Mix a light grey acrylic paint with a glazing medium or a significant amount of water. You want a semi-transparent, watercolor-like consistency. Test it on a piece of paper first to ensure it’s not too opaque. -
Fill the elephant:
Using a soft round brush, fill in the elephant’s head and body with your grey wash. Let the texture of the canvas show through slightly. I like to keep the edges slightly uneven to mimic a hand-drawn illustration style. -
Paint pink details:
Mix a soft, pale pink. Paint the insides of the large ears and the pads on the bottom of the feet. Add two small circles on the cheeks for a rosy blush effect. -
Paint the grass:
Using a diluted sage or mint green, paint the grassy hill. Use horizontal strokes that fade out at the bottom to create a soft vignette look. Add a few small upward flicks for grass blades near the elephant’s bottom.
Step 3: Adding Definition and Detail
-
Deepen the shadows:
Once the base layer is dry, mix a slightly darker grey. Add shading under the chin, where the ears meet the head, and under the trunk to give the figure dimension. -
Outline the artwork:
This is the most crucial step for the ‘illustration’ look. Dilute black acrylic paint until it flows like ink, or use a black paint pen. Using your finest liner brush, trace over your pencil lines with a scratchy, sketchy stroke rather than a solid, perfect line. This adds character. -
Define facial features:
Paint the eyes solid black, leaving a tiny white dot in each for a sparkle. Outline the pink cheeks with broken lines. Add small wrinkles on the trunk and knees for texture. -
Create texture on the ears:
Use your fine liner to make small, rapid hatching marks around the edges of the ears to suggest fuzziness or hair. This breaks up the solid outline and softens the look.
Make It Sparkle
For a magical nursery touch, use actual metallic gold paint or even a layer of gold leaf on the stars. It catches the light beautifuly when hung on the wall.
Step 4: Final Touches
-
Paint the stars:
Use a mix of sage green and a muted gold or ochre for the stars. Paint them solidly, keeping the points relatively sharp. Outline them loosely with your fine black liner once dry. -
Add floating dots:
Dip the handle end of a small brush into black or dark grey paint. Gently dot the canvas in the empty white spaces to create magical floating specks or ‘dust’ around the stars. -
Highlight the grass:
Add a few final scribbly lines of dark green or black over the grassy area to define individual blades of grass underneath the elephant. -
Final inspection:
Check for any pencil lines that need erasing (ensure paint is 100% dry first!). Sign your name in a corner using your fine liner brush.
Hang this sweet elephant in the nursery and enjoy the calm, whimsical atmosphere it brings to the room

PENCIL GUIDE
Understanding Pencil Grades from H to B
From first sketch to finished drawing — learn pencil grades, line control, and shading techniques.
Explore the Full Guide
Stroller Sketch With Pastel Background Wash
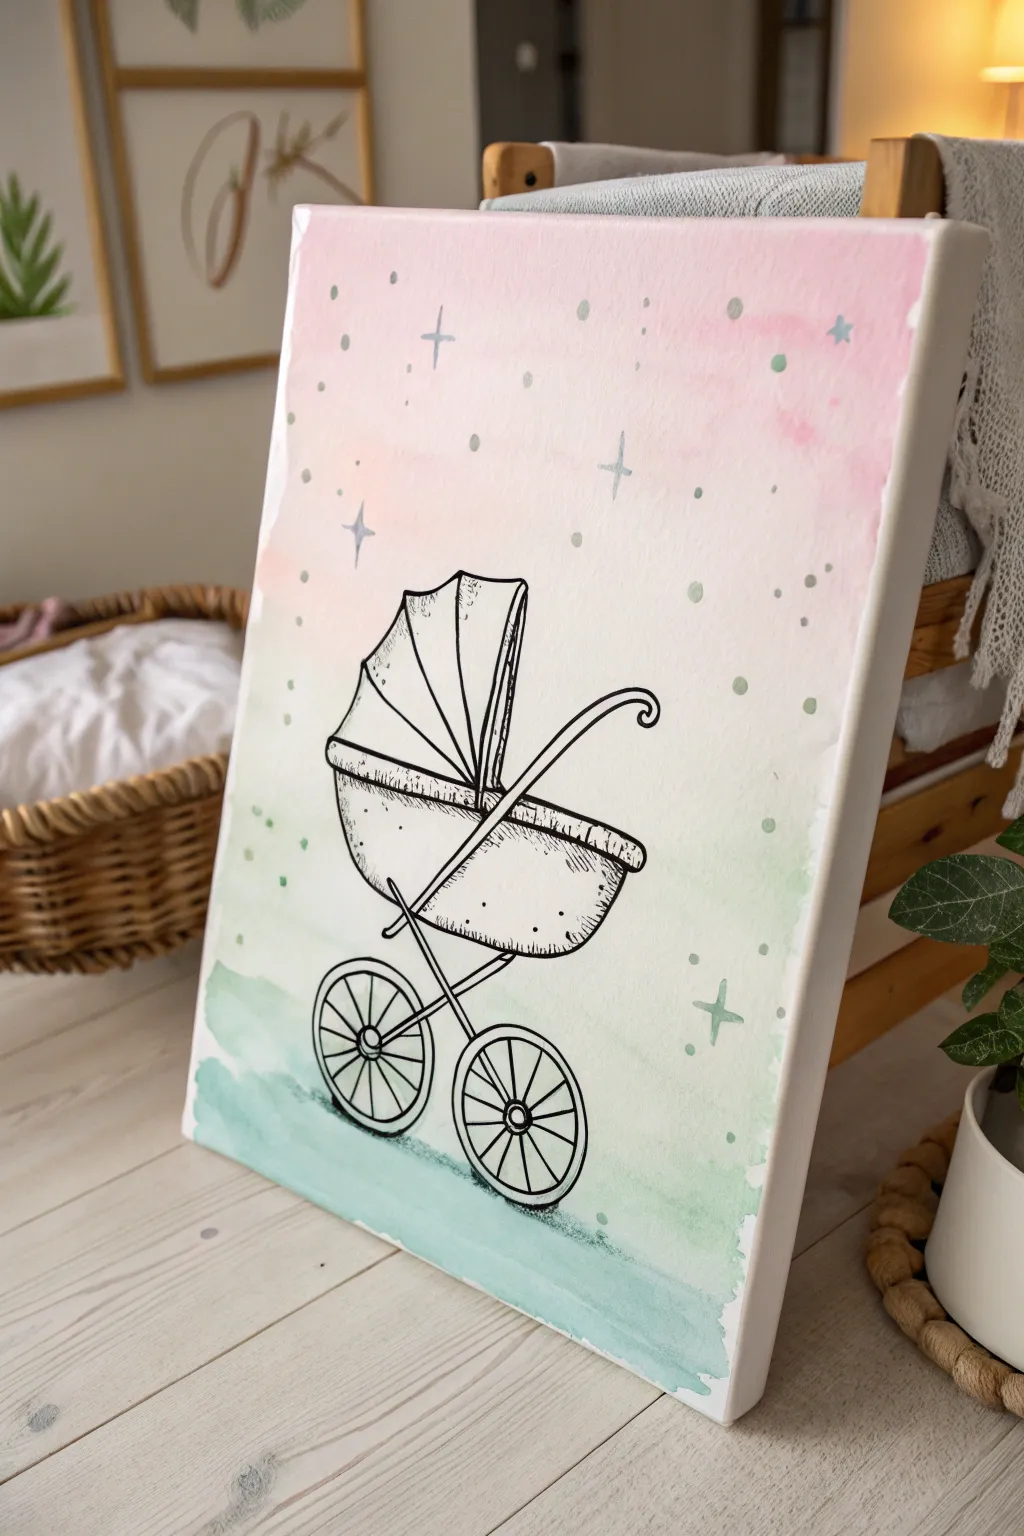
Capture the magic of a new arrival with this delicate canvas art, featuring a classic pram sketched over a dreamlike watercolor wash. The soft gradient from rose pink to mint green creates a soothing, celestial backdrop perfect for a nursery.
Step-by-Step
Materials
- Stretched canvas (rectangular, e.g., 11×14 or 16×20)
- Acrylic paints (Soft Pink, Mint Green/Teal, White)
- Black paint marker (fine and medium tips) or black acrylic paint with a liner brush
- Pencil and eraser
- Large flat paintbrush or sponge brush
- Water cup and palette
- Paper towels
- Ruler (optional)
Step 1: Creating the Pastel Wash
-
Prepare your palette:
Squeeze out your soft pink, mint green and a generous amount of white paint. You’ll want to water down the colored acrylics slightly to mimic a watercolor effect, or mix them with a glazing medium for transparency. -
Apply the pink sky:
Starting at the very top edge of the canvas, use a large wet brush to apply a horizontal band of the watered-down pink. Brush back and forth to ensure smooth coverage. -
Fade to white:
As you move down the canvas, dip your brush into water or white paint to dilute the pink gradually. By the time you reach the upper-middle section, the color should be barely visible, fading into the white of the canvas. -
Anchor with mint green:
Clean your brush thoroughly. Now, start at the bottom edge with the mint green paint. Apply a solid band of color at the base to represent the ground. -
Blend upward:
Similar to the pink section, work your way up from the bottom, adding water to fade the green out until it meets the white middle section. The center of your canvas should remain largely white to highlight the drawing later. -
Dry completely:
This is crucial; let the background dry 100% before sketching. If the canvas is damp, your pencil will dig in and the ink might bleed. I like to use a hairdryer on a cool setting to speed this up.
Pro Tip: Marker Flow
Store your paint markers horizontally before use. If the ink feels dry, press the nib down on a scrap piece of paper to pump the ink flow before touching the canvas.
Step 2: Sketching the Stroller
-
Draft the main shapes:
Using a light pencil, draw a large semi-circle or bowl shape in the lower center for the carriage body. Above it, sketch a fan shape for the retractable hood. -
Add the wheels:
Draw two large circles below the carriage body. To make them look like spoked wheels, draw a smaller circle inside each one for the hub. -
Connect the frame:
Sketch the ‘X’ frame that connects the wheels to the carriage body. Use your ruler here if you want straight structural lines. -
Draw the handle:
Add a long, curved line extending from the back of the carriage, ending in a small curl for the handle. This adds a lovely vintage feel to the silhouette.
Step 3: Inking and Details
-
Outline the drawing:
Using your medium-tip black paint marker, carefully trace over your pencil lines. Keep a steady hand and pull the marker towards you for smoother curves. -
Thicken the shadows:
Go back over the bottom curve of the carriage and the tires to thicken the lines slightly. This adds visual weight and makes the object feel grounded. -
Add texture marks:
Switch to a fine-tip marker. Add small hatching lines (short, parallel strokes) along the bottom of the carriage and inside the hood folds to suggest fabric texture and shadow. -
Draw the spokes:
Use the fine tip to draw lines radiating from the center hub to the tire rim on both wheels. -
Erase pencil guides:
Wait for the ink to be completely dry to the touch, then gently erase any visible pencil marks. -
Scatter the stars:
In the pink sky area, use a small brush or marker to add four-point stars. Draw a cross shape, then lengthen the vertical line slightly for a twinkling effect. -
Add magical dots:
Dip the back end of a paintbrush into your pastel paints (or grey) and dot them randomly around the sky and ground to add texture and whimsy to the scene.
Troubleshooting: Blotchy Paint
If your background wash looks harsh or blotchy, lightly mist the canvas with water while the paint is still wet and use a clean, dry brush to feather out the edges.
Hang this sweet masterpiece in the nursery or prop it on a gift table to welcome the new baby
Rainbow “Over The Moon” Baby Shower Canvas
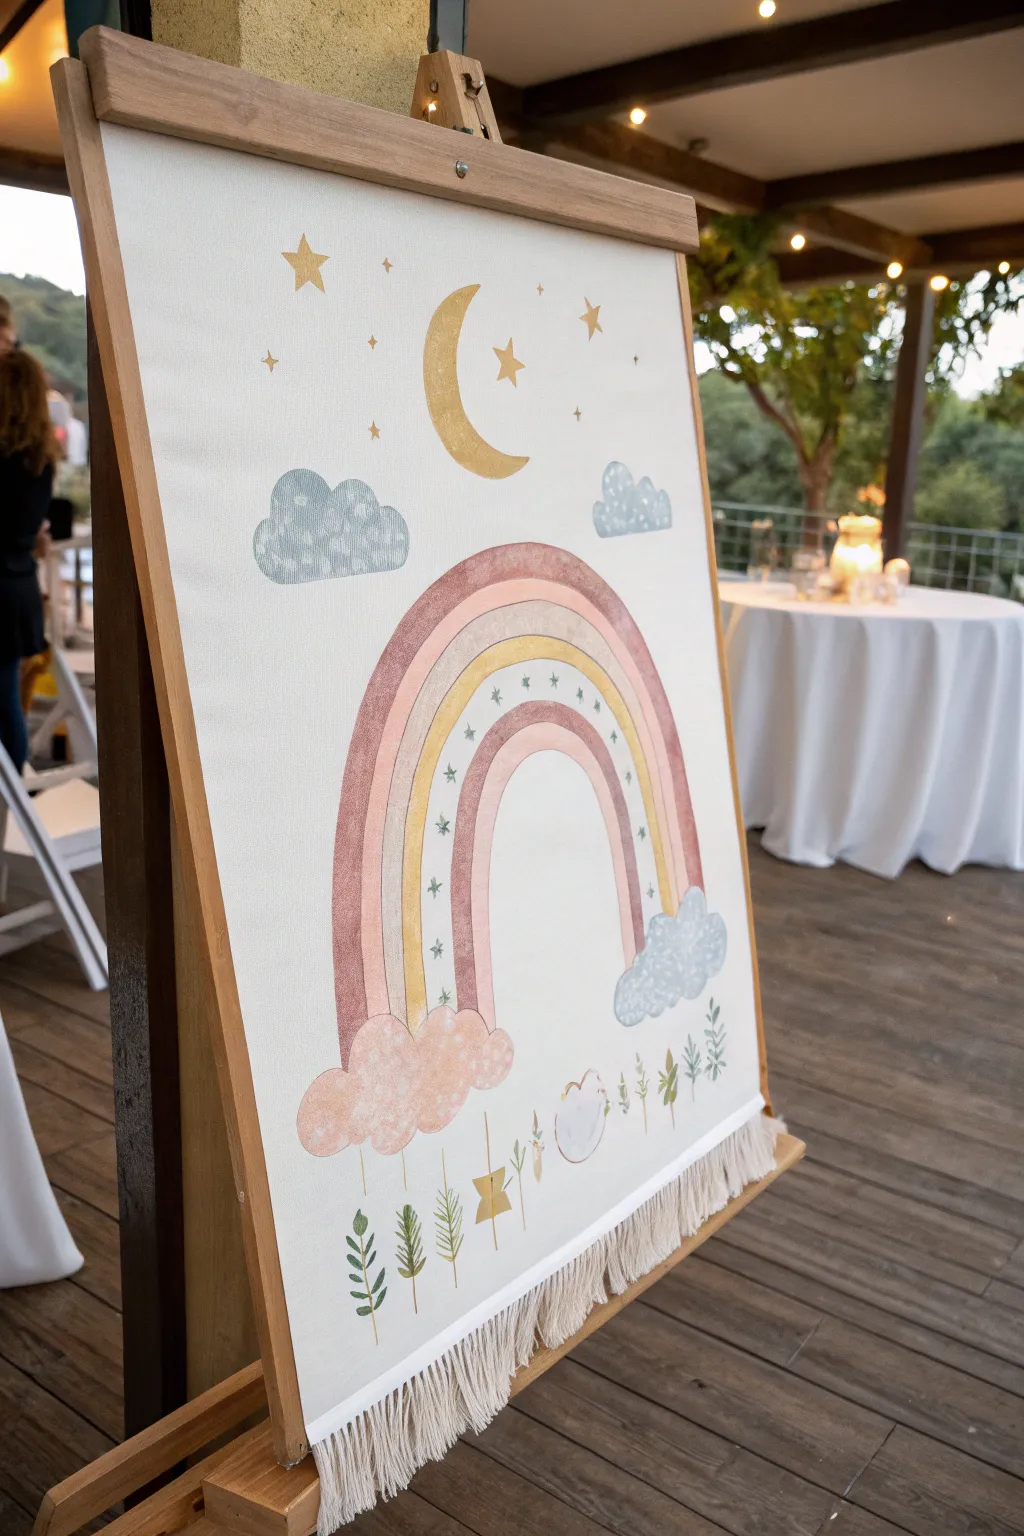
This dreamy hanging canvas combines celestial magic with a soft, muted rainbow palette perfect for a welcoming nursery or baby shower. The piece features a textured fringe and wooden rails for a warm, handcrafted finish that feels both modern and timeless.
Step-by-Step
Materials
- Heavyweight canvas fabric (approx. 24” x 36”)
- Wooden dowels or slat strips (x2, slightly wider than canvas)
- Acrylic paints (muted mauve, dusty rose, terracotta, metallic gold, white, sage green)
- Macramé cord or cotton fringe tassel trim
- Fabric glue or heavy-duty craft glue
- Paintbrushes (flat shader, round detail brush)
- Pencil and eraser
- Ruler or straight edge
- Large circular objects (bowls/plates) or a compass for tracing
- Scissors
Step 1: Preparing the Canvas Scroll
-
Cut the canvas:
Measure and cut your canvas fabric to your desired size (suggested 24 inches wide by 36 inches tall). Ensure the edges are cut cleanly, although the side edges can be left raw for a more rustic look or hemmed if you prefer. -
Attach the fringe:
Cut a length of fringe trim to match the width of your canvas bottom. Apply a strong line of fabric glue along the bottom edge of the canvas and press the trim firmly in place. Let this dry completely while you prepare your paints. -
Mount the wood rails:
Sandwich the top and bottom edges of the canvas between two thin wooden slats. You can glue these in place or use small screws for a more industrial look. This gives the artwork weight and structure, allowing it to hang flat.
Step 2: Sketching the Design
-
Establish the rainbow arch:
Using a pencil, lightly sketch the main rainbow shape in the lower center. Use mixing bowls or a large compass to get perfect concentric arches. Leave plenty of space at the top for the moon and stars. -
Draw the celestial elements:
Above the rainbow, sketch a crescent moon and several scattered stars. Vary the star sizes—some simple four-point stars and some tiny dots work well. -
Adds clouds and foliage:
Sketch fluffy cloud shapes at the base of the rainbow legs and floating in the sky. Finally, draw a horizontal line of simple botanical sprigs and leaves along the very bottom, just above the fringe.
Clean Lines
Issues with shaky edges? Use flexible masking tape (or painter’s tape cut into thin strips) to mask off the curves of the rainbow before painting for crisp bands.
Step 3: Painting the Rainbow & Sky
-
Paint the rainbow bands:
Start painting the rainbow arches. Use your muted mauve for the outer band, transitioning to dusty rose, and then terracotta. Painting smooth curves takes patience, so I like to use a flat brush and rotate the canvas as I go. -
Add the gold accent:
Paint one of the inner arches with metallic gold paint. This adds a lovely shimmer that catches the light. Let the colors touch slightly for a hand-painted feel, or leave a tiny sliver of canvas showing between bands for separation. -
Fill the clouds:
Using a mix of white and a tiny drop of blue-grey, paint the clouds. Use a dabbing motion with your brush to give them a fluffy, textured appearance rather than a flat fill. -
Paint the moon and stars:
Fill in the crescent moon with the metallic gold paint. For the stars, specific sharp points matter less than the placement, so paint them carefully with a small round brush. Add tiny gold dots for ‘stardust’ around the sky.
Add Dimension
Mix fabric medium into your acrylics if using heavy canvas. It helps the paint flex without cracking and sink into the weave for a softer, dyed look.
Step 4: Adding Details & Foliage
-
Detail the inner arch:
Once the rainbow bands are dry, use a fine detail brush to paint tiny stars or dots inside the lightest arch. This small pattern breaks up the solid blocks of color. -
Paint the bottom foliage:
Using sage green and subtle earth tones, paint the botanical stems along the bottom edge. Keep the lines thin and vary the leaf shapes—some fern-like, some broad leaves. -
Add texture to clouds:
Once the base cloud color is dry, add swirly details or small dots in white over the grey-blue clouds to mimic the pattern in the reference image. -
Final touches:
Review your painting for any patchy areas. A second coat on the gold elements often makes them pop significantly more.
Hang your beautiful canvas scroll at the venue entrance or behind the gift table to set a dreamy mood.


Fingerprint Heart Cluster For Guests
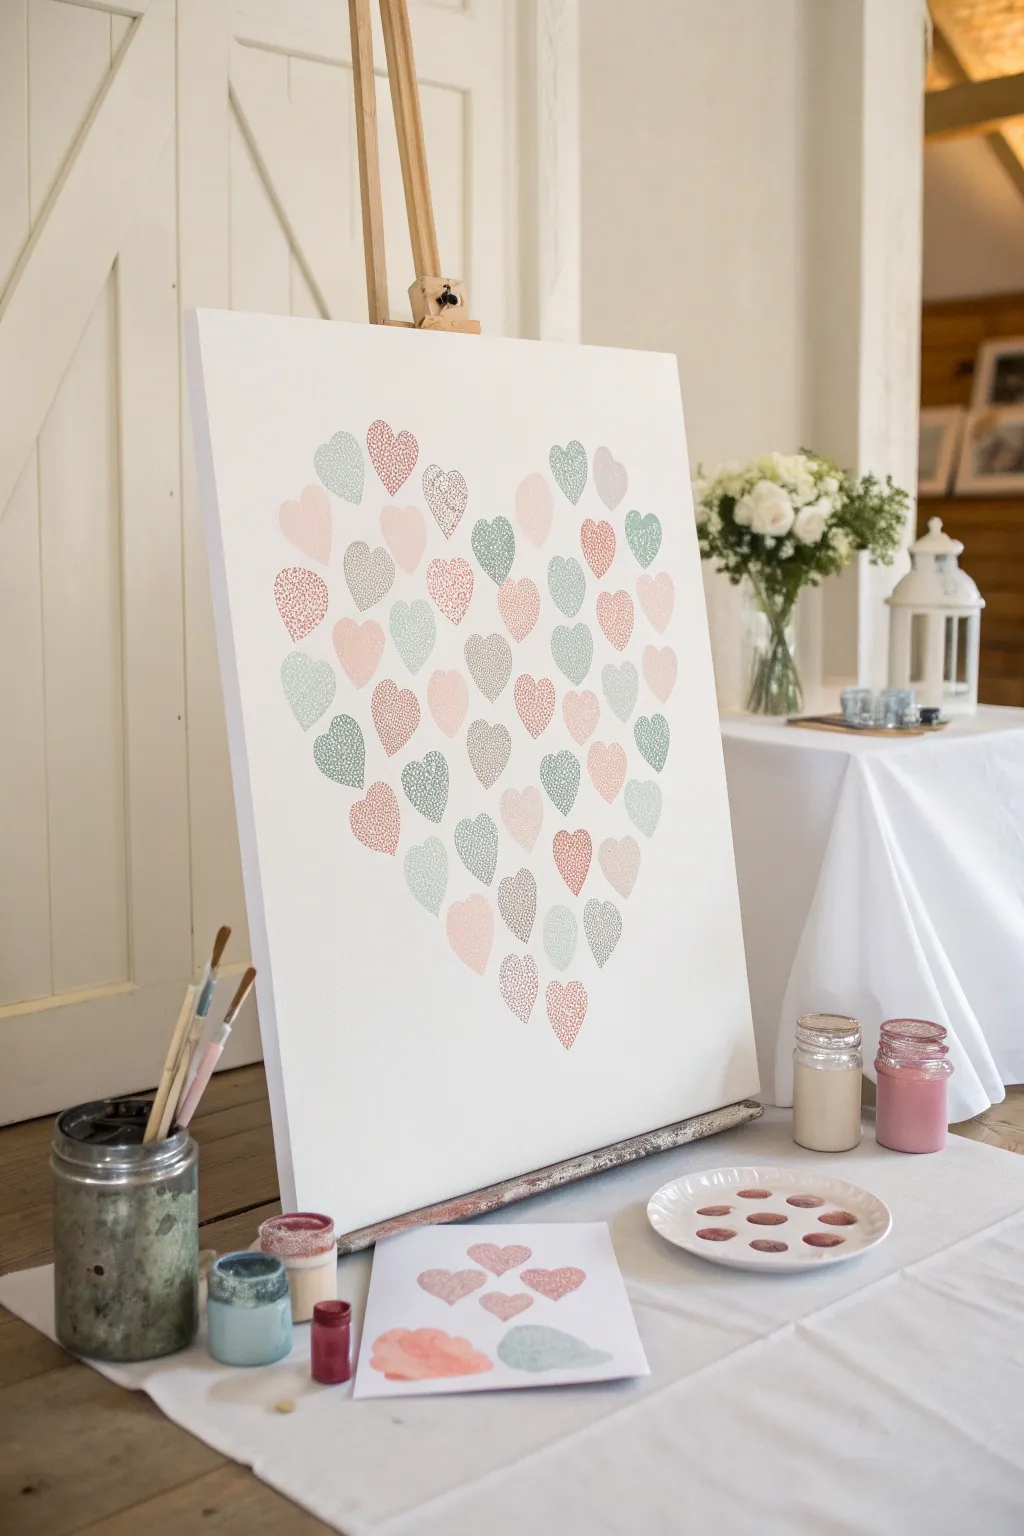
This heartwarming guest book alternative transforms the fingerprints of your loved ones into a cohesive, collaborative masterpiece. The soft pastel palette and organic arrangement create a delicate, romantic keepsake that perfectly captures the communal joy of a baby shower.
How-To Guide
Materials
- Large stretched canvas (16×20 or 18×24 inches)
- Acrylic paints (soft pink, dusty rose, teal, sage green, light grey)
- Small paper plates or palettes for paint
- Pencil
- Large sheet of paper or cardstock (for making a stencil)
- Scissors
- Painter’s tape or masking tape
- Baby wipes (essential for guests!)
- Small fine-point black pen (optional, for signing names)
- Easel for display
Step 1: Preparation & Setup
-
create the master shape:
Before you begin painting, you need a guide area. Cut a large paper heart out of your cardstock or scrap paper. Size it so there is a comfortable 3-4 inch negative space border around it on your canvas. -
Trace the boundary:
Center your paper heart on the canvas. Lightly trace around the outside edge with a pencil. You want this line to be visible to you but faint enough that it won’t show through the paint later. -
Prepare the palette:
Squeeze small dollops of your varying acrylic colors onto the paper plates. You want a harmonious mix of colors—some warm pinks and some cool greens and greys. -
Test paint consistency:
If the acrylic paint is very thick, mix in a tiny drop of water. The paint should be creamy enough to capture the ridges of a fingerprint without being runny.
Keep It Clean
Set up a “cleaning station” right next to the canvas with wet wipes and a small trash bin. Guests are more likely to participate if they know they won’t have paint on their hands all day.
Step 2: Creating the Fingerprints
-
Start at the top center:
Dip your thumb into one of the colors. Blot it once on a scrap paper to remove excess globsthen press firmly onto the canvas inside your pencil outline. -
Form the first heart:
To make a heart shape, press your thumb down again at an angle to the first print, overlapping the bottom ends to form a ‘V’. The two prints together create a perfect little heart. -
Establish the perimeter:
I recommend doing the outermost hearts first. Go around the inside edge of your pencil line, placing hearts in alternating colors to define the overall shape. -
Vary the angles:
Don’t make every heart perfectly vertical. Rotate your thumb slightly for some hearts to give the cluster a playful, fluttering movement, like leaves falling. -
Fill the interior:
once the border is defined, start filling in the middle. Space the hearts relatively evenly, leaving a little white space between them so they don’t look crowded. -
Clean often:
Between color changes, thoroughly wipe your thumb with a baby wipe and dry it on a paper towel. This prevents the colors from turning muddy on the canvas. -
Distribute colors evenly:
Step back occasionally to check the color balance. If you see a large patch of just pink, add a sage green or grey heart nearby to break it up visually.
Step 3: Finishing Touches
-
Check for gaps:
Look for any large empty spaces within your heart cluster. Add smaller pinky-finger hearts to fill these awkward gaps if a full thumbprint is too big. -
Let it dry completely:
Allow the paint to dry for at least 2-3 hours. Acrylic dries relatively fast, but the thicker parts of the prints might take longer. -
Erase guide lines:
Once the paint is bone dry, take a clean eraser and gently remove any visible parts of your initial pencil outline. -
Add guest signatures:
If this is for a shower, set the canvas back on the easel. Place a fine-point pen nearby and encourage guests to sign their name or write a tiny message near their specific heart print.
Add Dimension
Once dried, use a metallic gold or silver paint pen to outline just a few random hearts. This adds a subtle shimmer that catches the light without overpowering the soft pastel look.
Hang this beautiful collaborative piece in the nursery as a daily reminder of the community surrounding your little one.
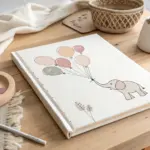
Baby Animal Parade Across The Bottom
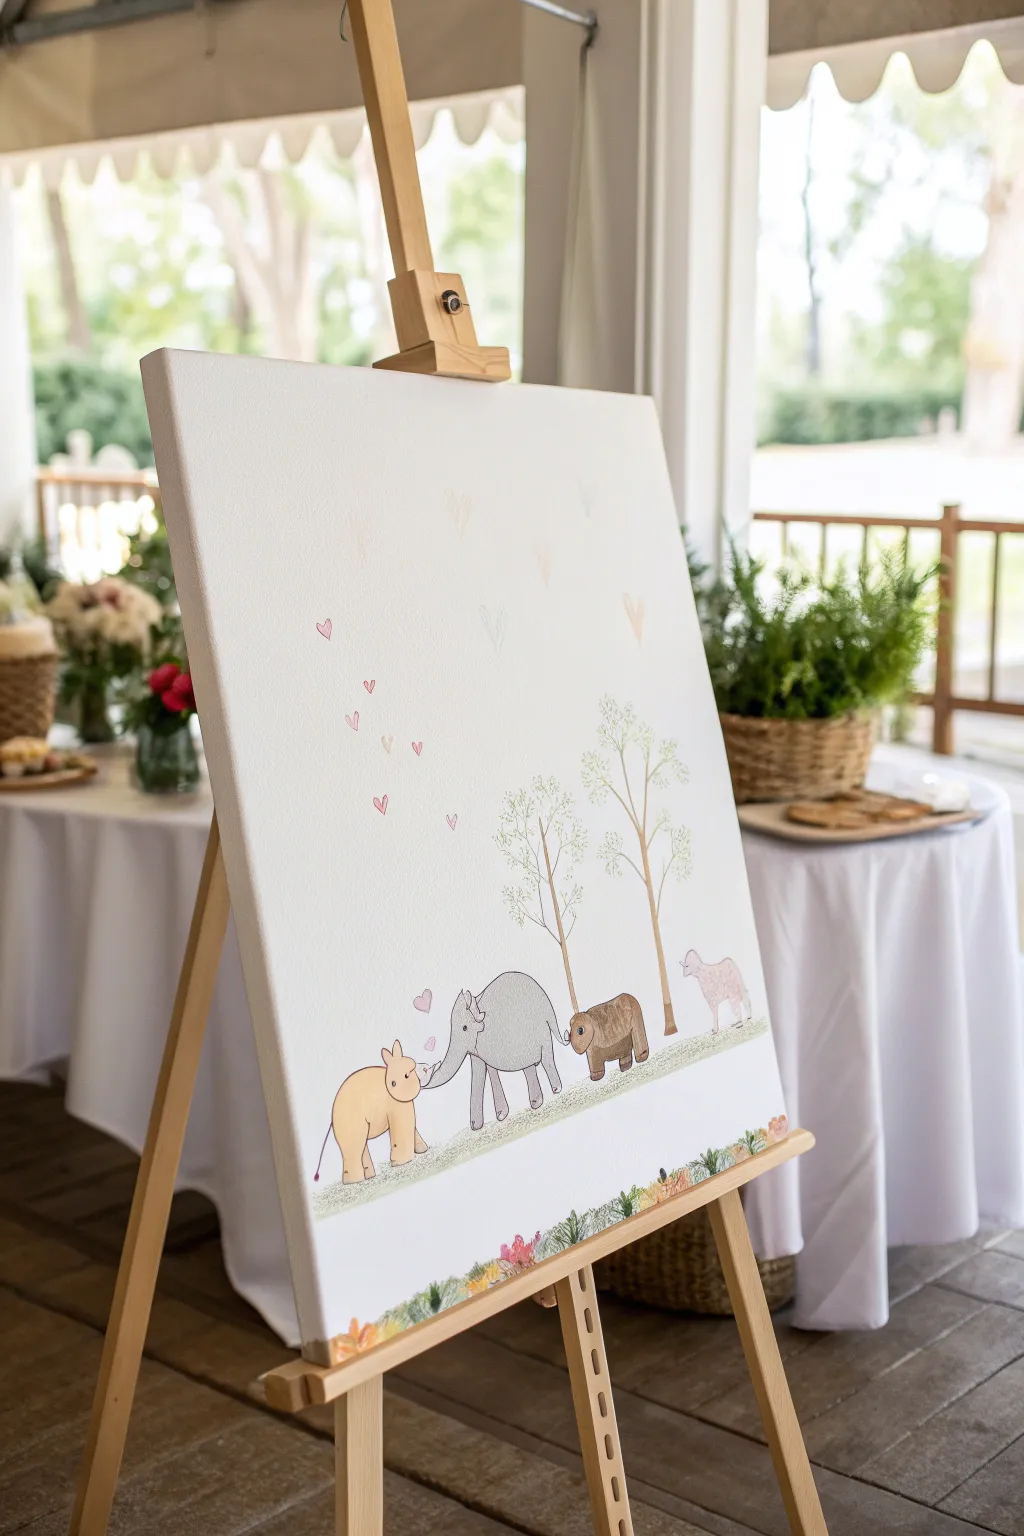
This tender nursery artwork features a sweet procession of baby animals—a rhino, elephant, bear, and lamb—walking beneath delicate trees. The scene uses plenty of negative space to create a clean, modern look perfect for a baby shower guest book or nursery decor.
Detailed Instructions
Materials
- Large rectangular canvas (approx. 18×24 or 24×36 inches)
- Acrylic paints (warm grey, cool grey, brown, pale pink, peach/yellow ochre, sage green, white)
- Pencil and eraser
- Set of acrylic brushes: flat shader, small round, and fine liner
- Palette or paper plate
- Water cup and paper towels
- Easel (optional but helpful)
Step 1: Sketching the Layout
-
Establish the ground line:
Use a ruler or straight edge to lightly draw a horizontal line near the very bottom of the canvas, about 2-3 inches up. This will be the path your animals walk on. -
Map out the trees:
Lightly sketch two tall, slender trees on the right side. Their trunks should be thin lines stretching up about halfway up the canvas, topped with loose, cloud-like shapes for foliage. -
Sketch the animals:
Draw the outline of the four animals walking in a line from left to right. Start with the baby rhino, followed by the elephant holding the rhino’s tail with its trunk. Next is the bear, followed by the lamb. -
Add floating hearts:
Scatter a few tiny heart shapes floating upwards from the animals towards the top left corner to add a sense of movement and love.
Wobbly Lines?
If painting fine outlines is difficult, wait for the paint to dry completely and use a fine-tip archival ink pen or paint marker instead of a brush for better control.
Step 2: Painting the Animals
-
Base coat for the rhino:
Mix a soft peach or yellow ochre with plenty of white. Fill in the rhino’s body, keeping the paint application smooth and flat. -
Paint the elephant:
Use a cool grey mixed with white for the elephant. Carefully paint around the ear shape, leaving it slightly lighter or darker to distinguish it from the body. -
Color the bear:
Mix a warm medium brown. Paint the bear’s body, ensuring you cover your pencil lines but keep that rounded, cuddly shape intact. -
Fill in the lamb:
Use a very pale pink or cream color for the lamb. You can dab the brush slightly here to suggest a fluffier wool texture compared to the smooth skin of the other animals. -
Details and outlines:
Once the base coats are totally dry, use your finest liner brush and dark grey or diluted black paint to outline each animal. Add simple facial features like small dot eyes and curved smiles.
Step 3: Creating the Landscape
-
Paint the tree trunks:
Using a light brown, paint the thin vertical lines for the tree trunks. Add small V-shaped branches near the top. -
Stipple the leaves:
Mix a very pale sage green. Use an old or dry brush to stipple (tap repeatedly) the foliage area. Keep it airy and transparent rather than a solid block of green. -
Paint the grassy path:
Wash a sheer layer of pale green along the ground line you sketched earlier. It shouldn’t be a solid stripe; use horizontal strokes that fade out at the edges. -
Add textual details:
Use the tip of a small round brush to dab tiny dots and grass blades along the green path. I like to add tiny touches of pink here to suggest wildflowers. -
Bottom border florals:
Along the very bottom edge of the canvas, paint a denser row of grass and small colorful flowers in pinks, oranges, and greens to frame the scene.
Make it Interactive
Turn this into a guest book by having guests press their thumbprints in green ink onto the tree branches to create the ‘leaves’ during the shower.
Step 4: Final Touches
-
Paint the hearts:
Fill in the floating hearts with varying shades of soft pink and peach. Make the ones closer to the animals slightly more saturated. -
Check for opacity:
Step back and look at your large white negative space. If any smudges occurred, touch them up with white paint to keep the background pristine. -
Seal the work:
Once strictly dry (wait at least 24 hours), apply a clear spray varnish to protect the painting, especially if guests will be signing the rest of the canvas later.
Now you have a charming piece of art ready to welcome a new little one into the world
Storybook Scene Guestbook In Disguise
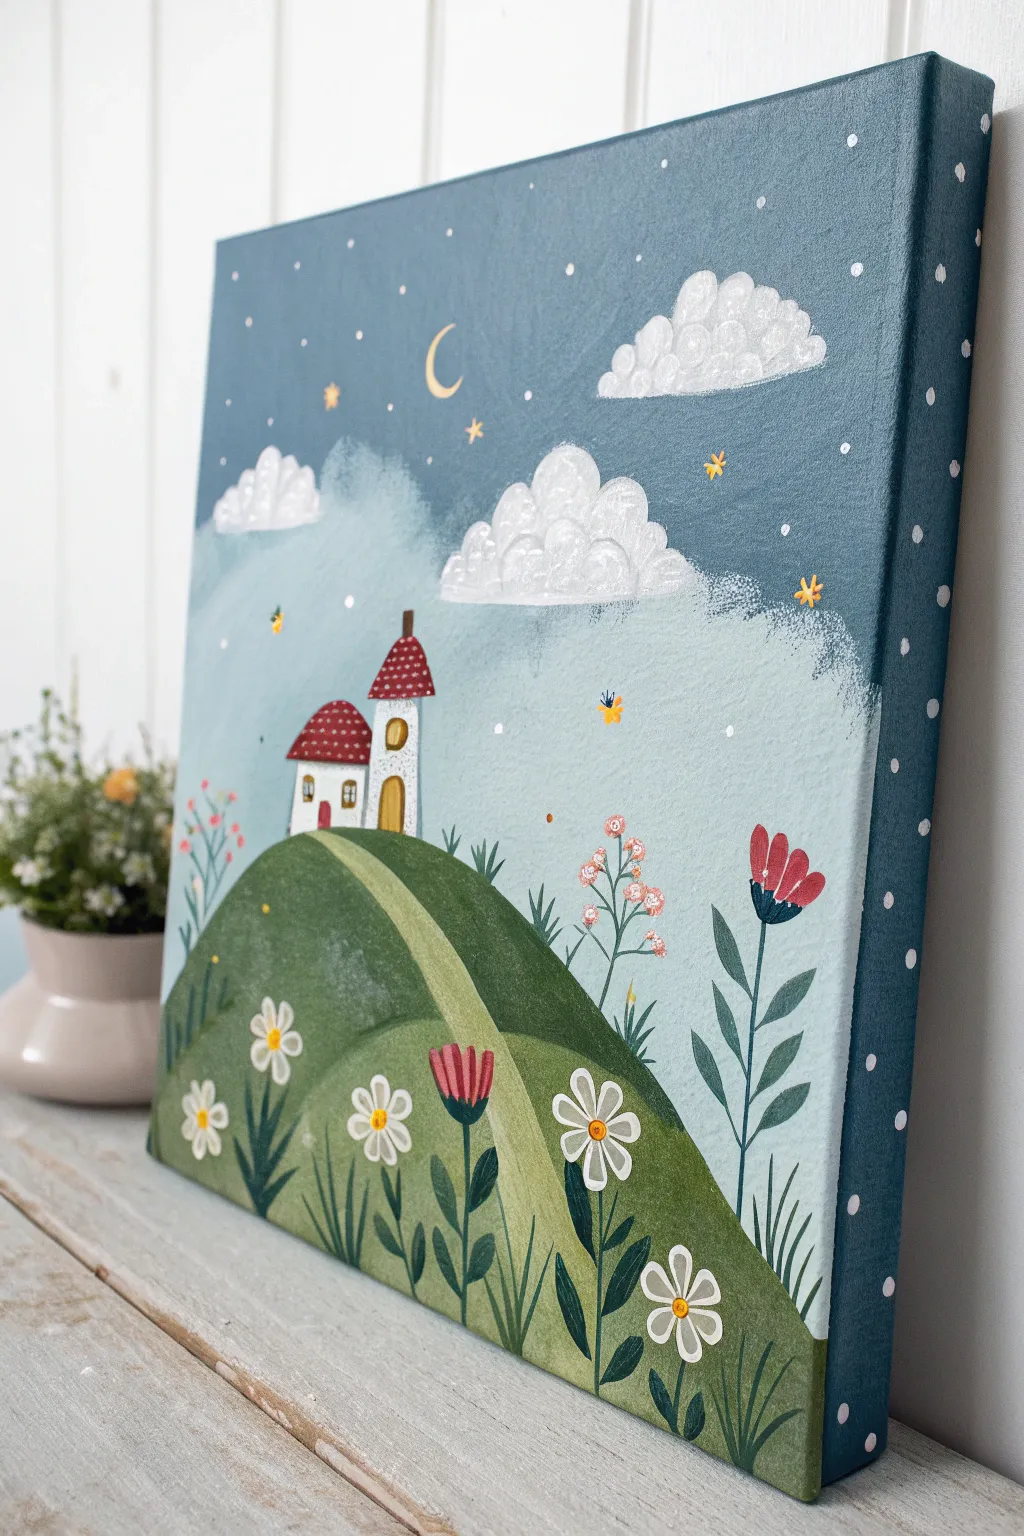
This enchanting canvas captures the magic of a storybook night with a deep teal sky, puffy clouds, and a sweet little cottage atop a rolling green hill. Its generous sky area and rolling hills act as a perfect backdrop for baby shower guests to sign their names or leave little well-wishes among the stars.
How-To Guide
Materials
- Stretched canvas (square format, e.g., 12×12 or 16×16)
- Acrylic paints: Deep teal/navy, light blue, white, multiple shades of green, red, yellow, pink
- Flat shader brushes (medium and large)
- Round detail brushes (small and extra-fine liner)
- Small round sponge pouncer or stippling brush
- Palette for mixing
- Cup of water and paper towels
- Pencil for sketching
- Gold or yellow paint pen (optional for stars)
Step 1: Setting the Sky and Atmosphere
-
Prime the background:
Begin by painting the entire background area. Mix a deep teal or navy blue for the upper sky portion, blending it downwards into a lighter, misty blue where the horizon will be. -
Wrap the edges:
Don’t forget the sides of your canvas. Extend that same deep teal color around the edges to give the piece a polished, gallery-ready look without needing a frame. -
Create the misty horizon:
While the blue paint is still slightly wet, take a clean, dry brush with a tiny amount of white paint and scumble it across the middle section to create a soft, foggy transition between the sky and where the ground will sit.
Step 2: Building the Landscape
-
Sketch the layout:
Once the background is completely dry, lightly use a pencil to outline the large rounded hill, the winding path leading up it, and the small house at the summit. -
Block in the hill:
Fill in the main hill shape with a medium olive green. Use smooth, curved strokes that follow the shape of the hill to suggest volume. -
Define the path:
Paint the winding path with a lighter, lime-green shade. If the paint is too transparent, apply a second coat after the first one dries to ensure the path stands out against the darker hill. -
Add shadows:
Mix a darker forest green and gently shade the sides of the hill where it meets the background, adding dimension to the mound.
Paint Transparency?
If your white paint looks streaky over the dark blue sky (especially on the house or clouds), don’t overload the brush. Apply thin layers, letting each dry completely before adding the next.
Step 3: The Cozy Cottage
-
Paint the walls:
Use white paint to fill in the body of the house and the adjoining tower structure. You may need two coats here to cover the blue background fully. -
Roof details:
Paint the roofs with a deep red. Once dry, use a fine-tip brush or a paint pen to add tiny white dots for a mushroom-like texture. -
Windows and doors:
Using a golden yellow, paint the arched door and the small windows. Outline them thinly with brown or dark grey to make them pop.
Make It Interactive
Since this is a guestbook alternative, use a waterproof fine-tip Sharpie or acrylic paint pen for guests to sign. The light clouds and large green hill offer the best contrast for signatures.
Step 4: Designing the Flowers
-
Foreground stems:
Using a thin liner brush and dark green paint, draw tall, sweeping stems rising from the bottom edge of the canvas. Vary their heights to keep the composition dynamic. -
Add leaves:
Paint broad, pointed leaves attached to the stems. I find that pressing down on the brush and lifting as you pull away creates the perfect tapered leaf shape. -
White daisies:
Paint simple five-petal flower shapes in white on several stems. Leave the centers empty for now. -
Pink and red blooms:
Add variety by painting tulip-like shapes in red and clusters of small pink dots on other stems to represent different wildflower varieties. -
Flower centers:
Once the white petals are dry, add a small dot of yellow or orange to the center of each daisy.
Step 5: Magical Final Touches
-
Fluffy clouds:
Use a round sponge pouncer or an old scruffy brush to dab white paint into cloud shapes in the sky. Layer the white over itself to build texture and opacity. -
Cloud highlighting:
Mix a tiny drop of grey into white and dab it on the bottom edges of the clouds to give them volume and shadow. -
Moon and main stars:
Paint a thin crescent moon and a few larger, five-point stars using bright yellow paint or a gold paint pen. -
Starry dusting:
Dip the handle end of a small paintbrush into white paint and dot it randomly across the dark blue sky to create distant stars. -
Patterned border:
Finish the piece by adding small, evenly spaced white polka dots along the painted deep blue edges of the canvas for a charming framed effect.
Step back and admire your charming storybook landscape, ready to welcome a new little one


Have a question or want to share your own experience? I'd love to hear from you in the comments below!