Basements can feel like a cave until the right paint choices flip the whole mood in a weekend. I’m sharing my favorite basement painting ideas that brighten low light, make ceilings feel taller, and give your walls a purpose (even if they’re surrounded by ducts and pillars).
Warm Off-White Walls That Don’t Feel Cold
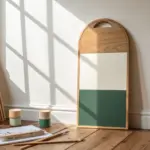
Emulate the sophisticated yet understated look of gallery art with this DIY textured piece. By combining joint compound and simple tools, you can create a tactile, cream-colored abstract design that adds depth to neutral walls without overwhelming the space.
How-To Guide
Materials
- Large wooden art panel or heavy-duty canvas (18×24 inches or similar)
- Joint compound or modeling paste
- gesso (white)
- Wide palette knife or putty knife
- Notched trowel or art comb (fine tooth)
- Acrylic paint (warm cream or beige to match the walls)
- Matte varnish spray
- Natural wood floating frame
- Painter’s tape
- Sandpaper (fine grit)
Step 1: Preparation & Base Layer
-
Prepare the surface:
If using a raw wooden panel, lightly sand it first to remove any splinters. Wipe it clean with a tack cloth to ensure the surface is free of dust. -
Prime the substrate:
Apply a generous coat of white gesso to seal the wood or canvas. This prevents the joint compound from soaking in unevenly and cracking later. -
Create a border:
If you want a clean edge where the frame sits, apply painter’s tape along the outer perimeter of your panel. This keeps the very edge smooth for framing. -
Mix the medium:
Scoop out a large amount of joint compound into a mixing container. I like to mix a small amount of the cream acrylic paint directly into the compound wet, creating a consistent base tone.
Crack Control
Joint compound naturally cracks as it shrinks. To minimize this, mix a little PVA glue into the wet paste. If cracks appear, embrace the aged look or fill them with a second thin layer.
Step 2: Creating the Texture
-
Apply the compound:
Using a wide putty knife, spread the tinted joint compound across the entire surface. Aim for a thickness of about 1/8 to 1/4 inch—thick enough to hold texture, but not so thick it will crack excessively. -
Smooth the surface:
Run the flat edge of your trowel over the wet compound to create a relatively level surface. It doesn’t need to be perfect, as the texture comes next. -
Plan your direction:
Observe the inspiration image: the lines create an inverted ‘V’ or chevron shape. Mark a faint center vertical line in the wet paste if you need a guide. -
Comb the left side:
Take your notched trowel or art comb. Starting from the top center, drag the tool diagonally down and to the left, creating a set of parallel ridges. -
Comb the right side:
Repeat the motion on the right side. Start at the top center (meeting the previous lines) and drag diagonally down and to the right to complete the chevron effect. -
Refine the texture:
If the lines look too uniform or messy, gently drag the knife over them again or re-comb specific sections. The beauty lies in minor organic imperfections.
Level Up: Ombré Effect
Mix three shades of cream—light, medium, and dark. Apply them in horizontal bands before combing to create a subtle vertical gradient within the texture.
Step 3: Finishing & Framing
-
Allow to cure:
Let the artwork dry completely. Put it in a flat, dry place for at least 24 hours. Thick areas may need up to 48 hours to fully harden. -
Sand rough peaks:
Once bone dry, take fine-grit sandpaper and very lightly brush over the sharpest peaks of the texture. You just want to knock down any dangerously sharp ridges, not flatten the design. -
Final paint coat:
Apply a thin wash of your warm cream acrylic paint over the textured surface. Use a soft brush to get into the grooves, ensuring the color is uniform and rich. -
Seal the art:
Spray the piece with a matte varnish. This seals the porous joint compound and protects it from dust and moisture over time. -
Remove tape:
Carefully peel away the painter’s tape from the edges to reveal a clean border. -
Frame it up:
Place your finished panel into a natural wood floating frame. Use framing points or offset clips to secure the panel from the back.
Hang your new textured masterpiece near a light source to let the shadows play across the ridges throughout the day


Crisp White Trim to Frame Everything
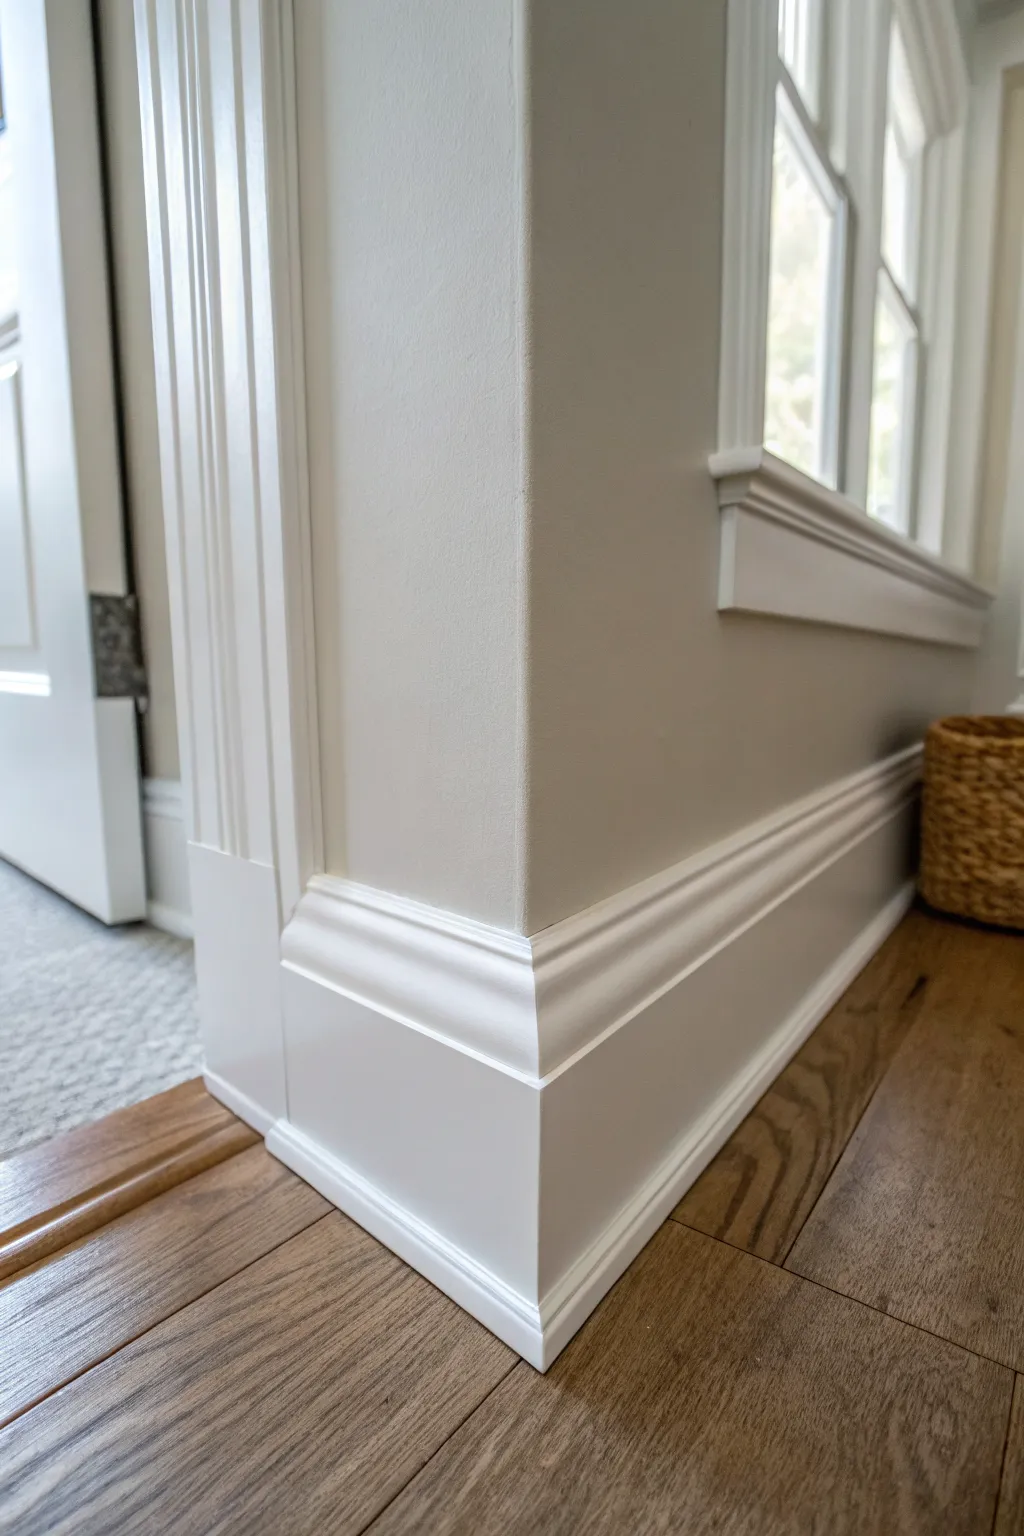
Transform your basement space with the timeless sophistication of perfectly painted white baseboards and trim. This project emphasizes clean lines and sharp contrasts, framing your walls beautifully against warm wood floors for a polished, finished look.
Step-by-Step Guide
Materials
- High-quality semi-gloss or satin white enamel paint
- 2-inch angled sash brush (synthetic bristles)
- Painter’s tape (high adhesion for floors, delicate for walls)
- Fine-grit sandpaper (220-grit) or sanding sponge
- Tack cloth
- Caulk gun and paintable acrylic latex caulk
- Spackling paste and putty knife
- Drop cloths or masking paper
- Clean water and rags
Step 1: Preparation & Surface Care
-
Protect the perimeter:
Begin by laying down drop cloths to protect your flooring. If you have hardwood floors like in the example, consider running a strip of painter’s tape along the floor right up against the baseboard to catch stray drips. -
Inspect and fill:
Examine the trim for any nail holes, dents, or gaps. Use your putty knife to fill these imperfections with spackling paste. Don’t worry about being messy; you’ll sand it later. -
Seal the gaps:
Check the seams where the trim meets the wall and where two pieces of trim join, especially at the corners. Run a thin bead of acrylic latex caulk along these lines to ensure a seamless look. -
Smooth the caulk:
Immediately smooth the caulk bead with a wet finger or a damp rag. This step is crucial for that professional, integrated appearance where the trim feels like part of the architecture. -
Sand for adhesion:
Once the spackle is dry, lightly sand all trim surfaces with 220-grit sandpaper. This scuffing helps the new paint adhere better and knocks down any high spots from your patching. -
Clean thoroughly:
Remove all sanding dust using a tack cloth. Any remaining dust will create a gritty texture in your final finish, so be thorough here. -
Tape the wall:
Apply painter’s tape to the wall just above the baseboard and trim. Press the edge down firmly with a putty knife to prevent paint bleed.
Smooth Operator
Add a conditioner like Floetrol to water-based paint. It extends drying time, allowing the paint to self-level and eliminating almost all visible brush strokes.
Step 2: Painting & Finishing
-
Load the brush correctly:
Dip your sash brush about one-third of the way into the paint. Tap it gently against the side of the can rather than wiping it, which keeps the paint inside the bristles for a smoother release. -
Cut in the edges first:
Start by painting the very top edge of the baseboard where it meets the wall tape. Use the angled tip of the brush to create a sharp line. -
Paint the details:
Work paint into the decorative curves and profiles of the molding. I find it helpful to wiggle the brush slightly to ensure paint gets into every crevice of the profile. -
Smooth the flat surfaces:
Apply paint to the flat vertical faces of the trim using long, horizontal strokes. Avoid overloading the brush to prevent unsightly drips or runs. -
Tip off the finish:
Once a section is covered, lightly drag the brush tip over the wet paint in one continuous direction. This ‘tipping off’ technique smooths out brush marks for a glass-like finish. -
Check for corners:
Pay special attention to inside and outside corners. Paint can tend to pool here, so use a drier brush to pull excess paint away from these junctions. -
Allow to dry:
Let the first coat dry completely according to the manufacturer’s instructions. Keep the area well-ventilated to speed up the process. -
Assess coverage:
Inspect the trim. If the old color shows through or the finish looks uneven, a light sanding followed by a second coat will add depth and durability. -
Remove tape carefully:
Score the edge of the tape where it meets the paint with a utility knife before pulling it off. This prevents the dried paint from peeling away with the tape.
Heighten the Drama
For a bolder look, install a plinth block at the base of the door casing where it meets the baseboard. It adds a grand, classical detailed transition.
Step back and admire how the fresh white lines brighten the entire room and define the space with clarity


Two-Tone Walls With a Chair Rail
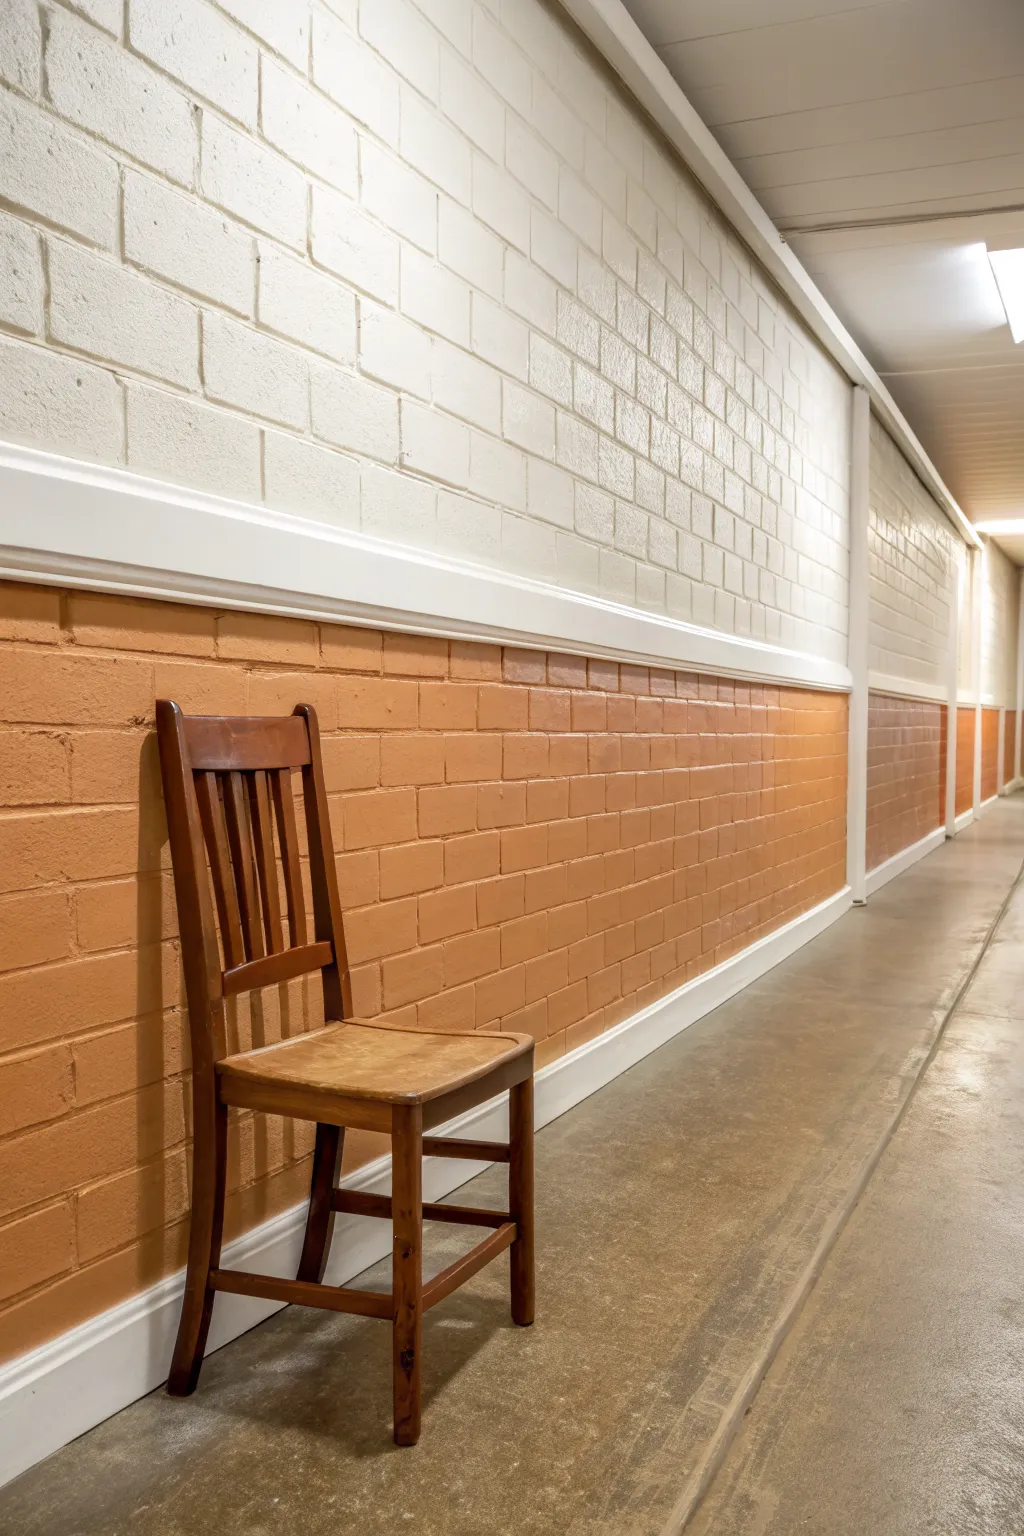
Bring warmth and vertical interest to a long basement corridor with this classic two-tone wall treatment. By separating painted brick with a crisp chair rail, you can brighten the upper space while grounding the room with rich, earthy hues below.
How-To Guide
Materials
- White satin or semi-gloss latex paint (for upper wall and trim)
- Terracotta or rust-orange satin latex paint
- High-adhesion masonry primer
- Pre-primed chair rail molding (composite or wood)
- Painter’s tape
- Paint rollers (thick nap for brick texture)
- Angled sash brush
- Construction adhesive
- Caulk gun and paintable caulk
- Finish nails and hammer (or nail gun)
- Level and measuring tape
- Drop cloths
- Sanding block (medium grit)
Step 1: Preparation and Priming
-
Clean the surface:
Begin by thoroughly vacuuming the brick walls to remove cobwebs and loose dust. If the brick is particularly grimy, scrub it down with a mixture of water and mild detergent, then let it dry completely for at least 24 hours. -
Measure rail height:
Determine the ideal height for your chair rail. A standard height is usually around 32 to 36 inches from the floor, but I like to adjust this slightly to align with the mortar lines of the brick if possible, which makes installation much smoother. -
Mark the line:
Use a level and a pencil or chalk line to mark the horizontal line where the top of your chair rail will sit across the entire length of the hallway. -
Prime the brick:
Apply a coat of high-adhesion masonry primer over the entire wall. Use a thick-nap roller (at least 3/4 inch) to ensure the primer gets into all the deep pores and mortar joints of the block.
Sticky Situation?
If the molding won’t stay put while the glue dries on the uneven brick, use painter’s tape to strap it tightly to the wall or prop lengths of lumber against it for leverage.
Step 2: Painting the Base Colors
-
Cut in the top section:
Using your angled sash brush and the white paint, cut in the corners near the ceiling and around any door frames in the upper portion of the wall. -
Roll the upper wall:
Roll on the white paint for the top section, extending slightly below your marked chair rail line to ensure full coverage behind where the trim will go. Apply two coats if necessary for a solid, bright finish. -
Cut in the lower section:
Once the top is dry to the touch, use a fresh brush to cut in the edges along the floor and corners for the lower section using your terracotta paint. -
Roll the bottom color:
Fill in the lower wall with the terracotta paint using a roller. Be generous with the paint to fill the brick texture, but watch for drips. -
Inspect coverage:
Brick drinks up paint, so check for pinholes or missed spots in the mortar. Dab these spots with your brush and let the paint cure fully.
Step 3: Installing the Chair Rail
-
Measure and cut molding:
Measure the total length required for the chair rail molding. Cut your pieces to size, mitering any corners at 45-degree angles for a seamless turn. -
Apply adhesive:
Run a wavy bead of heavy-duty construction adhesive along the back of your molding strip. This is crucial for brick walls where nails might not hold securely on their own. -
Position the rail:
Press the molding firmly against the wall, aligning the top edge with your pre-marked level line. The adhesive will grab quickly, so double-check your level immediately. -
Secure with nails:
Drive finish nails into the molding at varied angles to lock it in place while the adhesive cures. If you hit a mortar joint, the nail will sink easier; if you hit solid brick, you may need a masonry nail or rely more heavily on the glue. -
Caulk the gaps:
Brick is uneven, so you will have gaps between the straight molding and the textured wall. Run a bead of paintable caulk along the top and bottom edges of the chair rail. -
Smooth the caulk:
Dip your finger in water and smooth the caulk bead to create a seamless transition, wiping away excess with a damp rag. -
Fill nail holes:
Fill any nail holes on the face of the molding with a dab of wood filler or spackling paste. Let it dry, then lightly sand it flush. -
Touch up the paint:
Finally, paint the chair rail itself with the white satin paint, carefully cutting in against the terracotta and white wall sections to cover the caulk lines.
Clean Lines Pro Tip
When painting over the caulk lines, keep a damp rag handy. One quick wipe horizontally along the caulk bead creates the sharpest possible line against the textured brick.
Step back and admire how this simple division of color completely transforms the depth and character of the hallway


A Single Accent Wall Behind the Sofa

Transform a plain basement wall into a sophisticated focal point by combining crisp white wainscoting with a warm, earthy terracotta paint color. This dual-tone approach adds architectural interest and cozy depth to what can often feel like a cold subterranean space.
Step-by-Step Tutorial
Materials
- Interior latex paint (Satin sheen, Terracotta/Burnt Orange color)
- Interior latex paint (Semi-gloss sheen, Bright White)
- Primer (high-quality, bonding)
- Pre-cut wainscoting panels or MDF strips (for board and batten style)
- Molding adhesive / Liquid Nails
- Pin nailer or hammer and finishing nails
- Wood filler
- Sandpaper (120 and 220 grit)
- Paint rollers (medium nap)
- Angled sash brush (2.5 inch)
- Painter’s tape
- Level
- Caulk gun and paintable caulk
- Drop cloths
Step 1: Preparation & Lower Wall Structure
-
Clear and clean:
Remove all furniture, outlet covers, and light switch plates from the wall. Wipe down the entire surface with a damp cloth to remove any basement dust or spiderwebs. -
Mark your height:
Decide on the height of your wainscoting. A standard chair rail height is around 32-36 inches, but going slightly higher can make the ceilings feel taller. Use a level and pencil to mark a horizontal line across the entire wall at your chosen height. -
Install the top rail:
Apply construction adhesive to the back of your horizontal top rail board. Press it firmly against the wall, aligning the top edge with your pencil mark. Secure it into the wall studs using a pin nailer. -
Plan vertical spacing:
Measure the total length of the wall to determine the spacing for your vertical battens. Aim for a gap of roughly 16-24 inches between each vertical strip for a balanced look. Mark these positions on the wall. -
Install vertical battens:
Cut your vertical strips to fit snugly between the baseboard and the top rail. Apply adhesive and nail them into place at your marked intervals. Check each one with a level before nailing to ensure it is perfectly plumb.
Step 2: Refining & Priming
-
Fill the holes:
Take a small dab of wood filler and press it into every nail hole. Overfill slightly, as the filler will shrink when it dries. -
Caulk the seams:
Run a thin bead of paintable caulk along every edge where the wood meets the wall, and where the boards meet each other. Smooth the bead with a wet finger to create a seamless transition. -
Sand smooth:
Once the wood filler is completely dry, sand it flush with the surface using 220-grit sandpaper. Lightly scuff the face of the new wood trim as well to help the paint adhere. -
Clean dust:
Vacuum up the sanding dust and wipe the woodwork with a tack cloth or damp rag. -
Prime the paneling:
Apply a coat of bonding primer to the entire lower section, covering both the new wood trim and the drywall in between. I find this crucial for getting a uniform finish later.
Uneven Wall Woes?
If gaps appear behind your trim due to wavy basement walls, don’t force the wood. Use extra caulk to fill small gaps, or scribe the wood for large irregularities.
Step 3: Painting & Finishing
-
Tape the separation:
Once the primer is fully cured, run extended painter’s tape along the very top edge of your horizontal rail to protect it from the upper wall color. -
Cut in the upper wall:
Open your terracotta paint. Using an angled brush, carefully ‘cut in’ a 2-3 inch border along the ceiling line, corners, and right above the taped wainscoting rail. -
Roll the upper color:
Use a roller to fill in the large upper section with the terracotta paint. Apply in ‘W’ shapes to distribute wet paint, then smooth it out with vertical strokes. -
Apply second coat:
Allow the first coat to dry according to the can’s instructions (usually 2-4 hours), then apply a second coat for rich, opaque coverage. -
Paint the wainscoting:
Remove the tape from the rail. Switch to your bright white semi-gloss paint. Brush the recessed corners and edges of the paneling first, then use a small roller for the flat surfaces to minimize brush marks. -
Final touch-ups:
Once everything is dry, inspect your lines. If any terracotta bled onto the white rail, or vice versa, use a small artist’s brush for precise corrections.
Add a Picture Ledge
Instead of a standard 1×4 top rail, install a deeper 1×2 or 1×3 shelf on top of the wainscoting. This creates a perfect ledge for leaning framed art or photos.
Step back and admire how the rich color elevates the space and makes the white woodwork pop
BRUSH GUIDE
The Right Brush for Every Stroke
From clean lines to bold texture — master brush choice, stroke control, and essential techniques.
Explore the Full Guide
Deep Blue Walls for a Calm Basement Lounge
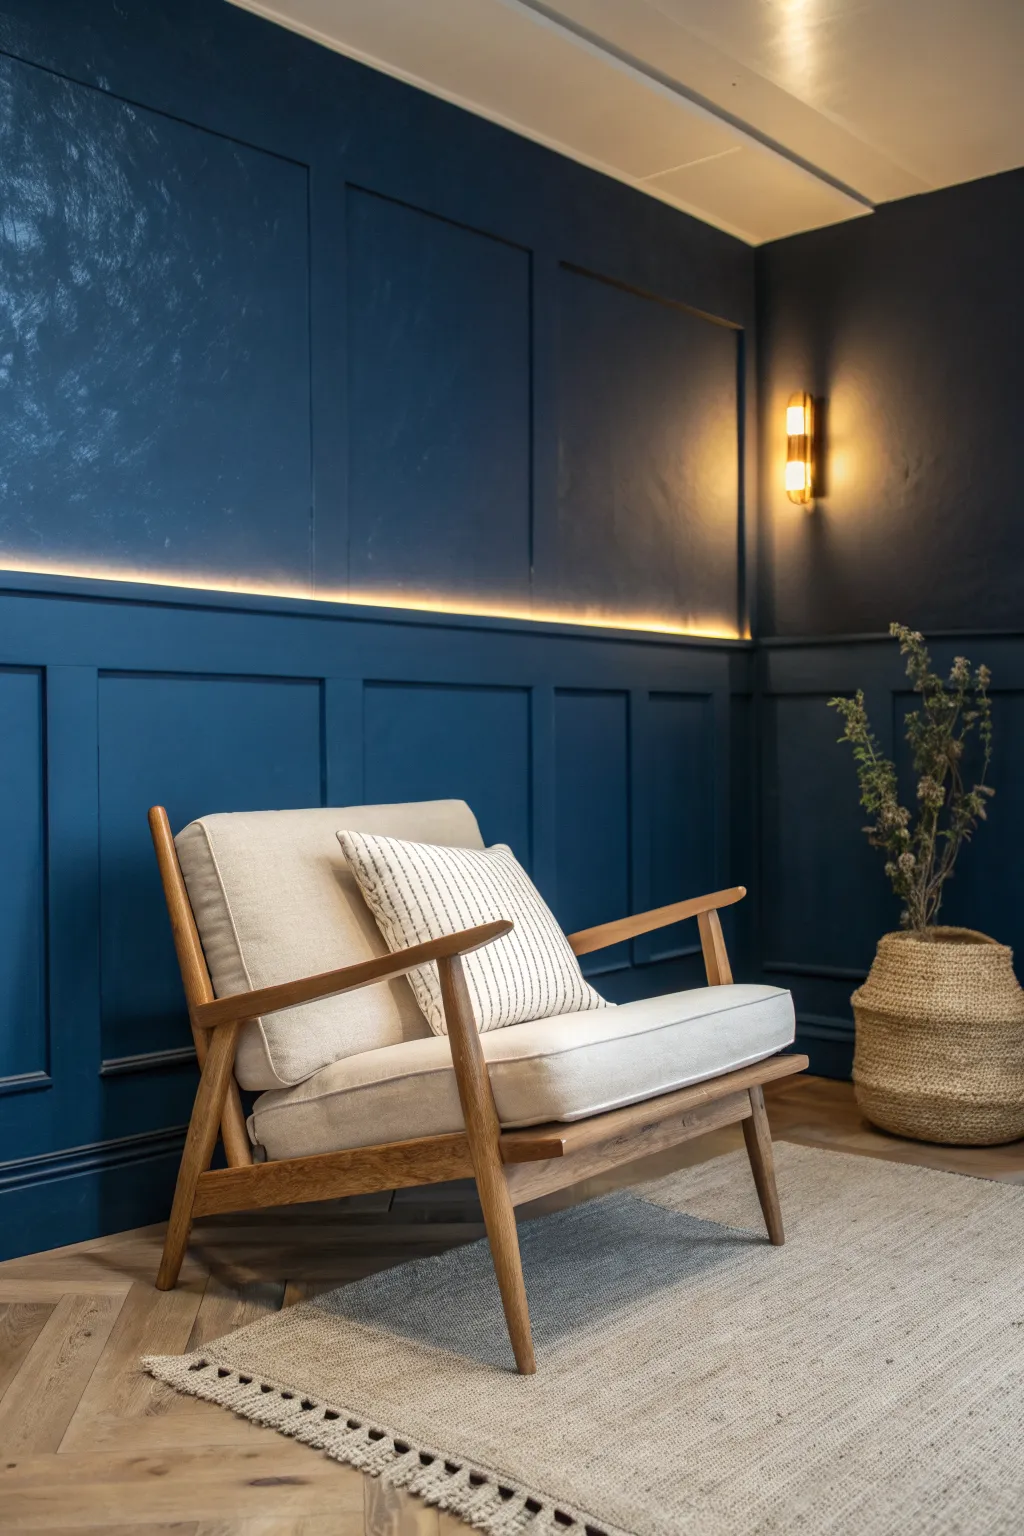
Transform a plain basement wall into a sophisticated retreat with this DIY board and batten project featuring a rich, textured deep blue finish. The combination of classic paneling and a modern, slightly mottled paint technique creates depth and coziness perfect for a lounge area.
Step-by-Step Guide
Materials
- 1×4 MDF boards or pine trim
- Construction adhesive
- Brad nailer and 1.5-inch nails
- Wood filler
- Sandpaper (120 and 220 grit)
- Caulk and caulk gun
- Painter’s tape
- Dark navy latex paint (satin finish)
- Glaze medium
- Wide paintbrush (4-inch)
- Paint roller and tray
- Clean cotton rags
- Level and measuring tape
- Warm white LED strip light (optional for the rail accent)
Step 1: Planning and Paneling Layout
-
Measure and Map:
Start by measuring your wall’s total width and height. Decide on the height of your wainscoting—in the image, it’s roughly two-thirds up the wall. Sketch a grid layout on paper to determine the spacing between your vertical battens. -
Mark the Wall:
Transfer your measurements to the wall using a pencil and a long level. Draw horizontal lines for the top and bottom rails, and vertical lines for where the battens will sit to ensuring everything is perfectly square. -
Install Horizontal Rails:
Apply construction adhesive to the back of your horizontal 1×4 boards. Press them onto your marked lines and secure them into the studs with a brad nailer. If you want the LED feature shown, leave a small gap or use a specific dado rail profile at the top edge. -
Attach Vertical Battens:
Cut your vertical 1×4 pieces to fit snugly between the horizontal rails. Apply adhesive, place them over your vertical guide lines, and nail them securely. I find using a scrap block of wood as a spacer helps keep the distance consistent between every batten. -
Fill and Sand:
Fill a small amount of wood filler into every nail hole and any joints where boards meet. Let it dry completely, then sand these spots smooth with 120-grit sandpaper until they are flush with the wood surface. -
Caulk the Seams:
Run a thin bead of paintable caulk along every edge where the wood meets the wall and where the boards meet each other. Smooth the bead with a damp finger to create a seamless, built-in look.
Uneven Texture?
If the glaze dries too fast and leaves hard lines, mist the wall lightly with water and rework the area with a rag. Keep a wet edge to blend sections seamlessly.
Step 2: Creating the Textured Blue Finish
-
Prime the Surface:
Since you are painting over both drywall and wood, apply a high-quality primer over the entire area. This ensures the paint absorbs evenly across the different materials. Let the primer cure fully according to the can’s instructions. -
Apply Base Coat:
Roll on your first coat of the dark navy paint. Don’t worry about the texture yet; just aim for solid, opaque coverage. Use a brush to cut in around the corners and inside the panel squares. -
Mix the Glaze:
In a separate container, mix one part of your navy paint with three parts glaze medium. This transparency is what will allow you to build that cloudy, limewash-style texture visible on the upper wall sections. -
Apply Texture to Upper Walls:
Working in 3-foot sections on the upper smooth wall (above the paneling), brush on the glaze mixture using random, crisscross X-strokes. -
Soften the Look:
Before the glaze dries, gently blot the surface with a clean, dry cotton rag. This removes harsh brush marks and creates that subtle, mottled variation seen in the inspiration photo. -
Paint the Paneling:
For the lower board and batten section, skip the glaze for a more solid, grounded look. Apply a second coat of the standard navy paint using a roller for the flat spaces and a brush for the trim detailed areas. -
Feather the Transition:
If your glaze meets the solid painted rail, use a dry brush to feather the glaze slightly near the edge so there isn’t a hard stop line, ensuring a cohesive flow. -
Install Lighting:
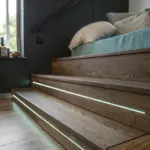
Once the paint is fully cured (give it at least 24 hours), peel the backing off your LED strip light and tuck it carefully along the top ledge of the paneling to recreate that warm, glowing define line.
Level Up: Hidden Glow
Add a small piece of molding specifically designed for LED channels to the top rail. It diffuses the light spots for a softer, more professional neon-free glow.
Step back and enjoy the moody, custom atmosphere your new wall brings to the room
Charcoal Theater Walls That Disappear
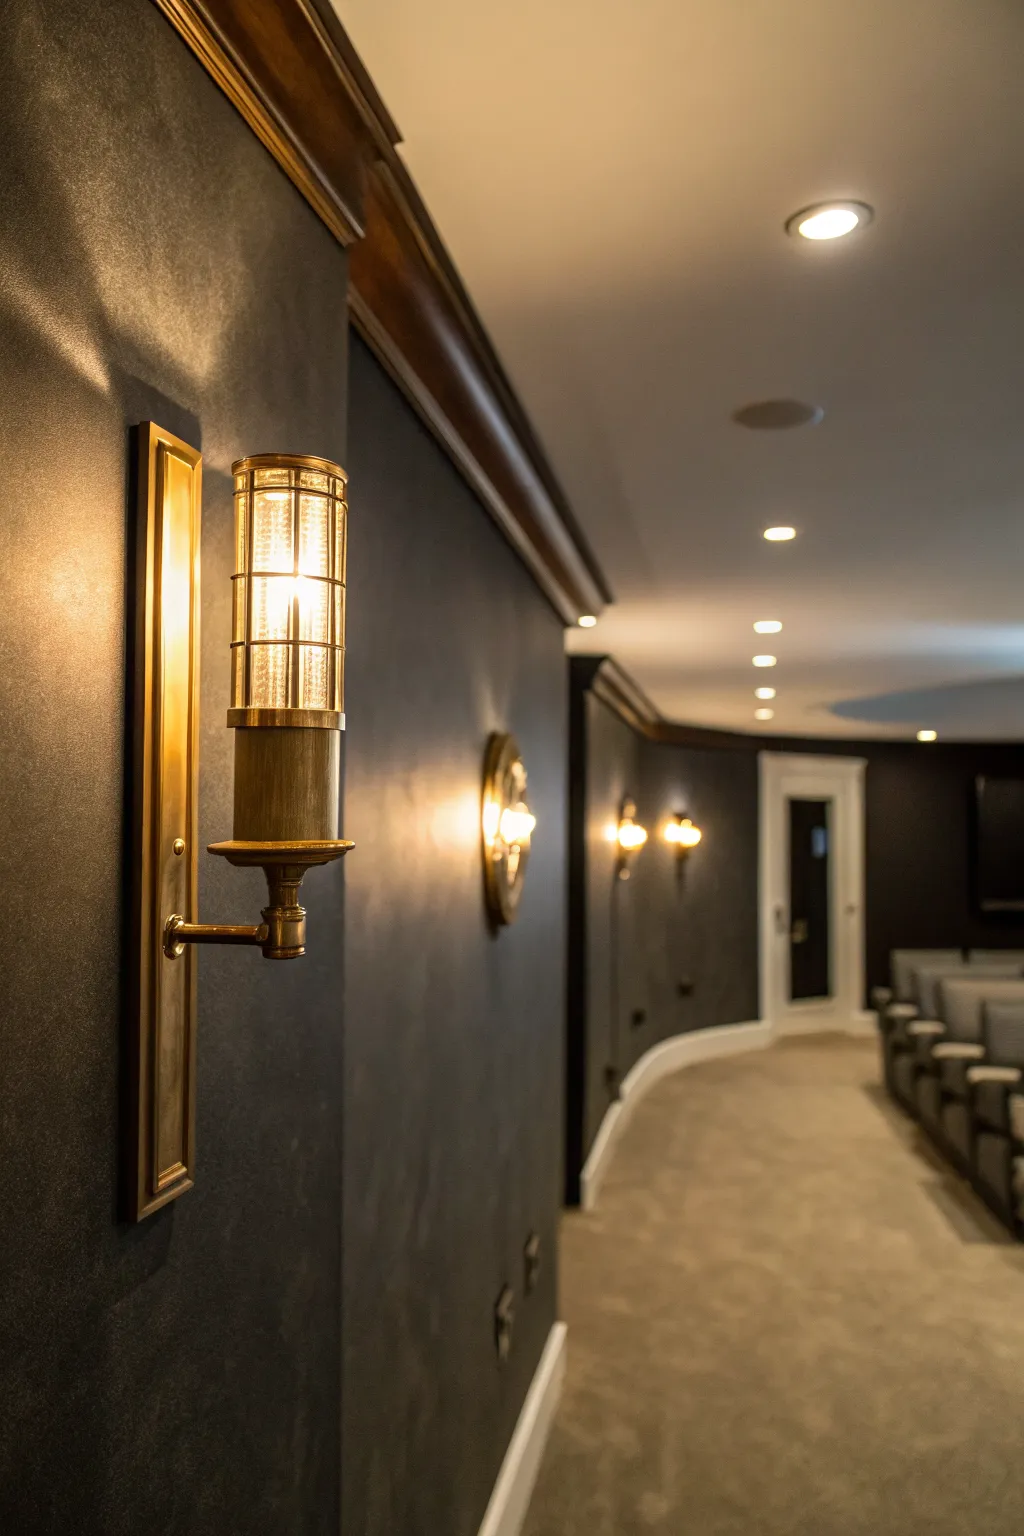
Transform your basement theater into a high-end cinema experience with this rich, dimensional wall finish. The deep charcoal hue absorbs stray light while the subtle, suede-like texture adds sophisticated depth that simple flat paint can’t achieve.
How-To Guide
Materials
- High-quality dark charcoal latex paint (eggshell or satin base)
- Black tinted glaze or faux finish medium
- Gold or bronze metallic paint (for subtle undertones)
- Painter’s tape (delicate surface)
- Large microfiber rollers and roller cage
- 4-inch paint brush (natural bristle)
- Sea sponge or wool polishing pad
- Drop cloths
- Sanding sponge (fine grit)
- Primer (tinted gray)
Step 1: Preparation and Base Coat
-
Clear and Protect:
Start by removing all existing sconces, outlet covers, and wall decor. Lay down drop cloths to protect your flooring, as dark pigments can be notoriously difficult to clean from carpet. -
Surface Prep:
Inspect the walls for any imperfections. Fill holes with spackle and sand them smooth once dry. If your walls currently have a high sheen, lightly scuff sand the entire surface to ensure the new dark paint adheres properly. -
Tape Trim:
Apply painter’s tape along the baseboards, ceiling line, and door frames. Press the edges down firmly with a putty knife or your fingernail to prevent bleed-through. -
Tinted Primer:
Roll on a coat of gray-tinted primer. Deep colors require a dark foundation to achieve true opacity; a white primer would make your job much harder. -
Base Color Application:
Apply your solid dark charcoal latex paint using a roller. Be generous but avoid drips. This doesn’t need to be perfect, as it’s just the background for your texture. -
Cut in Edges:
While the roller work is fresh, use your angled sash brush to cut in the corners and edges. Allow this base coat to dry completely, preferably overnight.
Uneven Texture?
If you see distinct ‘stop and start’ lines, lightly mist a dry area with water and use a soft, dry brush to feather the glaze edges together before they fully set.
Step 2: Creating the Texture
-
Mix the Glaze:
In a bucket, mix 4 parts faux finish glaze to 1 part of your original charcoal paint. Then, stir in a very small amount of metallic bronze paint—just enough to give it a warmth when light hits it, not enough to make it sparkle. -
Work in Sections:
Divide your wall mentally into 3-foot square sections. You need to keep a ‘wet edge’ so the texture looks seamless across the entire wall. -
Apply Glaze:
Brush the glaze mixture onto the first section using a cross-hatch motion (classic X-strokes) with the large 4-inch brush. Don’t worry about standard smooth painting; you want chaotic brushstrokes here. -
Stipple the Surface:
While the glaze is still wet, take a damp sea sponge or a balled-up lint-free rag and gently pounce it over the wet glaze. This softens the brush marks and creates that cloudy, suede-like effect. -
Blend the Edges:
As you move to the next 3-foot section, overlap into the previous wet edge. I prefer to feather these connection points lightly with a dry brush to ensure no grid lines appear. -
Check for Consistency:
Step back periodically to look for heavy spots or bare patches. The goal is random, organic movement, not a pattern. -
Full Cure:
Allow the textured glaze to cure for at least 24 to 48 hours. Faux finishes often feel dry to the touch quickly but remain soft underneath.
Level Up: Velvet Touch
For a true cinema feel, swap the glaze for a specialized ‘suede’ or ‘velvet’ finish paint, which contains tiny microspheres that texturally mimic fabric on the wall.
Step 3: Finishing Details
-
Remove Tape:
Carefully peel away the painter’s tape. Pull it at a 45-degree angle away from the painted edge to ensure a crisp line. -
Touch Up Trim:
If any dark glaze bled onto your white trim, use a small artist’s brush and your trim paint to conceal it for a professional finish. -
Reinstall Sconces:
Reattach your brass sconces. The warmth of the brass against the textured charcoal wall creates the specific high-contrast ‘theater’ look shown in the image.
Now dim the lights and enjoy how your walls recede into darkness, putting all the focus on the screen.

PENCIL GUIDE
Understanding Pencil Grades from H to B
From first sketch to finished drawing — learn pencil grades, line control, and shading techniques.
Explore the Full Guide
Light Ceiling Paint to Lift a Low Ceiling
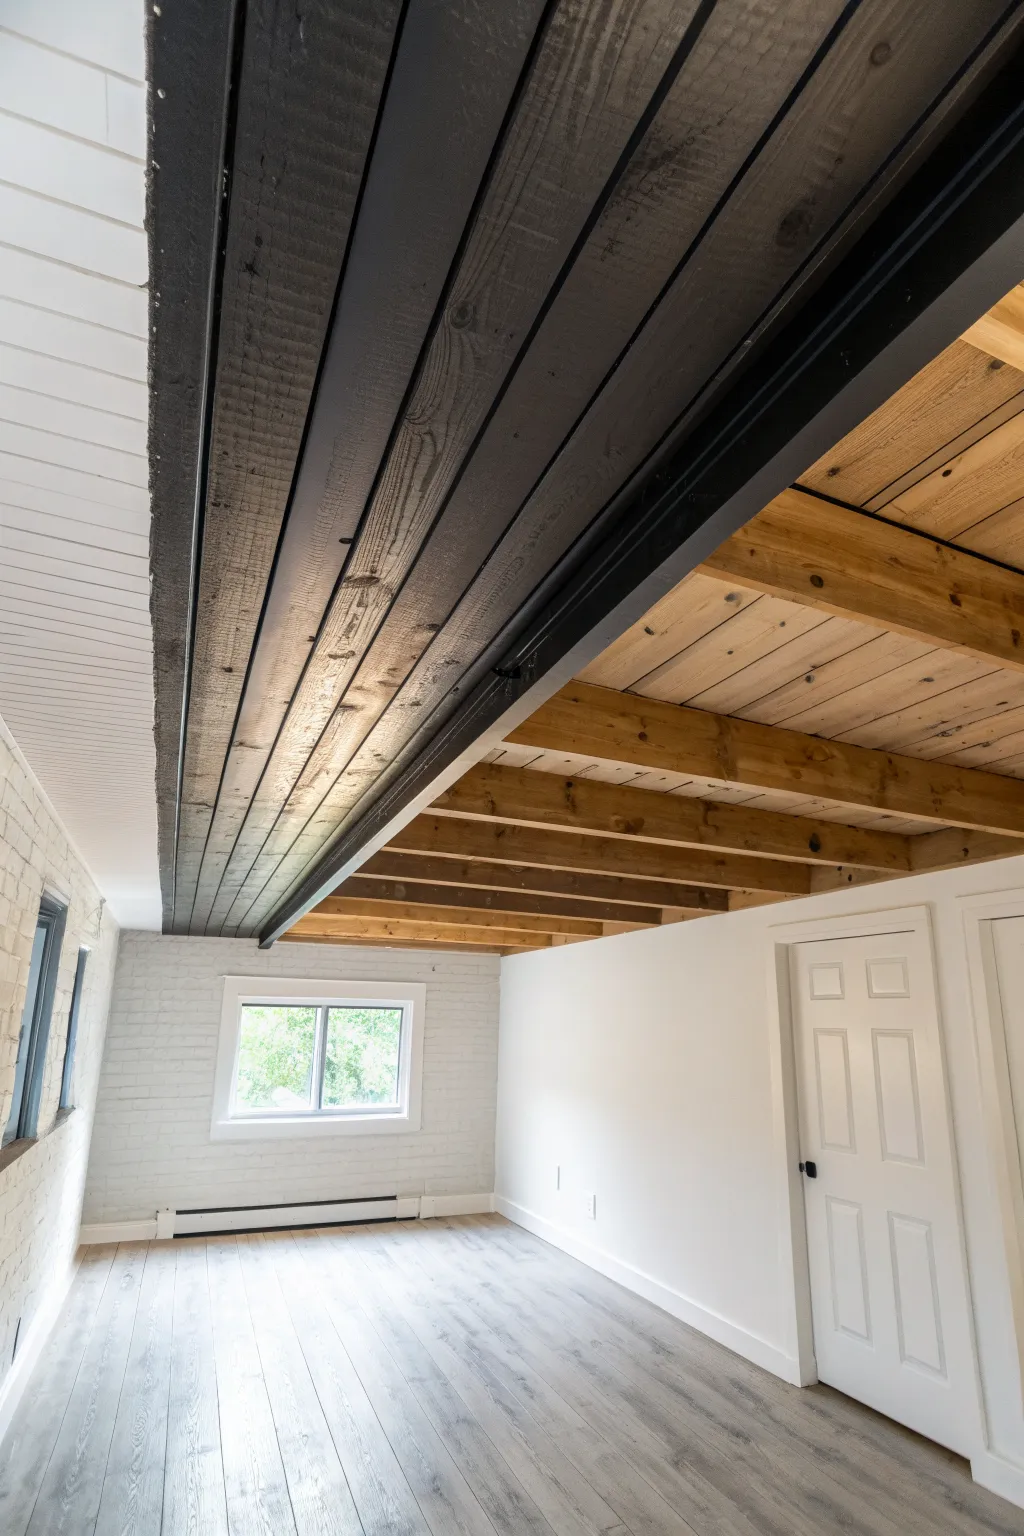
Transform a basement space by combining the raw warmth of exposed beams with a sleek, modern painted accent. This project creates a stunning visual divide that lifts the eye and adds architectural interest to lower ceilings.
Detailed Instructions
Materials
- High-quality interior latex paint (matte black or charcoal)
- Stain-blocking primer
- Clear matte polyurethane or water-based sealer
- Sandpaper (120 and 220 grit)
- Painter’s tape (multi-surface)
- Drop cloths
- Angled sash brush (2.5 inch)
- Mini roller with foam covers
- Extension pole
- Ladder
- Wood filler (optional)
- Tack cloth
- Clean rags
Step 1: Preparation & Cleaning
-
Clear the area:
Remove all furniture from the room or move it to the center and cover completely with drop cloths to protect your flooring. -
Inspect the wood:
Check the exposed beams and ceiling planks for any loose nails, splinters, or significant cracks. Tap in loose nails and fill large holes with wood filler if a smoother look is desired. -
Sand the surfaces:
Lightly sand all wooden surfaces—both the area to be painted and the area to remain natural—using 120-grit sandpaper to remove rough spots and old residue. -
Dust removal:
Use a vacuum with a brush attachment to remove sawdust from the crevices between planks, then wipe everything down with a tack cloth to ensure a dust-free surface.
Step 2: Sealing Natural Wood
-
Define the boundary:
Decide exactly where the dark painted section will meet the natural wood. This transition line needs to be sharp, perhaps following a specific beam or structural joint. -
Protect the paint zone:
Apply painter’s tape along the edge of the area you intend to paint black later, protecting it from the clear sealer for now. -
Apply first coat of sealer:
Brush a clear matte polyurethane onto the natural wood beams and planks. I find working in the direction of the grain prevents unsightly lap marks. -
Sand and recoat:
Once the first coat is dry (check can instructions), lightly scuff with 220-grit sandpaper, wipe clean, and apply a second coat for a durable finish.
Tape Sealing Trick
After applying painter’s tape, brush a tiny amount of the *base* color (or clear sealer) over the tape edge first. This seals the gap and guarantees a razor-sharp line.
Step 3: Painting the Accent Area
-
Mask the natural wood:
Once the clear sealer is fully cured (give it 24 hours), run a straight line of high-quality painter’s tape over the sealed wood edge where it meets the paint zone. -
Mask walls and trim:
protect the tops of the white brick walls and any adjacent white beadboard sections with generous taping and plastic sheeting. -
Prime the wood:
Apply a stain-blocking primer to the wood intended for the dark color. This is crucial to prevent tannins from bleeding through and discoloring your dark finish. -
Cut in edges:
Using an angled sash brush, carefully paint the corners, crevices between planks, and along the taped edges with your dark charcoal or black paint. -
Roll the flats:
Use a mini roller to apply paint to the flat surfaces of the planks and beams. Roll slowly to avoid splatter. -
Check coverage:
Allow the first coat to dry completely. Exposed wood often soaks up paint unevenly, so inspect for light spots. -
Second coat:
Apply a second coat of paint, repeating the cutting-in and rolling process to ensure a deep, opaque solid color. -
Remove tape:
While the final coat is still slightly tacky, slowly peel back the painter’s tape at a 45-degree angle to reveal a crisp, clean line.
Add Industrial Texture
For a grittier look on the black beams, distress the edges slightly with sandpaper after the paint dries to reveal just a hint of the wood underneath.
Step 4: Finishing Touches
-
Touch up gaps:
Inspect the ceiling for any missed spots in the crevices. Use a small artist’s brush to dab paint into deep grooves or knot holes that the roller missed. -
Clean boundaries:
If any paint bled onto the white walls or natural wood, carefully scrape it away lightly or touch it up with the appropriate wall color. -
Final inspection:
Turn on all lights in the room to check the uniformity of the finish from different angles.
This bold overhead choice completely redefines the room’s character without structural changes
Black Ceiling Paint for Height Illusion
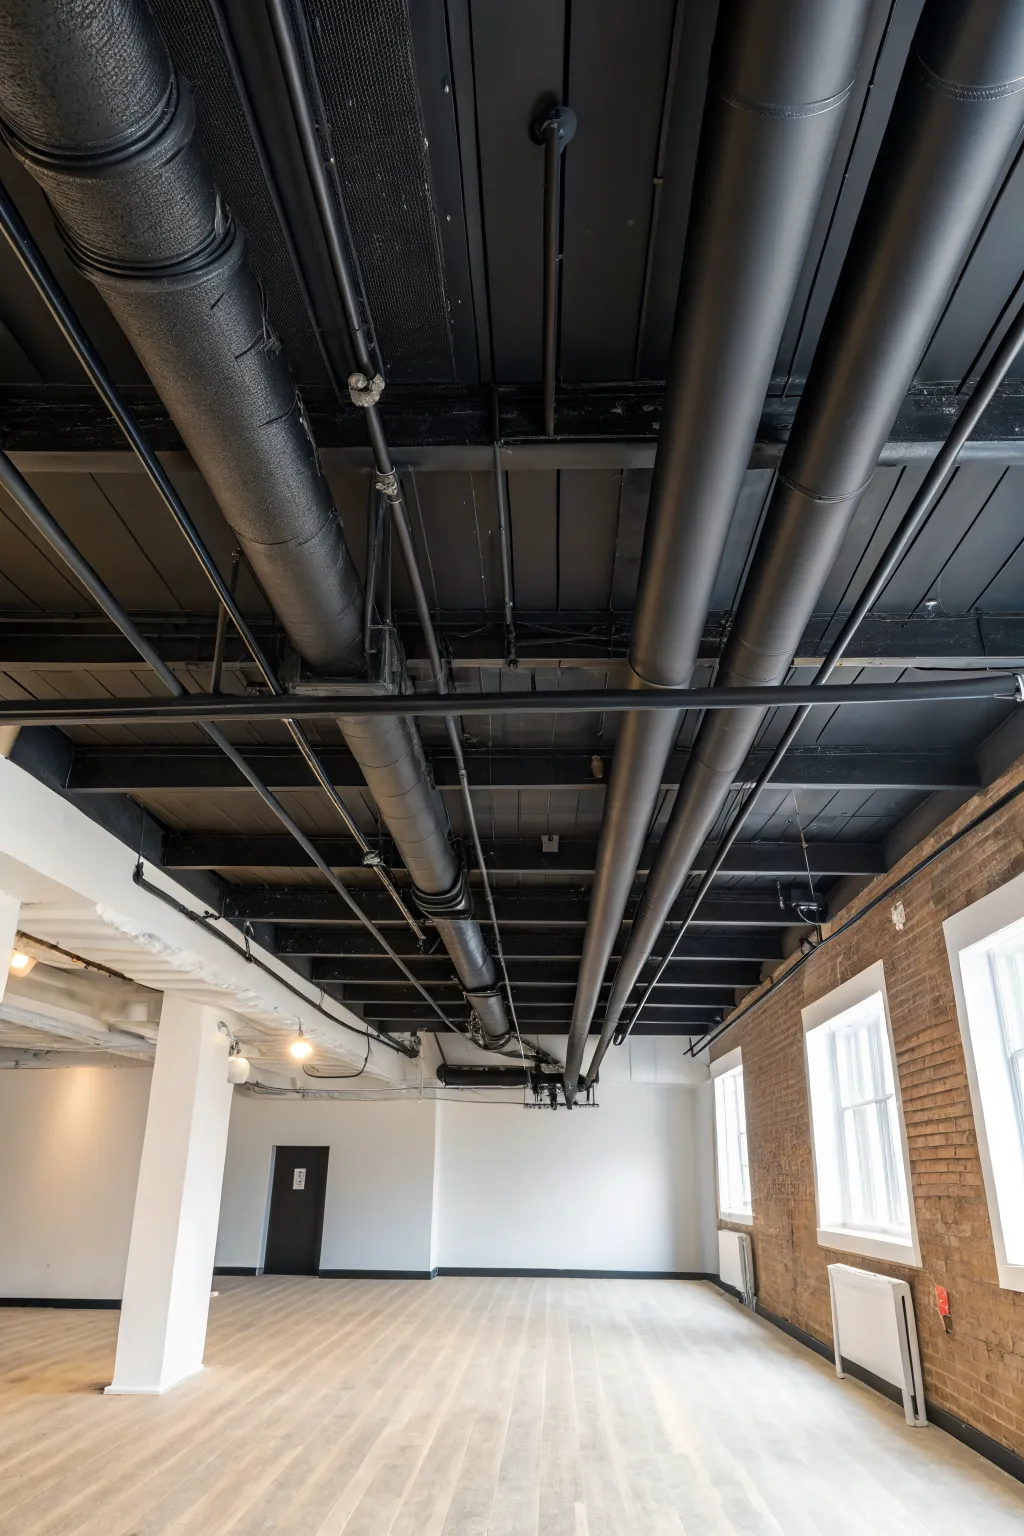
Transform a cluttered, unfinished basement ceiling into a sleek, industrial design feature that actually makes the room feel taller. This project turns exposed pipes, ductwork, and joists into a unified, monochromatic canopy that disappears into a sophisticated void.
Step-by-Step Tutorial
Materials
- Drywall compound (for patching)
- Sandpaper (medium and fine grit)
- Painter’s tape
- High-quality acrylic latex paint (Flat Black)
- Airless paint sprayer (rental recommended)
- N95 mask and safety goggles
- Plastic drop cloths (heavy duty)
- LED work lights
- Extension pole
- Angled sash brush (2.5 inch)
- Cleaning rags and degreaser
Step 1: Preparation & Cleaning
-
Assess the surface:
Begin by inspecting the entire ceiling area. You aren’t just looking for dirt; check for loose glowing insulation, exposed nails that need hammering in, or stray wires that need to be secured with cable staples. -
Clean everything thoroughly:
Dust is the enemy of adhesion. Use a shop vacuum with a brush attachment to remove cobwebs and sawdust from every joist bay, pipe, and duct. For greasy pipes, a quick wipe with a degreaser ensures the paint sticks for good. -
Protect the perimeter:
Mask off the top edge of your walls where they meet the ceiling joists. Be incredibly precise here—this sharp black-to-white line defines the look. Run plastic sheeting down the walls to protect them from overspray. -
Cover the floors and fixtures:
Lay down heavy-duty plastic drop cloths over the entire floor. Wrap any light fixtures, smoke detectors, or sensors you intend to keep unpainted with plastic bags and seal them tightly with tape.
Choosing Paint Sheen
Always use ‘Flat’ or ‘Matte’ black. Glossy paints reflect light, highlighting imperfections and dust, whereas flat paint absorbs light, making the ceiling elements disappear.
Step 2: Painting Mechanics
-
Set up the sprayer:
An airless sprayer is essential for getting paint into deep crevices. Prime the pump with water first to clear the lines, then load it with your flat black acrylic latex paint. Test the spray pattern on a piece of cardboard. -
Plan your path:
Don’t just spray randomly. Decide on a logical grid, usually working bay by bay between the joists, moving from one end of the room to the other to maintain a ‘wet edge’. -
Spray the deep corners first:
Aim your sprayer into the corners of the joist bays and the tops of the ductwork first. It’s easy to miss these spots, and trying to fix them later can result in uneven sheens. -
Apply the first coat:
Move the gun in smooth, sweeping overlapping strokes. Keep the sprayer about 12 inches from the surface. I find it helpful to spray from two different angles to ensure all sides of the pipes and wires are coated. -
Let it dry appropriately:
Allow the first coat to dry for at least 2-4 hours, depending on your humidity levels. Flat paint dries relatively quickly, but you want a solid base before the second pass.
Step 3: Finishing Touches
-
Inspect with a flashlight:
Once the paint is dry to the touch, shine a bright LED tactical light into the joist bays. You will almost certainly spot ‘holidays’ (missed spots) on the backs of pipes or deep in corners. -
Apply the second coat:
Perform a second pass with the sprayer, specifically targeting those lighter areas you identified. This coat unifies the finish and deepens the black color. -
Touch up manually:
For tricky areas around delicate wiring or right next to the wall line where the sprayer might be too aggressive, use your angled sash brush to dab paint in manually. -
Remove masking carefully:
Pull the tape while the paint is still slightly tacky if possible, or score the edge with a utility knife once dry to prevent peeling. This reveals that crisp, high-contrast line. -
Clean up the space:
Fold your drop cloths inward to trap paint dust and debris. A final vacuum of the floor prepares the room for furniture.
Accent Integration
Consider leaving metal conduit pipes unpainted (galvanized silver) or painting fire suppression pipes red before blacking out the rest for a striking industrial contrast.
Enjoy the dramatic, elevated feel your new industrial ceiling brings to the basement space


Exposed Ceiling Painted for an Industrial Look
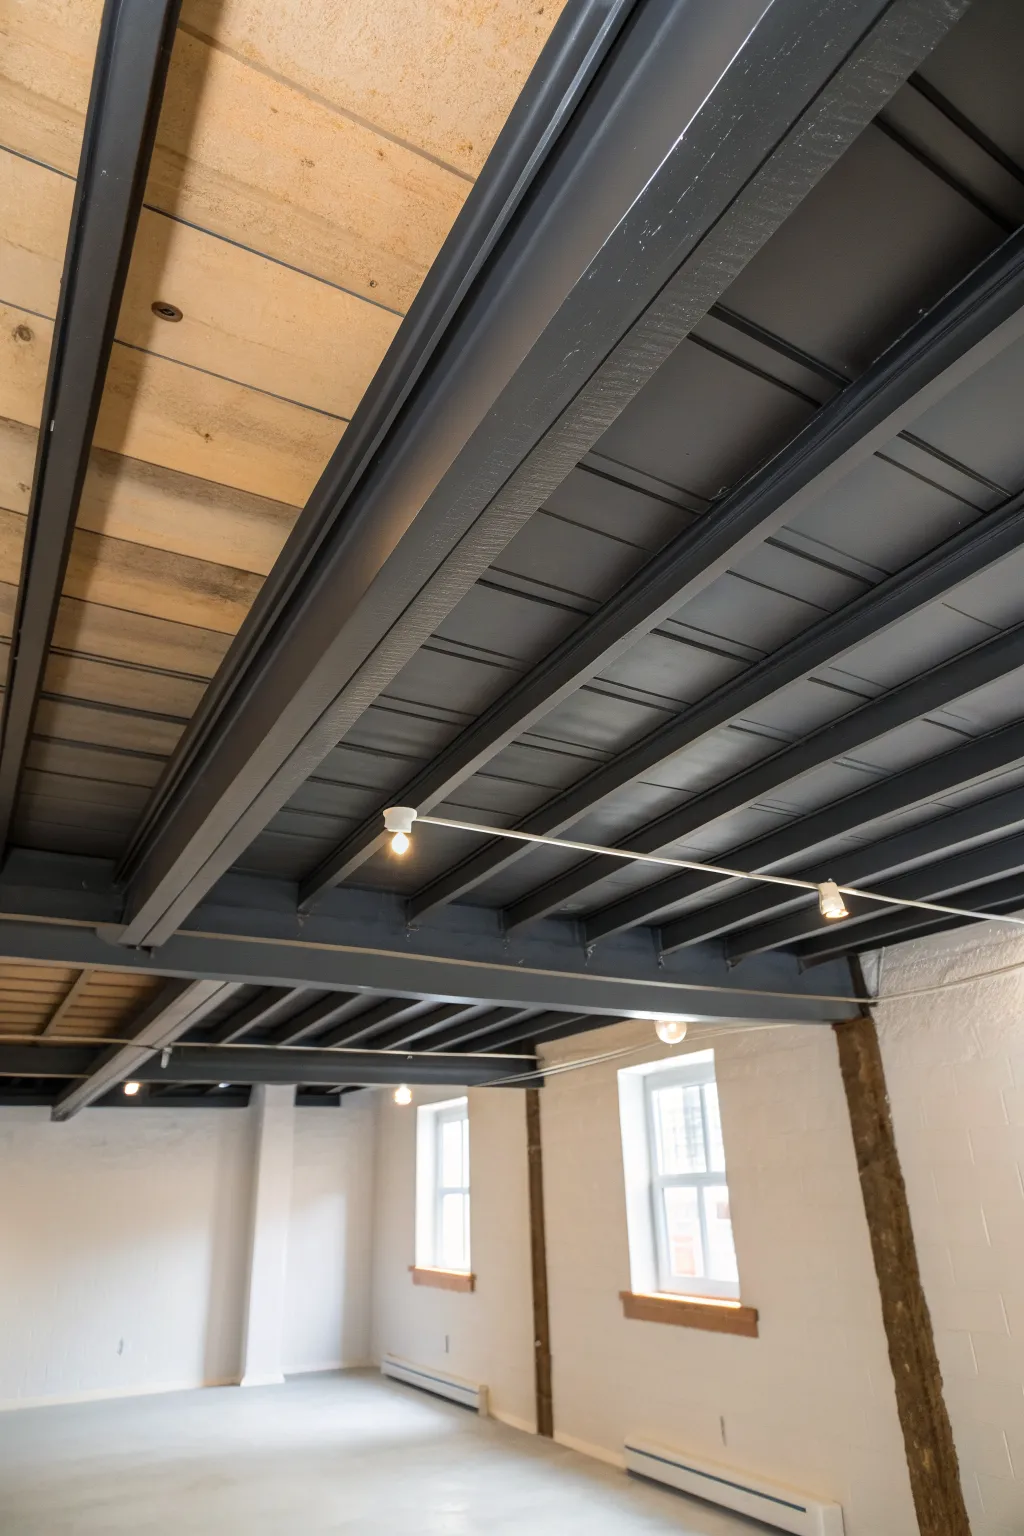
Transform a gloomy basement into a modern loft-style space by exposing and painting the structural elements. This project highlights the contrast between natural wood decking and sleek, dark painted beams for a striking industrial finish.
Detailed Instructions
Materials
- High-quality interior primer (oil-based recommended for metal)
- Dark charcoal or matte black interior paint (latex or enamel)
- Clear matte polyurethane or wood sealer
- Paint sprayer (airless is best for ceilings)
- Small roller and tray
- Assorted paintbrushes (angled sash brush, chip brushes)
- Painters tape (2-inch width)
- Plastic sheeting and drop cloths
- Protective gear (respirator, goggles, hazardous material suit)
- Sanding sponges and wire brush
- Degreaser or TSP substitute
- Extension pole
Step 1: Preparation & Cleaning
-
Clear and Protect:
Remove all furniture from the room. Lay down heavy-duty plastic sheeting or drop cloths to cover the entire floor. Tape the plastic securely to the baseboards to prevent shifting. -
Assess the Ceiling:
Inspect the exposed ceiling joists and decking. Remove any old insulation, loose nails, or staples that might be sticking out. -
Clean Surfaces:
Vacuum the beams and wood decking thoroughly to remove cobwebs and dust. For the metal beams, use a wire brush to knock off any loose rust or flaking paint. -
Degrease Metal:
Wipe down the steel beams with a degreaser or TSP substitute. This step is crucial for paint adhesion on metal surfaces. -
Masking Off Walls:
Run a line of painter’s tape along the top of the walls where they meet the ceiling structure. Hang plastic sheeting from this tape line to protect your freshly painted white walls from overspray.
Sprayer Pro Tip
Warm up your paint can in a sink of warm water before spraying. Warmer paint flows more smoothly through the nozzle, reducing clogs and creating a finer finish.
Step 2: Treatment of Wood Decking
-
Sand the Wood:
Lightly sand the wooden subfloor planks between the joists using a sanding sponge. You aren’t trying to make it furniture-smooth, just cleaning up splinters and opening the grain. -
Apply Sealer:
Using a roller on an extension pole, apply a clear matte polyurethane to the wooden planks. This seals the wood, prevents dust from falling later, and gives it a warm, finished look without changing the color too drastically. -
Detail Work:
Use a chip brush to get the sealer into the corners where the wood meets the metal beams. I find it easier to do this while the roller coat is still wet to blend any brush marks. -
Dry Time:
Allow the wood sealer to cure completely according to the manufacturer’s instructions before starting on the painted sections.
Bleed-Through Trouble
If paint bleeds under your tape onto the wood, wrap a damp cloth around a putty knife and gently scrape/wipe the wet paint off immediately.
Step 3: Painting the Structure
-
Masking the Wood:
This is the most tedious but important part. Carefully tape off the edges of the wooden planks where they touch the steel beams or joists you intend to paint. Precision here creates that crisp, professional line. -
Prime the Metal:
Spot-prime any areas of bare metal or rust on the beams with an oil-based metal primer. Allow this to dry fully. -
Prepare the Sprayer:
Load your airless sprayer with the dark charcoal paint. Test the spray pattern on a piece of cardboard to ensure even coverage. -
Spray the Main Beams:
Systematically spray the steel beams and joists. Hold the sprayer about 12 inches away and move in long, steady sweeps. Multiple light coats are better than one heavy, dripping coat. -
Back-Brushing:
Immediately after spraying a section, inspect for drips or recessed areas the spray missed. Use a brush to smooth out drips or dab paint into deep corners. -
Cut-In Work:
If spraying is too risky near your masked wood areas, use a small angled sash brush to hand-paint the tops of the beams right against the tape line. -
Remove Tape:
Ideally, peel off the painter’s tape while the paint is still slightly tacky. This prevents the paint skin from ripping and leaves a sharp edge. -
Touch Ups:
Once everything is dry, inspect the ceiling. Use a small artist’s brush to touch up any spots where the dark paint may have bled onto the wood or where coverage is thin on the metal.
Step 4: Finishing Touches
-
Install Lighting:
Mount your track lighting or conduit. Running silver or white conduit against the dark beams adds a great industrial contrast, as seen in the project image. -
Clean Up:
Remove all plastic sheeting and drop cloths. Sweep the floor to ensure no paint chips or dust remain.
Enjoy your sophisticated, loft-inspired basement retreat.
Painted Support Columns That Blend In
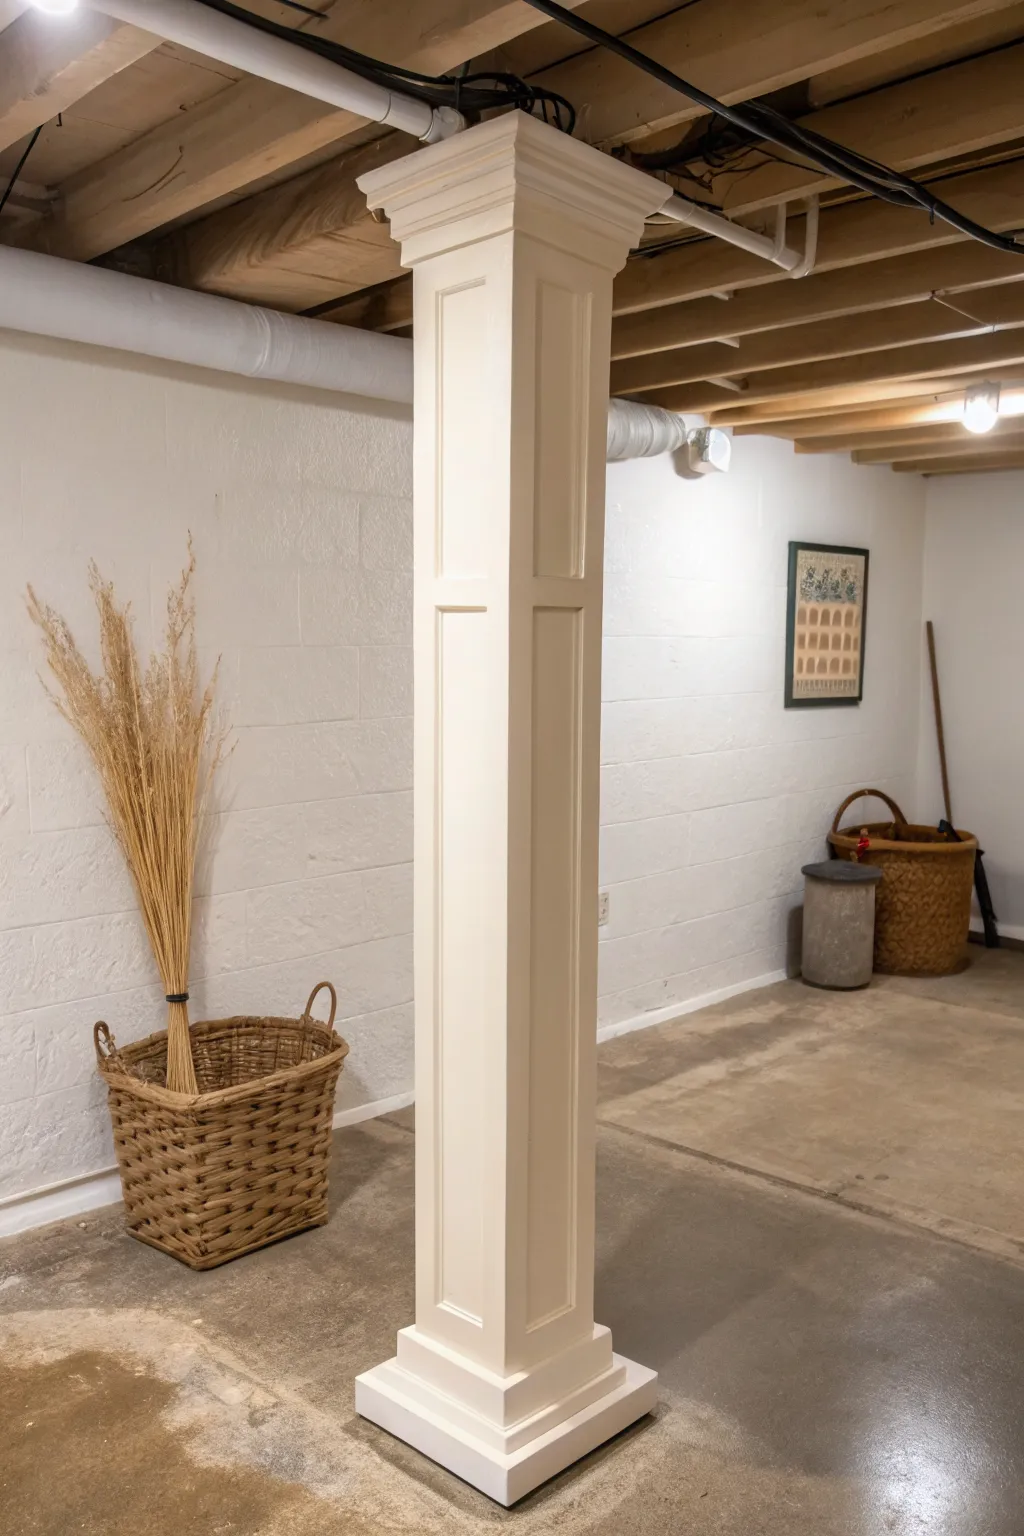
Transform a utilitarian steel support pole into a stunning architectural feature that anchors your basement design. This project wraps a standard lally column in MDF and trim molding, creating a high-end, custom look that blends seamlessly with painted basement walls.
How-To Guide
Materials
- 1/2-inch MDF sheet (4×8)
- 1×4 primed finger-jointed pine (or MDF boards)
- Base cap molding
- Crown molding
- Construction adhesive (heavy duty)
- 2×4 lumber (for blocking)
- Wood glue
- Wood filler
- Sandpaper (120 and 220 grit)
- Primer and interior semi-gloss paint
- Brad nails (1-1/4 inch and 2 inch)
- Table saw or circular saw
- Miter saw
- Brad nailer
- Clamps
- Caulk and caulk gun
Step 1: Building the Core Box
-
Measure the column:
Measure the height of your column from floor to ceiling. Also measure the diameter of the steel pole to ensure your box will be wide enough to clear it. -
Install top and bottom blocking:
Cut four pieces of 2×4 to box around the top of the steel pole and four for the bottom. Secure these to the joists above and the floor below using construction adhesive and screws; these will act as nailing anchors for your column wrap. -
Cut the wide sides:
Rip two strips of 1/2-inch MDF to the full floor-to-ceiling height. The width should be the diameter of the pole plus 1 inch (to clear the hardware). -
Cut the narrow sides:
Rip two more strips of MDF to the full height. The width for these should be the diameter of the pole plus 1 inch, *plus* the thickness of the two MDF sides you just cut (usually an extra inch total). -
Attach the first two sides:
Apply construction adhesive to the 2×4 blocking. Place the two narrower MDF strips on opposite sides of the pole and nail them into the blocking with 2-inch brad nails. -
Complete the box:
Apply wood glue to the long edges of the installed MDF panels. Place the wider MDF strips over the remaining open sides, covering the exposed edges of the first two panels to create a seamless square column. Nail along the entire length.
Uneven Floor Fix
Basement floors are rarely perfectly level. If you have gaps under your base trim, scribe the bottom edge to match the floor contour before cutting, or use shoe molding to hide small gaps.
Step 2: Adding Trim and Details
-
Install the baseboard:
Cut 1×4 trim to wrap around the bottom of the column. Miter the corners at 45 degrees for a crisp join, gluing and nailing them into place. -
Add the capital trim:
Similar to the base, install 1×4 trim wrapped around the very top of the column against the ceiling. -
Install vertical stiles:
Measure the distance between your top and bottom trim. Cut four strips of 1×4 trim (or rip MDF to 3.5 inches) and install them centered on each face of the column to create a recessed panel look. -
Add horizontal rails:
Determine the height for your visual break (usually about 2/3rds up the column). Cut short horizontal pieces of trim to fit snugly between the vertical stiles and the corner edges. -
Apply crown molding:
For a finished transition, cut and install crown molding around the very top edge where the column meets the ceiling. -
Add base cap molding:
To beef up the bottom, I like to add a piece of base cap molding on top of the 1×4 baseboard. This adds a nice decorative profile that catches the light.
Step 3: Finishing Touches
-
Fill the holes:
Go over every nail hole with wood filler. Overfill slightly to account for shrinkage. -
Sand smooth:
Once the filler is dry, sand all surfaces with 120 grit paper, then 220 grit. Pay special attention to the seams where MDF edges meet. -
Caulk the seams:
Run a bead of paintable latex caulk along every inside corner where trim meets the main column box. Smooth it with a wet finger for a seamless look. -
Prime the column:
Apply a coat of high-quality primer. MDF sucks up paint, so don’t skip this step. Sand lightly once dry if the grain raises. -
Apply topcoat:
Paint the entire column with two coats of semi-gloss white paint to match your trim or contrasting wall color.
Add a Drink Rail
Install a wider, flat ledge approximately 42 inches from the floor wrapped around the column. This creates a convenient spot for guests to set drinks during basement parties.
Now you have a sturdy, elegant architectural detail that completely hides the structural elements of your basement
Built-Ins Painted Like a Custom Feature Wall
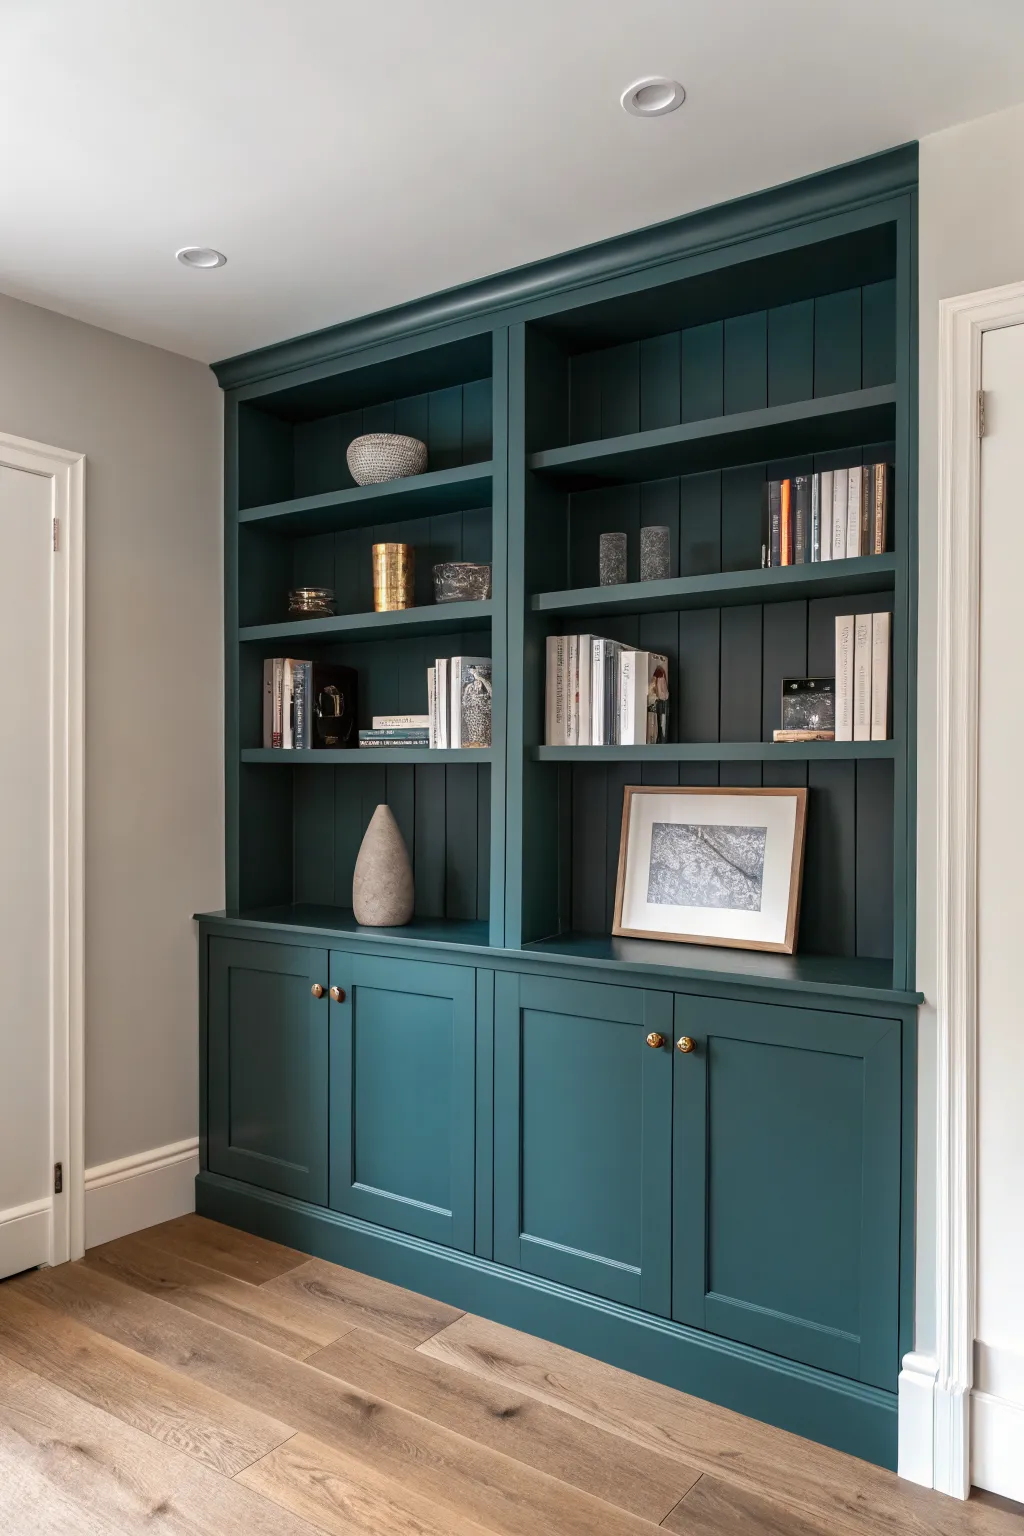
Transform a plain wall into a sophisticated focal point with these elegant, monochromatic built-ins painted in a deep, moody teal. This project combines shaker-style cabinetry with tongue-and-groove backing for a custom, high-end look that adds dramatic depth to any room.
Step-by-Step
Materials
- Pre-made base cabinets (unfinished or primed)
- Plywood sheets (3/4 inch for carcass/shelves)
- Poplar 1×2 and 1×3 trim boards
- Tongue-and-groove paneling or beadboard sheets
- Crown molding
- Jigsaw and circular saw
- Drill and driver
- Pocket hole jig
- Wood glue and wood filler
- Sandpaper (120 and 220 grit)
- High-quality primer (oil-based or shellac-based)
- Satin or semi-gloss enamel paint (Dark Teal/Peacock)
- Foam rollers and high-quality angled brush
- Brass cabinet knobs
Step 1: Base Construction
-
Prepare the base:
Position your pre-made base cabinets against the wall. Remove the baseboards behind them so the cabinets sit flush against the drywall. If the floor is uneven, shim the cabinets until they are perfectly level and square. -
Build the plinth:
Construct a simple toe-kick base platform out of 2x4s to elevate the cabinets off the floor slightly if they don’t have built-in legs. Secure this frame to the floor and wall studs. -
Secure cabinets:
Screw the cabinets into the wall studs and into each other through the face frames. Ensure everything remains level. Add a filler strip against the side walls if there are gaps. -
Top the base:
If your cabinets didn’t come with a top, cut a piece of 3/4 inch plywood to create a countertop surface. Let it overhang the front face frame by about an inch. Secure it from underneath.
Sticky Doors?
If painted doors stick to the frame, apply a thin layer of clear furniture wax to the contact points. Wait for paint to fully cure (up to 30 days) before doing this.
Step 2: Upper Shelving Assembly
-
Build the carcass:
Cut 3/4 inch plywood to form the vertical sides and horizontal top of the upper shelving unit. You are essentially building two tall boxes that will sit on the base cabinets. -
Install the backing:
Instead of a plain plywood back, attach tongue-and-groove paneling vertically to the back of your shelving carcass. This adds that crucial textural detail seen in the photo. Secure with construction adhesive and brad nails. -
Mount the uppers:
Lift the shelving units onto the base cabinets. Secure them into the wall studs and down into the cabinet top. I always double-check vertical level here, as walls are rarely perfectly straight. -
Add face frames:
Apply the 1×2 poplar trim to the front edges of the plywood to hide the raw layers. This face frame gives the unit a chunky, solid furniture appearance. -
Install crown molding:
Finish the transition between the top of the unit and the ceiling with crown molding. This bridges any gap and creates that built-in, structural look. -
Add adjustable shelves:
Drill shelf pin holes on the interior sides using a jig, or install permanent cleats if you prefer fixed shelves. Cut your shelves to size and add a 1×2 facing strip to the front edge of each shelf to make them look substantial.
Step 3: Prep and Paint
-
Fill and sand:
Fills all nail holes, seams, and plywood edges with wood filler. Once dry, sand everything smooth with 220-grit paper. This step is critical for a professional finish. -
Caulk the seams:
Run a bead of paintable caulk along every joint where wood meets wood or wood meets wall (except the cabinet doors). Smooth it with a wet finger to ensure no gaps remain. -
Prime the unit:
Apply a high-quality primer to the entire unit. Using a tinted primer (grey) can help when you are painting with deep, dark colors like this teal. -
Apply the color:
Using a high-density foam roller for the flat surfaces and a quality angled sash brush for corners and the shiplap grooves, apply your dark teal enamel. Work in thin, even coats. -
Second coat:
Lightly sand any rough spots from the first coat with a fine sanding sponge, then apply a second (and potentially third) coat of paint for full, rich opacity. -
Install hardware:
Once the paint has cured for at least 48 hours, drill holes and install the small brass knobs on the lower cabinet doors.
Add Integrated Lighting
For a museum-quality display, router a channel into the underside of the shelves and install warm-white LED strip lights before painting.
Step back and admire how this bold color choice completely redefines the architecture of your room.
Painted Brick to Freshen an Older Basement
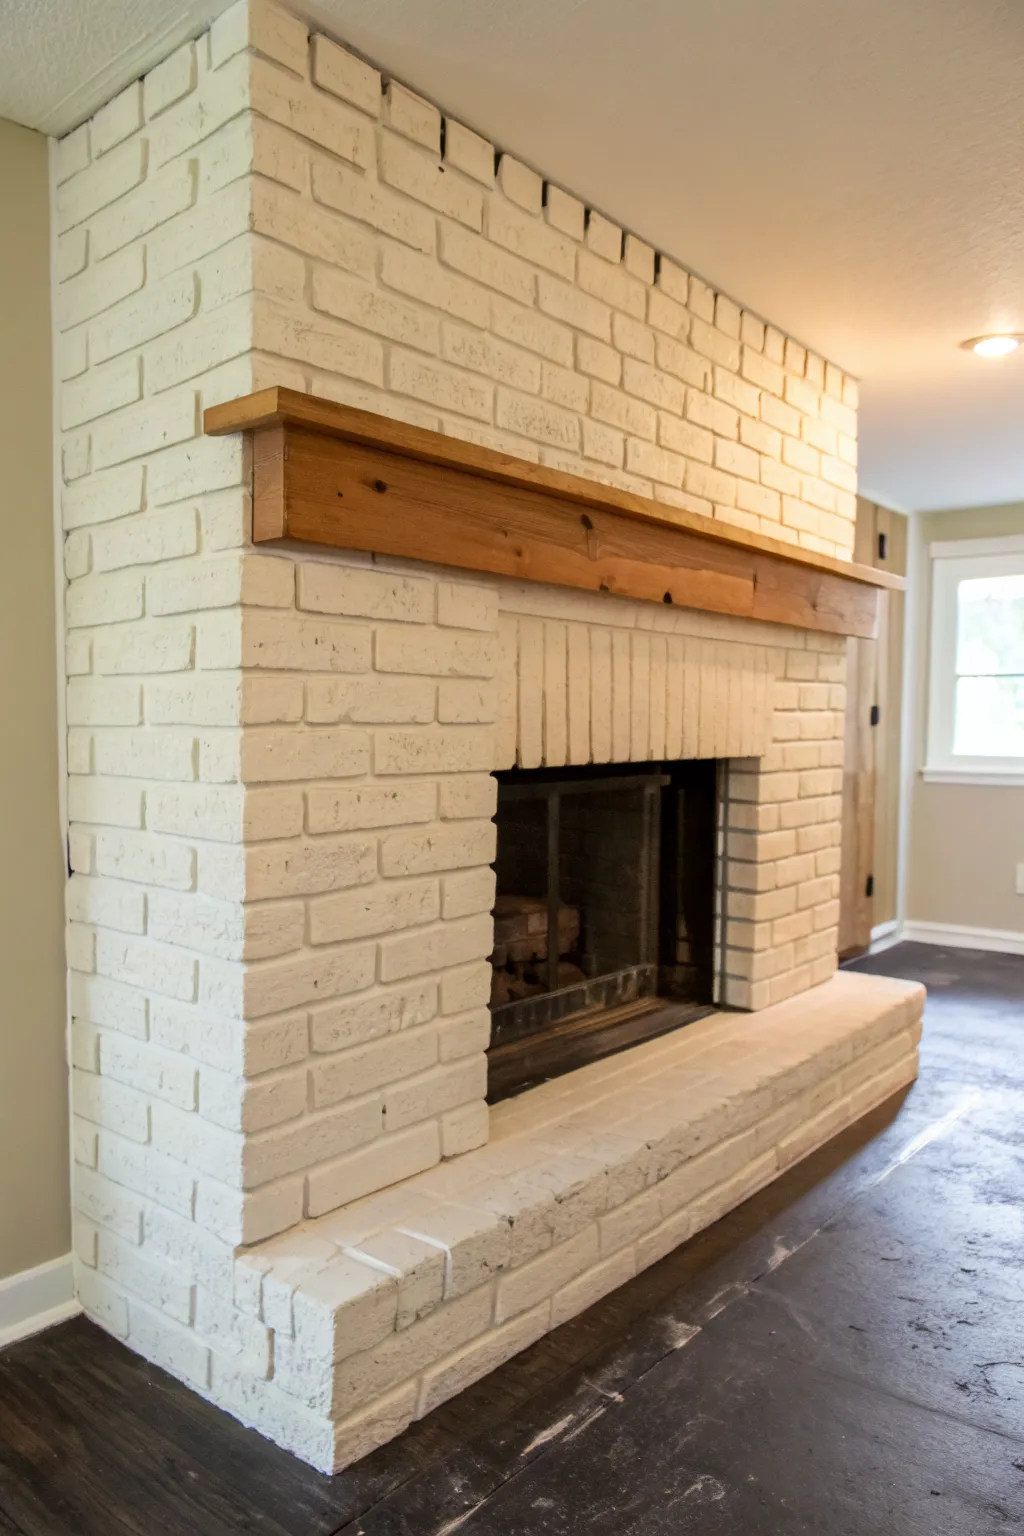
Transform a dark, dated brick fireplace into a bright focal point that instantly lifts a basement’s atmosphere. This project uses a solid opaque layering technique to refresh the texture while adding a warm, rustic beam mantel for contrast.
Detailed Instructions
Materials
- TSP (Trisodium Phosphate) cleaner
- Stiff bristle scrub brush
- Painter’s tape
- Drop cloths
- High-quality bonding primer (stain-blocking)
- Interior latex paint (Eggshell or Satin finish, warm white)
- 3/4-inch nap roller and frame
- 2-inch angled sash brush
- Rough-sawn cedar or pine lumber (for mantel)
- Wood stain (e.g., Early American or Provencal)
- Polyurethane sealer (matte or satin)
- Construction adhesive
- Masonry screws or lag bolts
Step 1: Preparation and Cleaning
-
Protect the area:
Begin by laying down drop cloths to cover the flooring completely, taping them securely at the edges. Taping off the walls adjacent to the brick is crucial to get that crisp line seen in the photo. -
Clean the brick thoroughly:
Mix TSP cleaner with warm water according to the package directions. Scrub the brick vigorously with a stiff bristle brush to remove years of soot, dust, and grease. -
Rinse and dry:
Wipe down the bricks with clean water and a sponge to remove any cleaning residue. Allow the masonry to dry completely for at least 24 hours; trapped moisture can cause paint failure later. -
Vacuum the crevices:
Use a shop vac with a brush attachment to get into deep mortar lines and pores one last time before priming.
Pro Tip: The Nap Matter
Don’t skimp on the roller nap size. A truly thick nap (3/4″ or even 1″) holds enough paint to flood the textured surface, saving you hours of tedious brush work.
Step 2: Painting the Brick
-
Apply the primer:
Roll on a heavy coat of high-quality bonding primer using a thick 3/4-inch nap roller. This thick nap helps push the primer into the rough brick texture. -
Cut in the mortar:
While the primer is wet, use your angled sash brush to jab and stipple primer into the deep mortar joints and crevices that the roller missed. -
Wait for cure time:
Let the primer dry according to the manufacturer’s instructions. If you see bleed-through (common on old chimneys), apply a second coat of stain-blocking primer. -
Roll the first topcoat:
Using a clean roller cover, apply your chosen warm white latex paint. Work in small sections, about 2×2 feet at a time. -
Brush the details:
Go back in with your angled brush to catch the mortar lines inside your working section. I find it easiest to work top-down so drips don’t ruin finished areas. -
Inspect and touch up:
Basement lighting can be tricky, so use a work light to check for missed spots simply by looking at the brick from different angles. -
Apply final coat:
Apply a second full coat of paint to ensure solid, opaque coverage that hides the original brick color completely.
Level Up: Hearth Contrast
Instead of painting the hearth white, try capping it with large slate tiles or a piece of bluestone. This creates a functional, durable surface that hides ash and scuffs.
Step 3: Installing the Wood Mantel
-
Size the lumber:
Measure the width of your fireplace breast. Cut your rough-sawn lumber to length, allowing for a slight overhang if desired, or flush fit as shown in the image. -
Distress the wood:
Use a hammer, chain, or heavy screw to create dents and dings in the wood surface for that reclaimed, rustic look. -
Stain the mantel:
Apply your chosen wood stain with a rag, wiping off excess after a few minutes. Let it dry completely. -
Seal the wood:
Brush on two coats of matte polyurethane to protect the wood without making it look too glossy or artificial. -
Mount the cleat:
Secure a 2×4 wooden cleat directly into the brickwork using masonry screws. Ensure this piece is perfectly level. -
Attach the mantel:
Slide your finished hollow box beam (or solid beam) over the cleat. Secure it by screwing through the top of the mantel into the cleat so fasteners remain hidden.
Step back and enjoy how the white brick reflects light, making your basement feel significantly larger and more inviting
Eggshell Walls for Soft Glow Under Recessed Lights
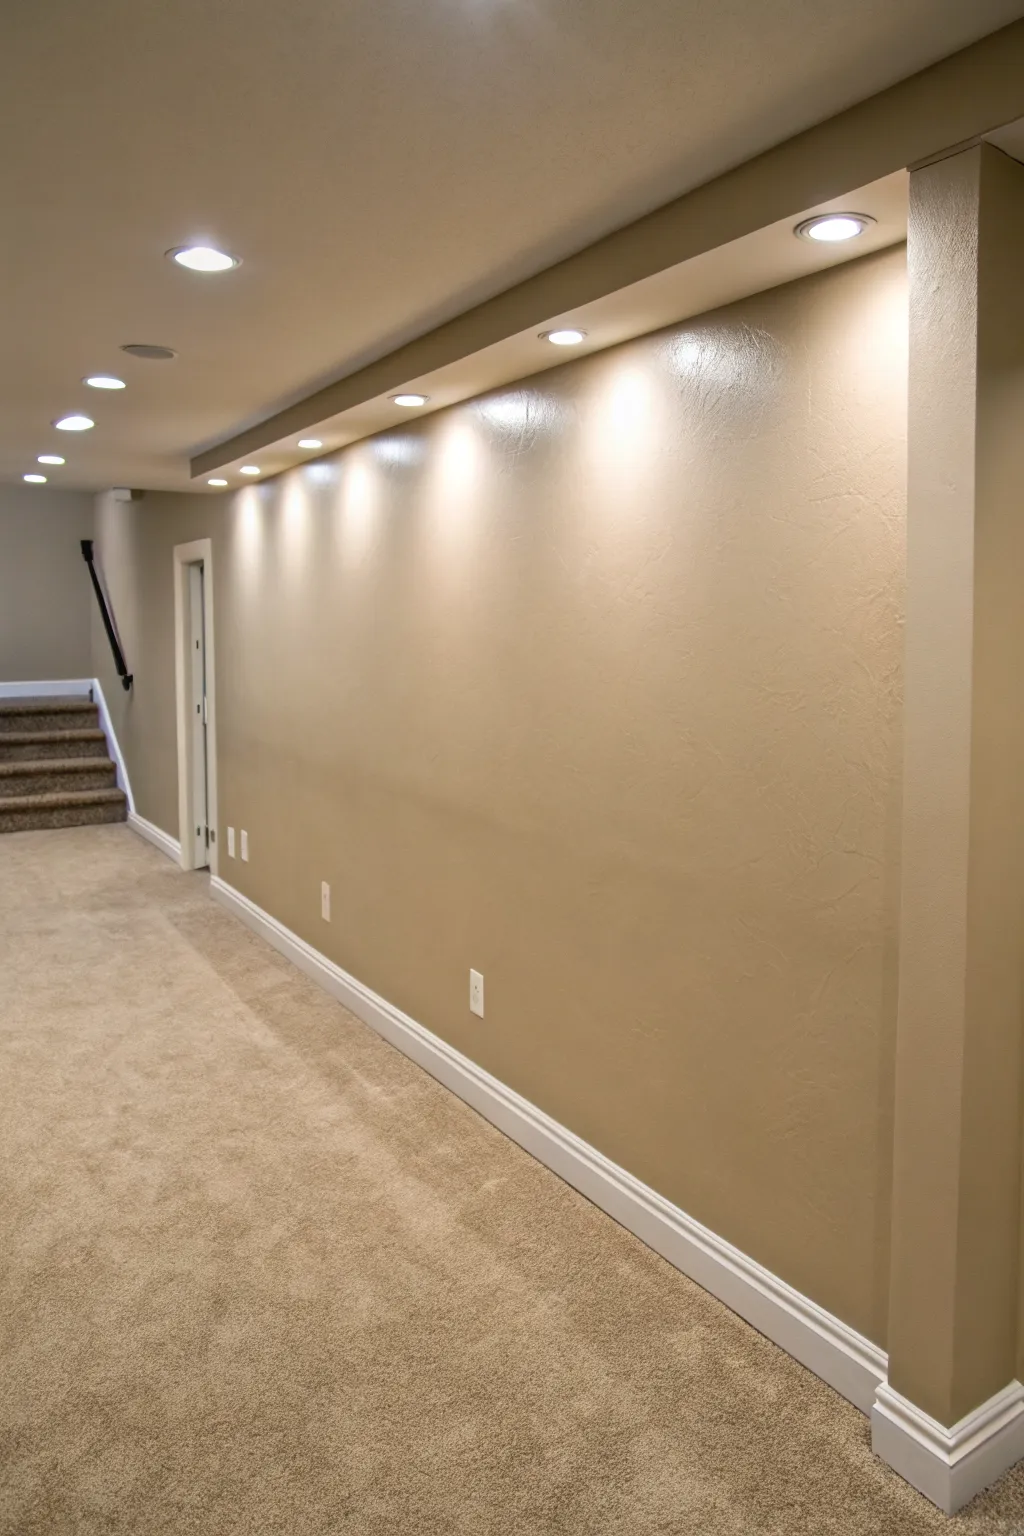
Capture the soft, inviting atmosphere of a modern basement hallway with this realistic acrylic painting tutorial. You’ll learn how to render subtle light gradients and warm shadows to create a convincing sense of depth and architectural space.
Step-by-Step Guide
Materials
- Canvas board or stretched canvas (16×20 inch or similar)
- Acrylic paints: Titanium White, Burnt Umber, Yellow Ochre, Raw Sienna, Mars Black, Unbleached Titanium
- Gesso (if canvas isn’t pre-primed)
- Flat brushes (1-inch, 1/2-inch)
- Filbert brushes (various sizes)
- Small round detail brush (size 1 or 2)
- Ruler or T-square
- Pencil (HB or H)
- Masking tape or painter’s tape
- Fine-grit sandpaper (optional for smoothing canvas)
Step 1: Drafting the Perspective
-
Prime your surface:
Begin by applying a smooth coat of gesso to your canvas if it’s not pre-primed. Let it dry completely, and optionally sand it lightly for a smoother finish that helps with straight architectural lines. -
Establish the horizon line:
Using your ruler and pencil, lightly draw a horizon line about one-third up from the bottom of the canvas. This will represent the eye level. -
Mark the vanishing point:
Place a small dot on the far left side of your horizon line. We’re looking down a hallway, so almost all horizontal lines on the right wall will angle toward this single vanishing point. -
Sketch the main wall:
Draw the large vertical line on the right side to define the corner of the wall. Connect the top and bottom of this line back to your vanishing point to create the long perspective of the hallway wall. -
Outline the ceiling details:
Sketch the soffit—the lowered section of the ceiling where the lights sit. This should run parallel to the main wall line, tapering as it recedes into the distance. -
Draw the light fixtures:
Along the underside of the soffit, sketch small ovals for the recessed lights. Remember that as they get further away, the ovals should appear smaller and closer together. -
Detail the background:
On the far left, sketch the door frame and the small set of stairs. Use valid linear perspective to ensure the stairs look like they are receding properly.
Step 2: Blocking in Color
-
Mix the base wall color:
Create a warm beige using Titanium White mixed with a generous amount of Yellow Ochre and a touch of Burnt Umber. It should be a mid-tone, not too bright, as we will add light later. -
Paint the main wall:
Using a large flat brush, apply this beige mixture to the entire large wall on the right. Keep your brushstrokes horizontal to mimic the flow of the wall. -
Block in the carpet:
Mix a slightly darker, textured version of the wall color by adding more Burnt Umber and a tiny touch of Mars Black. Stipple this onto the floor area to suggest the texture of carpet. -
Paint the ceiling:
Mix a light grey-beige for the ceiling using White and a speck of Raw Sienna. Paint the upper left area, keeping the tone flat and even. -
Darken the far wall:
The background wall near the stairs is in shadow. Mix a cooler, darker grey-brown and block in that back area to push it into the distance.
Straight Line Struggles?
If you’re having trouble painting crisp edges for the baseboards or door frames, use painter’s tape. Ensure the base layer is 100% dry before applying tape to avoid peeling up paint.
Step 3: Creating Light and Shadow
-
Paint the baseboards:
Using nearly pure Titanium White, carefully paint the trim along the floor. For the recession into the distance, tone the white down slightly with grey so the heavy contrast doesn’t kill the depth. -
Add the soffit shadows:
Under the lowered ceiling section, paint a strip of shadow using a mix of your wall color and Burnt Umber. This creates the ‘lip’ where the lights are hidden. -
Create the light cones:
This is the crucial step. Mix a glaze of Titanium White with a tiny bit of water or glazing medium. Using a filbert brush, gently paint ‘cones’ of light washing down the wall from each recessed fixture. -
Soften the light edges:
While the white glaze is still tacky, use a dry, clean brush to feather the edges of the light cones into the surrounding beige wall color. The light should be brightest at the top and fade as it goes down. -
Paint the light bulbs:
Inside the small ovals you sketched earlier, paint a bright white center. I like to add a tiny rim of grey around the oval to simulate the metal casing. -
Detail the carpet texture:
Return to the floor with a scruffy brush. Dapple in lighter sandy colors and darker brown shadows to create the speckled look of plush carpeting. -
Finalize architectural details:
Use your smallest brush to sharpen the lines of the door frame in the distance and the stair treads. Clean, sharp lines are essential for convincing architecture.
Make It Glow
For an extra warm atmosphere, glaze a very thin, transparent layer of Zinc White mixed with Yellow Ochre over the lighted areas once dry. This creates a cozy, incandescent glow.
Step back and admire how realistic light can transform a simple hallway sketch into a dimensional space
Satin Finish for Busy Basement Zones
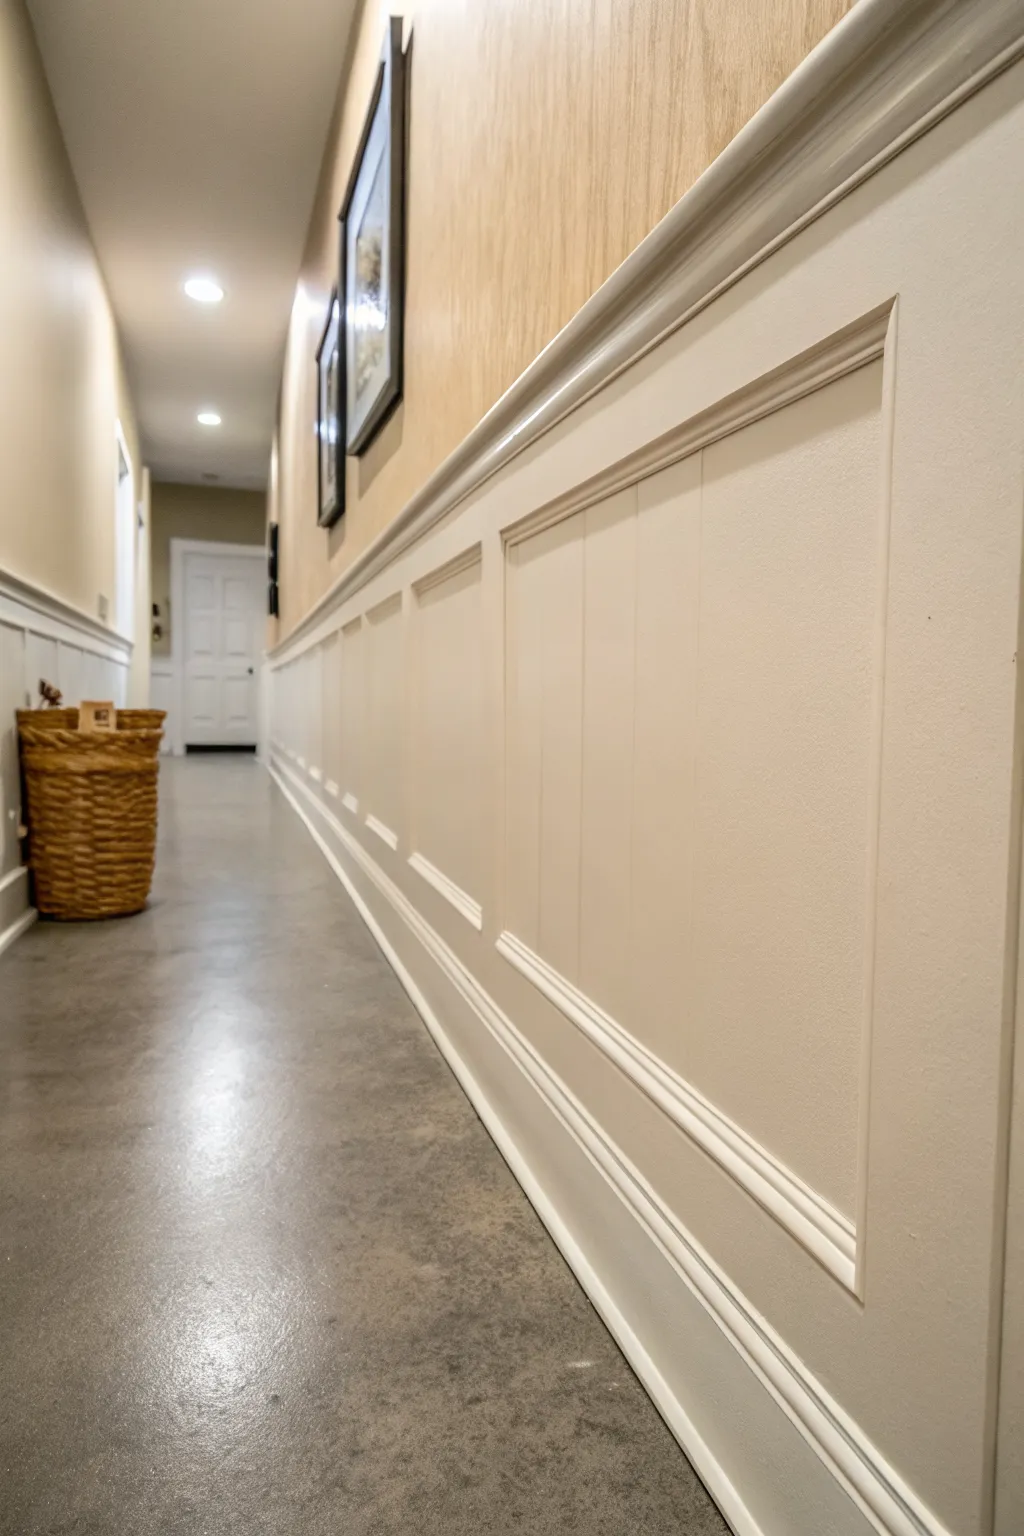
Transform a plain hallway into a sophisticated passage with this classic paneled wainscoting project. The combination of clean shadow boxes, sturdy chair rails, and a creamy satin finish adds architectural depth and durability to busy basement zones.
Step-by-Step Tutorial
Materials
- 1×4 MDF or poplar boards (for stiles and rails)
- Baseboard molding (height of your choice)
- Chair rail molding
- Small decorative trim (panel molding coves)
- Construction adhesive (e.g., Liquid Nails)
- Finishing nails (1.5 inch and 2 inch)
- Wood filler
- Paintable caulk
- Sandpaper (120 and 220 grit)
- Primer (stain-blocking)
- Satin finish interior paint (cream or off-white)
- Miter saw
- Level (4-foot or laser level)
- Nail gun
- Tape measure
Step 1: Planning and Layout
-
Determine Height:
Decide on the total height of your wainscoting. A standard height is usually around 32 to 36 inches, or roughly one-third of the wall’s height. Mark this horizontal line around the room using a laser level or a long spirit level. -
Map Out Panel Spacing:
Measure the length of your wall to calculate the spacing for your vertical stiles. Aim for equal spacing between panels. I find sketching this on paper first saves a lot of headache later compared to calculating on the fly. -
Prepare the Wall:
Remove any existing baseboards carefully if you plan to reuse them, though installing new, taller baseboards is often easier. Sand down any rough patches on the drywall where the boards will sit to ensure a flush fit.
Spacer Block Trick
Cut a scrap piece of wood to the exact width of your desired panel spacing. Use this ‘spacer block’ to quickly position vertical stiles without measuring every time.
Step 2: Installing the Framework
-
Install Baseboards:
Secure the bottom baseboard along the floor. Apply construction adhesive to the back and nail it into the studs. This acts as the bottom rail for your panel system. -
Attach Top Rail:
Install the horizontal 1×4 top rail. Align the top edge with the level line you marked earlier. Nail it securely into the wall studs. -
Cut Vertical Stiles:
Measure the vertical distance between the top of your baseboard and the bottom of your top rail. Cut your 1×4 lumber into stiles of this length. -
Install Vertical Stiles:
Place the vertical stiles at your predetermined marks. Use a level on each piece before nailing to ensure they are perfectly plumb. Apply adhesive to the back of each stile for extra holding power before nailing.
Two-Tone Effect
Paint the inner drywall section a slightly darker shade than the trim for a bold, high-contrast look that highlights the architectural details.
Step 3: Adding Trim and Detail
-
Install Chair Rail:
Place the chair rail molding directly on top of the upper horizontal 1×4 rail. This cap piece hides the top edge of the board and gives the wainscoting a finished furniture look. -
Measure Inner Panels:
Measure the inside dimensions of the rectangular boxes created by your rails and stiles. You will need to cut the small decorative cove molding to fit inside these rectangles. -
Cut Decorative Molding:
Using a miter saw, cut the small decorative trim pieces at 45-degree angles. These will frame the inside of each box to create the recessed panel effect shown in the photo. -
Attach Inner Trim:
Fit the mitered trim pieces inside each box. Use a little wood glue on the corners and secure them with smaller pin nails. This step adds that critical layer of depth.
Step 4: Finishing Touches
-
Fill Nail Holes:
Go over every nail hole with wood filler. Overfill slightly as the filler shrinks when drying. Once dry, sand flush with the surface. -
Caulk Seams:
Apply a thin bead of paintable caulk to all seams where wood meets wood or wood meets wall. Smooth it with a wet finger to create a seamless transition. This makes the separate pieces look like one solid unit. -
Prime the Surface:
Apply a high-quality primer to the entire wainscoting area, covering both the wood and the drywall inside the panels. This ensures the final paint sheen is consistent. -
Sand for Smoothness:
Lightly sand the primed surface with 220-grit sandpaper to remove any raised grain or dust nibs. Wipe clean with a tack cloth. -
Apply Final Paint:
Paint the entire assembly with a durable satin finish paint. Use a brush for corners and trim, and a small foam roller for flat areas to minimize brush strokes. Two coats usually provide the best coverage and durability.
Step back and admire how this elegant architectural addition completely redefines the character of your space
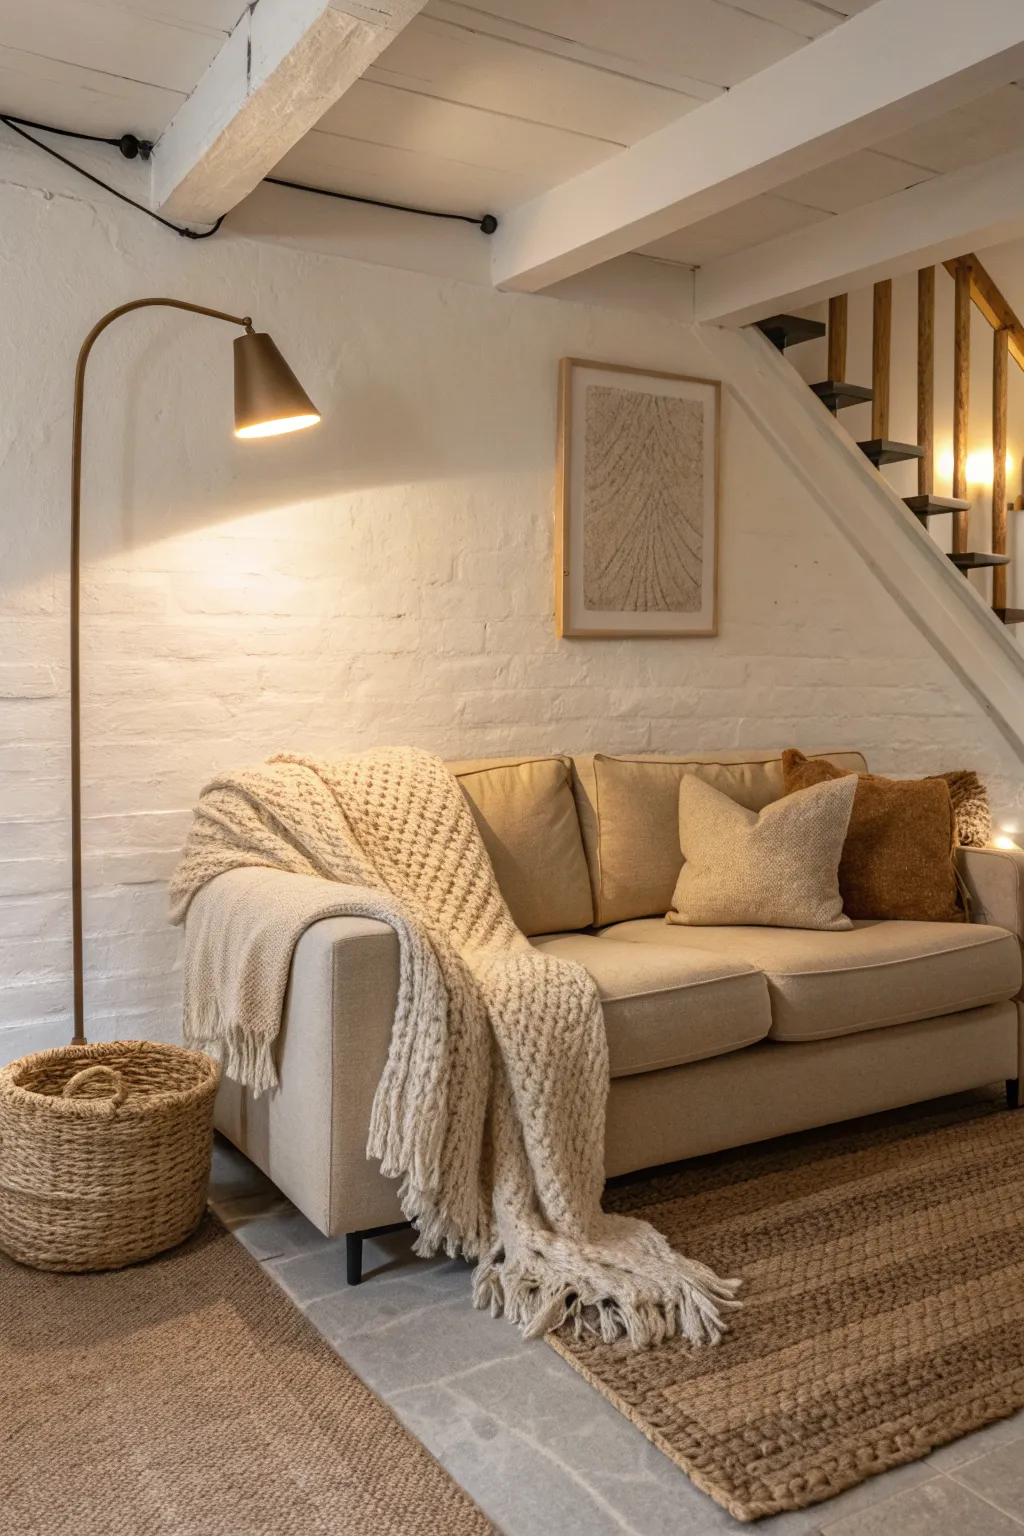
Color Drenching for a Cozy Basement Cocoon
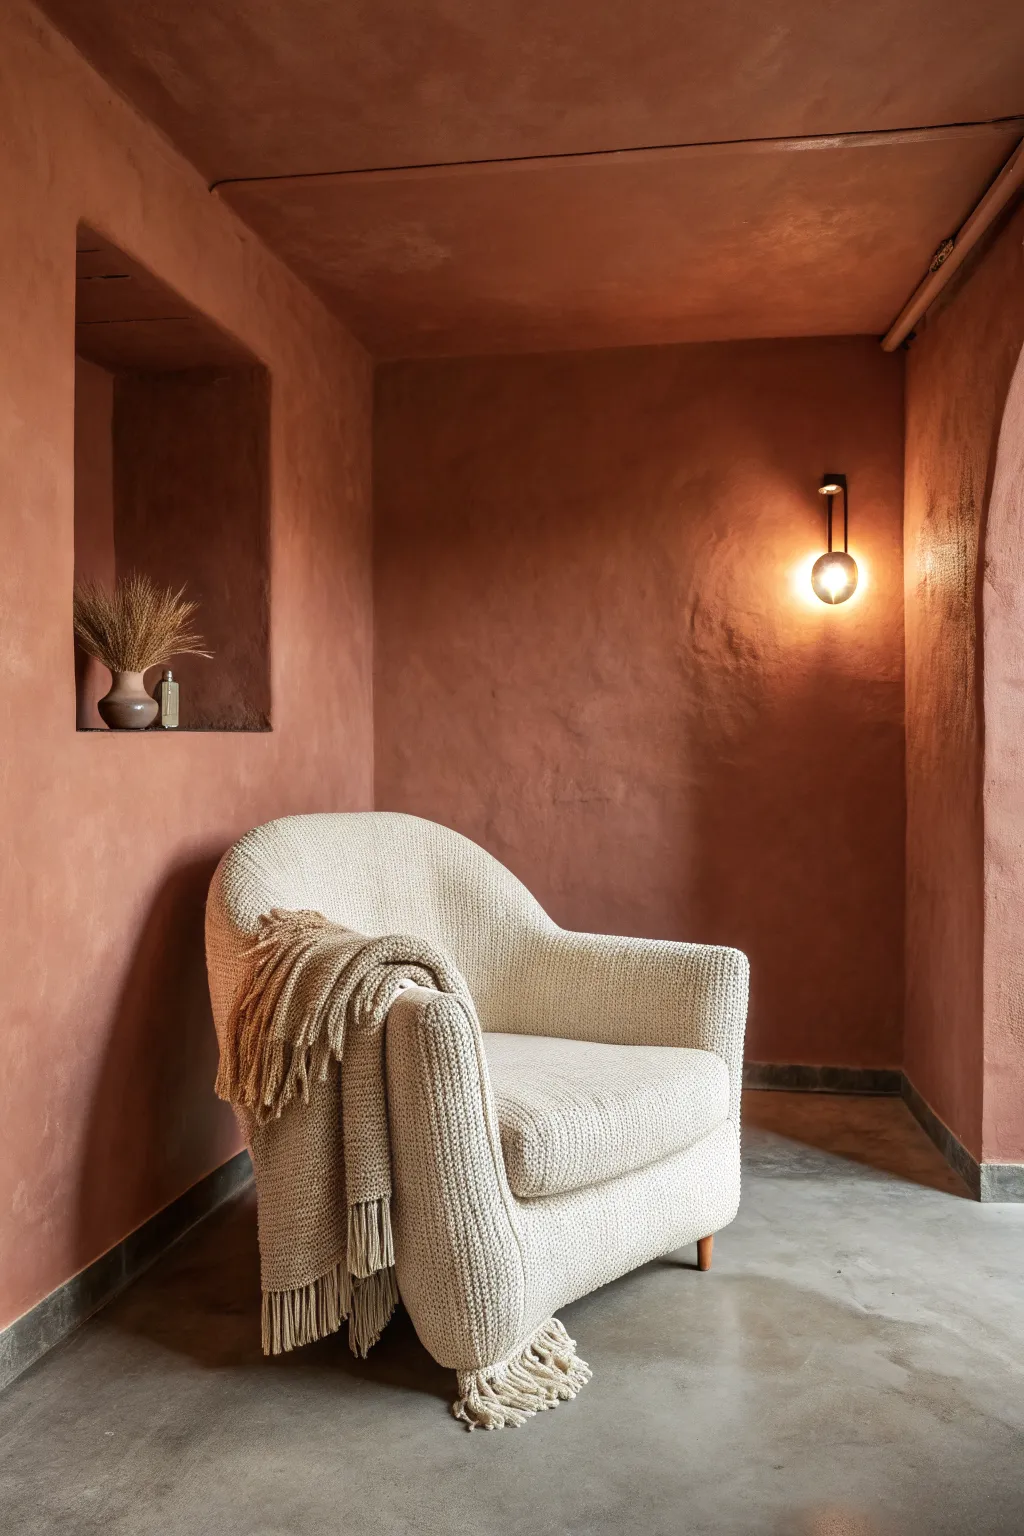
Transform a cold basement corner into a warm, enveloping retreat using the technique of color drenching in a rich, earthy terracotta hue. This monochromatic approach blurs the lines between walls and ceiling, creating an instant feeling of coziness and sophistication.
Step-by-Step Guide
Materials
- High-quality interior paint (matte or flat finish)
- Color: Burnt Orange, Terracotta, or Rust
- Paint roller with extension pole
- Microfiber roller covers (medium nap for texture)
- Angled sash brush (2.5 inch)
- Painter’s tape
- Drop cloths
- Spackling paste and putty knife
- Sandpaper (medium and fine grit)
- Primer (tinted gray or similar to topcoat strongly recommended)
- Wall sconce fixture (warm bulb)
- Textured armchair (bouclé or heavy knit fabric)
Step 1: Preparation & Repairs
-
Clear and Clean:
Remove all furniture, rugs, and switch plates from the area. Wipe down the walls and ceiling with a damp cloth to remove basement dust or cobwebs. -
Patch Imperfections:
Inspect the walls for any holes or cracks. Apply spackling paste with a putty knife, let it dry completely, and sand it smooth until it’s flush with the wall. -
Creating the Niche (Optional):
If your wall structure allows, frame out a small recessed niche between studs. Drywall, tape, and mud the recessed area just like a regular wall corner for that architectural detail seen in the image. -
Tape and Protect:
Lay down heavy canvas drop cloths to protect the concrete or finished floor. Tape off the baseboards strictly if you aren’t painting them (though true color drenching often includes the trim).
Paint Tip: Limewash Look
For the subtle cloudy texture seen in the photo, use a limewash paint or make ‘X’ strokes with a wide brush during the final coat to create movement.
Step 2: Priming the Canvas
-
Tint the Primer:
Basement walls can be thirsty. Use a primer tinted to a shade close to your final terracotta color. This creates a solid base and helps achieve that deep saturation with fewer topcoats. -
Cut In Edges:
Using your angled brush, paint a 3-inch strip of primer along the ceiling line, corners, around the niche, and along the floor. -
Roll the Primer:
Roll the primer onto the walls and the ceiling section you plan to paint. Don’t worry about perfect coverage here; you just want to seal the surface.
Create a Focal Point
Paint the electrical conduit or pipes the exact same color as the ceiling. This camouflage technique makes industrial basement elements disappear.
Step 3: Color Application
-
Mixing the Paint:
Stir your terracotta paint thoroughly. If you are using multiple gallons, mix them together in a 5-gallon bucket (boxing the paint) to ensure perfect color consistency across the room. -
Cutting In Again:
Start with the ceiling edges and corners using your brush. Work in sections so the ‘cut’ line doesn’t dry before you can roll into it, which helps blend the texture. -
Painting the Niche:
I like to tackle the niche early. Use the brush for the inner corners of the recessed shelf and a small mini-roller for the flat surfaces inside to avoid brush streaks. -
Rolling the Ceiling:
Paint the ceiling first to avoid splatters on finished walls. Use an extension pole and roll in a ‘W’ pattern, overlapping your wet edges to minimize roller marks. -
Rolling the Walls:
Load your roller and apply the first coat to the walls. Move from top to bottom. The goal is even coverage, but don’t panic if it looks patchy while wet; reds and oranges darken as they dry. -
Dry and Repeat:
Allow the first coat to dry for at least 4-6 hours. Terracotta pigments can be translucent, so a second (and sometimes third) coat is essential for that velvety, solid look. -
Final Coat Application:
Apply the final coat with a steady hand. Ensure the transition between the wall and ceiling is seamless—this continuity is the key to the ‘cocoon’ effect.
Step 4: Styling & Atmosphere
-
Install Lighting:
Once the paint is fully cured (give it 24 hours), install the modern sconce. Choose a fixture with a warm-toned bulb (2700K) to enhance the orange undertones of the paint. -
Style the Niche:
Place a simple earthenware vase with dried grasses or wheat in the niche. The natural textures complement the matte wall finish perfectly. -
Position the Chair:
Place a heavy, textured cream or oatmeal armchair in the corner. The high contrast between the pale fabric and dark walls makes the chair pop. -
Add Texture:
Drape a chunky knit blanket over the chair arm. This adds a crucial layers of softness that balances out the concrete floor and smooth walls.
Now settle into your warm, immersive corner and enjoy the serenity of your new space
Painted Stairwell Gradient to Pull You Downstairs
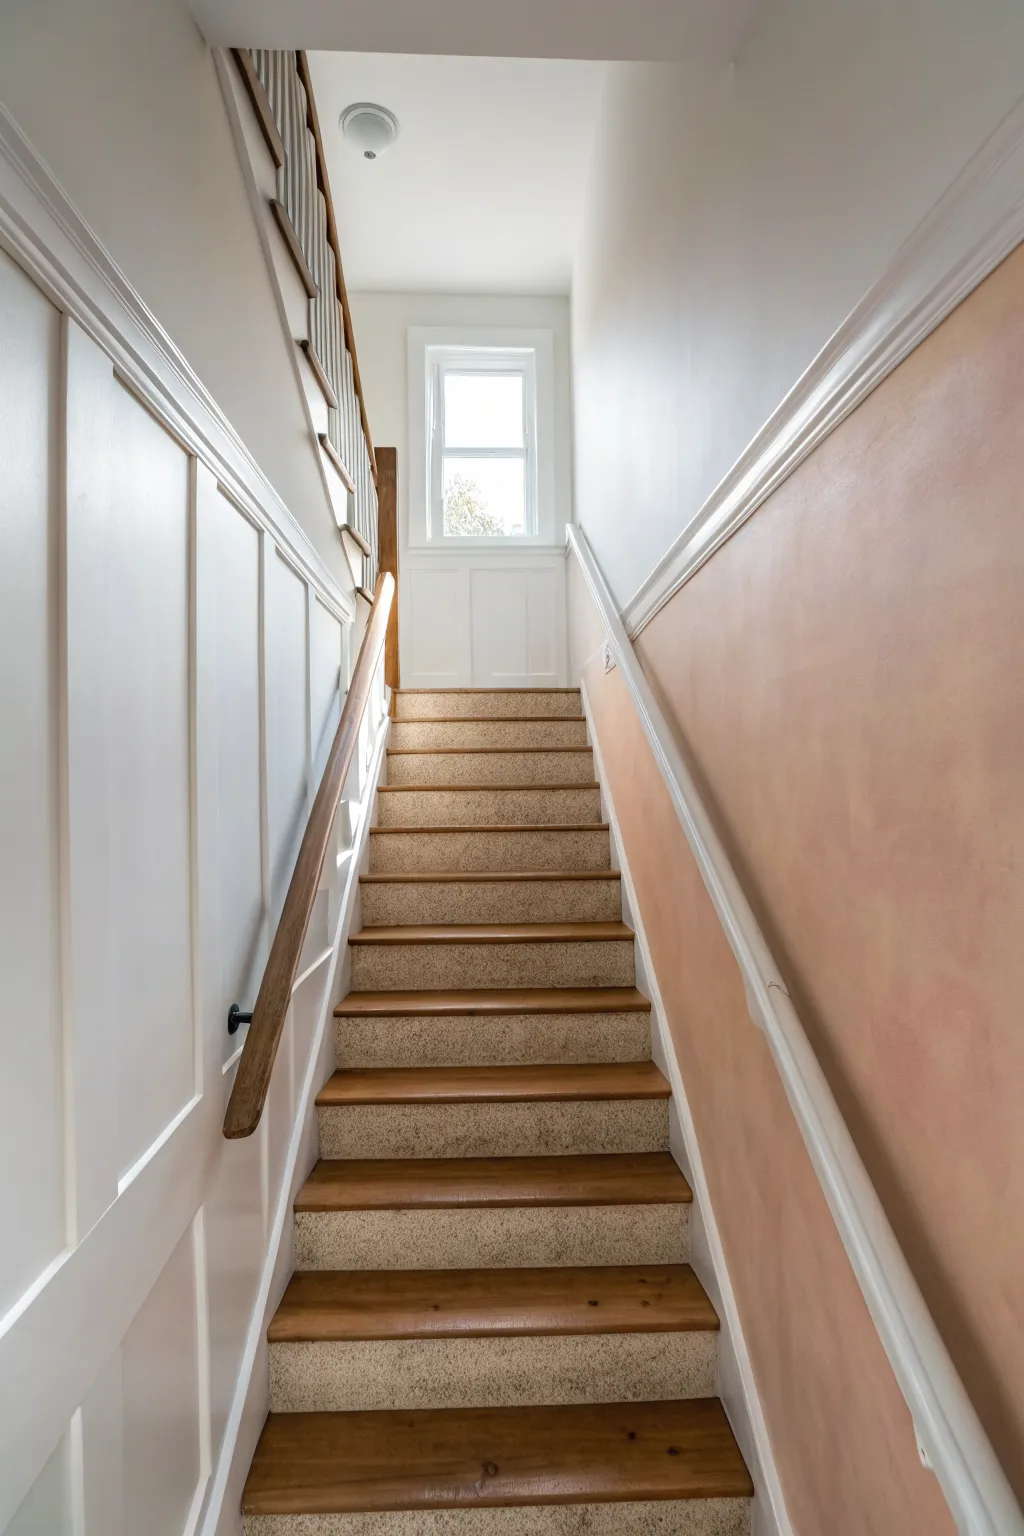
Transform a plain stairwell wall into a warm, inviting feature with this soft, textured finish that mimics the look of aged plaster. The subtle blend of peach and terracotta tones adds depth and movement, guiding the eye upward toward the light.
Step-by-Step Tutorial
Materials
- Matte latex paint (base coat, off-white or cream)
- Matte latex paint (peach/terracotta color)
- Glaze medium (acrylic or latex based)
- Large blending brush or block brush
- Clean, lint-free cotton rags
- Painter’s tape
- Drop cloths
- Paint tray and liners
- Bucket for mixing
- Stir sticks
- Ladder (if needed for high stairwells)
Step 1: Preparation and Base Coat
-
Protect the area:
Before you begin, lay down drop cloths on the stairs to protect the carpet or wood treads. Apply painter’s tape carefully along the skirting board, the handrail (if attached to the wall), and the ceiling line to ensure crisp edges. -
Clean the wall:
Wipe down the wall surface with a damp cloth to remove any dust or cobwebs, as debris will get caught in the texture later. -
Apply base coat:
Roll on a coat of high-quality matte off-white or cream paint. This neutral base prevents the existing wall color from influencing your new glaze tones. -
Dry completely:
Allow the base coat to dry for at least 4 to 6 hours, or overnight if possible. The surface must be non-tacky before you start the faux finish.
Patchiness Problems
If your wall looks too blotchy after drying, chances are the glaze dried too fast. Mix a very thin wash (mostly water/glaze) and go over the whole wall again to unify the finish.
Step 2: Mixing the Glaze
-
Prepare the ratio:
In your mixing bucket, combine one part of the peach/terracotta paint with four parts glaze medium. This translucent mixture is key to achieving that soft, washed look rather than a solid block of color. -
Add water if necessary:
If the mixture feels too thick or sticky, stir in a very small amount of water to loosen it up. It should have the consistency of heavy cream. -
Test the color:
Dab a small amount of your glaze mixture onto a piece of scrap cardboard or an inconspicuous corner to ensure the transparency is right. Adjust by adding more paint for opacity or more glaze for transparency.
Ragging Pro-Tip
Keep a supply of rags handy. Once a rag becomes saturated with paint, it stops removing texture and starts smearing it back on. Swap to a fresh cloth frequently for crisp texture.
Step 3: Applying the Texture
-
Work in sections:
Stairwells are large, so mentally divide the wall into manageable 3-foot by 3-foot sections. You need to maintain a ‘wet edge’ so the sections blend seamlessly. -
Apply the glaze:
Dip your large brush into the glaze mixture and apply it to the first section using random, crisscrossing strokes (often called an ‘X’ pattern). Don’t try to be neat; irregularity creates natural texture. -
The ragging technique:
While the glaze is still wet, bunch up a clean cotton rag in your hand. Gently dab and roll the rag over the wet glaze to lift off some pigment and soften the brush marks. -
Vary pressure:
Change your hand position and the pressure you apply with the rag frequently. Some areas should be slightly darker, while others let more of the cream base show through. -
Move to the next section:
Before the first patch dries, move to the adjacent area. Apply glaze and rag it off, overlapping the wet edge of your previous section to blur the boundary line. -
Blend the transition:
I like to use a dry, soft brush to lightly feather the area where two sections meet if the ragging looks too distinct. This ensures a cloud-like transition.
Step 4: Refining and Finishing
-
Check for heavy spots:
Step back periodically to view the wall from a distance. If you spot an area that looks too heavy or dark, dab it firmly with a clean, slightly damp rag to lift more glaze. -
Address the edges:
Use a smaller brush to dab glaze carefully into corners and along tape lines, then use a small piece of rag to texture these tight spots so they match the main wall. -
Let it cure:
Allow the faux finish to dry completely for at least 24 hours. The glaze extends the drying time significantly compared to standard paint. -
Remove tape:
Once dry, carefully peel away the painter’s tape at a 45-degree angle. Pulling slowly helps prevent peeling off any accidental thick spots of dried glaze. -
Touch up:
Inspect the edges where the tape was. If any glaze bled through, use a small artist’s brush and your base trim color to sharpen the lines.
Enjoy the warm, Tuscan-inspired glow this finish brings to your stairwell every time you walk by
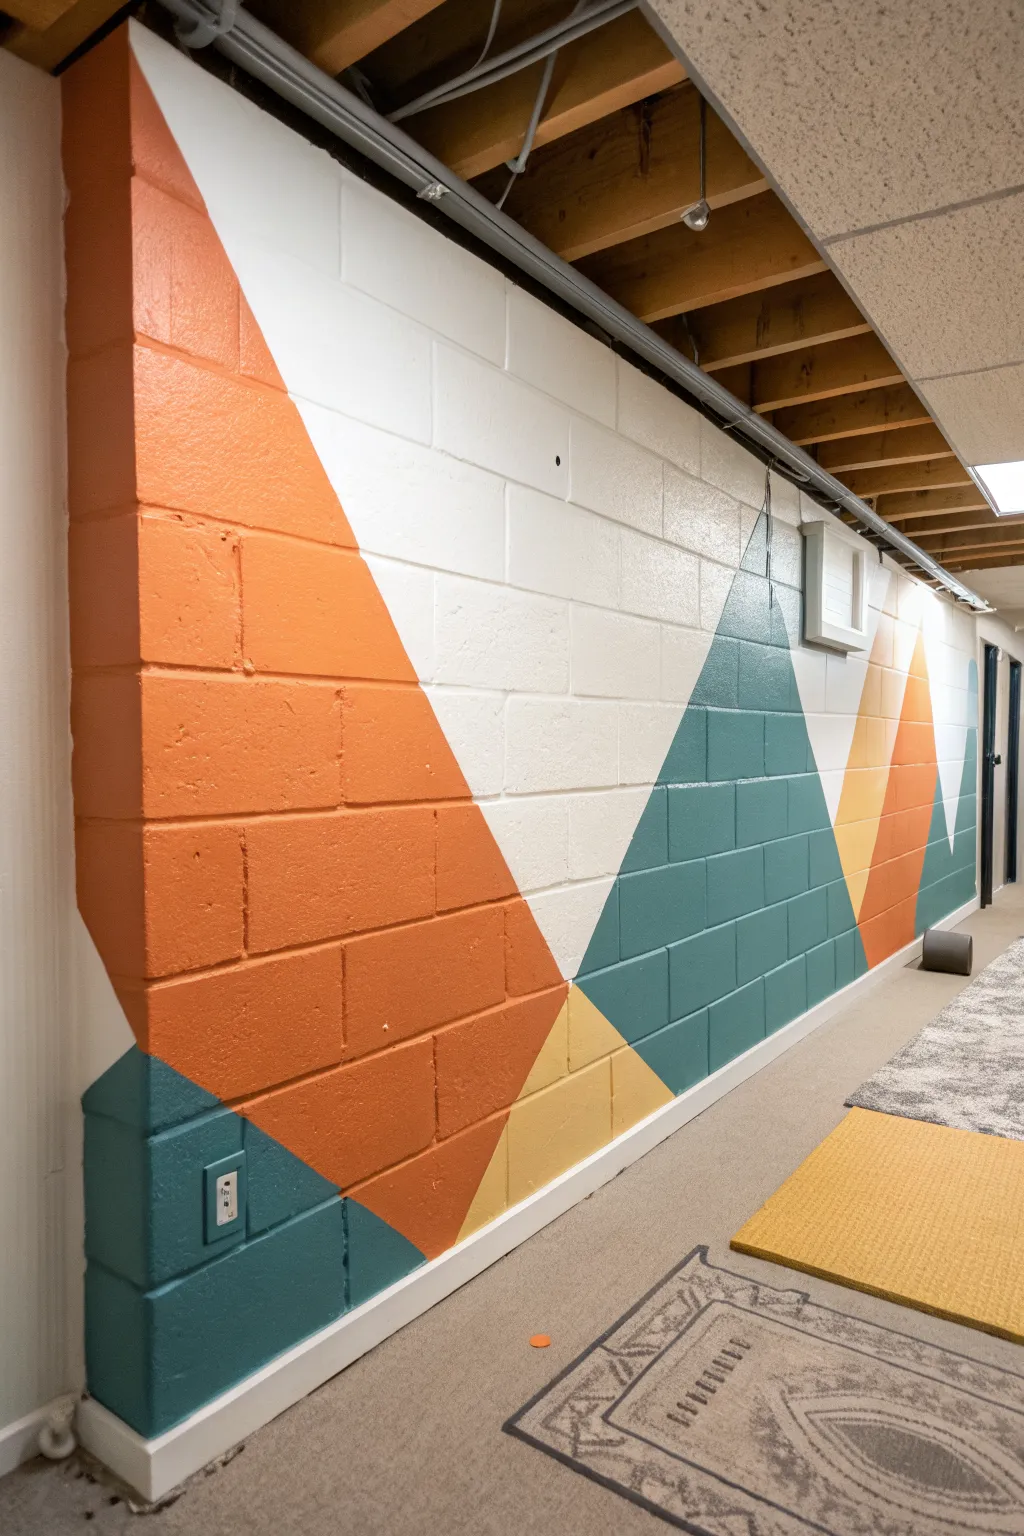
Geometric Color Blocking to Define Basement Zones

Transform a plain cinder block basement wall into a modern art feature with this striking geometric mountain mural. Using bold shapes and a cohesive palette of terra cotta, teal, and mustard, you’ll create visual interest that defines the space while brightening up the room.
Step-by-Step Tutorial
Materials
- Interior latex paint (flat or eggshell finish) in white (base), terra cotta, deep teal, and mustard yellow
- High-quality painter’s tape (1.5 to 2 inch width)
- TSP substitute or heavy-duty cleaner
- Scrub brush
- Paint rollers (3/8 inch nap for textured block)
- Angled sash brush (2 inch)
- Small craft brush or artist brush
- Pencil
- Straight edge or long level
- Drop cloth
Step 1: Preparation & Base Coat
-
Clean the surface:
Before painting, thoroughly scrub the cinder block wall with a TSP substitute and a stiff brush to remove any basement dust, efflorescence, or grime. Rinse with a damp sponge and let the wall dry completely. -
Protect the area:
Lay down your drop cloth along the base of the wall. If you have existing baseboards, tape them off now; otherwise, tape the floor edge where it meets the wall. -
Apply the white base:
Roll on a coat of white paint across the entire wall section. Cinder blocks are porous, so you may need two coats to get a solid, opaque background that will make your colors pop later. -
Fill the mortar lines:
Use your angled sash brush to work the white paint deep into the mortar grooves. This ensures no gray concrete shows through, which is crucial for a clean, finished look. -
Allow to cure:
Let the white base coat dry for at least 24 hours. Because we will be applying tape directly over this paint, it needs to be fully cured to prevent peeling.
Bleed-Through Blues?
On rough block, tape leaks happen. Don’t panic. Wait for the paint to fully dry, then use a tiny artist brush and your base white paint to carefully ‘erase’ the jagged edge by hand.
Step 2: Mapping the Design
-
Sketch the mountains:
Lightly sketch your triangle shapes onto the wall using a pencil. Aim for large, overlapping peaks like in the reference image—a large terra cotta peak on the left, a teal one in the middle, and smaller accent peaks. -
Apply the tape lines:
Following your pencil marks, apply long strips of painter’s tape to define the diagonal lines of the mountains. Press the tape firmly into the texture of the blocks. -
Seal the tape edges:
This is the most critical step for crisp lines on textured block: Take your *white* base paint and brush a light layer over the edge of the tape that faces the area you will color. This seals any gaps in the texture so the color won’t bleed under.
Add Dimension
Make the mural pop by extending the design onto adjacent surfaces. Painting a wrap-around corner or continuing the geometry onto an electrical conduit creates a cohesive, 3D effect.
Step 3: Blocking in Color
-
Paint the terra cotta peak:
Starting with the large triangle on the left, fill in the shape with your terra cotta orange paint. Use a brush to cut in near the tape and ceiling, then roll the larger areas for speed. -
Paint the teal section:
Move to the next large mountain shape and fill it with deep teal. Be careful not to cross over onto the wet orange paint if the shapes touch; usually, it’s safer to let adjacent colors dry before taping the dividing line. -
Add the yellow accents:
Locate the smaller triangular sections—often where two ‘mountains’ interact or at the base—and paint these with the mustard yellow to bridge the warm and cool tones. -
Watch the coverage:
Inspect your work as you go. The rough limestone texture can sometimes leave pinholes. I find that dabbing a loaded brush into these stubborn spots works better than trying to force paint in with a roller. -
Second coats:
Once the first color coat is dry to the touch, apply a second coat to ensure rich, vibrant color saturation.
Step 4: Finishing Touches
-
Remove the tape:
While the final coat is still slightly tacky (tacky, not wet), carefully peel back the painter’s tape at a 45-degree angle. Pulling slowly helps prevent pulling up any dried paint chips. -
Address adjacent shapes:
If your design involves shapes that overlap directly (where one color meets another without a white gap), you will need to let the first shape dry completely, then re-tape over the painted area to create the sharp edge for the second color. -
Touch up mortar lines:
Check the deep grooves in the mortar. If the tape bridged a gap and paint seeped under, use a small artist brush and the appropriate color (or white) to tidy up the line work. -
Clean hardware:
If you painted over outlet covers like the one shown in the teal section, you can either leave them painted for camouflage or replace them with fresh covers for contrast.
Step back and enjoy how your new geometric zone adds energy and structure to the basement space

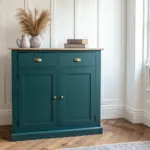
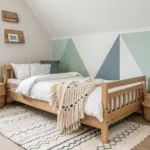
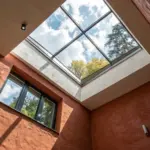
Have a question or want to share your own experience? I'd love to hear from you in the comments below!