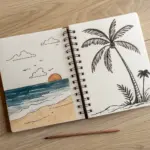
There’s something magical about using wet beach sand as your sketchbook—your lines go bold, your textures pop, and the whole shoreline becomes your canvas. Here are my favorite beach sand drawing ideas, starting with the classics and moving into more playful, wow-factor designs.
Classic Spiral Shell Swirl
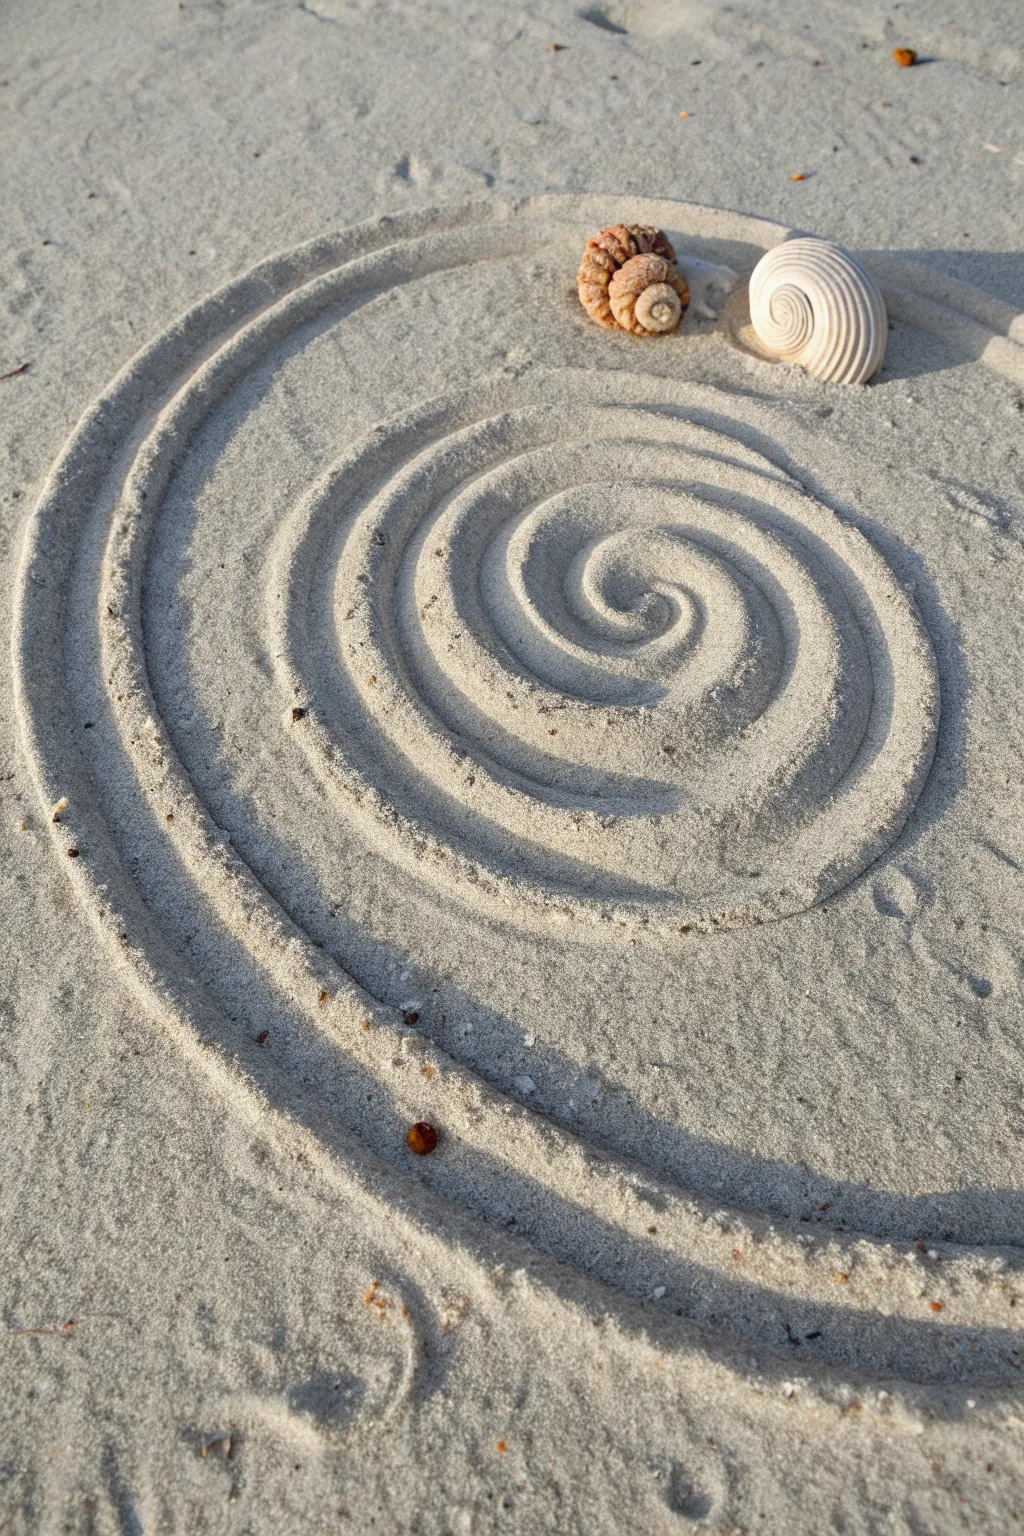
Capture the meditative rhythm of the ocean with this elegant spiral sand drawing. Using the natural canvas of damp beach sand and a pair of found seashells, you’ll create a soothing piece of temporary art that plays beautifully with sunlight and shadow.
How-To Guide
Materials
- A stretch of flat, damp beach sand
- A sturdy stick, piece of driftwood, or simply your finger
- Two seashells (one spiral, one rounder)
- Small rake (optional, for clearing the canvas)
Step 1: Preparing the Canvas
-
Scout the location:
Walk along the shoreline to find a patch of sand that is firm and damp, but not soaking wet. Aim for the area just above the current high-tide line so your art lasts longer. -
Smooth the surface:
Clear away any large debris, footprints, or seaweed from your chosen spot. Use your hand or a flat piece of driftwood to smooth out a square area roughly 2-3 feet wide. -
Select your centerpiece shells:
While clearing the area, hunt for two distinct shells. For this look, try to find a white moon snail shell and a textured, amber-colored rough winkle or turban shell.
Crumbling Walls?
If the sand grooves keep collapsing, the sand is likely too dry. Move closer to the water line or use a spray bottle to dampen the area before drawing.
Step 2: Drawing the Spiral Core
-
Mark the center:
Locate the precise center of your smoothed canvas. Place the tip of your finger or stick gently here to mark the starting point without digging a hole. -
Begin the swirl:
Start drawing a very tight curve moving clockwise. Press firmly enough to create a groove that will cast a shadow, typically about an inch deep. -
Expand the first loop:
As you complete the first full rotation, widen your arc slightly. Keep the spacing consistent between the lines—imagine the width of a small shell fitting between the grooves. -
Create the ridge texture:
Instead of just dragging a line, angle your finger or stick so it pushes sand up onto the outer edge of the groove. This creates a raised ridge that catches the light beautifully.
Sunlight Strategy
Create this piece early in the morning or late afternoon. Low sun angles create dramatic shadows in the grooves, making the spiral pop in photos.
Step 3: Expanding the Design
-
Widen the gap:
As you move into the second and third rotations, let the spiral ‘breathe’ by very gradually increasing the distance between the grooves. This mimics the natural growth pattern of a nautilus shell. -
Maintain fluidity:
Try to draw using your whole arm rather than just your wrist. This helps prevent jagged lines and keeps the curve looking smooth and organic. -
Manage the pressure:
If the sand starts to crumble or dry out as you work outward, dig slightly deeper to reach the moisture below, ensuring the walls of your lines stay crisp. -
Create the outer rings:
Continue spiraling outward until you have about 5 to 6 visible rings. The outermost line should be quite deep and bold to frame the entire piece. -
Fade the ending:
When you reach the top right section of the outer circle, gradually lift your finger or tool to let the groove taper off naturally rather than stopping abruptly.
Step 4: Finishing Touches
-
Clean the channels:
Inspect your grooves for any loose clumps of sand that fell back in. Gently blow on them or pick them out carefully to keep the shadows dark and clean. -
Position the first shell:
Place the darker, textured shell near the end of your spiral’s tail at the top right. Nestle it slightly into the sand so it looks integrated, not just dropped. -
Place the second shell:
Position the white spiral shell right next to the first one, slightly further out. Orient it so its spiral mimics the flow of your sand drawing. -
Enhance the shadows:
If I notice the sun angle is low, I like to gently pack the sand on the sun-facing side of the ridges to heighten the contrast.
Step back and watch how the changing light transforms your temporary masterpiece before the tide reclaims it.


Simple Wave Lines and Foam Edges
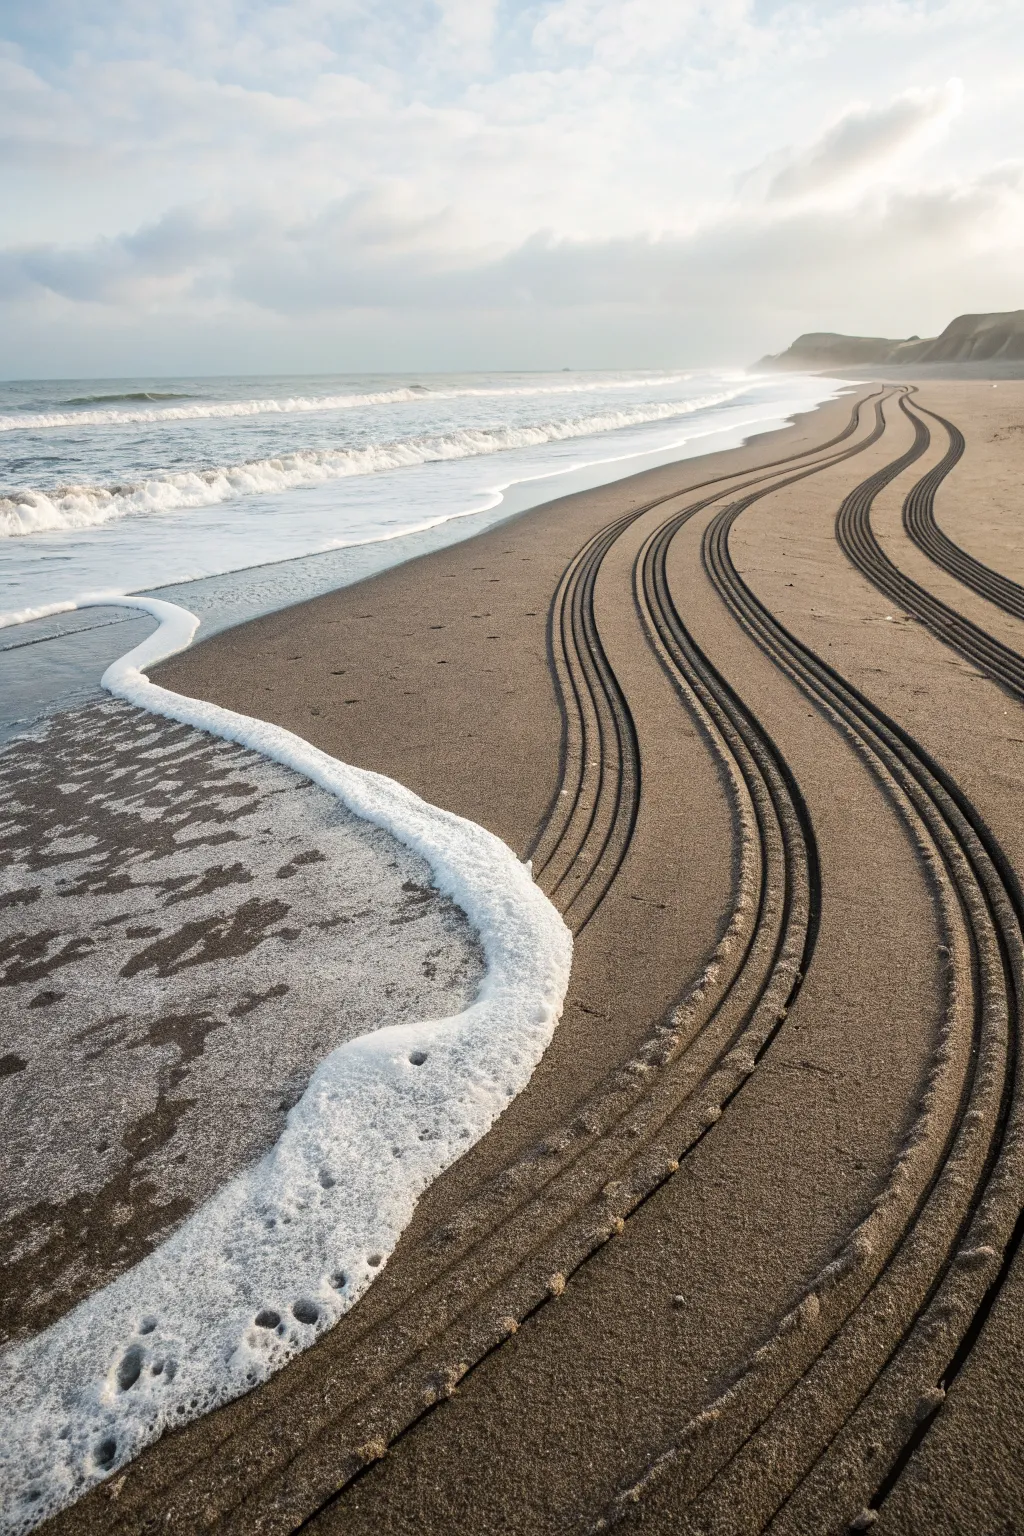
Capture the serene dance between land and sea with this large-scale sand drawing project that utilizes natural elements and texture. By mirroring the organic curves of retreating water with structured rake lines, you create a harmonious design that feels like a natural extension of the beach itself.
Detailed Instructions
Materials
- A wide, empty stretch of wet beach sand (low tide is best)
- A garden rake (metal or sturdy plastic tines)
- A stick or pole (optional, for guiding initial curves)
- Natural sea foam (available at the water’s edge)
- Tide chart (essential planning tool)
Step 1: Preparation & Layout
-
Check the Tides:
Before heading out, consult a local tide chart. You want to arrive about an hour before low tide so you have maximum workspace and the sand is firm and saturated, which holds details best. -
Scout Your Canvas:
Walk the beach to find a long, unobstructed section where the slope is gentle. A flatter beach allows the water to sheet evenly, creating better foam lines naturally, while the firmer sand higher up is perfect for drawing. -
Identify the Waterline:
Observe where the waves are currently reaching. You want to start your drawing just above the active wash zone so your work isn’t erased immediately, but close enough to interact visually with the sea. -
Mark a Starting Curve:
Using a stick or the handle of your rake, lightly sketch a long, S-shaped guide line parallel to the water. This doesn’t need to be deep; it’s just a visual reference for your raking path.
Uneven Lines?
If your raked lines look shaky, try walking faster. Momentum smoothes out small jitters. Also, lock your elbows against your ribs to stabilize your arms as you drag.
Step 2: creating the Raked Texture
-
Position the Rake:
Stand at the far end of your planned design. Hold the rake handle low to the ground to engage the tines deeply into the sand. This angle helps create the deep, shadowed furrows that defined the tracks in the photo. -
Begin the First Pass:
Walking backwards slowly, drag the rake steadily along your guide curve. Keep your pressure consistent. If you wobble, don’t stop—natural variations often look better than corrected mistakes. -
Establish the Rhythm:
Once your first line is done, step sideways just enough so your next pass will run parallel to the first. Overlap slightly or leave a small ridge between passes depending on the width of your rake. -
Creating the Swell:
As you rake the subsequent parallel lines, exaggerate the curves slightly. I like to swing wider on the outward curves to mimic the way waves fan out on the shore. -
Deepen the Grooves:
For the specific look in the image, you need high contrast. Go over your primary lines a second time if the sand is too hard, pressing down firmly to ensure the ridges cast distinct shadows. -
Clean the Edges:
As you turn or finish a section, lift the rake cleanly to avoid dragging stray marks across your smooth sand canvas. Smooth out footprints that fall outside the design area with the back of the rake.
Step 3: Integrating the Sea Foam
-
Wait for the Wash:
Watch the rhythm of the waves. You are looking for a gentle surge that pushes a thick line of sea foam up the beach without splashing violently. -
Capture the Edge:
The goal is to photograph or view the work right when the foam creates that bright white, scalloped border against the dark wet sand. You can’t force this, but you can time your drawing to meet the water. -
Enhance with Foam (Optional):
If the waves aren’t cooperating, scoop up fresh sea foam from the water’s edge with your hands or a bucket and gently deposit it along the bottom curve of your raked design to simulate a retreating wave. -
Refine the Contrast:
Look for the stark boundary where the dark, smooth wet sand meets your textured rake lines. If the transition is messy, use a flat tool or stick to crave a sharper line separating the ‘smooth’ zone from the ‘raked’ zone. -
Final Perspective Check:
Walk to a high point—like a dune or a boardwalk—or simply stand far back. The pattern relies on perspective to look like infinite tracks, so viewing it from a low angle down the beach emphasizes the length.
Golden Hour Glow
Shoot your photo just after sunrise or before sunset. The low sun angle casts long shadows in the rake grooves, maximizing texture and depth.
Now step back and watch as the tide inevitably claims your beautiful, temporary masterpiece


Big Heart With Shell Fill
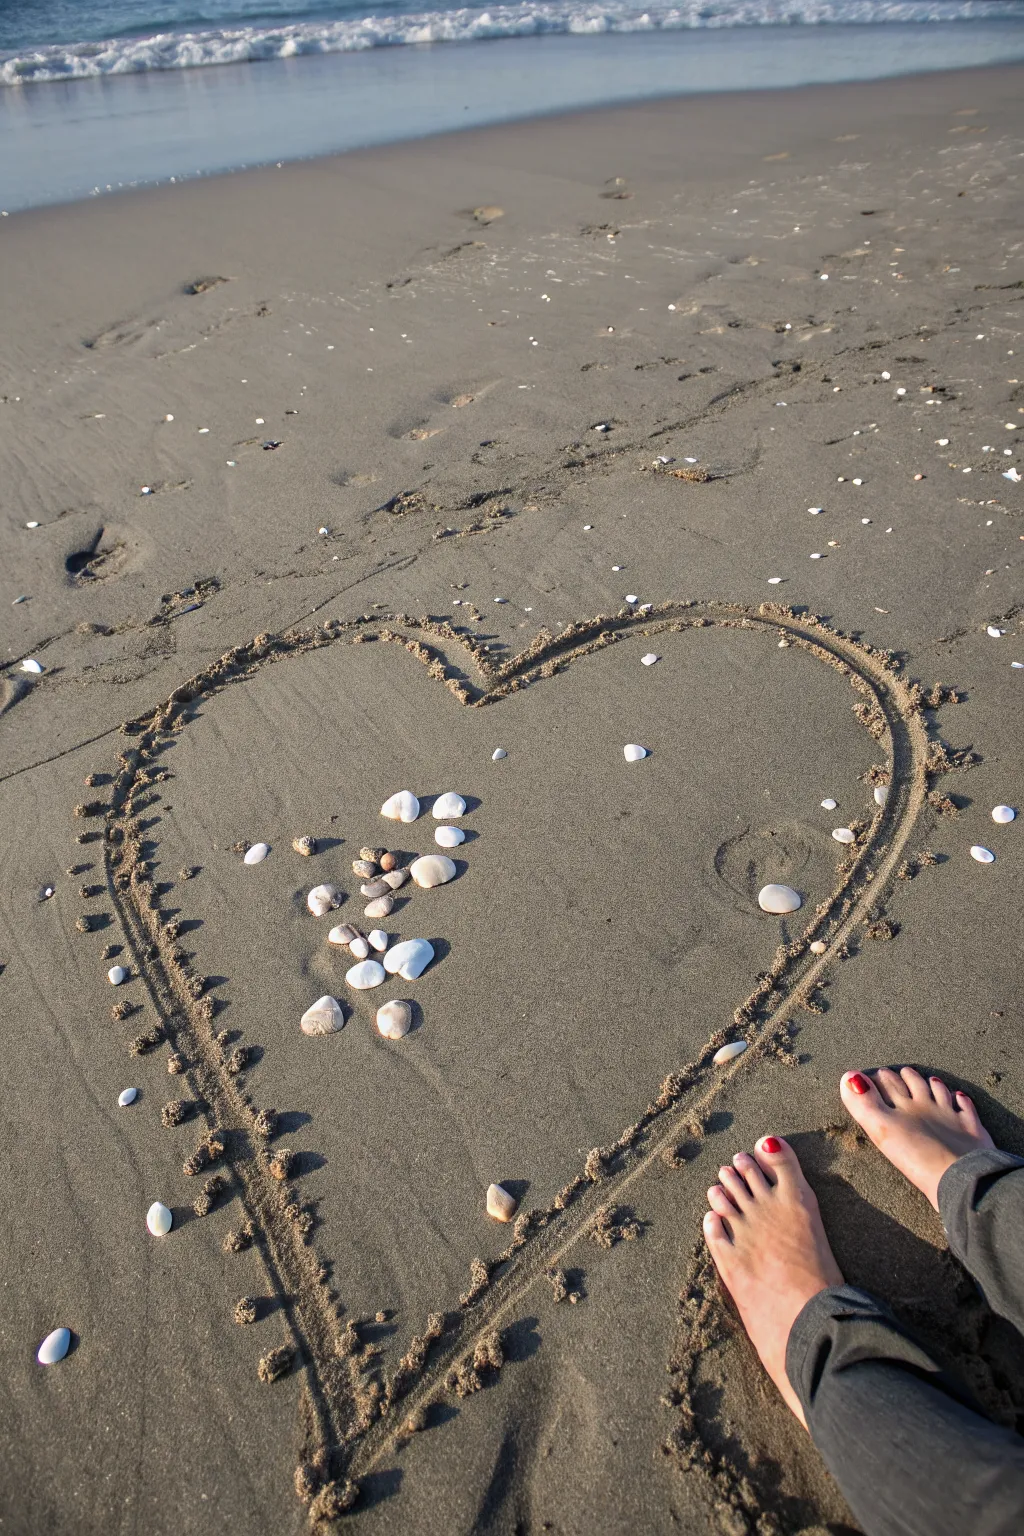
Create a textured, dimensional masterpiece right on the shoreline using the classic drip castle technique. This project combines the fun of drizzling wet sand with the natural beauty of scattered sea shells for a romantic or playful beach design.
How-To Guide
Materials
- Wet beach sand (near the shoreline)
- Collection of white sea shells (various sizes)
- A smooth patch of damp sand
- A small bucket (optional, for collecting water/sand)
Step 1: Preparation & Outline
-
Scout the location:
Find a smooth, flat area of the beach where the sand is damp and firm, but not currently being washed over by waves. You want a canvas that will last for a while. -
Gather your materials:
Before you start drawing, wander the tide line and collect a handful or two of white shells. Look for clean, bright clamshells or cockles that will stand out against the grey-brown sand. -
Mark the center:
Using your finger or a stick, lightly scratch a very faint guide line for your heart shape. This doesn’t need to be deep; it’s just a reference for where you’ll place your dripped sand.
Slurry Too Dry?
If sand clumps instead of dripping, mix more water into your handful. The mixture needs to be fluid enough to ooze through your fingers.
Step 2: Creating the Drip Outline
-
Mix the slurry:
Go to the water’s edge and scoop up very wet, sloppy sand. This shouldn’t be packable castle sand; it needs to be almost liquid, like pancake batter. I find digging a small hole near the waves creates a perfect mixing pot. -
Start the inner line:
Scoop a handful of the wet slurry. Move quickly to your heart outline and let the sand drip from your fist, following the inner edge of your guide. Let the blobs stack up slightly for texture. -
Complete the inner loop:
Continue grabbing fresh handfuls of wet sand and dripping them until you have a complete, enclosed heart shape. -
Begin the outer echo:
To give the heart more definition and width, start a second drip line parallel to the first one. Keep about an inch or two of space between the two lines. -
Thicken the border:
Follow the curve of the heart all the way around with this second layer. If your slurry is too dry, dip your hand in water; if it’s too runny, grab a bit more dry sand. -
Refine the points:
Make sure the dip at the top of the heart and the point at the bottom are clearly defined with extra drips if necessary. These areas tend to get messy, so deliberate placement helps here.
Sun Position
Photograph your heart when the sun is lower (morning or late afternoon). Long shadows emphasize the texture of the sand drips.
Step 3: Adding the Shell Details
-
Create the focal point:
Take your largest, whitest shells and place them in a small cluster near the left center of the heart. Cluster them loosely rather than evenly spacing them. -
Add secondary clusters:
Place a second, smaller grouping of shells near the bottom point of the heart. This creates balance without making the design look too rigid. -
Scatter small details:
Take tiny shell fragments or pebbles and sprinkle them randomly inside the heart shape to add texture to the smooth interior sand. -
Decorate the perimeter:
Place a few solitary shells outside the drip lines. Imagine they ‘fell’ off the heart. This integrates the drawing with the surrounding beach. -
Clean up the background:
Smooth out any unintended footprints right next to the outline so the heart takes center stage. You can use the flat of your hand to pat the surrounding sand down. -
The final touch:
Stand back and admire your work. If the sand drips have dried and lightened too much, you can gently sprinkle a little water over them to darken the outline again for a photo.
Now step back and snap a photo before the tide comes in to reclaim your canvas


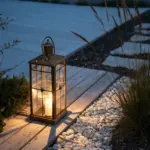
Sunset Half-Circle Horizon
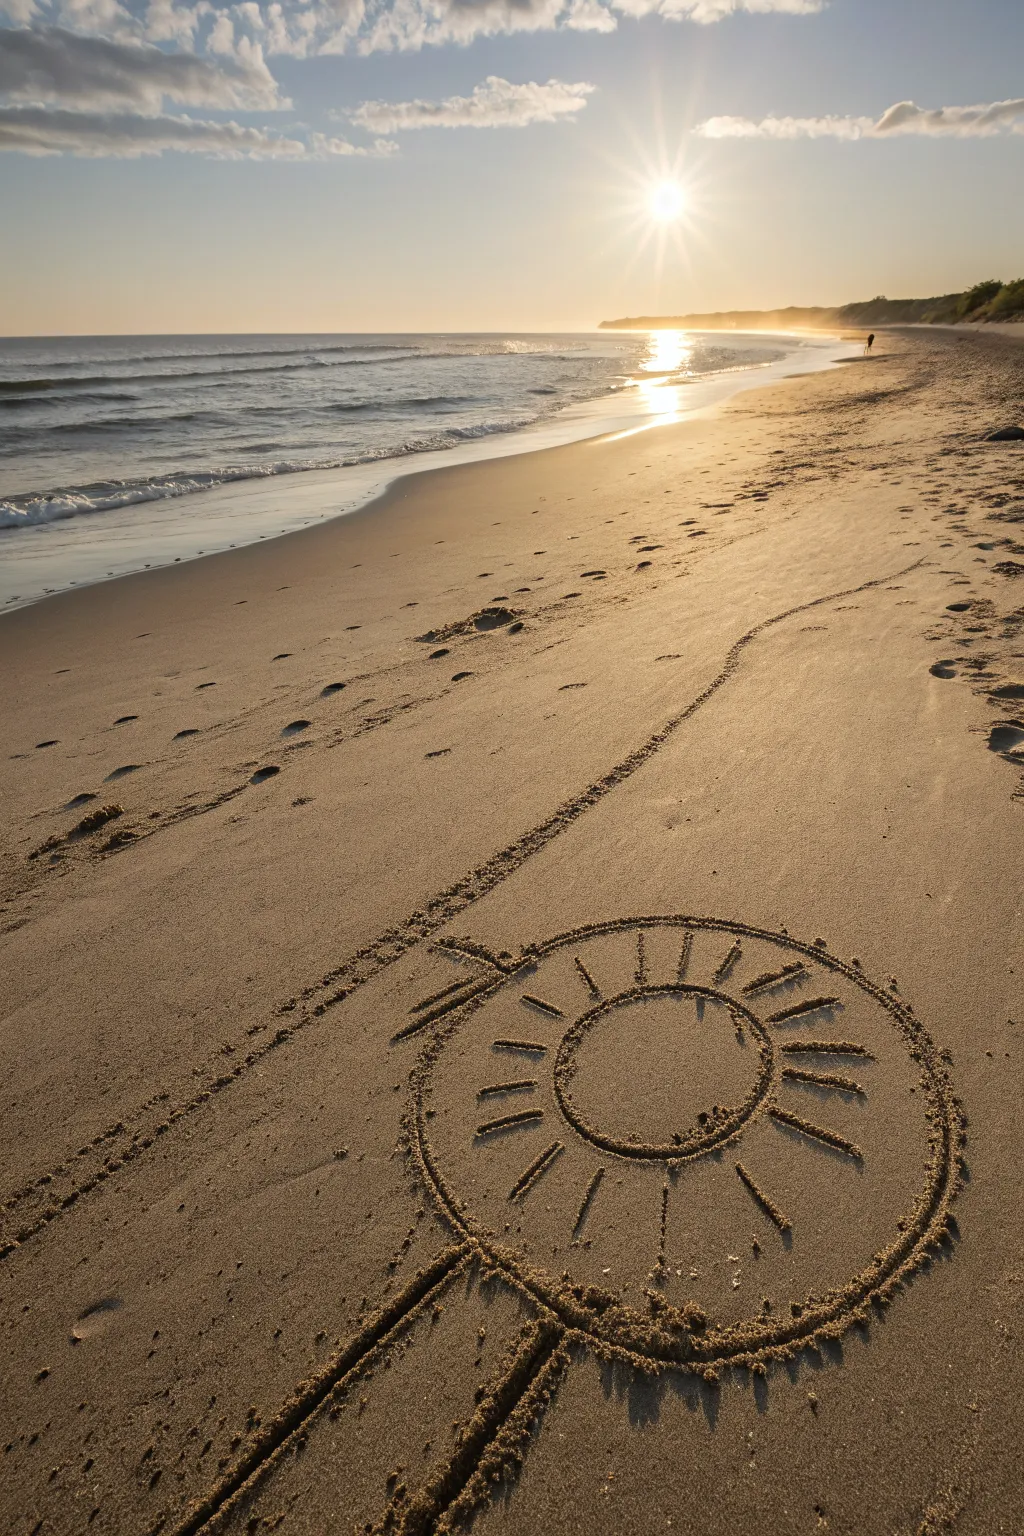
Capture the golden hour’s glow right in the sand with this radiant, sun-inspired circular drawing. Drawing inspiration from the actual sunset on the horizon, this design uses simple geometry and radiating lines to mirror the sun’s brilliance.
Detailed Instructions
Materials
- Damp, packed sand (near the shoreline)
- A sturdy stick or driftwood piece
- A secondary, thinner stick for details (optional)
- Your fingers (for smoothing)
Step 1: Setting the Foundation
-
Find the perfect canvas:
Walk along the shoreline until you find a patch of sand that is damp and dark but not currently being washed over by waves. The sand needs to be firm enough to hold a crisp line. -
Mark the center point:
Stand facing the horizon and place a small dot or indentation in the sand to mark the absolute center of your artwork. -
Draw the inner circle:
Using your stick like a compass, anchor one end (or your foot) near the center dot and pivot your arm to scribe a perfect circle about 12-16 inches in diameter. -
Deepen the groove:
Go over this initial circle a second time, pressing firmer with the stick to create a deep, shadowy trench that will stand out in photos. -
Create the outer boundary:
Draw a second, larger circle concentric to the first one. Leave a generous gap—about 6 to 8 inches—between the inner and outer rings to create a wide band.
Tide Timing
Start drawing about an hour before low tide. This gives you the maximum amount of smooth, firm sand and ensures the incoming waves won’t erase your work before you finish.
Step 2: Adding Radiant Details
-
Section the sun rays:
Inside the wide band between your two circles, begin drawing straight lines that radiate outward from the inner circle toward the outer one. -
Space them evenly:
Try to visualize a clock face first, marking the 12, 3, 6, and 9 positions, then fill in the gaps with two or three lines between each main marker for symmetry. -
Refine the ray lines:
Make sure each radiating line connects firmly to the inner circle but stops just short of touching the outer circle for a floating effect. -
Extend the stem lines:
At the bottom of the outer circle (the side closest to you), draw two long, parallel lines extending straight downward, creating a ‘stem’ or path leading into the design. -
Detail the perimeter:
I like to gently tap the stick along the very outer edge of the largest circle to create a textured, dotted border rather than a smooth line.
Creative Flair
Place seashells, sea glass, or smooth pebbles at the intersection of each sun ray to add dimension and catch the dying light of the sunset.
Step 3: Connecting to the Horizon
-
Draw the leading line:
From the top of your sun design, drag a single long, waving line that stretches far down the beach toward the water’s edge. -
Create the parallel track:
Add a second long line parallel to the first one to create a track that leads the eye from your drawing out to the real sunset. -
Add texture to the tracks:
Use the side of your stick or your fingers to rough up the sand between these long parallel lines, giving it a different texture than the smooth beach around it. -
Highlight with shadows:
If the sun is low, look at where the shadows fall in the grooves. Use your finger to deepen the side of the trench away from the sun to increase contrast. -
Cleanup the negative space:
Smooth out any footprints near the design using the back of your hand or a flat piece of driftwood so the drawing looks pristine.
Step back and align your camera so the drawn sun lines up perfectly with the real sunset on the horizon
BRUSH GUIDE
The Right Brush for Every Stroke
From clean lines to bold texture — master brush choice, stroke control, and essential techniques.
Explore the Full Guide
Starfish With Textured Arms
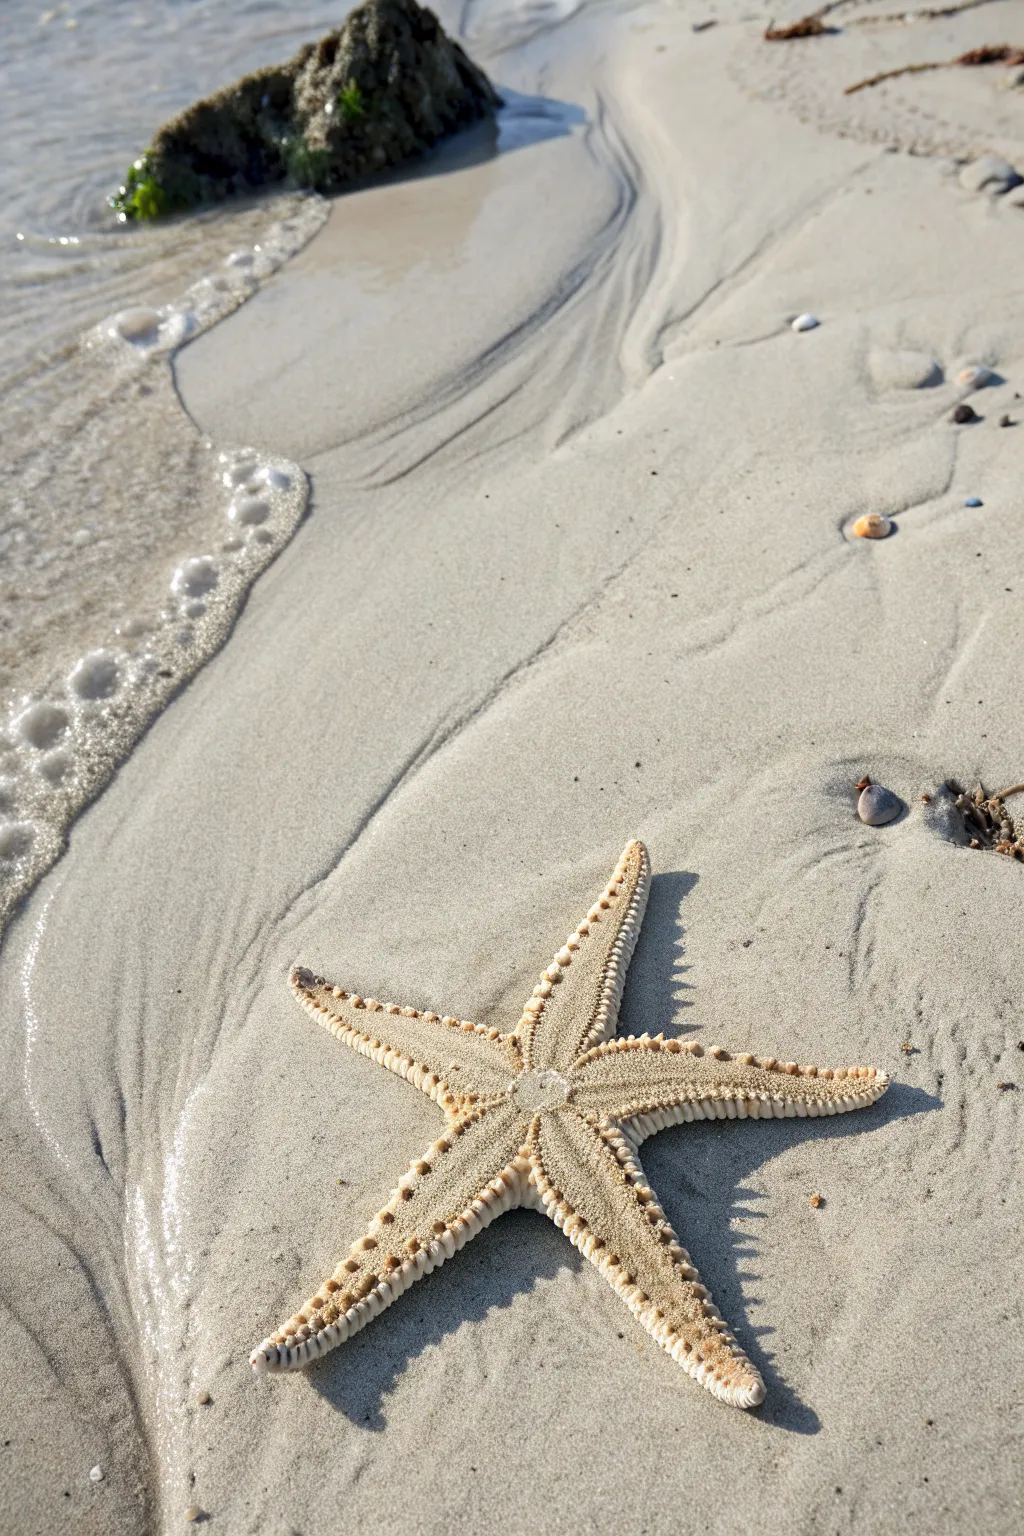
This project captures the serene beauty of a sandy beach, focusing on a highly realistic starfish resting near the tide line. Using colored pencils and textured paper creating the gritty feel of sand and the organic bumpiness of the sea star’s skin is surprisingly achievable.
Step-by-Step Tutorial
Materials
- Light tan or cream-colored textured drawing paper (approx. 9×12 inches)
- Graphite pencil (HB or H for sketching)
- Kneaded eraser
- Wax-based colored pencils (sand, beige, warm grey, dark grey, cream, orange-brown)
- White gel pen or gouache (for highlights)
- Blending stump or tortillon
- Fine-tipped embossing stylus (optional)
Step 1: Setting the Scene
-
Outline the Composition:
Begin by lightly sketching the main elements: a large five-pointed starfish in the lower right foreground, the curving shoreline running diagonally across the page, and the rough shape of a rock in the upper left corner. -
Refine the Starfish Shape:
Focus on the starfish’s anatomy. Draw the five arms radiating from a central disk, ensuring they taper naturally. Make the arms slightly uneven and curving to mimic a relaxed, living creature rather than a perfect geometric star. -
Sketch the Waterline:
Draw the foamy edge of the wave. Use wiggly, irregular lines to suggest the bubbles and the way the water laps against the sand. Don’t make this line straight; let it meander.
Grainy Texture Trick
Place your paper over a sheet of fine sandpaper while coloring the beach background. The pencil picks up the texture underneath instantly.
Step 2: Creating the Sand Base
-
Apply Base Color:
Using a sand or beige colored pencil, shade the entire sand area. Use the side of the pencil lead to cover ground quickly, keeping the pressure light to medium. -
Add Variation:
Layer in a warm grey color in areas where the sand is wet or shadowed, particularly near the shoreline and directly under the starfish. -
Texturize the Sand:
Stipple tiny dots using sharp dark grey and brown pencils scattered randomly across the sand to represent individual grains and tiny pebbles. Concentrate more dots in the shadow areas. -
Create Flow Lines:
Use a light grey pencil to draw subtle, sweeping curves in the sand leading away from the water. These suggest the patterns left by receding waves.
Make it 3D
Use a dab of clear dimensional glaze or glossy accents on the starfish’s central body to make it look permanently wet and glistening.
Step 3: Detailing the Starfish
-
Base Tone for the Starfish:
Color the starfish with a creamy beige pencil. Press firmly to create a solid, opaque base that stands out against the grainy sand background. -
Define the Central Spine:
Draw faint lines down the center of each arm. Use an orange-brown pencil to create small ridges and bumps along these lines, establishing the spiny texture. -
Add the Marginal Spines:
Along the edges of each arm, draw rows of small, bead-like shapes using a light brown pencil. These are the marginal plates that give the starfish its distinct border. -
Deepen the Texture:
Shade in between the central ridges and the edge beads with a darker brown. This negative space shading makes the raised textures pop out visually. -
Highlight the Bumps:
I like to use a very sharp cream or white pencil to burnish the tops of the ridges and beads. This highlights the texture and makes it look hard and calcified.
Step 4: Water and Finishing Touches
-
Shadowing the Subject:
Create a cast shadow using dark cool grey on the right side of the starfish arms. This anchors the creature to the sand so it doesn’t look like it’s floating. -
Rendering the Foam:
For the sea foam, use circular scrubbing motions with a white pencil on the wet sand area. Layer this over the grey background to make it look semi-transparent. -
Adding Bubble Highlights:
Use a white gel pen or tiny touches of gouache to add bright white dots within the foam area. This mimics the sparkle of sunlight on wet bubbles. -
Background Rock:
Fill in the rock shape with dark greys and varied browns. Texture it heavily with stippling to look mossy and wet, contrasting with the smooth water. -
Final Polish:
Review the entire drawing. Strengthen the darkest shadows under the starfish and add a few final stray pebbles on the sand for realism.
Step back and admire how you’ve brought a piece of the seaside onto your paper
Sand Dollar Mandala Center

Transform a blank stretch of shoreline into a stunning, impermanent masterpiece with this intricate sand dollar design. This large-scale drawing features a six-petaled floral center surrounded by concentric decorative rings, perfect for meditative creativity between the tides.
Step-by-Step
Materials
- Damp, packed sand (near the shoreline)
- A sturdy stick or driftwood (approx. 2-3 feet long)
- A makeshift compass (string tied to two sticks)
- Small seashell or pebble (for detail work)
- Optional: Rake or comb tool
Step 1: Setting the Foundation
-
Find your canvas:
Locate a smooth, flat area of wet sand where the tide is receding. The sand needs to be packed hard enough to hold crisp lines but soft enough to carve easily. -
Establish the center:
Mark a definitive center dot. This will be the anchor point for your entire mandala. -
Draw the outer boundary:
Using your string compass or by carefully walking a constant radius while dragging your stick, draw a large, perfect circle about 4-5 feet in diameter to define the outer edge. -
Create the inner ring:
Draw a second, slightly smaller concentric circle regarding 6-8 inches inside the main boundary line. This creates the border space for the final detailed edge. -
Mark the petal guide:
Sketch a third, much smaller circle in the center, roughly 6 inches in diameter. This will serve as the hub for your flower petals.
Uneven Circles?
If your freehand circles look wobbly, plant a stick firmly in the center, loop a string around it, and tie your drawing stick to the other end to create a perfect compass tool.
Step 2: Carving the Floral Center
-
Draft the petal shapes:
Starting from the center hub, lightly sketch six large, almond-shaped petals that extend outward. Aim for symmetry, ensuring the tips of the petals stop well before reaching the inner concentric ring. -
Deepen the outlines:
Retrace your petal lines with heavier pressure on the stick to create deep, shadowed grooves that stand out against the flat sand. -
Add petal veins:
Inside each petal, draw a central spine line from base to tip. Then, use a smaller stick or shell to scratch delicate, angled hatching lines on either side of the spine for texture. -
Create the inner outline:
Draw a secondary outline around the entire flower shape, maintaining a consistent gap of about an inch from the petals. This echoes the shape and adds depth. -
Connect the curves:
Where the secondary outlines meet between the petals, smooth them into soft points or curves so the pattern flows continuously.
Step 3: Adding Details and Borders
-
Fill the negative space:
In the triangular gaps between the petal tips and the surrounding circle rings, gently scrape away the top layer of sand to create a slightly recessed texture. -
Dotted inner accent:
Along the innermost circular line surrounding the flower, press your thumb or the round end of a stick into the sand to create a row of uniform divots or dots. -
Carve the keyholes:
Between each petal tip, midway to the outer border, press a deep, singular hole. These resemble the natural ‘keyholes’ found on real sand dollars. -
Sculpt the beaded edge:
Move to the outermost ring. Instead of a solid line, create the ‘beaded’ effect by scooping out small mounds of wet sand and placing them directly on the line, or by deeply carving repeating scoops. -
Refine the perimeter:
Go over the very outer edge one last time to sharpen the boundary. I usually brush away any loose footprints near the design to make it look pristine.
Level Up: 3D Texture
Instead of just drawing lines, gather small white shells or smooth pebbles and place them along the primary outlines of the petals to create a raised, mosaic-style mandala.
Step back and watch as the incoming tide eventually claims your beautiful, temporary design

PENCIL GUIDE
Understanding Pencil Grades from H to B
From first sketch to finished drawing — learn pencil grades, line control, and shading techniques.
Explore the Full Guide
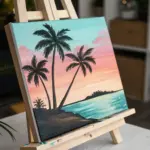
Palm Tree and Tiny Island Scene

Capture the essence of island life right at your feet with this detailed palm tree scene enclosed in a decorative oval frame. Using simple tools found near the shore, you’ll create textured trunks and sweeping fronds that mimic a vintage travel stamp.
Step-by-Step Guide
Materials
- Damp, compacted beach sand (the kind near the waterline)
- A sturdy stick or piece of driftwood (pencil-thickness)
- A wider, flatter stick or shell (for shading)
- A small twig (for fine details)
Step 1: Setting the Frame
-
Prepare the canvas:
Locate a smooth patch of wet sand just above the tide line where the surface is firm and flat. Smooth it out with your hand or foot if there are too many bumps. -
Draw the oval guide:
Using your main drawing stick, lightly sketch a large oval shape. It doesn’t have to be perfect on the first go; you can refine the curve in the next step. -
Deepen the border:
Go over your oval line again, pressing deeper into the sand to create a bold, dark outline. Make the line fairly thick to act as a strong frame for your scene. -
Add the decorative edge:
Along the outside edge of your oval, poke small holes or dashes at regular intervals to create a stitched or beaded border effect.
Sand Too Dry?
If the sand walls crumble as you draw, the sand is too dry. Move closer to the water or carefully mist the area with seawater using your hands to firm it up before redrawing.
Step 2: Sketching the Main Trunks
-
Position the first trunk:
Starting from the bottom center-right of the oval, draw a long, curved line reaching up toward the top right. This will be your tallest palm tree. -
Thicken the trunk:
Draw a second parallel line next to the first one, tapering slightly as you go up, to give the trunk width. -
Texture the bark:
Using a flat stick or shell, press small horizontal notches or ‘V’ shapes all the way up the trunk to mimic the rough texture of palm bark. -
Add the second tree:
Draw the second trunk starting from the same base point but curving it sharply to the left. This tree should be slightly shorter and lean across the scene. -
Add the third tree:
Sketch a smaller, shorter trunk branching off to the far left, creating a balanced trio of trees. -
Repeat the texturing:
Apply the same horizontal notch pattern to these two new trunks so they match the style of the first one.
Island Vibes
Add depth by placing real shells or small white stones along the oval border for a 3D mosaic effect, or place a real coconut near the base of the drawing.
Step 3: Detailing the Fronds
-
Draw the central spines:
At the top of the tallest tree, draw 5-6 curved lines radiating outward like a firework. These are the main spines of the palm fronds. -
Add the leaflets:
Along each spine, use your small twig to scratch quick, angled dashes on both sides. I find that flicking the stick outward creates a nice feathery look. -
Create the second canopy:
Move to the leaning tree on the left. Draw its radiating spines, making sure some overlap or go behind the first tree’s trunk for depth. -
Texture the second canopy:
Fill in the leaflets on the second tree, keeping your strokes tight and dense. -
Finish the third canopy:
Add the fronds to the smallest tree on the far left. Since this one is lower, you can angle the leaves slightly downward as if they are heavy. -
Add base details:
At the very bottom where the trunks meet, draw a few small tufts of grass or a couple of simple leaf shapes to ground the trees. -
Clean up:
Use your finger to smooth out any sand crumbs that fell inside the negative space of the oval, making the image pop.
Step back and snap a photo of your sandy masterpiece before the tide comes in to reclaim the canvas
Whale Tail Splash Shape
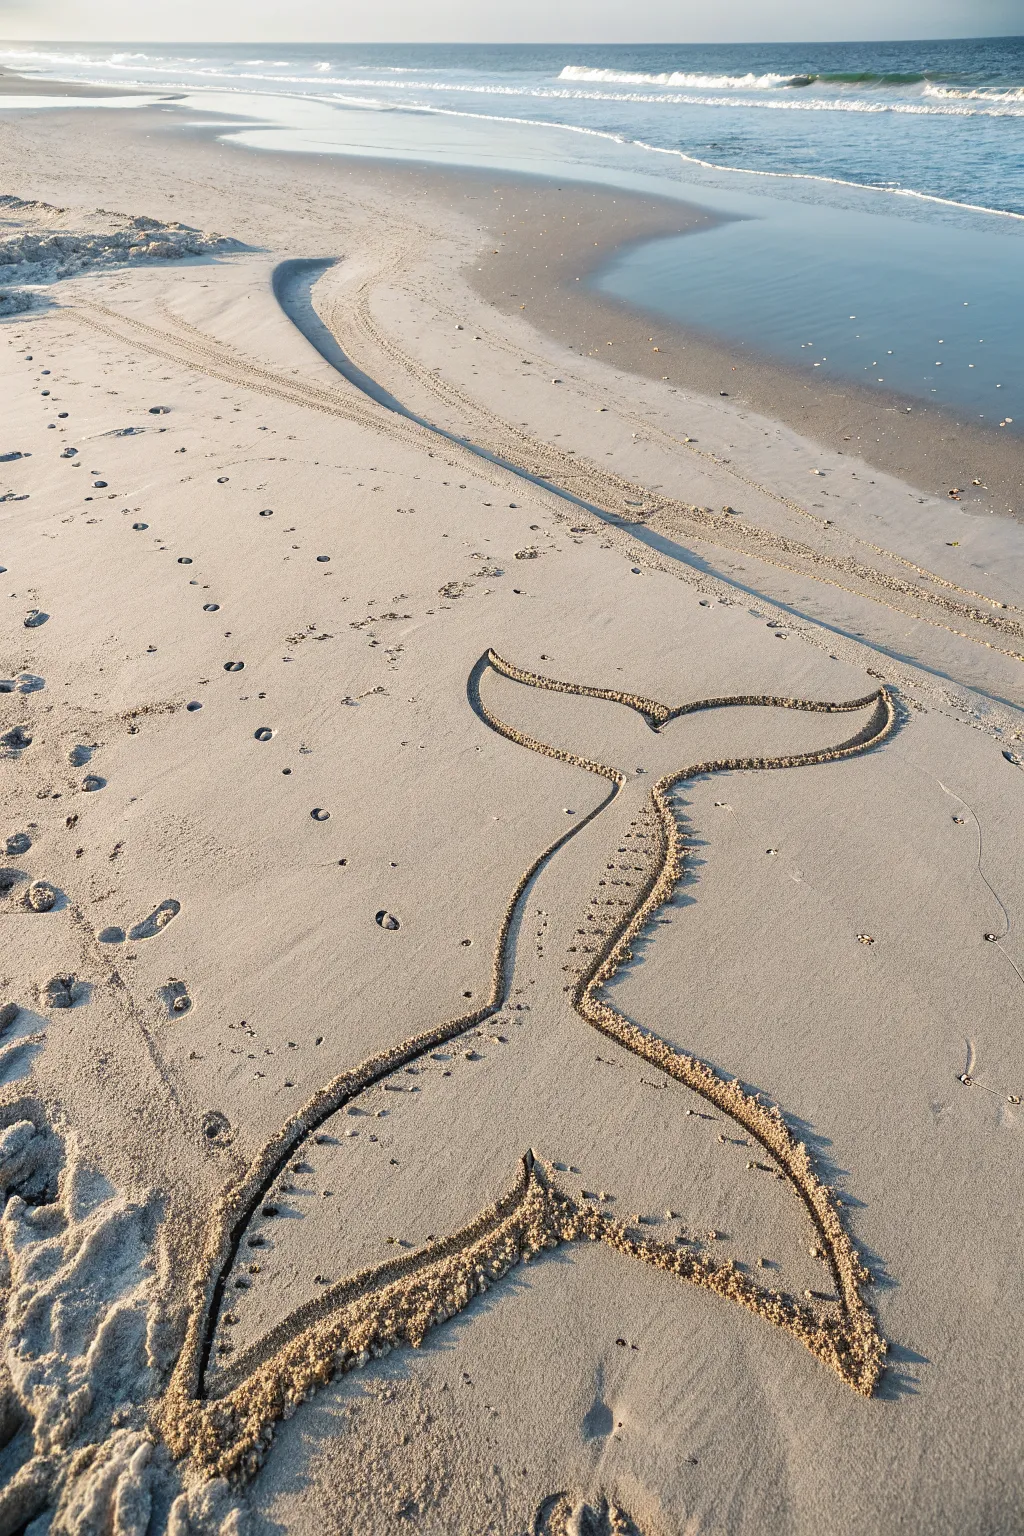
Capture the graceful silhouette of a diving whale with this simple yet striking sand drawing. By dragging your fingers deeply into the wet sand, you create high-contrast lines that stand out beautifully against the beach backdrop.
How-To Guide
Materials
- A smooth patch of damp sand
- A sturdy stick or driftwood (optional)
- Your hands (specifically fingers)
Step 1: Planning the Space
-
Scout the Location:
Find a large, flat area of wet sand where the tide has recently receded. The sand needs to be firm and packed, not loose or dry, to hold sharp edges. -
Clear Debris:
Before you begin, brush away any shells, seaweed, or large rocks from your chosen canvas to ensure your lines won’t be interrupted. -
Visualize the Center Line:
Imagine a vertical line running through your sand canvas. This will help you keep the tail symmetrical as you draw.
Step 2: Drawing the Flukes
-
Start at the Top Center:
Begin at the ‘notch’ of the tail (the V-shape at the top center). Position yourself so you can draw outwards. -
Draw the Top Curves:
Using two fingers or a thick stick, drag a line outwards and slightly upwards to the left to form the top edge of the left fluke. Repeat this on the right side, aiming for symmetry. -
Create the Tips:
At the end of your top curve, make a fairly sharp turn downwards to create the pointed tip of the fluke. -
Form the Bottom Curves:
Continue drawing from the tip, swooping back inwards towards the center line. These lines should curve gently, narrowing as they approach the peduncle (the tail stock). -
Deepen the Groove:
Go over these top fluke lines a second time. Press deeper to pile up the displaced sand on the edges; this creates a darker shadow and makes the drawing pop.
Collapsing Walls?
If the trench walls crumble immediately, the sand is too dry. Move closer to the water line where the sand is more saturated and cohesive.
Step 3: Creating the Tail Stock
-
Narrow the Body:
Where the two bottom curves of the flukes meet, extend the lines straight down, bringing them closer together to form the narrowest part of the tail. -
Widen for the Splash:
As you move further down the tail stock, begin to flare the lines outward again on both sides. This mimics the shape where the water is splashing up. -
Draw the Splash Base:
At the bottom of your drawing, connect the two flared lines with a jagged, irregular line. Use short, quick strokes to simulate the chaotic splash of water entry. -
Add Texture Inside:
Inside the splash area, use your fingertips to poke holes or make small divots in the sand to represent bubbles and foam.
Pro Perspective
Make the top flukes slightly larger than you think they need to be. When photographed from a standing height, this compensates for foreshortening.
Step 4: Adding Details
-
Spine Detail:
Starting from the center of the tail notch, draw a dashed line or a series of small dots running down the middle of the tail stock. This adds structure and visual interest. -
Enhance Contrast:
Look at your drawing from a standing position. Identify any lines that look faint and re-trace them, digging slightly deeper so the shadows are consistent. -
Clean Up Edges:
If you stepped inside your drawing or disturbed the surrounding sand, smooth those footprints away gently with your hand or foot. -
Final Step Back:
Take a few steps back to admire the perspective. The drawing often looks best when viewed from the bottom looking up toward the water.
Now you have a dynamic piece of ephemeral art ready to be washed away by the next high tide


Message in a Bottle Outline
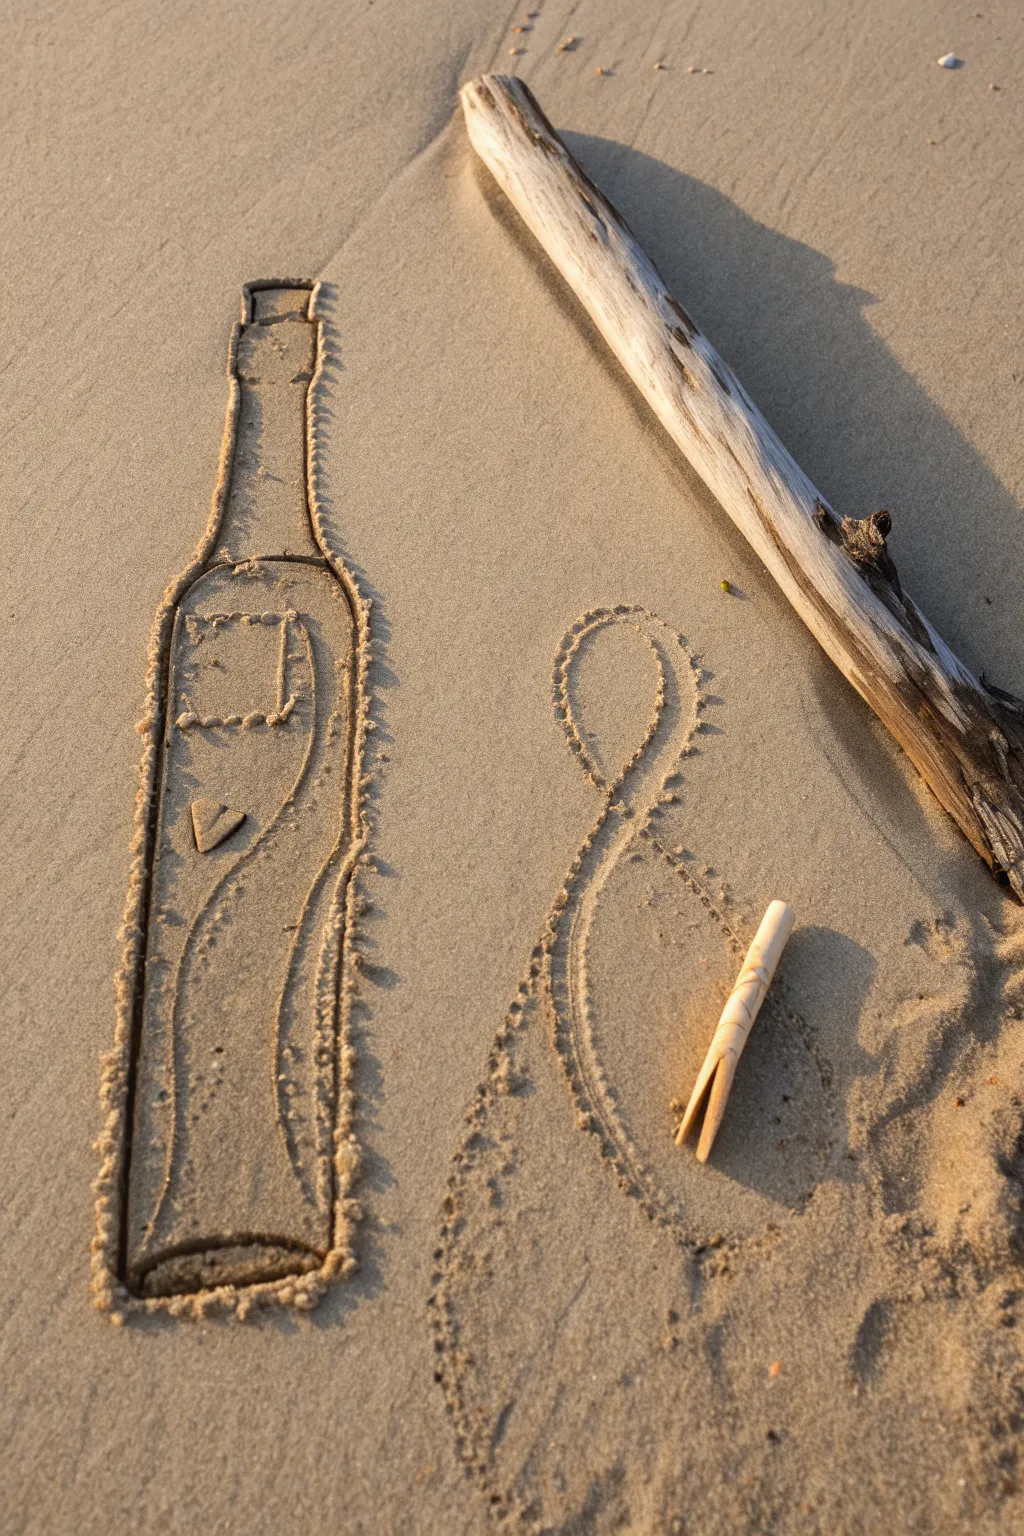
Capture the romance of a castaway’s message without getting your feet wet with this charming sand line art. Using nature’s own canvas, this simple yet evocative outline creates a whimsical beach scene perfect for a temporary shoreline masterpiece.
Step-by-Step Tutorial
Materials
- Smooth, wet beach sand (low tide is best)
- A long, smooth piece of driftwood (for outlining)
- A small twig or bamboo skewer (for details)
- Optional: Sea glass or shells for embellishment
Step 1: Preparing the Canvas
-
Find the perfect spot:
Walk along the shore until you find a patch of smooth, undisturbed sand. The sand needs to be damp enough to hold a crisp line but not so wet that water fills your grooves immediately. -
Smooth the surface:
If there are footprints or holes, use your hand or the side of your driftwood to gently smooth out a flat rectangular area for your drawing.
Crumbling Lines?
If the sand walls collapse as you draw, the sand is too dry. Move closer to the water’s edge where the sand is darker and firmer.
Step 2: Drawing the Bottle Silhouette
-
Start the base:
Using the pointed end of your large driftwood stick, draw a straight horizontal line for the bottom of the bottle. Press deep enough to create a shadowed edge. -
Draw the sides:
Extend two long vertical lines upwards from the ends of your base. Keep them parallel and straight, stopping where you want the bottle’s neck to begin tapering. -
Create the shoulder:
Curve both lines inward gently to form the sloped shoulders of the bottle. Try to keep these symmetrical for a realistic look. -
Form the neck:
Continue drawing upward with parallel lines, but much closer together now, to create the narrow neck of the bottle. -
Add the rim:
At the very top, draw a small, flattened oval or rectangle to represent the glass lip of the bottle. -
Draw the cork:
Just above the rim, sketch a small trapezoid shape sitting half-in and half-out of the neck to look like a stopper.
Level Up
Place real tiny seashells inside the outline of the bottle to act as the ‘sand’ inside the drawing for a mixed-media 3D effect.
Step 3: Adding Interior Details
-
Define the liquid line:
Switch to your smaller twig for finer control. Inside the bottle shape, draw a wavy line running diagonally or horizontally to suggest liquid moving inside. -
Outline the label:
In the upper center of the bottle’s body, use the small twig to etch a square or rectangular shape for the paper label. -
Detail the label:
Add a tiny jagged line on one corner of the label to make it look worn or torn, giving it that vintage castaway vibe. -
Draw the scroll:
Near the bottom or floating in the ‘liquid,’ draw a small triangle or rolled shape to represent the message scroll itself. -
Add glass reflections:
Draw a long, curved line following the inner contour of the bottle on one side. This negative space trick suggests the thickness and shine of the glass.
Step 4: Decorative Flourishes
-
Create the rope loop:
To the right of the bottle, use your large driftwood again to draw a large, looping figure-eight shape. -
Texture the rope:
Go back over the figure-eight line with short, repetitive poking motions. This stippling effect mimics the texture of braided rope or a chain. -
Clean the edges:
Use your fingers to brush away any kicked-up sand piles that blur your main outlines, ensuring the drawing reads clearly from a standing height. -
Final touches:
Place your drawing implement—the driftwood or small stick—artfully next to the sketch for a ‘work in progress’ photo aesthetic.
Now step back and watch the tide slowly claim your message.
Zen Rake Stripes With Curves
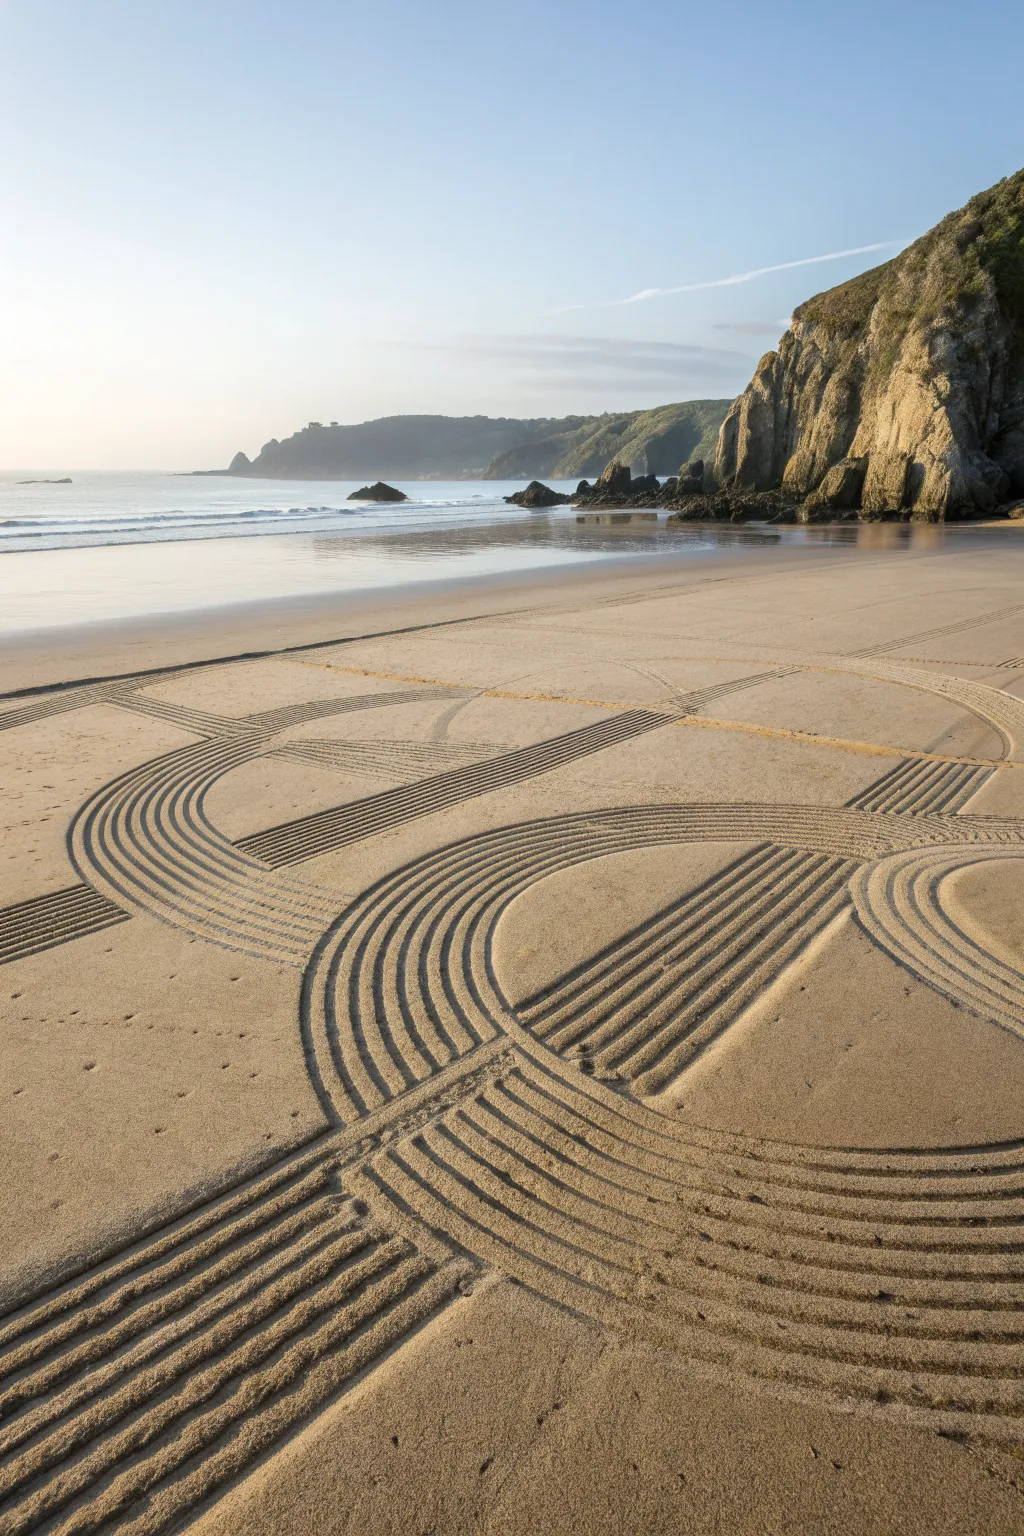
Transform a blank stretch of shoreline into a mesmerizing, large-scale geometric pattern that mimics the soothing flow of a Zen garden. This impermanent art form relies on precise raking techniques to create contrasting textures of smooth sand and deep, parallel grooves.
How-To Guide
Materials
- Wide garden rake (metal or sturdy plastic tines)
- String line or long rope (approx. 20-30 feet)
- Two stakes or heavy rocks (to anchor string)
- Stick or dowel (for sketching)
- Measuring tape (optional)
- Tidal chart (essential for planning)
Step 1: Preparation & Layout
-
Check the Tides:
Before heading out, consult a local tide chart. You need a large area of wet, compacted sand, so plan your arrival for low tide to maximize your workspace and drawing time. -
Select Your Canvas:
Walk the beach to find a flat section of sand that is free from footprints, seaweed, or rocks. The firmer the sand, the cleaner your lines will be. -
Establish the Center:
Mark a center point for your design using a small pile of sand or a rock. This will serve as the anchor for your primary circular elements. -
Sketch the Grid:
Using a long stick or the handle of your rake, lightly sketch the large boundary circles and straight pathways. I like to keep these initial lines very faint so they disappear once I start raking over them. -
Create a Compass:
If you struggle with freehand circles, plant a stake at your center point, tie a rope to it, and use the taut rope to guide your stick in a perfect arc.
Step 2: The Raking Technique
-
Assume the Position:
Stand with your feet shoulder-width apart. Hold the rake handle firmly but comfortably, ensuring the tines are parallel to the ground before you make contact. -
Start the Inner Circle:
Begin at the innermost section of your design. Drag the rake steadily through the sand, applying consistent downward pressure to create deep, visible grooves. -
Maintain Parallel Lines:
For the curved sections, walk slowly along your sketched guide. Keep your body turned slightly inward towards the curve’s center to help the rake follow a smooth arc. -
Connect the Path:
When transitioning from a curve to a straight section, try to keep your momentum fluid. Pause only slightly to realign your body, then pull the rake in a straight line extending outward. -
Clean the Tines:
Wet sand is sticky. Every few meters, lift your rake and tap it against the ground or pick out clumps of sand to ensure your stripes stay sharp and distinct.
Tide Timing Tip
Start your drawing just as the tide turns to go out. Following the receding water gives you the longest possible time with firm, wet sand before the surface dries out.
Step 3: Refining the Pattern
-
Define the Negative Space:
Identify the areas between your raked sections. Use the back of the rake (the flat side) to smooth these areas down, erasing any footprints or accidental marks. -
Intersecting Lines:
Where two raked paths meet or cross, decide which path is ‘on top.’ Stop raking the lower path just before the intersection, and rake the upper path cleanly across it. -
Sharpen the Edges:
Go back to the start and end points of your raked strokes. Use a small stick or your finger to clean up any messy piles of displaced sand, creating a crisp termination point. -
Survey and Correct:
Step back to a higher vantage point, like a dune or boardwalk, to view the geometry. If a curve looks wobbly, carefully re-rake that specific section to smooth it out. -
Final Smoothing:
Do a final walk-around the perimeter. Smooth out your own exit footprints so the artwork appears to float undisturbed on the beach surface.
Add Natural Accents
Place smooth, dark stones or pieces of driftwood in the flat ‘negative space’ areas of your design to mimic the rock formations found in traditional Japanese Zen gardens.
Now step back and enjoy the meditative view of your creation before the tide returns to wash it away
Giant Mandala at Low Tide
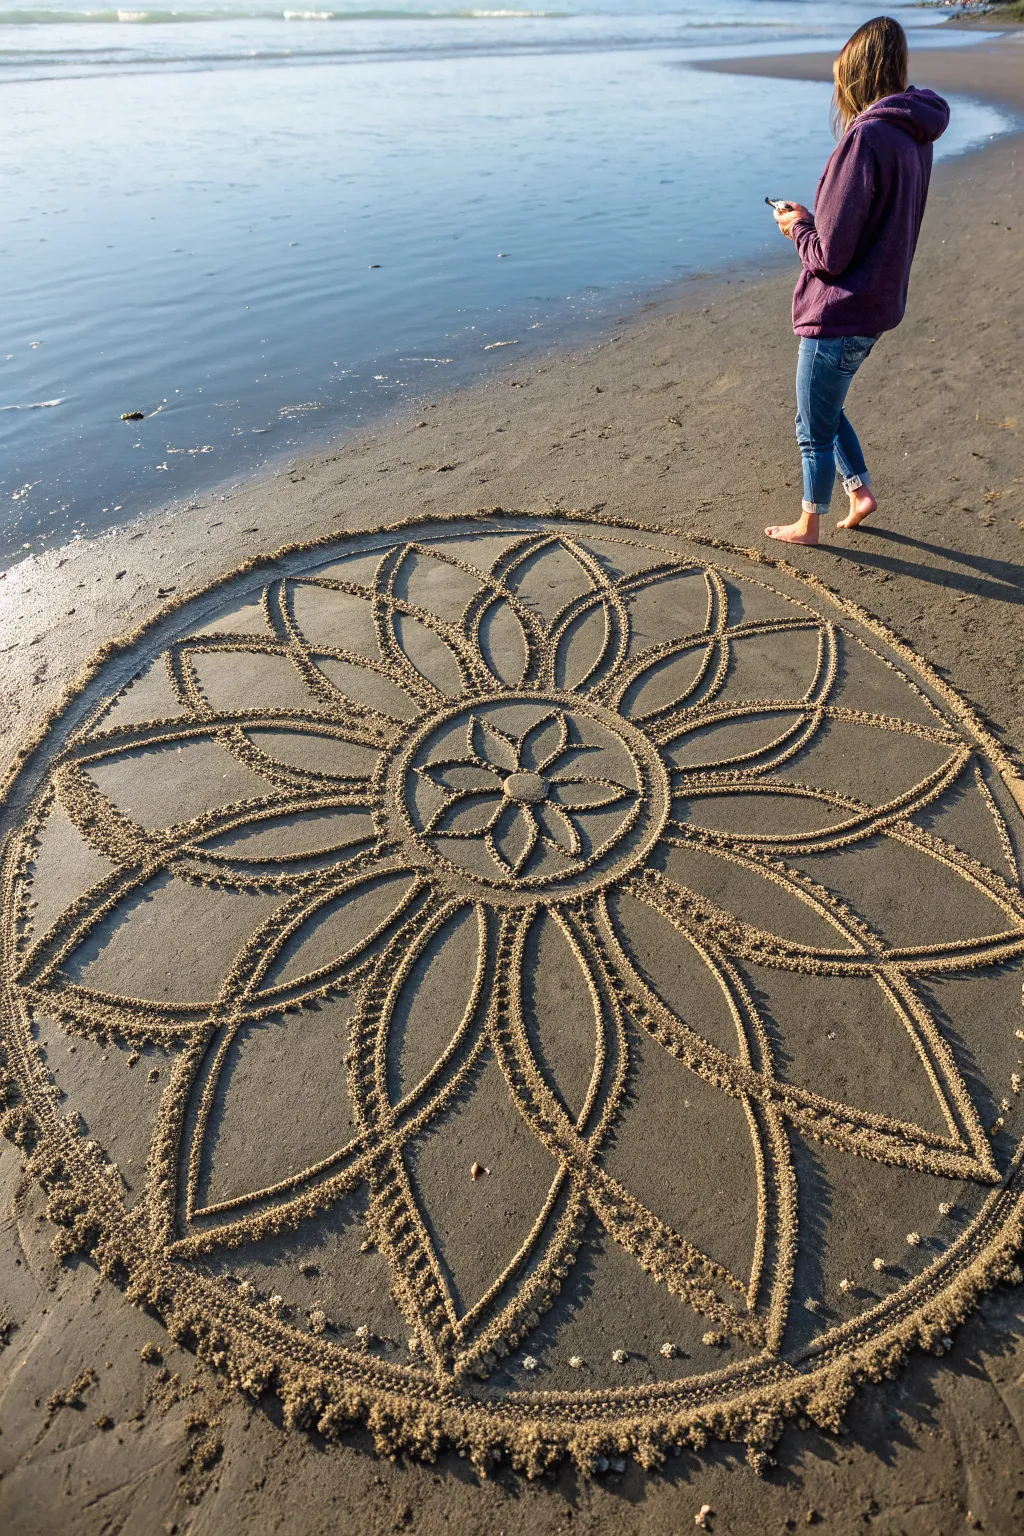
Transform a blank stretch of wet sand into a mesmerizing geometric masterpiece with this giant mandala tutorial. This intricate design relies on symmetry and repeating petal shapes to create a soothing, balanced focal point on the beach.
Step-by-Step Guide
Materials
- Large stick or driftwood (for drawing)
- String or rope (approx. 4-6 feet)
- Small stake or heavy stone (center anchor)
- Small seashells or pebbles (optional details)
- Bare feet (best for navigating the art without damage)
Step 1: Setting the Foundations
-
Find the perfect canvas:
Scout for a wide area of wet, packed sand near the low-tide line. The sand should be firm enough to hold crisp lines but soft enough to carve easily. Avoid areas where waves are still encroaching. -
Establish the center:
Mark your absolute center point by plunging a stick or placing a small stone. This will be the anchor for all your radial symmetry. -
Construct a sand compass:
Tie one end of your string to the center anchor and the other end to your drawing stick. This simple tool ensures your circles are perfectly round. -
Draw the outer boundary:
Walk the full length of the string, dragging the stick through the sand to create the large outer circle that defines the mandala’s size. -
Create inner guide circles:
Shorten the string by roughly a third and draw a secondary circle inside the first. Shorten it again significantly to draw a small third circle near the center for the flower motif.
Low Tide Timing
Start your drawing about an hour before low tide happens. This gives you the maximum amount of firm, damp sand to work with and ensures the incoming tide won’t erase your work before you finish.
Step 2: Drawing the Core
-
Sketch the central flower:
Inside the smallest center circle, freehand a six-petaled flower. Aim for teardrop shapes that touch at the center point and extend to the edge of that small circle. -
Add the first petal layer:
Working outward from the central flower, draw a larger ring of petals. The base of each new petal should start between the tips of the inner flower petals. -
Define the middle tier:
Move to the space between the middle guide circle and the outer boundary. Draw large, elongated arches that connect, forming the primary ‘star’ shape of the mandala. -
Double the lines:
Go back over your large arches and draw a second parallel line just inside the first. This creates a double-stroke effect that adds visual weight to the design.
Natural Ombré Effect
Use dry, lighter-colored sand from higher up the beach to fill in specific petals. This creates a striking color contrast against the dark, wet sand base.
Step 3: Detailing and Texture
-
Connect the layers:
Draw connecting lines or smaller petals bridging the gap between the central flower section and the large outer arches. Keep the symmetry consistent as you rotate around. -
The dotting technique:
This is the signature texture seen in the photo. Take a handful of wet sand and let it drip through your fingers, or use your stick to punch rhythmic divots. -
Outline the central petals:
Apply these sand-drip dots along the outlines of the innermost flower petals. The raised texture contrasts beautifully with the smooth negative space. -
Texture the large arches:
Move to the large outer petals. Apply a thick line of dripped sand or dug-out dots along the inner edge of those double lines you drew earlier. -
Embellish the perimeter:
Go to the very outer circle boundary. Add a continuous border of sand drips or small pebbles all the way around the circumference to frame the piece. -
Fill the gaps:
Look for large empty spaces within the petals. Draw simple vertical lines or smaller teardrops inside them to break up the smoothness.
Step 4: Final Touches
-
Clean up the edges:
Walk carefully around the outside, smoothing over any footprints that are too close to the design. -
Deepen the contrast:
I usually re-trace the deepest grooves one last time with the stick to ensure the shadows will pop in the sunlight. -
Center accent:
Place a special shell, white stone, or a mounded pile of sand in the very center as the finishing focal point. -
Step back and view:
Climb a dune or higher ground if possible to see the geometry align perfectly from a distance.
Enjoy the peaceful impermanence as the tide eventually returns to claim your artwork
Octopus With Curling Arms
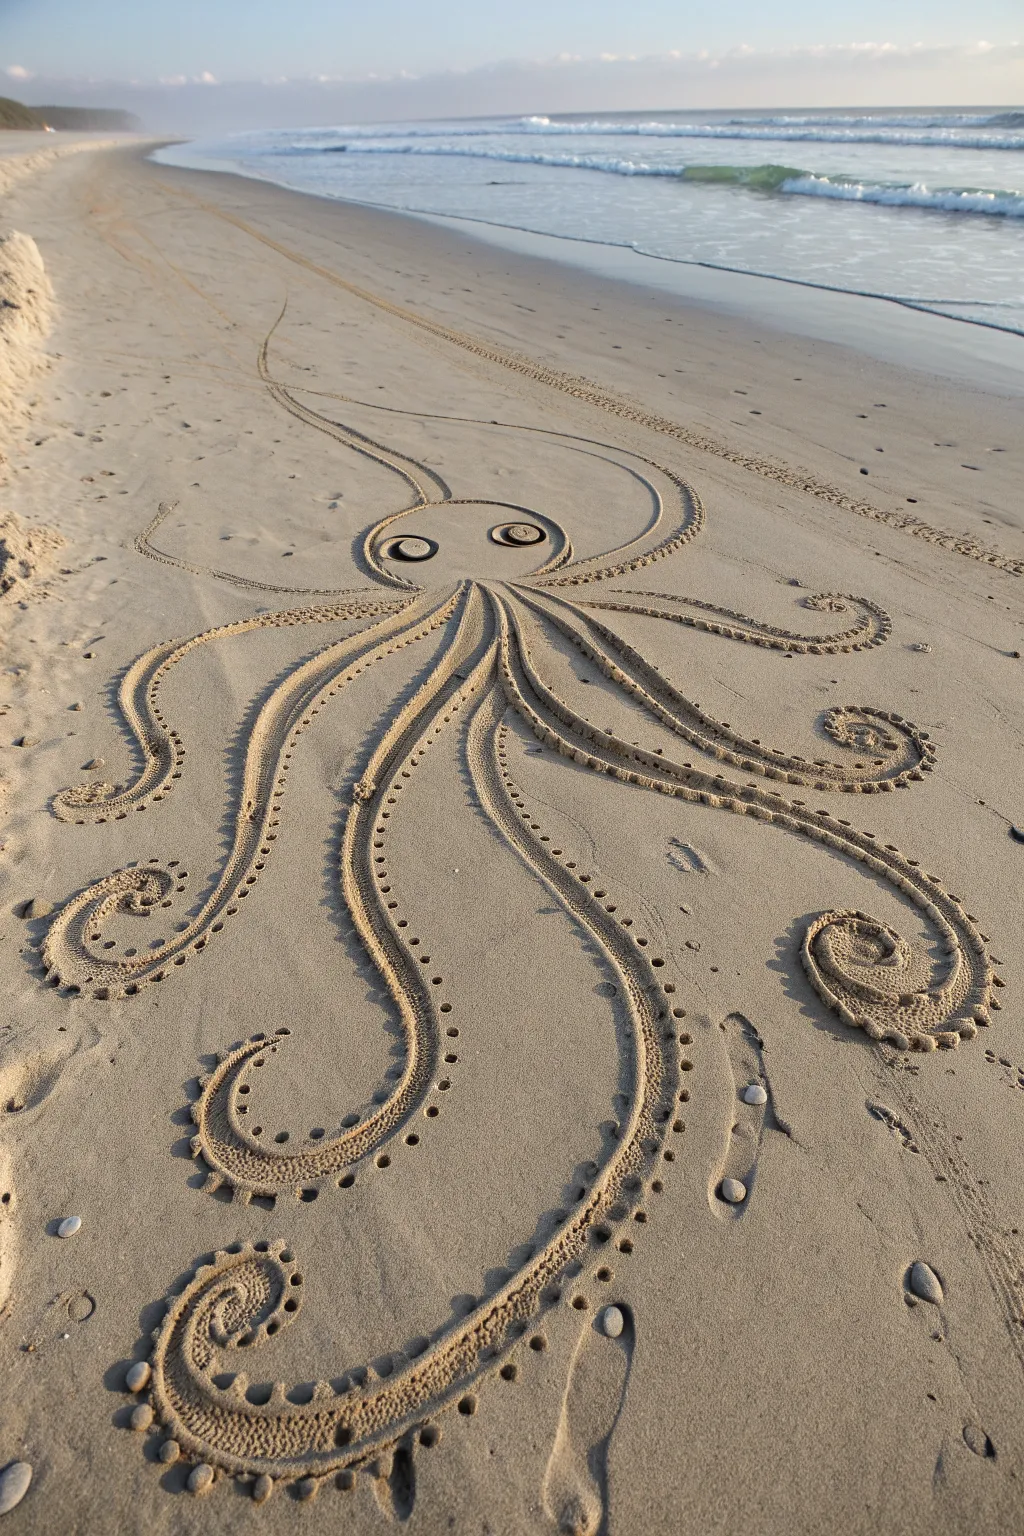
Transform a blank stretch of beach into a whimsical cephalopod with sweeping, elegant tentacles. This large-scale sand doodle uses the contrast between smooth and raked sand to create suction cup details and fluid motion.
Step-by-Step Tutorial
Materials
- A wide stretch of wet, packed sand (low tide is best)
- A garden rake or a stick with a distinct point
- A small hand rake or a wide-toothed comb (optional but helpful)
- Two large, dark stones or shells (for pupils)
- Two long pieces of driftwood or string (for layout, optional)
Step 1: Setting the Head
-
Choose your canvas:
Walk out to the wet sand area where the tide has receded. You need a large, smooth area that won’t be washed away immediately. -
Outline the head shape:
Using a stick or the handle of your rake, draw a large, slightly flattened oval shape for the octopus’s head. Make it big—at least three to four feet wide. -
Create the eyes:
Inside the head oval, draw two large circles for the eyes. Ideally, place them slightly lower than the center line. -
Add the pupils:
Find your two dark stones or shells and place them in the center of the eye circles to bring the creature to life instantly. -
Deepen the outlines:
Retrace the head and eye outlines with your finger or a thicker stick to create a deeper groove, increasing the contrast.
Wet Sand Woes
If the sand is too dry and crumbling into your lines, use a spray bottle of seawater to mist the area, or dig slightly deeper to reach the damp layer underneath.
Step 2: Drafting the Tentacles
-
Mark the starting points:
At the bottom center of the head, make eight small marks or indentations where the arms will originate. Keep them clustered close together. -
Draw the first sweeping arm:
Starting from one of the outer marks, drag your stick in a long, wide curve extending outward. Let the line hook at the end like a fern frond. -
Establish the arm width:
Draw a parallel line next to your first curve, tapering it so the tentacle is thick near the head and pointy at the tip. -
Fill the space:
Continue drawing the remaining seven arms. Vary their lengths and directions—some should curl tightly, others should stretch far out across the beach. -
Create overlaps:
If lines cross, decide which arm is ‘on top’ and stop the line of the underlying arm to create a sense of depth. -
Add motion lines:
Above the head, draw two long, wavy ‘feelers’ or motion lines trailing backward to suggest the octopus is swimming forward.
Pro Tip: Lighting
Start your drawing when the sun is lower in the sky (early morning or late afternoon). The long shadows will make your etched lines look much deeper and more dramatic.
Step 3: Detailing with Texture
-
Prepare the suckers:
Along the bottom edge of each tentacle outline, punch a series of shallow holes into the sand using your thumb or the blunt end of a stick. -
Graduate the size:
Make the sucker holes larger near the head and gradually smaller as you work your way toward the curling tips of the arms. -
Texture the arm interior:
I find dragging your fingers lightly inside the arm outlines creates a nice ‘skin’ texture. Alternatively, use a small hand rake to create parallel lines running down the length of the tentacles. -
Define the sucker rims:
Use your pinky finger to trace a tiny semi-circle around the top of each sucker hole, giving them a raised rim appearance. -
Clean up the edges:
Walk along the outside of your drawing and smooth out any footprints using the back of your rake or your foot, leaving only the pristine sand art. -
Final groove check:
One last time, dig the main outlines of the arms a little deeper. The shadows cast by these deep grooves are what make the drawing pop in photos.
Step back to the dunes or a higher vantage point to see your massive sea creature swimming across the sand
Negative Space Fish School
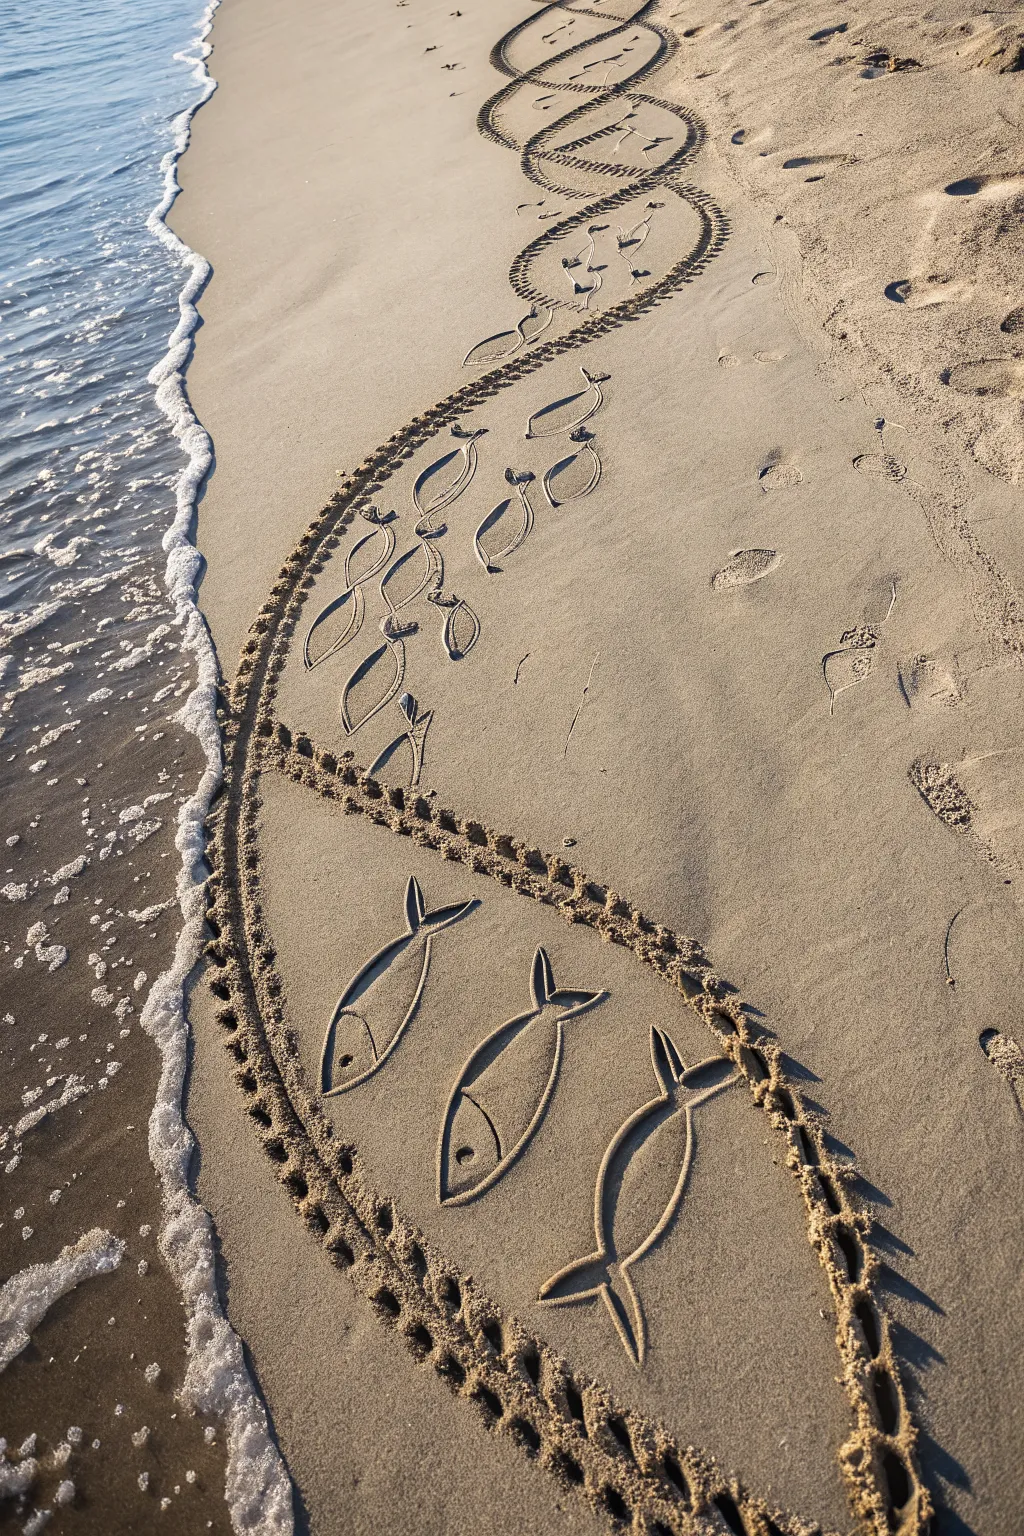
Transform a stretch of shoreline into a mesmerizing stream of negative-space fish swimming against the tide. This large-scale sand drawing uses textured borders and clever relief techniques to create depth and movement right at the water’s edge.
Step-by-Step
Materials
- A clear stretch of wet, packed sand
- A sturdy stick, driftwood, or rake handle
- A small shovel or trowel (optional)
- Bare feet (optional but recommended)
Step 1: Drafting the Current
-
Scout the location:
Find a large area of wet sand that the tide has recently left. You want sand that is firm enough to hold a crisp edge but soft enough to manipulate easily. Ideally, work parallel to the water line. -
Outline the main curves:
Using your stick, drag a long, smooth, S-shaped curve into the sand to define the left boundary of your fish stream. This line should mimic the natural motion of water. -
Close the shape:
Draw a second, mirroring curve to the right of the first one, widening and narrowing the gap between them to create ‘pools’ where the fish will swim. Join the ends to form enclosed, elongated pod shapes. -
Create the textured border:
To make the distinctive dotted border seen in the image, press the end of your stick deeply into the sand along your outline. -
Refine the border pattern:
Continue punching these holes closely together, creating a ‘perforated’ look. For a thicker border, I sometimes add a second row of dots slightly offset from the first to enhance the contrast.
Crumbling Edges?
If the sand walls of your fish trenches act dry or crumble, the sand isn’t wet enough. Dribble a little seawater over the area or dig slightly deeper to reach moister, firmer sand.
Step 2: Sculpting the Fish
-
Draw the first fish body:
Inside the widest part of your outlined shape, use a smaller stick or your finger to draw a simple almond or teardrop shape. This will be the body of your largest fish. -
Add the tail fin:
At the tapered end of the body, draw a ‘V’ shape pointing outwards, connecting the tips back to the body to form a classic fishtail silhouette. -
Carve the negative space:
This is the crucial step for the 3D effect: Use your fingers or a small trowel to deepen the outline of the fish. Instead of just drawing a line, dig a narrow trench around the fish shape. -
Bevel the edges:
Smooth the sand inside the fish shape so it sits slightly higher or flatter than the trench you just dug. This relief technique makes the fish pop. -
Add the eye:
Poke a deep, distinct hole near the front of the fish shape to create an eye. This simple detail instantly gives the shape character. -
Repeat for the school:
Continue drawing more fish of similar size in the main section. Orient them all in the same direction, as if they are swimming together upstream.
Add Shark Drama
Make the scene tell a story by drawing a large, ominous shadow or a shark fin shape swimming in the opposite direction of the main school.
Step 3: Adding Depth and Detail
-
Trace the connecting lines:
Draw faint, sweeping lines that connect some of the fish tails to the fish behind them, or create flow lines between the fish. This simulates the movement of water currents. -
Create smaller fish schools:
In the narrower sections of your large curves (the ‘bottlenecks’), draw much smaller, simpler fish shapes. These can just be quick loops without the deep trenching. -
Layer the composition:
Cluster these smaller fish tightly together. Varying the size from the large detailed fish to these smaller sketches creates a sense of perspective and distance. -
Clean up the negative space:
Check the sand between your fish. If footprints or loose sand have fallen into your ‘clean’ areas, gently brush them away to keep the background smooth. -
Enhance the perimeter:
Go back over your main dotted border one last time. If the sand has settled, re-punch the holes to ensure they are deep and cast strong shadows. -
Final polish:
Step back and look for any breaks in the flow. Use your stick to extend a tail or sharpen a curve where needed to unite the whole composition.
Wait for the sun to drop slightly so the shadows deepen, making your sandy school swim vividly before the tide returns.
3D Relief Ridge-and-Trench Spiral
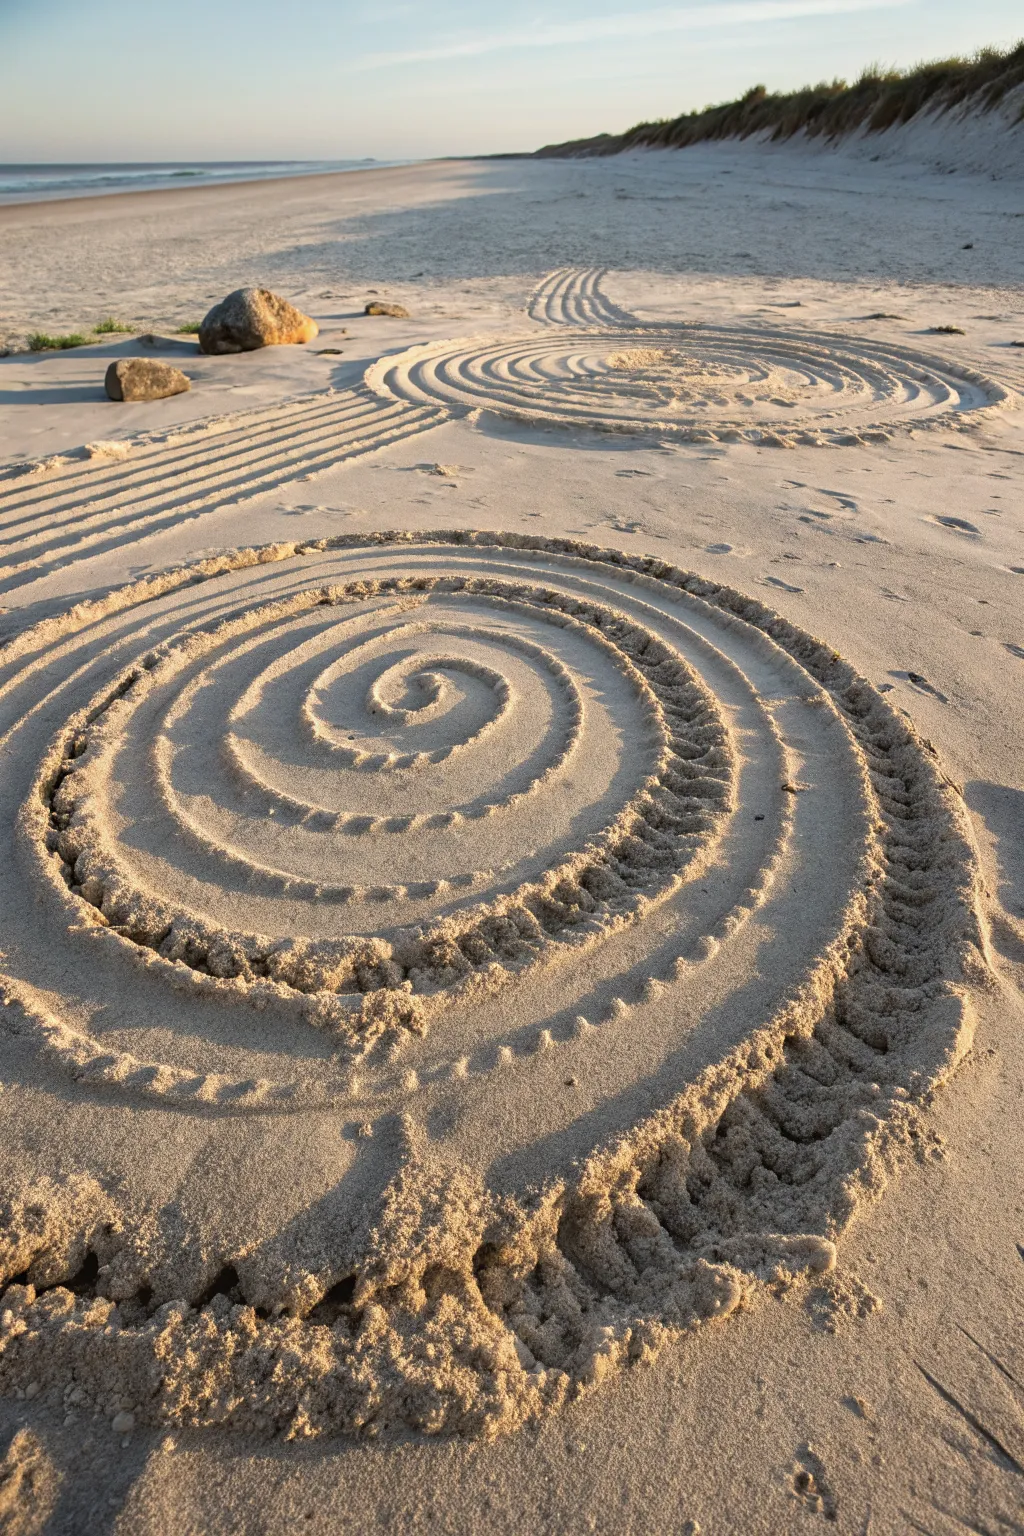
Transform a flat patch of beach into a mesmerizing optical illusion with this highly textured spiral design. By digging deep trenches and piling up high ridges, you create dramatic shadows that make the artwork pop right off the sand.
Step-by-Step
Materials
- Damp, compact beach sand (low tide is best)
- Garden hoe or flat-bladed shovel
- Hand rake or claw cultivator
- Stick or string for measuring (optional)
Step 1: Planning and Center Point
-
Find the perfect spot:
Locate a broad, flat area of the beach where the tide has recently receded. The sand needs to be damp enough to hold a shape but firm enough to walk on without sinking deeply. -
Establish the center:
Mark the center point of your first spiral with a small stone or by digging a small divot with your heel. This will be the anchor for your entire design. -
Sketch the guide path:
Using a stick or just your finger, lightly trace the initial spiral path starting from the center and winding outward. Don’t worry about depth yet; this is just to establish your spacing and flow.
Crumbling Walls?
If your ridges collapse, the sand is likely too dry. Move closer to the water line where the sand is darker and more saturated, or use a spray bottle to wet the ridge as you build.
Step 2: Digging the Trenches
-
Start the central trench:
Beginning at your center mark, use your hoe or shovel to dig a deep, narrow channel along your guide line. Aim for a depth of about 3-4 inches to create significant shadow. -
Expand outward:
Continue digging the trench as you spiral outward. As the circle gets larger, try to keep the width of the trench consistent. The removed sand should be tossed immediately to the ‘outside’ visual edge of the trench. -
Create the ridge:
As you dig, deliberately pile the excavated damp sand onto the space between your spiral lines. This creates a raised mound or ‘ridge’ next to every ‘trench,’ heightening the 3D effect. -
Keep the gap clean:
Ensure the bottom of your trench is relatively flat and clean of loose debris. A sharp contrast between the low trench and high ridge is what gives this drawing its dramatic look.
Add a Gradient
Make the center trenches shallow and get progressively deeper as you spiral outward. This subtle change adds a ‘vortex’ effect, making the hole look like it’s sinking.
Step 3: Texturing the Ridges
-
Form the crude mounds:
Go back over your raised ridges and pack the sand slightly with your hands or the back of the shovel. You want distinct, raised walls of sand separating the spiral channels. -
Introduce texture:
This is the signature step. Take a hand rake, cultivator, or even your spread fingers. Drag them firmly along the top and sides of the raised ridges. -
Create the ‘teeth’ marks:
If using a cultivator, press down periodically to create those deep, uniform indentations visible on the outer rings in the photo. This creates a ‘gear-tooth’ visual texture. -
Refine the inner spiral:
For the tight inner coils where a rake might be too big, use your thumbs to press divots into the ridge or sculpt the sand into a smooth, cresting wave shape.
Step 4: Connecting and Polishing
-
Start a second spiral:
Move several feet away and repeat the process to create a second, possibly smaller spiral. I often like to connect them with a winding path of parallel straight lines, as seen in the background. -
Dig the connector paths:
Drag your hoe in long, straight or slightly curved parallel lines to link the two main spiral elements. Keep the pressure even so the lines look uniform. -
Clean up stray sand:
Walk carefully around the perimeter and brush away foot traffic marks or loose sand clumps that distract from the main geometry. -
Deepen shadows:
If the sun is getting lower, check your angles. You might want to dig the ‘shadow side’ of your trenches slightly deeper to maximize the contrast. -
Final smooth:
Use your hands to gently smooth the very tops of the ridges if they’ve become too crumbly, ensuring the silhouette against the sand is crisp.
Step back to admire how the low angle of the sun catches those ridges and brings your temporary sculpture to life
Wave-Erasable Timeline Pattern

Capture the fleeting beauty of a beach day with this charming vertical sand illustration that incorporates natural treasures directly into the design. This tutorial guides you through creating a progressive pattern of hearts and sea life right at the water’s edge.
Step-by-Step Tutorial
Materials
- A stretch of damp, packed sand near the shoreline
- A sturdy, pointed stick or stylus tool
- A real starfish (dried decoration or found)
- A large, distinctly ribbed sea shell (scallop or cockle shape)
- Small spiral shell (auger or turret)
- Camera (essential for capturing the work)
Step 1: Setting the Stage
-
Scout the location:
Find a clean patch of sand just above the current high-water mark. You want the sand to be damp enough to hold a crisp shape, but not so wet that it fills in instantly with water. -
Smooth the canvas:
Use the side of your foot or a flat piece of driftwood to gently level out any existing footprints or irregularities in your chosen vertical strip. -
Plan the spacing:
Mentally mark out four vertical positions. The design flows from a shell imprint at the bottom, past a star, through two hearts, and ends with a turtle at the top.
Wet Sand Issues?
If the sand is crumbling rather than holding a shape, it’s too dry. Splash a little seawater over the area and smooth it down again before restarting.
Step 2: Imprints and Object Placement
-
Create the heart impression:
Start at the bottom position of your line. Take your large, ribbed scallop shell and press the rounded edge into the sand at a 45-degree angle to create the left lobe of a heart. -
Complete the heart shape:
Lift the shell and press it again, mirroring the first angle, to create the right lobe. The ribs of the shell should leave distinct, fan-like lines inside the heart shape. -
Place the starfish:
Move up about six to eight inches. Gently press your starfish into the sand just enough to nestle it securely, then lift it away if you prefer an imprint, or leave the actual starfish there as a 3D focus point. In this recreation, we are leaving the actual starfish in place.
Step 3: Drawing the Linear Elements
-
Outline the first heart:
Moving upward another six inches or so, use your pointed stick to draw a simple heart shape. Use a fluid motion to keep the line smooth. -
Add the texture:
Inside the line you just drew, re-trace the heart shape using a stippling motion. Poke small, rhythmic holes along the path to create a beaded or stitched look. -
Draw the second heart:
Above the stippled heart, draw a slightly smaller heart using the same technique. Outline it first for shape, then go back over it with your stick to create that distinct dotted texture. -
Refine the dots:
I find it helpful to wiggle the stick slightly in each hole to make them deep enough to catch shadows, which makes the drawing pop in photos.
Go Bigger
Use different sized shells to create a concentric heart pattern at the base, pressing a smaller shell inside the imprint of a larger one for a layered effect.
Step 4: The Final Details
-
Sketch the turtle body:
At the very top of your timeline, draw a small oval for the turtle’s shell using the stippling method. -
Add turtle limbs:
Poke four dots for legs and a slightly larger dot for the head. Add a tiny tail dot at the bottom to complete the whimsical creature. -
Place the accent shell:
Take your small spiral shell (the auger shell) and place it casually in the bottom right corner of your composition to balance the visual weight. -
Clean up stray grains:
Gently blow away any loose, dry sand that might have fallen into your etched lines or imprints to sharpen the contrast. -
Wait for the wave:
Step back and prepare your camera. Wait for the foamy edge of a wave to creep close to your artwork without washing it away for the perfect shot.
Now capture your ephemeral masterpiece quickly before the tide comes in to claim it
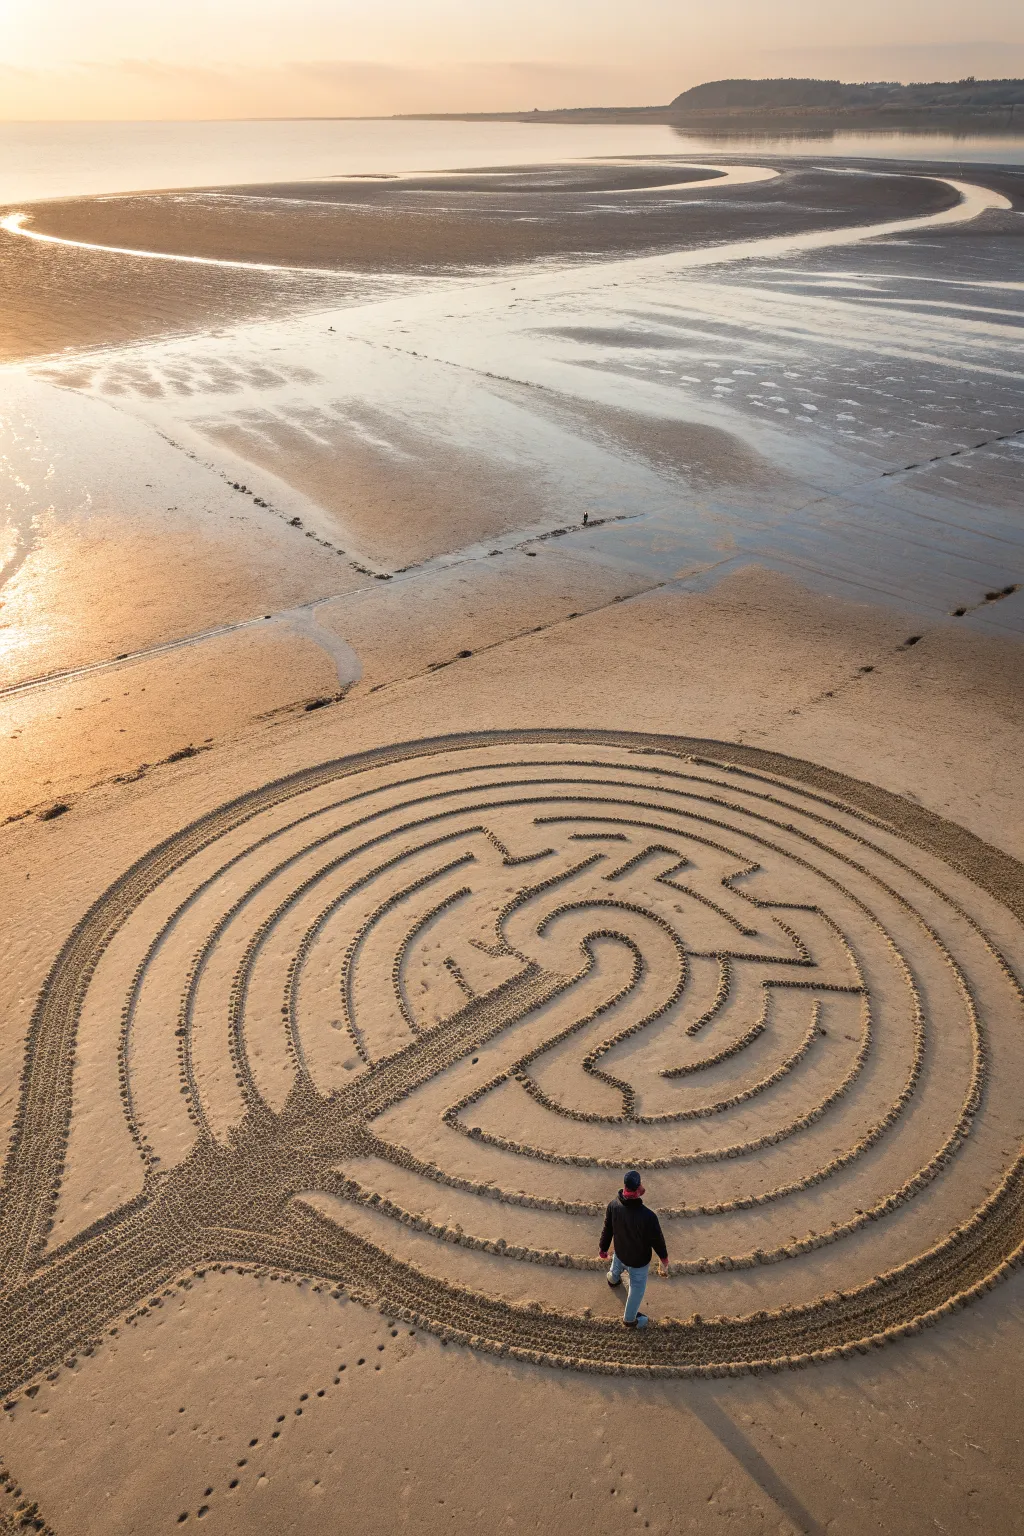
Huge Shoreline Labyrinth Walk

Transform a vast stretch of wet sand into a contemplative journey with this massive classical labyrinth design. Using the texture of raked sand against smooth beach flats, you’ll create a stunning, large-scale geometric pattern at low tide.
Step-by-Step
Materials
- Large garden rake (hard-tine)
- Measuring tape (long reel, 50ft+)
- Bamboo stick or dowel (for center marker)
- String or twine
- Small stick or trowel (for sketching)
- Sturdy boots or bare feet
Step 1: Planning and Center
-
Check the Tide:
Before heading out, consult a tide chart. You want to arrive about an hour before low tide to maximize your work time on the hardest-packed sand. -
Find Your Canvas:
Locate a large, flat area of wet sand free from deep tidal pools or excessive rocks. The darker, compact sand near the water line holds lines best. -
Mark the Anchor:
Plant your bamboo stick firmly in the sand to mark the absolute center of your labyrinth. This will be the pivot point for all your circles. -
Sketch the Base Radius:
Tie one end of your string to the center stick. Walk out about 3 feet and trace a small circle with a stick or trowel to create the central goal area.
Pro Tip: High Contrast
Work when the sun is low (early morning or late afternoon). The long shadows cast by the raked ridges create much deeper contrast, making the design pop in photos.
Step 2: Drafting the Rings
-
Define the Path Width:
Decide on a path width that is comfortable to walk—usually about 2-3 feet wide. Extending your string by this amount, trace concentric circles outward from the center. -
Continue the Rings:
Keep extending the string and tracing circles until you have about 7 or 11 concentric rings, depending on how large you want the final piece. -
Mark the Entrance:
Choose the direction for your entrance (usually facing upland or straight out to sea) and clear a straight path through the bottom rings leading toward the core, but don’t erase the lines yet. -
Draft the Turns:
This is the brain-teaser part. Using the classical labyrinth ‘seed’ pattern as a mental guide, mark where the U-turns happen. You are essentially connecting specific rings to create a single winding path rather than separate circles. -
Connect the Walls:
Lightly sketch the connecting curves with your small stick. You should be blocking off certain paths to force the walker to turn back and forth.
Troubleshooting: Dry Sand
If the sand is too dry and crumbling into the path, use the back of the rake to tamp down the walls rather than dragging tines through it.
Step 3: Raking and Refining
-
Start the Texture:
Pick up your garden rake. Begin dragging it directly over your sketched guide lines. The goal is to make the ‘walls’ of the maze thick and textured, leaving the walking path smooth. -
Widen the Walls:
Walk backwards while pulling the rake to avoid footprints in your textured walls. I prefer to do two passes side-by-side to make the walls substantial and highly visible from a distance. -
Define the Center:
Rake a distinct texture into the very center circle, perhaps distinct from the walls, or leave it perfectly smooth as a resting place. -
Clean the Path:
Walk the entire path yourself. As you go, scuff out any accidental footprints or stick marks in the walking lane to ensure clear contrast between smooth path and rough wall. -
Add Decorative Flourishes:
At the entrance, rake a wider, fan-like shape to welcome walkers. You can also add small piles of sand or finding stones to mark the turn points.
Step back to the dunes or fly a drone to appreciate the massive scale of your temporary masterpiece before the tide reclaims it


Have a question or want to share your own experience? I'd love to hear from you in the comments below!