If your calendar page feels a little too plain, a few well-placed calendar doodles can turn it into something you actually want to look at every day. I love how these doodle ideas keep your schedule clear while adding that cozy, creative “made by you” magic.
Classic Monthly Grid With Doodled Lines
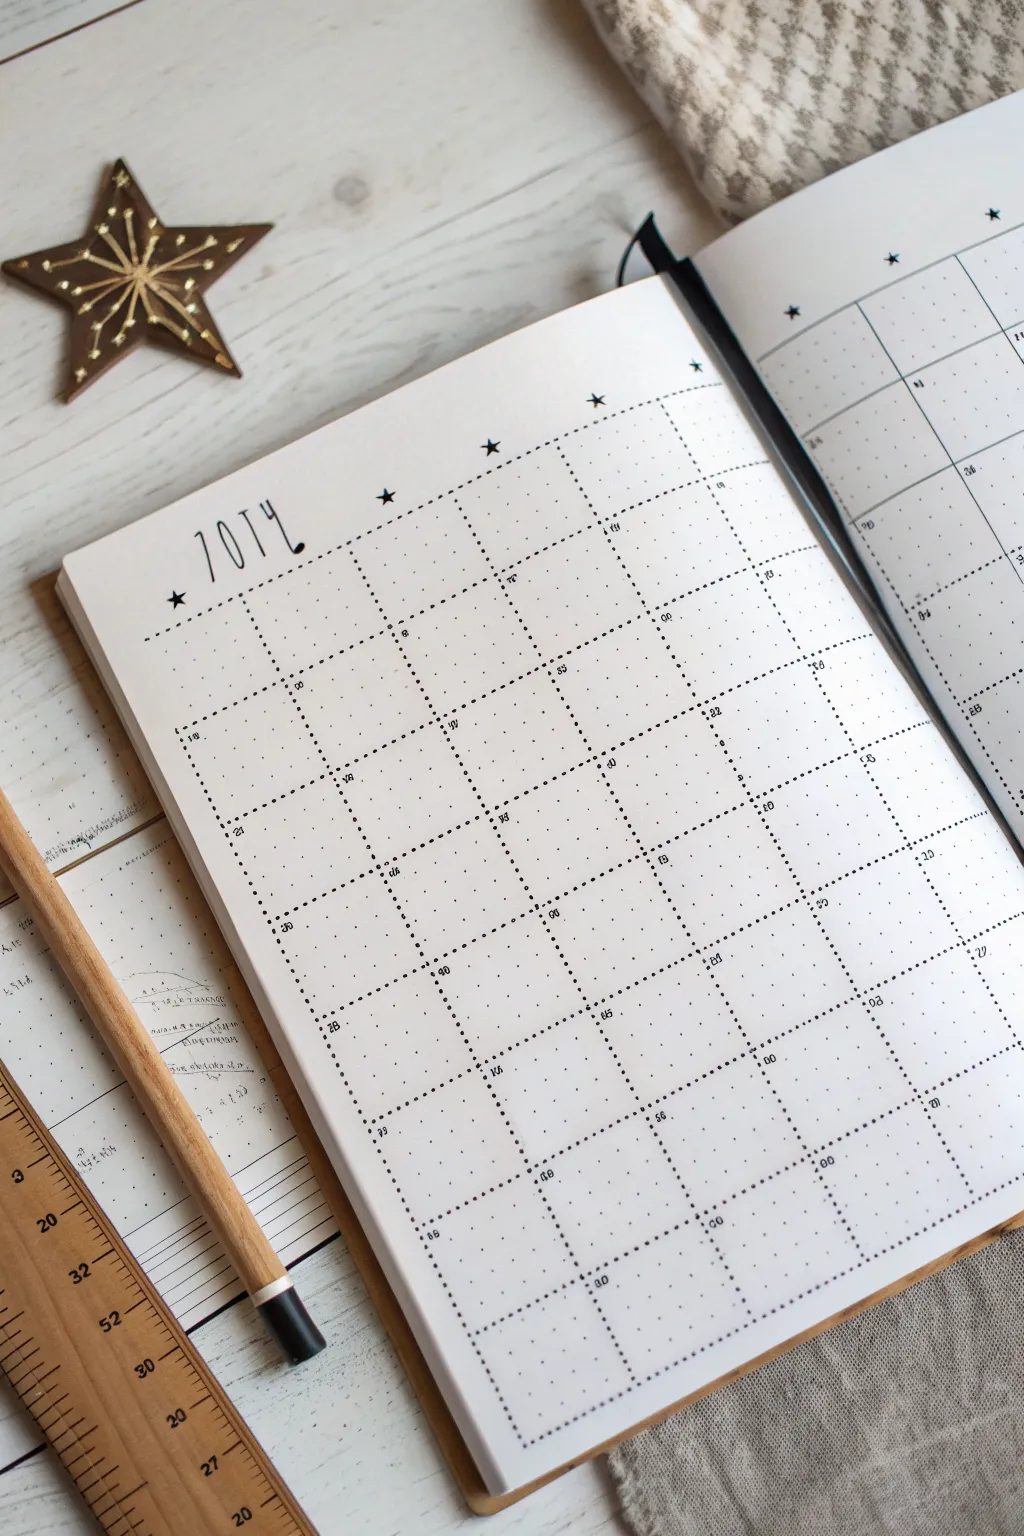
This clean and airy calendar layout uses delicate dotted lines to create a structured yet hand-drawn aesthetic perfect for any bullet journal. The minimalist design features a tall, skinny title font and simple star accents for a touch of whimsy without clutter.
How-To Guide
Materials
- A5 Dotted Notebook or Bullet Journal
- Fine liner pen (0.3mm or 0.5mm, black)
- Pencil (HB or mechanical)
- Eraser
- Ruler (preferably clear or wooden)
Step 1: Planning the Layout
-
Count your grid:
Begin by counting the total number of dots horizontally and vertically on your page. This ensures you can center your calendar perfectly. -
Calculate box sizes:
For a standard 5-week month view, you’ll need a grid of 7 columns (for days) and 5 or 6 rows. A common size on standard dot grid paper is 5×5 dots or 6×6 dots per square. -
Mark the corners:
Using your pencil, lightly mark the four corners of your main calendar rectangle. Don’t draw the full lines yet, just mark where the outer edges will sit. -
Sketch the grid lines:
Lightly sketch the internal horizontal and vertical lines with your pencil and ruler to create the individual day boxes. This is your safety net before using ink.
Wobbly Dots?
If your hand shakes while making dots, press the ruler firmly down and rest the side of your palm on it. This anchors your hand for consistent rhythmic tapping.
Step 2: Inking the Grid
-
Start the vertical ink lines:
Take your fine liner pen. Align your ruler with the first vertical pencil line. Instead of drawing a solid line, gently tap the pen tip against the paper at even intervals to create a dotted line. -
Consistency is key:
Try to keep the spacing between your ink dots consistent. I find that counting ‘one, two, one, two’ rhythmically helps maintain an even flow. -
Complete vertical lines:
Continue across the page, inking all vertical dividers with the same dotted technique. -
Ink horizontal lines:
Turn your ruler horizontally. Repeat the dotted line technique for all horizontal dividers, crossing over the vertical lines you just made. -
Top border variation:
For the very top line of the calendar grid (the header row), you might choose to make the dots slightly closer together or bolder to define the upper edge. -
Check for gaps:
Look over your grid. If any intersections look too empty, add a single dot right where the lines cross to anchor the corners.
Make It Shine
Use a metallic gold or silver gel pen for the stars and the date numbers to add a subtle festive sparkle without breaking the minimalist theme.
Step 3: Adding Typography & Details
-
Draft the title:
In the open space above the grid, lightly pencil in the month name (e.g., ‘JULY’). Use a tall, condensed style where the letters are much higher than they are wide. -
Ink the title:
Go over your pencil letters with the fine liner. Keep the strokes singular and thin; don’t thicken the downstrokes for this specific minimalist look. -
Add floating stars:
Draw small, solid black 5-point stars. Place two or three around the month title, and scatter a few tiny ones near the top corners of the grid. -
Number the days:
In the top-left corner of each box, write the date number. Keep these very small and neat so they don’t dominate the space. -
Erase guidelines:
Wait at least five minutes to ensure the ink is completely dry. Then, gently erase all underlying pencil marks.
Your calendar is now a functional piece of art, ready to help you organize your month with style


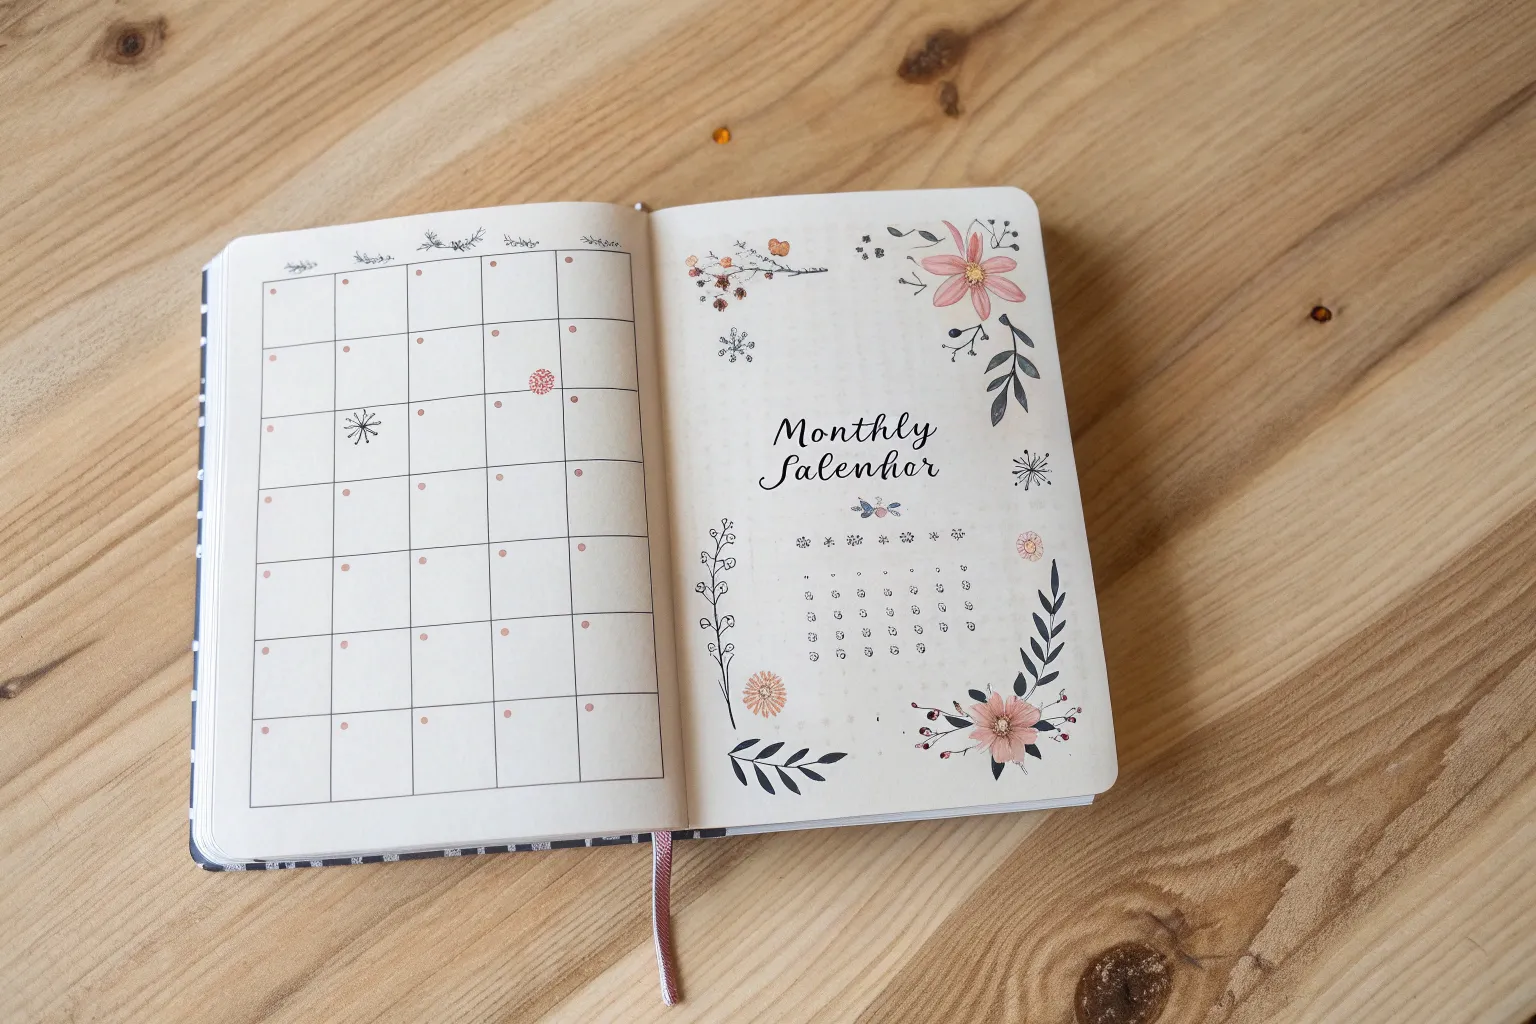
Seasonal Corner Doodles for the Month

Bring the calming essence of nature into your planner with this elegant June calendar layout featuring delicate leaf motifs and warm, earthy tones. This project balances functionality with minimalist floral doodles for a spread that feels both organized and organic.
Step-by-Step Guide
Materials
- A5 dot grid spiral notebook or journal
- Fine liner pens (0.1mm, 0.3mm, 0.5mm in black or dark brown)
- Brush pens or markers (muted gold/mustard, olive green, light grey)
- Ruler
- Pencil and eraser
Step 1: Setting the Structure
-
Map out the grid:
Start by lightly sketching a 5×6 grid layout using your pencil and ruler. Leave generous margins at the top for your header and at the bottom for decorative elements. -
Define the boxes:
Ink the main grid lines using a 0.3mm fine liner. For this specific look, keep the lines clean but perhaps don’t worry if they aren’t mechanically perfect; a slight hand-drawn feel adds charm. Some vertical lines can be solid, while horizontal lines within the rows can be lighter or dotted. -
Add the header row:
Create a distinct top row for your days of the week. Draw a double line or a slightly thicker border to separate the headers from the calendar days. -
Letter the days:
Using a simple serif or sans-serif block font, write the days of the week in the header row. Alternatively, use abbreviations if space is tight. -
Number the dates:
In the top left or right corner of each daily box, add the dates using a small, neat print font. A 0.1mm pen works best for these tiny details so they don’t clutter the space.
Step 2: The Botanical Header
-
Calligraphy title:
In the center of the top margin, letter the month name (‘Junho’ or ‘June’) using a brush pen or a faux-calligraphy technique. Keep the downstrokes thick and upstrokes thin for an elegant script look. -
Top corner foliage:
In the top left corner, sketch a small cluster of leaves. Draw a central stem curving outward, then add teardrop-shaped leaves along it. Vary the direction of the leaves slightly to make it look natural. -
Add accent berries:
intersperse small circles or dots amongst the leaves to represent berries or pollen. These small circles add texture to the empty spaces around your title. -
Color the accents:
Using a mustard or muted gold marker, color in alternate leaves or the berries. Leave some elements as simple line art to maintain a light, airy aesthetic.
Ink Smudge Rescue
Smudged a line? Turn the mistake into a falling leaf or a small gold berry dot. Cover larger errors with a small piece of washi tape or a sticker.
Step 3: Bottom & Side Details
-
Create a fern motif:
On the bottom right side of the spread, draw a larger fern-like frond. Start with a long, curved central spine. Then, use quick, short strokes to create the feathery leaves extending from both sides. -
Add bottom corner florals:
In the bottom left or right corner, draw a different type of plant, like dandelion puffs or wildflowers. Use thin lines for the stems and small radiating dashes for the flower heads to mimic a fluffy texture. -
Incorporate colored leaves:
Draw simple, broad leaves near the bottom edge. Color these in fully with your olive green or gold markers, rather than just outlining them, to anchor the page visually. -
Sprinkle floating details:
Fill any awkward negative space with tiny clusters of three dots or small varying-sized circles in your accent color (mustard or gold). This ties the top and bottom designs together. -
Highlight the grid:
Take your light grey or a very pale brown marker and highlight the header bar or specific important dates to add subtle depth without overpowering the text.
Color Palette Twist
Switch the earthy gold and green for lavender and sage to give the spread a cooler, spring-like vibe while keeping the same botanical layout.
Step 4: Finishing Touches
-
Erase guidelines:
Wait until all ink is completely dry—I usually give it a full 10 minutes to be safe—and then gently erase all your initial pencil sketches. -
Reinforce lines:
If any grid lines look too faint after erasing, go over them one last time. You can also re-darken the month title if needed to make it pop.
Your calendar is now ready to help you plan a productive month with a touch of natural beauty.


Tiny Icon Key for Daily Plans
Transform a standard spiral notebook into a customized fitness tracking calendar with this clean, minimalist layout. The design features a crisp grid structure accented by tiny, precise numerical icons for tracking daily progress without clutter.
Detailed Instructions
Materials
- A4 or A5 spiral-bound notebook (blank or dotted pages)
- Fine-point black fineliner pen (0.3mm or 0.5mm)
- Red fine-point pen or marker
- Ruler (preferably clear plastic)
- Pencil and eraser
- Small number stamps (optional, but replicates the printed look)
- Black ink pad (if using stamps)
Step 1: Setting the Foundation
-
Measure the spread:
Open your notebook to a fresh two-page spread. Measure the width of both pages combined, subtracting a small margin on the far left and far right edges. -
Draft the grid skeleton:
Using a pencil and ruler, lightly draw a large rectangular border that spans both pages. Divide this rectangle into seven vertical columns for the days of the week. -
Create horizontal rows:
Divide the columns into five or six equal horizontal rows to represent the weeks of the month. Ensure your lines are perfectly perpendicular to the vertical columns. -
Add header space:
Draw a horizontal line across the top of your columns, about 1cm down, to create a header bar for the days of the week. -
Ink the main lines:
Go over your pencil grid with the black fineliner. Use steady pressure against the ruler for crisp, dark lines. I find it helpful to ink all vertical lines first, let them dry for a moment, and then do the horizontal ones to prevent smudging.
Clean Lines
Lift your pen straight up at the end of each line rather than dragging it back. This prevents ink pooling at the intersections of your grid.
Step 2: Adding Details and Typography
-
Label the days:
In the top header row, write the abbreviations for days (Mon, Tue, Wed, etc.) in small, capital block letters using the black pen. -
Add the specific year:
In the top right corner of the right page, write the year (e.g., ‘2219’ or the current year) in a slightly larger, serif font to anchor the page design. -
Create the bottom tracker:
At the bottom of the grid, draw a separate, smaller grid section. This area often serves as a habit tracker or notes section. Subdivide it into smaller boxes just like the main calendar. -
Erase guidelines:
Once the variety of black ink lines are completely dry, gently erase all underlying pencil marks to reveal a clean structure.
Color Code It
Swap the red accent pen for different colors to track multiple habits: blue for hydration, green for cardio, and red for strength training.
Step 3: The Tiny Icon System
-
Draft the dates:
Lightly pencil in the dates of the month into the top-left corner of each daily box. -
Ink the dates:
Go over the dates with your black fineliner. Keep the numbers small and sans-serif for a tidy, printed aesthetic. -
Add the red accents:
Using your red fine-point pen, write small secondary numbers or codes in the center or corners of specific boxes. These act as your ‘Tiny Icon Key’—representing reps, sets, or specific workout types. -
Simulate a printed look:
If you want the numbers to look exactly like the reference, try using tiny number stamps instead of handwriting them. This gives that uniform, mechanical feel. -
Create the legend:
On a separate scrap paper or in the margins, define what your red and black number codes mean so you don’t forget your own system. -
Fill in the bottom grid:
Add diagonal hatching lines to the bottom tracker section to indicate ‘off’ days or completed habits. Use the ruler to keep the hatching parallel.
Now you have a structured, visually pleasing spread ready to help you hit your goals


Pattern-Filled Weekends for Quick Scanning
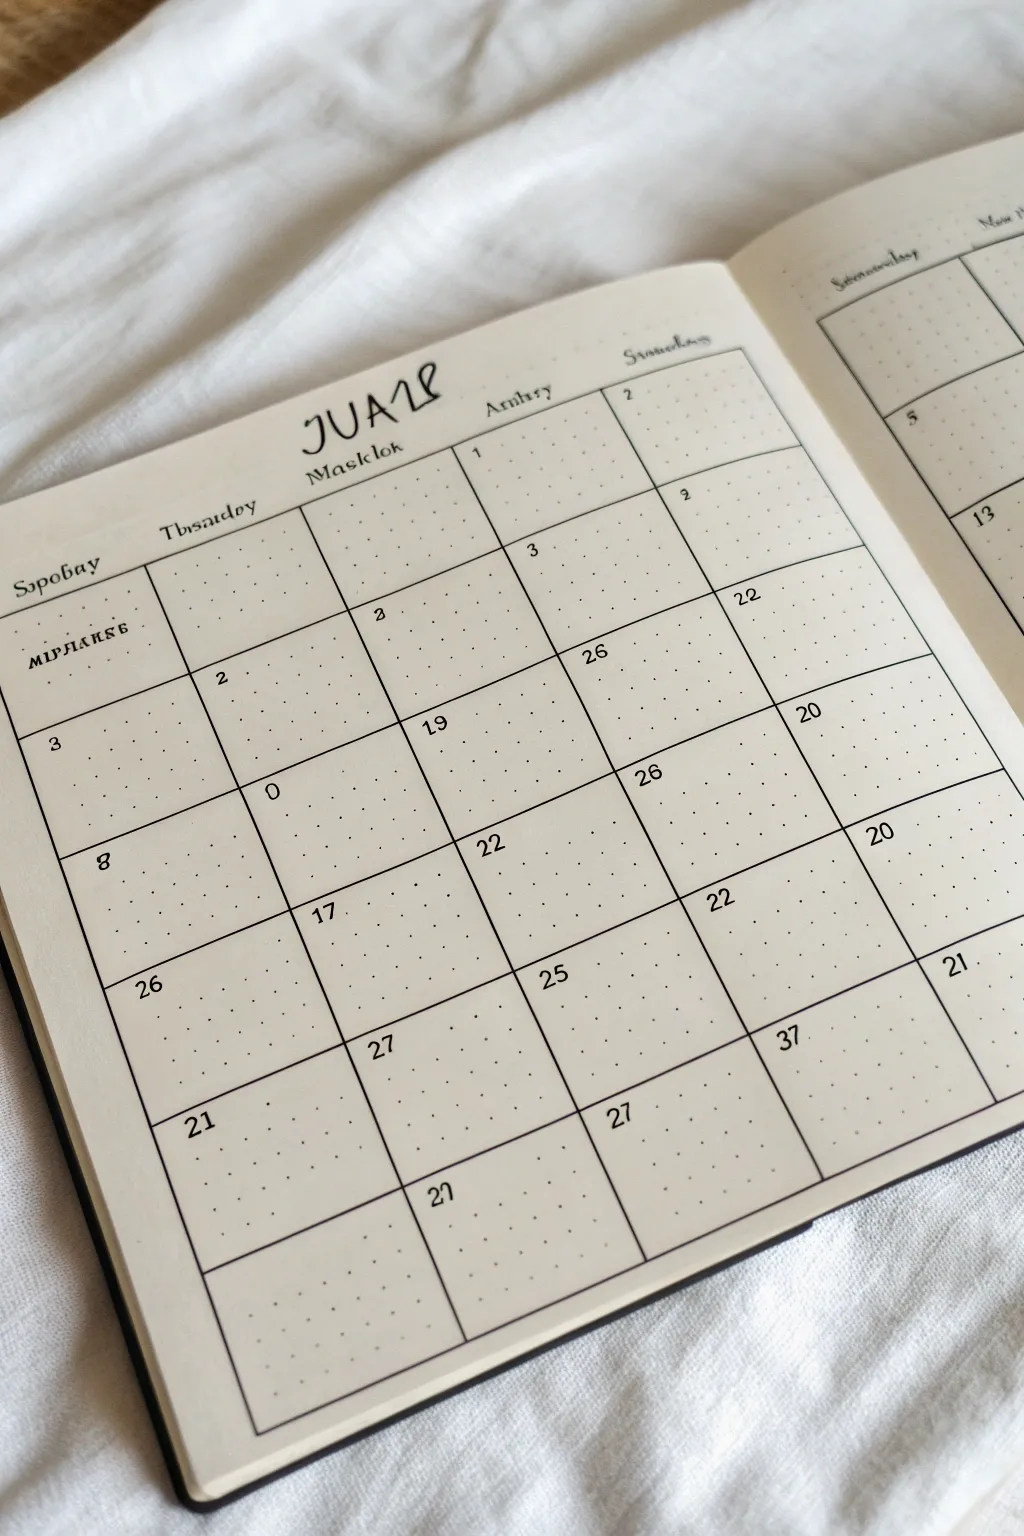
This rustic, grid-style calendar layout brings a charming, handmade feel to your bullet journal, perfect for those who love imperfect lines and fantasy-inspired lettering. Using a dot-grid notebook as your canvas, this spread combines functionality with a doodled aesthetic that invites creativity into your planning routine.
Step-by-Step Tutorial
Materials
- A5 dot grid notebook
- Fine liner pen (black, 0.3mm or 0.5mm)
- Ruler (clear acrylic reflects the dots best)
- Pencil and eraser for sketching
- Brush pen or calligraphy marker (black)
Step 1: Setting the Structure
-
Map out the month:
Begin by counting the dot grid spaces to determine your box sizes. A standard monthly spread usually fits well with 5 rows and 7 columns. Mark the corners of your main grid lightly with a pencil. -
Title placement:
Leave generous space at the top of the page (about 1.5 to 2 inches) for your header area. This negative space is crucial for the title lettering you’ll add later. -
Draw vertical lines:
Using your ruler and fine liner, draw the vertical lines of your grid first. Don’t worry about staying perfectly straight; a slight wobble adds to the hand-drawn charm seen in the example. -
Add horizontal lines:
Complete the grid by drawing the horizontal lines. Ensure your boxes are roughly square, using the dots as a guide but keeping the stroke relaxed. -
Create the header row:
Draw a distinct horizontal line across the top of your grid to create a dedicated row for the days of the week. This should be thinner than your calendar day boxes.
Ink Smear Rescue
Smudged a line? Turn the mistake into a doodle or thicken the line intentionally to mask the blur. It adds character!
Step 2: Adding the Details
-
Pencil the title:
Sketch your month name in the center of the top space. Aim for a distinct style—mix uppercase and lowercase letters or vary the height of the characters. -
Ink the header:
Go over your pencil title with a slightly thicker pen or brush marker. Add a small flourish or subtitle underneath if you like, keeping the line work loose. -
Draft the days:
In the header row, write out the days of the week. Position them slightly off-center or use a quirky, serif-style script to match the rustic vibe. -
Number the dates:
Add the dates into the top-left corner of each box. Keep the numbers small to leave room for writing appointments later. -
Vary number placement:
For visual interest, try placing a few numbers slightly lower or more centered in their boxes, breaking the strict uniformity.
Weekend Highlight
Use a light gray highlighter to shade in the Saturday and Sunday columns. This makes scanning your week much faster.
Step 3: Finishing Touches
-
Thicken the frame:
Go back over the outer perimeter of the entire calendar grid to make the border slightly bolder than the inner lines. This helps frame the month. -
Add doodle details:
If you have empty boxes at the beginning or end of the month, fill them with tiny dot patterns or simple line doodles to avoid blank space. -
Review patterns:
Check for visual balance. If one side of the layout looks too heavy, add a small decorative word or doodle on the opposite side. -
Erase guidelines:
Wait for the ink to be completely dry—give it a few extra minutes just to be safe—then gently erase all underlying pencil marks. -
Final inspection:
Look for any lines that need connecting or numbers that need a quick touch-up. The beauty is in the imperfection, so don’t over-correct.
Enjoy filling up your new, unique calendar spread with plans and memories

PENCIL GUIDE
Understanding Pencil Grades from H to B
From first sketch to finished drawing — learn pencil grades, line control, and shading techniques.
Explore the Full Guide
Mini Next-Month Calendar in the Margin
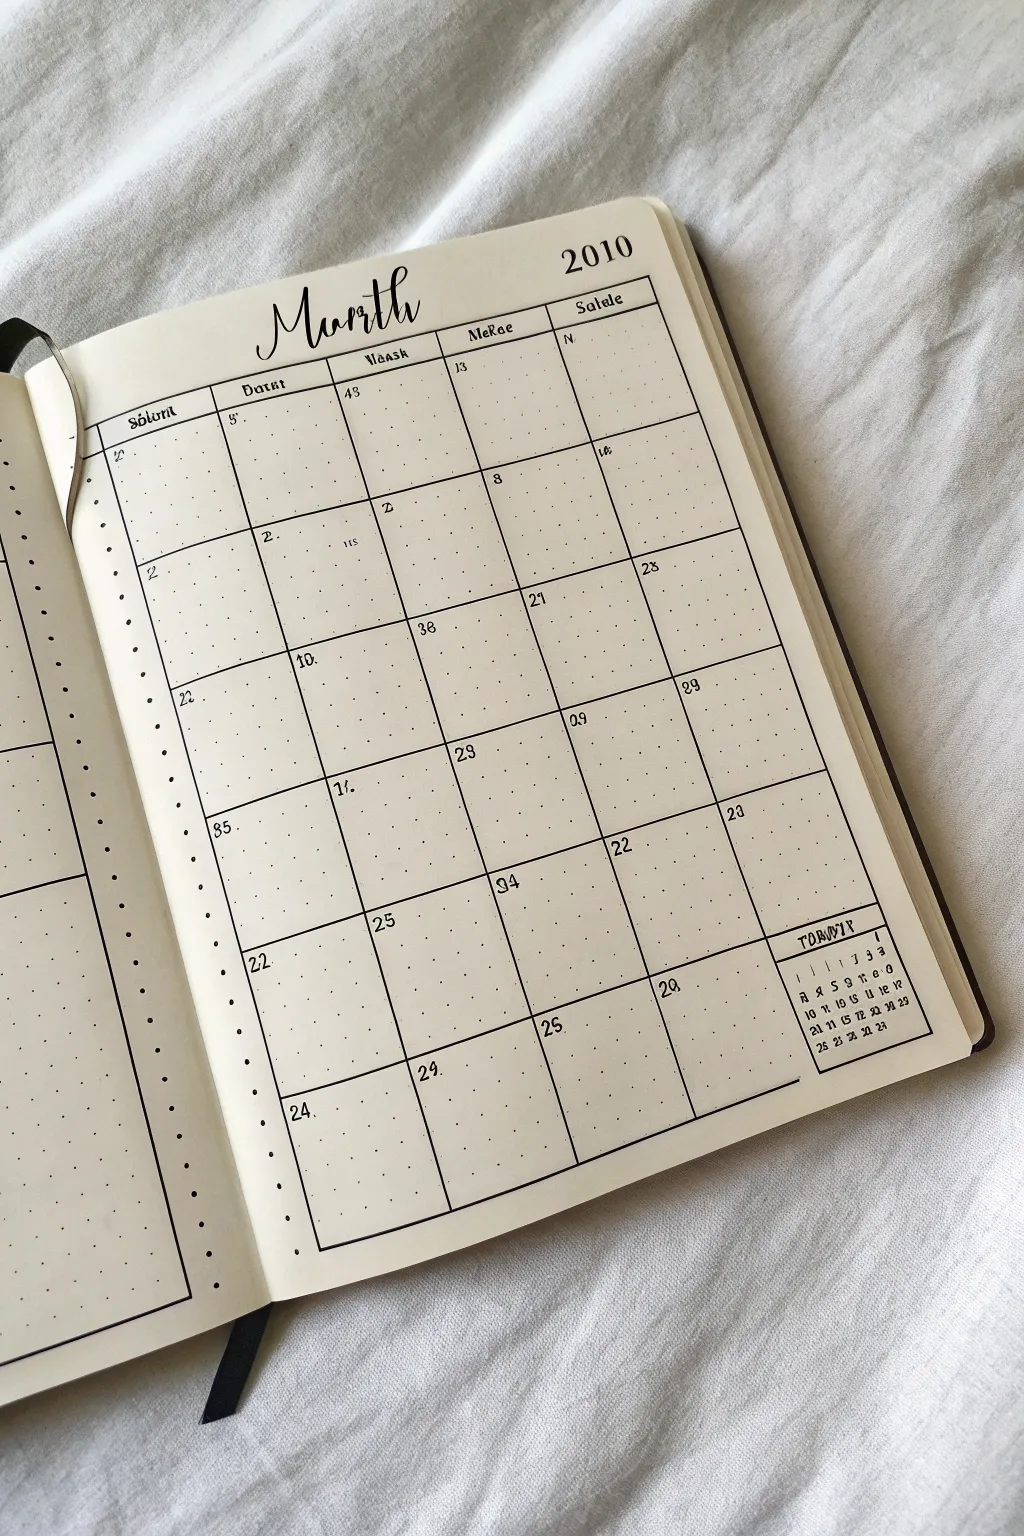
This minimalist bullet journal layout features a classic monthly grid with a clever addition: a tiny “next month” reference tucked neatly into the corner. The clean lines and dotted grid provide a structured yet hand-crafted aesthetic perfect for staying organized.
Step-by-Step Guide
Materials
- Dotted grid notebook or journal
- Fine liner pen (0.3mm or 0.5mm, black)
- Ruler or straight edge
- Pencil (for sketching)
- Eraser
Step 1: Setting the Structure
-
Define the grid area:
Start by identifying the space for your main calendar. On a dotted page, count out a grid that is roughly 5 boxes wide by 6 boxes tall for the days, leaving roughly a 1-inch header space at the top. -
Mark the corners:
Use a pencil to lightly mark the four corners of your main calendar box. This ensures your lines will be straight and your spacing even before you commit with ink. -
Draw the main frame:
Using your ruler and fine liner pen, draw the thick outer border of the calendar. Press slightly firmer or retrace this line once to make the outer frame stand out more than the inner grid lines. -
Add the header bar:
Draw a horizontal line across the top of the grid to create the header row where the days of the week will go. This section should be slightly narrower than the date boxes below. -
Create the vertical columns:
Divide the main box into vertical columns. Since this is a partial view, you can see four clear columns. Use the ruler to draw these vertical lines cleanly from the header down to the bottom edge. -
Add horizontal rows:
Draw the horizontal lines to create the weeks. Ensure each row is equal in height based on your dot grid count.
Ink Confidence
Use a piece of scrap paper under your writing hand. This protects the page from hand oils, which can make ink skip or smudge.
Step 2: The Mini Calendar Feature
-
Locate the empty space:
Identify the bottom right corner box of your grid. In months where the dates end early, this box often stays empty. This is where the mini calendar will live. -
Draw the mini divider:
Inside that final grid square, draw a horizontal line about one-third of the way down from the top of that square. This separates the mini-header from the mini-dates. -
Letter the mini header:
In the small top section you just created, write the name of the next month (e.g., ‘February’ or an abbreviation) in a tiny, capitalized font. -
Draft the mini grid:
Lightly pencil in a tiny 7-column grid structure below the mini header. You don’t need to draw vertical lines, just faint horizontal guides to keep your numbers straight. -
Fill in the mini dates:
With your finest pen tip, carefully write the numbers 1-28/30/31 in rows. Keep them extremely small and centered. I find holding the pen very upright helps with this tiny precision. -
Ink the mini days:
Above the number 1, write single-letter abbreviations for the days of the week (M T W T F S S) in the smallest print possible.
Step 3: Finishing Touches
-
Letter the main title:
In the open space above the grid, write ‘Month’ in a flowing, loose cursive script. Make the ‘M’ large and looped. Add the year ‘2010’ (or your current year) in a serif font to the right. -
Label the days:
In the main header row, write the days of the week. You can use a decorative serif font or a unique script style to match the vintage vibe. -
Number the main calendar:
Write the date numbers in the top left corner of each large grid box. Use a simple, small serif font for clarity. -
Erase guidelines:
Wait for the ink to ensure it is completely dry. Then, gently erase all pencil marks, moving the eraser in one direction to avoid wrinkling the paper.
Header Style
Try using a brush pen for the main ‘Month’ title to get thick downstrokes and thin upstrokes for a more dramatic calligraphy look.
Now you have a functional layout that keeps you looking ahead without turning the page
Year-at-a-Glance Tiny Calendar Page
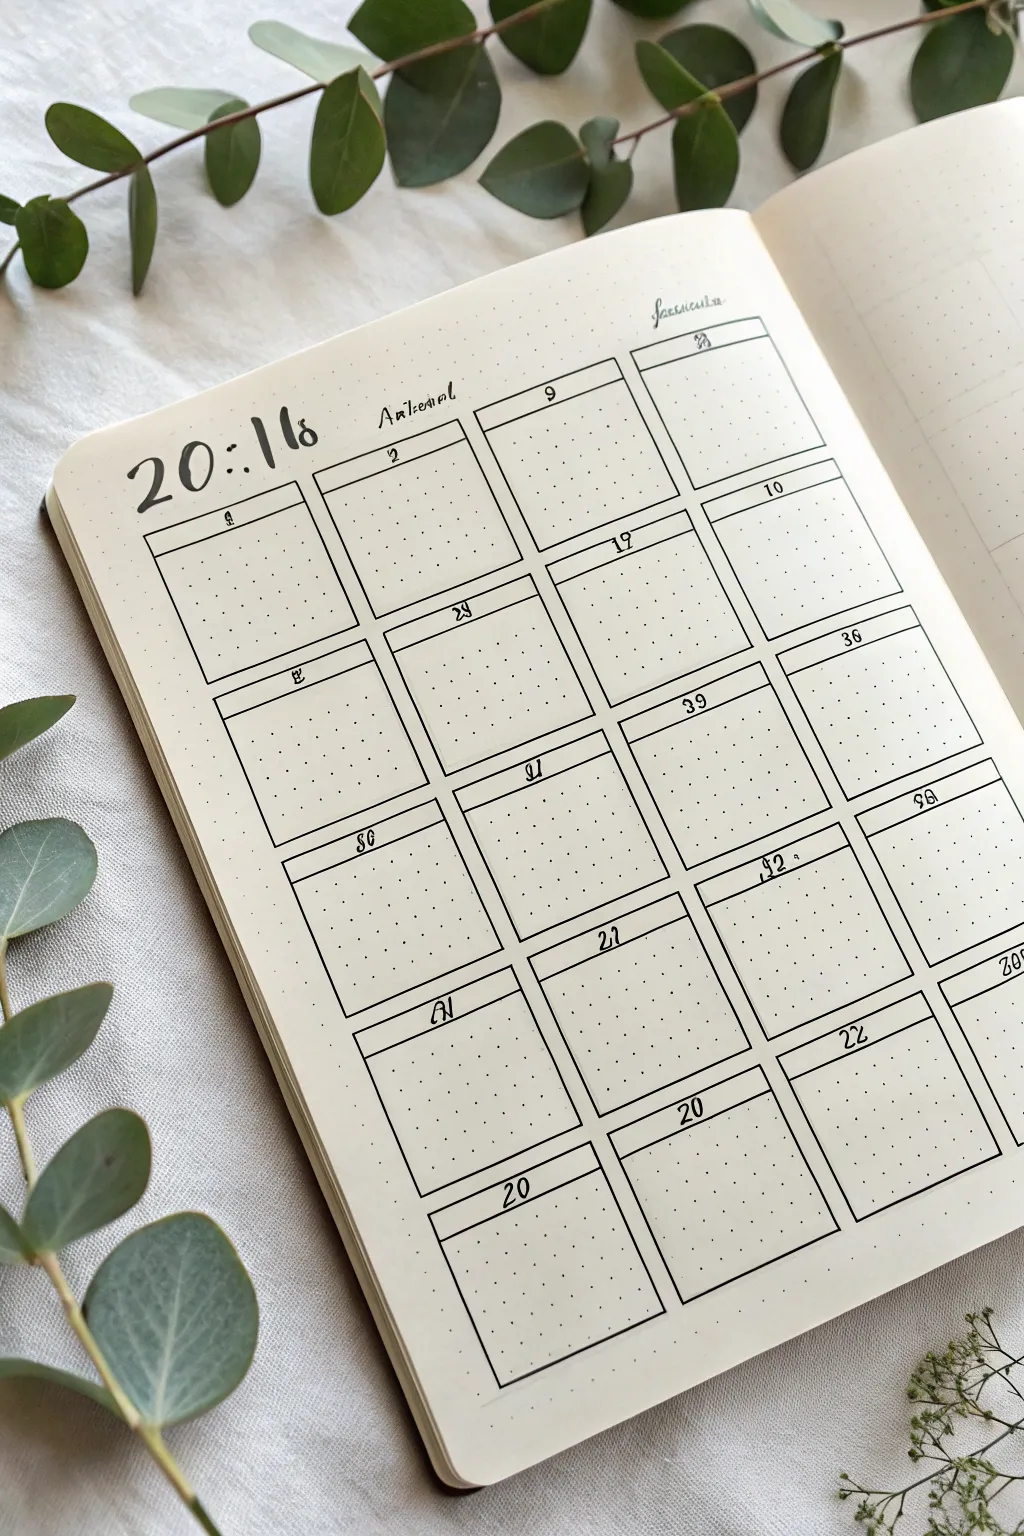
This clean, grid-based layout transforms your bullet journal into a functional masterpiece with crisp lines and elegant typography. Perfect for a year-at-a-glance or a monthly tracker, it balances structure with plenty of white space for daily notes.
Step-by-Step
Materials
- Dotted Grid Notebook (A5 size recommended)
- Fine Liner Pen (0.3mm or 0.5mm, black)
- Brush Pen or Calligraphy Marker (black)
- Ruler (preferably clear)
- Pencil
- Eraser
Step 1: Planning and Layout
-
Map out the dimensions:
Count the total dots available on your page both horizontally and vertically. For a standard 4×5 grid layout like this, you’ll need space for four columns and five rows. -
Calculate box sizes:
Divide your horizontal dot count by four to determine the width of each calendar box. Leave a 1-2 dot gap between columns if you prefer breathing room, or keep them touching for a compact look. -
Draft the grid:
Using a pencil and ruler, lightly sketch the vertical lines to separate your columns first. Ensure they are evenly spaced. -
Add horizontal dividers:
Sketch the horizontal lines to create the rows. Aim for boxes that are roughly square or slightly rectangular, keeping uniform height throughout the page.
Straight Line Secret
When using a ruler with ink, flip the ruler upside down (bevel down) or tape a penny to the back. This lifts the edge off the paper so ink doesn’t bleed underneath.
Step 2: Inking the Structure
-
Line work basics:
Switch to your fine liner pen. Place your ruler securely against your pencil lines and draw the vertical lines of the grid. -
Draw horizontal lines:
Carefully ink the horizontal lines to close off the boxes. I like to lift the pen cleanly at intersections to avoid ink pooling. -
Create header sections:
Inside each large box, draw a smaller horizontal line near the top, about 1cm or 2 grid squares down. This creates the dedicated space for the date number. -
Erase guidelines:
Wait for the ink to dry completely to avoid smearing, then gently erase all the underlying pencil sketches.
Drop Shadow Upgrade
Use a light grey marker to add a simple drop shadow to the right and bottom of every grid box. It makes the calendar pop off the page instantly.
Step 3: Adding Details and Typography
-
Lettering the year:
In the top left corner, use a brush pen or thicker marker to write the year. The style shown uses a loose, serif-inspired look where the numbers are slightly separated by a colon, like ’20:18′. -
Add subtle headers:
To the right of the year, write a small section title or month name in a loose, cursive script using your fine liner. -
Numbering the boxes:
Using your fine liner, write the date numbers (1-31) in the center of the small header sections you created earlier. Keep the numbers small and centered. -
Stylize specific dates:
For certain numbers, you can add a simple decorative flair, like underlining them or using a slightly italicized font to make them stand out. -
Add corner details:
In the top right corner of the page, write a secondary title or category in a very small, delicate cursive script. -
Final review:
Check for any missing lines in your grid or missed dates. If the grid lines look too thin, go over the outer border one more time to frame the content.
Enjoy the satisfaction of filling in your perfectly organized new spread
BRUSH GUIDE
The Right Brush for Every Stroke
From clean lines to bold texture — master brush choice, stroke control, and essential techniques.
Explore the Full Guide
Vertical List-Style Monthly Calendar
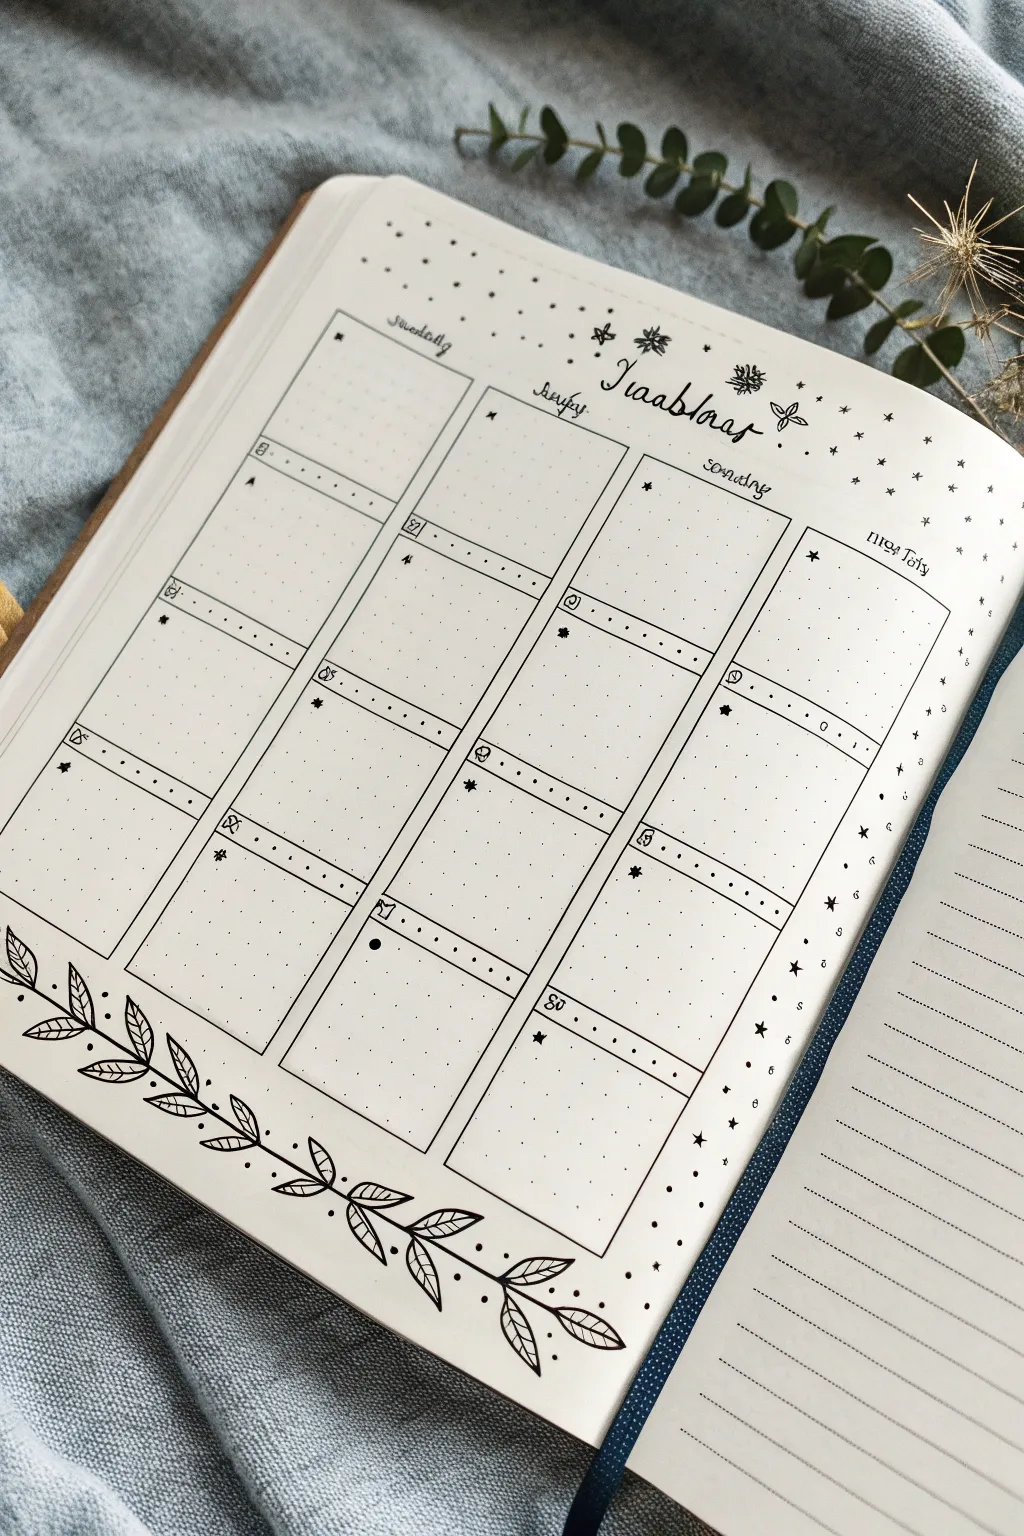
This elegant monthly layout combines the structure of a classic grid with delicate organic doodles, perfect for keeping your bullet journal organized yet beautiful. The design features four vertical columns with distinct daily blocks, adorned with a flowing leaf garland along the bottom edge.
Step-by-Step Guide
Materials
- A5 dot grid notebook
- Fine liner pen (0.3mm or 0.5mm)
- Ultra-fine liner pen (0.05mm or 0.1mm) for details
- Ruler
- Pencil
- Eraser
Step 1: Planning the Grid
-
Map out the skeleton:
Start by counting the dots on your page to find the center. Using a pencil, lightly mark out four equal vertical columns. Leave a small margin at the very top for your header and a larger margin at the bottom for the decorative wreath. -
Define the rows:
Divide these four columns into four or five horizontal rows, depending on how many days are in the month. Aim for rectangular boxes that provide enough space for daily tasks. -
Ink the main lines:
Once satisfied with the spacing, use your ruler and the 0.3mm fine liner to trace over your pencil grid lines. Keep your hand steady, but don’t worry if lines aren’t machine-perfect; a little wiggle adds character.
Grid Counting Hack
Count your total horizontal dots first. Divide by 4. Mark these points with a pencil dot before drawing any lines to ensure equal column widths without frustration.
Step 2: Adding Headers & Details
-
Create the date headers:
At the top of each individual box, draw a thin horizontal line about 0.5cm down from the top edge. This creates a small header space for the date. -
Add column headers:
Above the top row of your grid, write out the days of the week in a loose, cursive script. Center each day name over its corresponding column. -
Title the month:
In the open space at the very top center, letter the name of the month in a decorative script (like ‘November’ or ‘January’). Frame it with small starbursts or simple flower doodles. -
Number the days:
Inside the small header strip of each box, write the date number in the top left corner. You can embellish this by drawing a tiny icon next to the number, like a small leaf or star. -
Add decorative dots:
I like to add a row of tiny dots along the header line inside each box to separate the date from the main writing area. This adds a nice textural detail.
Step 3: Drawing the Botanical Footer
-
Sketch the vine stem:
Using a pencil, draw a long, gently curving line starting from the bottom left corner and sweeping up towards the center right. Let it meander naturally. -
Add leaf shapes:
Along this vine, lightly sketch almond-shaped leaves in pairs or alternating patterns. Vary the sizes, keeping larger leaves near the base and smaller ones near the tip. -
Ink the foliage:
Switch to your finer pen (0.1mm) to ink the leaves. Draw a central vein in each leaf first, then outline the leaf shape. Add diagonal veins inside each leaf for realistic detail. -
Thicken the stem:
Go back over the main stem line, slightly thickening it where leaves attach to give the drawing weight. -
Connect the garland:
Extend a second, smaller vine or loose dots trailing off the end of the main branch to balance the composition.
Uneven Lines?
If a ruler line slips or looks crooked, don’t white it out. Go over the line again loosely to create a ‘sketched’ double-line style. It looks intentional and artistic.
Step 4: Finishing Touches
-
Erase guidelines:
Wait until the ink is completely dry—give it a full minute or two—then gently erase all pencil marks to reveal a clean spread. -
Sprinkle stars:
Fill any empty negative space around the month title and along the right margin with tiny stars, dots, and asterisks to create a magical, starry sky effect. -
Add side notes area:
If you have a spare column on the far right (like in the image), label it ‘Notes’ or ‘To Do’ for general monthly tasks that don’t fit a specific day.
Enjoy filling up your neat new calendar with plans and memories
Two-Page Monthly Spread With Big Notes Space
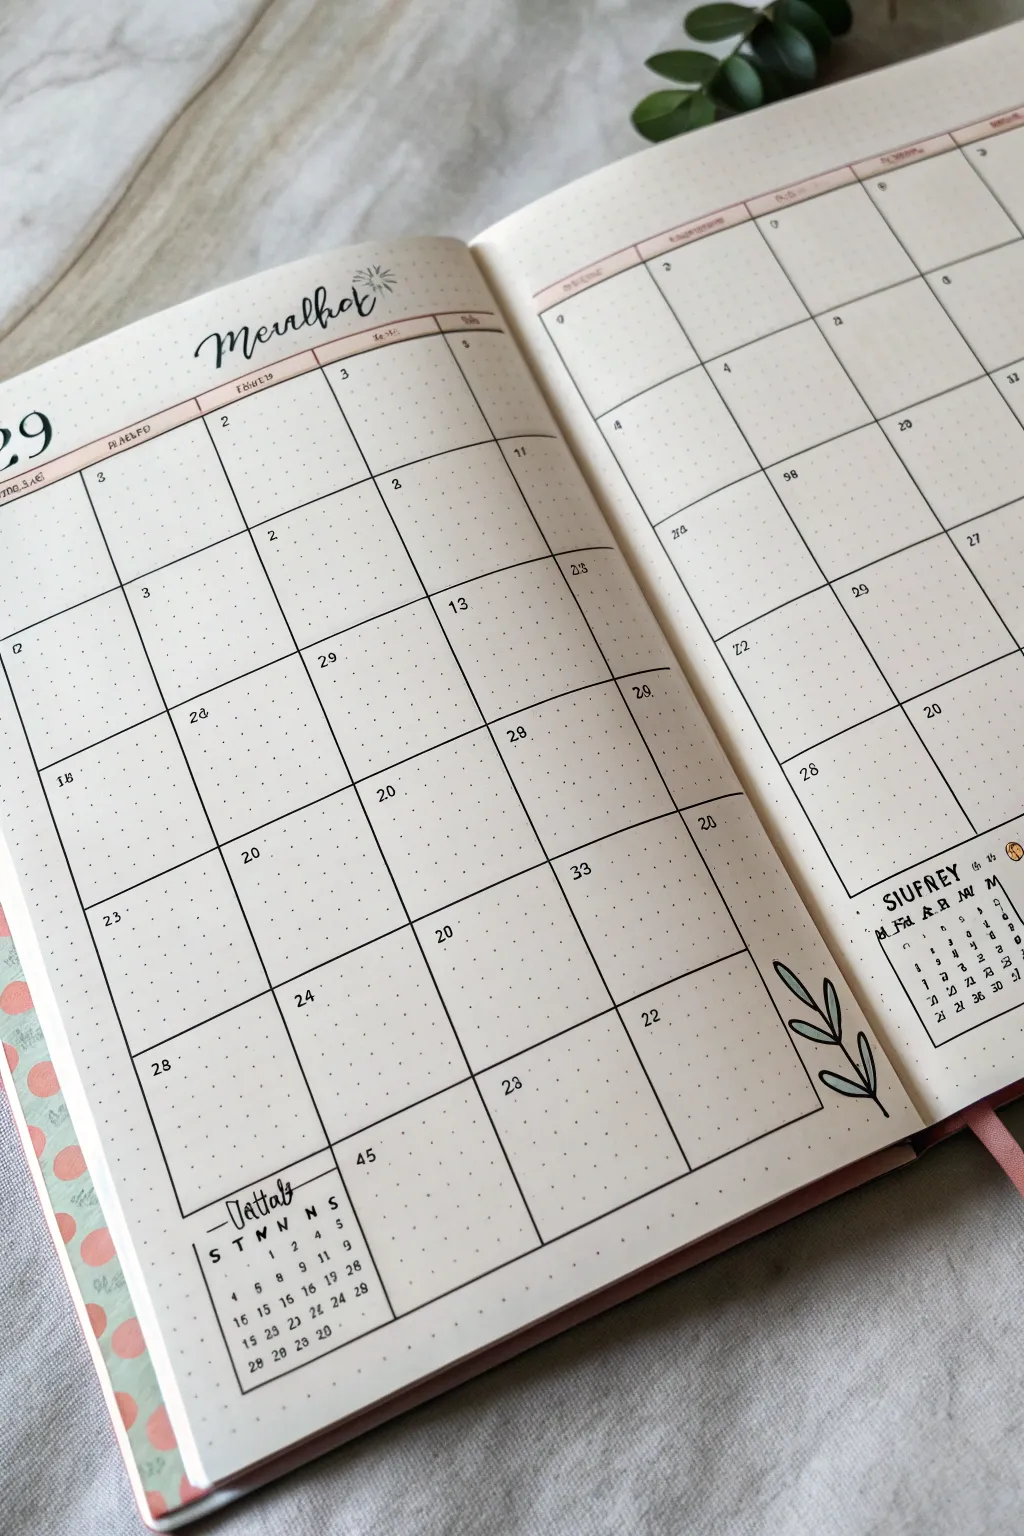
This elegant two-page spread combines functionality with a touch of nature, featuring clean lines and a soothing botanical doodle. Perfect for bullet journalists who need ample planning space without sacrificing aesthetic appeal, this layout keeps things organized and airy.
Step-by-Step Tutorial
Materials
- A5 dotted notebook (open flat)
- Fine liner pen (black, 0.3mm or 0.5mm)
- Ballpoint pen (black) for smaller text
- Ruler or straight edge
- Pencil and eraser
- Light green marker or colored pencil for leaves
- Pale pink or peach highlighter/marker for accents
Step 1: Setting the Foundation
-
Map out the grid:
Start by counting the dots on your open spread to determine the size of your calendar boxes. You will need a 7-column grid spanning both pages. Use a pencil to lightly mark the corners of each day’s box to ensure everything fits before committing to ink. -
Draw the main vertical lines:
Using your ruler and fine liner, draw the six vertical lines that separate the days of the week. Extend these lines from near the top of the page down to the bottom third, leaving space at the footer for notes. -
Add horizontal dividers:
Draw the horizontal lines to create five rows for the weeks. Ensure the boxes are square or slightly rectangular depending on your page dimensions. -
Create the header row:
Draw a double line at the very top of the grid to create a narrow header space for the days of the week. This separates the labels from the actual planning space. -
Ink the perimeter:
Close off the grid by drawing the final border lines on the far left and right. Leave the bottom area below the grid open for now.
Uneven Grid?
If your columns don’t divide perfectly by dot count, leave the extra space on the far right as a ‘notes’ column rather than forcing uneven daily boxes.
Step 2: Adding Functional Details
-
Letter the month title:
In the top left corner above the grid, script the name of the month in a loose, modern calligraphy style. Add a small, simple starburst doodle next to it for a bit of flair. -
Add accent color:
Using your pale pink highlighter or marker, carefully color in the narrow header row you created earlier. This adds a soft pop of color that defines the structure without overpowering it. -
Write the days of the week:
With a fine ballpoint pen, write the abbreviations for the days (M, T, W, T, F, S, S) inside the pink header strip. -
Number the dates:
Go through each box and write the date number in the top left corner using a small, neat print font. I find it helpful to double-check a real calendar on my phone while doing this to avoid mistakes. -
Create the mini-calendars:
In the bottom corners of the left and right pages (outside the main grid), draw small square boxes. Inside these, write out a mini month-at-a-glance calendar for the current and next month. -
Label the note spaces:
Above the mini-calendars, write a header like ‘Notes’ or ‘Summary’ in a decorative script similar to the main title.
Level Up: Washi Tape
Instead of using a highlighter for the header row, apply a thin strip of pastel washi tape. It adds texture and is repositionable if you make a mistake.
Step 3: Finishing Touches
-
Sketch the botanical doodle:
In the bottom right corner of the right page, pencil in a simple, curved stem with several oval-shaped leaves branching off. -
Ink the leaves:
Trace over your pencil sketch with the fine liner. Keep the lines smooth and continuous for an organic look. -
Add color to the leaves:
Use your light green marker to fill in the leaves. You don’t have to be perfect—staying slightly outside the lines or leaving white space can add artistic character. -
Erase pencil marks:
Once the ink is completely dry, gently erase all underlying pencil grid marks to clean up the spread. -
Final check:
Review your dates and headers for clarity, and strengthen any lines that look too faint.
Now you have a beautifully organized space ready to help you tackle the month ahead


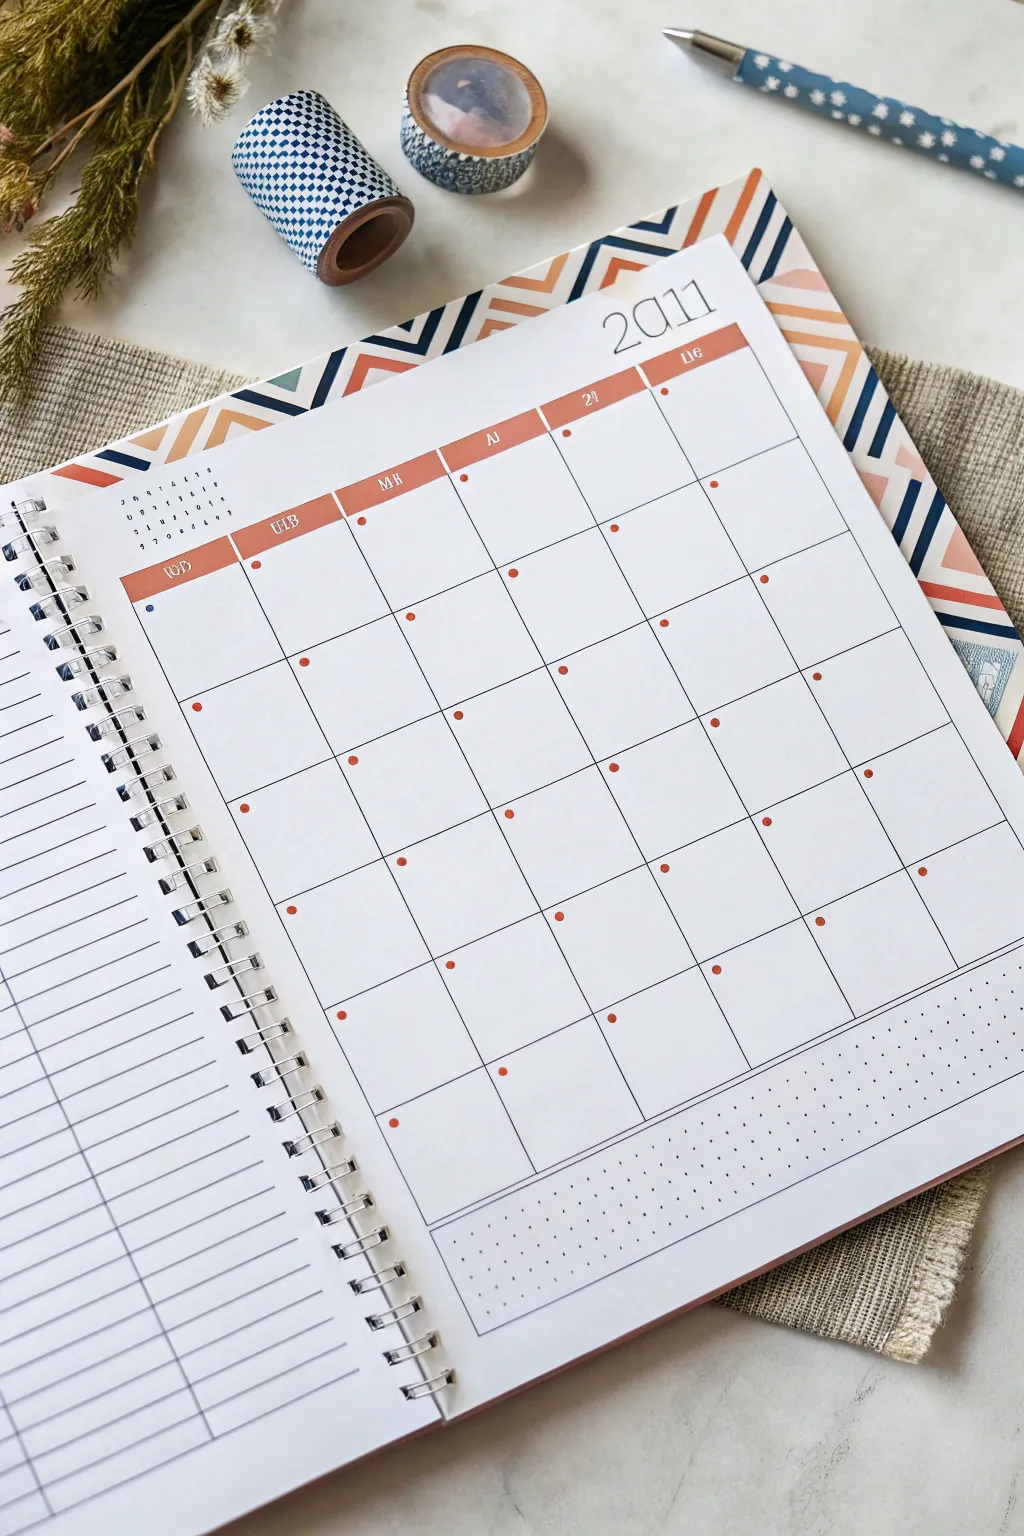
Polaroid-Style Frames Around Important Dates

Kick off the new year with this clean, minimalist minimalist monthly spread on dot grid paper featuring a hand-drawn calendar grid and delicate floral accents. The layout balances structural organization with soft, hand-lettered headers for a charming, productive start.
Step-by-Step
Materials
- A5 dot grid journal or notebook
- Fine liner pen (0.3mm or 0.5mm, black)
- Brush pen (black) for calligraphy
- Ruler (clear acrylic works best)
- Pencil and eraser
- Faint pink or coral highlighter/marker
- Light blue fine liner or marker
Step 1: Planning the Grid
-
Count your dots:
Begin by counting the available horizontal dots on your page to center your calendar. For a standard A5 journal, a 7-column layout usually fits well with 4 or 5 dot spaces per column. -
Draft the outline:
Using a pencil and ruler, lightly sketch the main rectangular box that will hold your calendar. Leave plenty of room at the top (about 1/4 of the page) for your header. -
Mark column widths:
Divide your large rectangle into 7 vertical columns. Ensure each column is equal in width by counting the dots carefully. -
Set row heights:
Divide the rectangle horizontally into 5 or 6 rows, depending on how many weeks are in the month. Standard squares are often 5×5 or 6×6 dots.
Step 2: Inking the Structure
-
Trace vertical lines:
Switch to your black fine liner. Place your ruler along your penciled vertical marks and draw smooth, straight lines from the top of the grid to the bottom. -
Trace horizontal lines:
Ink the horizontal rows next. Be careful to stop exactly at the vertical borders to keep the frame neat. -
Erase guidelines:
Wait a moment for the ink to dry completely to avoid smudging, then gently erase all your pencil marks to reveal a crisp grid.
Oops, skipped a line?
If you make a mistake on the grid lines, turn it into a deliberate design choice by thickening that specific border or covering it with washi tape.
Step 3: Lettering and Details
-
Header calligraphy:
In the center of the white space above the grid, use your black brush pen to write the month name. Use light pressure for upstrokes and heavier pressure for downstrokes to achieve that bouncy calligraphy look. -
Add the year:
To the left of the month name, write ‘2016’ (or your current year) in a simple, slightly enlarged serif font using the fine liner. -
Label the days:
Above each column, write the abbreviations for the days of the week. You can use a small, quirky serif font to match the year. -
Number the dates:
Inside each box, write the date number in the top-left corner. Keep these small so you have plenty of writing space for appointments.
Make it Pop
Use a grey mildliner to add a drop shadow to the right and bottom of the entire calendar grid to make it look like it’s lifting off the page.
Step 4: Decorative Accents
-
Draw floral doodles:
To the right of the month header, draw three simple asterisk-style flowers using your pink or coral marker. These don’t need outlines; just simple strokes radiating from a center. -
Add blue details:
Use a light blue fine liner to draw tiny star bursts or smaller flowers interspersed between the pink ones for contrast. -
Enhance text:
If you like, add very small, subtle subtitles or translation notes under specific headers using your thinnest pen for visual texture.
Enjoy filling up your calm and orderly new spread as the month progresses
Sticky Note Calendar Entry Doodles
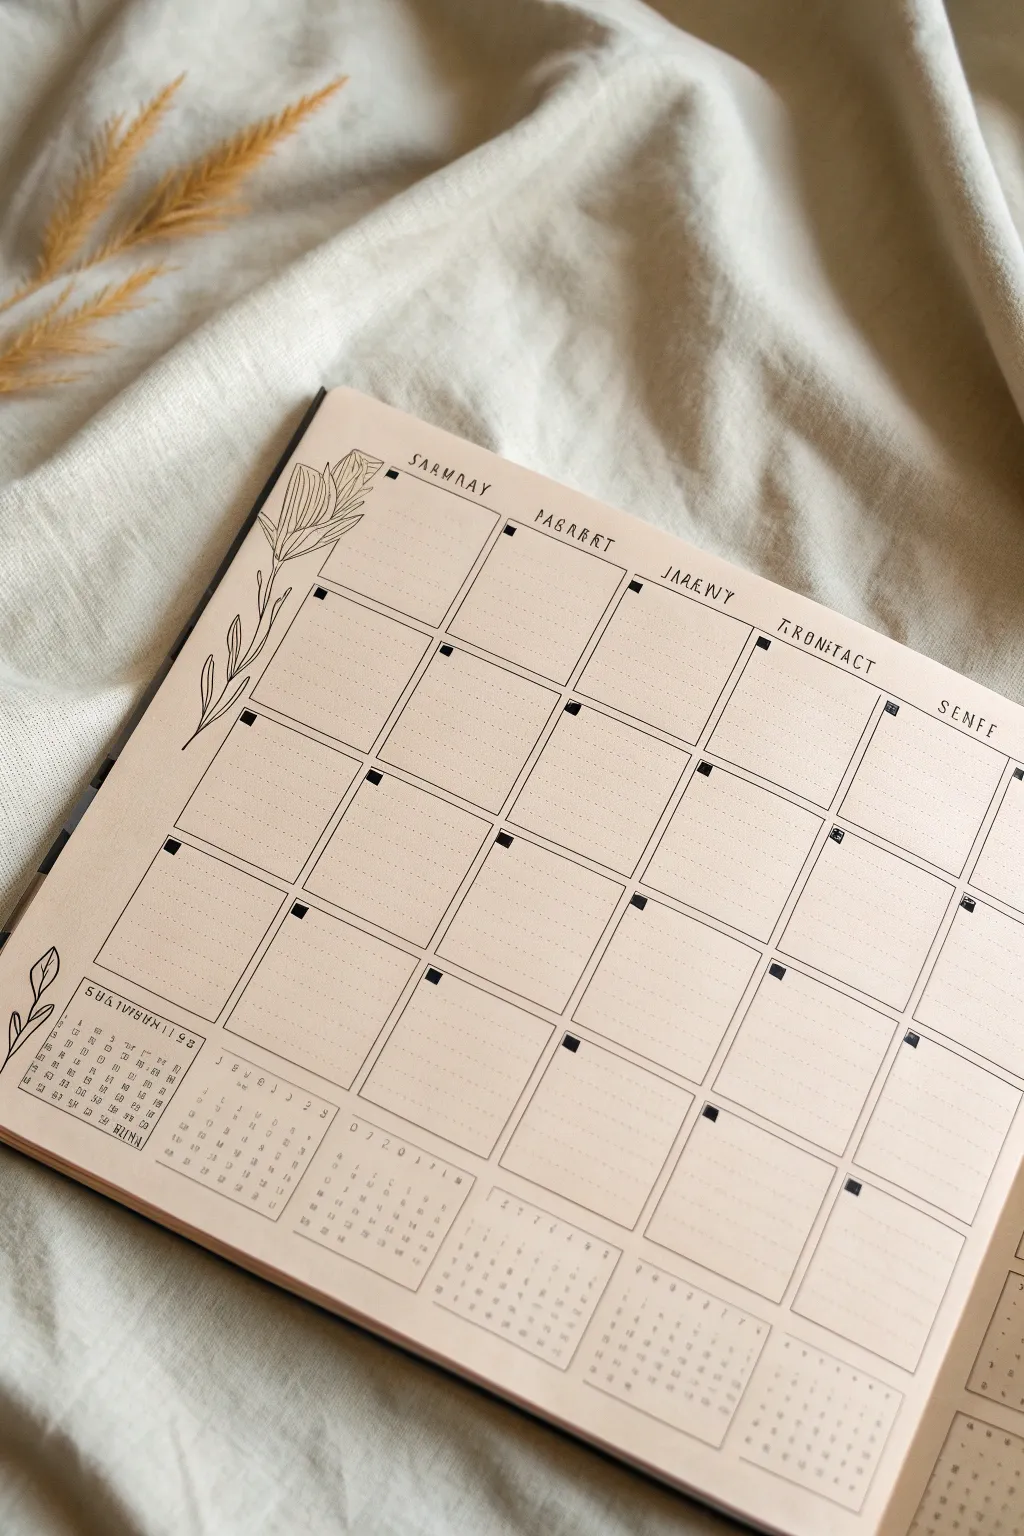
Create a stunningly simple yet functional monthly layout on kraft-colored paper featuring delicate floral line art and a structured grid. This aesthetic combines the warmth of tan paper with crisp black ink, perfect for tracking habits or planning ahead in your bullet journal.
Step-by-Step Tutorial
Materials
- Kraft paper notebook or loose-leaf kraft cardstock
- Fine liner pen (01 or 03 nib size, black)
- Ruler (clear acrylic is best for visibility)
- Pencil (HB or lighter)
- Eraser (kneaded or high-quality vinyl)
- Dot grid stencil (optional, if paper isn’t pre-dotted)
Step 1: Setting the Structure
-
Measure the margins:
Begin by deciding on the overall size of your calendar grid. Leave a generous margin on the left side (about 1.5 to 2 inches) for the floral illustration. The top, right, and bottom margins can be narrower, roughly 0.5 inches. -
Draft the grid layout:
Using your pencil and ruler, lightly sketch a grid of 5 columns and 5 or 6 rows, depending on the month’s needs. Aim for squares that are approximately 1.5 inches by 1.5 inches. -
Add header boxes:
Draw small, subtle rectangular guidelines above each column where your day names will go. Keep these very faint as they act only as spacing guides.
Step 2: Inking the Grid
-
Trace the vertical lines:
Switch to your fine liner pen. Place your ruler firmly and trace the vertical lines of your grid boxes. Lift the pen slightly at the intersections if you want a more broken, rustic look, or keep them connected for a clean finish. -
Trace the horizontal lines:
Ink the horizontal lines next. Ensure the corners meet neatly without overshooting. Allow the ink to dry for a moment before moving your hand across the page to avoid smudges. -
Add the corner accents:
To give the illusion of taped-in notes or a checklist, color in a small, solid black square in the top-left corner of each calendar box. This acts as a date placeholder.
Smudge Prevention
Kraft paper surfaces can sometimes absorb ink slowly. Place a scrap piece of paper under your drawing hand as you work across the page to prevent oils or smudges.
Step 3: Drawing the Floral Details
-
Sketch the main stem:
In the left margin you reserved earlier, lightly pencil a long, curving line that starts from the bottom left and reaches up toward the top. -
Add leave shapes:
Pencil in elongated, lance-shaped leaves branching off the main stem. Vary the angles so some point upward and others droop slightly for a natural feel. -
Ink the botanical art:
Go over your pencil sketch with the fine liner. Use a confident, steady stroke. I like to add a single center vein line to each leaf, keeping the shading very minimal to match the clean aesthetic. -
Repeat at the bottom corner:
Draw a smaller, simpler version of the plant springing from the bottom left corner, just a few leaves high, to balance the visual weight.
Highlight It
Use a white gel pen to add tiny highlights on the black corner squares or to write the date numbers inside them for high contrast.
Step 4: Text and Final Touches
-
Lettering the headers:
At the top of each column, write the days of the week. The style in the example uses a quirky, evenly-spaced serif font where letters are slightly separated. You can mimic this or use your own handwriting. -
Adding mini-calendars:
At the bottom of the page, beneath the main grid, pencil in outlines for small rectangular tracker boxes. -
Grid the mini-trackers:
Fill these rectangles with a tiny grid (7 columns for days of the week). Ink these carefully; a 005 or 01 pen nib works best here for the tiny details. -
Populate the trackers:
Add tiny numbers or dots inside these mini-grids to represent dates. These are perfect for habit tracking or monthly overviews. -
Erase guidelines:
Wait at least five to ten minutes to ensure all ink is completely bone dry. Gently erase all visible pencil marks, being careful not to wrinkle the paper.
Now you have a structured canvas ready to organize your month with clarity and style
Doodled Washi Tape Strips as Dividers
Transform a plain planner page into a structured, geometrically pleasing layout using a clever combination of washi tape and pen work. This project focuses on creating a custom monthly grid with a retro-inspired header that mimics overlapping tape strips.
Step-by-Step Guide
Materials
- Spiral-bound notebook or blank journal (A4 or A5 size)
- Ruler (clear plastic is best)
- Fine liner pen (black, 0.3mm or 0.5mm)
- Blue or grey fine liner for day names
- Orange or terracotta marker/highlighter
- Pencil and eraser
- Patterned Washi tape (geometric or chevron pattern)
- Solid color Washi tape (navy blue or similar)
- Small dot stickers (red/orange) or a red marker
Step 1: Planning the Layout
-
Measure margins:
Start by deciding on the margins for your calendar. Leave about an inch of space at the top for the decorative header and the year. -
Draft the grid:
Using a pencil and ruler, lightly sketch a 7-column grid. Ensure the columns are of equal width. The height should leave enough room at the bottom for a notes section. -
Define the notes area:
Draw a horizontal line below your main grid to designate the ‘Notes’ or ‘To Do’ section at the bottom of the page.
Sticky Situation
If your washi tape tears the paper when repositioning, stick it to your jeans or skin first. This removes some tact, making it safer for paper.
Step 2: Creating the Header
-
Apply patterned tape:
Cut strips of chevron or geometric patterned washi tape. Apply them diagonally along the top edge of the page to create a dynamic background border. -
Layer solid tape:
Intersperse thin strips of solid navy blue washi tape amidst the patterned pieces to add contrast and depth to the header design. -
Clean the edges:
Use scissors or a craft knife to trim any excess tape hanging off the paper edge for a clean, professional finish. -
Add the year:
In the top right corner, just below your tape border, write the year in a large, thin serif font using your black fine liner.
Ink Smudge Alert
Place a scrap piece of paper under your hand while writing. This prevents oils from your skin transferring and stops ink from smudging as you move across the grid.
Step 3: Inking the Grid
-
Draw vertical lines:
Trace over your vertical pencil lines with the black fine liner. Keep a steady hand or use the ruler for crisp straight edges. -
Draw horizontal lines:
Ink the horizontal grid lines. Stop shorter on the very top line so you don’t cross into the header area you are about to color. -
Create the header bar:
At the top of the grid columns, draw a thicker box or color in the top 0.5cm row with your terracotta marker to create a solid header bar for the days of the week. -
Label the days:
Inside the orange header bar, write the days of the week using a white gel pen if the marker is dark, or simply leave negative space. Alternatively, write the abbreviations in white ink over the dry marker. -
Erase guidelines:
Once the ink is completely dry, gently erase any remaining pencil sketches to clean up the page.
Step 4: Adding Details
-
Dot the dates:
Place a small red dot sticker or draw a small solid circle in the top left corner of each grid box. This serves as a placeholder for the numerical date. -
Mark specific events:
I like to use a blue dot or a different color to signify special holidays or birthdays within the grid, distinct from the regular date markers. -
Detail the notes section:
In the bottom section, draw a grid of tiny dots (bullet journal style) rather than lines. This separates the space visually from the main calendar. -
Border the notes:
Draw a simple rectangular frame around the dot-grid notes section to contain it neatly. -
Add a mini-calendar:
In the open white space to the left of the main grid (if using a spread), write a tiny numerical overview of the month for quick reference.
Now you have a structured, beautifully aligned calendar ready to be filled with your plans.
Mood Tracker Faces Inside Day Squares
Embrace a clean, aesthetic look for your monthly planning with this minimalist grid layout, featuring unique typography and soft peach accents. This spread combines the structure of a traditional calendar with the artistic freedom of a bullet journal, perfect for those who love understated elegance.
Detailed Instructions
Materials
- A5 Dot grid or blank notebook
- Fine liner pen (0.3mm or 0.5mm, black)
- Ruler or straight edge
- Peach or blush pink watercolor paint (or mildliner)
- Small round paintbrush
- Pencil and eraser
Step 1: Drafting the Grid Structure
-
Calculations:
Begin by counting the available horizontal and vertical space on your page. You will need a grid that is 7 columns wide and 6 rows high. Divide your page width by 7 to determine the width of each daily box. -
Pencil Outline:
Using a pencil and ruler, lightly mark the four corners of your main calendar rectangle. Leave ample margin at the top for headers and a smaller margin at the bottom. -
Vertical Lines:
Draw the six vertical lines to create your seven columns. Ensure they are evenly spaced based on your earlier calculations. -
Horizontal Lines:
Draw the five horizontal lines to create your six rows. The top row, intended for headers, can be slightly shorter than the date boxes if you prefer a compact look. -
Inking the Frame:
Once satisfied with the pencil variation, trace over the main outer rectangle and the internal grid lines with your black fine liner. Use a ruler for crisp, professional lines, or freehand it slightly if you want that organic feel shown in the reference.
Step 2: Typography and Headers
-
Top Header Row:
In the top row of boxes, letter the days of the week. To match the unique style in the image, use a serif font with slight quirks—perhaps extending the serifs or varying letter heights. -
Mini Calendar:
In the very first box of the grid (top left), draw a tiny 7×5 or 7×6 mini-grid representation. This acts as a reference ‘month-at-a-glance’. Letter the days (M, T, W, etc.) above it in a tiny font. -
Artistic Month Title:
Above the mini-calendar in that first square, write the name of the month or a short abbreviation like ‘MID’ or ‘JAN’ in a stylized, bold serif font. -
Adding Dates:
Fill in the dates for the month in the top right corner of each subsequent box. Use a small, neat serif number style. Double-check your real calendar to ensure the dates align with the correct weekdays.
Bleed-Through Blues?
If your watercolor bleeds through the page, stick to ‘dry’ media. A mildliner or pale Copic marker in ‘Barley Beige’ creates a similar effect without warping paper.
Step 3: Adding Artistic Details
-
Watercolor Swatches:
Mix a very watery, pale peach or blush watercolor. I like to test the opacity on a scrap paper first to ensure it isn’t too dark. -
Organic Shapes:
Paint a small, amorphous organic shape in the first box behind your month title. It should look like a soft cloud or a spilled drop. -
Bottom Accent:
Repeat this organic painted shape in one or two empty boxes at the end of the month (the empty spaces after the 30th or 31st) to balance the composition. -
Drying:
Let the watercolor dry completely. This is crucial before doing any final ink touches to prevent bleeding. -
Decorative Elements:
Once dry, draw a small, simple asterisk or starburst shape near the top paint swatch using a lighter brown or orange pen for a subtle pop. -
Final Erasure:
Wait until all ink and paint is bone dry, then gently erase all remaining pencil guidelines from your initial grid drafting to reveal the clean layout.
Add Functional Flair
Use the empty boxes at the start or end of the month to list top 3 monthly goals or a habit tracker, keeping the minimalist aesthetic intact.
Now you have a structured yet artistically open canvas ready to be filled with your month’s plans
Weather Icons Along the Top of Each Week
Brighten up your weekly planning with this clean, cheerful calendar layout featuring hand-drawn weather icons. This simple bullet journal spread combines practical organization with a touch of whimsical artistry.
How-To Guide
Materials
- A5 Dot grid journal or sketchbook
- Fine liner pen (0.3mm or 0.5mm, black)
- Pencil (HB)
- Ruler
- Eraser
- Yellow marker or colored pencil
- Beige or light orange marker involved
Step 1: Setting the Framework
-
Draft the grid structure:
Begin by lightly sketching your calendar grid with a pencil and ruler. Create a standard 5-row by 7-column layout, ensuring the boxes are large enough to write in. -
Leave room for headers:
Make sure to leave a generous amount of white space above the top row of the grid. This area will house your weather doodles and month title later. -
Ink the main lines:
Using your fine liner pen and ruler, trace over your pencil grid lines. Keep your hand steady and lift the pen cleanly at the intersections for a crisp look. -
Add day labels:
In the top left corner of each daily box, write the date number small and neat. Add simple weekday abbreviations (like ‘Mon’, ‘Tue’) at the top of the columns if desired, matching the loose handwriting style shown.
Smudge Alert
If your fine liner smears when erasing, switch to a waterproof pigment liner. Wait longer before erasing, or dab the eraser gently instead of rubbing.
Step 2: Doodling the Weather
-
Sketch the suns:
In the open space above the grid, lightly pencil in small circles to represent sunny days. Space them out nicely above specific columns. -
Add the rays:
Draw short, straight lines radiating outward from your circles. Mix up the pattern by alternating between slightly longer and shorter rays for a playful feel. -
Draft the clouds:
Next to the suns, sketch fluffy cloud shapes. Use a series of connected curved lines—usually three to five ‘bumps’ creates a classic cloud look. -
Ink the weather icons:
Go over your weather sketches with the fine liner. For the clouds, try to keep the line weight consistent and smooth. -
Color the sun:
Take your yellow marker and carefully fill in the center circle of the sun icons. You don’t need to color the rays; keeping them black preserves the high-contrast doodle style.
Step 3: Adding Details & Polish
-
Draw the lightning bolt:
Find a box later in the month to add a visual accent. Draw a jagged lightning bolt shape, keeping the lines sharp and angular. -
Color the accent:
Fill the lightning bolt with a beige or light orange marker for a subtle pop of color that doesn’t overpower the page. -
Add the mini-calendar:
In one of the empty grid boxes (usually at the start or end of the month), drawn a tiny grid. Fill it with a miniature overview of the dates for quick reference. -
Write the month title:
On the opposite page or top right corner, write the month name in a relaxed, cursive script. Add small dots or stars around it for decoration. -
Erase guidelines:
Once the ink is completely dry—give it a full minute—gently erase all your underlying pencil sketches to clean up the page.
Seasonal Swaps
Customize the top row icons for the season! Try snowflakes for winter, raindrops specifically for April looking spreads, or falling leaves for autumn.
You have now created a charming and functional calendar spread ready for your plans
Stamp-Style Doodles for Celebrations
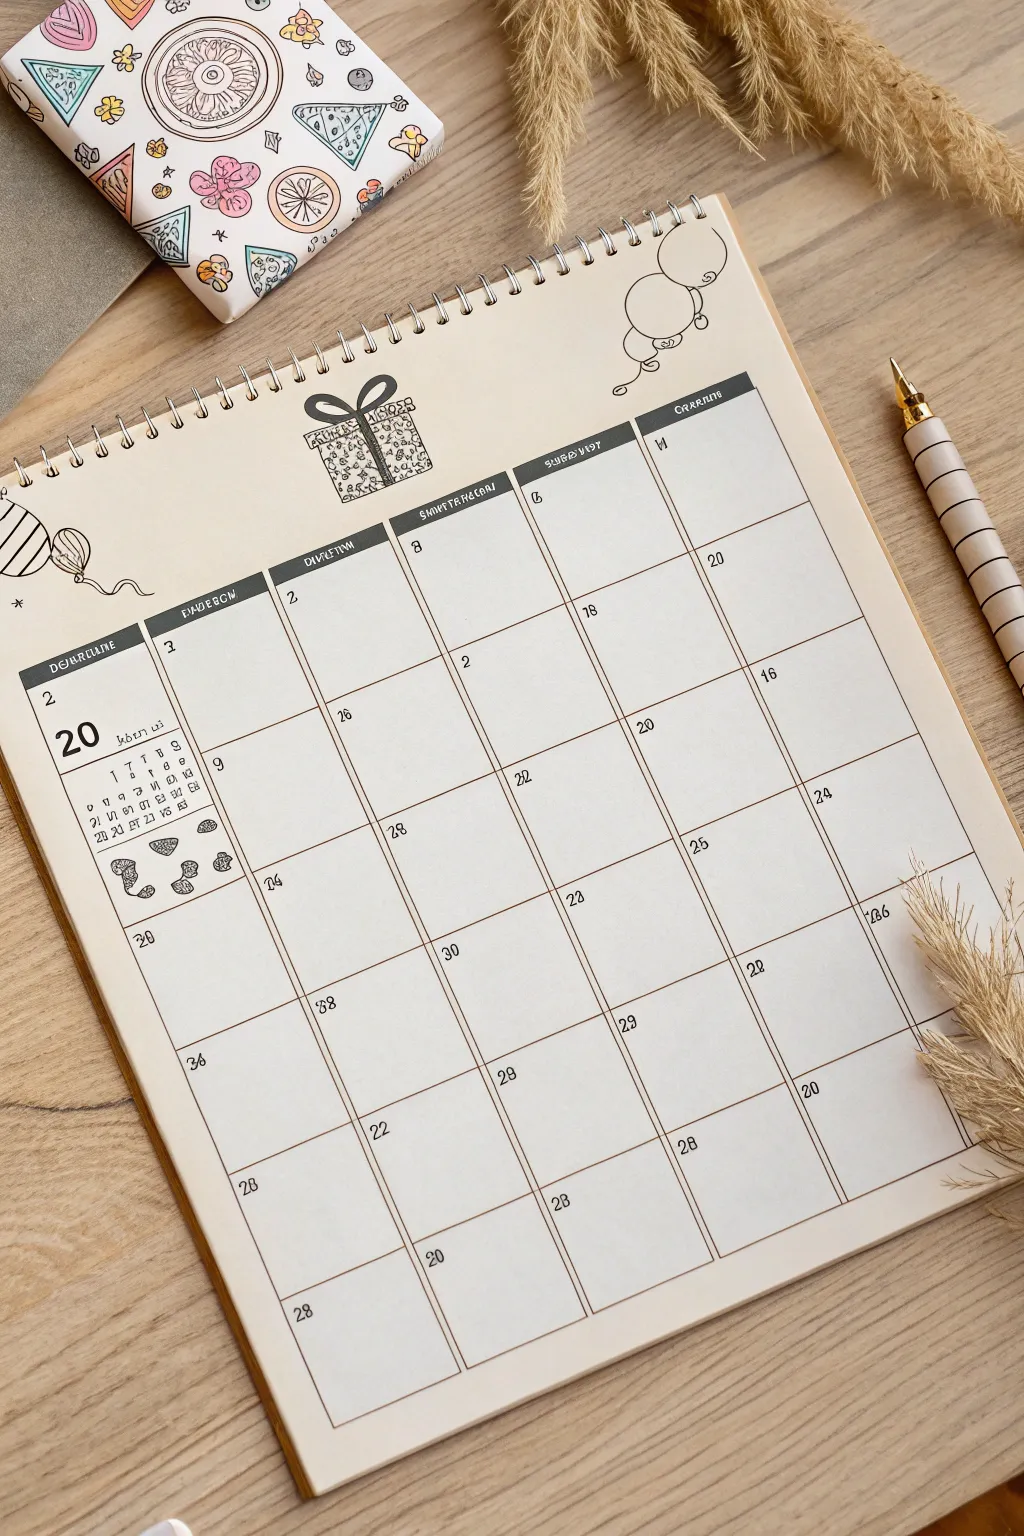
Capture the joy of gift-giving with this minimalist calendar layout featuring charming, stamp-style illustrations. The clean grid design balanced with playful, hand-drawn present and balloon motifs makes organizational planning feel like a celebration.
Step-by-Step Guide
Materials
- Spiral-bound sketchbook or heavy cardstock
- Ruler (preferably clear)
- Fine-point black drawing pen (0.3mm or 0.5mm)
- Pencil and eraser
- Light grey or brown marker (for headers)
- White gel pen (optional for details)
- Reference calendar for dates
Step 1: Planning the Grid
-
Define the layout:
Start by measuring your page to center the calendar grid. You will need a standard 7-column layout for the days of the week, with 5 or 6 rows depending on the specific month you are drawing. -
Draw vertical guides:
Using your pencil and ruler, lightly mark the vertical lines. Ensure the columns are equal in width to keep the layout looking professional. -
Draw horizontal guides:
Mark the horizontal lines for your rows. Leave extra space at the top of the grid for a decorative header bar where the days of the week will go. -
Ink the main grid:
Swith to your fine-point black pen. Carefully trace over your pencil grid lines. I find it helps to rotate the paper so you are always pulling the pen toward you for straighter lines. -
Create the header bar:
Draw the darker header row at the top of the grid. You can fill this in solidly with a dark grey or black marker, leaving small negative spaces for the text, or simply outline it heavily.
Ink Consistency
To get that ‘stamp’ look, slightly vary your line weight. Press harder on corners and lighter on straight edges to mimic uneven ink transfer.
Step 2: Adding Dates and Structure
-
Label the days:
Inside the header bar, write the abbreviations for the days of the week (M, T, W, T, F, S, S) using a white gel pen if the background is dark, or leave the paper white. -
Insert the dates:
Write the numerical dates in the top left corner of each daily box. Keep your handwriting small and consistent to leave room for your actual plans. -
Add the month feature:
On the far left column or in a dedicated notes sidebar, draw a large number ’20’ (or the current year/date) followed by a mini-calendar grid for quick reference. -
Erase guidelines:
Once the ink is completely dry, gently erase all underlying pencil marks to reveal a crisp, clean structure.
Color Pop
Use a single pastel highlighter (like mint or coral) to color just the ribbon on the gift or the specific dates of holidays for a subtle accent.
Step 3: Drawing the Stamp-Style Doodles
-
Sketch the center gift:
Above the grid, pencil in a large square gift box. This is the focal point. Add a bow on top with loops that are slightly asymmetrical for a hand-drawn feel. -
Ink the gift outline:
Trace the gift box with your pen. Thicken the outer lines slightly to make it pop, mimicking the look of a rubber stamp imprint. -
Add interior patterns:
Fill the gift box with tiny, repetitive patterns. Use small circles, animal prints, or confetti shapes. Leave the ribbon area clear or shade it differently to create contrast. -
Draw the left decoration:
On the left side of the header, sketch a striped balloon. Draw the string wavy and loose, connecting it down toward the grid or letting it float freely. -
Draw the right decoration:
On the right side, add a second balloon or a circular doodle. In the example, a simple round character or ornament adds balance to the composition. -
Detail the sidebar:
Under the mini-calendar on the left, draw small thematic icons like seashells or stones. Use stippling (tiny dots) to give them texture and depth. -
Final touches:
Scan the page for any uneven lines. You can thicken the day-of-the-week header bar again to ensure it creates a strong visual anchor for your artwork.
Now you have a beautifully organized and artistic start to your month that is ready to be filled with plans
Countdown Chain Doodle Across a Date Range
This clean and sophisticated bullet journal layout combines crisp lines with subtle rustic touches for a perfectly organized November. The warm parchment tones and delicate speckling create a cozy autumn vibe without cluttering your planning space.
How-To Guide
Materials
- Dotted grid notebook (A5 or B5 size)
- Black fineliner pens (0.1mm, 0.3mm, and 0.5mm)
- Light brown or beige mildliner/highlighter
- Ruler (preferably clear)
- Pencil and eraser
- Brown colored pencil (for speckling)
- Scrap paper (for testing)
Step 1: Setting the Foundation
-
Grid calculation:
Count the total width of your available dotted grid. Divide this by 6 (since the weekend days are often stacked or narrower) or 7 to determine the width of each daily box. Mark these vertical guides lightly with a pencil. -
Vertical layout:
Decide on the height of your rows. A standard calendar usually needs 5 or 6 rows. Mark the horizontal lines lightly in pencil, leaving plenty of room at the top for the header. -
Drafting the skeleton:
Using your ruler and pencil, draw the full grid layout. Don’t press too hard; these lines are just guides for your ink later.
Step 2: Inking the Calendar
-
Main grid lines:
Switch to your 0.3mm fineliner. Draw over your pencil grid lines carefully. For a hand-drawn look like the original, you can skip the ruler here and draw flexible, straight lines by hand. -
Top headers:
Draw small rectangular boxes at the top of each column to house the days of the week. These should be distinctly separate from the grid below. -
Adding header color:
Take your beige or light brown highlighter. Fill in the header boxes you just drew. I like to do this before writing the text so the ink doesn’t smear. -
Days of the week:
Once the highlighter is dry, use a 0.5mm pen to write the days of the week inside the colored boxes. Use a stylized, slightly gothic or serif font for that vintage feel. -
Drying and erasing:
Wait at least five minutes for the ink to settle completely. Gently erase all your underlying pencil marks to clean up the page.
Ink Confidence
If you make a mistake on a grid line, don’t white it out instantly. Often, turning a wiggly line into a thicker, bolder border can hide the error perfectly.
Step 3: Details & Typography
-
Main title:
At the top left, sketch ‘November’ in a loosely cursive, calligraphy style using a pencil first. The ‘N’ should act as a large swash. -
Inking the title:
Go over your title with a 0.5mm or brush pen. Vary the pressure slightly on downstrokes to give it a calligraphy affect without needing specialized tools. -
Numbering dates:
Using your finest 0.1mm pen, write the dates in the top left corner of each daily box. Keep these numbers small and neat to maximize writing space.
Rustic Texture
Dip an old toothbrush in watered-down brown watercolor and flick it lightly over the title area for a true vintage parchment speckle effect.
Step 4: Decorative Finishes
-
Right-side sidebar:
If you have extra space on the right page, create a vertical column for notes or mini-calendars. Use a spiral notebook edge stencil or draw small loops to mimic a spiral binding visually. -
Mini calendars:
Draw tiny grids within that sidebar area for future month reference (December/January). Keep these very minimal. -
Speckling effect:
To achieve the textured look around the header, take a brown colored pencil. Sharpen it over a scrap paper, then gently rub the shavings onto the paper in random spots, or simply dot randomly with a fine-tip brown marker. -
Final check:
Look over the spread for any missing lines or smudges. Add a tiny accent line inside the header boxes if you want extra dimension.
Enjoy filling up your elegant new calendar as the month begins
Botanical Vine Border That Weaves Through Dates
Transform a plain planner page into a lush garden scene by intertwining real or faux botanical elements around your monthly grid. This three-dimensional approach adds a refreshing, organic texture to your scheduling that feels both grounded and elegant.
Detailed Instructions
Materials
- Spiral-bound monthly planner or bullet journal
- Real ivy vines (fresh or pressed) or high-quality faux silk ivy
- Small stems of seeded eucalyptus or dried baby’s breath
- Matte transparent tape or adhesive dots
- Fine-point black pen (for touch-ups or adding drawn tendrils)
- Scissors
- Tweezers (optional, for precise placement)
Step 1: Planning the Composition
-
Assess your layout:
Open your planner to a blank monthly spread. Note the spiral binding on the side; this will act as the ‘trellis’ for your main vine structure. -
Select your greenery:
Choose vines that are pliable and thin. If using fresh ivy, ensure it is dry to the touch to avoid warping the paper. I find that slightly woody stems hold their shape best against the page edges. -
Dry fit the main stem:
Lay your longest ivy strand across the top left corner, letting it drape diagonally down the left side of the page. Do not glue anything yet; simply experiment with how the leaves fall. -
Incorporate secondary stems:
Take a second, shorter vine and arrange it near the bottom right or bottom center to create a sense of balance, making sure it doesn’t obscure important writing spaces.
Loose Leaf Trouble?
If leaves keep popping off the stem while you work, dab a tiny dot of clear craft glue on the back of the leaf itself and press it directly to the paper for stability.
Step 2: Securing the Botanicals
-
Anchor the primary vine:
Starting at the top edge of the paper, use a small piece of matte tape or a glue dot to secure the thickest part of the main ivy stem. Place the adhesive underneath a leaf where possible to hide it. -
Shape the flow:
Gently bend the vine so it curves naturally. Secure it at key stress points—usually where the stem branches—using tiny strips of tape. The goal is to make it look like it’s growing across the page. -
Add dimension with the spiral:
If your stem is thin enough, tuck the very end of the vine into or under the metal spiral binding. This integrates the plant with the book’s physical structure. -
Attach the lower vines:
Secure your secondary vine at the bottom. Allow some leaves to hang slightly off the edge of the paper for a dynamic, overflowing effect.
Seasonal Switch-Up
Swap the greenery based on the month. Use tiny fern fronds for spring, pressed red maple leaves for October, or sprigs of holly and pine needles for December.
Step 3: Adding Delicate Details
-
Prepare the filler stems:
Snip small sprigs of the seeded eucalyptus or baby’s breath. These should be much smaller than the ivy leaves to provide contrast in scale. -
Tuck and layer:
Slide these delicate stems underneath the main ivy vines or poke them out from behind the calendar grid lines. Use tweezers if your fingers feel too clumsy for this step. -
Create interaction:
Position a few seeded tips so they look like they are ‘reaching’ toward specific dates on the grid. This connects the border decoration to the functional part of the planner. -
Secure the delicate ends:
Use the tiniest amount of adhesive to tack down the ends of these filler stems so they don’t snag when you close the book.
Step 4: Final Touches
-
Check specifically for obstructions:
Close the planner carefully and open it again. Ensure no leaves are getting crushed in the binding mechanism or folding awkwardy. -
Trim excess stems:
Snip away any thick woody parts of the stems that are preventing the book from closing reasonably flat. -
Enhance with ink (optional):
If there are gaps in your arrangement, use a fine-point black pen to sketch tiny connecting tendrils or extra leaves directly onto the paper, blending the real plants with illustration. -
Press for longevity:
If using fresh plants, place a heavy book on top of the closed planner for 24 hours to help press the leaves flat and set their position.
Enjoy the feeling of bringing the outdoors in every time you check your schedule
Calendar Grid Inside a Glass Jar Illustration
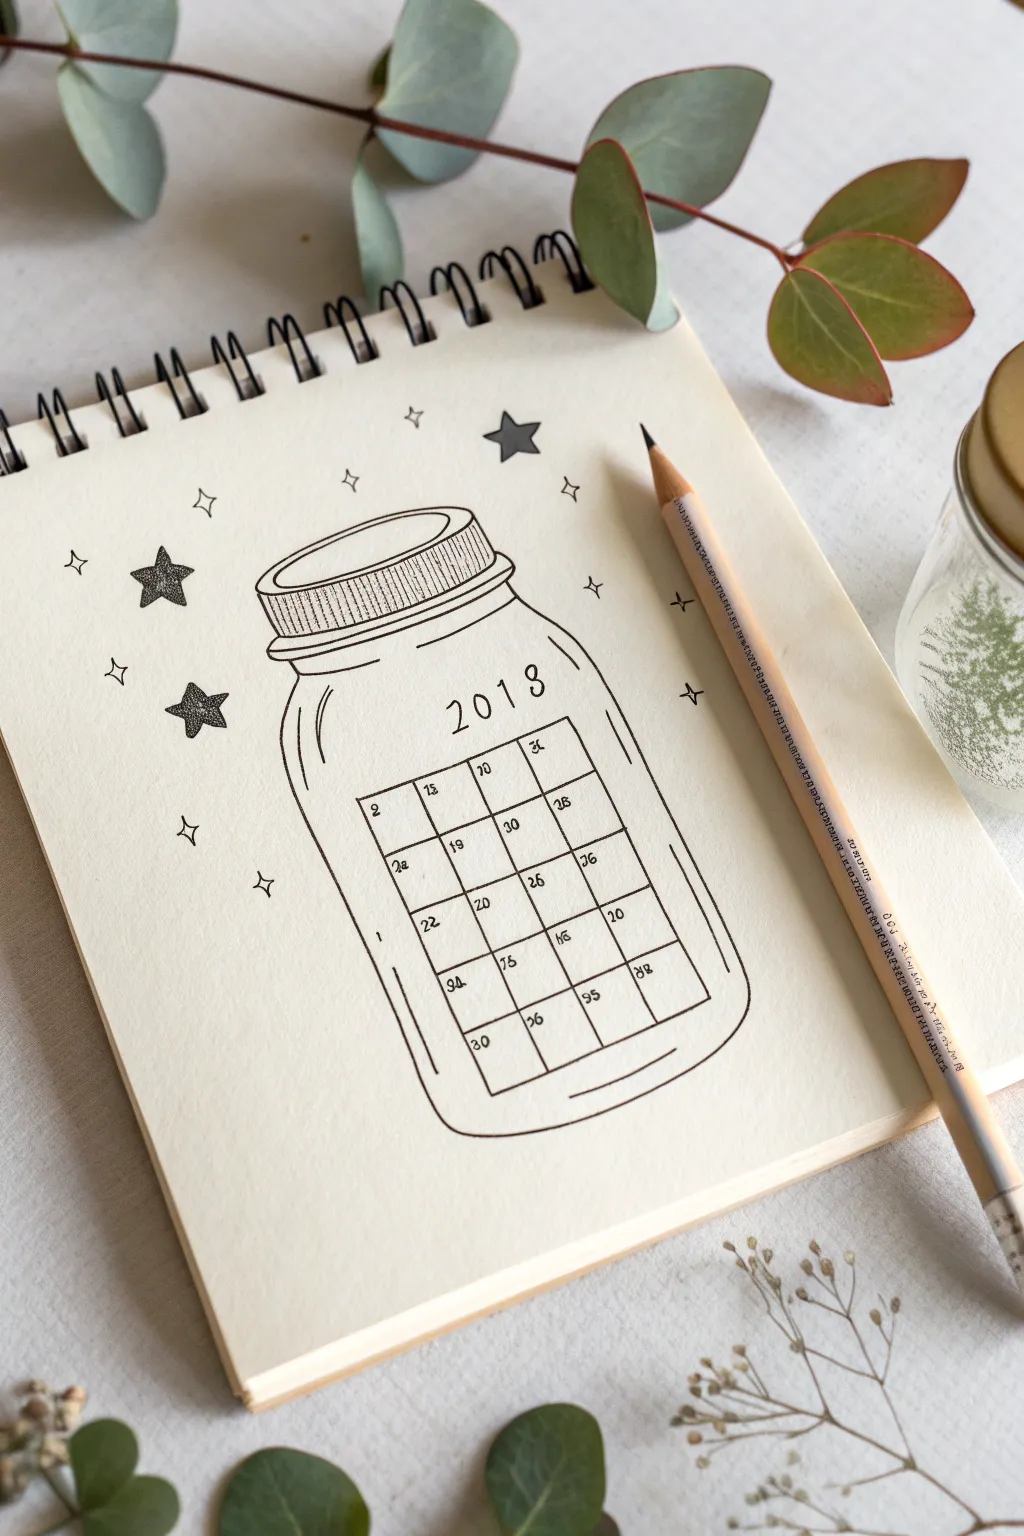
Capture the magic of the upcoming year with this charming bullet journal spread featuring a calendar grid nestled inside a sparkling glass jar. This minimalist line art design combines clean geometry with playful celestial touches for a perfect monthly planner page.
Step-by-Step
Materials
- Spiral-bound sketchbook or bullet journal
- Pencil (HB or 2H for sketching)
- Eraser
- Fine liner pen (black, 0.3mm or 0.5mm)
- Ruler
Step 1: Sketching the Jar Outline
-
Draft the lid:
Begin near the top center of your page. Lightly sketch a flattened oval for the top of the jar lid. Draw a second, slightly larger oval just beneath it to create the rim. -
Form the collar:
Connect the two ovals with short vertical lines. Add a third, slightly wider horizontal band below the rim to represent the threaded neck of the mason jar. -
Shape the jar body:
From the neck, draw two symmetrical curved lines flaring outwards to form the shoulders of the jar. Continue these lines straight down for the sides, then curve them gently inward at the bottom to meet in a flat base. -
Add dimension lines:
Sketch a thin inner line parallel to the left side of the jar to suggest the glass thickness and a few curved strokes near the bottom for reflection.
Starry Texture
For the shaded stars, denser dots near the center and fewer near the points creates a lovely 3D gradient effect.
Step 2: Creating the Calendar Grid
-
Outline the grid box:
Inside the jar’s belly, use your ruler to pencil a rectangle. Leave enough space at the top of the jar for the year header. -
Divide into cells:
Mark out a grid within your rectangle. For a standard month, you’ll typically need 7 columns (days) and 5 or 6 rows. In this specific design, a simplified 4-column layout is used for a cleaner look. -
Add the year:
Above the grid, strictly pencil in the year ‘2018’ (or your current year) in a simple, spaced-out sans serif font. Following the curve of the jar slightly adds a nice touch. -
Number the days:
Lightly write the dates into the top-left corner of each grid box.
Color Pop
Use a light blue highlighter or watercolor wash inside the jar’s edges to suggest glass, or color specific dates for holidays.
Step 3: Inking and Details
-
Ink the lid:
Switch to your fine liner pen. Carefully trace over your pencil lines for the lid. Add vertical hatching lines along the side of the lid band to simulate the texture of a screw-top. -
Trace the silhouette:
Go over the main jar outline with a confident, continuous stroke. Keep your hand loose to achieve smooth curves. -
Define the calendar:
Ink the calendar grid lines. I find freehanding these lines rather than using a ruler gives the drawing a warmer, more organic feel suitable for a journal. -
Ink the numbers:
carefully write over your date numbers. Keep them small and legible. -
Add glass reflexes:
Ink the inner contour line on the left and the curved reflection lines at the bottom right to make the jar look three-dimensional.
Step 4: Decorating and Finishing
-
Draw large stars:
Draw three large, five-pointed stars scattered around the outside of the jar. Fill them in with stippling (lots of tiny dots) to create a textured, shaded effect. -
Add diamond sparkles:
Draw several four-pointed diamond shapes (like elongated stars) floating around the jar to enhance the magical vibe. -
Erase pencil marks:
Wait until the ink is completely dry to avoid smudging. Then, gently erase all underlying pencil sketches to reveal a clean, crisp illustration.
Now you have a beautifully hand-drawn jar ready to hold all your plans for the month
Negative Space Calendar Made From Shapes
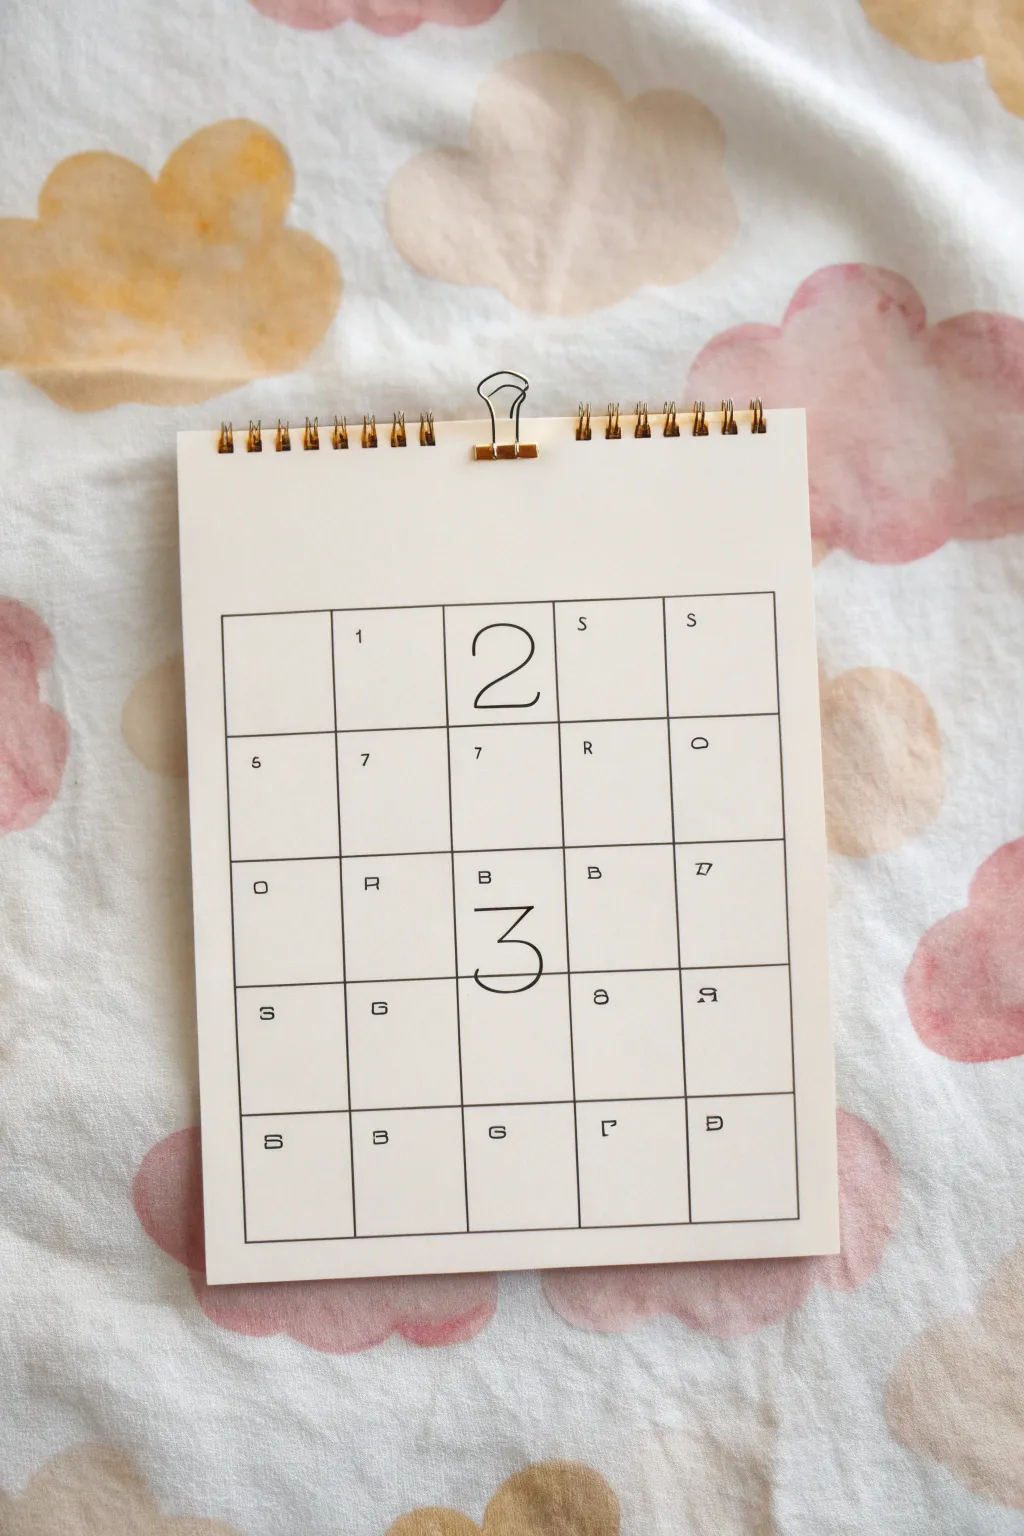
This minimalist calendar project turns standard date-keeping into a piece of abstract art by using a clean grid and oversized focal numbers. The unexpected arrangement of cryptic letters and numbers surrounding the large year digits creates an intriguing, modern puzzle aesthetic perfect for a desk or wall.
Detailed Instructions
Materials
- White cardstock or heavy mixed-media paper (A5 or similar size)
- Black fine-liner pen (0.3mm or 0.5mm)
- Black brush pen or broad marker (for large numbers)
- Ruler
- Pencil
- Binder clip (gold or copper for style)
- Spiral binding coil (optional, for decorative top edge)
- Eraser
Step 1: Setting the Structure
-
Measure margins:
Begin with your blank sheet of cardstock. Measure a generous margin from the top edge—about one-third of the page height—to leave plenty of negative space. This top area will remain mostly blank. -
Draw the grid perimeter:
Using your pencil and ruler, draw a large rectangle that will house your calendar grid. Leave equal margins on the left, right, and bottom sides to frame the design neatly. -
Divide into columns:
Mark the top and bottom horizontal lines of your rectangle at four equal intervals to create a total of five columns. Connect these marks with light vertical pencil lines. -
Divide into rows:
Similarly, mark the vertical sides at four equal intervals to create five rows. Connect these horizontally. You should now have a grid consisting of 25 equal squares (5×5). -
Ink the lines:
Once you are happy with the grid spacing, trace over your pencil lines with a 0.3mm fine-liner. Use a ruler to ensure the lines remain crisp and perfectly straight.
Step 2: Adding the Content
-
Draft the focal year:
The centerpiece of this design is the split year. In the top row, middle box, lightly pencil a large, thin geometric ‘2’. In the middle row, middle box directly below it, sketch a matching ‘3’. These should span almost the entire height of their respective boxes. -
Ink the large numbers:
Carefully trace the ‘2’ and ‘3’ with your fine-liner. Unlike a calligraphy project, you want these lines to be consistent in weight with the grid borders, perhaps just a hair thicker, to maintain that modern architectural look. -
Place the dates:
This calendar uses abstract placement. In the first box of the top row, pencil a small ‘1’. Continue filling selected boxes with seemingly random numbers like ‘5’, ‘7’, or letters. The specific image shows a cryptic mix (S, R, O, B) rather than sequential dates, treating the characters as graphic elements. -
Vary character orientation:
To enhance the ‘coded’ aesthetic seen in the example, rotate some letters. For instance, draw the ‘R’ in the bottom right corner sideways or upside down. Keep these characters very small and centered within their grid squares. -
Ink the small details:
Go over your small numbers and letters with a very fine pen tip. Keep the strokes clean and unserifed for clarity. -
Final clean up:
Wait for the ink to fully dry—I usually give it at least 15 minutes to be safe. Then, gently erase all pencil guidelines, including any grid construction marks that extended beyond the corners.
Grid Precision
Use a plotted ruler or a translucent quilting ruler to see your previous lines while measuring. This ensures your grid stays perfectly square.
Step 3: Final Assembly
-
Prep the binding edge:
If you want to mimic the spiral-bound look from the photo without a machine, you can punch a series of evenly spaced holes along the very top edge. -
Insert binding coils:
Thread a cut piece of brass wire or pre-made binding coil spiral through the holes. Alternatively, simply use the holes as a decorative perforation texture. -
Clip it:
Attach a gold or copper skeleton binder clip to the top center. This adds a crucial metallic accent and functional hanging mechanism. -
Mount texturing (optional):
If your paper feels too flimsy, you can lightly glue the finished sheet onto a slightly larger piece of cream backing board for stability.
Make It Color
Instead of black ink, use a deep navy or forest green fine-liner for a softer look, or fill specific grid squares with light pastel washes.
Hang your new abstract calendar on the wall for a stylish and conversation-starting organization tool
Interactive Flap Doodles for Hidden Notes

Transform your standard spiral planner into an interactive keepsake with rustic kraft paper flaps perfect for hiding secret notes or doodles. This simple addition brings a tactile, vintage charm to your monthly planning, using natural textures like twine and unbleached paper against clean calendar grids.
Step-by-Step Guide
Materials
- Spiral-bound desk calendar or planner
- Thick kraft paper or cardstock
- Jute twine or hemp cord
- Single-hole punch
- Scissors
- Ruler
- Pencil
- Fine-tip black pen (for writing)
- Small metal clips (optional)
Step 1: Preparing the Kraft Flaps
-
Measure your space:
Identify where on your calendar you want to place the hidden note. Measure the available area next to the spiral binding to determine the maximum size for your kraft flap. -
Cut the kraft paper:
Using your ruler and scissors, cut a rectangle from the kraft paper. A standard size of about 2.5 x 3.5 inches works well for most desk calendars, resembling a small tag. -
Create a folding crease (optional):
If you want the flap to open like a card, cut a piece twice the length you need and fold it in half. For a simple hanging tag style like the one shown, a single flat piece is sufficient. -
Add character:
I like to gently distress the edges of the kraft paper by running the blade of the scissors along them; this adds to the rustic aesthetic.
Knotty Issues?
If the jute twine keeps slipping or undoing itself, dab a tiny drop of clear craft glue or clear nail polish right onto the center of the knot to freeze it in place permanently.
Step 2: Attaching the Mechanism
-
Punch the hole:
Use a single-hole punch to make a hole in the top corner of your kraft paper rectangle. Position it about a quarter-inch from the edges to ensure it doesn’t tear easily. -
Preparing the twine:
Cut a length of jute twine, approximately 8 to 10 inches long. This generous length gives you plenty of room to tie knots without struggling. -
Threading the calendar:
Feed one end of the twine through the spiral binding of the calendar at the top edge. Loop it around the wire coil so it’s secure but can still slide freely. -
Connecting the flap:
Thread the other end of the twine through the hole in your kraft paper tag. -
Securing with a bow:
Bring the two ends of the twine together and tie them into a loose, casual bow. The bow should sit on top of the kraft paper, acting as a decorative anchor.
Step 3: Adding the Hidden Content
-
Lift and write:
Lift the kraft flap to reveal the white calendar paper underneath. This is your hidden space. -
Drafting your note:
Using a fine-tip black pen, lightly pencil in your secret message, doodle, or reminder in the space covered by the flap. Once satisfied, go over it with ink. -
Decorating the flap:
You can leave the front of the flap plain for a minimalist look, or draw a small symbol (like a moon or star) to hint at what’s underneath. -
Additional loose notes:
Cut additional squares of kraft paper to use as loose note cards. These can be tucked behind the main calendar pages or clipped onto the side for extra writing space. -
Final adjustment:
Adjust the position of the tied flap so it hangs straight and completely covers your secret message. Trim the ends of the twine bow if they are too long.
Layered Textures
Make the project more tactile by sandwiching a layer of sheer vellum or patterned washi paper between the kraft tag and the calendar page for a peek-a-boo effect.
Now you have a charming, interactive element that adds mystery to your daily planning routine


Have a question or want to share your own experience? I'd love to hear from you in the comments below!