When I want to say thank you in a way that feels personal, I reach for a canvas painting and build it around the little details that make a teacher’s day run. Here are my favorite teacher appreciation canvas ideas, starting with the classics and ending with a few playful twists.
Classic Apple With Teacher’s Name

This timeless design features a vibrant red apple centered on a crisp white canvas, offering a clean and professional look perfect for a classroom gift. The simplicity of the composition allows the bold fruit and lettering to stand out against the textured fabric background.
Detailed Instructions
Materials
- Small square stretched canvas (e.g., 6×6 or 8×8 inches)
- Acrylic paint (Red, Dark Red, White, Green, Brown)
- Small flat shader brush
- Fine liner brush or script liner
- Pencil
- Water cup
- Paper towels
- Palette or paper plate
Step 1: Sketching the Design
-
Prepare the canvas:
Ensure your canvas is clean. You can choose to leave the background as raw canvas for a rustic look or apply a thin layer of white acrylic paint for a brighter finish. If painting the background, let it dry completely before proceeding. -
Outline the apple shape:
Lightly sketch a circle in the center of the canvas using a pencil. Modify the top and bottom to dip inward slightly, creating that characteristic heart-like apple silhouette. -
Add stem and leaf:
Draw a short, slightly curved stem emerging from the top dip of the apple. Attached to the right side of the stem, sketch a simple teardrop-shaped leaf pointing diagonally upward. -
Draft the lettering:
Below the apple, lightly pencil in the word ‘TEACHER.’ Use a ruler if needed to keep your letters straight and centered, ensuring equal spacing from the bottom edge.
Wobbly Letters?
If painting text is difficult, write the word with a brown permanent marker or paint pen instead. This offers more control than a brush for crisp lines.
Step 2: Painting the Fruit
-
Base coat the apple:
Using your flat shader brush, fill in the apple shape with a layer of bright red paint. Don’t worry about perfect coverage yet; a second coat will add richness. -
Add depth with shading:
While the red is still slightly wet, mix a tiny dot of brown into your red paint to create a darker shade. Brush this along the bottom curve and left side of the apple to create a shadow effect. -
Paint the stem:
Switching to a smaller brush, carefully paint the stem with dark brown acrylic. Make the base of the stem slightly wider where it meets the apple. -
Fill in the leaf:
Paint the leaf shape with green acrylic. Using the tip of your brush, drag the paint towards the pointed tip for a sharp finish. -
Apply the highlight:
Once the red base is tacky or dry, dip a clean brush into white paint. Add a small, curved swipe on the upper left shoulder of the apple to simulate light reflecting off the shiny skin. -
Second coat (Optional):
If I notice the canvas texture showing through too much, I like to apply a second coat of red to the main body of the apple to deepen the color. -
Add leaf detail:
Mix a little white or yellow into your green paint to create a lighter shade. Paint a thin line down the center of the leaf or add a small highlight to give it dimension.
Step 3: Lettering and Finishing
-
Prepare paint for lettering:
Thicken your brown paint slightly or ensure it flows well. Using a fine liner brush allows for the most control over thin lines. -
Paint vertical strokes:
Start by painting only the vertical lines of each letter in ‘TEACHER.’ Keeping the brush perpendicular to the canvas helps maintain an even line width. -
Paint horizontal strokes:
Complete the letters by adding the horizontal crossbars. Take your time here to ensure corners meet neatly without blobbing. -
Refine the edges:
Check the perimeter of your apple. If the edges look rough, use a small brush with your red paint to smooth out the curve for a crisp look. -
Final drying check:
Allow the entire painting to sit undisturbed for at least an hour. Acrylics dry darker, so the contrast between the highlight and the red skin will pop nicely once set.
Make it Shine
Once the painting is completely dry, apply a layer of gloss varnish over just the apple part. This mimics the natural waxiness of real fruit.
Prop this delightful mini-canvas on a small easel or desk to brighten up any classroom environment


Chalkboard Quote Typography
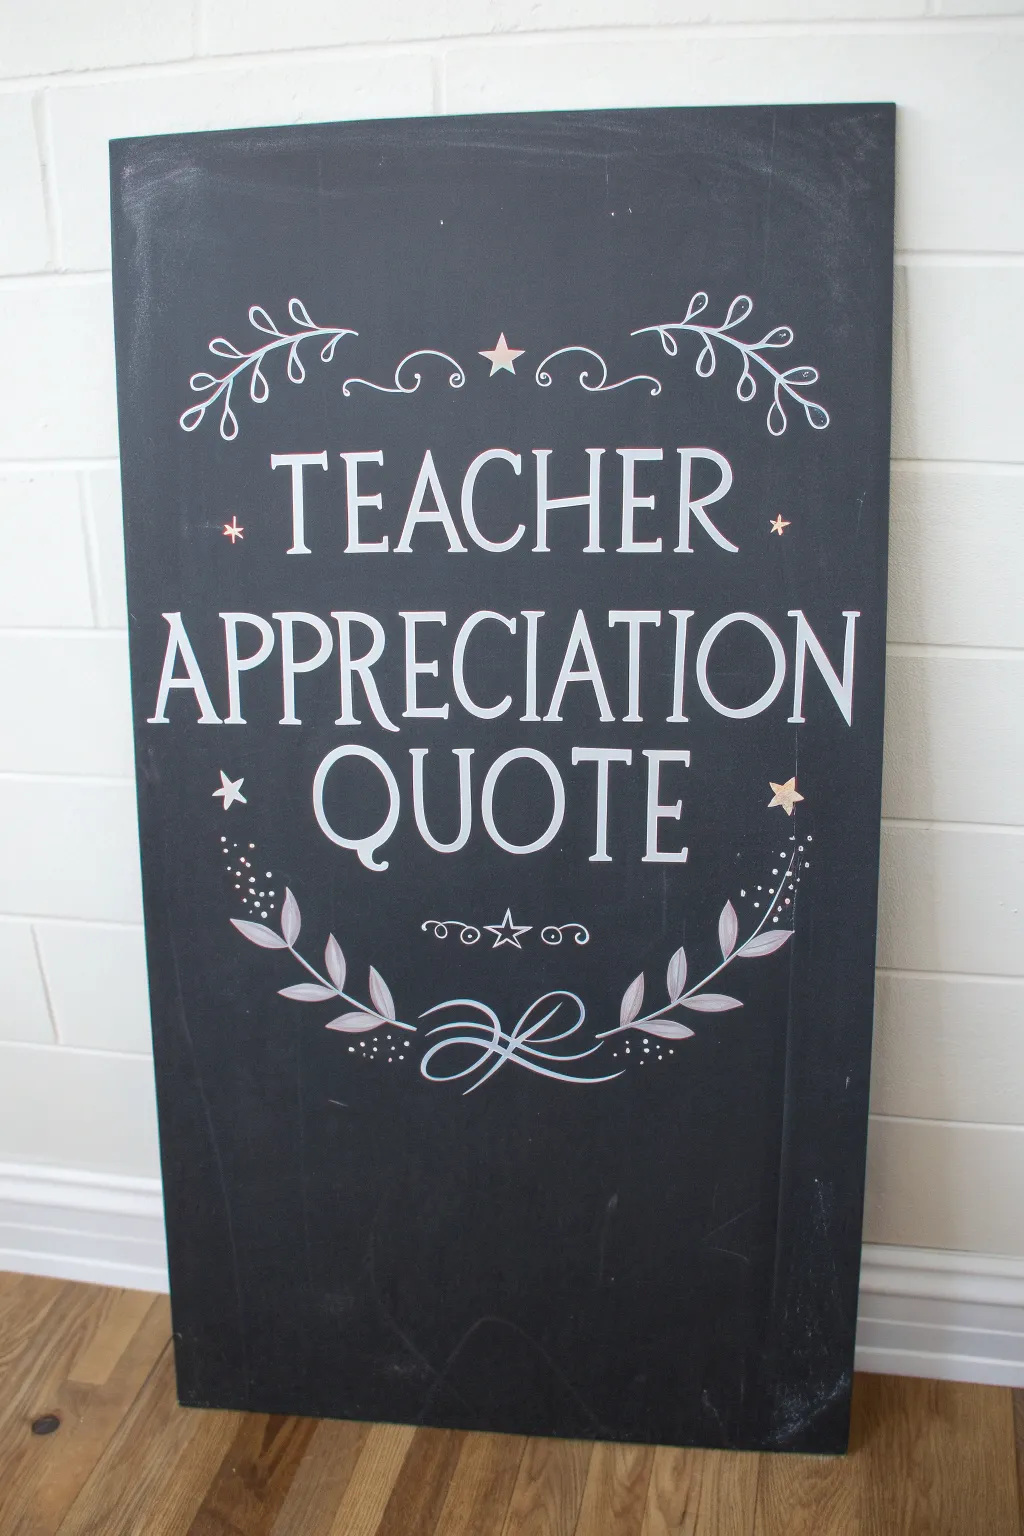
This elegant project creates a reusable-looking chalkboard sign with permanent flair, perfect for classroom decor or teacher appreciation gifts. By using white and pale pink paint pens on a black background, you achieve crisp, durable typography that mimics the charm of hand-lettered chalk without the dusty mess.
How-To Guide
Materials
- Large rectangular canvas or wood panel
- Black chalkboard paint or matte black acrylic paint
- Foam roller and paint tray
- White pencil or regular chalk (for drafting)
- Ruler or T-square
- White acrylic paint marker (bullet tip)
- White acrylic paint marker (fine tip)
- Pale pink or rose gold metallic paint marker
- Printable template (optional)
- Damp cloth and cotton swabs
- Spray sealer (matte finish)
Step 1: Preparation & Base Coat
-
Prepare the surface:
Ensure your canvas or wood panel is clean and free of dust. If you are using raw wood, give it a quick sanding to ensure a smooth lettering surface. -
Apply the black base:
Pour matte black acrylic paint or chalkboard paint into a tray. Using a foam roller, apply a smooth, even coat over the entire front and sides of the panel. The roller helps avoid brush strokes. -
Let it dry and repeat:
Allow the first coat to dry completely, usually for about an hour. Apply a second coat to ensure solid, opaque coverage without any white canvas showing through. -
Draft the layout guidelines:
Once the paint is fully cured, use a ruler and a white pencil or stick of chalk to lightly draw horizontal guidelines. You will need three main lines for the text tiers and a center vertical line to help with symmetry.
Smudge Control
Rest your hand on a piece of scrap paper while drawing. This prevents oils from your skin transferring to the matte black surface and stops you from accidentally smearing wet marker ink.
Step 2: Drafting the Design
-
Sketch the letters:
Lightly sketch the words ‘TEACHER’, ‘APPRECIATION’, and ‘QUOTE’ using your chalk/pencil. Use a serif font style with slight curves on the letter feet. Center the middle word first to balance the composition. -
Add floral sketches:
At the top, sketch two mirrored leafy branches curving outward from the center star. At the bottom, sketch two larger branches curving upward, creating a semi-circle bracket around the text. -
Check and refine:
Step back to look at your spacing. The beauty of this phase is that mistakes wipe away easily with a damp cloth, so adjust your kerning (space between letters) until it looks centered and professional.
Level Up: Real Chalk Texture
Before sealing, lightly rub the side of a piece of real chalk over the empty black spaces and wipe it off with a dry tissue. This leaves a dusty residue that makes the board look authentically used.
Step 3: Inking the Letters
-
Outline the main text:
Shake your white bullet-tip paint marker well. Carefully trace over your sketched letters. Maintain a steady hand and pull the pen toward you for straighter vertical lines. -
Thicken the downstrokes:
To create a ‘faux calligraphy’ look, go back over the vertical lines of each letter (the downstrokes) to make them slightly thicker than the horizontal crossbars. This adds visual weight and elegance. -
Refine the serifs:
Use the fine-tip white marker to sharpen the edges of the serifs (the little feet on the letters) and clean up any intersections where lines meet. -
Add the stars:
Draw small five-point stars: one centered at the very top, two flanking the word ‘TEACHER’, and two larger ones flanking ‘QUOTE’. I like to fill these in with the pale pink or rose gold marker for a subtle pop of color.
Step 4: Adding Decorative Flourishes
-
Ink the top vines:
Using the fine-tip white marker, trace the top floral vines. Keep the lines delicate. Add small loop details near the center star. -
Ink the bottom laurel:
Trace the stems of the bottom branches with the white marker. For the leaves, press down slightly harder at the base of the leaf and lift up at the tip to create a tapered shape. -
Add pink accents:
Take your pink/rose gold marker and carefully fill in the leaves of the bottom laurel branch. You can also add tiny pink dots near the stars for extra sparkle. -
Draw the bottom swirl:
Beneath the text and just above the bottom leaves, draw the decorative scroll design. It looks like a stylized loop or knot. Use the fine tip marker for this to keep it graceful. -
Stipple details:
Add clusters of tiny white dots around the bottom leaves and near the quote to mimic magical dust or pollen. Vary the size of the dots slightly for a natural look.
Step 5: Final Touches
-
Erase guidelines:
Allow the paint markers to dry for at least 30 minutes. Gently erase any visible chalk or pencil guidelines using a slightly damp cotton swab or a clean soft eraser. -
Touch up black areas:
If erasing caused any smudges on the background, use a small brush and your black base paint to touch up the negative space around the letters. -
Seal the artwork:
To protect the lettering from scratching, take the canvas outside and apply a light coat of matte spray sealer. This unifies the sheen and makes the sign durable for classroom handling.
Place your finished typography art on a sturdy easel or hang it on the wall to inspire students daily


Rainbow Crayon Border Thank-You
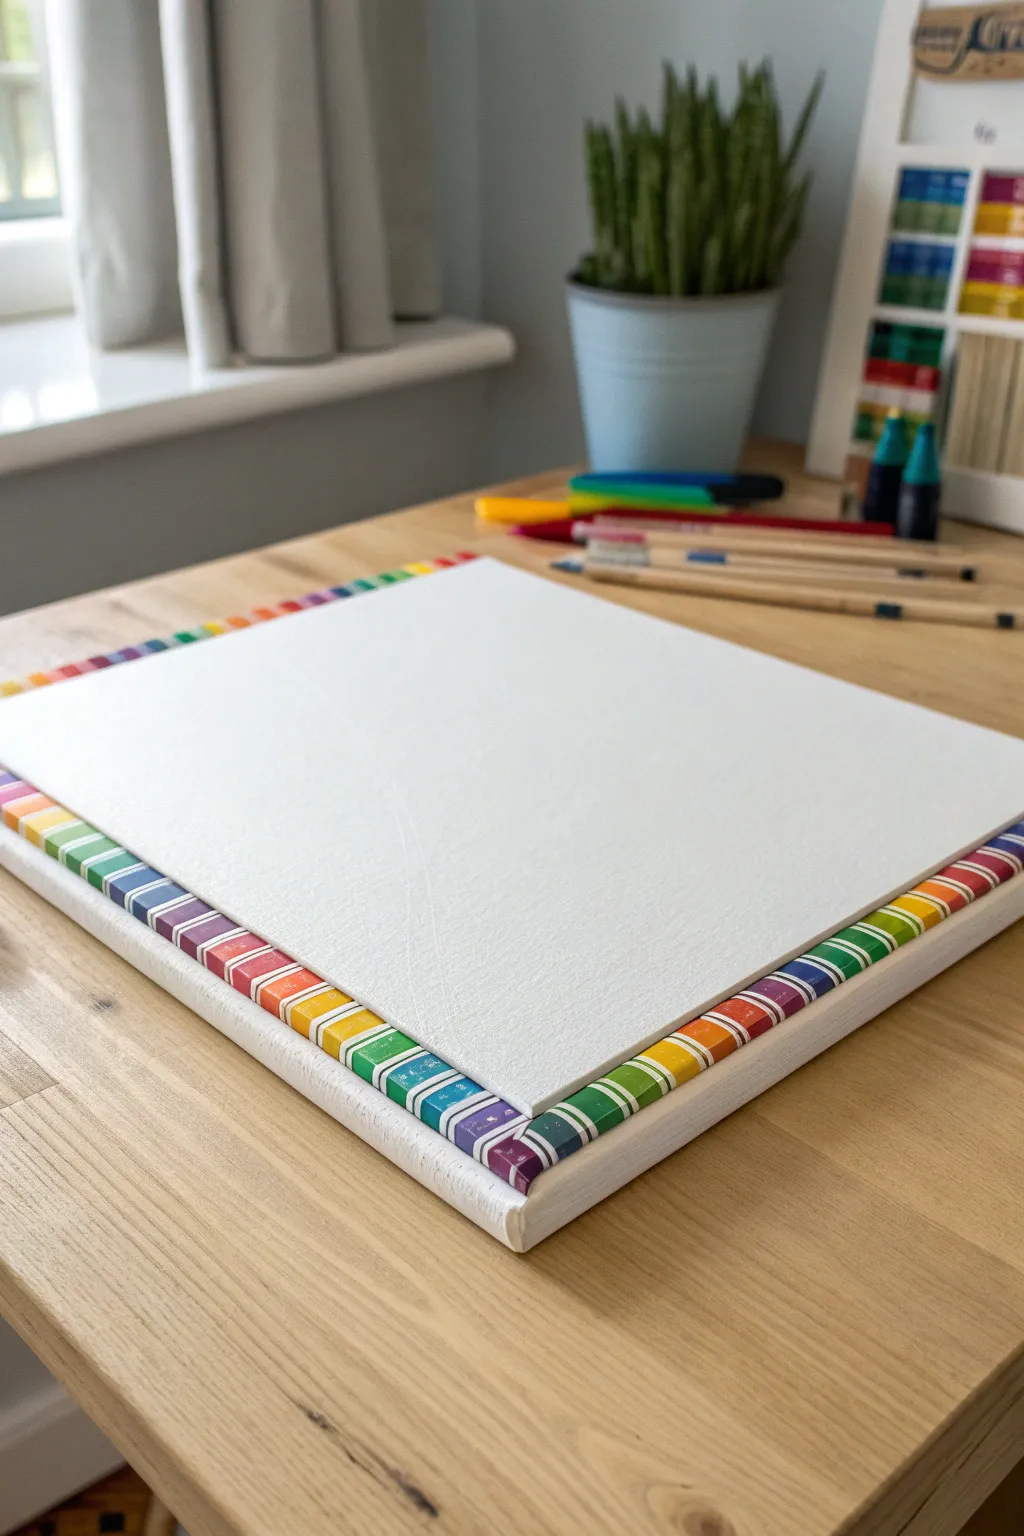
This clever layered canvas project turns melted art supplies into a sophisticated border that frames a clean white center. By creating a rainbow gradient of crayon segments or wrappers around a base canvas, you build a colorful foundation perfect for a thoughtful teacher’s gift or classroom decor.
Step-by-Step Tutorial
Materials
- Two stretched canvases (one slightly smaller than the other, e.g., 8×10 and 10×12 inches)
- Box of standard wax crayons (64 count recommended for shading)
- Hot glue gun and glue sticks
- Craft knife or sturdy scissors
- Ruler
- Pencil
- White acrylic paint (optional)
- Painter’s tape or masking tape
Step 1: Preparing the Base
-
Assess the fit:
Place the smaller canvas directly on top of the larger canvas. Center it perfectly using a ruler to measure the distance on all four sides. The exposed edge of the bottom canvas is where your crayon border will live. -
Mark the boundary:
Once centered, lightly trace the outline of the top canvas onto the bottom canvas with a pencil. This gives you a clear ‘do not cross’ line for your crayon placement. -
Prep the surface:
Remove the top canvas. If your bottom canvas has any prominent texture or darkness, you might want to give the border area a quick coat of white acrylic paint to ensure the colors pop, though standard primed canvas is usually sufficient.
Step 2: Creating the Crayon Border
-
Sort your spectrum:
Dump out your crayons and organize them by color families. You’ll need a smooth transition: pinks to reds, oranges, yellows, greens, blues, indigos, and violets. -
Measure the crayons:
Measure the width of the exposed border area on the bottom canvas. You need to cut your crayons to fit this width exactly, or just slightly shorter so they don’t peek out from under the top canvas. -
Cut the segments:
Using a craft knife (safely!) or sharp scissors, cut the crayons to your measured length. Keep the paper wrappers on for that classic school-supply look shown in the image. -
Plan the gradient:
Before gluing, lay out your cut crayon pieces along the border area. Arrange them to create a seamless rainbow gradient that wraps around the entire perimeter. -
Corner strategy:
Pay special attention to the corners. I find mitered corners (45-degree angles) are too tricky with crayons, so simply run the horizontal rows all the way to the edge, then butt the vertical rows against them for a clean, blocky look. -
Begin gluing:
Heat up your hot glue gun. Start at one corner and apply a thin bead of glue directly to the canvas within your penciled border. -
Secure the pieces:
Press each crayon segment firmly into the hot glue. Keep them tight against each other to minimize gaps. -
Check alignment:
As you work your way around, frequently place the top canvas back on momentarily to ensure your crayons aren’t drifting inside the pencil line where they would interfere with the top layer sitting flat. -
Complete the circuit:
Continue gluing until the entire perimeter is covered in a lush rainbow spectrum.
Uneven Crayons?
If crayons are different thicknesses, glue a small piece of cardboard under the thinner ones to raise them up. This keeps the top canvas level when you attach it.
Step 3: Final Assembly
-
Clean up threads:
Once the glue is fully set, go around and pick off those pesky little strings of hot glue that tend to get everywhere. -
Prepare the top canvas:
Flip your smaller top canvas over. Apply a generous amount of hot glue (or heavy-duty craft adhesive for a longer cure time) to the back wooden frame or the flat back surface. -
Mount the top canvas:
Carefully lower the top canvas onto the bottom one, using your crayon border as a guide. Press down firmly for about 30 seconds to bond the two canvases together. -
Inspect the gap:
Look at the project from the side. The top canvas should appear to be ‘floating’ slightly above or resting right on the crayon bed. If needed, add a little extra glue in hidden spots to stabilize it. -
Ready for inscription:
Your canvas is now built! The white center is ready for a painted thank-you message, a class photo, or handprints.
Add a Personal Touch
Before gluing the top canvas, have students sign the white space behind where the top canvas will go. It creates a hidden time capsule if the art is ever disassembled.
You now have a vibrant, dimensional frame ready to showcase a heartfelt message for a favorite teacher
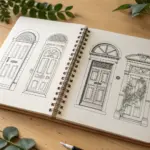

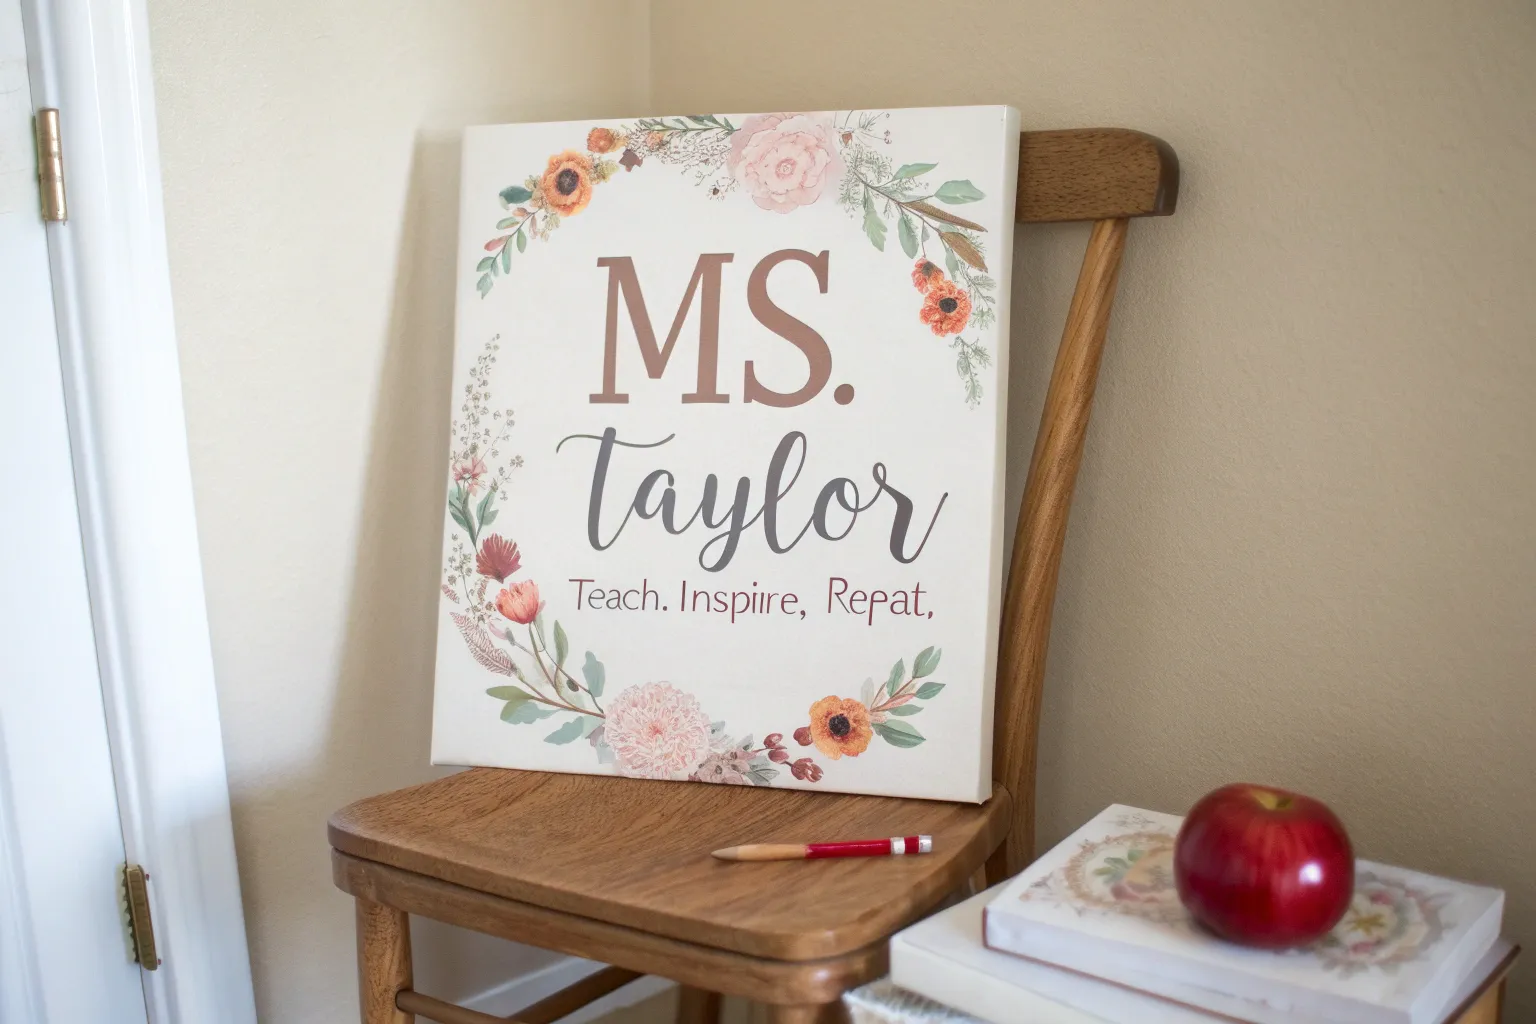
Classroom Door Sign Canvas
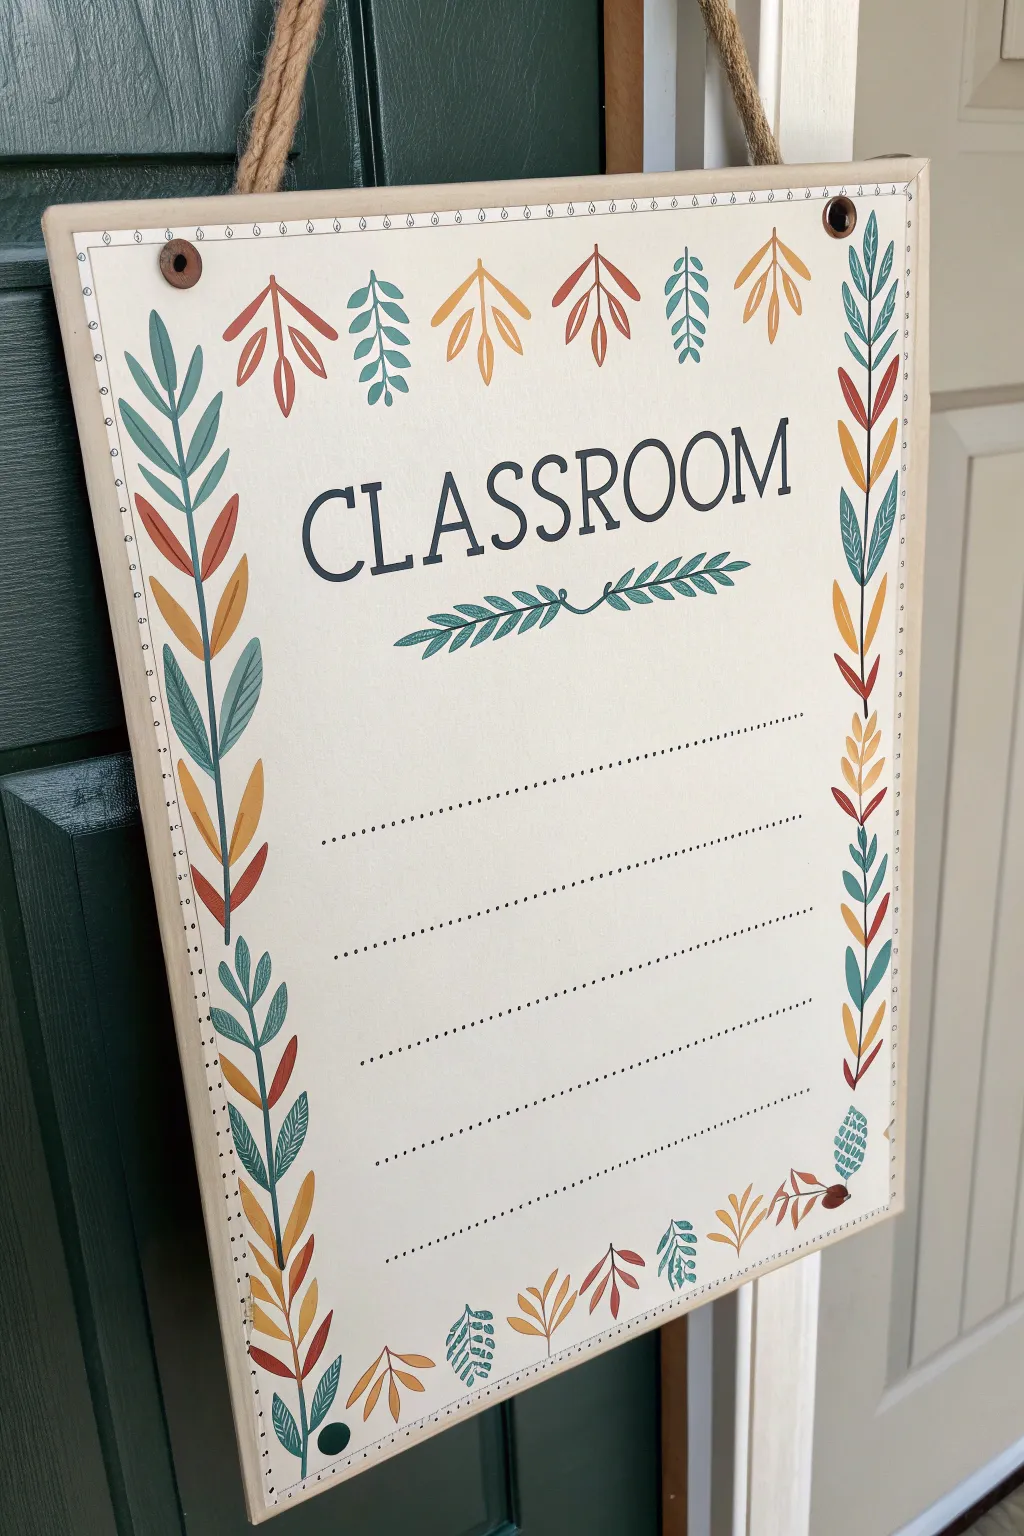
Create a warm, inviting entrance to your learning space with this botanically inspired classroom sign. Featuring earthy tones and delicate leaf motifs, this canvas project combines simple lettering with nature-themed borders for a professional yet handmade look.
How-To Guide
Materials
- Rectangular canvas or canvas board
- Acrylic paints (Cream/Off-white, Forest Green, Teal, Burnt Orange, Mustard Yellow, Brown)
- Flat brush (1-inch width)
- Round brushes (sizes 2 and 4)
- Fine liner brush (size 0 or 00)
- Pencil and eraser
- Ruler
- Carbon paper (optional)
- Stencil (for letters, optional)
- Jute twine or rope
- Two large grommets or metal eyelets
- Hammer and grommet setting tool
- Matte finish sealant spray
Step 1: Preparation & Base Coat
-
Prime the canvas:
Begin by painting the entire front and sides of your canvas with a cream or warm off-white acrylic paint. You’ll likely need two to three coats to achieve a fully opaque, smooth finish that hides the canvas texture. -
Plan the layout:
Once the base is bone dry, use a ruler to find the vertical center. Lightly sketch horizontal guidelines for your main text ‘CLASSROOM’ about one-third down from the top. Mark the spacing for five horizontal lines below for writing names or subjects later. -
Draft the text:
Sketch the word ‘CLASSROOM’ in a serif font. If you aren’t confident in your freehand lettering, print out the word in a font like Times New Roman, place carbon paper under it, and trace the outline onto the canvas.
Fixing Wobbly Lines
If your straight lines look shaky, use painter’s tape as a guide. Paint over the tape edge with your base color first to seal it, then apply the stripe color for a crisp edge.
Step 2: Painting the Main Elements
-
Paint the letters:
Using a size 2 round brush and dark charcoal or deep navy paint, carefully fill in your ‘CLASSROOM’ letters. Keep your wrist steady and rotate the canvas if needed to get crisp edges. -
Add the center embellishment:
Directly below the text, sketch a simple horizontal vine with leaves extending outward from the center. Paint these leaves using a mix of teal and forest green for a cohesive look. -
Draft the border vines:
Lightly sketch vertical wavy lines running up the left and right sides of the canvas. These will serve as the stems for your main decorative borders. -
Paint the vertical stems:
With a fine liner brush and dark brown or deep green paint, trace over your vertical pencil lines to create thin, elegant stems. -
Add the foliage:
Along the vertical stems, paint alternating leaves. Use a specific color pattern—such as classic green, muted teal, burnt orange, and mustard yellow—to mimic the fall-inspired palette shown in the reference. -
Create the top and bottom borders:
Repeat the leaf process along the top and bottom edges. Paint small, individual leaf clusters or sprigs rather than a continuous vine, alternating colors to balance the composition.
Pro Tip: Erasable Text
Instead of painting the names permanently, apply a layer of clear dry-erase paint over the dotted line area. This lets you update the sign yearly.
Step 3: Details & Assembly
-
Draw the writing lines:
Use a ruler and a fine tip black paint pen or a very fine liner brush with thinned black paint to create the dotted lines. Make sure the dots are evenly spaced for a clean, printed appearance. -
Add the secondary border:
Using a fine liner brush, paint a very simple dotted border rectangle about half an inch from the canvas edge to frame the entire piece. -
Detail the leaves:
Once the base colors of the leaves are dry, use your thinnest brush to add tiny veins in a lighter or darker shade of the same color for added dimension. -
Clean up:
Check for any smudges or pencil marks. Use a damp Q-tip to clean up paint mistakes or an eraser for visible sketch lines. -
Seal the artwork:
Apply a coat of clear matte sealant spray. This protects the paint from fading and makes the surface distinctively easier to clean if it hangs in a busy hallway. -
Install grommets:
Mark two points at the top corners for hanging. Carefully punch holes through the canvas and frame (if it’s wood) or just the canvas board, then set your metal grommets using a hammer and setting tool. -
Attach the hanger:
Thread a length of sturdy jute twine through the grommets from back to front and knot it securely to create a rustic hanging loop.
Step 4: Customization (Optional)
-
Personalize the sign:
Now that the sign is complete, use a permanent marker or paint pen to write specific teacher names, room numbers, or subjects on the dotted lines you created.
Your personalized sign is now ready to welcome students into a creative new year
BRUSH GUIDE
The Right Brush for Every Stroke
From clean lines to bold texture — master brush choice, stroke control, and essential techniques.
Explore the Full Guide
Globe With Heart Pin
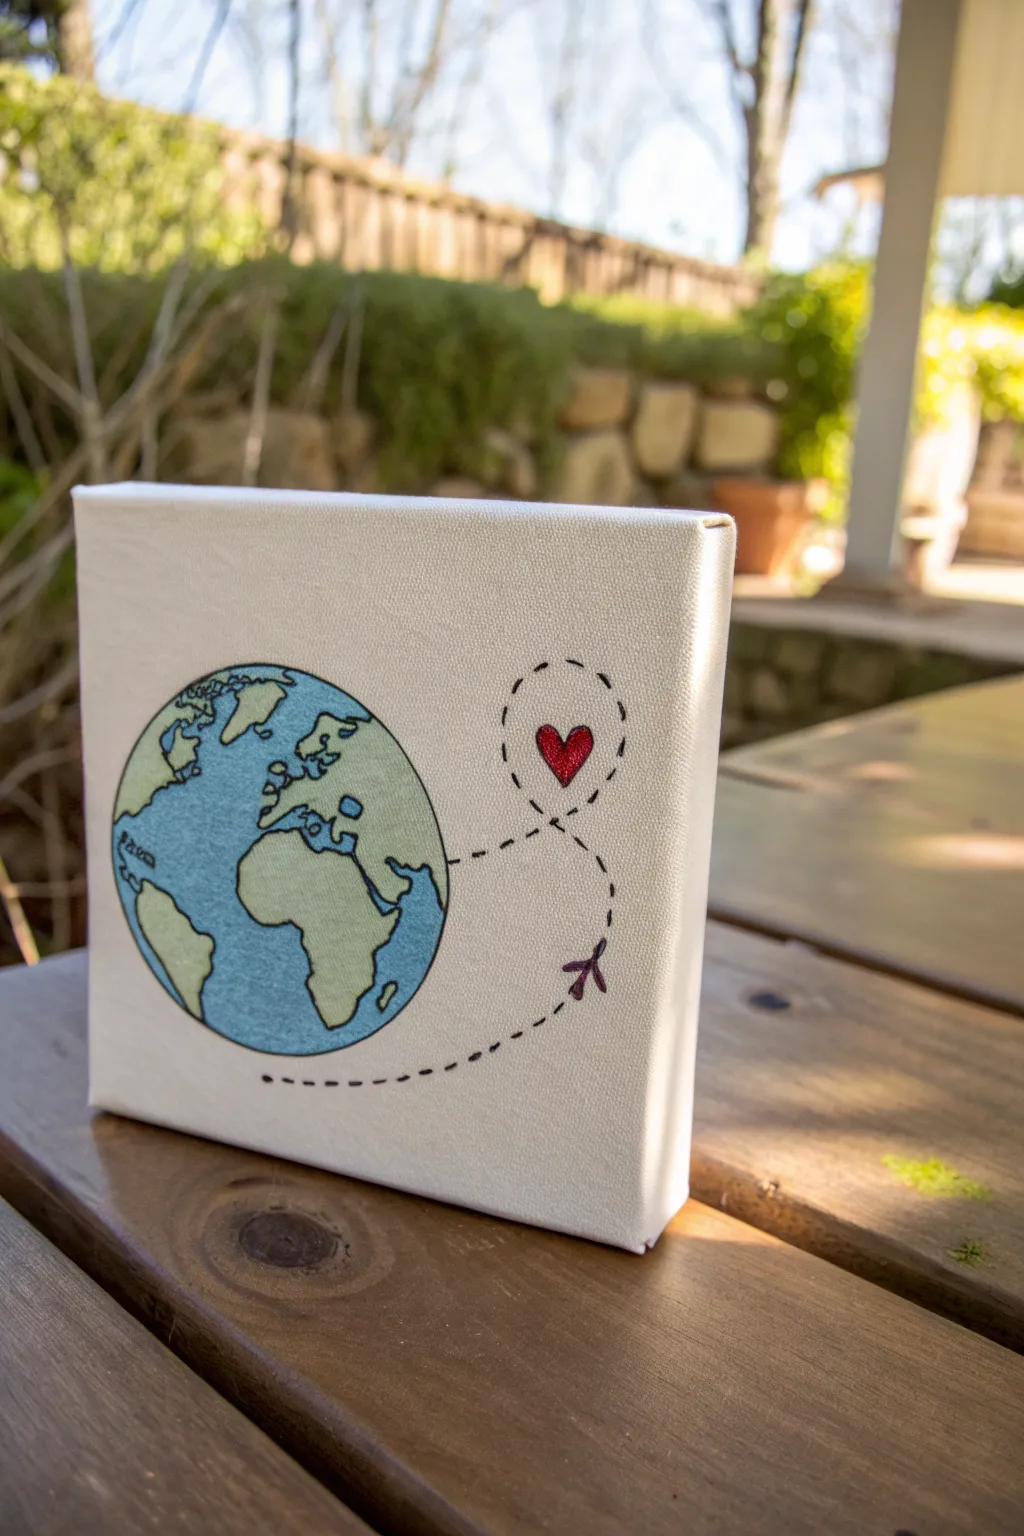
This charming, minimalist canvas captures the spirit of adventure and connection with a clean illustration of the Earth, a traveling airplane, and a heart marking a special destination. With its crisp lines and sweet sentiment, it makes a perfect gift for a geography teacher or a decoration for a classroom reading nook.
Step-by-Step
Materials
- Small square stretched canvas (e.g., 6×6 or 8×8 inches)
- Pencil for sketching
- Circular object for tracing (cup or jar lid)
- Acrylic paints: Light Blue, Sage Green, Red, Deep Purple
- Fine liner marker (black, permanent) or extra-fine black paint pen
- Small flat brush
- Fine detail brush (size 0 or 00)
Step 1: Sketching the Layout
-
Position the globe:
Place your circular object on the canvas. Instead of centering it perfectly, offset it slightly to the lower-left quadrant to leave plenty of room for the flight path. -
Trace the circle:
Lightly trace around the object with your pencil to create the outline of the Earth. Keep your touch gentle so the graphite doesn’t smudge into the paint later. -
Draft the continents:
Sketch the shapes of Africa, Europe, and parts of the Americas inside the circle. These don’t need to be cartographically perfect; aim for recognizable, simplified shapes. -
Map the flight path:
Draw the heart on the upper right side, then sketch a swirling, loopy line connecting the globe to the heart, ending with a tiny airplane shape near the bottom right.
Pro Tip: Steady Hands
Rest your pinky finger on a dry part of the canvas while outlining. This anchors your hand and gives you much better stability for clean, crisp lines.
Step 2: Painting the World
-
Fill the oceans:
Using your small flat brush, carefully paint the water areas of the globe with Light Blue acrylic paint. I like to work slowly around the continent edges first to get a clean line. -
Paint the land:
Once the blue is touch-dry, fill in the continent shapes with Sage Green. You may need two coats here to cover the canvas texture completely. -
Add the heart:
Switch to your fine detail brush and fill in the heart shape with bright Red paint. This will be the focal point, so make sure the color is opaque and solid. -
Paint the plane:
Using the very tip of your detail brush, paint the tiny airplane silhouette in Deep Purple. A simple cross shape usually works well for this scale. -
Let everything dry:
Allow the entire canvas to dry completely. The paint must be fully set before you add the line work, otherwise, the marker will snag and bleed.
Troubleshooting: Marker Issues
If your marker stops flowing over the paint, the paint might still be slightly damp or dragged into the nib. Scribble on scrap paper to clear the blockage.
Step 3: Detailing and Outlining
-
Outline the continents:
Take your black permanent fine liner or paint pen and carefully trace the borders between the green land and blue water. Go slowly to maintain a steady hand. -
Outline the globe:
Trace the main outer circle of the Earth. Rotating the canvas as you draw can help you maintain a smooth curve without awkward hand positions. -
Outline the icons:
Give the red heart and the purple airplane a thin black outline to make them pop against the white background. -
Create the flight path:
Trace your penciled flight path using small, evenly spaced dashes. Following the loop you sketched earlier creates a sense of movement. -
Clean up sketch lines:
Wait 15-20 minutes to ensure the ink is totally dry, then gently erase any visible pencil marks that weren’t covered by paint or ink.
Hang this sweet little canvas on your wall to remind you of travels past or adventures yet to come
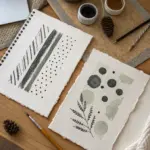
ABC and 123 Pattern Background

This trendy classroom décor piece combines soft, muted tones with bold educational typography for a look that is both calming and functional. The vertical brushstrokes create a modern textured background that makes the minimalist letters and numbers pop beautifully.
How-To Guide
Materials
- Large rectangular canvas (approx. 18×24 inches)
- Acrylic paints (White, Sage Green, Pale Peach, Mustard Yellow, Sand/Beige)
- Wide flat paintbrush (2-3 inches)
- Medium flat paintbrush (1 inch)
- Letter and number stencils (3-4 inches tall)
- Stencil brush or sponge dabber
- Painter’s tape or masking tape
- Pencil
- Ruler
- Paper plate or palette
- Easle (for display, optional)
Step 1: Planning and Base Coat
-
Prime the canvas:
Start with a clean canvas. While most come pre-primed, giving it a fresh coat of white acrylic paint ensures a smooth, bright surface. -
Let it dry completely:
Allow the white base coat to dry fully to the touch. This prevents your colored strokes from becoming muddy later on. -
Mark the center column:
Using a ruler and pencil, lightly mark a wide vertical column down the center of the canvas where the text will eventually go. This helps you keep the central area mostly white.
Dry Brush Technique
Don’t overload your brush for the background. A ‘starved’ brush with very little paint creates those beautiful, scratchy textures.
Step 2: Creating the Background Strokes
-
Mix your palette:
Squeeze out your sage green, pale peach, mustard yellow, and beige onto your palette. I like to keep a good amount of white nearby to mix in and soften the colors as needed. -
Start with the sage green:
Load your wide brush with sage green. Apply vertical strokes starting from the top edge, dragging down about a third of the way. -
Add lower green accents:
Repeat the green strokes at the bottom of the canvas, dragging upward, but vary the placement so it doesn’t look too symmetrical. -
Apply the peach tones:
Clean your brush (or switch to a clean one) and load it with pale peach paint. Apply vertical strokes next to or slightly overlapping the green areas, keeping the strokes loose and textured. -
Layer in mustard yellow:
Add touches of mustard yellow in the remaining gaps. Use a ‘dry brush’ technique here—wipe most of the paint off the brush first—to achieve those scratchy, textured edges seen in the photo. -
Soften with white:
While the colors are still slightly tacky, take a clean brush with a little white paint and drag it over the edges where colors meet the white center. This creates a faded, distressed look. -
Refine the central space:
Ensure the central, white vertical column is relatively clean, though some feathering from the colored strokes should drift into it for unity. -
Dry thoroughly:
Let the abstract background dry completely. This is crucial before stenciling to ensure crisp lines.
Interactive Art
Paint the central white column with clear chalkboard paint so you can change the letters or numbers daily with chalk.
Step 3: Adding the Typography
-
Position the letters:
Arrange your ‘A’, ‘B’, and ‘C’ stencils vertically in the top half of the white column. Use a ruler to ensure equal spacing between them. -
Secure the stencils:
Tape the stencils down firmly with painter’s tape so they don’t shift while you work. -
Stencil the letters:
Dip your stencil sponge or brush into a dark green or metallic gold paint (depending on your preference). Dab off excess paint on a paper towel until the brush is almost dry. -
Apply paint to letters:
Use an up-and-down dabbing motion to fill in the stencils. Using a distinct color for the middle letter (like ‘B’) adds a nice visual rhythm. -
Position the numbers:
Once the letters are dry, arrange the ‘1’, ‘2’, and a partial ‘3’ (if space allows) below the ‘C’. -
Stencil the numbers:
Repeat the stenciling process for the numbers. Ensure they align vertically with the letters above. -
Remove stencils:
Peel the tape and stencils off carefully while the paint is still slightly wet to avoid peeling up dried acrylic skin. -
Touch up:
Use a small detail brush and white paint to clean up any bleeds or smudge marks around the letters.
Place your finished masterpiece on a wooden easel to bring a gallery feel to your learning space

PENCIL GUIDE
Understanding Pencil Grades from H to B
From first sketch to finished drawing — learn pencil grades, line control, and shading techniques.
Explore the Full Guide
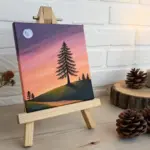
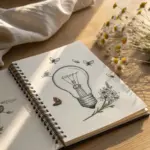
Math Equation Heart for Teachers
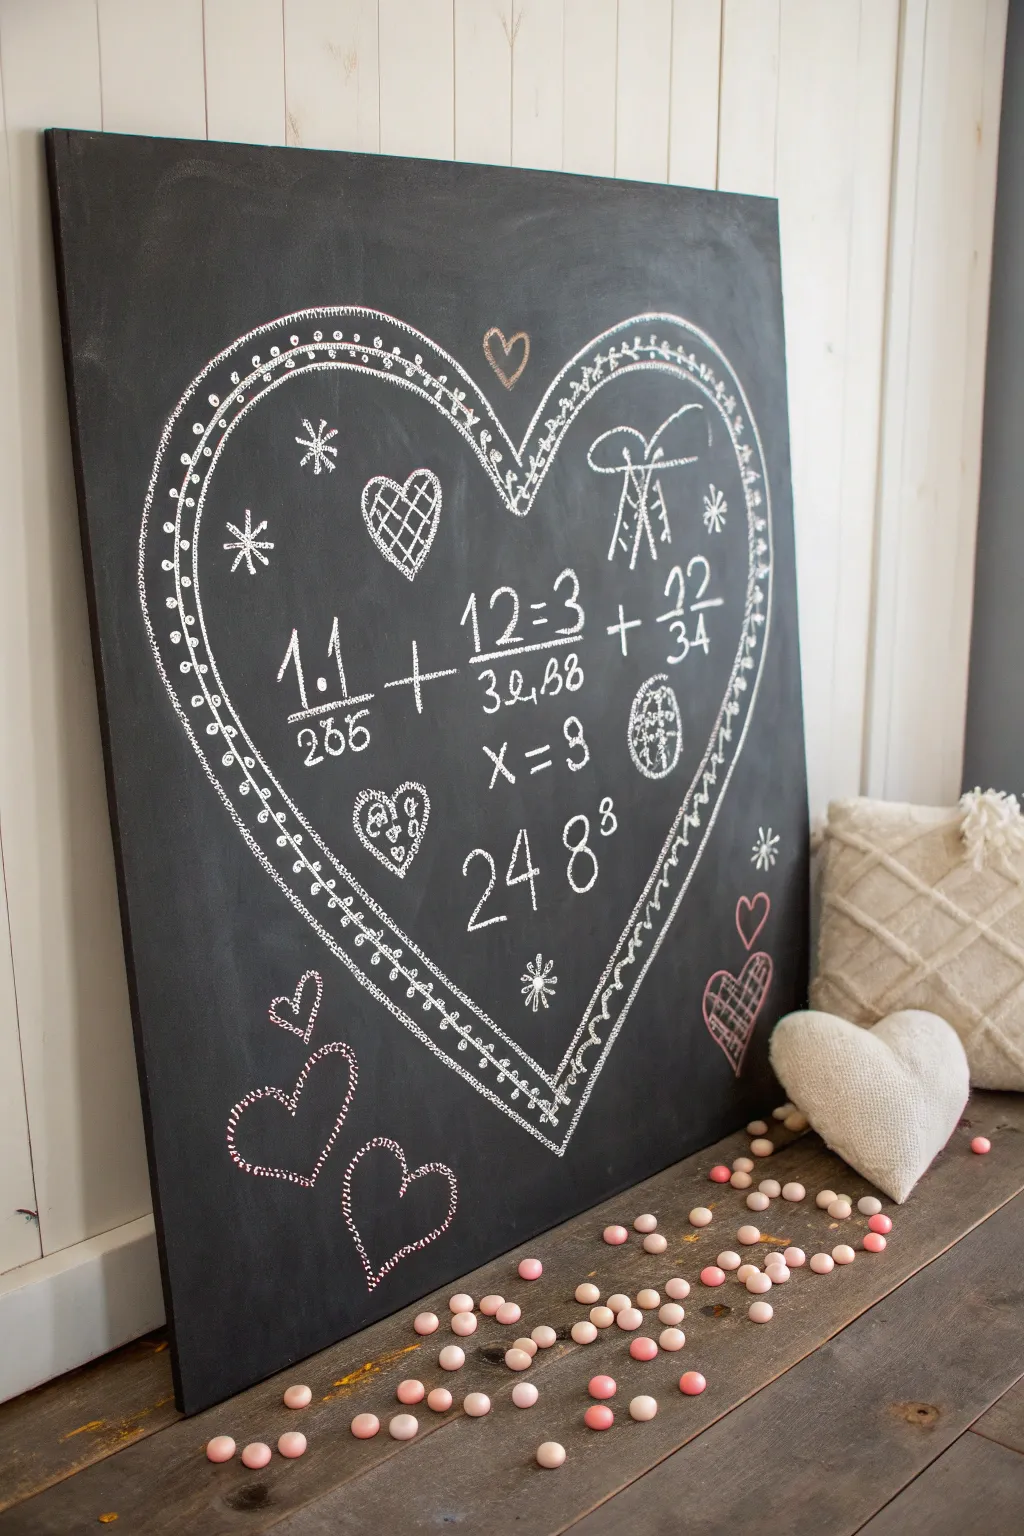
Celebrate the love of learning with this charming, rustic chalkboard art piece perfect for a math teacher’s classroom or home office. The design features a large, detailed heart filled with whimsical equations and symbols, drawn in classic white chalk on a dark slate background.
Step-by-Step
Materials
- Large rectangular canvas (approx. 24×36 inches) or wood panel
- Black chalkboard paint
- Wide foam brush or paint roller
- White chalk marker (fine and medium tip)
- Standard white stick chalk
- Ruler or yardstick
- Pencil
- Damp cloth or paper towel
- Cotton swabs (Q-tips)
Step 1: Preparing the Canvas
-
Prime the Surface:
Lay down a drop cloth and place your canvas or wood panel on a flat surface. Stir the chalkboard paint thoroughly to ensure the texture is consistent. -
Apply the Base Coat:
Using a wide foam brush or roller, apply a smooth, even layer of chalkboard paint across the entire surface. Paint in long, vertical strokes to minimize texture lines. -
Second Coat Application:
Allow the first coat to dry completely according to the manufacturer’s instructions (usually 1-2 hours). Apply a second coat, this time using horizontal strokes to create a cross-hatch pattern for better coverage. -
Seasoning the Board:
Once fully cured (often 24 hours), take a piece of regular stick chalk, turn it on its side, and rub it over the entire board. Wipe it off with a dry cloth. This ‘seasons’ the surface so your first drawing doesn’t leave a permanent ghost image.
Step 2: Drawing the Heart Outline
-
Sketch the Shape:
Lightly sketch a large heart shape in the center of the board using a pencil or very faint stick chalk. Aim for it to take up about 70% of the board’s height. -
Create the Border Layers:
Using a medium-tip chalk marker, trace over your pencil line. Draw a second heart line about an inch inside the first one to create a thick border band. -
Add Decorative Dots:
Inside the border band you just created, place small dots evenly spaced apart. I find that placing dots at the top, bottom, left, and right first helps split up the space evenly. -
Draw the Scalloped Edge:
On the very outside of the heart, draw small, repeating semicircles (scallops) all the way around the perimeter to give it a lace-like effect. -
Detail the Scallops:
Add a tiny dot inside each scallop and draw short, radiating lines (like eyelashes) from the outer edge of the border band toward the center.
Smudge Control
Work from the top of the board down to the bottom. This prevents your hand from smearing the wet chalk marker or dry chalk dust you’ve already applied.
Step 3: Filling with Math & Love
-
Placement Strategy:
Visualize the center of the heart. You will want your largest equation to sit slightly below the middle line to anchor the design. -
Draft the Large Equation:
In the center, write the main equation (e.g., 1.1 + 12=3 + 22/34) using your medium chalk marker. Keep the numbers tall and legible. -
Add Secondary Formulas:
Below the main equation, add smaller variables like ‘X=3′ and large numbers like ’24 8’. Vary the size of your writing to create visual interest. -
Draw Interior Icons:
In the upper lobes of the heart, draw a cross-hatched heart shape on the left and a geometric bow or diagram on the right. -
Scatter the Snowflakes:
Fill the empty negative spaces inside the main heart with simple asterisks and snowflake shapes. -
Add the Globe Grid:
Near the ‘X=3’ section, draw a small circle with grid lines to represent a sphere or globe.
Level Up: Color Pop
Instead of pure white, trace just the hearts or specific numbers with a pastel pink or red chalk marker to make the ‘love’ theme stand out more.
Step 4: Finishing Touches
-
Outer Embellishments:
Outside the main heart, draw a few loose, sketchy hearts near the bottom left and right corners. Use broken lines or cross-hatching to make them look textured. -
Clean Up Edges:
Use a damp cotton swab to sharpen the edges of your letters or wipe away any smudge marks from your hand resting on the board. -
Final Chalk Dusting:
For an authentic classroom look, gently rub a little bit of chalk dust in random corners with your finger so the black background isn’t perfectly pristine.
Hang this mathematical masterpiece in your classroom to inspire students or gift it to your favorite teacher
Science Beaker Flower Bouquet
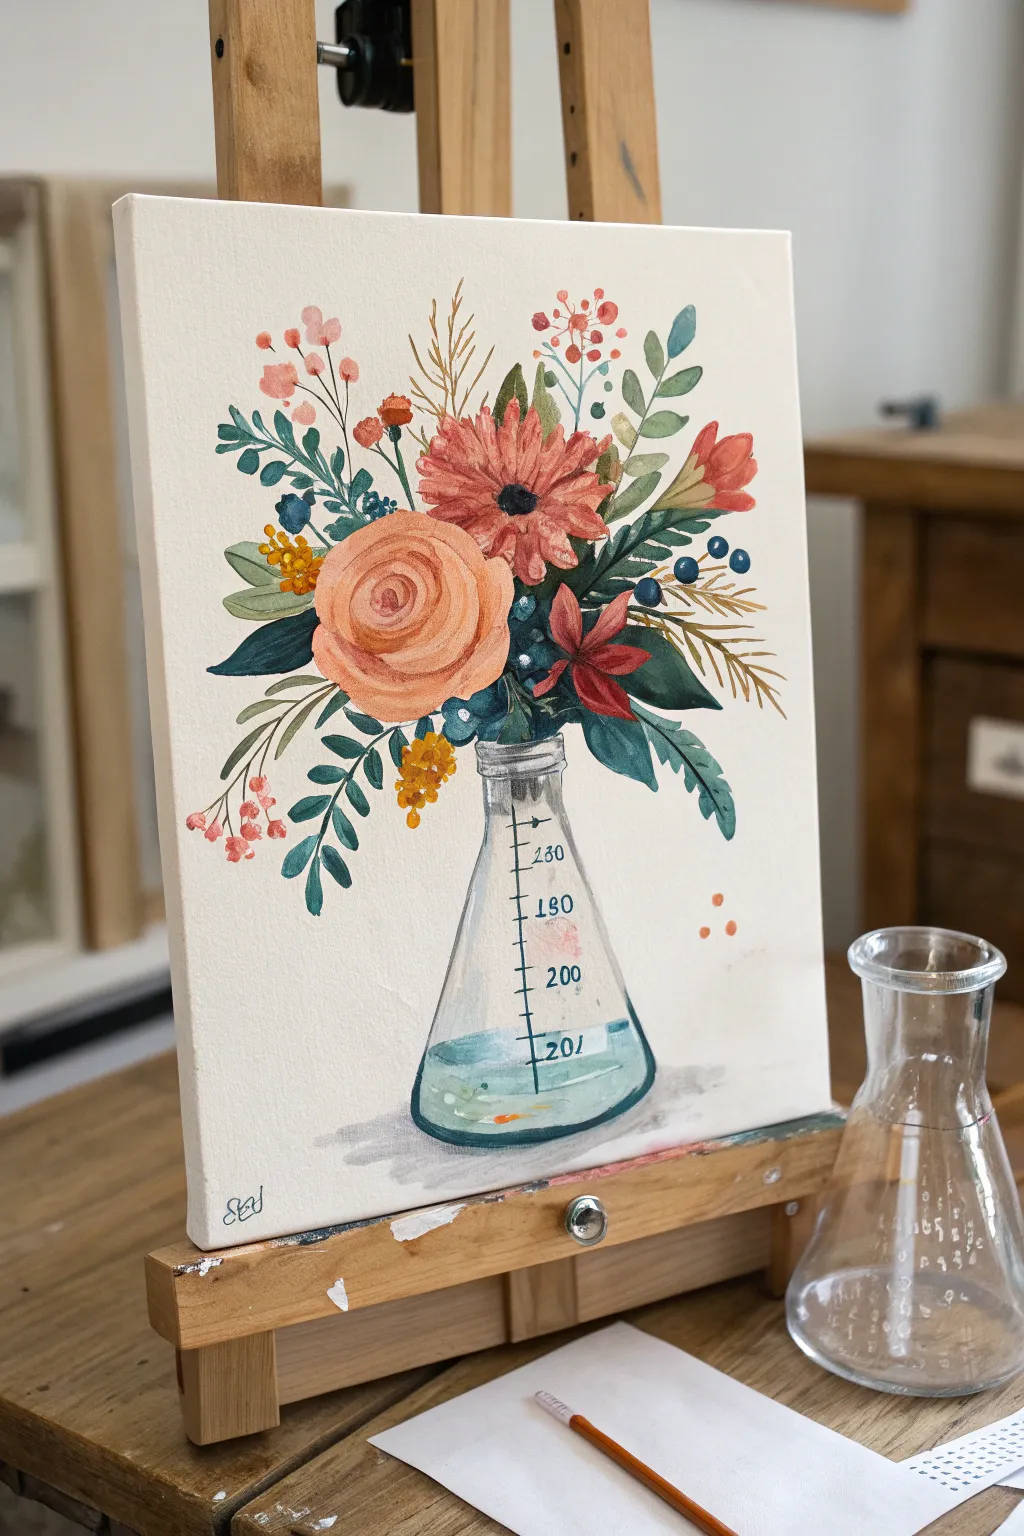
Merge the analytical world of science with the organic beauty of nature in this charming canvas project. Featuring a classic Erlenmeyer flask bursting with wildflowers, this painting makes the perfect classroom decor or gift for a favorite science teacher.
Step-by-Step Tutorial
Materials
- Canvas panel or stretched canvas (suggested size 9×12 or 11×14)
- Pencil (HB or lighter) and eraser
- Acrylic paints (Titanium White, Burnt Sienna, Yellow Ochre, Cadmium Red, Alizarin Crimson, Sap Green, Phthalo Blue)
- Glazing medium or water for thinning paint
- Paintbrushes: Flat brush (1/2 inch), Round brushes (size 4, 6, and 0 for details)
- Palette for mixing
- Ruler
- Water cup and paper towels
Step 1: Sketching the Composition
-
Outline the flask:
Start by lightly sketching the Erlenmeyer flask geometry in the lower center of the canvas. Use a ruler to ensure the neck is straight and the base is symmetrical. Drawing a light vertical centerline first can help you keep both sides even. -
Map out floral shapes:
Above the flask’s neck, sketch rough circles and ovals to indicate where your main flowers will sit. Place the largest circle (for the rose) slightly left of center and a second large circle (for the daisy) slightly right and higher up. -
Add directional stems:
Draw loose, flowing lines extending outward from the bouquet center to represent the various leaves and filler flowers. Don’t worry about detailing petals yet; just establish the flow and balance of the arrangement.
Fixing Wobbly Lines
Issues with bottle symmetry? Use two strips of painter’s tape to mark the straight sides of the flask neck. Paint the glass wash between them, let dry, and peel for crisp edges.
Step 2: Painting the Glassware
-
Create the glass tint:
Mix a very watery wash of Phthalo Blue and a tiny touch of Sap Green with plenty of white. You want a color that is barely there. Paint the interior of the flask shape, keeping it extremely transparent to mimic clear glass. -
Add the liquid line:
Mix a slightly more saturated version of your teal-blue glass color. Paint a horizontal oval near the bottom of the flask to represent the water line. Fill the area below this line with a slightly darker wash to show the volume of liquid. -
Define the edges:
Using a size 0 liner brush and a dark grey (mix Blue and Burnt Sienna), carefully outline the flask. Keep the lines thin and slightly broken in places so the glass doesn’t look too heavy or cartoonish. -
add measurement markings:
Once the base is dry, use your liner brush or a fine-tip paint marker to add the graduation lines and numbers up the side of the flask. Start from the bottom (e.g., 20) and work your way up to 130.
Step 3: Creating the Focal Flowers
-
Base coat the rose:
Mix a soft peach color using White, Yellow Ochre, and a dot of Red. Paint the large circular shape on the left. While the paint is still wet, swirl in slightly darker orange tones in a spiral motion to suggest the tight center of the rose. -
Paint the pink daisy:
For the flower on the right, mix a muted coral pink. Use a round brush to dab small, petal-like strokes radiating from a center point. Leave the center empty for now or paint it a dark contrasting brown. -
Add rose details:
Once the rose base is tacky, use a smaller brush with a darker terracotta color to define the edges of the petals. Create ‘C’ shaped strokes that overlap, getting smaller and tighter as you reach the center, giving the bloom depth. -
Detail the daisy center:
Paint the center of the pink daisy with a dark brown/black mix. Add small dots of white or yellow around the edge of this dark center to create texture and pollen.
Make it Personal
Customize the measurement numbers on the flask to represent a significant date, a classroom number, or a birthday for a hidden ‘easter egg’ in the painting.
Step 4: Leaves and Filler Elements
-
Paint the dark foliage:
Mix Sap Green with a little Phthalo Blue for a deep, cool green. Paint the larger leaves tucking behind the main flowers, especially the ones drooping down the left side. I find that varying the pressure on your brush helps create tapered leaf tips naturally. -
Add lighter greenery:
Mix Sap Green with Yellow Ochre and White for a lighter, olive tone. Paint the fern-like sprigs and smaller leaves sticking out the top. These lighter leaves should look like they are catching the light. -
Create berry accents:
Using a small round brush, add clusters of small dots for the berries. Use a reddish-pink for the tall sprigs on the left and a darker blue-grey for the berries on the right side. -
Insert wheat or dried grass:
Using a thin liner brush and a watered-down yellow-brown vertical mix, flick quick, thin lines upwards to resemble dried grasses or wheat stalks adding height to the bouquet.
Step 5: Final Touches
-
Add the shadow:
Mix a very sheer grey wash. Paint a soft, horizontal shadow underneath the flask to ground it on the surface. Soften the edges with a clean, damp brush so it fades out gently. -
Pop the highlights:
Using pure Titanium White and your smallest brush, add tiny reflection lines on the flask’s neck and base liquid to make the glass look shiny. You can also add tiny highlights to the berries. -
Sign your work:
Find a discreet corner, perhaps near the bottom left, and sign your initials using a fine liner brush or a permanent ink pen.
Now you have a blooming masterpiece that perfectly captures the chemistry of creativity


Music Staff Thank-You Notes
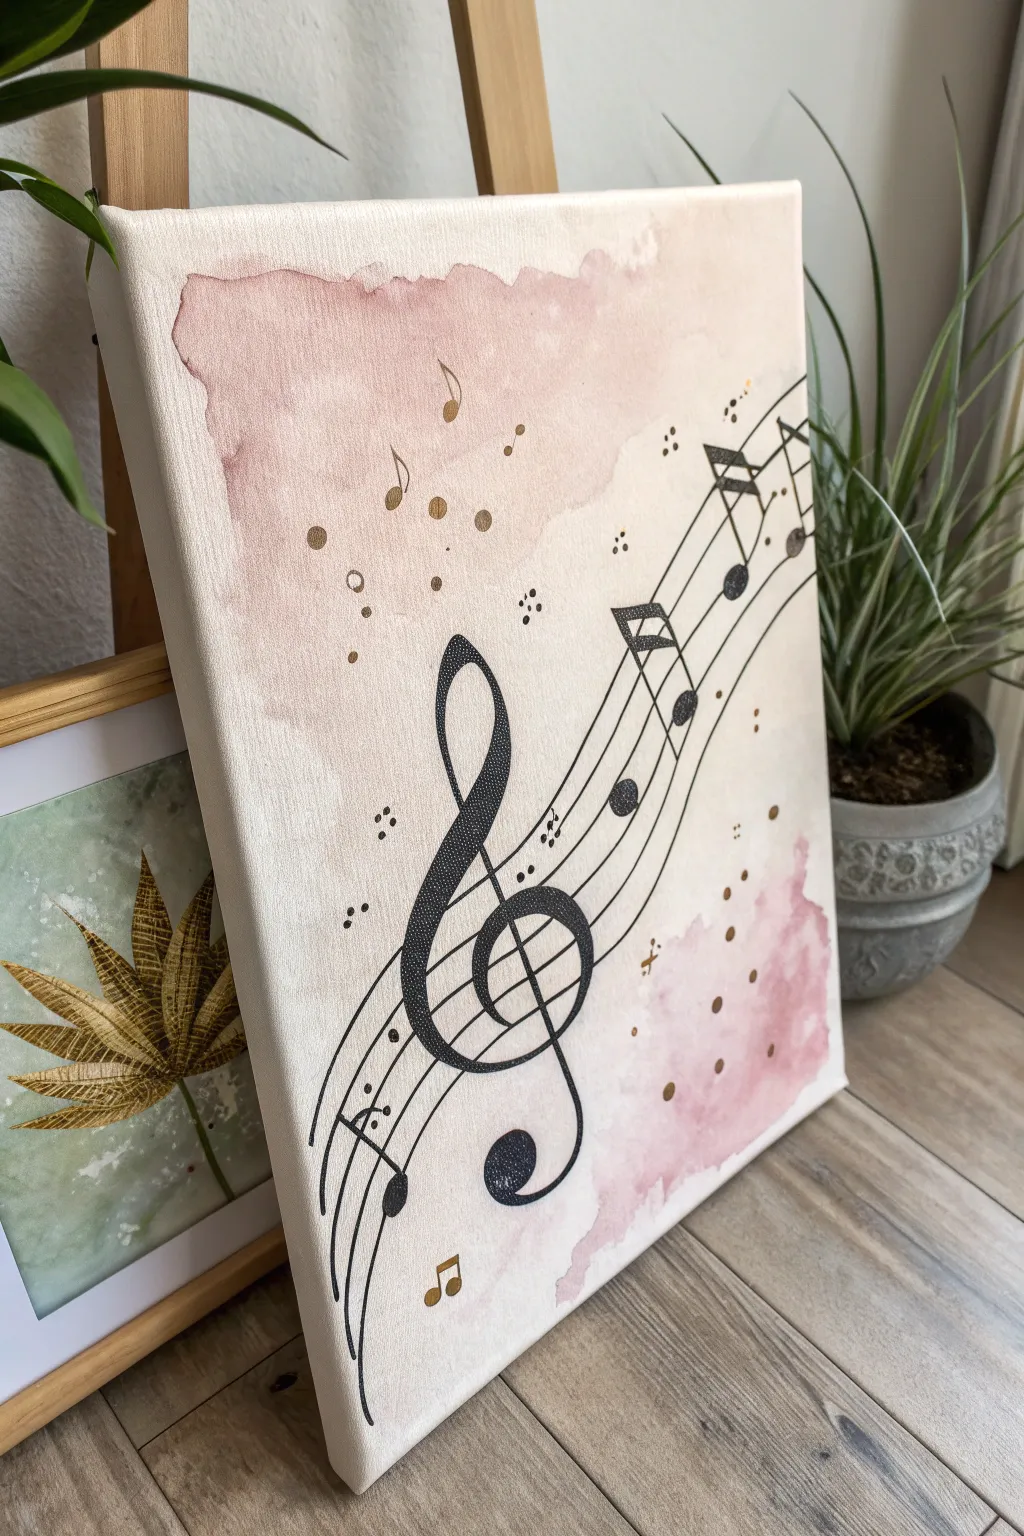
This elegant canvas combines soft, watercolor-style washes with crisp musical notation for a sophisticated teacher gift. The dusty pink background creates a dreamy atmosphere, while gold accents add a touch of sparkle suitable for any music lover’s wall.
Detailed Instructions
Materials
- Stretched white canvas (8×10 or 11×14 inches)
- Acrylic paints: Dusty Rose (or pink and brown mix), Black, Metallic Gold
- Water
- Large soft brush or watercolor brush
- Small round detail brush (size 0 or 1)
- Medium flat brush
- Pencil and eraser
- Ruler
- Palette or paper plate
- Paper towels
Step 1: Creating the Watercolor Background
-
Prepare the wash:
Mix a small amount of Dusty Rose acrylic paint with a generous amount of water on your palette. You want a very thin, translucent consistency, almost like ink or watercolor paint. -
Apply the first wash:
Using your large soft brush, lightly drift the watered-down pink across the top left corner. Don’t try to cover the whole canvas; let the edges range from jagged to soft for an organic look. -
Add the bottom accent:
Repeat the wash technique in the bottom right corner. I like to keep the center of the canvas mostly white so the black musical notes will pop against a clean background later. -
Soften edges:
While the paint is still wet, dip your brush in clean water and run it along the inner edges of your pink patches to create a bleeding, faded effect. Let the background dry completely before moving on.
Clean Lines Trick
If you struggle with steady hands for the long staff lines, use a black permanent marker or paint pen instead of a brush for consistent thickness.
Step 2: Drafting the Music
-
Draw the staff lines:
Using a ruler and a light pencil, lightly sketch five parallel diagonal lines curving slightly from the bottom left to the top right. Spacing them about half an inch apart usually works well. -
Sketch the clef:
Lightly draw a large Treble Clef in the center. Start the spiral on the second line from the bottom, loop up above the top line, and bring the tail down with a hook at the bottom. -
Add notes:
Sketch in your quarter notes and eighth notes along the staff lines. Placement doesn’t need to be musically perfect, but ensure the note heads sit clearly on lines or in spaces.
Sheet Music Collage
Decoupage pieces of actual vintage sheet music onto the background before adding the pink wash for gorgeous texture.
Step 3: Painting the Details
-
Paint the staff lines:
Load a thin round brush with black acrylic paint. Carefully trace over your pencil lines. You can use a ruler as a guide, but lifting it carefully is key to avoid smudging. -
Fill the Treble Clef:
Switch to a slightly thicker brush if needed to fill in the body of the Treble Clef. The shape should bulge slightly in the middle stem for that classic calligraphic look. -
Paint the note heads:
Fill in the oval note heads with solid black. Be sure they are opaque; you may need a second coat after the first dries. -
Add stems and beams:
Use your finest brush to connect the note heads with vertical stems and the horizontal beams at the top. Keep these lines crisp and straight. -
Clean up:
Once the black paint is fully dry, gently erase any visible pencil marks that weren’t covered by paint.
Step 4: Golden Accents
-
Add floating notes:
Dip your small detail brush into metallic gold paint. Paint tiny, free-floating music notes in the pink areas to create a sense of movement. -
Create confetti dots:
Using the back end of a small paintbrush handle, dip it into the gold paint and dot it onto the canvas. Group some clusters near the music notes and leave others isolated. -
Paint subtle sparkles:
Paint tiny ‘plus signs’ or four-pointed stars with the gold paint in empty spaces to add a magical shimmer effect. -
Final heavy dots:
Add a few larger gold dots using a larger brush handle or a round sponge dabber for variety in size.
Let your beautiful musical tribute dry overnight before wrapping it up for your favorite teacher
Abstract Lesson-Plan Grid in Color Blocks
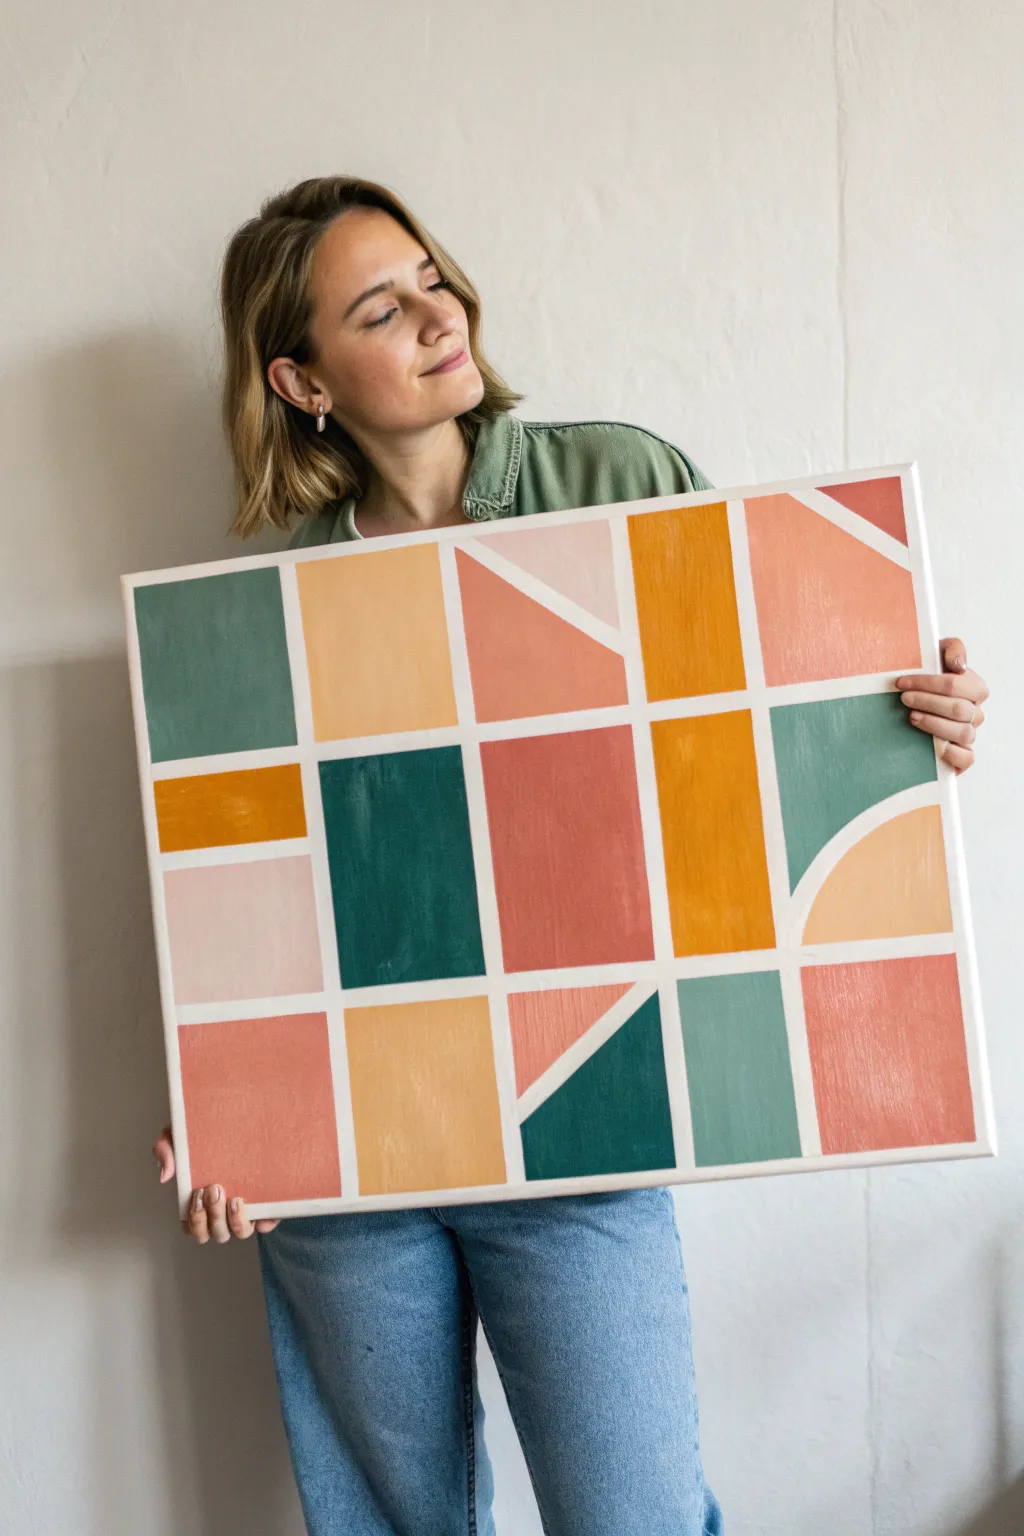
Bring structured beauty to your walls with this vibrant, modern geometric grid painting characterized by its clean lines and warm, earthy palette. The design balances order with playfulness, using angular shapes to create movement within a classic grid layout.
Detailed Instructions
Materials
- Large stretched canvas (approx. 24×30 inches)
- Painter’s tape (various widths, 0.5-inch and 1-inch recommended)
- Acrylic paints (Sage Green, Terracotta, Mustard Yellow, Dark Teal, Peach/Blush)
- Flat paintbrushes (medium and large)
- Ruler or straight edge
- Pencil
- Palette or paper plates for mixing
- A putty knife or credit card (optional)
- White acrylic paint (for touch-ups)
Step 1: Planning and Taping
-
Prime your surface:
Ensure your canvas is clean and taut. If it isn’t pre-primed, apply a coat of gesso to create a smooth, gripping surface for your paint. -
Map out the grid:
Using a pencil and ruler, lightly mark out a basic 4×3 grid structure. Don’t worry about being perfectly symmetrical; slightly offset lines add visual interest. -
Tape the main vertical lines:
Apply strips of painter’s tape vertically to establish your columns. Use a ruler to keep them straight, and press the edges down firmly. -
Tape horizontal dividers:
Place horizontal strips of tape to create the rows. You can align them perfectly or stagger them slightly for a more dynamic look. -
Add geometric angles:
Within selected rectangles, place diagonal pieces of tape to biscuit them into triangles or trapezoids. Look at the reference image to see how diagonals are scattered to create flow. -
Create curves (optional):
To recreate the curved shape seen in the top right and middle right, you can carefully freehand the tape or use a flexible curve tool to guide your masking. -
Seal the edges:
Run a putty knife, credit card, or your fingernail firmly along the edges of every piece of tape. This is crucial for achieving crisp, clean lines later. -
Apply a base seal:
I always paint a thin layer of white paint (or clear matte medium) over the tape edges. This bleeds under the tape first, blocking colored paint from seeping through.
Bleeding Lines?
If paint bleeds under the tape, wait for it to dry fully. Then, place a ruler over the line and use a correction pen or white paint with a fine liner brush to neaten the edge.
Step 2: Painting and Finishing
-
Plan your palette:
Squeeze out your colors: Sage Green, Deep Teal, Mustard Yellow, Terracotta, and Peach. Keep them separate on your palette. -
Start with the lightest tones:
Begin painting the Peach and lighter Blush block sections. Use a flat brush to fill the spaces, brushing away from the tape edges to minimize seepage. -
Apply mid-tones:
Move on to the Mustard Yellow and Terracotta sections. Try to balance the composition by ensuring no two identical colors touch directly. -
Add depth with darks:
Paint the Deep Teal and Sage Green sections. These darker shades act as anchors for the composition, so scatter them evenly across the canvas. -
Double check coverage:
Acrylics can be translucent. Check your first blocks; if they look streaky, apply a second coat once the first is dry to the touch. -
Let it dry completely:
Patience is key here. Allow the painting to sit until the paint is bone dry. Rushing this step can cause the paint to peel up with the tape. -
The reveal:
Slowly peel off the tape at a 45-degree angle. Pull gently and steadily to reveal the crisp white grid lines underneath. -
Touch up:
If any paint bled through, use a small detail brush and white paint to clean up the lines.
Add Texture
Mix a texture medium or modeling paste into one or two specific colors (like the terracotta) before painting its block to create a raised, tactile element in your grid.
Hang your masterpiece proudly and enjoy the modern splash of color it adds to your space

Have a question or want to share your own experience? I'd love to hear from you in the comments below!