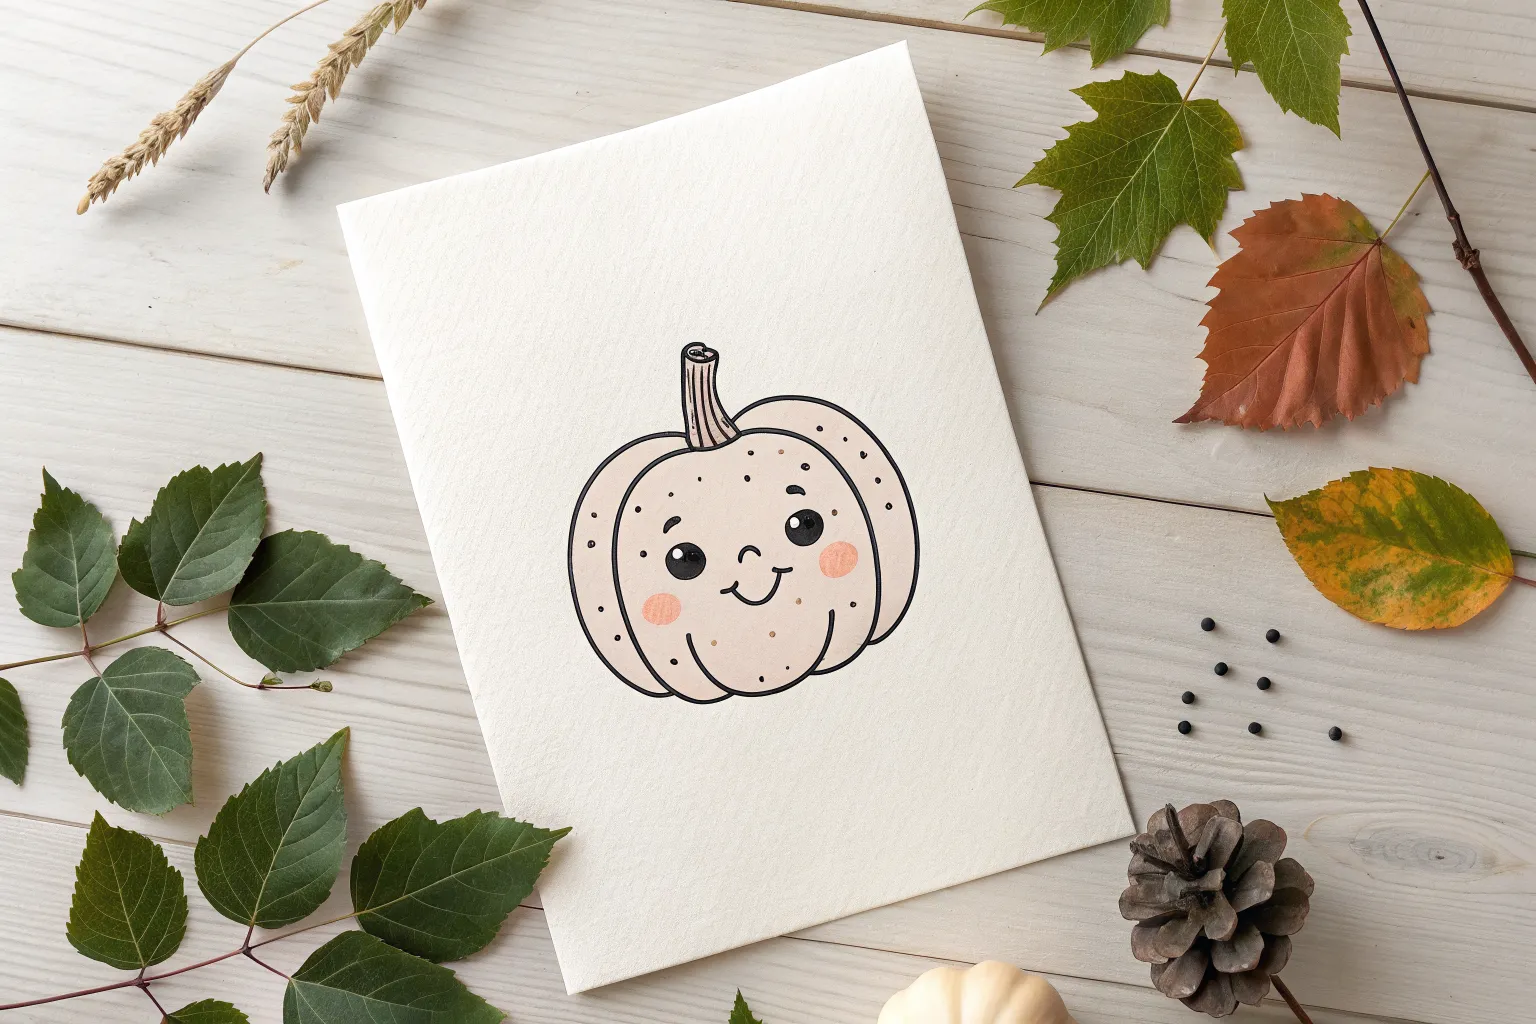
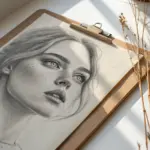
When you want cute easy Halloween drawings, it helps to lean on simple shapes, bold outlines, and tiny faces that make everything feel friendly. I put together my go-to doodle ideas that look instantly festive but stay totally beginner-friendly and fun to draw.
Friendly Kawaii Ghost
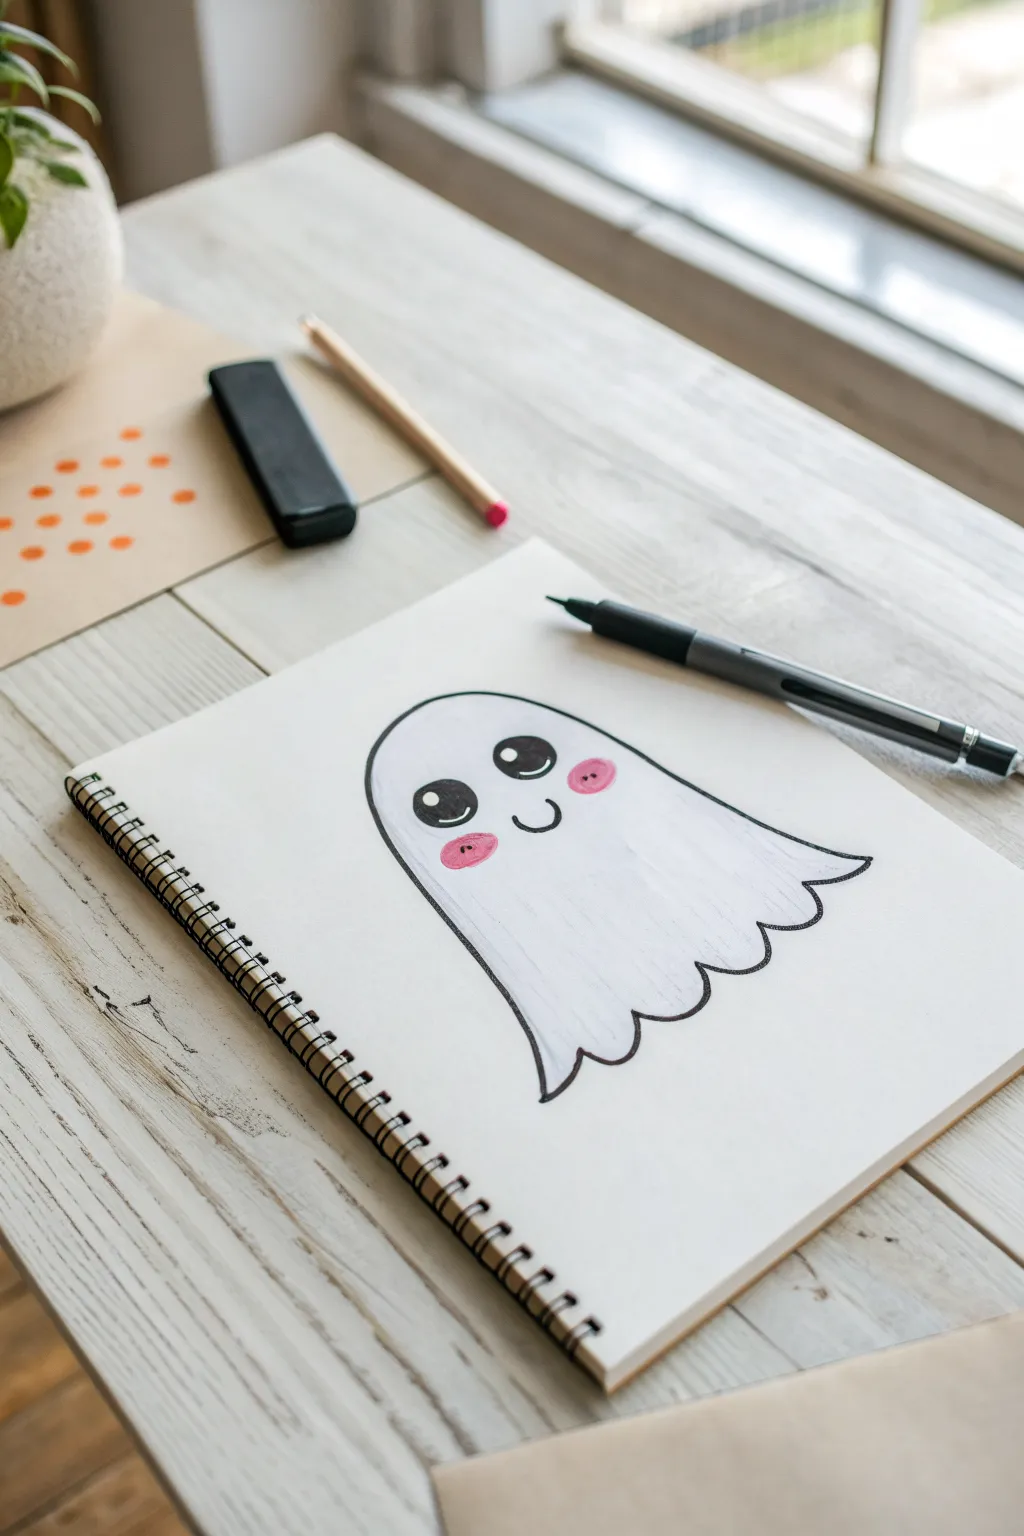
This friendly little spirit proves that Halloween drawings don’t have to be scary to be festive. With its blushing cheeks and gentle smile, this kawaii ghost sketch is perfect for adding a touch of sweetness to your spooky season art.
Step-by-Step Tutorial
Materials
- Sketchbook or white drawing paper
- Pencil (for sketching)
- Eraser
- Black drawing pen or fine-tip marker
- Pink colored pencil or pastel marker
Step 1: Sketching the Shape
-
Start the curve:
Begin near the top center of your page to create the ghost’s head. Lightly sketch a large, smooth inverted ‘U’ shape. This arc should be nice and round to give the ghost a soft, friendly appearance. -
Extend the sides:
Continue drawing lines down from both ends of your arc. Bring the left side down straight but slightly angled outward. For the right side, drape the line outward a bit more dramatically, like a flowing sheet. -
Define the bottom waves:
Connect the bottom of your two side lines with a wavy line. These scallops represent the hem of the sheet. Keep them loose and slightly irregular rather than perfectly uniform. -
Refine the flow:
Add a small, upward flick on the right-hand side where the ‘sheet’ ends, creating a little tail that suggests movement.
Smooth Curves
Turn your sketchbook as you draw the long curves of the body. Pulling the pen toward you often results in a smoother line than pushing it away.
Step 2: Adding the Face
-
Position the eyes:
Sketch two large oval shapes for eyes in the upper third of the ghost’s body. Space them fairly wide apart to get that classic kawaii look. -
Sketch the mouth:
Place a small, simple ‘u’ shape directly between and slightly below the eyes for a smiling mouth. -
Mark the highlights:
Inside each eye oval, draw two smaller circles—one larger one near the top and a tiny one below it. These will remain white to act as light reflections. -
Place the cheeks:
Lightly outline oval spots right under each eye for the cheeks.
Glow Up
Use a light blue crayon or pastel to gently outline the outside of the ghost. This creates a cool, spectral ‘glow’ effect around your character.
Step 3: Inking and Details
-
Ink the outline:
Using your black drawing pen, carefully trace over your pencil outline for the ghosts body. Use a steady, continuous stroke for the long curves to keep them smooth. -
Fill in the eyes:
Switch to a slightly thicker pen if you have one, or just carefully fill in the large pupil area of the eyes black. Be extremely careful not to color over your white highlight circles. -
Ink the smile:
Trace the small smiling mouth with a singular, confident stroke. -
Erase pencil marks:
Wait a moment for the ink to fully dry to avoid smudges. Then, gently erase all your underlying pencil sketches until the paper is clean.
Step 4: Adding Color
-
Color the cheeks:
Take your pink colored pencil or marker. Fill in the cheek ovals you sketched earlier. I prefer using a colored pencil here and pressing lightly in a circular motion for a soft, diffused blush effect. -
Add subtle texture:
If you want to add a tiny bit of dimension, you can add very faint vertical lines on the ghost’s body with a grey pencil, but keep it minimal to maintain the clean, white look. -
Final check:
Review your lines. If any parts of the black outline look thin or shaky, go over them one last time to bolder the silhouette.
Your adorable ghost is now ready to haunt your sketchbook with cuteness


Candy Corn With a Tiny Face
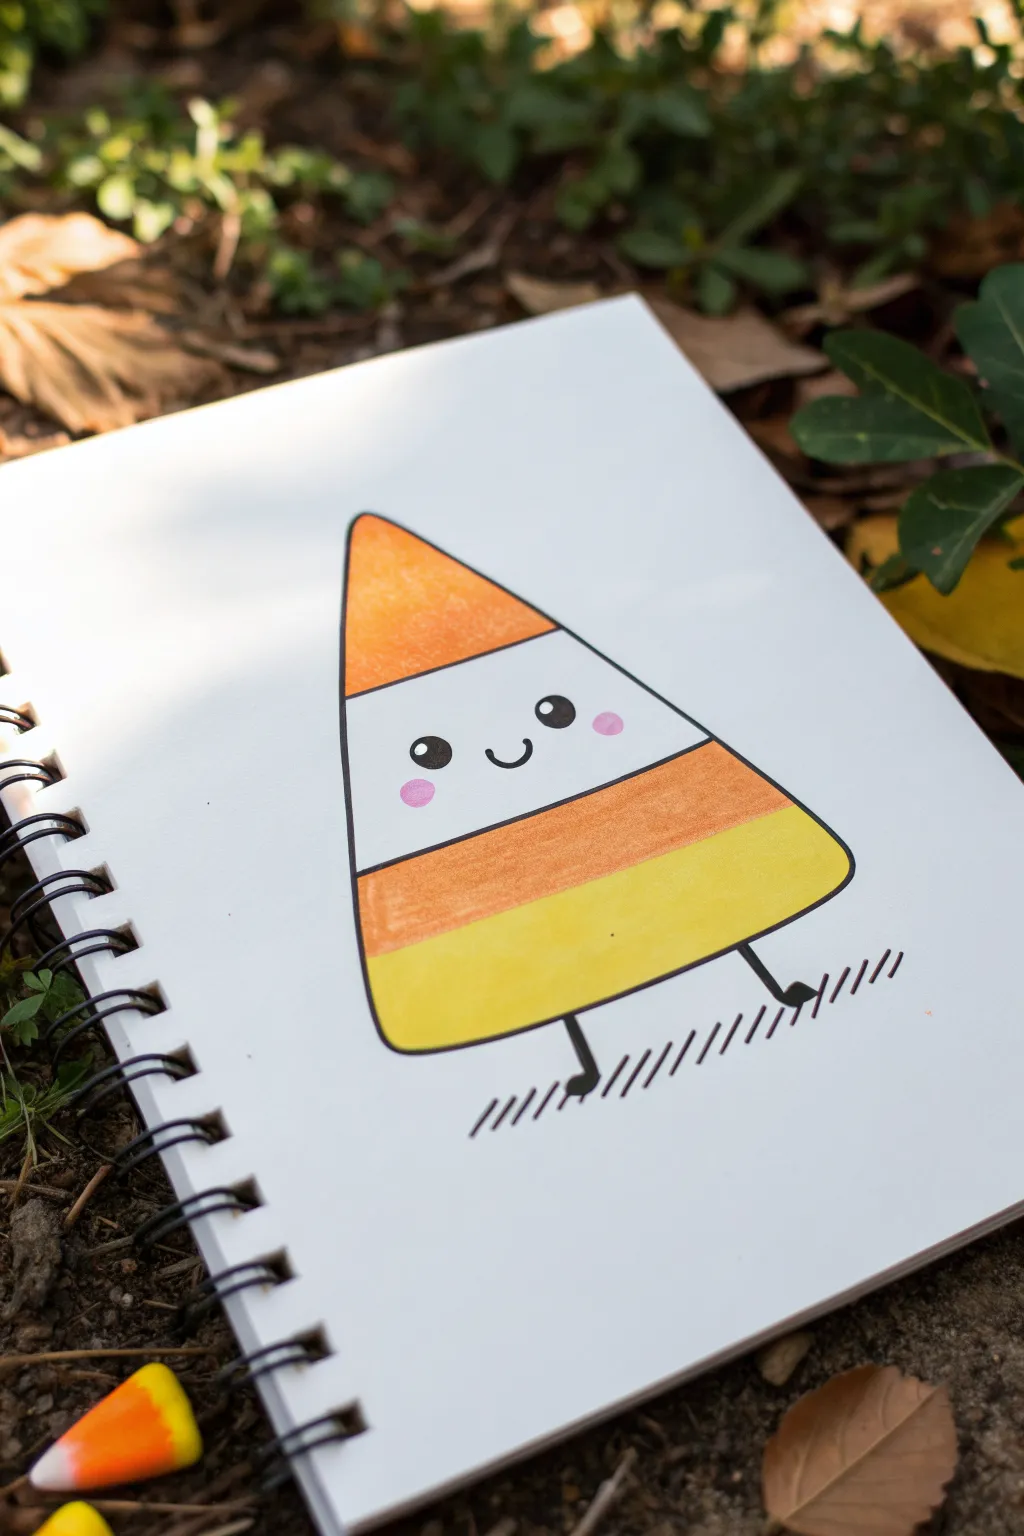
This adorable candy corn character brings a sweet twist to Halloween art with its simple triangular shape and cheerful expression. It’s a perfect beginner-friendly drawing project that uses bold markers and clean lines to create a charming seasonal mascot.
Step-by-Step
Materials
- White sketchbook paper or cardstock
- Pencil (HB or 2H)
- Eraser
- Fine liner pen (black, 0.5mm or 0.8mm)
- Thick black marker
- Orange art marker (alcohol-based preferred)
- Yellow art marker (alcohol-based preferred)
- Pink colored pencil or pastel marker
Step 1: Sketching the Shape
-
Establish the base:
Begin by lightly sketching a horizontal line near the bottom of your page. This will determine the width of your candy corn’s base. -
Find the peak:
Mark a center point significantly higher up on the page. This doesn’t need to be perfectly centered, but it sets the height of the character. -
Connect the sides:
Draw straight lines connecting the ends of your bottom line to the top point, creating a tall triangle with rounded corners. Aim for soft, rounded corners rather than sharp points to keep it cute. -
Divide the sections:
Lightly sketch two curved horizontal lines across the body of the triangle. The curve should dip slightly downwards in the middle to give the object some volume. -
Add the face:
In the middle white section, lightly mark positions for two wide-set eyes and a small, U-shaped mouth right between them. -
Sketch the legs:
Draw two simple straight lines sticking out from the bottom edge for legs, adding tiny ovals at the ends for feet.
Highlight Preservation
Draw the tiny white circles inside the eyes *before* filling them black. It’s much easier to color around them than to try adding white ink on top later.
Step 2: Inking the Outline
-
Trace the outline:
Using your black fine liner, carefully trace over the main triangular shape of the candy corn. -
Seal the sections:
Go over the internal curved lines that separate the color bands. Keep your hand steady to ensure smooth, continuous arcs. -
Ink the legs:
Trace the stick legs and the little feet. Feel free to thicken the feet slightly to make them look solid. -
Define the eyes:
Draw the circles for the eyes. Inside each eye, draw two small white circles (highlights) near the top left before filling the rest in black. -
Draw the mouth:
Ink the small U-shaped smile. I like to make the line slightly thicker in the middle for a friendlier look. -
Create a ground shadow:
Beneath the feet, draw a series of short, diagonal hash lines to suggest a shadow on the ground. -
Erase pencil marks:
Once the ink is completely dry, gently run your eraser over the entire drawing to remove the initial sketch lines.
Make it a Trio
Draw two smaller candy corn friends behind the main one, or tilt them sideways to create a candid group photo scene.
Step 3: Adding Color
-
Color the top tip:
Take your orange marker and fill in the very top section of the triangle. Use long strokes to minimize streaking. -
Color the bottom band:
Switch to your bright yellow marker and fill in the bottom-most section of the candy corn. -
Add the middle stripe:
Wait—trick step! The middle band of a candy corn is white, so leave this paper-white. However, you need to add the secondary orange stripe. Color the band *below* the face section orange. -
Refine the coloring:
If your markers look uneven, wait for the first layer to dry and add a second coat for a smoother, more vibrant finish. -
Add blush:
Using a pink colored pencil or a very light pink marker, draw small oval cheeks just below and to the outside of the eyes. -
Final touches:
Check your black outlines. If the marker ink bled over them slightly, you can re-trace the thick outer lines with a thicker black marker to make the drawing pop off the page.
Now you have a sweet little seasonal friend ready to brighten up your sketchbook


Cute Bat With Rounded Wings
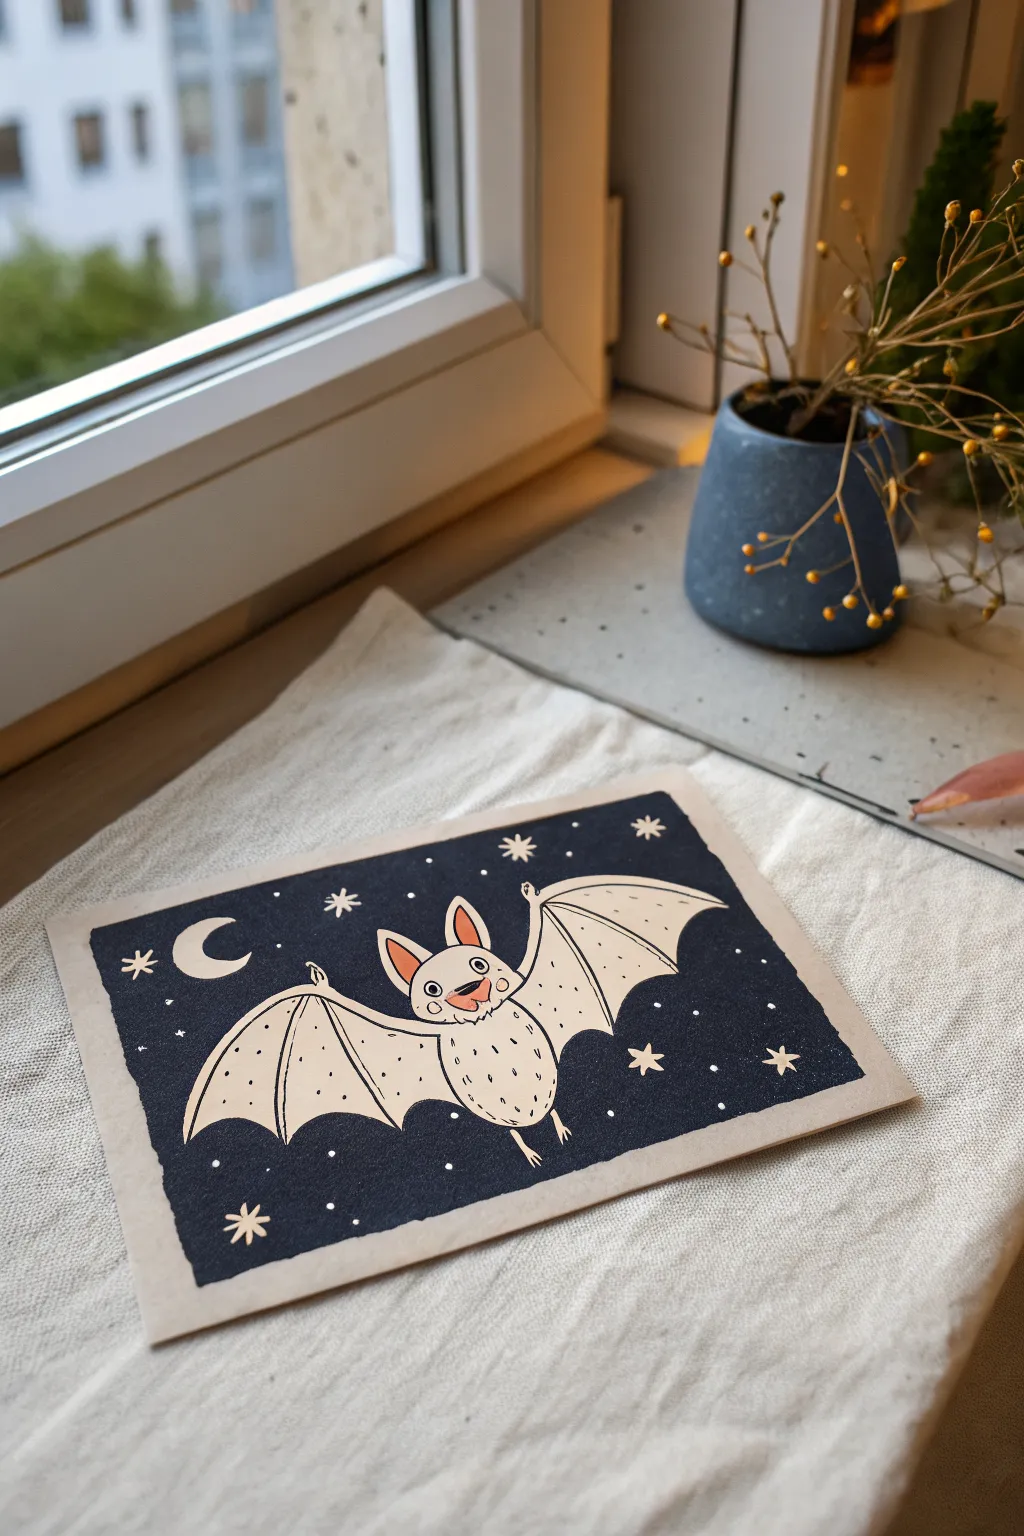
This charming project features a friendly, round-bellied bat soaring through a deep blue midnight sky. With its distinct cutout-style appearance and crisp white details, this illustration makes for a perfect non-scary Halloween decoration or greeting card.
How-To Guide
Materials
- Heavyweight mixed media paper or watercolor paper (beige or off-white)
- Deep indigo or navy blue gouache or acrylic paint
- Flat shader brush (medium size)
- Fine liner brush (size 0 or 00) or extra-fine paint pen (black)
- White gel pen or fine white paint marker
- Pencil and eraser
- Ruler
- Masking tape or painter’s tape
Step 1: Setting the Scene
-
Define the borders:
Begin by deciding on the size of your illustration area. Using a ruler and pencil, lightly draw a rectangle in the center of your paper, leaving a generous margin of about 1-1.5 inches of the natural paper showing on all sides to act as a frame. -
Tape the edges:
Carefully apply masking tape along the outside edges of your pencil lines. Press down firmly to seal the edges so paint won’t bleed underneath, ensuring a crisp border later. -
Paint the night sky:
Load your flat brush with deep indigo or navy blue gouache. Fill in the entire rectangle with an even, opaque layer of paint. Gouache dries quickly and matte, which gives that lovely velvety texture seen in the reference. -
Let it dry completely:
Wait for the blue background to become completely dry to the touch. If the paper feels cold, it’s still damp. I usually give it an extra 10 minutes just to be safe before sketching on top.
Bleeding Edges?
If paint bled under the tape, wait for it to dry fully, then use a white gouache or acrylic (mixed to match your paper color) to carefully paint over the mistake and straighten the line.
Step 2: Sketching the Bat
-
Outline the body:
Using a white charcoal pencil or a light colored pastel pencil (regular graphite might be hard to see), lightly sketch a simple oval shape in the lower center for the bat’s body. -
Add the head:
Draw a slightly smaller horizontal oval on top of the body for the head, overlapping slightly. Add two tall, pointed triangles for the ears. -
Map out the wings:
Sketch the wing structure. Start with the ‘arm’ extending from the shoulder, bending upward, and then scalloping down toward the bottom of the rectangle. The wings should be large and expressive, filling much of the side space. -
Add floating elements:
Sketch a crescent moon in the upper left corner and mark small dots or asterisks where you want your stars to go.
Make it Sparkle
Mix a tiny amount of glitter medium into the white paint used for the stars, or use a metallic gold pen for the moon and stars to catch the light.
Step 3: Painting the Character
-
Base coat the bat:
Mix a light cream or off-white color (or use the paper color if you are working digitally/negatively, but for traditional paint, use a light cream). Paint the entire silhouette of the bat—body, head, and wings—blocking out the dark blue background. -
Refine the edges:
Use a small round brush to make sure the edges of your cream bat shape are smooth and sharp against the dark blue background. -
Paint the moon:
Using the same cream color, fill in the crescent moon shape you sketched earlier. -
Add pink details:
Once the cream base is dry, mix a soft salmon pink. Paint the inner triangles of the ears, a small circle for the nose, and a curved shape for the mouth interior.
Step 4: Inking and Details
-
Outline in ink:
Using a fine black liner brush or a black paint pen, carefull trace the outline of the entire bat. Keep your hand steady to create a consistent line weight. -
Draw wing veins:
Draw lines radiating from the top ‘arm’ of the wing down to the pointed tips of the scallops. This gives the wings their skeletal structure. -
Facial features:
Draw two small circles for eyes with tiny black pupils. Outline the pink nose and mouth, adding a small tooth if you like for extra cuteness. -
Texture the fur:
Add small, dashed tick marks on the bat’s tummy and chest. This simple technique suggests a fluffy texture without needing to draw individual hairs. -
Add the stars:
Switch to your white gel pen or a fine brush with pure white paint. Draw simple asterisks (three crossed lines) and tiny dots scattered across the blue background to create the starry night effect. -
The reveal:
Slowly peel away the masking tape at a 45-degree angle away from the painting. This reveals the crisp, clean edges and the beige border that frames your artwork perfectly.
Hang your finished starry night bat on the fridge or frame it for a seasonal touch.
Simple Witch Hat With Stars
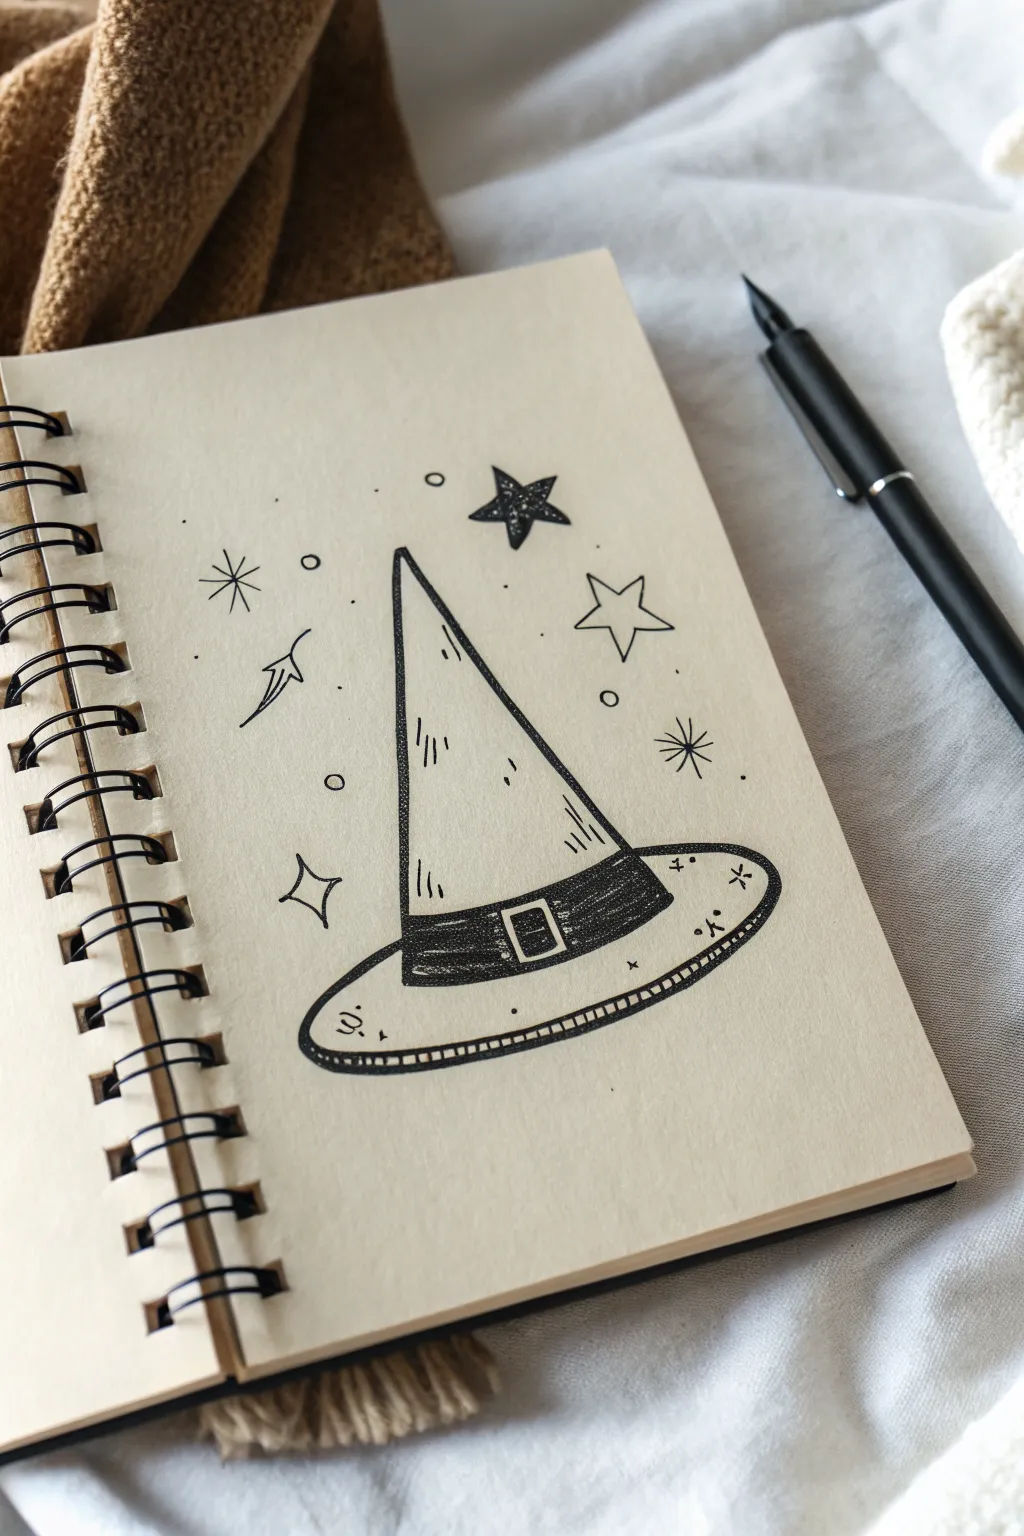
Capture the magic of the season with this simple yet charming ink drawing of a classic witch hat. Surrounded by a sprinkling of stars and sparkles, this doodle is perfect for adding a touch of enchantment to your bullet journal or sketchbook.
Step-by-Step Guide
Materials
- Fine liner pen (0.3mm or 0.5mm)
- Pencil (HB or H)
- Eraser
- Sketchbook or drawing paper (cream or off-white recommended)
Step 1: Foundational Sketch
-
Draw the basic cone:
Start lightly with your pencil. Draw a tall, narrow triangle for the top of the hat, but keep the bottom open. Tilt the top point slightly to the left to give the hat a bit of personality. -
Add the brim structure:
At the base of your triangle, sketch a wide, flattened oval that extends past the sides of the cone. This will become the brim of the hat. -
Outline the hat band:
Just above the brim, draw two parallel curved lines across the cone. This creates the belt or band around the hat. -
The buckle detail:
In the center of the band, sketch a small rectangle for the buckle. Inside that rectangle, draw a smaller rectangle to show the opening.
Uneven Start?
If your hat cone looks lopsided, don’t erase it! Embrace it as a ‘crumpled’ look, focusing on adding extra crease lines where the fabric would fold.
Step 2: Inking the Hat
-
Outline the main shape:
Switch to your fine liner pen. Trace over your pencil lines for the cone and the brim. When tracing the brim, make the line slightly wobbly or imperfect for a hand-drawn, fabric feel. -
Define the brim edge:
Draw an inner line parallel to the outer brim edge, creating a narrow rim. Add tiny vertical hash marks between these two lines to suggest stitching or thickness. -
Fill the hat band:
Ink the hat band lines. Use your pen to color in the band entirely black, leaving the buckle white. I like to leave tiny horizontal streaks of white within the black to simulate light hitting the leather. -
Detail the buckle:
Ink the buckle outlines. Add a small vertical line inside the inner rectangle to represent the prong of the buckle. -
Add texture marks:
On the main cone of the hat, draw short, vertical strokes—some singular, some in groups of three. This adds texture and volume to the hat so it doesn’t look flat. -
Decorative brim elements:
Add a few tiny symbols on the surface of the brim itself, such as a small ‘x’, a dot, or a tiny triangle, to give it a worn, magical look. -
Clean up:
Once the ink is completely dry, gently erase the underlying pencil sketch.
Star Power
Practice drawing your five-pointed stars on a scrap piece of paper first. Drawing them in one continuous motion usually yields sharper points than lifting the pen.
Step 3: Stars and Embellishments
-
Draw the main stars:
Place a standard five-pointed star to the right of the hat. Outline it simply with your pen. -
Create a filled star:
Above the first star, draw a slightly smaller five-pointed star and color it in completely with black ink for contrast. -
Add sparkles:
Draw two ‘sparkle’ shapes—one to the left of the hat and one near the brim. These are drawn like four-pointed stars with curved, concave sides. -
The shooting star:
On the left side, draw a small symbol resembling a comet or shooting star with a trailing tail pointing down. -
Starburst accents:
To the left of the hat top and to the right of the brim, draw two simple starbursts (an asterisk shape with 8 lines radiating from a center point). -
scattering dots:
Pepper the empty space around the hat with small open circles and solid black dots to represent magic dust. -
Final texture check:
Review your drawing. If any areas look too empty, add a few more tiny dots or dash marks to balance the composition.
Enjoy admiring your magical creation and perhaps add a date to the corner
BRUSH GUIDE
The Right Brush for Every Stroke
From clean lines to bold texture — master brush choice, stroke control, and essential techniques.
Explore the Full Guide
Black Cat in a Witch Hat
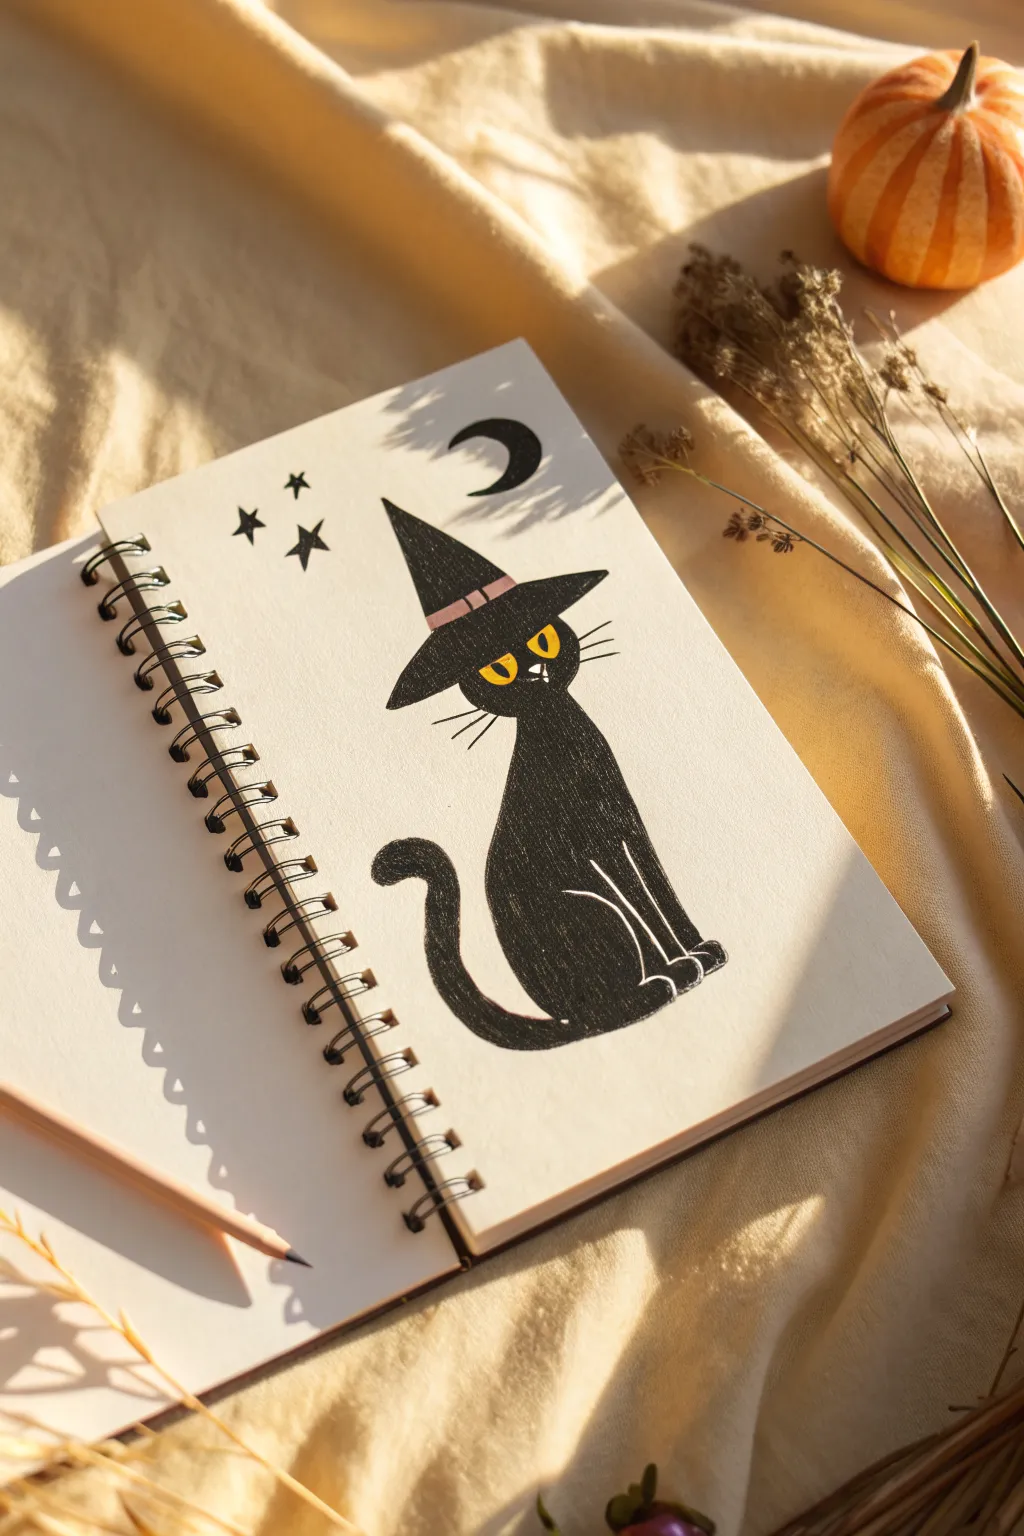
Capture the spooky spirit with this charming illustration of a black cat donning a classic witch’s hat. Using simple shapes and bold contrast, you’ll create a striking piece of artwork perfect for your Halloween journal spreads.
Step-by-Step
Materials
- Sketchbook or watercolor paper
- HB pencil for sketching
- Eraser
- Black fine liner pen (0.5mm)
- Black brush pen or broad marker
- Yellow marker or colored pencil
- Pink marker or colored pencil
Step 1: Sketching the Outline
-
Map out the head:
Start by lightly sketching a simple circle for the cat’s head. Since the hat covers the top, you only need the bottom curve to suggest the chin and cheeks. -
Add the hat brim:
Draw a wide, tilted oval shape sitting directly on top of your circle sketch to form the brim of the witch’s hat. Let it extend past the head on both sides for a floppy look. -
Form the hat cone:
Sketch a tall triangle rising from the brim. Give the tip a slight curve to the right to add character, rather than making it perfectly straight. -
Shape the body:
From the chin area, draw a long, curved line extending downward and slightly right for the cat’s chest and front leg. Add a curved line for the back, creating a sleek, elongated teardrop shape for the body. -
Sketch the tail:
Draw a thick, curved tail rising up from the bottom left of the body. Keep the shape fluid, resembling a letter ‘S’ or a question mark. -
Detail the face:
Inside the head area, under the hat brim, lightly mark positions for two oval eyes and a tiny triangular nose.
Fixing Ink Smudges
If you smudge black ink, turn it into a tiny star or a floating speck of dust to blend it into the background scenery.
Step 2: Inking & Filling
-
Outline the hat:
Using your black fine liner, go over your pencil lines for the hat. Draw the brim with a slightly jagged or textured line to make it look like fabric. -
Define the hat band:
Draw a thin band across the cone of the hat, just above the brim. Leave this space empty for now—we will add color later. -
Ink the cat’s body:
Trace the outer contour of the cat with confident strokes. I like to make the fur look slightly textured by avoiding perfectly smooth lines. -
Preserve the features:
Before filling anything in, carefully outline the eyes and the tiny nose. It is crucial to keep these areas white so the color pops later. -
Add separation lines:
Draw thin white guidelines to separate the front leg from the back leg. You won’t ink over these; instead, you’ll color around them to create negative space lines. -
Fill with black:
Switch to your black brush pen or broad marker. Color in the entire hat (except the band) and the cat’s body. Work carefully around the eyes, nose, and the negative space lines for the legs. -
Refine the edges:
Once the heavy black is filled, use your fine liner again to touch up any uneven edges or tiny gaps near the whiskers or paws.
Make it Shine
Use a white gel pen to add highlights on the black hat and the cat’s back to give the drawing a glossy, dimensional look.
Step 3: Adding Details & Color
-
Color the eyes:
Take your yellow marker or pencil and fill in the oval eyes. Leave a tiny vertical slit in the center of each for the pupils if you wish, or outline them later. -
Add the nose and band:
Use a pink marker for the hat band. You can leave the nose white or give it a very pale pink tint. -
Draw whiskers:
With a steady hand and your fine liner, flick three quick lines outward from each cheek. Quick strokes make for straighter, more natural whiskers. -
Create the pupils:
Carefully draw vertical black slits inside the yellow eyes to complete the feline gaze. -
Add celestial elements:
In the white space above the cat, draw a crescent moon and a few scattered stars (some 5-point, some 4-point) using your black pen. -
Erase pencil marks:
Wait until the ink is completely dry—give it a few minutes—then gently erase any visible pencil sketch lines for a clean finish.
Now you have a purr-fectly spooky companion for your Halloween notes
Shy Spider With Rosy Cheeks
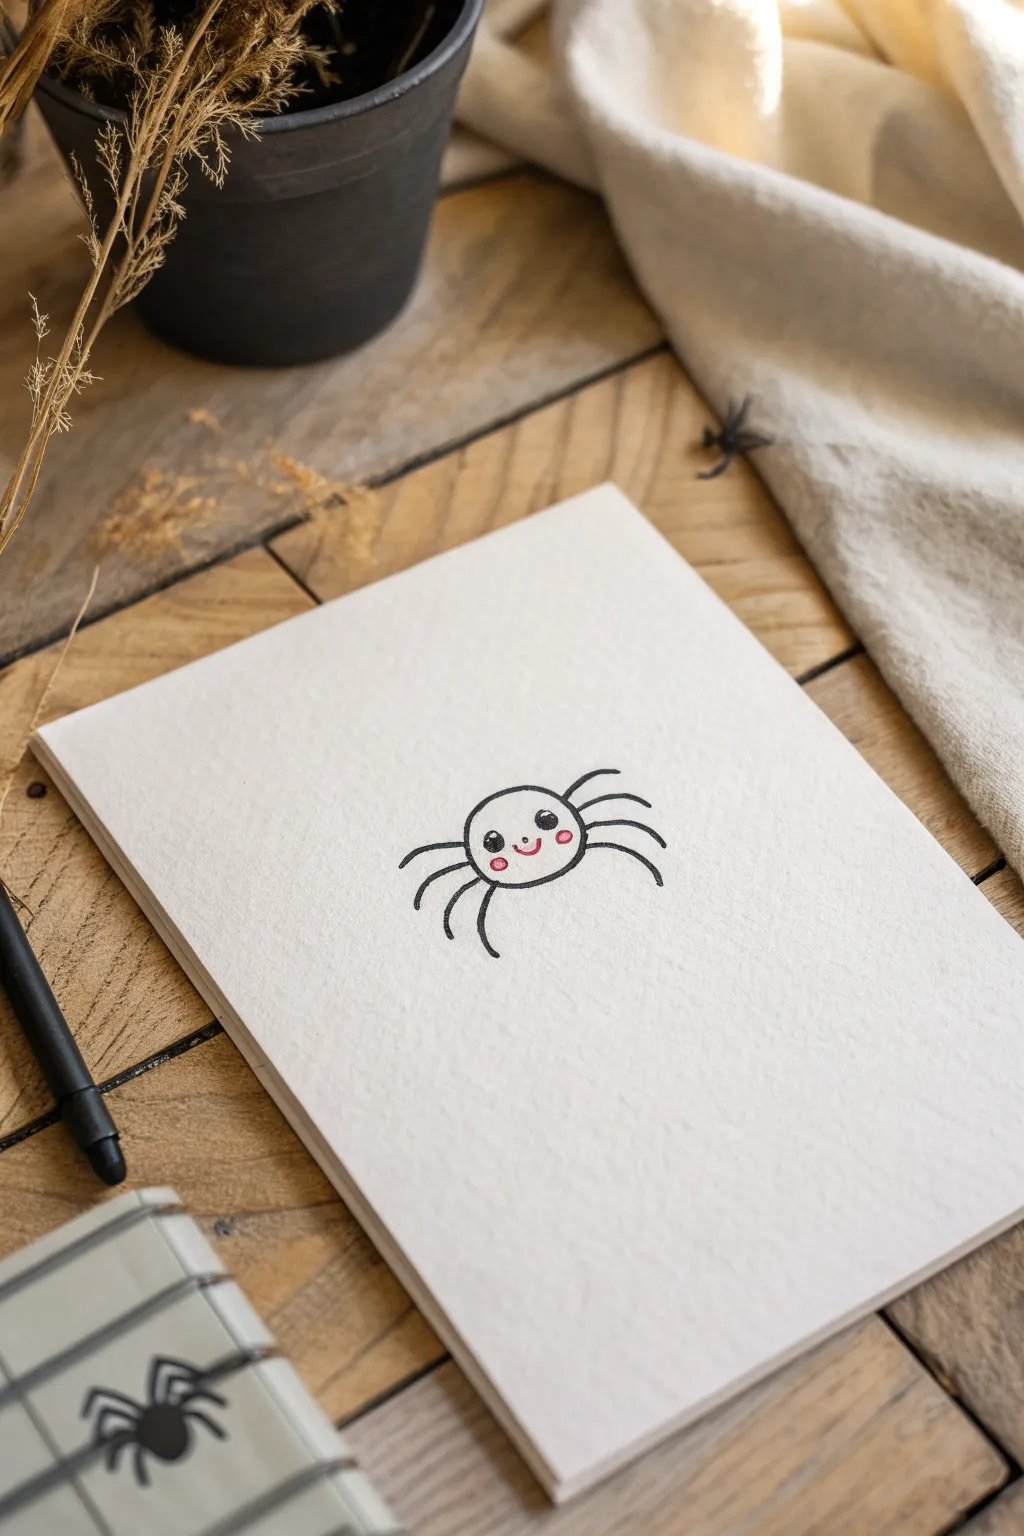
This adorable little arachnid is far more sweet than spooky, featuring big eyes and blushing cheeks. It’s a perfect minimalistic doodle for adding a touch of cute Halloween spirit to your cards or journals.
How-To Guide
Materials
- White cardstock or heavy drawing paper
- Fine-tip black drawing pen (0.5mm or 0.8mm)
- Pink marker or colored pencil
- Pencil
- Eraser
Step 1: Drawing the Body
-
Start with a pencil sketch:
Begin by lightly sketching a simple circle in the center of your paper using a pencil. This doesn’t need to be geometrically perfect; an organic, slightly oval shape adds character. -
Ink the main body outline:
Take your black fine-tip drawing pen and carefully trace over your pencil circle. Try to do this in one or two smooth strokes rather than many short, scratchy lines for a cleaner look.
Wobbly lines?
If your circle or legs aren’t perfectly smooth, simply go over the line again to thicken it intentionally. A thicker outline often hides small jitters and makes the drawing look bolder.
Step 2: Adding the Legs
-
Draw the top right leg:
Starting near the top right side of the circle, draw a curved line that arches up and then down. Repeat this just below the first line for the second leg. -
Complete the right side legs:
Add two more curved legs below the first two, spacing them evenly. You want four legs on this side total. -
Mirror on the left:
Move to the left side of the body. Draw the top leg, mirroring the curve of the one on the right so they look balanced. -
Finish the left legs:
Draw the remaining three legs on the left side. I find it helpful to slightly vary the curve of the bottom legs to make the spider look like it’s crawling. -
Check leg symmetry:
Before moving on, ensure you have eight legs total—four on the left and four on the right—radiating from the sides of the circle.
Make it spooky
Add a single straight line going upward from the top of the spider’s head to the edge of the paper to make it look like the spider is hanging from a web thread.
Step 3: Creating the Face
-
Placement of eyes:
visualizing the face area, aim for the lower half of the circle. Draw two medium-sized circles for the eyes, spacing them somewhat wide apart. -
Add eye highlights:
Inside each eye circle, draw a tiny circle near the top right or top left. This white spot will be the reflection. -
Fill in the eyes:
Color in the rest of the eye circles with your black pen, being very careful not to color inside that tiny highlight circle you just drew. -
Draw the mouth:
directly between the eyes, draw a small, U-shaped curve. Keep it tiny and centered for maximum cuteness.
Step 4: Finishing Touches
-
Erase pencil marks:
Once the black ink is completely dry—give it a minute to be safe—gently erase the initial pencil circle guide so only the clean ink remains. -
Add the blush:
Using a pink marker or colored pencil, draw two small circles right next to the outer edges of the mouth, just below the eyes. -
Review and refine:
Take a look at your finished spider. If any lines look too thin, you can thicken them slightly with the pen to make the doodle pop off the page.
Now you have a charming little spider friend to brighten up your Halloween crafts

PENCIL GUIDE
Understanding Pencil Grades from H to B
From first sketch to finished drawing — learn pencil grades, line control, and shading techniques.
Explore the Full Guide
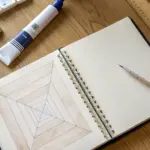
Easy Spiderweb With Curvy Rings
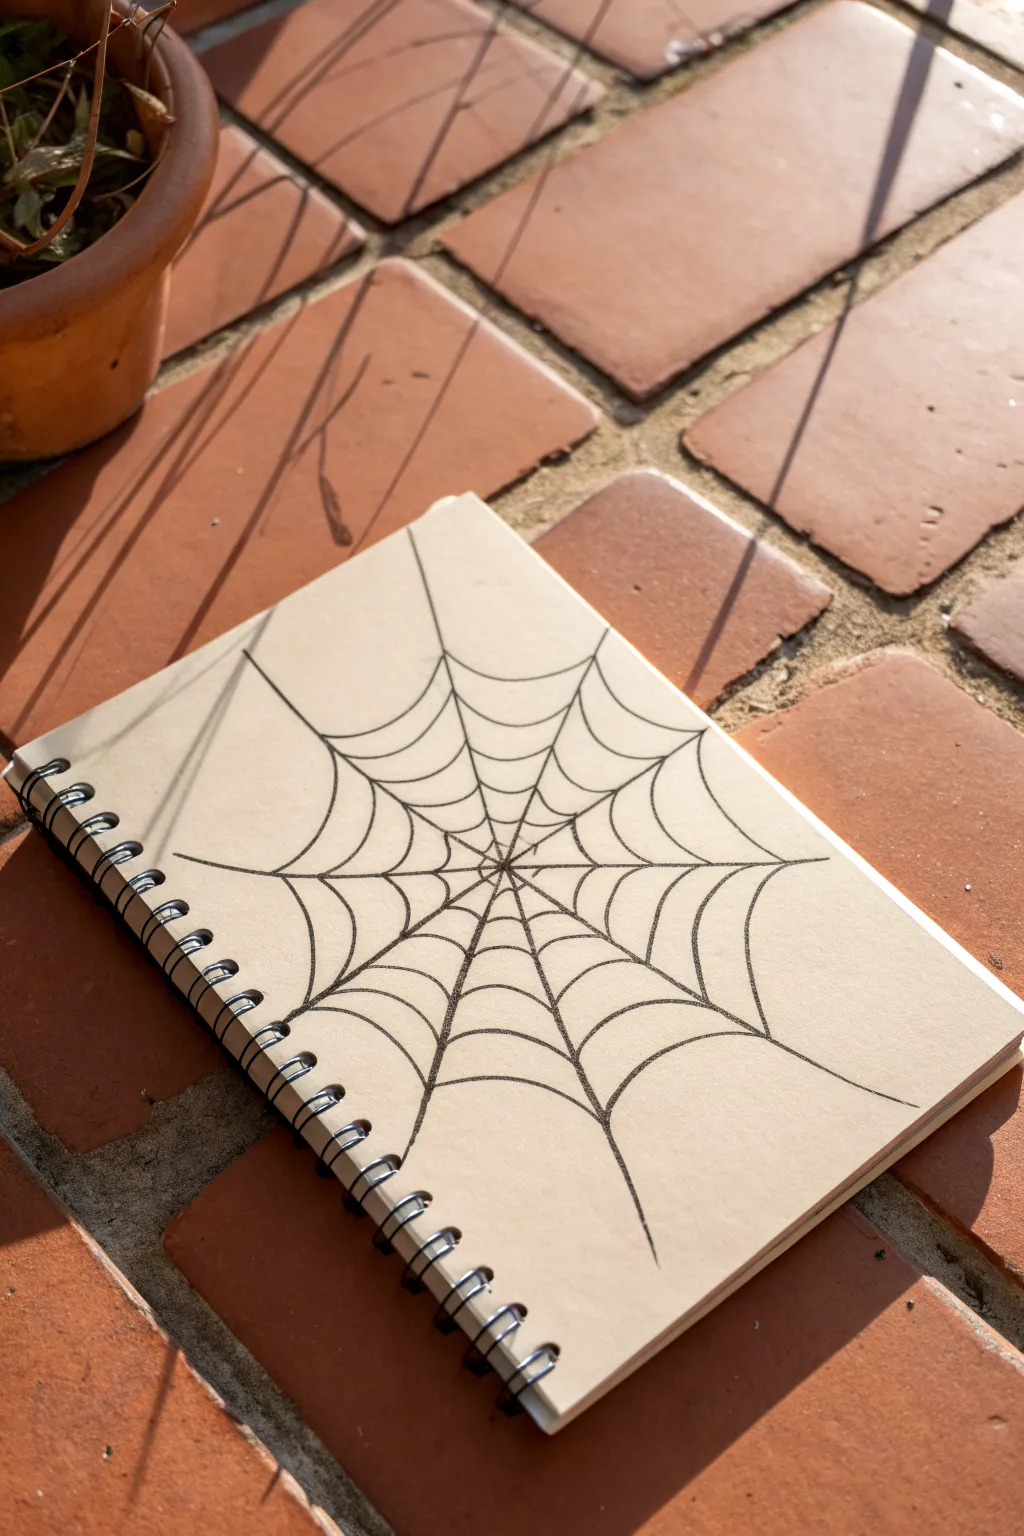
Learn to sketch a classic spiderweb design that balances structure with clean, sweeping curves. This simple black ink drawing creates a satisfyingly symmetric look that fits perfectly in any sketchbook or Halloween doodle page.
Step-by-Step Tutorial
Materials
- Spiral-bound sketchbook (cream or white paper)
- Black fine liner pen (0.5mm or 0.8mm)
- Pencil (HB or similar)
- Eraser
- Ruler (optional)
Step 1: Setting the Structure
-
Find the center:
Visualize or lightly mark a center point on your page. It doesn’t need to be dead center; slightly off-center often looks more dynamic. -
Draw the main axis:
Using your black pen, draw a long vertical line passing through your center point. Extend it comfortably toward the top and bottom edges of the paper. -
Add the cross line:
Draw a horizontal line crossing the vertical one at the center point. It should represent the width of your web. -
Fill in the diagonals:
Draw diagonal lines that bisect the four quadrants you just created. Aim for them to meet right at that central intersection. -
Add spacing lines:
Between your existing diagonals and the main cross, add one or two more radial lines in each section. Your goal is to have about 10 to 12 spokes radiating from the center like a wheel.
Ink Advice
Use a waterproof pen if you plan to paint over it later, or a felt tip for a bold, comic-book style line.
Step 2: Weaving the Web
-
Start the center ring:
Beginning very close to the center intersection, draw a small curved line connecting two adjacent spokes. The curve should dip inward, toward the center point. -
Complete the first loop:
Continue this pattern around the center, connecting each spoke to its neighbor with a tiny inward curve until you close the first circle. -
Begin the second layer:
Move outward slightly along one of the spokes. Draw a larger curved line to the next spoke. Keep that concave ‘U’ shape consistent. -
Work your way around:
Proceed in a circle, connecting each radial line with these swooping curves. I find it helps to tackle one full ring at a time rather than jumping around. -
Expand outward:
Continue adding layers of rings, spacing them further apart as you move away from the center. The gaps between the web strands should get progressively larger. -
Vary the tension:
As you get to the outer edges, make the curves slightly deeper. This makes the web look like it has some slack or ‘give’ to it. -
Extend the tips:
Ensure your radial spokes extend slightly past the final layer of webbing. This makes the web look anchored to the surrounding space.
Make it Real
Add a tiny spider hanging from a single silk thread off one of the bottom spokes for extra character.
Step 3: Final Touches
-
Thicken intersections:
Go back to the very center where all lines meet. Go over the lines gently to darken that central knot. -
Check connectivity:
Scan your drawing for any gaps where a curved line didn’t quite touch a straight spoke. Carefully bridge those tiny gaps with your pen. -
Erase guidelines:
If you started with pencil sketches underneath, wait for the ink to be completely dry, then gently erase the graphite marks. -
Add gentle shading:
Optionally, trace over the downward-facing curves one more time to give them a subtle shadow or line weight variation.
Your sketchbook now hosts a perfectly spun web ready for the season
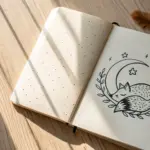
Cozy Blanket Ghost
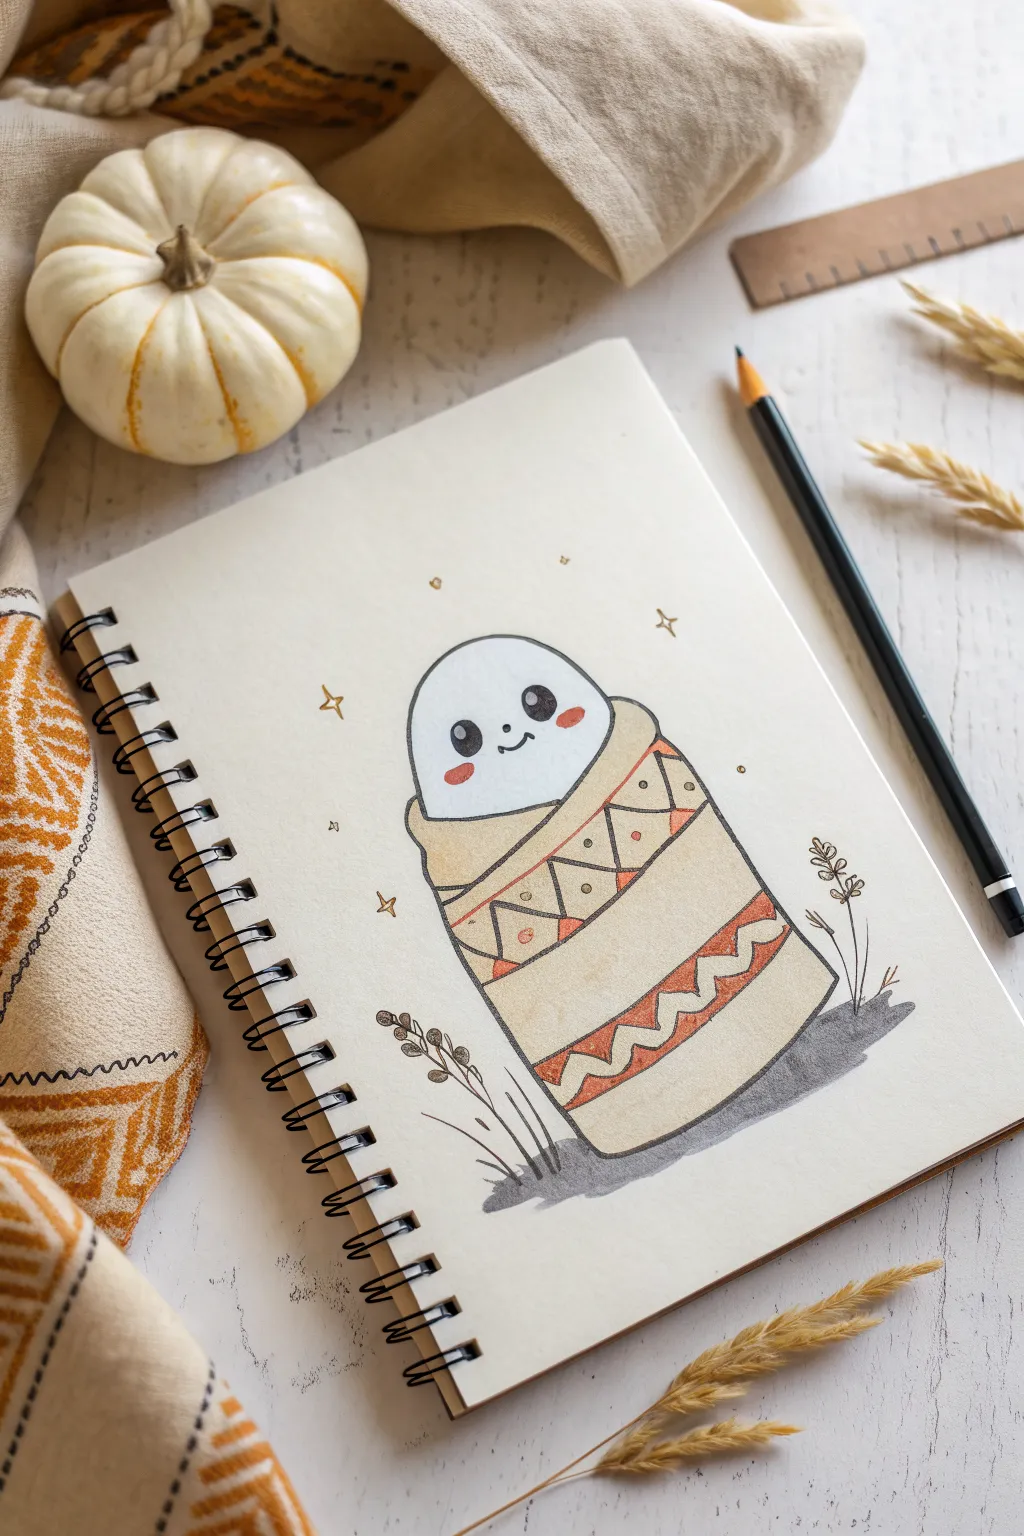
This adorable drawing captures the essence of a cozy autumn evening with a cute little ghost wrapped snugly in a patterned blanket. It’s a perfect beginner-friendly doodle that combines simple shapes with warm, earthy tones to create a heartwarming Halloween illustration.
Step-by-Step
Materials
- Sketchbook or drawing paper (heavyweight preferred)
- Pencil (HB or similar for sketching)
- Eraser
- Fine liner pen (black, 0.3mm or 0.5mm)
- Colored pencils or markers (cream/beige, warm brown, burnt orange/rust)
- Grey marker or pencil for shadows
Step 1: Sketching the Base Shapes
-
Draw the main body:
Start by lightly sketching a tall, rounded cylinder shape in the center of your page. This will become the blanket wrapped around the ghost. -
Add the ghost’s head:
At the top of the cylinder, draw a smooth semi-circle protruding upwards. This is the top of the ghost’s head peeking out. -
Define the blanket edges:
Draw a thick, folded-over rim just below the ghost’s head. Imagine the blanket is turned down like a cuff. Make this line curve slightly downward to show the volume of the roll. -
Refine the wrap:
Adjust the sides of the cylinder so they taper slightly toward the bottom, making it look snug. Curve the bottom line of the blanket gentle to match the curve of the top cuff.
Keep It Soft
When coloring large areas like the blanket, use small circular motions with your pencil. This prevents harsh streaks and keeps the texture looking like soft fabric.
Step 2: Adding Patterns & Details
-
Create pattern bands:
Sketch two main horizontal bands across the body of the blanket. Place one near the top third and another near the bottom third. These will hold your decorative patterns. -
Draw the zig-zags:
Inside the top band, draw a zig-zag line. Do the same for the bottom band, creating a series of triangles. -
Add dot details:
Place small circles inside the triangles of your top band for extra texture. Keep the patterns simple but repetitive. -
Sketch the face:
On the ghost’s face, lightly mark two small ovals for eyes and a tiny ‘u’ shape for a smile right between them. Add two oval patches for blush on the cheeks. -
Add nature elements:
To ground the drawing, sketch some simple sprigs of dried grass or wheat on either side of the ghost’s base. -
Add floating stars:
Scatter a few tiny four-pointed stars and small dots around the ghost’s head to give it a magical vibe.
Make It Yours
Don’t stick to just zig-zags! Try adding polka dots, stripes, or tiny pumpkin doodles onto the blanket bands to verify the pattern.
Step 3: Inking and Coloring
-
Ink the outlines:
Using your black fine liner, carefully trace over your pencil lines. I prefer to use a slightly thicker line (or go over it twice) for the outer contour of the blanket to make it pop. -
Solidify the eyes:
Fill in the eyes with black ink, leaving a tiny white dot in each for a sparkle highlight. Ink the mouth and the blush outlines. -
Erase guidelines:
Wait a moment for the ink to dry completely, then gently erase all your underlying pencil sketches. -
Color the blanket base:
Use a cream or light beige pencil to color the main body of the blanket. Apply the color lightly to keep the texture soft. -
Color the patterns:
Fill in the triangular patterns and zig-zags with alternating warm tones like burnt orange and brown. This autumnal palette gives the drawing its cozy feel. -
Add face color:
Use a soft pink or coral color for the cheek blush spots. Leave the ghost’s body white. -
Shade the ground:
Take a grey marker or pencil and add a small, irregular puddle of shadow underneath the ghost to ground it on the page. -
Final nature touches:
Color the grass sprigs with a thin brown or grey line, just enough to distinguish them from the background.
You have now created a wonderfully snug little ghost perfect for the season


Mini Mummy With Bandage Stripes
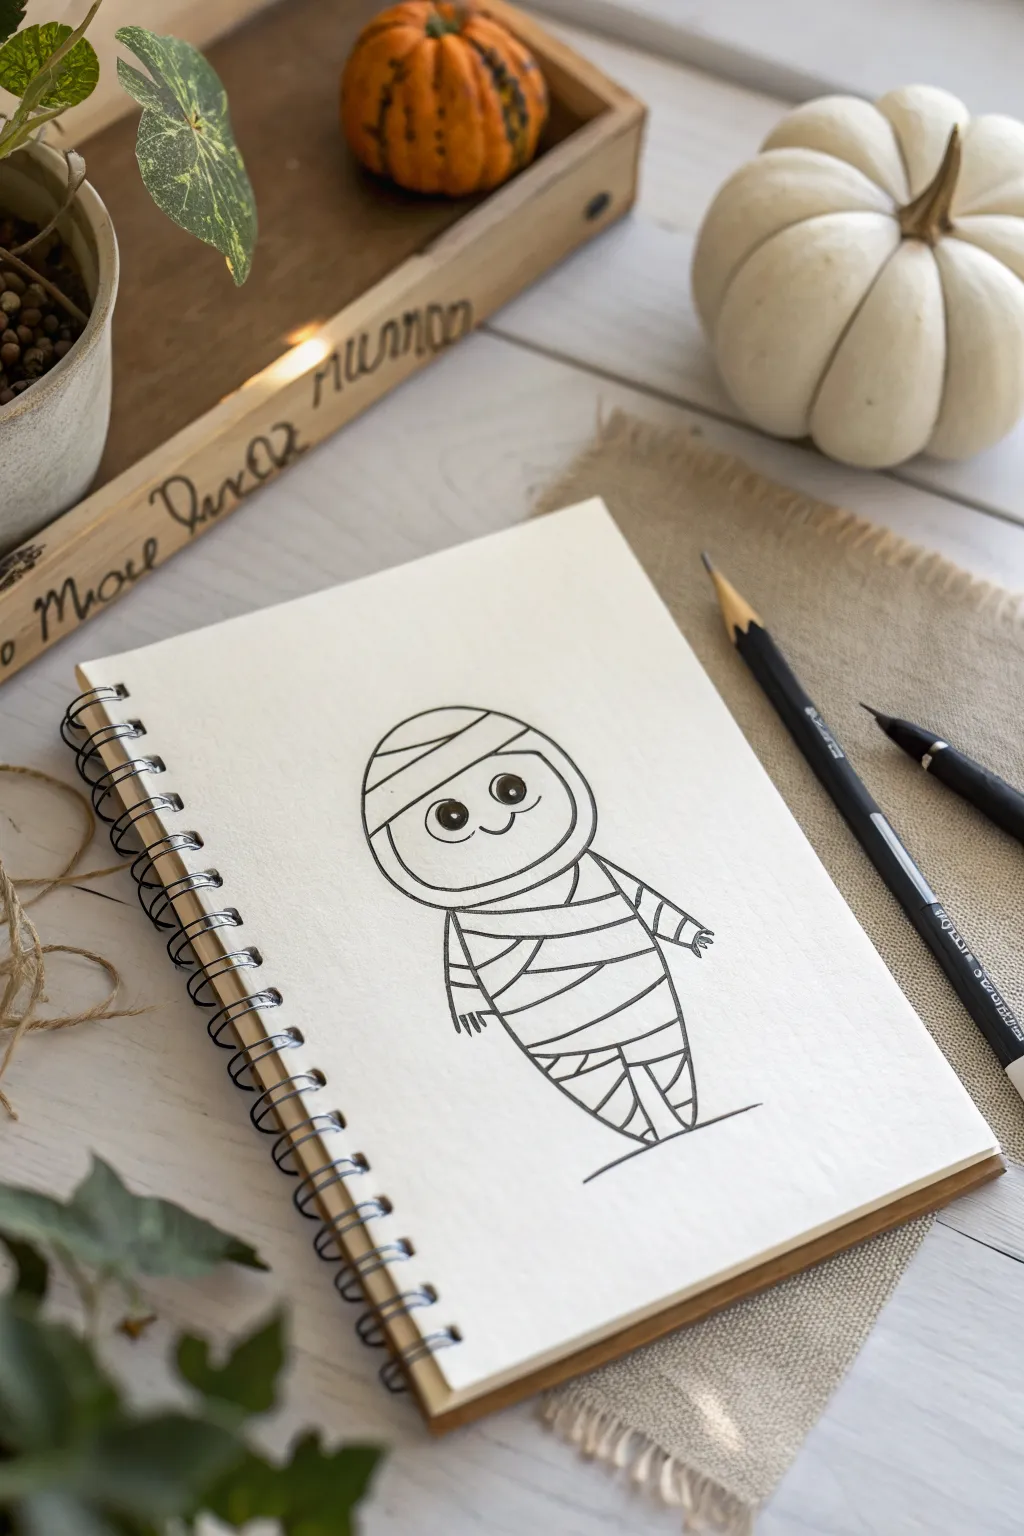
This adorable mini mummy is less spooky and more sweet, making it a perfect addition to a cute Halloween sketchbook page. The simple line work and charming large eyes give it a friendly personality that comes together in just a few minutes.
How-To Guide
Materials
- Sketchbook or drawing paper (heavyweight preferred)
- Pencil (HB or 2B for initial sketching)
- Fine-liner pen (black, archival ink)
- Thicker marker (black, for filling eyes)
- Eraser
Step 1: Sketching the Base Shape
-
Create the Head:
Start by drawing a large oval shape for the mummy’s head. Imagine an egg lying on its side, slightly flattened at the top and bottom to create a friendly, rounded face. -
Outline the body:
Directly below the head, draw a tapered shape for the body. It should look a bit like a carrot or a wrapped bundle, wider at the shoulders and coming to a point at the feet. -
Define the Face Opening:
Inside the head oval, draw a slightly smaller, curved shape essentially mirroring the bottom half of the outer oval. This creates the ‘window’ where the mummy’s face will peek through the bandages. -
Add Arms:
Sketch two simple tube shapes extending from the sides of the body. Keep them close to the torso, angling slightly downwards, as if the mummy is standing at attention. -
Draw Tiny Hands:
At the end of each arm, add small, simple hands. You don’t need detailed fingers—just three small points or bumps will suggest the bandage-wrapped fingers perfectly.
Uneven Bandages?
Perfect! Mummies shouldn’t look tidy. If your lines cross or vary in width, it just makes the wrapping look older and more authentic.
Step 2: Wrapping the Mummy
-
Head Bandages:
Draw horizontal, slightly curved lines across the top section of the head oval (above the face opening). These represent the wrapping around the forehead. -
Neck Wrapping:
Add a few curved lines right under the chin area to connect the head to the body seamlessly. -
Torso Stripes:
Begin drawing diagonal lines across the body. I find it looks best if you vary the angles slightly—some going left-to-right, others right-to-left—to make the wrapping look more organic. -
Arm Details:
Add small, curved stripe lines across the arms to continue the wrapped texture. Two or three lines per arm are usually enough. -
Leg Wrappings:
Continue the diagonal stripes down to the pointed feet. Near the bottom, you can create a ‘V’ shape with the lines to emphasize the legs being wrapped together.
Step 3: Bringing It to Life
-
Draw the Eyes:
In the face opening, draw two large circles for eyes. Place them fairly wide apart to increase the cuteness factor. -
Add Highlights:
Inside each eye circle, draw a smaller circle near the top right corner and a tiny dot below it. These highlights are crucial for that sparkling, lively look. -
Create a Smile:
Draw a tiny, shallow ‘u’ shape directly between and slightly below the eyes for a subtle smile. -
Ground the Figure:
Sketch a simple horizontal line under the mummy’s feet so it isn’t floating in space.
Ancient Glow
Use a light yellow or cream colored pencil to gently shade the bandages, leaving the paper white near the edges for a rounded, aged effect.
Step 4: Inking and Refining
-
Trace Main Outlines:
Switch to your fine-liner pen. Carefully trace over the main outer shape of the head and body first to establish the silhouette. -
Ink the Bandages:
Go over your pencil lines for the bandages. You don’t have to be perfectly straight; a little wobble adds to the fabric texture. -
Fill the Eyes:
Using a slightly thicker marker or pen, color in the large pupils, being extremely careful to leave the white highlight circles completely untouched. -
Refine the Face:
Ink the smile with a delicate touch so the line doesn’t become too heavy. -
Erase Sketches:
Wait a minute for the ink to dry fully, then gently erase all the underlying pencil marks to reveal a clean, crisp drawing.
You now have a charming little ancient friend ready to guard your notebook pages
Little Vampire With a Heart Cape
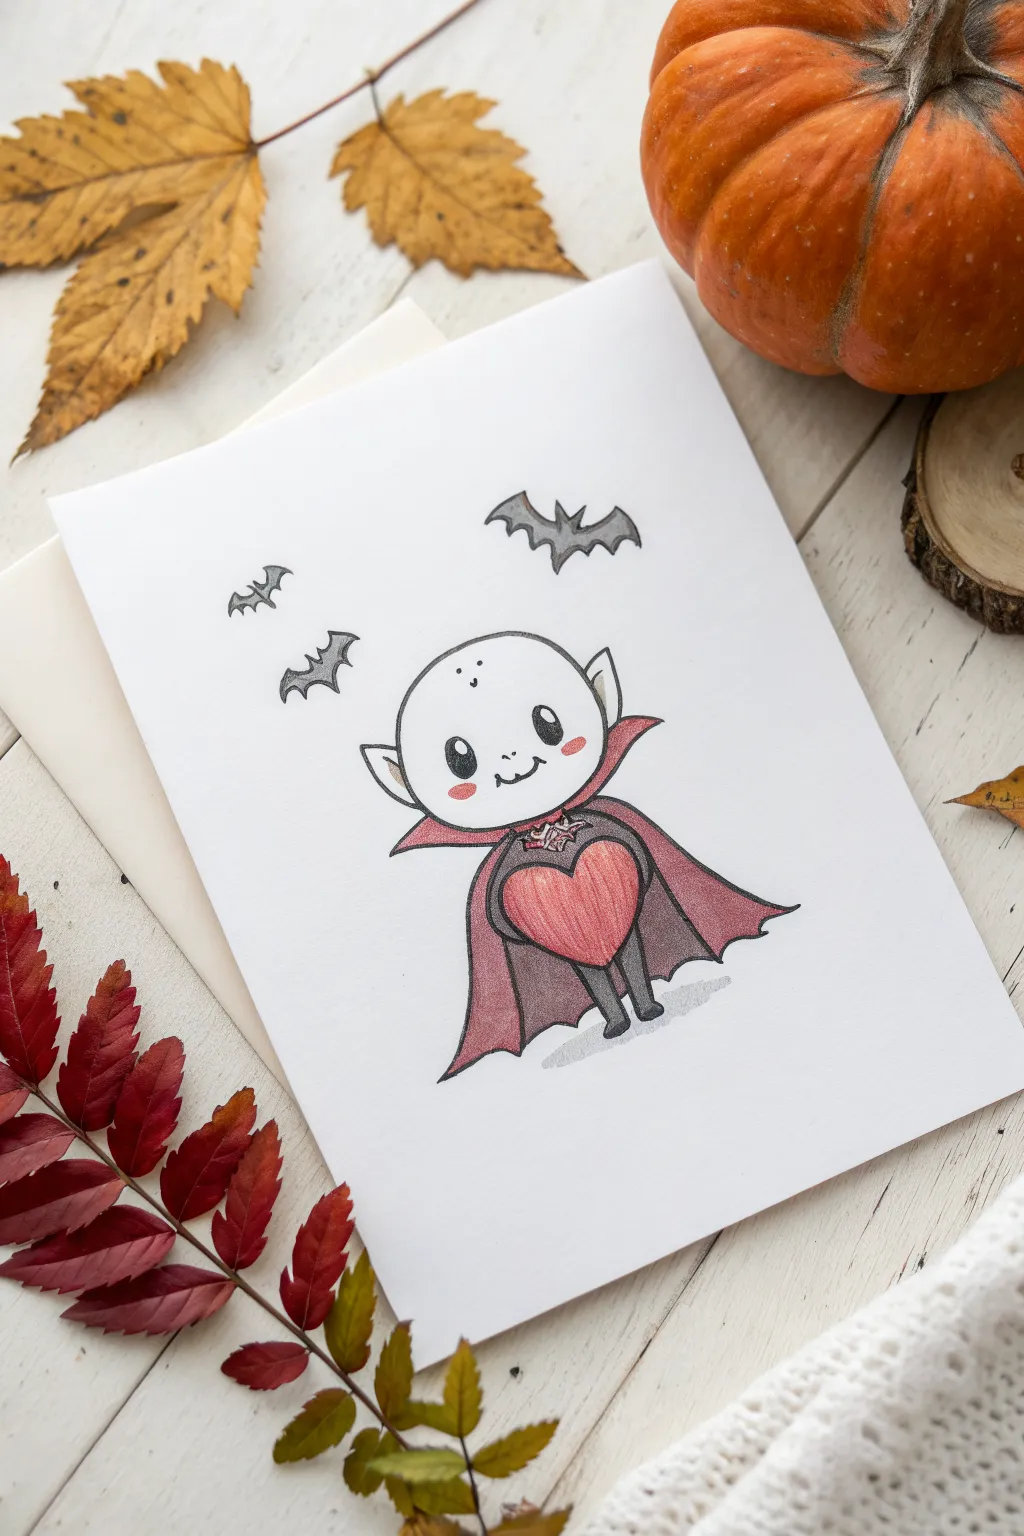
Spread a little spooky love with this adorable vampire doodle, perfect for a handmade Halloween card or journal page. The clean lines and minimal coloring give it a sweet, modern look that pops against white paper.
Step-by-Step Guide
Materials
- White cardstock or heavy drawing paper
- Pencil (HB)
- Eraser
- Fine liner pen (black, 0.3mm or 0.5mm)
- Colored pencils (red, light pink, dark grey/charcoal, grey)
- Ruler (optional)
Step 1: Drafting the Vampire
-
Map out the head:
Start by lightly sketching a large, rounded circle for the vampire’s head. It doesn’t need to be perfectly round—a slightly flattened oval shape works great for this cute chibi style. -
Position the body:
Directly below the head, sketch a smaller, U-shaped body. Keep it petite; the oversized head is key to the cuteness factor. -
Draw the heart:
In the center of the body, sketch a large heart shape. It should take up most of the torso, looking like the vampire is holding it close to their chest. -
Add the cape collar:
Draw the vampire’s high collar. Sketch two triangles flaring out from the neck area behind the head, framing the jawline. -
Draw the cape drapery:
Sketch the flowing lines of the cape extending from the shoulders down to the feet. Make the bottom hem slightly jagged or pointed to suggest fabric folds.
Keep it Clean
Place a scrap piece of paper under your hand while coloring. This prevents the graphite or colored pencil pigment from smudging onto the clean white background.
Step 2: Adding Details
-
Face features:
Place two wide-set ovals for the eyes in the lower half of the face. Add a small ‘w’ shape between them for the mouth, and don’t forget two tiny fangs poking down. -
Ears and feet:
Sketch small, pointed ears on the sides of the head. At the bottom of the body, draw two simple, rounded shapes for feet peeking out. -
Tiny hands:
Draw two small nubs overlapping the sides of the heart to show the vampire gripping it. -
Flying companions:
Sketch two or three silhouette bats in the background above the vampire. Use simple ‘M’ shapes for the wings with small pointed bodies.
Step 3: Inking and Coloring
-
Outline the drawing:
Go over your pencil lines with a black fine liner. Use confident, smooth strokes. I prefer to outline the main subject first and the background bats last. -
Erase drafts:
Once the ink is completely dry—give it a good minute—gently erase all the underlying pencil marks to clean up the page. -
Color the eyes:
Color in the eyes with black, leaving a small white circle in the upper corner of each for a highlight. -
Rosy cheeks:
Use a light pink pencil to draw small oval blush marks under the eyes. -
Fill the heart:
Color the heart with a vibrant red pencil. Build up the color in layers for a smooth, solid look. -
Shade the cape interior:
Use a dark red or maroon pencil for the outside of the cape for contrast, or stick to the same red as the heart but press lighter. -
Color the outfit:
Use a dark grey or charcoal pencil to color the body suit and the inside lining of the cape. Leave the face and ears uncolored (white). -
Add a shadow:
With a light grey pencil, scribble a soft, horizontal oval shadow on the ground beneath the little vampire’s feet to ground the character. -
Final touches:
Fill in the background bats with either dark grey pencil or your black inking pen.
Make it Sparkle
Use a white gel pen to add extra highlights to the top of the heart or the vampire’s forehead for an extra glossy, polished finish.
Now you have a charming little creature of the night ready to share some love
Baby Frankenstein Monster
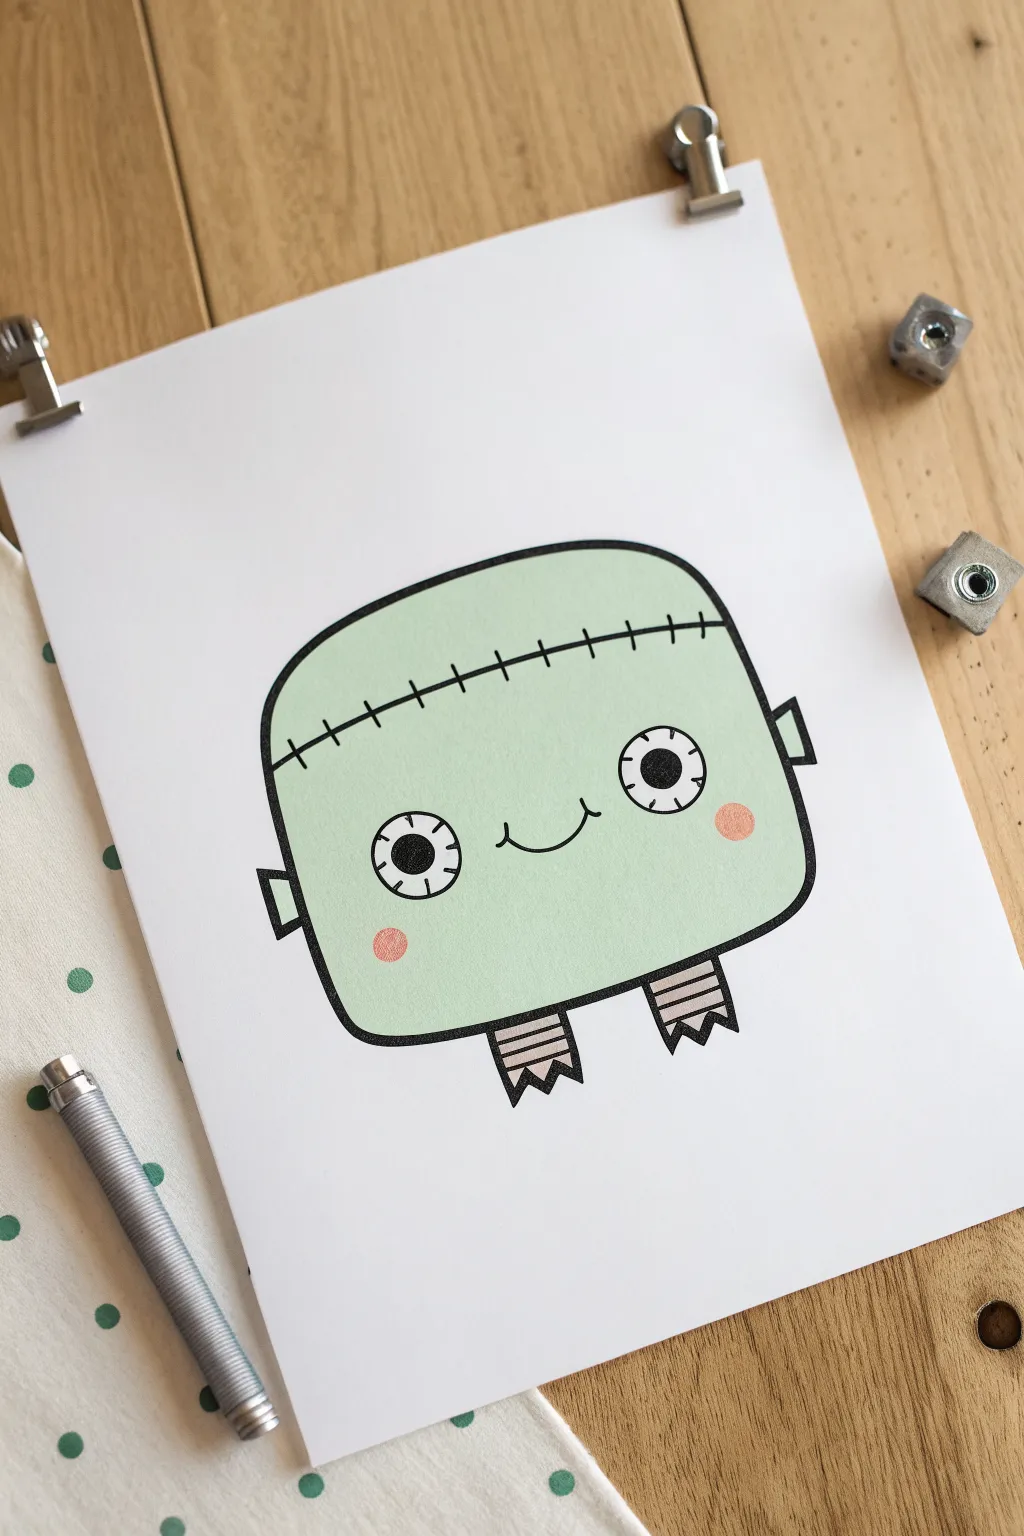
This adorable Baby Frankenstein features soft pastel greens and bold black outlines, making him more sweet than scary. With his wide, bewildered eyes and tiny jagged feet, this project is perfect for creating charming Halloween cards or nursery decor.
Detailed Instructions
Materials
- White cardstock or heavy drawing paper
- Pencil (HB or 2B)
- Eraser
- Black fine liner pen (0.5mm or 0.8mm)
- Light green marker (pastel or mint shade)
- Light pink marker or colored pencil
- Ruler (optional)
Step 1: Creating the Basic Shape
-
Draw the main outline:
Start by drawing a large, rounded rectangle in the center of your page. The corners should be very soft and curved, rather than sharp, to give him a chubby, friendly look. -
Add the hairline:
About one-third of the way down from the top edge, draw a horizontal line across the forehead. This line should follow the curve of the head slightly. -
Stitch the forehead:
Along that horizontal hairline, add small vertical tick marks spaced evenly apart. This creates the classic Frankenstein stitch effect. -
Position the feet:
At the bottom of the body, draw two small, stubby rectangles coming down for legs. Keep them short to maintain the ‘baby’ proportions. -
Add jagged toes:
At the bottom of each leg rectangle, draw a zigzag line to create his little monster feet or boots. -
Sketch the bolts:
On the left and right sides of the head mostly aligned with where ears would be, draw small rectangular shapes jutting out for his neck bolts.
Keep it Clean
Place a scrap piece of paper under your drawing hand while coloring. This prevents the oils on your skin from smudging the ink or marker ink.
Step 2: Adding Facial Features
-
Draw the eyes:
Place two large circles in the middle of the face. Space them far enough apart to leave room for a mouth. -
Add the pupils:
Inside the large circles, draw smaller black circles for pupils. I like to keep them centered to give him a surprised expression. -
Detail the irises:
Draw tiny straight lines radiating from the pupil to the edge of the eye circle, like the spokes of a wheel. -
Create the smile:
Draw a small, gentle ‘w’ shape directly between the eyes for a simple, happy mouth. -
Add cheek spots:
Sketch small circles just below and to the outside of each eye to mark where his rosy cheeks will go.
Step 3: Inking and Coloring
-
Outline the body:
Using your black fine liner, carefully trace over your pencil lines. Make the outer edge of the head and body slightly thicker for a bold, graphic look. -
Ink the details:
Trace the stitches, bolts, and facial features. Be precise with the lines inside the eyes so they don’t blur together. -
Stripe the legs:
Add horizontal stripes to the legs with your pen. -
Erase pencil marks:
Wait a moment for the ink to set, then gently erase all visible pencil sketches underneath. -
Color the skin:
Fill in the main face area with the light green marker. Work in smooth, consistent strokes to avoid streakiness. -
Rosy up the cheeks:
Use the pink marker or colored pencil to fill in the small cheek circles you drew earlier. -
Add leg color:
Use the pink marker to fill in alternating stripes on the legs if desired, or leave them black and white for contrast.
Go 3D
Make this a mixed media project by gluing on real tiny googly eyes instead of drawing them, or use silver metallic paint for the neck bolts.
Your little monster is now ready to bring a smile to anyone’s face this spooky season
Bubbling Potion Bottle
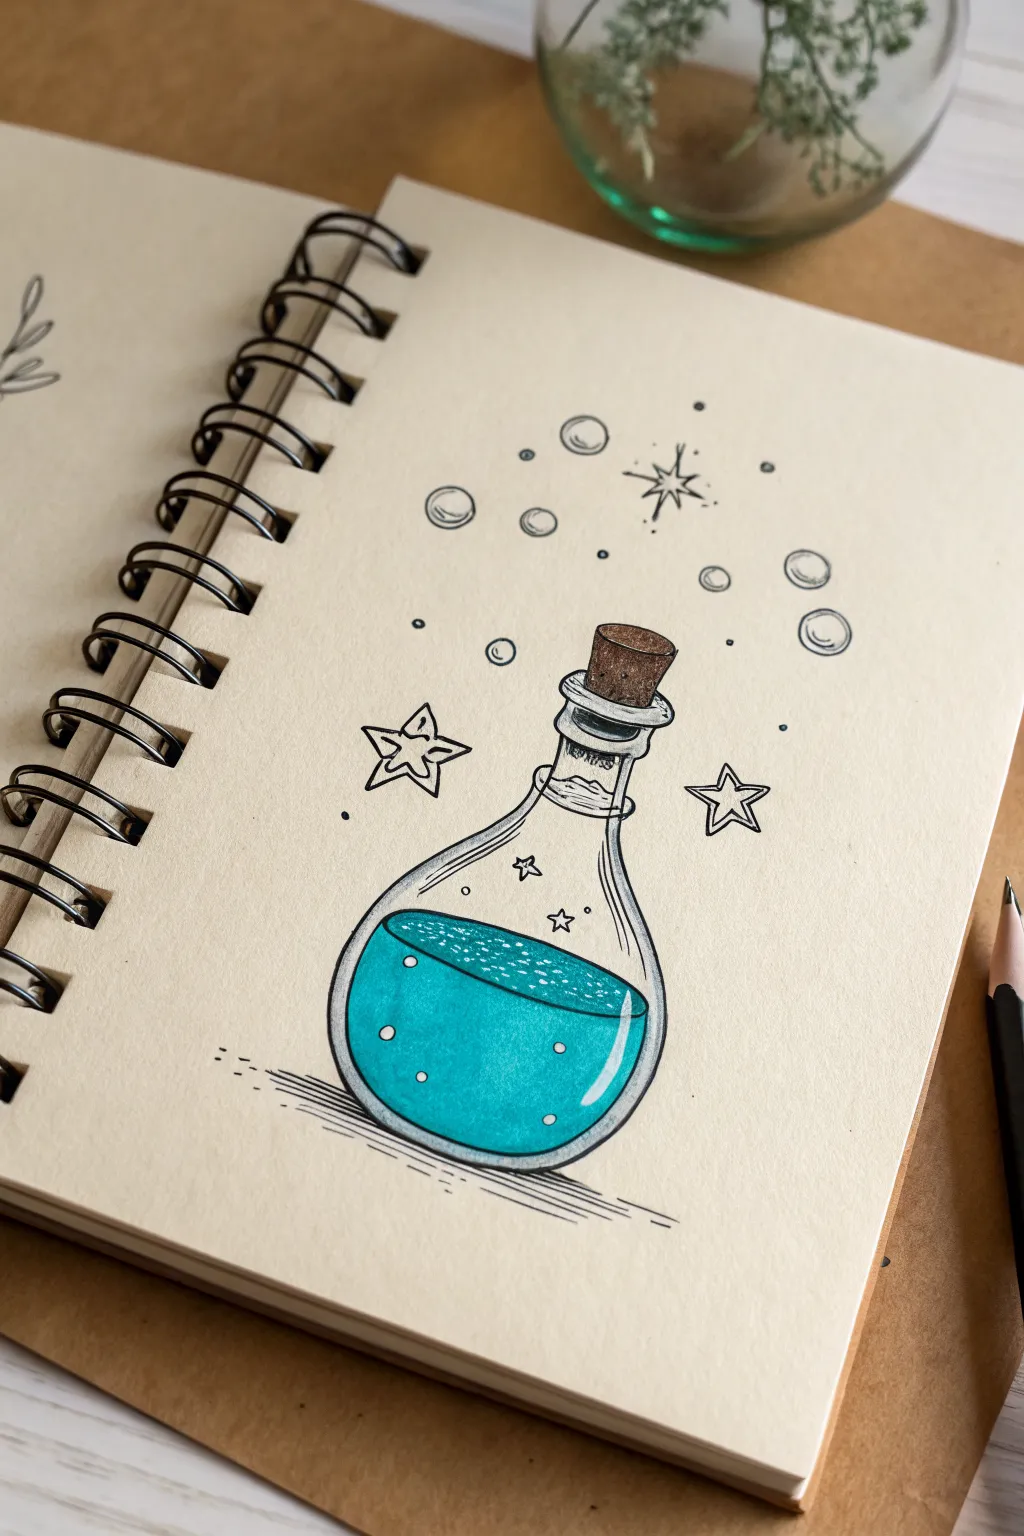
This bubbling teal concoction is pure magic on paper, capturing a witchy vibe with simple lines and pop of color. It’s the perfect little sketch for filling up a journal page with something that looks both mysterious and cute.
Step-by-Step Tutorial
Materials
- Sketchbook with cream or off-white paper
- Fine liner pen (black, 0.3mm or 0.5mm)
- Teal or aqua blue marker (alcohol or water-based)
- Brown colored pencil or marker
- Pencil and eraser for initial sketching
- White gel pen
Step 1: Shaping the Bottle
-
Draft the basic shape:
Start with a light pencil sketch. Draw a large circle for the base, and extend a neck upwards from the top. It doesn’t need to be perfectly round; a slight pear shape works wonderfully. -
Define the neck and rim:
At the top of the neck, sketch a rounded rectangular shape for the rim of the bottle. Add a few horizontal curved lines below it to suggest the thickness of the glass lip. -
Add the cork:
Sit a trapezoid shape right on top of the rim for the cork stopper. Make the top line of the cork slightly curved so it looks 3D rather than flat. -
Ink the outline:
Go over your pencil lines with your fine liner pen. Keep your hand relaxed; slightly wobbly lines actually add to the hand-drawn, magical charm. Don’t close the very top line of the liquid level inside just yet.
Step 2: The Magical Contents
-
Draw the liquid level:
Inside the bottle, draw an oval shape that follows the curve of the bottle’s belly. This oval represents the surface of the potion. Make the back line of the oval slightly lighter or broken if you want extra depth. -
Color the potion:
Take your teal marker and fill in the liquid area below the oval surface line. Color in smooth horizontal strokes to minimize streaks. Leave a small, curved strip of white on the right side of the bottle body to act as a glass reflection. -
Detail the surface:
Using the same teal marker, gently stipple small dots on the top surface of the liquid (the oval you drew earlier) to differentiate the surface from the body of the liquid. -
Color the cork:
Use a brown colored pencil or marker to fill in the cork stopper. If using pencil, press a little harder on the left side to create a shadow, giving it a rounded form.
Reflection perfection
When coloring the glass, leave the white highlight area *uncolored* rather than adding white over top later. It creates a much brighter, cleaner shine.
Step 3: Atmosphere and Details
-
Add floating bubbles:
Draw circles of varying sizes rising from the bottle. Draw some near the cork and others floating higher up. Inside the larger bubbles, add a tiny crescent line to show reflection. -
Draw the stars:
Sketch a few five-pointed stars around the bottle. For variety, draw one ‘North Star’ style shape with four long points and smaller radiating lines near the top bubbles. -
Include internal sparkles:
Draw tiny four-pointed stars inside the upper, empty part of the glass bottle to show that magic is brewing inside the air gap. -
Ground the object:
Use your black pen to draw a few quick, horizontal hatch marks underneath the bottle. This shadow anchors the drawing so it doesn’t look like it’s floating in a void. -
Add white highlights:
Once the teal ink is completely dry, use a white gel pen to add small dots or ‘bubbles’ inside the liquid. You can also sharpen the main white reflection on the glass if your coloring overlapped it. -
Final touches:
Scatter a few tiny dots and small circles around the outside of the composition to balance the negative space. Erase any remaining visible pencil marks.
Glow Up
Outline the entire finished bottle with a thick, light grey marker line or a very pale yellow highlighter to give the potion a subtle, magical glowing aura.
Now you have a charming little potion that looks ready to cast a spell.
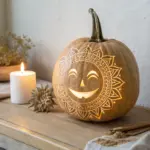
Round Cauldron With Sparkles
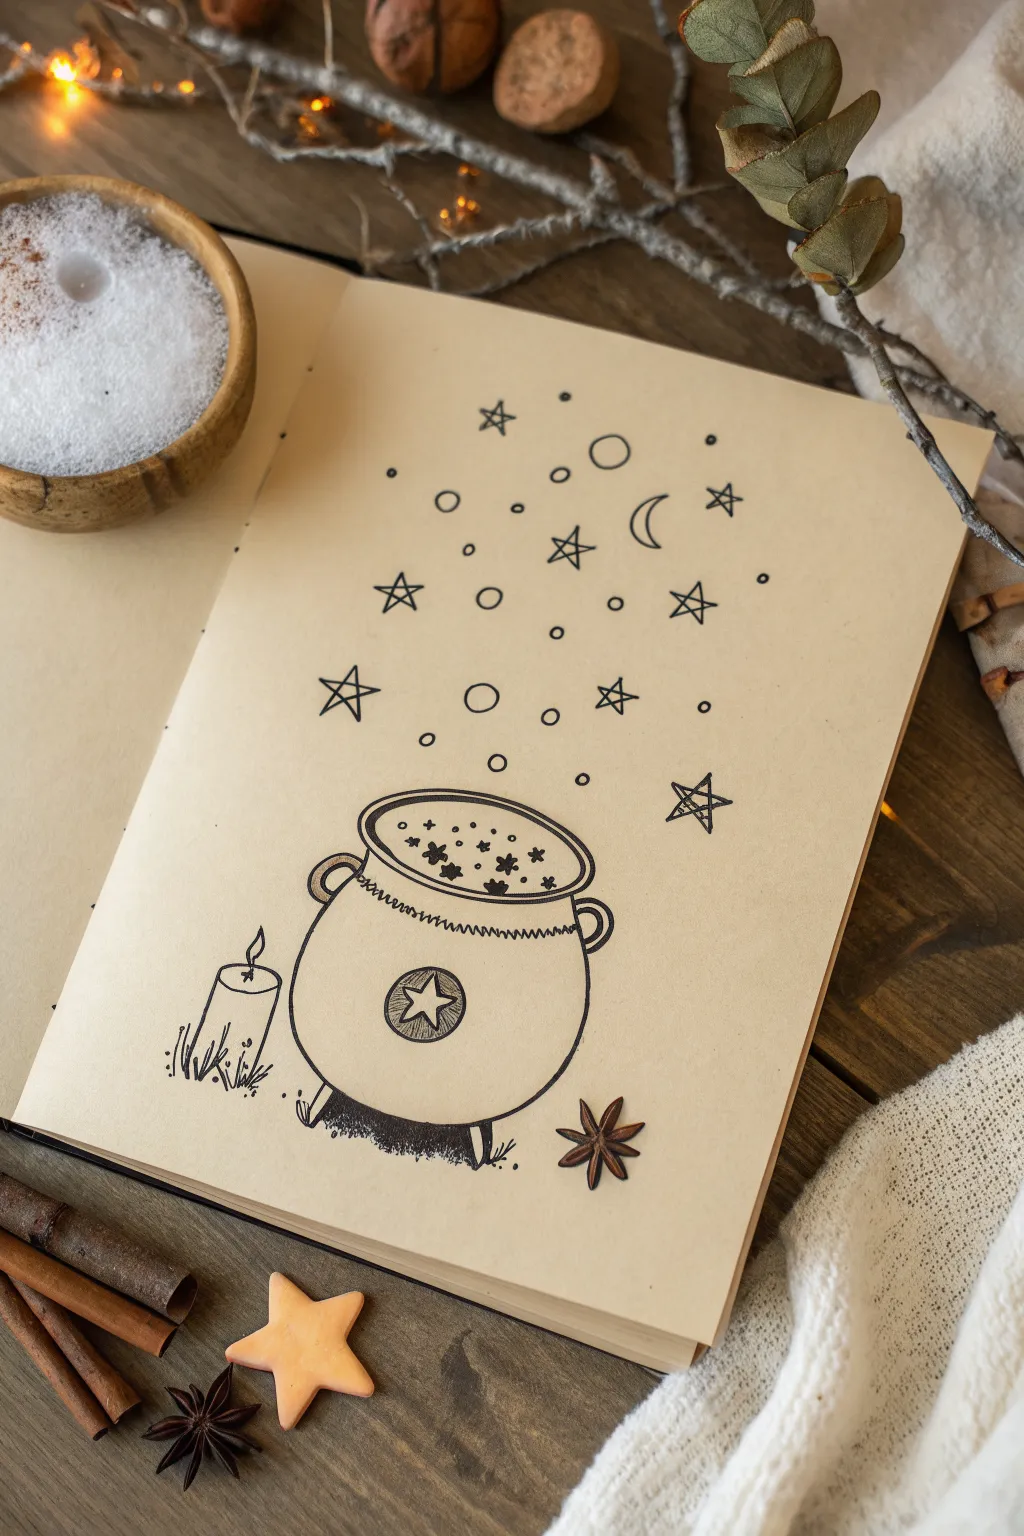
This charming, minimalist doodle captures the magic of Halloween without being scary. Using simple linework on warm-toned paper creates a cozy, rustic vibe perfect for seasonal journaling.
Step-by-Step
Materials
- Tan or kraft paper sketchbook
- Fine liner pen (size 05 or 08 recommended)
- Pencil (HB)
- Eraser
- Ruler (optional)
Step 1: Sketching the Base Shape
-
Draw the rim:
Start by lightly sketching a wide, flattened oval shape for the opening of the cauldron. This ellipse determines the perspective of your pot. -
Add the lip:
Draw a second, slightly larger oval around the first one to create the thickness of the cauldron’s rim. -
Form the body:
From the widest points of the rim, draw a large, deep ‘U’ shape to form the belly of the cauldron. Make it nice and round for a cute look. -
Add little feet:
At the bottom of the ‘U’ shape, sketch two small, rectangular feet sticking out at slight angles to support the pot. -
Add the handles:
On either side of the rim, attach small ‘C’ shapes or loops for handles. Sketch a double line on these to give them some dimension.
Wobbly Circles?
Don’t stress if your ovals or bubbles aren’t perfect. A slightly uneven, organic line actually adds to the hand-drawn, witchy aesthetic of this doodle.
Step 2: Inking the Cauldron
-
Trace the outline:
Switch to your black fine liner. Go over your pencil lines for the main body and rim. I like to keep my hand slightly loose here so the lines aren’t too rigid. -
Detail the rim:
Inside the rim, instead of a solid line, draw a jagged, zig-zag line all the way around. This suggests bubbling liquid or a decorative texture. -
Draw the central emblem:
In the center of the cauldron’s belly, draw a circle. Inside that circle, draw a classic five-pointed star. -
Fill the emblem:
Carefully color in the space around the star within the circle, leaving the star itself the color of the paper. -
Add a shadow:
Underneath the cauldron, scribble a rough, dark patch of ink to ground the drawing and give it weight.
Step 3: Adding the Magic
-
Draw the potion surface:
Inside the top oval, add small dots and tiny flower-shaped sparkles to represent the bubbling potion. -
Create the rising magic:
Move upwards from the cauldron. Start drawing circles of various sizes to look like bubbles floating up. -
Add simple stars:
Interfused with the bubbles, draw open five-pointed stars. Vary their rotation so they look like they are tumbling upward. -
Include a moon:
Towards the top right of your bubble stream, add a small crescent moon shape. -
Fill empty space:
Sprinkle tiny dots and very small circles between the larger stars and bubbles to connect the composition together. -
Draw a candle:
To the left of the cauldron, draw a simple cylinder with a wick and a flame shape on top. Add tiny vertical lines at the base for grass. -
Clean up:
Once the ink is completely dry, gently erase all your initial pencil sketches.
Add Some Shine
Use a white gel pen to add tiny highlights on the black filled-in circle or on the side of the cauldron to make it look smooth and metallic.
Now you have a magical page ready for your Halloween journal entry
Sweet Skull With Simple Flowers
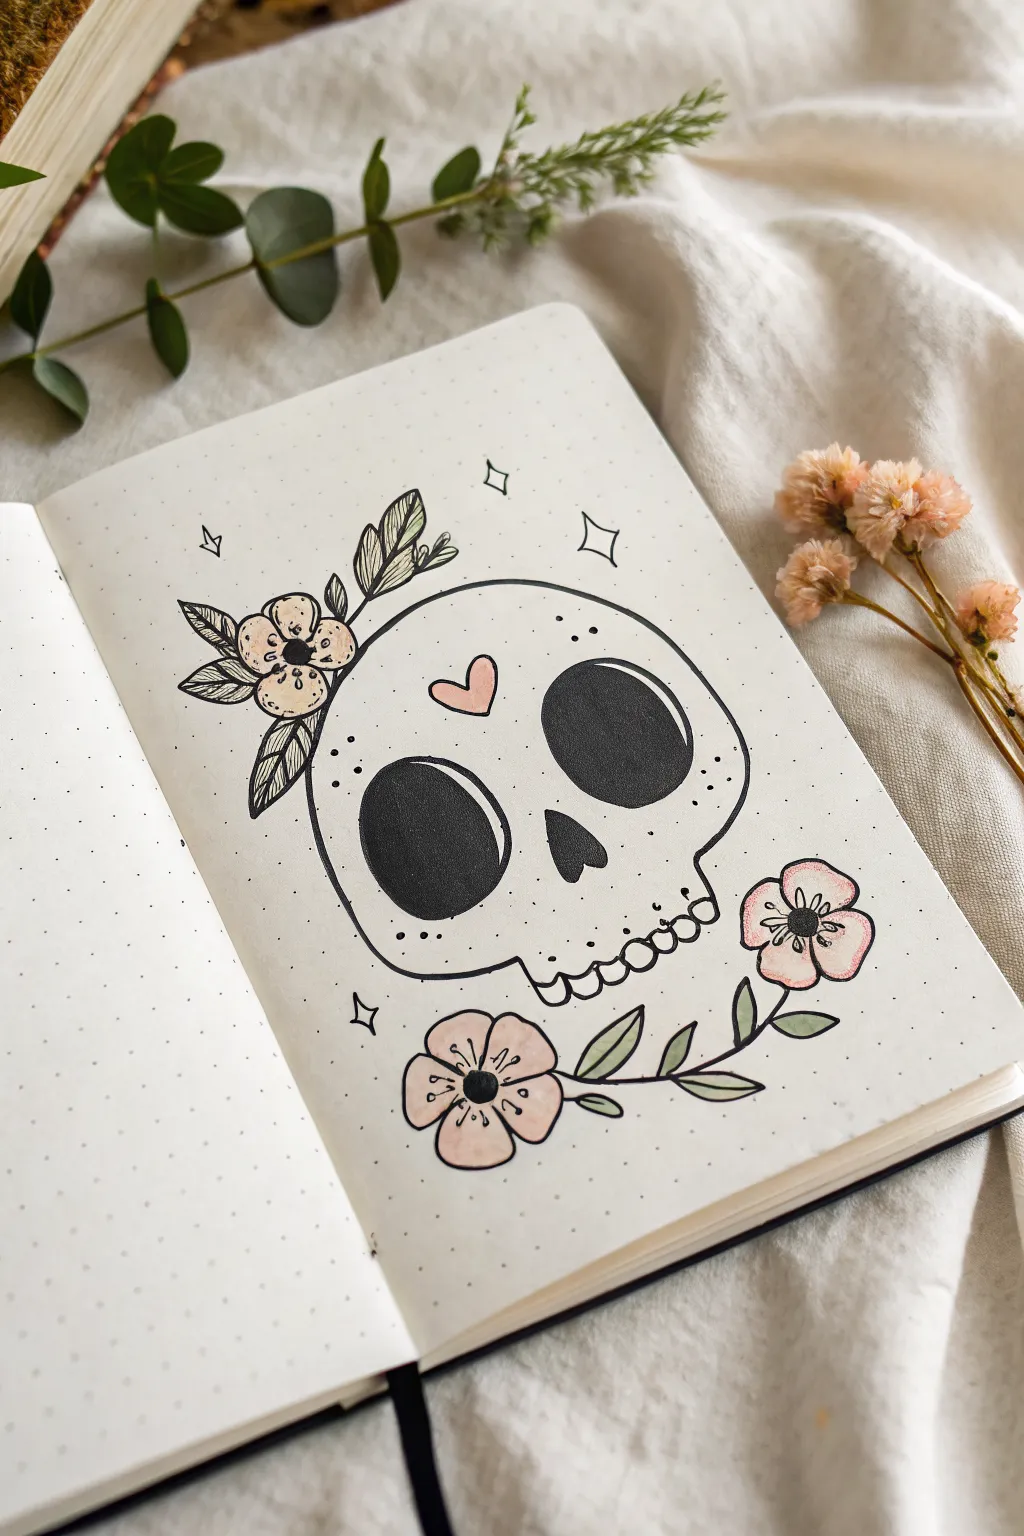
This charming design combines spooky and sweet, featuring a stylized skull adorned with delicate botanical elements and a tiny heart. It’s perfect for a bullet journal spread or a quirky Halloween greeting card.
Detailed Instructions
Materials
- Dot grid notebook or sketching paper
- Pencil (HB or H)
- Eraser
- Fine liner pen (01 or 03 size, black)
- Thicker black marker or brush pen
- Colored pencils (soft pink, sage green)
Step 1: Sketching the Foundations
-
Outline the skull shape:
Start near the center of your page. Lightly sketch a large, rounded dome for the top of the skull. Bring the lines down and gently curve them inward to create the cheekbone area, keeping the shape relatively wide and friendly rather than anatomically rigid. -
Define the jawline:
From the cheekbone curves, draw a simpler, slightly narrower U-shape for the jaw. It doesn’t need to be perfectly straight; a little wobble adds character to the hand-drawn look. -
Mark the facial features:
Pencil in two large, slightly slanted ovals for eye sockets. Leave plenty of space between them. Below that, draw an upside-down heart shape for the nose cavity. -
Add the teeth:
Sketch a horizontal line near the bottom of the jaw. Draw small U-shapes hanging from this line to create the upper teeth, then mirror them with smaller curves below for the lower teeth.
Step 2: Adding Floral details
-
Position the top flowers:
On the top left of the skull, sketch a simple five-petal flower resting right on the curve of the head. Add three leaves extending upwards and outwards from behind it. -
Sketch the bottom garland:
Draw two curving stems originating from under the right cheekbone. Add two more simple flowers blooms—one large, one slightly smaller—along with several small, almond-shaped leaves attached to the stems. -
Add decorative elements:
Draw a small heart right in the center of the forehead. Sprinkle tiny four-pointed stars or diamond shapes around the skull to fill the negative space.
Uneven Eyes?
Don’t stress about symmetry! If one eye socket is larger, thicken the outline of the smaller one slightly to balance them out visually.
Step 3: Inking and Color
-
Outline the main shapes:
Using your fine liner pen, carefully trace over your pencil sketch. I like to use a slightly disjointed line for the skull outline to give it a sketchier, organic feel. -
Fill the eye sockets:
Switch to your thicker marker or brush pen to fill in the large eye sockets. Leave a thin white highlight curve on the upper right side of each socket to make the eyes look glossy and alive. -
Darken the nose:
Fill in the nose cavity completely black with the marker. -
Add texture details:
With the fine liner, add tiny stippling dots on the cheeks and forehead to suggest shading. Draw lines inside the leaves for veins and add stamens to the flower centers. -
Erase pencil marks:
Wait until the ink is completely dry to prevent smudging, then gently erase all visible pencil lines. -
Color the heart:
Take a soft pink colored pencil and fill in the heart on the forehead. Apply the color lightly for a pastel look. -
Color the flowers:
Use the same pink shade for the flower petals. You can press a bit harder near the center of the flower and fade out toward the petal edges for a gradient effect. -
Color the leaves:
Use a sage green colored pencil to fill in the leaves. Keep the coloring soft and slightly textured to match the journal aesthetic.
Make it Shine
Use a white gel pen to add extra sparkles or highlights on top of the black eye sockets after the ink has fully dried for a pop.
Enjoy your beautifully spooky creation as part of your seasonal journal setup
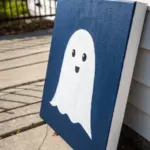
Tiny Haunted House With Glowing Windows
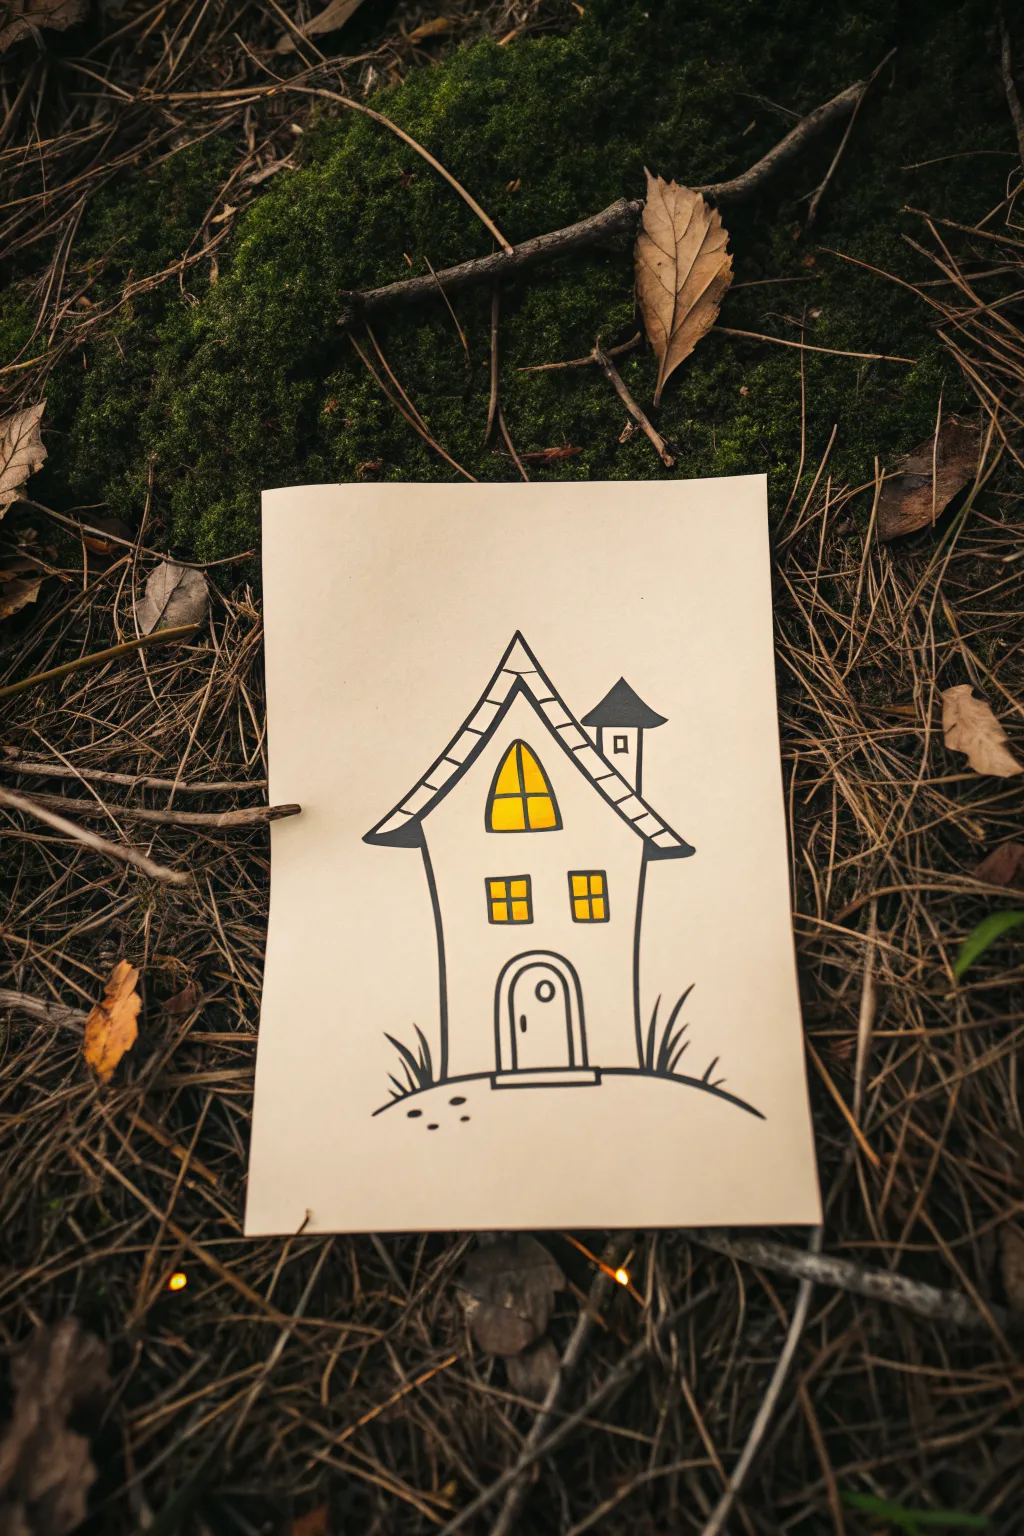
This charming little haunted house sketch relies on bold lines and a pop of warm yellow to create a cozy yet spooky atmosphere. The simple silhouette makes it perfect for beginners, while the glowing windows add a magical touch against the beige paper.
How-To Guide
Materials
- Light beige or tan cardstock
- Thick black marker (chisel tip or brush pen)
- Fine tip black liner pen
- Yellow alcohol marker or paint pen
- Orange alcohol marker or colored pencil (optional for shading)
- Pencil
- Eraser
Step 1: Drafting the Structure
-
Map the shape:
Start by lightly sketching the main body of the house with a pencil. Draw a tall, slightly wonky rectangle that is wider at the bottom than the top to give it a whimsical feel. -
Add the roof:
Sketch a large triangle on top of your rectangle. Extend the edges well past the walls of the house so the eaves hang over, curling the tips upward slightly. -
Draft the chimney:
On the right slope of the roof, draw a small rectangular chimney capped with a tiny triangular roof of its own.
Bleeding Lines?
If your black ink bleeds into the yellow, color the yellow windows first, let them dry completely, and then draw the black outlines over top.
Step 2: Inking the Outline
-
Outline the main roof:
Using your thick black marker, trace the main roof triangle. Make the line thick and dark. -
Create the shingles:
Draw a second line parallel to the roof’s bottom edge to create the roof’s thickness. Connect these parallel lines with small vertical dashes to suggest individual shingles or tiles. -
Ink the walls:
Trace the vertical walls of the house. I like to curve these lines inward ever so slightly to make the house look old and settled. -
Define the chimney:
Ink the chimney outline, filling in the tiny triangular cap completely with black so it matches the aesthetic of the main roof edges. -
Fill the eaves:
Color in the underside triangles of the roof eaves with solid black ink to give the roof visual weight.
Step 3: Windows and Doors
-
Draw the attic window:
In the center of the upper triangle area, draw a simplified Gothic-style window—rounded at the bottom and pointed at the top like a flame. -
Add lower windows:
Sketch two square windows side-by-side in the middle of the house facade. -
Create the door frame:
At the bottom center, draw an arched doorway. Draw a second arch inside the first to create a door frame. -
Detail the door:
Add a small circle for a window within the door, and a tiny dot for the doorknob.
Boost the Atmosphere
Use a light grey marker to add subtle shadows under the roof eaves and on one side of the house for a 3D effect.
Step 4: Color and Final Details
-
Add the glow:
Take your yellow marker and carefully fill in the attic window, the two square windows, and that tiny circular window in the door. -
Draw window panes:
Once the yellow ink is dry, switch to your fine tip black pen. Draw a cross in the square windows and a vertical line in the attic window to create panes. -
Ground the house:
Using the thick marker again, draw a curved horizon line underneath the house so it isn’t floating in space. -
Add grass tufts:
Draw three or four sharp, grassy spikes on either side of the house near the ground line. -
Texture the ground:
Use the fine tip pen to add a few small dots or pebbles below the ground line for texture. -
Erase pencil lines:
Wait a moment to ensure all ink is completely dry, then gently erase any visible pencil sketch lines to clean up your artwork.
Display your haunted cottage sketch near some autumn leaves or pine cones to complete the cozy seasonal vibe
Crescent Moon With a Sleepy Face
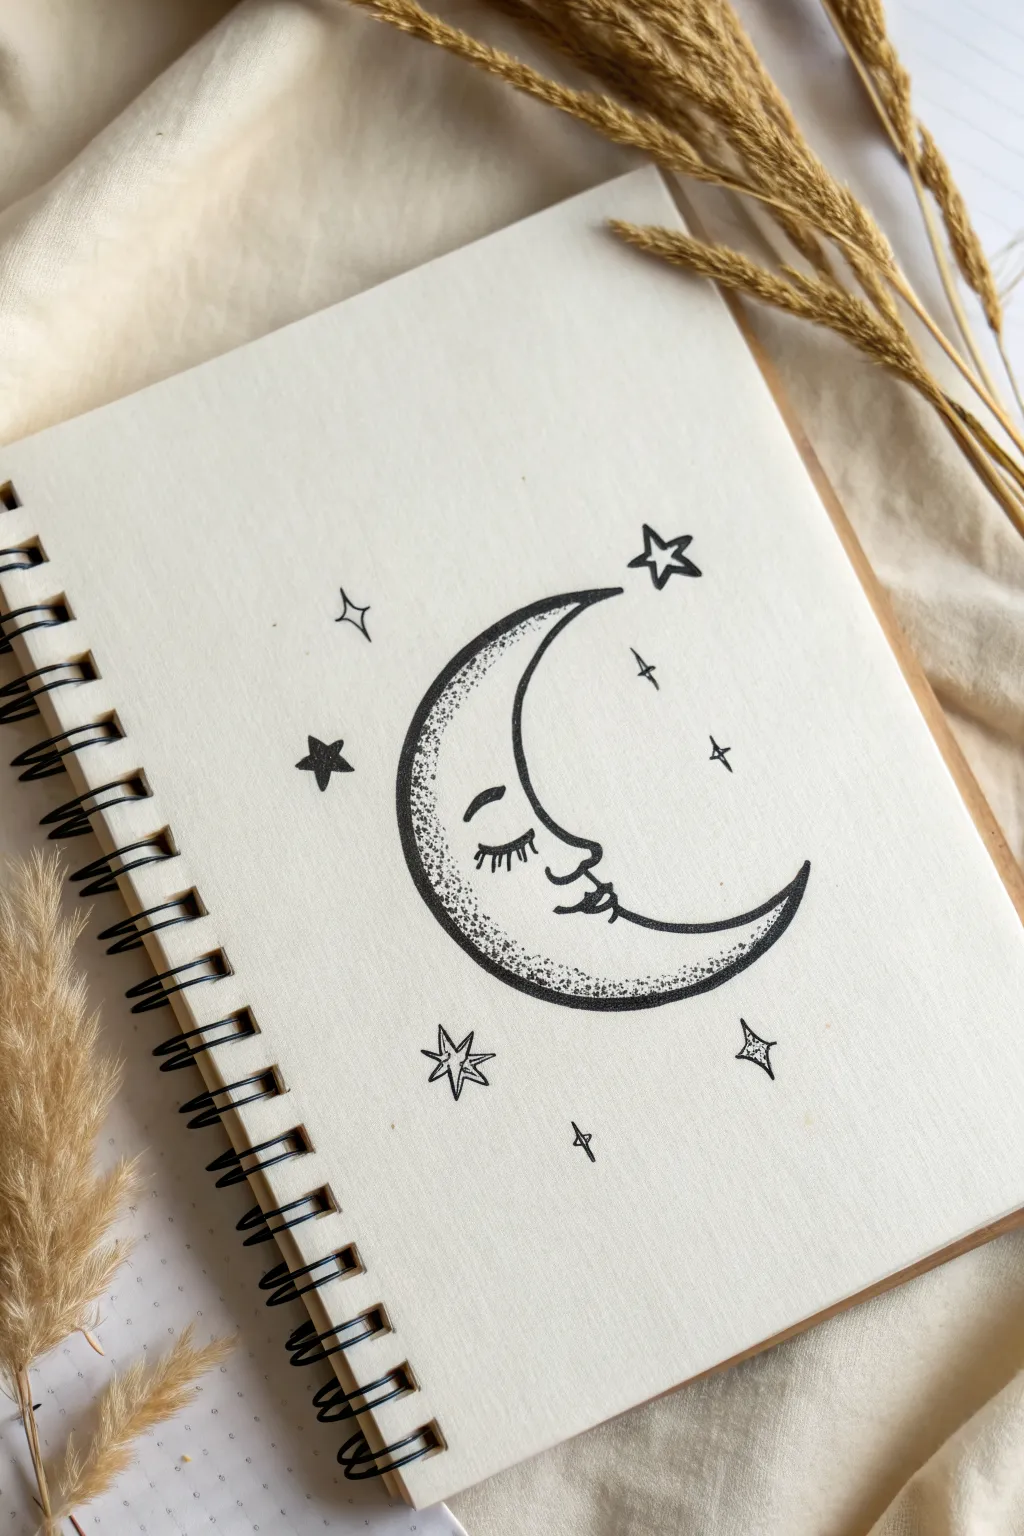
This whimsical crescent moon drawing combines clean line work with delicate stippling to create a soft, textured effect. It’s a perfect beginner-friendly project that looks lovely in a bullet journal or sketchbook.
Step-by-Step Guide
Materials
- Sketchbook or drawing paper (heavyweight preferred)
- Pencil (HB or 2B)
- Eraser
- Fine liner pens (sizes 0.1, 0.3, and 0.5)
- Ruler (optional,/ for star placement)
Step 1: Sketching the Foundations
-
Outline the crescent shape:
Start lightly with your pencil. draw a large ‘C’ shape. Instead of closing it with another simple curve, leave the inner curve open for now to plan the facial features. -
Sketch the profile:
Along the inner curve, roughly sketch a small bump for the nose and a smaller curve below it for the mouth. This doesn’t have to be perfect yet; we are just placing the elements. -
Add the sleeping eye:
Place a closed, curved eyelid in the center of the face area. Add a few angled lines coming off it for the long eyelashes. -
Plan the stars:
Lightly mark positions for the surrounding stars. Sketch a five-pointed star near the top tip, a solid star on the left, and various four-pointed sparkles scattered around the moon.
Step 2: Inking the Lines
-
Trace the outer curve:
Switch to your 0.5 fine liner. Carefully trace the large outer curve of the moon, making the line confident and smooth. Taper the line slightly as you reach the top and bottom points. -
Define the face profile:
Using the same pen or stepping down to a 0.3, trace the inner profile. Define the round nose and the sleeping smile. Ensure the lines connect smoothly to the crescent points. -
Draw the eyelashes:
Use a finer 0.1 pen for the eye details. Draw the curved eyelid and flick the pen outward quickly for each eyelash to give them a natural, tapered look. -
Ink the surrounding stars:
Go over your star sketches. For the solid black star, outline it first and then fill it in completely. For the hollow stars, keep your lines crisp and sharp at the corners. -
Erase pencil marks:
Wait a moment for the ink to dry completely to avoid smudging. Gently erase all your underlying pencil sketches until the page is clean.
Wobbly Lines?
If your long curves are shaky, try drawing from your shoulder rather than your wrist. It allows for smoother, more sweeping motions.
Step 3: Shading and Texture
-
Start the stippling base:
Use your finest 0.1 pen for the shading. Begin placing small dots densely along the outer edge of the crescent moon’s spine. Keep the dots very close together here to create a dark shadow. -
Fade the gradient:
As you move inward toward the face, space the dots further apart. This creates a gradient effect that makes the moon look rounded and 3D. -
Detail the tips:
Add a concentrated cluster of dots at the very top and bottom tips of the crescent, fading them out as they move toward the center. -
Add character to the stars:
I like to add just a tiny bit of stippling inside one point of the larger open stars, giving them a little sparkle and dimension similar to the moon. -
Final touches:
Review your drawing. If you want more contrast, add a second layer of dots along the very back edge of the moon to deepen the blackest areas.
Better Gradients
Don’t rush the dots! Keep your pen vertical. Angled dots look like dashes. Straight up-and-down motion creates perfect, round stippling.
Enjoy the peaceful vibe of your new celestial artwork
Cute Halloween Doodle Grid Page

Embrace the cozy autumn vibes with this charming collection of miniature Halloween icons drawn in crisp black ink. These bite-sized illustrations are perfect for filling up a journal page, decorating custom greeting cards, or adding flair to your October planner spread.
Step-by-Step Tutorial
Materials
- Spiral-bound notebook (blank or dot grid paper preferred)
- Fine-point black drawing pen (0.5mm or 0.8mm)
- Pencil (for sketching)
- Eraser
- Ruler (optional for spacing)
Step 1: Planning the Layout
-
Establish a grid structure:
Visualize a grid of 4 columns and 5 rows on your page to keep the doodles organized. If you’re nervous about spacing, lightly pencil in small squares (about 1.5 inches each) to act as boundaries for each drawing. -
Rough pencil framing:
Before committing to ink, lightly sketch the basic shapes of your icons. Start with circles for the pumpkins and skulls, triangles for the witch hats, and soft blobs for the ghosts. This ensures everything fits nicely.
Smudge Patrol
Ink not drying fast enough? Place a piece of scrap paper under your drawing hand as you work across the page to prevent oil from your skin transferring or smudging wet ink.
Step 2: Row 1: The Basics
-
Happy face & Ghost:
In the first slot, draw a simple circle with a wide, U-shaped mouth and two dots for eyes. Next to it, draw a classic sheet ghost—a rounded top with wavy lines at the bottom and two small oval eyes. -
Moon & Second Ghost:
Draw a crescent moon shape. For the fourth slot in the top row, sketch a different ghost variant, perhaps just the top half peeking up or a more amorphous blob shape.
Step 3: Row 2: Hats & Spiders
-
Jack-o’-lantern face:
Start the second row with a circle containing triangle eyes and a toothy grin. Keep the lines simple. -
Witch’s Hat:
Draw a wide, slanted triangle. Add a brim at the bottom connected by a curved line, and draw a small band with a buckle just above the brim. I like to fill the hat in with tight cross-hatching or solid black for contrast. -
Laughing Pumpkin:
Draw a slightly flattened circle. Add a stem on top and a wide, open mouth with a tongue visible. -
Spiderweb:
Draw a central point, then radiate 5-6 straight lines outward. Connect these lines with scalloped curves to create the classic web look.
Make It Pop
Add pops of color using orange or purple markers on just one element per doodle (like the pumpkin skin or the witch hat band) to create a striking minimalist look.
Step 4: Row 3: Potions & Pals
-
Vampire face:
Draw a circle with two triangle eyes, but give the mouth little fangs pointing down. -
Little Ghost:
Create a ghost shape with a rounded head and a jagged bottom hem. Give it a surprised ‘O’ mouth. -
Squash Pumpkin:
Draw a pumpkin that’s slightly taller and oval-shaped. Add vertical lines to show the ribs of the pumpkin and give it a grumpy or serious face. -
Potion Bottle:
Sketch a rectangle with rounded corners, topped with a narrow neck and a pump dispenser. Draw a few bubbles inside to suggest a magic potion.
Step 5: Row 4: Skulls & Spooks
-
Classic Pumpkin:
Draw a standard round pumpkin shape with vertical curved lines. Give it a classic jagged grin. -
Mushroom:
Draw a triangle cap shape on a thin stem. Add a few dots or markings on the cap. -
Cute Skull:
Draw the top half of a circle, but bring the bottom lines in to create a jaw. Draw large, round eye sockets and a small upside-down heart for a nose. -
Magic Wand:
Draw a diamond shape on top of a stick. Add interior lines to make the diamond look faceted like a jewel.
Step 6: Row 5: The Finale
-
Wizard Hat:
Draw a tall, pointy hat similar to the witch’s hat, but make the brim wider and floppier. -
Spider:
Draw a round body. Add four legs on each side, bending them at sharp angles so they look creepy-crawly. -
Caged Pumpkin:
This is a fun abstract one—draw a pumpkin shape but fill it with a grid pattern instead of a face. -
Final Jack-o’-lantern & Cupcake:
Finish with one last grinning pumpkin and a spooky cupcake. For the cupcake, draw a ribbed wrapper and a high swirl of frosting with spots.
Step 7: Finishing Touches
-
Inking:
Go over your pencil sketches with your black pen. Use a confident, steady hand. Don’t worry if lines aren’t perfectly straight; the wobble adds charm. -
Erase and Clean:
Wait at least 5-10 minutes for the ink to dry completely to avoid smudging. Then, gently erase all underlying pencil marks to leave crisp black illustrations.
Now you have a whole page of festive characters ready to haunt your sketchbook.


Have a question or want to share your own experience? I'd love to hear from you in the comments below!