If you’ve been craving an easy landscape that still looks bold and dreamy, desert painting is such a satisfying place to start. With a few simple shapes—sand dunes, a glowing sky, and a cactus or two—you can get a finished piece that feels dramatic without stressing over tiny details.
Classic Desert Sunset Gradient
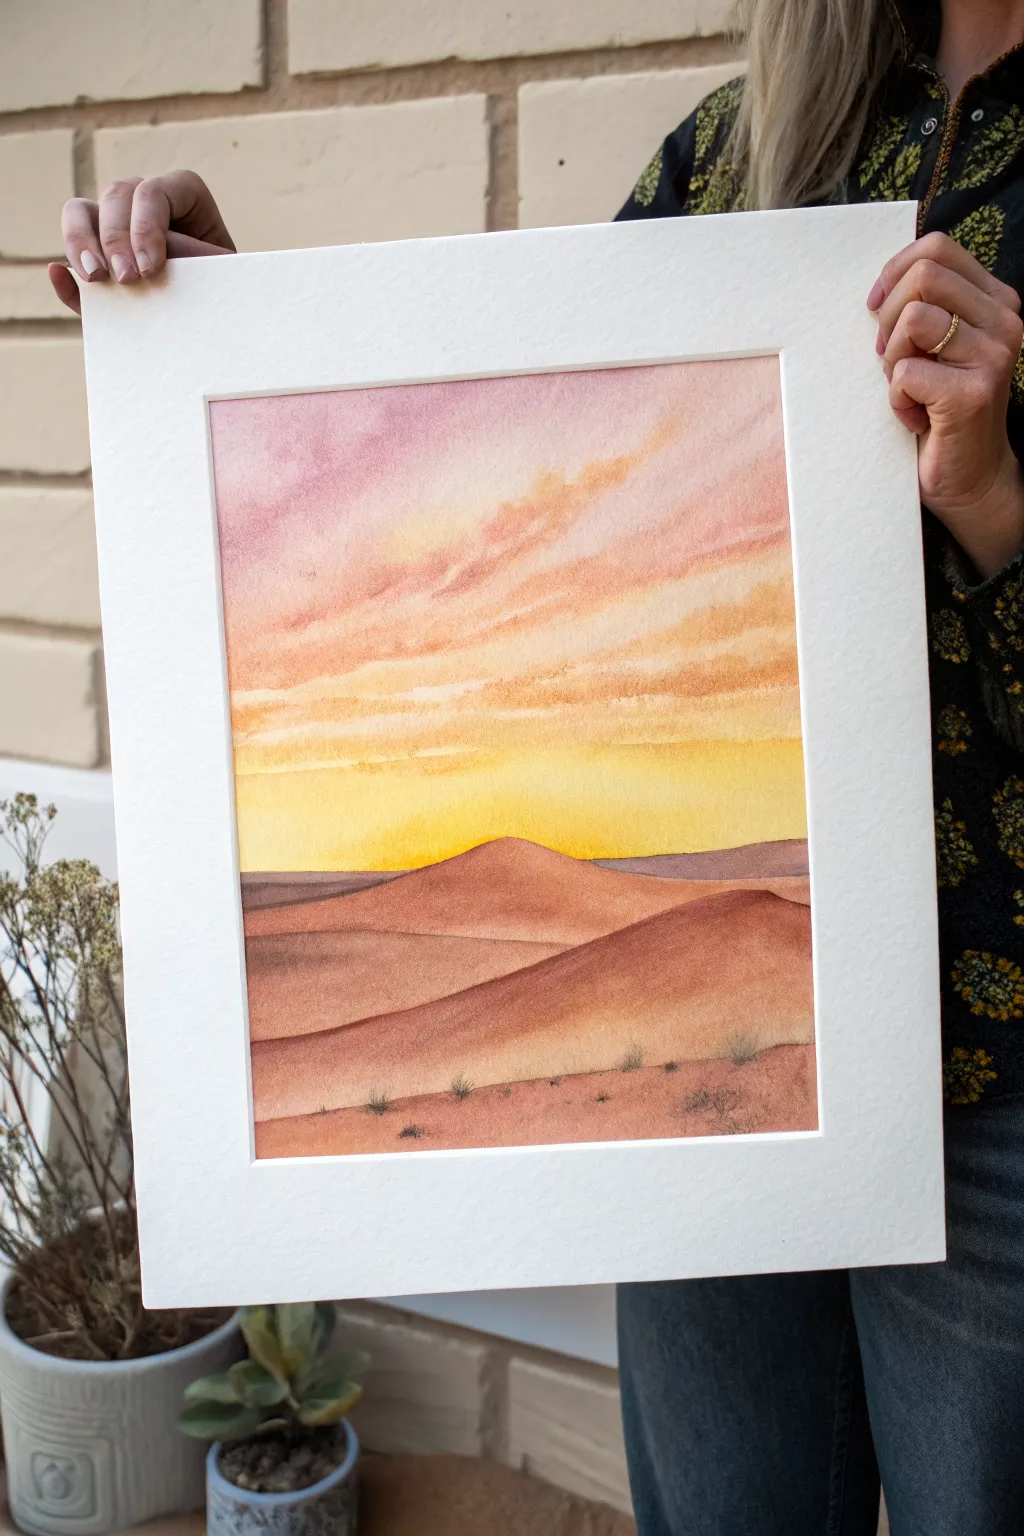
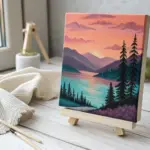
Capture the serene beauty of a desert evening with this soft, warm watercolor landscape. The piece focuses on a seamless sunset gradient fading into rolling dune silhouettes, creating a sense of depth and tranquility.
Detailed Instructions
Materials
- Cold press watercolor paper (140lb/300gsm)
- Watercolor paints (Alizarin Crimson, Cadmium Yellow, Yellow Ochre, Burnt Sienna, Burnt Umber)
- Flat wash brush (¾ inch)
- Round brushes (size 6 and size 2)
- Masking tape
- Clean water jar
- Paper towels
- Mixing palette
Step 1: Preparation & Sky Gradient
-
Secure the paper:
Tape down all four edges of your watercolor paper to a board using masking tape. This creates a crisp white border and prevents buckling while you paint. -
Wet the sky area:
Using your large flat brush and clean water, apply an even coat of water to the top two-thirds of the paper where the sky will be. -
Apply the top color:
Load your brush with a watered-down mix of Alizarin Crimson or a soft purple-pink. Paint horizontal strokes across the very top, letting the color bleed downwards slightly. -
Blend the middle sky:
Rinse your brush and pick up a warm peachy orange mix. Apply this below the pink, overlapping slightly so the wet colors blend naturally on the paper. -
Add the horizon glow:
Finish the sky with pure Cadmium Yellow near the bottom of the wet area. This should be your brightest color, representing the sun dipping below the horizon. -
Create soft clouds:
While the sky is still damp but not soaking wet, use a thirsty (dry) brush or a scrunched paper towel to lift out faint diagonal streaks, suggesting wispy clouds. -
Enhance cloud bottoms:
Mix a slightly stronger orange-pink and, using a round brush, gently paint the undersides of your lifted clouds to give them volume. Ensure edges remain soft.
Clean Edges Check
Before removing your tape, run a warm hair dryer over the edges for a few seconds. This softens the adhesive slightly and ensures the paper underneath doesn’t rip.
Step 2: Painting the Dunes
-
Sketch the dune lines:
Once the sky involves is completely dry, very lightly sketch three overlapping dune shapes with a pencil. The furthest should be highest, sloping down towards the front. -
Paint the furthest dune:
Mix Burnt Sienna with a touch of purple for a muted, distant tone. Fill in the top dune shape using a round brush, keeping the top edge crisp against the yellow sky. -
Let it dry:
Wait for the first dune to dry completely. If you paint the next layer too soon, the colors will bleed into each other and you’ll lose the defined edge. -
Paint the middle dune:
Create a warmer mix using Burnt Sienna and a little Yellow Ochre. Paint the middle dune shape, making sure its top edge overlaps the first dune clearly. -
Add the foreground dune:
For the closest dune, use a stronger concentration of Burnt Sienna or light Burnt Umber. Paint this largest bottom section, creating a sweeping curve across the foreground. -
Soften the gradients:
While the dune shapes are drying, you can gently drop in a tiny bit of water or lighter pigment at the top of each dune ridge to make it look like sunlight is hitting the crest.
Sun Silhouettes
For a dramatic focal point, use black ink or opaque gouache to paint a small, sharp silhouette of a cactus or a lone traveler on the highest dune ridge against the sun.
Step 3: Details & Final Touches
-
Add texture to the foreground:
Once the foreground dune helps is semi-dry (damp, not wet), splatter extremely tiny droplets of plain water onto the bottom area to create a subtle sandy texture bloom. -
Paint desert scrub:
Switch to your smallest size 2 round brush. Mix a dark brown-grey using Burnt Umber and a touch of blue. -
Detail fine grasses:
Using quick, short upward flicks, paint tiny tufts of dry grass along the ridge of the bottom dune. Vary the height and angle for realism. -
Reveal the border:
Wait until the entire painting is bone dry. Slowly peel away the masking tape at a 45-degree angle, pulling away from the center of the artwork to prevent tearing.
Frame your warm desert scene with a nice wide mat to accentuate that crisp white border you created

Layered Sand Dunes in Three Tones
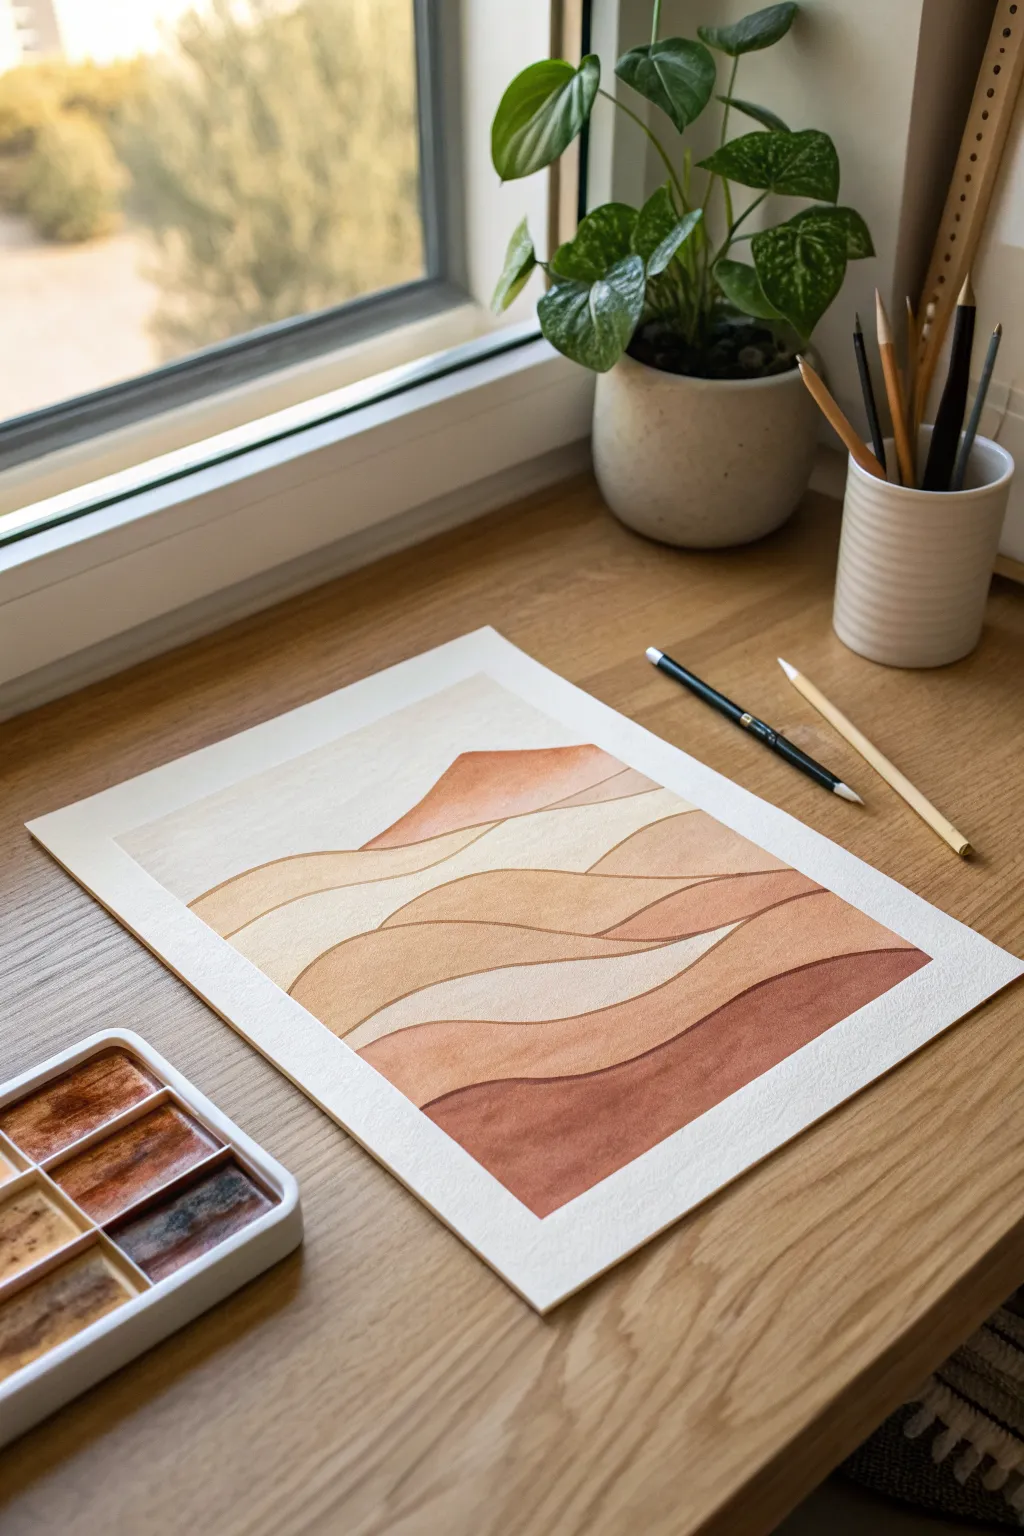
Capture the serene beauty of the desert with this minimalist watercolor landscape featuring rolling sand dunes in a calming spectrum of terracotta and beige. Using a layered technique with distinct, clean edges, you’ll create depth and atmosphere on paper.
How-To Guide
Materials
- Cold press watercolor paper (approx. 9×12 inches)
- Watercolor paint palette (burnt sienna, yellow ochre, raw umber, burnt umber)
- Masking tape or painter’s tape
- Pencil (HB or H)
- Kneaded eraser
- Round watercolor brushes (size 6 and size 2)
- Two jars of water
- Paper towels
- Drawing board or hard surface
Step 1: Preparation and Sketching
-
Secure the paper:
Begin by taping your watercolor paper down to a board or table on all four sides. This creates a clean white border as seen in the photo and prevents the paper from buckling when wet. -
Outline the dunes:
Using a light hand, sketch the flowing curves of the sand dunes. Start from the bottom foreground and work your way up to the horizon line. Keep your lines organic and wavy. -
Plan the hill peak:
Near the top visible third of the paper, sketch a subtle triangular peak to represent the furthest dune, just like the focal point in the inspiration image. -
Clean up the sketch:
Gently roll a kneaded eraser over your pencil lines to lift excess graphite. You want faint guidelines that won’t show through the transparent watercolor layers.
Clean Lines Trick
If you struggle with steady hands, paint every *other* dune first. Let them dry, then fill in the gaps. This prevents wet paint from bleeding across the boundary lines.
Step 2: Mixing the Palette
-
Create the base tones:
Prepare three main puddles of paint: a pale creamy beige (lots of water + yellow ochre), a medium sandy tone (yellow ochre + burnt sienna), and a deep clay red (burnt sienna + burnt umber). -
Test your colors:
Swatch your colors on a scrap piece of paper first. The key to this look is a harmonious gradient, so ensure your darkest color isn’t too jarring against the lightest one.
Patchy Paint?
If your large washes look streaky, you likely didn’t mix enough paint water initially. Pre-mix large puddles so you don’t run out half-way through a dune shape.
Step 3: Painting the Layers
-
Start from the top:
Begin painting with the sky or the furthest dune. For this specific look, we represent the sky/background as negative white space or a very faint wash of cream. -
Paint the first dune:
Using your size 6 brush, fill in the highest peak (the triangular shape) with a medium-strength terracotta mix. Keep the bottom edge of this shape wet if you plan to blend, but for this graphic style, hard edges are preferred. -
Wait for drying:
Crucially, let each section dry completely before painting the adjacent shape below it. This ‘wet-on-dry’ technique ensures crisp lines between the dunes rather than them bleeding together. -
Alternate colors:
Moving downward, paint the next curved section with a very pale beige tone. This contrast between the dark peak and light middle ground creates immediate visual interest. -
Add a mid-tone layer:
For the next wave down, use your sandy ochre mix. Focus on keeping the top edge of your brush stroke smooth against the dried line of the previous layer. -
Introduce texture:
While the paint is still wet on this mid-tone layer, I like to drop in a tiny touching of clear water or a slightly darker pigment to create subtle ‘blooms’ that mimic sand texture. -
Darken the descent:
As you move toward the bottom half of the paper, begin using slightly more saturated versions of your colors. The dunes closer to the viewer (bottom) generally look heavier and more grounded. -
Paint the foreground:
For the largest shape at the very bottom, use your deepest clay red mixture. Apply it boldly, ensuring an even wash without overworking the paper. -
Check edges:
Use the smaller size 2 brush to neaten up any wobbly edges where two dune layers meet. A steady hand here defines the crisp, illustration-style aesthetic.
Step 4: Final Touches
-
Assess the values:
Once fully dry, look at the painting from a distance. If any lighter sections feel too washed out, gently glaze a second layer of the same color over them to deepen the tone. -
Erase guidelines:
If any pencil marks are still visible in the unpainted sky area or edges, carefully erase them now. -
The reveal:
Slowly peel away the masking tape at a 45-degree angle, pulling away from the image to prevent tearing the paper. This reveals that satisfying, crisp white border.
Frame your warm desert landscape in simple wood to complement those earthy tones


Big Sun Disc Over the Desert
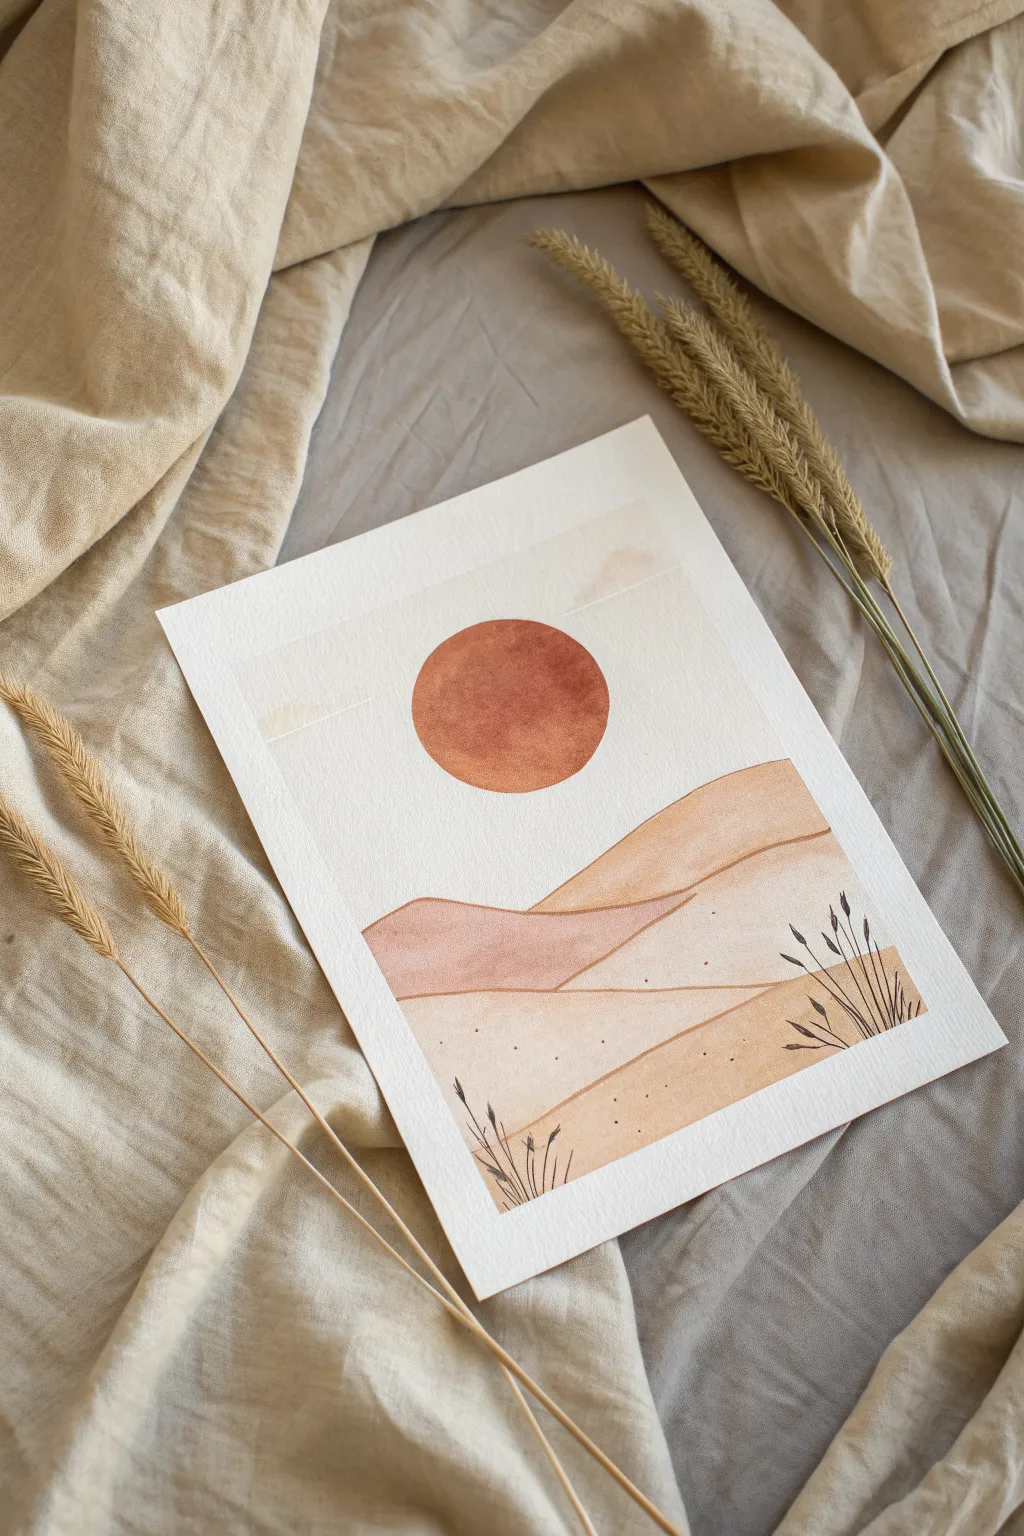
This minimalist watercolor piece captures the serene warmth of the desert with soft, undulating dunes and a striking terra cotta sun. The simplicity of the composition allows the textured paper and delicate washes to take center stage.
How-To Guide
Materials
- Cold press watercolor paper (300 gsm)
- Watercolor paints (terra cotta/burnt sienna, yellow ochre, beige/buff titanium, peach)
- Round watercolor brushes (size 8 for washes, size 2 for details)
- Pencil and eraser
- Ruler
- Masking tape (low tack)
- Two jars of water
- Paper towels
- Compass or circular object (like a jar lid)
Step 1: Planning compositions
-
Tape the borders:
Begin by taping down all four edges of your watercolor paper to a board or table. This creates that clean, professional white border shown in the photo and keeps the paper flat while wet. -
Sketch the sun:
Using a compass or a small round object (like a jar lid or glass bottom), lightly trace a perfect circle in the upper center of the page. Keep the pencil lines faint so they don’t show through the paint later. -
Outline the dunes:
Lightly sketch three to four overlapping hill shapes below the sun. Let the lines curve gently to mimic rolling sand dunes, ensuring they overlap to create a sense of depth. -
Sketch the horizon:
Use a ruler to draw a very light, straight horizon line that sits behind the dunes but doesn’t cross through the sun circle.
Clean Edges
To keep the sun perfectly round, you can use liquid masking fluid to cover the circle before painting the sky. Rub it off once dry to reveal clean paper, then paint the sun.
Step 2: Painting the Sun and Sky
-
Mix the sun color:
Create a rich terra cotta hue by mixing burnt sienna with a touch of red or orange. You want a strong, saturated color for the sun disc. -
Paint the sun:
Carefully fill in the circle shape. Use the tip of your brush to get a crisp edge. Because the shape is simple, you can lay down a fairly geometric wash without worrying too much about texture. -
Let the sun dry:
Allow the sun to dry completely before moving on. If you paint near it while it’s wet, the colors might bleed into the sky. -
Paint the sky wash:
Mix a very watery, pale beige or cream color. Apply a light wash across the upper background, painting carefully around the dry sun. I sometimes leave small patches unpainted to suggest faint clouds.
Step 3: Layering the Dunes
-
Paint the furthest dune:
For the dune furthest in the back, mix a soft peach or diluted terra cotta. Apply this as a flat wash within your pencil lines. -
Paint the middle dune:
Once the previous layer is dry (or slightly damp for a softer edge), paint the middle dune using a mix of yellow ochre and buff titanium. This should be slightly lighter than the back dune. -
Paint the foreground dune:
For the closest dune at the bottom, use your lightest sand color—mostly buff titanium with a drop of ochre. Keep this layer very transparent. -
Add separation lines:
Once the dunes are dry, mix a slightly darker, concentrated version of your sand color. Use a finer brush to re-trace the top edge of each dune, creating a subtle shadow line that distinguishes the layers.
Add Metallic Flair
Mix a small amount of gold shimmering watercolor or metallic gouache into the sand colored paint for the foreground dune. It will make the sand sparkle in the light.
Step 4: Details and Finish
-
Add texture spatters:
Load your brush with watery brown paint and tap it against your finger over the bottom dunes. These tiny speckles mimic sand grains and add organic texture to the foreground. -
Paint the grass stems:
Switch to your size 2 brush and dark brown or black paint. Paint very thin, wispy vertical lines rising from the bottom corners to create dried desert grasses. -
Add seed heads:
At the top of the grass stems, add small, teardrop-shaped brushstrokes to represent the seed pods or wheat-like heads of the desert plants. -
Review and refine:
Look for any uneven edges or areas that need a touch more contrast. You can deepen the shadow lines between dunes if necessary. -
Remove the tape:
Wait until the paper is bone dry—warm to the touch. Peel the tape away slowly at a 45-degree angle to reveal your crisp white border.
Frame your new desert landscape in simple wood or white molding to complement the natural earth tones


Quiet Desert Night With a Full Moon
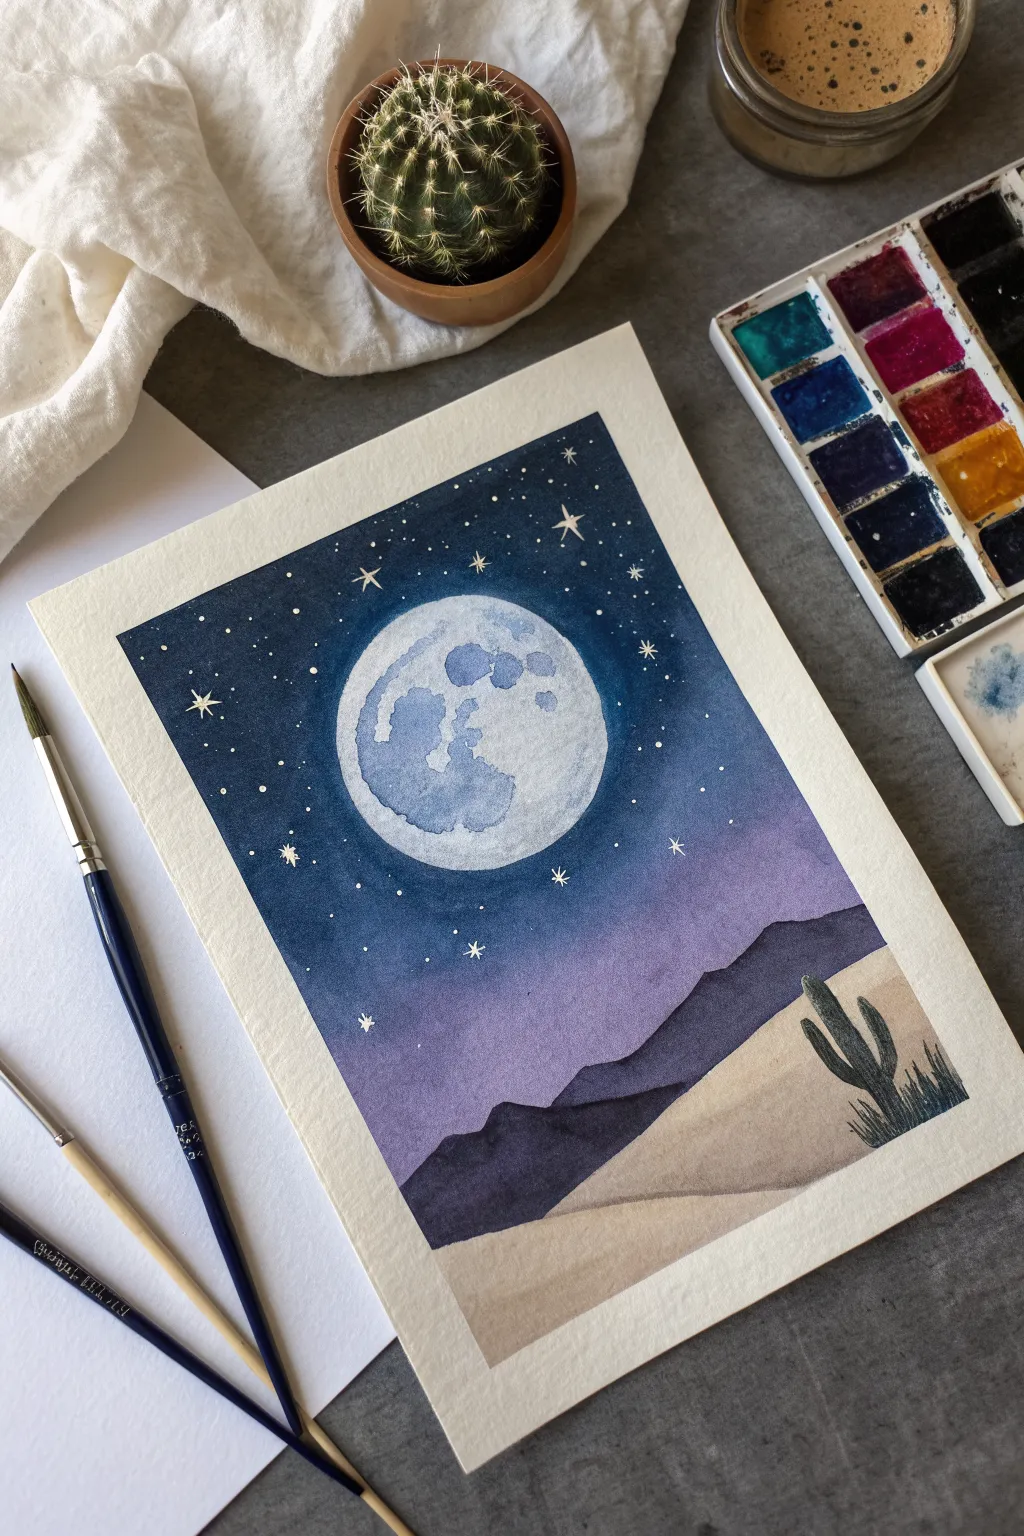
Capture the stillness of a desert night with this atmospheric watercolor piece. Featuring a glowing full moon, indigo skies, and gentle dunes, this painting balances simplicity with striking contrast.
Step-by-Step Guide
Materials
- Cold press watercolor paper (A5 or similar size)
- Watercolor paints: indigo, violet, ultramarine blue, burnt umber, yellow ochre
- White gouache or white gel pen
- Masking tape
- Round watercolor brushes (sizes 6, 4, and 0 for details)
- Pencil and eraser
- Jar of clean water
- Palette for mixing
Step 1: Sketching the Composition
-
Tape the edges:
Begin by taping down all four sides of your watercolor paper to a board or table. This creates that crisp, clean white border seen in the final piece and prevents the paper from buckling. -
Draw the moon:
Lightly sketch a large circle for the moon in the upper center of the page. You can trace a roll of tape or a jar lid to get a perfect shape. -
Outline the landscape:
Sketch the rolling sand dunes at the bottom right. Then, draw the silhouette of the distant mountains behind them, sloping upwards toward the left. -
Add the cactus:
Lightly pencil in a small Saguaro cactus silhouette on the right side of the dunes, just to mark its placement for later.
Bleeding Edges?
If paint bleeds under your tape, use a slightly thicker paint consistency near edges, or seal the tape edge with a clear layer of water or masking fluid first.
Step 2: Painting the Sky and Moon
-
Paint the moon’s craters:
Using diluted ultramarine blue, paint soft, irregular shapes inside the moon to represent craters. Keep these wet and loose, leaving patches of white paper for the moon’s bright surface. -
Start the sky gradient:
While the moon dries, mix a deep, dark blue using indigo and a touch of black. Begin painting the top of the sky around the moon, carefully cutting in around the circle’s edge. -
Blend downwards:
As you move down the paper, mix in some violet and more water to lighten the color. Create a seamless transition from the dark night sky to a softer purple horizon line just above the mountains. -
Refine the moon’s edge:
If necessary, use a small damp brush to soften the blue paint around the moon’s rim to create a subtle glow effect, but ensure the white paper of the moon remains clean. -
Let it dry completely:
Wait for the sky layer to become bone dry before proceeding. Painting the mountains too soon will cause the colors to bleed into the sky.
Step 3: Creating the Landscape
-
Paint the distant mountains:
Mix a dark purple-grey shade. Paint the mountain range silhouette, ensuring the top edge is crisp against the sky gradient. Fill the shape solidly down to where it meets the sand dunes. -
Mix sand colors:
For the dunes, dilute yellow ochre with a tiny bit of brown to create a soft beige. You want this to look pale and moonlit, not bright yellow. -
Paint the background dune:
Apply a wash of the beige color to the dune furthest back. I like to keep this slightly darker than the foreground to show depth. -
Paint the foreground dune:
Once the previous layer is dry, paint the front dune with a slightly lighter, more watery mix of the beige, defining the ridge where the two dunes overlap. -
Add the cactus silhouette:
Using a size 0 brush and a thick mix of dark green and indigo (almost black), carefully paint the cactus. Use the very tip of the brush to flick upward at the base for grass textures.
Starry Splatter
For a more random star field, load a toothbrush with white gouache and flick the bristles over the dry sky area. Cover the moon with a paper scrap first!
Step 4: Final Details
-
Add stars:
Using white gouache or a white gel pen, dot small stars throughout the dark blue section of the sky. Vary the sizes for a natural look. -
Create twinkling stars:
Select a few larger stars and draw tiny cross shapes or four-pointed sparkles to make them twinkle. -
Define the dune edge:
If the separation between dunes looks too faint, add a very thin line of diluted brown along the ridge of the foreground dune for crispness. -
Peel the tape:
Once the paper is 100% dry to the touch, slowly peel away the masking tape at a 45-degree angle to reveal your clean edges.
Now enjoy the serenity of your handmade desert night scene.
BRUSH GUIDE
The Right Brush for Every Stroke
From clean lines to bold texture — master brush choice, stroke control, and essential techniques.
Explore the Full Guide
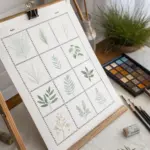
Easy Foreground Plants: Agave and Scrub
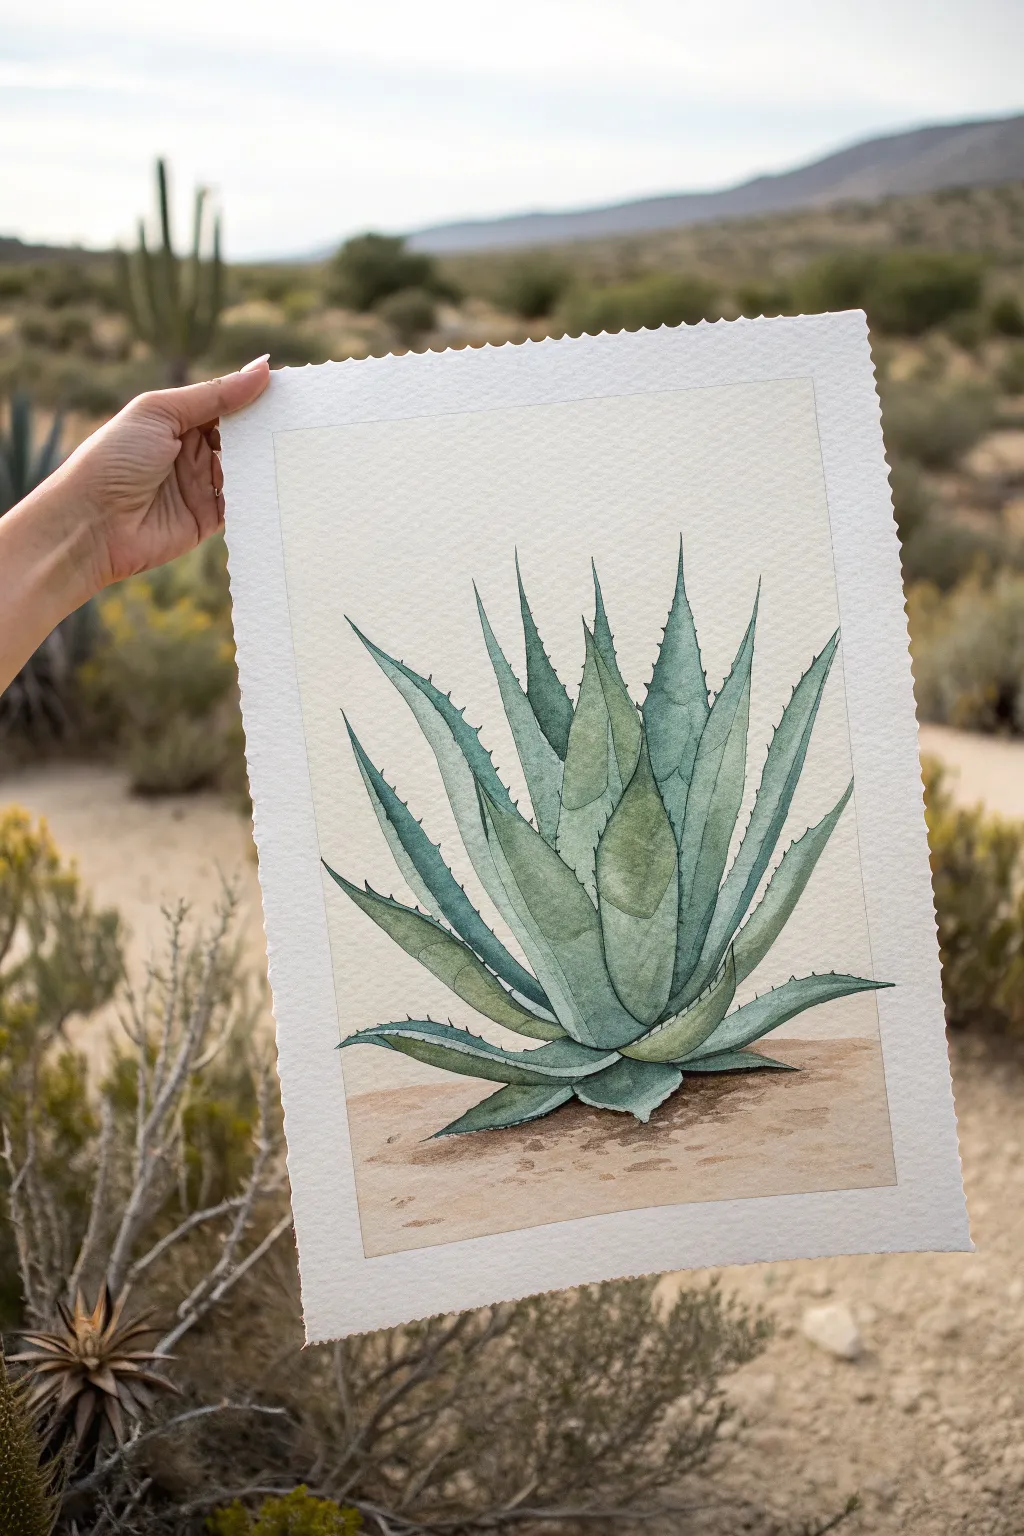
Capture the structural beauty of the desert with this elegant watercolor study of an agave plant. Using transparent washes and gentle layering, you’ll create a piece with depth and calmness that mirrors the arid landscape.
Step-by-Step
Materials
- Cold press watercolor paper (300gsm/140lb)
- Watercolor paints (Sap Green, Hooker’s Green, Prussian Blue, Burnt Sienna, Yellow Ochre)
- Round brushes (sizes 2, 6, and 8)
- Pencil (HB or 2H)
- Kneaded eraser
- Two jars of water
- Paper towels
- Masking tape or gummed tape
Step 1: Sketching the Silhouette
-
Plan the composition:
Visualize the agave sitting centered on the lower half of your paper. Leave ample negative space at the top to let the subject breathe. -
Draw the central cone:
Lightly sketch the tightly packed center cone of leaves first. These should be upright and slightly overlapping, resembling a closed flower bud. -
Add radiating leaves:
Sketch the outward-facing leaves curving away from the center. Ensure the leaves at the bottom are wider and shorter, appearing to lay closer to the ground. -
Refine the spines:
Go back over your leaf edges and add the characteristic serrated teeth or thorns. Keep these small and sharp-looking along the margins. -
Lighten the lines:
Roll your kneaded eraser gently over the entire drawing to lift excess graphite. You want faint guidelines that won’t show through the transparent paint.
Step 2: Basic Washes and Shadows
-
Mix your base green:
Create a watery mix of Sap Green with a touch of Prussian Blue to get a cool, dusty desert green hue. Test it on a scrap piece of paper first. -
Paint the first leaves:
Using your size 6 brush, paint every other leaf to avoid wet edges bleeding into each other. Use a consistent wash, pulling the pigment from the base to the tip. -
Complete the base layer:
Once the first set is dry, paint the remaining leaves. Varry the tone slightly by adding more water for distant leaves to create atmospheric perspective. -
Deepen the shadows:
Mix a darker version of your green by adding more Prussian Blue and a tiny dot of Burnt Sienna. Apply this to the base of the leaves where they meet the ground and behind overlapping sections. -
Create leaf dimension:
While a leaf is slightly damp, drop a little darker pigment along one edge or the central vein area. This wet-on-wet technique adds soft, natural volume.
Wet-Defined Edges
Wait for adjacent leaves to dry fully before painting neighbors. This ‘hard edge’ technique is crucial for the sharp, graphic look of agave leaves.
Step 3: Refining Details and Ground
-
Define the outlines:
Switch to your size 2 brush. Using a concentrated mix of Hooker’s Green and blue, carefully outline the leaves and the sharp thorns to give the plant its crisp graphic look. -
Add texture marks:
Paint faint, vertical striations on some of the larger leaves to mimic the fibrous texture of agave skin. -
Mix the sand color:
Combine Yellow Ochre and Burnt Sienna with plenty of water for a soft, sandy beige tone. -
Paint the ground:
Apply the sand wash loosely at the bottom of the page, letting it fade out irregularly before it reaches the paper’s edge. Keep it organic rather than painting a straight horizon line. -
Ground the plant:
Add a concentrated shadow of Burnt Sienna and Green directly under the bottom leaves to firmly plant the agave in the sand. -
Decker the edges (optional):
If your paper doesn’t have a natural deckle, you can carefully tear the edges against a ruler to achieve that rustic, handcrafted finish shown in the example.
Level Up: Salt Texture
While the sandy ground wash is still wet, sprinkle a pinch of table salt on it. As it dries, the salt pushes pigment away, creating amazing grainy sand textures.
Now you have a serene desert botanical ready to frame or display
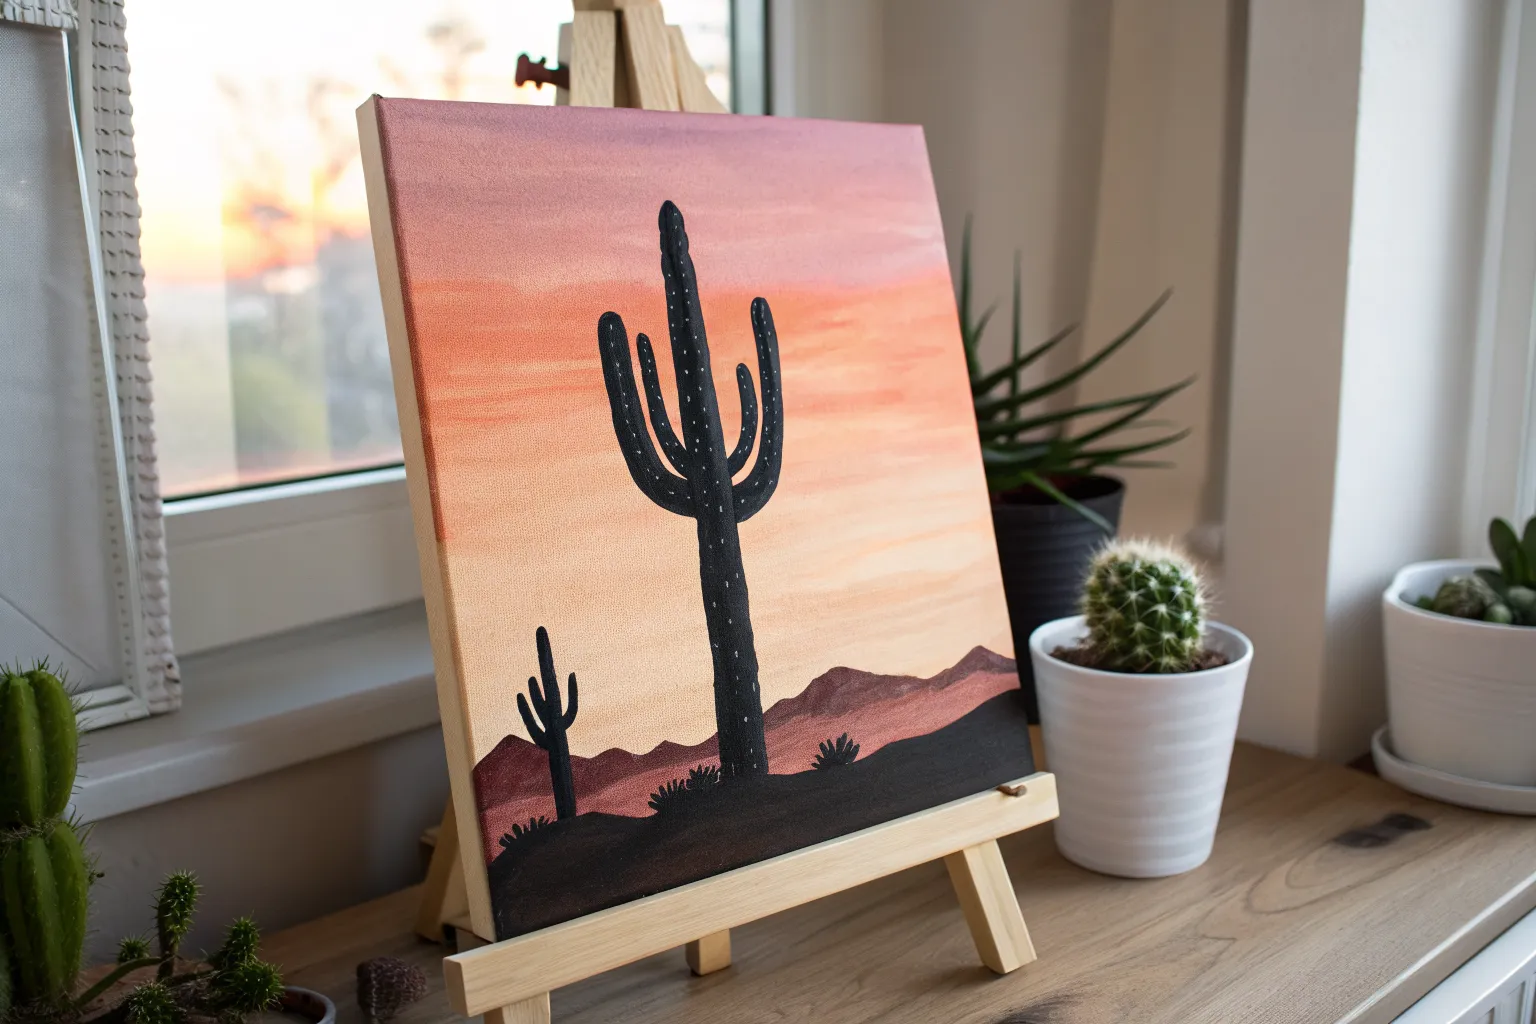
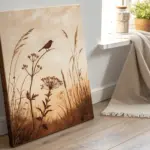
Tiny Birds in Flight for Instant Life
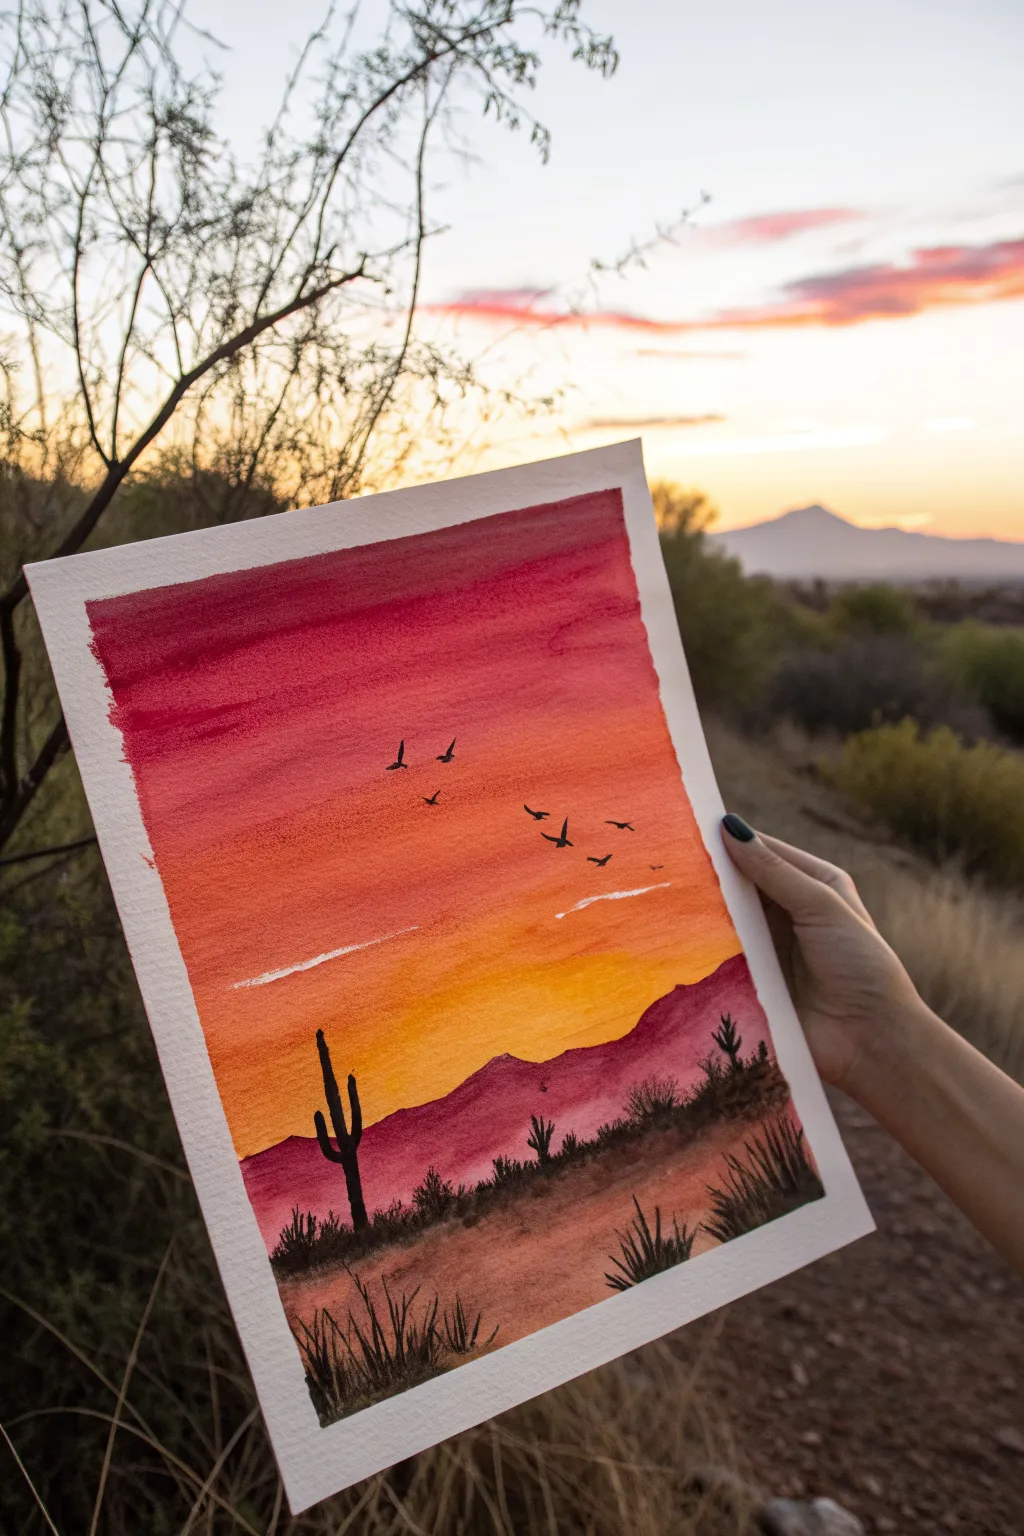
Capture the magic of a desert sunset with this vibrant watercolor project that focuses on warm gradients and striking silhouettes. By adding a flock of tiny birds against a blazing sky, you will instantly bring movement and life to the tranquil scene.
Step-by-Step Tutorial
Materials
- Cold press watercolor paper (140lb/300gsm suggested)
- Painter’s tape or masking tape
- Watercolor paints (Alizarin Crimson, Cadmium Red, Cadmium Orange, Cadmium Yellow, Indigo or Black)
- Flat wash brush (3/4 inch or 1 inch)
- Round brush (size 6 or 8)
- Small detail brush (size 0 or 1)
- Cup of clean water
- Paper towels
- Mixing palette
Step 1: Setting the Scene
-
Tape the Edges:
Secure your watercolor paper to a board or table using painter’s tape on all four sides. This creates that crisp, clean white border seen in the final piece and prevents the paper from buckling when wet. -
Prepare Your Sunset Palette:
Squeeze out your red, orange, and yellow paints onto the palette. You want these colors to be ready to grab quickly because the background needs to be painted while the paper is still damp to get smooth transitions. -
Wet the Sky Area:
Using your large flat brush and clean water, apply a gentle wash over the top three-quarters of the paper. You want the surface to be glistening but not forming puddles.
Bleeding Colors?
If your mountains are bleeding into the sky, the sky wasn’t dry enough. Wait longer or use a hair dryer. Watercolors only stay separate if the underlying layer is bone dry.
Step 2: Painting the Gradient Sky
-
Start with Deep Reds:
Load your flat brush with a rich mixture of Alizarin Crimson and Cadmium Red. Apply this to the very top of the paper using long, horizontal strokes, letting the color bleed slightly down the wet page. -
Transition to Orange:
Rinse your brush slightly and pick up a vibrant orange. Paint directly below the red section, overlapping the wet edges so the colors fuse together naturally without a hard line. -
Add the Golden Glow:
Clean your brush thoroughly and load it with bright yellow. Paint the lower section of the sky, blending it upwards into the orange. Leave the bottom quarter of the paper white for now. -
Lift Some Clouds:
While the paint is still damp but losing its sheen, use a clean, slightly damp brush or a twisted corner of a paper towel to gently lift a few horizontal streaks of paint near the horizon. -
Dry Completely:
This is crucial: allow the sky layer to dry 100%. If you paint the mountains too soon, the colors will mud together.
Step 3: Adding the Landscape
-
Mix a Dusky Mountain Shade:
Create a muted violet-red color by mixing a little Indigo or blue into your crimson paint. You want a color that looks like a shadowed mountain range in the distance. -
Paint the Distant Mountains:
Using a round brush, paint an uneven, undulating line across the paper where the yellow sky ends. Fill in the shape below this line with your mountain color, making the bottom edge slightly jagged. -
Let the Mountains Dry:
Wait for this layer to dry completely. I like to use a hairdryer on a low, cool setting to speed this part up. -
Mix a Deep Silhouette Color:
For the foreground, you need a very dark value. Mix a concentrated amount of Indigo with a touch of brown or black. It should be opaque and bold. -
Paint the Foreground Ground:
Paint the bottom-most section of the paper with this dark mix, creating a textured edge that overlaps the bottom of the purple mountains. -
Add Grassy Texture:
With the tip of your round brush, flick tiny upward strokes along the top edge of the foreground to simulate dry desert grass.
Level Up: Starry Night
Wait for the painting to fully dry, then use an old toothbrush dipped in white gouache or acrylic to gently flick ‘stars’ onto the darker red upper portion of the sky.
Step 4: Detailing Life
-
Paint the Saguaro Cactus:
Using your smaller detail brush and the black mixture, paint a vertical line rising from the foreground on the left side. Add one arm pointing up on the left, and a slightly higher arm on the right. -
Add Smaller Cacti:
Paint a few smaller, distant cacti shapes along the horizon line of the foreground to add depth and scale to the landscape. -
Paint More Foliage:
Use the detail brush to add spiky agave plants or bushes in the bottom corners. Press down firmly at the base and flick upward quickly to get sharp, tapered points. -
Practice the Birds:
Before committing to the painting, practice making small ‘V’ or ‘M’ shapes on a scrap piece of paper to get the feel for the bird wings. -
Add the Flock:
Using your finest brush and the dark silhouette paint, add a scattered group of tiny birds in the orange part of the sky. Vary the shape of their wings; some should be gliding flat, others flapping upward. -
The Reveal:
Once the painting is bone dry to the touch, slowly and carefully peel away the painter’s tape at a 45-degree angle to reveal your crisp white borders.
Frame your new desert masterpiece and enjoy the warmth it brings to your space

PENCIL GUIDE
Understanding Pencil Grades from H to B
From first sketch to finished drawing — learn pencil grades, line control, and shading techniques.
Explore the Full Guide
Scraped-Paint Cacti for Fast Texture
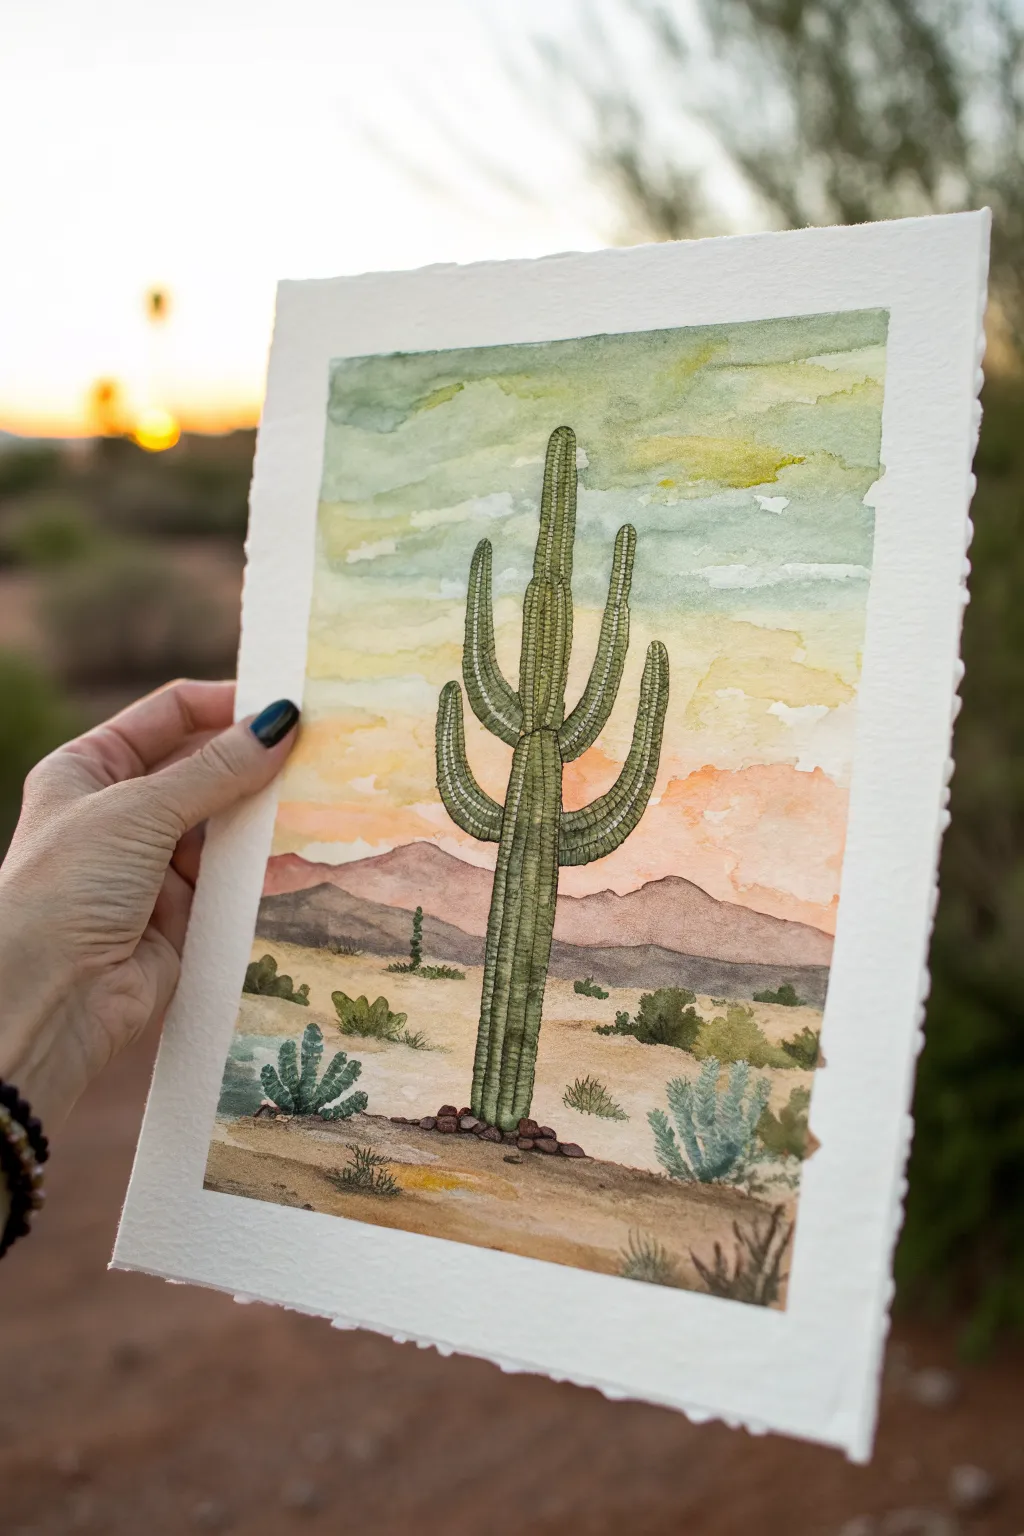
Capture the serene beauty of the desert with this watercolor project that uses a clever scraping technique for texture. Soft, blended layers create a glowing sunset backdrop, while precise removal of wet paint reveals the tactile ridges of a saguaro cactus.
Step-by-Step Tutorial
Materials
- Cold press watercolor paper (deckled edge optional)
- Watercolor paints (Sap Green, Olive Green, Burnt Sienna, Yellow Ochre, Cadmium Orange, Indigo)
- Flat wash brush (3/4 inch)
- Round brushes (size 4 and size 0)
- Plastic card, palette knife, or stiff cardstock for scraping
- Masking tape
- Paper towels
- Pencil
Step 1: Planning and Sky
-
Sketch the outline:
Begin by lightly sketching the main saguaro cactus in the center of your paper. Draw the central column and four distinct arms curving upward. Add a gentle horizon line about a third of the way up the page to mark distant mountains. -
Wet the sky area:
With clean water and your flat brush, wet the entire sky area above the mountain line, carefully painting around the cactus shape. The paper should be glistening but not forming puddles. -
Apply the sunset base:
Drop in a pale wash of Yellow Ochre near the horizon line, letting it bleed upward. While still wet, blend in touches of Cadmium Orange just above the yellow to start the glowing sunset effect. -
Add the sky gradients:
Further up the paper, introduce a watery mix of Olive Green and a touch of Indigo to create a muted, teal-grey sky. Allow these colors to merge softly with the yellow and orange sections below, tilting the paper slightly if needed to encourage flow. -
Paint the background mountains:
Once the sky is damp but not soaking, paint the distant mountain range using a dilute mix of Burnt Sienna and a tiny bit of Indigo for a purple-brown hue. Let the bottom edge of the mountains remain undefined for now.
Step 2: Foreground and Details
-
Establish the desert floor:
Mix a sandy color using Yellow Ochre and a lot of water. Wash in the foreground area below the mountains, leaving some white paper showing for high-contrast highlights. -
Darken the ground:
While the sandy wash is still wet, drop in Burnt Sienna near the bottom edge and under where the cactus will stand to create depth and shadow. -
Base coat the cactus:
Mix a vibrant Sap Green with a touch of Olive Green. Using a size 4 round brush, paint the entire cactus shape. Ensure the paint is juicy and heavily pigmented, as you need a wet surface for the next step. -
Scrape the vertical ribs:
Immediately after painting the cactus—while it is very wet—take the edge of a plastic card or palette knife. Gently scrape vertical lines down the length of the central column and along the curve of the arms to lift the paint and create lighter, textured ribs. -
Define the ridges:
If I notice the paint pooling back into the scraped lines, I sometimes do a second, gentle pass. You want to see the paper’s texture peeking through to simulate the cactus structure. -
Paint the spines:
Once the cactus is fully dry, use your smallest size 0 brush and a dark mix of Olive Green and Indigo. Paint tiny, horizontal dashes along the darker ridges of the cactus to represent the needle clusters. -
Add distant shrubs:
Using the same dark green mix, dab in small, irregular shapes across the desert floor to create distant creosote bushes. Keep them loose and unrefined. -
Create foreground plants:
Paint a small, spiky agave or prickly pear shape in the left foreground using a cooler, blue-green shade. Add a few vertical strokes for dry grass near the bottom corners. -
Ground the cactus:
Paint small, dark rocks at the very base of the main cactus using Burnt Sienna mixed with Indigo. This visually weighs the plant down so it doesn’t look like it’s floating. -
Final dry brushing:
Take a nearly dry brush with dark brown paint and drag it horizontally across the foreground sand to create texture and grit.
Paint Not Lifting?
If scraping doesn’t reveal light lines, your paint might be too dry or too thin. Re-wet the area with pigment-heavy paint and scrape immediately while it’s still glossy.
Pro Tip: Card Angle
Don’t scrape flat against the paper. Hold your plastic card at a 45-degree angle. This pushes the paint aside cleanly rather than smearing it, creating sharper ridges.
Step back and admire how the scraped texture brings your desert scene to life.
Simple Desert Road to the Horizon
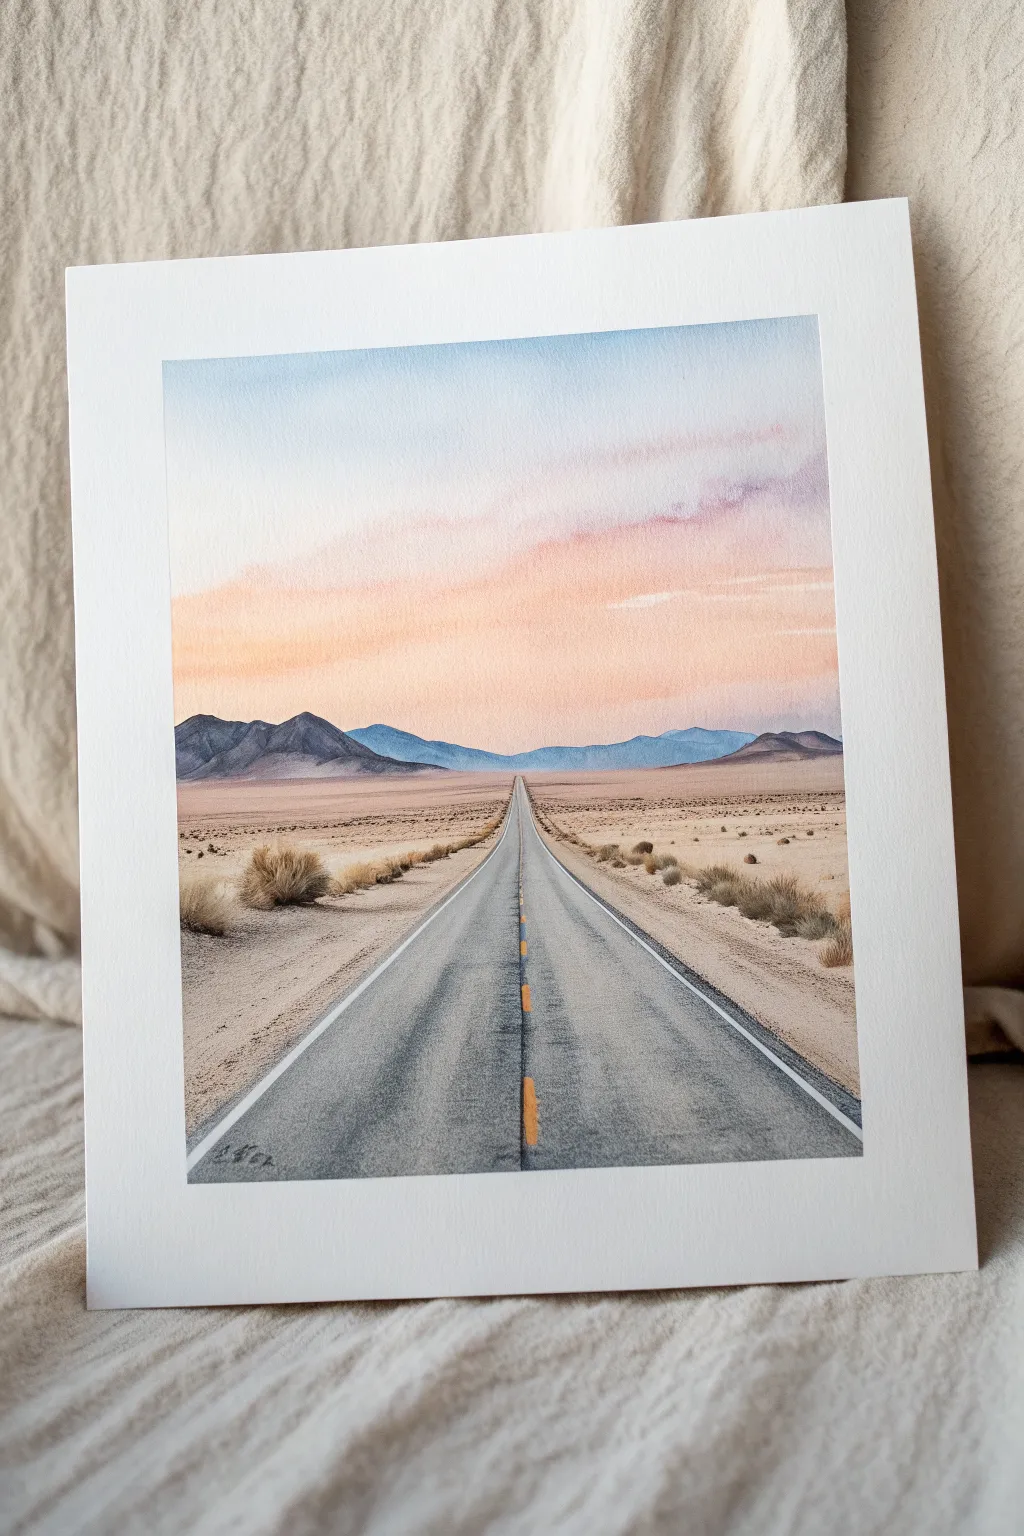
Capture the serene beauty of a lonely desert highway stretching endlessly toward distant mountains under a pastel sky. This watercolor project uses simple perspective techniques and soft washes to create a peaceful, expansive landscape perfect for beginners.
Step-by-Step
Materials
- Cold press watercolor paper (140lb/300gsm)
- Watercolor paints (Ultramarine Blue, Alizarin Crimson, Burnt Sienna, Yellow Ochre, Lamp Black)
- Masking tape
- Large flat wash brush (3/4 inch)
- Medium round brush (size 8)
- Small liner or detail brush (size 2)
- Pencil and ruler
- Two jars of water
- Paper towels
Step 1: Planning and Sky
-
Tape edges:
Begin by taping down all four sides of your watercolor paper to a board with masking tape. This creates that clean, crisp white border seen in the final piece and prevents the paper from buckling during the wash stages. -
Establish the horizon:
Using a ruler and a light pencil touch, draw a horizontal line slightly below the middle of the paper. Mark a vanishing point right in the center of this line—this is where your road will disappear. -
Sketch the road:
Draw two diagonal lines extending from the vanishing point down to the bottom corners of the paper. Don’t make them too wide at the bottom; keeping them somewhat centered emphasizes the distance. -
Outline mountains:
Sketch a simple, uneven mountain range along the horizon line. Make the mountains on the left slightly taller and jagged, and the ones on the right lower and more rolling. -
Wet the sky area:
Using your large flat brush, apply clean water to the entire sky area above the mountains. The paper should be glisten but not have puddles. -
Paint the upper sky:
While the paper is wet, drop in a light wash of diluted Ultramarine Blue at the very top, fading it out as you move downward. -
Add sunset warmth:
Rinse your brush and pick up a mix of Alizarin Crimson and a touch of Yellow Ochre. Paint this across the middle sky, letting it bleed softly into the blue above and fading to nearly white at the horizon.
Step 2: Mountains and Desert Floor
-
Paint the distant mountains:
Once the sky is completely dry, mix Ultramarine Blue with a tiny bit of Burnt Sienna to create a muted slate blue. Paint the mountain range, keeping the color fairly transparent to suggest atmospheric perspective. -
Warm up the foreground:
For the desert ground on either side of the road, mix a very watery wash of Yellow Ochre and Burnt Sienna. Apply this wash loosely, leaving some tiny white gaps for texture. -
Deepend the earth tones:
While the ground wash is still damp, drop in slightly concentrated Burnt Sienna near the bottom foreground edges and around the base of the mountains to add depth and shadow. -
Base layer for the road:
Mix a cool grey using Ultramarine Blue and a touch of Lamp Black. Paint the road area, using horizontal strokes near the bottom and vertical strokes near the horizon to help with the perspective illusion.
Clean Edges Secret
Use a hair dryer to gently warm the masking tape before peeling it off. This softens the adhesive and prevents the paper from tearing.
Step 3: Details and Definition
-
Texture the asphalt:
After the road base is dry, take a dryer brush with darker grey paint. Use a ‘scumbling’ technique—rubbing the side of the brush lightly over the paper—to create the texture of rough asphalt. -
Paint the road lines:
Switch to your small detail brush. Paint the white shoulder lines using opaque white gouache or by lifting color carefully. Then, paint the dashed yellow centerline using Yellow Ochre, making the dashes smaller and closer together as they approach the horizon. -
Add desert scrub bushes:
Mix a brownish-green using Burnt Sienna and Ultramarine. Using the tip of your round brush, dab small, irregular clusters along the roadside to represent desert bushes. -
Ground the vegetation:
Add a tiny dark shadow underneath each bush on the right side to anchor them to the ground. -
Final dry brush details:
Use a very dry brush with dark brown paint to add subtle vertical strokes in the immediate foreground bushes to mimic dried grass blades.
Add a Lonely Traveler
Paint a tiny silhouette of a car or a motorcycle far down the road near the vanishing point to add a sense of scale and narrative to the scene.
Peel off your tape and admire how a few simple perspective lines created a vast journey on paper


Minimal Boho Desert in Soft Pastels
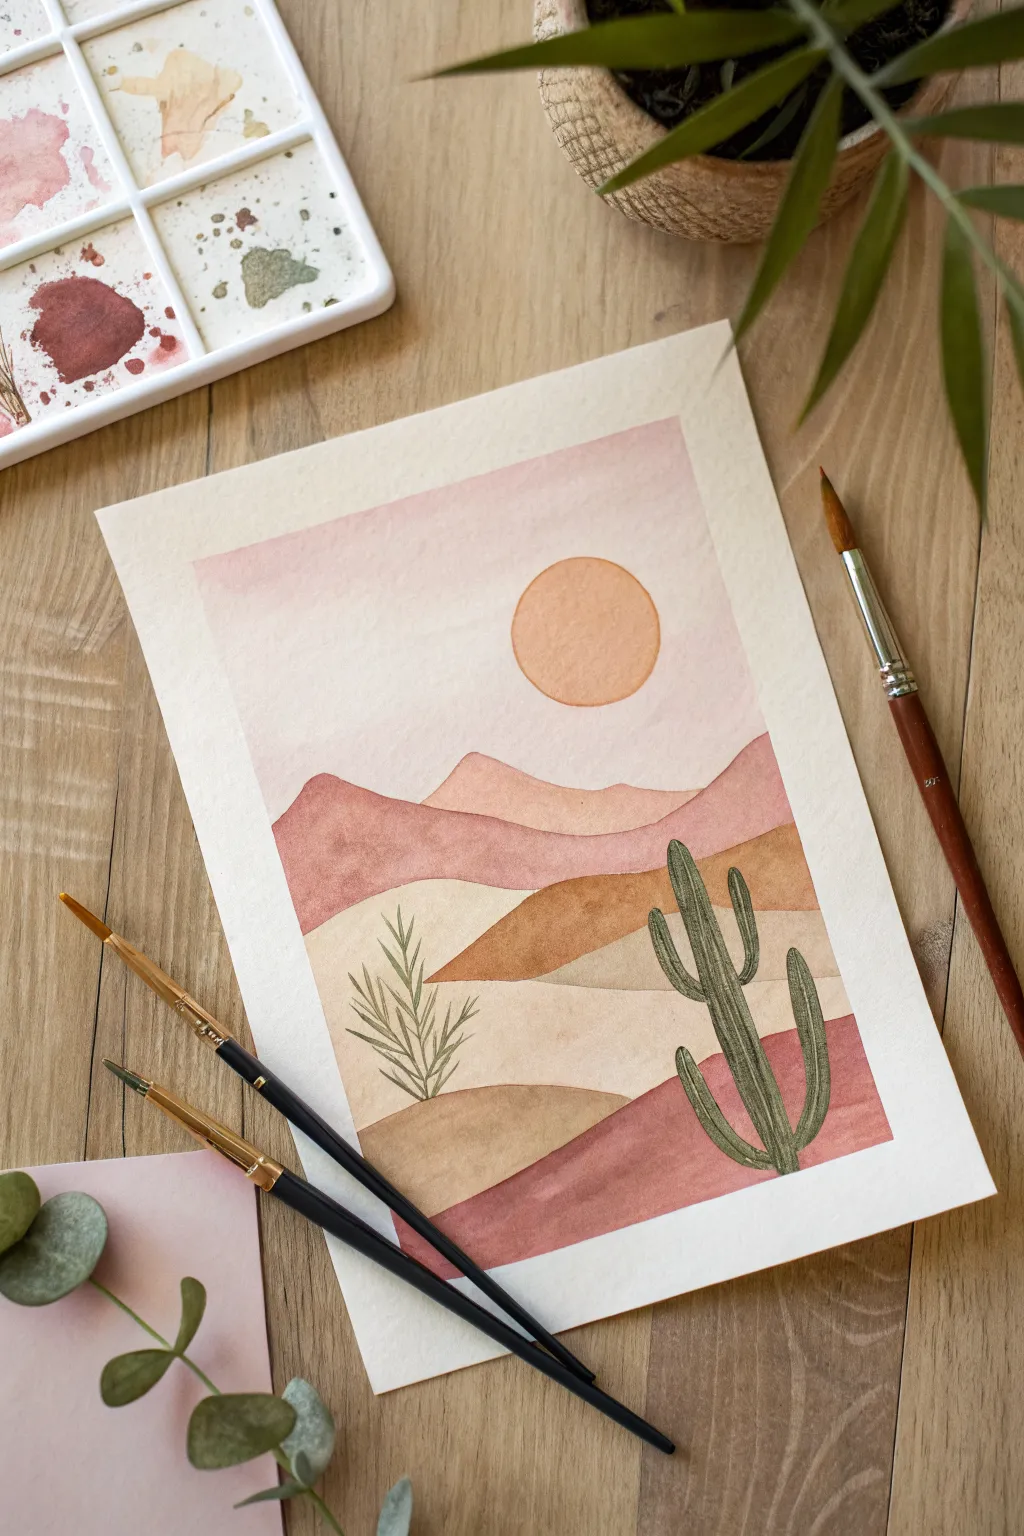
Capture the serene warmth of a desert sunset with this minimal bohemian watercolor painting. Using a soft, earthy palette of terra cotta, ochre, and blush pink, you’ll learn to layer translucent washes to build a peaceful, stylized landscape.
Detailed Instructions
Materials
- Cold press watercolor paper (approx. 5×7 or A5 size)
- Watercolor paints (Terra Cotta, Yellow Ochre, Burnt Sienna, Blush Pink/Rose, Sap Green)
- Masking tape (washi or painter’s tape)
- Round watercolor brushes (size 6 for washes, size 2 for details)
- Jar of clean water
- Paper towels
- Pencil (HB or H) and eraser
- Palette for mixing
Step 1: Preparation and Sketching
-
Tape the Edges:
Begin by taping down all four edges of your watercolor paper to a board or table. This creates that crisp, professional white border shown in the final piece and prevents the paper from buckling when wet. -
Sketch the Horizon:
Lightly sketch the rolling hills of the desert. Start about halfway down the page for the furthest mountain range, drawing a wavy, organic line. -
Add Foreground Hills:
Draw two or three more layers of hills closer to the bottom, allowing them to overlap naturally. Keep your pencil pressure very light so the graphite doesn’t show through the paint later. -
Place the Sun and Plants:
Use a circular object or freehand a circle for the sun in the upper right quadrant. Then, lightly outline the position of the cactus on the right and the small shrub on the left.
Clean Edges
To get perfectly sharp lines between mountains, leave a tiny, hair-thin gap of white paper between sections, or wait until one section is fully dry before painting the neighbor.
Step 2: Painting the Sky and Sun
-
Mix the Sky Wash:
Prepare a very watery, dilute mixture of blush pink or a soft rose color. You want this to be quite transparent. -
Apply the Sky Layer:
Using your larger round brush, paint the entire sky area, carefully working around the circle of the sun. Bring the wash down to meet the top edge of your furthest mountain range. -
Soften the Gradient:
While the sky paint is still wet, you can drop in a tiny bit more pigment at the top edge to create a subtle ombré effect, fading out as it goes down. Let this dry completely. -
Paint the Sun:
Mix a warm, muted orange or peach color. Carefully fill in the sun circle. If you want a flat, graphic look, apply an even coat; for texture, let the water pool slightly.
Add Gold Accents
Once the painting is dry, use metallic gold watercolor or a gold pen to outline the sun or add tiny geometric dots to the sky for a magical tarot-card vibe.
Step 3: Layering the Dunes
-
First Mountain Range:
Mix a terra cotta or dusky pink shade. Paint the furthest range (the one touching the sky). Ensure your brushstrokes follow the curve of the land. -
Drying Time:
It is crucial to let this first range dry fully before painting the next one, otherwise the colors will bleed together. -
Middle Dunes:
For the middle hills, switch to a yellow ochre or sandy beige mix. Paint the sections in the middle ground, varying the tone slightly to distinguish between the hills. -
Darker Accents:
Paint the hill behind the cactus in a deeper burnt sienna or brown to create depth and contrast against the lighter sand in front. -
Foreground Layers:
Finish the land by painting the bottom-most hills. I like to use a mix of the terra cotta and burnt sienna here to ground the composition with a heavier color at the base.
Step 4: Botanical Details
-
Mix Green Shades:
Prepare a muted green by mixing sap green with a tiny touch of red or brown to desaturate it. You don’t want a bright, artificial neon green. -
Paint the Cactus Base:
Using your smaller detail brush (size 2), carefully fill in the cactus shape. Start with a lighter wash of green. -
Add Cactus Texture:
While the cactus is drying (or after it dries for sharper lines), take a slightly darker, thicker green mixture and add vertical stripes or lines to mimic the ribs of the cactus. -
Paint the Shrub:
On the left side, paint the small desert shrub. Use quick, light flicking motions with the tip of your small brush to create thin, leafy branches radiating outward. -
Final Touches:
Assess the painting. If any edges look ragged, you can carefully refine them with a damp brush, but the charm of this style is a slightly imperfect, hand-painted feel.
Step 5: The Reveal
-
Remove the Tape:
Once the paper is 100% bone dry, slowly peel away the masking tape. Pull the tape away from the paper at a 45-degree angle to prevent tearing.
Frame your new desert landscape in a simple wood frame to complement those warm earth tones
Heat Wave Lines Across Desert Dunes
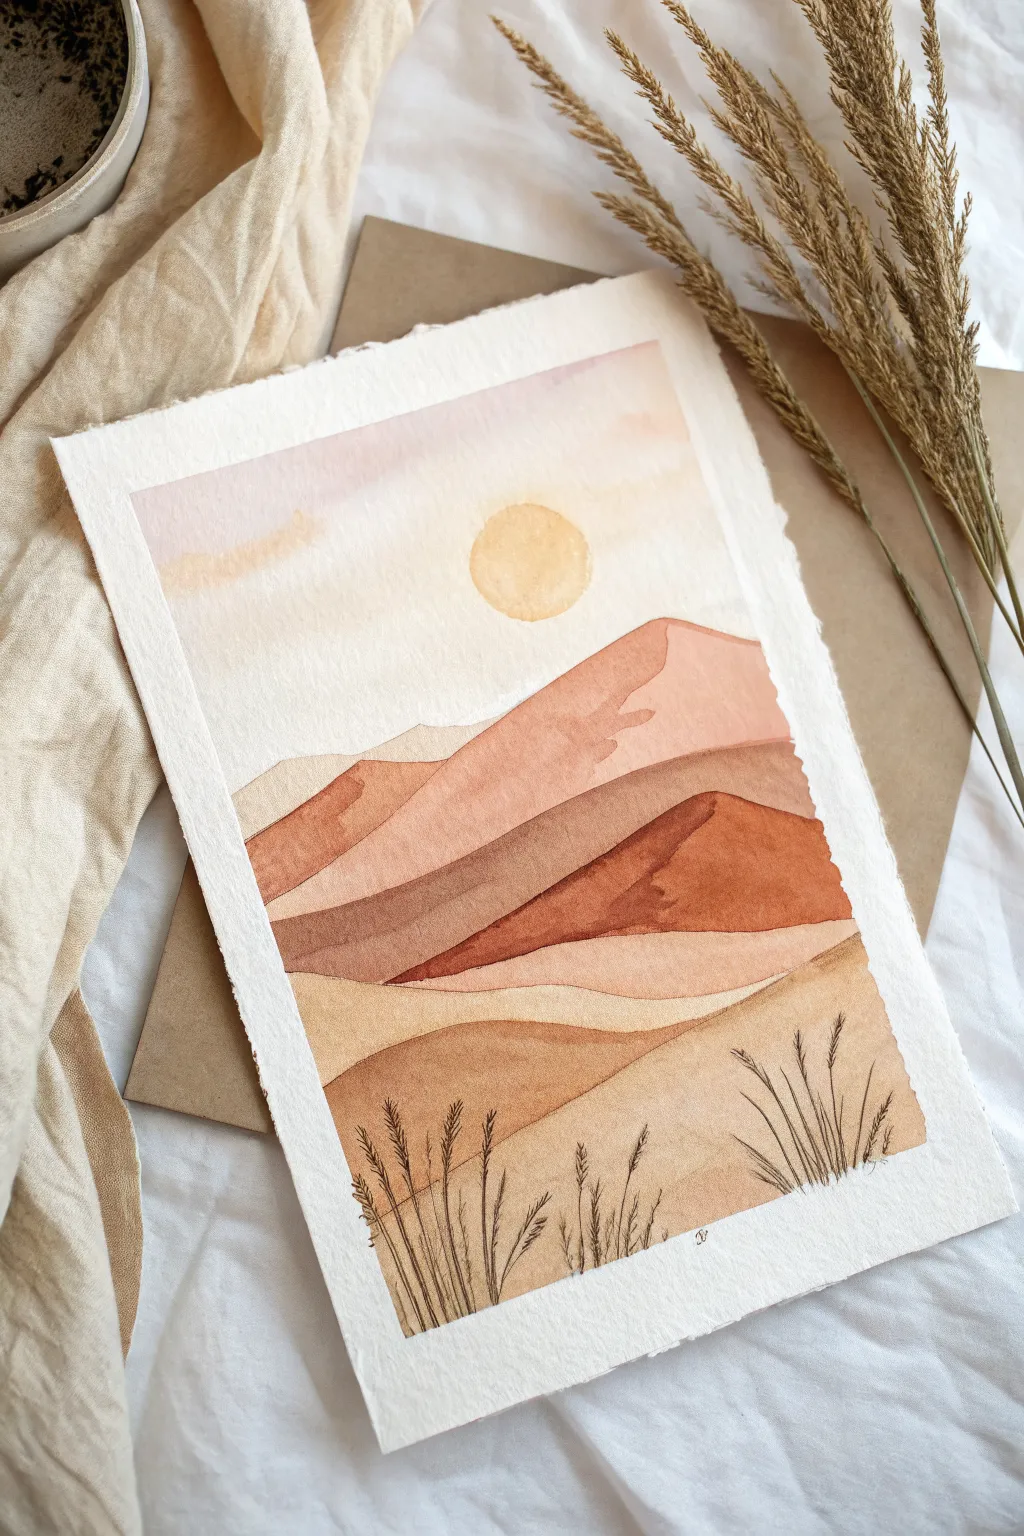
Capture the warmth of a desert sunset with this minimalist watercolor landscape featuring soft rolling dunes and delicate grasses. The soothing palette of terracotta, beige, and dusty pink creates a tranquil, heat-soaked atmosphere perfect for modern decor.
Detailed Instructions
Materials
- Cold press watercolor paper (deckled edge optional)
- Watercolor paints (burnt sienna, yellow ochre, dusty rose, burnt umber, black)
- Round watercolor brushes (sizes 6 and 2)
- Pencil and eraser
- Painter’s tape or masking tape
- Jars of clean water
- Paper towels
- Fine liner pen (brown or black, waterproof) – optional
Step 1: Preparation & Sketching
-
Prepare your workspace:
If you are using a loose sheet of paper without deckled edges, tape it down to a board to prevent warping. If using deckled paper like the example, you can tape just the corners or work carefully on a flat surface. -
Sketch the horizon:
Using a pencil, lightly sketch the outline of the dunes. Start about halfway down the paper for the distant mountains, creating overlapping swooping shapes that getting progressively closer to the bottom edge. -
Draw the sun:
Place a circle in the upper third of the paper for the sun. You can trace a coin or bottle cap to get a perfect shape, or freehand it for a more organic look.
Step 2: Painting the Sky
-
Wet the sky area:
Dip your clean size 6 brush into water and gently wet the entire sky area, being careful to paint around the circular sun shape so it stays dry for now. -
Apply the first wash:
Mix a very watery pale pink or diluted dusty rose. Drop this color into the wet sky, letting it naturally disperse. Keep the color lightest near the sun and slightly deeper towards the top corners. -
Add cloud suggestions:
While the sky is still damp, dab in a tiny bit of yellow ochre or a slightly darker pink in random, horizontal streaks to suggest faint clouds. Let the sky dry completely. -
Paint the sun:
Once the sky is dry, fill in the sun circle with a wash of yellow ochre. Keep it relatively flat and warm.
Fixing “Blooms”
If water backflows and creates cauliflower-like edges (blooms) inside a smooth dune, wet that entire specific clipped shape again gently and smooth it out with a damp brush before it dries
Step 3: Layering the Dunes
-
Mix your palette:
Create puddles of your dune colors: a light beige, a medium terracotta (burnt sienna mixed with a touch of red), and a deeper brown-red. Having these ready helps you work fluidly. -
Paint the furthest dune:
Start with the dune furthest in the distance. Fill this shape with your lightest beige or pale pink mix. The watercolor will dry lighter, so don’t be afraid of a little pigment. -
Create the hard edge:
Wait for that first shape to dry completely. This is crucial to get the crisp, overlapping look characteristic of dunes. I prefer to use a hairdryer on low heat to speed this up. -
Paint the middle dunes:
Paint the next layer of dunes using your medium terracotta color. Vary the saturation—make the top ridge of the dune slightly darker and pull the color down with water to create a gradient effect. -
Work foreground to background:
Continue painting the dune shapes, moving downwards. As you get closer to the foreground, switch to lighter, sandy ochre tones for variety. Ensure each layer is dry before painting the one below it/overlapping it to prevent bleeding unique shapes together. -
Add depth shadows:
On the darker, reddish dunes, add a second layer of glaze on the shadow side (usually the right or left slope) to emphasize the ridge. Use a darker mix of burnt sienna and umber for this.
Deckled Edge Fake-out
Don’t have fancy paper? Create the jagged edge look by folding your watercolor paper back and forth along a ruler, wetting the crease, and carefully tearing it by hand before painting
Step 4: Foreground Details
-
Paint the final ground layer:
The very bottom section should be a warm, sandy color. Paint this wash and let it dry. -
Switch to a fine brush:
Change to your size 2 brush or a fine liner pen. Mix a concentrated dark brown or black watercolor paint (very little water). -
Paint grass stems:
Starting from the bottom edge, flick your brush upward to create thin, tapering lines representing grass stems. vary the height and angle so they look natural and wind-blown. -
Add the seed heads:
At the top of the stems, make small, rhythmic dashing motions or tiny ‘V’ shapes to create the texture of wheat or pampas grass heads. -
Vary the density:
Review your foreground composition. Group some grasses together in clumps and leave other areas sparse for balance.
Frame your desert scene in a simple wood frame to complement those warm earth tones
Mixed-Media Desert Collage With Cutout Cacti
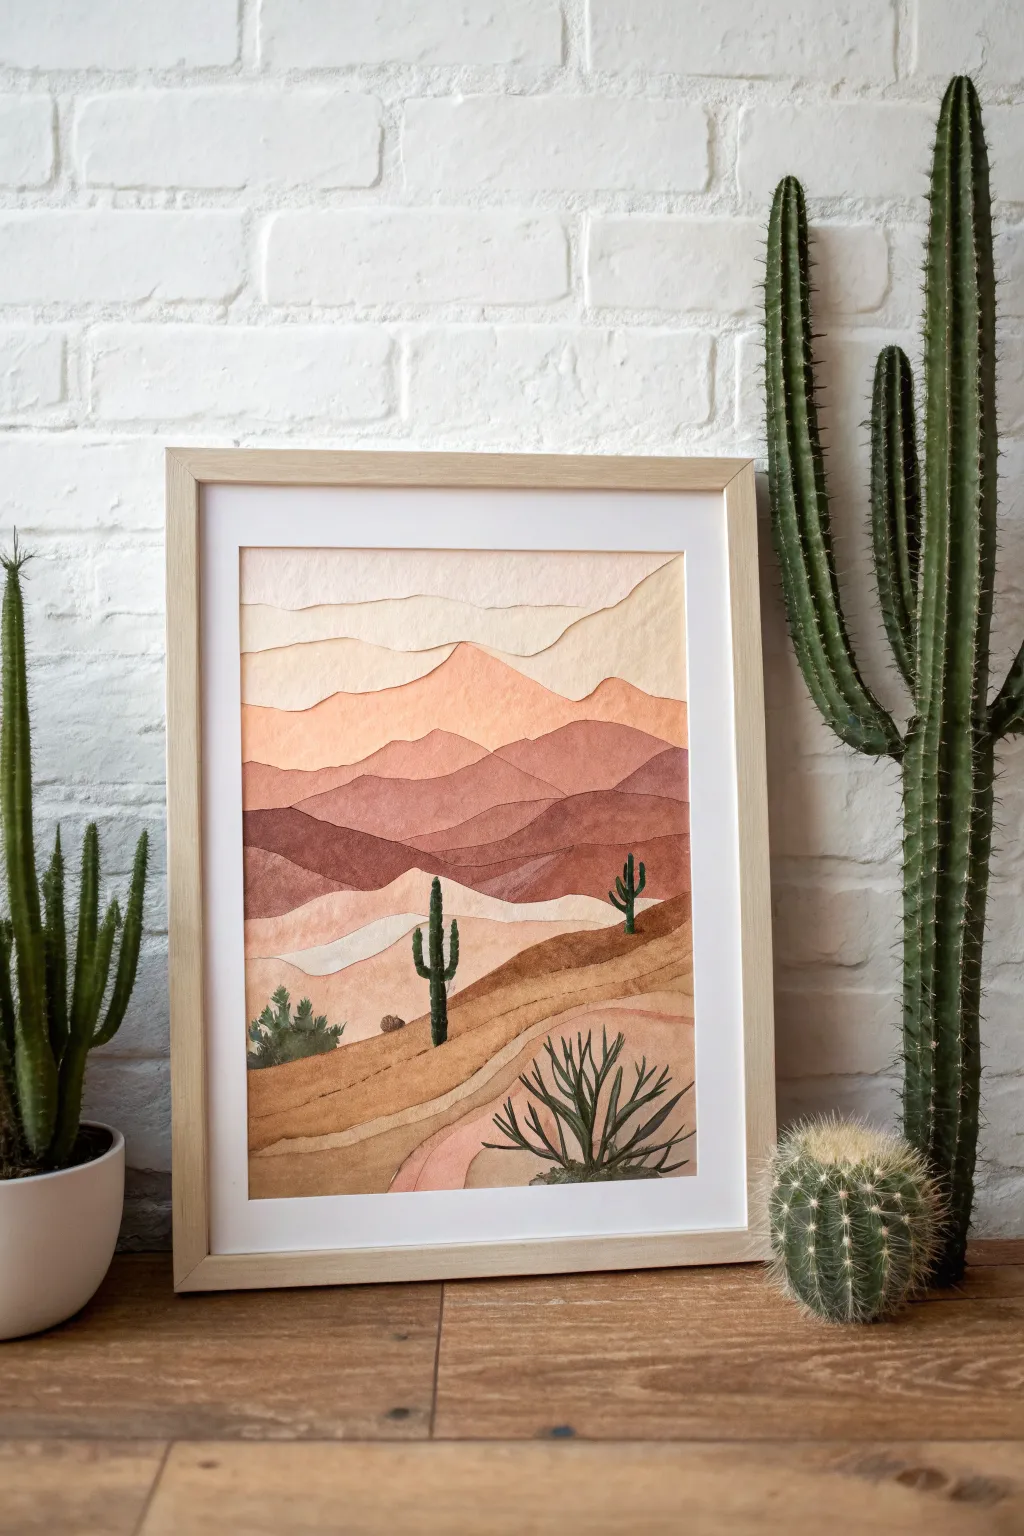
Capture the serene warmth of the desert with this dimensional paper collage project that uses layered horizons to create depth. By combining watercolor-painted textures with precise cutting, you’ll build a striking scene featuring rolling dunes and silhouetted cacti.
Step-by-Step Guide
Materials
- High-quality mixed media or watercolor paper (heavyweight, roughly 300gsm)
- Watercolor paints (pan or tube sets)
- Flat wash brushes (large and medium)
- Detail round brush (size 0 or 1)
- Sharp craft knife or precision scissors
- Self-healing cutting mat
- Pencil and eraser
- Glue stick or spray adhesive
- Foam adhesive squares (optional for extra depth)
- Light wooden frame with white mount
Step 1: Painting Your Base Layers
-
Plan your palette:
Mix several gradients of watercolor washes on separate sheets of paper. You will need a pale cream for the sky and distant clouds, soft peach tones for the background mountains, and deeper terracotta, rust, and burnt sienna shades for the foreground dunes. -
Create texture washes:
Apply the washes loosely to your paper. Don’t worry about perfect evenness; the natural blooms and streaks of dried watercolor add organic texture that mimics sand and rock. I like to keep the washes slightly wetter for the sky layers to keep them soft. -
Let it dry completely:
Allow all your painted sheets to dry fully. If the paper buckles significantly, flatten it under a heavy book overnight before proceeding to the next step.
Step 2: Designing the Horizon
-
Sketch the layers:
On the back of your dried painted papers, lightly sketch organic, waving lines. These will be the top edges of your mountains and dunes. Ensure the shapes vary in height to create a dynamic composition. -
Cut the sky elements:
Using your lightest cream paper, cut out two or three strips with gentle, rolling top edges to serve as the cloud layers at the very top of the frame. -
Cut the background mountains:
From your peach and light orange papers, cut shapes that resemble distant peaks. These should be taller in the center to draw the eye inward. -
Cut the mid-ground details:
Using the medium rust tones, cut wider, flatter shapes for the middle rolling hills. Add a few jagged edges to suggest rocky terrain. -
Cut the foreground dunes:
Using your darkest browns and burnt siennas, cut large, sweeping curves for the bottom of the composition. These pieces will anchor the entire scene.
Uneven Edges?
If your scissor cuts look jagged, use a fine-grit sandpaper block to gently smooth the paper edges for a polished, windswept look.
Step 3: Detailing and Assembly
-
Paint the cacti:
On a scrap of green-washed paper (or using dark green paint directly on a dry scrap), paint small Saguaro cactus shapes and a spiky yucca plant. Use a fine detail brush to add tiny needles or texture. -
Cut out the vegetation:
Carefully cut out your cactus and plant shapes using a precision craft knife. Leave a tiny bit of extra paper at the base of each plant to help with gluing later. -
Add detail to the foreground:
On your foreground dune layer, use a fine brush with dark brown paint to add subtle lines that mimic tracks or shadows in the sand. Keep these lines organic and flowing. -
Arrange the composition:
Before gluing, stack your layers on a backing board to test the layout. Adjust the height of the mountains until you are happy with the perspective overlap. -
Glue the sky down:
Start from the top. Glue your sky and cloud layers flat against the backing board or base paper. -
Secure the mountains:
Working your way down, glue the background mountains. Ensure each new layer overlaps the bottom edge of the previous one to hide the seams. -
Attach the foreground:
Glue down the rusty mid-ground and the detailed dark foreground layers last. -
Place the vegetation:
Tuck the bases of your cutout cacti behind the foreground dune ridges so they look like they are growing out of the sand, and secure them with a small dot of glue. -
Add the final bush:
Glue the spiky yucca plant in the bottom right corner, sitting on top of the final dune layer for immediate foreground interest. -
Frame the artwork:
Once the adhesive is set, place your collage into the frame behind the mount, ensuring the edges are concealed for a clean, professional finish.
Depth Trick
Use thin foam adhesive tape instead of glue between the foreground layers to create actual shadows and physical depth.
Hang your finished desert collage in a well-lit spot to let the layers cast subtle, natural shadows
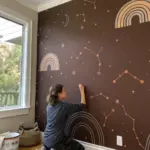
Topographic Contour-Line Desert Landscape
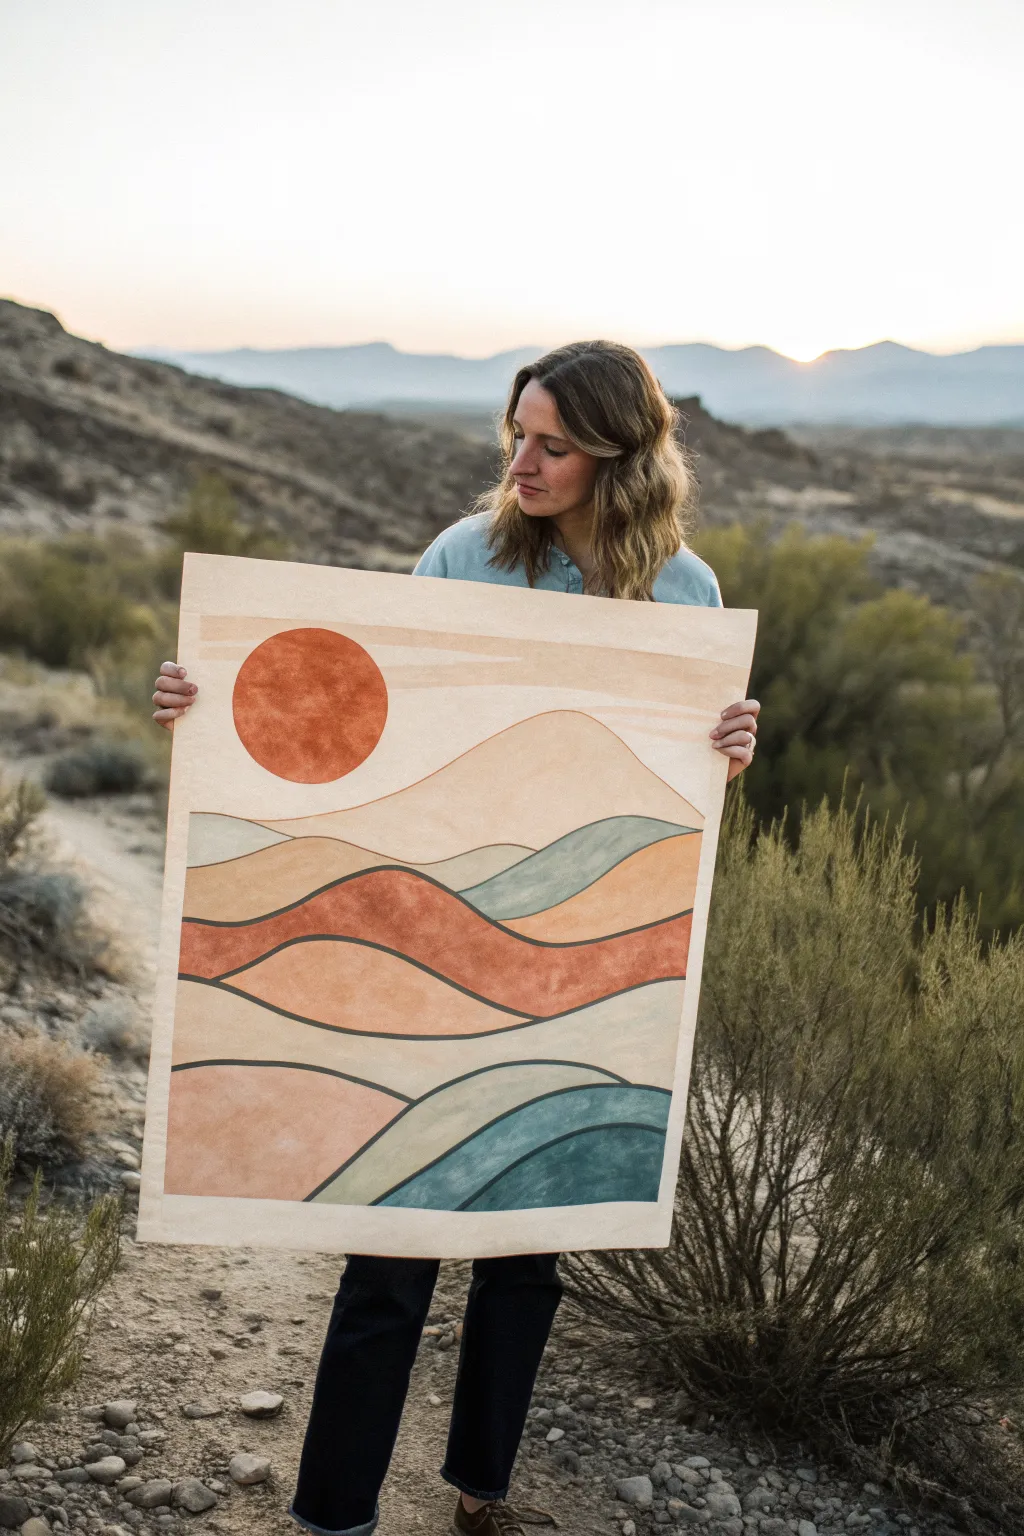
Capture the serene warmth of the desert with this stylized landscape painting, featuring bold, rolling color blocks and flowing contour lines. The soft, harmonious palette of terracottas, teals, and sands creates a soothing modern topography perfect for any wall.
Detailed Instructions
Materials
- Large sheet of heavy mixed media paper or stretched canvas (approx. 18×24 inches)
- Acrylic paints (terracotta, burnt orange, peach, cream, teal, muted sage green, dark charcoal/black)
- Pencil and eraser
- Medium flat brush (3/4 inch)
- Small round brush or paint marker (black/dark grey)
- Palette for mixing tones
- Paper towels and water cup
Step 1: Drafting the Design
-
Establish the horizon:
Begin by lightly sketching a horizontal line about one-quarter of the way down from the top of your paper. This separates the sky from the distant mountain range. -
Place the sun:
Trace a perfectly circular object, like a roll of tape or a bowl, in the upper left quadrant of the sky area to create the prominent sun. -
Sketch the dunes:
Draw flowing, wavy lines that span the width of the page. Start just below the horizon and work your way down. These shouldn’t be jagged; keep them smooth and rolling like slow water waves. -
Layer the foreground:
As you reach the bottom, make the curves more pronounced to simulate hills closer to the viewer. Ensure lines overlap slightly to create depth, but keep the composition balanced.
Step 2: Blocking in Color
-
Paint the background sky:
Mix a large amount of cream with a tiny dot of peach. Use your flat brush to fill the sky area, painting horizontally around the sun circle. -
Add subtle clouds:
While the sky paint is still slightly wet, mix a faint beige tone and streak in two thin, transparent horizontal bands across the top and just behind the sun for a hazy effect. -
Fill the sun:
Use a burnt orange or rust color for the sun. To give it texture, I like to dab the paint on rather than brush it smooth, creating a slight stippled look. -
Base coat the distant mountains:
Paint the large hill directly under the sky in a soft, sandy beige tone. This should be slightly darker than the sky but lighter than the foreground colors. -
Paint the middle ground (warm tones):
Select two or three middle-ground dune sections. Paint these in varying shades of terracotta and warm peach. Don’t worry about perfect edges yet; the outlines will cover them later. -
Paint the middle ground (cool tones):
Balance the warmth by painting alternating dune sections in muted sage green and teal. Keep these colors slightly desaturated so they don’t overpower the desert feel. -
Finish the foreground:
The bottom-most hills should have your strongest colors. Use a deep teal for the lowest right section and a solid peach for the bottom left. -
Second coats:
Once the first layer is dry, assess the opacity. Acrylics often need a second coat, especially with the lighter cream and beige tones, to look solid and professional.
Wobbly Lines?
If painting straight lines is difficult with a brush, use a wide-tip acrylic paint marker for the dark contours. It offers much more control.
Step 3: Defining the Contours
-
Mix the outline color:
Mix black with a little bit of the rust or blue paint. Pure black can be too harsh, so a very dark charcoal or deep indigo looks more organic. -
Test line thickness:
Practice making consistent lines on a scrap piece of paper with your small round brush. The lines should be bold enough to separate the colors clearly but not chunky. -
Outline the dunes:
Carefully trace over your original pencil lines between the colored sections. Move your hand slowly to keep the curves smooth. -
Outline the sun option:
Decide if you want a rim around the sun. The reference image leaves the sun borderless against the sky, which helps it glow, but an outline adds a stained-glass effect. -
Clean up edges:
If any paint went over your borders, you can touch it up now or simply widen your contour line slightly to hide the mistake.
Add Texture
Mix a pinch of fine sand or baking soda into your terracotta paint before applying. It gives the ‘rust’ sections a gritty, real-desert feel.
Now you have a stunning piece of modern desert art ready to warm up your space


Have a question or want to share your own experience? I'd love to hear from you in the comments below!