I’m obsessed with how dimensional fabric paint can turn the simplest piece of fabric into something you want to touch—those raised lines and glossy little dots are pure magic. If you’ve got a plain tee, a tired tote, or a denim piece that needs personality, these ideas will give you that satisfying 3D pop fast.
Puffy Outline and Color-Fill Icons
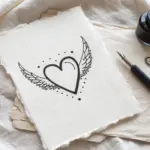
Embrace the textured charm of mixed-media fabric design with this simple yet striking heart project. By combining a raised, puffy outline with a smooth, filled center, you create a tactile design that feels modern and handcrafted.
Step-by-Step Tutorial
Materials
- Light-colored linen or cotton fabric (pre-washed)
- White dimensional fabric paint (puffy paint) with a fine applicator tip
- Terracotta or burnt orange fabric paint
- Squeeze bottle applicator with a fine brush or needle tip
- Pencil or disappearing ink fabric pen
- Cardboard or plastic barrier
- Small flat paintbrush (optional)
- Iron (for heat setting)
Step 1: Preparation & Outlining
-
Prep the fabric:
Begin by washing and drying your linen or cotton fabric to remove any sizing, which ensures the paint adheres properly. Iron out any wrinkles to create a perfectly flat surface. -
Insert a barrier:
Place a piece of cardboard or plastic underneath the top layer of your fabric. This is crucial to prevent the paint from bleeding through to the other side or the work surface. -
Sketch the heart:
Lightly draw a large heart shape directly onto the fabric using a pencil or a disappearing ink pen. Don’t worry about perfection; a slightly organic shape adds to the charm. -
Test the puffy paint:
Before applying it to your final piece, practice squeezing the white dimensional paint onto a scrap piece of paper to get a feel for the flow and pressure needed. -
Trace the outline:
Carefully trace over your pencil line with the white puffy paint. Hold the bottle tip slightly above the fabric surface to allow the paint to fall in a thick, consistent line. -
Thicken the border:
I like to go back and add a second pass or slightly wiggle the tip to make the white border wider and more textured. This acts as a ‘dam’ for the color fill later. -
Allow to dry completely:
Let the white outline dry undisturbed for at least 4 hours. It must be fully hardened so the wet fill paint doesn’t mix with it.
Bleeding Lines?
If the orange paint bleeds under the white border, your outline wasn’t thick enough or fully dry. Ensure the white line seals the fabric weave completely.
Step 2: Color Filling
-
Prepare the fill color:
Pour your terracotta fabric paint into a squeeze bottle with a fine tip attachment. Alternatively, you can use a paintbrush, but the bottle gives that smooth, flooded look. -
Start filling edges:
Begin applying the orange paint right up against the inner edge of the dry white puffy border. The raised border makes it easy to stay inside the lines. -
Work inward:
Continue squeezing paint to fill the interior of the heart, working from the outside edges toward the center. -
Smooth the paint:
If you notice uneven ridges or gaps, use the tip of the bottle or a small brush to gently spread the paint so it saturates the fabric weave evenly. -
Check saturation:
Ensure the paint has soaked into the fibers but isn’t pooling excessively. A nice matte, soaked-in look works best with linen. -
Dry the fill:
Allow the center paint to dry flat for 24 hours. Fabric paint often takes longer to cure than acrylics, so patience is key here.
Level Up: Pattern Play
Create a repeating pattern by painting smaller hearts across a table runner or pillowcase, alternating the fill colors for visual interest.
Step 3: Finishing
-
Heat activate puffy paint:
Once fully dry, use a steam iron hovering close to (but not touching) the white outline to puff it up. The steam heat causes the dimensional properties to expand. -
Heat set the color:
To make the terracotta permanent, cover the design with a pressing cloth and iron on the setting recommended by your fabric paint manufacturer.
Enjoy styling your new textile piece, knowing the custom texture adds a special touch to your home decor


Constellation Hoodie Highlights
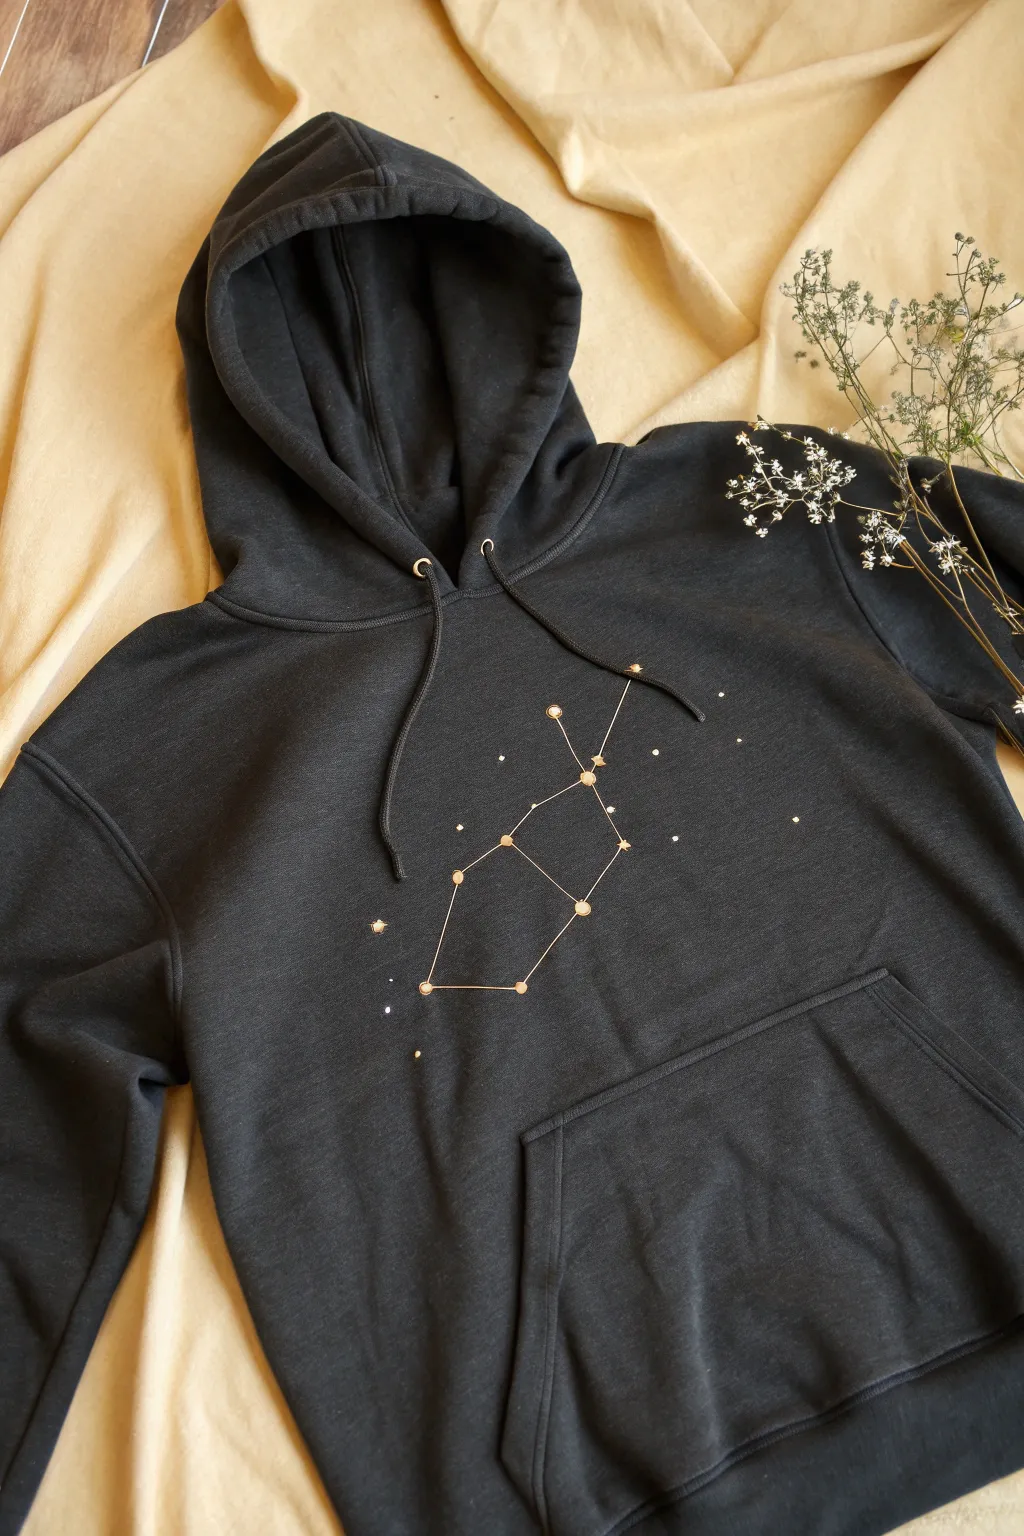
Transform a plain black hoodie into a piece of wearable art featuring a delicate, shimmering constellation design. By combining dimensional fabric paint with precise line work, you can create a starry motif that pops against dark fabric with an elegant metallic finish.
Step-by-Step Tutorial
Materials
- Black cotton or cotton-blend hoodie (pre-washed)
- Dimensional fabric paint (Gold metallic)
- Dimensional fabric paint (White or Pearl for extra stars)
- Fine-tip applicator nozzles for paint bottles
- Tailor’s chalk or white fabric pencil
- Self-healing cutting mat or thick cardboard insert
- Ruler or straight edge
- Constellation reference image (Virgo is shown)
- Masking tape or fabric clips
- Toothpicks
Step 1: Preparation & Mapping
-
Prepare the fabric surface:
Begin by inserting a thick piece of cardboard or a cutting mat inside the hoodie. This is crucial as it prevents paint from seeping through to the back of the garment and provides a flat, stable surface for your work. -
Secure the hoodie:
Pull the fabric taut over your insert board so there are no wrinkles or creases in the chest area. Use fabric clips or masking tape on the back or sides to hold it firmly in place. -
Locate the center:
Using your ruler, measure the width of the chest area to find the exact center point. Mark this lightly with your tailor’s chalk to ensure your constellation sits symmetrically. -
Draft the ‘star’ points:
Referencing your constellation image, lightly mark the positions of the main stars with small chalk dots. I find it helpful to start with the four central stars that form the ‘box’ shape of Virgo and work outward from there. -
Connect the constellation lines:
Use your ruler and chalk to lightly draw straight lines connecting your star points. Double-check your reference image to ensure the geometry is correct before committing to paint.
Step 2: Painting the Constellation
-
Test paint flow:
Before touching the fabric, squeeze a small line of gold dimensional paint onto a scrap paper or paper towel. You want to remove any air bubbles and ensure a smooth, steady flow. -
Create the main stars:
Place the nozzle tip directly over one of your chalk star marks. Squeeze gently to create a raised dot. For larger ‘alpha’ stars in the constellation, squeeze slightly longer to make a bigger dot. -
Refine star shapes:
If any dots have sharp peaks from pulling the bottle away, gently tap them down with a clean toothpick to round them out while the paint is wet. -
Draw the connecting lines:
Starting from the edge of one wet star dot, drag the paint bottle nozzle toward the next star, squeezing with consistent pressure. Move at a moderate pace—too fast and the line breaks, too slow and it gets blobby. -
Connect all segments:
Continue connecting the stars until the main stick-figure shape of the constellation is complete. Try to lift the bottle straight up at the end of each line to keep intersections clean.
Clean Lines Pro-Tip
Make accidental blobs? Don’t wipe them wet! Let the dimensional paint dry completely, then carefully peel the mistake off with tweezers. It usually lifts cleanly.
Step 3: Adding Celestial Details
-
Add background stars:
Look at the negative space around your main constellation. Add tiny scattered dots using the gold paint to represent distant stars. -
Incorporate variation:
For visual interest, vary the size of these background stars. Some can be mere pinpricks, while others can be slightly larger dots. -
Create starburst accents:
Select two or three points near the constellation lines to create starbursts. Draw a tiny ‘cross’ shape or a 5-point star using the very tip of your applicator or a toothpick dipped in paint. -
Add contrasting elements (optional):
If you are using white or pearl paint, add a few extremely small dots interspersed among the gold ones to create depth and mimic a real night sky. -
Final inspection:
Scan the design for any gaps in your connecting lines. If needed, carefully bridge any breaks with a tiny amount of fresh paint. -
Let it cure fully:
Leave the hoodie flat and undisturbed for at least 24 hours. Dimensional paint takes longer to dry than standard acrylics, and the raised areas must be fully hardened before moving the fabric. -
Remove the chalk marks:
Once the paint is completely cured (check your bottle’s instructions, usually 72 hours before washing), gently brush away any visible chalk lines with a soft, clean cloth or a slightly damp sponge.
Level Up: Crystal Skies
For extra sparkle, press tiny flat-backed Swarovski crystals into the center of the largest ‘star’ paint dots while they are still wet. They will act as glue.
Wear your new celestial hoodie with pride knowing you have captured a piece of the night sky


Non-Slip Sock Soles With Cute Shapes

Transform a cozy pair of wool-blend beige socks into functional non-slip footwear without sacrificing style. By carefully applying dimensional fabric paint in sweet heart shapes directly over the existing knitted pattern, you create traction that’s practically invisible to the eye but essential on hardwood floors.
Detailed Instructions
Materials
- Pair of beige wool-blend socks with rust-colored heart pattern
- Puffy dimensional fabric paint (rust or dark orange color)
- Cardboard inserts (cut to foot size)
- Masking tape
- Fine-point applicator tip for paint bottle
- Toothpicks
- Scrap paper for practice
Step 1: Preparation
-
Prepare the socks:
Begin with a clean, dry pair of socks. If they are brand new, give them a quick wash and dry cycle to remove any factory sizing, which helps the puffy paint adhere better to the fibers. -
Create structured forms:
Cut two pieces of sturdy cardboard into a rough foot shape, slightly smaller than the sock itself. This doesn’t need to be perfect, just distinct enough to separate the layers. -
Insert the forms:
Slide the cardboard forms inside each sock. Flatten the fabric so the sole area is taut and smooth, ensuring the knitted heart pattern is undistorted and easy to work on. -
Stretch and secure:
Gently stretch the fabric over the cardboard just enough to open the knit stitches slightly. Secure the excess sock cuff at the back with a piece of masking tape to keep it out of your way.
Clean Tip Trick
Keep a paper towel handy to wipe the nozzle tip after every few hearts. Dried paint crud on the tip is the number one cause of messy, uneven lines.
Step 2: Applying the Hearts
-
Test your flow:
Before touching the sock, squeeze a small amount of your rust-colored dimensional paint onto scrap paper. I like to check here that no air bubbles sputter out and ruin the smooth flow. -
Outline the first heart:
Starting with a heart on the sole (where traction is needed most), place the applicator tip at the top center of a knitted heart. Ideally, you are tracing over the existing pattern. -
Trace the curves:
Gently squeeze the bottle while moving the tip along the upper left curve of the heart, down to the point. Repeat for the right side, creating a clean outline directly over the colored yarn. -
Fill the center:
Use a zigzag motion or small dots to fill in the outlined heart with paint. You want a consistent, raised layer, but avoid making it so thick that it creates an uncomfortable lump underfoot. -
Refine the shape:
If the paint settles unevenly or goes outside the lines, quickly use a toothpick to nudge it back into the heart shape or smooth out any peaks. -
Repeat on the sole:
Move to the next heart on the sole area. Repeat the outlining and filling process. Focus primarily on the ball of the foot and the heel, as these are the high-contact areas for slipping. -
Add floating hearts:
For maximum grip, if your sock pattern has gaps, you can paint additional small, solid heart shapes in the empty beige spaces between the knitted ones, creating a uniform traction field.
Glow Up
Mix a pinch of fine glitter into your wet paint on a palette before applying, or sprinkle it over wet hearts for grip that sparkles.
Step 3: Finishing Up
-
Check for consistency:
Look over your wet paint. All hearts should have a similar thickness to ensure a level walking surface. Add a tiny dot of paint to any that look too flat. -
Initial drying:
Carefully place the socks—still on their cardboard forms—in a safe, flat place where they won’t be bumped. Let them sit undisturbed for at least 4 hours so the outer skin of the paint sets. -
Full cure time:
Allow the socks to dry for a full 24 hours. Most dimensional paints require this time to fully cure and become durable enough for walking. -
Remove inserts:
Once completely dry, gently wiggle the cardboard forms out. The paint might have stuck slightly to the board through the knit, so peel slowly to avoid pulling the yarn. -
Heat set (optional):
Check your paint bottle instructions. Some brands recommend a quick burst of steam from an iron (held an inch away) to ‘puff’ the paint further and set the grip permanently.
Your new custom grip socks are now ready to keep you cozy and upright all winter long


3D Beaded Fringe on Wall Hangings

This elegant wall hanging mimics the texture of elaborate weaving and beading using simple dimensional fabric paint. The result is a tactile, monochromatic artwork that adds warmth and sophisticated texture to any modern space.
Step-by-Step
Materials
- Heavyweight linen or canvas fabric (natural cream color)
- Wooden dowel (approx. 18 inches long)
- Matte dimensional fabric paint (cream or off-white puff paint)
- Cotton macramé cord (natural/cream, 3-4mm)
- Fabric glue or heavy-duty craft glue
- Tailor’s chalk or disappearing ink fabric pen
- Ruler or straight edge
- Scissors
- Iron and ironing board
- Masking tape
Step 1: Preparation & Base Construction
-
Cut the fabric base:
Begin by cutting your linen or canvas into a rectangle roughly 14 inches wide by 24 inches long. Add an extra 2 inches of length at the top for the dowel pocket. -
Hem the sides:
Fold the long vertical edges of the fabric back about half an inch and press them with an iron. Secure these hems with fabric glue or a simple straight stitch to prevent fraying. -
Create the dowel pocket:
Fold the top edge of the fabric down about 2 inches to the back side. Press flat, then glue or sew across the fabric width, leaving enough room for your wooden dowel to slide through. -
Plan the design:
Use your ruler and tailor’s chalk to lightly mark horizontal guidelines across the front. Space them out creatively; for this look, alternate large gaps (3-4 inches) with clustered lines.
Step 2: Creating Texture with Paint
-
Test your flow:
Before touching the fabric, practice squeezing the dimensional paint onto a scrap piece of paper. You want a steady, even flow to create uniform dots. -
Pipe linear bead strands:
Start with the horizontal lines that look like strung beads. Hold the paint bottle nozzle just above the fabric and squeeze gently while moving in a straight line, creating a continuous, raised ridge. -
Add dot accents:
Along some of your chalk guidelines, pipe distinct, individual dots to simulate loose beads. Vary the spacing—some lines should have tightly packed dots, while others can be spaced further apart. -
Create the large faux-blooms:
For the larger, more prominent dots seen in the wider sections, hold the bottle tip in one spot and squeeze for a count of three. Allow the paint to mound up into a larger bead shape. -
Layering the texture:
To achieve the stacked look on the lines, you can pipe a second, smaller line of paint directly top of a base line once the first layer has skinned over slightly. -
Adding micro-details:
Go back in and add tiny dots between your larger elements to fill empty visual space and enhance the woven illusion. -
Let it cure completely:
This is crucial: allow the dimensional paint to dry flat for at least 24 hours. If you painted thick ‘beads,’ you might even want to give it 48 hours to ensure they are hard and set.
Paint Flattening Out?
If your large ‘beads’ slump as they dry, try pre-thickening your paint by leaving the cap off for 30 minutes, or apply the paint in two thinner layers, letting the first dry before adding height.
Step 3: Attaching the Fringe
-
Cut the macramé cord:
Cut lengths of macramé cord approximately 12-14 inches long. You will need enough to cover the entire width of your hanging. -
Attach cords to bottom edge:
Fold a cord in half to create a loop. Place the loop over the bottom raw edge of your fabric. -
Secure the knots:
Using a lark’s head knot technique isn’t possible directly on the fabric edge without holes, so instead, use fabric glue to adhere the top inch of the folded cords to the back bottom edge of your tapestry. -
Add a front trim piece:
To hide the glued cord tops, glue a final horizontal strip of fabric or a piece of cord across the front bottom edge, blending the transition between weave and fringe. -
Knot the fringe:
Take two adjacent cords hanging down and tie a simple overhand knot about 1 inch down from the attachment point. Repeat across the entire width. -
Comb and trim:
Use a comb to gently unravel the cord ends below the knots for a fluffy look. Finally, use sharp scissors to trim the fringe bottom into a straight line or a shallow V-shape. -
Final Assembly:
Slide the wooden dowel through the top pocket and tie a length of cord to both ends of the dowel for hanging.
Level Up: Dye Dip
Once fully dry and cured, dip-dye just the bottom fringe in a diluted tea bath or soft grey dye for a subtle, ombré gradient effect.
Hang your finished piece in a well-lit spot to let shadows play across the textures you’ve created
BRUSH GUIDE
The Right Brush for Every Stroke
From clean lines to bold texture — master brush choice, stroke control, and essential techniques.
Explore the Full Guide
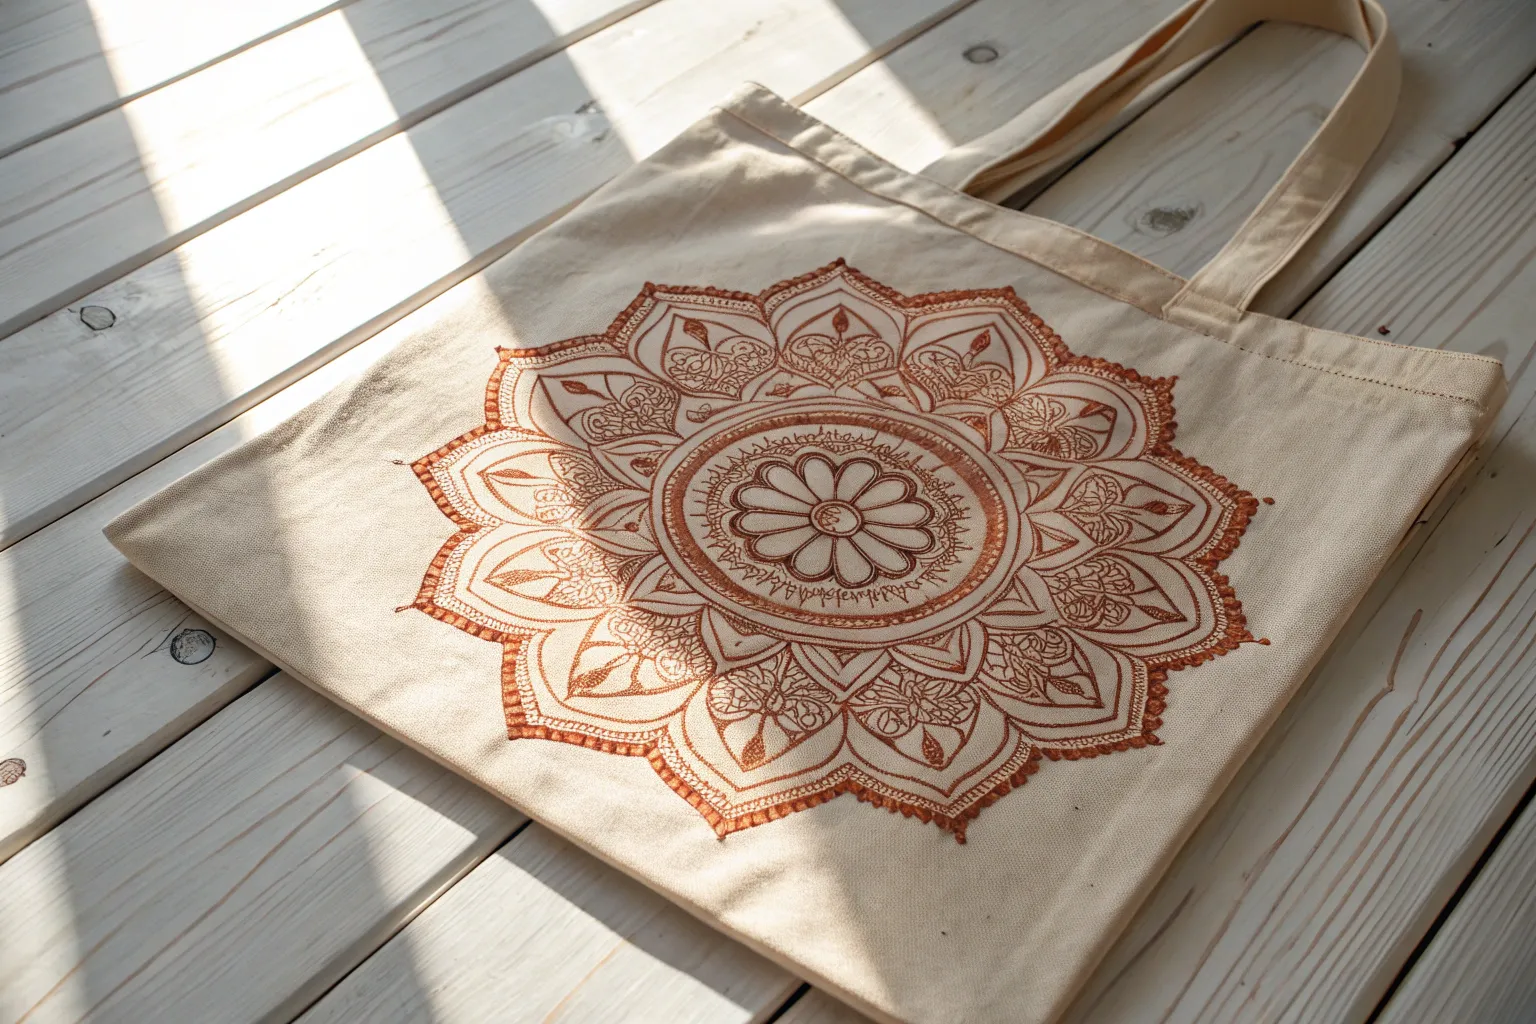
Color-Shifting Accents for Hidden Surprise
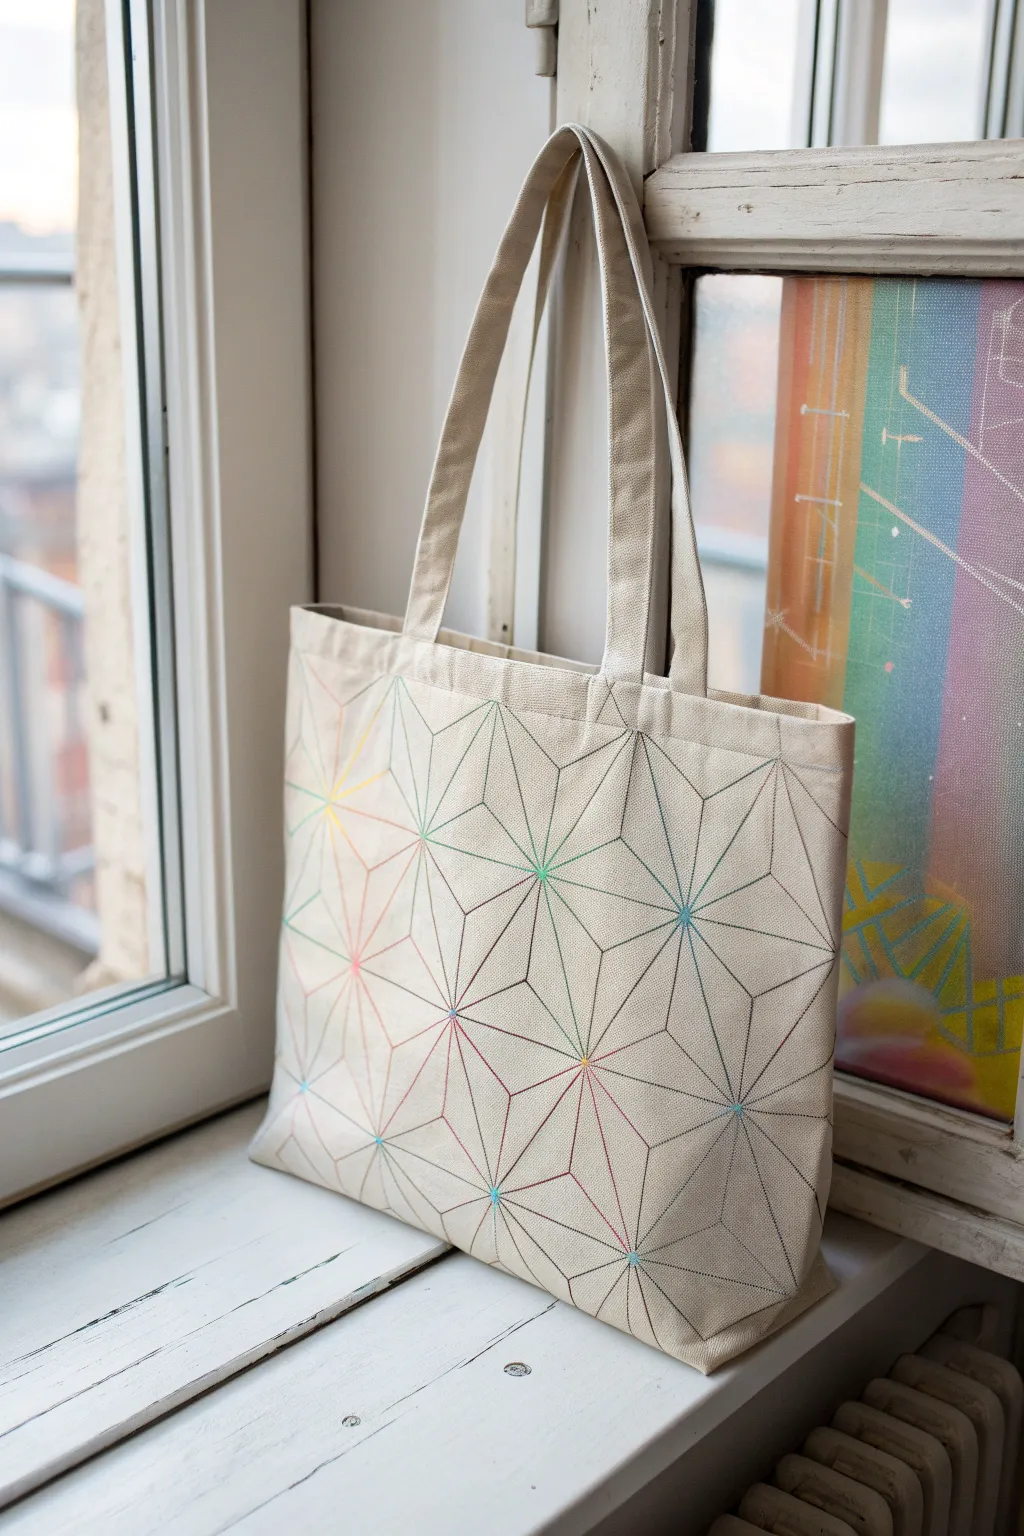
Transform a plain canvas tote into a modern masterpiece using fine-tip dimensional fabric paint. The repeating geometric star pattern creates a sophisticated look, while the color-shifting paints add a hidden surprise that reveals itself as the bag moves in the light.
Step-by-Step Tutorial
Materials
- Blank canvas tote bag
- Dimensional fabric paint (puff paint) with fine writer tips
- Iridescent or color-shifting fabric paint medium
- Ruler or straight edge
- Disappearing fabric marker or tailor’s chalk
- Cardboard insert or pressing cloth
- Iron
- Hexagon stencil (optional but helpful)
Step 1: Preparation and Planning
-
Pre-wash the fabric:
Start by washing and drying your canvas tote without fabric softener. This removes sizing chemicals and ensures the paint adheres permanently to the fibers. -
Press for a smooth surface:
Iron the tote bag meticulously to remove all wrinkles. A perfectly flat surface is crucial for drawing long, straight geometric lines. -
Insert a barrier:
Place a piece of stiff cardboard or a few layers of parchment paper inside the bag. This prevents paint from bleeding through to the back side and gives you a firm surface to draw on.
Clogged Tip?
If the fine tip clogs, don’t squeeze harder or the bottle might explode. Remove the cap and use a sewing pin or a straightened paperclip to clear the blockage from the inside out.
Step 2: Drafting the Design
-
Mark the center point:
Find the approximate center of the bag’s front panel and make a tiny dot with your disappearing ink marker. -
Create the base grid:
Using a ruler, lightly draw a series of interconnected triangles or hexagons radiating from your center point. If you have a hexagon stencil, use it to trace a honeycomb pattern across the bag. -
Add internal lines:
Connect the corners of your hexagons to the center point to create six triangles within each shape. This creates the ‘cube’ or star effect seen in the design. -
Expand the pattern:
Continue tracing this geometric grid until you reach the edges of the bag. Don’t worry if the pattern cuts off at the seams; this adds to the continuous fabric look. -
Double-check alignments:
Step back and look at your grid. The lines should look crisp and the intersections precise. Make corrections now before any paint is applied.
Step 3: Painting the Lines
-
Test your flow:
Squeeze a small amount of dimensional paint onto a scrap paper towel to ensure the nozzle is clear and you have a feel for the flow rate. -
Start the gradients:
Choose a color scheme—like the pastel rainbow transition shown here. Begin with your yellow or lightest iridescent shade in one section of the grid. -
Trace with steady pressure:
Using the fine writer tip, trace over your marker lines. Hold the bottle at a 45-degree angle and pull it toward you, letting the paint bead slightly on the surface. -
Blend color transitions:
To create the color-shift effect, stop a line halfway and pick up immediately with the next color (e.g., transitioning from pink to blue). Use the tip of the second bottle to gently drag the first wet color slightly, creating a micro-blend. -
Work in clusters:
I find it best to finish painting one ‘star’ or hexagon cluster before moving to the adjacent one to keep track of the color gradient flow. -
Watch your hand placement:
Be extremely careful not to smudge wet lines as you move across the bag. Rotate the entire tote if necessary to keep your hand away from fresh paint.
Sharper Lines
For the crispest geometric lines, don’t drag the plastic tip directly on the canvas. Lift the bottle slightly and let the strand of paint ‘lay down’ onto the line for a smooth finish.
Step 4: Finishing Touches
-
Inspect intersections:
Check the points where multiple lines meet. If there is a gap, add a tiny dot of paint to connect them cleanly. -
Let it cure completely:
Allow the bag to dry flat for at least 24 hours. Dimensional paint takes longer to dry than standard acrylics, especially in the thicker intersections. -
Remove guide lines:
Once fully dry, remove any visible marker lines. For water-soluble markers, a light dab with a damp cloth works; for air-soluble inks, they will fade on their own. -
Heat set if required:
Check your specific paint bottle instructions. Some dimensional paints puff up with heat (finish by ironing strictly on the reverse side), while others just need time to cure.
Now you have a functional piece of art that catches the light beautifully whenever you carry it


Have a question or want to share your own experience? I'd love to hear from you in the comments below!