If you’re looking for dot painting for kids ideas that feel fun (not fussy), you’re in the right place. I love dot art because it’s colorful, calming, and secretly amazing for fine motor skills—all while kids make something they’re genuinely proud of.
Q-Tip Outline Animals
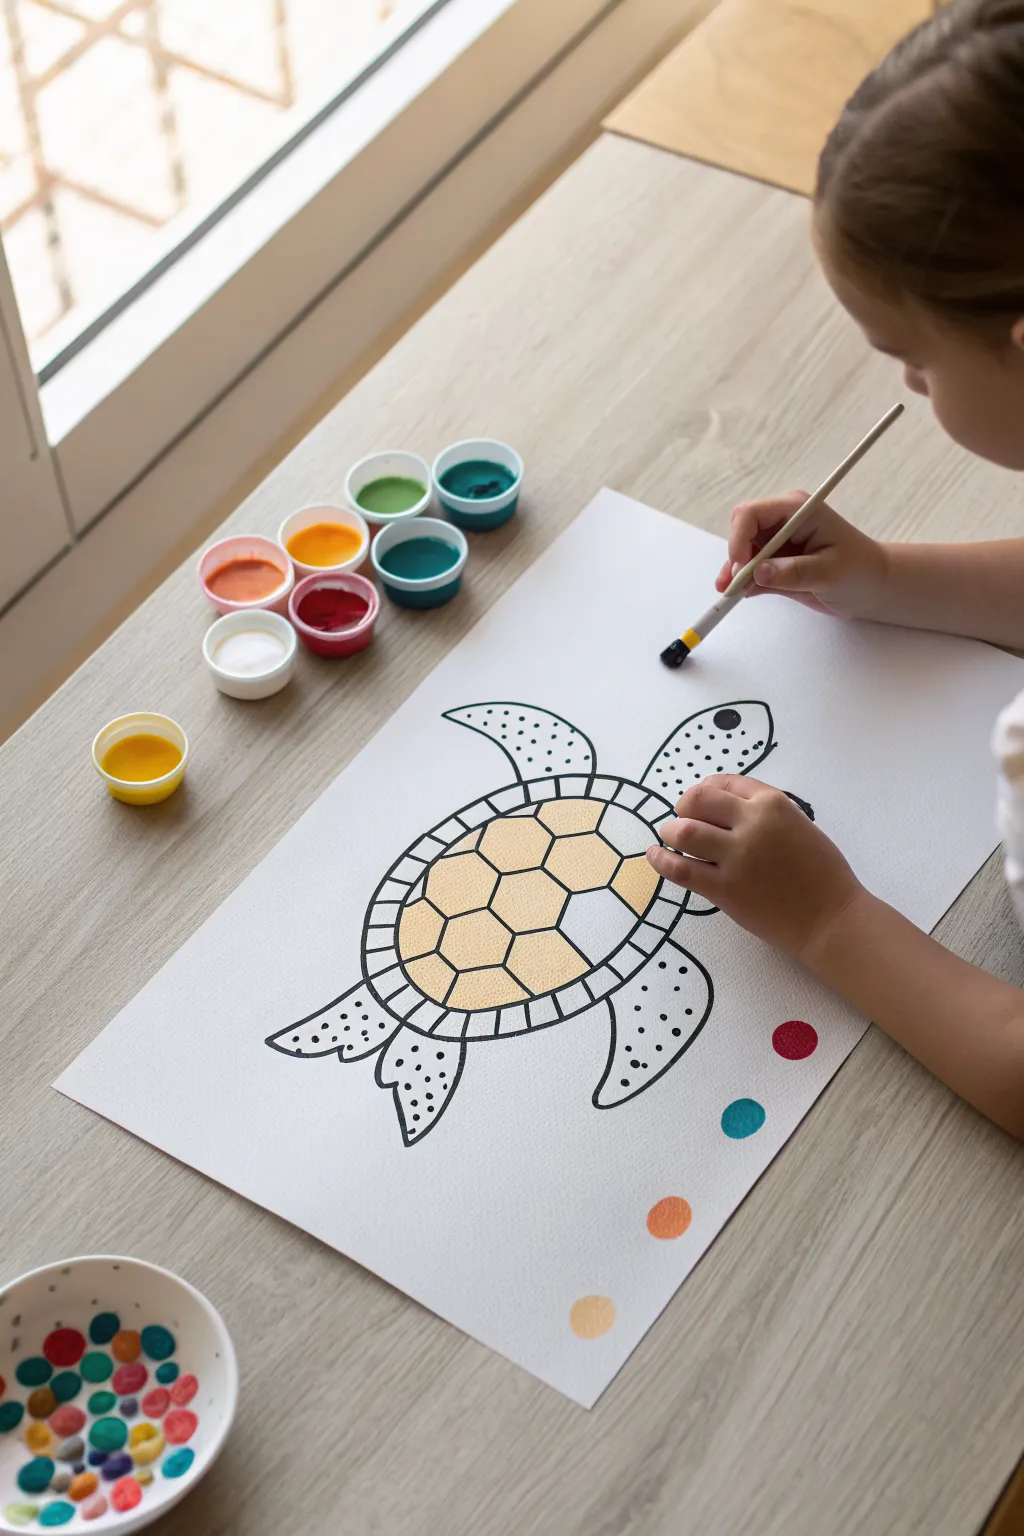
Bring the ocean to your craft table with this charming sea turtle project that mixes solid colors with playful patterns. This activity combines careful brushwork for the shell with a fun, textured dotting technique for the flippers, making it perfect for developing fine motor skills.
Step-by-Step Guide
Materials
- White cardstock or heavy watercolor paper
- Black permanent marker (thick tip)
- Pencil (for sketching)
- Tempera or poster paints (mustard yellow, teal, emerald green, white)
- Small round paintbrush
- Medium round paintbrush
- Q-tips (cotton swabs)
- Small paint palette or paint cups
- Water cup and paper towels
Step 1: Drawing the Turtle
-
Outline the shell:
Start in the center of your paper by drawing a large oval shape for the turtle’s shell. Keep it slightly wider than it is tall so there is plenty of room for the pattern later. -
Add the head and tail:
Draw a rounded, thumb-like shape at the top right of the oval for the head. At the opposite end, add a small, pointed triangle for the tail. -
Sketch the flippers:
Sketch two large, curved front flippers extending from the upper sides of the shell. Add two smaller, rounded back flippers near the tail. -
Create the shell pattern:
Inside the main oval, draw a smaller oval. Connect the two ovals with small lines to create the rim of the shell. Then, draw a honeycomb pattern (hexagons) inside the center oval to make the scutes. -
Finalize with marker:
Trace over all your pencil lines with a thick black permanent marker. Add a small circle for the eye and fill it in, leaving a tiny white speck for a highlight. Let the ink dry completely before painting.
Clean Edges Instantly
If you accidentally paint over a black outline, wait for the paint to dry completely and then simply re-trace the line with your black marker.
Step 2: Painting the Shell
-
Prepare the yellow paint:
Pour some mustard yellow or golden ochre paint into your palette. If the paint is too thick, mix in a tiny drop of water to help it flow smoothly. -
Fill the center scutes:
Using a small round brush, carefully paint inside the hexagons on the turtle’s back. Try to stay within the black lines, but don’t worry if it’s not perfect. -
Paint the outer rim:
Wash your brush and switch to a light cream or very pale yellow. Fill in the small rectangular sections around the rim of the shell to create a slight contrast with the center. -
Let the shell dry:
Pause here and let the yellow paint dry fully. This prevents your hand from smudging the wet paint while you work on the detail sections next.
Ocean Texture
Mix a little sand into your yellow paint before applying it to the shell. It adds a gritty, realistic texture that looks and feels just like a real turtle shell.
Step 3: The Q-Tip Dot Technique
-
Dip the Q-Tip:
Dip one end of a clean Q-tip into black paint. I find it helps to dab the excess paint onto a paper towel first so the dots don’t turn into globs. -
Dot the flippers:
Press the Q-tip gently onto the white space of the front flippers to create perfectly round polka dots. Space them out randomly, like the natural spots on a real sea turtle. -
Complete the pattern:
Continue the dotting process on the back flippers and the top of the turtle’s head. Use a fresh Q-tip if the cotton starts to get fuzzy or loses its shape.
Step 4: Artistic Flourish
-
Add background dots:
To give the artwork a finished feel without coloring the whole background, create a color palette row at the bottom right. Use a large brush or your fingerprint to stamp four or five circles in different colors. -
Align the palette:
Ideally, place these dots in a diagonal line or a gentle curve near the bottom corner, using the colors you might use for a background later, like teal, orange, and red. -
Thicken outlines if needed:
Once all paint is dry, look at your black outlines. If any paint covered them up, go back over those specific spots with your black marker to make the turtle create ‘pop’ off the page.
Enjoy displaying your spotted sea turtle artwork on the fridge or framed on a wall

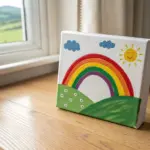
Rainbow Dot Arches
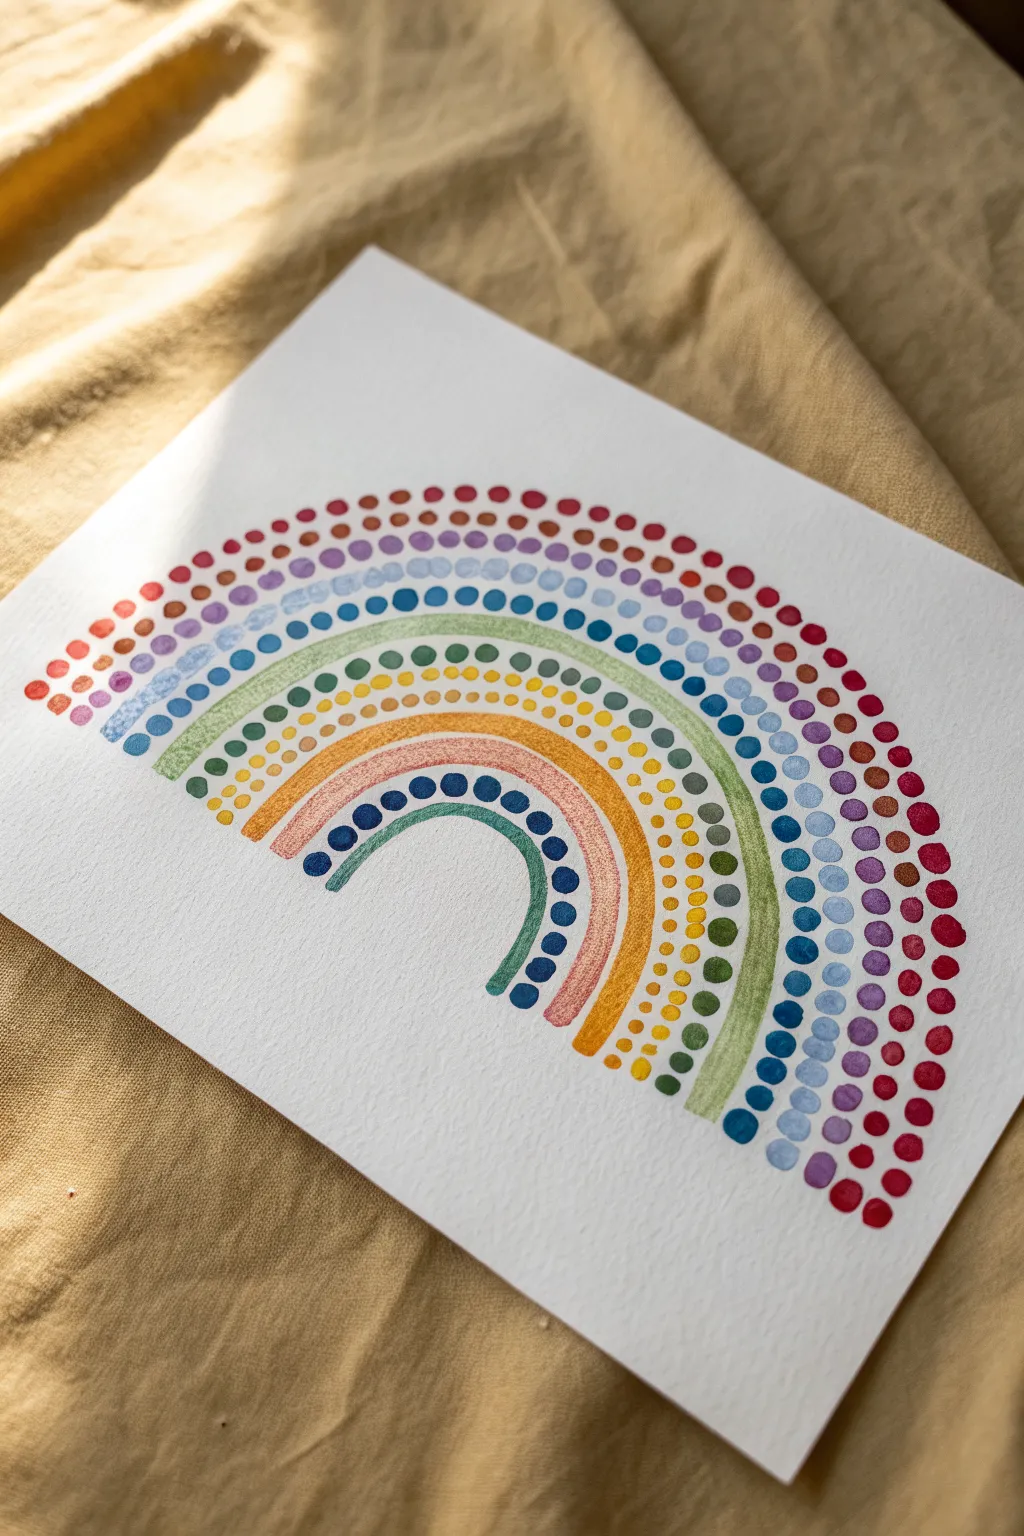
This charming art project combines solid sweeps of color with meticulously placed dots to create a textured, modern rainbow. The mix of solid and stippled arches adds wonderful depth, making it a perfect piece for a nursery or playroom wall.
Step-by-Step Tutorial
Materials
- Cold press watercolor paper (A4 or similar size)
- Watercolor paints or fluid acrylics
- Flat brush (small/medium)
- Round brush or cotton swabs (for large dots)
- Toothpicks or a fine detail brush (for small dots)
- Pencil
- Compass or round objects to trace
- Cup of water
- Paper towels
Step 1: Planning the Layout
-
Find your center:
Locate the horizontal center of your watercolor paper near the bottom edge. Make a tiny, faint mark with your pencil as a guide for your compass or tracing templates. -
Lightly sketch the arches:
Using a compass or by tracing nested bowls, lightly sketch faint semicircles to map out where each color band will go. Leave a little breathing room between each sketched line so the colors don’t bleed into each other later.
Pro Tip: Consistent Circles
For perfectly round dots without a special tool, dip the back end of a paintbrush handle or a pencil eraser into the paint and stamp it straight down.
Step 2: Painting the Solid Bands
-
Start with the smallest arch:
Mix a muted teal-green color. Using a flat brush, paint the innermost solid arch. Focus on keeping the edges smooth, but don’t worry if the texture looks slightly streaky; that’s the charm of watercolor. -
Paint the middle band:
Skip a space—where the yellow dots will eventually go—and paint the next wide solid band in a soft orange. Follow the curve carefully with your flat brush to maintain an even width. -
Create the green textured band:
Skip another space and paint the third solid band using a grassy green shade. For this one, try a dry-brush technique: load your brush with less water and lightly drag it to create a streaky, organic texture. -
Let it dry completely:
Before moving on to the dots, ensure these solid bands are fully dry. I like to wait about 15 minutes or use a hair dryer on a low setting so my hand doesn’t smudge the wet paint.
Step 3: Adding the Dotted Details
-
Inner blue accent dots:
Load a round brush with deep navy blue paint. Carefully place evenly spaced dots along the top edge of your innermost teal arch. -
The golden yellow layer:
Between the teal and orange solid arches, create a band of yellow dots. Use a medium-sized round brush or the end of a paintbrush handle to stamp irregular clusters of small dots, creating a ‘stippled’ effect. -
Adding texture to the orange band:
Mix a slightly darker shade of orange. Just like you did with the navy blue, paint a row of distinct, evenly spaced dots right along the top curve of the solid orange arch. -
The blue stippled arch:
In the gap between the orange and green solid bands, use a variety of blue shades to create a mosaic effect. Use a fine-tip brush to dab many small dots close together without touching. -
Green accent dots:
Using a dark forest green, add a row of large, bold dots along the top edge of the solid green textured band. -
The large outer indigo dots:
Moving outward again, paint a row of large, watery indigo or purple dots. These should be larger than the previous accents, perhaps using a larger brush or even a cotton swab for uniform sizing. -
Soft blue layer:
Add another row of slightly smaller, lighter blue dots right above the indigo ones, following the same curve. -
Outer red accent dots:
Finish the rainbow with the largest, boldest dots in a deep red or maroon. Place these along the very outer perimeter to frame the entire piece. -
Fill in the gaps:
Look closely at your outer dot layers. If there are spaces that feel too empty, add smaller dots of lighter red or pink in between the main dots to create a dense, rich look. -
Clean up sketch lines:
Once the paint is bone-dry—give it plenty of time—gently erase any visible pencil marks from your initial sketch, being careful not to rub over the painted areas.
Troubleshooting: Blobby Dots
If your dots are pooling or running, your paint is too watery. Dab your brush on a paper towel to remove excess moisture before touching the paper.
Now step back and admire the lovely rhythm and texture of your finished rainbow art
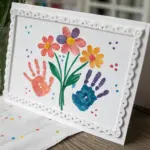


Easy Flower Dot Bouquets
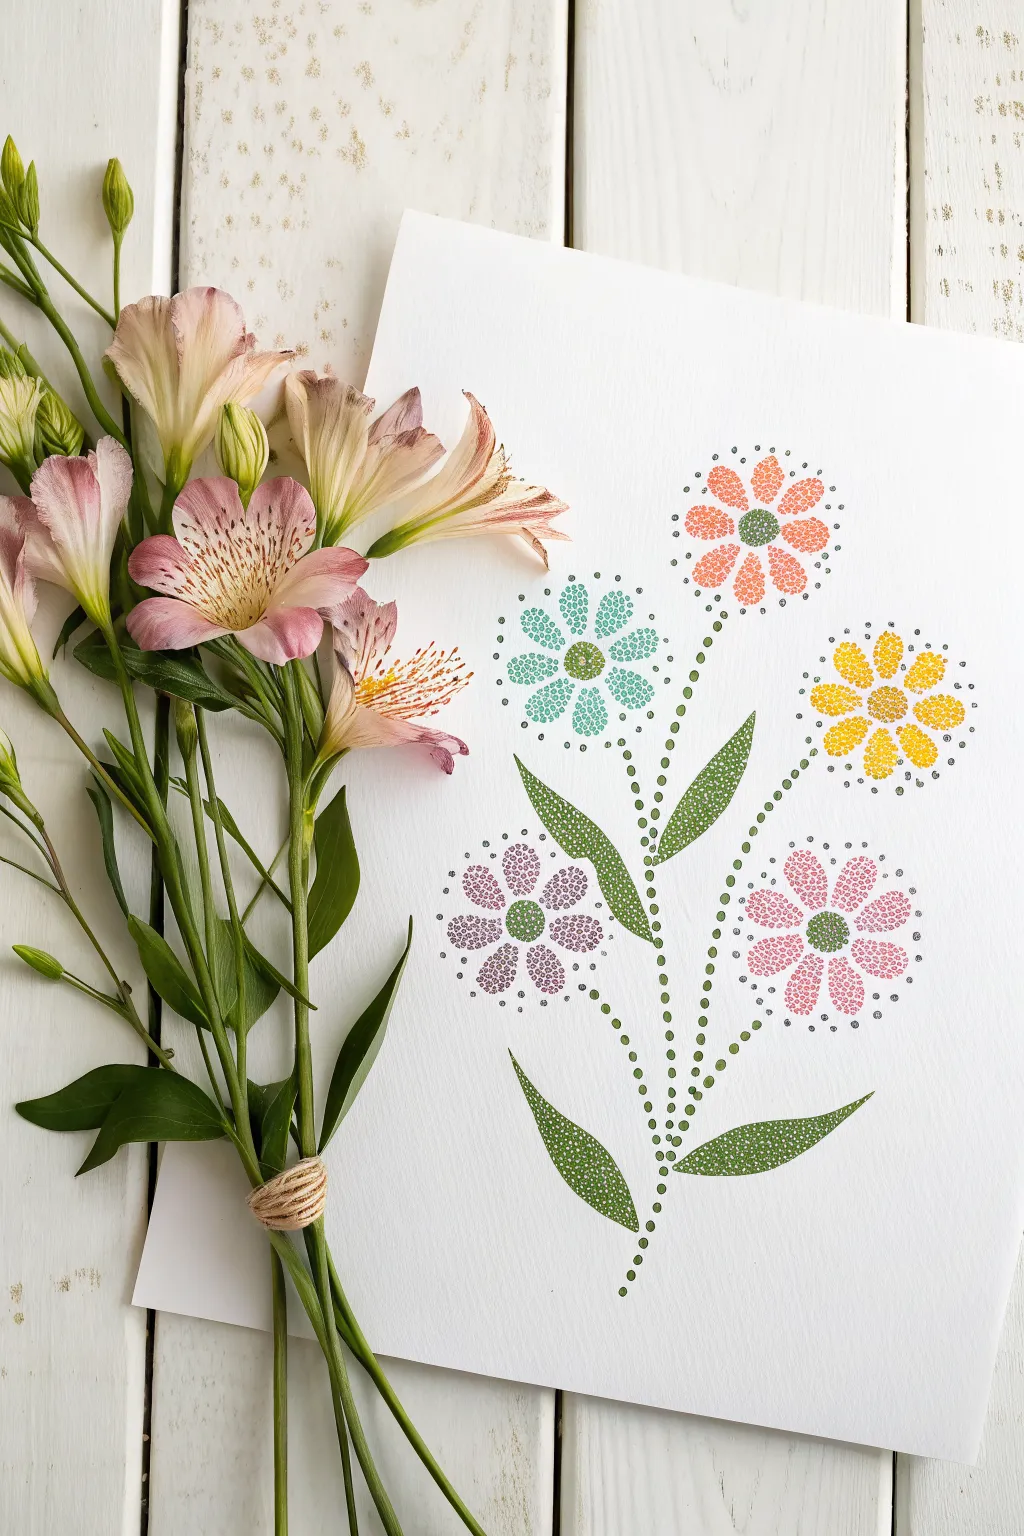
This charming project uses the simple technique of pointillism to build a vibrant bouquet of five flowers. By using tiny dots instead of solid brushstrokes, you create a lovely texture that gives the petals and leaves a delicate, airy feel.
Step-by-Step
Materials
- Heavyweight white drawing paper or cardstock
- Cotton swabs (Q-tips) or dotting tools
- Fine-tip paintbrush or toothpick (for tiny dots)
- Acrylic paints (orange, yellow, pink, purple, teal, light green, dark green)
- Pencil
- Eraser
- Palette or paper plate
Step 1: Planning the Composition
-
Sketch the flower centers:
Start by lightly drawing five small circles in the upper half of your paper to represent the flower centers. Stagger their heights to create a natural bouquet shape, placing some higher and others lower. -
Outline the petals:
Around each center circle, lightly sketch simple teardrop or oval petal shapes. Aim for about 8-10 petals per flower, keeping the lines very faint so they won’t show through the paint later. -
Draw the stems:
Draw single curved lines extending downward from each flower head, making them meet at a central point near the bottom of the page as if they are gathered in a bunch. -
Add the leaves:
Sketch long, pointed leaves branching off the stems. Place larger leaves near the bottom and smaller ones closer to the blooms to balance the composition.
Consistent Dots
Reload your paint tool frequently. If you dot 3-4 times without reloading, the dots will shrink in size. Re-dip after every dot for perfect uniformity.
Step 2: Dotting the Blooms
-
Prepare your palette:
Squeeze small amounts of orange, yellow, pink, purple, and teal paint onto your palette. It helps to have a wet paper towel nearby to clean your tools between colors. -
Dot the centers:
Dip a cotton swab or the back of a paintbrush into dark green or yellow paint. Fill in the center circle of each flower with closely packed dots. -
Outline the first flower:
Choose your first color (e.g., orange). Using a fine-tip tool or toothpick, carefully place small dots along the pencil outline of the petals to define the shape. -
Fill the petals:
Continue with the same color, filling in the petals with more dots. You can use a cotton swab for slightly larger dots in the middle of the petals to add variety. -
Repeat for all flowers:
Move to the next flower, switching colors (yellow, teal, pink, purple) for each one. Remember to wipe your tool clean or swap cotton swabs to keep the colors bright and distinct.
Step 3: Stems and Leaves
-
Create the stems:
Dip a fine-tip tool into dark green paint. Follow your pencil lines for the stems, placing tiny dots in a single row. Ideally, space them evenly for a clean, graphical look. -
Outline the leaves:
Using a slightly lighter green shade if available, dot the outline of each leaf shape. This separation helps distinguish the leaves from the stems visually. -
Fill in the greenery:
Fill the inside of the leaves with green dots. To create depth, I like to pack the dots closer together near the base of the leaf and space them out slightly toward the tip. -
Add decorative outer dots:
For a finished touch, take a very fine tool and place tiny grey or silver dots in a circle around the outer perimeter of each flower head, creating a delicate halo effect. -
Erase pencil marks:
Allow the paint to dry completely—this is crucial to avoid smearing. Once fully dry, gently erase any visible pencil sketch lines between the dots.
Metallic Magic
Swap matte acrylics for metallic gold or silver paint on the flower centers or the halo dots to add a subtle shimmer that catches the light.
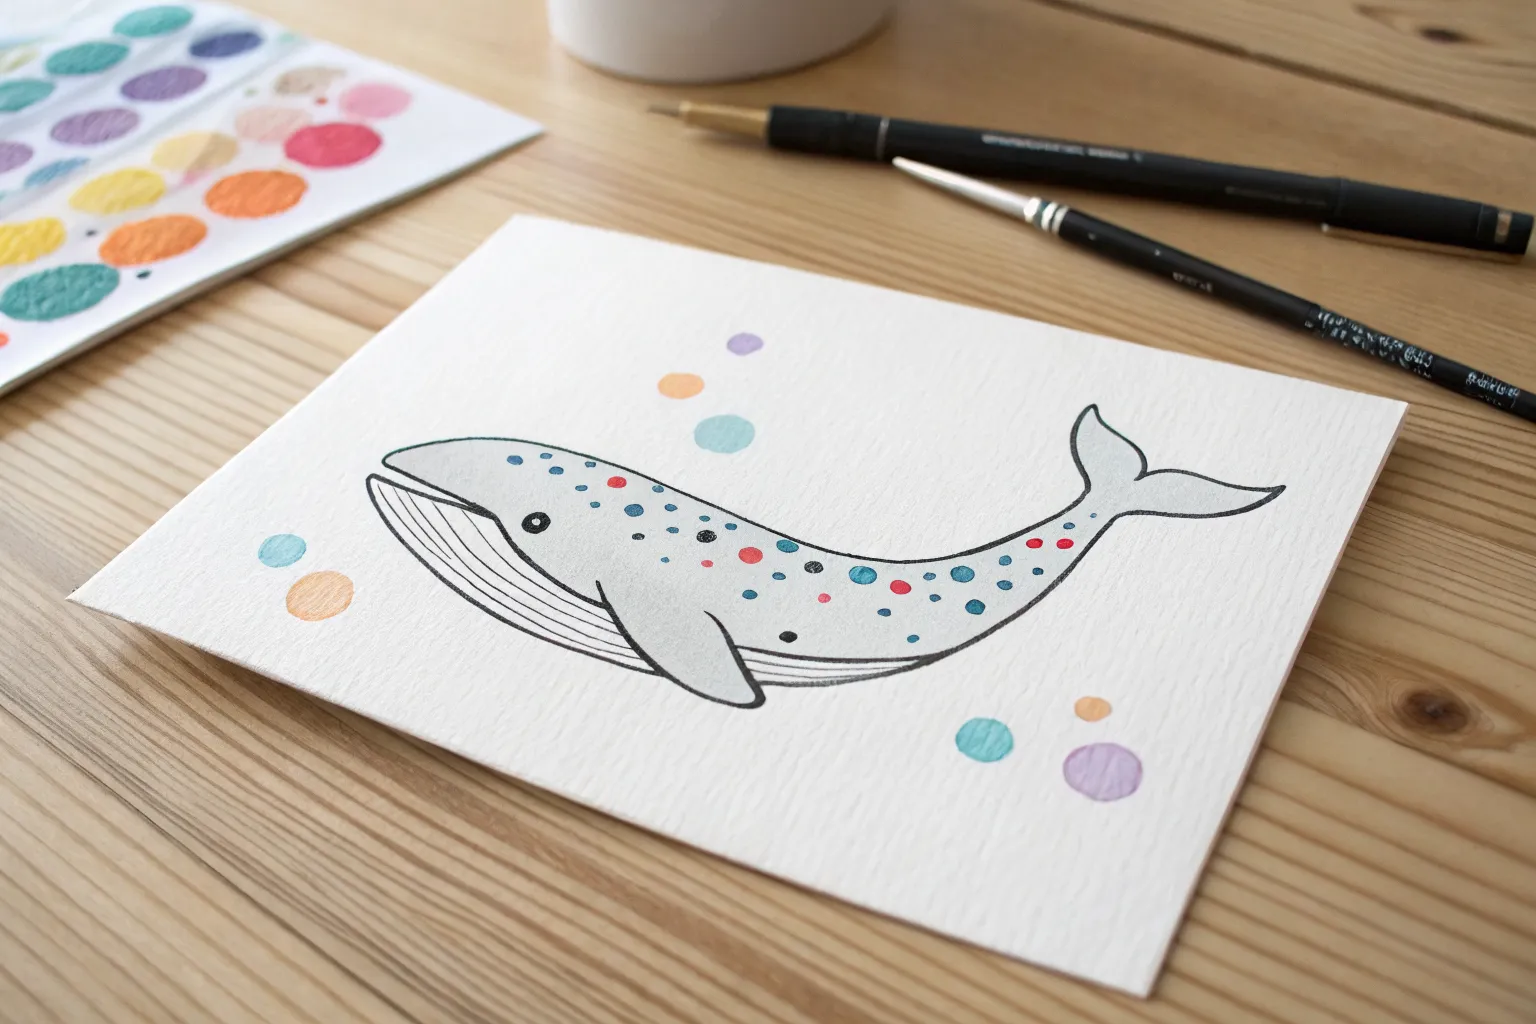
Once the paint is dry, you can frame your spotted masterpiece or turn it into a beautiful handmade greeting card


Heart Dot Paintings
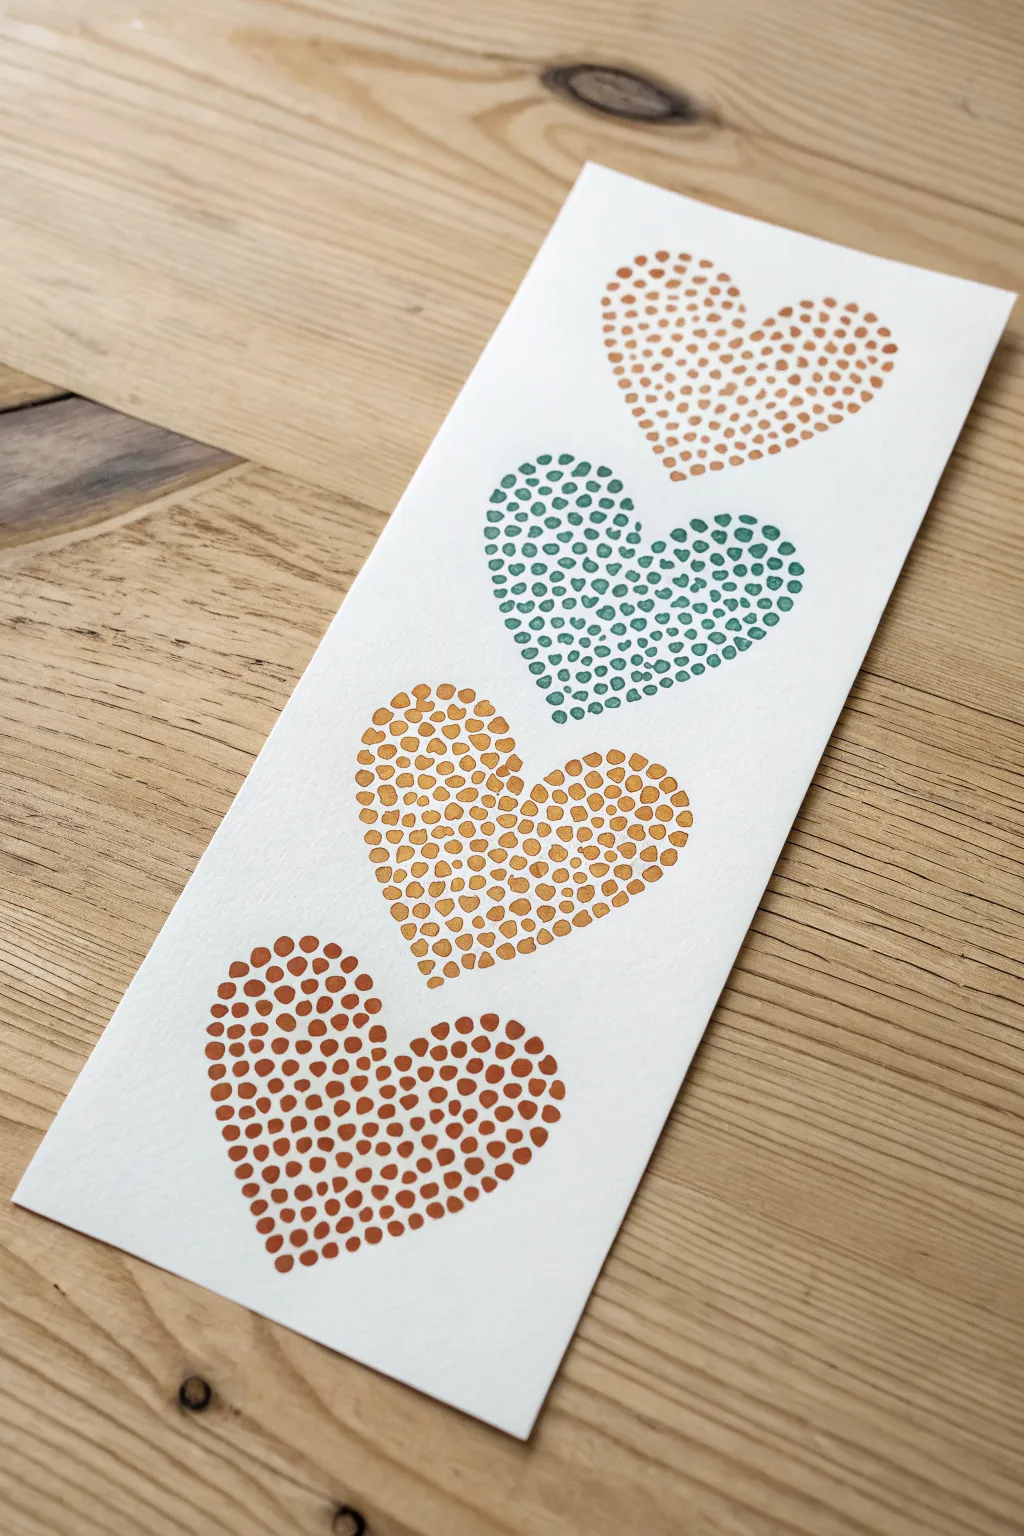
Create a charming piece of art using nothing but carefully placed dots to form floating heart shapes. This vertically arranged design features a warm, earthy gradient of colors that transition beautifully from rust red to teal, perfect for a handmade bookmark or greeting card.
Detailed Instructions
Materials
- Heavy white cardstock or watercolor paper (approx. 3×8 inches)
- Acrylic paints or gouache (rust red, mustard yellow, teal/sage green, burnt orange)
- Dotting tools (various sizes) or the back of a paintbrush handle
- Pencil
- Eraser
- Paper palette or small dish for paints
- Paper towel
- Ruler (optional)
Step 1: Preparation & Sketching
-
Cut the paper:
Begin by cutting your heavy cardstock or watercolor paper into a long, narrow rectangle. A size of about 3 inches by 8 inches works beautifully for this vertical composition. -
Plan the placement:
Visualize where your four hearts will go. They should be stacked vertically but slightly offset from one another—tilted left or right in a gentle zig-zag pattern rather than a perfect straight line. -
Sketch the hearts:
Using a pencil, very lightly sketch the outline of four heart shapes. Keep your lines incredibly faint, as you will need to erase them later, and you don’t want graphite smudging into your paint.
Step 2: Painting the Dots
-
Prepare the first color:
Squeeze a small amount of rust-red paint onto your palette. If the paint is very thick, add a tiny drop of water to make it creamy, but not runny. -
Outline the bottom heart:
Dip your chosen dotting tool or brush handle into the rust-red paint. Start by placing dots directly along the pencil line of the bottom-most heart to define its shape. -
Fill the center:
Continue filling the inside of the heart with dots. Try to keep the spacing somewhat consistent, but allow some natural variation in dot size to give it an organic feel. -
Switch to mustard yellow:
Clean your tool thoroughly. Prepare your mustard yellow paint for the second heart from the bottom. -
Dot the second heart:
Just like before, outline the pencil sketch with mustard yellow dots first, then fill in the center. I find it helps to rotate the paper as I work to keep my hand from smudging the wet paint below. -
Apply the teal:
Clean your tool again and mix a sage green or teal color. Apply this to the third heart up, following the same outline-and-fill method. -
Complete the top heart:
For the final top heart, use a burnt orange or light terracotta shade. Carefully dot the outline and fill the interior, completing your column of hearts.
Clean Edges Trick
Make your hearts pop by keeping the outermost ring of dots slightly smaller and closer together. This creates a crisp ‘edge’ without needing a solid line.
Step 3: Finishing Touches
-
Check for density:
Look over your hearts. If any areas look too sparse, add tiny ‘filler’ dots in the gaps using a smaller tool or a toothpick to make the hearts look fuller. -
Let it dry completely:
Allow the card to sit undisturbed until the paint is bone dry. Acrylics usually dry fast, but thick dots can take a little longer. -
Erase guidelines:
Once you are absolutely certain the paint is hard and dry, take a soft eraser and gently remove any visible pencil marks from around the edges of the dots. -
Flatten if necessary:
If the moisture from the paint has curled your paper slightly, place the finished artwork under a heavy book overnight to flatten it out.
Layered Texture
Once the first layer of dots is dry, add a second, smaller dot of a lighter shade on top of larger dots to create a cool 3D effect.
You now have a lovely, handcrafted piece that celebrates color and precision
BRUSH GUIDE
The Right Brush for Every Stroke
From clean lines to bold texture — master brush choice, stroke control, and essential techniques.
Explore the Full Guide
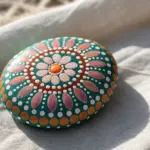
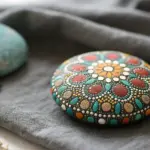
Paper Plate Dot Mandalas
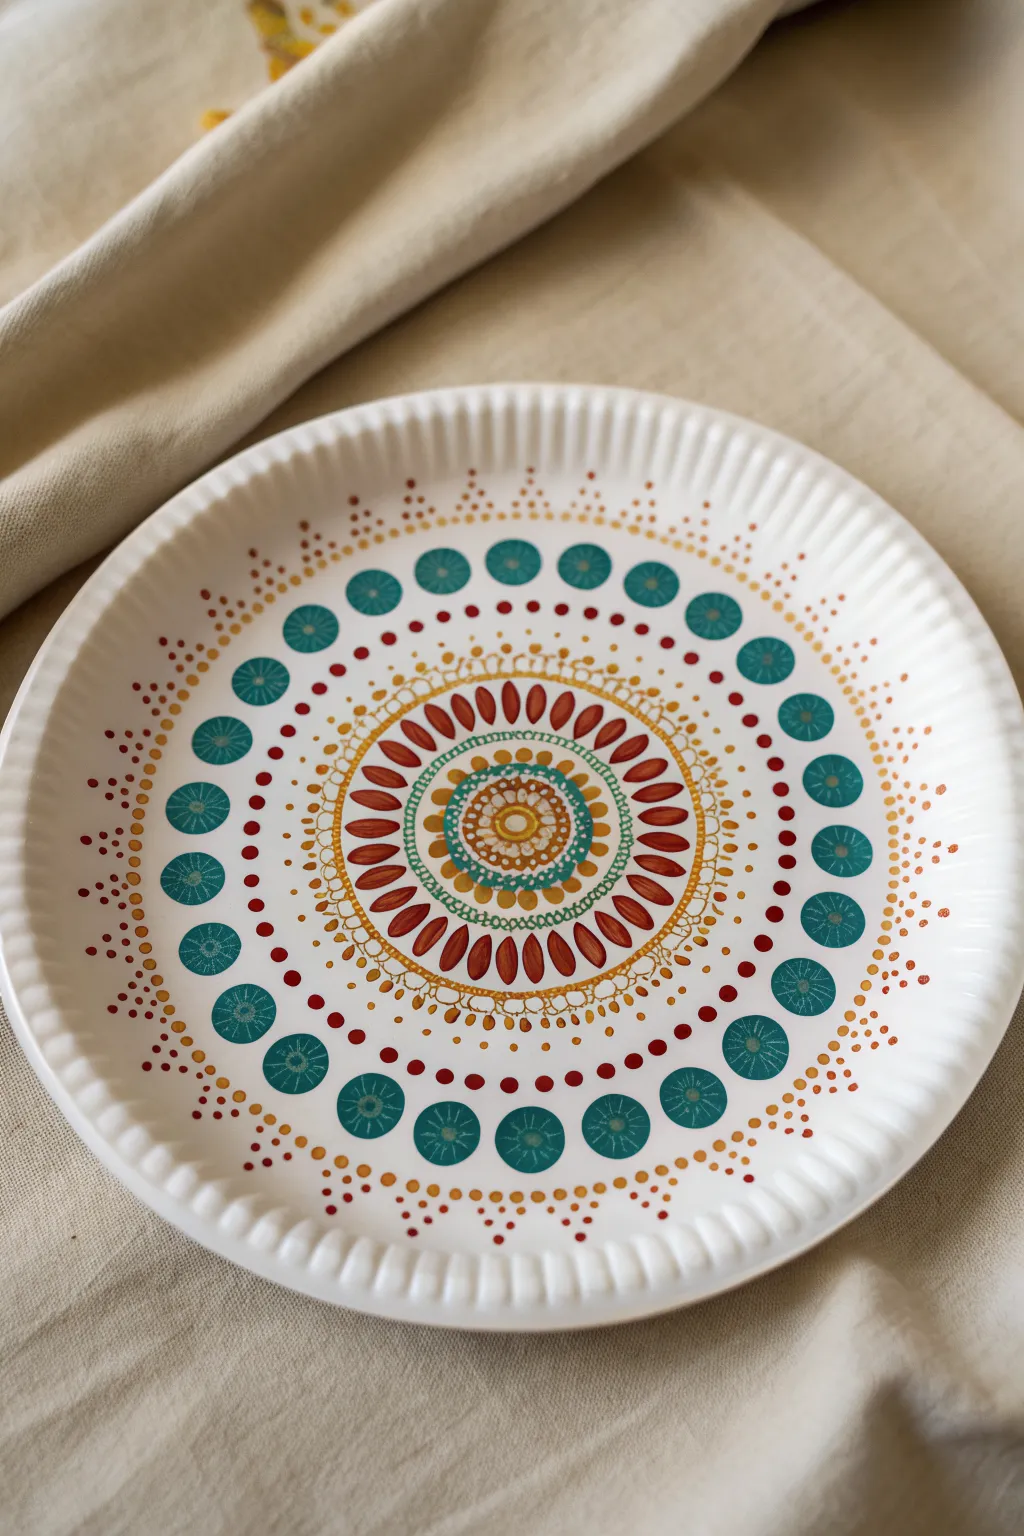
Transform a simple paper plate into a stunning piece of geometric art using just dots and simple shapes. This project builds distinct rings of color and pattern, moving from a sunny center out to a detailed, beaded rim.
Step-by-Step
Materials
- Sturdy white paper plate (uncoated/matte finish preferred)
- Acrylic paints (Teal/Turquoise, Dark Red/Burgundy, Yellow-Ochre, White, Deep Orange)
- Dotting tools (set of various sizes) or household substitutes (pencil erasers, cotton swabs, toothpick ends)
- Fine-tipped paintbrush
- Pencil and ruler (optional, for guidelines)
- Palette or paper plate for mixing
Step 1: Setting the Center
-
Find the middle:
Begin by finding the exact center of your paper plate. You can lightly mark this with a pencil if it helps you stay symmetrical, as the entire design radiates from this single point. -
Create the central yellow dot:
Using a medium-sized dotting tool or a cotton swab, place a bright yellow-ochre dot right in the center. -
Paint the first white ring:
Dip a small tool into white paint and create a tight circle of tiny dots immediately surrounding the central yellow dot. -
Add the first petal layer:
Switch to a fine brush or a small dragging tool. Using turquoise paint, create a ring of small tear-drop or petal shapes around the white dots. The pointed ends should face outward. -
Outline with sunlight dots:
Using yellow-ochre again, place a small dot in the crevice between the top of each turquoise petal, creating a sunny border.
Uneven Spacing?
If your large teal circles don’t meet up perfectly at the end of the ring, don’t panic. Just make the last few dots slightly smaller or closer together to fudge the gap.
Step 2: Building the Middle Rings
-
Paint the teardrop ring:
Using the dark red or burgundy paint and a small brush, paint a prominent ring of elongated teardrop shapes. These should be larger than your center details and radiate outward like flower petals. -
Add delicate dividers:
In the spaces between the red teardrops, use a very fine tool to place tiny yellow dots that travel up the length of the petals, adding texture. -
Create the scalloped gold border:
Using ochre or gold-toned paint, paint a thin, scalloped line that encases the red teardrop layer. Think of this like drawing lace around the center flower. -
Dot the scallops:
Along this scalloped line, add tiny white or pale yellow dots to make the line look like a string of beads. -
Double the border:
Paint a second, slightly larger scalloped line outside the first one using the deep orange paint, leaving a small gap of white space between them.
Make it Shine
Once the paint is 100% dry, apply a layer of glossy Mod Podge or clear spray sealant. This gives the acrylic paint a ceramic-like shine and protects the dots.
Step 3: The Teal Circle Medallions
-
Space out the main feature:
Now for the boldest element. Load a large dotting tool (or a pencil eraser) with teal paint. Stamp a ring of large, evenly spaced circles around the design. Aim for about 20-24 circles total. -
Add the starburst details:
Once the large teal dots are dry to the touch, use a fine tip or toothpick with white or very pale blue paint to draw a tiny starburst or wheel-spoke pattern inside each teal circle. -
Bridge the gap:
Between the inner orange scallop line and these new large teal dots, fill the empty white space with a relaxed scattering of medium-sized red dots to connect the sections visually.
Step 4: The Outer Rim
-
Start the outer chain:
Just past the large teal circles, begin a new pattern ring using medium red dots. Place one red dot directly above each teal circle. -
Fill the outer gaps:
Between those red dots, add smaller orange dots to create a continuous, colorful chain that feels loose and airy. -
Create the pyramid peaks:
Near the fluted edge of the plate, build small triangular pyramids of dots. Start with a row of 4-5 tiny orange or brown dots, then stack fewer dots on top until you reach a single point facing the center. -
Dust the edge:
Finish the artwork by adding a dusting of very fine specks or micro-dots in gold or brown along the very rim of the plate, fading out as they move toward the center. -
Final dry:
Let the plate sit undisturbed on a flat surface. I find it usually takes at least an hour for the thicker paint globs to dry completely solid.
Now you have a vibrant mandala design that looks far more complex than the simple dots used to create it
Under-the-Sea Fish Dots
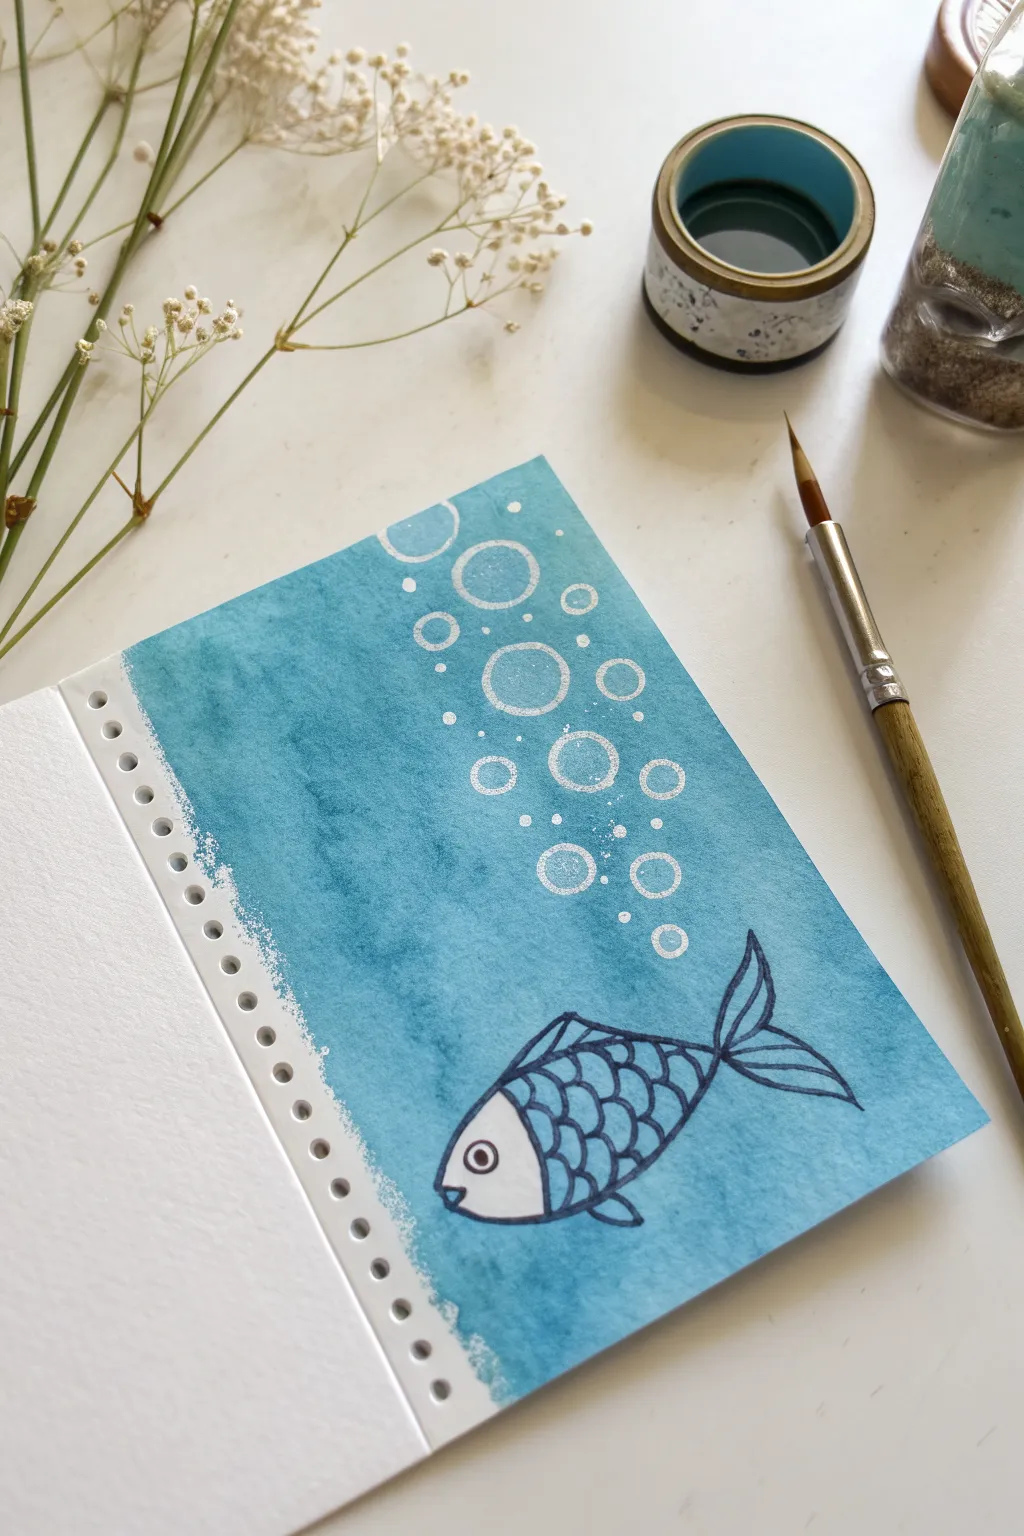
Bring the ocean to your sketchbook with this serene watercolor project featuring a patterned fish swimming through rising bubbles. The stunning contrast between the deep turquoise wash and the crisp white details makes for a simple yet striking underwater scene.
How-To Guide
Materials
- Watercolor paper sketchbook (ring-bound or perforated page)
- Turquoise watercolor paint
- Flat wash brush
- Round detail brush (size 2 or 3)
- White gel pen or white acrylic paint/gouache
- Black fineliner (waterproof)
- Masking tape or washi tape
- Circular objects for tracing (bottle caps, varying sizes) or a circle stencil
- Water jar
- Paper towels
Step 1: Preparing the Ocean Backdrop
-
Define the painting area:
Start by applying a strip of masking tape or washi tape vertically along the left side of your paper, just past the perforated holes. This will create that jagged, artistic edge when we paint up to it. -
Mix your ocean color:
Load your flat wash brush with plenty of water and pick up a generous amount of turquoise paint. You want a color that is rich but still transparent. -
Paint the wash:
Apply the paint across the entire right side of the page. Use broad, horizontal strokes. -
Vary the saturation:
While the paper is still wet, drop a little more concentrated pigment into random areas to create natural texture and depth in the water. -
Create the rough edge:
Gently gently brush the paint towards your tape line on the left. Don’t paint a solid straight line; instead, let the brush drag slightly dry near the tape to leave a distressed, raw edge. -
Let it dry completely:
Allow the blue background to dry fully. This is crucial so your pen lines don’t bleed later. If the paper feels cool to the touch, it’s still damp.
Step 2: Drawing the Fish
-
Outline the body:
Using your black waterproof fineliner, draw a simple almond shape for the fish body near the bottom right quarter of the page. -
Add the head:
Draw a curved vertical line to separate the head from the body. Add a small circle for the eye with a black dot in the center. -
Draw the fins:
Sketch a triangular tail fin at the back and a smaller fin on the bottom and top of the body. -
Detail the scales:
Fill the body section with a pattern of scallops or ‘U’ shapes to represent scales. Start from the head line and work your way back to the tail. -
Thicken the lines:
Go over your outline one more time with the fineliner to give it a bold, illustrative look. -
Whiten the head:
I like to use a white gel pen or a tiny bit of white gouache to color in the fish’s head, making it pop against the blue water.
Clean Edges Tip
When peeling off masking tape/washi tape, always pull it away from the painting at a 45-degree angle. This prevents the tape from tearing your delicate watercolor paper.
Step 3: Adding the Bubbles
-
Plan the bubble path:
Visualize a column of bubbles rising from the fish towards the top of the page. -
Stamp or draw circles:
Dip the rim of a small bottle cap or round tool into white acrylic paint (or use a white gel pen) to create circle outlines. Place the largest bubbles near the top. -
Vary the sizes:
Add smaller circles using smaller tools or freehand drawing to fill in the gaps between the larger bubbles. -
Add tiny dots:
Scatter tiny opaque white dots around the main bubbles to create a fizzy, effervescent effect. -
Remove tape:
Once everything is bone dry, carefully peel away the masking tape to reveal your clean, white margin.
Make it Sparkle
Mix a tiny pinch of silver mica powder or glitter into your white paint for the bubbles. This gives them a magical shimmer that catches the light.
Now you have a refreshing piece of ocean art ready to brighten up your journal

PENCIL GUIDE
Understanding Pencil Grades from H to B
From first sketch to finished drawing — learn pencil grades, line control, and shading techniques.
Explore the Full Guide
Ladybug And Butterfly Spot Dots
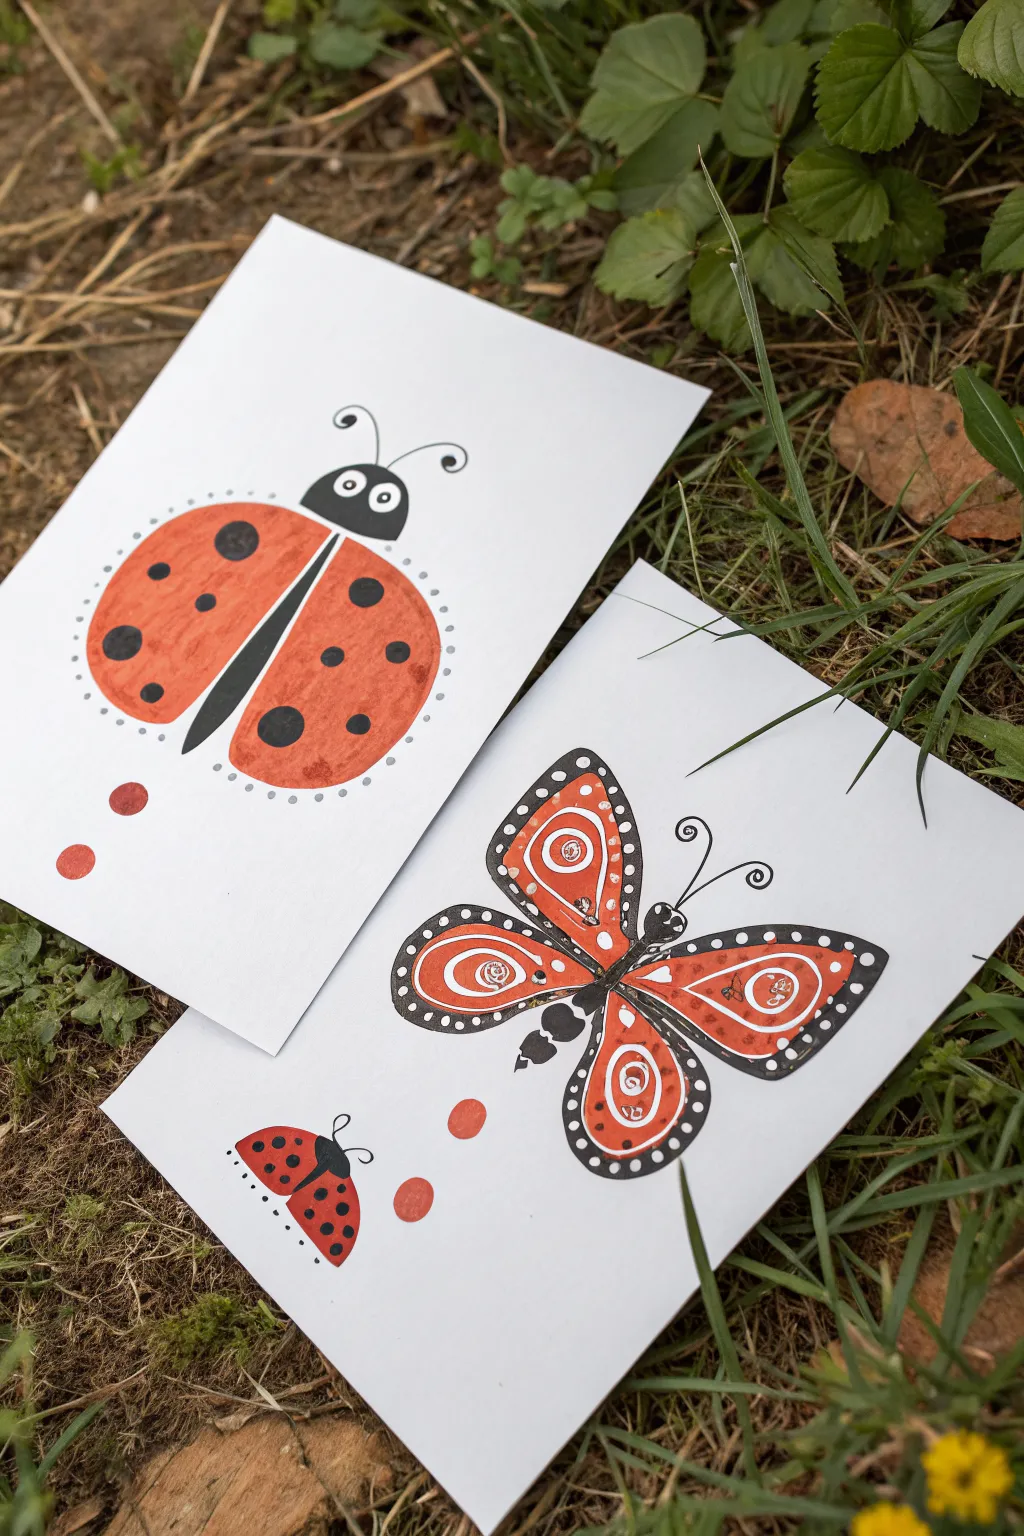
Celebrate garden friends with these charmingly stylized insect paintings featuring bold colors and decorative patterns. This project combines simple geometric shapes with intricate dot work to create a folk-art inspired look that pops on crisp white paper.
Step-by-Step
Materials
- Heavyweight white cardstock or watercolor paper
- Orange and red acrylic paint
- Black acrylic paint or black marker/fineliner
- White acrylic paint
- Paintbrushes (medium round and fine detail)
- Dotting tool or cotton swabs (Q-tips)
- Pencil and eraser for sketching
Step 1: Planning and Base Coats
-
Lightly sketch outlines:
Begin by sketching your insect shapes very lightly with a pencil. For the ladybug, draw a large oval split slightly down the middle. For the butterfly, sketch a central body with two large upper wings and two smaller lower wings. -
Paint the main color blocks:
Using a medium round brush, fill in the ladybug’s wings with a solid coat of orange paint. Do the same for the butterfly’s wings. If the orange looks streaky, let the first coat dry completely and apply a second layer for opacity. -
Add the black bodies:
While the orange dries, use black paint or a thick black marker to color in the ladybug’s semi-circular head and the central strip dividing its wings. For the butterfly, paint the segmented body down the center.
Paint Is Too Sheer?
If your orange paint looks transparent, mix in a tiny drop of white paint. This increases opacity instantly without changing the hue too much.
Step 2: Adding the Ladybug Details
-
Paint the ladybug’s spots:
Once the orange base is fully dry, dip a small brush or a large dotting tool into black paint. Create several large, evenly spaced circular spots across the ladybug’s wings. -
Create the eyes:
Paint large white circles on the black head area. Once these dry, add smaller black pupils in the center, positioning them slightly toward the middle for a ‘looking forward’ expression. -
Add antennae:
Using a fine liner brush or a black pen, draw two curled antennae springing from the top of the head. -
Apply the perimeter dots:
This is the signature detail. Dip a fine tool or toothpick into grey paint (mix a tiny bit of black into white). Carefully dot a halo around the entire outside edge of the ladybug’s wings. -
Finish with finger dots:
Add two or three bright red or orange dots trailing off the bottom of the page for a playful decorative touch.
Step 3: Detailed Butterfly Patterns
-
Outline the wings:
Use a fine brush with black paint or a marker to create a thick outline around each wing section. Inside this black border, paint a series of white dots to create a frame effect. -
Draw interior swirls:
On the orange part of the butterfly wings, paint white concentric swirls or circles. I find using a very fine liner brush helps keep these lines crisp. -
Layer the wing centers:
Inside your white swirls, add a small dot of the background orange color to create depth, making the patterns look like eyespots. -
Add floating decorative dots:
Scatter a few tiny white dots randomly across the orange wing sections to add texture and whimsy to the design. -
Draw the antennae:
Complete the butterfly by drawing two elegant, curly antennae extending from the head. -
Create a companion mini-bug:
If you have space at the bottom, paint a miniature version of the ladybug (a small red semi-circle with a black head and spots) to accompany the butterfly.
Perfect Circles Hack
Don’t freehand the dots! Use household items like pencil erasers, cotton swabs, or the handle end of a paintbrush dipped in paint for perfect circles.
Allow your artwork to dry flat completely before displaying these cheerful garden critters on your wall
Tree Canopy Dot Textures
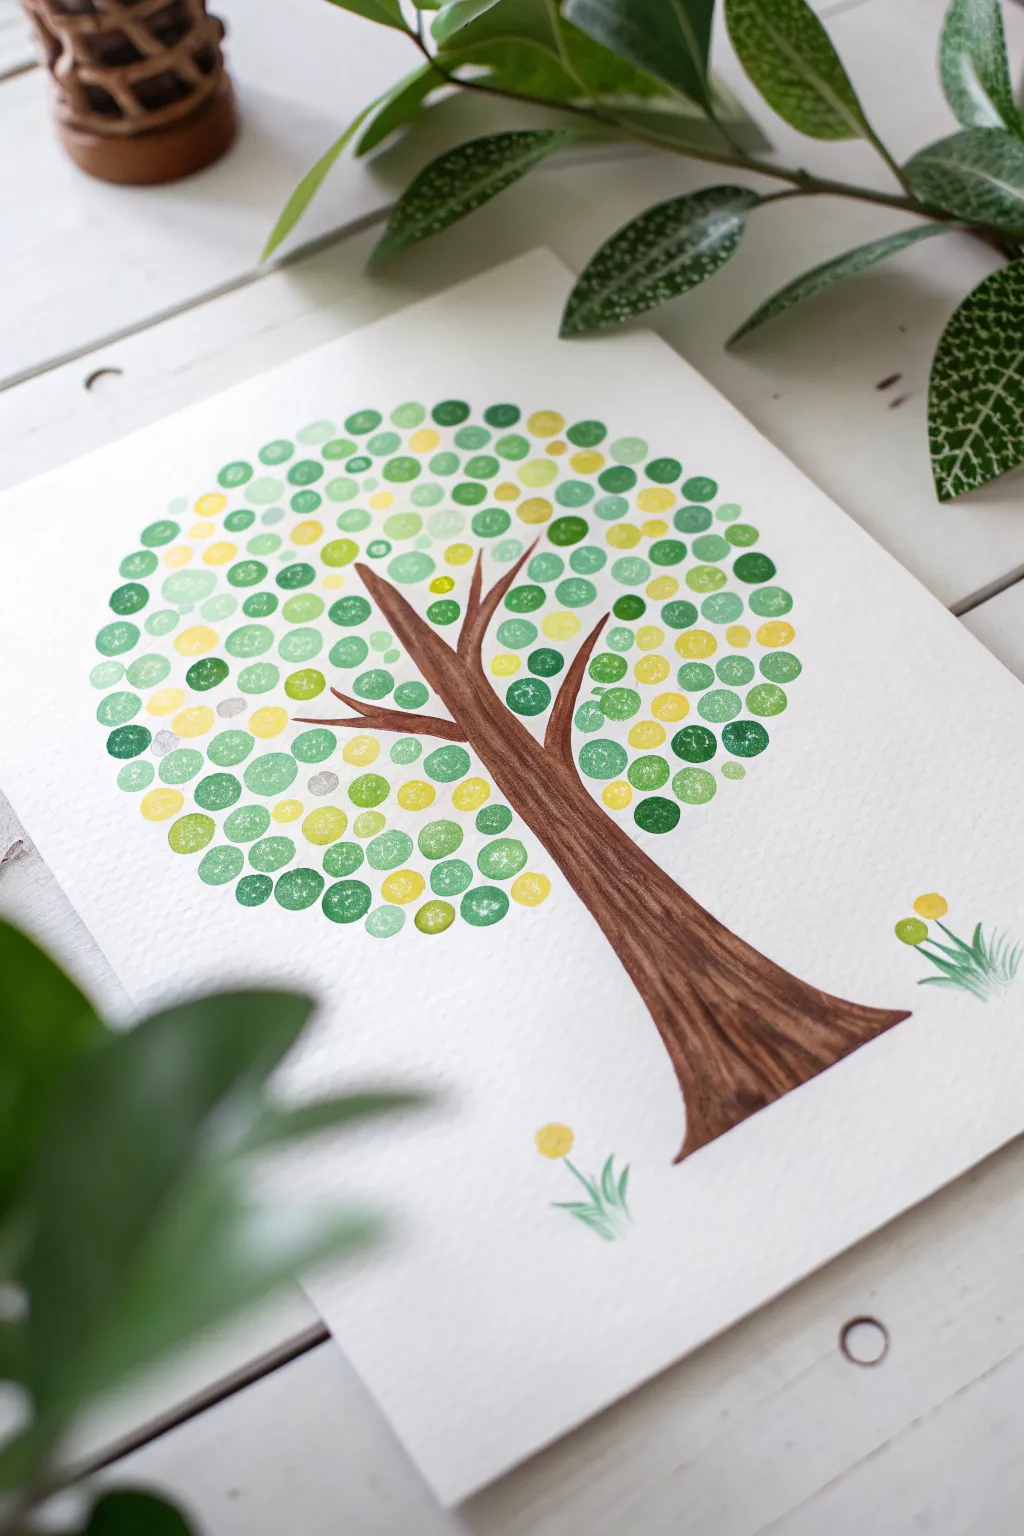
This charming art project uses simple circular shapes to build a lush, vibrant tree canopy full of texture. The mix of green and sunny yellow dots creates a cheerful, stylized look that captures the feeling of sunlight filtering through leaves.
How-To Guide
Materials
- Heavyweight watercolor paper or mixed-media paper
- Brown watercolor paint or brown markers (for the trunk)
- Round foam pouncers (small size) or corks
- Acrylic or tempera paints (various shades of green, yellow, white)
- Fine liner brush (for details)
- Pencil and eraser
- Palette or paper plate
Step 1: Planning and Trunk
-
Rough sketch:
Begin by lightly sketching a large circle in the upper center of your paper to guide the shape of your canopy. This doesn’t need to be perfect; it’s just a boundary line. -
Trunk outline:
Draw the outline of a tree trunk starting from the bottom center, flaring out slightly at the base. -
Add branches:
Extend the trunk upwards into your circle guide, splitting it into three or four main branches that reach towards the top edges of the circle. -
Base coat:
Fill in the trunk and branches with a solid layer of medium brown watercolor or marker. -
Wood grain details:
Once the base brown is dry, use a darker brown shade or a fine brush to add vertical, wavy lines along the trunk to mimic bark texture, giving it a realistic, woody look.
Pro Tip: Texture Tools
Don’t have foam pouncers? The eraser end of a new pencil makes perfect, tiny dots. For larger dots, try using the flat end of a carrot or potato cut into a circle.
Step 2: Creating the Canopy
-
Prepare the palette:
Squeeze out dabs of dark green, lime green, yellow, and a tiny bit of white onto your palette. -
Mix custom shades:
Create intermediate shades by mixing the green with yellow for a chartreuse, or green with white for a soft mint. -
First dots:
Dip your foam pouncer or cork into your darkest green paint. Press firmly onto the paper within your circle guide, spacing the dots out so they don’t touch yet. -
Rotate colors:
Clean your tool (or use a fresh one) and switch to a medium green. Fill in some of the gaps, keeping the dot shape distinct and crisp. -
Add sunlight:
Dip into the bright yellow paint. Place yellow dots scattered throughout the canopy, especially near the top, to suggest sunlight hitting the leaves. -
Fill the canopy:
Continue adding dots in various shades until the circular guide is filled. Ideally, the dots should be close together but not overlapping heavily, creating a mosaic effect. -
Edge work:
Make sure to place a few dots right on the pencil guide line to define the round shape, but verify the pencil mark itself is hidden or erased.
Step 3: Finishing Touches
-
Ground details:
Using a small brush, paint two or three tiny yellow dots near the base of the trunk to serve as flowers. -
Stems and grass:
With the finest point of your brush and green paint, add thin stems to the flowers and flick a few blades of grass upward from the ground. -
Final review:
Check the canopy for any large empty white spaces that look out of place and fill them with a small dot of light green or yellow. -
Dry time:
Let the artwork sit flat until the paint dots are completely dry to prevent any running or smearing.
Level Up: Seasonal Shift
Change the color palette to reflect the seasons. Use pinks and whites for spring blossoms, or oranges, reds, and browns for a crisp autumn tree.
Now you have a vibrant, dot-filled forest scene ready to display


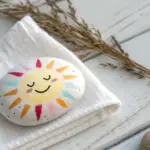
Sunny Sky Dot Backgrounds
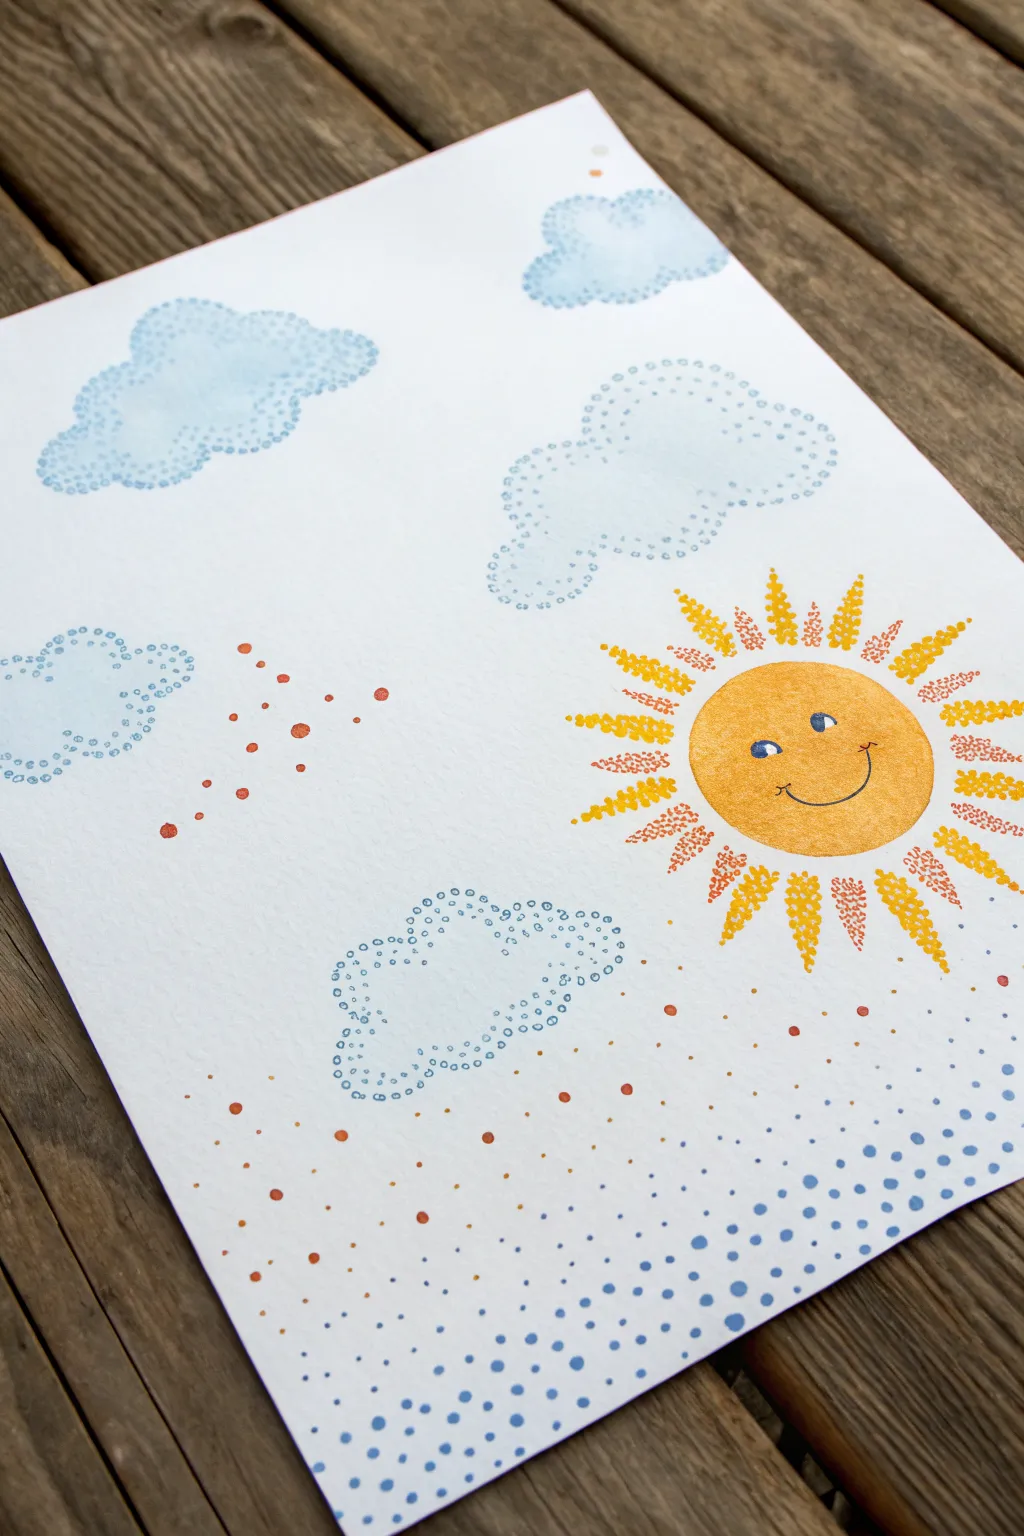
Brighten up a rainy day with this mixed-media artwork that combines a boldly painted sun with delicate pointillism clouds. The playful dotting technique creates a lovely texture for the fluffy clouds and gently falling rain.
Step-by-Step Guide
Materials
- Heavyweight drawing paper or watercolor paper
- Yellow and orange acrylic craft paint or gouache
- Blue ink pad or blue watercolor paint
- Orange and blue fineliner pens or thin markers
- Pencil and eraser
- Circle stencil or a small bowl to trace
- Q-tips (cotton swabs) or a small round foam dauber
- Paintbrushes
- Black fine-tip marker
Step 1: Setting the Scene
-
Outline the sun:
Start by lightly tracing a circle on the right side of your paper using a stencil or small bowl. This will be the main face of your sun. -
Lightly sketch clouds:
With a very light pencil touch, sketch out fluffy cloud shapes in the upper left and middle areas of the paper. Keep the lines faint so they won’t show through later. -
Plan the rays:
Sketch guiding lines radiating outward from your sun circle to mark where the sunbeams will go.
Smudge Alert!
Work from top to bottom (or left to right if you’re right-handed) to avoid dragging your hand through wet ink spots.
Step 2: Painting the Sun
-
Fill in the sun:
Using yellow acrylic or gouache paint, fill in your sun circle completely to create a solid, bright base. Let this dry fully before moving on. -
Start the sunbeams:
Dip a fine paintbrush or a Q-tip into yellow paint. follow your pencil guides and create the sun’s rays by stamping rows of small dots radiating outward. -
Add dimension to rays:
Switch to an orange hue. Add a second layer of dots interspersed within the yellow rays to give them depth and a fiery glow. -
Draw the face:
Once the yellow circle is bone dry, use a black fine-tip marker to draw a smiling mouth. Paint two small white ovals for eyes, adding blue irises and tiny white highlights once the base layers are dry.
Sparkle Upgrade
Once dry, add tiny dots of glitter glue to the sunbeams or the center of the rain puddles for a magical shimmery effect.
Step 3: Creating Clouds
-
Outline with dots:
For the clouds, you want a softer look. Use a blue fineliner or marker to trace over your pencil cloud outlines using only tiny stippled dots. -
Inner texture:
Continue stippling inside the cloud shapes, concentrating more blue dots near the edges and fewer towards the center to create a sense of volume and fluffiness. -
Optional wash:
If you want the clouds to have a faint blue tint like the image, I sometimes use an extremely watered-down blue paint to fill the center, or smudge a bit of blue pastel.
Step 4: Making it Rain
-
Start the raindrops:
Using a blue marker or fine-tip pen, start adding dots below the clouds. Keep the dots sparse near the clouds and denser as you move down the page. -
Transition colors:
Introduce some orange dots mixing in with the blue in the middle section of the page, perhaps representing light filtering through the rain. -
Intensify the bottom:
At the very bottom of the page, create a dense field of blue dots. Use a slightly thicker marker or press harder here to make larger dots, simulating puddles or heavy rain. -
Layering sizes:
Go back over the bottom section with a smaller pen tip to fill in gaps with tiny dots, creating a rich, textured look. -
Final check:
Erase any visible pencil lines gently, ensuring all paint and ink is completely dry before rubbing.
Hang your cheerful artwork near a window to catch the real sunlight
Night Sky Constellation Dot Art
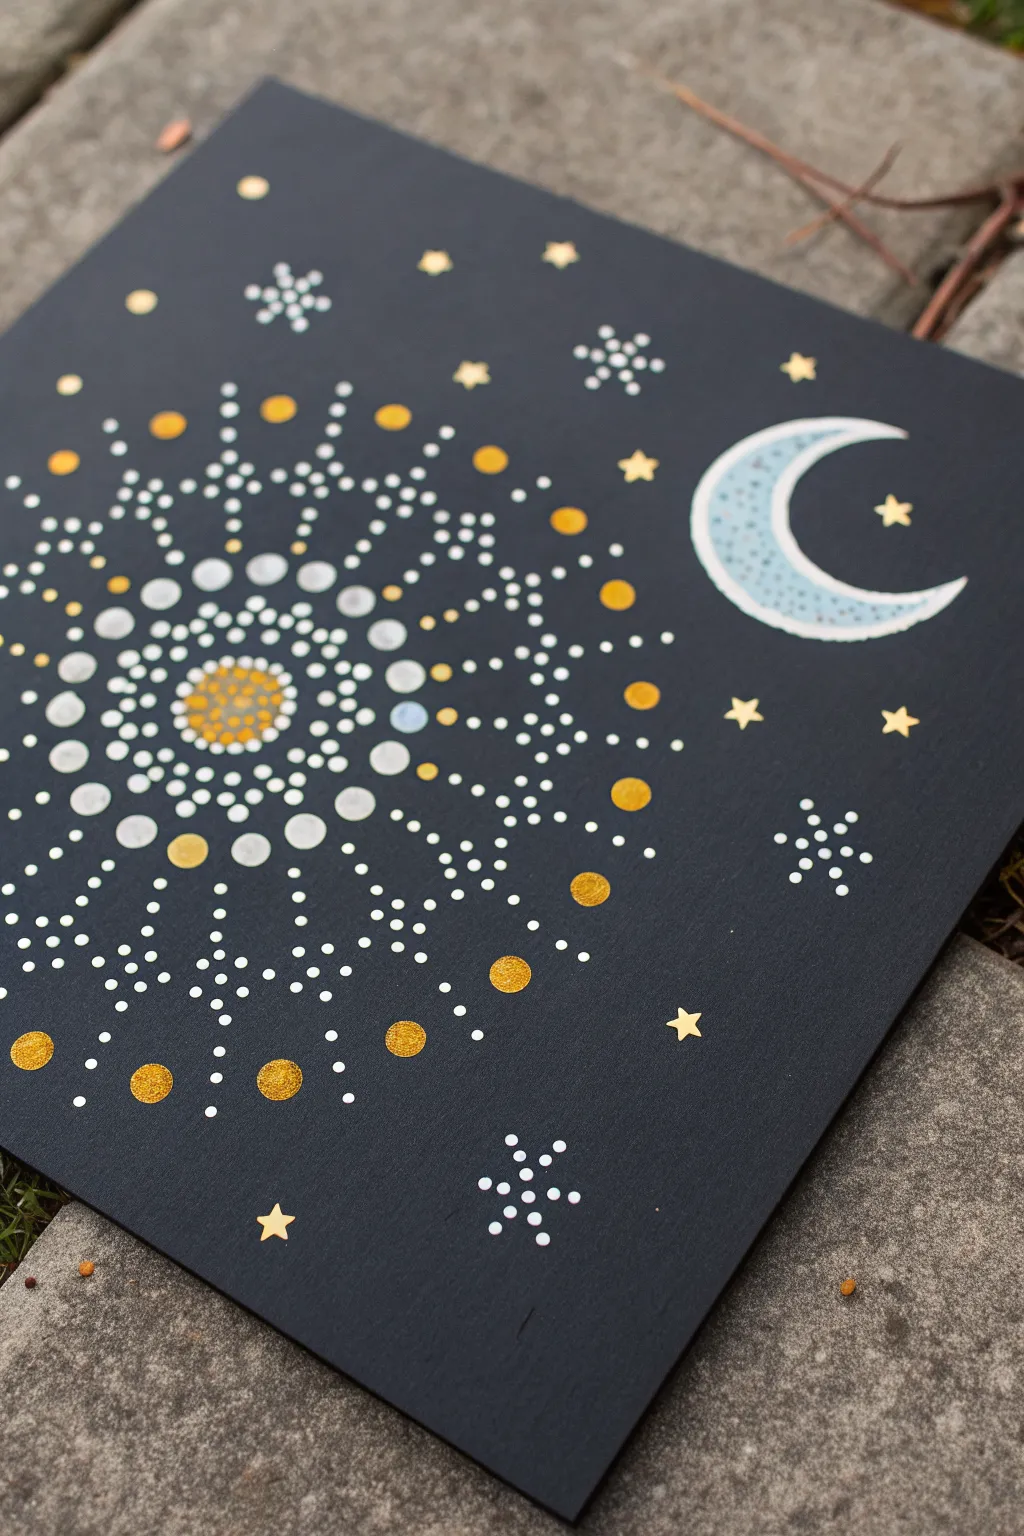
Bring the magic of the cosmos onto a small canvas with this striking dot-painted night sky. Featuring a radiant mandala sun, a pale blue crescent moon, and golden stars, the high contrast between the dark background and metallic paints creates a stunning, glowing effect.
Step-by-Step Guide
Materials
- Square wood panel or canvas board (approx. 8×8 or 10×10 inches)
- Black acrylic paint (matte or satin finish)
- White acrylic paint
- Metallic gold acrylic paint
- Light blue acrylic paint (or mix blue and white)
- Dotting tools (various sizes from stylus to flat-end rods)
- Small paintbrush
- Compass or round object to trace
- Pencil (white charcoal pencil works best on dark backgrounds)
- Palette or small plate
- Paper towels for cleaning tools
Step 1: Setting the Stage
-
Prepare the Background:
Begin by painting your entire wood panel or canvas with a solid coat of black acrylic paint. Let it dry completely, then apply a second coat if needed to ensure a deep, opaque background without visible brushstrokes. -
Map the Layout:
Once the black paint is bone dry, lightly sketch your design. Use a compass to draw the large curve of the crescent moon on the right side. On the left, mark a center point for your mandala sun burst to help keep your circles concentric. -
Paint the Crescent Moon:
Using a small brush, carefully fill in the crescent moon shape with light blue paint mixed with a tiny bit of white for opacity. You may need two thin coats strictly inside the lines for solid coverage. Let this dry before adding dots later.
Oops! Smudged a dot?
Don’t panic! Wait for the smudge to dry completely, paint over it with a dab of black background paint, let that dry, and then re-dot the area perfectly.
Step 2: Creating the Mandala Sun
-
Start the Center:
Dip a medium-sized dotting tool into metallic gold paint. Place a central dot on your left-side mark. Wipe the tool, then use a slightly smaller tool to create a ring of gold dots directly around this center point, keeping them touching or very close. -
Add White Accents:
Switch to white paint. Using a small tool, place a ring of small white dots around the gold cluster. Try to place these dots in the ‘valleys’ between the previous gold dots to create a tight, flower-like center. -
Expand with Size Variation:
Selecting a slightly larger flat-end tool, create a new ring using a mix of white or very pale grey dots. Space them out slightly more than the center rings. This begins the radiating ‘spoke’ pattern of the mandala. -
Begin the Spoke Pattern:
Visualize lines radiating outward from the center like a wheel. Use a small dotting tool and white paint to create lines of tiny dots extending outward from each of the larger dots you just placed. -
Enhance the Spokes:
Continue these radiating lines of small white dots until they reach about halfway across the design’s radius. As you move outward, the gap between the ‘spokes’ will widen naturally. -
Fill the Gaps:
In the widening spaces between your spoke lines, add larger feature dots using white or pearl paint. I like to graduate the sizes here, placing a medium dot followed by a larger dot further out in that wedge of negative space. -
Add the Gold Perimeter:
Switch back to your metallic gold paint. Use a large dotting tool to place prominent gold dots at the outer edge of the design, spacing them evenly between fit the radiating white patterns. These act as the ‘points’ of your sun. -
Connect the Elements:
Refine the mandala by adding tiny ‘walking dots’ (decreasing in size) of white paint that curve around the larger gold and white feature dots, creating delicate lace-like connections.
Step 3: Moon and Stars Details
-
Detail the Moon:
Return to your dry blue crescent moon. Using a very small tool and darker blue or grey paint, add random tiny dots inside the moon shape to give it texture and a cratered appearance. -
Add Scattered Stars:
Dip a small brush or stylus into metallic gold paint to create five-pointed stars. Place a few larger stars around the moon and in the empty black space. You can hand-paint these as small crosses with an X over them. -
Create Distant Clusters:
Using your smallest dotting tool and white paint, create little clusters of 5-7 tiny dots grouped together. Place these ‘constellations’ in the open black areas to fill the void without overwhelming the main subjects.
Make it Shine
Mix a tiny pinch of iridescent glitter or mica powder into your clear sealer before applying the final coat. This gives the entire night sky a subtle, magical sparkle.
Step 4: Final Touches
-
Review and Correct:
Look over your piece for any spacing that feels empty. Add single, tiny white dots (‘stardust’) randomly in the background to balance the composition. -
Seal the Artwork:
Allow the painting to dry for at least 24 hours. Once cured, gently erase any visible pencil marks, then apply a coat of clear spray sealer (gloss or matte) to protect the dots and make the metallic gold pop.
Now you have a serene piece of celestial art ready to display on a shelf or hang on the wall
Bubble Wrap Dot Printing Layers
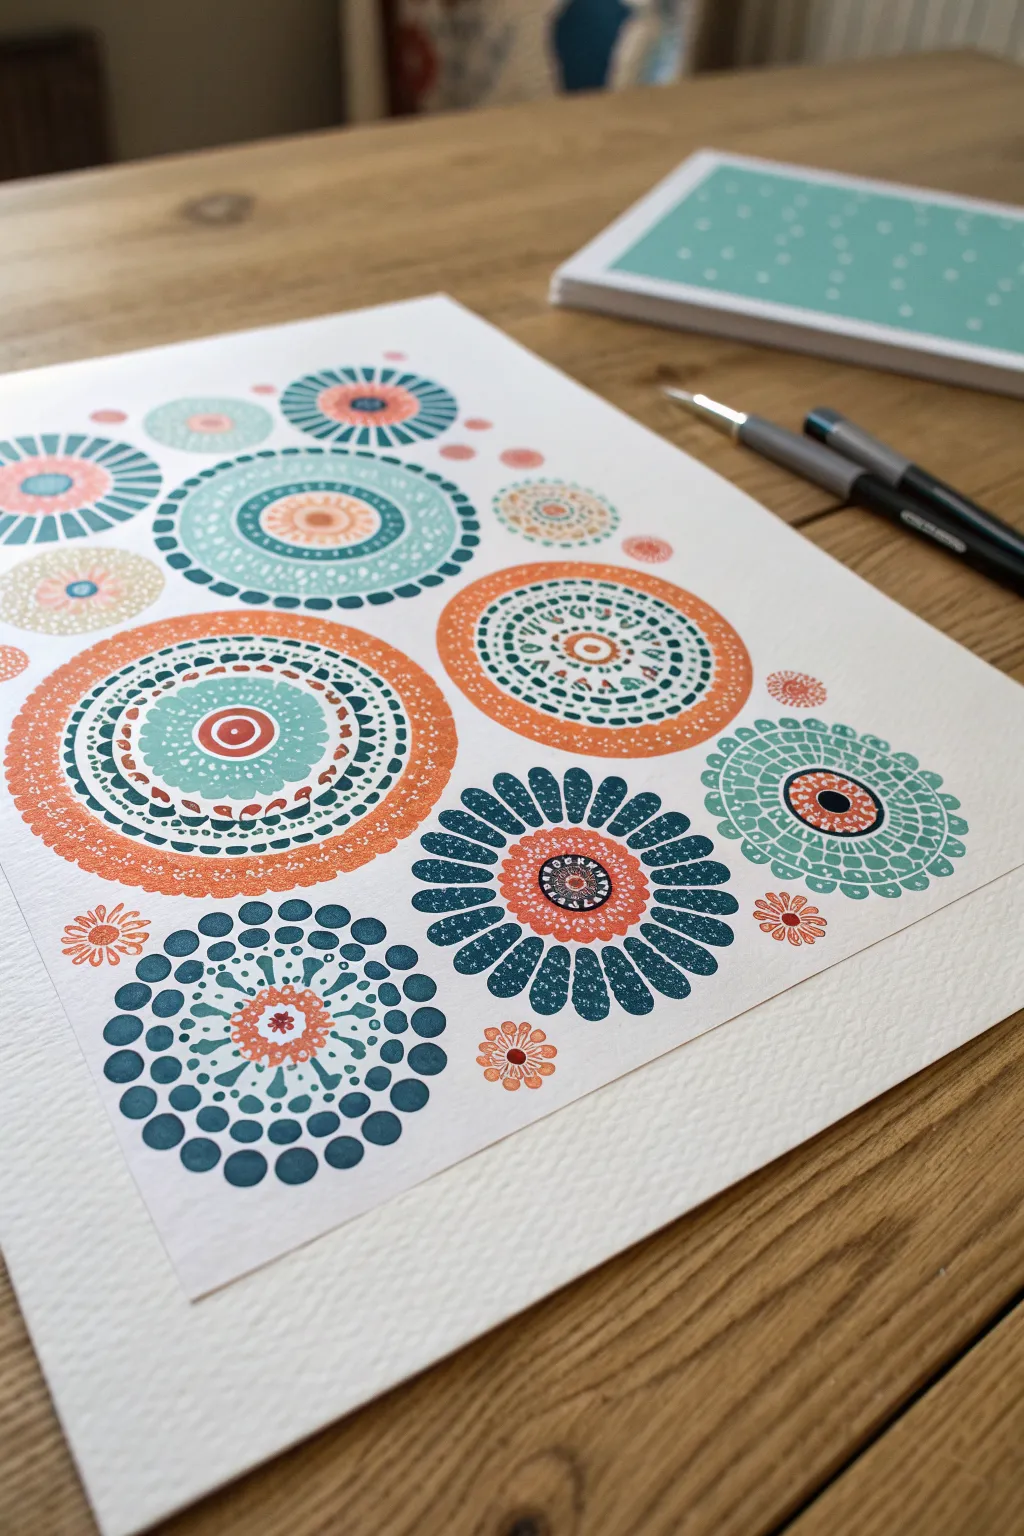
Create stunning, intricate-looking mandala patterns without needing advanced brush skills by using the humble texture of bubble wrap. This project layers stamped circles in soothing teal, coral, and navy tones to build complex, textured designs that pop against crisp white paper.
Step-by-Step Guide
Materials
- White textured watercolor paper or cardstock
- Bubble wrap (various bubble sizes if available)
- Acrylic paints (teal, coral orange, navy blue, light blue)
- Cardboard tubes (toilet paper rolls, paper towel rolls)
- Bottle caps or lids of various sizes
- Foam brushes or sponges
- Paper plate or palette
- Scissors
- Rubber bands
Step 1: Preparing The Stamps
-
Gather circular bases:
Collect several cylindrical objects to act as your stamp bases. Toilet paper rolls are perfect for medium circles, while jar lids works for larger ones, and bottle caps for the smallest details. -
Cut the bubble wrap:
Cut squares of bubble wrap slightly larger than the opening of your cardboard tubes and lids. -
Secure the texture:
Place a piece of bubble wrap over one end of a cardboard tube, pulling it taut. Secure it firmly with a rubber band so the bubbles face outward. -
Create size variety:
Repeat this process for your different sized lids and tubes. Ideally, you want a large, medium, and small bubble-wrap stamp for layering.
Clean Press Tip
Don’t overload the bubble wrap with paint. Too much paint fills the gaps between bubbles, ruining the dotted effect. A thin, even layer applied with a sponge works best.
Step 2: Printing the Base Layers
-
Prepare the palette:
Squeeze out your teal, coral, and navy acrylic paints onto a paper plate. Add a drop of water if the paint feels too thick, as you want a smooth application. -
Load the largest stamp:
Take your largest bubble-wrap stamp and use a foam brush to dab a layer of coral paint onto the bubbles. Avoid dipping it directly to prevent globs of paint. -
First impression:
Press the stamp firmly onto your watercolor paper. Rock it very slightly to ensure all bubbles make contact, then lift straight up to reveal a dotted circle. -
Create a composition:
Stamp 3-4 more large circles around the paper in different colors like teal and light blue. Leave plenty of space between them for now. -
Let it set:
Allow these base circles to dry for about 5-10 minutes. This prevents the colors from muddying when we layer on top.
Metallic Magic
Mix a little metallic gold or copper paint into your orange or teal acrylics. This adds a subtle shimmer to the stamped circles that catches the light beautifully.
Step 3: Layering the Details
-
Medium circle overlay:
Choose a contrasting color for your medium-sized stamp. If you stamped a coral base, try loading the medium stamp with navy or teal. -
Center the stamp:
carefully align the medium stamp in the center of a dry large circle and press down. The bubble wrap texture will create a beautiful, lattice-like overlap. -
Add independent circles:
Use the medium stamp to fill in some of the empty white spaces on the paper with standalone circles, creating a balanced layout. -
Small intricate details:
Using your smallest bottle cap stamp, add center points to the layered circles. I find a dark navy center really grounds the brighter colors. -
Tiny accents:
Dip the end of a chopstick or pencil eraser into paint to add solid dots around the edges of your texturized circles for variety.
Step 4: Final Flourishes
-
Petal effects:
To create the flower-like shapes seen in the teal and navy motif, use a small piece of loose bubble wrap. Paint just a strip of it and press it repeatedly around a center point. -
Fill the gaps:
Look for empty spots that feel unbalanced. Add tiny ‘floating’ flowers using a small lid stamp or just a fingertip dipped in paint. -
Dry completely:
Let the entire artwork dry flat for at least an hour. -
Optional definition:
Once fully dry, you can use a fine-tip opaque marker to outline specific rings or dots if you want to sharpen the look.
Hang your finished textured masterpiece in a simple frame to show off those intricate layers


Have a question or want to share your own experience? I'd love to hear from you in the comments below!