When I’m planning Easter art with toddlers, I reach for big shapes, simple tools, and processes that feel like play. These easter art ideas for toddlers lean into bunnies, eggs, chicks, and carrots—sweet, doable projects that let little hands lead the way.
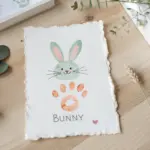
Footprint Bunny Ears Keepsake
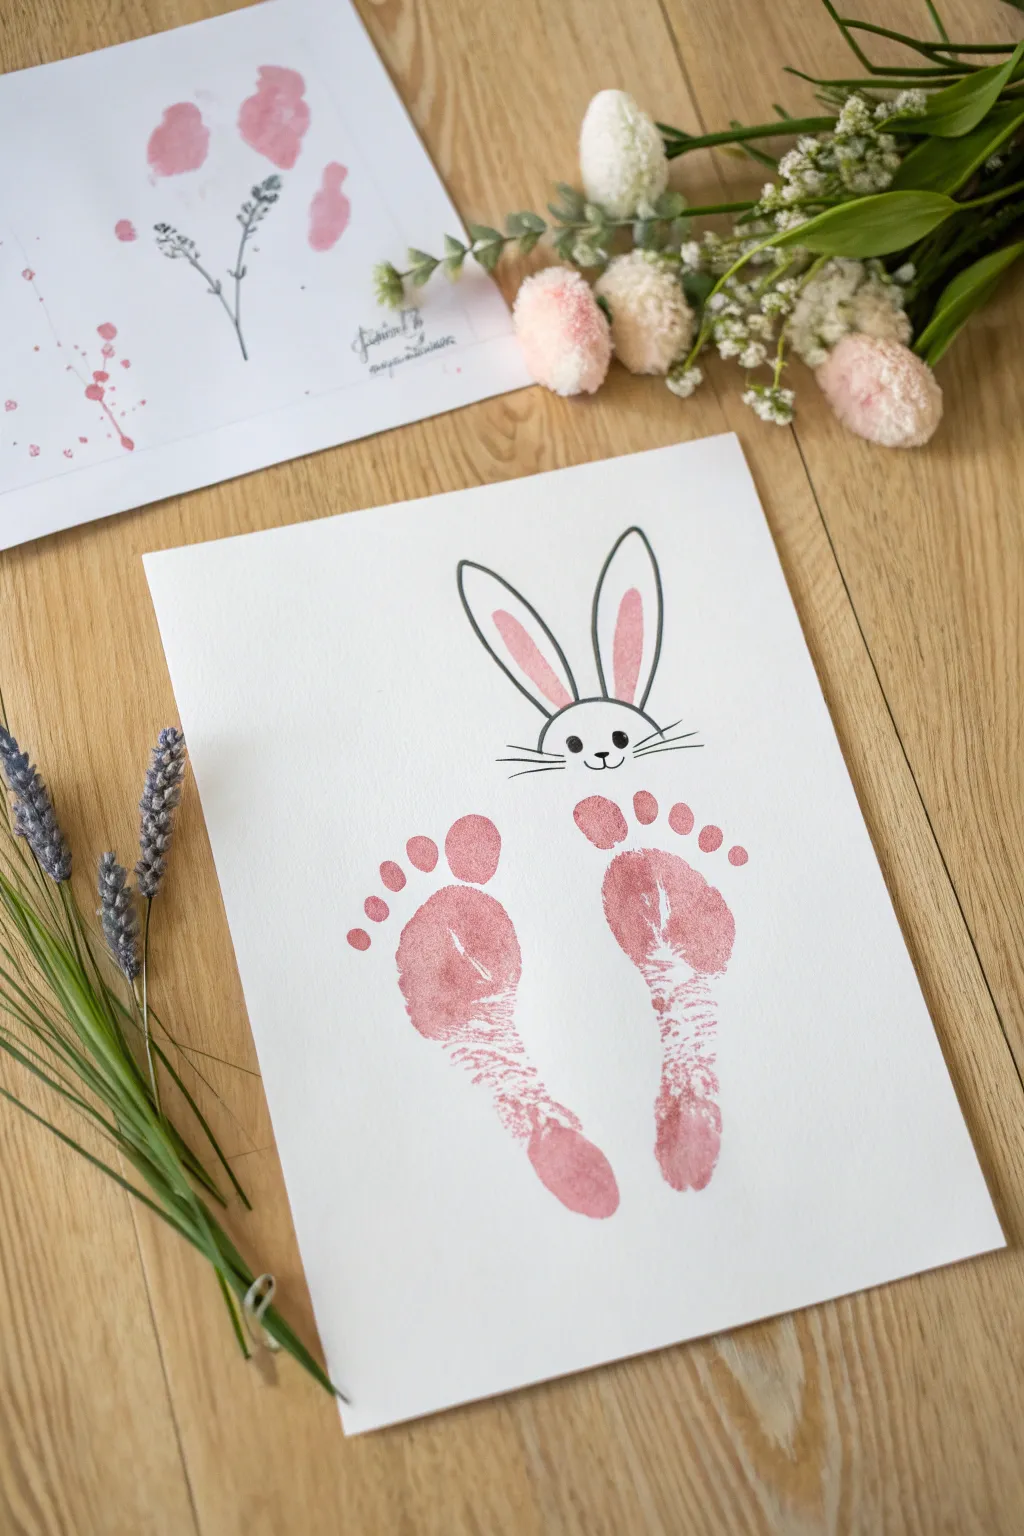
Turn tiny toes into a precious Easter memory with this adorable footprint bunny art. The soft pink prints form the bunny’s paws, while a simple line drawing adds whimsy to create a minimalist yet heartwarming piece of decor.
How-To Guide
Materials
- Heavyweight drawing paper or cardstock (white)
- Non-toxic washable craft paint (dusty pink or rose)
- Wide foam brush or sponge applicator
- Fine-tip black marker or drawing pen
- Soft pink colored pencil or pastel
- Baby wipes or damp cloth (essential for cleanup)
- Pencil (optional, for sketching)
Step 1: Creating the Prints
-
Prepare the workspace:
Set up a flat, stable surface on the floor or a low table. Have your paper ready and tape the corners down gently with painter’s tape to prevent slipping. -
Apply the paint:
Squeeze a small amount of dusty pink paint onto a paper plate. Use a foam brush to coat the bottom of your toddler’s foot evenly. Avoid globs of paint; a thin, even coat captures the best skin texture details. -
Position the first print:
Guide the foot toward the lower half of the paper. We need to leave plenty of empty white space at the top for the bunny’s head. Aim to angle the heel slightly inward. -
Press and lift:
Press the foot firmly onto the paper, ensuring the toes and heel make contact. Lift the foot straight up to avoid smudging the print. -
Clean and repeat:
Immediately wipe the first foot clean. Repeat the painting process with the other foot. -
Place the second print:
Stamp the second foot next to the first relative to the center, leaving a small gap between the heels. Again, angle the heel slightly inward so the toes fan out. -
Check the alignment:
Ensure the heels are roughly aligned at the bottom. It doesn’t have to be perfect; the natural variation adds character. -
Dry completely:
Set the paper aside to dry fully. I usually give this at least an hour to ensure the paint doesn’t smear when we draw the face.
Wiggle Control
Work while the child is in a high chair for better control. If doing this on the floor, have a helper hold the child’s ankle steady while you press the paper to the foot, rather than foot to paper.
Step 2: Drawing the Bunny
-
Outline the head:
Using a black fine-tip marker, draw a simple semi-oval shape centered above the gap between the two footprints. This will be the bunny’s head. -
Add the ears:
Draw two long, tall loops extending upward from the top of the head. Make them slightly asymmetrical or tilted for a playful look. -
Draw the inner ears:
Inside each ear loop, draw a smaller, similar loop to define the inner ear shape. -
Sketch the face:
Draw two small solid black circles for eyes within the head oval. Just below them, draw a tiny rounded triangle for the nose. -
Add the mouth:
From the bottom point of the nose, draw two small curves branching outward to form the classic bunny smile. -
Draw whiskers:
Add three straight, horizontal lines extending from each cheek area, projecting past the outline of the face.
Cotton Tail Twist
Instead of leaving the space between the heels empty, glue a fluffy white pom-pom there. It adds a cute 3D texture and mimics a bunny tail right between the quirky footprint paws.
Step 3: Finishing Touches
-
Color the ears:
Using a soft pink colored pencil or pastel that matches your paint tone, gently shade inside the inner ear loops. -
Add toe details (optional):
If any toe prints were too faint, you can very lightly create a separate fingerprint dot above the main footprint using the residual paint on the brush, though natural prints usually look best. -
Erase guidelines:
If you used a pencil for sketching the face first, gently erase any visible graphite lines once the ink is totally dry. -
Final inspection:
Check the drawing for any skipped lines and darken the black marker strokes if necessary to make the face pop against the white paper.
Frame your artwork in a simple wood frame to create a timeless keepsake intended to last for years


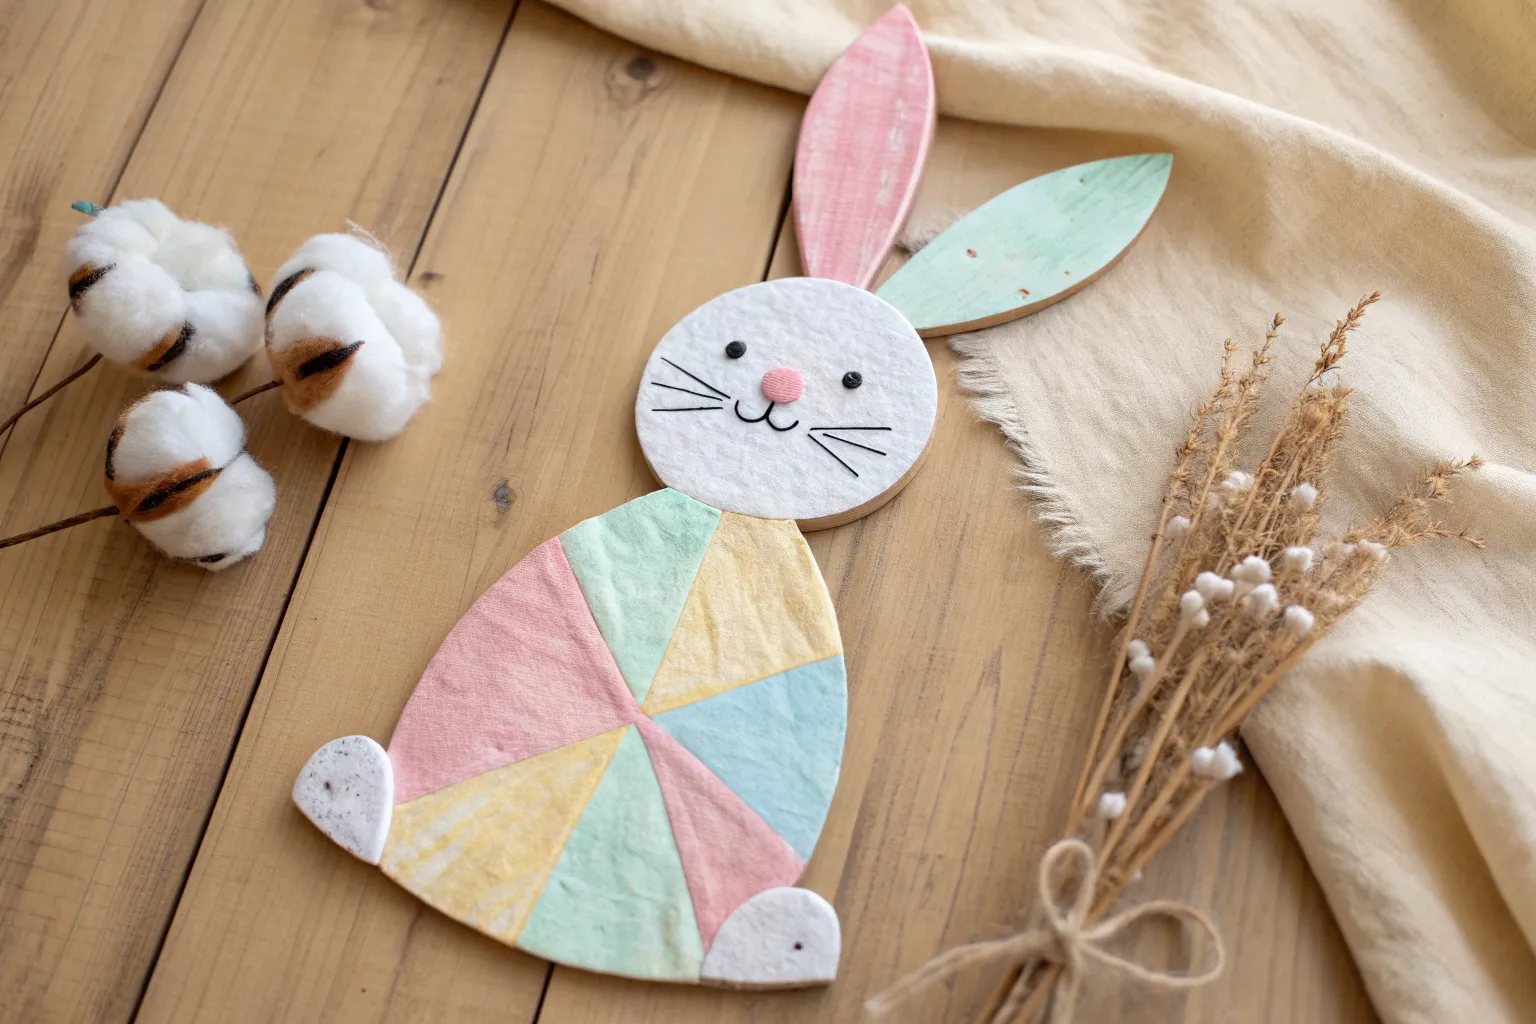
Paper Plate Bunny Face
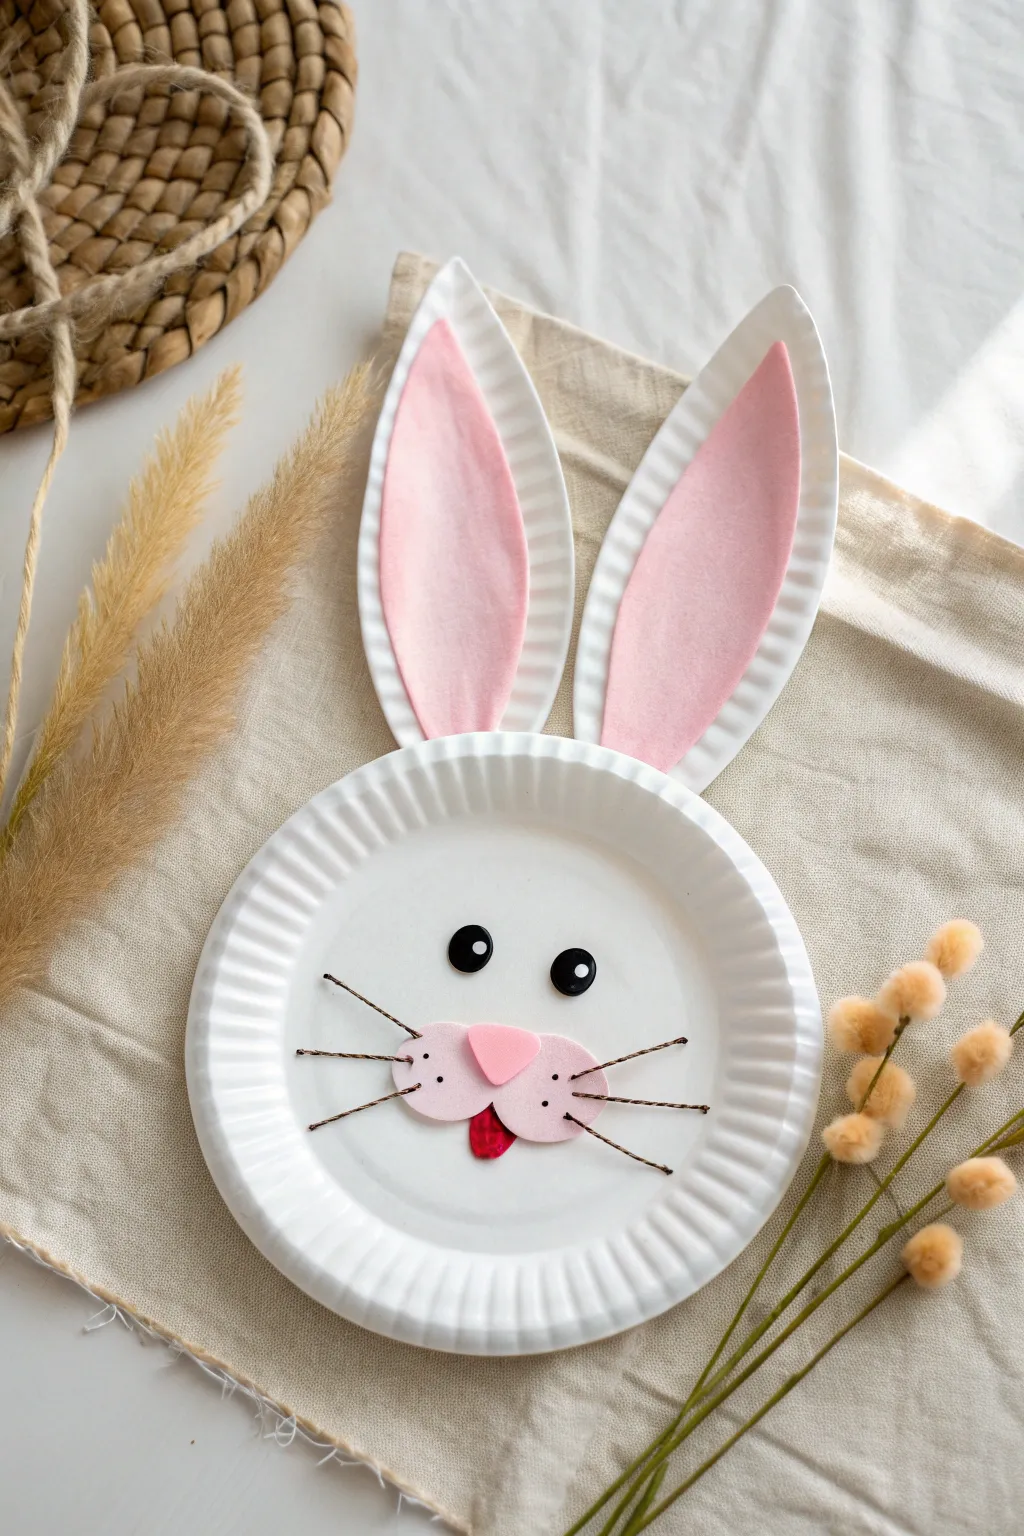
Transform a simple paper plate into an adorable bunny face complete with tall, pink ears and a sweet little nose. This cheerful craft uses basic supplies to create a festive decoration perfect for hanging on a door or wall.
Step-by-Step Guide
Materials
- 2 Large white paper plates (fluted edge prefered)
- Pink felt sheet or pink construction paper
- Light pink cardstock or foam sheet
- Black buttons (2 medium size)
- Dark brown twine or yarn
- Small red glitter foam piece or red paper
- Pencil
- Scissors
- White glue or hot glue gun (for adult handling)
- Black marker
Step 1: Shaping the Foundation
-
Prepare the base:
Select a clean, sturdy white paper plate with a nice fluted rim to serve as the main face of your bunny. -
Cut the ear shapes:
Take a second paper plate and use a pencil to draw two long, pointed oval shapes on the rimmed section. Following the curve of the plate adds a nice 3D effect. -
Refine the ears:
Cut out the two ear shapes carefully. Aim for them to be about 6-7 inches long so they look proportionate to the face. -
Create the inner ears:
Place your pink felt or pink paper on a flat surface. Draw two smaller elongated ovals that will fit inside the white paper plate ears you just cut. -
Attach the inner ears:
Glue the pink ovals into the center of the white paper plate ears. Smooth them down gently to prevent any bubbles. -
Mount the ears:
Flip the main face plate over to the back side. Glue the bottom of each ear to the top rim of the plate, spacing them about an inch apart so they stand tall.
Use Vertical Curves
When cutting the ears from the second plate, follow the natural ridges of the rim vertically. This textured grain mimics fur and adds structural stiffness.
Step 2: Creating the Features
-
Make the muzzle:
Cut a kidney bean shape or a joined double-circle shape out of light pink cardstock. This will form the chubby cheeks of the bunny’s muzzle. -
Add muzzle details:
Use a fine-point black marker to add three small freckle dots on each side of the pink muzzle piece. -
Cut the whiskers:
Snip six pieces of dark brown twine, making them each about 3 to 4 inches long. These will be the stiff whiskers. -
Position the whiskers:
Arrange the twine pieces on the back of the pink muzzle piece, fanning three out to the left and three to the right. -
Secure the whiskers:
Glue the twine ends securely to the back of the muzzle. I find using a small strip of tape over the glue helps hold them while drying. -
Create the nose:
Cut a small, rounded triangle shape from a scrap of darker pink felt, foam, or paper. Glue this upside down in the top center of the muzzle to cover the whisker connection point.
Make It Fluffy
Replace the paper muzzle with glued-on cotton balls and bury the nose and whiskers in the cotton for a texture-rich sensory craft toddlers will love touching.
Step 3: Assembly and Finishing Touches
-
Attach the muzzle:
Apply glue to the back of the assembled muzzle and press it firmly onto the lower center of the paper plate face. -
Make the tongue:
Cut a small teardrop shape from the red glitter foam or red paper. This adds a playful touch. -
Place the tongue:
Glue the red teardrop just underneath the center of the pink muzzle so it looks like a little tongue sticking out. -
Add the eyes:
Take your two black buttons and glue them just above the muzzle. Space them slightly apart to give the bunny a bright, wide-eyed expression. -
Let it set:
Allow the entire project to dry completely flat for at least 20 minutes before lifting it up.
Your charming paper plate bunny is now ready to hop onto the wall and bring some Easter cheer to the room.


Cotton Ball Bunny Tail Collage
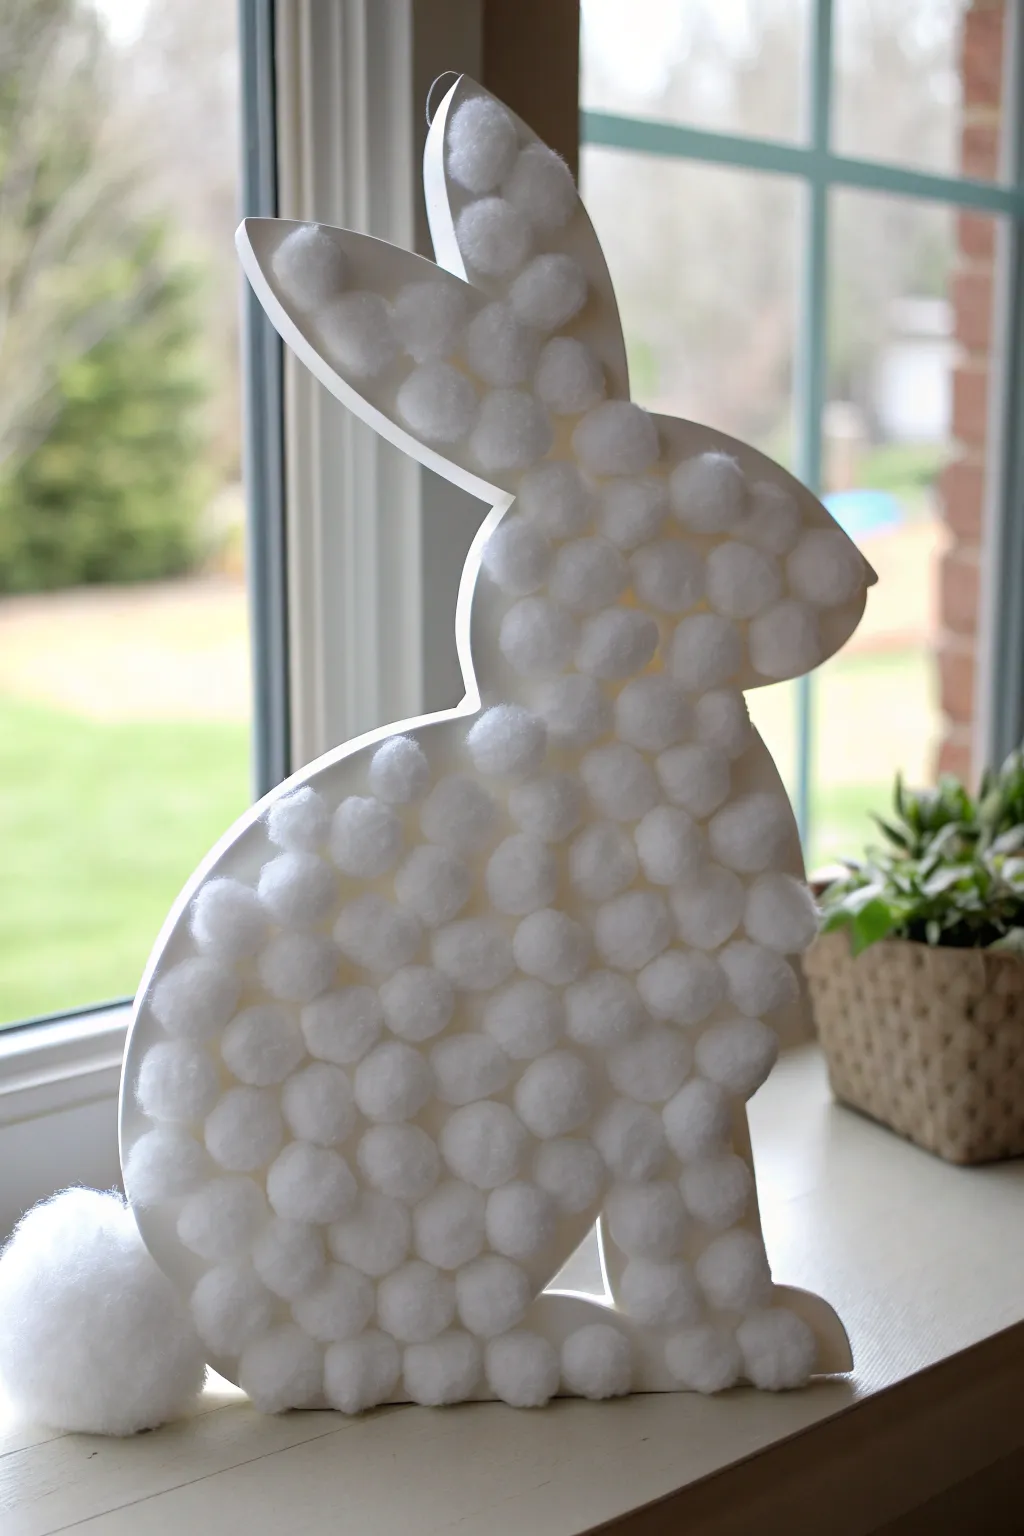
Transform a simple bunny cutout into a soft, textured decoration perfect for greeting Easter morning. This charming stand-up project uses cotton balls to create a cozy, cloud-like finish that looks adorable perched on a windowsill.
Step-by-Step
Materials
- Thick white cardstock or foam board
- Rabbit silhouette template
- Pencil
- Scissors or craft knife
- Bag of white cotton balls (medium size)
- One large white pom-pom or stuffing for the tail
- White school glue or tacky glue
- Small bowl for glue (optional)
- Paintbrush for glue application (optional)
Step 1: Preparing the Base
-
Trace the shape:
Begin by printing or drawing a simple rabbit silhouette onto a piece of paper to use as a template. Cut it out and trace the outline onto your thick cardstock or foam board with a pencil. -
Cut the silhouette:
Carefully cut along your traced line. If you are using foam board, a craft knife works best for clean edges, but standard scissors are fine for cardstock. Ensure the bottom edge is flat if you want it to lean or stand. -
Check the surface:
Wipe away any eraser shavings or dust from the surface. A clean base ensures the glue adheres properly and keeps your cotton snowy white.
Sticky Situation?
If the cotton sticks to your fingers more than the paper, pour glue into a shallow dish. Dip the cotton ball into the glue directly strictly on one side to keep your hands clean.
Step 2: Adding the Fluff
-
Plan your spacing:
Before gluing, lightly place a few cotton balls on the bunny to see how they fit. This helps you gauge if you need to squish them slightly or leave them fluffy. -
Apply glue to the ears:
Start at the top of the ears. Squeeze a generous dot of glue for each cotton ball, or paint a layer of glue onto the cardstock surface. -
Fill the ears:
Press the cotton balls firmly onto the glued areas of the ears. Arrange them tightly so very little of the white backing shows through. -
Work down the head:
Continue gluing cotton balls down into the head area. I find it helpful to work in horizontal rows to keep the texture consistent. -
Navigate the neck:
As you reach the narrower neck area, you might need to gently compress the cotton balls on the sides to maintain the curve of the silhouette. -
Fill the body:
Move onto the larger body section. Apply glue in patches rather than all at once so it doesn’t dry out before you place the cotton. -
Create the legs:
Pay attention to the feet and legs. Ensure the cotton balls follow the curve of the cutout all the way to the bottom edge. -
Inspect the edges:
Look at the bunny from different angles. If any cardboard is peeking out too much on the edges, gently nudge the cotton balls outward to cover the rim.
Make It Sparkle
Lightly mist the finished bunny with hairspray and quickly dust fine iridescent glitter over the damp cotton. It gives the fur a magical, frosty morning shimmer.
Step 3: Finishing Touches
-
Prepare the tail:
For the signature fluffy tail, take your large pom-pom. If you don’t have one, you can bunch up a handful of loose polyester stuffing or several cotton balls glued together. -
Attach the tail:
Apply a larger amount of glue to the lower back area of the bunny silhouette. Press the large tail piece firmly and hold it for twenty seconds to ensure a strong bond. -
Dry completely:
Lay the bunny flat on a table to dry. Letting it sit undisturbed for at least an hour prevents the cotton balls from sliding down due to gravity. -
Create a stand (optional):
If your bunny needs help standing upright, glue a small triangle of cardstock to the back as a kickstand.
Now you have an adorable, soft bunny to brighten up your festive display


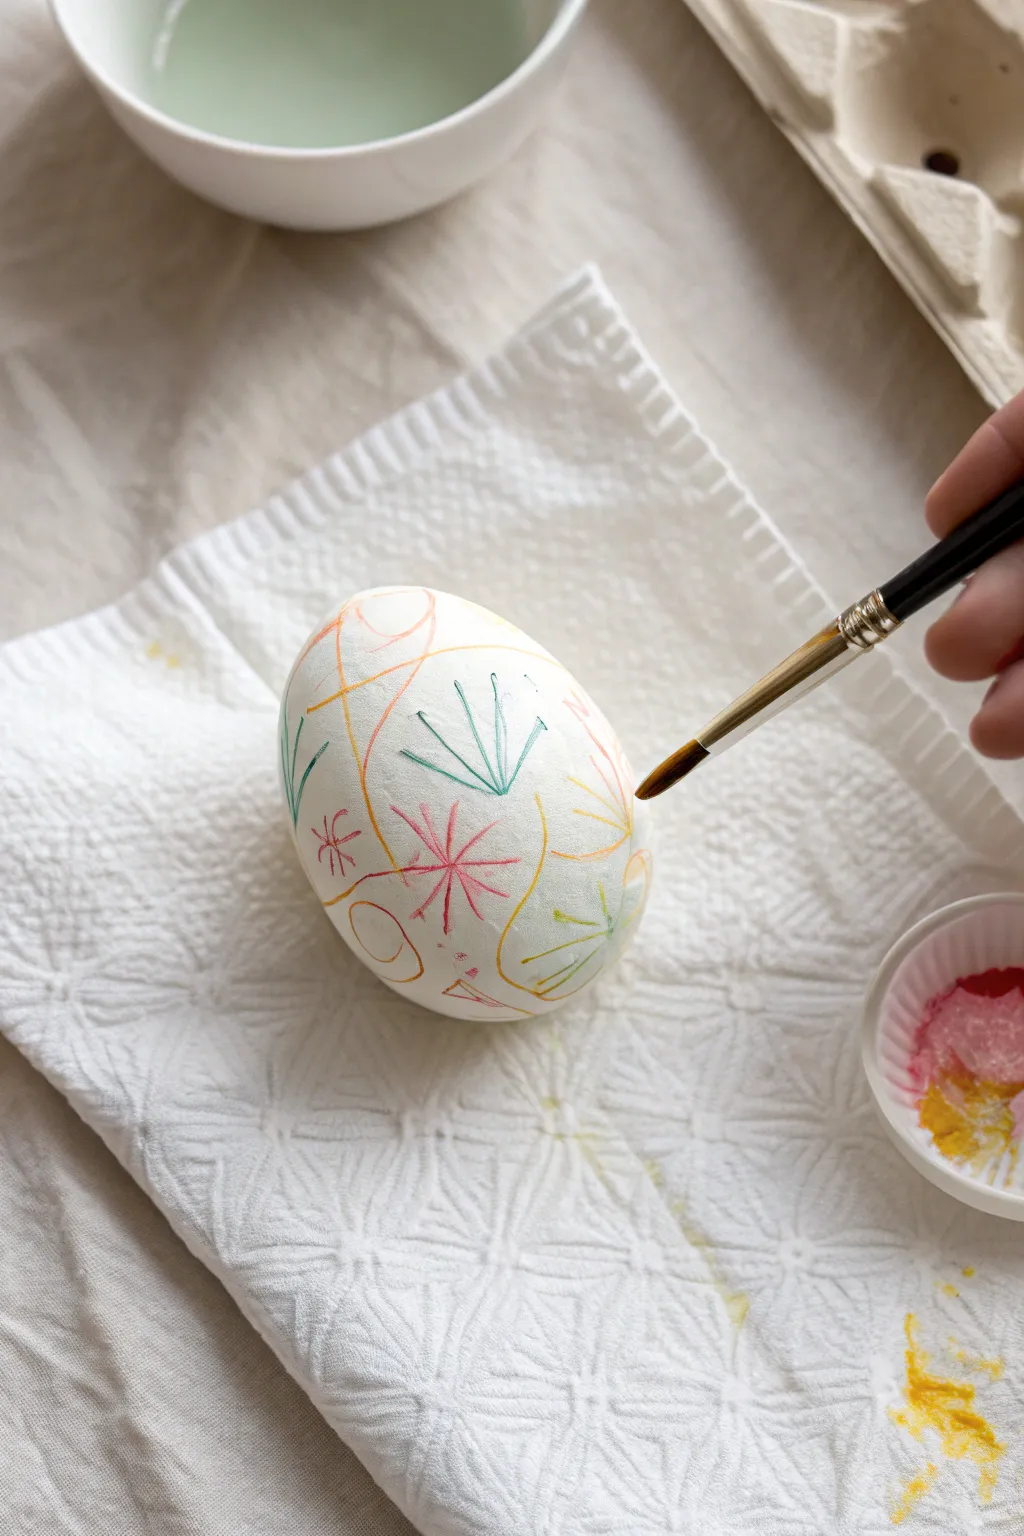
Fingerprint Pattern Easter Eggs

Transform plain white eggs into vibrant miniature canvases using simple dotting and line techniques that are perfect for little hands. This project combines fingerprint-style dots, swirling rosettes, and geometric line work for a charming, hand-painted look.
Step-by-Step Guide
Materials
- White or blown-out eggs
- Acrylic paints (red, yellow, blue, green, pink)
- Fine liner brushes (size 0 or 1)
- Medium round brush (size 4)
- Palette or paper plate
- Pencil
- Jar of water
- Paper towels
- Egg drying stand or empty carton
Step 1: Preparation & Base Work
-
Clean and dry:
Ensure your eggs are perfectly clean and dry before starting. If you are using real eggs, wipe them down with a little vinegar to help the paint adhere better. -
Set up your palette:
Squeeze dime-sized amounts of yellow, pink, light blue, green, and red acrylic paint onto your palette. I like to keep the colors slightly separate to prevent muddying. -
Stabilize the egg:
Place your first egg in a holder or simply hold it gently in one hand. It helps to rest your painting hand’s wrist on the table for better control.
Step 2: The Polka Dot Egg
-
Paint primary dots:
Using a medium round brush or even a fingertip, dab random yellow spots all around the upper and middle sections of the egg. -
Add secondary colors:
Rinse your brush or wipe your finger, then add light blue dots scattered among the yellow ones. Keep the spacing loose and airy. -
Introduce contrast:
Dip a smaller brush into red paint and add tinier dots into the empty spaces. This variation in size makes the pattern more dynamic. -
Detail the base:
Near the bottom of the egg, switch to a very fine brush. Paint delicate radiating lines from a central point using reddish-pink paint to create a starburst or flower detail. -
Complete the pattern:
Fill any remaining gaps with small green dots to balance the color palette. Let this egg dry completely.
Paint Consistency Tip
If your acrylics are too thick, dilute them with a single drop of water. This helps the liner brush glide smoothly for the geometric patterns.
Step 3: The Geometric Star Egg
-
Draft the lines:
Take a new egg and lightly sketch a six-pointed flower or star pattern using a pencil. Draw curved lines that intersect at the ‘pole’ of the egg. -
Trace with green:
Load a fine liner brush with watery green paint. Carefully trace over your pencil lines to create the primary structural grid of the design. -
Add pink accents:
Clean your brush thoroughly. Paint curved pink lines that echo the green ones, placing them inside the petals or segments created by the green grid. -
Highlight with yellow:
Add singular strokes of yellow inside the triangle shapes formed by the intersection of your lines. -
Layering blue lines:
Finally, add thin blue strokes parallel to portions of the green grid to add depth and complexity to the geometric weave.
Smudge Control
Paint the top half of the egg first and let it dry in a carton for 10 minutes before flipping it to paint the bottom to avoid messy fingerprints.
Step 4: The Swirling Rosette Egg
-
Create the center swirls:
On the third egg, use a small round brush loaded with pink or red paint. Instead of a dot, press down and twist the brush slightly to create a messy, spiral circle. -
Distribute the rosettes:
Paint 5-6 of these swirling shapes scattered randomly around the egg’s surface. -
Add blue centers:
While the previous paint is still slightly tacky, mix a little blue into your swirls or create separate blue spiral dots. -
Paint yellow accents:
Fill noticeable gaps with solid, bright yellow oval shapes. These act as bright filler stones in the mosaic. -
Finish with solid dots:
Use green paint to create solid, flat circles between the swirled patterns. This variety of texture—swirls versus solids—gives this egg a tactile look.
Arranging these colorful creations in a basket makes for a delightful centerpiece or a lovely handmade gift
BRUSH GUIDE
The Right Brush for Every Stroke
From clean lines to bold texture — master brush choice, stroke control, and essential techniques.
Explore the Full Guide
Sticker-Bomb Giant Easter Egg
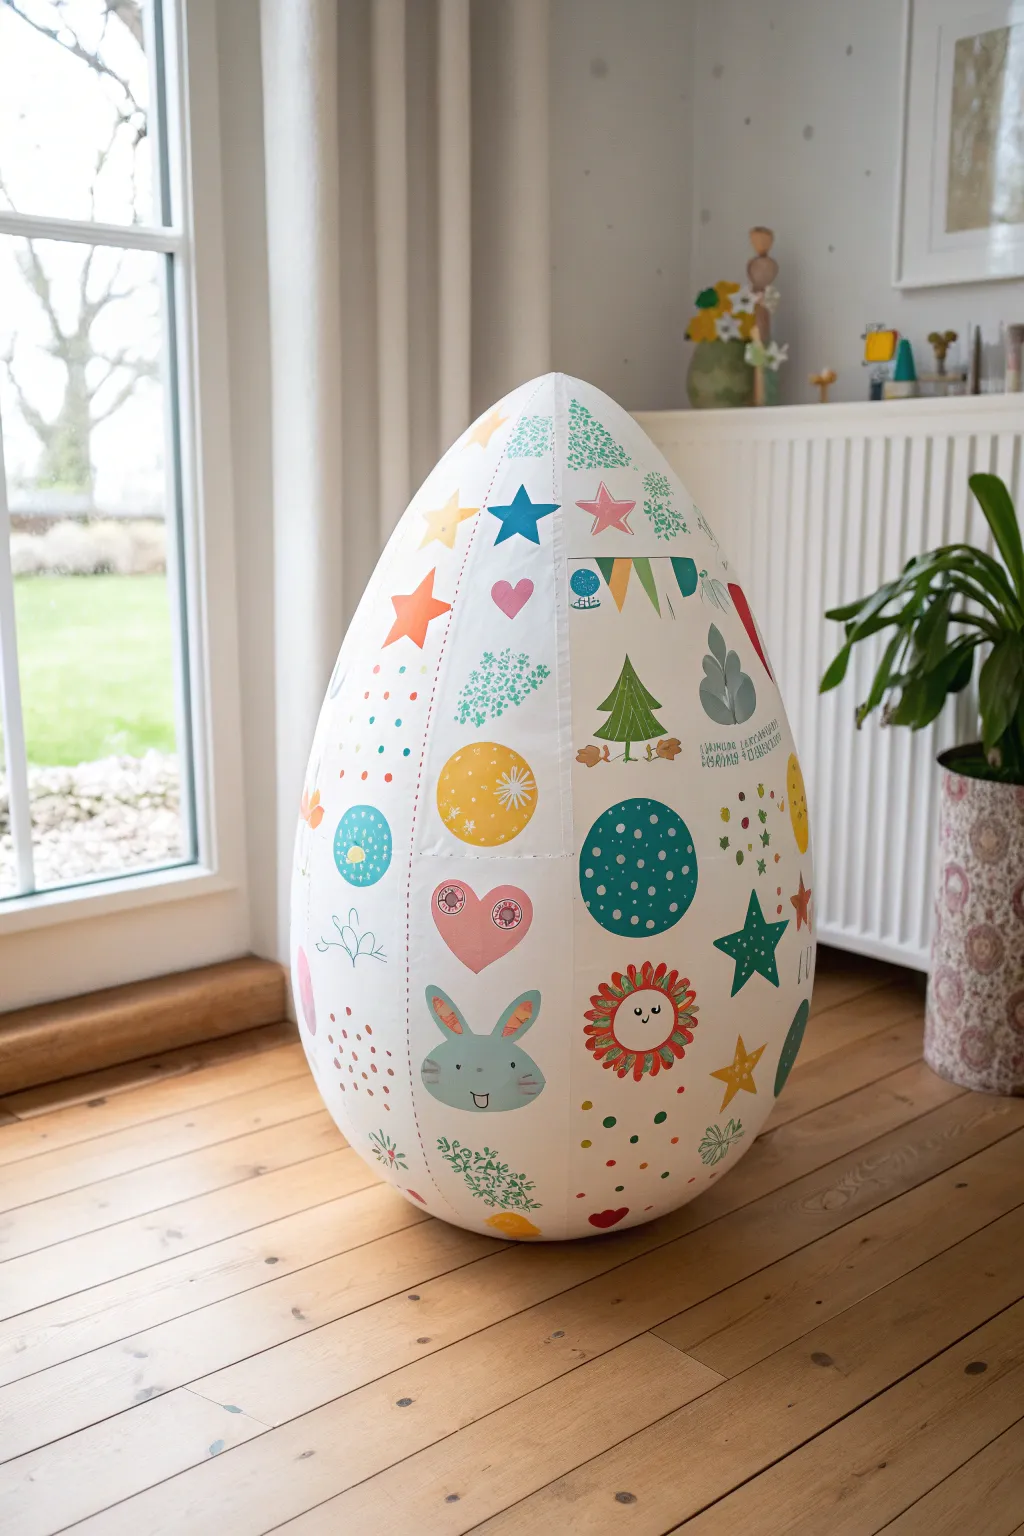
Transform your living room into an Easter wonderland with this oversized, statement-making egg that toddlers will adore decorating. Combining the fun of stickers with the charm of simple illustrations, this project creates a festive focal point that is both sturdy and sweet.
Step-by-Step Tutorial
Materials
- Large, heavy-duty white balloon or inflatable egg base
- White or off-white fabric (cotton or muslin)
- PVA glue or Mod Podge (matte finish)
- Large foam brush or paintbrush
- Water and a mixing bowl
- Cardstock or high-quality matte sticker paper
- Scissors (for adult use)
- Printer (colored ink)
- Pastel colored markers or paint pens (optional for hand-drawn details)
- Drop cloth or newspapers
Step 1: Preparing the Giant Base
-
Inflate the form:
Begin by inflating your large balloon or egg-shaped inflatable to your desired size. If you want it to stand upright securely like the example, tape a small weight, such as a heavy coin or washer, to the very bottom inside before inflating, or tape it externally to the base. -
Mix the adhesive:
In a mixing bowl, combine your PVA glue or Mod Podge with a small splash of water. The consistency should be like heavy cream—thin enough to spread easily but thick enough to hold fabric. -
Cut fabric strips:
Cut your white cotton fabric into wide, manageable strips. Vertical strips work best for navigating the curves of an egg shape without too much bunching. -
Apply the first layer:
Dip a fabric strip into the glue mixture, squeegee off the excess with your fingers, and smooth it onto the balloon. Start from the top and work your way down. -
Cover completely:
Continue overlapping the fabric strips slightly until the entire balloon is covered. This fabric layer creates that beautiful, textural ‘paper-mache’ look seen in the photo but with more durability. -
Let it cure:
Allow the base to dry completely in a warm, dry area. This usually takes overnight. It should feel hard and fabric-textured to the touch when ready. -
Add a smoothing coat:
Once dry, brush a thin layer of plain white paint or gesso over the fabric if you want a brighter white background, though the natural fabric look is also lovely.
Smooth Surface Secret
When applying fabric strips, snip small horizontal slits along the edges of the fabric as you curve around the top and bottom. This prevents wrinkles.
Step 2: Designing the Decorations
-
Curate the graphics:
Select a variety of Easter and spring-themed clip art. Look for simple shapes like stars, hearts, bunnies, polka dots, and small pine trees. The aesthetic relies on pastel tones and flat, illustrative styles. -
Print the elements:
Print your chosen designs onto matte sticker paper. If you don’t have sticker paper, printing on cardstock and using a glue stick works just as well. varying the sizes adds visual interest. -
Cut out the shapes:
Carefully cut out each shape. For a toddler-friendly activity, you can pre-cut these so they are ready to peel and stick. -
Sort by theme:
Group your cutouts into piles: large focal points (like the bunny face), medium fillers (circles and stars), and tiny accents (dots and small hearts).
Step 3: Decorating the Egg
-
Plan the zones:
Visually divide the egg into vertical sections or random zones. The original image uses faint vertical lines to segregate different pattern densities, which is a clever way to organize the chaos. -
Mark vertical guides:
Use a pencil and a flexible ruler or measuring tape to lightly draw dotted vertical lines down the egg. These mimic the sewn panels of a fabric egg and add structure to the design. -
Place focal stickers:
Help your toddler place the largest stickers first. Position the bunny face near the bottom-middle and the large sun or hearts in the central area. -
Fill with medium shapes:
Distribute the medium-sized stickers—like the Christmas trees, large stars, and patterned circles—around the focal points. Try not to cluster all one color in a single spot. -
Add the confetti layer:
Use the smallest stickers (tiny dots, mini stars, and dashes) to fill in the white space. This ‘confetti’ look ties everything together. -
Draw manual details:
I like to take a colored marker and draw little dashed lines, stems, or extra scribbles near the stickers. This integrates the stickers into the surface so they look painted on. -
Write festive text:
If you wish, use a fine-tip pen to add small text details or dates in the white spaces, mimicking the typography seen in the reference. -
Seal the artwork:
Finally, gently brush a coat of matte Mod Podge over the stickers. This seals the edges so toddlers can’t peel them off and unifies the sheen of the egg.
Level Up: Surprise Inside
Before sealing the final fabric layer at the bottom, pop the inner balloon and fill the hollow shell with light treats or streamers for a smashing finale.
Step back and admire your gallery-worthy giant egg, ready to be the star of your Easter celebration
Dot-Marker Baby Chicks
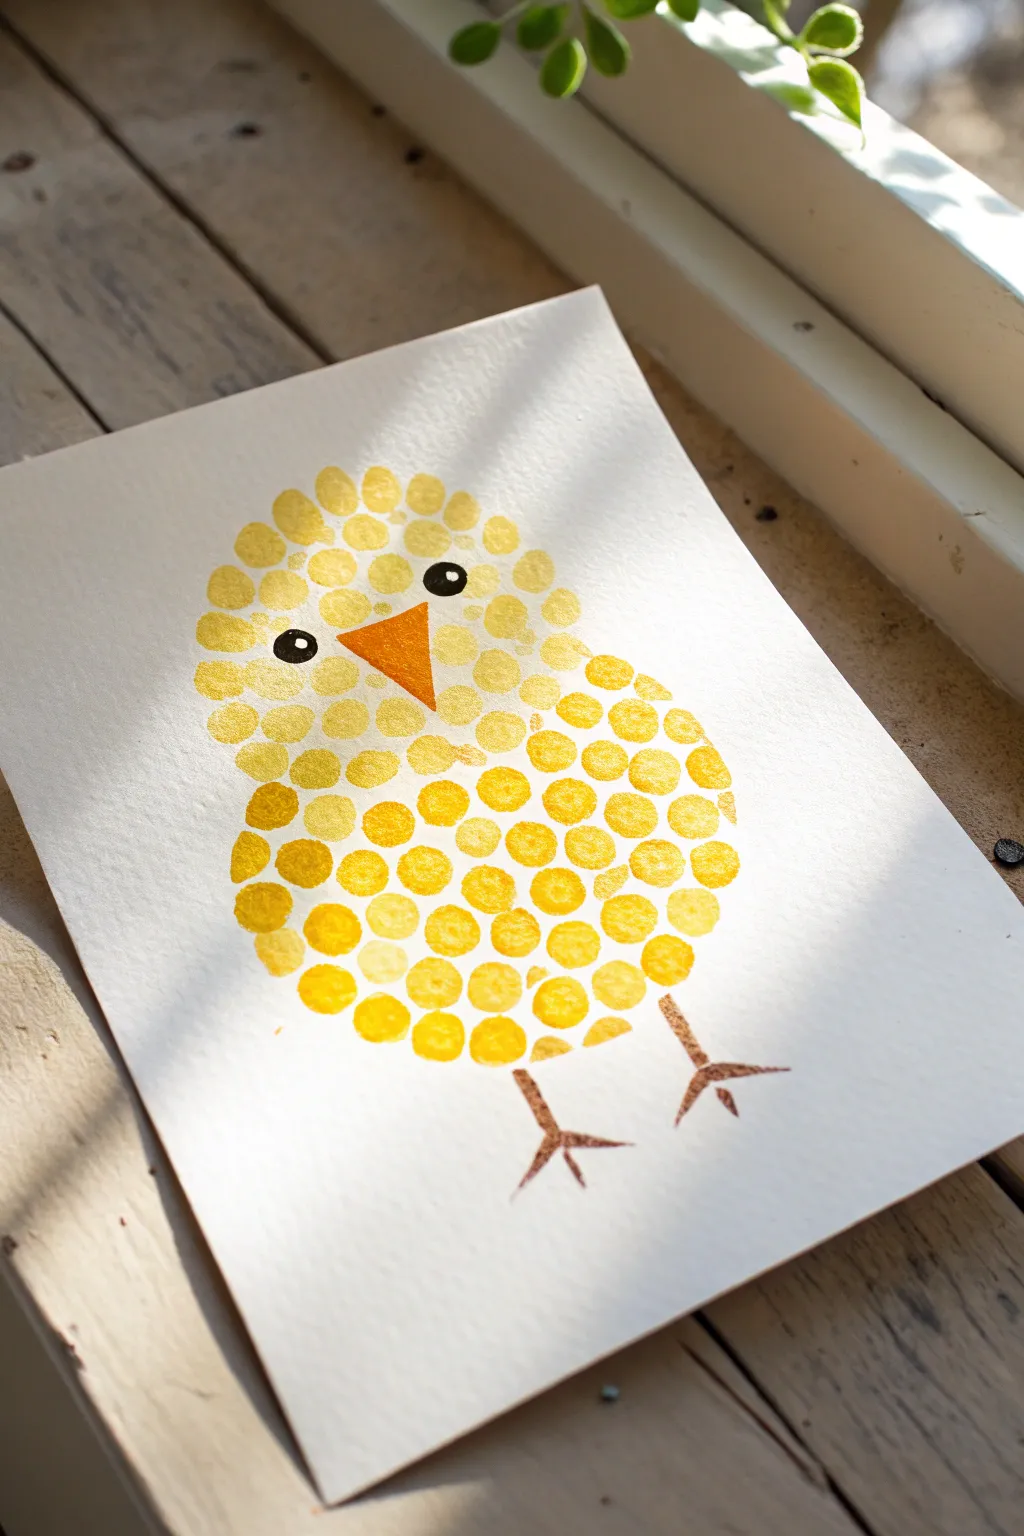
These adorable little chicks are created using a simple dotting technique that captures their fluffy texture perfectly. The bright yellows and oranges pop beautifully against white paper, making for a cheerful keepsake that even the littlest hands can help create.
Step-by-Step
Materials
- Heavyweight white drawing paper or cardstock
- Yellow dot markers (or yellow paint and a round stamp)
- Orange construction paper or cardstock
- Black marker or black paint
- Brown marker or brown paint
- Scissors
- Glue stick
- Pencil (optional)
Step 1: Planning the Shape
-
Light sketch:
Start by very lightly sketching the outline of your chick on the white paper using a pencil. Draw a smaller circle on top for the head and a slightly larger, wider oval below it for the body, overlapping them slightly. -
Refine the outline:
Smooth out the connection point where the head meets the body so it looks like one continuous, cute shape rather than a snowman.
Stamp Alternative
No dot markers? A wine cork dipped in yellow paint makes the perfect size stamp for this project. Even a thumbprint works for a personal touch.
Step 2: Creating the Dots
-
Prepare your yellow:
Shake your yellow dot marker well to ensure the ink flows evenly. If you are using paint instead, pour a small amount of yellow tempera onto a tray and grab your round sponge stamper. -
Outline with dots:
Begin stamping dots directly over your pencil line. Try to keep the dots close together but not completely overlapping, creating a defined edge for your chick. -
Fill the silhouette:
Work your way inward, filling the entire head and body with yellow dots. -
Check for gaps:
Look for any large white spaces in the center. Stamp extra dots to fill these in, which helps the chick look nice and fluffy. -
Layer for texture:
I like to go back over a few random spots with a second stamp once the first layer is semi-dry. This adds a subtle variation in the yellow tone, giving it more depth. -
Dry time:
Set the artwork aside for several minutes to ensure the dot marker ink or paint is completely dry to the touch before adding details.
Step 3: Adding the Face
-
Create the beak:
Cut a small triangle out of orange construction paper. You can keep it sharp or slightly round the corners if you prefer a softer look. -
Place the beak:
Apply a dab of glue to the back of the triangle and press it onto the center of the head area, pointing downward. -
Draw the eyes:
Using a black marker or a fine paintbrush with black paint, draw two small solid circles above the beak for eyes. Leave a tiny speck of white paper showing inside each black circle for a ‘glint’ or add a dot of white paint later.
Smudge Prevention
Dot marker ink can stay wet longer than you expect. Test a dot on a scrap paper first to see how fast it dries before your toddler touches the main art.
Step 4: Finishing Touches
-
Add the legs:
Take a brown marker and draw two straight lines coming down from the bottom of the yellow body. -
Draw the feet:
At the bottom of each leg line, draw three small toes branching out to create the little bird feet. -
Clean up:
Once everything is fully dry, gently erase any visible pencil sketch marks from the very beginning that might still be showing around the edges.
Now you have a cheerful, fluffy friend ready to brighten up your fridge or wall

PENCIL GUIDE
Understanding Pencil Grades from H to B
From first sketch to finished drawing — learn pencil grades, line control, and shading techniques.
Explore the Full Guide
Potato-Stamped Easter Eggs
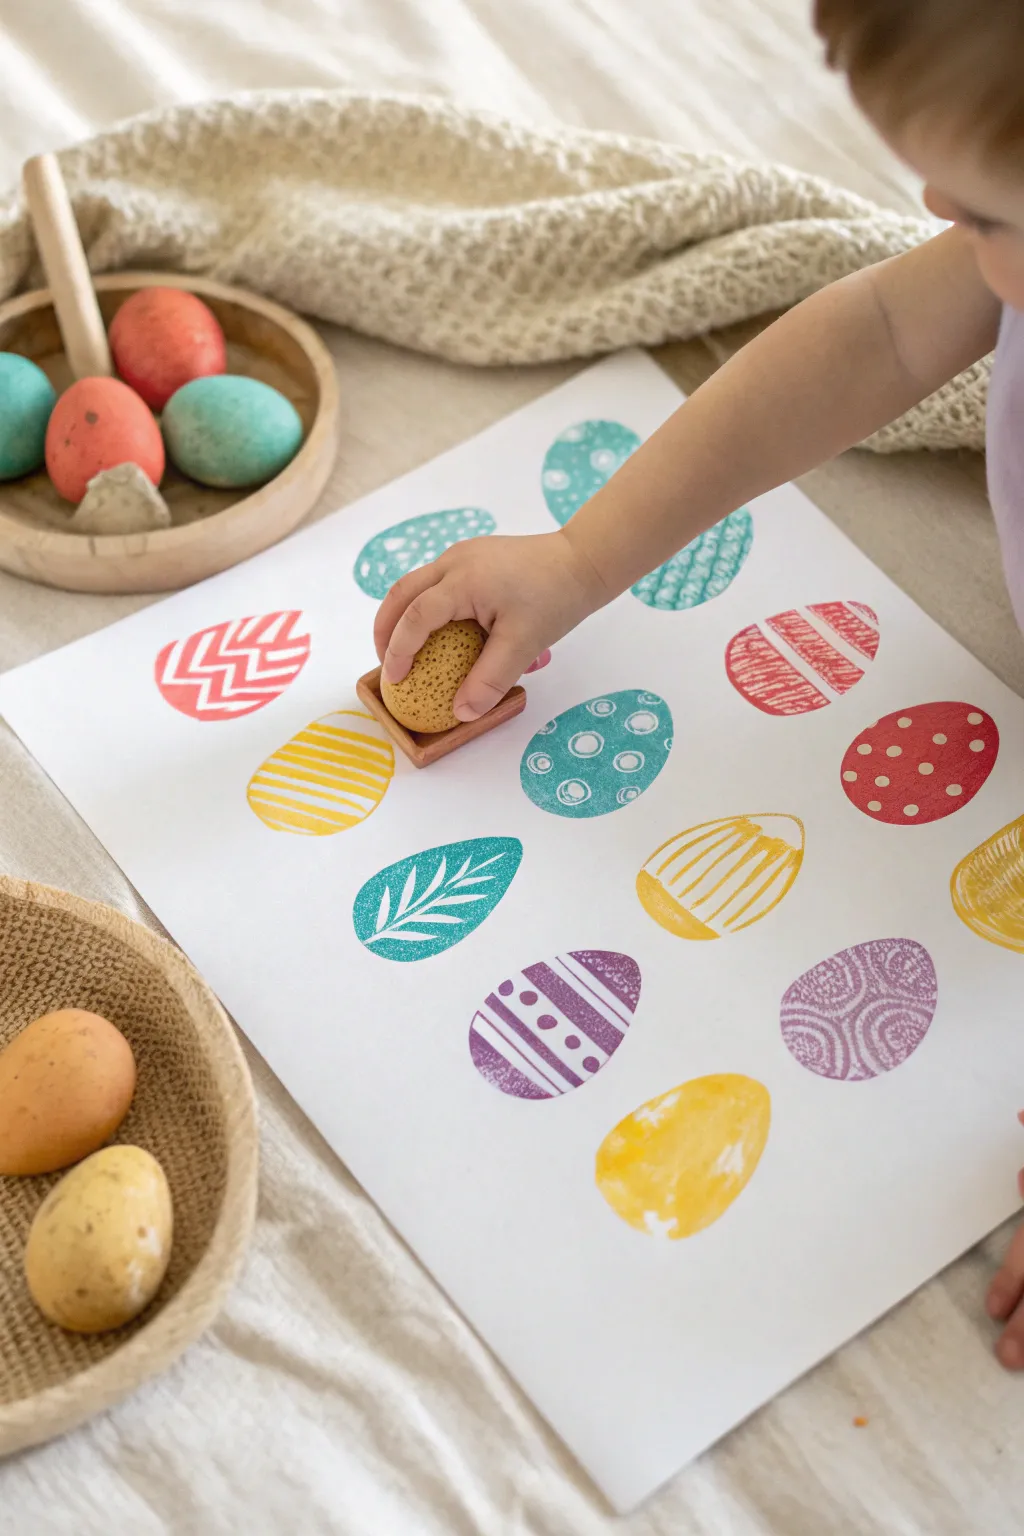
Transform everyday vegetables into a vibrant gallery of patterned Easter eggs with this engaging toddler-friendly craft. The result is a clean, colorful print featuring stripes, chevrons, and dots that looks beautiful displayed for the holiday.
Step-by-Step Guide
Materials
- Large, firm russet potatoes
- Sharp knife (for adult use only)
- Small carving tools or a melon baller
- Tempera or acrylic paint in pastel spring colors (pink, teal, yellow, purple)
- Small paint trays or paper plates
- Large sheet of white construction paper or cardstock
- Paintbrushes or foam sponges (for applying paint)
- Newspaper or a mess mat
Step 1: Prepping the Potato Stamps
-
Select and clean:
Choose potatoes that are large and oval-shaped to mimic the look of an egg. Wash and dry them thoroughly so the starch doesn’t interfere with the paint. -
Cut the base:
Slice the potato in half width-wise to create a flat, oval surface. Pat the cut side dry with a paper towel—removing moisture is key for a crisp stamp. -
Carve simple patterns:
Using a knife or small carving tool, carefully etch designs into the flat surface of the potato. I like to keep lines simple for toddlers. -
Design ideas:
Create chevron zig-zags by cutting out small triangles in a row. For stripes, carve out straight parallel lines. For polka dots, use a melon baller to scoop out small circles. -
Create a handle (optional):
If the potato is too slippery for small hands, you can cut a notch into the rounded skin side to give them a better grip.
Step 2: Setting Up the Station
-
Prepare the paint:
Squeeze your pastel paint colors onto individual paper plates or shallow trays. Mixing white into primary colors is a great way to get those soft Easter shades. -
Secure the paper:
Lay down your large sheet of white paper. You might want to tape the corners to the table so the paper doesn’t slide around while your toddler is stamping. -
Test prints:
It helps to do a quick test stamp on scrap paper first to ensure your carved lines are deep enough to show up clearly.
Slippery Grip?
If the potato is hard to hold, stick a plastic fork into the rounded, non-stamping side. It acts as a perfect handle for little hands to grasp and push.
Step 3: Stamping the Design
-
Apply paint:
Instead of dipping the potato directly into the glob of paint, use a brush or sponge apply a thin, even layer of paint onto the carved surface. This prevents globs from filling in your carved details. -
Position the stamp:
Help your toddler hold the potato over the paper. Aim for rows or a random pattern, leaving a little white space between each egg. -
Press and hold:
Press the potato firmly onto the paper. Encourage your child to push down without wiggling the potato to avoid smearing the design. -
Lift carefully:
Lift the potato straight up to reveal the print. The negative space where you carved will remain white, showing the pattern clearly. -
Switch colors:
Wipe the potato stamp with a damp cloth if you want to switch paint colors, or designate one potato half per color to keep things bright and muddy-free. -
Fill the page:
Continue stamping until the sheet is filled with colorful eggs. Try rotating the orientation of some eggs slightly for a playful look. -
Add detail (optional):
For the solid-colored eggs without carvings, you can go back over them once dry with a white paint pen or a small brush to add surface details. -
Let it dry:
Set the artwork aside on a flat surface to dry completely before hanging or using it as wrapping paper.
Crisp Lines Secret
Apply paint with a brush rather than dipping. Dipping overloads the carved grooves, which causes the pattern to vanish. Thin layers print best.
Now you have a festive collection of printed eggs ready to brighten up your home for the holiday
Watercolor Coffee Filter Eggs
These delicate, pastel-hued eggs mimic the soft, sugary texture of sophisticated confectionery but are crafted with simple materials. The watercolor effect creates a dreamy, marbled finish that looks beautiful displayed in a basket or on a table setting.
How-To Guide
Materials
- White craft eggs (paper mache or porous ceramic work best)
- Watercolor paints (tube or pan)
- Small spray bottle filled with water
- Soft round paintbrush (size 6 or 8)
- Paint palette or white plate
- Paper towels
- Small wooden drying rack or bamboo skewers
- Matte clear sealant spray (optional)
Step 1: Preparation and Base Layer
-
Prepare your workspace:
Cover your table with a protective sheet or newspaper. Since watercolors can be runny, having paper towels nearby is essential for catching drips. -
Select your palette:
Choose 3-4 soft pastel colors. Based on the image, mix a dusty rose, a pale sage green, a soft lavender, and a warm golden yellow. Dilute them significantly with water on your palette until they are very sheer. -
Dampen the egg surface:
Before applying any paint, lightly mist your craft egg with the spray bottle. You want the surface damp but not dripping wet; this helps the colors bleed softly into one another rather than creating hard lines. -
Apply the first wash:
Load your brush with the golden yellow wash. Gently dab it onto random sections of the egg, allowing the damp surface to wick the pigment outward. -
Soften edges immediately:
If any brushstrokes look too harsh, touch them with a clean, wet brush to blur the edges.
Fixing Muddy Colors
If colors blend into brown, let the egg dry completely. Then, gently wipe the muddy area with a damp magic eraser to lift the top layer of pigment before reapplying fresh color.
Step 2: Creating the Marble Effect
-
Add the lavender tones:
While the egg is still slightly damp, introduce the lavender color. Place it adjacent to the yellow areas, letting them touch just enough to blend slightly without turning muddy. -
Layer in the green:
Apply the sage green wash in empty spaces, swirling the brush slightly to create organic, cloud-like shapes rather than distinct spots. I like to keep the green sparse to let the warmer colors dominate. -
Introduce the rose accents:
Use the dusty rose color to create the deepest accents. Dab this color into the centers of larger colored patches or along the veins where two colors meet to create depth. -
Blot for texture:
Take a crumpled piece of paper towel and very gently blot painting surface. This lifts excess water and creates that slightly chalky, textured look seen in the photo. -
Let it rest:
Allow the egg to dry for about 10-15 minutes until the shine disappears but the surface is cool to the touch.
Sparkle Finish
While the final paint layer is still wet, sprinkle a tiny amount of ultra-fine clear glitter or embossing powder over the egg to give it a crystallized sugar texture.
Step 3: Refining and Finishing
-
Second layer for depth:
Once the base is mostly dry, go back in with slightly less diluted paint. Enhance specific swirls—like the purple band shown in the image—to make the marble pattern more distinct. -
Create distinct veins:
Use the very tip of your brush with a more concentrated pigment to draw thin, wandering lines through the color patches, mimicking natural stone veining. -
Soften the new lines:
Immediately but gently dab these new lines with a moist paper towel to ensure they look integrated into the surface rather than painted on top. -
Final texture check:
Inspect the egg for any ‘bald’ spots. If you find white areas that stand out too much, do a very light wash of dirty water (from your rinse cup) over them to tint them cream. -
Dry completely:
Set the decorated egg on a small wooden rack or elevate it on skewers to dry completely. This creates airflow underneath so the bottom doesn’t get soggy. -
Seal the surface:
To protect the watercolor from moisture, spray a light coat of matte clear sealant over the egg. Avoid glossy sprays, as they will ruin the soft, sugar-like aesthetic.
Now you have a collection of dreamy, artful eggs ready to elevate your spring décor


Marker-Bleed Paper Towel Eggs
These delicate, modern eggs combine the magic of wax resist with soft watercolor washes for a sophisticated yet accessible craft. The fine lines of crayon repel the liquid paint, creating crisp designs that seem to pop right off the bright white shell.
Detailed Instructions
Materials
- White hard-boiled eggs or hollowed eggshells (blown)
- White wax crayon or clear wax resist stick
- Colored wax crayons (sharp points)
- Watercolor paints or liquid food coloring diluted with water
- Fine-point paintbrush
- Small bowls for water/paint
- Paper towels (textured)
- Egg carton (for drying)
Step 1: Preparation & Drawing
-
Prepare your workspace:
Lay down a textured paper towel on your work surface. This not only protects your table but provides a soft, non-slip cushion for the delicate eggshells. -
Ensure clean shells:
Make sure your eggs are completely dry and room temperature. Any condensation on a cold egg will prevent the wax crayon from adhering properly to the shell. -
Sharpen your tools:
Since we are aiming for thin, crisp lines like the ones in the photo, ensure your crayons are sharpened to a fine point before you begin. -
Draft the primary lines:
Start with a light orange or yellow crayon. Draw loose, sweeping curved lines that wrap around the egg to create movement. Keep these lines swift and confident. -
Add radial bursts:
Using a pink or coral crayon, draw starburst shapes. Create a central point and flick small lines outward. These loose, firework-like shapes add energy to the design. -
Incorporate foliage shapes:
Switch to a green or teal crayon. Draw fan-like botanical shapes—imagine three to five lines radiating from a single base point, resembling simple grass tufts or palm fronds. -
Layer with invisible wax:
For a magical hidden effect, take your white crayon and draw a few secret squiggles or dots in the empty spaces. These will only reveal themselves once we start painting.
Wax Not Sticking?
If the crayon slides off without leaving a mark, the egg might be cold or oily. Wipe the shell with vinegar and let it dry, or warm the egg slightly in your hands before drawing.
Step 2: Painting & Reveal
-
Mix your wash:
In a small cup, dilute your watercolor paint or food coloring with plenty of water. You want a very translucent wash, not a thick opaque paint. -
Load the brush:
Dip a fine-point paintbrush into either plain water or your very light color wash. The brush should be wet but not dripping. -
Apply the wash:
Gently stroke the wet brush over your crayon drawings. Watch how the wax repels the water, keeping your drawn lines distinct while the shell stains slightly around them. -
Control the bleed:
If you are using water-soluble markers instead of wax (for the ‘marker bleed’ technique mentioned in the section title), touch the wet brush adjacent to the lines to pull the color out gently. -
Blot excess moisture:
I prefer to keep a piece of paper towel handy to immediately dab away any large pools of water. This keeps the design crisp and prevents the colors from becoming muddy. -
Rotate and repeat:
Turn the egg carefully and continue applying your wash to different sections, ensuring you don’t smudge the wet areas you just painted. -
Final drying:
Place the finished egg into the egg carton upright. Let it dry completely undisturbed for at least 30 minutes to set the dye.
Add Gold Accents
Once the watercolor is fully dry, use a metallic gold paint pen to trace over select lines or add tiny dots. This adds a chic, modern finish to the matte eggshell.
Display your beautiful creations in a ceramic bowl or clear vase for a stunning centerpiece
Tissue Paper “Stained Glass” Eggs
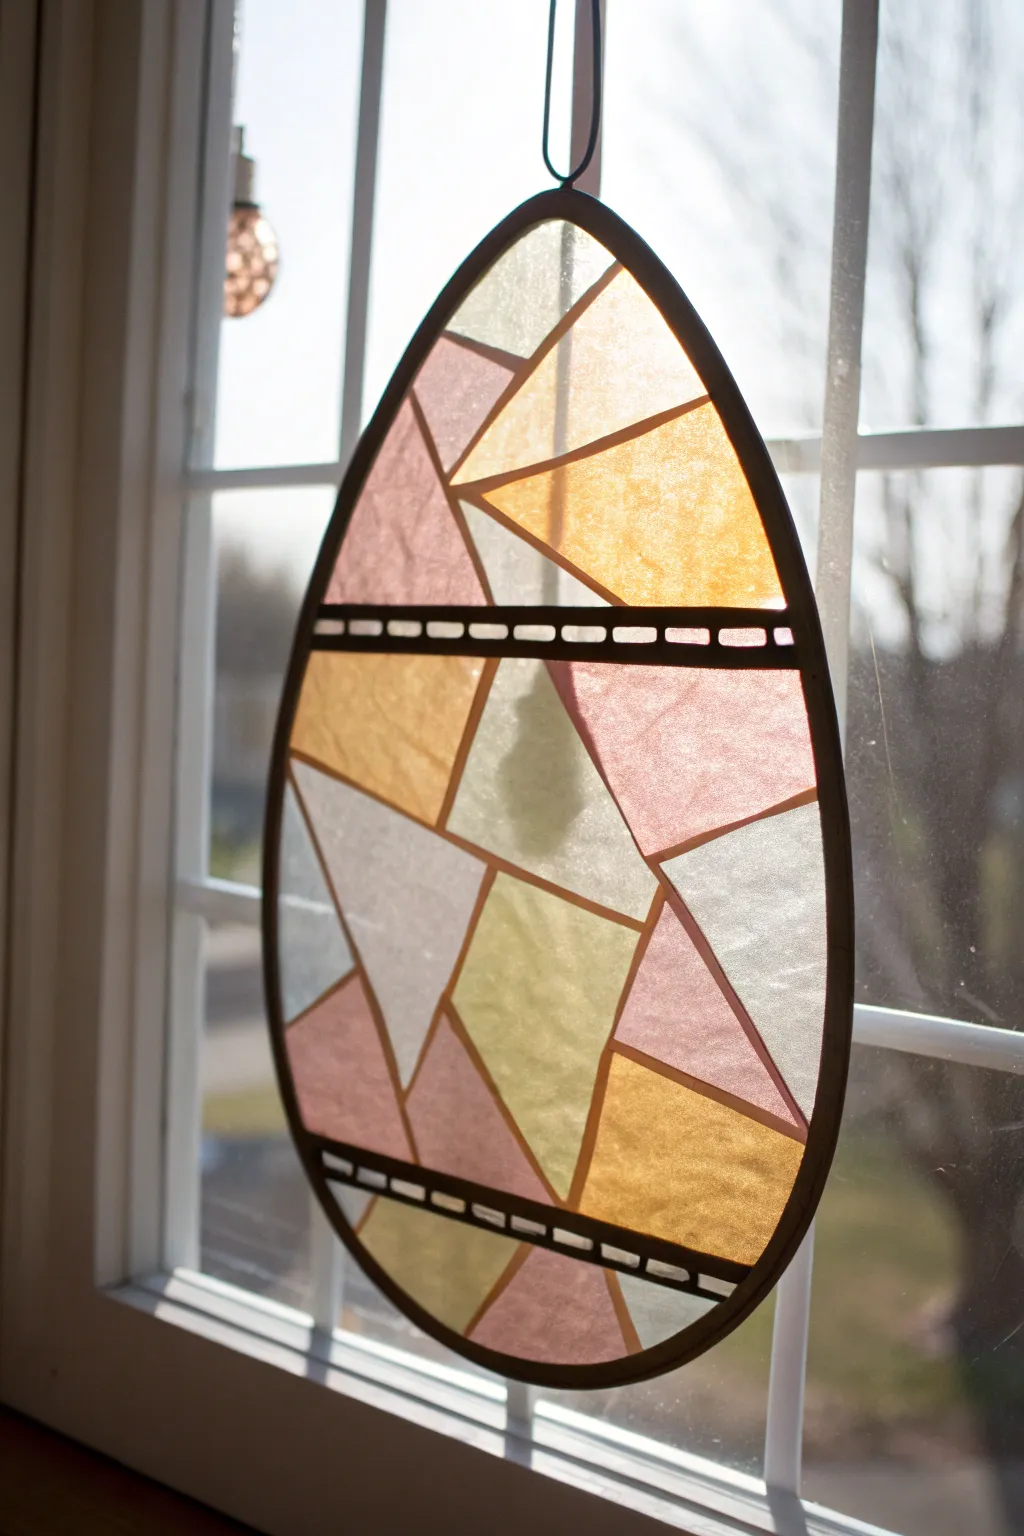
Capture the soft pastel light of spring with these stunning faux stained glass eggs. Using simple tissue paper and contact paper, this project creates a translucent, geometric decoration that glows beautifully in any sunny window.
Step-by-Step Tutorial
Materials
- Clear contact paper (self-adhesive laminating sheets)
- Black cardstock or construction paper
- Tissue paper in pastel colors (pink, yellow, peach, light blue, mint green)
- Scissors
- Pencil
- Tape (masking or scotch)
- Single-hole punch (optional, for hanging)
- String or ribbon
Step 1: Preparing the Frame
-
Draw the outline:
Sketch a large egg shape onto your black cardstock. It should be substantial, roughly the size of a sheet of paper, to allow plenty of space for the ‘glass’ panes. -
Create the border:
Draw a second, slightly smaller egg shape inside the first one to create a thick border, about ¼ to ½ inch wide. -
Cut the outer edge:
Carefully cut along the exterior line of your egg shape using sharp scissors. -
Cut the inner window:
Poke a hole in the center of the cardstock egg and cut out the inner oval, leaving you with just the black ring frame. -
Make the decorative strips:
Cut two long, thin strips of black cardstock to serve as the horizontal dividers seen in the image. You can make them fancier by cutting small rectangular notches along one edge to mimic a film-strip pattern.
Step 2: Creating the Stained Glass
-
Tape down the contact paper:
Cut a piece of clear contact paper slightly larger than your egg frame. Peel off the backing and tape it sticky-side up to your table so it doesn’t shift while you work. -
Place the frame:
Carefully press your black cardstock egg frame onto the sticky contact paper. Smooth it down gently to ensure a good seal. -
Add the dividers:
Place your decorative notched black strips horizontally across the egg—one near the top third and one near the bottom third—pressing them firmly onto the adhesive. -
Prepare tissue shapes:
Cut your pastel tissue paper into sharp geometric shapes. Aim for triangles and irregular polygons rather than soft circles to match the sharp, faceted look of the example. -
Begin filling spaces:
Start placing tissue paper shapes onto the sticky surface inside the frame. I find it easiest to start at the edges and work inward. -
Overlap for depth:
Don’t be afraid to let the tissue paper shapes overlap slightly. This creates interesting darker shades and mimics the variance in real stained glass. -
Fill the gaps:
Continue adding shapes until the entire clear area inside the frame is covered. It’s okay if the paper goes over the black frame a little bit; we will trim it later. -
Seal the back:
Once the design is full, cut a second piece of contact paper the same size as the first. Peel the backing and carefully lay it sticky-side down over your artwork, sandwiching the tissue paper inside.
Sticky Situation?
If the contact paper gets stuck to itself while you are peeling it, try freezing it for a few minutes before trying to pry it apart, or just start fresh with a new piece to avoid frustration.
Step 3: Finishing Touches
-
Smooth the seal:
Use the edge of a credit card or a ruler to smooth out any air bubbles, pushing them toward the edges to ensure the two sheets of contact paper are fused. -
Trim the excess:
Cut along the outside edge of the black cardstock frame, trimming away all the excess contact paper and overhanging tissue paper for a clean finish. -
Add the hanger:
Use a hole punch to make a small hole at the very top of the black frame, or simply tape a loop of string to the back. -
Hang and enjoy:
Thread a piece of ribbon or string through the hole and hang your masterpiece in a bright window to see the colors shine.
Pro Tip: Sharp Lines
For the crisp, geometric look in the photo, pre-cut your tissue paper with a rotary cutter and a ruler. Torn edges give a softer look, but cut edges look more like glass.
Watch how the colors shift throughout the day as the sun moves across the sky
Toilet Roll Bunny Tracks Stamping

Create adorable bunny footprints leading across a page using nothing more than recycled cardboard tubes and paint. This simple stamping activity results in a clean, minimalist artwork that captures the playful spirit of the Easter bunny hopping by.
Detailed Instructions
Materials
- White cardstock or heavy drawing paper
- Toilet paper rolls or paper towel tubes (at least 2)
- Reddish-brown acrylic or poster paint
- Hot glue gun and glue sticks
- Scissors
- Paper plate or paint palette
- Pencil or black marker
Step 1: Crafting the Stamps
-
Prepare the tubes:
Gather your cardboard tubes. You will need one tube to serve as the main handle and ‘frame’ for your stamp, and another tube to cut up into shapes. -
Cut the shapes:
Take one cardboard tube and cut off a small ring, about 1/2 inch wide. This will become the main pad of the paw. -
Form the main pad:
Gently squeeze and shape this ring so it looks somewhat like a rounded triangle or a kidney bean shape to mimic the large pad of a bunny’s foot. -
Cut toe shapes:
Cut three smaller strips or oval shapes from the remaining cardboard. These will become the three toes for the paw print. -
Arrange the stamp face:
Place your shaped cardboard pieces onto a flat surface to test the arrangement. You want the large pad at the bottom and the three toes arching above it. -
Attach to handle:
Once you are happy with the shape, use hot glue to attach these cardboard pieces onto the end of an uncut cardboard tube. The tube acts as a handle, making it easy for little hands to grip. -
Secure the bond:
Make sure the edges of your glued shapes are level and flat. If they are uneven, the stamp won’t pick up paint evenly, so I sometimes press it gently against a table while the glue sets.
Stamp Flatness Trick
Glued edges uneven? Rub the stamping face gently on fine-grit sandpaper. This levels the cardboard edges so every part of the paw touches the paper perfectly.
Step 2: Stamping the Tracks
-
Prepare the paint:
Squeeze a generous amount of reddish-brown paint onto a paper plate or flat palette. Spread it out slightly so it creates a thin, even layer. -
Position the paper:
Lay your white cardstock flat on your workspace. Ensure you have enough room to create a trail of prints. -
Load the stamp:
Dip your homemade stamp into the paint. Press down firmly to ensure the cardboard edges are fully coated with color. -
Test the impression:
Before committing to your final paper, do a quick test stamp on a scrap piece of paper to check if the toes and pad are printing clearly. -
Stamp the first print:
Press the stamp onto the bottom right corner of your white paper. Rock it very gently side-to-side without sliding to transfer the paint cleanly. -
Create the trail:
Re-dip the stamp and place a second print slightly above and to the left of the first one to simulate walking motion. -
Continue the path:
Add a third print further up the page, continuing the diagonal or winding path you’ve started. -
Let it dry:
Allow the stamped paint to dry completely. This usually takes about 10-15 minutes depending on how thick the paint application was. -
Add a detail:
Once dry, use a black marker or pencil to draw a small horizontal line or scratch mark near the bottom print for a bit of extra texture or context.
Make it a Scene
Don’t stop at tracks! Use green thumbprints at the bottom of the page to create grass, or draw a tiny carrot at the end of the trail for a fun narrative.
You now have a charming set of bunny prints ready to decorate your home for spring
Peekaboo Bunny Mask Plate

Transform a simple paper plate into an adorable bunny buddy perfect for Easter play. This easy craft features tall, impressive ears and a sweet face that your toddler will love peering through during festive games.
Step-by-Step Tutorial
Materials
- White paper plate (standard size)
- White cardstock paper
- Pink construction paper or colored paper
- Black construction paper
- Pink cardstock (for the nose)
- Gold or black marker (for whiskers)
- Glue stick or white PVA glue
- Scissors
- Pencil
- Craft knife (for adult use only)
Step 1: Prepping the Plate Base
-
Mark the eye placement:
Hold the paper plate up to your child’s face gently to gauge where their eyes are. Use a pencil to lightly mark two circles in the center of the plate for the eye holes. -
Cut the eye holes:
I find it easiest to carefully poke a hole in the center of your eye circles with a craft knife first, then use scissors to cut out the full circles. Smooth any rough edges. -
Create the mouth shape:
Cut a curved crescent moon shape out of black construction paper. This will be the bunny’s smiling mouth. -
Attach the mouth:
Glue the black mouth piece near the bottom center of the plate, positioning it so the curve looks like a happy smile.
Sturdy Ears Tip
If you don’t have heavy cardstock, glue two sheets of regular printer paper together for the ears. The double layer adds stiffness so they stay upright.
Step 2: Crafting the Ears
-
Sketch the outer ears:
Draw two large, long rabbit ear shapes on your white cardstock. They should be at least as tall as the plate itself for that fun, oversized look. -
Cut out the white ears:
Cut along your pencil lines to free the two white ear shapes. -
Sketch the inner ears:
On the pink construction paper, draw two slightly smaller ear shapes that will fit inside the white ones, leaving a nice white border. -
Assemble the ears:
Glue the pink inner ear shapes directly onto the center of the white cardstock ears. Smooth them down flat to prevent bubbling. -
Attach ears to the plate:
Flip the paper plate over so the back (convex side) is facing you. Glue the bottom inch of each finished ear to the top rim of the plate, ensuring they stand up straight.
Cutting Clean Eye Holes
If cutting the center eye holes is bending the plate too much, place the plate on a cutting mat and use an X-Acto knife instead of scissors.
Step 3: Adding the Cute Details
-
Make the nose:
Cut a small oval or rounded triangle shape from the pink cardstock for the bunny’s nose. -
Position the nose:
Glue the pink nose right in the center of the face, just above the black mouth but below the eyes. -
Draw the whiskers:
Using a gold or black marker, draw three long, straight lines radiating outward from each side of the nose area towards the plate’s ruffled rim. -
Optional reinforcement:
If the ears feel a bit floppy, I like to tape a popsicle stick or a strip of stiff cardboard to the back of each ear where it meets the plate for extra stability. -
Let it dry:
Allow the glue to dry completely for about 15-20 minutes before letting your little one play, ensuring all pieces stay securely attached.
Now your little bunny is ready to hop around and spread some Easter cheer
Sponge-Painted Carrot Patch
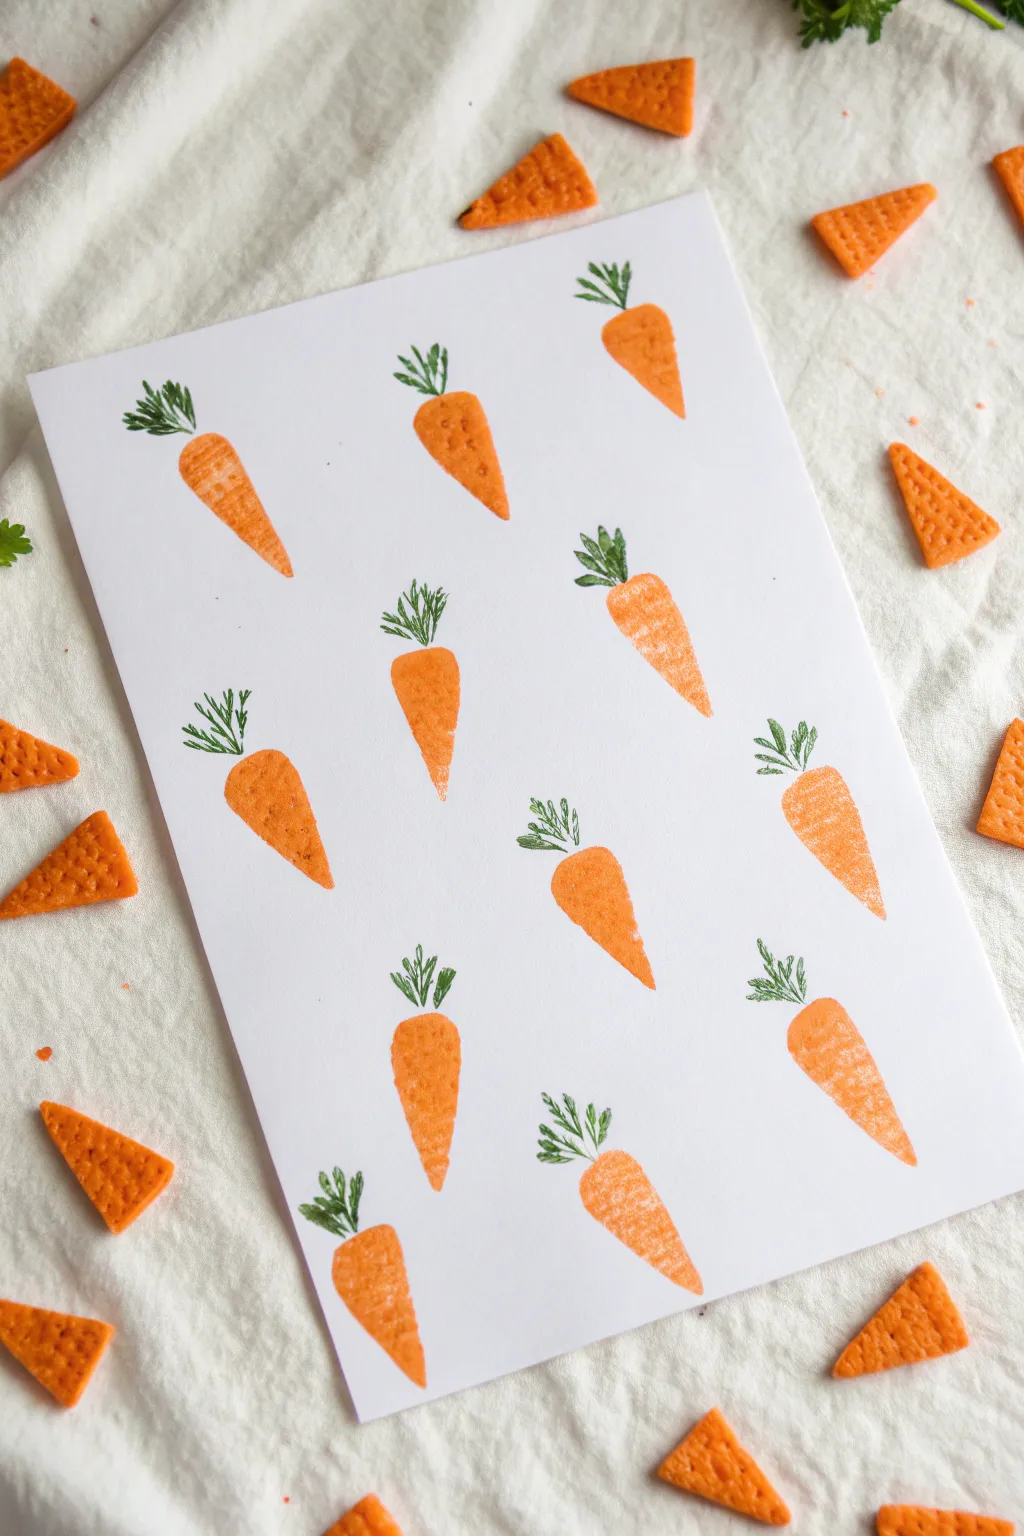
Transform a simple kitchen sponge into an adorable garden of carrots with this mess-free stamping project. The distinct texture of the sponge mimics the root vegetable perfectly while giving toddlers a fun sensory element to explore.
Detailed Instructions
Materials
- Clean kitchen sponge (without scouring pad)
- Orange craft paint (washable tempera or acrylic)
- Green craft paint
- White cardstock or heavy drawing paper
- Scissors
- Paper plate or palette
- Small paintbrush (optional)
- Fresh parsley or celery leaves (optional alternative for stamping)
Step 1: Preparation & Shapes
-
Cut the sponge:
Begin by taking a clean, dry kitchen sponge. Using sharp scissors, cut a long, narrow triangle shape. This will be the body of your carrot. -
Trim the edges:
Soften the sharp corners of the triangle slightly with your scissors. You want the top edge (where the greens will go) to be a bit rounded rather than perfectly flat. -
Create the greenery stamp:
From the remaining sponge scraps, cut a very small, rectangular piece or a tiny wedge. You will use the edge of this piece to stamp the leafy tops later. -
Prepare the palette:
Squeeze a generous dollop of orange paint onto a paper plate. Spread it out slightly so it’s a thin, even layer rather than a calm pool.
Make It Grippy
Hot glue a clothespin or a plastic bottle cap to the back of the sponge shape. This creates a perfect handle for little toddler hands to grip while stamping.
Step 2: Stamping the Carrots
-
Load the sponge:
Dip the carrot-shaped sponge into the orange paint. Press it down firmly to ensure the entire bottom surface is coated, but try not to let paint glob up the sides. -
Test print:
Do a quick test stamp on a scrap piece of paper. This removes excess paint and ensures you get that nice, bubbly texture instead of a solid blob. -
Start the pattern:
Press the orange sponge onto your white cardstock. I like to start near the center to anchor the composition. -
Vary angles:
Continue stamping orange triangles lightly across the page. Rotate your hand slightly for each one so the carrots tilt in different directions, making the pattern feel organic. -
Reload paint:
Refill your sponge with paint after every two or three stamps. As the paint fades, you get a lovely textured effect that looks even more like a real carrot skin. -
Fill the page:
Keep stamping until you are happy with the number of carrots. Leave enough white space between them for the green tops you’ll add next. -
Let dry briefly:
Allow the orange paint to dry for about 5-10 minutes. This prevents the green paint from smearing into the orange if they happen to touch.
Too Much Paint?
If the carrot prints look like solid blobs without texture, the sponge is overloaded. Dab it on a paper towel 2-3 times before hitting the main paper.
Step 3: Adding the Greens
-
Prepare green paint:
Clean off a spot on your paper plate and squeeze out a small amount of green paint. -
Load the detail sponge:
Take the small scrap of sponge you cut earlier. Dip just the narrow edge or corner into the green paint. -
Stamp the stems:
Press the green sponge edge directly on top of the widest part of an orange carrot. Stamp two or three little lines radiating outward to mimic leafy stems. -
Repeat for all carrots:
Work your way across the paper, adding a little tuft of greenery to every orange shape. -
Alternative variation:
If you want a different texture, you can dip a small paintbrush in green paint and flick three short strokes for the leaves instead. -
Final touches:
Check your artwork for any carrots that look ‘bald’ and give them their leaves. Let the entire sheet dry completely flat.
Once dry, this festive print makes wonderful wrapping paper or a charming Easter card front
Painted Egg Carton Chicks
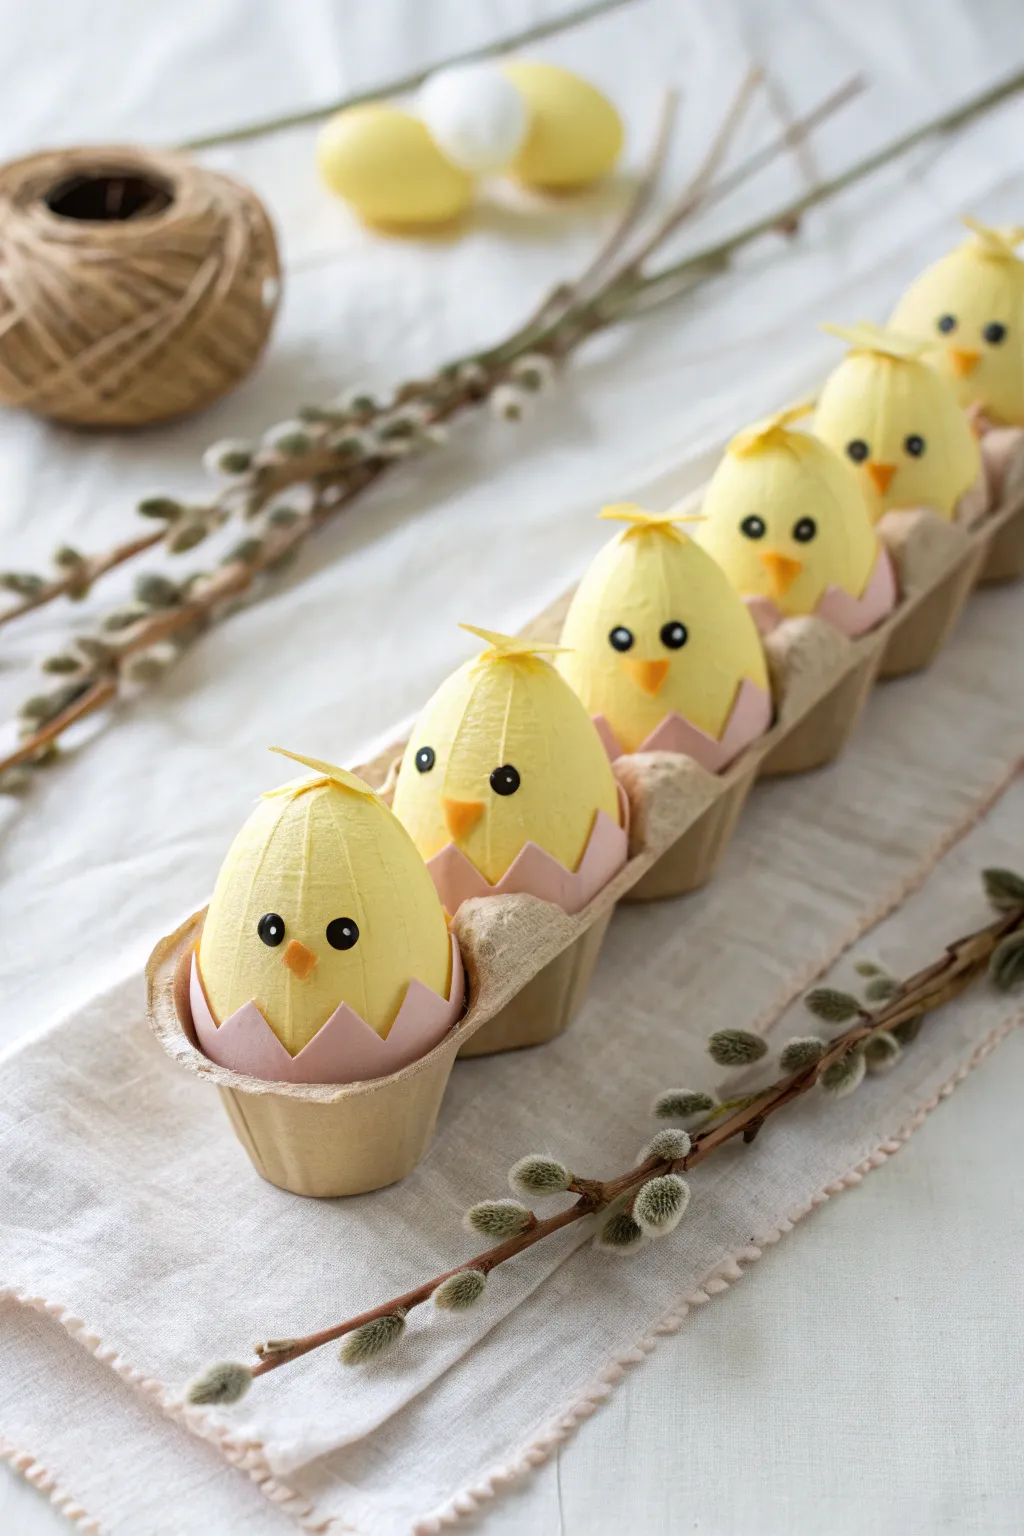
Transform a simple paper egg carton into a row of adorable, chirping friends ready to greet spring. These bright yellow chicks, tucked inside their painted shells, make for a delightful centerpiece or a fun play set for little hands.
Step-by-Step Guide
Materials
- Cardboard egg carton (pointed cone style)
- Yellow acrylic paint
- Light pink acrylic paint
- Paintbrushes (flat and fine tip)
- Orange felt or construction paper
- Small black beads or black marker
- Yellow cardstock or construction paper
- Scissors
- Craft glue or hot glue gun (adult use)
- Pencil
Step 1: Preparation & Base Painting
-
Separate the carton:
Begin by carefully cutting apart the individual cups of the egg carton. You will need the tall, pointed center cones for the chick bodies and the rounded cup sections for the shells. -
Trim the chick bodies:
Take the tall, pointed cone pieces and trim the bottom edges so they sit flat and stable on a table surface. -
Shape the shells:
Cut the rounded cup sections to be shallow, creating a jagged, zigzag pattern along the top rim to mimic a cracked eggshell. -
Paint the chicks:
Coat the tall cone pieces entirely in bright yellow acrylic paint. I usually apply two coats to cover the grey cardboard completely, letting the first dry before adding the second. -
Paint the shells:
Paint the outside of the jagged cup pieces a soft, pastel pink. Leave the inside unpainted as it won’t be visible once assembled. -
Dry thoroughly:
Set all painted pieces aside on a sheet of newspaper or wax paper to dry completely before handling them again.
Uneven Paint Coverage?
If the grey carton shows through the yellow paint, mix a tiny bit of white paint into your first yellow layer to act as a primer, then use pure yellow on top.
Step 2: Detailed Features
-
Create the crests:
While the paint dries, cut small, curved triangle shapes from yellow cardstock or construction paper to serve as the feather crests. -
Prepare the beaks:
Snip tiny triangles out of orange felt or paper. These should be quite small to fit proportionally on the narrow cones. -
Attach the crest:
Once dry, glue the yellow paper crest to the very top point of the yellow cone. You may need to hold it in place for a few seconds until the glue sets. -
Position the eyes:
Apply two small dots of glue about a third of the way down the cone for the eyes. -
Set the eyes:
Press two small black beads into the glue dots. If working with very young toddlers, simply drawing the eyes with a black marker is a safer alternative. -
Add the beak:
Glue the orange triangle beak just below and centered between the eyes. Create a slight fold in the felt first to make it dimensional.
Step 3: Assembly & Display
-
Test the fit:
Place the yellow chick body inside the pink shell base to ensure it sits snugly. If the chick wobbles, add a dab of hot glue to the bottom of the yellow cone before inserting it. -
Secure the pair:
Press the chick firmly into the shell base so the jagged pink edges rise up around the yellow body. -
Repeat the process:
Continue assembling all your painted pairs until you have a full row of hatching chicks. -
Prepare the holder:
Take a long strip of the original egg carton lid or a bottom section cut length-wise to serve as a tray. -
Arrange the chicks:
Seat each completed chick-in-shell into the carton tray. -
Final touch:
Adjust the crests so they all point in a similar direction for a uniform look. -
Add texture:
Optionally, gently brush the yellow paint with a dry, rough texture to make it look a bit more like downy feathers.
Make It Fuzzy
Instead of just painting, coat the yellow cones in glue and roll them in yellow flocking powder or chopped yarn for a truly fuzzy, tactile chick.
Now you have a charming row of spring chickens ready for display
Torn-Paper Egg Collage
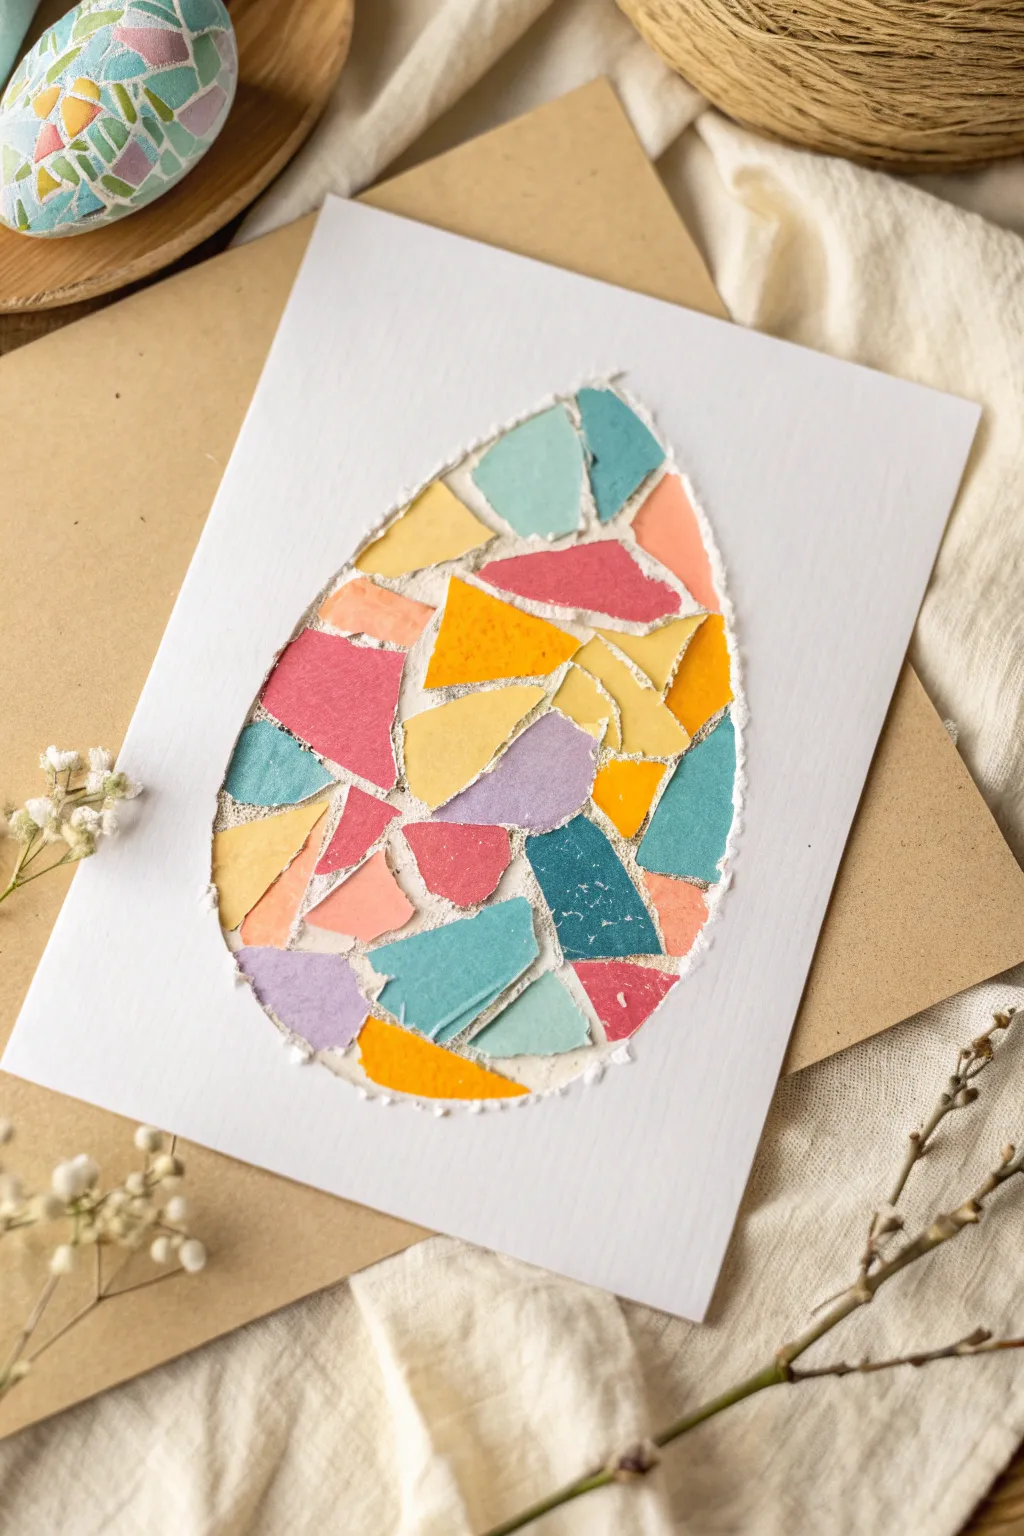
This charming project transforms simple scraps of colorful paper into a vibrant Easter egg mosaic. The clever “window” technique ensures clean edges every time, making it a stress-free and satisfying activity for little hands.
Detailed Instructions
Materials
- Two sheets of heavy white cardstock or watercolor paper
- Various colored construction paper or scrapbook paper (pinks, blues, yellows, teals)
- Pencil
- Scissors
- Glue stick
- White liquid school glue (PVA)
- Small paintbrush (optional, for spreading glue)
- Paper plate or tray for paper scraps
Step 1: Preparing the Mosaic Pieces
-
Select your palette:
Gather your colored construction papers. Aim for a mix of spring shades like coral, teal, lemon yellow, light blue, and lavender to match the example. -
Tear the paper:
Encourage your toddler to tear the colored paper into small pieces. The pieces should be roughly the size of a coin—big enough to handle but small enough to fit many inside the egg shape. -
Sort the scraps:
Collect all the torn pieces onto a paper plate or tray. Keeping them contained helps manage the mess and makes selection easier during the gluing phase. -
Mix colors vs. separate:
Decide on your strategy: you can mix all the colors together for a confetti look or keep them in piles if you want to create color-blocked sections.
Sticky Situation?
If paper corners curl up inside the mosaic, dab a tiny dot of liquid white glue under the curled edge with a q-tip and press down for ten seconds.
Step 2: Creating the Egg Window
-
Draw the outline:
Take one sheet of your heavy white cardstock. Lightly draw a large, classic egg shape in the center using a pencil. -
Pierce the center:
To start cutting out the egg, carefully poke a hole in the middle of the egg shape with your scissors. -
Cut the window:
Cut outward from the center hole to the pencil line, then carefully cut along the line to remove the egg shape entirely. You now have a frame with an egg-shaped window. -
Add texture (optional):
For the slightly rustic look seen in the photo, you can tear the very edge of the window opening slightly instead of cutting it perfectly straight, or distress it with sandpaper. -
Prepare the backing:
Take your second sheet of white cardstock. This will be the base that holds the colorful paper.
Add a Little Sparkle
Mix in scraps of gold or silver wrapping paper, or even pieces of old foil candy wrappers, to give your egg a special Easter shine.
Step 3: Building the Mosaic
-
Trace the guide:
Place your window frame over the backing sheet and lightly trace the egg shape onto the backing sheet with a pencil. This tells you exactly where to glue. -
Apply the first layer of glue:
Remove the top frame. On the backing sheet, apply a generous layer of glue stick within the pencil lines you just drew. -
Start sticking:
Have your toddler press the torn paper pieces onto the sticky area. It’s okay if they go slightly over the pencil lines, as those edges will be covered later. -
Fill the gaps:
Look for white spaces between the colored pieces. Tear smaller bits of paper to fill these gaps, fitting them together like a puzzle. -
Check for flatness:
I prefer to smooth down the papers with the palm of my hand every few minutes to ensure no corners are curling up. -
Create variety:
Try to alternate colors so that two pieces of the same color aren’t always touching. This creates that high-contrast mosaic energy. -
Let it dry briefly:
Give the collage a few minutes to set so the papers don’t slide around during the final assembly.
Step 4: Final Assembly
-
Glue the frame:
Flip your window frame (the paper with the hole) over. Apply a strong glue stick or thin lines of liquid glue all around the back, especially close to the egg-shaped opening. -
Align the layers:
Carefully place the window frame on top of your mosaic sheet. Line up the edges of the paper so they match perfectly. -
Press and seal:
Press down firmly around the egg opening to seal the two sheets together. The white frame will neatly cover any messy edges of your torn paper. -
Trim edges:
If the two sheets aren’t perfectly aligned at the outer corners, use scissors to trim the outer perimeter of the card for a clean finish.
Display your colorful creation on a mantle or fridge to welcome the season
Tape-Resist Bunny Silhouette Scribble
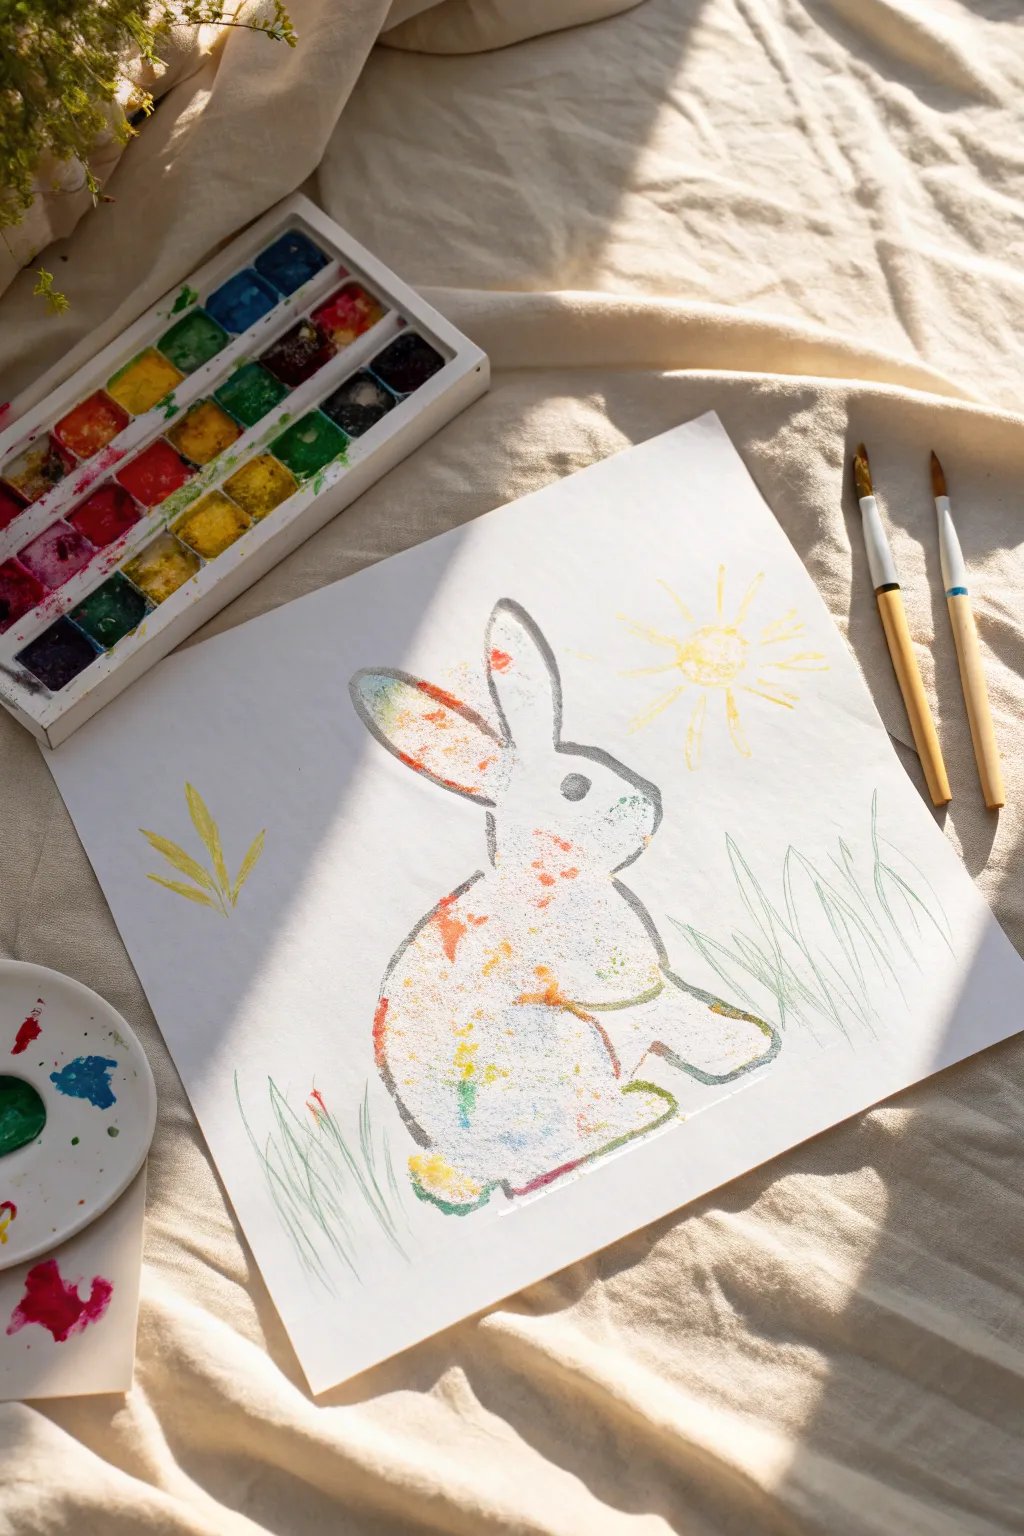
This charming project uses a clever resist technique to create a crisp bunny shape filled with joyful, chaotic color. It’s a perfect way for toddlers to experiment with texture and scribbling while still achieving a recognizable and adorable Easter masterpiece.
Step-by-Step Tutorial
Materials
- Heavyweight drawing paper or watercolor paper
- Cardstock or thin cardboard (for the stencil)
- Pencil
- Scissors
- Removable adhesive putty or rolled painter’s tape
- Grey crayon or oil pastel
- Watercolor paints (pan set)
- Small round paintbrush
- Cup of water
- Paper towels
Step 1: Creating the Resist Mask
-
Draw your bunny shape:
On a separate piece of cardstock or thin cardboard, draw a simple outline of a sitting bunny. Keep the lines smooth and not too detailed, as this will serve as your mask. -
Cut out the silhouette:
Carefully cut out the bunny shape you just drew. This cutout is the tool that will protect the white paper underneath. -
Prepare the adhesive:
Roll small pieces of painter’s tape into loops or use small dots of removable mounting putty. Stick these to the *back* of your bunny cutout. -
Secure the mask:
Press the bunny cutout firmly onto the center of your main sheet of watercolor paper. Ensure the edges are flat against the paper so paint doesn’t sneak underneath.
Clean Lines?
If paint bleeds under your outline, the crayon layer wasn’t thick enough. Next time, press harder to create a stronger wax barrier.
Step 2: Tracing the Outline
-
Trace the bunny:
Take a grey crayon or oil pastel and trace heavily around the entire edge of your cardstock bunny. You want a thick line that goes half on the cutout and half on the paper. -
Check the coverage:
Make sure you haven’t missed any spots, especially around the ears and tail. This waxy line creates a barrier and distinct outline for the final reveal. -
Remove the mask:
Gently peel up the cardstock bunny. You should now see a perfect white bunny shape defined by your thick grey crayon outline.
Step 3: Adding the Color
-
Wet your brush:
Dip your brush into the water and activate your watercolor paints. You want the colors to be vibrant but not too watery. -
Start the colorful texture:
Using a technique sometimes called ‘stippling’ or just gentle dabbing, begin adding spots of color *inside* the bunny outline. Start with warm colors like orange and yellow. -
Layer cool colors:
Rinse your brush and switch to greens or blues. Dab these lightly in different areas of the bunny’s body to create a speckled, confetti-like effect. -
Scribble lightly:
For added texture, use the tip of a semi-dry brush to make light scribbles or scratches of color over the dried dabs. I find this creates a nice sense of fur texture. -
Keep it loose:
Don’t try to fill every white space. Leaving plenty of white paper showing inside the bunny keeps the image bright and airy.
Make it Sparkle
While the paint inside the bunny is still wet, sprinkle a tiny pinch of salt over it. As it dries, it creates a magical crystallized texture.
Step 4: Background Details
-
Paint the sun:
In the upper right corner, paint a simple yellow circle. Add radiating lines for the sunbeams using a quick, light touch. -
Add blades of grass:
Using a diluted green paint, create upward flicking motions around the base of the bunny to simulate grass. Vary the height of the strokes for a natural look. -
Add decorative elements:
If you like, add a tiny yellow leaf shape or two floating on the left side to balance the composition. -
Define the eye:
Once the paint inside the bunny is mostly dry, paint a distinct grey or black dot for the eye. A simple round shape works best. -
Final touches:
Let the entire page dry completely flat so the watercolor paper doesn’t buckle too much.
Hang this cheerful bunny in a sunny spot to welcome spring into your home
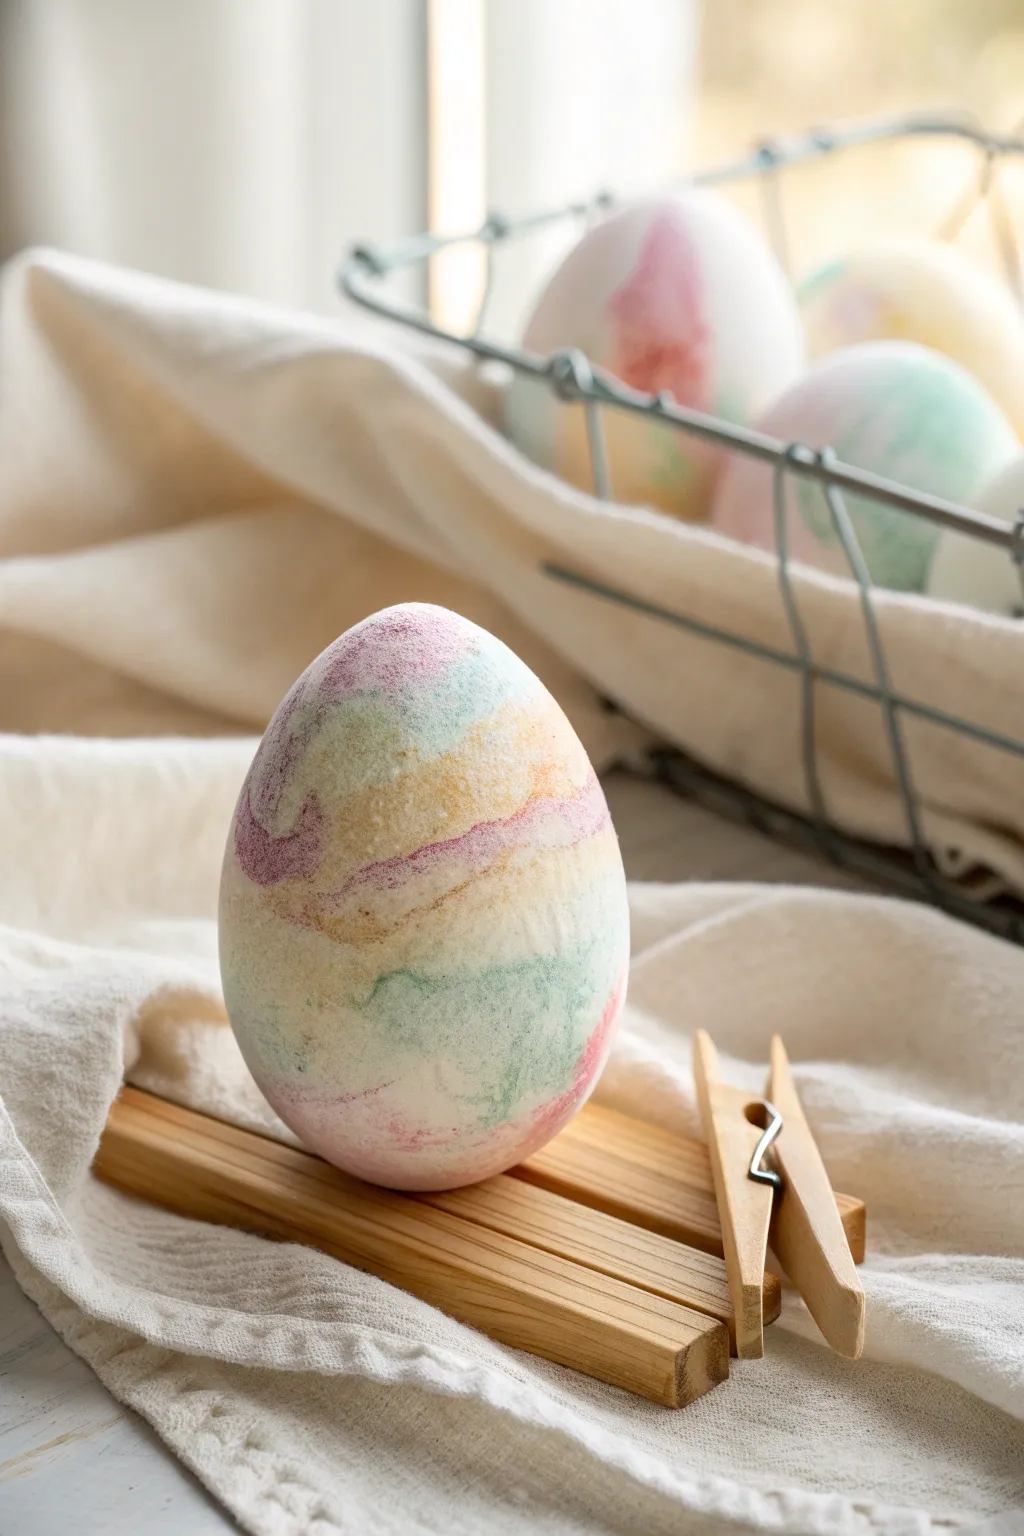
Shaving-Cream Marbled Easter Eggs
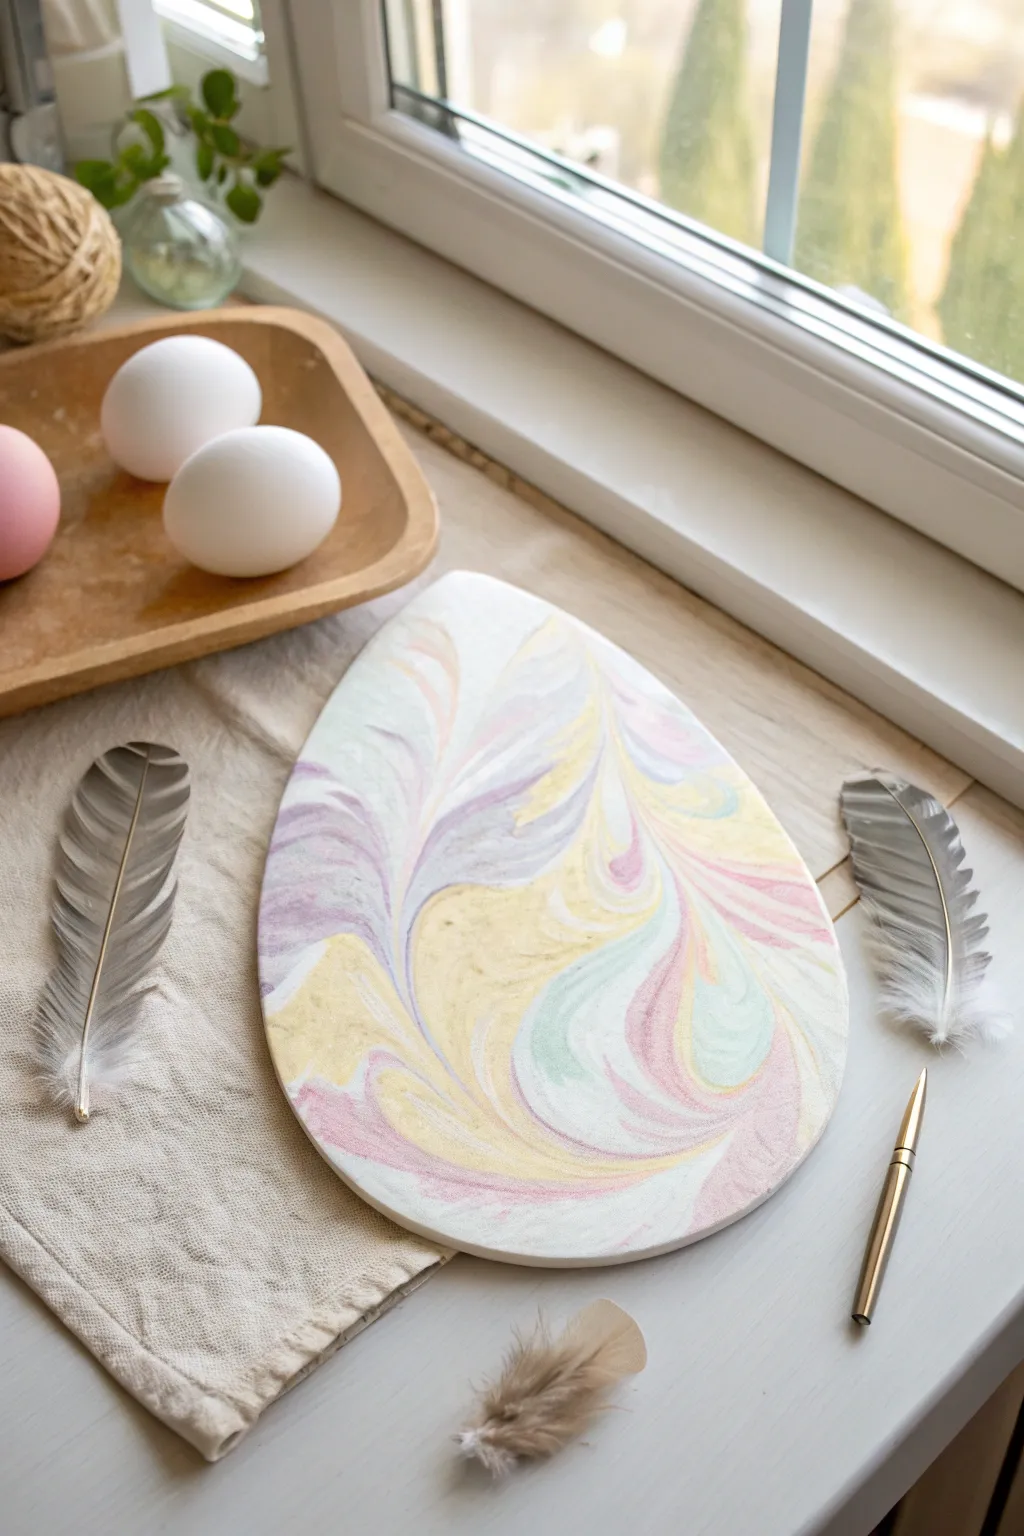
Capture the soft, dreamy colors of spring with this large-scale paper marbling project. The result is a stunning, oversized egg decoration featuring gentle swirls of lavender, pale yellow, and mint green that looks far more sophisticated than the simple shaving cream technique used to create it.
How-To Guide
Materials
- Thick white cardstock or watercolor paper (A4 or larger)
- Shaving cream (foam, not gel)
- Acrylic paints or liquid watercolors (pastel pink, soft yellow, lavender, mint green)
- Baking sheet or shallow tray
- Spatula or butter knife
- Bamboo skewer or toothpick
- Ruler or squeegee (piece of stiff cardboard)
- Scissors
- Pencil
- Paper towels
Step 1: Preparation
-
Cut the Shape:
Begin by drawing a large egg shape on your thick cardstock or watercolor paper. Use the full size of the paper for impact. -
Refine the Edges:
Cut out your egg shape carefully with scissors. Since this cardstock will get wet, using a heavier weight paper is crucial to prevent curling. -
Prepare the Base:
Spray a generous layer of shaving cream into your baking sheet or shallow tray. You need enough foam to cover an area slightly larger than your paper egg. -
Smooth the Surface:
Use a spatula or a butter knife to spread the shaving cream into a flat, even layer. Aim for a smooth surface like a frosted cake.
Muddy Colors?
If your swirls turn brown, you likely overmixed the foam. Start fresh with new cream and use fewer strokes with the skewer.
Step 2: Marbling Process
-
Apply Paint Drops:
Gently squeeze drops of your acrylic paint onto the shaving cream. Space them out randomly, alternating between lavender, yellow, pink, and mint. -
Swirl the Colors:
Take your skewer or toothpick and drag it through the shaving cream and paint dots. Move in curves and figure-eights to marble the colors together. -
Don’t Overmix:
Create a pattern that looks pleasing but stop before the colors turn muddy. You want distinct ribbons of pastel color, not a brown mix. -
Press the Paper:
Gently place your cut-out paper egg face down directly onto the colored foam. Press lightly all over to ensure the entire surface makes contact with the paint. -
Lift the Egg:
Peel the paper egg off the foam carefully. It will look like a messy blob of shaving cream at this stage, but don’t worry. -
Let it Sit Briefly:
Place the messy egg paper-side up on a protected surface for about 30-60 seconds to let the paint soak into the paper fibers.
Step 3: The Reveal
-
Scrape the Cream:
Take your ruler or squeegee tool and firmly scrape the shaving cream off the paper in one smooth motion. -
Clean Wipe:
Wipe the scraper clean and do a second pass if any foam residue remains, being careful not to smear the design beneath. -
Blot Excess:
If the paper feels very wet, gently blot it with a dry paper towel, but avoid rubbing. -
Flatten While Drying:
Allow the egg to dry completely. If the paper starts to curl as it dries, place a heavy book on top of it once it is dry to the touch. -
Final Presentation:
Trim any rough edges if paint bled over the sides, creating a crisp, clean silhouette.
Add Sparkle
Before the paint fully dries, lightly dust the surface with fine iridescent glitter for a magical, shimmering finish.
Display your beautiful marbled creation in a window or on a mantle to celebrate the season
Salt Dough Easter Egg Ornaments
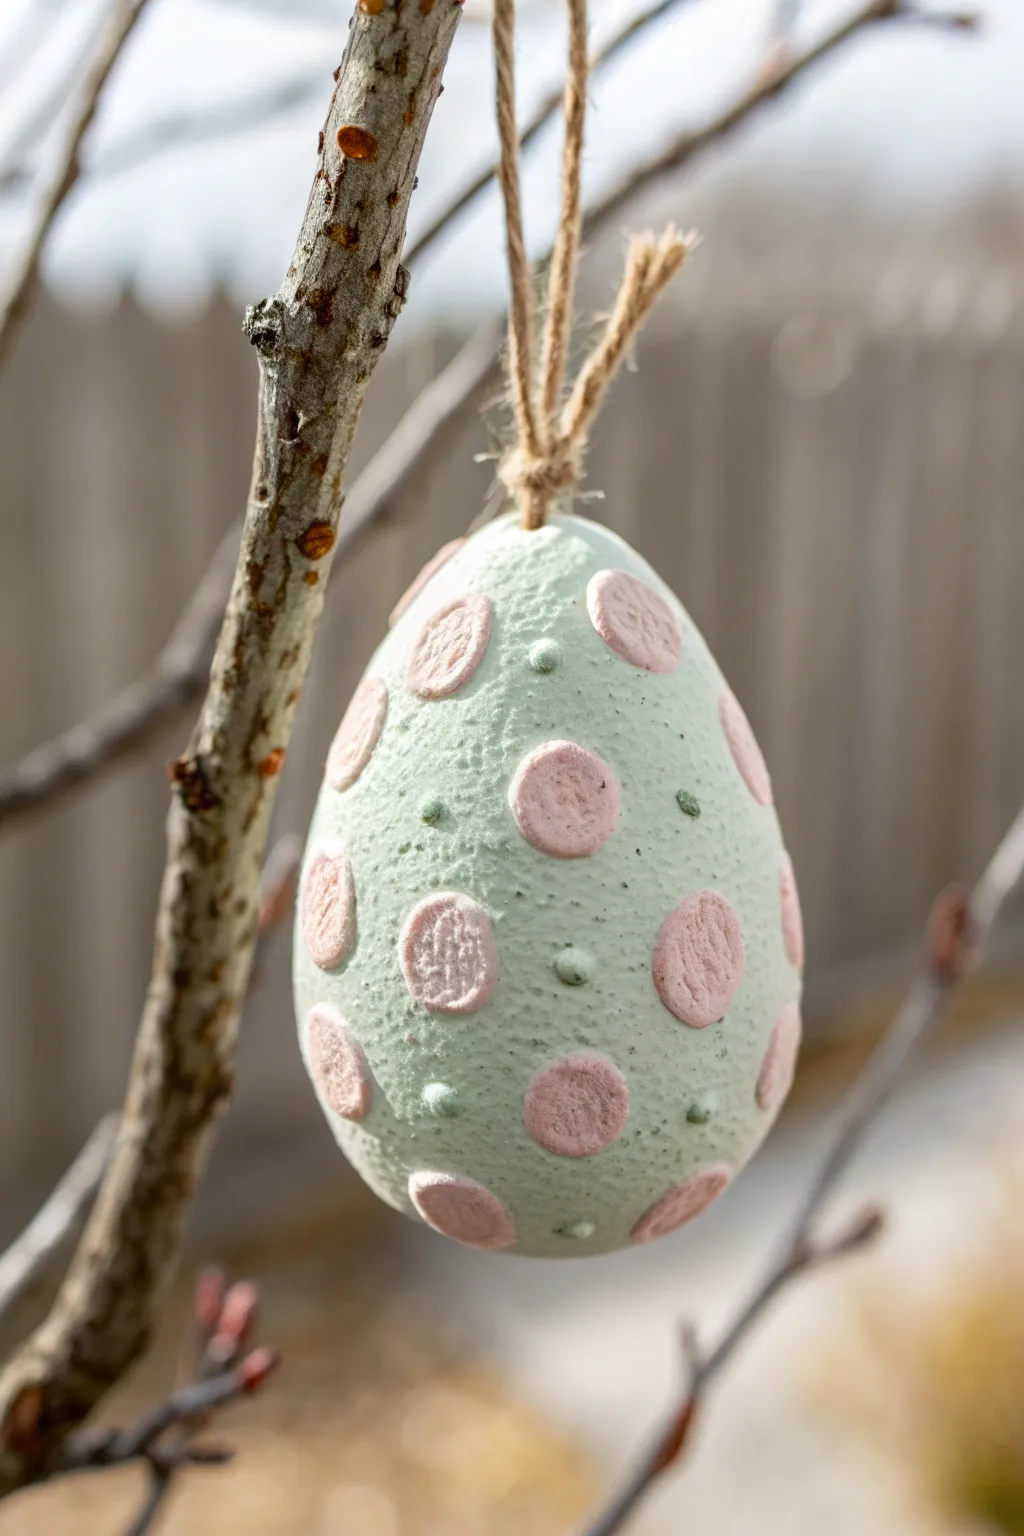
These charming ornaments bring a soft, textured elegance to your Easter decor with their mint green base and raised pink polka dots. The rustic twine loop and matte finish give them a lovely artisanal quality that looks beautiful hanging from budding spring branches.
Detailed Instructions
Materials
- All-purpose flour
- Salt
- Warm water
- Egg-shaped cookie cutter (medium size)
- Straw or skewer (for hole)
- Jute twine
- Acrylic paint (mint green and pastel pink)
- Texture paste or puffy paint (optional, for raised effect)
- Small round sponge dobber or paintbrush
- Fine grit sandpaper
- Mod Podge or matte sealant spray
Step 1: Mixing & Baking the Dough
-
Mix dry ingredients:
Combine 2 cups of flour and 1 cup of salt in a large mixing bowl, stirring until they are evenly distributed. -
Add water gradually:
Slowly pour in 1 cup of warm water while mixing. You may not need all of it, or you might need a tiny splash more. Aim for a consistency similar to playdough—smooth, pliable, but not sticky. -
Knead the dough:
Turn the dough onto a floured surface and knead for about 5-7 minutes. This step is crucial for getting a smooth surface for your ornaments later. -
Roll it out:
Use a rolling pin to flatten the dough to about 1/4 inch thickness. If it’s too thin, the ornaments might crack; too thick, and they will take forever to dry. -
Cut the shapes:
Press your egg-shaped cookie cutter into the dough. Peel away the excess dough carefully so you don’t warp the egg shapes. -
Create the hanging hole:
Using a straw or a skewer, poke a hole near the top (narrow end) of the egg. Make sure the hole is big enough for your twine to thread through later, keeping in mind the dough might shrink slightly. -
Bake carefully:
Place the eggs on a parchment-lined baking sheet. Bake at a low temperature, around 200°F (95°C), for 2-3 hours. Flip them halfway through so they dry evenly. They are done when hard and dry to the touch.
Dough too sticky?
If your dough sticks to the cutter or rolling pin, just sprinkle a little more flour onto your surface and knead a pinch more into the ball.
Step 2: Decorating & Finishing
-
Sand the surface:
Once fully cool, lightly rub the surface of the egg with fine-grit sandpaper. This smooths out any bumps and creates a perfect canvas for the paint to adhere to. -
Apply the base coat:
Paint the entire egg with the mint green acrylic paint. Since salt dough is porous, I find it usually needs two coats for solid, opaque coverage. Let the first coat dry completely before adding the second. -
Create texture (Optional):
To achieve the specific grainy texture seen in the photo, you can lightly dab a dry sponge over the wet paint, or mix a tiny pinch of sand or baking soda into your green paint before applying. -
Add raised dots:
The dots in the image are slightly raised. You can achieve this by mixing your pastel pink paint with a little texture paste or thickening medium. Use a small round sponge applicator or the back end of a large paintbrush to stamp the dots onto the green surface. -
Add tiny accents:
Between the large pink dots, add tiny raised dots using the green paint (mixed with texture paste) or a slightly darker green shade for subtle contrast. -
Let it cure:
Allow the painted and textured ornaments to dry completely, ideally overnight, so you don’t smudge the raised dots. -
Seal the ornament:
Apply a coat of matte sealant or Mod Podge. This protects the ornament from moisture, which is the enemy of salt dough, and ensures it lasts for years. -
Attach the hanger:
Cut a length of jute twine—about 6 inches. Thread it through the hole at the top of the egg. -
Secure the loop:
Tie a secure knot at the base of the loop, close to the egg, capturing both ends of the twine to create the rustic hanger shown.
Scented Dough
Add a few drops of essential oil like lavender or lemon to the water before mixing. Your ornaments will smell like spring while they hang.
Now you have a set of beautiful, handcrafted eggs ready to brighten up your home for the holiday
Crayon Rubbing Egg Textures
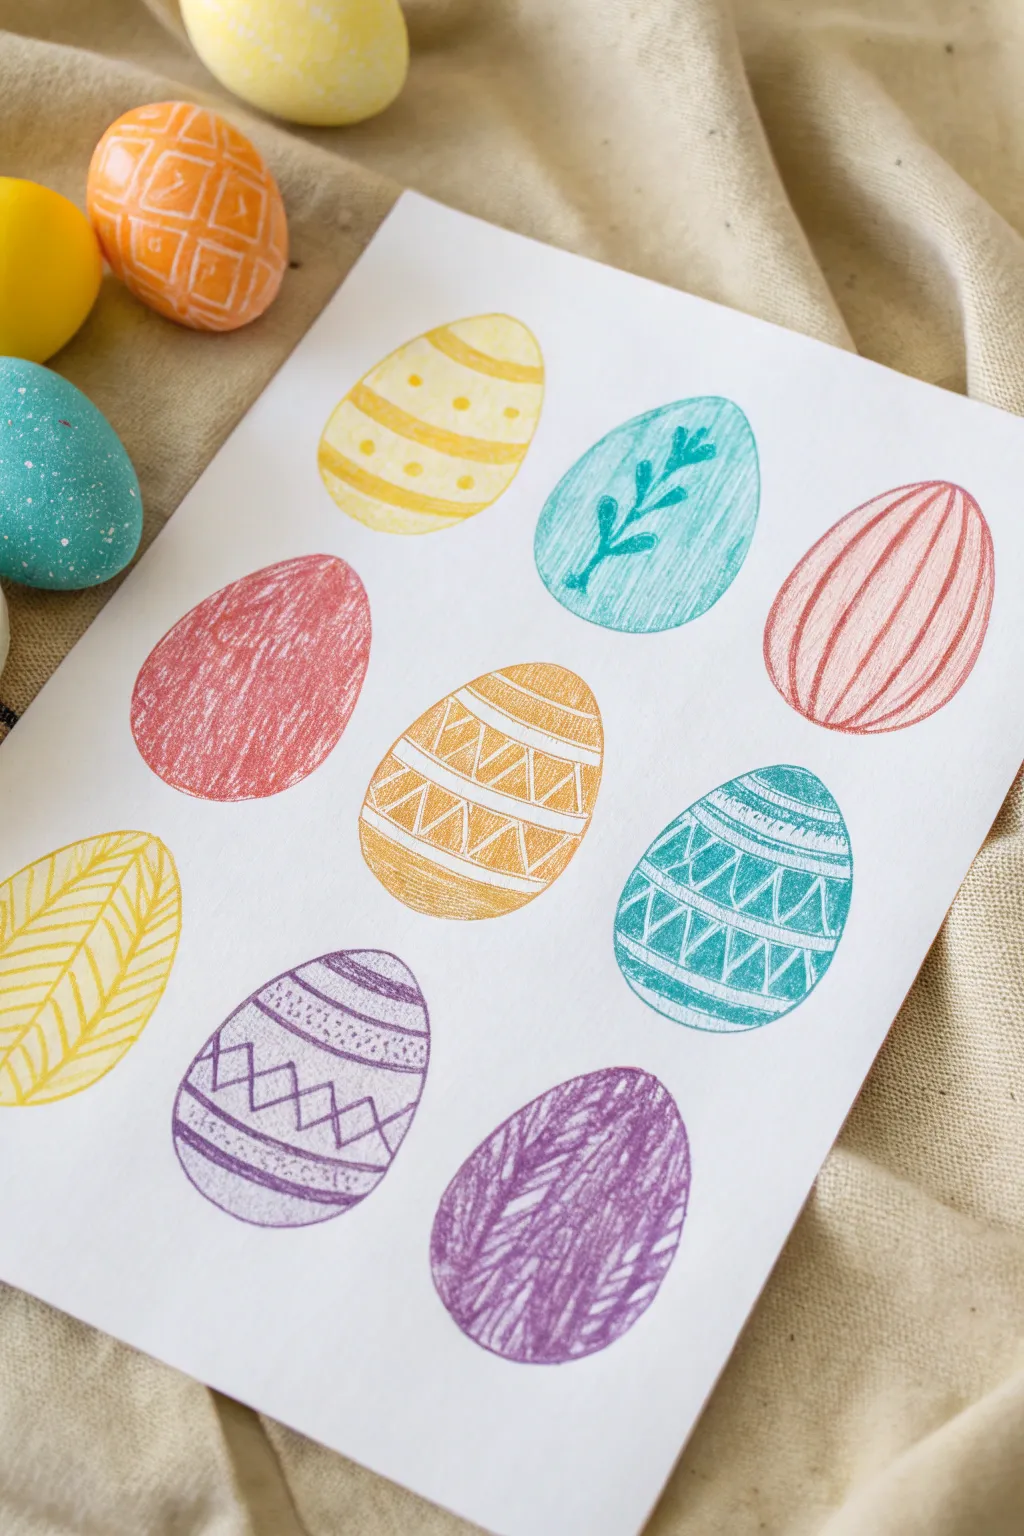
Transform simple household textures into a vibrant collection of patterned Easter eggs with this magical reveal technique. Using crayon rubbings creates intricate designs that look complex but are perfectly simple for little hands to master.
How-To Guide
Materials
- White printer paper or light cardstock
- Cardboard or stiff cardstock (for the stencils)
- Scissors
- Masking tape or painter’s tape
- Various textured items (textured wallpaper, lace, leaves, mesh, corrugated cardboard)
- Wax crayons (paper wrappers removed)
- Pencil
Step 1: Preparation
-
Create the egg template:
Draw a classic egg shape on a piece of stiffness cardboard. Aim for a size that allows you to fit 6-9 eggs comfortably on your main sheet of paper. -
Cut the stencil:
Cut out the egg shape from the center of the cardboard to create a negative space stencil. Keep the surrounding cardboard intact, as this frame will be your guide. -
Gather texture plates:
Hunt around the house for interesting flat textures. Look for things like mesh produce bags, textured placemats, leaves with prominent veins, or scraps of corrugated cardboard. -
Peel the crayons:
Remove the paper wrappers from several colorful wax crayons. This is essential because you will need to use the broad side of the crayon, not the tip.
Uneven Patterns?
If the pattern isn’t showing up clearly, ensure your paper isn’t too thick. Standard printer paper works better than heavy cardstock for capturing delicate texture details.
Step 2: Creating the Textures
-
Position the first texture:
Place your first textured item (like a leaf or piece of mesh) on a hard, flat table surface. -
Layer the paper:
Lay your white drawing paper directly over the textured item. -
Place the stencil:
Position your cardboard egg stencil on top of the white paper, aligning the opening directly over where the texture is hidden underneath. -
Secure the stack:
I like to use a small piece of painter’s tape to hold the stencil and paper steady so they don’t shift while rubbing. -
Rub the pattern:
Turn a yellow crayon on its side. rubbing firmly back and forth across the stencil opening. The texture from below will magically appear as you color. -
Fill the shape:
Continue rubbing until the entire egg shape within the stencil is filled with the pattern. The stencil edges will give you a crisp, clean outline automatically.
Use a DIY Texture Board
Make your own reusable texture plates by using a hot glue gun to draw zig-zags, dots, or swirls on a piece of cardboard. Let dry completely and rub over them.
Step 3: Building the Collection
-
Move to the next spot:
Lift the stencil and texture item. Move to a new empty spot on your white paper to start the next egg. -
Switch textures:
Select a different texture object for this new egg, placing it under the paper in the new location. -
Choose a contrasting color:
Pick a contrasting crayon color, perhaps a bright red or teal, for this next design. -
Repeat the process:
Align the stencil again over the texture and rub firmly with the side of the crayon to reveal the new pattern. -
Vary geometric patterns:
Try using cut-out cardboard shapes like zig-zags or stripes as your texture underneath for a more geometric look. -
Fill the page:
Continue creating eggs until you have a grid of 9 colorful designs filling your sheet. Try to space them evenly for a balanced composition. -
Final touches:
Check your rubbings for any faint spots and go over them lightly if needed, being careful not to color outside the crisp egg shape. -
Clean up edges:
If any crayon strayed beyond the intended shapes, you can carefully use a clean eraser to tidy up the white space between eggs.
Now you have a gallery of unique patterned eggs ready to display for the holiday
Balloon-Printed Egg Patterns

This simple yet impactful project captures the essence of spring with soft pastels and playful patterns. Perfect for little hands, this activity focuses on filling a classic egg shape with charming, textured polka dots.
Step-by-Step Guide
Materials
- White cardstock or heavy drawing paper (A4 or Letter size)
- Black fine-liner pen or marker
- Pencil (for initial sketching not seen)
- Colored pencils, crayons, or soft pastel chalks (pink, teal, yellow, beige)
- Small circular object for tracing (like a bottle cap) or a circle stencil
- Eraser
Step 1: Creating the Outline
-
Draw the egg shape:
Start by drawing a large, clean egg shape in the center of your white paper. You can sketch this lightly with a pencil first to get the curve just right—narrow at the top and wider at the bottom. -
Trace over the line:
Once you are happy with your pencil sketch, carefully go over the outline with a black fine-liner pen. Keep your hand steady to create a smooth, continuous edge. -
Erase guidelines:
Let the ink dry for a moment, then gently erase any visible pencil marks underneath your black outline to keep the drawing looking crisp.
Smudge Alert
If you’re using chalk pastels or soft pencils, place a scrap piece of paper under your hand while coloring. This prevents your palm from smearing the ink or transferring color to the white background.
Step 2: Planning the Pattern
-
Visualize the dots:
Imagine where you want your polka dots to go. Aim for a random but balanced spacing, leaving plenty of white space between them. -
Trace the circles:
Use a small bottle cap, a button, or a stencil to lightly trace circles inside the egg shape with a pencil. Some circles can touch the edge of the egg line, appearing as half-circles, which adds a nice sense of dimension. -
Ink the circles:
Trace over your penciled circles with the black fine-liner. Make sure the lines are thin and delicate, matching the style of the outer egg shape.
Make It Pop
For a mixed-media 3D effect, cut circles out of patterned scrapbook paper or textured fabric and glue them onto the egg outline instead of coloring them in.
Step 3: Adding Color & Texture
-
Select your palette:
Pick out 3 to 4 soft pastel colors. In the example, we’re using a dusty pink, a muted teal/green, a soft yellow, and a warm beige. -
Fill the first color:
Start with your pink pencil. Gently color in a few random circles. Instead of solid block coloring, use a light hand to create a textured, slightly speckled look. -
Add the second tone:
Move on to the teal or light green shade. Color in another set of circles, distributing them evenly so two of the same color aren’t right next to each other. -
Brighten with yellow:
Fill in a few more circles with the pale yellow. This adds a sunny highlight to the composition. -
Finish with neutrals:
Use the beige or peach tone for the remaining empty circles to ground the color palette. -
Create speckles:
To mimic the look of real bird eggs, take a darker shade of each color (or a sharp pencil) and add tiny dots or stippling inside the colored circles. This creates that lovely speckled texture seen in the artwork. -
Leave negative space:
Ensure the background inside the egg (the space between the dots) remains stark white. This contrast is what makes the pastel colors really pop.
Once finished, display your lovely spotted egg in a simple frame or on the fridge to welcome the season

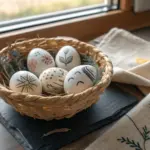
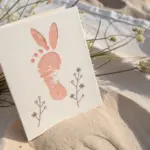

Have a question or want to share your own experience? I'd love to hear from you in the comments below!