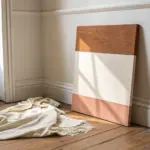
Faux painting is my favorite kind of “paint magic” because you can fake texture, age, and luxury with nothing but layered color and a few simple tools. If you’ve been craving walls and surfaces with real depth (without the big renovation), these faux painting techniques will get you there.
Sponging for Mottled, Cloudy Depth

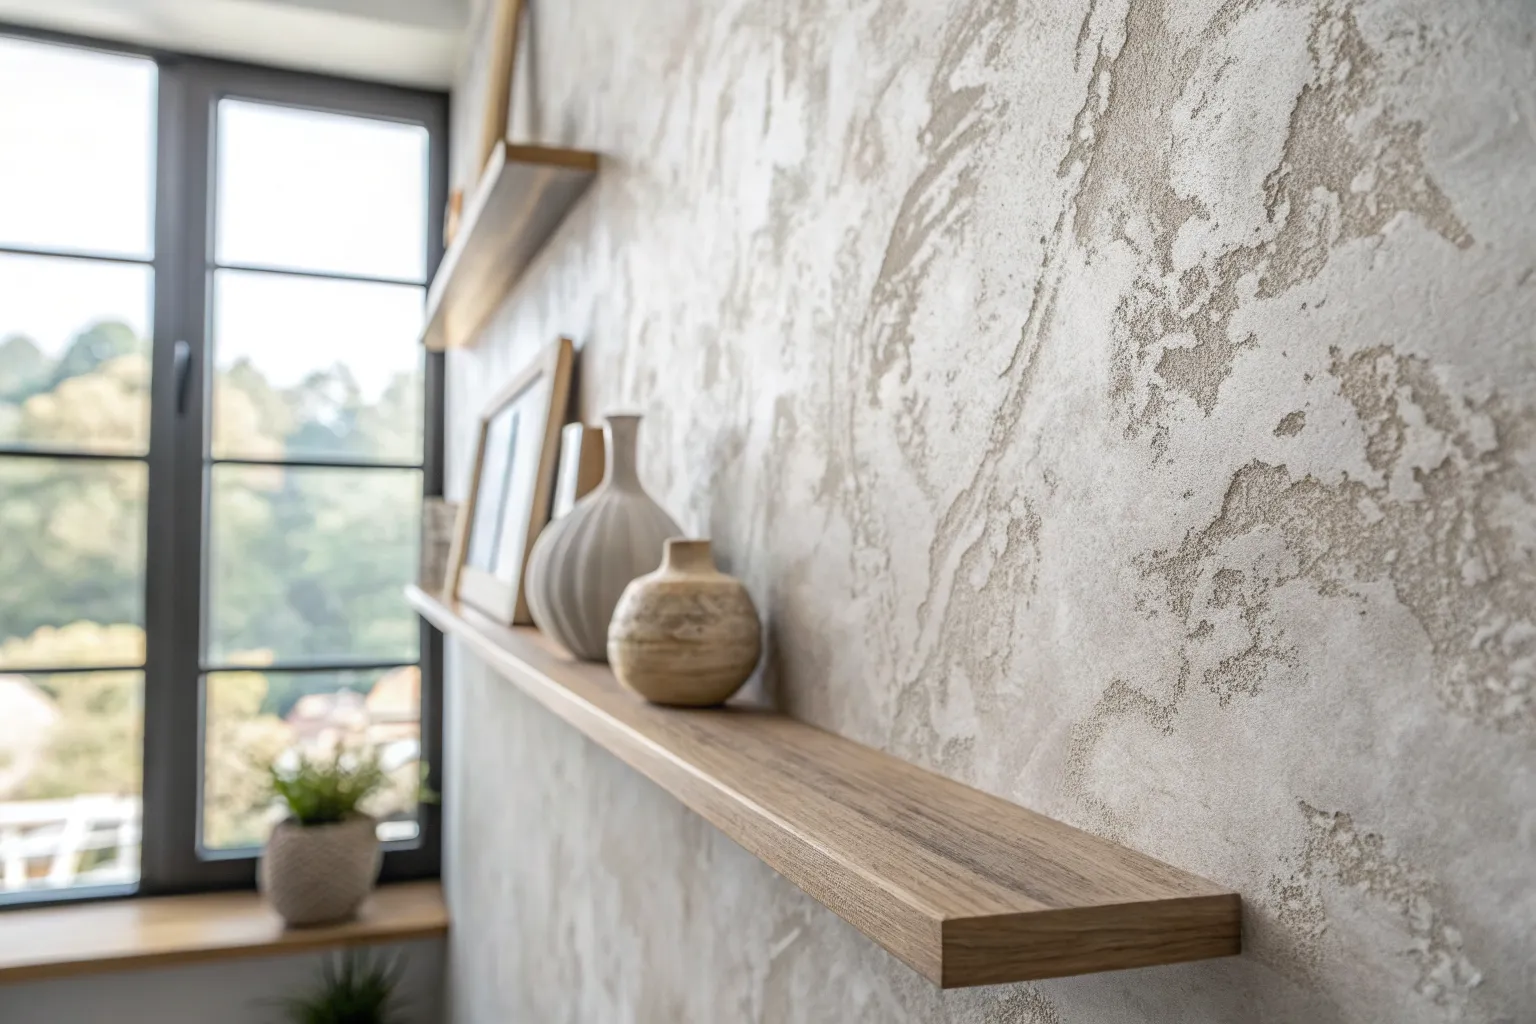
Transform a plain wall into a dimensional masterpiece with this simple sponging technique that mimics the look of weathered, whitewashed stone tiles. The beauty lies in the imperfect, mottled texture created by a natural sea sponge, giving your surface an aged, cloudy depth that feels both rustic and modern.
Step-by-Step Guide
Materials
- Latex wall paint (base coat color – e.g., warm cream or light beige)
- Latex wall paint (glaze color – e.g., off-white or light grey)
- Acrylic glazing liquid
- Large natural sea sponge (various pore sizes are best)
- Painter’s tape (1-inch width)
- Paint tray and liners
- Measuring tape
- Level
- Pencil
- Paper towels or clean rags
- Cardboard scrap (for practice)
- Bucket of water
Step 1: Preparation & Base Coat
-
Clean and Prep:
Begin by cleaning your wall surface thoroughly to remove dust and grease, which ensures better paint adhesion. -
Apply Base Color:
Roll on your chosen base coat color—a warm cream or soft beige works beautifully as the ‘grout’ color that will peek through later. Apply two coats if necessary for full coverage. -
Dry Completely:
Allow the base coat to dry completely, preferably overnight, so the tape won’t peel it off in the next phase.
Step 2: Creating the Grid
-
Measure and Mark:
Decide on your tile size (e.g., 12×12 inches). Use a measuring tape and pencil to mark the grid points lightly on the wall. -
Apply Vertical Tape:
Using a level to ensure straight lines, apply the 1-inch painter’s tape vertically along your marks first. Press the edges down firmly to prevent bleed-through. -
Apply Horizontal Tape:
Apply the horizontal tape lines over the vertical ones to complete your grid. This tape represents the grout lines between your ‘stones’.
Uneven Texture?
If you applied too much glaze in one spot, quickly dab it with a clean, damp rag to lift the excess paint before it dries. Sponging is very forgiving.
Step 3: Mixing & Sponging
-
Mix the Glaze:
In a paint tray, mix 1 part of your top coat paint (the off-white color) with 4 parts acrylic glazing liquid. This transparency is crucial for the cloudy effect. -
Prepare the Sponge:
Soak your natural sea sponge in water until soft, then wring it out thoroughly until it is just damp, not dripping. -
Load the Sponge:
Dip the face of the sponge into the glaze mixture, absorbing a small amount of paint. -
Blot Excess:
Always blot the sponge on a scrap piece of cardboard or paper towel first. You want a consistent, airy texture, not a splat of paint. -
Begin Sponging:
Starting in a top corner, gently press the sponge against the wall within a taped square. Use a light pouncing motion. -
Rotate Frequently:
Rotate your wrist and the sponge frequently as you work. This prevents a repetitive stamp pattern and ensures a natural, random mottling. -
Layering Texture:
I find it helpful to work in layers; apply a light all-over texture first, then go back and dab more glaze in certain areas to create highlights and density. -
Work in Sections:
Complete a few grid squares at a time so you can maintain a consistent wet edge if you need to blend, though sponging is forgiving with dry times. -
Check Consistency:
Step back periodically to look at the wall as a whole. Ensure no single square looks vastly different in density than the others.
Add Dimension
For a 3D stone look, sponge a slightly darker shade of glaze just along the bottom and right edges of each square to create a subtle shadow effect.
Step 4: The Reveal
-
Wait for Tacky Dry:
Let the glaze dry until it is tacky but not fully hardened, usually about 30 to 60 minutes. -
Remove Tape:
Gently pull the painter’s tape off at a 45-degree angle. Removing it before the paint is rock-hard helps prevent chipping your new faux finish. -
Touch Up:
If any glaze bled under the tape, use a small artist’s brush and your base coat color to tidy up the faux grout lines.
See how the subtle variations in the sponge print bring a soft, inviting atmosphere to the entire room

Color Washing for Old-World Softness
Transform a plain wall into a surface that feels like aged Italian plaster or sun-baked adobe using this classic color-washing technique. The finish creates a soft, translucent depth with shifting tones of terracotta, ochre, and warm beige that warms up any room.
How-To Guide
Materials
- Satin or eggshell base paint (creamy off-white/beige)
- Latex glaze medium
- Latex paint (terracotta or warm ochre)
- Latex paint (slightly darker sienna or rust)
- Clean, lint-free cotton rags (t-shirt material works best)
- Bucket for mixing
- Painter’s tape
- Large paintbrush (4-inch)
- Water spray bottle
- Ladder or step stool
Step 1: Preparation and Base Coat
-
Protect the surrounding area:
Begin by firmly applying painter’s tape along the ceiling line, baseboards, and any adjoining window frames to protect trim. If your wall has wainscoting like the reference image, tape off the top edge of the chair rail carefully. -
Apply the base color:
Roll on your base coat of creamy off-white or light beige paint. This light background is crucial because it will show through the translucent glaze layers, giving the wall its inner glow. -
Ensure full coverage:
Check for any thin spots and apply a second coat if necessary to ensure a solid, opaque foundation. Allow this base layer to dry completely, preferably overnight, so the glaze doesn’t lift it.
Uneven Patches?
If you see hard lines where sections meet, re-wet the edge with a little clear glaze or water on a sponge and gently rub in circles to reactivate and blend the seam.
Step 2: Mixing the Glaze
-
Create the primary wash:
In your mixing bucket, combine one part of your main color (terracotta/ochre) with four parts glaze medium. Add about one part water to loosen the mixture; you want a consistency similar to heavy cream but slightly runnier. -
Mix the accent wash:
In a separate smaller container, mix your darker accent color (sienna/rust) using the same 1:4:1 ratio of paint, glaze, and water. This will add the varying depth seen in the photo. -
Prepare your rags:
Dampen a clean cotton rag with water and wring it out tightly until it is just barely moist. A bunched-up rag is the primary tool for this effect.
Step 3: Applying the Wash
-
Work in sections:
Dip your large brush into the primary glaze mixture and apply it to a roughly 3×3 foot section of the wall. Apply it in random, crisscrossing X-strokes rather than straight lines. -
Soften with the rag:
Immediately take your bunched-up rag and gently pounce or rub over the wet glaze. The goal involves removing some glaze to reveal the base coat while blurring harsh brush marks. -
Feather the edges:
Keep the edges of your working section wet and irregular. Never stop at a straight vertical line, or you’ll create visible seams when you move to the next patch. -
Add depth with accent color:
While the primary glaze is still wet, dip a corner of your rag (or a small brush) into the darker accent glaze. Dab it randomly into areas where you want deeper shadows or ‘aged’ spots. -
Blend the tones:
Use a clean part of the rag to blend the dark accent spots into the lighter wash. I like to use a circular buffing motion here to create that cloudy, mottled look characteristic of old plaster.
Add Metallic Warmth
Mix a small amount of bronze or gold metallic paint into your glaze, or use it as a third ‘highlight’ layer on top for a subtle shimmer when the sun hits the wall.
Step 4: Refining the Texture
-
Create water spots:
For an authentic weathered look, lightly spritz water from your spray bottle onto the wet glaze in a few random areas. Let it sit for a few seconds. -
Lift the water spots:
Gently blot the water droplets with a dry cloth. This lifts the pigment, creating organic, lighter speckles that mimic natural weathering. -
Continue across the wall:
Move to the next 3×3 section, overlapping the wet edges of the previous patch to blend them seamlessly. Repeat the brushing, ragging, and accenting process. -
Corner handling:
When you reach corners or trim, push the glaze into the crevice with a smaller brush, then dab with the rag to ensure the texture goes all the way to the edge. -
Assess and adjust:
Step back periodically to view the wall from a distance. If an area looks too heavy or dark, mist it slightly with water and blot with a clean rag to lighten it before it dries. -
Final cure:
Allow the wall to dry undisturbed. Glaze dries slower than standard paint, so give it at least 24 hours to cure completely before touching it or removing the tape.
Enjoy the warm, timeless atmosphere your new walls bring to the space


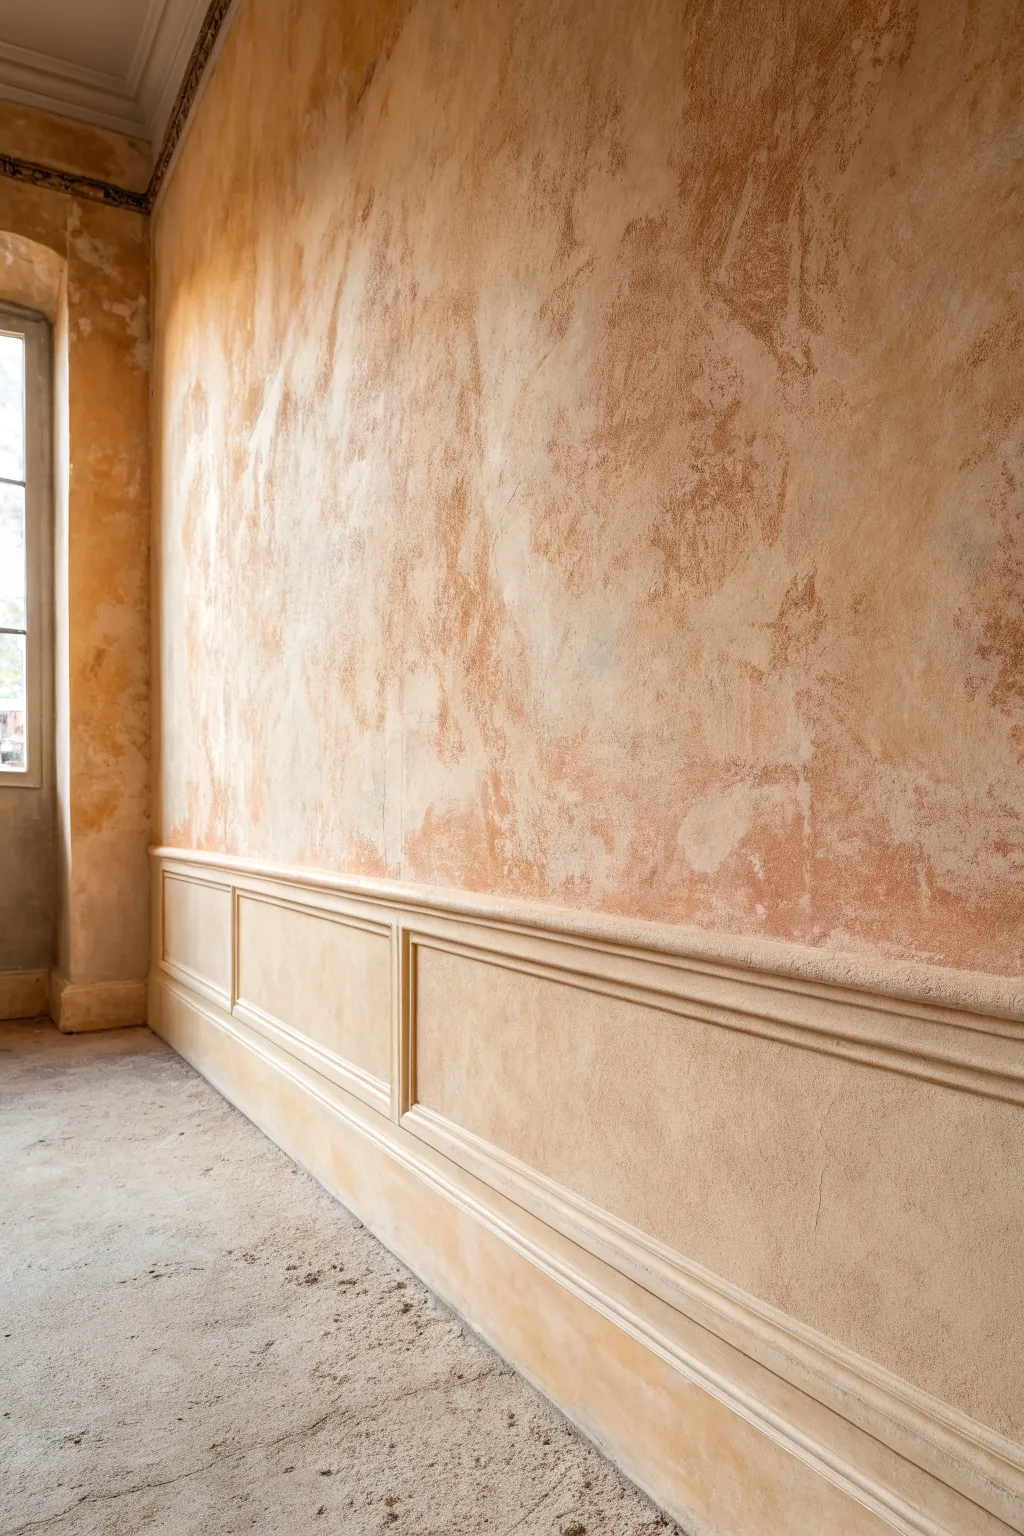
Limewash Look for Chalky, Breathable Movement

Transform a plain wall into a textural masterpiece by combining the old-world charm of faux limewash with the crisp elegance of classic wainscoting. This project creates a stunning visual contrast between the moody, clouded upper wall and the bright, structured woodwork below.
Step-by-Step Tutorial
Materials
- Matte beige or tan latex paint (base coat)
- Glaze medium
- Darker brown or taupe latex paint (for texture)
- Wide block brush (4-6 inch)
- Lint-free rags
- Pre-primed baseboard and chair rail molding
- Picture frame molding strips
- Spackle or wood filler
- Caulk and caulk gun
- White semi-gloss paint
- Painter’s tape
- Level and measuring tape
- Miter box and saw
- Construction adhesive and finishing nails
Step 1: Planning and Foundation
-
Define the divide:
Decide on the height of your wainscoting versus the limewash area. A standard rule of thumb is one-third of the wall for the paneling, but putting it closer to waist height creates a cozy feel. -
Mark the line:
Use your tape measure and a long level to draw a horizontal pencil line across the entire wall where the top of the chair rail will sit. -
Protect the area:
Apply painter’s tape just below this pencil line to protect the area that will become your wainscoting, ensuring your faux finish doesn’t drip onto the lower section.
Too Streaky?
If your brushstrokes look too harsh or linear, dip a damp rag into water and gently wash over the aggressive areas while wet. This helps remelt the glaze and soften the texture.
Step 2: Creating the Limewash Effect
-
Apply the base color:
Roll on your matte beige or tan base coat over the entire upper section of the wall. Let this dry completely, usually for at least 4 hours. -
Mix the glaze:
In a bucket, mix 1 part of your darker brown paint with 4 parts glaze medium. Stir thoroughly until the consistency is smooth and uniform. -
Cross-hatching technique:
Dip a wide block brush into the glaze mixture. Apply it to the wall using large visible ‘X’ strokes, working in random patches about 3 feet wide. -
Blending the clouds:
While the glaze is still wet, use a clean, dry brush or a lint-free rag to soften the edges of your ‘X’ strokes. I find that lightly buffing the edges creates that dreamy, clouded look. -
Layering depth:
Once the first glaze layer feels tacky but not fully dry, go back in with slightly more concentrated glaze in random spots to create areas of darker intensity. -
Final softening:
Step back to view the whole wall. If any brush strokes look too harsh, stipple them gently with a dry rag to blur them into the background. -
Remove tape:
Peel off the painter’s tape while the glaze is barely tacky to ensure a clean line, then let the upper wall cure for 24 hours.
Aged Patina
For an antique look, mix a tiny drop of raw umber into your white paint for the wainscoting grooves. Wipe it away quickly, leaving just a hint of shadow in the crevices.
Step 3: Installing the Wainscoting
-
Install the rails:
Measure and cut your baseboard and chair rail molding. Attach them using construction adhesive and finishing nails, using your previous pencil line as the guide for the chair rail. -
Plan the boxes:
Determine the spacing for your picture frame molding boxes. Mark their positions on the wall between the chair rail and baseboard, keeping the spacing between boxes equal. -
Cut the molding:
Using a miter box, cut 45-degree angles on the ends of your picture frame molding strips to create the four sides for each box. -
Assemble the frames:
It is often easier to glue the corners of your frames together on the floor first, letting them set briefly before attaching them to the wall. -
Attach the frames:
Adhere the assembled frames to your marked positions on the wall, securing them with a few finishing nails for extra hold.
Step 4: Finishing Touches
-
Fill and sand:
Use wood filler or spackle to cover all nail holes and mitered corner gaps. Once dry, sand these spots smooth with fine-grit sandpaper. -
Caulk the seams:
Run a thin bead of caulk along every edge where the molding meets the wall to create a seamless, built-in appearance. Smooth with a damp finger. -
Prime the woodwork:
Apply a high-quality primer to the entire lower section, covering the molding and the drywall inside the frames to unify the texture. -
Paint the panels:
Finish by painting the entire wainscoting section with white semi-gloss paint. Two coats will give you that professional, durable sheen.
Step back and admire how the natural, organic movement of the upper wall perfectly balances with the crisp structure of your new paneling

Faux Concrete for a Modern, Industrial Wash
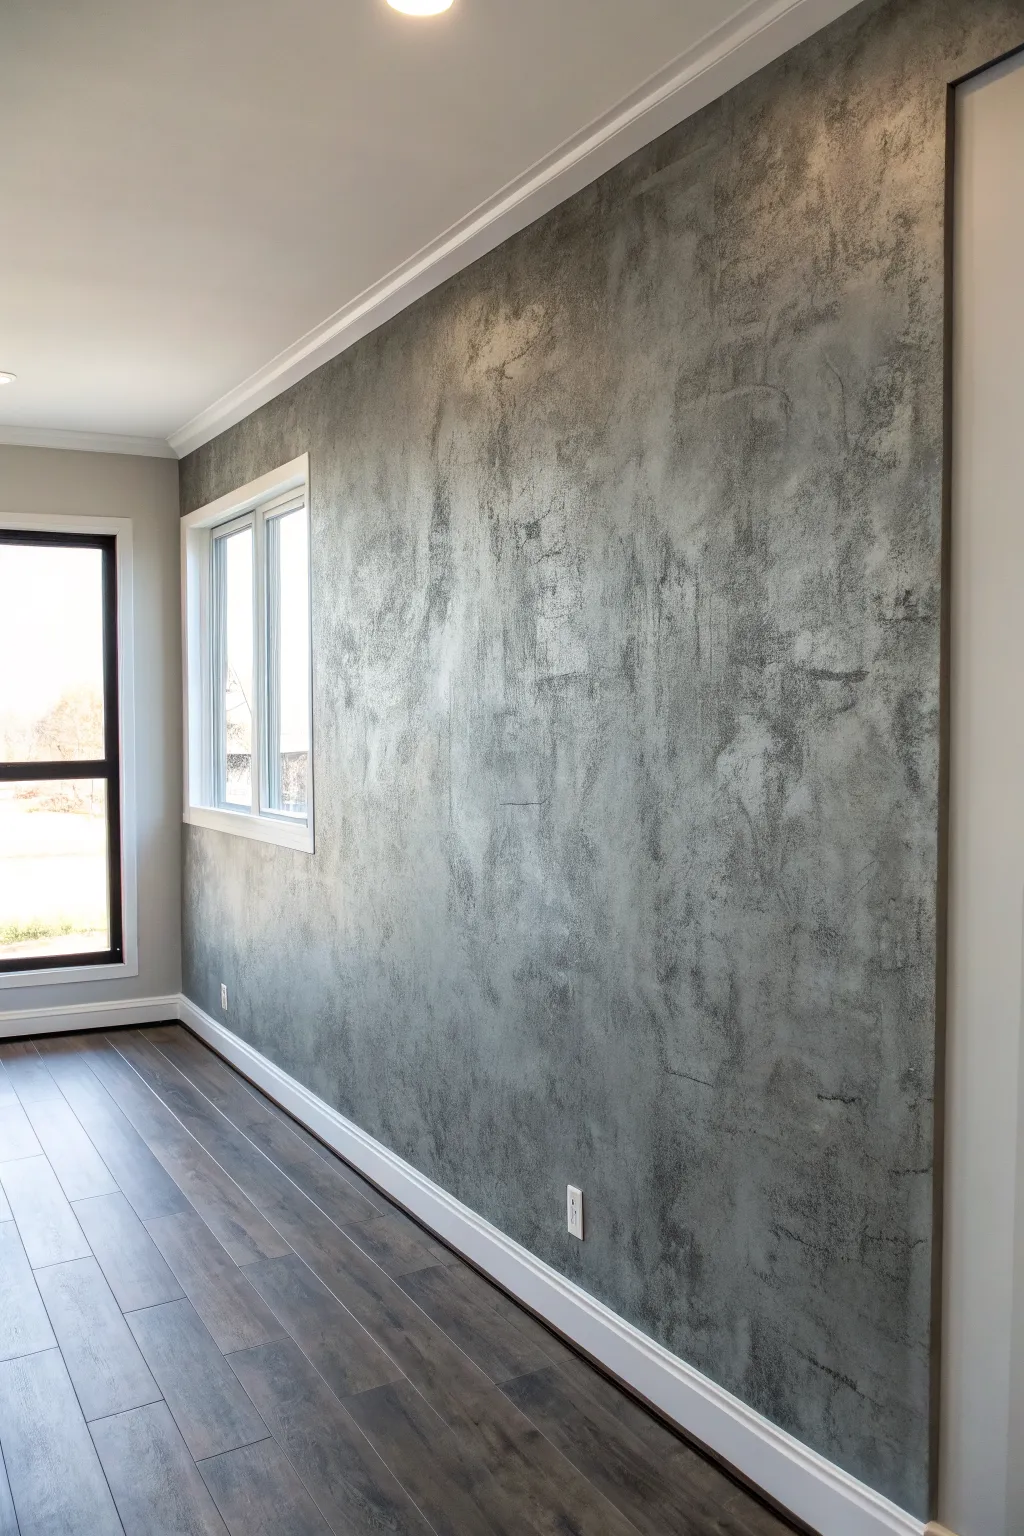
Transform a plain drywall surface into a striking architectural feature with the raw, edgy look of poured concrete. This technique uses layered glazes and texture to create depth, giving your space a modern, loft-style vibe without the heavy construction.
Step-by-Step
Materials
- Dark grey satin latex paint (base coat)
- Medium grey matte latex paint
- Light grey or silver metallic glaze
- Black acrylic paint (for tinting)
- Water-based glazing liquid
- Painter’s tape
- Drop cloths
- 9-inch paint roller and tray
- Sea sponge or texture sponge
- Clean, lint-free rags
- Trowel or putty knife (optional for texture)
- Wide softness bristle brush
Step 1: Preparation and Base Coat
-
Prepare the workspace:
Clear the area of furniture and cover the floors completely with drop cloths. Use painter’s tape to mask off the ceiling, baseboards, and any adjacent walls or window frames you want to keep clean. -
Clean the wall:
Wipe down the wall with a damp cloth to remove any dust or grease. This ensures your base coat adheres perfectly. Let it air dry completely before moving on. -
Apply the base coat:
Roll on a coat of the dark grey satin latex paint. This darkness will serve as the shadow and depth behind your concrete texture. Don’t worry if it looks too dark right now; much of it will be covered. -
Cut in the edges:
Use a brush to carefully paint the corners and edges where the roller couldn’t reach. Ensure full coverage, as holiday spots will show through later layers. -
Let it cure:
Allow this base coat to dry for at least 4 to 6 hours, or overnight if possible. The subsequent glazing steps require a solid, dry foundation.
Step 2: Creating the Concrete Texture
-
Mix your middle glaze:
In a bucket, mix 1 part medium grey paint with 1 part glazing liquid. The glaze extends the drying time, allowing you to manipulate the paint on the wall. -
Apply the sponge layer:
Dip a dampened sea sponge into your glaze mixture. blot the excess onto a piece of cardboard or paper towel to prevent drips. -
Sponge on the texture:
Press the sponge onto the wall in random, overlapping patterns. Twist your wrist slightly with each press to avoid a repetitive stamp look. Work in small 2-foot sections. -
Soften the edges:
Before the glaze dries, take a clean, dry softness brush and gently whisk over the wet sponge marks. This blurs the distinct sponge shapes and creates that cloudy, poured-concrete appearance. -
Repeat across the wall:
Continue this sponge-and-soften process across the entire wall. I find it helpful to stand back occasionally to check for bald spots or areas that look too uniform.
Too Blotchy?
If the texture looks too much like a sponge print, your glaze might be drying too fast. Mist the wall lightly with water and use a large dry brush to soften and feather out the hard edges.
Step 3: Adding Depth and Highlights
-
Mix the shadow glaze:
Mix a small amount of black acrylic paint with glazing liquid to create a translucent charcoal color. This will replicate the darker curing spots often seen in real concrete. -
Apply shadows sparingly:
Using a small rag or a clean sponge, dab this darker glaze into random areas, focusing on corners or ‘low’ spots. Keep this layer subtle; you can always add more, but it’s hard to remove. -
Blend the shadows:
Use a dry rag to blot and blend these darker patches into the medium grey layer while wet, ensuring there are no harsh lines. -
Create the highlight glaze:
Mix your light grey or silver metallic paint with a little glazing liquid. This metallic element mimics the mineral shimmer found in cured cement. -
Apply highlights:
Lightly drag a rag dipped in the highlight mixture over the ‘high’ points of the texture. Use a very light hand here—you just want a hint of sheen. -
Optional trowel finish:
For an authentic plaster look, you can drag a clean metal trowel over the partially dry paint in random sweeping arcs. This flattens high spots and adds realistic tool marks. -
Final softening:
Do one last visual sweep. If any areas look too stark or disconnected, use a barely-damp clean rag to gently buff and merge the layers. -
Remove tape:
Carefully score the edge of the painter’s tape with a utility knife before pulling it off. This prevents dry layers of faux finish from peeling away with the tape.
Add Faux Cracks
Use a fine liner brush with thinned dark grey paint to paint hairline cracks. Following up with a tiny highlight line right next to the dark line makes the crack look 3D.
Step back and admire the rugged, sophisticated atmosphere you’ve brought to your room using just paint and patience.
BRUSH GUIDE
The Right Brush for Every Stroke
From clean lines to bold texture — master brush choice, stroke control, and essential techniques.
Explore the Full Guide
Metallic Glaze for Soft Shimmer and Dimension

Transform a plain wall into a luxurious feature with this faux finish that mimics the look of brushed silk or raw shantung. By layering a metallic glaze over a textured base, you’ll create a sophisticated surface that catches the light beautifully and adds incredible depth to any room.
Step-by-Step Tutorial
Materials
- Latex primer (tinted to a base color similar to your glaze)
- Metallic glaze (champagne or soft gold)
- Satin latex base paint (light beige or taupe)
- Painter’s tape
- Drop cloths
- 4-inch wide high-quality synthetic bristle brush
- Medium-nap roller and tray
- Clean, lint-free rags
- Mixing bucket
- Glaze extender (optional, for longer working time)
Step 1: Preparation & Base Coat
-
Protect the area:
Begin by masking off your ceiling, baseboards, and adjacent walls with painter’s tape. Lay down drop cloths to protect your flooring from any drips. -
Prime the surface:
Roll on a coat of primer. If your final color is dark or rich, tinting the primer helps achieve full coverage faster. Let this dry completely according to the manufacturer’s instructions. -
Apply the base color:
Using a roller, apply your satin latex base paint. This opaque layer provides the solid background color. A light taupe or beige works best for the champagne finish shown. -
Let it cure:
Allow the base coat to dry thoroughly, preferably overnight. A fully cured base ensures the glaze glides on smoothly without lifting the paint underneath.
Uneven Sheen?
If you see ‘lap marks’ (dense stripes where sections overlap), keep a wet edge at all times. If the glaze dries too fast, add more extender to the mix.
Step 2: Mixing & Application Strategy
-
Prepare the glaze mixture:
In a bucket, mix your metallic glaze with a small amount of water or glaze extender if it feels too thick. You want a consistency similar to heavy cream. -
Plan your sections:
Work in vertical sections about 3 to 4 feet wide. This prevents the glaze from drying before you can manipulate the texture. -
Cut in the edges:
Use your 4-inch brush to apply the metallic glaze along the ceiling line and baseboard of your first section.
Step 3: Creating the Texture
-
Apply the heavy vertical stroke:
Generously brush the metallic glaze onto the wall section using long, vertical strokes. Don’t worry about perfect coverage yet; just get the material on the wall. -
The cross-hatch technique:
While the glaze is still wet, use the dry tips of your brush to drag through the glaze horizontally, then vertically again. This creates a weave-like texture. -
Refining the striae:
I like to finish each section with long, unbroken vertical strokes from ceiling to floor (or as far as your arm reaches) to align the metallic particles. This mimics the grain of fabric. -
Create distinct brush marks:
Vary your pressure slightly. The ‘hills and valleys’ created by the brush bristles are what will catch the light later. Leave some areas slightly heavier with glaze than others for organic variation.
Add Drama
For a richer, antiqued look, apply a second layer of a darker bronze glaze sparingly over the dry champagne layer, focusing on the edges.
Step 4: Blending & Finishing
-
Move to the next section:
Apply glaze to the adjacent section, slightly overlapping the wet edge of your previous work. -
Blend the seams:
Lightly brush back into the previous section to meld the two areas together. Keep the brush moving to avoid a dark vertical line where the sections meet. -
Check for drips:
Scan your work constantly. If metallic glaze pools or runs, softy tip it off with your brush immediately before it sets. -
Corner details:
When you reach a corner, pull the brush straight out from the corner rather than into it to avoid a heavy buildup of paint. -
Final inspection:
Once the entire wall is covered, remove the painter’s tape carefully while the glaze is still slightly tacky to prevent peeling. -
Illuminate the texture:
Install or adjust lighting (like the LED strip in the example imagery) to graze down the wall. This is crucial for revealing the shimmery, dimensional effect you’ve just created.
Enjoy the warm glow and sophisticated movement this stunning metallic finish adds to your space


Have a question or want to share your own experience? I'd love to hear from you in the comments below!