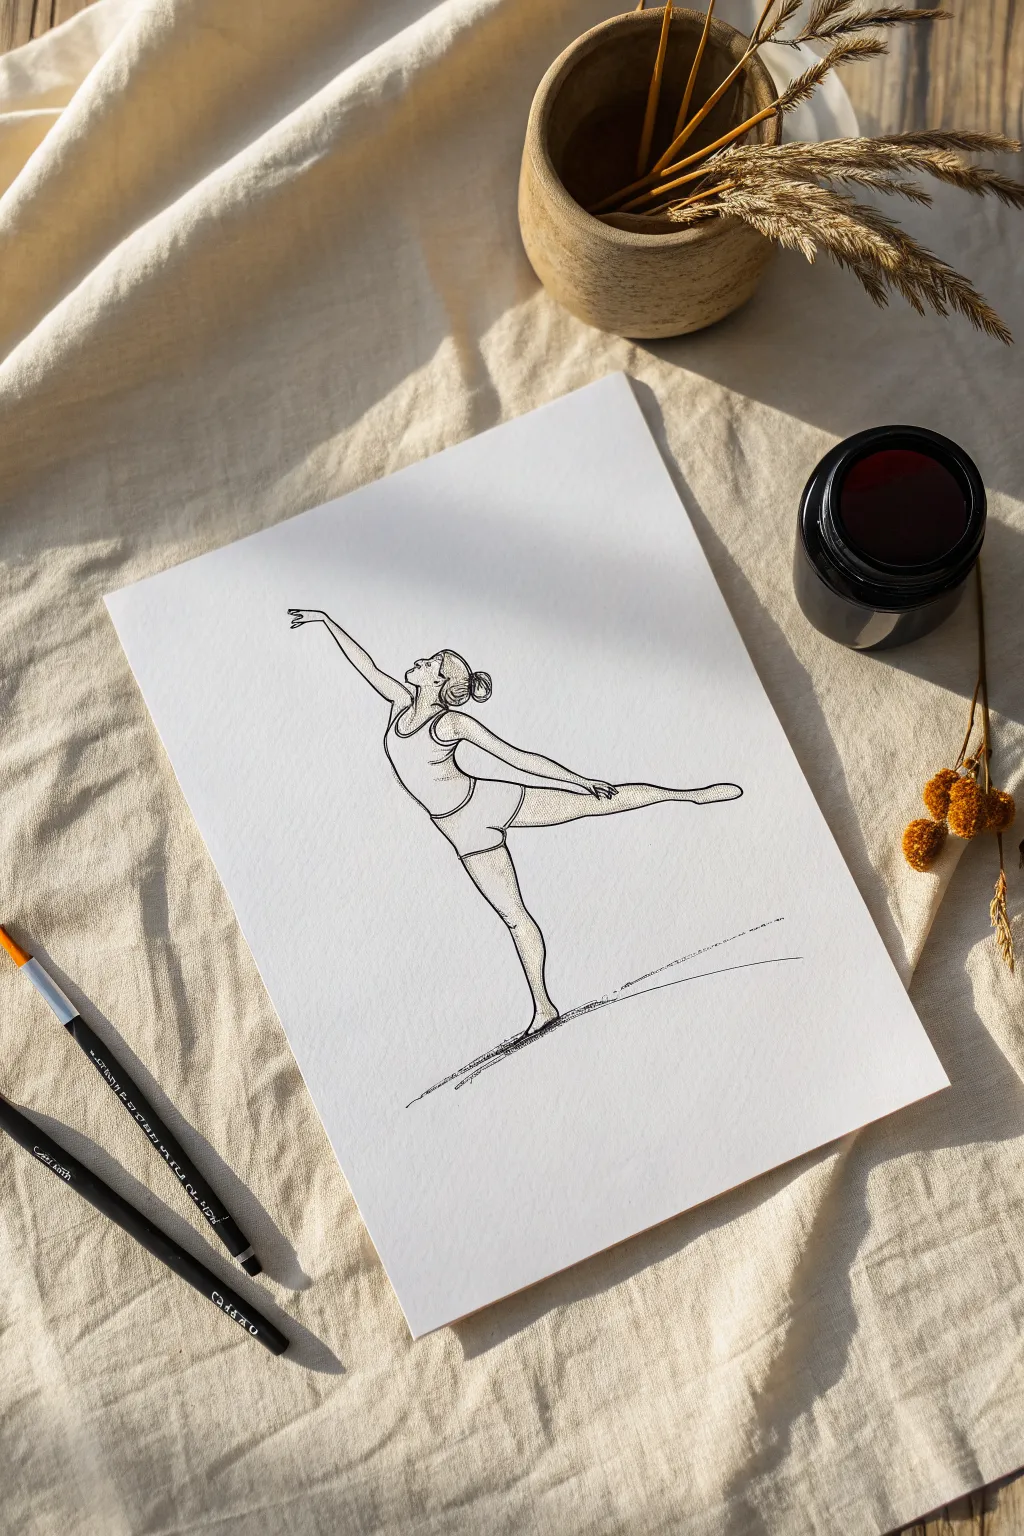
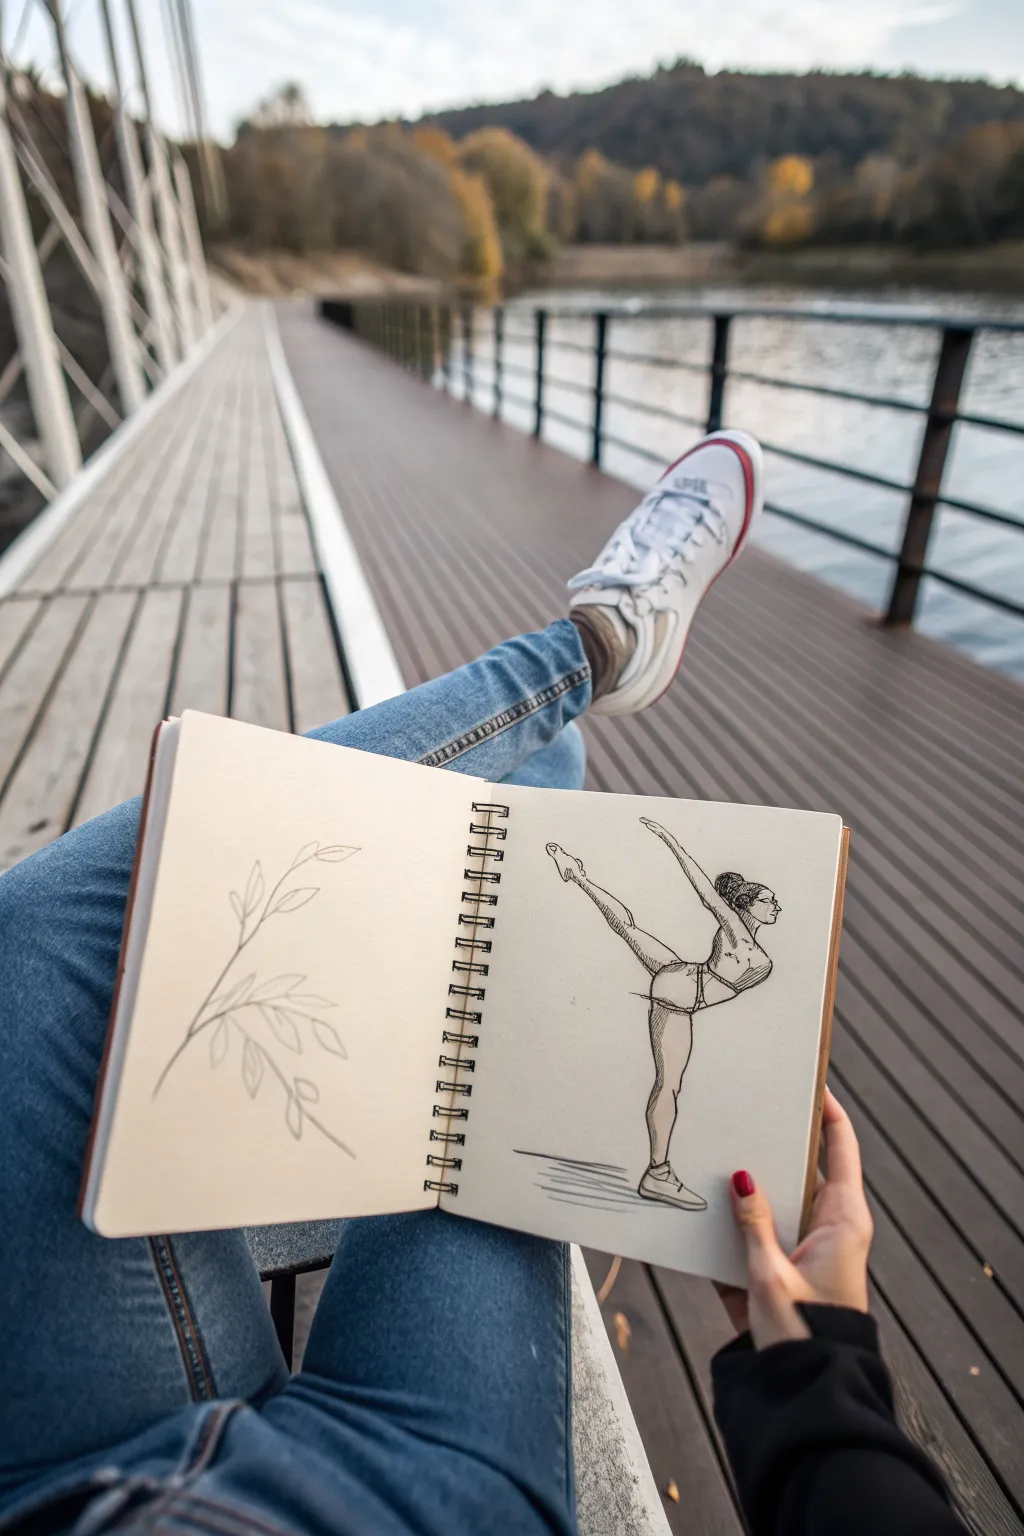
Whenever I need a subject that instantly forces my drawings to feel more alive, I reach for gymnastics poses—they’re basically a masterclass in line, balance, and stretch. Below are my favorite gymnastics drawing ideas to help you capture flexibility, strength, and that split-second “how are they doing that?” energy.
Split Leap Freeze-Frame
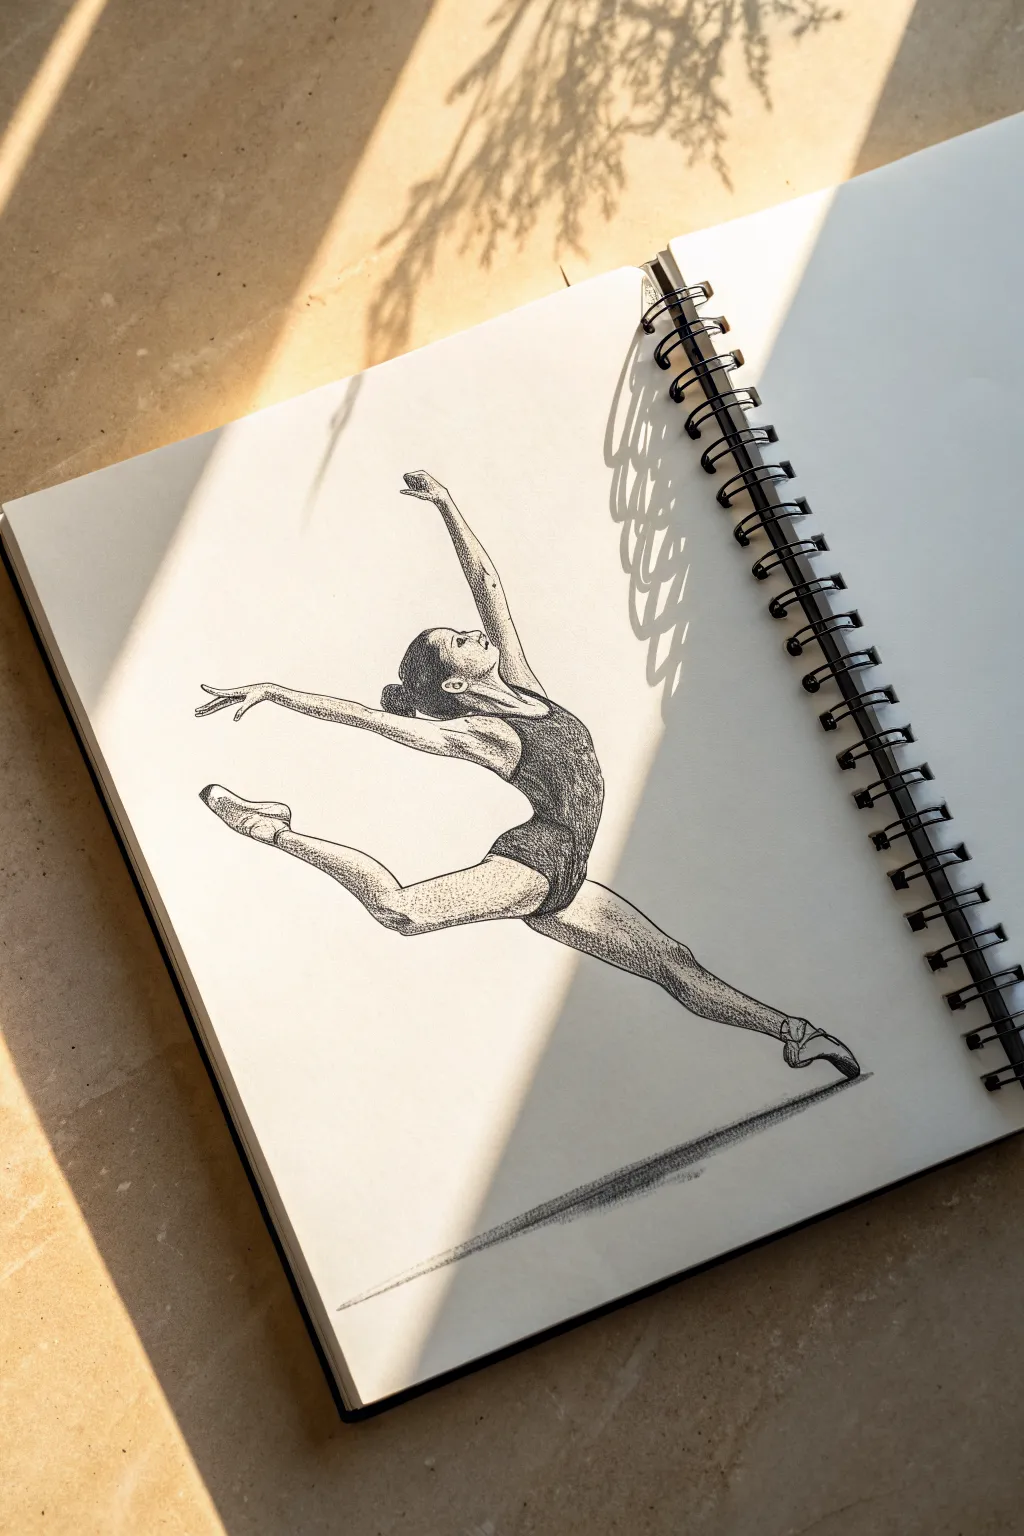
Capture the momentary suspension of a grand jeté with this dynamic pen and ink study. Using a combination of contour lines and patient stippling, you will create a high-contrast figure that seemingly floats across the sketchbook page.
Step-by-Step Guide
Materials
- Spiral-bound sketchbook (heavyweight paper)
- HB or 2H graphite pencil
- Kneadable eraser
- Fine liner pens (sizes 0.1, 0.3, and 0.5)
- Reference photo of a split leap
Step 1: Drafting the Gesture
-
Establish the curve:
Start with a light pencil line representing the spine’s arch. This ‘line of action’ should sweep upwards and backwards, dictating the energy of the jump. -
Block in the legs:
Sketch the legs extending from the hip area. The front leg should drive forward and slightly up, while the back leg extends fully behind. Ensure the angle between them is wide, striving for that 180-degree split look. -
Position the arms:
Draft the arms to complement the legs. The front arm reaches forward gently, and the back arm reaches high overhead, creating a beautiful diagonal line through the body. -
Refine the anatomy:
Flesh out the stick figure. Pay close attention to the definition of the calf muscles, the point of the toes, and the arch of the back. The leotard line should cut high on the hip. -
Lighten the sketch:
Once you are happy with the pose, use a kneadable eraser to gently lift the graphite until the lines are barely visible phantom guides.
Stipple Rhythm
Don’t rush the dots! A uniform rhythm prevents ‘tailed’ dots (accidentally turning dots into tiny dashes). Keep the pen vertical for clean, round marks.
Step 2: Inking the Contours
-
Outline the body:
Using a 0.3 fine liner, carefully trace the outer contour of the gymnast. Keep your hand steady but allow for slight variations in line weight to suggest muscle tension. -
Define the leotard:
Ink the edges of the leotard. I find it helpful to draw these lines slightly thicker to separate the fabric texture from the skin. -
Detail the face and hair:
Switch to a 0.1 pen for the delicate features. Keep the facial profile simple—just the suggestion of a nose, chin, and closed eye. Outline the bun hairstyle. -
Add the ground shadow:
Draw the long, cast shadow beneath the back foot. This is crucial for showing that the figure is airborne.
Step 3: Shading with Texture
-
Base layer stippling:
Begin stippling the skin areas with the 0.1 pen. Place dots sparsely on the highlights (top of the thigh, chest, face) and more densely where shadows naturally fall (under the arm, bottom of the legs). -
Darkening the leotard:
For the leotard, use a dense cross-hatching technique rather than stippling. This differentiates the black fabric from the skin. Build up layers of short, intersecting lines until the value is a deep grey-black. -
Deepening muscle definition:
Go back to the legs with a 0.3 pen. Add concentrated dots along the bottom curves of the quadriceps and calves to give the limbs a rounded, 3D form. -
Refining the hair:
Fill in the hair and bun using curved hatching lines that follow the direction of the strands, leaving a small white gap for a glossy highlight. -
Shadow intensity:
Using the 0.5 pen, forcefully darken the shadow on the ground. Use long, horizontal strokes that fade out at the edges. -
Final contrast check:
Step back and look at the drawing. Add more stippling to the darkest shadow areas on the body—specifically the hip crease and under the jaw—to ensure the figure pops against the white paper.
Level Up: Sunlight
Photograph your finished drawing in dappled sunlight, letting real shadows play across the page to mimic the atmospheric reference photo.
Now you have a dynamic moment frozen in time, ready to leap off the page


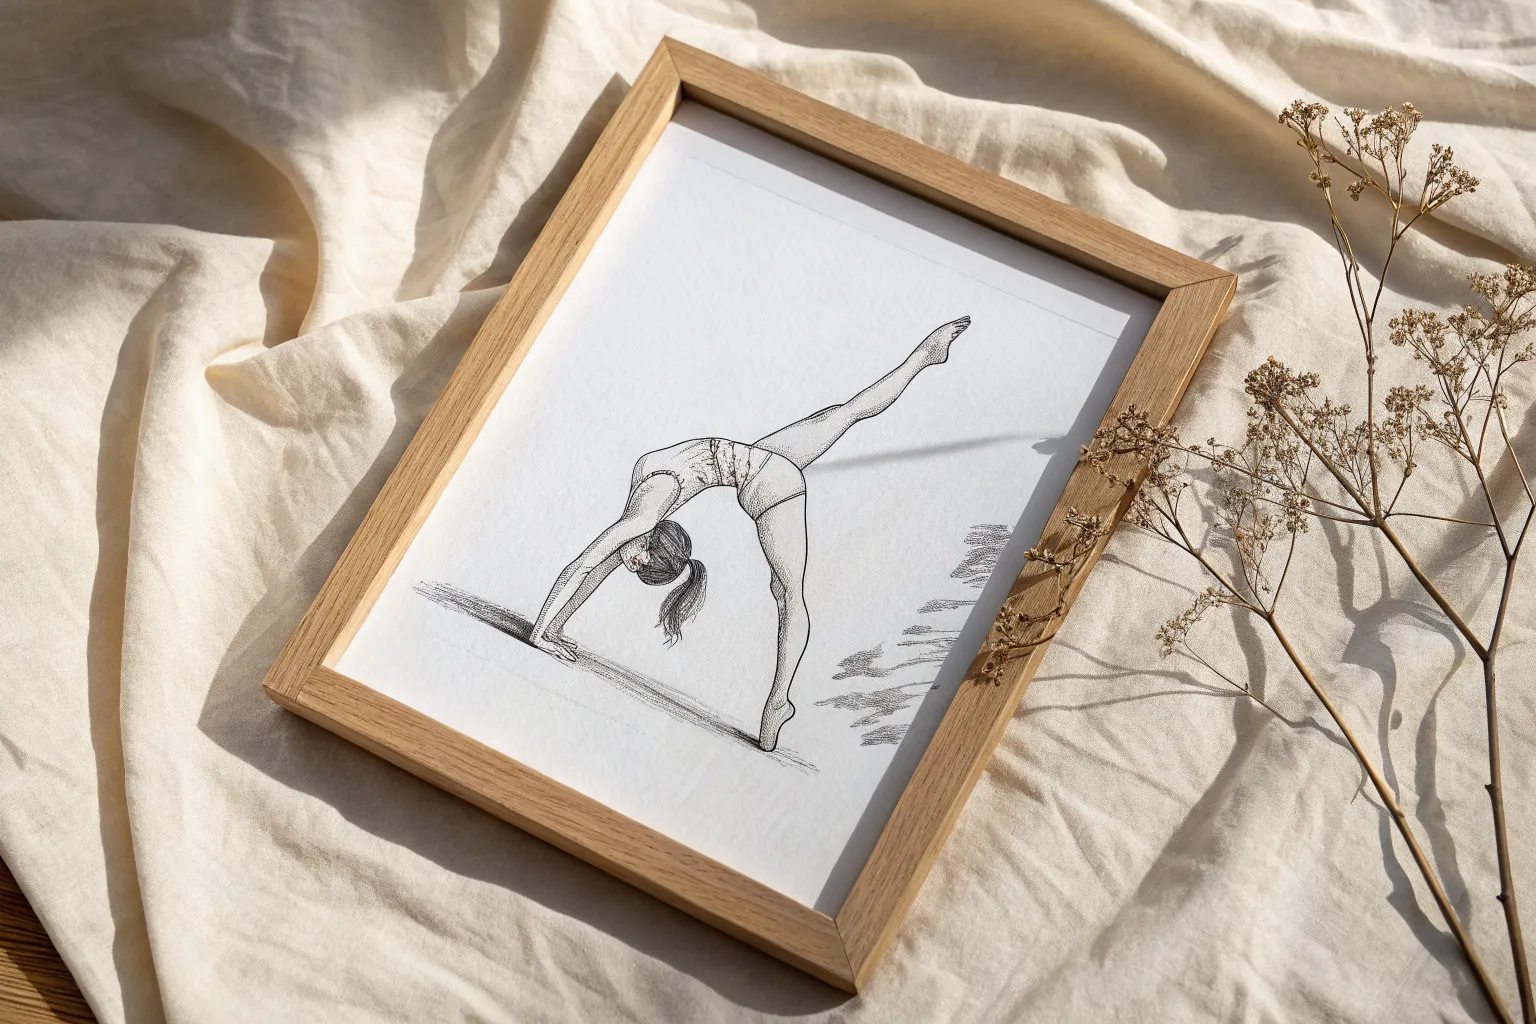
Handstand With Strong Shoulder Lines
Capture the elegance of movement with this refined line art drawing featuring a gymnast in a deep backbend handstand. The project focuses on clean linework and subtle stippling to create shading, all set against the texture of quality paper.
Step-by-Step Tutorial
Materials
- Fine-tooth watercolor paper or Bristol board (A5 or similar size)
- HB graphite pencil
- Kneaded eraser
- Fine liner pens (0.1mm, 0.3mm, and 0.5mm)
- Ruler (optional, for ground line)
Step 1: Drafting the Pose
-
Establish the curve:
Begin with your HB pencil by lightly drawing a steep, C-shaped curve. This will serve as the spine’s primary line, guiding the flow from the hands on the ground up through the arched back. -
Block in the torso:
Sketch a simple oval for the ribcage along the lower part of your curve, and a smaller, tilted oval above it for the hips. Connect them with smooth lines to form the waist. -
Position the arms:
Draw the supporting arm as a straight, strong vertical line extending down from the shoulder area. Sketch the head tucked slightly between the arms, ensuring the neck alignment follows the spine’s arch. -
Sketch the legs:
For the bent leg, draw the thigh extending back from the hip, then angle the shin down sharply toward the head. For the extended leg, draw a long, sweeping line reaching upward, ending in a pointed toe. -
Refine the anatomy:
Go over your blocked shapes to soften the anatomy. Add the definition of the shoulder muscles and the curve of the calves, ensuring the joints look natural rather than stiff. -
Add clothing details:
Sketch the outlines of the activewear, placing a waistband just below the ribcage and defining the short hemlines on the thighs. Keep these lines light.
Wobbly Lines?
If your long ink lines feel shaky, try pivoting from your shoulder rather than your wrist. This creates smoother, more confident strokes.
Step 2: Inking Guidelines
-
Outline the body:
Switch to a 0.3mm fine liner. Carefully trace your refined pencil lines, using confident strokes. I find it helps to pull the pen toward you rather than pushing it away. -
Define the hair:
Use the 0.1mm pen for the hair. Instead of outlining a solid shape, use quick, flicking strokes to create the texture of a messy bun, letting some strands escape for a realistic look. -
Detail the clothes:
Ink the clothing lines with the 0.3mm pen. Add small, subtle creases where the fabric bends at the waist and hip joint to suggest tension in the material. -
Draw the ground line:
Use a ruler or a steady hand to draw a straight horizontal line beneath the hands and foot. Don’t make it a solid block; sketchy, broken lines work best here.
Step 3: Shading and Finishing
-
Erase pencil marks:
Wait until the ink is completely dry—give it a few minutes—then gently roll your kneaded eraser over the entire drawing to lift all graphite. -
Start tonal work:
With the 0.1mm pen, begin hatching. Add parallel diagonal lines on the underside of the extended leg and the stomach area to indicate shadow. -
Deepen the shadows:
Apply stippling (tiny dots) to denser shadow areas, particularly under the armpit, the hair bun, and the waistline. The closer the dots, the darker the shadow. -
Texture the ground:
Add heavy hatching to the ground line, creating a shadow cast by the body. This anchors the figure so they don’t look like they are floating. -
Final varied weights:
Take the 0.5mm pen and re-trace just the ‘shadow side’ of the main body outlines (the bottom edge of limbs). This line variation adds immediate depth.
Add a Spot of Color
Use a single watercolor wash in a muted tone (like sage or dusty rose) just on the clothing for a chic, minimalist splash of interest.
Step back and admire the balance and strength captured in your clean line work.


Bridge Backbend Side View
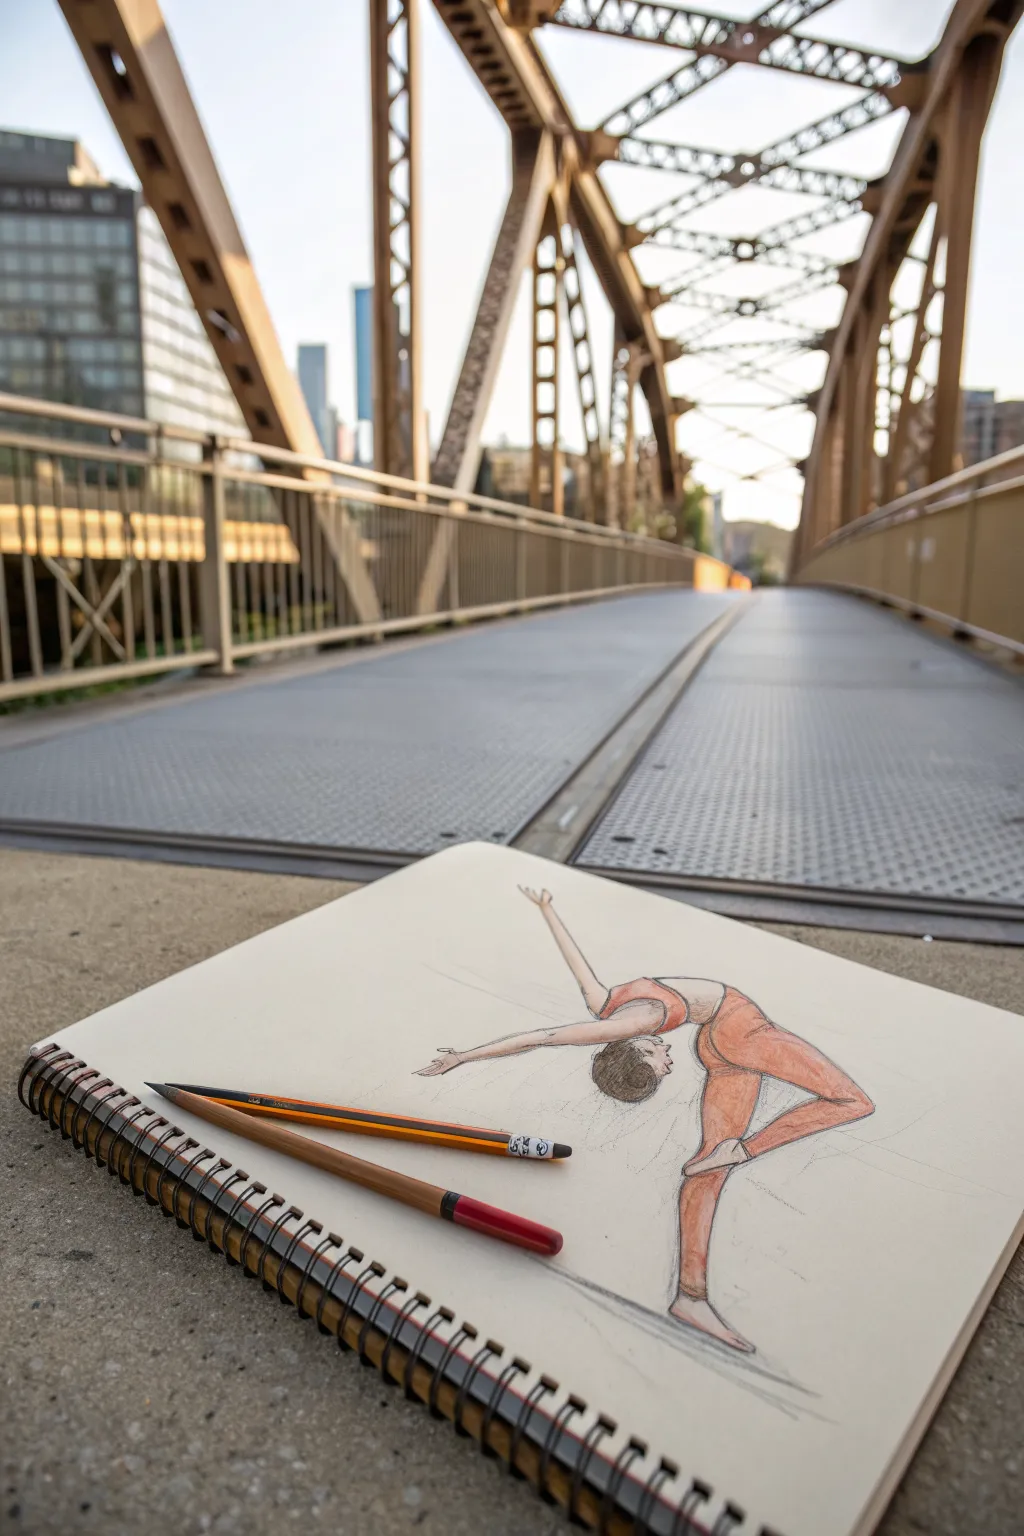
Capture the elegance of a gymnast in mid-backbend with this mixed-media sketch that balances dynamic lines with soft shading. This side view study emphasizes spinal flexibility and limb extension, rendering the figure in warm tones against a clean background.
Step-by-Step Guide
Materials
- Sketchbook with cream or off-white paper (heavyweight)
- Graphite pencil (HB or 2B)
- Kneaded eraser
- Colored pencils (Warm orange/terracotta, light peach/skin tone, dark brown/black)
- Fine-liner pen (optional for details)
- Blending stump (optional)
Step 1: Drafting the Structure
-
Establish the curve:
Begin by lightly sketching a large, sweeping ‘C’ shape in the center of your page with your graphite pencil. This arc represents the spine connecting the head to the planted foot and sets the foundation for the backbend. -
Position the anchor points:
Mark a small oval for the head near the bottom curve of your ‘C’ shape. Lower down, sketch a triangle shape to indicate the supporting foot planted on the ground. -
Map the torso:
Flesh out the torso by drawing a parallel curve beneath your spine line. Connect the chest area to the hips, keeping the waist pinched to emphasize the deep arch of the back. -
Sketch the legs:
Draw the supporting leg first, extending straight down from the hip to your foot anchor. The knee should be slightly bent to show weight-bearing. Sketch the other leg extended outward in a stylistic ‘attitude’ position, with the knee bent and foot pointed. -
Add arm placement:
Sketch the arms extending backward from the shoulders. One arm reaches toward the ground (but doesn’t touch yet), and the other extends upward and outward for balance. Use long, fluid lines to suggest movement rather than static posing.
Step 2: Refining the Form
-
Define the face and hair:
Sharpen the profile of the face, drawing a simple nose and chin line facing upwards. Sketch a rounded shape for a bun hairstyle at the back of the head. -
Outline the clothing:
Draw the lines for a two-piece gymnastics outfit. Sketch a crop top with a scoop neck and high-waisted leggings or shorts. Make sure the clothing follows the contour of the body’s twist. -
Refine hands and feet:
Add detail to the hands, keeping the fingers long and graceful. Refine the feet to show the pointed toes characteristic of gymnastics. -
Clean the linework:
Use your kneaded eraser to lift the darkest graphite lines, leaving only a faint guide visible. Go back over the final outline with a slightly firmer graphite touch or a very light colored pencil outline.
Fixing Proportions
If the backbend looks ‘broken’ rather than flexible, smooth out the spine curve. The arc should be continuous from neck to tailbone without sharp angles.
Step 3: Adding Color and Depth
-
Base skin tone:
Using a light peach or skin-tone colored pencil, apply a light, even layer of color to the face, arms, midriff, and exposed legs. Keep the pressure light to allow the paper texture to show through. -
Color the outfit:
Take your warm orange or terracotta pencil and color the gym outfit. I find applying color in small circular motions helps achieve a smooth, fabric-like texture. -
Shading the muscles:
Deepen the shading on the outfit where the body bends—specifically under the curve of the back and the crease of the hip. Use the same orange pencil but press slightly harder. -
Define hair texture:
Use a dark brown or black pencil to fill in the hair bun. Add small strokes following the direction of the hair growth to create volume and texture. -
Shadows on skin:
Add subtle shadows to the skin areas using a slightly darker beige or light brown pencil. Focus on the underside of the arms and the neck area to give the figure three-dimensional form. -
Final outlines:
With a sharpened dark pencil (or fine charcoal), carefully re-outline key areas like the profile, the spine’s curve, and the bottom of the foot to make the drawing pop off the page. -
Grounding shadow:
Sketch a very faint, horizontal shadow underneath the supporting foot. This crucial step prevents the gymnast from looking like they are floating in mid-air.
Dynamic Energy
Add ‘action lines’ or faint sweeps of graphite around the hands and extended foot to suggest movement and speed, making the pose feel less static.
Now you have a dynamic study of athletic flexibility ready to display.


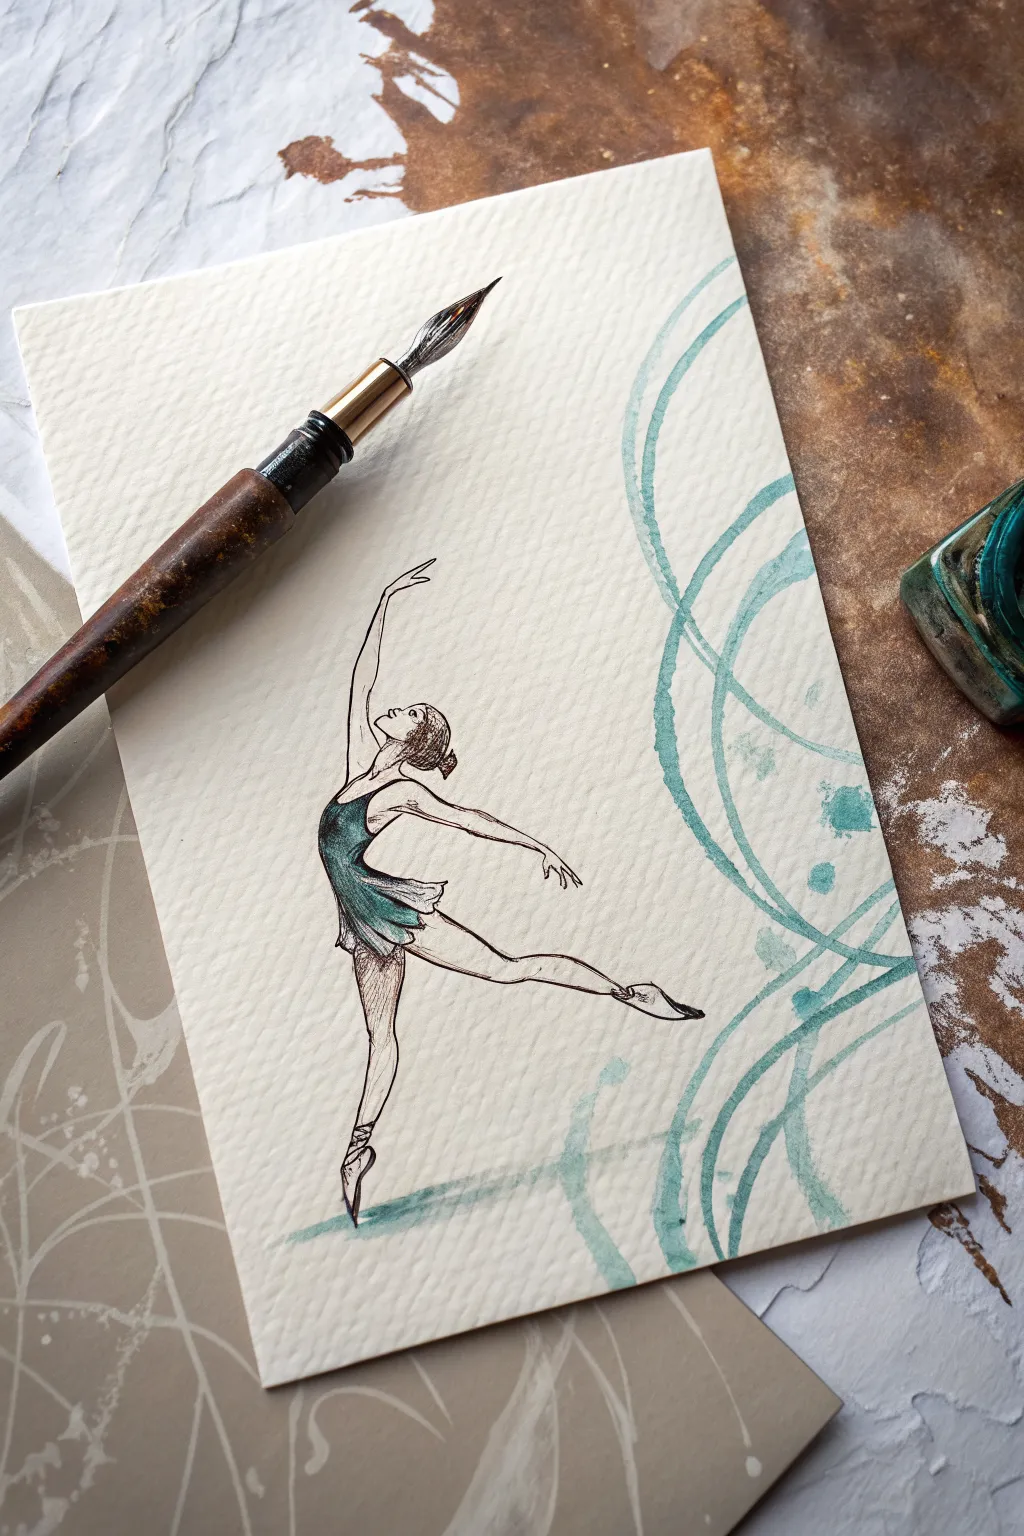
Balance Beam Arabesque Hold
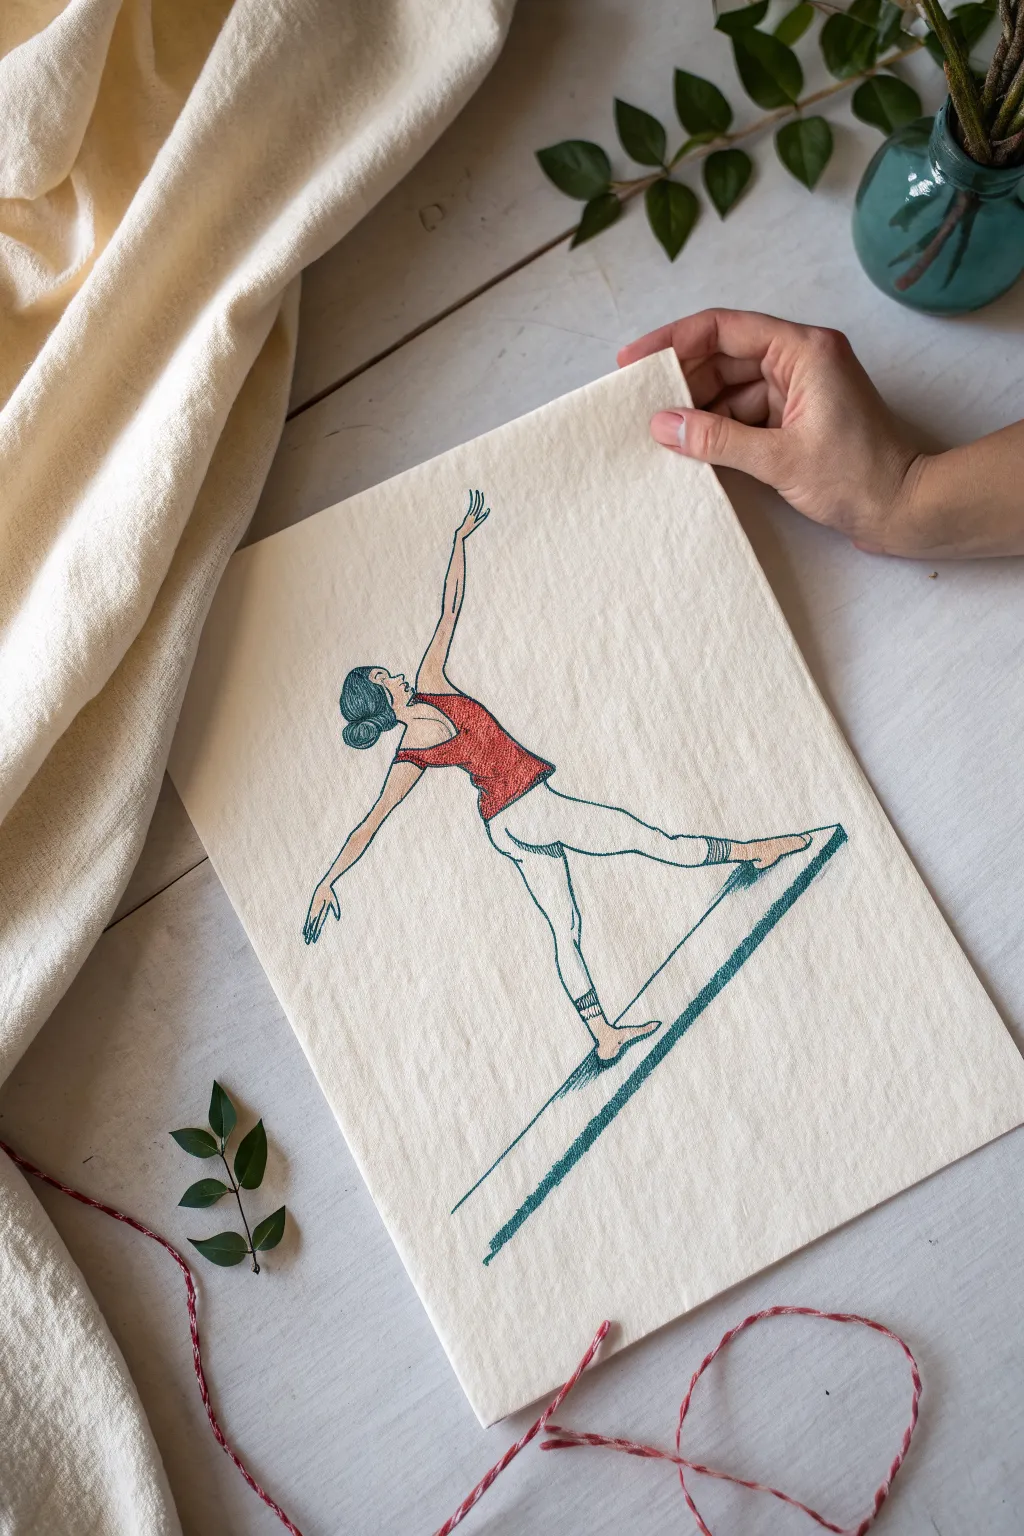
Capture the poise and focus of a gymnast in this delicate, vintage-inspired illustration. Using textured paper and a limited color palette creates a timeless, elegant look perfect for a wall art series or gift card.
Step-by-Step
Materials
- Unbleached, textured multimedia paper or thin canvas sheet
- HB or 2B graphite pencil (for sketching)
- Kneaded eraser
- Fine liner pen (dark teal or forest green, 0.3mm)
- Colored pencils (terracotta red, pale cream/peach, white)
- Ruler
- Paper blending stump (optional)
Step 1: Laying the Groundwork
-
Establish the balance beam:
Begin by lightly ruling a long, diagonal line near the bottom third of your paper to represent the top edge of the balance beam. -
Mark the base foot:
Position the gymnast’s right foot (the standing foot) on the beam line. Draw the foot slightly angled, showing the arch and toes gripping the surface. -
Sketch the leg structure:
Draw the standing leg extending upwards, leaning slightly backward to counterbalance the extended leg. Capture the calf muscle and the knee joint lightly. -
Draft the extended leg:
From the hip, sketch the left leg extending backward in a low arabesque. Ensure the line flows smoothly from the glute down to the pointed toe. -
Outline the torso and head:
Sketch the torso arching slightly backwards. Draw the head in profile, facing forward with a focused expression, and add a simple bun hairstyle. -
Position the arms:
Draw the right arm extending backward and down for balance. Sketch the left arm reaching gracefully upward, elongating the line of the body.
Step 2: Inking and Definition
-
Refine the outline:
Review your pencil sketch and make any necessary adjustments to the proportions. When happy, lightly erase the lines until they are faint guides. -
Ink the main contours:
Using your dark teal or forest green fine liner, carefully trace over the body outline. Use broken or lighter lines for interior muscles to keep the drawing delicate. -
Detail the features:
Add facial profile details—nose, lips, and chin. Define the hair bun with swirling lines to suggest volume and texture. -
Define the clothing:
Draw the neckline and armholes of the leotard. Add small lines near the ankle to indicate socks or tape wrapping. -
Create the beam texture:
Ink the top line of the beam firmly. Add a second parallel line below it to create thickness, filling the space with diagonal hatching to simulate shading.
Keeping It Clean
Place a piece of scrap paper under your drawing hand while coloring. This prevents oils from your skin transferring to the paper and stops the colored pencil from smudging.
Step 3: Adding Color and Texture
-
Color the leotard:
Take the terracotta red pencil and fill in the leotard. Use a heavier hand on the right side of the torso to create a shadow, leaving the chest area slightly lighter. -
Add skin tones:
Lightly shade the exposed skin with a cream or pale peach pencil. Keep the application sheer so the paper texture shows through. -
Enhance the legs:
I prefer to use a white pencil to highlight the leggings, blending it slightly with the paper tone to make them look opaque but soft. -
Deepen the shadows:
Go back over the darkest areas of the red leotard and the green hair bun with a second layer of color to increase contrast. -
Final touches:
Use the green fine liner to add tiny, vertical hatching marks on the shadow side of the legs and arms for a classic illustrative feel.
Collage Element
Instead of drawing the beam line, glue a thin strip of colored washi tape or a piece of actual twine to the paper for a mixed-media 3D effect.
Now you have a charming piece of gymnastic art ready to display or gift to a sports enthusiast

PENCIL GUIDE
Understanding Pencil Grades from H to B
From first sketch to finished drawing — learn pencil grades, line control, and shading techniques.
Explore the Full Guide
Uneven Bars Swing Arc
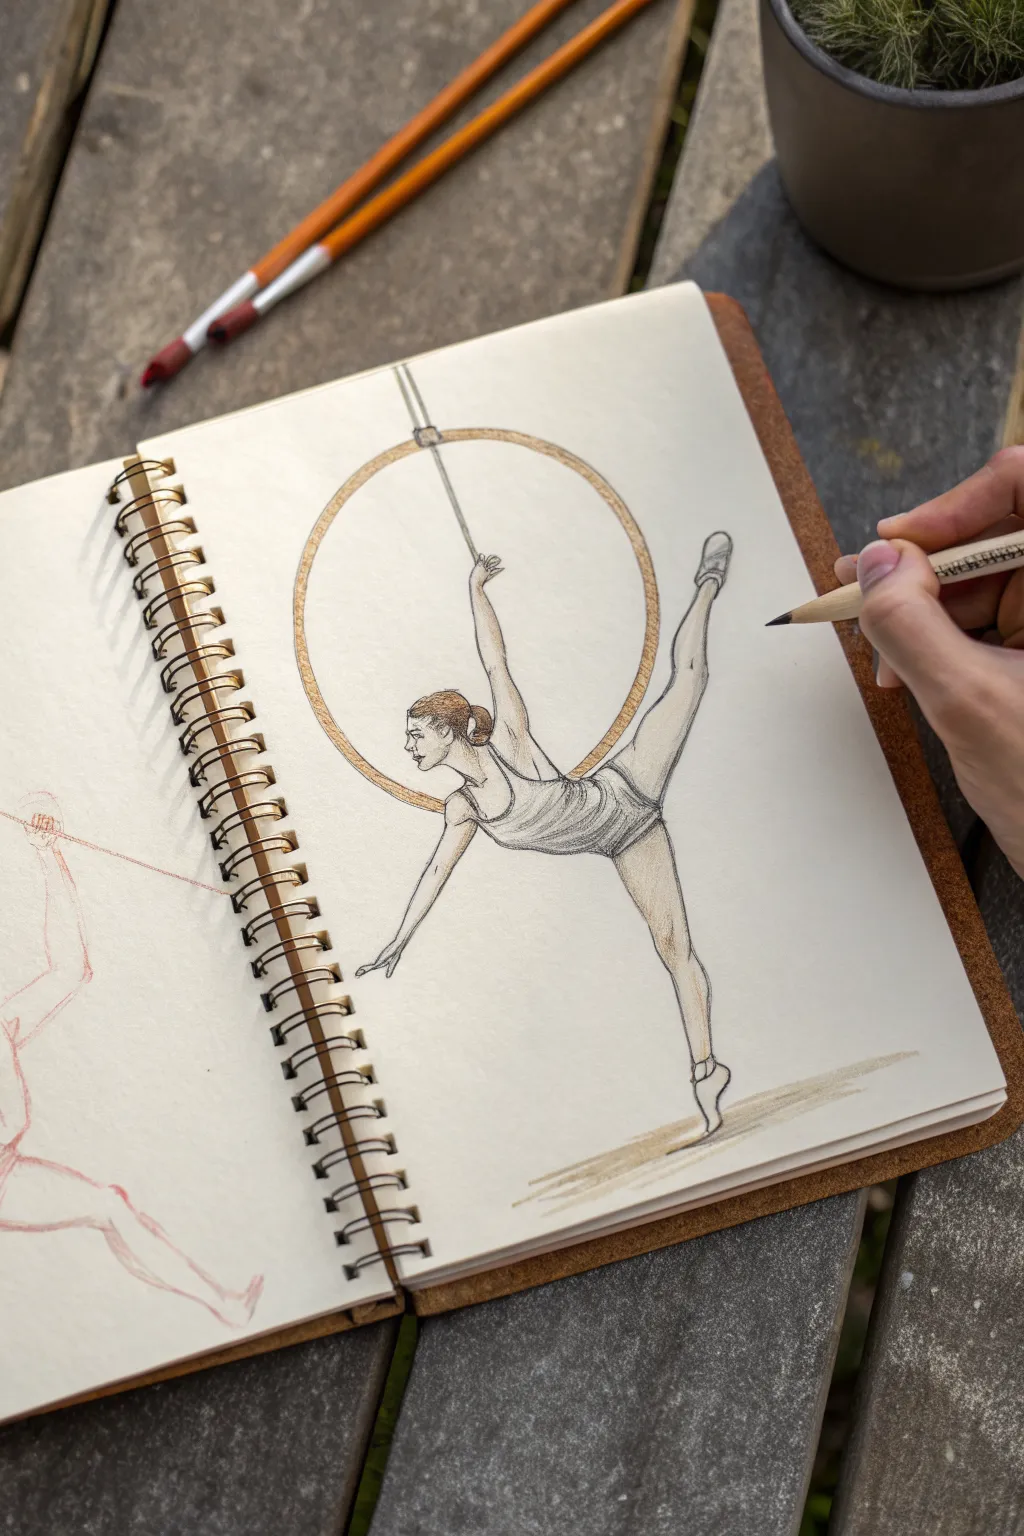
Capture the elegance and strength of an aerialist with this mixed-media sketch that combines precise graphite lines with soft touches of color. This project focuses on capturing a dynamic pose suspended in mid-air, emphasizing the graceful extension of the limbs against the solid structure of the hoop.
Detailed Instructions
Materials
- Spiral-bound sketchbook (heavyweight paper recommended)
- Graphite pencils (HB and 2B)
- Colored pencils (Gold/Ochre, Burnt Sienna, Flesh tones, Grey)
- Fine-point eraser or kneaded eraser
- Pencil sharpener
- Ruler or compass (optional, for the hoop)
Step 1: Establishing the Structure
-
Draw the hoop:
Start by lightly sketching a large circle in the center of your page. You can use a compass or trace a circular object if you aren’t confident drawing freehand, but aim for a natural, slightly imperfect sketched look. -
Thicken the hoop rim:
Add a second, concentric circle slightly inside the first one to give the hoop thickness. Sketch the attachment tab at the very top where the rope will connect. -
Add the rope:
Draw a straight line extending upward from the top tab. Add a diagonal line coming down from the tab into the center of the hoop, representing the hand strap or rope the gymnast will hold. -
Map the body gesture:
Lightly sketch a stick figure to place the gymnast. The torso should curve slightly backward, with one arm reaching up to the center rope and the other extending down and away. -
Position the legs:
Sketch the leg lines. One leg should extend straight back and up in an arabesque position, resting against the inside of the hoop rim. The other leg should reach straight down towards the ground, creating a long, elegant vertical line.
Unsteady Circles?
If freehand circles are tricky, lightly trace a bowl or roll of tape first. You can then sketch over this perfect line with looser strokes to keep that artistic, hand-drawn aesthetic.
Step 2: Defining the Form
-
Flesh out the torso:
Using your gesture lines as a guide, outline the muscles of the torso. Pay attention to the arch of the back and the stretch of the ribcage as the arm reaches up. -
Detail the limbs:
Refine the arms and legs, adding subtle curves to show muscle definition in the calves and thighs. Ensure the toes are pointed for that classic gymnastic aesthetic. -
Draw the face and hair:
Sketch the profile of the face looking forward. Add a simple bun at the back of the head, keeping the hair neat and tight to the scalp. -
Sketch the clothing:
Draw a leotard or unitard on the figure. Add sketch lines to indicate fabric folds around the waist and where the torso twists. -
Refine the hands and feet:
Carefully draw the fingers gripping the rope above. For the feet, sketch simple ballet slippers or bare feet with pointed toes.
Sparkle & Shine
Use a metallic gold gel pen for the hoop instead of colored pencil. It adds a literal shimmer that mimics the taped surface of a professional aerial lyra perfectly.
Step 3: Shading and Color
-
Clean up the lines:
Go over your main graphite lines with a slightly sharper or darker pencil (like a 2B) to make the figure pop. Erase any unnecessary construction lines. -
Shade the hoop:
Take a gold or ochre colored pencil and shade the rim of the hoop. Use short, diagonal strokes to mimic the texture of the tape often used on aerial equipment. -
Add skin tones:
Lightly shade the skin areas with a flesh-toned pencil. I usually apply a bit more pressure on the underside of the limbs to create shadow and volume. -
Define the hair:
Use a brown or burnt sienna pencil to color the hair, adding darker strokes near the bun and hairline to show depth. -
Shade the clothing:
Use a grey pencil to lightly shade the leotard, focusing on the folds and the side of the body away from the light source. Keep the shading scratchy and loose to maintain the sketchbook feel. -
Ground the figure:
Using a light brown or grey pencil, sketch a few horizontal lines beneath the bottom foot to create a subtle shadow on the floor, suggesting distance from the ground.
Step back and admire the beautiful sense of motion you have captured on the page
Turn Pose With Spotting Head
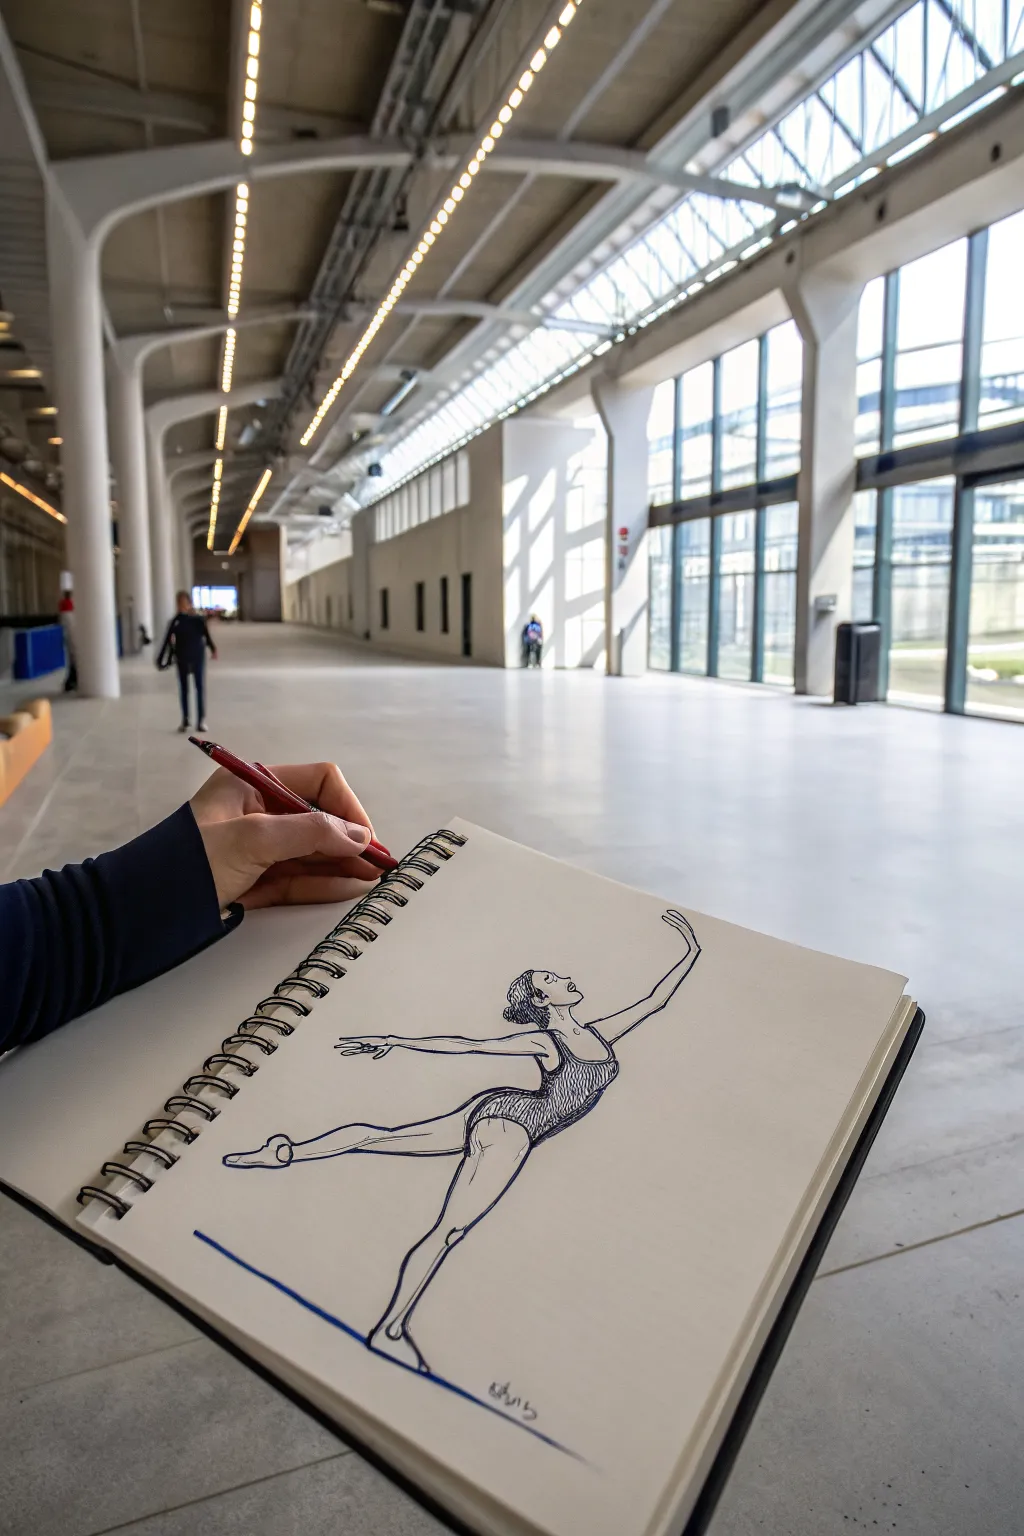
This dynamic sketch captures a gymnast mid-pirouette, highlighting the classic “spotting” technique where the head stays fixed while the body turns. The drawing uses confident, flowing lines and cross-hatching to emphasize movement and the form of the leotard.
Detailed Instructions
Materials
- Spiral-bound sketchbook (heavyweight paper preferred)
- Pencil (HB or 2B for sketching)
- Eraser
- Fine-point black ink pen or marker (0.5mm)
- Medium-point black pen (optional, for thicker lines)
Step 1: Planning the Gesture
-
Establish the Line of Action:
Begin by lightly sketching a long, curved vertical line that represents the spine and the supporting leg. This primary axis will guide the entire pose. -
Map the Body Blocks:
Lightly draw an oval for the torso, slightly angled backward. Add a smaller circle for the head, positioning it looking sharply to the right side of the page to indicate the “spotting” action. -
Sketch the Limbs:
Draw stick-figure guides for the legs and arms. The supporting (left) leg should be straight and extended. The working (right) leg should be raised in an arabesque position behind the body. -
Position the Arms:
Sketch the left arm reaching forward horizontally. Sketch the right arm reaching gracefully upward and slightly back, creating a beautiful long line from fingertips to toes.
Fixing Stiff Poses
If the figure looks stiff, exaggerate the curve of the back and point the toes more sharply. Gymnastics is about hyperextension, so pushing angles often helps.
Step 2: Refining the Form
-
Flesh Out the Legs:
Draw the contour of the legs around your stick guides. Pay attention to the calf muscle on the supporting leg and the pointed toes on both feet to emphasize the extension. -
Define the Torso:
Refine the waistline and the curve of the back. Sketch the outline of the leotard, marking the high leg cuts and the scoop neck. -
Detail the Hands and Head:
Add shape to the hands; keep the fingers elongated and graceful. Refine the profile of the face, ensuring the chin is lifted and the nose points clearly to the side. -
Clean Up the Pencil Sketch:
Once you are happy with the proportions, gently erase any confusing heavy sketch lines, leaving only a faint guide for your ink work.
Dynamic Lines
Try using a brush pen for the final outline. By varying pressure, you can create tapered lines that make the movement look faster and more elegant.
Step 3: Inking the Outline
-
Start the Facial Profile:
Switch to your ink pen. Carefully trace the profile of the face, the ear, and the bun hairstyle. Using a lighter touch here keeps the features delicate. -
Outline the Upper Body:
Draw the neck, shoulders, and arms. Use long, continuous strokes rather than short, scratchy ones to mimic the fluid movement of the gymnast. -
Ink the Leotard and Legs:
Trace the rest of the body. You can use a slightly heavier line weight on the underside of the legs and torso to suggest shadow and weight. -
Add the Floor Line:
Draw a simple blue or black horizontal line beneath the supporting foot to ground the figure, giving her a surface to turn on.
Step 4: Adding Texture and Detail
-
Hatch the Leotard:
Create the texture of the fabric by drawing diagonal hatching lines across the entire leotard area. -
Cross-Hatch for Shading:
Go back over the darker areas of the leotard—specifically the side of the torso and near the hip—with hatching lines in the opposite direction. This cross-hatching adds depth and form. -
Define Muscle Tone:
Add very sparse, broken lines on the thigh and calf of the supporting leg. I find that less is more here; just a hint of a line suggests the muscle strain without cluttering the drawing. -
Hair Texture:
Fill in the hair with tight, curved lines that follow the shape of the skull towards the bun, leaving a small white area for a highlight. -
Final Erasure:
Wait specifically for the ink to become completely dry to the touch. Then, erase all remaining pencil marks to leave a crisp, high-contrast final image.
Now you have a graceful study of gymnastic motion captured permanently in your sketchbook
BRUSH GUIDE
The Right Brush for Every Stroke
From clean lines to bold texture — master brush choice, stroke control, and essential techniques.
Explore the Full Guide
Leotard Stretch Highlights
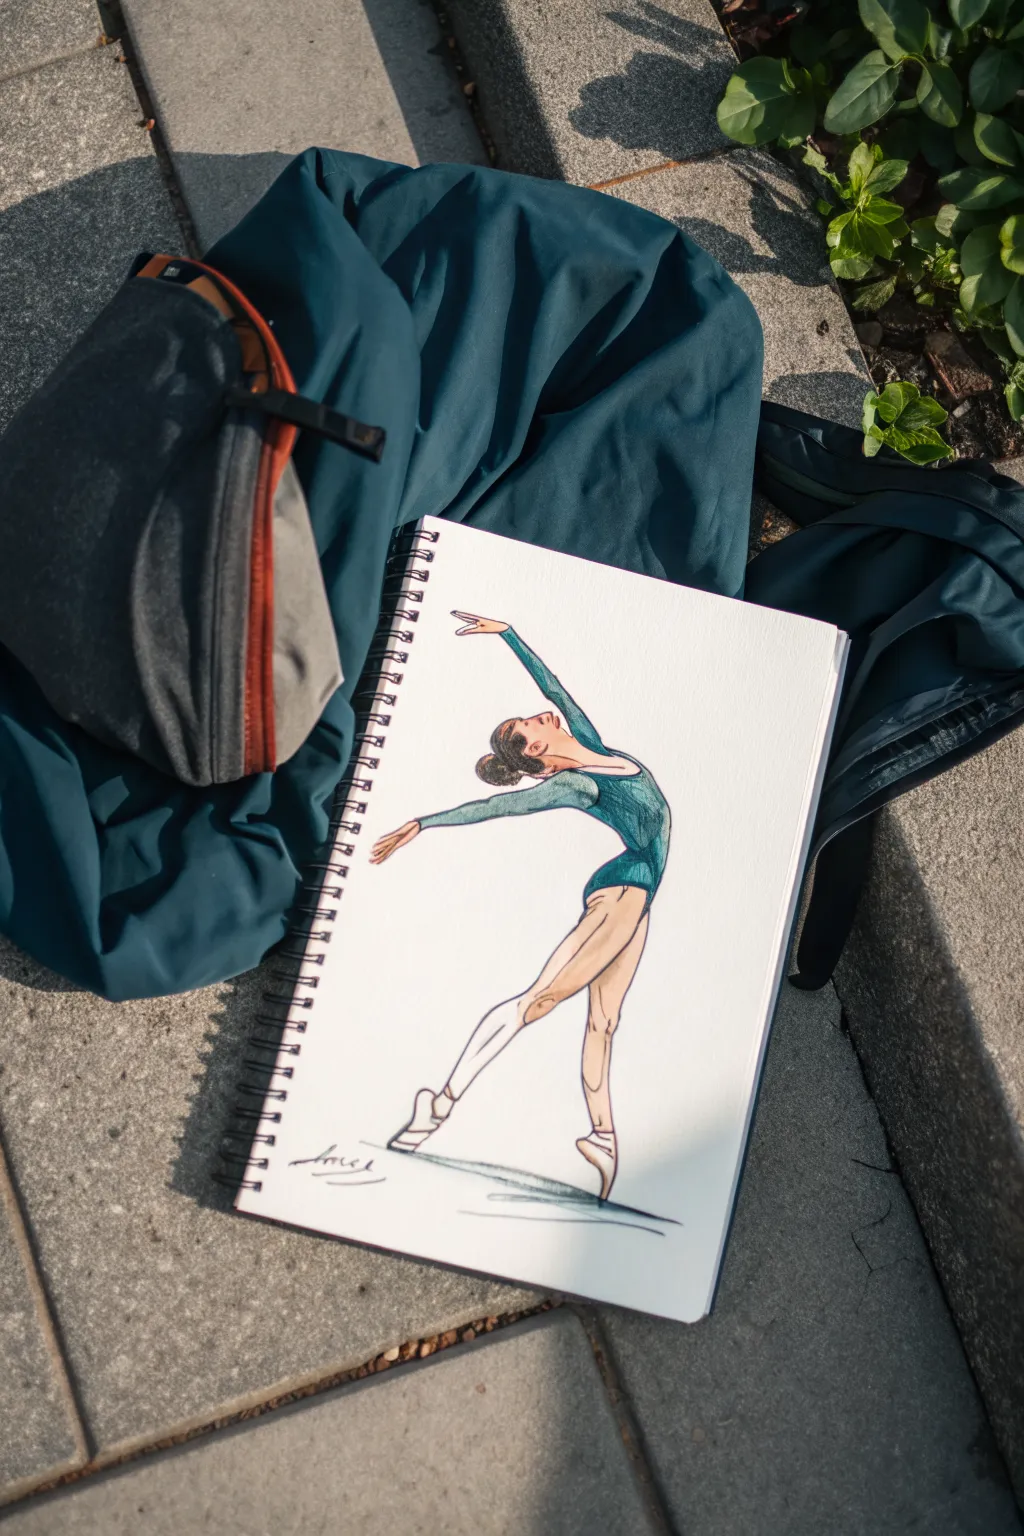
Capture the graceful extension of a rhythmic gymnast with this stylized illustration that blends flowing lines with vibrant color. Using a mix of markers and colored pencils, you’ll recreate the sheen of a leotard and the elegant arch of a performance pose.
Step-by-Step
Materials
- Spiral-bound sketchbook (heavyweight paper)
- H or HB pencil for sketching
- Kneaded eraser
- Fine-point black ink pen (0.1 or 0.3mm)
- Alcohol markers (Teal/Green-blue, distinct Flesh tones)
- Colored pencils (Dark teal, warm brown, white)
- White gel pen (optional)
Step 1: Posing the Figure
-
Map the spine:
Begin with a single, sweeping ‘C’ curve to establish the dramatic arch of the gymnast’s back. This line is the anchor for the entire pose, determining the flow of movement. -
Establish landmarks:
Lightly sketch an oval for the head at the top of the curve and mark the position of the hips and shoulders. Keep the pressure very light so you can erase easily later. -
Extend the limbs:
Draw the legs extending from the hips. The back leg should be straight and rooted, while the front leg extends forward in a pointed toe stance. Add lines for the arms, with one reaching high overhead and the other gracefully extending back. -
Flesh out the form:
Build the muscles and contours around your stick figure frame. Pay attention to the calf definition and the sleek silhouette of the torso. -
Define the leotard:
Sketch the neckline and leg openings of the leotard. Focus on how the fabric stretches across the arched back and bust area. -
Refine the hands and feet:
Detail the pointed toes, perhaps indicating ballet slippers or rhythmic shoes. Soften the hands into delicate, expressive gestures rather than rigid shapes.
Fixing Stiffness
If the pose looks stiff, emphasize the ‘line of action’ more. The spine should be a smooth curve, not straight. Try erasing the torso and redrawing the back arch deeper.
Step 2: Adding Color & Depth
-
Base skin tones:
Using your lightest flesh-tone alcohol marker, fill in the face, legs, and exposed hands. Keep the strokes quick to avoid clear overlaps. -
Shadowing the skin:
Go back in with a slightly darker flesh marker or a warm brown colored pencil to add contour to the leg muscles and under the chin. This creates volume. -
Coloring the leotard:
Apply a base coat of teal marker to the leotard. I like to leave small slivers of white paper showing on the highest points of the chest and hip to suggest a satin-like sheen. -
Fabric layering:
Once the base is dry, add a second layer of the same teal marker or a darker blue-green to the shaded areas—specifically under the arm and along the side of the torso. -
Hair details:
Fill in the hair bun with a dark brown or black marker, leaving a tiny highlight near the crown for dimension.
Add Sparkle
Rhythmic gymnastics leotards often have crystals. Use tiny dots of white gel pen or metallic silver ink scattered across the dark teal sections to simulate rhinestones catching the light.
Step 3: Defining Lines & Finishing
-
Outline the silhouette:
Take your fine-point black pen and trace the final contour of the body. Use a confident, continuous line rather than short, scratchy strokes. -
Add textural shading:
Using the same pen, add very subtle hatching lines on the leg muscles and the folds of the leotard to enhance the graphical style. -
Deepen the teal:
Use a dark teal colored pencil to shade over the marker on the leotard. This mixed-media technique adds a rich texture that markers alone sometimes miss. -
Highlighting:
If your white paper highlights got covered, use a white gel pen or white charcoal pencil to add a crisp shine to the shoulder and thigh of the leotard. -
Grounding the figure:
Sketch a quick, loose shadow beneath the feet using grey marker or pencil. This anchors the drawing so the gymnast doesn’t look like she is floating. -
Final signature:
Add your signature near the feet with a loose, artistic flair to match the movement of the piece.
Now you have a dynamic figure drawing that perfectly captures the beauty of athletic movement
Foreshortened Vault Takeoff
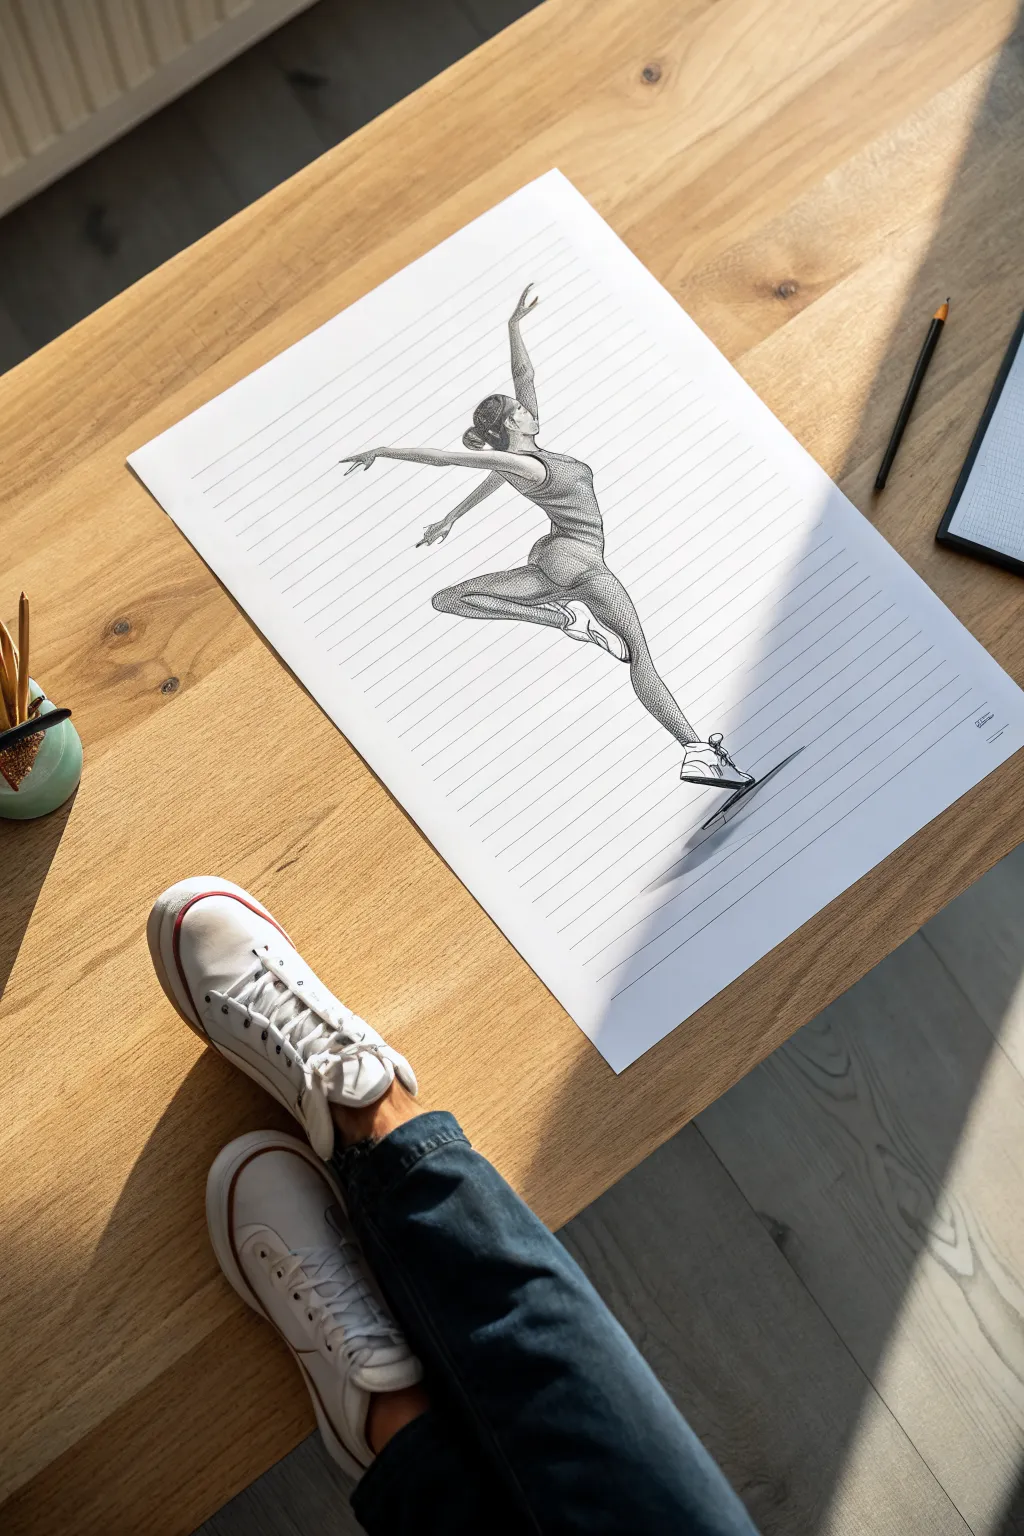
Capture the dynamic energy of gymnastics with this elegant sketch that plays with perspective and line work. The drawing features a graceful gymnast mid-leap, rendered in a classic hatching style on large-format lined paper for a unique, studious aesthetic.
Step-by-Step Guide
Materials
- Large sheet of white drawing paper (A2 or 18×24 inches)
- Graphite pencils (HB for sketching, 2B/4B for shading)
- Fine liner pens (Black, sizes 0.1, 0.3, and 0.5mm)
- Long ruler or T-square
- Light gray marker or pencil (for the background lines)
- Kneadable eraser
- Quality pencil sharpener
Step 1: Preparation & Foundation
-
Prepare the ‘notebook’ background:
Since we want the look of giant notebook paper, start by using your long ruler and a light gray marker (or a very light pencil touch) to draw evenly spaced horizontal lines across the entire sheet. Space them about 1.5 to 2 inches apart depending on your paper size. -
Establish the gesture line:
Using an HB pencil, lightly sketch a sweeping ‘line of action’ that curves from the bottom right (where the foot will be) up through the torso and extends out through the raised arm. This ensures the pose feels fluid. -
Block in the major forms:
Visualize the body as simple geometric shapes. Sketch an oval for the ribcage and a pelvis shape, connecting them with a curved spine. Keep your pencil pressure very light so these lines can be erased later. -
Position the limbs:
Draw the legs and arms using cylinders and joints. The front leg should be bent at the knee, driving upward, while the back leg extends straight down and back for that classic leap silhouette. Position the arms gracefully, one reaching forward and one back.
Proportions Off?
Issues with anatomy usually stem from the initial block-in phase. Use the ‘head height’ rule: a realistic human figure is roughly 7.5 heads tall. Measure your sketch against the head size to check lengths.
Step 2: Refining the Anatomy
-
Detail the head and neck:
Refine the shape of the head, adding the bun hairstyle and a profile view of the face. Ensure the neck connects smoothly to the shoulders, looking up slightly toward the raised hand. -
Define the leotard:
Sketch the outline of the leotard over the body forms. Pay attention to the curve of the waist and the leg openings to give the clothing volume. -
Refine leg muscles:
Erase your geometric guides within the legs and draw the actual contours of the muscles. Gymnasts have defined quadriceps and calves, so use subtle curves to suggest strength. -
Add the shoes:
Draw the gymnastics shoes or socks on the feet. The back foot should be pointed (plantar flexion) while the front foot is caught in motion.
Add a Splash of Color
Keep the sketch black and white but use a single colored pencil (like red or blue) to color just the leotard or the shoes. This ‘spot color’ technique creates a striking, modern focal point.
Step 3: Inking & Texture
-
Outline the silhouette:
Switch to a 0.5mm fine liner. carefully trace over your final pencil lines to create a crisp outer boundary for the figure. I find it helpful to rotate the paper to keep my hand steady on curves. -
Begin cross-hatching shadows:
Using a thinner 0.1mm pen, start adding shadows. Instead of smudging, use fine diagonal lines (hatching). Focus on the underside of the leg, the stomach area, and under the chin. -
Build mid-tone values:
Cross-hatch the initial lines by drawing a second set of diagonal lines in the opposite direction. This creates a darker value for the deeper recesses of the muscle definition and clothing folds. -
Texture the leotard:
Give the leotard a different texture than the skin. You might use tighter, denser stippling or very close vertical lines to make the fabric look distinct from the smooth skin shading. -
Detail the hair:
Use the 0.1mm pen to draw individual strands flowing into the bun. Leave a small white area on the crown of the head to represent a shiny highlight. -
Erase pencil marks:
Once the ink is completely dry (give it a few minutes to avoid smearing), gently use the kneadable eraser to lift off all the underlying graphite sketch lines.
Step 4: Grounding & Final Touches
-
Create the cast shadow:
To make the gymnast look like she is popping off the page, draw a horizontal, elongated shadow underneath the back foot using a 2B or 4B pencil or a gray marker. This shadow creates the illusion of height. -
Soften the shadow edges:
Blur the edges of your cast shadow slightly so it doesn’t look like a solid object. It should be darkest right under the foot and fade as it moves outward. -
Re-establish background lines:
If your drawing overlapped the horizontal notebook lines, decide if you want the figure ‘behind’ or ‘in front’ of them. For a 3D effect, ensure the figure obscures the background lines, or redraw the lines through the figure if you want a transparent ghost-like effect (though opaque is standard). -
Final assessment:
Step back and look at contrast. If the figure feels flat, go back in with your 0.3mm pen and deepen the darkest shadows in the deepest creases of the body and clothing.
Now you have a dynamic piece of art that freezes a moment of athletic grace in time


Watercolor Motion Trails on Floor
Capture the grace of a gymnast mid-performance using fine liner pens and expressive watercolor washes. This project combines precise anatomical sketching with loose, flowing brushstrokes to create a dynamic sense of movement on textured paper.
Step-by-Step Tutorial
Materials
- Cold press watercolor paper (textured)
- Dip pen with a fine nib (or a 0.1mm waterproof fine liner)
- Black drawing ink (waterproof)
- Teal or turquoise watercolor paint
- Small round watercolor brush (size 2 or 4)
- Pencil (HB or 2H)
- Kneadable eraser
- Paper towel
- Water jar
Step 1: Sketching the Pose
-
Establish the curve:
Begin with a very light pencil line to establish the ‘line of action.’ For this pose, draw a gentle S-curve that starts at the raised hand, flows down through the spine, and extends out through the back leg. -
Block in the body:
Lightly sketch the basic shapes of the gymnast’s body. Focus on the triangular torso, the extension of the neck looking upward, and the energetic kick of the back leg. Keep your pencil pressure minimal so lines are easy to erase later. -
Refine the anatomy:
Tighten up your sketch details. Define the pointed toes in their shoes, the curve of the calf muscles, and the arch of the back. Sketch the leotard shape, including the small ruffle at the hip. -
Check proportions:
Take a moment to step back and look at your drawing. Ensure the arms aren’t too long and the head is tilted at a natural angle before you commit to ink.
Uneven Ink Flow?
If using a dip pen, clean the nib with Windex or toothpaste before starting. Manufacturers coat nibs in oil to prevent rust, which causes ink to bead up or refuse to flow.
Step 2: Inking the Figure
-
Prepare your dip pen:
Dip your nib into the black ink, wiping off any excess on the bottle’s rim. If you’re using a fine liner instead, just make sure it’s waterproof so the watercolor won’t bleed later. -
Outline the silhouette:
Carefully trace over your pencil lines. Use confident, sweeping strokes for the long lines of the legs and arms to avoid a shaky look. Break the line slightly on the ruffle of the skirt to suggest lightness. -
Detail the hair and face:
Use the very tip of the nib for the facial profile. Scribble tightly for the hair bun to create texture, leaving small gaps for highlights. -
Add hatching shadows:
Add depth by hatching (drawing closely spaced parallel lines) on the shadowed side of the body—specifically under the skirt, along the back thigh, and on the lower calf. -
Define the shoes:
Ink the ballet slippers or gymnastics shoes, darkening the soles and the ribbons wrapping the ankle to ground the figure. -
Erase pencil marks:
Wait until the ink is completely bone-dry. Then, gently roll your kneadable eraser over the drawing to lift all graphite guidelines.
Paper Choice Matters
Use cold press watercolor paper for this project. Its bumpy texture is essential for achieving the ‘broken’ or ‘dry brush’ look on the teal swooshes.
Step 3: Adding Watercolor Accents
-
Paint the leotard:
Load your brush with a diluted teal watercolor. Carefully fill in the leotard shape. I like to start lighter at the top and drop in slightly more pigment near the waist for instant dimension. -
Create the motion trails:
Mix a watery pool of the same teal color. Starting from behind the figure, paint long, swooping curved lines that mimic the path of a rhythmic gymnastics ribbon. -
Loosen the strokes:
Allow the brush to skip over the paper’s texture as paint these trails. Don’t worry about solid coverage; the dry-brush effect adds energy and suggests speed. -
Add dynamic splatters:
While the trails are wet, tap your brush handle to create a few small splatters near the curves. This enhances the feeling of movement. -
Ground the figure:
Paint a very faint, quick horizontal sweep under the standing foot to create a subtle floor shadow.
Once dry, you’ll have an elegant illustration that perfectly balances precision with artistic flow
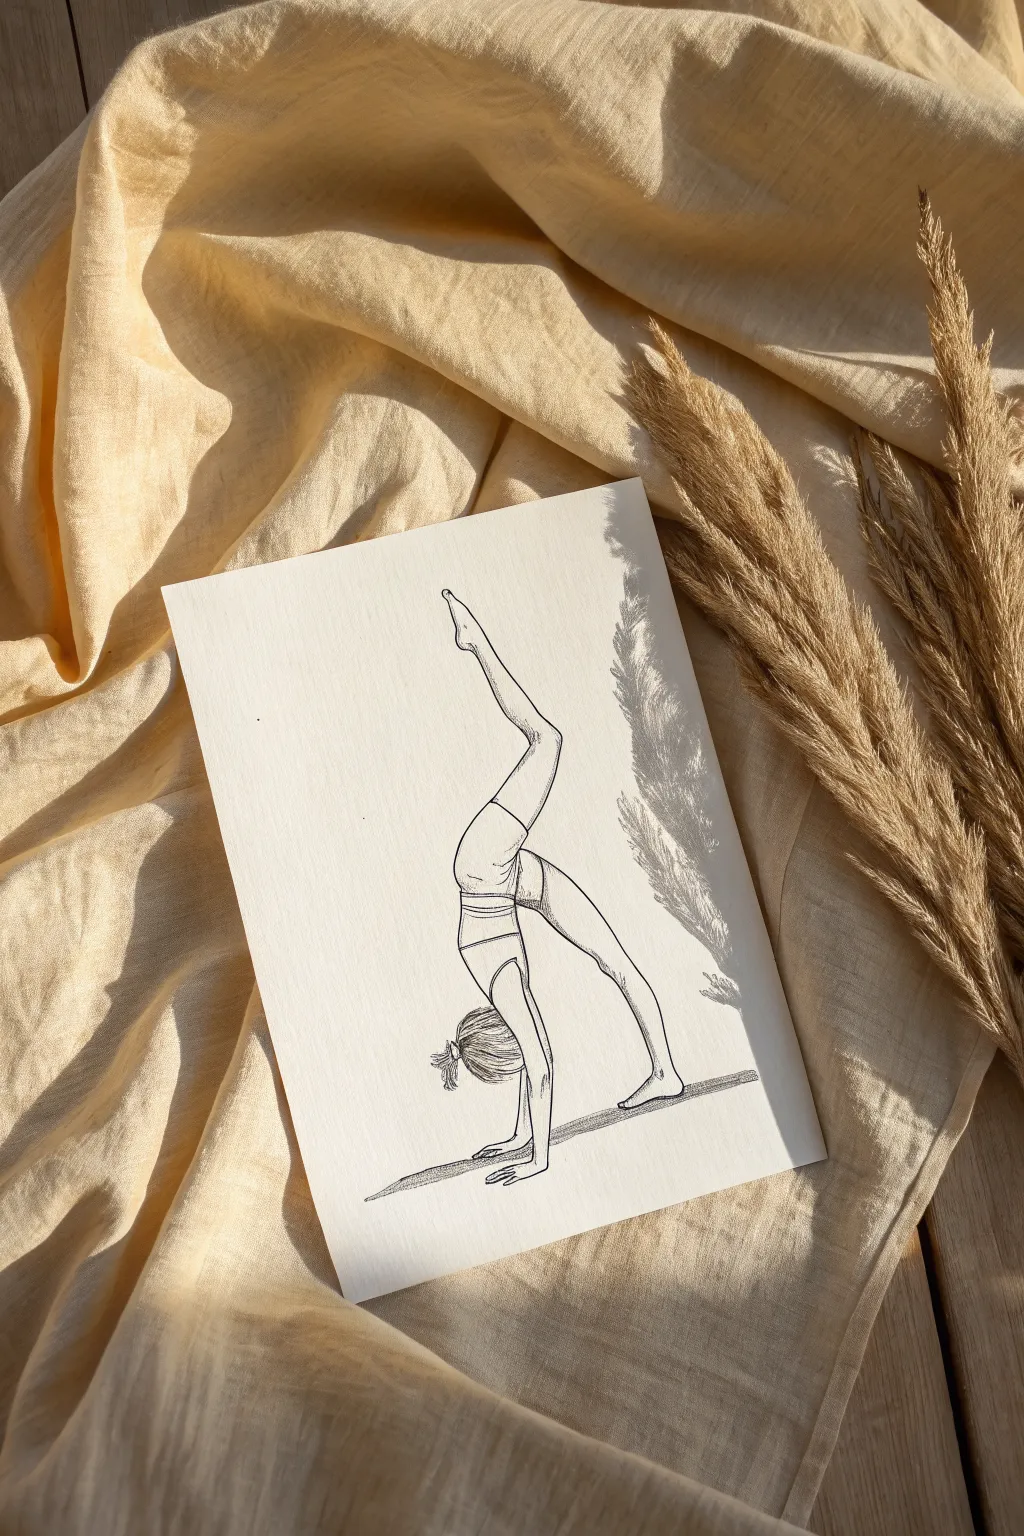
Continuous Line Gymnast Pose
Capture the elegance and balance of a gymnast with this refined pen and ink drawing. The artwork combines clean contour lines with subtle stippling to create dimension without overwhelming the simple composition.
How-To Guide
Materials
- Smooth bristol board or hot-press watercolor paper
- HB graphite pencil
- Kneaded eraser
- Fine liner pen (size 01 or 03)
- Ultra-fine liner pen (size 005)
- Ruler (optional for ground line)
- Reference photo of a gymnast in arabesque
Step 1: Drafting the Pose
-
Establish the curve:
Begin lightly with your HB pencil. Draw a gentle, sweeping ‘S’ curve that represents the spine flowing down into the standing leg. This action line will ensure your gymnast feels balanced and fluid. -
Block in the torso:
Sketch an oval for the ribcage and a smaller, slightly tilted oval for the hips along your action line. Connect them with curved lines to form the waist, keeping the shapes organic. -
Position the limbs:
Use stick lines to map out the arms and legs. The standing leg should be straight and strong, while the back leg extends horizontally. Extend the front arm upward for balance and the back arm following the line of the extended leg. -
Flesh out the form:
Draw the contours of the muscles around your stick figure framework. Focus on the tapered shapes of the calves and the forearms. Outline the leotard simply, following the curve of the torso. -
Refine the details:
Sketch the head in profile, looking upward toward the raised hand. Add a simple bun for the hair. Lightly erase your initial construction lines until only a faint guide remains.
Steady Hands
Rest the heel of your hand on a scrap piece of paper while stippling. This prevents hand oils from smudging the paper and keeps your dots crisp and round.
Step 2: Inking the Contours
-
Trace the main outline:
Switch to your 03 or 01 fine liner. Start tracing the pencil lines with a steady hand. I find it helps to pull the pen toward you rather than pushing it away for smoother curves. -
Handle intersections carefully:
When outlining overlapping areas, like where the arm crosses the body or the legs meet the leotard, stop your line just short of the intersection to keep the drawing feeling open and airy. -
Detail the face and hands:
Use the finer 005 pen for the delicate profile of the face and the fingers. These areas require precision, so keep your touch incredibly light. -
Clean up the sketch:
Once the ink is completely dry—give it a few minutes to be safe—gently erase all remaining pencil marks with the kneaded eraser. This leaves a stark, clean contour.
Step 3: Shading with Stippling
-
Understand the light source:
Imagine the light coming from the front and slightly above. Shadows will naturally fall on the underside of the limbs, the back of the neck, and the waistline. -
Start the stippling process:
Using your 005 pen, begin placing tiny dots along the shadowed edges. Start with the underside of the extended leg and the back of the standing thigh. -
Build gradients:
Cluster the dots densely near the black outline and space them out as you move toward the center of the limb. This creates a soft gradient that implies roundness without using harsh hatching lines. -
Shade the torso:
Add light stippling to the side of the ribcage and underneath the bust line of the leotard. Keep this subtle; you want to suggest form, not create a heavy shadow. -
Ground the figure:
Below the standing foot, sketch a few fragmented horizontal lines. Add a cluster of stippling right under the heel and fade it out horizontally to create a shadow on the floor. -
Final assessment:
Step back and look at the overall contrast. If any area looks too flat, add a few more careful dots to deepen the shadow, particularly under the chin and the leotard leg bands.
Add a Splash
For a contemporary look, keep the figure monochrome but paint a single, loose watercolor circle in gold or red behind the gymnast’s upper body.
This minimal approach results in a drawing that feels both classic and beautifully modern.
Skeleton Overlay for Extreme Flexibility
This project captures the elegance of extreme flexibility by combining loose, gestural line work with detailed cross-hatching. The result is a striking, classical-style ink illustration of a gymnast performing a vertical split that pops against the creamy tone of sketchbook paper.
Step-by-Step Guide
Materials
- Spiral-bound sketchbook (cream or off-white paper preferred)
- HB Graphite pencil
- Kneaded eraser
- Fine liner pens (sizes 0.1, 0.3, and 0.5)
- Ruler (optional for alignment)
- Reference photo of a gymnast
Step 1: Planning and Foundation
-
Gesture line:
Begin with your HB pencil, drawing a very light, sweeping curve to establish the ‘line of action.’ This should run from the extended toe, down through the spine, and to the standing foot. -
Skeleton blockage:
Lightly sketch the ribcage and pelvis as simple oval shapes. Connect the limbs using stick-figure lines to ensure the proportions are correct before adding flesh. -
Fleshing it out:
Draw the contours of the muscles over your stick figure framework. Pay special attention to the quadriceps and the calf muscles, keeping your pencil marks faint so they are easy to erase later. -
Refining the pose:
Define the gymnast’s outfit—in this case, a sporty two-piece—and the bun hairstyle. Check your angles; the upper leg should be extending straight back and up for that extreme flexibility look. -
Adjacent botanical:
On the opposite page, sketch a simple, flowing branch with leaves. This minimalist addition balances the complexity of the figure drawing.
Anatomy Tip
For realistic legs, remember the calf muscle is higher on the outside and lower on the inside. This small asymmetry adds huge realism to the standing leg.
Step 2: Inking the Outline
-
Primary contours:
Switch to a 0.3 fine liner. Carefully trace the outer silhouette of the gymnast. Use confident, single strokes rather than ‘petting’ lines to keep the drawing clean. -
Internal details:
Ink the clothing lines, the hair bun, and facial profile. Use a lighter touch here to ensure these details don’t overpower the strong silhouette. -
Botanical inking:
Ink the branch on the left page. Keep these lines loose and organic, perhaps breaking the line slightly on the leaf edges for a natural feel. -
Erase graphite:
Wait for the ink to dry completely to avoid smudging. Then, gently roll your kneaded eraser over the entire page to lift the pencil guides, leaving only the clean ink lines.
Smudge Control
If you are right-handed, work from left to right across the body to avoid dragging your hand through wet ink. Or, place a scrap piece of paper under your hand.
Step 3: Shading and Texture
-
Establishing light source:
Decide where your light is coming from (usually top-left or top-right). Mark the shadow areas lightly in your mind, focusing on the underside of the legs and the curve of the back. -
Hatching basics:
Using a 0.1 fine liner, start adding parallel diagonal lines (hatching) to the shadowed areas of the skin. Keep the lines evenly spaced for a smooth look. -
Cross-hatching depth:
To deepen the shadows, add a second layer of lines perpendicular to the first set. Focus this cross-hatching on the darkest areas, like the groin, the under-glute crease, and the armpit. -
Clothing texture:
Use tighter, denser hatching on the clothing to distinguish the fabric texture from the skin. I like to curve these hatch lines slightly to follow the volume of the body underneath. -
Hair details:
Fill in the hair bun with curved strokes that mimic the direction of hair strands, leaving a small white highlight to suggest shine. -
Grounding shadow:
Create a cast shadow under the standing foot. Use horizontal hatching lines to suggest the floor plane, grounding the figure so she doesn’t look like she’s floating.
Now you have a dynamic figure study that celebrates the beauty of human movement.


Have a question or want to share your own experience? I'd love to hear from you in the comments below!