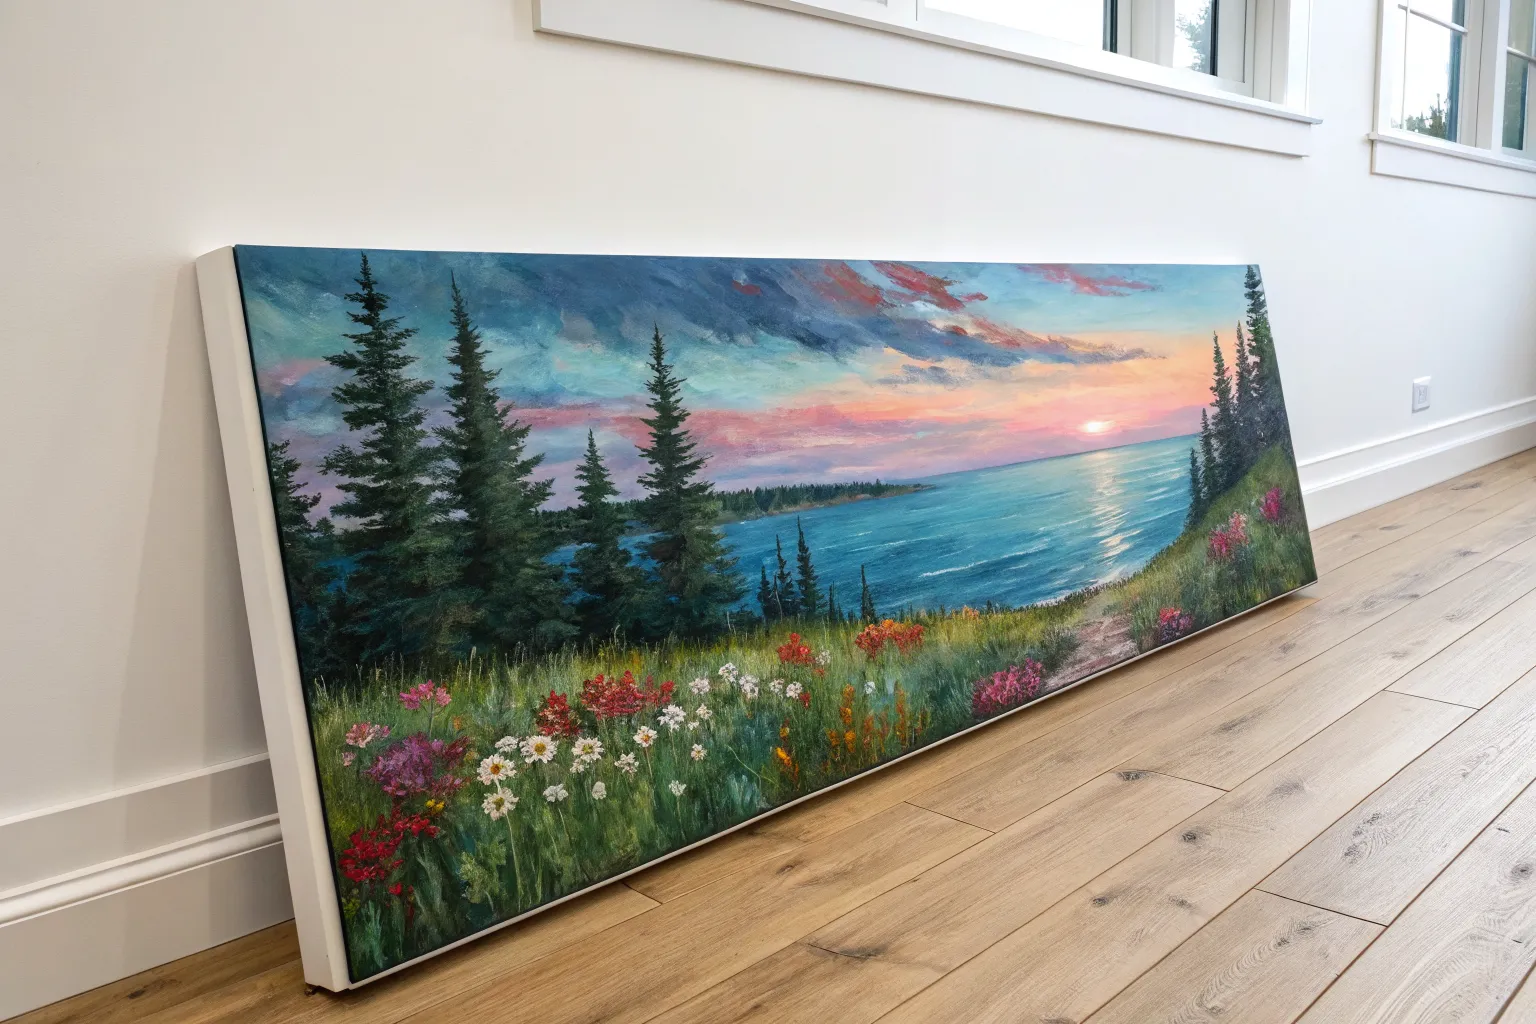
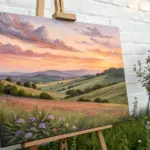
A horizontal canvas is basically an invitation to let your painting breathe—wide skies, long shorelines, and stories that unfold left to right. Here are my favorite panoramic painting ideas that naturally fit a wide format and look amazing across big wall spaces.
Panoramic Sunset Over Water
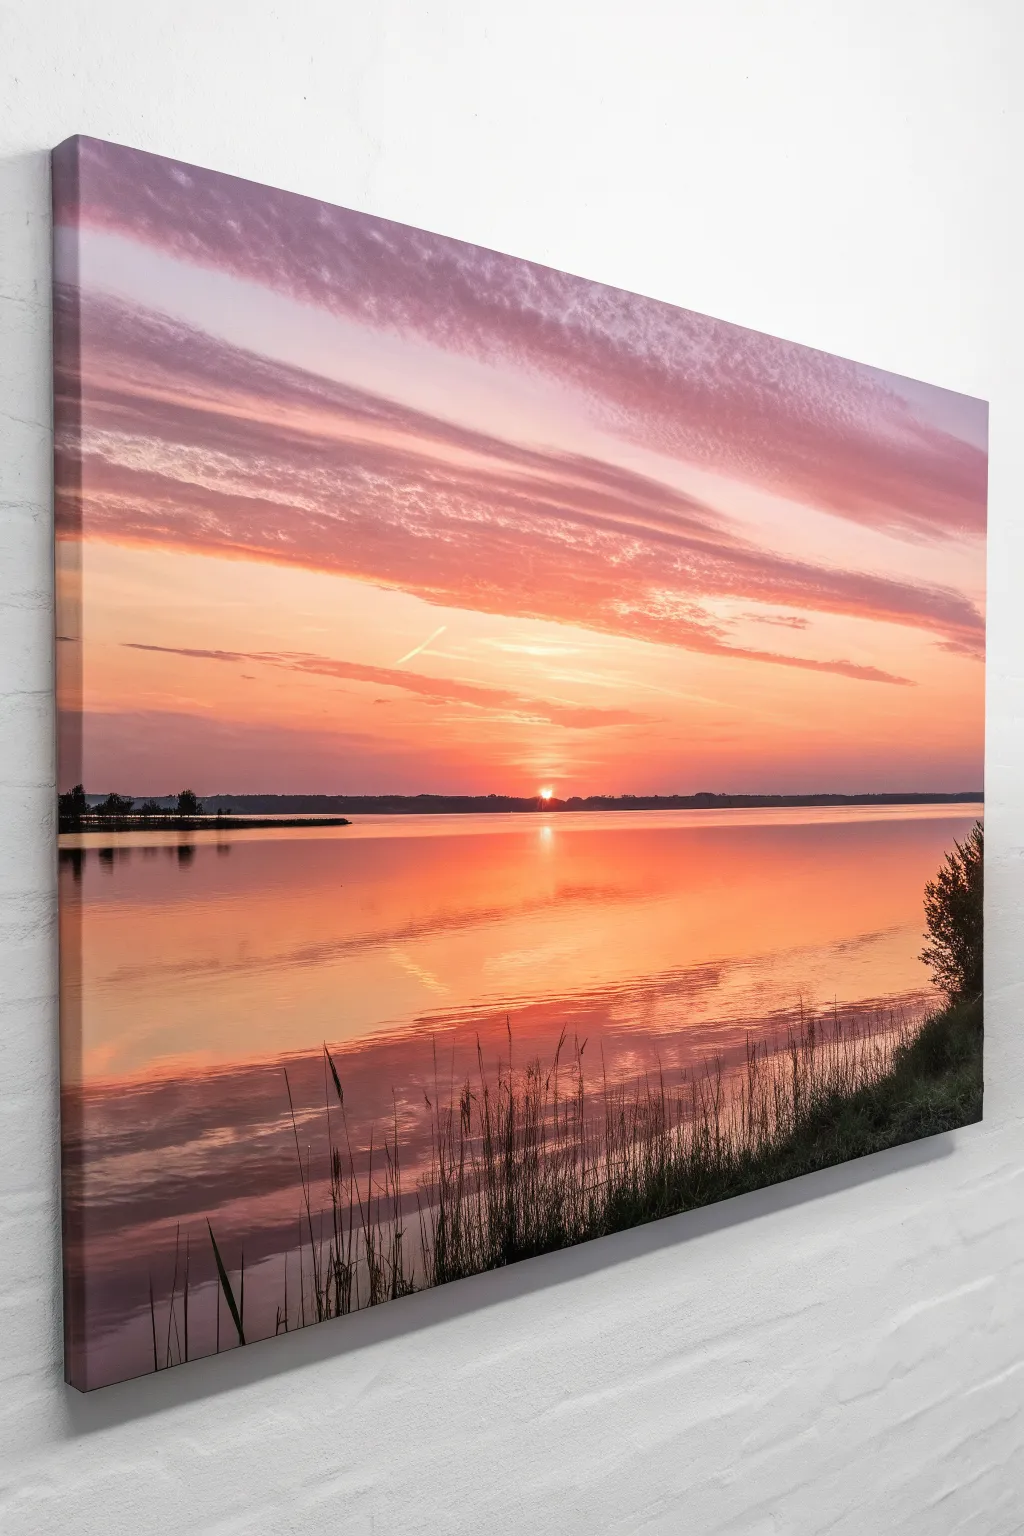
Capture the serene beauty of a panoramic sunset with this acrylic painting tutorial that emphasizes soft gradients and striking silhouettes. You will learn to blend warm hues seamlessly to create a tranquil lake scene reflecting a fiery sky.
How-To Guide
Materials
- Large panoramic stretched canvas (e.g., 20×40 inches)
- Acrylic paints: Titanium White, Cadmium Yellow, Cadmium Orange, Alizarin Crimson, Dioxazine Purple, Mars Black
- Large flat brush (2-3 inch) for blending background
- Medium flat brush (1 inch)
- Small round detail brush (size 1 or 2)
- Fan brush (optional, for clouds)
- Palette knife
- Cup of water and paper towels
- Masking tape (low tack)
Step 1: Setting the Sky
-
Establish the horizon:
Place a strip of masking tape horizontally across the canvas, slightly below the center line. This will preserve a crisp separation between your sky and the water surface. -
Mix your twilight purple:
Start by mixing Titanium White with a small amount of Dioxazine Purple and a touch of Alizarin Crimson to create a soft, dusty lavender. Apply this color to the very top edge of the canvas using your large flat brush. -
Transition to warmth:
While the purple layer is still wet, mix a lighter pink using White and Alizarin Crimson. Paint this band immediately below the purple, using long horizontal strokes to blend the two colors where they meet. -
Intensify the sunset:
As you move toward the horizon tape, introduce Cadmium Orange and Cadmium Yellow into your mixture. The area directly above the tape should be the brightest, glowing with pure yellow and orange tones to represent the setting sun. -
Paint the clouds:
Load a medium flat brush or fan brush with a purple-grey mix (Purple + touches of Black and White). Gently streak diagonal, sweeping cloud formations across the upper sky. Keep the edges soft by feathering them with a dry brush. -
Refine the sun position:
Identify where the sun sits just above the horizon tape. Add a small, focused semicircle of Titanium White mixed with a tiny bit of yellow right at the tape line to create the sun’s blinding core.
Muddy colors?
If your orange and purple blend into a brown mess, let one layer dry completely before glazing the next color over it, or clean your brush thoroughly between color transitions.
Step 2: Creating the Reflection
-
The mirror image:
Once the sky is dry to the touch, carefully remove the masking tape. You now have a sharp horizon line to work from. -
Reverse the gradient:
Paint the water by mirroring the sky colors roughly in reverse order. Start comfortably below the horizon with the darker purples and pinks at the bottom of the canvas, working your way ‘up’ (visually down the canvas) toward the horizon. -
Paint the horizon glow:
Just under the horizon line, paint the water with your brightest yellows and oranges. This needs to match the intensity of the sky immediately above it. -
Soften the water:
Using a clean, damp large brush, sweep horizontally across the water area to smooth out brushstrokes. This gives the lake that glassy, calm appearance. -
Add the sun path:
Mix a bright orange-yellow. Paint a vertical, shimmering path starting from the horizon line downwards. Use short, choppy horizontal strokes that get slightly wider as they come closer to the bottom edge. -
Highlight the reflection:
Take a tiny bit of pure White on a small brush and add intense, short horizontal highlights down the center of your sun path to show the water catching the light.
Step 3: Silhouettes and Details
-
Define the far shore:
Mix a dark grey using Mars Black and a little Purple (avoid pure black for distant objects to keep atmospheric perspective). With a small flat brush, paint a very thin, uneven strip of land right on the horizon line. -
Add distant trees:
Along that thin land strip, dab the tip of your brush to create tiny bumps that suggest distant treetops. Keep them small so the lake looks vast. -
Foreground grasses:
Switch to your smallest round detail brush and load it with thinned Mars Black paint (water it down slightly to ink consistency). Start at the bottom right corner and flick the brush upward to create tall, thin reed shapes. -
Vary the vegetation:
I like to vary the pressure here—press down at the base and lift off quickly at the tip to make the grass blades sharp. Add some thicker, bushier clumps on the far right edge to frame the composition. -
Reflections of reeds:
Where the reeds touch the water at the bottom, paint hazy, less distinct black lines downward into the water to show their reflection. -
Final ripples:
Using a glaze of orange (paint mixed with a lot of water), paint very faint horizontal lines over the reflection of the reeds to show that the plants are sitting in the water, not just on top of it.
Make it sparkle
Once the painting is fully dry, mix a tiny amount of iridescent or metallic medium into your white paint and re-touch the sun’s reflection for a true shimmering water effect.
Step back and enjoy the warmth of your permanent sunset on the wall


Calm Ocean With Long Rolling Waves
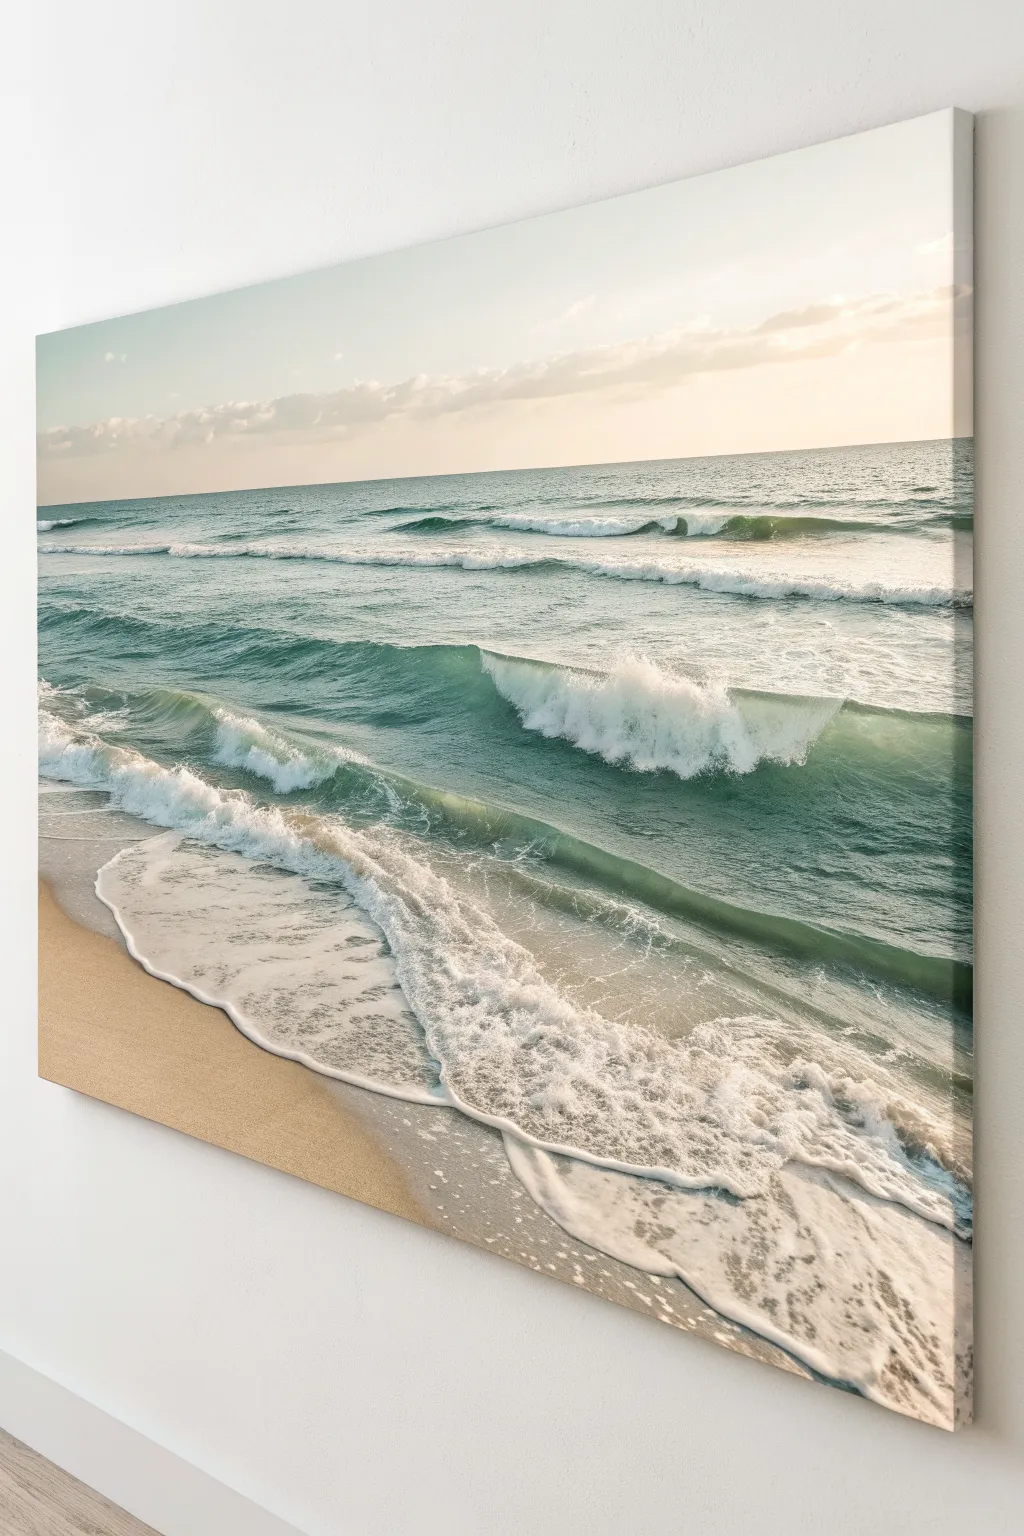
Capture the serenity of a quiet morning at the beach with this realistic seascape painting. You will learn to layer semi-transparent glazes and texturize sea foam to recreate the gentle rhythm of rolling waves hitting the sand.
Step-by-Step
Materials
- Large stretched canvas (primed)
- Acrylic paints: Titanium White, Phthalo Turquoise, Ultramarine Blue, Yellow Ochre, Burnt Umber, Unbleached Titanium
- Large flat brush (2-3 inch)
- Medium filbert brush
- Fan brush
- Palette knife
- Acrylic glazing medium
- Water container and spray bottle
- Paper towels
Step 1: Sky and Horizon Foundation
-
Prime the horizon:
Use a ruler or painter’s tape to establish a perfectly straight horizon line about one-third down from the top of the canvas. -
Mix sky colors:
Create a pale, warm sky gradient by mixing Titanium White with a tiny touch of Yellow Ochre and a whisper of Burnt Umber for warmth. -
Paint the sky:
Apply your sky mixture using a large flat brush, keeping the strokes horizontal and smooth to create a soft, hazy atmosphere. -
Establish the deep water:
Below the horizon line, paint a band of darker teal using Phthalo Turquoise mixed with a pinch of Ultramarine Blue and White. This represents the distant, deeper ocean.
Foam looking flat?
If your white foam looks like stickers on top of the water, mix a tiny bit of blue-grey into the white for the ‘under’ side of the foam, reserving pure white only for the highest sunlit tips.
Step 2: Building the Waves
-
Block in the water gradient:
Move down the canvas, gradually adding more White and a little Unbleached Titanium to your turquoise mix as the water gets shallower and closer to shore. -
Define the wave shapes:
With a medium filbert brush, sketch in the rolling forms of the waves using a slightly darker version of your turquoise to indicate the shadowed, curved face of the wave. -
Create transparency:
Mix a glaze using glazing medium and a very light yellow-green tint. Apply this thinly to the top crest of the waves where light shines through the water. -
Paint the sand:
For the bottom section, mix Yellow Ochre, Unbleached Titanium, and White. Paint the beach area, blending it softly where the wet sand meets the future foam line. -
Shadow the wet sand:
Darken the sand color slightly with Burnt Umber and paint the area immediately under the receding water to make it look wet and reflective.
Add sparkle
Once the painting is completely dry, use a tiny liner brush to add minuscule dots of pure white on the wet sand and wave crests to mimic glittering sunlight reflections.
Step 3: Foam and Details
-
Start the breaking wave:
Load a fan brush with pure Titanium White. Tap it gently along the crest of the main wave to simulate crashing foam. -
Add churning movement:
Use a dry brush technique to drag some of that white paint downward from the crest, following the curve of the wave. -
Create sea foam patterns:
I like to water down white paint slightly here. Use a small round brush to paint thin, lace-like patterns on the surface of the green water behind the main wave. -
Form the shoreline foam:
Along the beach edge, apply thick white paint with a palette knife to create the textured, bubbly ridge where the water stops. -
Soften the edges:
While the shoreline foam is wet, use a clean, damp brush to blur the bottom edge into the wet sand for a realistic transition. -
Add surface highlights:
Mix a very pale blue-white and add horizontal streaks on the distant water to suggest gentle ripples catching the light. -
Mist the crashing wave:
Use an almost dry brush with a tiny amount of white to scumble (lightly scrub) above the crashing part of the wave, creating a mist effect. -
Final texture check:
Step back and see if the foam looks too uniform. Add extra thick white highlights to the brightest points of the churned water for depth.
Hang your finished seascape in a well-lit room to let those turquoise tones truly shine


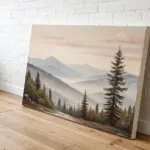
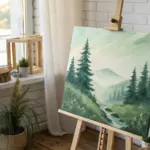
Layered Mountain Range Silhouette
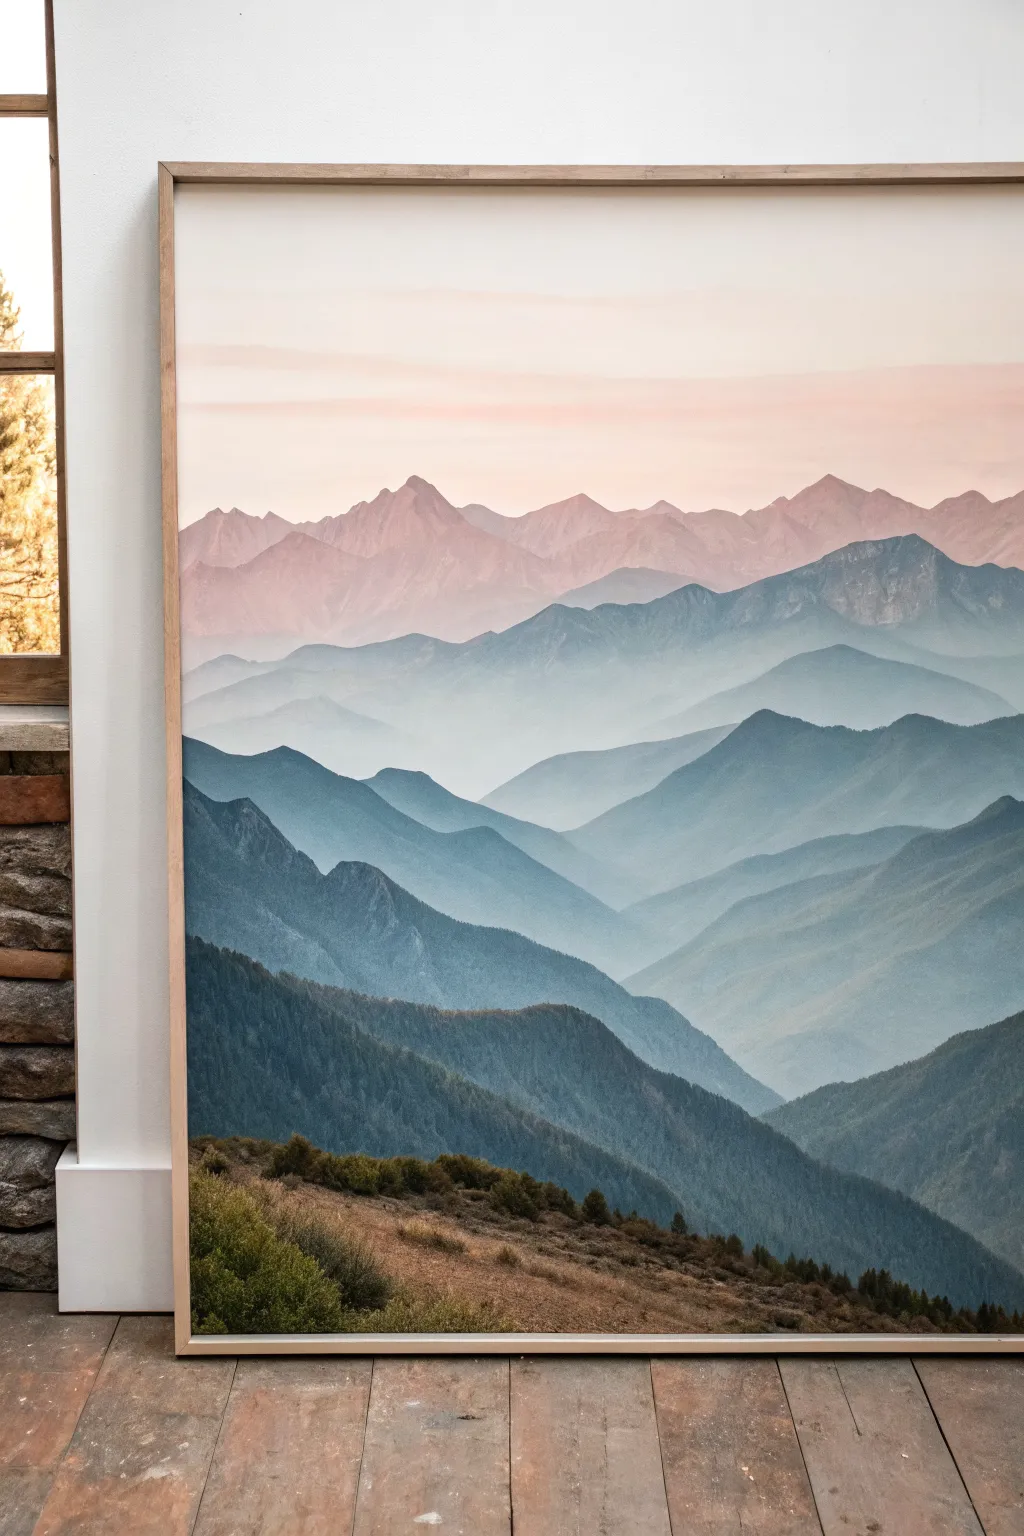
Capture the serene beauty of a mountain range fading into the distance with this atmospheric landscape painting. Using a technique called atmospheric perspective, you’ll layer colors from bold, detailed foreground greens to soft, hazy pinks in the background to create incredible depth.
Step-by-Step Guide
Materials
- Large canvas (vertical orientation recommended)
- Acrylic paints (Phthalo Blue, Hookers Green, Burnt Umber, Titanium White, Titanium Buff, Alizarin Crimson)
- Slow-drying medium or retarder
- Large flat brush (2-3 inch)
- Medium filbert brush
- Small round brush for details
- Palette knife
- Water spray bottle
- Palette (disposable or glass)
- Pencil
Step 1: Atmospheric Sky
-
Prime the sky:
Begin by covering the top quarter of your canvas with a mix of Titanium White and a tiny touch of Titanium Buff. This warmest, lightest layer sets the mood for the dawn light. -
Blend the gradient:
While the white is still wet, mix a very pale salmon pink using White, a speck of Alizarin Crimson, and Buff. Blend this horizontally into the white area, keeping the strokes smooth. -
Add the distant peaks:
Mix a hazy lavender-grey for the furthest mountains using White, a touch of Phthalo Blue, and Alizarin Crimson. Paint the silhouette of jagged peaks right over the drying sky, keeping the edges soft.
Fixing Hard Lines
If your fog looks too sharp, use a soft, dry makeup brush to gently blend the wet paint borders. If dry, apply a very thin wash of watered-down white over the transition area.
Step 2: Middle Ground Haze
-
Shift to cool blue:
For the next layer down, create a cool, misty blue. Mix Phthalo Blue with plenty of White and a small amount of grey. Outline a new mountain ridge below the pink ones. -
Create the fade:
Fill in the shape of this blue mountain range. As you work downward, mix in more white to create a gradient that mimics fog settling in the valley floor. -
Build the next ridge:
Mix a slightly darker, more saturated blue-green. Create a new silhouette below the previous layer. The key here is overlapping; ensure this new ridge covers the faded bottom of the previous one. -
Soften edges:
While the paint is wet, use a clean, dry brush to lightly sweep over the bottom edge of this mountain shape, blurring it into the canvas below to maintain that foggy effect.
Step 3: Detailed Foreground
-
Darken the palette:
As you approach the bottom third, introduce Hookers Green and a touch of Burnt Umber to your blue mix. The colors should be significantly darker and more intense now. -
Define jagged slopes:
Paint a large, sloping mountain range that cuts diagonally across the canvas. Use the tip of your brush to give the ridge a sharper, more defined edge than the distant mountains. -
Add texture:
I like to use a dry brush technique here. With very little paint on your brush, drag it vertically down the mountain face to simulate ravines and tree lines. -
Create the nearest peak:
For the closest mountain mass before the ground, use your darkest mix yet—mostly Phthalo Blue and Hookers Green. Paint a large, looming shape on the left or right side to frame the view. -
Detail the trees:
Switch to a small filbert or round brush. Stipple (tap repeatedly) along the ridges of this dark mountain to suggest dense pine forests.
Add Metallics
For a modern twist, mix a pearl or iridescent medium into the sky colors. It gives the dawn light a subtle shimmer that catches the eye as you move past the canvas.
Step 4: The Earthy Base
-
Lay the ground color:
For the very bottom section, mix Burnt Umber, Titanium Buff, and a touch of yellow for a warm, grassy earth tone. Block in the rolling hill in the immediate foreground. -
Scumble shadows:
Mix a darker brown and lightly scumble (scrub) it into the lower areas of the hill to create uneven terrain and shadows. -
Paint foreground bushes:
Using a dark olive green, dab small, irregular clusters along the ridge of the foreground hill. These represent low bushes and shrubs. -
Highlight the foliage:
Mix a lighter, yellow-green and carefully tap highlights onto the top-left side of your bushes, assuming the light source is coming from the upper left. -
Final mist adjustment:
Mix a transparent glaze of water and a tiny bit of white. Lightly brush this over any valley areas between the mountains that need more separation or ‘fog’.
Step back and admire the depth you’ve created, bringing the tranquility of the high alps into your room
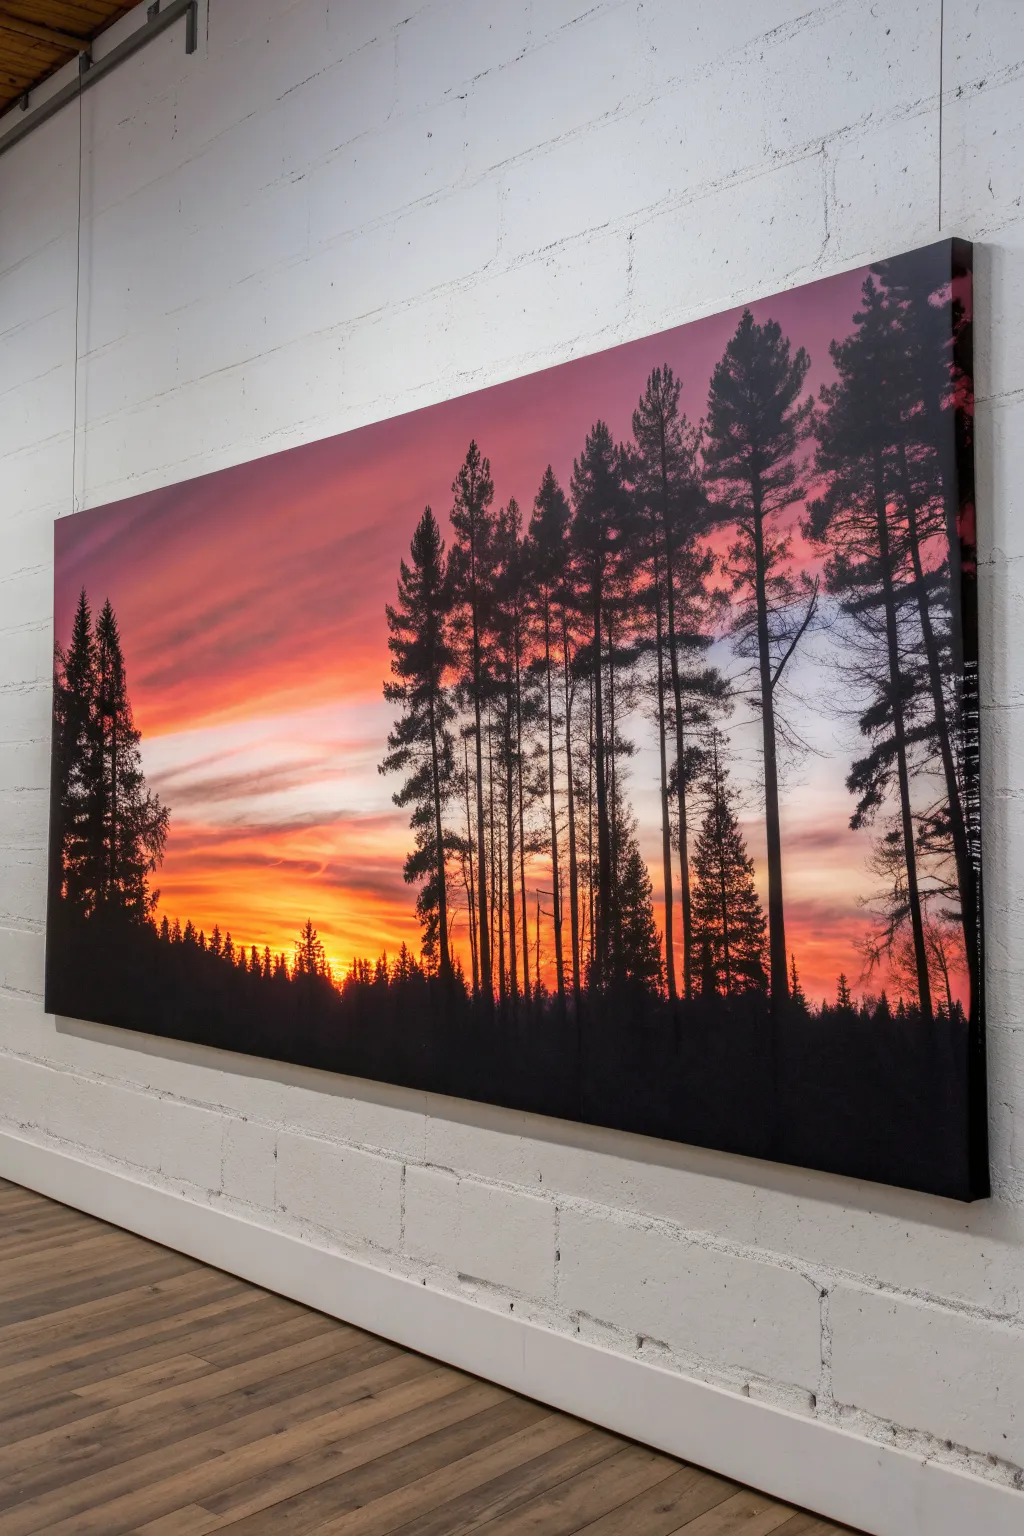
Forest Tree Line at Dusk
Capture the serene drama of a winter sunset with this striking horizontal canvas project. By blending vibrant acrylics into a smooth gradient and layering stark silhouettes, you’ll create a piece that feels both expansive and intimate.
Step-by-Step Tutorial
Materials
- Large rectangular stretched canvas (e.g., 24×48 inches)
- Acrylic paints: Titanium White, Cadmium Yellow, Napthol Red Light, Alizarin Crimson, Dioxazine Purple, Mars Black
- Large flat brush (2-3 inch)
- Medium flat brush (1 inch)
- Fan brush
- Script liner brush or rigger brush
- Palette knife
- Water spray bottle
- Table easel or drop cloth for wall mounting
Step 1: Setting the Sky
-
Prepare the gradient palette:
Squeeze out generous amounts of your sky colors—Purple, Crimson, Red, Yellow, and White—onto your palette. Keep the black separate for later. -
Start with the darkest tones:
Using the large flat brush, apply a band of Dioxazine Purple mixed with a touch of Crimson across the very top edge of the canvas. Don’t worry about perfect smoothness yet. -
Transition to crimson:
Immediately below the purple, paint a band of Alizarin Crimson. While the paint is still wet, use long horizontal strokes to blend the boundary where it meets the purple. -
Introduce the warms:
Clean your brush quickly and mix Napthol Red with a tiny bit of Yellow. Apply this below the crimson layer, blending upwards into the previous color to soften the transition. -
Create the horizon glow:
Near the bottom third of the canvas, paint a band of pure Cadmium Yellow mixed with White. This area needs to be the brightest part of your painting to mimic the setting sun. -
Blend the sky:
With a clean, slightly damp large brush, sweep across the entire sky area from side to side. I like to mist the canvas very lightly with water here to help the acrylics fuse seamlessly. -
Add cloud streaks:
While the sky is still tacky, take a small amount of the purple-grey mix on a dry brush. Lightly streak in diagonal cloud wisps across the pink and yellow sections to create movement.
Natural spacing
Avoid the ‘picket fence’ look by clustering trees. Paint two or three close together, leave a gap, then paint a solo tree. Nature favors irregularity.
Step 2: Painting the Silhouette
-
Establish the ground line:
Once the sky is completely dry, use the medium flat brush and Mars Black to paint an uneven, hill-like horizon line across the bottom 2-3 inches of the canvas. -
Map out tree placement:
Using thinned black paint and a small round brush, lightly mark vertical lines where your tallest trees will stand. Vary the spacing so it doesn’t look uniformed or artificial. -
Paint the trunks:
With the medium flat brush turned sideways (or a round brush), paint the main trunks over your guide lines. Make them thicker at the bottom and tapering to a fine point at the top. -
Start the foliage:
Switch to a fan brush loaded with black paint. Tap the brush gently, starting from the top of a tree and working down, widening your strokes as you descend to create the conical pine shape. -
Detail branches:
For more precise branches, use a liner brush to pull jagged, horizontal lines outward from the trunks. These should look slightly erratic, mimicking natural growth. -
Fill the dense forest:
Between your main tall trees, paint smaller, indistinct tree shapes and fill the bottom area with solid black to represent the dense forest floor. -
Add texture to the canopy:
Use the very corner of your fan brush to stipple tiny black dots around the edges of the trees, suggesting loose needles and breaking up any smooth outlines.
Step 3: Final Touches
-
Paint the sides:
Don’t forget the deep edges of the canvas. Extend the black silhouette and the sky gradient colors around the sides for a professional, gallery-wrap finish. -
Check for light leaks:
Inspect the black areas for any pinholes where the canvas shows through. DAB a second coat of black over the densest parts of the forest to ensure it is opaque.
Muddy sky fix
If your sky colors turn brown while blending, stop. Let the layer dry completely, then glaze over it with a thin layer of the intended pure color.
Hang this wide panoramic piece in a hallway or above a sofa to bring the quiet majesty of the forest indoors
BRUSH GUIDE
The Right Brush for Every Stroke
From clean lines to bold texture — master brush choice, stroke control, and essential techniques.
Explore the Full Guide
Golden Field With a Big Sky
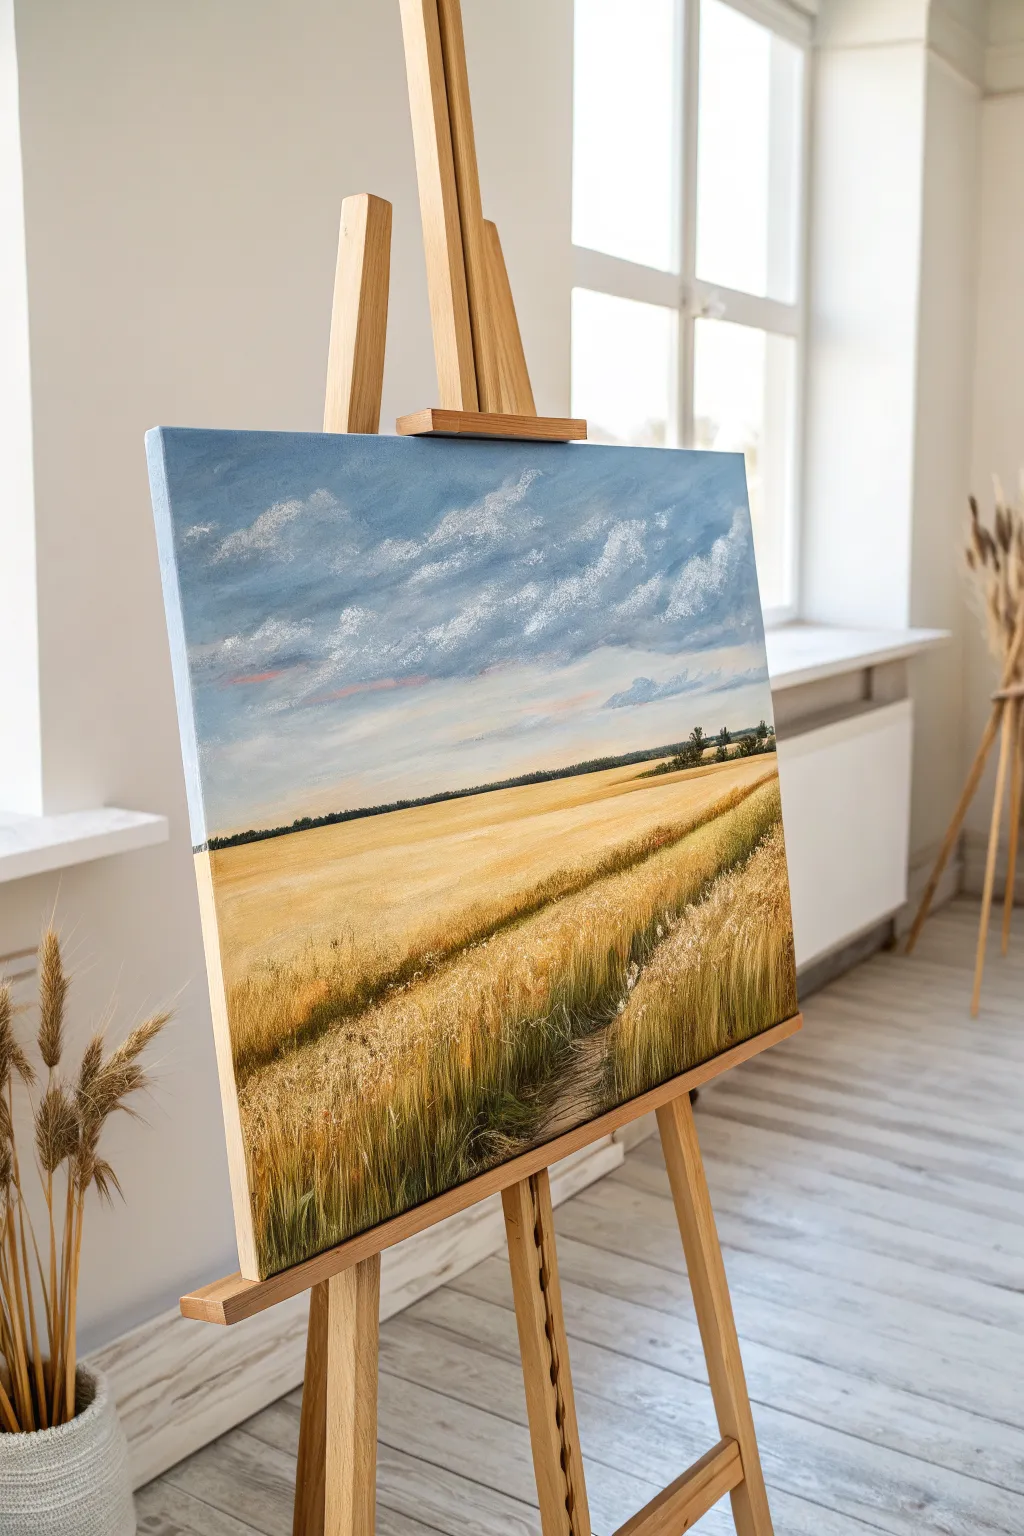
Capture the serene beauty of a vast, golden field stretching out under a dynamic summer sky. This acrylic painting project focuses on creating depth through perspective and texture, perfect for bringing a feeling of open space into your home.
Step-by-Step Guide
Materials
- Horizontal stretched canvas (approx. 18×24 inches or similar)
- Acrylic paints (Titanium White, Ultramarine Blue, Cerulean Blue, Yellow Ochre, Burnt Sienna, Cadmium Yellow, Sap Green)
- Large flat brush (1-2 inch)
- Medium filbert brush
- Small round brush
- Fan brush
- Palette knife
- Water container and paper towels
- Easel
Step 1: Setting the Sky
-
Prime the canvas:
Ensure your canvas is clean and primed. If needed, apply a thin coat of gesso and let it dry completely to create a smooth surface for blending. -
Create the horizon line:
Mix a small amount of Yellow Ochre with plenty of water. Paint a faint horizon line roughly one-third of the way up from the bottom of the canvas. It doesn’t need to be perfectly straight, as nature is organic. -
Block in the upper sky:
Using your large flat brush, mix Ultramarine Blue with a touch of Titanium White. Apply this to the top corners and upper edge of the canvas, painting with broad, horizontal strokes. -
Blend the gradient:
As you move closer to the horizon, gradually mix in more White and a little Cerulean Blue. Blend this wet-on-wet into the darker blue above to create a smooth transition from deep blue to a pale, misty blue near the horizon line. -
Add subtle warmth:
While the horizon area is still slightly tacky, glaze a very tiny amount of watered-down Yellow Ochre or pale pink just above the ground line to simulate atmospheric warmth.
Step 2: Painting the Clouds
-
Form the cloud shapes:
Load a filbert brush or a bunched-up paper towel with Titanium White. Dab in diagonal, sweeping cloud formations stretching from the top left towards the center right. -
Soften the edges:
Clean your brush and use it dry to gently whisk the edges of the white paint into the blue background, making the clouds look wispy and wind-blown rather than solid cotton balls. -
Add cloud shadows:
Mix a light lavender-grey using White, a speck of Ultramarine, and a tiny dot of Burnt Sienna. Apply this sparingly to the bottom edges of the larger cloud masses to give them volume.
Muddy colors?
If your yellow field looks muddy against the blue sky, insure the sky is 100% dry before painting the horizon line. Green happens instantly when wet blue touches wet yellow!
Step 3: Laying the Groundwork
-
Block in the field base:
Mix a base color of Yellow Ochre and White. Paint the entire land area below the horizon line. Make your brushstrokes horizontal in the distance and slightly more angled in the foreground. -
Paint the distant tree line:
Mix Sap Green with a little Ultramarine Blue and Burnt Sienna to get a deep, dark green. Using the small round brush, stipple a thin, uneven line of trees right on the horizon. Make them very small to emphasize distance. -
Establish the path:
Roughly mark out a sweeping diagonal line cutting through the field from the bottom right corner toward the center left. Use a darker mix of Burnt Sienna and Ochre to suggest a trodden dirt path or a break in the crops.
Add a focal point
Create a stronger narrative by painting a tiny, distant farmhouse or red barn near the tree line. This draws the viewer’s eye deep into the perspective.
Step 4: Creating Texture and Depth
-
Add mid-ground shadows:
Mix Yellow Ochre with a touch of Burnt Sienna. Paint sweeping, diagonal bands across the field to simulate rolling terrain and shadows cast by clouds. Keep these strokes softer and blended. -
Texture the foreground wheat:
Load a fan brush with pure Yellow Ochre and Cadmium Yellow. Hold the brush vertically and tap/flick upward strokes in the bottom third of the canvas to create the appearance of tall grain stalks. -
Introduce highlights:
Clean the fan brush and load it with Titanium White mixed with Cadmium Yellow. Apply focused highlights to the tips of the ‘wheat’ in the immediate foreground, especially where the imagined sunlight hits. -
Darken the path edges:
Using the small round brush and dark green/brown mix, paint darker, grassy textures along the edge of your diagonal path to create a sense of recession and separation between the path and the tall crops. -
Final detailed stalks:
I like to switch to a very fine liner brush for this last touches. Paint individual, thin stalks of wheat in the very front with a light cream color, overlapping the path slightly to enhance the realism.
Step back and admire the warmth and vastness of the beautiful landscape you have created
Birds in a Long Sky Migration
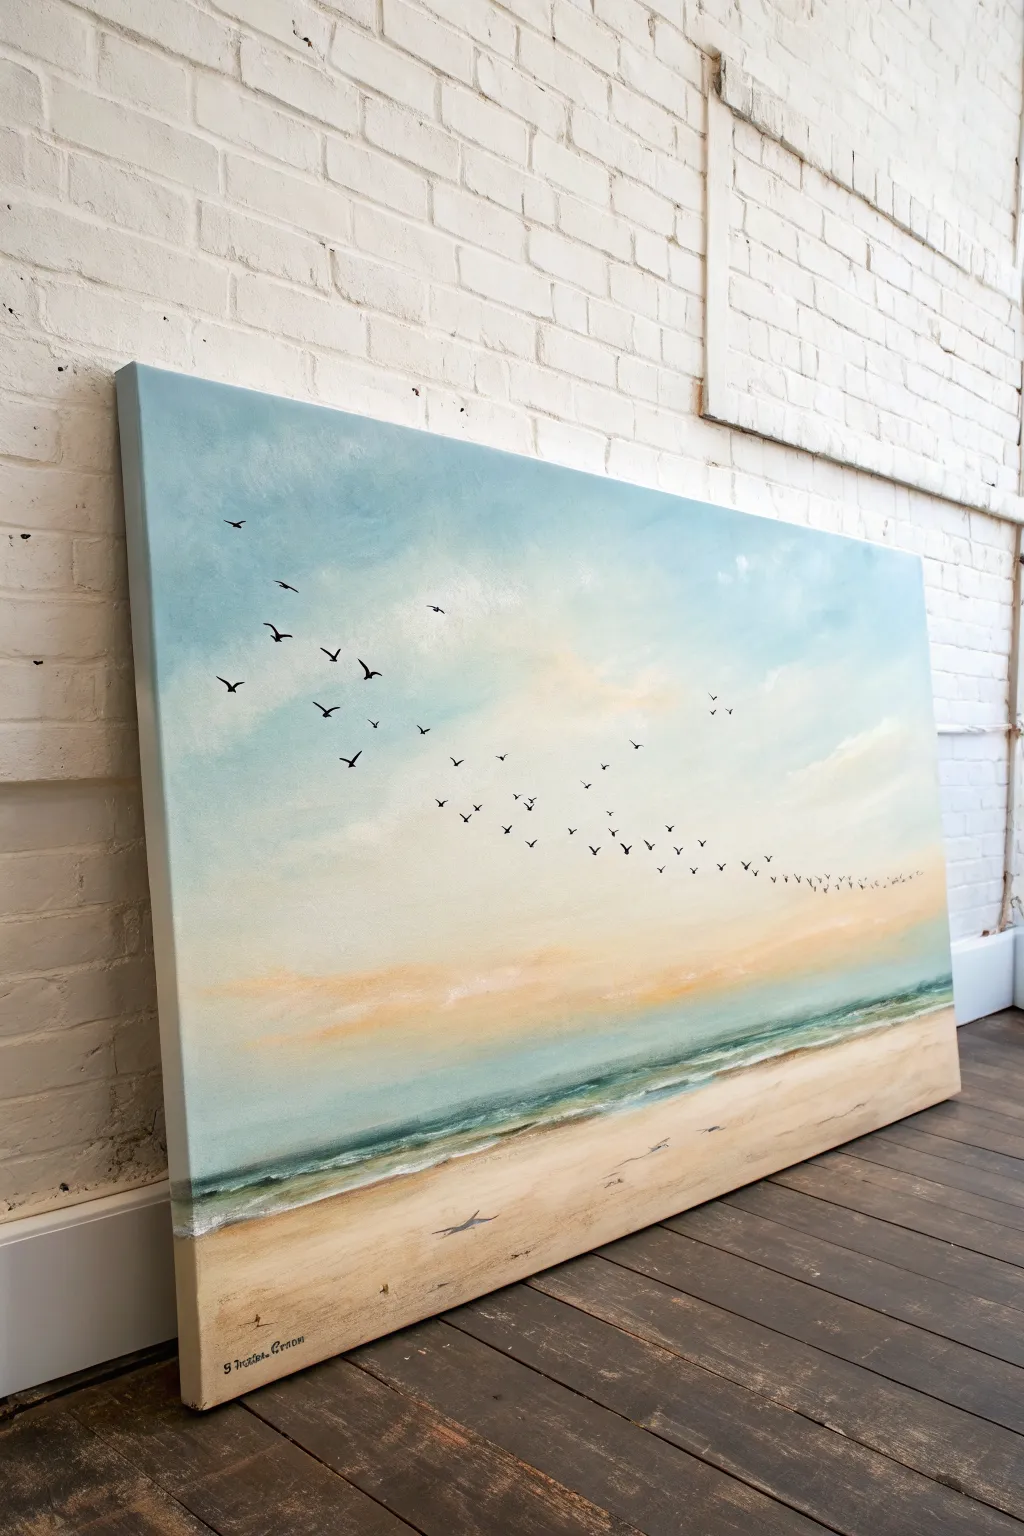
Capture the serene movement of a flock in mid-migration with this expansive horizontal canvas project. Soft pastels and airy blending create a tranquil atmosphere, while the dynamic composition of birds draws the eye across a vast, painted sky.
Step-by-Step
Materials
- Large rectangular canvas (approx. 24” x 48”)
- Acrylic paints (Titanium White, Phthalo Blue, Yellow Ochre, Burnt Sienna, Payne’s Grey, Alizarin Crimson)
- Wide flat wash brush (2 inch)
- Medium filbert brush
- Small round detail brush (size 0 or 1)
- Palette knife
- Water container and paper towels
- Slow-drying blending medium (optional)
Step 1: Setting the Scene
-
Prepare the sky gradient:
Begin by mixing a large amount of Titanium White with a tiny touch of Phthalo Blue. Start painting at the very top of your canvas, using long, horizontal strokes with your wide brush to lay down the coolest, bluest tone. -
Fade to warmth:
As you move down the canvas, gradually mix in more white and a hint of Yellow Ochre or Alizarin Crimson to create a soft, peachy warmth. Blend this transition carefully while the paint is still wet to avoid harsh lines. -
Paint the horizon haze:
Near the middle-lower third of the canvas, the sky should be its lightest and warmest. Use almost pure white with the faintest touch of orange to create a hazy, atmospheric glow where the sky will meet the sea. -
Establish the ocean:
Mix Phthalo Blue with a little Payne’s Grey and White to create a muted teal. Paint a horizontal band below your sky for the ocean, keeping the line relatively straight but soft. -
Add ocean depth:
Darken the blue slightly for the distant water, and add more white as you get closer to the shore to suggest shallow, churning foam.
Fixing “Heavy” Birds
If a bird looks too thick or clunky, don’t wipe it. Wait for it to dry, then use the sky color to paint over the edges, carving the shape back into a thin, elegant silhouette.
Step 2: Creating the Coastline
-
Base the sand:
Mix Titanium White, Yellow Ochre, and a touch of Burnt Sienna to get a warm, neutral beige. Paint the bottom section of the canvas, using slightly diagonal strokes that mimic the slope of a beach. -
Blend the shoreline:
Where the water meets the sand, use a clean, damp filbert brush to gently blend the teal into the wet sand color. This creates the look of wet, reflective sand. -
Add gentle waves:
Take Titanium White on your medium brush and dry-brush a few horizontal lines right at the water’s edge. Keep these irregular and broken to look like gentle foam rolling in. -
detail the foreground:
Add subtle texture to the foreground sand by stippling or lightly dragging a dry brush with slightly darker brown paint. This grounds the bottom of the painting.
Add Golden Hour Glow
Glaze a tiny amount of transparent yellow or gold over the white foam of the waves and the birds’ bellies to simulate a sunset light source hitting them.
Step 3: The Migration
-
Plan the flight path:
Visualize a sweeping ‘S’ curve or an arc stretching from the top left toward the center right. You can lightly sketch this path with a piece of chalk if you feel unsure about freehanding it. -
Paint the lead birds:
Using Payne’s Grey (which is softer than pure black) and your smallest round brush, paint the largest birds in the upper left. Use simple ‘V’ or ‘M’ shapes, varying the angle of the wings to show movement. -
Create distance:
As you follow your imaginary curve toward the right side of the canvas, make the birds progressively smaller and simpler. The birds at the far end of the migration line should be mere specks or dashes. -
Vary the grouping:
Don’t space the birds perfectly evenly. Allow some to cluster together and others to fly solo; natural irregularity makes the flock look alive. -
Add faint shadows:
I like to mix a watery wash of grey-purple and paint very faint reflecting shadows on the wet sand for just one or two low-flying birds in the foreground. This connects the sky to the earth. -
Refine the highlights:
Step back and look at your clouds. If the sky looks too flat, scumble in a bit of bright white around the bird cluster to make them pop against the background. -
Final touches:
Clean up the edges of your canvas (or paint them to match the image) and sign your work in the bottom corner using a thin, contrasting color like Burnt Umber.
Hang this wide piece in a hallway or above a sofa to bring a sense of open air and freedom to your room

PENCIL GUIDE
Understanding Pencil Grades from H to B
From first sketch to finished drawing — learn pencil grades, line control, and shading techniques.
Explore the Full Guide
Drifting Leaves Across the Canvas
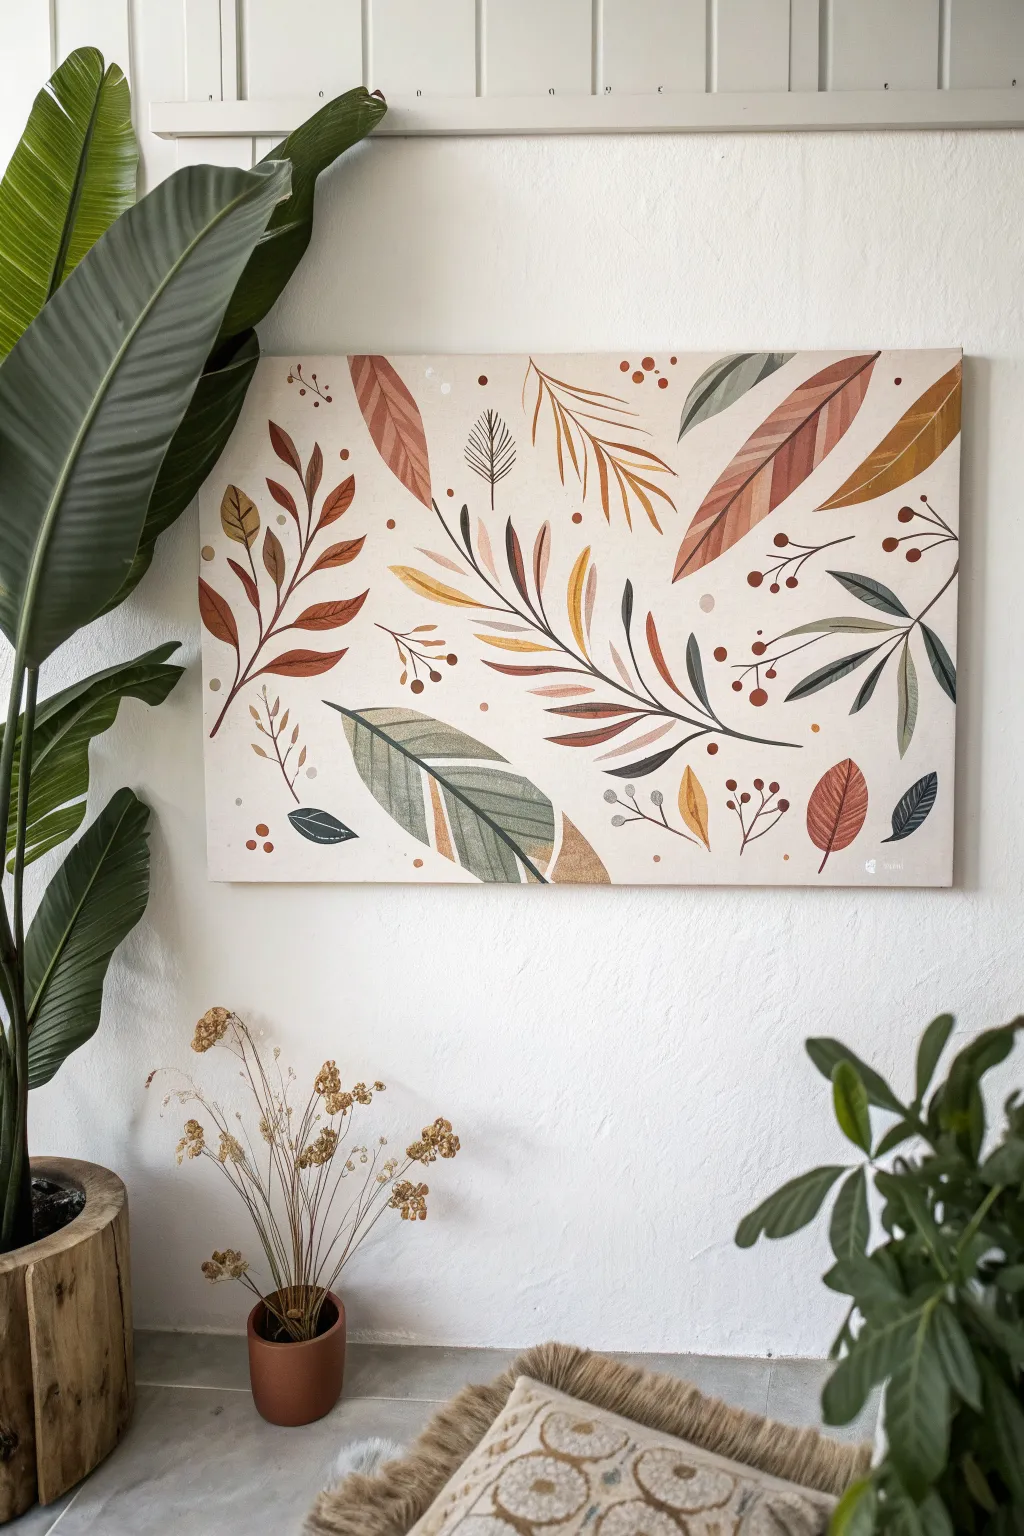
Capture the gentle movement of autumn with this illustrative canvas art featuring floating leaves and berries in warm, earthy tones. The composition uses a creamy backdrop to let shapes of rust, sage, and ochre breathe, creating a calming focal point perfect for a neutral living space.
How-To Guide
Materials
- Horizontal canvas (approx. 24×36 inches)
- Acrylic paints: Cream/Off-White (base), Burnt Sienna, Sage Green, Yellow Ochre, Dark Brown/Black, Terracotta
- Gesso (optional but recommended)
- Pencil (HB or H)
- Large flat brush (for background)
- Medium round brushes (sizes 4 and 6)
- Fine liner brush (size 0 or 1)
- Palette for mixing
- Water cup and paper towels
Step 1: Canvas Preparation
-
Prime the Surface:
Start by applying a coat of clear or white gesso if your canvas is raw. Even on pre-primed canvases, a fresh layer creates a smoother tooth for detailed work. -
Mix the Background Color:
Create a warm, creamy off-white tone. Mix a large amount of Titanium White with a tiny drop of Yellow Ochre and a pinhead-sized dot of Brown. You want a color that looks like unbleached cotton or linen. -
Apply the Base Coat:
Using your large flat brush, paint the entire canvas with your mixed cream color. Use long, horizontal strokes to minimize texture. I prefer to do two thin coats rather than one thick one for better coverage. -
Let it Cure:
Allow the background to dry completely. It must be bone dry before you start sketching, otherwise your pencil tip might dig into soft paint.
Step 2: Sketching the Composition
-
Map Main Flow lines:
Lightly sketch the central spine of the composition. Notice how the large central branch curves gently from the bottom left toward the middle right. Draw a few sweeping arcs to establish this directional flow. -
Outline Large Leaves:
Sketch the outlines of the largest elements first—the big feather-shaped leaf at the bottom center and the large reddish leaf on the top right. These anchor your composition. -
Fill in Smaller Foliage:
Draw the smaller sprigs and fern-like leaves into the negative spaces. Keep the layout balanced but random to mimic falling leaves; avoid clustering everything in the center. -
Add Berry Clusters:
Mark small circles attached to thin stems in empty pockets of the canvas. These don’t need to be perfect circles yet, just placeholders for spacing. -
Lighten Your Sketch:
Take a kneaded eraser and gently dab (don’t rub) over your pencil lines to lift excess graphite. You want the lines barely visible so they don’t show through lighter paint colors.
Clean Lines Hack
If you struggle with shaky hands while painting the long stems, support your painting hand with your pinky finger resting on a dry part of the canvas for stability.
Step 3: Painting the Foliage
-
Mix the Color Palette:
Prepare your key colors on the palette: a deep rust (Burnt Sienna + Red), a muted mustard (Yellow Ochre + White), a soft sage (Green + Gray/White), and a dark charcoal brown. -
Block in Base Shapes:
Start blocking in the solid leaf shapes using a medium round brush. Paint the large bottom leaf with sage green and the upper right leaf with diluted rust tones. Keep the paint relatively flat. -
Paint the Central Fern:
Using the dark charcoal brown or deep plum, paint the long, thin stems of the central branch. Switch to ochre and rust to paint the alternating small leaves stemming from it. -
Add Decorative Patterning:
Once the large sage leaf at the bottom is dry, use a lighter cream or white mix to paint the geometric vein lines and tip details over the green base. -
Create Gradient Leaves:
For the large reddish leaf top-right, blend a little cream into your rust paint while it’s still wet on the canvas to create soft streaks that mimic leaf veins. -
Paint Secondary Sprigs:
Fill in the surrounding foliage. Use the darker brown to create high-contrast, skeletal fern leaves (like the one near the top middle).
Add Metallic Flair
For a subtle glow, replace the yellow ochre paint with gold leaf paint or metallic gold acrylic for specific details like the veins or berry centers.
Step 4: Fine Details
-
Detail the Stems:
Switch to your fine liner brush. With thinned dark brown paint, carefully trace over your stem lines to make them crisp and connect them to their respective leaves. -
Paint the Berries:
Load a round brush with rust or terracotta paint. Press down and lift up to create the small round berries. Vary the sizes slightly for a natural look. -
Add Falling Dots:
Dip the handle end of a paintbrush into your paint colors and dot random single specks around the canvas to suggest pollen or distant seeds. -
Review and Touch Up:
Step back from the canvas. If any pencil lines are still visible where paint didn’t cover them, carefully erase them. Add a second coat to any leaves that look streaky.
Hang your new botanical artwork in a well-lit spot to enjoy the calming, organic atmosphere it brings to the room


Have a question or want to share your own experience? I'd love to hear from you in the comments below!