Hybrid drawings are my favorite kind of creative puzzle: you’re basically stitching two worlds together and making it feel believable. Here are 20 hybrid drawing ideas you can riff on right away, from classic mashups to the weird little experiments that spark totally new characters.
Cat-Fish Sidekick

Merge two unlikely friends into one whimsical creature with this quick and quirky sketchbook exercise. This minimal line drawing combines a satisfied cat face with a sleek fish body, accented by just a hint of golden-orange color.
How-To Guide
Materials
- Sketchbook with smooth paper
- HB pencil
- Eraser
- Identify or Fineliner pen (black, approx 0.3mm or 0.5mm)
- Gold or orange brush pen (or colored pencil)
Step 1: Penciling the Hybrid Shape
-
Establish the curve:
Start lightly with your pencil. Draw a gentle, diagonal ‘S’ curve in the center of your page to act as the spine of your creature. -
Head contour:
At the top left of your curve, sketch a rounded, slightly flattened circle for the cat’s head. Tilt it upwards to match the flow of the spine. -
Body outline:
Connect the fish body to the head. Draw a sleek, tapered oval shape extending downwards from the back of the head, narrowing as it reaches the tail area. -
Tail sketch:
At the very end of the tapered body, sketch a classic fish tail shape—two diverging lobes that look a bit like a leaf or a mermaid fin. -
Ear placement:
Add two small triangles on top of the head circle. Position the one on the left slightly lower to show perspective.
Ink Confidence
Don’t stress about shaky lines. A slightly wobbly line adds organic character to scales and fins that a perfectly straight ruler line lacks.
Step 2: Inking the Outline
-
Refining the head:
Switch to your black fineliner. Trace the cat head, but keep your lines smooth. I like to leave small gaps where the ears meet the head for a more illustrative style. -
Drawing the face:
Ink two small curved slits for happy, closed eyes. Add a tiny triangle nose and a split mouth below it, giving the cat a satisfied grin. -
The collar:
Where the neck would be, draw a curved band with vertical stripes. This separates the cat head from the fish body. -
Dorsal fin:
Draw the dorsal fin along the upper back using a jagged, saw-tooth line to suggest spines. -
Belly scales:
Ink a cross-hatching pattern on the belly area. Create a grid of diamond shapes to represent scales, but don’t fill the whole body—keep it loose. -
Finishing the tail:
Go over your tail pencil lines with ink. Add interior lines that follow the shape of the fin to show texture. -
Whiskers and bubbles:
Add three long, sweeping whiskers on each side of the face. Finally, draw three or four small circles rising from the nose to look like underwater bubbles.
Step 3: Adding Color & Cleanup
-
Erase pencil lines:
Wait a moment for the ink to be fully dry, then gently erase all your initial graphite sketches. -
Coloring the ears:
Using your gold or orange marker, carefully fill in the inner triangles of the cat ears. -
Accenting the collar:
Use the same color to fill in alternating stripes on the collar band. -
Adding blush:
Dab a tiny bit of color on the cheeks, just under the eyes, to give the cat a rosy, warm expression. -
Body highlight:
Run a very thin line of color along the lower edge of the fish belly to give the drawing just a bit of dimension without overwhelming the simple linework.
Pattern Play
Instead of cross-hatch scales, try drawing tiny ‘U’ shapes or stippled dots for a completely different texture on the fish body.
Now you have a charming aquatic companion swimming across your page


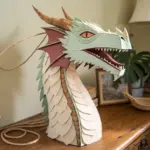
Lion-Bird Guardian
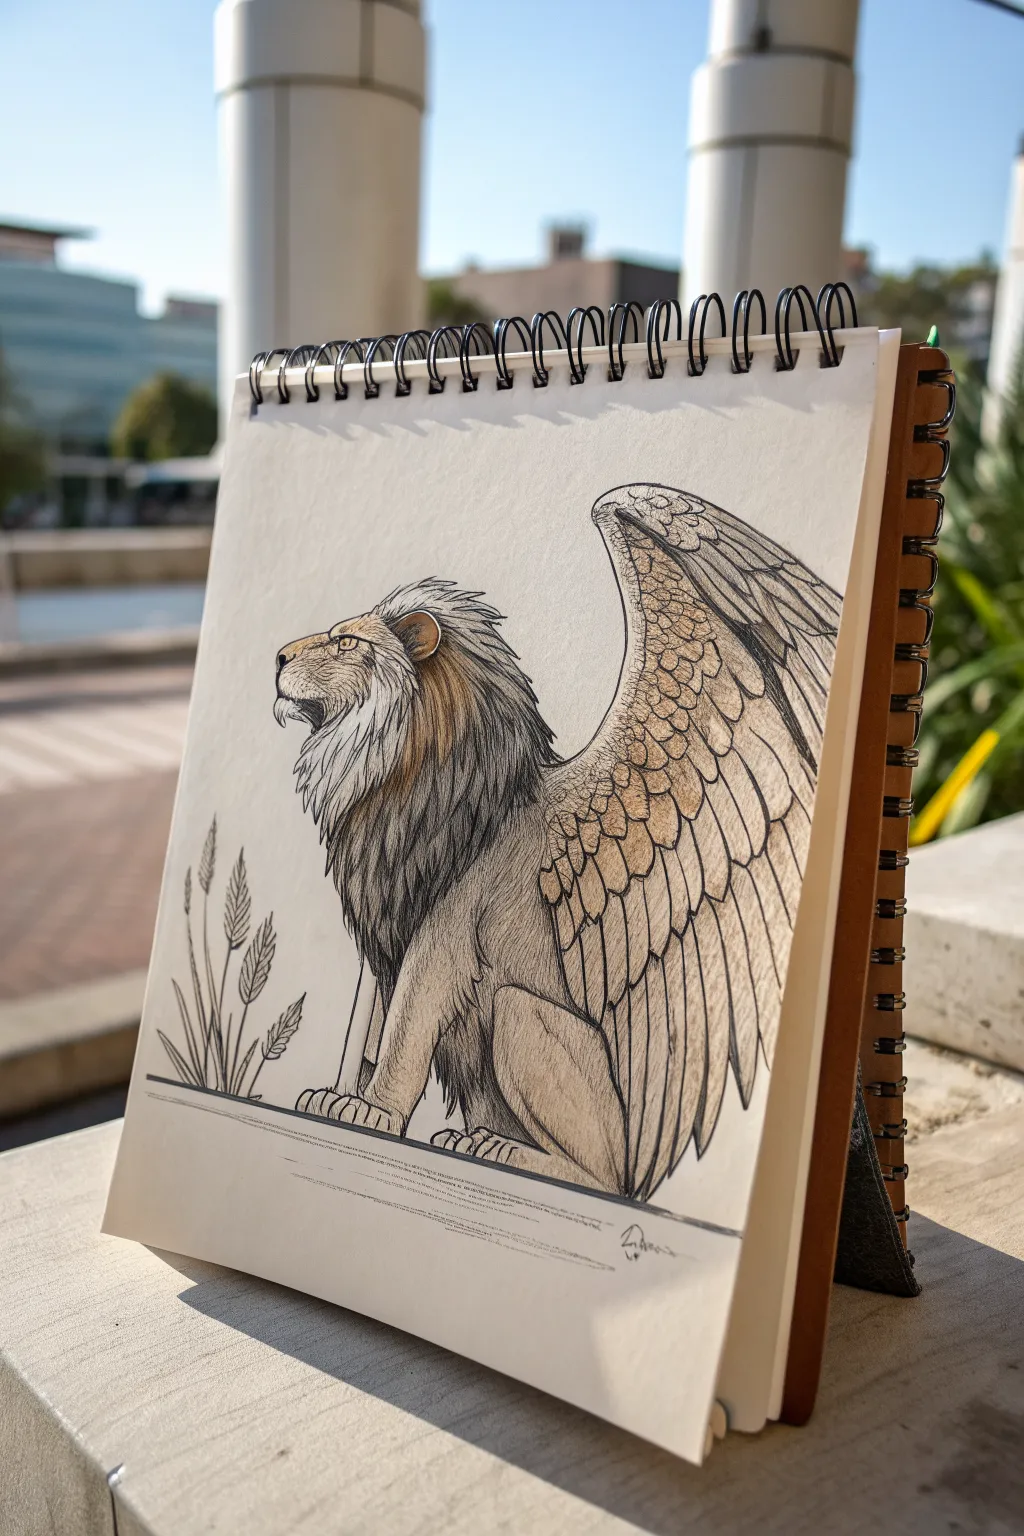
Bring myth to life by creating a regal hybrid creature that combines the strength of a lion with the majesty of an eagle. This tutorial guides you through sketching this detailed guardian on a cream-toned paper to give it a warm, classic illustration feel.
Step-by-Step
Materials
- Spiral-bound sketchbook with cream/off-white paper
- HB graphite pencil (for initial structural sketching)
- Kneaded eraser
- Fine liner pens (black, sizes 0.1, 0.3, and 0.5mm)
- Colored pencils (Warm Grey, Ochre, Burnt Sienna, Dark Brown)
- White gel pen (optional for highlights)
- Ruler (for the base line)
Step 1: Structural Proportions
-
Lay the Foundation:
Start by drawing a light horizontal line near the bottom of your page using a ruler; this will be the ground plane for your guardian. -
Block in the Body:
Using your HB pencil, lightly sketch a large oval for the lion’s chest and ribcage, angled slightly upwards. Add a smaller circle for the hindquarters. -
Position the Head:
Draw a circle for the head, placing it higher and forward from the chest. Connect it to the body with a thick, powerful cylinder shape to form the neck. -
Establish the Limb Structure:
Sketch the front legs as straight, pillared forms ending in large paws. Sketch the rear leg in a seated crouching position, with the knee bent and the thigh muscle distinct. -
Map the Wing:
Draw a large, curved triangular shape emerging from the shoulder area. This should sweep upward and backward, extending well past the back of the lion’s body.
Feather Flow Tip
Feathers should overlap like shingles on a roof. Always draw the row closest to the wing bone first, then layer the next row underneath it.
Step 2: Inking and Detailing
-
Refine the Lion’s Face:
Switch to a 0.3mm fine liner. Carefully outline the profile of the lion, focusing on a strong muzzle, a heavy brow, and a focused eye. Add small textured strokes for the chin fur. -
Define the Maine:
Draw the mane using flowing, jagged lines that sweep backward from the face. Layer the hair clumps to create volume around the neck and chest. -
Draw the Wing Feathers:
Start at the top edge of the wing structure. Draw rows of small, scale-like covert feathers near the ‘arm’ of the wing, slowly transitioning into longer, slender flight feathers at the tips. -
Outline the Body:
Ink the rest of the body contours, using a slightly heavier line weight (0.5mm) for the paws and underbelly to suggest weight and shadow. -
Add Foreground Elements:
Sketch some tall, simple graphical stalks of wheat or reeds on the left side to balance the composition, and add the thick border line beneath the creature. -
Erase Guidelines:
Once the ink is completely dry—I usually give it at least five minutes—gently erase all the underlying graphite pencil marks with a kneaded eraser.
Step 3: Shading and Color
-
Base Tone Shading:
Take a Warm Grey colored pencil and lightly shade the underside of the belly, the rear leg, and the shadows of the mane. Use vertical hatching strokes to mimic fur texture. -
Coloring the Mane:
Apply Burnt Sienna and Dark Brown to the mane. Press harder near the roots and neck creases to create depth, fading out towards the lighter tips. -
Feather Definition:
Use an Ochre or light tan pencil to color the feathers. Focus the pigment on the upper curve of each feather scale, leaving the bottom edges lighter to make them look dimensional. -
Deepen the Textures:
Go back in with your 0.1mm pen to add very fine hatching lines over the colored pencil in the deepest shadow areas, specifically under the wing and behind the front legs. -
Final Touches:
Darken the eye pupil leaving a tiny spec of white paper, or add a dot of white gel pen for a glint. Reinforce the thick black line at the base to ground the drawing.
Creative Twist
Swap the lion hindquarters for eagle talons to create a true traditional griffin, or change the wing type to bat wings for a darker aesthetic.
Now you have a majestic mythical guardian ready to protect the pages of your sketchbook.


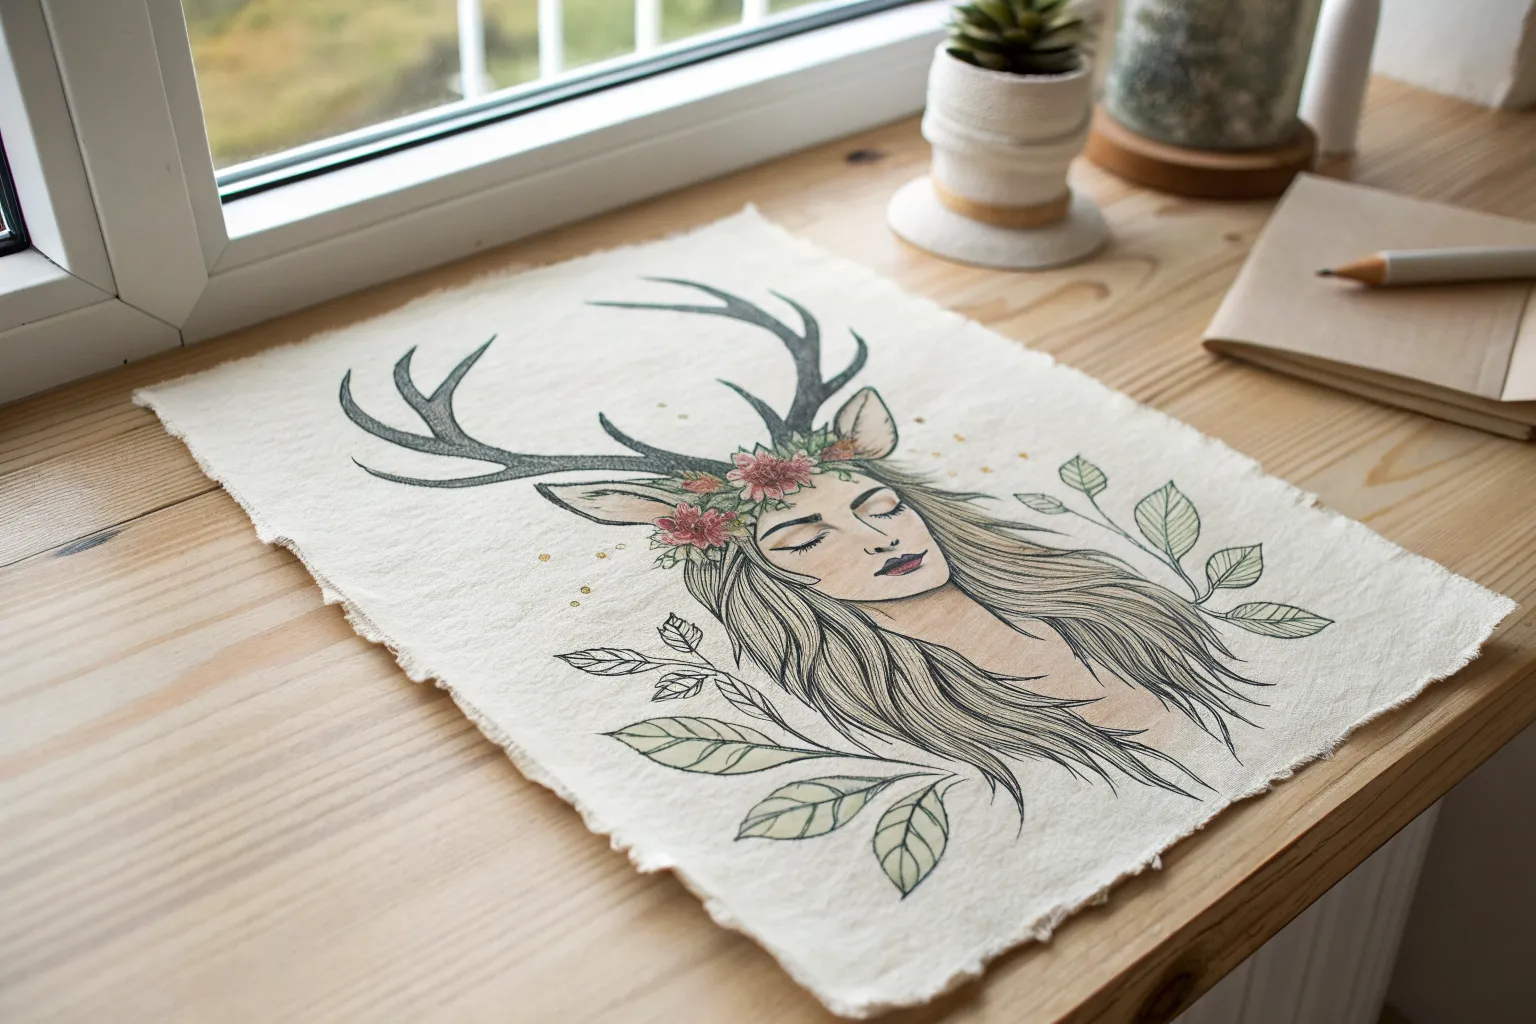
Rabbit With Antlers
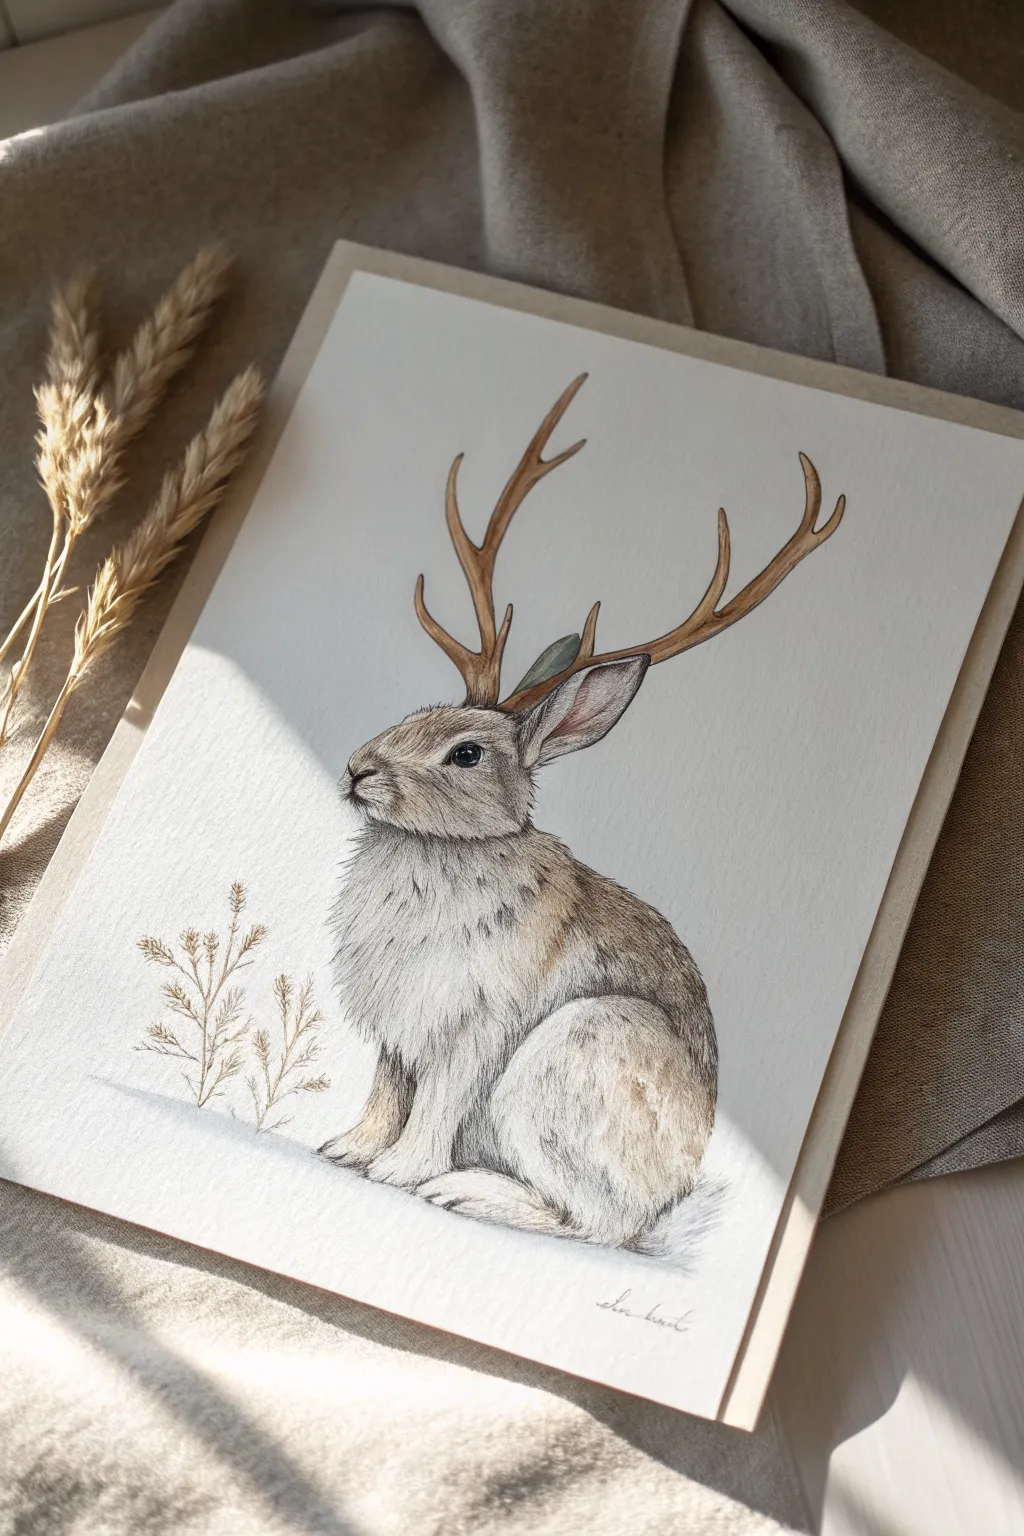
Blend reality and folklore by drawing a charming jackalope, combining the soft fur textures of a rabbit with the sturdy structure of deer antlers. This mixed-media piece uses fine liner pens and gentle washes to create a vintage, naturalist illustration style.
Detailed Instructions
Materials
- Hot press watercolor paper (smooth texture)
- HB and 2B graphite pencils
- Fine liner pens (sepia or dark brown, sizes 0.1 and 0.3)
- Watercolor paints (browns, ochre, grey)
- Small round watercolor brush (size 2 or 4)
- Colored pencils (optional, for fur texture)
- Kneaded eraser
Step 1: Drafting the Hybrid Form
-
Basic shapes:
Begin lightly with an HB pencil. Sketch a rounded oval for the rabbit’s body, angling it slightly upward. Add a smaller, slightly flattened circle for the head, connecting them with a short neck curve. -
Refining the rabbit profile:
Refine the face shape, marking the slight protrusion of the nose and the cheek curve. Draw the prominent, long ear extending back, making sure the base is wide. -
Positioning the antlers:
This is the ‘hybrid’ moment. Locate the forehead space just in front of the ear. Sketch two main stems rising upward and branching out. Keep the lines organic and slightly curved, not rigid sticks. -
Adding the feet and tail:
Sketch the large, powerful hind leg folded against the body, creating a distinct thigh curve. Add the small front paws grounded firmly, and suggest a fluffy tail at the rear. -
Placement of botanical elements:
To the left of the rabbit, lightly sketch a few vertical stems with small, feathery offshoots to balance the composition.
Step 2: Ink and Texture
-
Outlining the features:
Switch to your 0.1 brown fine liner. Carefully outline the eyes, nose, and the main contours of the antlers. Avoid outlining the fur with a solid line; use broken strokes. -
Creating fur texture:
Using short, quick flicks of the pen, build up the fur along the back, chest, and neck contours. Follow the direction the fur would naturally grow—down and back. -
Detailing the eye:
Fill in the pupil leaving a tiny white highlight to bring the rabbit to life. Darken the rim around the eye to create depth. -
Antler texture:
Use the pen to add subtle striations and tiny bumps along the antlers to make them look like bone rather than wood. -
Clean up:
Once the ink is fully dry, gently erase your initial pencil guides with the kneaded eraser so the drawing looks clean.
Muddy Fur?
If your watercolors are blending into a brown blob, let the paper dry completely between layers. Patience is key for crisp fur textures.
Step 3: Color and Shading
-
Initial wash:
Mix a very watery wash of pale ochre or light brown watercolor. Apply this loosely over the rabbit’s body, avoiding the bright white chest area. -
Deepening the shadows:
While the first layer is damp (but not soaking), drop slightly darker brown pigment into the shadow areas: under the chin, beneath the thigh, and behind the legs. -
Coloring the antlers:
Paint the antlers with a warm brown tone. I find adding a tiny touch of red oxide here makes them stand out against the cooler grey-brown fur. -
Adding fur detail with pencil:
Once the paint is bone dry, use a sharp dark grey or brown colored pencil to draw individual hairs over the dried watercolor. This adds incredible realism and depth. -
Highlighting the textural fluff:
Focus your pencil strokes on the chest ruffle and the fluffy tail, keeping the strokes light and airy. -
Botanical accents:
Use a light brown or dried-grass color to sketch the small plant to the left. Keep it sparse and barely there, so it doesn’t distract from the main subject. -
Grounding shadow:
Mix a cool grey wash and paint a soft, diffused shadow underneath the rabbit to ground it, so it doesn’t look like it’s floating. -
Final inspection:
Step back and check your contrast. If the eye needs more definition, go back in with your darkest pen or pencil to make it pop.
Seasonal Twist
Make it festive by hanging tiny ornaments from the antlers or wrapping them in holly vines for a winter holiday card design.
Frame your fantastical creature with a wide mat to give the detailed line work plenty of breathing room


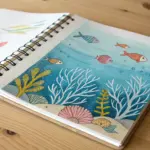
Crocodile-Dolphin Swimmer
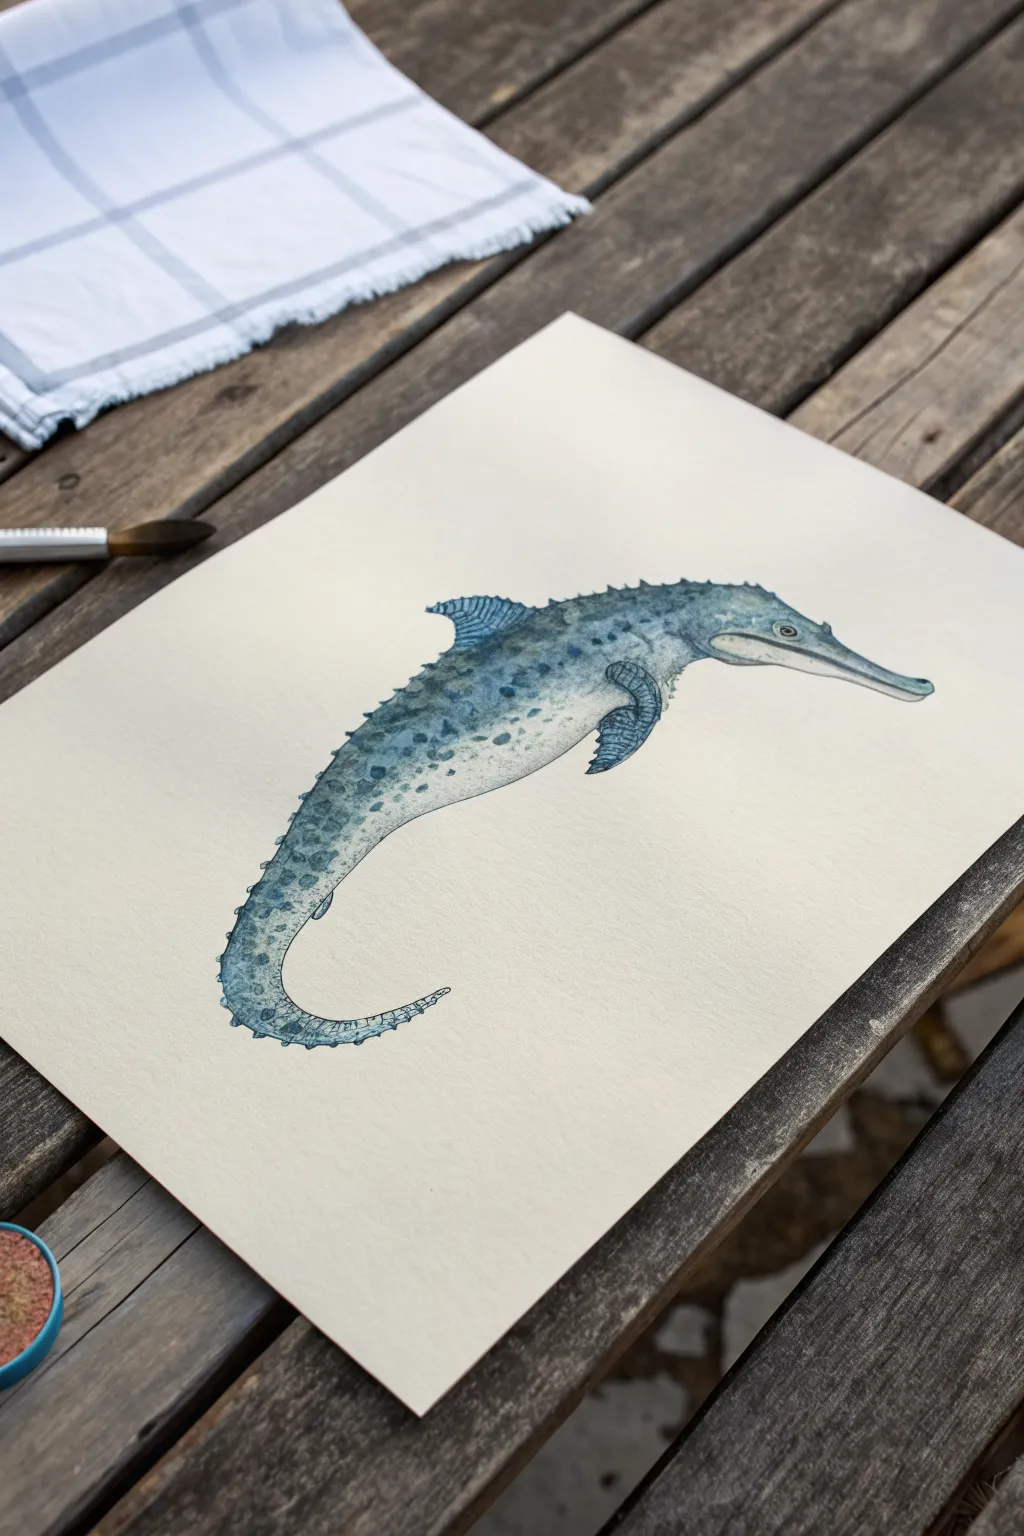
This whimsical project combines the textured, prehistoric look of a crocodile with the sleek, swimming form of a dolphin or shark. Using watercolor techniques, you will create a believable ocean dweller that feels both ancient and agile, all captured on a crisp sheet of heavyweight paper.
How-To Guide
Materials
- Hot press watercolor paper (heavyweight, at least 300gsm)
- H or HB pencil for sketching
- Kneaded eraser
- Watercolor paints (Payne’s Gray, Indigo, Prussian Blue, Burnt Umber)
- Round brushes (size 4 and size 0 or 00 for details)
- Clean water jar
- Paper towel
Step 1: Planning the Hybrid Form
-
Sketch the spine:
Begin by lightly drawing a smooth ‘C’ curve. This will serve as the central spine for your creature, starting from the tip of the snout and curling down to the tail. -
Outline the head:
At the top right of your curve, sketch a long, narrow crocodile snout. Keep the jawline distinct but merge the back of the head smoothly into a thicker neck area. -
Draft the body shape:
Connect the neck to the main curve, widening the torso before tapering it significantly as you reach the tail. Imagine a shark’s silhouette that bends into a curled seahorse-like tail. -
Add fin details:
Place a dorsal fin high on the back and a pectoral fin on the underside of the torso. Sketch these with slight jagged edges to hint at a reptilian texture rather than smooth skin. -
Clean up:
Use your kneaded eraser to lift away excess graphite until only a faint ghost of the outline remains.
Water Control is Key
Keep a piece of scrap paper nearby to test your paint opacity. The spotted texture works best if your paint isn’t dripping wet but has a creamy consistency.
Step 2: Applying the Base Layer
-
Mix your base color:
Create a watery wash of Indigo mixed with a tiny drop of Payne’s Gray. You want a cool, muted blue-grey tone that isn’t too saturated. -
Wet-on-dry wash:
Apply this wash over the entire upper body and head, but leave the jawline and underbelly noticeably lighter or even dry white paper for now. -
Soft blending:
While the paint is still damp, take a clean, slightly wet brush and soften the transition between the colored back and the white belly so there is no harsh line. -
Darken the extremities:
Drop a slightly more concentrated mix of the blue-grey into the tips of the fins and the very end of the tail to add weight to the form. -
Let it dry:
Wait for this initial layer to become completely bone dry before moving on. This prevents muddying the textures later.
Fixing Blooms
If water pools and creates ‘cauliflower’ blooms, don’t panic. Use a thirsty (dry) brush to soak up the excess liquid gently, then smooth the pigment.
Step 3: Adding Texture and Detail
-
Define the eye:
Using a small brush and concentrated Paynes Gray, paint a small circle for the eye with a tiny white highlight left unpainted. -
Create the spots:
Mix a darker, thicker version of your main blue. Paint irregular, organic spots along the spine and main body. Make them larger on the back and smaller towards the belly. -
Spiny ridge details:
Along the top edge of the back and tail, use the tip of your size 0 brush to paint tiny, triangular spikes or bumps, mimicking alligator skin ridges. -
Fin texture:
Draw fine lines inside the fins radiating from the body outward. I like to make these slightly wavery to suggest webbing. -
Shadowing the underbelly:
Mix a very faint, watery grey wash. Glaze this gently under the jaw and along the bottom curve of the belly to give the creature roundness and volume. -
Tail segments:
Near the curled tip of the tail, use short, horizontal strokes to create a segmented, armored look similar to a crustacean or seahorse. -
Final outlines:
With your finest brush and the darkest paint mix, carefully outline key areas like the snout, the jaw hinge, and the fins to make them pop against the paper.
Once dry, verify that the eye has enough contrast to give your creature a lively spark

PENCIL GUIDE
Understanding Pencil Grades from H to B
From first sketch to finished drawing — learn pencil grades, line control, and shading techniques.
Explore the Full Guide
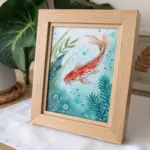
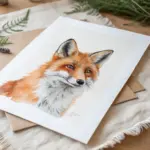
Fox-Koi River Spirit
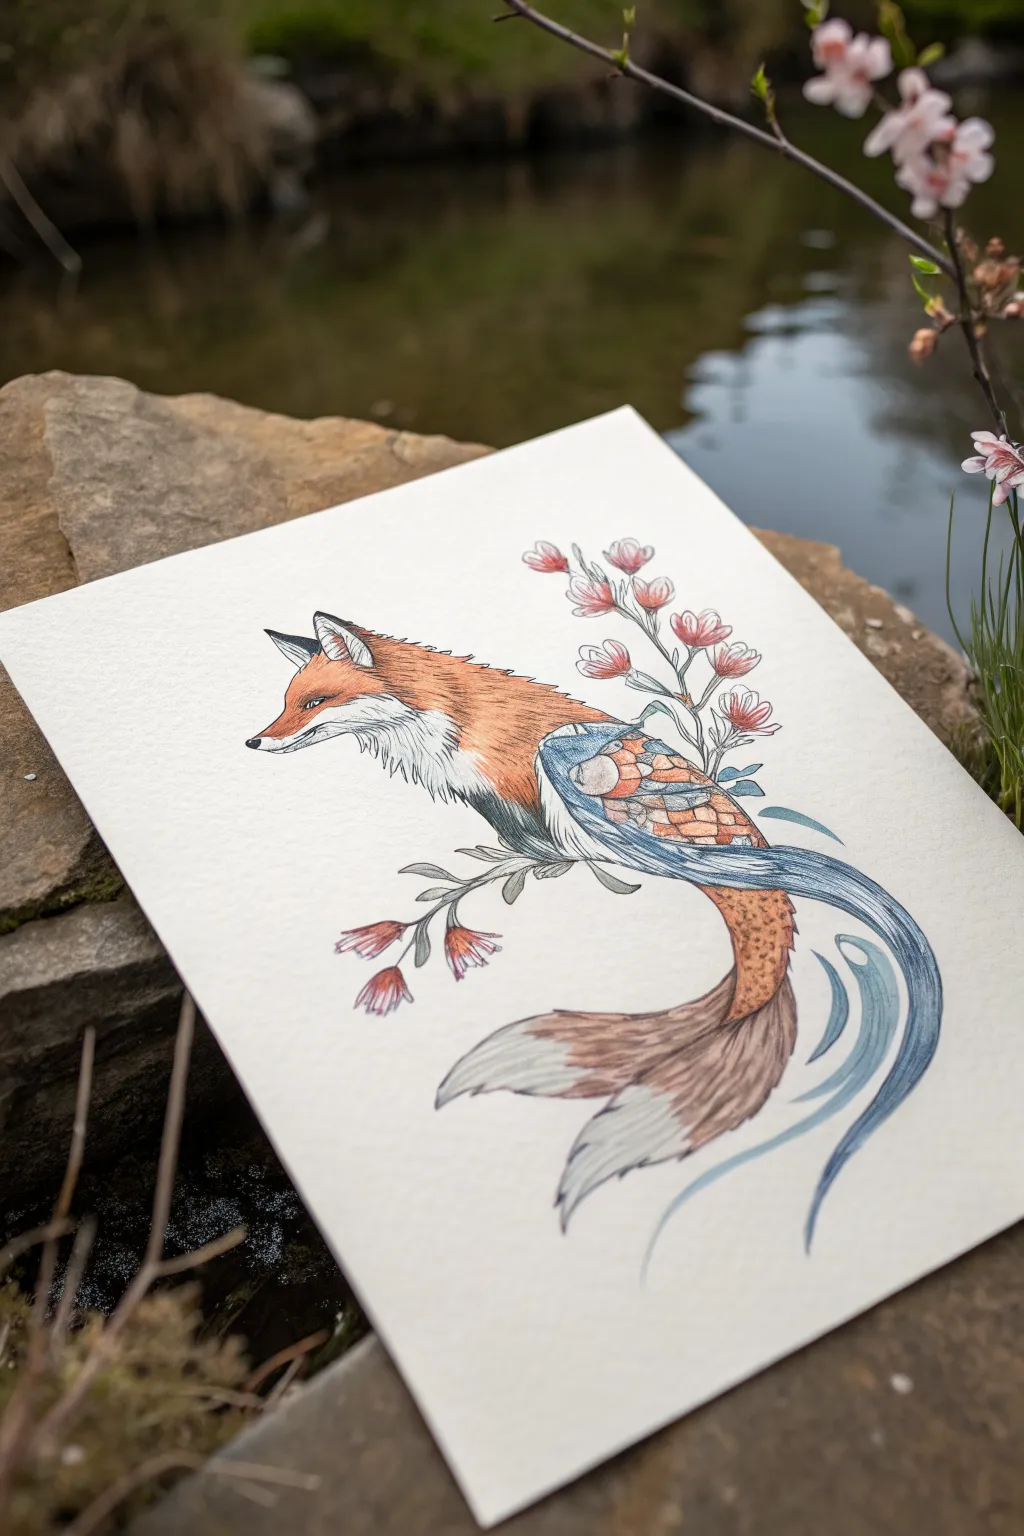
This whimsical illustration blends the fiery coat of a red fox with the flowing elegance of a koi fish, symbolizing the harmony between earth and water. Using fine liners and colored pencils, you’ll create a surreal creature that seems to swim through the air, surrounded by delicate cherry blossoms.
Detailed Instructions
Materials
- Heavyweight textured paper (hot press watercolor or bristol vellum)
- HB graphite pencil for sketching
- Kneaded eraser
- Fine liner pens (sizes 0.05, 0.1, and 0.3 in black)
- Colored pencils (burnt sienna, orange, pale blue, indigo, pink, olive green)
- White gel pen (optional for highlights)
Step 1: Drafting the Hybrid Form
-
Map the skeleton:
Begin with a very faint HB pencil sketch. Draw a circle for the fox head and a sloping oval for the chest. Extend a long, S-shaped curve backwards to define the flowing movement of the koi tail. -
Refine the fox features:
Sketch the triangular ears, the sharp muzzle, and the eye placement. Keep the lines light. Outline the fur on the neck, making it jagged to suggest texture. -
Transition to the koi body:
Where the fox’s ribcage ends, morph the line work into smooth, overlapping scales. Let the body narrow and then flare out into a large, fan-like tail fin that mimics the fox’s brushy tail. -
Add floral elements:
Draw winding branches originating from behind the creature. Sketch small, clustered blossoms—some budding, some open—curving over the fox’s back and under the tail to frame the composition.
Uneven Blending?
If your pencil strokes look scratchy, use a colorless blender pencil or a cotton swab with a tiny drop of baby oil to smooth the pigments together seamlessly.
Step 2: Inking the Outline
-
Outline the head:
Switch to a 0.1 fine liner. Carefully trace the fox’s face, using broken, short strokes on the cheek and neck to represent fur. -
Define the scales and tail:
Use a steady hand to ink the scales on the mid-section. For the tail, use long, sweeping lines that follow the S-curve guide to emphasize fluidity. -
Ink the botanical details:
Trace the branches and flowers with a 0.05 pen for a delicate touch. Once the ink is fully dry, gently erase all pencil marks with a kneaded eraser.
Step 3: Coloring the Fox
-
Base layer for the fur:
Start with a light layer of orange colored pencil on the fox’s head and back. Leave the muzzle, cheek, and chest white. -
Build depth:
Layer burnt sienna over the orange, concentrating on the top of the head and the spine. Use short, flicking strokes in the direction of hair growth to blend the colors naturally. -
Shadowing the white fur:
Use a very light grey or pale blue to add subtle shadows under the chin and on the white chest fur, giving it volume without darkening it too much.
Enhance the Magic
Add metallic gold watercolor or ink to the scales and the center of the flowers. This makes the river spirit shimmer when the light hits the paper.
Step 4: Coloring the Koi and Scenery
-
Scales and transition:
Color the scales starting with orange near the fox body, blending into pale blues and greys as you move backward. I find it helps to leave tiny white highlights on the edge of each scale for a wet look. -
Flowing tail gradient:
For the tail fin, blend burnt sienna at the base into a soft grey-brown at the tips. Add streaks of blue curves around the tail to simulate water currents. -
Botanical accents:
Color the branches with olive green and brown. Use a soft pink for the flower petals, darkening the centers slightly for depth. -
Final touches:
Strengthen the darkest shadows with a touch of indigo pencil in the deepest fur and scale crevices. Optionally, use a white gel pen to add a spark to the fox’s eye.
Take a moment to admire how the textures of fur and scale merge into one unique creature
Three-Way Hybrid in One Silhouette
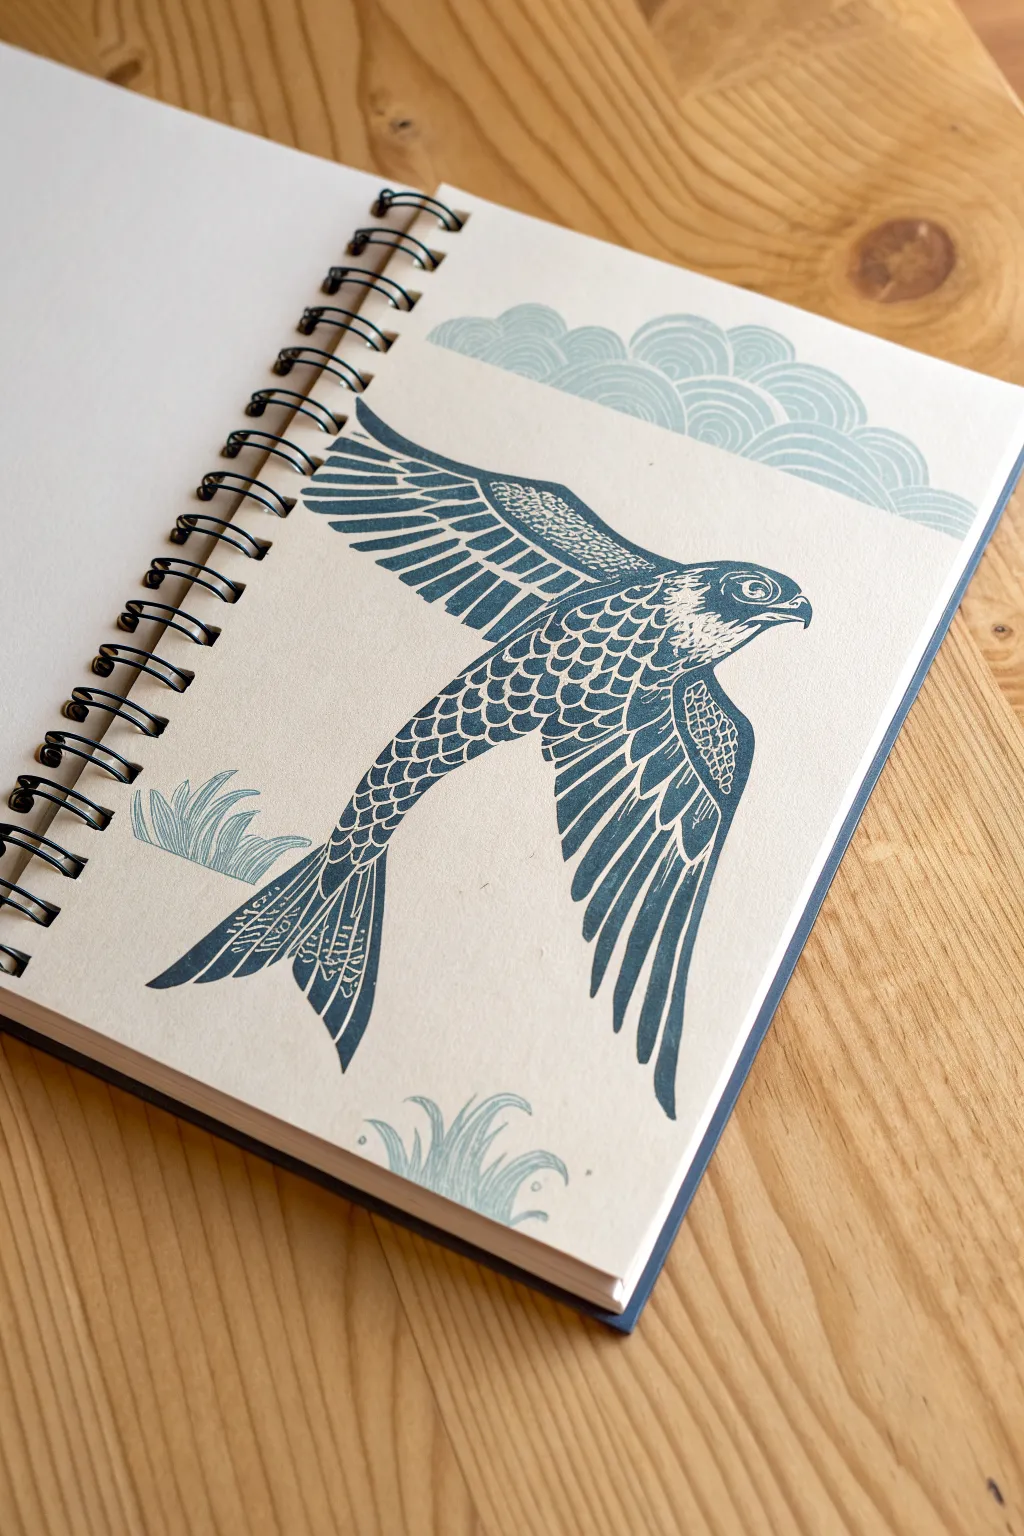
This striking linocut-style illustration merges three natural forms into a single, cohesive silhouette. Using just one shade of blue ink, you will transform a diving bird into a creature that seamlessly incorporates fish scales and crashing waves within its own outline.
Step-by-Step Tutorial
Materials
- Spiral-bound sketchbook with smooth, heavyweight paper
- Pencil (HB or 2B) for sketching
- Eraser
- Fine-point pigment liner (dark blue or navy)
- Medium felt-tip marker or brush pen (matching dark blue)
- Light blue pigment liner or colored pencil (for decorative waves)
- Tracing paper (optional but helpful)
Step 1: Conceptualizing and Sketching
-
Establish the silhouette shape:
Start by lightly sketching the outline of a diving bird of prey, like a falcon or swift. Focus on the sharp, angular wings and the sweeping curve of the body as it descends. -
Divide the animal segments:
Mentally divide the bird into three zones. The head and upper wing will remain bird-like. The middle body will transition into fish scales. The tail feathers will morph into a stylized fishtail or wave shape. -
Draft the ‘Bird’ zone:
In the head area, sketch the eye, the beak, and the neck feathers. Draw long, straight lines for the primary flight feathers on the upper wing to suggest stiff bird plumage. -
Draft the ‘Fish’ zone:
Moving down the torso, replace feathers with rows of interlocking semi-circles to create scales. Let these scales gradually get smaller as they move down the body. -
Draft the ‘Wave’ zone:
Sketch the lower wing as if it were made of flowing water, using curved, fluid lines instead of straight feather shafts. Turn the tail into a forked fin shape with internal water droplet details.
Block Print Look
To mimic the look of a linocut print, try not to taper your lines. Keep line widths consistent and abrupt, as if cut by a carving tool.
Step 2: Inking the Outline
-
Outline the head:
Using your fine-point dark blue pen, carefully ink the bird’s beak and eye. Leave a small white highlight in the eye to bring it to life. -
Define the upper wing:
Ink the long flight feathers on the top wing. Use the negative space technique—draw the shapes between the feathers rather than just outlines—to give it that block-print look. -
Ink the scale transition:
Outline the scales on the body. Instead of thin lines, thicken the bottom edge of each scale slightly to create depth and dimension. -
Complete the tail silhouette:
Trace the outer edge of the tail and the lower wing with a steady hand. Ensure the lines are clean and confident.
Step 3: Filing and Texturing
-
Fill the dark areas:
Switch to your medium marker or brush pen. Fill in the solid dark blue sections, particularly on the lower wing tips and the back of the neck. -
Create the scale texture:
Go back to the scales with the fine liner. Add small, curved hatching lines inside each scale to suggest texture without filling them in completely solid. -
Stylize the lower wing:
In the lower wing, draw long, flowing shapes that mimic water currents. Leave thin white channels between the blue ink strokes to separate the ‘feathers’. -
Detail the tail fin:
Add intricate patterns to the tail. I like to include tiny circles or dashes inside the tail shapes to resemble bubbles or sea foam within the fin. -
Refine the shoulder pattern:
On the bird’s shoulder, create a dense, stippled texture or a tight honeycomb pattern to bridge the gap between the smooth head and the scaled body.
Uneven Ink Coverage?
If your large filled areas look streaky, do a second layer of ink in the opposite direction once the first layer is fully dry. Or use a high-flow pigment marker.
Step 4: Atmospheric Elements
-
Draw stylistic clouds:
In the upper right corner of the page, use a lighter blue pen or apply less pressure to draw rolling, Japanese-style wave clouds. Keep these lines uniform and rhythmic. -
Add ground waves:
At the bottom left, sketch small tufts of grass or stylized wave splashes where the bird is diving towards. Use the lighter blue tone here as well. -
Clean up the drawing:
Once the ink is completely dry (wait at least 15 minutes to be safe), gently erase all underlying pencil sketch lines. -
Critique and balance:
Step back and look at the overall balance. If the ‘fish’ section looks too light, thicken the outlines of the scales slightly to match the visual weight of the darkened wings.
You have successfully fused three elements into a single, mythological creature that flows across the page


Have a question or want to share your own experience? I'd love to hear from you in the comments below!