
Keyholes are my favorite little portal frames—that classic keyhole silhouette instantly turns a drawing into a story. Here are my go-to key hole drawing ideas for revealing secret worlds, playing with contrast, and making your viewer feel like they’re sneaking a peek at something magical.
Secret Garden Through a Keyhole
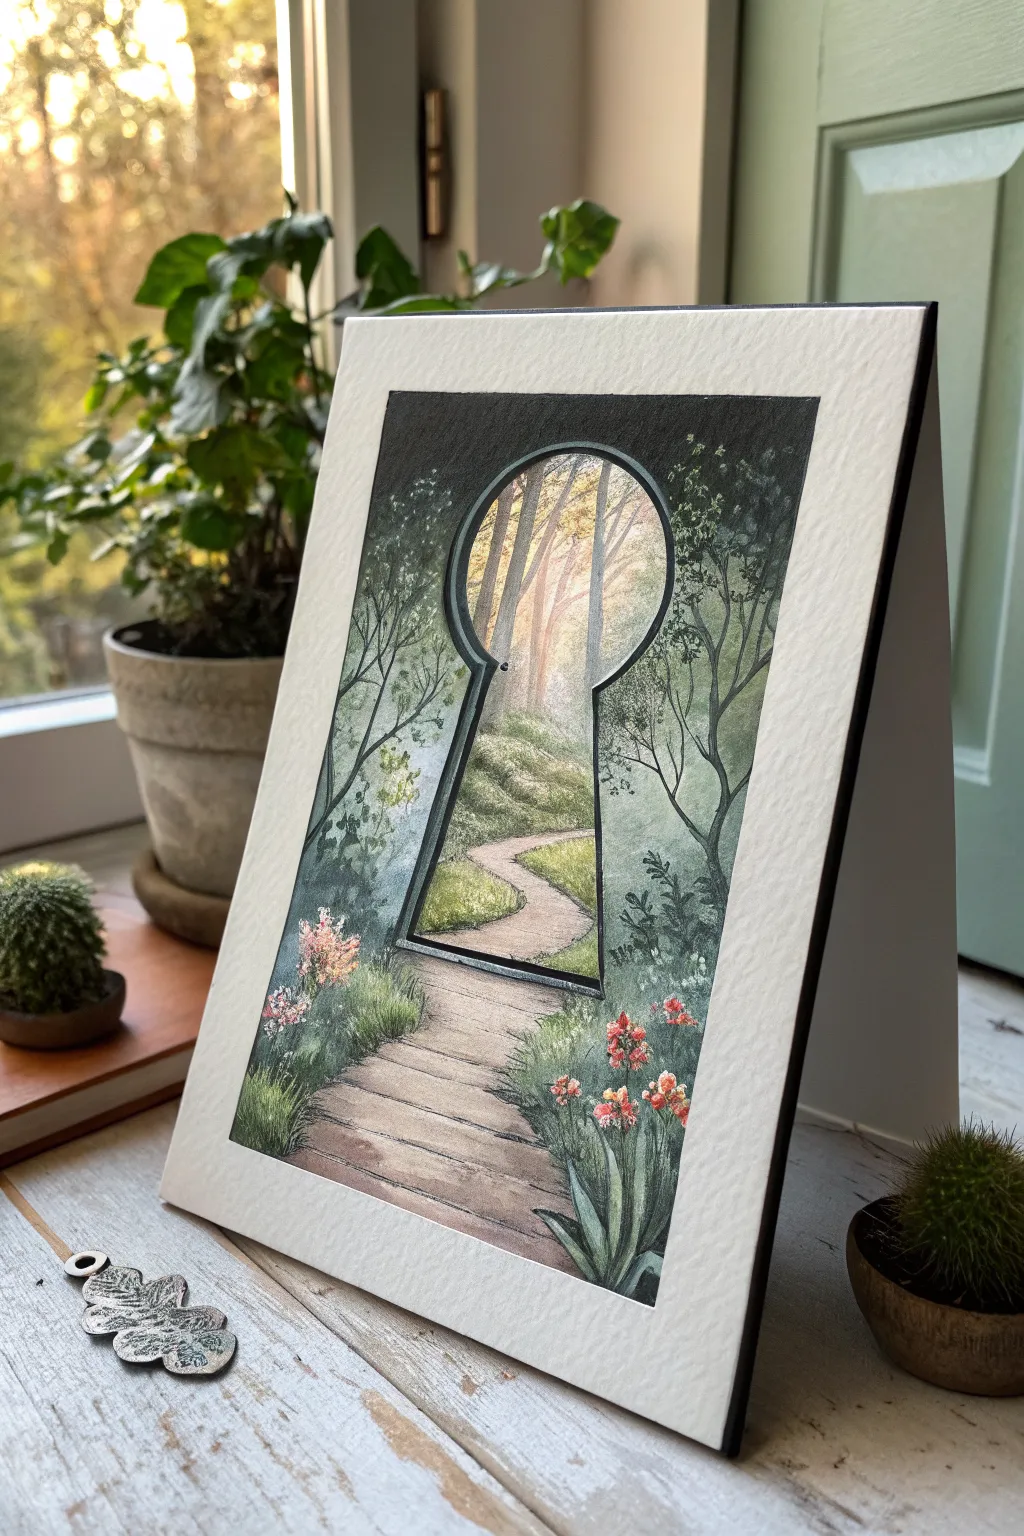
This enchanting double-exposure style piece uses watercolor and gouache to create a magical sense of depth. You’ll layer misty woodland tones outside a stark keyhole shape, revealing a brighter, sun-drenched path within, inviting the viewer to step into a secret world.
Step-by-Step
Materials
- Hot press watercolor paper (heavyweight, 300gsm)
- Watercolor paints (forest green, indigo, sap green, burnt sienna, yellow ochre)
- White opacity gouache
- Pencil (HB or 2H)
- Ruler
- Compass or circle template
- Black waterproof fine liner pen (01 and 03)
- Round brushes (size 2, 4, and 0 for details)
- Masking fluid (optional)
- Painter’s tape
Step 1: Planning and Sketching
-
Prepare the paper:
Tape your watercolor paper down to a board to prevent warping. Evenly measure the center of your page. -
Draw the keyhole shape:
Using a compass, draw a perfect circle in the upper third of the center line. Use a ruler to extend two straight lines downward from the circle, flaring slightly at the bottom to create the classic keyhole silhouette. -
Sketch the pathways:
Lightly sketch a wooden plank path leading up to the keyhole in the foreground. Inside the keyhole, sketch a winding dirt path that continues the perspective into the distance. -
Outline the vegetation:
Very faintly sketch the placement of trees on the ‘outside’ framing the keyhole, and the distant trees ‘inside’ the keyhole. Keep these lines minimal so they don’t show through the paint.
Step 2: Painting the Internal World
-
First wash inside:
Wet the paper inside the keyhole shape only. Drop in diluted yellow ochre and a touch of light pink near the top for a sunlit glow. -
Define the distant path:
Mix burnt sienna with a little white gouache for an opaque, milky look. Paint the winding path inside the keyhole, getting lighter and less distinct as it moves further away. -
Add inner foliage:
Using sap green mixed with yellow, dab in soft, grassy textures along the path inside the keyhole. Keep the edges soft to suggest distance and dreaminess. -
Paint the inner trees:
With a diluted grey-brown mix, paint the vertical trunks inside the keyhole. They should be paler than anything in the foreground to push them back in space.
Depth Trick
Keep the ‘inside’ colors warm (yellows/greens) and the ‘outside’ colors cool (indigos/teals). This temperature contrast forces the keyhole to recede visually.
Step 3: The Darker Exterior
-
Establish the darkness:
For the area outside the keyhole, mix indigo and forest green to create a deep, moody shadow color. Carefully paint around the keyhole shape, making the paint darkest right next to the outline to create high contrast. -
Fade the edges:
As you move away from the top of the keyhole, dilute the dark mix with water to create a misty, atmospheric fade into the white of the paper at the edges. -
Layering the foreground trees:
Once the background wash is dry, use a size 2 brush to paint darker, sharper tree trunks and branches framing the keyhole. These should be more distinct than the internal trees. -
Painting the wooden planks:
Mix burnt sienna and grey. Paint individual wooden planks leading up to the image, leaving tiny slivers of white paper between them to define the cracks. -
Adding texture to wood:
Once the base wood color is dry, use a dry-brush technique with darker brown to add wood grain texture to the foreground path.
Level Up: Metal Flakes
Use gold leaf or metallic gold paint for the rim of the keyhole instead of black. It gives the piece a fairytale storybook aesthetic.
Step 4: Details and Definition
-
Outline the keyhole:
Using your 03 fine liner or a very steady hand with black paint, create a crisp, thick border around the keyhole shape. I find adding a slight 3D beveled edge on the left side adds realism. -
Add foreground flora:
Using opaque gouache in greens and teals, paint sharp, blade-like grass tufts in the immediate foreground at the bottom of the page. -
Pop of color:
Mix a coral or salmon pink gouache. Dot tiny clusters of flowers onto the foreground foliage to break up the greenery. -
Final highlights:
Use pure white gouache with your smallest brush (size 0) to add highlights to the flower petals and the edges of the keyhole frame.
Peel off your tape reveal a crisp border and admire your own little portal into a hidden world.

Underwater Reef Behind the Keyhole
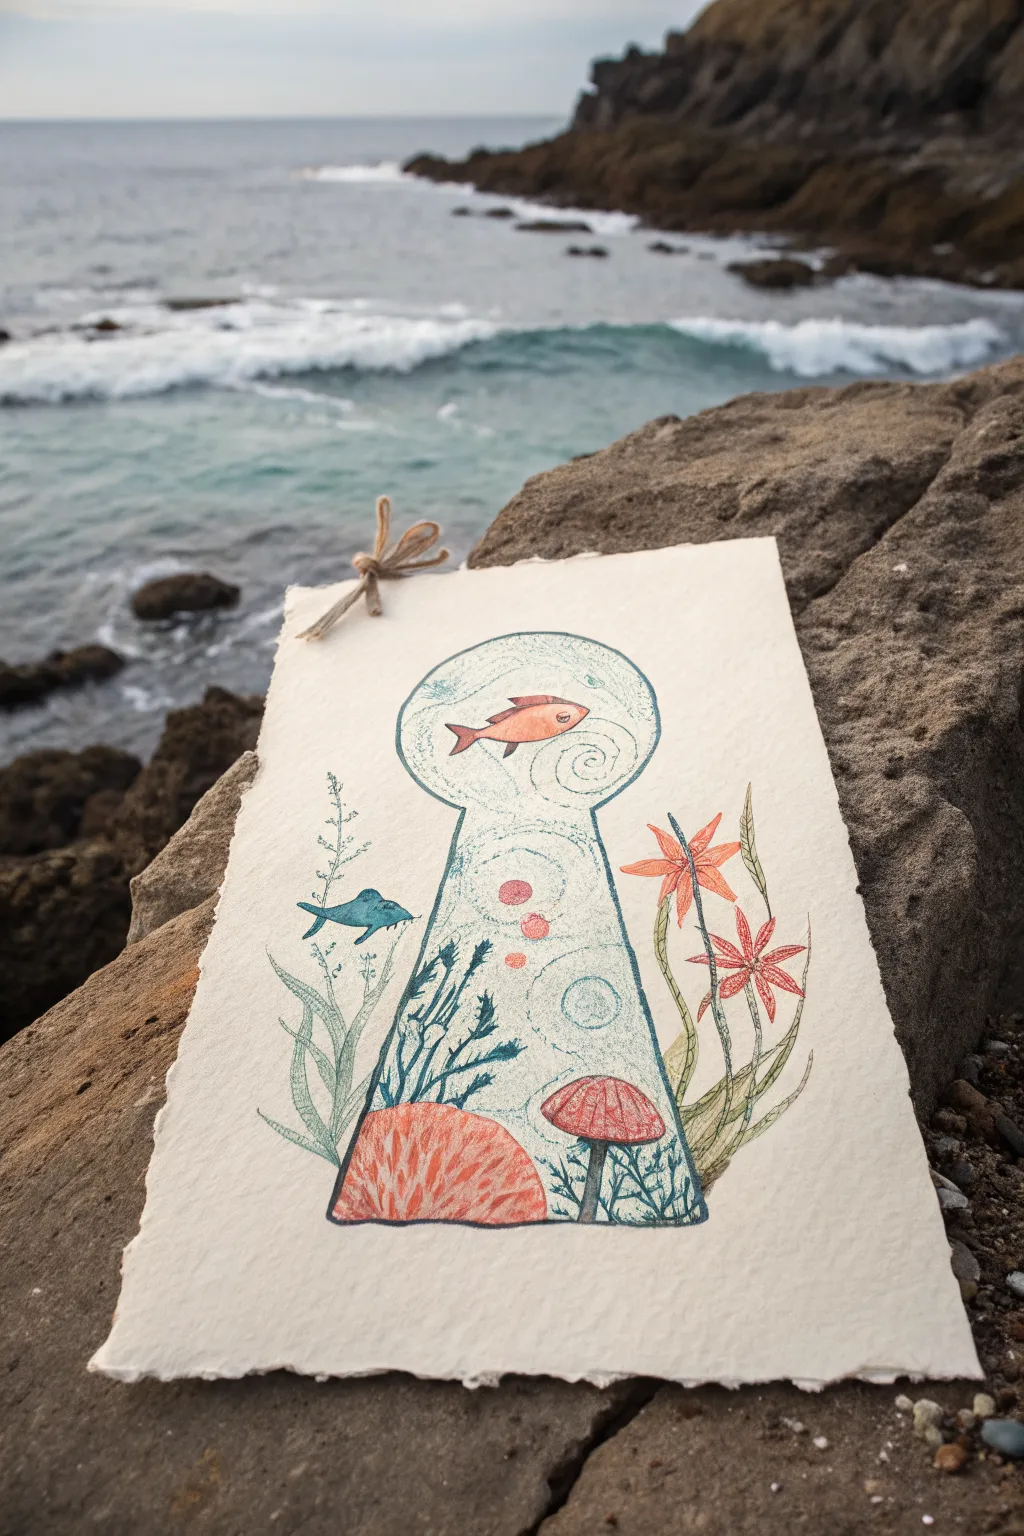
Peek into a hidden marine world with this whimsical illustration that frames a vibrant underwater scene inside an antique keyhole shape. The textured paper and soft colored pencil shading give this piece a lovely, organic feel that captures the magic of the ocean.
How-To Guide
Materials
- Heavyweight, textured drawing paper or watercolor paper (rough grain)
- Pencil (HB for sketching)
- Fine liner pen (0.3mm or 0.5mm, black or dark blue)
- Colored pencils (coral, teal, sage green, salmon pink, light blue)
- Ruler
- Eraser
- Jute twine or rustic string
- Hole punch
Step 1: Setting the Frame
-
Paper Preparation:
Begin by tearing the edges of your paper instead of cutting them. This deckled edge adds to the rustic, found-object aesthetic of the final piece. -
Draw the Outline:
In the center of the paper, lightly sketch a classic keyhole shape. Start with a circle specifically at the top, and draw a trapezoid shape flaring downwards from it. -
Refine the Shape:
Connect the circle and the trapezoid with smooth curved lines to create that distinctive keyhole silhouette. Keep your pencil pressure light so you can erase easily later. -
Add the Tag Hole:
Punch a small hole centered at the very top of the paper. Thread a short piece of jute twine through it and tie a simple bow to mimic a gift tag.
Uneven Texture?
If the textured paper makes coloring difficult, place a smooth sheet of cardstock underneath while you work to provide a firmer surface for your pencils.
Step 2: Sketching the Ecosystem
-
Place the Main Subjects:
Inside the keyhole shape, sketch a fish swimming near the top circle. Below it, towards the bottom left, draw a large rounded coral or rock shape, and a mushroom-shaped coral on the bottom right. -
Add Flowing Plant Life:
Sketch long, wavy seaweed strands rising from the bottom corners. Let some of these plants spill ‘outside’ the keyhole frame on both the left and right sides to create depth. -
Include Outside Elements:
Draw a smaller fish swimming freely outside the keyhole on the left. On the right, sketch two star-shaped flowers or sea anemones on tall stems. -
Detail the Interior:
Fill the negative space inside the keyhole with swirling lines and small bubbles to represent water currents and movement.
Design Continuity
Make elements overlap the keyhole edge. Having plants or fish cross the border line creates a fun 3D illusion compared to confining everything inside.
Step 3: The Coloring Process
-
Outline the Keyhole:
Use a teal or sea-green colored pencil to trace the main keyhole outline. Don’t use ink here; a soft pencil line blends better with the water theme. -
Color the Coral:
Fill in the large bottom-left coral shape with a salmon or coral-colored pencil. Use vertical strokes to give it texture, resembling brain coral. -
Shade the Mushroom Coral:
Color the mushroom cap on the right with a dusty red or pink. Add vertical lines to define the gills or texture of this structure. -
Greenery and Seaweed:
Using a sage green pencil, color the flowing seaweed strands. I like to press harder at the base and ease up towards the tips to create a gradient effect. -
Color the Fishes:
Color the top fish in a bright orange or peach tone. For the smaller fish escaping the keyhole on the left, use a cool teal blue. -
External Flora:
Color the star-shaped flowers on the right with the same coral/orange tone used for the fish to balance the color composition.
Step 4: Details and Definition
-
Inking the Details:
Take your fine liner pen and carefully go over the internal details—the swirling water lines, the fish scales, and the veins in the leaves. -
Texture the Water:
Gently shade the empty space inside the keyhole with a very light blue pencil. Use circular motions to integrate the swirls you drew earlier. -
Defining the Border:
If the keyhole shape got lost during coloring, re-trace the border with a darker teal pencil, pressing firmly to create a clear separation between the ‘inside’ and ‘outside’ worlds. -
Adding Bubbles:
Draw small circles in the water area using a darker blue or red pencil to act as bubbles rising from the coral. -
Final Contrast Check:
Look over the drawing. If the seaweed needs more definition, add thin lines of dark green or blue ink to separate the strands.
Now you have a charming piece of oceanic art that invites the viewer to take a closer look


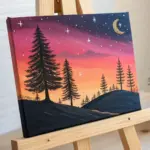
Starry Galaxy Portal Keyhole
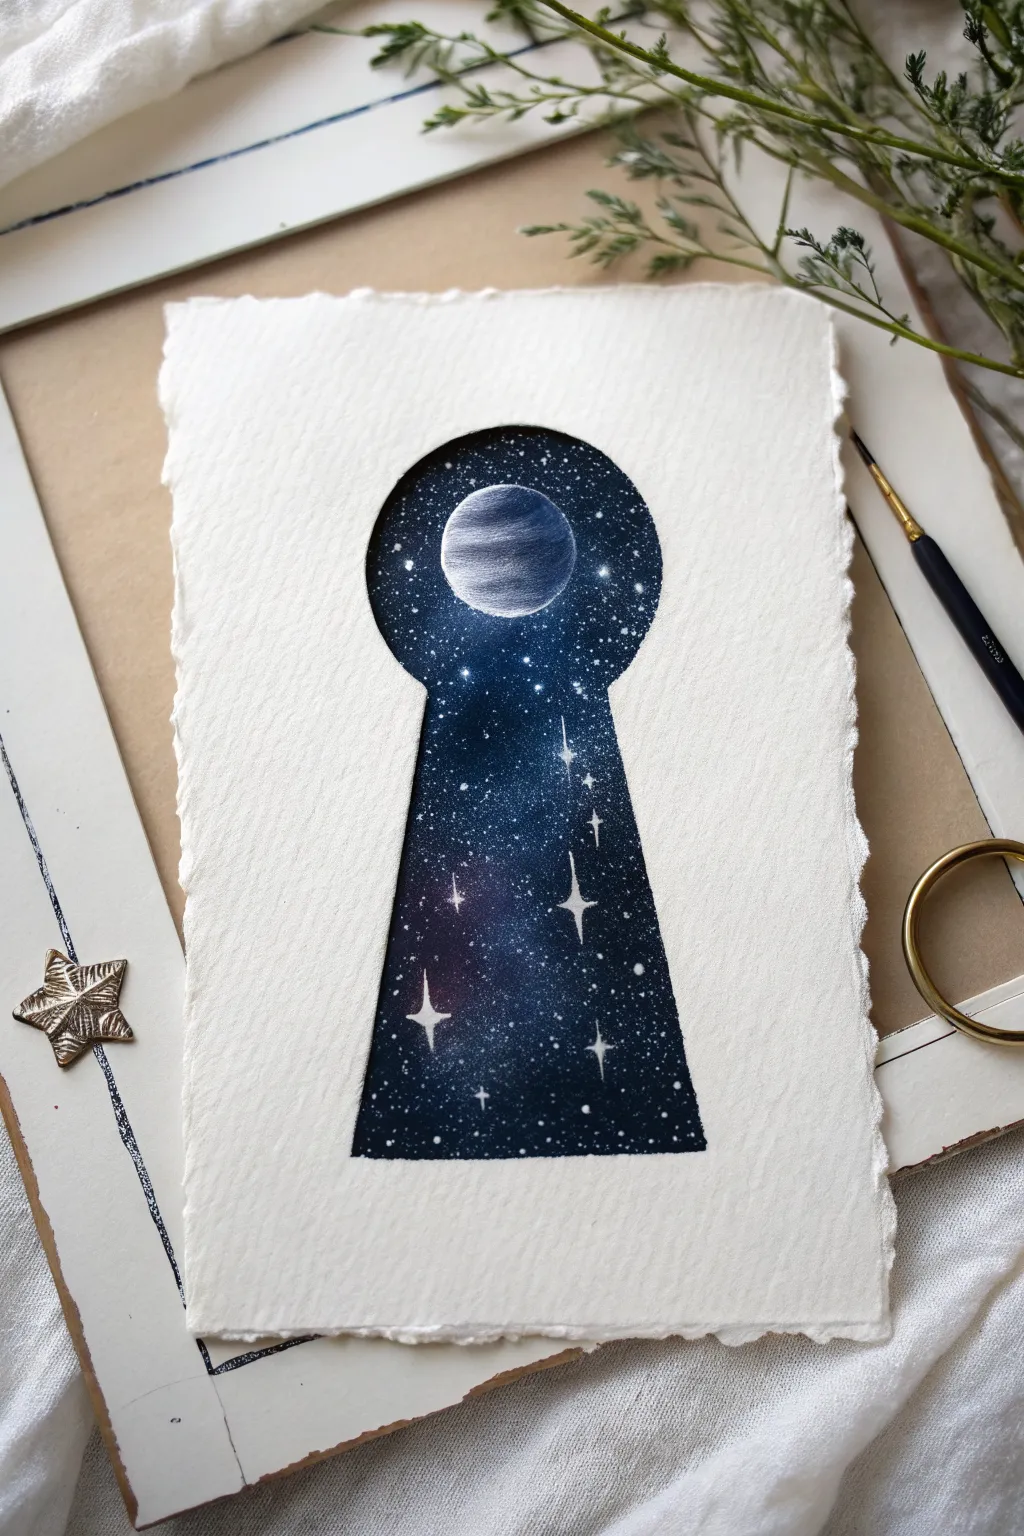
Peer into another universe with this captivating artwork that uses negative space to frame a deep, starry galaxy. The sharp, clean edges of the keyhole contrast beautifully with the ethereal, blended blues and purples of the cosmic scene within.
Step-by-Step Tutorial
Materials
- High-quality watercolor paper (cold press, roughly 300gsm)
- Pencil and eraser
- Ruler
- Gouache paint (Black, Prussian Blue, Violet, Magenta, White)
- Masking tape or painter’s tape
- Small round brushes (sizes 0 and 2)
- Flat shader brush
- Old toothbrush (for splattering)
- Palette for mixing
- Deckle edge ruler or scissors (optional for paper edges)
Step 1: Preparing the Portal
-
Shape the paper edge:
Begin by tearing your watercolor paper to size. If you want that beautiful, rustic deckled edge shown in the reference, gently tear the paper against a ruler rather than cutting it with scissors. -
Draft the keyhole:
Lightly sketch a circle in the upper-middle section of your paper. Use a coin or a small circular object to trace if you want it perfectly round. -
Complete the silhouette:
Draw two diagonal lines extending downward from the sides of the circle, widening slightly as they go down to form the trapezoidal bottom of the keyhole. Connect the bottom with a straight horizontal line. -
Refine the lines:
Use your ruler to ensure the sides are symmetrical. I find it helpful to draw a very faint vertical center line first to keep everything balanced, then erase it. -
Mask the borders:
This is crucial for crisp edges. Carefully apply masking tape around the *outside* of your pencil lines, covering the white paper area. Unlike typical masking, you aren’t masking the border of the paper, but rather the negative space around the keyhole shape itself.
Step 2: Painting the Galaxy
-
Base coat of black:
Using your flat brush, apply a layer of black gouache mixed with a tiny bit of blue to the very top and bottom edges of the keyhole shape. This creates depth at the periphery. -
Blend the deep blues:
While the black is still slightly damp, mix Prussian Blue with a touch of black. Paint this into the middle sections, blending it into the pure black areas to create a gradient. -
Add some nebula color:
Mix a small amount of Violet or Magenta. While the blue layer is still wet, drop small amounts of this purple hue into the lower-middle section to suggest a nebula cloud. -
Soft blending:
Use a clean, slightly damp brush to gently soften the transitions between the black, blue, and purple areas. You want a smooth, misty look rather than hard lines. -
Create the planet base:
Near the top within the circular part of the keyhole, paint a solid white circle where your planet will be. Let this dry completely before moving on. -
Detailing the planet:
Once the white circle is dry, mix a diluted grey-blue wash. Paint creating curved bands across the planet to simulate gas giant stripes, leaving some areas pure white for highlights.
Tape Seal Secret
After applying your masking tape, run a bone folder or your fingernail firmly along the edge to ensure a tight seal. This prevents paint bleed.
Step 3: Stars and Sparkles
-
Create the star field:
Dilute some white gouache with water until it has a milky consistency. Dip an old toothbrush into this mixture. -
Splatter technique:
Hold the toothbrush over the painting and run your thumb across the bristles to flick tiny white specks onto the dark background. Aim for random distribution. -
Add major stars:
Using your smallest size 0 brush and pure white paint, carefully dot larger individual stars in open spaces to create variety in star size. -
Paint the starbursts:
Select 3 or 4 of your larger dots to turn into twinkling stars. Paint a thin vertical line and a thin horizontal line crossing through the center dot. -
Star details:
Elongate the vertical line of the starburst slightly more than the horizontal one for a stylized look. You can add tiny diagonal rays on the largest star for extra flair. -
Planet shadow:
To make the planet look spherical, lightly glaze a translucent dark blue shadow on the side furthest from your imaginative light source. -
The reveal:
Once the paint is 100% dry to the touch, very slowly peel away the masking tape. Pull the tape away from the painted area at a 45-degree angle to prevent tearing the paper. -
Final touch-ups:
If any paint bled under the tape, use a slightly damp, clean brush or a white gel pen to tidy up the edges and re-establish the sharp silhouette.
Level Up: 3D Depth
Add a faint grey shadow on the white paper just outside one side of the keyhole. This creates an optical illusion that the hole is physically cut into the page.
Now you have a miniature window into the cosmos ready to display or gift


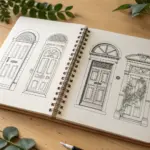
Desert Dunes and Mirage Keyhole
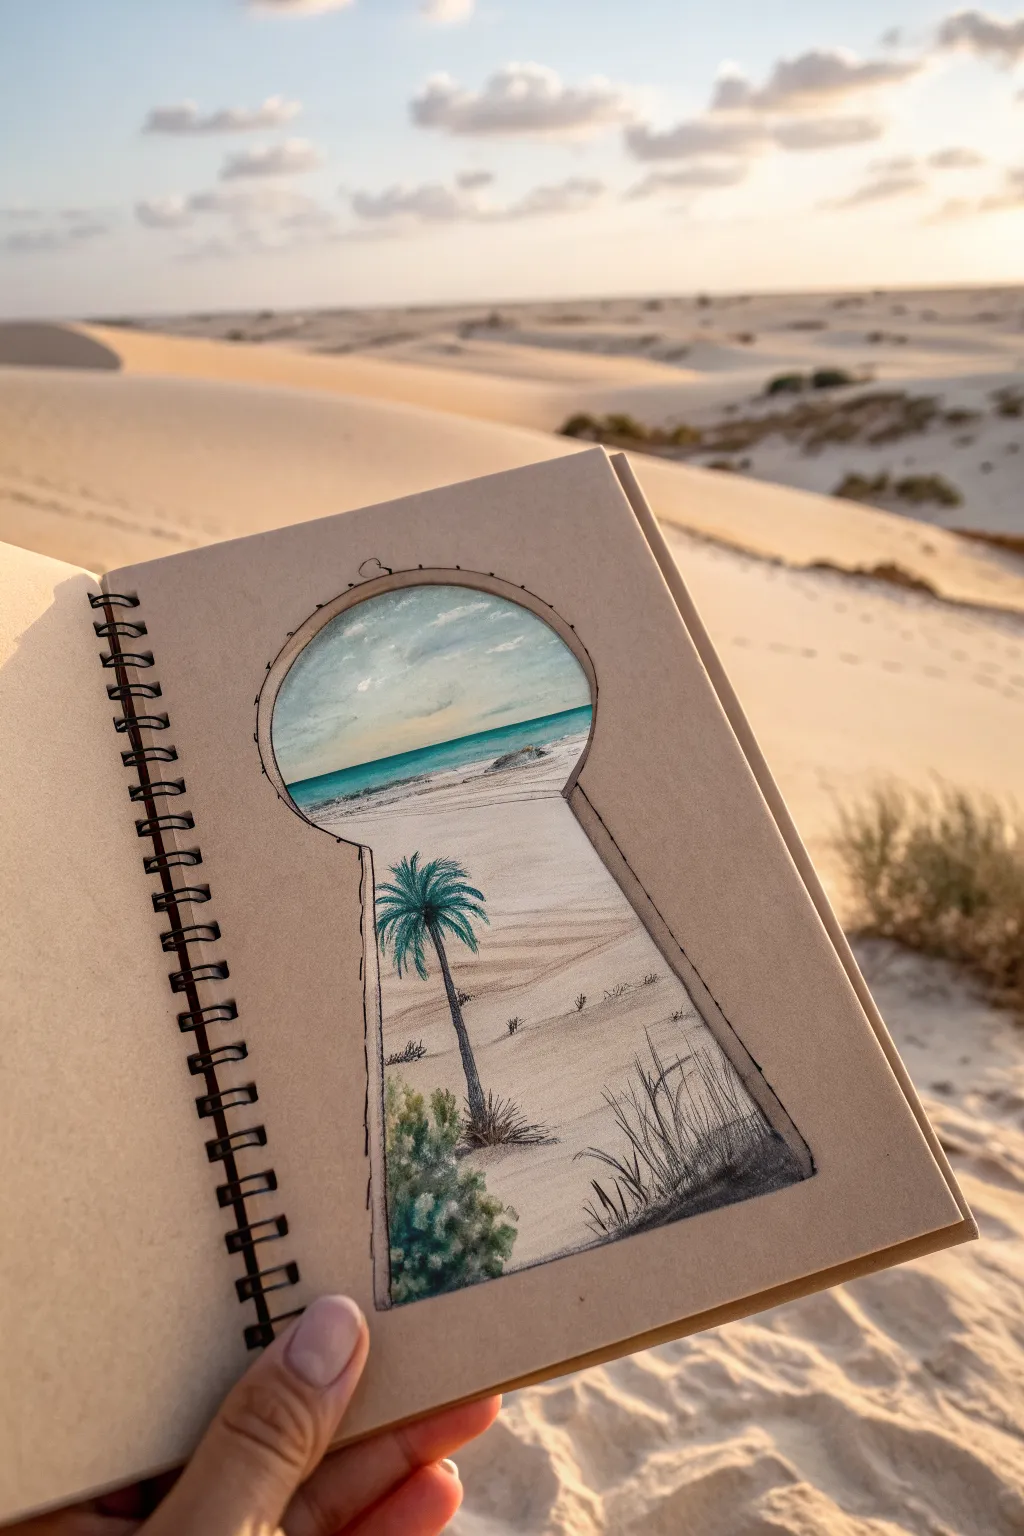
Transport yourself to a hidden oasis with this clever sketchbook illusion that frames a tropical paradise within a classic keyhole silhouette. Using colored pencils on toned paper creates a warm, atmospheric glow that mimics the feeling of a sun-drenched beach.
Step-by-Step
Materials
- Spiral-bound sketchbook with tan or grey toned paper
- Graphite pencil (HB or 2B)
- Black fineliner (0.3mm or 0.5mm)
- Colored pencils (white, oceanic blues, sandy beige, warm browns, palm greens)
- Eraser
- Ruler (optional)
Step 1: The Outline
-
Draft the keyhole shape:
Start by lightly sketching the keyhole in the center of your page. Draw a large circle for the top section and extend two straight lines downward that flare out slightly at the bottom to form the trapezoidal base. Don’t press too hard; you want these lines to be easily adjustable. -
Refine the silhouette:
Create the illusion of thickness by drawing a double line around the entire perimeter. The outer line represents the wall or door surface, while the inner line frames the view. Add small tick marks or dots along the outer rim to suggest old hardware or rivets. -
Sketch the horizon:
Inside the circular part of the keyhole, lightly draw a horizontal line about one-third of the way up. This will separate your ocean from the sky. Leave plenty of room below for sand.
Step 2: Sky and Sea
-
Base layer for the sky:
Using a white colored pencil, lightly shade the sky area to build a base that will make the blues pop against the tan paper. Keep your strokes horizontal and smooth. -
Add atmospheric blues:
Blend a pale blue into the upper portion of the sky, letting it fade into white near the horizon. This gradient creates depth and mimics atmospheric haze. -
Define the clouds:
Press harder with your white pencil to create fluffy, distinct cloud shapes against the blue. I like to smudge the edges slightly with my finger for a softer look. -
Fill the ocean strip:
Color the band of water with a rich turquoise or teal. Make the color deepest at the horizon line and lighter as it approaches the shore to show shallow water.
Uneven Blending?
If the sky looks scratchy on the toned paper, layer white over your blue pencil heavily to burnish the wax. This smooths out the texture without losing the color.
Step 3: Sand and Foliage
-
Establish the dunes:
For the sand inside the keyhole, use the toned paper as your base color. Add faint horizontal streaks of white and light beige to suggest ripples in the sand, following the perspective of the ground. -
Plant the palm tree:
Draw a slender, slightly curved trunk rising from the lower third of the keyhole. Use dark brown for the shadowed side and a lighter tan for the sunlit side to give it roundness. -
Draw the fronds:
Explode the palm leaves outward from the top of the trunk using quick, flicking strokes of deep green and teal. Ensure the leaves droop naturally. -
Add foreground bushes:
In the bottom left corner, scumble densely packed strokes of cooler greens to create a scrub bush. This darker foreground element pushes the ocean view deeper into the distance. -
Sketch grassy textures:
On the bottom right, use sharp, upward strokes with a dark grey or black pencil to draw tall, thin dune grasses. Vary the lengths and angles so they look windblown.
Depth Perception
Make items at the bottom of the keyhole (bushes) darker and more detailed. Make distant items (ocean, horizon) lighter and bluer to mimic atmospheric perspective.
Step 4: Final Details
-
Ink the border:
Take your black fineliner and carefully trace over your initial keyhole outline. Make the line slightly jittery or broken in places to give it an antique, weathered feel. -
Add shore details:
Use the fineliner to add tiny stippling dots or small lines where the water meets the sand, suggesting foam or debris on the shoreline. -
Cast the palm shadow:
Using a light grey or cool brown pencil, draw a long, stretched shadow extending from the base of the palm tree towards the right, anchoring it to the ground. -
Highlight the foliage:
Add touches of white or light yellow to the tops of the bush and palm fronds to show where the sun hits them. -
Clean up:
Erase any stray graphite marks outside the keyhole border. If needed, reinforce the outer black line one last time to ensure a crisp separation between the ‘world’ outside and the view inside.
Now you have a tiny window to paradise right in your pocket, ready to transport you whenever you open your book

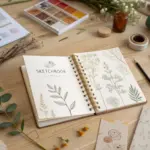
PENCIL GUIDE
Understanding Pencil Grades from H to B
From first sketch to finished drawing — learn pencil grades, line control, and shading techniques.
Explore the Full Guide
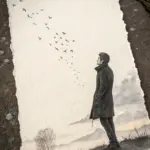
Day-to-Night Keyhole Gradient
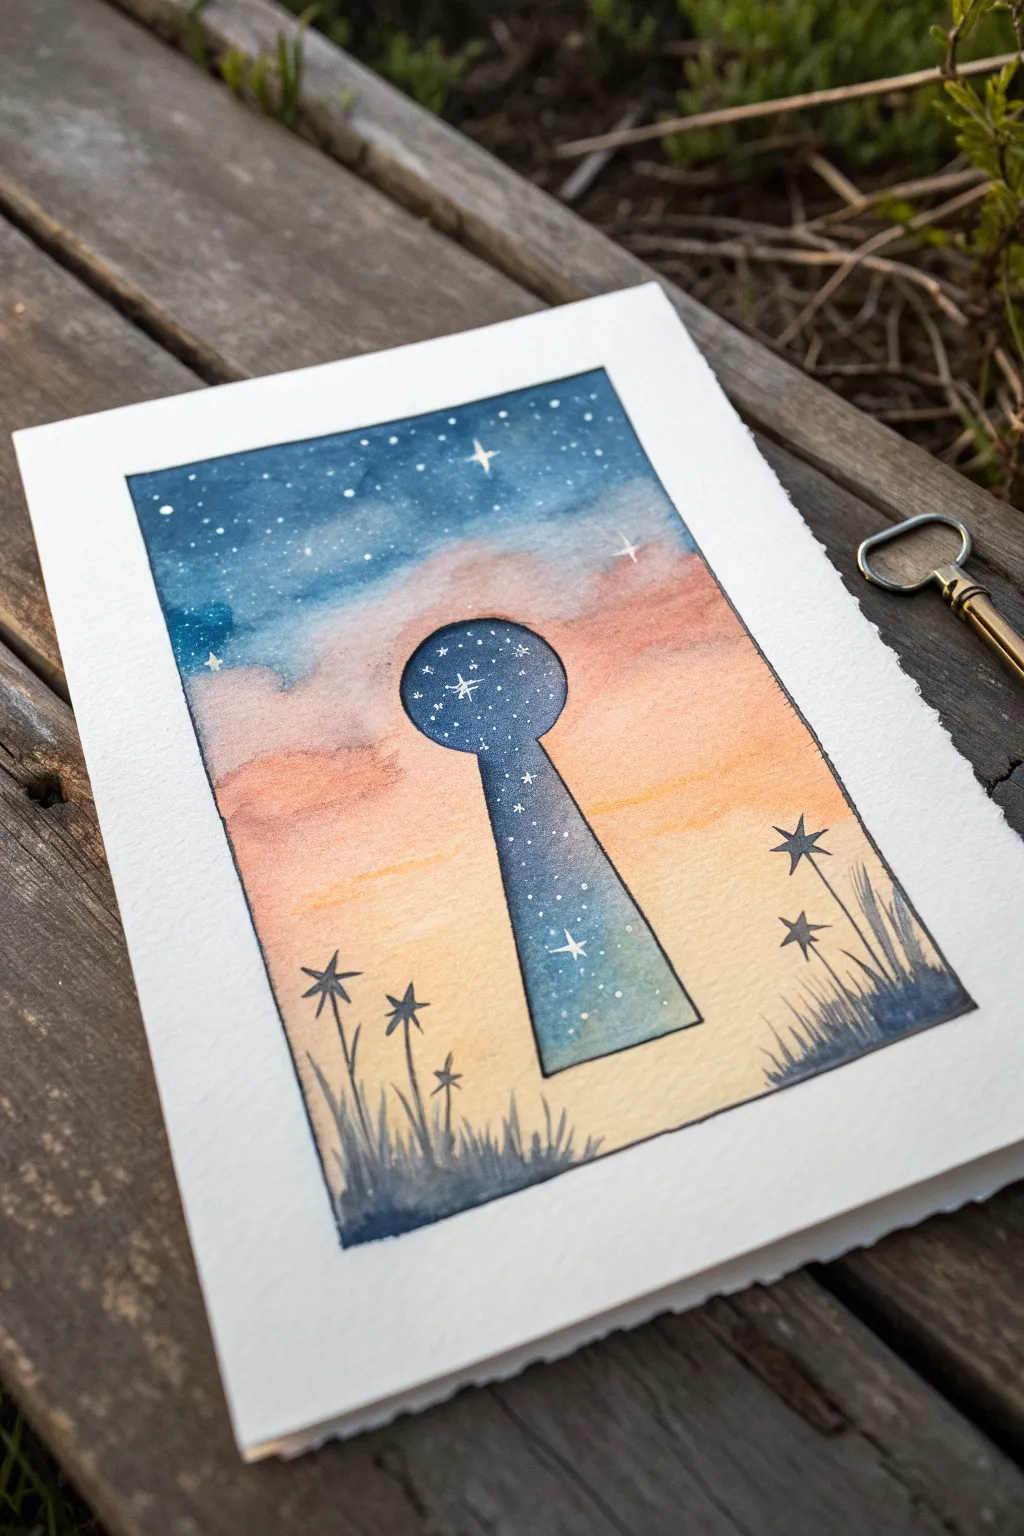
This whimsical watercolor painting plays with perspective by placing a starry night sky inside a keyhole silhouette against a soft sunset gradient. The contrast between the warm twilight background and the cool, deep blue interior creates a magical window into another world.
Step-by-Step Tutorial
Materials
- Cold press watercolor paper (300 gsm)
- Pencil and eraser
- Watercolor paints (Indigo, Cobalt Blue, Rose Madder/Pink, Yellow Ochre, Payne’s Grey)
- Round watercolor brushes (sizes 2, 6, and 10)
- White gel pen or white gouache
- Micron pen or black waterproof fine liner (0.5mm)
- Masking tape (washi style)
- Clean water and paper towels
- Ruler
Step 1: Sketching and Preparation
-
Tape the edges:
Begin by securing your watercolor paper to a board or table with masking tape. This creates that crisp white border seen in the final piece and prevents the paper from buckling when wet. -
Draw the frame:
Use a ruler to lightly draw a rectangle inside your taped area to define the painting’s boundaries. Keep the pencil pressure extremely light so it doesn’t show through the transparent paint later. -
Outline the keyhole:
In the center of your rectangular frame, sketch the keyhole shape. Draw a perfect circle for the top, and extended sloping lines for the bottom section. I find it helpful to draw a light vertical centerline first to ensure symmetry.
Step 2: Painting the Sunset Background
-
Wet the background area:
Using your largest clean brush, apply a thin layer of clean water to the area *outside* the keyhole shape. Be careful not to get water inside the keyhole outline yet. -
Apply the top blue sky:
While the paper is damp, drop in Cobalt Blue at the very top of the rectangle. Let it naturally bleed downwards, fading out as it reaches the upper third of the paper. -
Add the pink transition:
Rinse your brush and pick up a soft pink or Rose Madder. Apply this directly below the fading blue, allowing the two colors to touch and blend slightly on the paper to create a violet transition. -
Paint the golden horizon:
For the bottom third, use a watered-down Yellow Ochre. Blend this up into the pink section to create a warm, glowing horizon line. Ensure the color is lightest near the bottom edge. -
Soften the edges:
If any lines between colors look too harsh, use a damp, clean brush to gently gently traverse the border between shades to smooth the gradient. Let this sunset layer dry completely.
Fixing Back-Runs
If water pools and creates ‘cauliflower’ blooms in your gradient, wait for it to dry, then gently scrub the edge with a damp stiff brush to soften it.
Step 3: The Starry Interior
-
Fill the keyhole:
Once dry, wet the *inside* of the keyhole shape. Load a size 6 brush with concentrated Indigo or a deep Navy Blue mixed with a touch of purple. Paint the entire interior dark, leaving it slightly lighter near the bottom for atmospheric depth. -
Add texture:
While the keyhole paint is still wet, you can drop in tiny hints of clean water or darker Payne’s Grey to create a nebulous, galaxy-like texture. -
Dry thoroughly:
Allow the keyhole section to dry completely. It must be bone-dry before the next step to prevent ink bleeding.
Level Up: Metallic Touch
Use metallic gold watercolor paint for the keyhole outline or the stars to make the portal truly shimmer when the light hits it.
Step 4: Inking and Details
-
Outline the keyhole:
Using a waterproof black fine liner (0.5mm), carefully trace the pencil outline of the keyhole to give it a sharp, defined edge separating night from day. -
Draw the silhouette grass:
With a diluted Payne’s Grey or dark blue watercolor mix and a fine detail brush (size 2), paint wispy grass blades growing from the bottom corners. Vary the height and angle for a natural look. -
Add star-flowers:
At the tips of some taller grass blades, paint small five-pointed stars or abstract flower shapes using the same dark blue-grey mix. These act as silhouetted navigational stars. -
Create the galaxy stars:
Using white gouache or a white gel pen, add tiny dots inside the dark keyhole. create one or two larger, four-pointed ‘sparkle’ stars to serve as focal points. -
Add sky stars:
Place a few sparse white stars in the upper blue section of the sunset background to tie the two zones together. Keep these subtle. -
Define the border:
Use your black fine liner to trace the main rectangular border of the painting to create a clean frame. -
Reveal the painting:
Once everything is perfectly dry, slowly peel away the masking tape at a 45-degree angle to reveal the crisp white edges.
Now you have a stunning surrealist window ready to be framed or sent as a card
Surreal Staircase Into the Keyhole
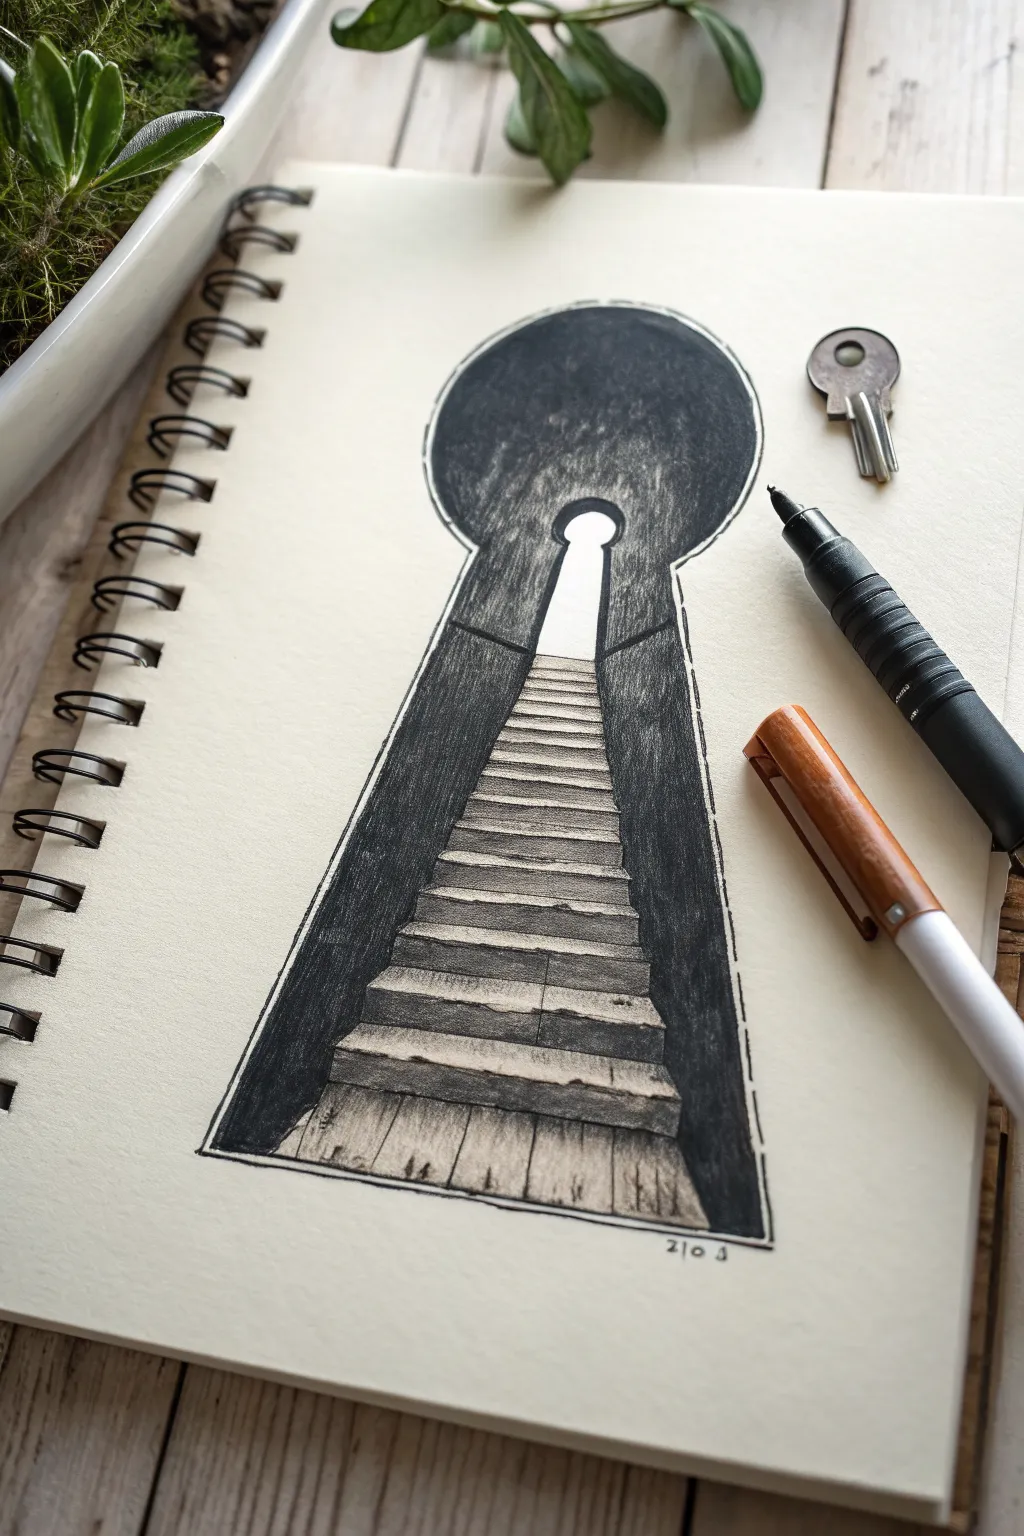
This intriguing sketch transforms a simple keyhole silhouette into a portal of mystery by embedding a long, wooden staircase leading toward a distant light. The stark contrast between the heavy black shading and the textured wood grain creates a compelling depth illusion that is surprisingly easy to achieve.
Detailed Instructions
Materials
- Sketchbook with smooth, heavy paper (approx. 140gsm or higher)
- HB or 2B graphite pencil (for initial sketching)
- Fine liner pen (0.3mm or 0.5mm, black)
- Thick black marker or brush pen (for filling large areas)
- Ruler or straight edge
- Soft eraser
- Compass or circle template (optional)
Step 1: Drafting the Silhouette
-
Outline the keyhole shape:
Begin by lightly sketching the large keyhole shape in the center of your page. Draw a large circle at the top and extend two lines downward that flare out slightly towards the bottom to create the classic skeleton keyhole body. -
Establish the inner portal:
Inside the large circle of your keyhole, draw a much smaller, identical keyhole shape near the top center. This represents the ‘light at the end of the tunnel’ and serves as your single vanishing point. -
Draw the main perspective lines:
Using your ruler, connect the bottom corners of the small inner keyhole to the bottom corners of the large outer keyhole. These diagonal lines define the width of your staircase. -
Sketch the horizon line:
Draw a faint horizontal line across the middle of the large circle section. This helps establish where the ‘ground’ of your tunnel begins relative to the curved ceiling.
Uneven Steps?
If your stairs look skewed, your horizontal lines likely aren’t parallel. Use the paper’s edge as a reference guide for your ruler to keep every step perfectly level.
Step 2: Constructing the Stairs
-
Mark the step increments:
along the diagonal perspective lines you just drew, make small tick marks to indicate where each step will go. Space them closer together near the top (the small keyhole) and wider apart as they get closer to the bottom to create realistic depth. -
Draw the horizontal step edges:
Connect your tick marks with horizontal lines using a ruler. Ensure these lines are perfectly parallel to the bottom edge of the paper. -
Add step verticality:
To give the stairs dimension, draw short vertical lines down from the ends of each horizontal step line, then connect those bottoms. This creates the ‘riser’ or front face of each step. -
Detail the wooden planks:
Lightly sketch vertical lines on the flat surfaces of the steps to suggest individual wooden planks. I find it looks more organic if these don’t line up perfectly from one step to the next.
Pro Tip: Atmospheric Depth
Fade your pen pressure as you draw steps closer to the top light source. Lighter, thinner lines in the distance increase the illusion of infinite depth.
Step 3: Inking and shading
-
Outline the main shapes:
Switch to your fine liner pen. Carefully trace the outer perimeter of the large keyhole and the inner perimeter of the small light source. -
Ink the staircase:
Go over your pencil lines for the stairs. Use a slightly shaky or broken line for the wood grain details to simulate a rough, aged texture. -
Fill the dark void:
Use your thick marker or brush pen to fill in the entire space between the staircase and the outer keyhole walls. This deep black background is crucial for making the stairs pop. -
Texture the tunnel ceiling:
For the curved area above the stairs (inside the large circle), switch back to the fine liner. Instead of solid black, use dense vertical hatching or stippling that fades as it gets closer to the center light. -
Shade the step risers:
Darken the vertical faces (risers) of the stairs significantly using hatching. Since the light is coming from the front/top, these vertical faces would naturally be in shadow.
Step 4: Finishing Textures
-
Enhance wood grain:
Add knots and darker grain lines to the horizontal step surfaces. Keep the lines thinner near the top of the drawing to maintain the perspective illusion. -
Create the outer border:
Draw a thin, slightly broken line just outside the main black keyhole shape, leaving a tiny gap of white space. This creates a halo effect that separates the drawing from the page. -
Clean up highlights:
Ensure the small inner keyhole remains pure white. If you accidentally marked it, you can use a white gel pen or correction fluid to reclaim that brightness. -
Erase pencil guides:
Wait until the ink is completely dry—give it a few extra minutes just to be safe—then gently erase all underlying graphite sketches. -
Add final separation lines:
Reinforce the varying depths by thickening the lines where the steps meet the dark walls. This subtle line weight variation adds weight to the structure.
Now you have a compelling portal drawing that invites the viewer to step right into a mysterious world
Have a question or want to share your own experience? I'd love to hear from you in the comments below!