There’s something instantly charming about painting on an oval canvas—it feels like a little window into a scene. The curved edges naturally guide your composition, so the trick is choosing subjects that flow with that shape instead of fighting it.
Centered Floral Bouquet in an Oval Frame
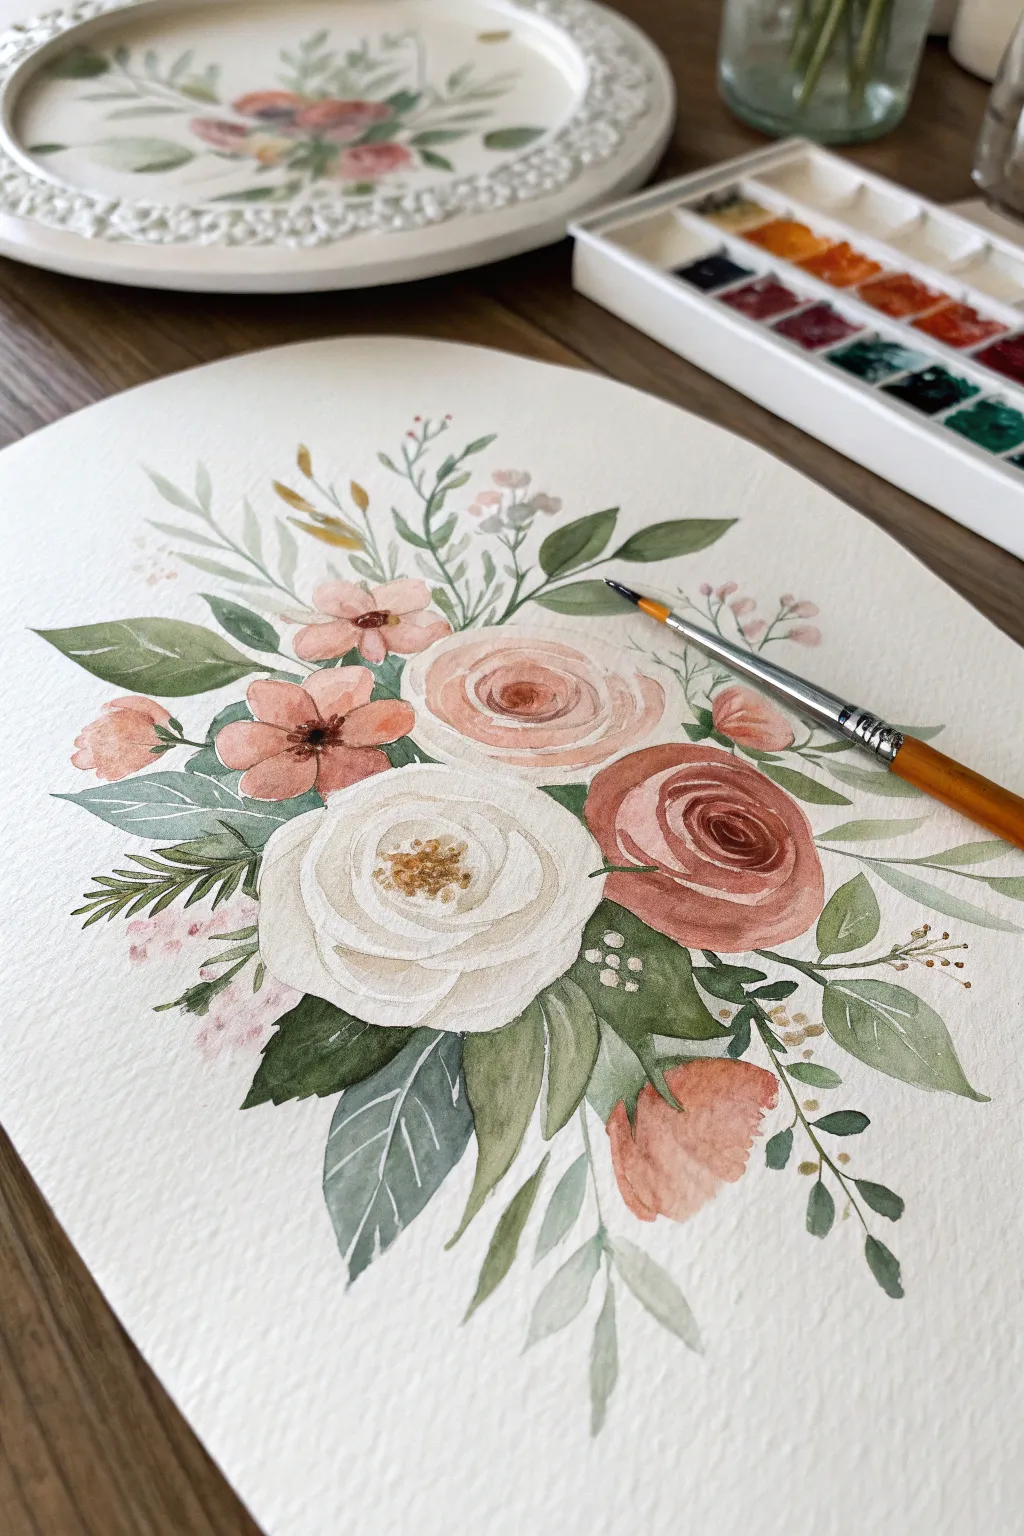
Capture the delicate romance of a vintage garden with this watercolor study, designed to fit perfectly within an oval composition. The soft palette of blush pinks, warm terracotta, and sage greens creates a timeless floral bouquet that looks stunning even before it’s framed.
Step-by-Step
Materials
- Cold press watercolor paper (cut to an oval shape or masked)
- Watercolor paints (Alizarin Crimson, Yellow Ochre, Burnt Sienna, Sap Green, Indigo)
- Round watercolor brushes (Size 2, 6, and 8)
- Pencil (HB or H for light sketching)
- Kneaded eraser
- Two jars of water
- Paper towels
- Ceramic or plastic mixing palette
Step 1: Planning the Layout
-
Define the oval:
Cut your watercolor paper into a large oval shape, or lightly trace an oval guideline onto a rectangular sheet to ensure your composition stays centered. -
Map the main blooms:
Using an H pencil, lightly sketch three large circles in the center-right area to represent the main roses. Place the largest circle centrally, a medium one slightly higher and to the right, and a third lower and to the right. -
Add supporting flowers:
Sketch smaller circles for the wild roses and buds on the left side, balancing the heavier visual weight of the main roses. -
Draft the foliage:
Draw loose, sweeping lines radiating outward from the center to indicate where your leaves and stems will go. Keep the pencil marks extremely faint so disappear under the paint.
Wet-on-Wet Magic
For softer rose petals, wet the paper shape first with clean water, then drop pigment into the center. Let it bloom naturally outward.
Step 2: Painting the Main Roses
-
Mix the blush tone:
Create a very watery mix of Alizarin Crimson with a touch of Yellow Ochre to get a soft, peachy blush color. -
Start the central rose:
With a size 6 brush, paint the center of the top rose tightly, using C-shaped strokes that hug each other. As you move outward, clean your brush and use plain water to pull the pigment out, making the outer petals much lighter and larger. -
Paint the terracotta rose:
Mix Burnt Sienna with a little Alizarin Crimson for a deeper, rusty pink. Paint the lower-right rose using the same C-stroke technique, but keep the pigment saturation higher for a bolder look. -
Create the white rose:
For the large white rose, use a very dilute grey-brown wash to define the shadows between petals, leaving the majority of the paper white. Paint negative space to reveal the form rather than painting the petals themselves. -
Add smaller blooms:
Using your blush mix, paint the smaller, simple five-petal flowers on the left side. Keep these loose and airy.
Add Metallic Flair
Once fully dry, use gold watercolor or ink to add tiny dots to the flower centers or outline a few key leaves for elegant shimmer.
Step 3: Adding Greenery and Details
-
Mix leaf greens:
Prepare two green mixes: a warm, yellow-green (Sap Green + Yellow Ochre) and a cool, shadowed green (Sap Green + Indigo). -
Anchor the bouquet:
Tuck dark, cool green leaves directly underneath the white and terracotta roses. This high contrast will make the light flowers pop forward. -
Paint extending foliage:
Switch to the warm green mix and paint longer, sweeping leaves extending toward the top left and bottom right. Vary the pressure on your brush to get tapered points. -
Add blue-green accents:
Mix a muted eucalyptus color using Indigo and a lot of water. Paint the broad, rounded leaves near the bottom left for variety in texture and color temperature. -
Stem work:
Use a size 2 brush and a watery brown-green mix to connect the floating buds and leaves to the main cluster with thin, delicate lines. -
Detail the centers:
Once the flower centers are bone dry, use a concentrated yellow-brown mix to dot in the stamen clusters on the open white rose and the small wild roses.
Step 4: Final Touches
-
Deepen shadows:
Going back to the terracotta rose, add a second layer of darker pigment in the very center crevices to increase the sense of depth. -
Soft splatter:
Load a small brush with very watery pink paint and tap it against your finger to create tiny, controlled speckles around the outer edges of the bouquet for a loose, artistic feel. -
Erase guidelines:
I like to wait until the paper is warm to the touch (completely dry) before using a kneaded eraser to gently lift any visible pencil marks.
Now you have a stunning botanical centerpiece ready to be mounted in a vintage frame


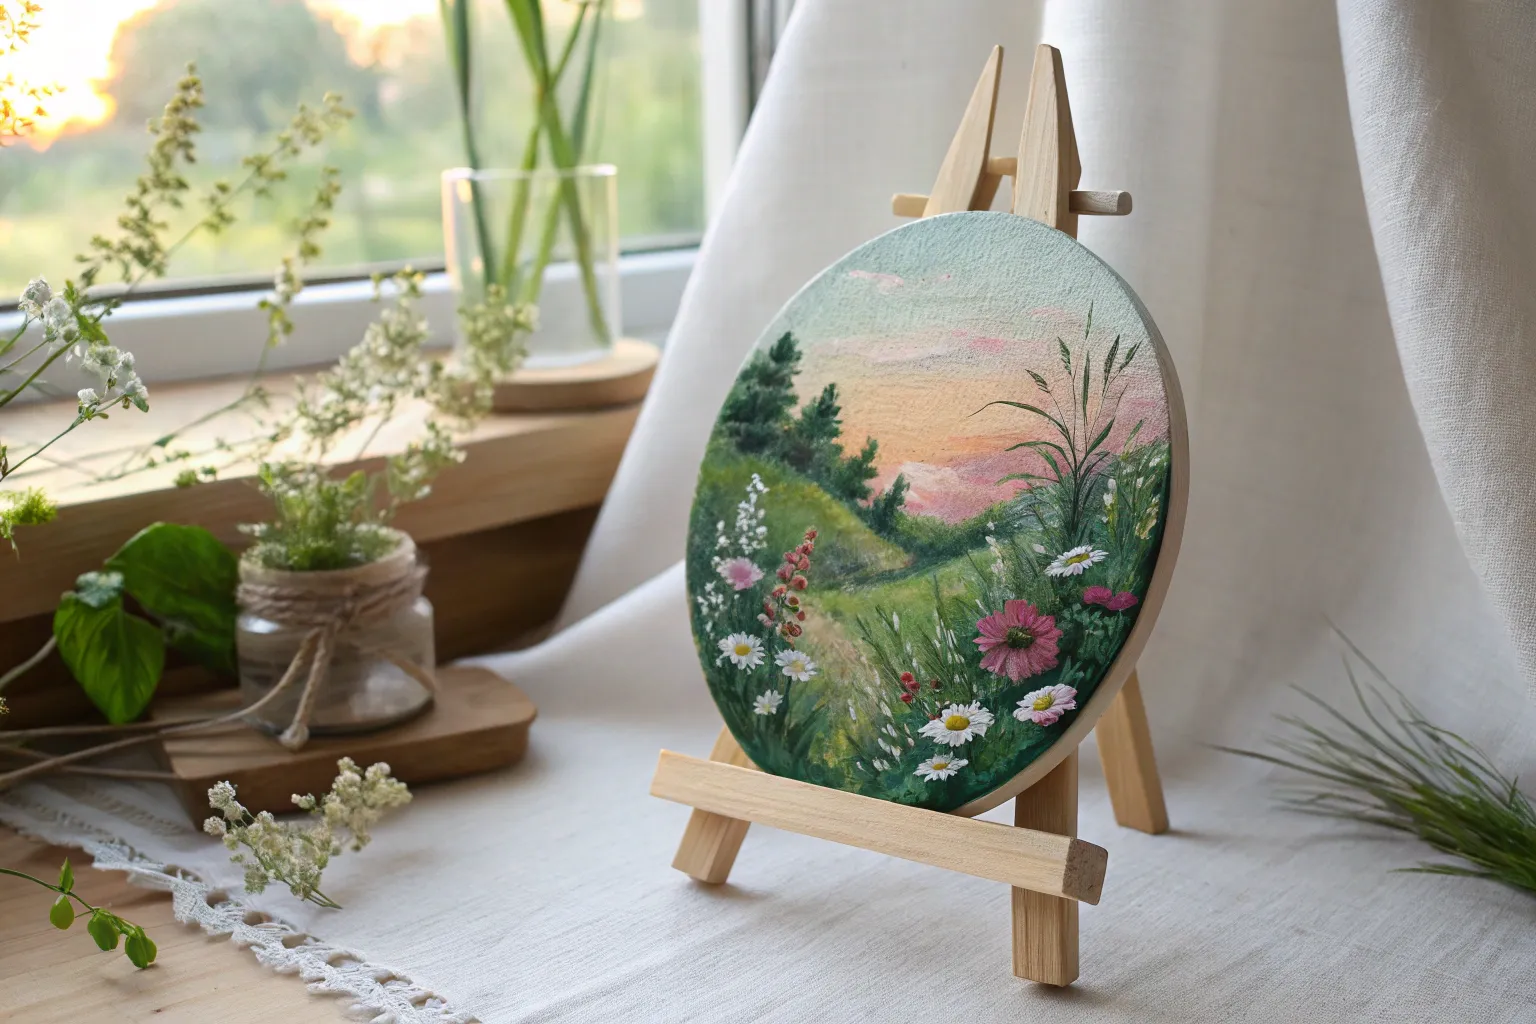
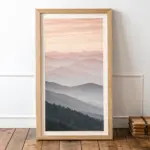
Mini Meadow With a Curved Hill Line
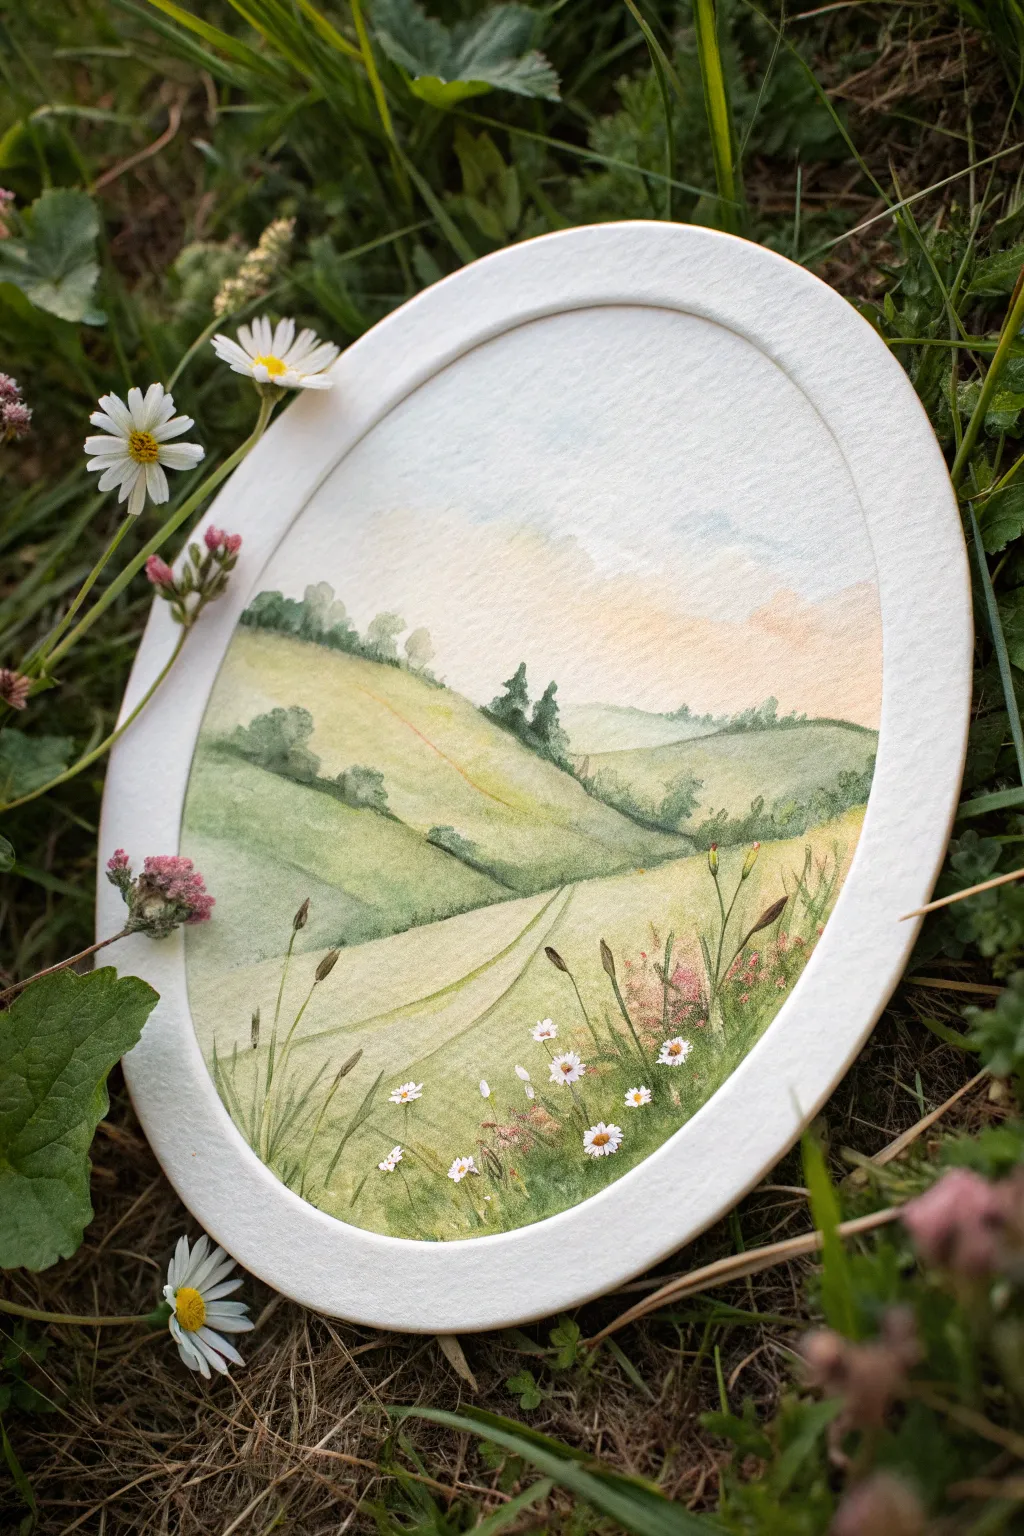
Capture the serenity of a countryside walk with this gentle oval watercolor landscape. Using soft washes for distant hills and precise detailing for foreground wildflowers creates a beautiful sense of depth that draws the viewer in.
Step-by-Step
Materials
- Oval watercolor paper block (cold press, 300gsm)
- Watercolor paints (Sap Green, Olive Green, Yellow Ochre, Burnt Sienna, Payne’s Grey, White Gouache)
- Round brushes (sizes 6, 2, and 00 for details)
- Pencil (HB or H)
- Kneaded eraser
- Jars of water & paper towels
- Masking fluid (optional but helpful for flowers)
Step 1: Sketch and Sky
-
Outline the Composition:
Begin by lightly sketching the horizon line just above the center of the oval. Draw sloping curves for the rolling hills, making sure they overlap to create depth. Sketch a faint, winding path leading from the bottom center toward the middle distance. -
Prepare the Sky Wash:
Wet the sky area of your paper with clean water using your size 6 brush. The sheen should be even but not pooling. -
Paint a Soft Gradient:
Mix a very dilute wash of blue with a touch of warmth—perhaps a tiny bit of Yellow Ochre or diluted pink—for the horizon. Drop this into the wet sky, keeping the top slightly cooler and the bottom warmer to mimic a sunset glow. Let this dry completely.
Muddy Greens?
If your greens look dull, stop adding black to darken them. Instead, mix red or burnt sienna into your green. This deepens the value while keeping the color rich and organic.
Step 2: Rolling Hills and Distance
-
First Hill Layer:
Mix a light, tea-consistency wash of Yellow Ochre and Sap Green. Apply this to the most distant hill shapes. Keep the edges soft where they meet the sky to suggest atmospheric perspective. -
Mid-Ground Shadows:
While the first layer is still slightly damp (or after re-wetting), drop in a slightly darker green mix (add a touch of Olive Green) on the shadowed sides of the hills to define their form. -
Defining the Tree Line:
With a size 2 brush and a mix of Olive Green and Payne’s Grey, paint the distant tree line along the crest of the farthest hill. Use small, vertical dabbing motions to suggest clusters of trees. -
Foreground Hills:
Move to the closer hills, using a richer, more saturated green. I find that mixing Sap Green with a little Burnt Sienna creates a lovely natural grass tone. Paint around the path area. -
The Winding Path:
Paint the path using a very pale wash of Yellow Ochre and Burnt Sienna. Keep it significantly lighter than the surroundings. While wet, lift a little paint from the center of the path with a thirsty brush to create a highlight.
Step 3: Mid-Ground Texture
-
Adding Vegetation Structure:
Using a size 2 brush, add distinct bushes and shrubs in the mid-ground valleys. Use a darker blue-green mix to ground the vegetation and create contrast against the lighter hills. -
Strengthening Shadows:
Glaze a transparent layer of darker green over the shadowed side of the foreground hill to emphasize the slope. This helps the lighter path pop out visually. -
Texture Building:
Once the hill layers are dry, use a dry-brush technique with the size 2 brush to lightly drag texture across the grassy areas. This mimics the look of tall grass catching the light.
Level Up: Golden Hour
Add a warm glaze of diluted yellow ochre over the entire painting (once fully dry) except for the sky. This unifies the colors and gives the scene a warm, late-afternoon sunlit glow.
Step 4: Foreground Detail
-
Grasses in the Front:
Switch to your 00 detail brush. Mix a dark, concentrated green. Paint long, sweeping blades of grass rising from the very bottom edge of the oval. Vary the lengths and angles for a natural look. -
Adding Stems:
Paint thin, delicate stems for the wildflowers. Some should be straight, others slightly bent under the weight of imaginary blooms. -
Pink Posies:
Mix a soft pink or muted mauve. Stipple tiny dots in clusters near the grass blades to represent clover or wild buds. -
Daisies with Gouache:
This is the magic step. Take your opaque White Gouache (straight from the tube, little water) and paint the petals of the daisies in the extreme foreground, overlapping the green grass. -
Flower Centers:
Once the white gouache is dry, dab a tiny dot of Yellow Ochre mixed with Orange into the center of each daisy. -
Final Highlights:
Add a few tiny specks of white gouache or light green to the tips of the tallest grass blades to simulate sunlight catching the dew.
Enjoy the peaceful feeling of your hand-painted miniature meadow

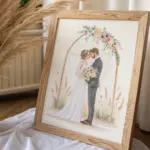
Cameo-Style Portrait With Soft Vignette Edges
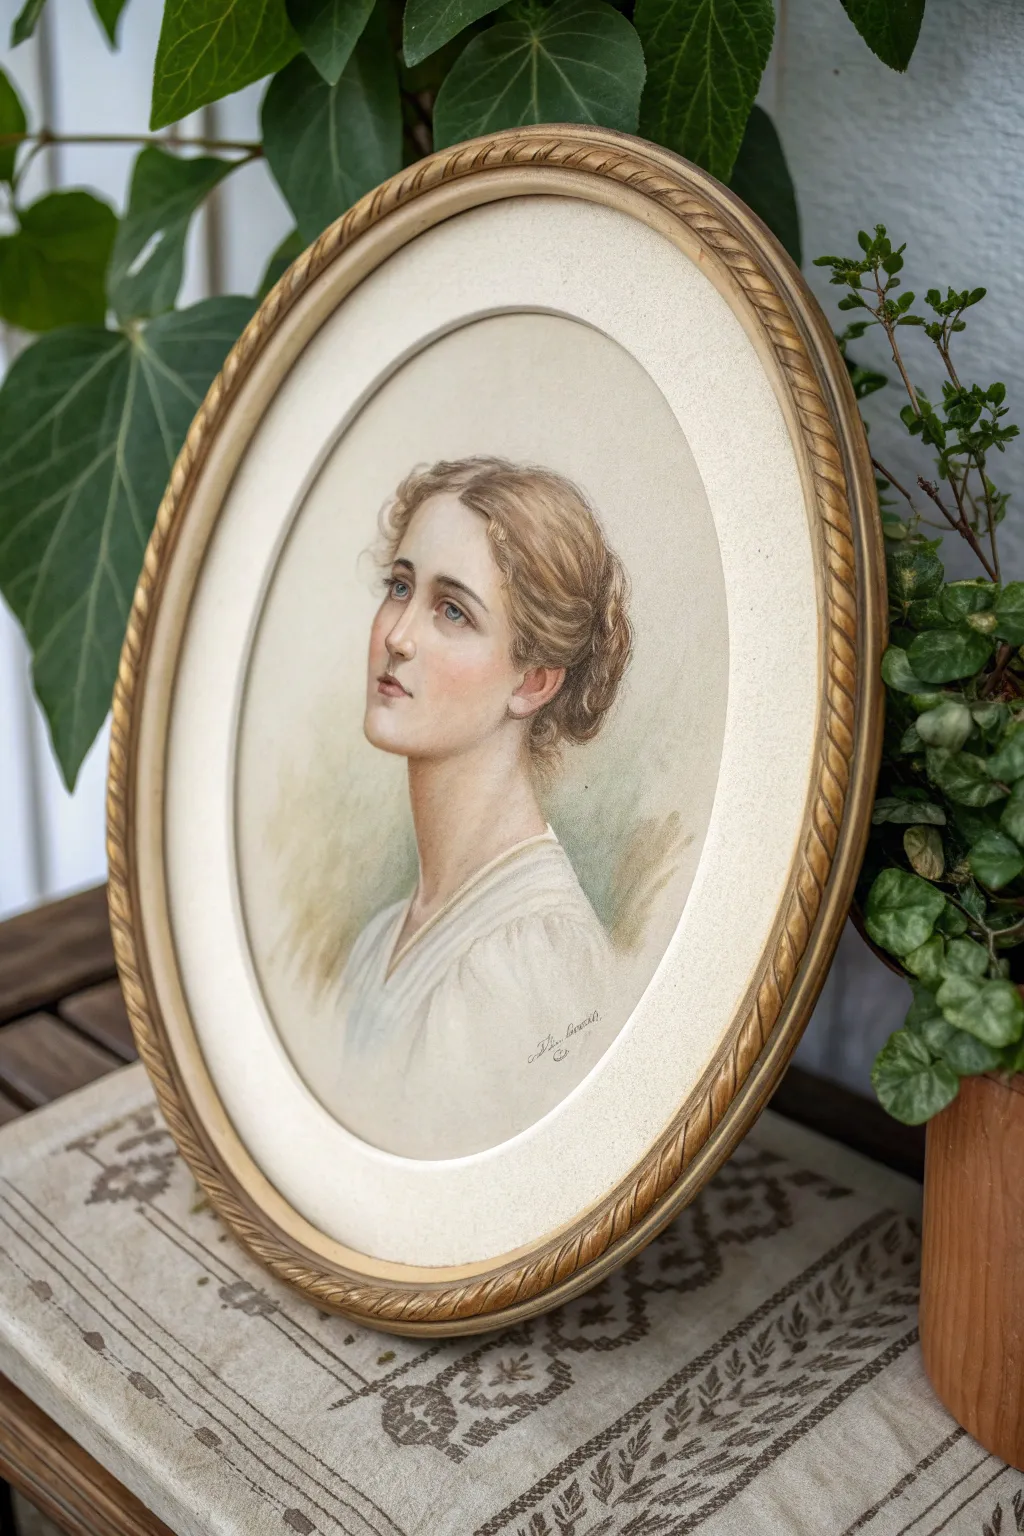
Capture the romance of a bygone era with this delicate cameo-style portrait, featuring soft, vignette edges that fade seamlessly into the paper. Using watercolor paints, you will recreate the ethereal glow and subtle detailing characteristic of classic oval miniatures.
Step-by-Step Guide
Materials
- Cold press watercolor paper (fine grain)
- Oval frame with mount
- Watercolor paints (Alizarin Crimson, Yellow Ochre, Burnt Umber, Ultramarine Blue, Ivory Black)
- Round brushes (sizing 2, 4, 6, and a 0 for details)
- HB pencil
- Kneaded eraser
- Masking tape
- Clean ware jar
- Paper towels
Step 1: Preparation & Sketching
-
Size the composition:
Begin by lightly tracing the inner oval of your frame mats onto the watercolor paper to ensure your composition stays within the display area. -
Outline the subject:
Using an HB pencil, sketch the subject’s profile. Focus on the tilt of the head and the soft curls of the hair. Keep your lines incredibly faint, as heavy graphite can muddy the transparent watercolor later. -
Refine the features:
Lightly mark the placement of the eyes, nose, and mouth. The gaze should be directed upward and away to capture that dreamy, classical look. -
Lift excess graphite:
Roll a kneaded eraser gently over your sketch. You want the lines to be barely visible—just ghost images to guide your brush.
Step 2: Underpainting & Skin Tones
-
Mix a base flesh tone:
Create a very dilute wash using Yellow Ochre and a tiny touch of Alizarin Crimson. The consistency should be like weak tea. -
Apply the first wash:
With a size 6 brush, apply this wash to the face and neck. Avoid the eyes and the brightest highlights on the nose and forehead. -
Create the vignette effect:
While the paint is still wet on the neck and shoulders, dip a clean, damp brush into water and soften the bottom edges, dragging the pigment out until it fades completely into the white of the paper. -
Add warmth to cheeks:
While the face is damp but not soaking, drop a slightly more saturated mix of Alizarin Crimson onto the cheek area and the tip of the nose for a natural flush. -
Define shadows:
Mix a faint purple-grey using Alizarin Crimson and Ultramarine Blue. When the skin layer is dry, apply this under the chin, beneath the nose, and in the eye sockets to build form.
Pro Tip: Softening Edges
If a paint edge dries too hard, scrub it gently with a damp stiff brush and blot with a paper towel to reclaim the soft, hazy vignette look.
Step 3: Hair & Details
-
Establish hair value:
Mix Yellow Ochre and Burnt Umber for a golden-brown hue. Wash this over the hair area, leaving slivers of white paper for highlights where the light hits the curls. -
Paint the eyes:
Switch to a size 2 brush. Use a watery Cobalt or Ultramarine Blue for the irises, leaving a tiny spot of white paper for the catchlight to bring the subject to life. -
Deepen the hair texture:
Using a thicker mix of Burnt Umber, paint expressive, curving strokes to mimic strands of hair. Focus on the nape of the neck and the bun, keeping the outer edges loose and soft. -
Paint the lips:
Use Alizarin Crimson with a touch of Burnt Umber. paint the upper lip slightly darker than the lower lip to create dimensionality. -
Add the garment:
Suggest the blouse with very faint, watery strokes of cool grey (Ultramarine and Burnt Umber). Do not overwork this; let the white of the paper represent the white fabric.
Level Up: Colored Pencils
For extra crisp details, use sharp colored pencils over the dried watercolor to define individual stray hairs or deepen the eyelashes.
Step 4: Background & Final Touches
-
Wash the background:
Mix a muted olive tone. Apply it loosely around the back of the head and shoulders. I prefer to use a wet-on-wet technique here so the background blurs softly away from the figure. -
Fade the background edges:
Just like the portrait base, use clean water to fade the background paint out toward the edge of the oval, ensuring no hard lines remain near the border. -
Refine facial details:
With your smallest brush (size 0), add the pupils, lashes, and nostrils using a concentrated mix of Burnt Umber and Blue. -
Sign and frame:
Once fully dry, sign your name in a small, elegant script near the shoulder. Place the artwork into the oval mount and secure it in the frame.
Now step back and admire how the oval framing perfectly complements the soft, romantic atmosphere of your portrait
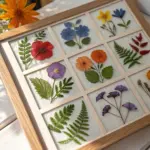

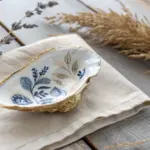
Botanical Wreath Following the Oval Outline
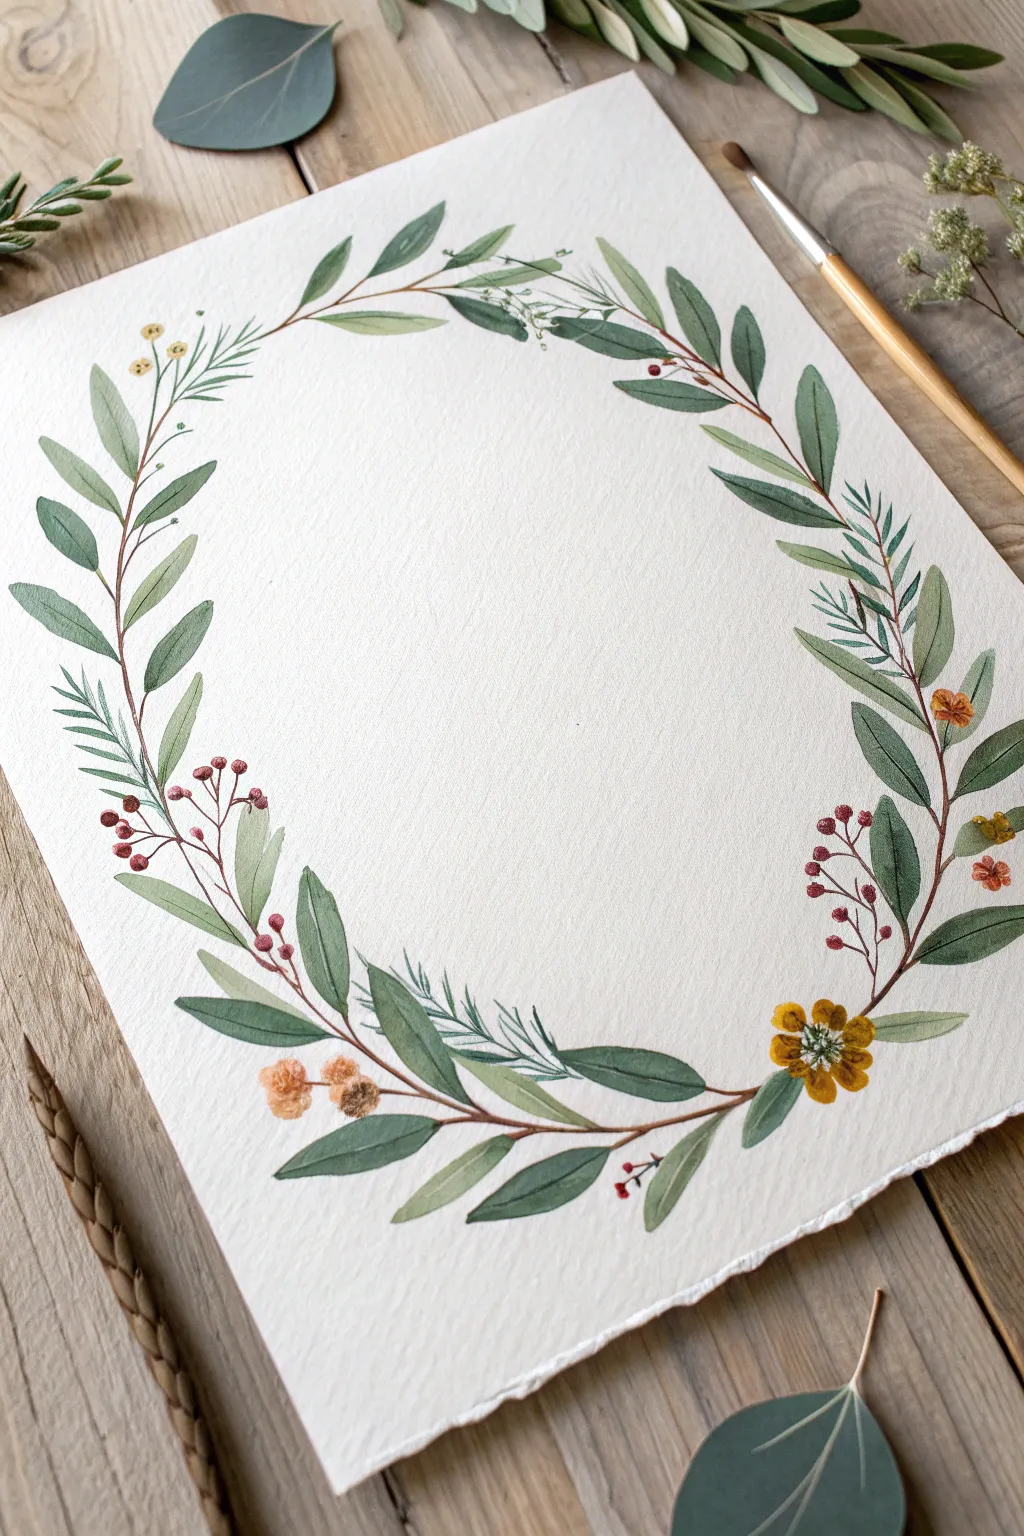
Capture the elegance of nature by painting a graceful oval wreath adorned with eucalyptus leaves, red berries, and small meadow flowers. This watercolor project uses an oval guide to create a perfectly balanced composition that feels organic and airy.
Detailed Instructions
Materials
- Cold press watercolor paper (deckled edge preferred)
- Watercolor paints (Sap Green, Olive Green, Burnt Sienna, Alizarin Crimson, Yellow Ochre)
- Round watercolor brushes (size 2 and 6)
- Pencil (HB or 2H)
- Kneaded eraser
- Oval template or stencil
- Jar of water
- Paper towel
Step 1: Preparation & Structure
-
Trace the foundation:
Begin by lightly tracing an oval shape onto your watercolor paper using an HB pencil. This line will serve as the central spine for your wreath, but it shouldn’t be visible in the final piece, so keep your pressure extremely light. -
Draft the main stems:
Sketch the primary stems flowing along the oval path. Instead of one continuous line, break the stems into two or three curved segments that overlap slightly, creating natural start and stop points for the branches. -
Map out floral clusters:
Lightly mark the positions for the main floral elements—specifically the yellow flower cluster at the bottom right and the berry sprigs on the left—to ensure the composition remains balanced before you start painting.
Natural Variation
Mix a tiny drop of red into your green paint every few leaves. This muddies the green slightly, creating a more realistic, organic color palette.
Step 2: Painting the Foliage
-
Mix your greens:
Prepare two shades of green on your palette: a cool, blue-leaning green for the eucalyptus-style leaves and a warmer, olive tone for the filler foliage. Add plenty of water to keep the pigment translucent. -
Paint the main stem:
Using a thin size 2 brush and a mix of brown and green (Burnt Sienna with a touch of Olive), paint the fine lines of the main branch structure following your pencil guide. -
Add base leaves:
Switch to a size 6 brush. Load it with your cool green mixture and press the belly of the brush down to create the wider part of the leaf, then lift as you pull away to form a tapered point. Scatter these larger leaves along the stem. -
Vary leaf orientation:
Ensure some leaves curve inward toward the center of the oval and others curve outward. This variety creates movement and prevents the wreath from looking stiff. -
Paint pine sprigs:
With the size 2 brush and a darker green mix, add small, needle-like strokes to represent pine or rosemary sprigs interspersed between the larger leaves. -
Layer overlapping leaves:
Once the first set of leaves is dry to the touch, paint a few darker leaves that appear to sit behind the main branch. This simple step adds immediate depth to the illustration.
Add a Sentiment
The empty center of the oval is perfect for modern calligraphy. Once dry, use a micron pen to write a quote, a family name, or a wedding date inside.
Step 3: Adding Florals & Details
-
Paint the yellow accents:
Mix Yellow Ochre with a tiny bit of Burnt Sienna. Paint the five-petaled flowers in the bottom right corner, leaving small white gaps in the center for detail later. -
Add the berry clusters:
Using Alizarin Crimson, paint small, round berries on the left side of the wreath. Connect them to the main branch with very fine, reddish-brown stems. -
Create soft orange buds:
Dilute a mix of orange and brown to create soft, fuzzy buds near the bottom left. Use a stippling motion (dabbing the brush tip) to give them a textured appearance. -
Detail the flower centers:
Once the yellow flowers are dry, use a dark brown paint on the tip of your smallest brush to add tiny dots in the center of the blooms. -
Add veins to leaves:
Mix a slightly darker version of your green base color. With your finest brush, paint a single central vein down the middle of the largest leaves for definition. -
Erase guidelines:
Wait until the painting is completely bone-dry. gently dab the area with a kneaded eraser to lift any visible pencil marks from your initial oval sketch.
Step back and admire the gentle flow of leaves that now frame a perfect oval space
BRUSH GUIDE
The Right Brush for Every Stroke
From clean lines to bold texture — master brush choice, stroke control, and essential techniques.
Explore the Full Guide
Moonlit Night Sky Framed by the Oval Curve

Capture the serene beauty of a quiet evening with this stunning circular canvas painting. The deep indigo tones contrast beautifully with the bright lunar glow, creating a peaceful window into the night sky.
Step-by-Step
Materials
- Large round or oval stretched canvas (or fabric stretched in an embroidery hoop)
- Acrylic paints: Carbon Black, Phthalo Blue (or Prussian Blue), Titanium White, Ultramarine Blue
- Large flat wash brush (1-inch width)
- Medium filbert brush
- Small round detail brush (size 0 or 1)
- Palette or mixing plate
- Cup of water
- Paper towels
- Circle template or compass (optional, for the moon)
Step 1: Setting the Scene
-
Prepare the Surface:
If you are using fabric stretched in an embroidery hoop like the reference, ensure the cloth is pulled taut and primed with layer of gesso. If using a standard round canvas, simply wipe it clean of dust. -
Map the Moon:
Decide on the placement of your moon. While dead center is classic, placing it slightly off-center can add dynamic interest. Use a compass or trace a bowl to lightly pencil in the circle. -
Mix Your Base Night Sky:
Create a dark, moody blue mixture. Combine Phthalo Blue with a touch of Carbon Black. You want a color that reads as a deep night sky, but not pure flat black.
Starry Splatter
For a dense star field, dilute white paint with water. Load an old toothbrush and flick the bristles with your thumb to spray tiny droplets across the sky.
Step 2: Painting the Sky
-
Apply the Darkest Layer:
Using your large flat brush, paint the outer edges of the canvas with your darkest blue-black mixture. Work in smooth, sweeping strokes that follow the curve of the canvas edge. -
Create the Gradient:
Add a small amount of Titanium White and Ultramarine Blue to your dark mix. Paint this slightly lighter blue as you move inward toward the moon, blending the wet edge with the darker outer ring. -
Approach the Moon:
Mix a medium blue tone (more Ultramarine and White) for the area immediately surrounding the moon circle. Paint carefully around your pencil line, ensuring the gradient transitions smoothly from the dark edges to this lighter center area. -
Dry the Background:
Allow the sky gradient to dry completely before moving on. This prevents the white of the moon and clouds from turning muddy gray.
Step 3: The Moon and Stars
-
Base Coat the Moon:
Fill in the moon circle with pure Titanium White. It might need two coats to be fully opaque against the texture of the canvas. -
Add Lunar Texture:
Mix a tiny drop of black or grey into your white to create a very faint grey. Using a small filbert brush or even your fingertip, dab subtle, irregular patches onto the wet white paint to spur the look of craters and maria. -
Diffuse the Glow:
Take a dry brush with a tiny amount of white paint and verify most of it is wiped off. Very gently scumble (scrub lightly) around the outer edge of the moon into the blue sky to create a soft, glowing halo. -
Dot the Stars:
Using your smallest detail brush and thinned white paint, dot tiny stars throughout the dark blue areas. Vary the pressure to create different sizes. -
Paint Star Flares:
Select a few of the larger ‘stars’ to turn into twinkling flares. Paint a simple cross shape with long, thin tapering lines, then add a smaller ‘X’ through the center for extra sparkle.
Orion’s Belt
Instead of random stars, research real constellations like Cassiopeia or the Big Dipper and map them accurately onto your night sky background.
Step 4: Floating Clouds
-
Block in Cloud Shapes:
Load a medium filbert brush with a mix of White and a tiny dot of Blue. Rough in the main cloud shapes at the bottom and sides, using a tapping motion to keep the edges fluffy. -
Define the Tops:
Dip the tip of your brush into pure Titanium White. Paint the top edges of the cloud banks with curved, rolling strokes. This simulates moonlight hitting the peaks of the clouds. -
Shadow the Bottoms:
I prefer to mix a soft grey-blue using your sky color and white. Apply this to the undersides of the clouds, blending upward into the white tops to give the clouds volume and weight. -
Add Wispy Layers:
Use a dry brush to drag some of the cloud paint horizontally across the sky in thin streaks. These wispy stratus clouds add movement and interrupt the solid blue space. -
Final Highlights:
Step back and look at the composition. Add a few final touches of pure white to the brightest points of the clouds and the center of the largest stars for maximum contrast.
Hang your lunar masterpiece on a wall that catches evening light to amplify the mood
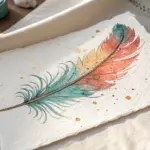
Bird and Branch Composition That Fits the Taper
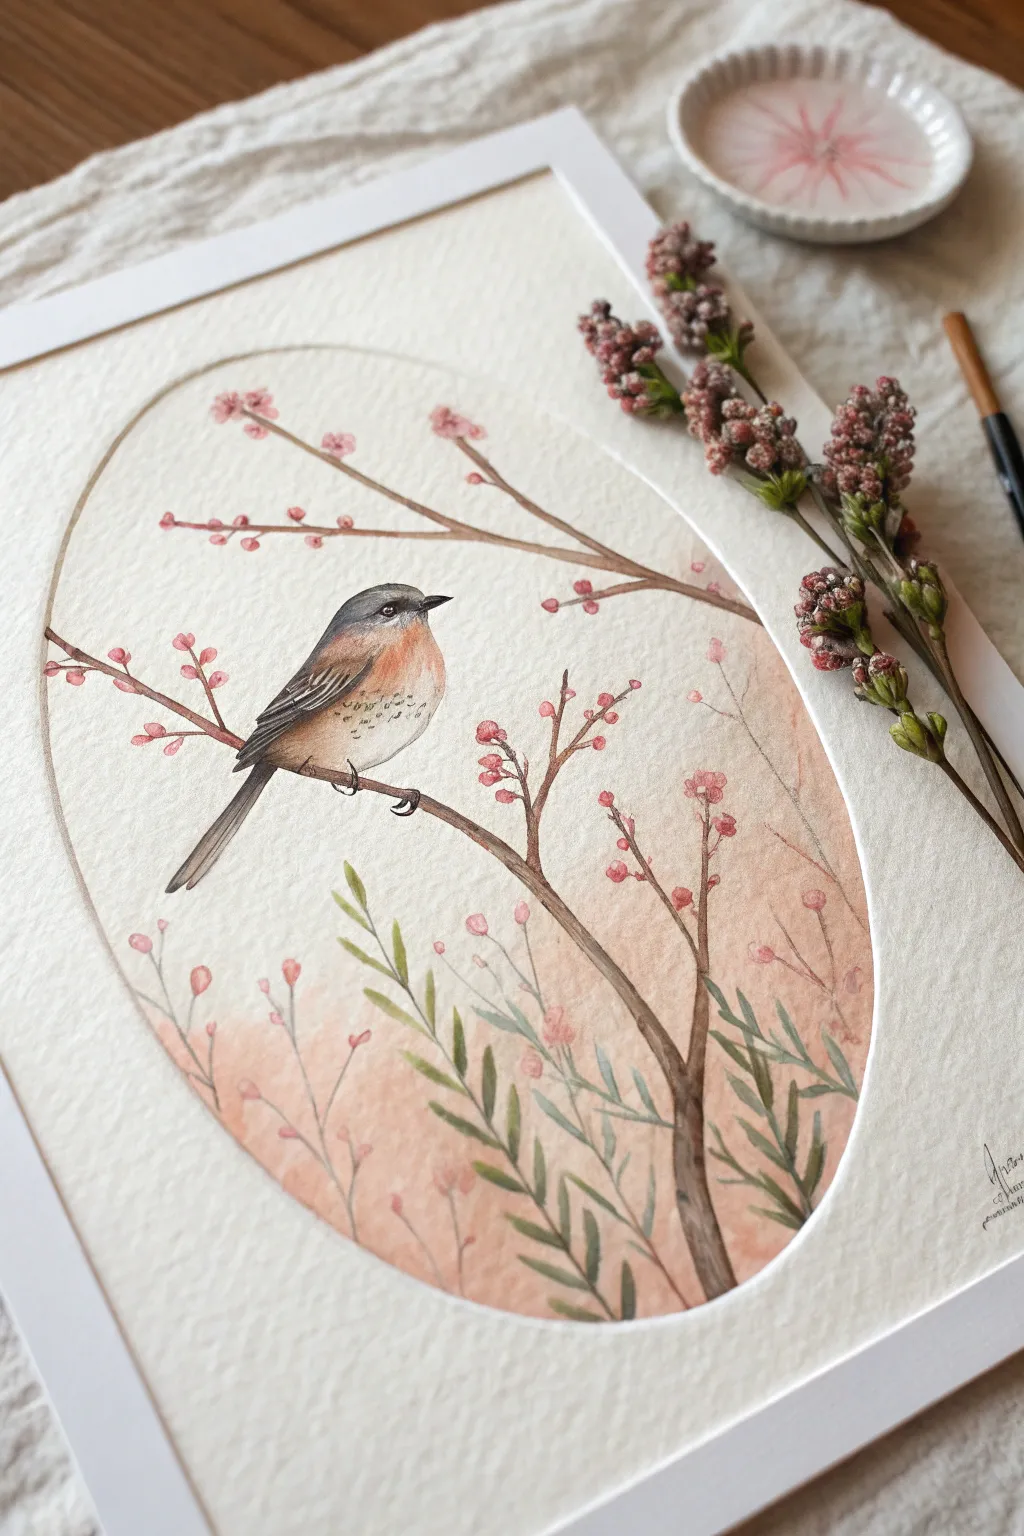
Capture the delicate beauty of a small bird perched amidst budding branches in this elegant oval composition. The soft, textured watercolor paper and warm, muted tones create a peaceful vignette perfect for framing.
How-To Guide
Materials
- Cold press watercolor paper (300 gsm)
- Pencil (HB or 2H)
- Watercolor paints (Payne’s Grey, Burnt Sienna, Yellow Ochre, Alizarin Crimson, Sap Green)
- Watercolor brushes (Round sizes 2, 4, and 0 for details)
- Masking tape
- Clean water and palette
- Oval mat or stencil
Step 1: Preparation and Sketching
-
Establish the boundaries:
Begin by lightly tracing your large oval shape onto the watercolor paper. This will be your painting boundary. You can cut a template from cardstock if you don’t have a pre-cut mat. -
Map the main branch:
Sketch the primary branch entering from the bottom right, curving gently upward towards the center. Let it fork naturally, creating a perch for your bird. -
Place the bird:
Draw the bird’s outline sitting on the central branch. Position it slightly to the left of the center for balance. Focus on the teardrop shape of the body and the small, rounded head. -
Add floral details:
Sketch thinner twigs extending upwards and downwards. Add small circles for the flower buds at the tips of these twigs and draw the lance-shaped leaves near the bottom.
Fixing Water Blooms
If cauliflower-like blooms appear in your smooth background wash, wet a clean brush and gently soften the hard edges while the area is still damp.
Step 2: Background and Base Layers
-
Apply the background wash:
Mix a very dilute wash of Alizarin Crimson and a touch of Burnt Sienna. Wet the area inside the oval (avoiding the bird) and drop in this soft peach color, concentrating it at the bottom and letting it fade to white near the top. -
Paint the bird’s belly:
While the background dries, mix a light wash of Burnt Sienna and Yellow Ochre. Apply this to the bird’s chest and belly, keeping it wet-on-dry for control. -
Base coat for wings and head:
Using a diluted Payne’s Grey, paint the head and wing area. I like to leave a tiny sliver of white paper around the eye to act as a highlight later. -
Define the branches:
Mix Burnt Sienna with a little Payne’s Grey to get a warm brown. Using your size 4 brush, paint the main branches, varying the pressure to create natural thick and thin sections.
Step 3: Building Depth and Detail
-
Layering the feathers:
Once the grey base on the bird is dry, use a size 2 brush with a more concentrated Payne’s Grey to paint individual wing feathers. Add short, dashed strokes on the chest to suggest texture. -
Detailing the eye and beak:
Switch to your size 0 brush. With dark, almost black paint (concentrated Payne’s Grey), carefully fill in the eye (preserving that white speck) and the sharp, small beak. -
Painting the buds:
Mix a pinkish-red using Alizarin Crimson. Dot the small flower buds at the ends of the twigs. Let the color be slightly uneven to mimic natural petals. -
Adding the leaves:
Use a mix of Sap Green and a tiny bit of Burnt Sienna (to mute the green). Paint the leaves at the bottom with quick, single strokes to keep them looking fresh and tapered. -
Adding branch texture:
Go back over the dried brown branches with a darker brown mix. Add knots, shadows on the underside of the branch, and slight texture lines to make the wood look realistic.
Seasonal Shift
Change the season by swapping the pink buds for bright green spring leaves, autumnal orange berries, or white gouache snow on the branches.
Step 4: Final Touches
-
Refining the background:
If the background looks too flat, you can add faint, ghostly silhouettes of leaves or stems in the background using extremely diluted paint. This adds depth without distracting from the main subject. -
High contrast adjustments:
Check your values. Deepen the darks on the bird’s wing tips and the shadow where the bird’s feet grip the branch to ground the subject. -
Painting the feet:
Use the size 0 brush and dark brown paint to draw the tiny claws wrapping around the branch. Ensure they look like they are gripping, not just resting on top. -
Clean up edges:
If your paint bled outside the oval, you can touch it up with white gouache or simply mat the artwork to hide the edges.
Once dry, erase any visible pencil lines to reveal your soft, oval avian portrait

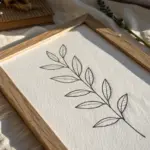
PENCIL GUIDE
Understanding Pencil Grades from H to B
From first sketch to finished drawing — learn pencil grades, line control, and shading techniques.
Explore the Full Guide
Ocean Wave Curl That Mirrors the Oval
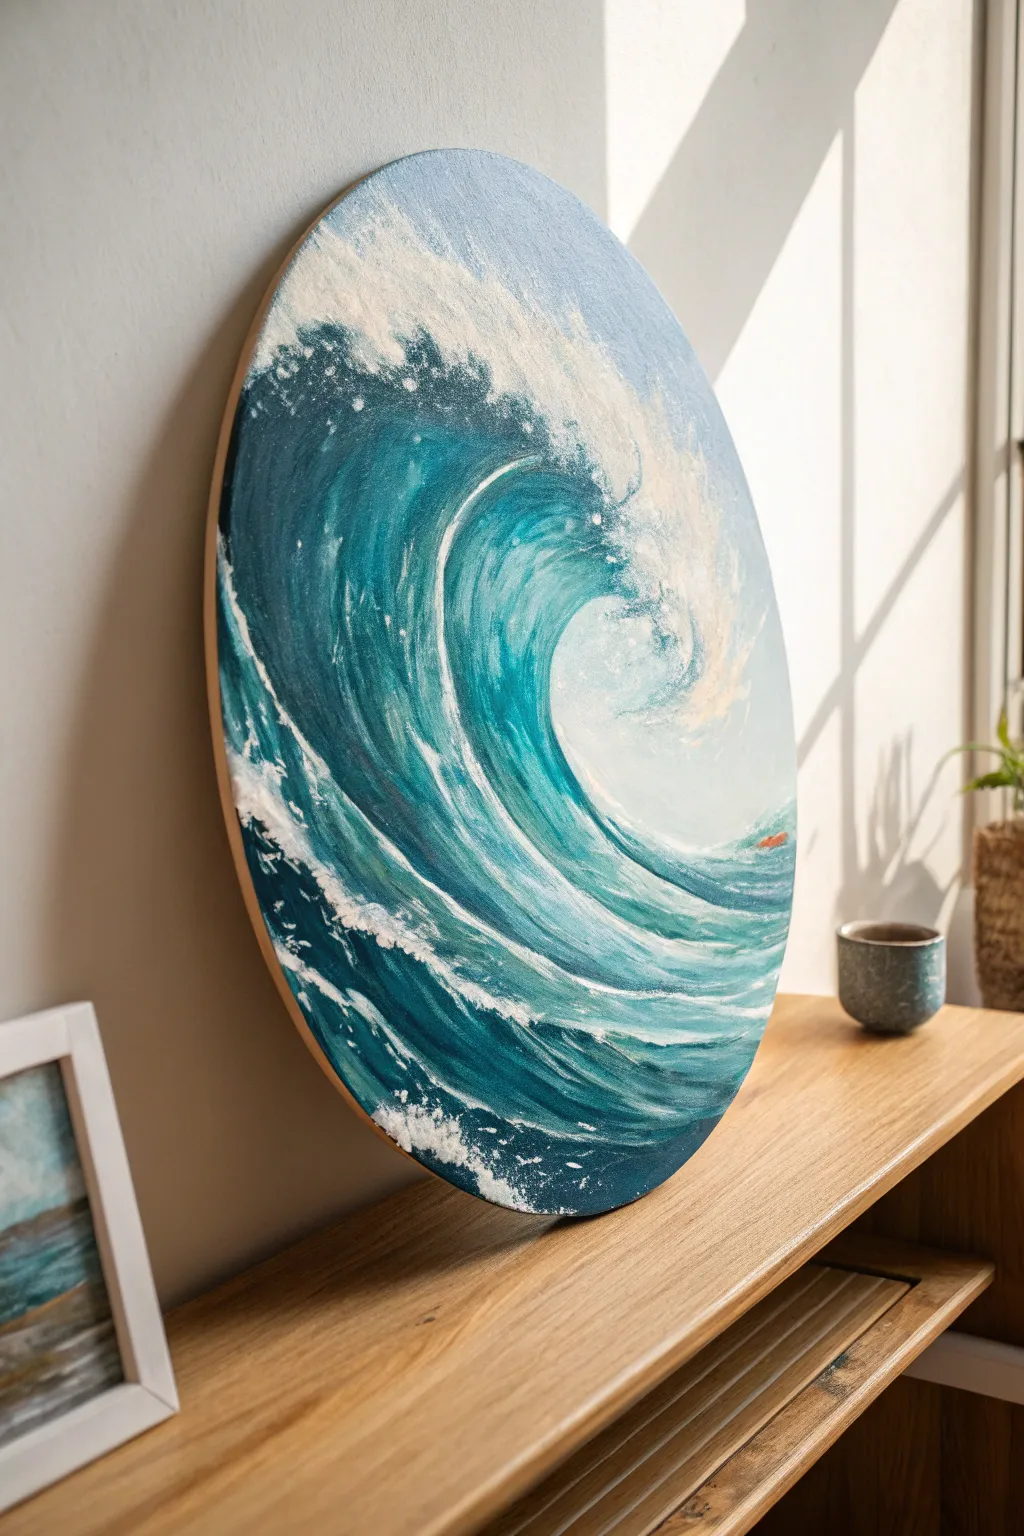
Capture the powerful motion of the sea with this dynamic oval painting that uses the canvas shape to emphasize the curl of a crashing wave. The finished piece combines deep teals, foamy whites, and textured brushwork to create a stunning coastal focal point.
Step-by-Step
Materials
- Oval wooden painting panel or stretched oval canvas (approx. 16×20 inches)
- Gesso (if panel is unprimed)
- Heavy body acrylic paints (Phthalo Blue, Phthalo Green, Titanium White, Ultramarine Blue, Ivory Black)
- Wide flat brush (1-2 inch)
- Medium filbert brush
- Small round brush or rigger brush for details
- Palette knife
- Water cup and paper towels
- Palette for mixing
Step 1: Preparation & Background
-
Prime the surface:
If you are using a raw wooden panel, apply two coats of gesso to seal the wood. Sand lightly between coats for a smooth finish that welcomes paint without soaking it up instantly. -
Sketch the flow:
Using a diluted wash of blue paint and a small brush, lightly map out the main currve of the wave. Start low on the left and sweep upwards and over to the right, mimicking the oval curve of the canvas edge itself. -
Establish the deepest darks:
Mix Phthalo Blue with a touch of Ivory Black and Phthalo Green to create a deep, oceanic teal. Apply this to the underside of the wave and the bottom left corner where the water is thickest and less light penetrates. -
Paint the mid-tones:
Lighten your deep teal mix with a little Titanium White and more Phthalo Green. Paint the middle section of the wave face, blending it wet-into-wet with the dark section below to create a seamless gradient. -
Create the sunlit water:
For the translucent upper curve of the wave where the sun hits, mix a bright turquoise using Phthalo Blue, Phthalo Green, and a generous amount of Titanium White. Apply this near the crest, brushing in the direction of the water’s movement. -
Fill the sky area:
Mix a very pale grey-blue for the sky visible in the top right ‘tube’ of the wave. Keep this color flat and subtle so it doesn’t compete with the detailed water texture.
Muddy Water?
If your white foam is turning blue and muddy, let the underlying teal layer dry completely before applying the white. Acrylics blend wet-on-wet but layer cleanly when dry.
Step 2: Defining the Wave
-
Streaking the water:
Using a dry flat brush and your mid-tone teal, add sweeping, curved strokes that follow the shape of the wave tunnel. These streaks simulate the motion of water being pulled up the face of the wave. -
Initial foam layer:
Load a filbert brush with slightly thinned Titanium White. scrub in the crashing foam at the crest and the turbulent water at the base. Don’t worry about perfect details yet; focus on blocking in the white shapes. -
Adding depth to the foam:
Mix a light blue-grey shadow color. Apply this underneath the bright white foam areas to give them volume and dimension, so they look like 3D froth rather than flat white paint. -
Enhancing the barrel:
Deepen the contrast inside the curl of the wave. I like to glaze a thin layer of transparent dark blue here to really make the bright opening of the wave pop by comparison.
Step 3: Texturing and Details
-
Palette knife texture:
Pick up thick Titanium White on the edge of a palette knife. Gently scrape it across the top crest of the wave to create broken, organic spray patterns that a brush creates less naturally. -
Sea spray details:
Use an old, splayed bristle brush or a toothbrush to flick tiny droplets of white paint near the crest and the crash zone. This mimics the mist and chaotic spray of crashing water. -
Refining the water veins:
Switch to your smallest round brush. Mix a very light turquoise and paint fine, web-like veins of foam that stretch across the dark face of the wave, following the curve you established earlier. -
Highlighting the base:
Add sharp, bright white accents to the churning water at the bottom left. Use quick, choppy brushstrokes to convey the violent energy of the water hitting the surface. -
Final light check:
Step back and identify the brightest point where light shines through the water. Glaze a tiny bit of yellow or warm green over the turquoise area near the lip of the wave to make it glow. -
Painting the edges:
Since this is an oval panel, the edges are a visible design element. Paint the rim a solid dark blue or black to frame the image cleanly, or continue the painting over the sides for a sculptural look.
Gloss Finish
Apply a high-gloss varnish once the painting is fully cured. The gloss mimics the wet sheen of real water and deepens the dark blue tones significantly.
Hang your new oval seascape and enjoy the refreshing energy it brings to your wall
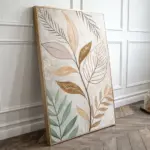
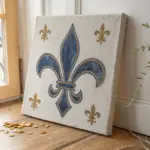
Tape-Masked Oval Sections for Easy Composition
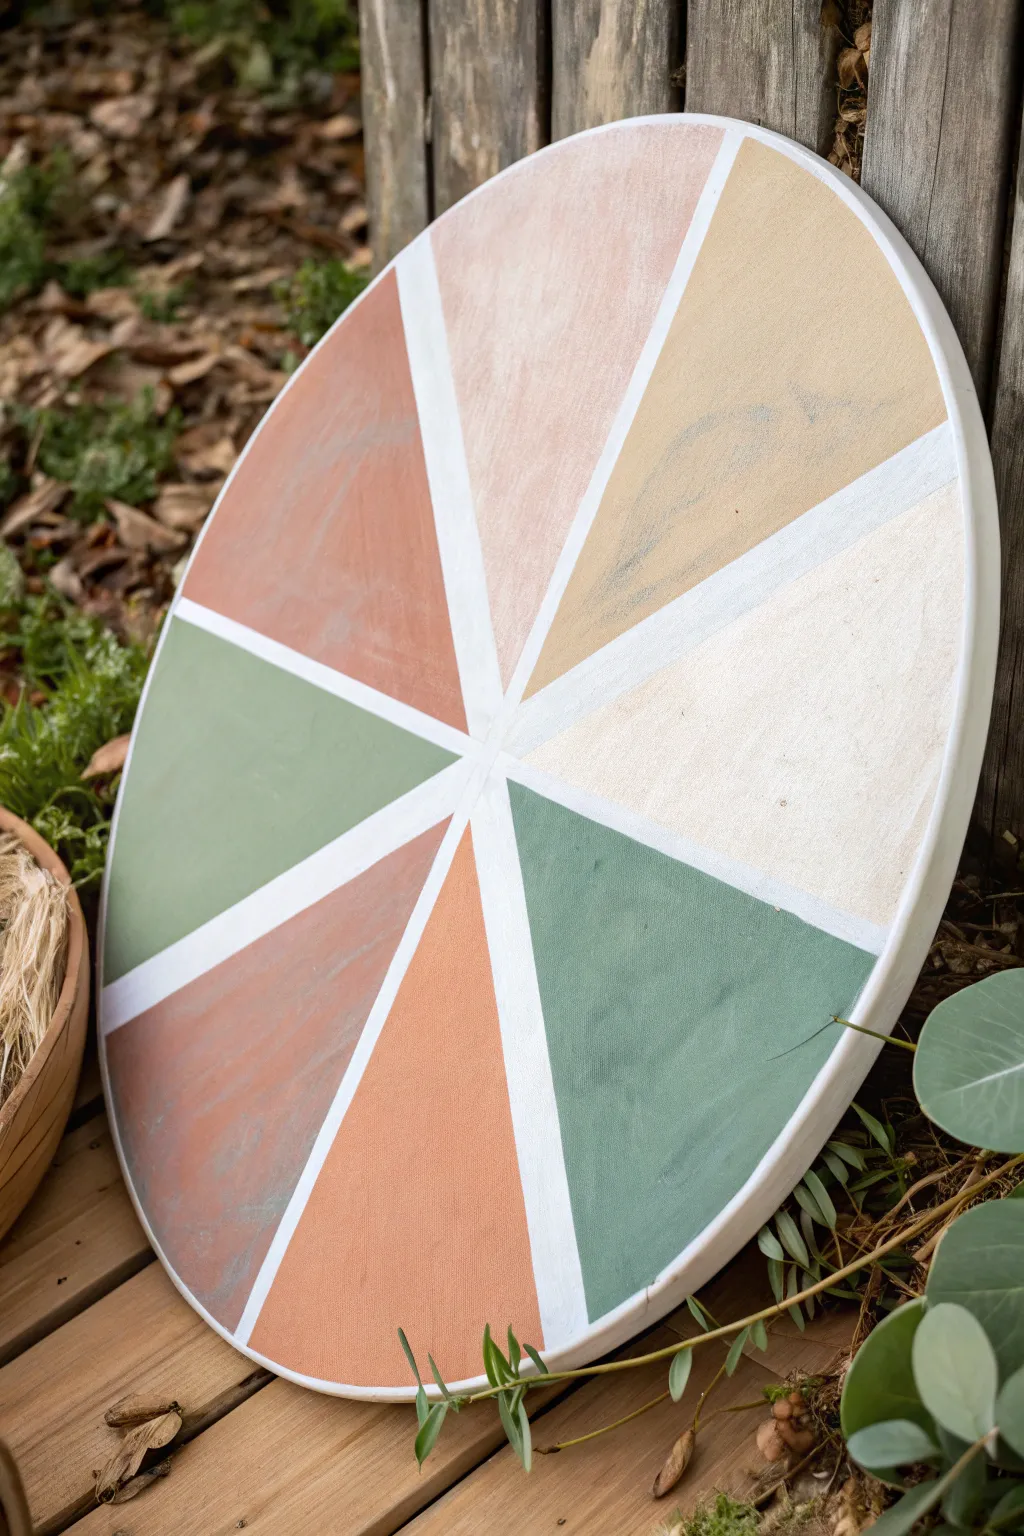
Transform a simple oval canvas into a striking piece of modern geometric decor with this easy tape-resist method. The earthy color palette of terracotta, sage, and sand gives it a grounded, organic feel perfect for any contemporary space.
Step-by-Step Tutorial
Materials
- Oval stretched canvas (medium to large size)
- Acrylic paints (terracotta, sage green, beige/sand, white, soft pink)
- Painter’s tape or masking tape (approx. 0.5 to 0.75 inch width)
- Ruler
- Pencil
- White gesso (optional)
- Medium flat paintbrush
- Small round paintbrush (for touch-ups)
- Palette or paper plate
- Matte varnish (optional)
Step 1: Preparation & Masking
-
Prime the surface:
If your canvas isn’t pre-primed, or if you want a smoother base, apply a coat of white gesso and let it dry completely. This ensures your colors pop. -
Find the center point:
Using your ruler, measure the height and width of the oval canvas to locate the absolute center. Mark this spot lightly with a pencil. -
Create the vertical axis:
Place a strip of painter’s tape vertically across the canvas, passing directly over your center mark. Press the edges down firmly to prevent paint seepage. -
Create the horizontal axis:
Lay a second strip of tape horizontally across the center mark, perpendicular to the first strip. You should now have four roughly equal quadrants. -
Add diagonal divisions:
Apply two long diagonal strips of tape that intersect at the center point, effectively splitting each quadrant in half. This creates the eight-section sunburst pattern. -
Seal the tape edges:
Run your fingernail or a credit card firmly along the edges of all the tape strips. I like to paint a very thin layer of white paint over the tape edges now; this seals them and ensures your colored lines will be crisp later.
Bleeding Lines?
If paint seeps under the tape, wait for it to dry fully. Then, place a ruler over the line and use a white paint pen to redraw the boundary crisply.
Step 2: Painting the Sections
-
Mix your palette:
Prepare your acrylic colors. You’ll need a deep rust, a lighter terracotta, a sage green, a sandy beige, and a pale blush. Aim for matte, earthy tones by mixing in a little white or grey if the colors are too vibrant. -
Plan the color layout:
Decide which section gets which color. To replicate the image, alternate between warm (rust/orange) and cool/neutral (green/beige) tones so no two similar shades touch. -
Paint the first section:
Start with the deep rust color. Fill in a chosen wedge, painting carefully up to the tape edge. Use confident strokes to create a slight texture. -
Continue painting:
Move around the oval, painting each wedge in your predetermined colors. Wash your brush thoroughly between color changes. -
Apply a second coat:
Once the first layer is touch-dry, apply a second coat to each section. This adds opacity and depth to the artwork. -
Add texture (optional):
For a more stone-like look akin to the photo, dabbing the wet paint slightly with a dry brush or sponge can create a subtle, mottled finish.
Add Metallic Flair
Swap the white separation lines for gold! After removing the tape, use a gold leaf pen or fine brush with metallic gold paint to trace the white gaps.
Step 3: Finishing Touches
-
Let it dry completely:
Allow the painting to dry for at least an hour. The paint needs to be fully set before you disturb the tape. -
Peel the tape:
Slowly peel back the tape at a 45-degree angle. This is the most satisfying part, revealing the crisp white lines between your colorful wedges. -
Clean up the center:
Because the tape strips overlapped in the middle, the center point might look a bit messy. Use a small brush and white paint to tidy up the central intersection into a neat star or point. -
Touch up edges:
Inspect the color boundaries. If any paint bled under the tape, use white paint to carefully correct the lines. -
Seal the artwork:
Apply a coat of matte varnish over the entire canvas to protect the paint and unify the sheen.
Hang your new geometric masterpiece in a well-lit spot to enjoy the calming balance of the earth tones


Negative-Space Silhouette Inside an Oval Sky
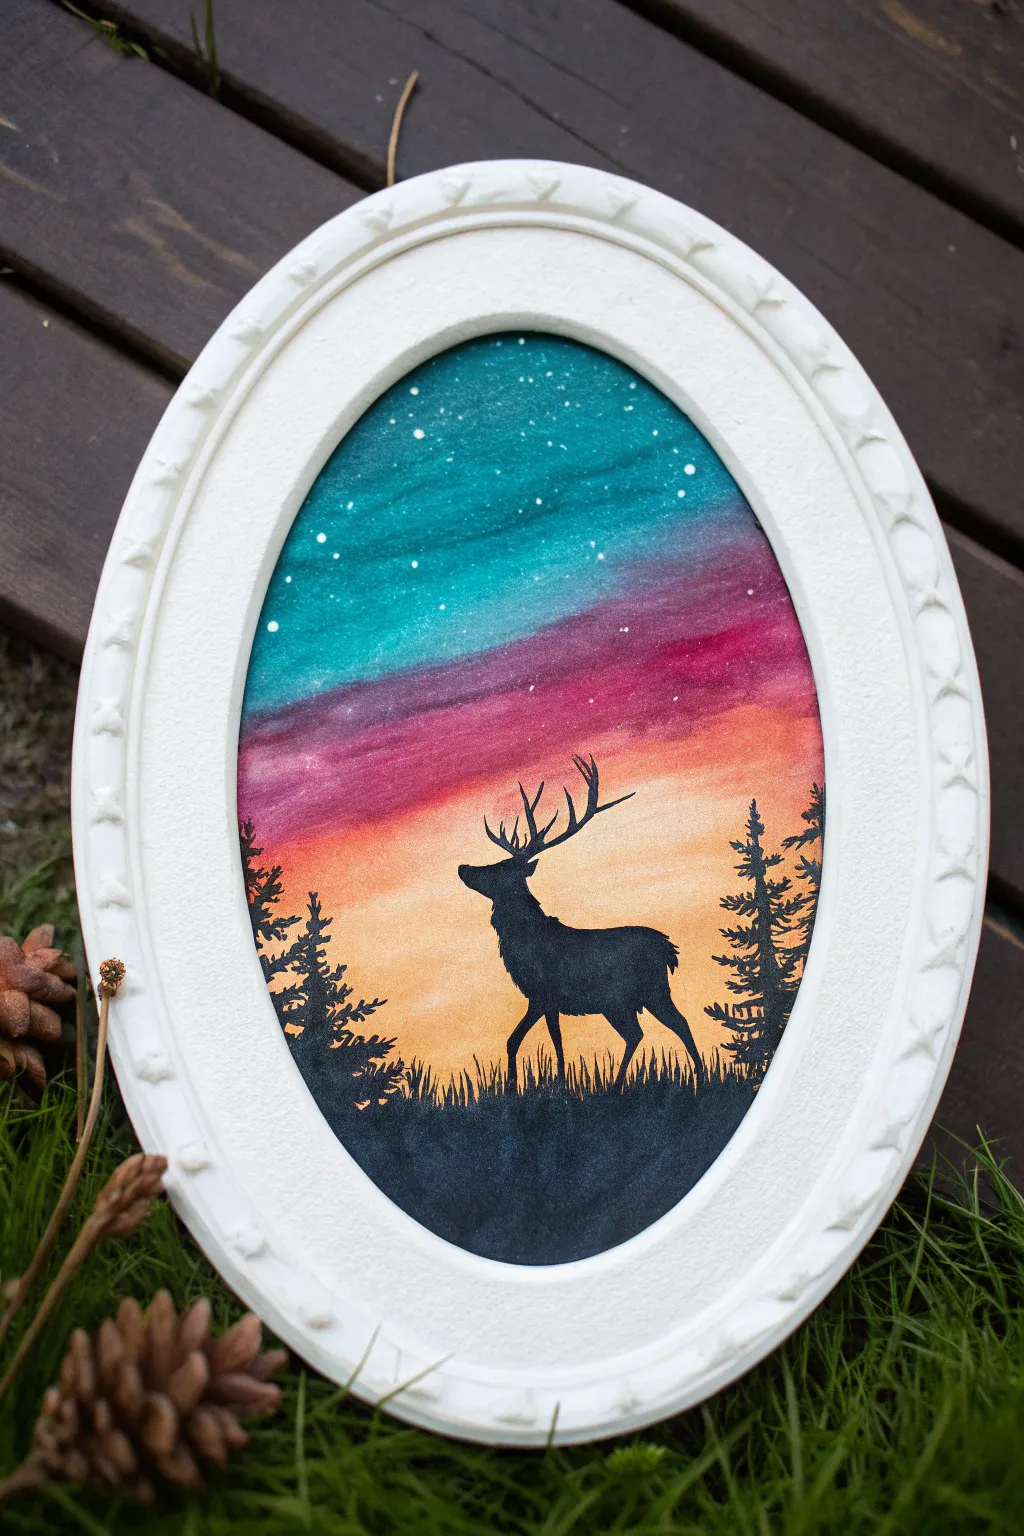
Capture the serene beauty of a twilight forest with this striking oval painting. Using a vibrant blend of watercolors or acrylics, you’ll create a glowing sunset backdrop for a sharp, majestic stag silhouette.
Detailed Instructions
Materials
- Oval canvas board or watercolor paper cut to an oval shape
- White oval frame
- Acrylic paints (teal, purple, crimson, orange, yellow, black, white)
- Flat shader brushes (medium and large)
- Fine liner brush (size 0 or 00)
- Old toothbrush (optional for stars)
- Pencil and eraser
- Water cup and palette
- Paper towels
Step 1: Creating the Background Gradient
-
Prepare the surface:
If you are working on canvas, ensure it is primed. If using paper, tape it down gently to prevent warping. Sketch a very faint horizon line about one-third of the way up from the bottom to mark where the ground will be. -
Start with lightness:
Begin by painting the lowest section of the sky, just above your horizon line. Mix a warm yellow with a touch of white to create a glowing horizon light and brush it horizontally across the oval. -
Transition to orange:
While the yellow is still slightly wet, pick up your orange paint. Apply it directly above the yellow, blending the edges where they meet to create a smooth, seamless transition. -
Introduce pink and purple:
Moving upwards, blend a crimson or deep pink into the wet orange layer. Immediately follow this with a band of purple, working quickly to keep the paint workable for soft gradients. -
Cap with teal:
Finish the top of the sky with a rich teal or turquoise. Blend this into the purple layer below it; don’t worry if the colors muddy slightly, as this creates a natural ‘night sky’ transition. -
Dry completely:
Allow the gradient background to dry entirely. This is crucial because painting sharp black details over wet paint will result in blurry, gray smudges.
Step 2: Painting the Foreground Silhouette
-
Sketch the stag:
Using a pencil, lightly sketch the outline of the stag. Focus on the posture—head held high—and the branching antlers. Keep the drawing light so graphite lines don’t show through later. -
Block in the ground:
Load a medium brush with solid black paint. Fill in the ground area below your horizon line completely, ensuring the bottom curve of the oval is solid black. -
Paint the body:
Switch to a smaller brush to fill in the body of the stag. work carefully around the legs to keep them distinct. I prefer to paint the bulk of the body first before refining the edges. -
Detail the antlers:
Use your finest liner brush and slightly thinned black paint (add a drop of water) to paint the antlers. The thinner paint flows better, allowing for sharp, crisp points. -
Add texture:
Along the top of the horizon line, use the tip of a small brush to flick jagged, uneven strokes upward. This simulates grass blades and uneven terrain.
Uneven Blending?
If acrylics dry too fast to blend, use a ‘retarder’ medium or keep your brush slightly damp (not dripping) to extend working time.
Step 3: Adding Atmosphere and Scene Details
-
Position the trees:
Decide where your pine trees will go on either side of the stag. They act as a frame within a frame. Lightly mark vertical lines in black to denote the trunks. -
Build the branches:
Using a stippling motion or short, dabbed strokes, add branches to the trees. Start narrow at the top and get wider near the base, verifying that the texture looks organic and rough. -
Connect to the ground:
Ensure the base of your trees blends seamlessly into the black ground layer you painted earlier. -
Create the stars:
Dip a toothbrush or a stiff bristle brush into white paint diluted with a little water. Test the spray on a paper towel first, then gently flick the bristles to spray tiny white specks over the teal and purple sections of the sky. -
Enhance specific stars:
If the splatter is too fine, take your detail brush or a toothpick and manually dot a few slightly larger, brighter stars in the upper teal section. -
Final assembly:
Once the artwork is completely dry, place it into the white oval frame to create a high-contrast finish that makes the colors pop.
Add Dimension
Mix a tiny drop of metallic gold into the yellow horizon paint for a subtle shimmer that catches the light.
This peaceful scene brings a touch of wilderness magic to any wall it adorns

Have a question or want to share your own experience? I'd love to hear from you in the comments below!